Reddit Reddit reviews BLACK+DECKER 9-Inch Electric Carving Knife, Black, EK500B

We found 3 Reddit comments about BLACK+DECKER 9-Inch Electric Carving Knife, Black, EK500B. Here are the top ones, ranked by their Reddit score.

Kitchen & Dining
Cutlery & Knife Accessories
Carving Knives & Forks
Carving Knives
Home & Kitchen
BLACK+DECKER 9-Inch Electric Carving Knife, Black, EK500B
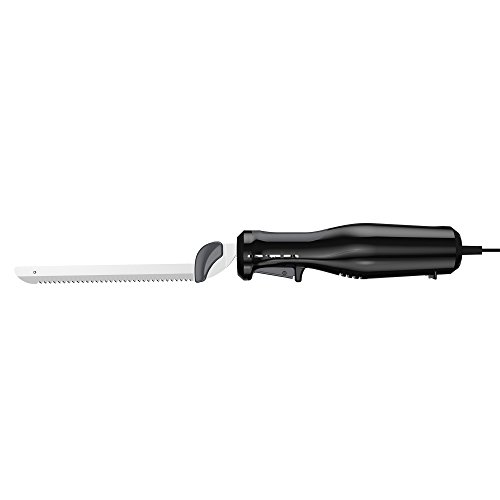
9-Inch Stainless Steel BladesComfort Grip Handle - The ergonomic handle gives added control during slicingDishwasher-Safe Removable PartsSafety Lock Button - Prevents the knife from turning on while it's plugged inBlade Release Button - Unlocks the blades for easy removal
Check price on Amazon

3 Reddit comments about BLACK+DECKER 9-Inch Electric Carving Knife, Black, EK500B:

u/Dalimar2000 · 1 pointr/jerky

Oh nice. Lately I have been doing last minute batches. So I roll over to the grocery store butcher case and pickup 4-6 pounds of round stakes. The consistency isnt the best but for Last minute I cant complain.
Thst being said my normal butcher (the place I go to for my freezer packs) will cut a roast down for me to what ever sized I ask. So I generally dont need something like that. I am thinking of https://www.amazon.com/BLACK-DECKER-Electric-Carving-EK500B/dp/B01K1JJAI2/ref=mp_s_a_1_6?keywords=electric+knives&qid=1570729413&sprefix=electric+knifes&sr=8-6.

u/fuzzy_one · 1 pointr/cosplay

General Suggestion I love Dremels, they are great tools, but I am not sure they are the right tool for this job. While they are great for small detail work, as you discovered it is hard to use one to make a large smooth curve. You might to pickup a cheap palm sander, and experiment with different grit sandpapers. I do know that EVA is not real keen on getting sanded.

I am going to go into some details here, because I do not know what you have experiance with and what you don't but the way I would tackle the prop:

  • Test - start with building one, maybe even 1/2 scale, odds are you will learn on this one and not use it anyway.
  • Styrofoam - I would glue white styrofoam sheets together to make a block large enough to make the prop, make the stacked a little thicker than you want the prop to be. Standard white glue works as does a special foam glue, do not use hot glue or it will mess up your sanding later. Test with any other glues you want to use as most will dissolve Styrofoam. White Styrofoam is cheap, and makes for firm, but light weight props. You can usually get sheets cheaply in home improvement stores. Some people like the blue foam, but I prefer the white because it sands nicely. (Tooth picks will help hold things together while the glue dries... will take days by the way)
  • 2D Template - I would make an outline of the general shape of the spiral. I would do this by blowing up a picture to the appropriate scale.
  • Trace on foam - I would then use a sharpie and transfer the outline to the foam.
  • Carve - Using a HotWire cutter, or even an cheap electric knife I would carve out the shape I traced from my template. Cuts will be straight down through the foam (perpendicular to the pattern lines I traced).
  • Ridge - I would then sketch in the ridge line on to the flat surface of the foam. This is the center line that represents the thickest part of the prop.
  • Roughing in - I would then use the hotwire or knife to start tapering the corners in. The idea here is to remove bulk material, not to get it perfect or even that close to perfect. Rough it in.
  • Rough Sanding - Now I start sanding the angles down into curves. A few warnings here: This makes a mess. The mess is light weight and floats around, so I suggest doing it outside. I sand with a torn sheet of sandpaper just larger than my hand, so I can hold on to as it move it across the surface. You can also wrap it around a block. Start with a lower grit 100 - 200. Power sanders can be used but they will move through the foam very quickly.
  • Finer Sanding - Move up to finer grit sandpaper 200-300. This will smooth out the surface, so as smooth as you want it. Again using your hand so you are sanding over a large surface area. Avoid temptation to break out the Dremel.

  • Surface Coating - Styrofoam can not take standard spray paint, it will dissolve the foam. Several options on surface here depending on how durable you want the prop to be. For ultra durable you can coat in Epoxy and fiberglass, for medium durability you can just brush a layer of epoxy on. For somewhat durable you can coat in a layer of modpodge or one of the foam friendly primers they have out now.