 Reddit reviews Clean Bottle Express 8D-G21Y-SRPZ Wine/Beer DeGasser
We found 14 Reddit comments about Clean Bottle Express 8D-G21Y-SRPZ Wine/Beer DeGasser. Here are the top ones, ranked by their Reddit score.
Clean Bottle Express wine/beer degasserUsed with pet carboysUsed with electric drill
You could do both with an ounce of frugality. My oxygenation "kit"
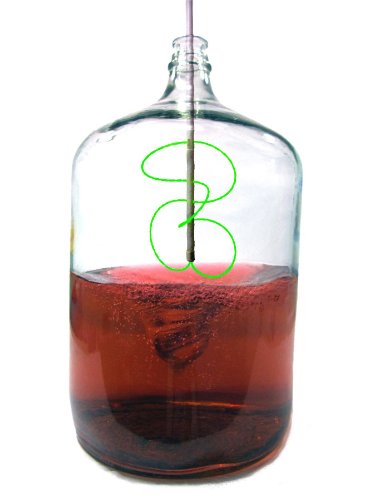
i bought a degasser drill attachment on amazon, it works well for 1 gallon carboys
note - do not run drill at full speed
I have this thing:
http://www.amazon.com/Clean-Bottle-Express-Wine-DeGasser/dp/B007RT8U1S/ref=pd_sbs_k_1?ie=UTF8&refRID=0C5Y1WX765AG6J2B3W1E
Works good enough for me, and it takes a lot less energy than picking up a full 6 gallon carboy!
this
Works as well as what others posted but half the price. Otherwise, you could probably make your own for even cheaper if you're not the last type.
Tough to say as there are so many little hacks. I like these three the most though:
I use my wine whip to mix must, aerate and of course degas. One of the best tools you can get.
I'm using this beer/wine degasser with a drill to mix/stir/degas in a carboy. Search for "wine whip" or "wine degasser" to see similar tools.
Two options: wine whip (you can use other things on hand with the same effect like some stiff wire that's been sanitized) and Fermcap-S.
Not really sure how effective Fermcap is when degassing (never tried it) - it's mainly just to prevent excessive foam during fermentation, not while actively mixing it up. Very, very careful use of a wine whip is probably your best bet. However, it's really not the end of the world if you don't degas at all.
I've had pretty good results with this one. It's basically just weed trimmer cord on the end of a plastic dowel rod, but it gets the job done.
I use one of these in buckets and a 1 gallon test jug. Seems to work pretty well.
Clean Bottle Express Wine/Beer DeGasser https://www.amazon.com/dp/B007RT8U1S/ref=cm_sw_r_cp_apa_mpp8ybF1RJC5Z
There are a bunch of different styles of degassers that would probably all work.
Having made mead before, the only reason to stir/agitate is to remove carbon dioxide, or "degas" as it's called.
Are you doing staggered nutrient additions? If yes, then I advise stirring for 5 minutes or so with a degasser like this one which is what I used for my first few batches with great success, but any type of degassing wand from your LHBS will work for this purpose.
If not, I do not recommend daily stirring at all until primary fermentation is completed. Doing so does add risk of contamination and oxidation without any real benefit. The reason you'd want to do it when adding nutrients is because doing so without degassing will cause a huge foam-over. Ask me how I know.
In either case, I do not suggest shaking, or you're going to have a huge mess on your hands. Go to your local supplier and spend the $10-$15 for the proper tool.
I now use a vacuum pump to degas my wine/mead which is more expensive but easier, faster, and less risk of contamination.
Seriously though if you shake an active fermentation it's going to explode on you.
Edit: Just realized NZ. Have you checked AliExpress, you might be able to get something drop shipped reasonably? Other options are to use a pond pump and infusion stone, or to get an oxygen welding tank. Whirlpooling really doesn't need to be done with a drill FWIW. It's more about getting all the break/trub in one spot so you don't clog pumps. Hop utilization will be just find in a hop stand with some gentle stirring.
Finally, the counterpoint to oxygenation is hitting with a well sized starter. Even if you don't have a stir plate, if you can source a 1G / 4L jug, you can do the "shaken not stirred" starter method, which will minimize the need for additional oxygen prior to yeast pitch.
Still wouldn't recommend a paint mixer. These can be made with not-acid-safe metals and coatings, and who knows what kind of crap may leach out of the plastics and adhesives that hold them together. Sure you can get away with it and it won't kill you immediately, but given the risk, and the fact that it will be used every brew, I'd be a little more selective about my equipment.
There's actually a bunch of these available as "Wine Whip" or "Wine Degasser" on amazon, such asthis.NorCal Brewingmakes a really nice stainless one that isn't too expensive.I use this thing. https://www.amazon.com/dp/B007RT8U1S?ref=ppx_pop_mob_ap_share
Transfer wort to fermenter stick this thing in attached to a drill and let it rip.
OK well I'll give you my recipe, here's what you'll need:
1 large stock pot 30-32 quarts is what you're shooting for. I got mine at Walmart for much less than this.
Yeast nutrient I prefer fermaid K but you can use Fermax, avoid DAP for a while it's kinda rough to dial in for a novice and can cause funky stuff to happen.
Campden Tablets
Wine Tannin
Some form of CO2, you can use Wine Preservation spray or if you paintball like me, fill your tanks up at the local place, and just use a regulator to dispense it.
WLP-099 for yeast. You can also use Wyeast 4347 if you want it to finish a bit sweeter.
You need a bathtub full of apples (not kidding) this is about ~100-150 pounds. I live in New England and buy cider apples for cheap money when they're in season from an orchard.
18-21 pounds of honey depending on which yeast you're using and if you want it to finish sweet or dry, I like to use orange blossom honey for this recipe, but anything light such as clover or some wildflower honeys will work. If you go with the Wyeast stuff stick with 18 pounds, if you're using the White Labs stuff and you still want some residual sweetness, go for 21 pounds.
A juicer to crush your apples. You could do this manually, but you will hate your life.
A Carboy stirrer or a Wine Whip You could use a super long stainless steel spoon, but in all honesty these do a much better job.
A big ass primary bucket this is what I use now, but if you've got a pair of 6.5 gallon buckets you're good too. I drilled a hole in the top for my "dry airlock" These open at 0.25 PSI, and they're both indestructible and cheap, plus you'll never have to worry about forgetting to fill your airlocks.
2 6.5 gallon glass carboys (these will be MUCH cheaper locally due to shipping costs)
1 All in One Wine Pump with a 10" house filter setup You can get the 1 and 5 micron filters cheaper on Amazon then the site they link there, and for the 0.5 micron finishing filter you get that HERE
Start with a bathtub full of apples with the stopper in, after the tub is full, fill around the apples with hot water. let that soak overnight to loosen up the dirt and hydrate the apples as well as you can. All hot water, no cold for this. Stir up the apples gently.
Wash the apples in bunches the next day, I have my kids help me with this, any ones with bad spots they put aside so I can either reject them outright or just cut the bad spots off. Cut the apples into quarters, only remove the stem and any leaves don't worry about the core or seeds or anything else. Any bad spots or worm eaten apples throw into the garbage.
Run all of the cleaned apples through a juicer. Put the pulp into your big primary bucket & put the juice into your big ass pot.
Heat the juice to 200 degrees, add 3 to 3.5 pounds of honey per gallon of juice (depends on what yeast you're using) and stir until well mixed (and still at 200 degrees.) This is to pasteurize the apple juice and kill any wild yeast or other microbes. Don't boil it, 200 degrees is fine. You should have about 7-7.5 gallons of juice from a full bathtub of apples plus a crapload of solids.
Add 1 teaspoon of Fermaid K nutrient, 1/2 teaspoon wine tannin, and 2 crushed campden tablets, stir that bitch up good.
Pour that on to the apple solids in each bucket. Mix it quickly, and make sure it's still at least 185 degrees F. This will pasteurize your apple solids. If it is under 185 degrees, then either pour in some boiling water and get it back to temperature OR siphon some juice out, reheat that stuff and pour it back. This is the ONLY time you can add ANY water, and if you're quick with the apple juice you won't need boiling water and it will turn out MUCH better.
Wait 24 hours.
Pitch your yeast. For this brew I make a big ass starter of the WLP-099 or the Wyeast 4347. With 3.5 pounds of honey per gallon plus the 100% apple juice liquids, I end up with around 35-37 Brix, giving me a high potential alcohol. The WLP-099 typically eats it nicely if step fed and aerated daily for the first week to give around 22-23% ABV while still finishing sweet with 3 pounds per gallon of honey and the Wyeast 4347 it will finish slightly sweet at around 20-21% ABV.
Let it sit on the apple mash for 30 days, for the first week use the Carboy stirrer to mix it up good, every 3 days add 1/3 teaspoon yeast nutrient for the first 9 days (so initial addition during creation of the must, and an additional 1/3 teaspoon on days 3, 6 and 9 so 2 teaspoons total fermaid K.)
Let the mash sit unmolested from day 12 to day 30.
Siphon that off into glass carboys for secondary.
For this step I normally pull the mead through a 5 micron and then a 1 micron filter (both in a single pass with my filtration setup) this doesn't remove the yeast, but it makes sure no apple particulate is transferred into your secondary. It will still be very cloudy though, to the point where it is opaque, that's fine.
Hit the carboys with some CO2, either from wine preservation spray or the paintball canister setup like I said.
This is where I add spices and any other flavor. I have made a number of differently spiced Cysers, but my typical secondary includes 1/16 teaspoon of ground cloves, 1/8 teaspoon cardamom, 1/4 teaspoon of freshly ground nutmeg, 1/2 teaspoon of freshly ground cinnamon.
After 30 more days I rack it off that, passing it once again through the 5 and 1 micron filters.
Then I hit it with CO2 to prevent oxidation and bulk age it. It doesn't move for at least 6 months, 12 if I can leave the carboys full for that long. After 2-3 months aging you can swap to a solid bung as you don't need the airlock anymore.
The mead will clear during aging. When it's transparent, it is ready to bottle. I do one more pass from my carboy through a 0.5 micron filter into another carboy, then siphon into my bottling bucket. I don't like bottling with my vacuum pump I suck at it and just make a big ass mess.
Yea it's a lot of work, but it's some of the best Cyser you'll ever have, and it's got one helluva kick so take care when you drink it.