 Reddit reviews Dremel 952 Aluminum Oxide Grinding Stone, 3/8" (9.5mm), Sharpening & Grinding Rotary Tool Accessory (1 Piece)
We found 3 Reddit comments about Dremel 952 Aluminum Oxide Grinding Stone, 3/8" (9.5mm), Sharpening & Grinding Rotary Tool Accessory (1 Piece). Here are the top ones, ranked by their Reddit score.
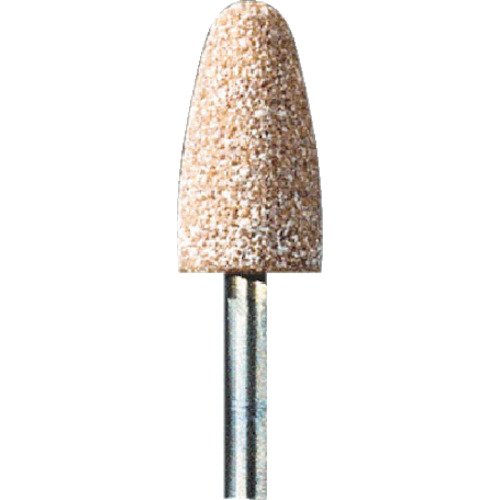
Aluminum Oxide Grinding Stones can be used for a variety of applications like sharpening lawn mower blades and other cutting tools, grinding down sharp points or edges on metal, and rust removal.Ideal for shaping, smoothing, sharpening, deburring, rust removal and general purpose grindingDremel Sharpening & Grinding bits come in a variety of head shapes to fit nearly every possible grinding use. The 952 features a Large Tapered head shape.WORKING DIAMETER: 3/8" (9.5mm), SHANK: 1/8", (3.2 mm) MATERIAL: Aluminum OxideAPPLICATIONS: Grinding/Sharpening (green color code)1 rotary accessory includedDremel accessories are also color-coded into usage categories, to find more Sharpening & Grinding accessories look for the Green color code.USA-BASED CUSTOMER SERVICE – Available by chat, email, phone or visit us at our service center in Racine, WI.High-quality industrial abrasiveDeburrs and grindsCurved surfacesDo not run in excess of 30,000 RPM
A couple things.
So, what to do? The easiest fix, though impermanent and none too graceful, is to tighten it up as much as it needs and build on it. Once you've got a good, solid coil installed, then you start to loosen up the positive pin. Only a teeny tiny little bit at a time, and you'll need to be testing the airflow changes somehow, while also making sure to keep an eye on your coil, ensure it doesn't get all fuckered in the process. It's simple, but inconvenient, as you'll likely have to re-do everything every time you need a rebuild. You may also be able to tighten it a little further and thereby align the airflow paths properly, but it's pretty unlikely. Worth a try, just keep in mind that if you severely overtighten the post, you'll likely snap something and render the whole thing useless. If you go this route, use caution.
The other option you have is a bit more elegant, noticeably more permanent, and possibly significantly more of a challenge. You can widen the opening of the cross-drilled section on the positive pin. Don't widen the hole itself, as there's not a whole lot of spare material there, and you'll likely just break the bolt, which will render the tank useless unless you can find a replacement (I'm sure they exist, but I don't know where). No, what you'll want to do is grind away small amounts of material from the front and back of the hole, thereby opening up a much wider range of relational angles that will allow a less-restricted flow of air. I would definitely recommend a Dremel (or similar) with some sort of a conical, fine-grit, metal-grinding attachment. Maybe like this one
What about how the SvoeMesto people solved this issue? Well, the positive pins are pretty much identical between the clone and genuine. But the way the airflow was machined is not. Inside the base, where the positive pin's air inlet hole meets the air inlet hole in the base of the tank, they've machined away a little area, like the outer race in a ball bearing, to allow unrestricted airflow, no matter where the holes end up in relationship to each other.
I hope this helps you figure out what's going on. If all else fails, I can attest to the wonderfulness of the real ones. They're unmatched in vape quality, for that type of vaping.
If the obstruction is pretty close to the lip, a dremel will make quick work of it. Borrow/rent a Dremel, buy a grinding bit for it example, have fun!
It's not really. It takes about 5 minutes with a dremel, using a thin grinding stone tip. Just grind a bit, then test-fit the standard mag for fitment. You can get it to the point where it will still accept the Vepr magazine in addition to the standard/surplus magazines.
Here's a brief video detailing the process.
Arguably the bullet guide installation is more difficult, since you have to be very careful while drilling and tapping. If you botch the magazine catch, you can always install an aftermarket upgrade, but you won't be able to easily repair a botched hole in your receiver.