 Reddit reviews OEMTOOLS 25025 26 Blade Master Feeler Gauge
We found 30 Reddit comments about OEMTOOLS 25025 26 Blade Master Feeler Gauge. Here are the top ones, ranked by their Reddit score.
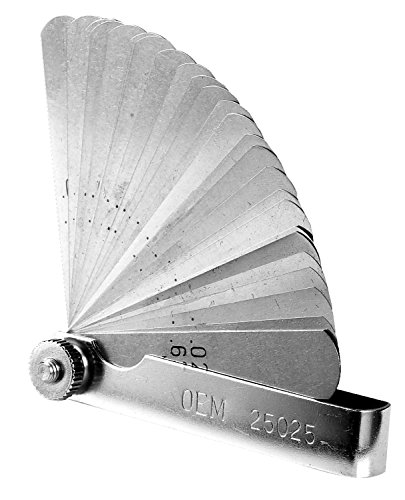
26 Hardened, Tempered Steel BladesMeasures: 0.0015 Inch (0.038 mm) to 0.025 Inch (0.635 mm)Chrome Plated Main Shaft for Easy Clean Up and Professional LookEach Blade is Laser Etched with Inches and MillimetersBlade Protector has Thumb Notch to Aid in Removal of Blades
Here is my advice, buy some new strings and a feeler gauge. Grab an allen wrench, a screw driver, and your tuner. Restring your bass with the new strings. Then watch this video for neck adjustment. It helps to have a capo, if you dont and pen and some rubber bands will do fine. After you watch that video set up your bass neck relief. Then set your intonation. This covers most of what you need to do to get it sounding more accurate. This should help with the fret buzz.
Feeler gauges for measuring the thickness of a gap between two things.
https://www.amazon.com/OEMTOOLS-25025-Blade-Master-Feeler/dp/B000BYGIR4
Just buy a set of automotive gap gauges.
They should cost about $5. You want metric gauges that have come a spacing of 0.05mm and include a 0.5mm gap.
I prefer the flat blade style.
BTW these are better then buying a fencing gauge since you can test how good your gap is. I typically fence with points that trigger at 0.35mm.
Remember that the spec on an epee point is that it must not trigger at 0.5mm +/- 0.05mm so you need to actual set your points not to trigger at 0.45mm to be safe.
Feeler Gauge much better than using paper to measure nozzle distance.
I actually don't know, but if you just need basic truss rod/action adjustments, I would recommend learning to do it yourself. It's really not that hard and the tools can be found at any local hardware store. Adjust in this order:
Truss Rod: You will need Feeler Gauges and a Capo on the first fret. press down with one had on the low E on the fret where the neck meets the body and stick a feeler gauge (.010") between the fret and the E string halfway between the first fret and the one you are pressing (usually 8th or 9th). Adjust the truss rod until the gap allows the gauge to slide in without pushing the string, and with no residual gap. The truss rod section of this page is good.
Bridge Height: You need a 6" Steel Ruler to measure the strings to your comfort, around 5/64's of an inch on the low E and 4/64's on the high e measured at the 17th fret. Adjust the bridge height with a screwdriver or allen wrenches as applicable.
Nut Height: You'll need your feeler gauges again and nut files that match the gauge of each string. You may be able to find a cheap alternative in a hardware store. As a rule of thumb, any tool branded as a luthier tool probably has a dirt cheap exact alternative at your local hardware store. Nuts should be filed down so that the string lays in halfway in the groove, halfway over the top. Bottom of the trough should be filed down to be .010" from the top of the first fret (use the feeler gauge).
Intonation: quoting from that fender link i posted above
>Set the pickup selector switch in the middle position, and turn the volume and tone controls to their maximum settings. Check tuning. Check each string at the 12th fret, harmonic to fretted note (make sure you are depressing the string evenly to the fret, not the fingerboard). If sharp, lengthen the string by adjusting the saddle back. If flat, shorten the string by moving the saddle forward. Remember, guitars are tempered instruments! Re-tune, play and make further adjustments as needed.
skipping the nut height isn't the end of the world if you dont want to shell out for the files.
Edit: oh and pretty much any tool has a high quality demo video on stewmac.com so check those out.
Get one of these.
Line up all the feelers and clamp it tight. Get a sharp edged file. File grooves into the edges of all of the feelers.
You don't have to go in deep.
Easy peasy and super cheap.
It's actually very easy. I'm a total newbie - if you go through my posts, you'll see that I bought my first guitar in June and that the Rocksmith community helped a lot.
Since then I learned how to set up (truss rod, action, intonation, pickup height) and change the tuners/ bridges of my guitars. The key here is to not be afraid of your guitar anymore - I used to be scared shitless I would break it. No, I won't. The thing is tough as hell, and you need to first overcome that fear. Fun fact, the first guitar I tried to perform a setup on was a $1000 Gibson. I know, I'm stupid and should've tried with my cheaper guitars, but oh well.
All you really need to adjust the truss rod is the truss rod wrench (should come with your guitar if you bought it new), some sort of feeler gauge, an action ruler - I use it for the precise measures, a Phillips screwdriver & flathead, and an accurate tuner - I use the Polytune 2
If you'd like to learn, I could send some tips & noob advice I learned for myself. It's really easy - I PROMISE.
Buy a feeler gauge on Amazon: OEMTOOLS 25025 26 Blade Master Feeler Gauge https://www.amazon.com/dp/B000BYGIR4/ref=cm_sw_r_cp_api_eTKEAbM4H1TJR
They’re $5 and well worth it!
Not an expert, but
I'd focus on the drive train issues first, get all those tires working, might be a lost cause before going any deeper, but others will have to help with that, I take that kind of stuff to my mechanic.
Brake pedal could be that it's low on brake fluid, or one of the brake calipers is stuck.
My quad has a foot brake like that and a hand brake, but the foot brake only brakes 1 tire. That tire has two brake calipers on it's roter, one to the foot break and one to the hand brake. So the hand brake is all 4 wheels, and the foot brake is 1 wheel. There is a master cylinder on my hand brake and another on my right rear tire (foot brake). If my foot brakes master cylinder runs low or springs a leak, my pedal goes through the floor like in your pic but I'll still have brakes on the hand brake. It's like a double/emergency braking system. If my hand brake goes out I can down shift (engine brake) and lay on that foot brake to brake and not hit a tree...
___
Fuel wise, it's likely carburetor being old. The carburetor should have a primer on it that injects gas into the carb when you press/pull it. Those generally have a diaphragm in them (rubber) that tends to go bad over time and cause a fuel leak.
If you can find a diagram of the carburetor that would help emensely.
Really though, you should take the whole carburetor off, take it apart and give it a bath in carb cleaner (no plastic/rubber in there) and clean all the jets out.
Also, they make rebuild kits for most carb's that come with all new jets, and pilot screw etc. See if you can find one. I typically just replace them all, easier and then I have spares.
Also, inspect the carb's vent hose and make sure it's intact and not clogged. Check the fuel line too, for damage/rot.
You should also remove the gas tank and clean it out. Take the petcock off and inspect the filters and valve, then clean the whole gas tank out so there's no dirt/bad gas in there.
Then check/change the spark plug(s). Before running it though, I'd check the valve clearance on the valves, guides on that online.
Once all that's done, it should run good and not leak gas.
Then you can address your other issues.
Pending how old it is, there are some parts I might replace just because:
If the current ones are working, call them spares.
Starters and solenoids are cheap, voltage regulators OEM are expensive, but you can buy a few after markets pretty cheap to have spares.
Tool wise, I can recommend at least the following:
Then your typical ratchet sets, air tools, impact guns, etc.
And socket extensions (long ones) because getting to some things is a royal pita.
I use this feeler gauge, and keep mine set at 0.03"
Minatures can be a whole different beast, but its rewarding to pull it off on an FDM. I would lower your layer height to one or two nozzle volumes (if you have a .04 do .04 or 0.08) and slow everything real far down. I have a Wanhao v2.1, but it should be about the same premise. they take a while but turn out great. support helps too.
Feeler gauge -- just a more accurate way to check the bed height, and you will have a physical number you can report if you are having issues. Just make sure to adjust the bed until you feel slight resistance, kinda like what you do with paper. I think your printer can accept a auto bed leveler (control board should allow it) you may want to look into it. Looks like you have a metal bed, so inductive might work best for you. It will really help out.
I been using feeler gauges from amazon. and measuring the distance at .038 MM.
https://www.amazon.com/gp/product/B000BYGIR4/ref=oh_aui_detailpage_o02_s00?ie=UTF8&psc=1
Unless you are printing PETG, or the paper you choose is a different thickness, or if it's swolen from humidity.
Paper isn't the best tool, among other things it varies in thickness, a set of feeler gauges (https://www.amazon.com/dp/B000BYGIR4) is a much better tool for this.
But I have completely quit using it. I now print out this link https://www.thingiverse.com/thing:2187071 and, as it's printing, manually adjust the bed screws until it's printing with uniform squeeze out and the print looks good. This works great for printers without automatic bed leveling like mine.
Please don't use that coin to gap your plugs. Take it back. Buy a proper feeler gauge. https://www.amazon.com/OEMTOOLS-25025-Blade-Master-Feeler/dp/B000BYGIR4
Those things are known ESPECIALLY on our iridium tipped plugs, to damage and crack them. You are still running the risk of damaging them and having your misfire.
Credit card gauge is good, but high precision requires a spark plug gauge. It will tell you exactly the distance between rollers. I understand commercial breweries target 1-1.2mm and home brewers are in the 1.2-1.4mm range.
link 1 - the notches are overkill, it's the straight edge you want because you're aligning the frets not the fretboard. Amazon has an 18" steel ruler that should work fine https://www.amazon.com/Westcott-Stainless-Steel-Office-Inches/dp/B000093IJ1/ref=sr_1_1?ie=UTF8&qid=1483315326&sr=8-1&keywords=18%27+ruler
link 2 That's overkill as well, you'll end up using just one or two of the files. I don't like the fret guards because it's more efficient to tape all the frets at one time than it is to tape up the guard 22 times. If you want to round the fret ends this file is similar to one I've used and will work fine. Just make sure the edge of the file doesn't saw the fretboard https://www.amazon.com/Nicholson-Triangular-Ergonomic-American-Pattern/dp/B001R1UZII/ref=sr_1_12?ie=UTF8&qid=1483315923&sr=8-12&keywords=triangular+file
link 3 - That's fine, there's another one $1 cheaper. They're basically all stamped out in China, and do the same as the $25 Stew Mac one. https://www.amazon.com/Pixnor-String-Action-Ruler-Guitar/dp/B01HM8SNHY/ref=sr_1_3?s=musical-instruments&ie=UTF8&qid=1483316161&sr=1-3&keywords=String+Action+Gauge
Your choices are fine, but I'm a cheap dude. And while you're in the ordering mood, you might get a set of automotive feeler gauges. This is what you can use with the ruler to set the amount of relief the neck should have. https://www.amazon.com/OEMTOOLS-25025-Blade-Master-Feeler/dp/B000BYGIR4/ref=pd_sim_267_16?_encoding=UTF8&psc=1&refRID=BA62DPTD81NDZKM36V6C
More on neck relief from Fender's web site: http://www2.fender.com/experience/tech-talk/how-to-measure-neck-relief/
If you wanna learn how to work on your own guitars, Frets.com is a great resource, here's their link on neck relief and buzz diagnosis http://www.frets.com/FretsPages/Luthier/Technique/Setup/BuzzDiagnosis/Relief/relief.html
Good luck!
This will be your best friend.
​
https://www.amazon.com/gp/product/B000BYGIR4
​
My bed is leveled to 0.03 mm and I use a BLTouch to make up the remaining difference.
Instead of just a paper to test, I use feeler gauges like these. That with a glass bed has me pretty well set.
https://www.amazon.com/OEMTOOLS-25025-Blade-Master-Feeler/dp/B000BYGIR4/ref=sr_1_7?ie=UTF8&qid=1527135292&sr=8-7&keywords=feeler+gauge+metric
I set the gap to .1 mm
Here's a list of basics that I bought recently to give you an idea:
Feeler Gauges
Hex Key Wrench Set
String Action Gauge
String Winder
Contact Cleaner for Electronics
Neck Rest
I already have various sized screw drivers, but if I didn't that would be on the list as well.
The above would be enough to do a basic setup: adjust truss rod, adjust action, get into the guts and clean the electronics. Everything will fit in a beat up old shoe box haha.
Along with YouTube videos, this book is a good reference guide. It has everything from basic repair and maintenance information all the way to repairing a broken neck or trying to repair a messed up truss rod.
If you have them, and you have the car, you can try putting them on, and check clearance with a feeler gauge set.
Wheels should have dimensions stamped on the inside of the spokes.
By feeler gauge do you mean something like this?
https://www.amazon.com/OEMTOOLS-25025-Blade-Master-Feeler/dp/B000BYGIR4
I'm thinking of learning to make my own picks and I'm looking into materials!
I bought a couple on Amazon that were real janky — none of the notches lined up properly on any scale length — but this one worked well.
That said, I’ve found that I rarely use it — you’ll get a lot more use out of the little ruler that u/dngvasht recommended and a set of [feeler gauges](OEMTOOLS 25025 26 Blade Master Feeler Gauge https://www.amazon.com/dp/B000BYGIR4/ref=cm_sw_r_cp_apip_HmRgRGboIDhaz).
Does it have any numbers or measurements on it? It almost looks like a very simple Feeler Gauge (for measuring gap widths.)
https://www.amazon.com/OEMTOOLS-25025-Blade-Master-Feeler/dp/B000BYGIR4
Sorry for the double up comment, but if you're really interested in a kit, here are each of the tool's they'll give you
Feeler Gauge
Allen Wrench Set (this is actually more comprehensive)
64th inch ruler
Straight Edge (For judging neck relief/bow)
Mini Screwdrivers
String Winder (with wire cutter)
Compare to $60 dollars
$100:(http://www.stewmac.com/Luthier_Tools/Essential_Tool_Kits/Basic_Setup_Kit.html)
This actually seems like a solid deal, but you can get all of these at a hardware store for less and not pay for shipping and wait around for it.
I zero my extruder and move it to the corners. At each corner, I manually adjust the bed until the correct feeler gauge barely fits. Takes less than 5 minutes about once a month.
http://www.harborfreight.com/32-piece-sae-metric-feeler-gauge-32214.html
http://www.amazon.com/25025-26-Blade-Master-Feeler-Gauge/dp/B000BYGIR4/ref=sr_1_1?ie=UTF8&qid=1409135061&sr=8-1&keywords=feeler+gauge
Given what you described, it could also be a feeler gauge, a bunch of thin metal shims of a set thickness stacked together with a pivot point so that you can check the clearance between things.
OEMTOOLS 25025 26 Blade Master Feeler Gauge https://www.amazon.com/dp/B000BYGIR4/ref=cm_sw_r_other_apa_xYPAxbGC4RDH3
Here you go. $6
Shims are useful for spreading the tines and can be used without damaging the nib if careful.
This is a feeler gauge set that I use... https://www.amazon.com/gp/product/B000BYGIR4
It starts at .0015 inch with the next ones being .002, .003, .004 and .005. Working up through those 5 sizes has gotten the job done well.
This set is made from steel, but is well formed and polished which should not damage even softer gold nibs when used carefully.