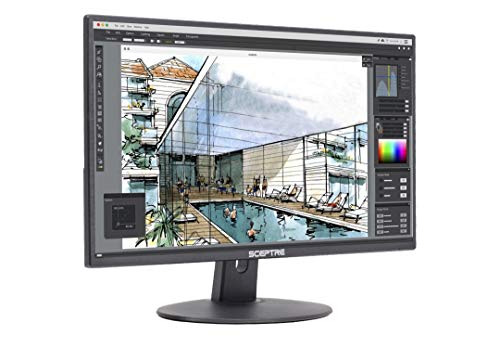
 Reddit reviews Sceptre E205W-1600 20" 75Hz Ultra Thin LED Monitor HDMI VGA Build-in Speakers, Metallic Black (2018 version)
We found 15 Reddit comments about Sceptre E205W-1600 20" 75Hz Ultra Thin LED Monitor HDMI VGA Build-in Speakers, Metallic Black (2018 version). Here are the top ones, ranked by their Reddit score.
True 16:9 Resolution 1600 x 900High Contrast Ratio: 5,000,000: 1.20 inches LED HD+ Monitor
(19.5 inches Diagonal corner to corner).
Dimensions
With Stand (Inches) 18.01 x 7.17 x13.57 (inches).
Without stand: 18.01 x 2.17 x 13.47(inches)HDMI, DVI or VGA Input. Power Range :100 – 240 VAC, 50/60 Hz, 1.1A (Max). (optional, need an external HDMI-DVI adapter)Build in dual Speakers. Signal compatibility : Digital Signal Frequency 30 – 80 kHz (Horizontal) / 60 – 75 kHz (Vertical)VESA Wall Mount Ready. OS Compatibility- Windows 10, Windows 8, Windows 7, macOS High Sierra, macOS Sierra, OS X El Capitan
Very brief build guide:
Mirror: ~110$ after shipping -Two Way Glass Mirror - 12" x 24" - Mirropane - 1/4" Thickness - Flat Edge Polished - for Smart Mirrors, Hidden Televisions, Security and Surveillance Applications https://www.amazon.com/dp/B01MSAZ3PN/ref=cm_sw_r_cp_apa_i_UAdiDbB7HTW20
Rpi 3: ~40$ - Element14 Raspberry Pi 3 B+... https://www.amazon.com/dp/B07BDR5PDW?ref=ppx_pop_mob_ap_share
Monitor: ~ 70$ - Sceptre E205W-1600 20" 75Hz Ultra Thin LED Monitor HDMI VGA Build-in Speakers, Metallic Black (2018 version) https://www.amazon.com/dp/B00S8W8QMG/ref=cm_sw_r_cp_apa_i_.CdiDb9X0FX93
Assorted cables: ~10$
I spent about 20$ on wood for the frame.
I got the code from here: https://github.com/HackerShackOfficial/Smart-Mirror
Total: ~250$
Rough build guide:
Pull the code onto the pi with git.
Follow the instructions in the README to get everything working.
Disassemble the monitor. Be mindful of ESD and don't destroy the display panel. Set aside all the electronics; you'll need them, duh. Once it is free test it. BE SURE to test the panel at most steps to make sure it's not dead or damaged.
Make the frame to the spec of the mirror. Add in support to make sure the panel will lie where you want it to in the mirror.
Do a dry fit to place and route all the electronics.
I used hot glue and masking tape to secure everything down and block out light leak.
Lastly, go into a dark room and test it out. It'll show you where most of your light leak is.
I hope this is helpful for everyone. Sorry if it isn't comprehensive enough. Also, two things not included in the price were my priceless pals that helped with the assembly. Big thanks to LDC and Big Jo.
Heatsinks $11
Sonoff switch $14.00
N-Channel MOSFET $8.88
Stickable Breadboard $9.99
LED lights $11.25
Google AIY Voice Kit $12
HDMI $6.99
5V Power Supply $7.99
12V Power Supply $9.99
Raspberry Pi $38
Monitor $69.99
Mirror $129.99
Total : ~$330
These are 1080p monitor links from amazon (free shipping with student prime):
$90 IPS monitor (better viewing angles)
$66 75hz monitor
Hey, the mirror came in the mail today.
This was my first magic mirror put together, however it was pretty simple, considering.
There's a particle board back with 18 screws, 8 of them dedicated to vertical and horizontal hanging hooks. They are in there tight, I had to use an electric drill.
Underneath the particleboard is a black coated foam, to prevent light leak
Initially I used a staple gun to attach shims as brackets for the monitor that I used, I already had it as a secondary monitor for a laptop. I'm going to need to get another, but hey :P
Removing the plastic case was very easy from that brand, I used a flathead and an 8 pound weight to pry apart the plastic housing. The bottom holds a couple of light wires, so be wary if using this monitor specifically. Also, the glass frame can fall off once the housing is removed. Finally, while the buttons are "behind" the monitor, it's actually just a wire PCB with buttons. I have it drilled down with the Raspi, on a single screw. Slide out to turn on when needed, slide back in to hide. It's underneath/behind the frame, out of sight.
Once everything was removed everything else, I used electric tape to seal the edges of the monitor in an attempt to prevent light leak (it worked, but I missed a spot.) I placed it in the center of the mirror and lined the black foam board, cutting out the width of the monitor. It ended up in 4 pieces (probably the light leak cause), however electric tape holds it firm. The edges of the foam are white, so I taped off the edges as well, making everything fight together very snug.
I initially used shims, however removed them as I felt the monitor is well held by the foam and the particle board backing.
Upon trying to drill the particle board back in, it's pretty clear that the monitor's PCB, HDMI, power inputs are in the way. Considering I'll also need room for the RPI, I made a 2 square overlay cutout.
I wasn't sure how to cut particle board from the centerish of the piece, so I took a drillbit and perforated my design, punched it out, and have a basically perfectly flush mirror frame.
Basically.
I drilled the RPI into the particle board, with the monitors control panel, into the bottom of the frame. However, the HDMI cable for the monitor juts out a bit.
My 2 solutions for this are to build some little backing... not exactly what I'm aiming for.
So, the PCB for the monitor is actually mounted with screws, which I had removed and shifted. I'm thinking simply removing them entirely may allow me to adjust the PCB in a way to let it sit flush, secure, and still within reach of all of its wires.
Option 1 is guaranteed but requires materials outside the purchase of just the mirror and frame. Option 2 lets me simply use the mirror that I bought "plug-n-play". """""". """"""""". Extra air quotes, just in case.
It looks good though. It's a little darker than base monitor, but that's to be expected. Definitely wish that I had used a larger monitor and remembered to seal off the front foam to the front of the monitor, as that would completely resolve the little eyes that are formed from light leak. I may end up coming to like it though!
___
As for the mirror and frame for $69.99...
Honestly, it's "good enough". It... "comes" with everything that you need for an amazing price. The mirror seems nice, the frame isn't falling apart, and it's quite hefty. However, the particle board is somewhat misaligned / improperly cut to shape. While this makes it clear which side goes where when trying to put the board back on, it does feel like the cut corner, next to the inside of the frame/edges of the inside of the mirror.
The foam pad came a little dirty, I ended up using the opposite side. Finally, these screws strip. Have a rubber band handy, luckily I actually had the exact same screws provided, so I was able to easily add an extra screw for the RPI and monitor PCB.
I'll make this a reddit post, but I figured I'd give you my first impression!
I don't think I'm afraid to hang it on the wall
I completed mine about a week ago, based on the square RIBBA I scored at a thrift store. If you use a flat screen that’s not too bulky you should be in great shape.
https://imgur.com/a/Fjo4n
I used a sceptre 20in monitor. Was going inexpensive.
https://www.amazon.com/dp/B00S8W8QMG/ref=cm_sw_r_cp_apip_jCtAxgzjSyHns
The biggest “mistake” I made was not realizing early enough the hdmi output and power cable stick out from the back which keeps it from fitting flush to the wall. :/ haven’t found a great solution yet. Maybe some stand offs and an adjustable VESA mount...we’ll see.
https://imgur.com/a/BK81f
Anywho, best of luck!!
EDIT: just measured. My 19 3/4” x 19 3/4” RIBBA is 1 3/4” deep.
One monitor is powered by 12v dc the other is powered by usb. The 12v monitor is great because it was half the price of the usb, and has hdmi port, vga port and speakers. Here's the 12v and here's the usb one If i turn the back ligthing on the 12v monitor all the way down I can run it from a usb power bank to using a 12v step up converter, using only about 9 watts. The usb monitor uses about 6 watts.
>$100
>With speakers
>Gaming
Not sure where you live but $70 USD is sub $100 in most currencies
https://www.amazon.com/Sceptre-E205W-1600-Monitor-Speakers-Metallic/dp/B00S8W8QMG/
See I'm coming from a 15 inch laptop screen. So. Anything greater than that seems like a world of difference. For example, I'd been looking at this Sceptre monitor - https://www.amazon.com/gp/product/B00S8W8QMG/ref=ox_sc_act_title_1?ie=UTF8&psc=1&smid=ATVPDKIKX0DER
How does this look?
Edit: I have an HDMI cable ready for this purpose, by the way.
they are both on 1600x900 atm. i can link you the amazon where i got them. https://www.amazon.com/gp/product/B00S8W8QMG/ref=oh_aui_detailpage_o04_s00?ie=UTF8&psc=1
Es posible comprarse un TV/monitor de amazon? he comprado cosas costosas pero pequenas, pero veo unos monitores a decente precio https://www.amazon.com/Sceptre-E205W-1600-Monitor-Speakers-Metallic/dp/B00S8W8QMG/ref=sr_1_6?keywords=tv+monitor&qid=1574966644&sr=8-6
Porque aqui quieren 100$ por una vaina usada.
Can you explain to me when I would use the DSI?
Regarding your answers, could I possibly take this monitor in the amazon link and just hook it to the RPI 2?
http://www.amazon.com/Sceptre-E205W-1600-V1-LED-Lit-Monitor/dp/B00S8W8QMG/ref=sr_1_2?s=pc&ie=UTF8&qid=1454023852&sr=1-2&keywords=lcd+screen+hdmi&refinements=p_n_feature_keywords_browse-bin%3A5779382011%2Cp_36%3A1253505011
They're very common, Walmart, Microcenter, Best Buy, Amazon, ect.
https://www.amazon.com/Dell-E198WFP-Widescreen-Panel-Monitor/dp/B000VZRPF2/ref=sr_1_3?s=electronics&ie=UTF8&qid=1480554994&sr=1-3&keywords=1080p+monitor
https://www.amazon.com/Sceptre-E205W-1600-V1-LED-Lit-Monitor/dp/B00S8W8QMG/ref=sr_1_5?s=electronics&ie=UTF8&qid=1480554994&sr=1-5&keywords=1080p+monitor
https://www.amazon.com/AOC-e2050Swd-20-Inch-Computer-Resolution/dp/B00C8T5KOW/ref=sr_1_6?s=electronics&ie=UTF8&qid=1480554994&sr=1-6&keywords=1080p+monitor
https://www.amazon.com/Sceptre-E248W-19203R-Monitor-Speakers-Metallic/dp/B0773ZY26F/ref=sr_1_3?qid=1550425042&refinements=p_36%3A1253505011&rnid=2633086011&s=pc&sr=1-3 its $98 but its brand new and the 22" version is even cheaper
https://www.amazon.com/Sceptre-E205W-1600-Monitor-Speakers-Metallic/dp/B00S8W8QMG/ref=sr_1_4?qid=1550425042&refinements=p_36%3A1253505011&rnid=2633086011&s=pc&sr=1-4
​
https://www.amazon.com/AOC-Widescreen-DisplayPort-Certified-Refurbished/dp/B075XPMTCR/ref=pd_day0_hl_147_17?_encoding=UTF8&pd_rd_i=B075XPMTCR&pd_rd_r=f4b03a6d-32da-11e9-98e2-37d5230d235d&pd_rd_w=lWOUk&pd_rd_wg=5xVUf&pf_rd_p=ad07871c-e646-4161-82c7-5ed0d4c85b07&pf_rd_r=0Y6QW4T4J9WNFH1P45BF&psc=1&refRID=0Y6QW4T4J9WNFH1P45BFpretty much exactly what you want. its not prime, but the shipping is still free on this one
No idea how high your budget is but check out this 20 inch screen on Amazon for $64.
Shop around.
https://www.amazon.com/Sceptre-E205W-1600-V1-LED-Lit-Monitor/dp/B00S8W8QMG/ref=sr_1_7?s=pc&ie=UTF8&qid=1483756542&sr=1-7&keywords=1080p+monitor&refinements=p_36%3A1253505011
$10 cheaper here.