 Reddit reviews StarTech.com Self-adhesive Nylon Cable Tie Mounts - Pkg of 100 - Cable organizer - HC102
We found 37 Reddit comments about StarTech.com Self-adhesive Nylon Cable Tie Mounts - Pkg of 100 - Cable organizer - HC102. Here are the top ones, ranked by their Reddit score.
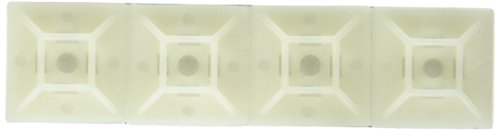
Easy to use and quick to installpeel and stick, no screws requiredEliminate cable tangles and clutter
Hey, heads up on modern bulbs.
I started doing this about five years ago when not as many LEDs were used, my first with a Space Bucket is here from about four years ago, and some are now using a lot more LEDs in the bulbs. I did remount some of the LED modules for side lighting. I'm going to modify the article with a disclaimer.
The problem with more LEDs is that they are each ran in series, each LED needs 3-3.3 volts, so in some instances you are going to be exposing voltages that are going beyond safe levels by removing the cover. This should be isolated DC voltage, not AC line voltage, but keep in mind that with more than 15-20 LEDs that you can have a shock hazard.
Big Clive on YouTube has shown that they might not always be isolated from ground.
https://www.youtube.com/watch?v=rNf6VSj6M-E
Shock hazards are most serious when it's a hand to hand shock since the current path can go through the heart and 50mA is when things can start becoming lethal.
Also I found that if the LEDs become disconnected from the power supply that the power supply voltage floated up to about 170 volts which in 120 volt AC nations is the peak voltage that you would get with a rectified capacitor. You have to be aware of this particularly when doing major modifications to the bulb.
It can be done safely but insulation is the key.
Also, don't use hot glue with power electronics. You can use 5 minute epoxy instead and give it 5 hours to cure.
edit spelling
/u/MrSparkleBud is using modules with 10 LEDs and his setup looks pretty safe. The hot glue is being used in areas where there would not be an expected heat build up. Adhesive cable tie mounts with tiny cable ties would still be a much better option as they provide really good strain relief (as an electrician I used a lot of these). Those now exposed power supplies still have line voltage on them, though, but it's obvious he has experience doing stuff like this from the very neat layout.
Make sure the line voltage splicing is soldered/taped and not just twisted with line voltage. Be sure to use Scotch Super 33+ tape if you can get it and not cheap, generic tape. Home Depot etc will have it for about $3 as well as the cable mount stuff.
Wire nuts are preferred for line voltage splicing.
Things I feel are a must:
Useful extras:
--EDIT--
My order of assembly:
Actually look at the picture. There is clearly something anchored to the underside of the shelves which they're tied to. Since you really can't use nails or screws they basically have to be self adhesive. About two minutes of googling later I found these. They don't look exactly like what he's using, but close enough.
Really just try thinking about it.
Damn, I thought that's what they were called I guess the actual term is self adhesive zip tie mounts, here you go fam. Cheers.
https://www.amazon.com/Startech-HC102-Adhesive-Cable-Mounts/dp/B00008VFBE
I got them form Fry's. Just zip ties and cable mounts.
Something like this: https://www.amazon.com/Startech-HC102-Adhesive-Cable-Mounts/dp/B00008VFBE
You maybe able to find them cheaper somewhere else.
Something like this or use 3m on the back of the desk to raise wires...also..zippptiiesss
Thanks! The cables are secured with tie wraps and tie wrap mounts very similar to these ones. I bought a bag of them a while back to try to clean up the cabling around my house and they still seem to come in handy now and then.
I use zip ties and anchors like these ones to hold everything in place. It's a massive pain if even the slightest thing needs to change underneath, but gets the job done extremely well.
A fair amount of zip ties, indeed. I feel like there are a billion in my PC, as I used them with things like this for ultimate cable management potential.
http://www.amazon.com/Startech-HC102-Adhesive-Cable-Mounts/dp/B00008VFBE/ref=sr_1_1?ie=UTF8&qid=1408638506&sr=8-1&keywords=zip+tie+sticky
If you want a solution that is repeatable and nice looking, maybe do some of these w/ some zip ties? That way, you can just cut the zip ties when done, and leave the mounts on the boards for next year.
Edit: These are the same thing, but more cost effective and have the prime/free shipping option.
Get yourself some of [these things](http://www.amazon.com/Startech- HC102-Adhesive-Cable-Mounts/dp/B00008VFBE). They hold down zip/twist ties.
Get behind/under your desk and plan and think for about an hour before actually doing any routing so you don't have any goof ups. The important thing to remember is that the cables don't have to go directly to the destination, unless it's a very short cord, so create a few common paths rather than many individual ones. I used to have a bundle of wires where my feet rest, and I did this a few weeks ago and it's been worth every penny and every second.
Cat5e should be sufficient for any house. Really. You can get gigabit speeds on that, which is good for 20 simultaneous 4K video streams, plus another dozen or so netflix HD streams. Really, GigE is fine.
Source: http://blogs.iis.net/alexzam/archive/2013/01/28/h-265-hevc-ratification-and-4k-video-streaming.aspx
The only time I'd recommend cat6a is if you, right now, have a home application which routinely requires greater than 500 Mbit/s. The extra cost for cat6a isn't worth it, and the cost of 10G components is still quite high (for the home)
Wire cat5e from each place you might want a phone, TV or media device. My living room has 4 cat5e drops (TV, blu-ray, xbox, Roku) back to your panel box area.
Secure them to the joists in the ceiling with J-hooks, not staples, please.
http://store.cablesplususa.com/jhook225pk.html?utm_source=googlepepla&utm_medium=adwords&id=20005783933&utm_content=pla&gclid=CMvZ5vG4nLoCFQSf4AodMRsAiA
If you're feeling cheap, get some anchors and small zip ties. Screw the anchors to the joists, peel and stuck will come loose.
http://www.amazon.com/Startech-HC102-Adhesive-Cable-Mounts/dp/B00008VFBE/ref=pd_sim_e_4
At the walls, use keystone jacks and wall plates
http://www.monoprice.com/Product?c_id=105&cp_id=10517&cs_id=1051703&p_id=6734&seq=1&format=2
Don't forget the low voltage box
http://www.monoprice.com/Product?seq=1&format=2&p_id=7016&CAWELAID=1329454251&catargetid=320013720000010679&cadevice=c&cagpspn=pla&gclid=CLuwocO8nLoCFYWe4AodtF4AmQ
and use a proper patch panel in the basement
http://www.monoprice.com/Product?c_id=105&cp_id=10514&cs_id=1051402&p_id=7255&seq=1&format=2
Don't save the labeling for last, you won't remember. Label things as you go.
I have a brother labeler, which works really well.
http://www.brother-usa.com/Labeling_Solutions/ModelDetail/7/PT18R/Overview#.Ul8cOFBwqsM
I stress the cat5e thing as being good enough because people very often think that they need cat6a or somehow their 15Mb/s turbo internet package will be bottlenecked. The only project I've ever worked on where cat6a made sense was for a public works project in NYC, where the labor rate was $105/hour. For them, it made sense to buy the best cable money could buy.
Oh. Here's the link though if you need it.
These and zip ties.
Dude.
You can find these guys at any hardware store.
http://www.ikea.com/us/en/catalog/products/30200253/
Or if it's too big for your desk, ziptie holders holders like https://www.amazon.com/Startech-HC102-Adhesive-Cable-Mounts/dp/B00008VFBE, here they sell whole packs (20-100) of those for cheap in every home improvement/DYI shops. Don't tighten zipties, leave enough room to pull cables through.
Or self-adhesive velcro straps under the desk, then tighten cables with opposing velcro tie and stick it there.
They are just regular cable ties. You get a pack of tie mounts like these http://www.amazon.com/Startech-HC102-Adhesive-Cable-Mounts/dp/B00008VFBE/ref=lp_507844_1_9?s=electronics&ie=UTF8&qid=1396873899&sr=1-9 and you place a zip tie through it and around what you want to mount.
Couldn't find the post from awhile back but they essentially used clips like in the link below to attach to the monitor. 2 of them stacked vertically and then I can't remember if they put some sort of an extension on the shaft of the sensor or if they had enough length on it to then zip tie it down to the clips.
https://www.amazon.com/Startech-HC102-Adhesive-Cable-Mounts/dp/B00008VFBE/ref=sr_1_1?ie=UTF8&qid=1483998355&sr=8-1&keywords=sticky+zip+tie+clips
These.
Zip ties are attached to these.
I know everybody here gave you a hard time about the cable management... get some zip ties and some of these: http://smile.amazon.com/gp/product/B00008VFBE?keywords=adhesive%20zip%20tie%20mount&qid=1450045130&ref_=sr_1_3&sr=8-3
They would be put along the back edges of your shelves. They hold the zip ties in place, then you run the wires through the loose zip ties and then tighten everything down once it looks good.
Seriously spend some time on cable management and it will be night and day different. Post some "after" pics!
That doesn't look too bad already! You should get some cable tie anchors to align the cables better. I used some cable hooks in the old case as seen here for the SATA cables as it was the only thing I had at the time.
Something like this with a zip tie?
Order these and some zip ties. I'm about to use some of the 90+ extra ones I have to hang up a banner on my wall.
Nope! You can buy them on Amazon for cheap though:
http://www.amazon.com/Cables-43036-Cable-Ties-4-inch/dp/B0002GX1XA/ref=sr_1_3?ie=UTF8&qid=1377822338&sr=8-3&keywords=Cable+Ties
http://www.amazon.com/Startech-HC102-Adhesive-Cable-Mounts/dp/B00008VFBE/ref=sr_1_1?ie=UTF8&qid=1377822347&sr=8-1&keywords=Cable+Tie+Mount
Yeah that should work no problem.
Self-adhesive ziptie mounts, just run them along your planned cable routing every couple of feet and tie down the cables with zipties, no need for nails.
Yeah somebody else suggested that. Something like https://www.amazon.com/Startech-HC102-Adhesive-Cable-Mounts/dp/B00008VFBE should work nicely.
I've never seen them in a panel before but I can't find anything in the code that says they're not allowed, and I've seen them in industrial installations...
That's a cable tie mount, and it shouldn't be there, but you might not want to take it out. It might've just fallen in there by mistake, but it might have been jammed in there to keep something from moving/bending. Ask your friend if he knows why it's there.
Something like this will resolve your problem. Although a bit of a pain when you add a cable to need to adjust since they only work with cable ties...
https://www.amazon.com/Startech-HC102-Adhesive-Cable-Mounts/dp/B00008VFBE/ref=pd_ybh_a_10?_encoding=UTF8&psc=1&refRID=0PE9781TTEZ6W8FHWN13
Edit: Words are hard
These cable tie mounts work pretty good for things like this, just stick under the cabinets and zip-tie them up.
You could do something as simple as zip ties and tie mounts. They really just need to be run in a clean manner.
https://www.amazon.com/Startech-HC102-Adhesive-Cable-Mounts/dp/B00008VFBE
https://www.amazon.com/Cable-Matters-Combo-Self-Locking-12-Inch/dp/B00L2LGMO4/ref=pd_lpo_23_bs_img_2?_encoding=UTF8&psc=1&refRID=5DYNP9R4B5H3AEXY4DNY
You made this more complicated than it needed to be OP. Just use springs. Thread the cord through a keyring, that is attached to an extension spring, that is anchored near the bottom of the dresser. Have cable mounts near where the cable plugs into your hub/outlet so that it doesn't pull the cable out, or put tension on the outlets, and you're good to go.
Really, you could probably get away with just weighted rings, or several rings on the cord that naturally weight it down, but slide along as you pull it. May get tangled or snag though.
If you're worried about tangling put each spring and cord through their own tube (like a paper towel tube, or PVC) that's mounted at the bottom. It'll pull each cord down through it's own tube.
Your holder/stopper solution for keepign the cord from falling behind the table is perfect though, keep using that.
Getting some cable tie mounts definitely helps with the zip ties, if you need to route them a certain way.
http://www.amazon.com/Startech-HC102-Adhesive-Cable-Mounts/dp/B00008VFBE
+
http://www.amazon.com/Cable-Matters-Combo-Self-Locking-12-Inch/dp/B00L2LGMO4
Not sure, new to building and cable management myself. Google "zip tie mounts", those seemed to help me. Only $8 for 100.
EDIT: [Here they are.] (http://www.amazon.com/Startech-HC102-Adhesive-Cable-Mounts/dp/B00008VFBE)