 Reddit reviews Taylor Precision Products Digital Cooking Probe Thermometer and Timer, Pack of 1
We found 48 Reddit comments about Taylor Precision Products Digital Cooking Probe Thermometer and Timer, Pack of 1. Here are the top ones, ranked by their Reddit score.
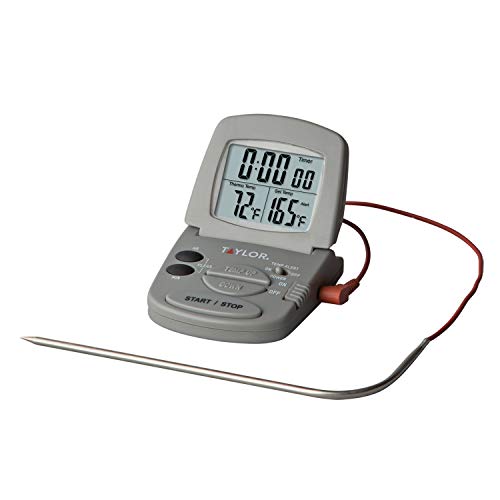
Monitor food without removing it from the oven: durable stainless steel probe with a 4-foot silicone cord allows monitoring of food inside oven without opening the door.Programmable temperature and timer alarm: set the target temperature and monitor the ACTUAL temperature on the display. Also has timer feature that has a range up to 24 hours.Versatile design: this cooking thermometer can be kept at an angle, or laid flat to be seen in any cooking environment.Highly accurate: this digital thermometer measures temperatures from 32°F to 392°f, 0°C to 200°c.Batteries included: Requires 2 AAA batteries (included).
I've only made canna caps a few times so I'm still tweaking things but here's what I've got so far.
Ingredients:
• 1oz bud - your choice of strain.
• 8oz (1 cup) coconut oil or butter. I prefer coconut oil.
• 1.5tb soy lecithin
Directions:
Pre-heat your oven to 215° F.
Chop up your herb finely.
You can grind it but I've found it's easier to strain if chopped.
Sprinkle evenly into a small oven safe dish.
Cover well with aluminum foil, crimping up around the edges.
Place in oven for 30-45 minutes.
After 30-45 minutes, remove the dish and let it cool, WITH the foil still on. Letting it cool down slowly, allows any vapors to settle back into the material (theoretically).
Note: for the extraction process I prefer a Nesco 6-Quart Roaster Oven. I prefer this over a crock pot because it has temp control.
I used this in combination with a Digital Cooking Thermometer which comes in handy not only for more accuracy but also because you can set an alarm on it if the temp gets too high - in which case you'd just add some water to the mixture.
While you wait for the container to cool, Melt your coconut oil or butter in a pan on low heat.
Once cool, remove the foil lid from the pan and place the decarbed herb into the roaster/crock pot.
Pour enough distilled water over the herb to float it, then add the oil or butter over your herb and stir it up.
Set the temperature between 200 and 220 Fahrenheit and let cook for 12-18 hours, stirring occasionally.
Note: this step is where that digital thermometer with temperature alarm comes in particularly useful. Set it and forget it.
After 12-18 hours turn off heat and and strain the oil from the herb using a stainless steel mesh strainer, pouring the extract into a class or ceramic dish.
Note: I prefer a steel strainer but it's possible to use cheesecloth. Coffee filters do not work. Also, I don't throw away the herb. I let it dry as much as possible, grind it finely and put it in capsules also.
Place dish in refrigerator over night or until the oil or butter has hardened.
Once solid, separate oil/butter from the water, discarding the water.
Place solid extract in an oven safe dish and heat at low temp until liquid.
Once liquid, add 1.5tb of soy lecithin to the extract and stir gently until homogenized.
You now have cannabis extract ready to be used for cooking or for filling capsules.
Here are some things that I used that may help you.
1,000 Herbal Oil Capsules - Size "00"
Size 00 Capsule Holding Tray
Soy Lecithin Powder - 1 Lb
Glass Eye Droppers
Hope this helps. Happy cooking :)
Just looked at your thermometer. That would be safe in a slow cooker and probably stay visible through the glass.
For an oven, I can't recommend getting a digital probe thermometer like this enough.
I use one literally every time I cook meat or bread in the oven or on the grill.
Get a thermometer for your meats. I use this one at home.
Stop caring about grill marks. You're not cooking on a grate. You don't need to make it look like you are.
Cut back on the oil. Commercial restaurant appliances are very different than what you're working with in a dorm.
I actually used to do this. Now I have a digital probe thermometer that I can leave in the meat while it's cooking.
You plug the headphone-jack type thing into a part that will usually have a digital display of some sort that will show you the temp of wherever you have put the spike part. You would typically put the spike in meat that is in the oven and have the digital reader part on the counter.
Here's a picture of one!
you did mention that you went straight from the fridge to the pan. that means the meat is starting out cold in the center and will take longer to heat up. he started with a steak that had been left to warm up to room temperature.
i agree with /u/AManAPlanACanalErie that using a thermometer takes a lot of the guesswork out. if your steak isn't hitting the internal temperature that you want after searing on each side for 1.5min or whatever, you can toss into a low heat oven to finish off. i have a thermometer like this that i stick in the steak as I'm finishing the sear. If it is still below the temp I want, I throw it in the oven for a bit to finish it off, leaving the thermometer in it. You want to make sure the tip of the thermometer is in the thickest part of the meat.
I use this one.
A lot of people also like this one.
But I'm thinking of getting this one because it has a temperature alarm.
Strange. That's exactly how mine behaved when it got wet. If it were me, I'd throw it in the oven just to satisfy my curiosity. Also, are you sure the part that plugs into the base isn't getting wet? Mine has a huge warning about that, but I haven't personally experienced what happens when it gets wet.
Anyway, if you continue to have problems, you might try this thermometer. It's cheap, but mine has held up through 18 batches and survived a drop into my sparge water despite not being labeled as waterproof.
You're welcome. It's definitely one of the easiest ways to cook a perfect steak if your new to it. It's hard to go wrong, unlike if you were cooking solely on a grill/in a pan.
The two most important things to remember here are cook on a rack like this, not flat on a cooking sheet.
And use a meat thermometer like this one. Don't just guess at the temperature.
I completely agree with this. I only had my machine about a month before I went to the Auber PID. Early on I attached a multimeter thermocouple to the base of the boiler to get an idea of what the temps were doing near the grouphead.
The PID is great because you get a live temp reading in the well on top of the boiler and it changes instantly. Since the PID, I added a grill thermometer to take a temp reading on the top of the grouphead. The thermometer has an alarm I can set so I know when the machine is up to temp. It also has a stopwatch so I can time my shots and everything is on the screen at once. I did a ton of searching to find a thermometer with all of these functions displaying at once and in a small size. Definitely recommend it.
Learn how to cut up a chicken. This saves you tons of money, I bought a whole chicken for $4 last weekend, enough for 3 meals for my wife and I.
here is a really good short how-to.
Get a good digital thermometer, preferably one of the ones with a probe that can go in the oven. A lot of recipes tell you to cook until "done" or the internal temperature reads something. A good thermometer will help keep you from over or undercooking things, especially meats. This is a decent one.
If you have two, why don't you do one as a perfect standing rib roast and play with the second one?
I'll get to the playful ideas for the second hunk of meat later.
Part One - an instructional on making prime rib:
Keep in mind, for some of my less essential estimations, I'm totally guessing. Just use your brain.
My procedure was born from the standing rib roast episode of Good Eats. I couldn't find the whole episode for you online, but [here's a clip from it] (http://www.foodnetwork.com/recipes/alton-brown/dry-aged-standing-rib-roast-with-sage-jus-recipe/standing-rib-roast.html) in case you're interested.
Basically, the trick is to take your time with it. This method is foolproof if you're patient and if you give your meat a day to hang out in a salt and pepper rub-down, a couple hours to get to room temperature, and a chunk of time to roast in a very low oven.
Why a low oven if you can reach medium rare in less time with a hot oven? Because a low oven will help keep the whole mass of the meat at roughly the same temperature while it cooks. The thermal assault of a hot oven would decimate the roast's outer inches before beginning to cook the raw center. Look at [one] (http://www.heroacres.com/heroacres/PrimeRib.jpg) and [two] (http://literalminded.files.wordpress.com/2012/09/prime_rib.jpg).
As for special equipment, you'll need [something like this] (http://www.amazon.com/Taylor-1470-Digital-Cooking-Thermometer/dp/B00004XSC5/ref=sr_1_1?s=home-garden&ie=UTF8&qid=1411674292&sr=1-1&keywords=digital+thermometer+probe). Don't rely on interrupting the cooking and sticking it every 20 minutes once it gets close. This isn't a horror movie. The less you stab it, the less blood, the better.
So here's how it'll go:
A day or two before your dinner (I prefer two), season the meat.
Rub the meat (giggity) with salt, pepper, and whatever else you want. I like garlic and mustard powder. Classic flavor combos exist for a reason. Wrap it in saran and toss it in the fridge to let that salty/savory crust develop. The seasoning needs to support the otherwise monotonous roast, so don't miss this opportunity as step 1 to getting an A+ crust on there.
When you wake up the day of your prime rib dinner, take it out of the fridge. Let the roast come to room temperature (about 2 hrs), rub it with a mix of non-extra-virgin olive oil and some good mustard. This'll help that crust we've been talking about.
Insert the meat thermometer at center-mass. Set the device to alert you at your desired temperature. Count on about degrees of carryover cooking once it's out of the oven. I set mine last time to 127 I think. Put it in your favorite ovenware, cover it with foil to aid even-heating, and put it in a cold oven. Set that oven to 200 degrees, or 250 if you're feeling pressed for time.
Once it beeps, let it sit on the counter. You'll notice there isn't much juice for gravy. That's cause being gentle kept the proteins intact and the juices inside. Fear not, gravy and Yorkshire Pudding lovers-- juices will flow soon. When you're an hour away from dinner, crank your oven to 500. Turn it on convection mode if you have it.
Once it's up to temp, stick the roast in and keep your eye on it. It helps if your window is clean, cause opening and closing will partially reset the searing process (you want to leave the inside at perfectly medium rare). Start checking after 5 minutes, then every 2. Once you get that golden-brown/brown, you're there. Pull it. Let it rest for another 15-20. Enjoy.
Part Two - playing with your meat:
Lots of cool ideas on this thread already. This will speak to some of that.
If you wanted to go the Korean bbq or Philly Cheesesteak route, a nice trick is to partially freeze the roast so that your knife can slice it thinly. It's a restaurant trick for carpaccio, but it's super-useful here. Then have fun on YouTube and Google, weigh the pro's and con's of all your options, and learn how to make the most kickass cheesesteak possible. Then tell me about it. Or don't. Not like I've told youanything about food.
The other obvious route is to make steaks. If you wanna make that a project, try dry-aging the roast in your fridge and cutting steaks out of that. I love dry-aging my own beef. If you have a beer fridge in the garage or basement like I do, it's a pretty damn easy task. Just put it on a non-reactive rack and let it sit in the open air.
I have no idea if it helps, but I generously sprinkle salt under the rack to make sure any excess moisture is being sucked out of the air instead of feeding mold.
It'll smell a little beefy and maybe a little funky, but that's fine. Trim the crusty edges and treat them like normal steaks. Be careful, cause their reduced water content (flavor dilution, as dry-aging aficionados know it) make them cook faster.
Have fun!
Thermometer: https://www.amazon.com/gp/aw/d/B00004XSC5/
Chili - the first time I made this, I just used ground turkey, which is why that's in the recipe... I've also made it with pork and bison/beef and it's good. Whichever you prefer. Sometimes I use pureed tomatoes instead of diced. You can use both, if you like. If the chili is too liquidy, put a few tablespoons of cornstarch into a glass with a little water, mix until it's blended, and then add to the chili, and cook - this will help thicken in up a bit.
8 strips (half a package) of bacon
1 red onion
1 small bulb of garlic
3 to 4 tablespoons tomato paste
2 lbs extra lean ground turkey
1 large can diced tomatoes
1 can baked beans
1 can mixed beans
2 tablespoons maple syrup
1 tablespoon chili powder
1 tablespoon Sriracha hot sauce
1 teaspoon paprika
1 teaspoon cayenne pepper
1 teaspoon cinnamon
salt and pepper, to taste
.
Chop bacon into small bits and cook in a large pot. Add chopped onion, saute until clear, and add minced garlic. Add ground meat, and cook until it's done (sometimes I add some of the spices now). Add tomato paste, tomatoes, and both cans of beans to the pot, as well as the spices and maple syrup. Simmer for at least half an hour, but an hour is ideal. I tend to cook this a day ahead, and then reheat and simmer for another 20 minutes or so - I find it's better the next day.
Jamie Oliver's Guinness Pie is amazingly delicious.
Also, a digital thermometer - like this - is your best friend when cooking meat.
If you're a fan of breakfast food, check this out. It's so good.
Edit: Cornbread goes wonderfully with chili. I leave out the green chile peppers, and replace with chopped green onions. Sometimes I put about a tsp of chili powder in, and sometimes a little cayenne to give it some kick.
Your budget is pretty low but for 45$ here's what you can get that will set you up correctly
Fry/candy thermometer (Alton's favorite): 10.00
Instant read (the same one use by chefs everywhere): 19.00
Alarm Thermometer ( the good old Taylor): 16.00
And if you want to invest more change the alarm thermometer to something more serious like the chef alarm. But it's 60$ just for that.
Everything I hear is that those things aren't the best for brewing...
I got this Taylor Digital Cooking thermometer with probe for $20 at Target a year ago and it works amazingly. Here it is on Amazon for $2 less with free shipping.
The probe is linked to the unit via a 4' long cable capable of withstanding oven broil temperatures, very durable. You can set timer alerts and temp alerts to let you know when your mash/wort has reached a certain temp.
The unit is magnetic so you can stick it to your brew pot or oven (you can use it for baking and stuff too) and it's brought my grilling to an entirely new level. I've gotten really good at grilling steaks and pork chops thanks to this thing.
I've had this one for years.
Get a digital meat thermometer with an alert that you can leave in while the roast is cooking (like this one), and it becomes basically impossible to fuck up a roast. The method in this video looks delicious, but you can also just slap some salt and pepper on a roast and as long as you take it out of the oven at the right time and rest it, it will be some good eatin'.
https://www.amazon.com/dp/B00004XSC5
The real set it and forget it.
> Will any kind of cooking thermometer do?
Have used a variety of thermometers. In the drawer is an OXO and an inexpensive Thermoworks pocket.
I'd recommend a ThermoWorks DOT probe-style oven thermometer. This way you can insert the probe into the chicken and bake/roast it to the temperature you want without opening the oven door to check. You don't have to go with the DOT. I started out with something similar to Taylor Digital. (I no longer have it because I burnt the probe over a grill hot spot.)
You can put the boneless chicken in a baggie or fold over plastic wrap. For a recipe/instructions, have a look at 101 Cooking for Two's Pan Seared then Oven Roasted, Skinless Boneless Chicken Breast.
= = = = Edit to add
You might like to read through this post on Baked Chicken Breasts at ThermoWorks
What's it called? Do you have a link?
Edit: Nevermind, I found it... http://www.amazon.com/Taylor-1470-Digital-Cooking-Thermometer/dp/B00004XSC5
That recipe sounds absolutely terrible, man, no wonder they tasted like shit. Get yourself a meat thermometer and do this thing:
Rub some olive oil and sprinkle some Old Bay on it, bake at 425F until it's 159F in the thickest part, let it rest at least two minutes. Perfect every time. Chicken breasts are all different thicknesses, never do a whole breast recipe based on time if you want it to be cooked right. Cook it until it's done in the middle, and no longer.
If it has skin on it, even better, but make sure you cover it (cut some vent holes in the foil for steam) because the fat renders out and goes eeeeeverywhere and will splatter down onto the heating element and smoke up your place. But crispy chicken skin rocks, and it makes the chicken a little bit juicier.
This is what I did for four years. You can also use the scale to weigh your pot..
I might also recommend a timer & thermometer combo. Convenient when you use it every day, and the thermo for if you feel like dialing in your temperature.
http://www.amazon.com/Taylor-1470-Digital-Cooking-Thermometer/dp/B00004XSC5
Oh I also had a cheap electric grinder for those days when you wake up just before class starts but you're not willing to go without a fresh cup. Not gonna stand there for 2 minutes grinding when 15 seconds will produce okay results.
Honestly, my best advice is to get a probe thermometer like this and stick the probe in the meat when you put it in the oven. I've done this a few times so I know about how long it takes in my oven for my steaks, but your mileage may (and probably will) vary.
What about something like this? I used something similar until I got a temperature controlled kettle. The only thing is the temperature alarm goes off when the temperature exceeds the temp you have set. What I did was hang the probe in the spout of my kettle, and set the alarm for about 5 degrees below the temp I wanted. Then when the alarm went off I'd just turn off the heat and it would end up right about where I wanted it. Might save you a bit of time since you're not waiting for it to boil then waiting again for it to cool. Almost all of these have some sort of countdown timer, no tea presets as they're mostly meant for meat, but should still do the job.
Here is a little explanation on a [dry brine] (https://www.youtube.com/watch?v=QkaslYP1Ruk&list=PLDmXPQGZmiCGEvCF-XztLdo1boZWkXSqK). Also butter under the skin. The most important thing is to make sure you don't over cook the turkey. So I use a thermometer that allows me to keep an eye on the temp without having to open the oven. Good luck with the turkey
This instant read thermometer is really nice. It's what I use.
Also, this thermometer has temperature/alarm settings which, though I've only used for brewing beer, would work equally as well for coffee or tea.
After checking the temp a few times you'll get an idea for when to pull the pot off the stove or how long to let it sit to get down to the right temp.
I noticed that too. It looks like a digital meat thermometer to me.
you get one of these ;)
​
https://www.amazon.com/Taylor-Digital-Cooking-Probe-Thermometer/dp/B00004XSC5
Tangentially related, I would get his books as well:
http://www.amazon.com/Im-Just-Here-Food-Version/dp/158479559X/ref=sr_1_4?s=books&ie=UTF8&qid=1291527138&sr=1-4 (This one is about cooking)
http://www.amazon.com/Im-Just-Here-More-Food/dp/1584793414/ref=sr_1_6?s=books&ie=UTF8&qid=1291527138&sr=1-6 (this one is about baking)
Read through those and you'll feel much more confident.
If you are cooking meat, I'd suggest getting a probe thermometer: http://www.amazon.com/Taylor-1470-Digital-Cooking-Thermometer/dp/B00004XSC5/ref=sr_1_2?ie=UTF8&qid=1291527262&sr=8-2
You'd be amazed how good any kind of meat tastes just with some salt and fresh pepper cooked to the exact right temperature tastes...
I use a probe thermometer with a cord similar to this
I stick that sucker in the meat and then put the meat in the oven (the cord is oven-proof). As long as you aren't probing it multiple times in multiple locations, you shouldn't have any issue with losing juices.
Almost every episode of Good Eats
Watch them all, even the ones that deal with non paleo foods because the techniques are all solid. There are three basic cooking methods you need to worry about. On the stove, in the oven and in the microwave.
For the stove, all you need is a good cast iron skillet, but I recommend having a teflon pan as well. The iron will cook everything you can imagine. I like having the teflon for eggs mainly, iron will do eggs as well, but it can take some practice getting the temperature and lubrication levels correct. Teflon is much more forgiving. I have not used any of the newer nonstick pans so I cannot comment on those.
For the oven, get a aluminum half sheet pan and a oven safe cooling rack. Also get some sort of glass dish or casserole. Always wrap your sheet pan in aluminum foil, or line it with parchment paper when you cook with it. Makes clean up so much easier. Always grease your casserole dish. Baking, roasting, broiling are all pretty simple. Follow the recipes, and keep your eye on it. Get a probe thermometer and it'll tell you when your meat is cooked to your desired doneness.
For the microwave, all you need is a microwave safe plate, plastic wrap and some parchment paper. You can steam so many vegetables just using the microwave, it's ridiculously easy.
I hope this helps out, feel free to PM any questions. Don't forget a good sharp knife too. I still can't stress enough to just watch all the Good Eats episodes, they really have a lot of good techniques and explain the science behind it all. And if you ever want and/or get to cheat, there are some pretty awesome cheats there too.
EDIT: Forget to add this It is a great article on some really cheap tools you should pick up.
http://www.amazon.com/Taylor-1470-Digital-Cooking-Thermometer/dp/B00004XSC5/ref=pd_sim_k_4
For well done it's unnecesary, just cook it until it's (almost) a charcoal.
The thing is, you're looking for a high/low alarm, where you want to know if it's out of a range. You can certainly get a cheap $16 model with only a high notification alarm, but it doesn't sound like that's what you want.
I have a Thermapen and one of their meters, and ThermoWorks has very nice stuff.
This is going to be my first year going with this recipe. But I would assume for a turkey that is almost half the weight of the prescribed turkey, I would cut the time in half. I always use a digital thermometer (that is oven safe) that I leave in the turkey so I can see how it is doing as it cooks. I use something like this: http://www.amazon.com/Taylor-1470-Digital-Cooking-Thermometer/dp/B00004XSC5/ref=sr_1_1?ie=UTF8&qid=1416934813&sr=8-1&keywords=digital+oven+safe+thermometer&pebp=1416934815131
I hope that helps!
Anything like this works. do not wash the probe in a dishwasher, or soak in water, clean by hand.
https://www.amazon.com/Taylor-Digital-Cooking-Probe-Thermometer/dp/B00004XSC5/ref=sr_1_13?gclid=Cj0KCQjw_absBRD1ARIsAO4_D3tpSRCT7fe9Xc1KjO4E7kx1aBCAiombNRw1V8uRgLiFcWTRFdm0SeIaAhJCEALw_wcB&hvadid=241567707765&hvdev=c&hvlocphy=9030029&hvnetw=g&hvpos=1t1&hvqmt=e&hvrand=1892287846665362991&hvtargid=kwd-573895322&hydadcr=28576_10704709&keywords=digital+thermometers+with+probe&qid=1569379975&s=gateway&sr=8-13
Something like this will give you the best temperature, since it checks temperature at the grate, as well as the meat. If you do not smoke that much, you could buy a cheap oven thermometer and calibrate it in hot water and just set it on the grate.
https://www.amazon.com/ThermoPro-TP-08S-Wireless-Thermometer-Grilling/dp/B014DAVHSQ/ref=sr_1_14?crid=N6C4AIL1BP61&keywords=maverick+thermometer&qid=1569380102&s=gateway&sprefix=mavrick+them%2Caps%2C191&sr=8-14
First, the hats look great! I have always dropped a digital thermometer in one of the top vents and has seemed to work well. As rocketspank pointed out, just make sure it isn't touching any of the pit or grill and you should get a good reading.
I used an digital cooking thermometer. The meat was cooked to an internal temperature of 165F. I set the alarm for that threshold and pulled it out right when it hit it. Used this recipe for its simplicity.
this kind of thermometer have extremely slim wire for the probe, it should not skew the cooking temp / time that much
also, just cook chicken or any other protein the simple traditional way. hard pan sear for color / crust and throw it in a low temp oven (225 - 250) with the probe thermometer and let the temp rise to 145 and rest.
I use a leave-in cooking thermometer all the time for meat in the oven, in my opinion it's worth the $15 bucks to get the right type of thermometer. I would be worried that a standard probe thermometer would end up reflecting the heat of the slow cooker or get damaged from the moisture. http://www.amazon.com/Taylor-Precision-Products-Digital-Thermometer/dp/B00004XSC5/ref=sr_1_5?s=kitchen&ie=UTF8&qid=1464048847&sr=1-5&keywords=kitchen+thermometer
Yeah my oven keeps the temp pretty consistent, usually within a few degrees of 150. I guess it just depends on your oven. I measured the "warm" setting on my oven to see what the temp would be. Here is the exact probe thermometer I have. It's nice because you can set an alarm if it gets to a certain set temperature.
Well, there are always these options:
this or this
The only problem is the lack of temperature control, it's basically hit boil and it stops. If you care about temperature control, then I recommend buying an instant thermometer(I recommend this one because it will beep when it reaches the desired temperature, make sure to set it to like 180 if you want 185) along with those kettles.
So if you purchase the the cheapest electric kettle and the thermometer, then you don't even break $30.
Alternatively you can always buy a normal kettle and microwave the water but control management would be more difficult.
Use a meat thermometer like this.
You know, that exact same style is available from multiple manufacturers.
http://www.amazon.com/Taylor-1470-Digital-Cooking-Thermometer/dp/B00004XSC5
http://www.amazon.com/ThermoWorks-Original-Cooking-Thermometer-Timer/dp/B0019R4HQQ
I wonder whether they're all the same probe/curcuit board/LCD panel
https://www.amazon.com/gp/product/B00004XSC5/ref=oh_aui_detailpage_o01_s01?ie=UTF8&psc=1
This product is garbage. I suspect that my first batch of my Honey Wheat Ale mashed too high (BIAB method). As such, I fear that not enough starch conversion happened, and yeah.
So I learned, always have iodine on hand. I did not, so I will not be able to tell the full damage for 3 weeks at least. But I have iodine now.
I also really learned that brewing beer is forgiving as hell. I may not have perfect cleaning and sanitizing methods like the big boys do in the industry, but my first batch of beer came out pretty damn good. And I already have ideas to tweak that kit recipe further.
I also learned that it only takes 1 or 2 yeast cells to propogate properly and ferment. I had an incident where I spilled half of my rehydrated yeast if not more, and that was my first batch. Came out absolutely delicious, but was worrying because of the slow start to fermentation, but it worked.
I was also worried that my first batch was going to come out wrong somehow, because I was not able to test my Original Gravity, because some idiot in the room forgot to purchase a hydrometer. I own one now, and my Final Gravity readings were on par. I did something right!
Brewing Beer is a forgiving hobby, compared to most. There is truth in the statement "Relax and have a homebrew."
I just got this for cooking. It works pretty well.
This is the style of one that I have that I've seen recommend a few times around here. If you have a thermopen you should be fine. Those things are pretty awesome (and pricey).