 Reddit reviews TEKTON 30812 Double-Faced Soft Mallet, 35 mm
We found 9 Reddit comments about TEKTON 30812 Double-Faced Soft Mallet, 35 mm. Here are the top ones, ranked by their Reddit score.
Soft faces deliver a solid strike without damaging work surfaceLightweight tubular steel handle shifts the weight balance toward head for extra power in each blowExtra soft, non-slip rubber handle grip for ultimate comfort and controlAlways Guaranteed
I'm not a huge fan of hook knives as I prefer to carve seasoned hardwoods rather than green, so I prefer gouges instead. I love my set of Flexcut Deluxe Palm Set for detail work, well worth the investment for me with excellent steel, quality, and fit/finish. The only problem is the relative small size, making large amounts of stock removal a chore even with a mallet. I plan to invest in a set of Flexcut's mallet tools next and use larger antique carving gouges for that task. As for a mallet, I love my Wood is Good mallet for gouges, and a chisel hammer for bench chisels. The carving mallet allows you to put different angles and power behind your blows for carving, while the chisel hammer lets you connect very squarely.
For me at least, a spokeshave is a must for contouring the outer bowl and handle. I prefer a good antique Stanley 53 as you can adjust the mouth to quickly dial in depth of cut. They are affordable on the secondhand market and depending on where you live can be found at flea markets and antique shops. Veritas also makes multiple models that i have heard great things about and plan to purchase one of those in the future as well.
Rather than an axe, I prefer a small draw knife for roughing work. I currently have the Flexcut 5" which isn't bad if you can get it on sale, but it is a bit smaller than I would like. Currently on the lookout for a larger antique one at a good price. If I am going to use an axe, I like a sharp hewing hatchet, as it is easier to get the bevel to bite accurately without gouging too deeply.
A good carving knife is beneficial, but I find myself using my bench chisels for that work more often. You don't need to go too crazy here as they are very simple tools, and you can get sets on Amazon for cheap. I like my VonHaus set, and have heard good things about Narex as well. I have a set of Flexcut carving knives but honestly find the pelican knives useless and would much rather have something else, but do use the carving knife and detail knife on occasion. Wish this set would have come with any other 2 knives.
Whatever tools you decide on, invest equally in your sharpening system. The best tools on the planet aren't worth anything if they dull and you can't bring them back to a pristine edge, especially in seasoned hardwoods. Tools that allow you to control depth of cut are going to give you a more precise and evenly contoured look, whereas tools without depth control will give you a more rustic and uneven look. Each has their place and are fun to explore and mix. I prefer symmetrical, even shapes normally but love to switch it up and try new techniques. If you don't have the cash to make big purchases, start scouring local flea markets and antique shops. Normally there is at least one booth at flea markets specializing in cheap old tools which you will need to learn to restore. There is usually at least one antique shop as well that specializes in old tools (some woodworking specifically) that you want to search for. Be careful though, acquiring and restoring antique tools can end up being just as fun as using them. If you have any questions, just let me know!
If you buy from PSA, I'd recommend using a pre-paid credit card, as they've had site security issues in the past.
I think by "80% lower" you may have been thinking of a stripped lower, where all you have is the aluminum lower, with none of the controls installed. A stripped lower is s great place to start! YouTube has a bunch of easy how-to videos. I recommend /u/nsz85 videos, which I used for my first build.
Some other things you'll want to have handy:
Vice Block for Lower
Vice Block for Upper
Roll pin starter kit
Rubber Mallet
Torque Wrench
These are the basics, and once you buy them, you'll never have to buy them again for future builds. There's other tools out there to consider, but get you started.
Best of luck!
EDIT: shit, how could I forget the AR Wrench!
I bought one of these a while ago from an Amazon vendor. It's heavy as fuck, but does the job.
EDIT: Don't know if you need other tools, but this seems like a pretty good deal too, since it also includes vise blocks and a front sight tool for not much more.
EDIT #2: You'll also want a roll pin punch set if you don't already have one. A roll pin starter set and a rubber/plastic mallet are nice to have but not absolutely needed.
Woodworking with power tools revolves around the table saw. If you go that path, get the best one you possibly can. But used so your money goes father.
Woodworking with hand tools needs a few things:
I'm a big believer in starting small and cheap and working my way up. With a few hand tools, you can get started for under $200 and have everything you need to make good quality stuff. The skills you learn with those tools will transfer to every project in the future, no matter how big. Fine joinery is the same, whether the boards are cut with a hand saw or a table saw, and you will never learn to read wood with a power jointer, planer and table saw like you will with a handsaw and bench plane.
As you reach competency with these tools, you can decide how you want to expand your tools to achieve more. That may be more hand tools like a dovetail saw, additional planes, cabinet scrapers, etc, or it may be power tools with a table saw, band saw, dust collector, etc. Or it may be somewhere in the middle.
Personally, I do this for relaxation, so a quiet shop and a face free of respirators and face shields is much better to me. Since I am in no hurry to finish projects, I use primarily hands tools (I have a few power tools from a previous life that I'll pull out on very rare occasions. I think often about selling them).
If getting stuff done drives you, though, power tools are a great way to do that. It changes woodworking a little because it becomes a skill of setting machines up correctly (not a trivial skill!) to get the correct cut.
The Wood Whisperer, who coined the phrase and, literally, wrote the book, Hybrid Woodworking, does a pretty good job blending hand and power tools. If I cared more about getting things done (and had the space and money to devote to it), that would be the path I would follow.
First, I would not recommend using those rubber caps - they'll probably leave black marks on whatever you're hitting.
I would recommend getting a specific non-marring hammer rather that putting a rubber cup over a regular hammer.
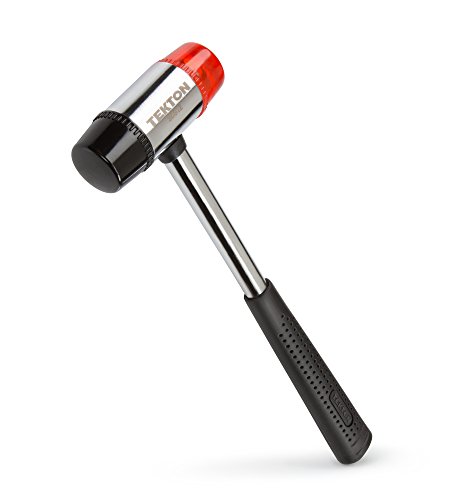
I really like this hammer:
TEKTON 30812 Double-Faced Soft Mallet, 35 mm https://www.amazon.com/dp/B00MWVAUUA/ref=cm_sw_r_cp_apa_i_hmYACbJB984TN
Also, a few layers of electrical tape on a regular hammer works too, in a pinch.
This mallet works pretty well for getting pieces to fit together: TEKTON 30812 Double-Faced Soft Mallet, 35 mm https://www.amazon.com/dp/B00MWVAUUA/ref=cm_sw_r_cp_api_i_rQ7hDb17C17DE
Also, I only use glue a few times per insert, when a joint feels particularly loose. Most brands fit together nicely and feel quite sturdy when they’re done. I second the recommendation for gorilla wood glue on this front.
I just built exactly what you're describing. I can share some of my experiences.
I'm super happy with the results of my build. The process is fraught with a lot of cursing and you're probably going to lose a couple of the tiny parts (like detent pins and tension springs) but the end result will be totally worth it. You'll be intimately familiar with the insides of your AR-15 and share a sentimental connection with your firearm thanks to its DIY nature. Enjoy!
Yes...and the thing is, I would not have used it if I hadn't seen it suggested a couple of times as a way to not scratch the receiver. Look at it on Amazon and you'll see people talking about how they used it on their AR. Look in these comments and you'll see people who used one...
but I will never ever use one again on this particular pin
I used something like this for the hammer - plastic end worked great. You can get something like this if you prefer metal.
These are the punches I used, they're great. Definitely recommend something like these.