 Reddit reviews Twin Bubble Airlock and Carboy Bung (Pack of 2)
We found 27 Reddit comments about Twin Bubble Airlock and Carboy Bung (Pack of 2). Here are the top ones, ranked by their Reddit score.
Twin Bubble airlock with Carboy bungAllows for slower evaporationUniversal Carboy bung for any fermentation vessel
I would think that a water lock would be the best method. These are mostly used for brewing beer.
Sorry to be this guy but get a damn airlock. Seriously though the next time you or your friend make an amazon purchase try buying something like these here. They're so cheap and you'll need them eventually if this hobby interests you.
The balloon will most likely being to lost its elasticity and start to feel crunchy. When this happens it's very likely that the balloon will start to tear or the small hole you made will become large enough, from loss of elasticity to keep it closed, for bacteria and airborne contaminants to get in.
I brew beer mostly, no patience, and the yeast for an ale sometimes takes up to 36 hours to get going to the point where I see good bubbling in my airlock. Good luck!
I can't really tell, and I hope not. Its literally just the airlock this one to be exact, and the jug. The jug is new today, and when I cap it, it builds pressure with no leak. The airlock works to my knowledge (I gently blew air through it and it bubbled normally) so I don't get what could be happening.
Grapes, ehh no wine you can make at home will compare to a $10 bottle of red you could get at the store.
Cider is different story, most of America's cider making apple varietals were chopped down during prohibitions, so the cider market isn't what it could be, compared to wine.
Now most apple juice you'd buy at the store is gonna be from Dessert Apples, apples with low tannins(bitter stuff that gives body/better flavors) and high in sugar. Most apples you'd find on trees, say in your back yard, are probably a dessert apple, unless theyre crab apples in which case theyre pretty okay for making cider. A good varietal for cidermaking that is grown in the USA is Winesap, that's probably the best you can find, if you don't know what you're looking for. If you have any access to peaches or pears you can add those to your juice to give it a little complexity.
So here's what I would if I were ( and I am) a frugal bastard wanting to make cider on the cheap. Go to wholefood, trader joes, any "organic" market you can find and look for one of these now the key for apple juice, if you're buying from the store, is that is DOESN'T have any preservatives. Those preservatives help block or inhib fermentation, so it has a longer shelf life. You want something that says it doesnt have any preservatives, look on the ingredient list for things like potassium sorbate.
So you've got your juice ( and conveniently a glass container to ferment in) now you need to get some sugar ( any sugar will do), an airlock, a rubber seal, and some yeast. Throw some sugar into the juice, toss some yeast in, put the bung (rubber seal) on, put some water in the airlock, smush that into the bung, place in 55-65F degree dark room, and wait 2 weeks.
Ka-Blam 6-10% Cider. Add back in some apple concentrate to taste when you serve it, and there you go 5-8% ABV Apple Cider on the cheap.
And now you get to keep the glass container, which is known in the brewing world as a carboy for future brews.
Here is, albeit a little over priced, bung and airlock combo from amazon.
Granted, I've never made the mead in the official cookbook, but my husband and I make a batch of mead every fall. We start with apple cider and honey instead of the suggest water and honey. This is called a melomel, or apple mead, and it's not entirely necessary, we just like it more that way. And for your first tries, you don't have to get super fancy brewer's yeast. We just use baker's yeast from the grocery store to keep our costs down. It's not the best quality, but the first few batches are never going to be perfect, and it's better to make the early mistakes on less-expensive ingredients.
For the actual brewing, I highly recommend getting a bubble airlock for your carboy. It lets the carboy release gases, so you don't have to worry about potential explosions, but also doesn't let in flies and other pests that are attracted to the smell of said gases. Also! Once it's been fermented and strained, you can add extra spices and things to flavor it. We usually add a bit of brown sugar (I have a sweet tooth) and usually a tiny bit of extra cinnamon so that flavor stands out a bit more with the apple.
Last, when it's all finished, make sure you store your mead in the fridge or other likewise cold space. No matter how well you strained your mead, there will always be yeast left in it, and those little buggers can and will start being active again if left at room temperature. That can lead to a build-up of gas and a taste you may not enjoy.
Honestly, you could do a 1 gallon batch for much cheaper if you want. You could buy a gallon of water in a plastic jug, get some sort of air lock and bung (so long as the bung fits the jug), buy some wine yeast for a dollar or so and make your batch in the jug. Some people just put a balloon over the opening and poke a hole in it.
The only other thing you'd need is bottling equipment (tubing to transfer into the bottles, a bottle capper and caps or a bottle corker and corks, and empty bottles). Everything else is optional. Hell, the bottles are optional if you have enough people!
I've made some slight modifications to this, mostly to make it easier to follow. I've also included steps that should be quite obvious to someone who's done any homebrewing before, but I wish someone had told me when I first started.
I'd link to the original, for the sake of attribution, but the user who posted this deleted their account not long after I wrote everything down.
This will produce a sweet fruit-mead (or melomel). WARNING this will be far more alcoholic than it tastes, and should not be consumed if you've recently taken antibiotics, or suffered gastric distress, as the yeast culture will still be alive, and will happily colonize your intestines if your gut microbiome is too fucked up.
Equipment: Most of this stuff will be a good deal cheaper at your local homebrew store, but I've included amazon links (also to the yeast).
At least 2 (3 is better, for reasons we'll get to) 1-gallon jugs (I don't recommend scaling this up), glass preferred. Add an extra jug for each additional batch. This one includes a drilled stopper and airlock
Drilled stoppers (or carboy bungs) and airlocks, non-drilled rubber stoppers.
An autosiphon and food-safe tubing.
Food-safe sanitizing solution (I recommend StarSan).
An electric kettle with temperature selector is useful, but not needed.
If you want to bottle it rather than just keeping a jug in your fridge:
Empty beer or wine bottles (just save your empties), capping or corking equipment, caps or corks, and a bottling wand.
Ingredients:
2.5 lbs (1130g) honey, clover recommended.
A cup (approximately 250ml) or so of fruit (I recommend blackberries, and I strongly recommend against cherries, other recipes have worked for me, but this yields a very medical flavor with cherries).
1 packet Lalvin EC-1118 yeast (a champagne yeast notable for its hardiness, its ability to out-compete other microorganisms, and its high alcohol tolerance).
Optional: potassium sorbate (to reduce yeast activity when our ferment is done), pectic enzyme (aka pectinase - for aesthetic purposes). Both are also available in bulk.
Process:
Day 1:
Mix sanitizing solution with clean water at specified proportions in one of your jugs, filling the jug most of the way. Stopper it, shake it. Remove stopper, set it down wet-side-up (to keep it sterile), pour the fluid to another jug. There will be foam left behind, this is fine, don't bother to rinse it or anything. At low concentrations this stuff is totally fine to drink, and won't ruin your fermentation or flavor.
Add honey to jug, all of it.
If you have a kettle, and your jug is glass, heat water to around 160F (71 Celsius), pour a volume into your jug roughly equal to the amount of honey present. Fix sterile stopper to jug. Shake until honey and water are thoroughly combined. The heat will make it FAR easier to dissolve the honey. Set aside for an hour or so while it cools. Add clean water 'til mostly full, leaving some room for fruit and headspace.
If you're missing a kettle, or using a plastic jug, this is gonna be a little harder. Fill most of the way with clean water (I recommend using a filter) leaving some room for fruit and headspace. Fix sterile stopper, shake 'til honey and water are thoroughly combined. This will take a while, and you will need to shake VERY vigorously.
At this point, you should have a jug mostly-full of combined honey and water. To this, add fruit (inspecting thoroughly for mold, don't want to add that). Then dump in a single packet of the Lalvin EC-1118 yeast, don't bother rehydrating it first or anything, it'll be fine going straight in. Add pectic enzyme if you have it (this does nothing to the flavor, it just makes the end product less cloudy). Stopper it up, shake it again. This jug now contains your "must" (pre-ferment mead).
Pour some sterilizing fluid in a bowl, put a carboy bung/drilled stopper in the bowl, with an airlock. Ensure full immersion. Let sit for a minute. Replace stopper with your bung/drilled stopper, affix airlock. Fill airlock with clean water, sanitizing fluid, or vodka. Rinse the stopper, fix it to your jug of sanitizing fluid.
Place must-jug in a dark place, I recommend a cabinet or closet.
Days 2-7:
Retrieve jug, give it a little jostle. Nothing so vigorous as to get your mead into the airlock, but enough to upset it. This is to release CO2 buildup, and to keep any part of the fruit from drying out. The foaming from the CO2 release may be very vigorous. Do this over a towel for your first batch. If the foam gets into your airlock, clean your airlock and reaffix it. Perform this jostling procedure at least once per day, more is better.
Day 8:
Final jostling, I recommend doing this in the morning.
Day 9:
let it sit, we want the sediment to settle.
Day 10: Time to get it off the sediment
Shake sterilizing fluid jug. Affix tubing to siphon. Put the siphon in the sterilizing fluid, shake the jug a little just to get the whole siphon wet. Siphon fluid into either a third container or a large bowl. This is all to sterilize both the inside and outside of your siphoning system.
Remove siphon from jug. Give it a couple pumps to empty it of any remaining fluid. Place siphon in your mead jug, leaving the end of the tubing in sterilizing fluid while you do this.
Take the jug that you just siphoned the sterilizing fluid from. Dump what fluid remains in it. Place the end of the tubing in this jug, then siphon the mead into it. Make no attempt to get the last bit of mead into your fresh container, it's mostly dead yeast and decomposing fruit.
Add potassium sorbate if you have it, stopper the jug, place it in your fridge.
Clean the jug you started in. Clean your siphon and tubing.
Day 11:
Let it sit
Day 12 or later: time to transfer again, or bottle it.
If you no longer have a jug full of sterilizing fluid, make one.
Repeat the earlier steps to sterilize the siphoning system, with a bottling wand attached to the end of the tubing if you want to bottle.
Sterilize your bottles or a clean jug, either with fluid or heat.
Siphon mead either into your bottles or jug. Stopper/cap/cork when done.
Put your jug/bottles in the fridge.
The yeast culture is still alive, and will continue to ferment. The fridge, and optional potassium sorbate, will merely slow this down. I recommend drinking any bottles within two months, to avoid a risk of bursting bottles. The mead should already be tasty at this point, but usually tastes much better after a couple more weeks.
EDIT: Fixed the formatting up a bit.
How does this look for a shopping list?
Airlock
Yeast
Jar One (3L vol)
Not sure how much water, but maybe about 2.3L?
25 Raisins
1 Cinnamon stick
1 whole orange, sliced, no peels to prevent bitterness
1 pinch of allspice
1 pinch of nutmeg
1.6kg of wild flower honey
1 whole clove
Jar Two (also 3L vol)
Again, not sure on the water. 2.3L maybe?
1kg blackberries
1.6kg of wild flower honey
Oh yes, and it is quite simple to get the stuff together without buying a kit. Do you have a local home brew store?
This subreddit's wiki which includes a beginner section: https://www.reddit.com/r/Homebrewing/wiki/index
There are several videos on youtube that have good instructions.
Here is a basic list of gear to brew beer in a bag. You can get all of this stuff on amazon if you don't have it already. This is not the best list, but it works.
http://homebrewmanual.com/home-brewing-equipment/
Some of the stuff you won't likely have at home:
Beer recipes: http://beerrecipes.org/
To get grains from amazon, type in the grain type and it will provide you options. If you don't have the ability to mill it yourself, you can order it crushed. Its not ideal, but if you don't have a homebrew store near you and don't have your own mill....it will work. You will have to measure out the correct amounts for each grain that you add on your own from the bulk that you ordered. If you want to brew with extracts, you can also order those on amazon as well.
You can order hops on amazon the same way as grains or extracts.
Oooo I want to try this. How many grams of yeast for six gallons? Do I need to buy a special sanitizer?
This is what I have in my cart right now:
[Airlock](https://www.amazon.com/gp/product/B00A6TRKO4/ref=ox_sc_act_title_1?
smid=ATVPDKIKX0DER&psc=1)
Yeast
6 gallon carboy
Anything I'm missing beside the juice?
Malt extract is basically a syrup. It's sugar (and some other things) it needs to be dissolved in hot water so buy a thermometer and a big ass spoon.
Get the water up to 155-200 degrees F.
Add all of your extract and stir a lot until it's dissolved.
Then raise water/syrup mixture until it boils and add .5 oz to 1 oz of hops. Set a timer for 60 minutes. after 15 minutes add another .5oz-1 oz hops. Wait 30 minutes and add another .5oz to 1 oz hops.
Cool mixture to 70 F. Add Yeast.
Put in a clean sterilized container with a way to release pressure.
Like [this] (https://www.amazon.com/Twin-Bubble-Airlock-Carboy-Bung/dp/B00A6TRKO4/ref=asc_df_B00A6TRKO4/?tag=hyprod-20&linkCode=df0&hvadid=222720245886&hvpos=1o1&hvnetw=g&hvrand=7780163563752260182&hvpone=&hvptwo=&hvqmt=&hvdev=c&hvdvcmdl=&hvlocint=&hvlocphy=9007095&hvtargid=pla-384129294913&psc=1)
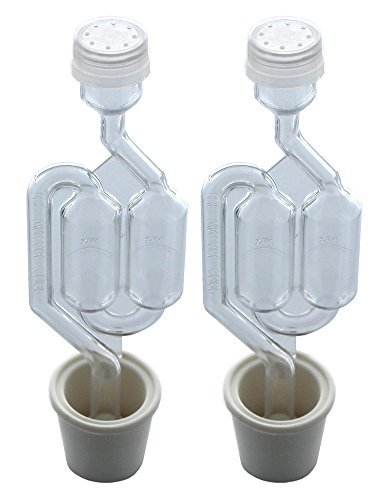
Side note: If you do use an airlock for long term, get this type....
https://www.amazon.com/Twin-Bubble-Airlock-Carboy-Bung/dp/B00A6TRKO4/
versus this type....
https://www.amazon.com/Home-Brewing-Supplies-48-9AJX-W965-Econolock-6pk/dp/B0041F2DL4/
I currently have six carboys on the rack coming up on 12 months and they all have the first type of airlock with the double chamber. At most I have lost 5mm of water over that period. I use a sharpie to mark a line so I can see if they are evaporating. With the second type of airlock, I can't go three months before having to add water. They also have a tendency to open a pathway for air to get to the wine while looking like they are okay for fill level.
To piggy back on u/stormbeforedawn's comment.
This is the equipment I used that I've had good luck with so far. It's what he recommended, I'm just providing links to the specific product I used.
For best results, add sugar, add champagne yeast, and put one of these where the cap goes. They fit directly in a welch's container.
The plastic pieces are Airlocks typically used for fermenting beer/wine.
http://www.amazon.com/Twin-Bubble-Airlock-Carboy-Bung/dp/B00A6TRKO4
If you want to take it to the next level, use an airlock instead of a balloon and a strip thermometer. By keeping the temperature low (55F) you will get a smoother mead with less hot alcohols, but it will take longer to ferment.
Without a proper airlock, the brewing vessel is either going to build up pressure and pop, or it's going to let in all sorts of things from the air, and would be about as safe as any attempt to drink grape juice that's been sitting out on the counter for a few weeks.
It's possible to brew this way, but it's almost guaranteed to end up poorly. There's a very high chance of it going bad, that is, of growing mold or other unwanted microbiotic visitors. You'll probably be able to see this happen.
Even if it doesn't work, the end result will most likely be one of the nastiest forms of wine you've ever had. It's not quite prison hooch, but it'll be close.
----
If you and your friends really want to try and get into brewing on the cheap, my suggestion is to start with an airlock and bung like these, find a gallon of apple juice or apple cider at the grocery store in a glass bottle with no preservatives (check the label), and drop in 1/4 of a packet of a brewing yeast like this one. It's a very beginner friendly (and kinda harsh) yeast that will survive mistreatment and bad conditions no problem. You put the yeast in the apple juice, you put a little water in the airlock, you put the airlock on the jug, and wait a month. You'll want to get a food safe hose to siphon out the brew when it's done, and you'll need bottles to age it in (the stuff will taste bad at first but give it 5-8 months and you'll have somethign wonderful). When the brew finishes that first month, fill up the bottles and seal them, then keep them somewhere cool for 5-8 months. Note: you'll need clean glass bottles, and you'll want to sanitize them or else any bugs in there will make the brew go bad while it ages. I like swing top bottles, they don't require a capper machine or a supply of caps.
Total cost to brew up a simple tasty cider, including all supplies:
Coming out to less than 50$ to get started, and most of that you won't have to buy again for later brews. If you find a local homebrewing shop you might be able to get these things cheaper... or not. At least you should be able to find them in single packs instead of amazon's bulk sets.
Equipment:
2 5 gallon glass carboy
Bubble Airlocks These allow the CO2 to escape the carboy while keeping the oxygen out. Alcohol fermentation is an anaerobic process. Too much oxygen will cause production of acetic acid(vinegar).
Non-Chlorinated water(I buy 5 gallon jugs, carboys what have you of spring water from my local co-op. Make sure it is spring water. Not "drinking" water. Chlorine isn't good for yeast.)
Wine siphons are really helpful. Used to just use a polyurethane tube, and that lead to some trial and error siphoning. There are two fermentations that'll happen during the process. You'll have to siphon the wine from one carboy to another. Hence why you need 2. Pro tip: Don't stick the siphon all the way to the bottom. That's where yeast, the oak chips, and clay from the primary fermentation are going to settle. Same with the secondary, but that'll be mostly yeast if you siphoned from the primary properly.
A giant ass funnel and corks obviously.
Wine Bottles! Go with the green. Reduces oxidation by letting less light in.
Bottle Tree! Use this to let your bottles dry out after cleaning them. Make sure all your pieces are sterile.
A corker!
I usually buy a wine must kit that has the clay sediment for nutrient content, finely ground oak, yeast, clarificant, and of course the wine must. (Must is a high quality grape juice that is fairly dense). For a first time I do suggest getting a must kit. It has detailed step by step instructions along with it. It's going to take about a month for both fermentations to be completed. Do try to keep the temperature of the carboy between 75-80 degrees Fahrenheit/23.5-27 degrees Celsius. Saccharomyces cerevisiae thrives best at that temperature gradient.
The musts price range wise are going to be between 60-200 dollars for the most part. You can ferment anything with sugar though. A 5 gallon carboy is going to get you 25+ bottles of wine easy. It's actually interesting to see how the taste of the wine changes over time between each bottle. Generally the yeast/sugar content will give you ~12% alcohol in these kits.
I'd like to do 5 gallon batches. I don't think the quantity from the Mr Beer keg is worth it.
How's this look? Total is around $80.
Fermentation bucket
Bung/airlock
Stock pot
Autosiphon
Star San or Idophor (What's the difference?)
Is there any advantage to having a carboy as well? How long would I leave the beer in the fermentation bucket?
So if I wanted to do sours, I'd basically have to get 2 of everything?
Edit - actually, wouldn't this kit be about the same, but with an extra bucket but no stock pot?
Edit 2 - another pot, 36qt is good price, leaving this here so I can find it again.
I'm in the same boat as you. I followed this recipe. The only additional step I took was melting the sugar before I added it to the mix.
I bought a jug and a set of airlocks on Amazon. I bought a 4lb bag of sugar, a can of frozen white grape concentrate, and some packets of yeast at the grocery store. It cost about $25 total, but most of it was on the jug and airlocks, and I won't have to buy those again.
Since I had the extra airlock, I started another batch in a 3/4 gallon bottle of grape juice with some added sugar. Should the grape juice batch turn out better, the $10 jug wouldn't have even been necessary. I'm 10 days in, we'll see which batch turns out better.
Someone didn't study home brewing much.
https://www.amazon.com/dp/B00A6TRKO4/
For next time
Everyone's got time for it! Next time you're at the store, get a gallon or two of apple juice... the one in the glass jug. Get one or two Of these and a few packets Of this and you're good to go. If you want to get to the scientific part, get one of these to measure potential and finished alcohol content.
Dump out 1/3 of the juice, add more sugar for more alcohol if you want, add the yeast, put the air lock on and throw it in a dark place for a few weeks ;)
This might be a better investment. I use this for my 2F and it works great. You may also want to get a Air lock and a siphon as well.
1: A simple awesome tasting mead:
Okay, here we go:
You need something to ferment in. a 1-gallon bottle is perfect. You also need an airlock of some kind. Fermentation produces alcohol and carbon dioxide. If you sealed up something that's fermenting it would explode. So you want to let out the CO2 without letting IN any air (contamination, blah blah.) Some people use a balloon with a pinhole in it when they're getting started. But a proper airlock is only a couple bucks.
A profoundly simple, wonderful tasting mead that's great to start with is one called "JAOM" (Joe's Ancient Orange Mead.) There's nothing ancient about it.
Now? Just put all that in the jar and put your airlock on it and wait.
The hard part? Waiting. Depending on the temperature it may take a day to start bubbling. It will actively ferment for weeks. Perhaps a month or more.
You need to wait for it to clear. Really clear. Like "I can put a piece of paper behind this and read it through the mead" clear.
This is going to take months. I recommend putting it in a closet someplace and pretending to forget about it.
You'll notice, over time, that a layer of stuff is going go cover the bottom of the jar, and get pretty deep (maybe an inch or so thick.) This is fine. It's mostly dead yeast. There's nothing wrong with it, but it's a little gross, so you don't want it in the final product. What I did before I had syphoning gear was pour as much off the top into a soda bottle as I could, then pour the rest into another one. It would re-settle so that I could do it again.
It's a cumbersome process, and you'll always have to waste some of your initial product. But it's worth it.
Now that you have a bottle of clear mead you have two options, only one of which will you take.
Disclaimer: This isn't my recipe. I found this on one of my favorite sites on ye olde innert00bz. Those knuckleheads are awesome.
Cheapest thing: Two pack of airlocks with rubber bungs
How much: $1.25 +$5.45 shipping
Why do you want it: They're airlocks. I'm a homebrewer. I will use them to make delicious mead, cider, wine, and beer!
My favorite pokemon is: Hariyama!
The best thing would be something like this airlock. Normally used to let off CO2 in home brew fermentation, would probably work just fine for this purpose. Just cut an appropriate size hole and add, follow instructions for particular airlock. Probably a bit cumbersome but I'm sure there's a way to engineer a sleek design somehowedit: didn't think about creating a vacuum would defeat the airlock and draw the water in :/
I just got an airlock in the mail, I would recommend it, super cheap but it's well made.
Twin Bubble Airlock and Carboy Bung (Pack of 2) https://www.amazon.com/dp/B00A6TRKO4/ref=cm_sw_r_cp_apap_d2JwcdyQM9mwC