 Reddit reviews Walnut Hollow Creative Versa with Versa Variable Temperture Control & 11 Points (Tips)
We found 54 Reddit comments about Walnut Hollow Creative Versa with Versa Variable Temperture Control & 11 Points (Tips). Here are the top ones, ranked by their Reddit score.
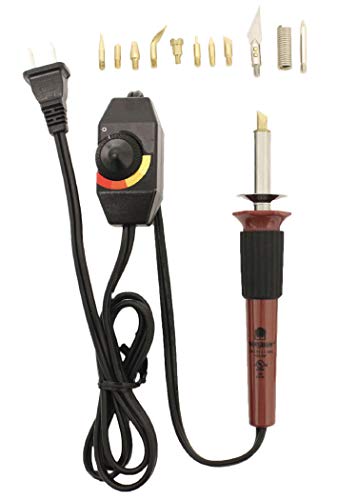
Hot Woodburning Tool with variable temperature control gives you control of the heat for any projectThe Versa Tool has a comfort grip for long time use, a heat shield for protection and an easy to use standThe points (tips) can be changed using pliers for your safety. Do not bend when removingThe points can be used to woodburn; solder; cut and carve a variety of surfaces such as wood, leather and cardIncludes 11 interchangeable points with a lead-free solder (Universal, Flow, Tapered, Calligraphy, Shading, Mini Flow Point, HotKnife, Solder, and 3 Hot Stamp Points)
There are 'wood burners' like this: https://www.amazon.com/Walnut-Hollow-Versa-Temp-Temperature-Woodburning/dp/B005P1TRAS
That you use like a marker to burn wood. They're basically a soldering iron with a fat tip.
Woodburner - I got it for Christmas but here it is on sale now for $28 and it comes with assorted attachments. The carbon paper is less than $10 for 10 sheets, too.
Better tool than the one shown in his video, comes with variable temperature knob and flat end and other tips.
http://www.amazon.com/Walnut-Hollow-Versa-Temp-Temperature-Woodburning/dp/B005P1TRAS
Would suggest adding this bits kit to give more hot end shape versatility.
http://www.amazon.com/gp/aw/d/B0024JMIPA/ref=pd_aw_fbt_21_img_3?ie=UTF8&refRID=139FHWPPGW5KYRDHVAQA#immersive-view_1456844011167
Looks like a wood burner tool with some sort of letter attachments (like these maybe). I've never used the letter attachments myself but wood burners are cheap to pick up, pretty easy to get the hang of, and loads of fun. You could burn the letters with the regular attachment too but I guess if you don't have the best handwriting or if the wood you're using is tough to burn evenly then the letters make things simple.
Edit: Really cool project OP. Nicely done and a great idea.
Hi there. If you're looking for a craft, woodburning can be a lot of fun!
I'd recommend picking up a basic woodburning tool at your local craft store or online and give it a try. Most come with some instructions/ideas and a variety of different tips to use. A popular one (which I enjoyed using) is the Versa Tool by Walnut Hollow, since it's inexpensive and you can adjust the temperature. They make an even cheaper one-temp model but if you want to practice shading and such the temperature control is really nice for a few extra bucks.
Other than that, you really just need some wood and you're ready to get started! The craft store will likely have wooden plaques and shapes as well, usually pine or basswood which are easy to burn. But if you just want to practice, any wood will do. I get scraps from local carpenters or lumber yards; driftwood can be fun too. Just be careful you aren't burning wood that's been coated or chemically treated, as you'll breathe in some unhealthy fumes. Just regular smoke from burning can be a nuisance but usually more so when burning larger pieces/burning for long periods of time. So although it may not be necessary for a beginner, down the road I would recommend getting a fan if this becomes an issue.
As for stenciling, I personally use graphite paper to trace designs onto the wood (you'll also find this at the craft store). Carbon paper is a similar option but I find it a bit messier/hard to remove if I've made a mistake. All you do is draw or print off the image that you want to burn. Then you lay the graphite paper (black side down) onto the wood, lay your image on top (I recommend taping to keep it in place), and lightly trace over it. Once you are finished and pull up the papers, the graphite will have transferred onto the wood where you traced and now you have your outline to burn over.
I hope that made sense! I find seeing a visual can often help, so some Youtube tutorials may be a good place to start to learn the basics. There are tons of resources online, and quite a few books on how to do different techniques/use different tips if that's more your style. Or just find some old scrap wood and experiment.
Have fun!
Adding to all this:
Get a soldering iron that allows you to control the temperature. That made all the difference in the world to my own soldering abilities.
This is the one I've been using lately. Only costs approximately $20USD shipped, and does have a temp dial. Now the placement of the temperature dial is a problem for some people, because it's on the cord close to the iron itself. I have never had an issue of the dial pulling the iron off the table, but am really careful to avoid that scenario in the first place.
Practice safety with regards to any hot tools like soldering irons: turn em off when done, don't leave em unattended until they cool down, and ALWAYS unplug em when not in use. Never depend on an "on/OFF switch on anything in your shop/work space. Always unplug, making sure the cord (and everything else) is safely away from both the hot part of the iron and keep all things from the edge of the table itself.
The helping hands clamping devices on the market today have much smaller bases. I have 2 and the one with the magnifying lens is made useless because of the small footprint of the base. A regular helping hands would probably suffice. I bought a cheap lamp that has a built in magnifying lens which does the job for me.
I got this set as a gift, but after doing three projects and burning my fingers on the handle I'd recommend buying a tool like this where you can actually adjust the temperature. For more information and inspiration I'd recommend checking out /r/pyrography and good luck getting started.
my best advice, as a semi-novice myself in wood burning:
i'd start with a cheaper wood burning tool. can find one at wal mart, home depot, craft store... it'll look like a soldering iron. get one with a few interchangeable tips, maybe one with a heat regulator if you're so inclined to spend the extra money. they can get complex and expensive, so depending on your involvement in the hobby it can get expensive, but you'll definitely see a difference in the heat consistency in the more expensive tools. but for a beginner, something like this is perfect to figure it out: http://www.amazon.com/Walnut-Hollow-Creative-Versa-Temp-Temperature/dp/B005P1TRAS
this is the exact one
This is the one to get, Walnut Hollow Creative Versa Tool with Versa-Temp Variable Temperature Control & 11 Woodburning Points (Tips) https://www.amazon.com/dp/B005P1TRAS/ref=cm_sw_r_cp_apa_i_kIZSDbJ6TJ852
Well, considering another user just posted that Walnut Hollow Versa Tools are frickin dirt cheap on Amazon right now, I'd get one of those asap. Here's the link. I've used mine for the last 3 1/2 years and it's the only tool you'll ever need if you learn how to use it. This entire piece was done with my Versa Tool
Lightly sketch out the outline of the design you want to burn. Then turn the burner on and just trace the pencil lines. You'll need to just get in there and practice, nothing I tell you will make much sense until you get some hands on experience. Don't wet anything, you use the burner to draw the same way you'd use a pencil.
This is the burner I'm currently using, but it's pricy. I started Woodburn initially using this,to see if I'd like it, but the thread for the tips melted with extended use. I invested in the fancy professional one when I felt certain I was going to keep this hobby going, but the first one I bought really worked well for practice and testing out the hobby!
I used these to burn the lettering:
Definitely want to sand the finish off the handle first - makes the burning easier. Also need to go slow with it since the curve won't allow you to get the entire letter burned in at once. Kinda have to roll it up and down.
Did the whole thing (including hammer) for about $50
I have a process down that I love (since I'm not artistically gifted at drawing or writing pretty). I neither free hand, nor draw it.
I use an inkjet printer and print the image, phrase, etc. onto wax paper (but it has to be mirrored horizontally). The inkjet printing on wax paper will not allow the ink to dry. You can then press the paper onto the wood (do some careful measuring and marking to ensure that you get it where you want it). Make sure you do it once and do it right without moving it (otherwise the ink will smear). Then you basically have a printed version of whatever you want to burn on the wood piece all drawn out for you. You can then trace over the ink with a wood burner (see link below for cheapo kit I have used for this method which works great). This saves me from having to be skilled/artistic, and I also find that the ink burns into the wood and helps enhance the blackness of the burn marks.
​
I spent about $150 a couple years ago for a cheap cheap inkjet printer, a ream or two of wax paper, and the wood burning kit and I have gotten a ton of mileage out of it.
​
Link for transferring printed item to wood
https://www.theartofdoingstuff.com/print-on-wood/
​
Cheapo wood burning kit I use
https://www.amazon.com/Walnut-Hollow-Versa-Temp-Temperature-Woodburning/dp/B005P1TRAS/ref=sr_1_7?keywords=wood+burning+kit&qid=1569870300&s=gateway&sr=8-7
Mine cost about 30 bucks I got it off amazon. I wish I would have got one that had a temperature control because that has been an issue with the one I’ve been using so I’m planning on trying a This type soon.
https://www.amazon.com/Walnut-Hollow-Versa-Temp-Temperature-Woodburning/dp/B005P1TRAS
The other friend just stopped talking to me a couple weeks later for reasons unknown. It was a big bummer.
A couple months later, ex-gf contacted me out of the blue to get lunch. I was super excited at the prospect, so I went. She told me she was sorry for not keeping in touch as promised. Her previous breakups were always terrible, but she realized I actually meant it when I said I wanted to remain friends. We kept in touch for a few years and saw each other on occasion. It was nice.
Moral: If someone needs space, do your best to give it to them. It could turn around.
4. [Surprised Crono](http://www.videogamesprites.net/ChronoTrigger/Party/Crono/Crono%20-%20Shocked%20(Front%29.gif), [Lucca casting a spell](http://www.videogamesprites.net/ChronoTrigger/Party/Lucca/Lucca%20-%20Right%20Arm%20(Front%29.gif), emo Setzer - for perlers, of course!
Thanks for the contest!
---
The fact that you are even thinking of doing something like this for people you've never met, especially when it will cost you money that you don't have, is amazing. Never let anyone tell you that you're anything less than great. You've got a good head on your shoulders, and you should be proud of that.
You can get them pretty cheap. This is a pretty decent starter one with temperature control.
https://www.amazon.com/gp/product/B005P1TRAS/
This is the foam I used. 1 sheet is enough to do both those drawers fully without having to mess with piecing offcuts together. I know, it's pretty expensive for what it is, but once you get used to it there's no going back. It's like power windows or having the ice dispenser in the fridge door.
Optional but highly recommended is cutting the foam with a hot knife. I bought this one and it's decent.
The foam I used has a weird silicone- or wax-impregnated backing so no marker or pencil or pen I tried would write on it usefully, so I had to make all my marks on the backing with shallow exacto cuts, then cut through with the hot knife. It's important to remember that since you lay out the marks on the backing that everything will be mirrored left-to-right from the finished product. I took pictures so I'd be sure everything would be where I wanted it when I flipped back over.
I burn the designs in by hand using an inexpensive wood burner, then stain, seal, and line the bottom with felt.
I used one of these.
This is what I'll be getting. Similar to my old one.
Walnut Hollow Creative Versa Tool with Versa-Temp Temperature Control https://www.amazon.com/dp/B005P1TRAS/ref=cm_sw_r_awd_P5Ufvb1271FZZ
https://www.amazon.com/dp/B005P1TRAS/ref=cm_sw_r_awd_P5Ufvb1271FZZ
This is the exact burner that I use: https://www.amazon.com/Walnut-Hollow-Versa-Temp-Temperature-Woodburning/dp/B005P1TRAS
I just bought mine at a crafts store in the city I live in. However, pretty much all burners are the same, so you can definitely buy a cheaper one and it will probably work just fine. I used to have one that I got for $15, but I upgraded to this one for the temperature control abilities.
You use a special tool that's basically a soldering iron with special tips. I currently use one of these. The red comes from stain applied after the burning. And thanks :)
What about some cool paint by numbers? Like a cool cow or maybe a neat tree.
I've recently attempted to take up wood burning and fried a couple of wooden spoons, may take some time to actually get the hang of it..or that could just be me....
wood burning
Thanks! I got this one off Amazon.
https://www.amazon.com/dp/B005P1TRAS/ref=cm_sw_r_cp_apap_pIoTAxt7fU2iu
I use this, and like it quite a bit. Walnut Hollow Creative Versa Tool with Versa-Temp Variable Temperature Control & 11 Woodburning Points (Tips) https://www.amazon.com/dp/B005P1TRAS/ref=cm_sw_r_cp_tai_vm11BbXHK4WMT
I used this one:
http://www.amazon.com/Walnut-Hollow-Versa-Temp-Temperature-Woodburning/dp/B005P1TRAS?ie=UTF8&psc=1&redirect=true&ref_=oh_aui_detailpage_o02_s00
It worked well for my first project but I will likely be investing in a better tool for future projects.
My husband uses rolls of this: http://www.dickblick.com/products/grafix-wrap-dura-lar-rolls/
I forgot to mention that he uses a burning tool with a fine tip to 'cut' the stencil. Like this one
Honestly... no. This handgun is as basic as it gets- you'll be able to strip it in 30 seconds. Just buy a bunch of ammo and get rolling. If you're into DIY projects, go ahead and get an [extra grip module] (http://www.selwayarmory.com/shop-by-category/firearms-parts/sig-sauer-parts-and-tools/sig-sauer-p250p320-grip-modules.html) and a wood burning kit. That way you can work on stippling. Practice on a PMAG or something first! You can look into the Apex flat trigger (link in my big comment) as well.
Thank you, just a regular wood burning kit. My wife free-handed it with a pencil first and then traced her lines.
If you ever get the urge to refinish it, the beeswax can be removed fairly easily, and a good wood burner can be bought pretty cheap.
If it were me, I'd spend $20 or so on a small U-Gouge and use it to cut out the lines you scored originally. Because that gouge is 1.5mm, you should also be able to straighten up any slightly-crooked lines by choosing a good starting point for your cut. Since it's a log, I would use a small paintbrush to brush hot water onto each line a minute or so before you start your cut to soften it a bit. With the gouge I mentioned you shouldn't have to re-sharpen, but you'd need to strop it frequently during the process.
After cutting the lines, use the chisel tip (or a round tip 1mm or smaller) of the wood burner to re-trace the lines to get that nice, dark look to them. The kit also comes with a big, blunt, round tip that is perfect for re-making the dots once you've finished with the lines.
That would hold up better and wouldn't fade in the sun. Of course, that all assumes the wood itself is still in good condition, which it might not be.
Anyway, it's a pretty easy and cheap weekend project you could do to restore that awesome board to have a nice look and playable quality. Wish I had some stumps around here....
I picked up the Creative Versa-Tool kit for $29.99 at a local store. It's currently $26.31 at amazon.
Thanks! One thing that I realized while doing this project is that it will require you to a) learn how to draw, or b) find some creative way to sketch a pattern onto the wood for you to trace. I ended up free hand sketching the design on a piece of paper (while looking at a wiki image), overlaying it onto the wood, taking a pocket-knife and poking holes through the paper/onto the wood at the corners of the shapes, playing connect the dots with the resulting holes, and then traced over with the wood burner. However, I'm pretty sure there are easier methods, this is just what was in hands reach.
> My grandfather was an amazing woodworker, and my skills are limited, but years ago before he died, we worked on a few pieces and I really took to the woodburning. For my birthday that year he bought me a little woodburning kit (cost about $20). About 9 months ago my wife told me to clean out the shed and I found it and thought, "why not." I've been hooked ever since.
It only takes about $20 to get started (http://www.amazon.com/Walnut-Hollow-Creative-Versa-Temp-Temperature/dp/B005P1TRAS/ref=sr_1_1?ie=UTF8&qid=1451521659&sr=8-1&keywords=woodburner)
I have been using this model https://www.amazon.com/Walnut-Hollow-Versa-Temp-Temperature-Woodburning/dp/B005P1TRAS
I bought a 25 dollar wood burning kit off Amazon. Here is the one I used. I really liked it because it had its own temperature control, and a whole lot of different tips you could use to make patterns or thin lines.
I use this dial controlled “pyro pen” or wood burning tool for various cleanup tasks, especially removing supports from small bits on figures. The included “x-acto” blade works great. This specific model will dial down pretty low though I’ve never actually measured the temperature.
Walnut Hollow Creative Versa Tool with Versa-Temp Variable Temperature Control & 11 Woodburning Points (Tips) https://www.amazon.com/dp/B005P1TRAS/ref=cm_sw_r_cp_tai_7SkWCbW11FD6E
This is the pen that I used to make this. I taught myself by just messing around on a blank piece of wood and it wasn't too difficult, but I'm sure you could find some good videos on YouTube if you just search "Pyrography".
You could always make shadowed socket holders out of Kaizen foam and place the sockets exactly where you want them. You can use a hot knife, long thin razor knife and/or a hole saw kit to make cut-outs for your sockets.
A wood burning kit like THIS works great on the foam for making finger grip holes and for cleaning up the bottoms of shadowed spots that are less than the thickness of the foam.
FastCap's long nose permanent markers are great for marking out the patterns of your sockets or other tools for you to cut on.
​
Just my two cents.
Build list:
Zev Dragonfly Slide
Trijicon RMR 06 Type 2
Zev Glock 19 Dimpled Bronze Match Barrel
AmeriGlo GL-429 Suppressor Sights
TTI Spring Kit
SSVi Tyr Trigger
Glock OEM Minus Connector
​
Tools used:
Wood Burner
Dremel Micro Max 8050
Dremel Bit 108 Engraving Cutter
Dremel Polishing Kit
Sand Paper Assortment
Flitz Polish
Link to Heat Gun: https://www.amazon.com/dp/B005P1TRAS/ref=cm_sw_r_cp_tai_BAHLybZMSVPMZ
alright just getting an idea of what you used, I was using soldering iron first then got
https://www.amazon.com/Walnut-Hollow-Versa-Temp-Temperature-Woodburning/dp/B005P1TRAS/ref=pd_lpo_21_bs_t_2?_encoding=UTF8&psc=1&refRID=GRGCG1F455C6GW8D7XXJ
and my stippling went from what you got there to PRO looking overnight the variable temp is the way to go. I also did alot of prep maybe too much but i used just sandpaper (120>300>600) grits to get it super smooth, then stipped with a fine or med point. Not telling you that it looks like crap I just want you to know that the wood burner can take it alot farther than the iron ever will without any more practice involved.
I've been using a woodburning tool which is an adjustable temp soldering iron type of deal with multiple nozzle attachments when I want to heat smooth any PLA, works great if a little awkward to hold due to the heat shield. I mostly use it for the exacto blade attachment since it slices PLA like the proverbial hot knife through butter and couldn't be happier with that aspect of it and would be kind of lost without it.
​
I picked mine up at a Michael's in the wood crafting section, if you're in the US go there or amazon something like this https://www.amazon.com/Walnut-Hollow-Versa-Temp-Temperature-Woodburning/dp/B005P1TRAS/ref=sr_1_2_sspa?keywords=wood+burning+tool&qid=1559074816&s=gateway&sr=8-2-spell-spons&psc=1 as I think that's my exact model.
​
I also do heat welding/smoothing with a 3Doodler 3dpen with the nozzle removed and a pin vise drill bit embedded in the hot end to conduct heat to a fine pointy tip for super fine detail. About the only use I have for that 3d pen since it's incompatible with my typical filament diameter and I won't buy their proprietary overpriced filament on principle lol. But the little attachement modification I made to it is too useful to return the device so I keep it.
​
This isn't a perfect solution, neither of these are and are going going to be useful in certain circumstances but you can royally mess up your prints with heat smoothing, especially when you're not mindful and the heat shield melts off a giant chunk of your piece. Not to mention toasting the hell out of your fingers from time to time. Anyway it's useful but not a magic bullet. Best way I've got to smooth prints is using filler primer, filling compound and sanding and I stick to the heat tools for cutting and welding these days, but I did try for awhile to perfect this, just not ideal for my needs. Useful tool to have though for this hobby, like I said couldn't do without the exacto attachment it's worth it just for that!
A pretty ok wood burner is about $28 on Amazon
Here’s the one we have
No problem!!!
Capital letters:
Walnut Hollow Hotstamps Uppercase Alphabet Branding and Personalization Set for Wood and other Surfaces https://www.amazon.com/dp/B0019N4VSO/ref=cm_sw_r_cp_apip_qZ3nYNo4V4dhs
Lower case letters:
Walnut Hollow Mini Hot Stamps Lowercase Alphabet Branding & Personalization Set for Wood, Leather & Other Surfaces https://www.amazon.com/dp/B01KTBQU3A/ref=cm_sw_r_cp_apip_kDRK8wBD2b4RL
Wood burner:
Walnut Hollow Creative Versa Tool with Versa-Temp Variable Temperature Control and 11 Woodburning Points https://www.amazon.com/dp/B005P1TRAS/ref=cm_sw_r_cp_apip_l5txnwxGFubDB
Actually this one looks like the kit I have -- http://www.amazon.com/Walnut-Hollow-Creative-Versa-Temp-Temperature/dp/B005P1TRAS/ref=sr_1_1?ie=UTF8&qid=1413925846&sr=8-1&keywords=leather+burning+kit
...and it's a bit cheaper, anyway. And I completely know what you mean about tooling and neighbors! That was a problem until I finally got out of an apartment....
Walnut Hollow Creative Versa Tool... https://www.amazon.com/dp/B005P1TRAS?ref=ppx_pop_mob_ap_share
Glad you figured something out, there are these as well:
https://www.amazon.com/dp/B005P1TRAS/ref=cm_sw_r_sms_awd_rnXfxb9BQNTF9
https://www.amazon.com/dp/B00MJW08JK/ref=cm_sw_r_sms_awd_4nXfxbPS230AX
Thank you! I definitely think you should give it a shot. From what I see so far on this subreddit, I use a different tool than most. https://www.amazon.com/Walnut-Hollow-Versa-Temp-Temperature-Woodburning/dp/B005P1TRAS/ref=sr_1_3?ie=UTF8&qid=1466045184&sr=8-3&keywords=wood+burning , but I really like it.
I'd say that I'm somewhat artistically inclined, but in that I like to be creative. I wouldn't say I can freehand well, aside from stick figures. I use carbon paper to help me transfer images.
The tricky part is more in your steady hand and eye for shading than in your artistic ability, I think! I mainly use three tips: one that looks like a pencil, one that's a tinier pencil tip, and one that looks like a leaf (I use that one for the shading and the others for outlining). That's it!
I've been doing this for maybe a year now, and still learning techniques. Give it a shot!
I'm a big fan of Pyrography or Wood Burning Art and the amazing art it makes. You should look some up if you have the time. If not just comment and I'll post some links of some cool stuff. You need this puppy to put the art onto the wood. I find the entire process very relaxing. Hope you may considering venturing into this awesome art form.
Oh and...... Stillneverwrong is so groovy
I'm assuming you're using one of the cheaper green pens with the three tips. There's another, more robust hobby pen from the same company that comes with a circle-shaped tip to it, that's about the size you're asking. The burns won't be crazy fast, but if you do it right they'll come out as nice black polka dots.
This is the pen I'm talking about
If that doesn't work for you, you should look into getting a more expensive setup or a blowtorch that you can heat that circular tip with more quickly.
Great job! I do this as well but I only trace stuff I find online or create on my own. What tools do you use?
I own this:
https://www.amazon.com/Walnut-Hollow-Versa-Temp-Temperature-Woodburning/dp/B005P1TRAS/ref=sr_1_2?ie=UTF8&qid=1469129344&sr=8-2&keywords=wood+burning+kit
In my experience, I find basswood the easiest to work on. I am still very new to this so any advice/links would be greatly appreciated. I have done approximately 6-7 pieces.
I've got this one
Thanks dude! And, yeah that's an awesome design, I think it'd make a cool deck too.
I'll let you in on a secret that took me forever to figure out: the best way to make masking / stencils is to get yourself some transparency sheets, like the kind used for overhead projectors in school, and then take a marker and draw what you want to spray through (best way to make stencils). Then take a 'wood burning kit' (which is just a low-heat soldering gun pretty much) and use it to "trace" your lines on the transparancy sheet, do it light and quick and it'll cut the parts out that you want - afterwards you'll be left with a mask or stencil that's much stronger than paper, easy to clean, and the wood engraver allows you to make more detailed and smoother cuts than if you were masking with tape, or cutting out of cardboard or card stock.
When you finish your painting, you'll want to give it a light coat of clear spray finish, and when that dries hit it with a coact of actual clear coat - I use minwax - that''s 'satin' (which is their way of saying 'matte') listed there but I prefer mine to be gloss. It's important that you hit it with the spray finish first, because it'll seal the paint, and the minwax may cause it to run if you don't. I use a lot of markers in my paintings and minwax will absolutely make them bleed and run if I don't seal them first.
You also want to seal it because the acrylic will easily chip off the deck
Like I said, also be aware that painting on a deck is A LOT different than painting on canvas, the deck will cause the acrylic to paint much faster than canvas so you lose that 'wet period' you normally have to blend paint.
Good luck, post a picture when you finish it! And feel free to drop me a line if you have any other questions.