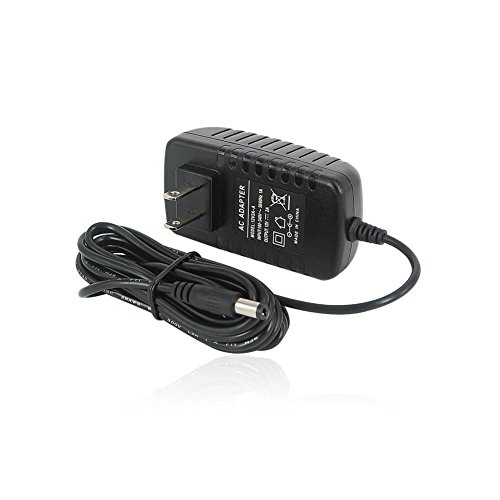
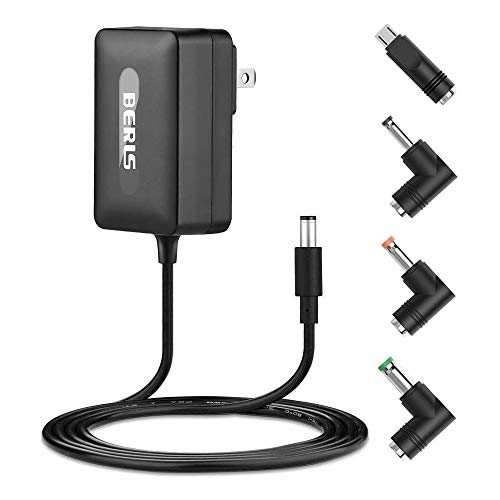
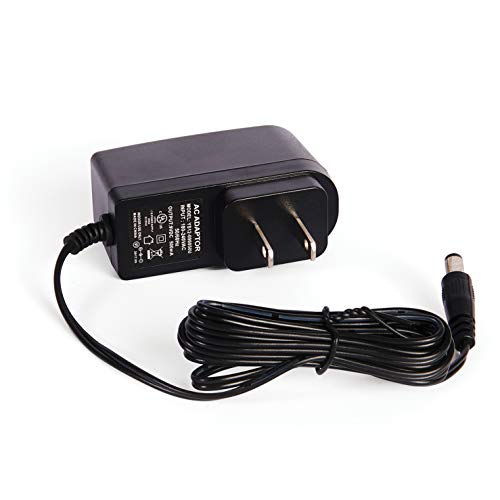
Best ac adapters according to redditors
We found 1,363 Reddit comments discussing the best ac adapters. We ranked the 501 resulting products by number of redditors who mentioned them. Here are the top 20.
We found 1,363 Reddit comments discussing the best ac adapters. We ranked the 501 resulting products by number of redditors who mentioned them. Here are the top 20.


![[Upgraded Version] SoulBay 30W Universal AC/DC Adapter Switching Power Supply with 8 Selectable Adapter Tips, Including Micro USB Plug, for 3V to 12V Household Electronics and LED Strip - 2000mA Max](https://m.media-amazon.com/images/I/51UOyUkeeqL.jpg)


Hey so I hate to shit in on everyone else's opinions, but they're not really recommending the best gear for your dollar. /r/audiophile has a sticky on this exact subject. Basically the lowest end system they are willing to recommend is a pair of Micca MB42s . If you can spring for the 42x's, they are more than worth the 10 extra dollars. You will need an amplifier to drive them. /r/audiophile reccomends the Muse m50, but I can tell you from personal experience, a lepai 2020a+ with a slightly beefier power supply will run them just fine for half the price. These are pretty chunky speakers, but they'll blow any "pc/gaming" speakers out of the water. If you decide you'd like to go for this, I have about 30 feet of speaker wire lying around that I'd be happy to mail to you to save you the 8 bucks or so. Hope this helps, and happy listening!
The fans run on 12V and likely don't use more than 12-24W each. You could use a cheapo power brick.
Most 140mm case fans should only pull 1-2 watts.
http://www.xbitlabs.com/articles/coolers/display/140mm-fan-roundup_12.html
A small wall wart should do it. I'd just repurpose something I already had, but something like this would do it:
http://amzn.com/B00KZ2ZQE8
Also going down to 9v might be an option for this setup as it would make it quieter at the expense of slower fan speed.
I have that same amp. I find that upgrading the power supply to a nicer 3 prong model, like the one linked below, will eliminate all noise and static at higher volumes.
https://www.amazon.com/gp/product/B003TUMDWG/ref=ppx_yo_dt_b_asin_title_o05_s00?ie=UTF8&psc=1
I couldn't find an affordable buttkicker brand package but I did find a great amp and transducer on amazon for 2/3 the price of the Gamer 2 (cheapest buttkicker) at just about $100. It works fantastically! I'll post links to the products if you care to see them.
Edit:
AuraSound AST-2B-4 Pro Bass Shaker Tactile Transducer by Aura Sound
Lepai LP-168HA 2.1 2 x 40-Watt Amplifier and 1x68W Sub Output by Lepai
12v 6a Adapter Power Supply for LCD Monitor with Power Cord by LCD AC Power Adapter
I get adapters for my cords so I can carry fewer: I have just a short and long USB-C cord but then alternate tips I can put on it to change into micro USB, lightning, and plug into a regular USB slot if need be.
I also carry a tiny flashlight on a keychain hanging off my pack - it's surprising how often this comes in handy.
The Kikkerland Universal Travel Adapter is AMAZING, works everywhere and is a third of the size of most travel adapters: https://www.amazon.com/Kikkerland-UL03-A-Universal-Travel-Adapter/dp/B00210MRGC
https://www.amazon.com/gp/product/B00210MRGC
seems more minimalist.
I personally hate both of them. they're too bulky and take up too much of the outlet space, sometime blocking access to other outlets or finding yourself not able to use to because it can't fit.
for converting I simply use this. most of what I charge is via USB, so I use this two port dongle. I also travel full time and use this converter/extension cord.
Heatsinks $11
Sonoff switch $14.00
N-Channel MOSFET $8.88
Stickable Breadboard $9.99
LED lights $11.25
Google AIY Voice Kit $12
HDMI $6.99
5V Power Supply $7.99
12V Power Supply $9.99
Raspberry Pi $38
Monitor $69.99
Mirror $129.99
Total : ~$330
I almost always recommend the http://www.hobbyking.com/hobbyking/store/__18066__Turnigy_Accucel_6_50W_6A_Balancer_Charger_w_Accessories_US_Warehouse_.html
same 50W as the B6 charger but this one can handle 6A. It doesnt come with a power supply though so you will need something like this: http://www.amazon.com/Adapter-Power-Supply-LCD-Monitor/dp/B003TUMDWG/ to make it all work.
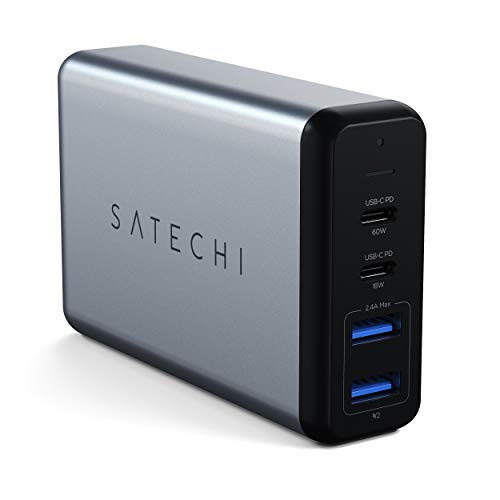
Came here to suggest to OP to look at replacing all of their power bricks with a single all-in-one like this Satechi or maybe wait for one of the new upcoming GaN adapters this year.
All you need is a 9 volt adaptor and a daisy chain. You can buy both on Amazon for under $15, I use the Planet Waves adapter and it works fine for me. For connecting your pedals together you can use whatever instrument cable you want. I use smaller (1.5 inch) ones because it keeps my pedals closer together and preserves the signal.
internal shot
Parts list:
Tools:
STL for 3d printing:
All three files
Wiring diagram:
Terrible MS paint Diagram
Model IH-005. The "Russian doll" Portable Dynavap Induction Heater.
​
Purpose: The purpose of this project is to create a design for a Dynavap Induction Heater that fit inside of a plastic 16oz coffee cup. Additionally, this design allows this Dynavap Induction Heater to be replicated using off-the-shelf parts and commonly available tools.
​
Design: The design was intended to improve upon DIH-004 (link), which required the use of a custom chassis to align the internal parts correctly. DIH-005 incorporates a "sleeve" design (like a Russian doll) to align internal parts and provide a mounting platform for the induction heater power supply unit.
​
Features:
Parts:
Parts List
Miscellaneous parts:
You're a jackass. Here is a real link to the shitty power supply.
http://www.amazon.com/Replacement-adapter-charger-Benq-Monitors/dp/B003Z6ZR5O/ref=sr_1_1?ie=UTF8&qid=1405051813&sr=8-1&keywords=replacement+LCD+60w+12v+5a
Happy?
So, presumably, you're going to want different sections to have lights which operate independently from each other. Lights in this "room" lights in another "room" lights somewhere else yet. And also, presumably, you don't want it to be "all on" or "all off," but different sections that turn on when players are there, leaving the other sections off.
All sections will require power in order to operate, but it won't be necessary to run power cables willy nilly all over the board for this. Instead, you can run two lines - one positive, and one negative - back to your power source. It's similar to a breadboard in that you have power lines running the full length so you can tap power wherever you need it. I personally would run something like 14AWG wire to a series of screw down terminals, which will be where you connect any "room" circuits up.
I personally would change your design to use LEDs instead of incandescent bulbs. The incandescent bulbs will require a much higher voltage, which will require more expensive reed switches, and will also pose more hazard to work with and for the players. It definitely can be done safely at 120V, but it will be less work for better results (that will also last longer) if you switch. Using say, 12V DC for power, you can leave your power rails exposed if you want and it won't be a risk even if someone is touching them.
Here is a hastily drawn wiring schematic for you, which shows one light that would be activated by standing upon 6 different tiles. The black and red lines up top are your power rails. On one end, each of those is connected to a + (red) and - (black) on a power source. I would recommend something like this or even like this depending upon what your actual power requirements end up being. My overwhelming suspicion is your entire board, even if every fixture was lighted, would still be consuming less than 24W (if you go LED!). The cluster of 6 of the same item to the left are a bank of switches. Power is drawn off the + rail, and if any one switch is closed, power will continue to flow to the LED (purple), which is attached to the - rail to close the circuit. This can be scaled up or down almost infinitely - more LEDs on from one switch or switch bank - no problem - more or less switches - no problem. You can make as many of these set ups as you want, and attach them to the same rails - no problem!
To be honest, reading your post it sounds like still have some work to go to reach even a fundamental understanding of electrical circuitry. That's of course ok and not intended as a diss. This is partially why I recommend switching to a lower voltage of DC power (although it is what I would do personally as well), but also I would recommend you continue working on the fundamentals - it will make designing your project a lot easier. Here's a kinda whack video for kids but it's the most digestible one I was able to find in quickly searching. I also found this really cool lab software which will allow you to create simulations of the concepts you've learned about. If you need help or have specific questions, feel free to ask. Also, if you've got a design of your board laid out in a grid and you know where you want lights, switches, etc, I can help you turn that into a wiring diagram.
Custom made out of plywood. Exhaust on that Sony is in that front corner, so I put two fans, buy I'm actually only using one. I left a small gap along too back for intake.
Using this to automatically turn on.
https://www.amazon.com/dp/B01HXM5UAC/ref=cm_sw_r_cp_apa_i_RAztDbWC9XWZ6
And then the noctua plugs into this.
https://www.amazon.com/dp/B000MGG6SC/ref=cm_sw_r_cp_apa_i_IHztDbJCPQ5XY
And then I found a good temp for it to turn on, and it balances out nicely and keeps temps from skyrocketing, and even runs til it cools down and shuts off.
Lined it with carpet, and overall noise is good. Never hear it. That being said, I'm weird, and I could hear it in quiet scenes, and then I'd START listening for it, ruining the movie, so I made the box. Most normal people don't have this problem. 😆
Also, I should note: I chose the quietest 4 power supplies that I had on hand. I also have a lab-grade power supply @ 12V, but the scoping also looked similar so I didn't feel like including it to save space on the final image. The Nintendo Wii adapter was chosen because I felt like it was one that people could relate to, and also it was made for a mass-market device by a high quality Japanese company. The Planet waves adapter, which you can pick up on Amazon for like $9, is actually quite good, and a great deal IMO. 200mV [+/- 50] Vpp is actually very quiet (tame..), compared to any other switching power supplies. If I upload a pic using a China-eBay-generic adapter, it will NOT look pretty. Expect like 500mV [+/- 250mV] Vpp....w/ a Fourier transform showing massive peaks at 60Hz and 120Hz.
TL;DR: "BZZzzzzzz......."
Alright, so here's the heater, https://www.amazon.com/dp/B01C71XKZ6/ref=cm_sw_r_cp_apa_i_8dF8AbWZFK127 And here's the power supply I'm using. https://www.amazon.com/dp/B003TUMDWG/ref=cm_sw_r_cp_apa_i_PfF8AbGCHFMGV You're gonna want a 12volt 10 amp rated switch, the supply goes to 6. It's worth the 20 bucks, totally changed the vapcap
I'm 37 and have wanted one of these since I was 10 as well. Also work in IT, but as a programmer, but I have done a lot of PC building and repairing on the side for decades. Never owned or worked on an arcade cabinet before, or worked with Raspberry Pi before. The Arcade1Up MK was also my first (and only so far) cab. As a tinkerer, I modded mine immediately (as in, within 3 days of ownership), and I'll give you some tips for if/when you mod yours that will save you a lot of time and money, because I made a lot of mistakes with mine buying wrong or insufficient parts, and general things that I would have done better/differently if I got to do it over again.
Modding is NOT hard. It's as easy as building the thing out of the box was (requires moderate effort and very little skill).
Hardware:
Software:
Go into a game, and hit Select/Coin + X. This will bring up a special Retroarch menu. Go to
Settings -> Onscreen Display -> Onscreen Notifications -> Display Frame Count -> OFF. Hit B to go back to the Settings menu, then go toConfigurationand make sureSave Configuration on ExitisON. You may have to do this for every system you're emulating, because it seems to only apply to whichever emulator you have running when you change the setting.None of this is nearly as complicated as it might sound. I was just trying to be thorough and save you a ton of time and money. Hope this helps!
Here's a video of my modded cab:
https://www.youtube.com/watch?v=J8lNARvbiKA
I was thinking something like these for a power cable:
https://www.amazon.com/SMAKN-Switching-Supply-Adapter-100-240/dp/B01N4HYWAM
https://www.amazon.com/d/Small-Device-AC-Air-Conditioner-Adapters-Power-Supply/SMAKN-Switching-Supply-Adapter-100-240/B00LN3FC0G
If you want to turn your MiSTer on and off, a lot of us use this power supply which doesn’t drop voltage
https://www.amazon.com/gp/product/B01N336XEU/
and this type barrel adaptor for it
Fucung DC 5.5x2.1mm (type M barrel) Male Plug To Micro USB Female Connector Adapter Charge Converter https://www.amazon.com/dp/B07G5DS6J4
You think I have time to be your link slave???
Just kidding, here are all the links from under the youtube video. Also will be useful for the future if this video ever goes down:
> Library I'm using: https://github.com/2dom/PxMatrix
>
> Live Stream link : https://youtu.be/espfESarDkc
>
> YouTube Stats display Code: https://github.com/witnessmenow/LED-M...
>
> Parts:
>
> RGB LED Matrix 64 x 32 P3 (The one I'm using)
> - Amazon.co.uk https://amzn.to/2HyLRbD
> - Amazon.com https://amzn.to/2KmsJvl
> - Aliexpress http://s.click.aliexpress.com/e/EMvjy3z
>
> 5v 8A laptop style PSU
> - Amazon.co.uk https://amzn.to/2JBauB2
> - Amazon.com https://amzn.to/2Ko5WiX (This one seems to come with the adapter for connecting to the cables)
> - Aliexpress http://s.click.aliexpress.com/e/vzJ2rnE
>
> Wemos D1 Mini Clone: http://s.click.aliexpress.com/e/uzFUnIe
>
> Female-Female 20CM Dupont cable: http://s.click.aliexpress.com/e/eu3j2j6
>
> 10pcs 2.1mm Adapters (both sockets and plugs): http://s.click.aliexpress.com/e/UbMvnmQ
>
>
> Other Platforms:
> Twitter: @witnessmenow - https://twitter.com/witnessmenow
> Twtich: BrianLough - https://twitch.tv/brianlough
> Instructables: witnessmenow - https://www.instructables.com/member/...
>
>
> My Tools & Kit:
>
> Ts-100 Soldering Iron
> - UK : http://amzn.to/2nlOF23
> - US : http://amzn.to/2jDcyxl
>
> Logitech C920 HD 1080p Pro webcam
> - UK: http://amzn.to/2pnxk9Z
> - US: http://amzn.to/2BsLMiF
>
> Blue Snowball USB Microphone
> - UK: http://amzn.to/2C0x4TH
> - US: http://amzn.to/2DEA85J
>
> Self Adjusting Wire Strippers
> - UK: http://amzn.to/2C0urkR
> - US: http://amzn.to/2BXQAh1
(FWIW I didn't manually place the
>in each row, I did a regex replace in TextMate for: replace^(start of line) with>.)and while all of this is on the way, read about parallel charging because LiPo batteries can and will burn your house down if you are careless.
DO NOT have batteries connected without it plugged into your charger. If the banana plugs touch and short the batteries, you will have problems. You will want to unplug the JST connectors instead, because it is much safer.
Learn about C ratings, parallel charging and safe lipo storage.
In a parallel configuration you want your charger to think you're charging a single cell lipo with the combined capacity of all of the batteries. For your 1C charge rate: 240*5=1200mAh/1000=1.2A, so you would select 1.2A and leave the default 3.7v(1S) configuration.
You could also purchase a serial balance harness for those situations where the voltages of the batteries aren't close enough.
This was a really rough write up, and I may edit it a bit. But it's 5 AM and I just wanted to spit it out.
Grrr, I rattled off a bunch of information and the edits didn't take.
The power supply for the HMD is rated at 12 volts, 1.5 amps. This "ZOZO" adapter from Amazon should work fine. I just checked my Vive HMD power supply with a meter and the polarity is "inner Positive(+), outer Negative(-)", just like in the Zozo description, so polarity won't be a problem. Just pick out the plug adapter that fits from the assortment they give you and set the voltage to 12 volts.
Edit: The $10.98 unit is rated at 12 watts, which is only 1 amp at 12 volts, so the current rating of that unit is lower that the original power supply. Maybe you'd better get the 36 watt unit for $14.99, just in case. That unit should be good for 3 amps, which means double the rated capacity of the original supply.
Amazon has a lot of other choices as well. Just look for 12 volt capability at at least 1.5 amps (or 18 watts), the correct polarity, and an assortment of plug adapters so that you'll get one that fits.
I use this. This should convert dmx to led talk. And you will need a power supply.
For best results I power my strips from both aide. Other wise they will get darker as the strip gets longer.
Materials I had to buy:
Cost me about $50, plus some materials I had lying around. ($60 after that second fan)
Hope this post is informative enough guide anyone else interested in making one of similar design.
Video of it in action
Edit: Also, huge thank you to rcombs and derinerkan of #XKCD on Foonetic IRC network for helping me troubleshoot the fan issue when I set it on fire, and helping me figure out what I did wrong.
Hi space bucket folks.
Here is my bucket build. I at the stage of testing the temp and humidity. Next steps are to tack down the wiring and power supply, buy a cabinet to stash the bucket in...and then start growing!
Here are the parts I bought off amazon:
LED:
http://www.amazon.com/gp/product/B00MY5VY2W/ref=oh_aui_detailpage_o00_s00?ie=UTF8&psc=1
UFO:
http://www.amazon.com/gp/product/B00INM0BPG/ref=oh_aui_detailpage_o01_s00?ie=UTF8&psc=1
power adapters and mylar:
http://www.amazon.com/gp/product/B000MGG6SC/ref=oh_aui_detailpage_o02_s00?ie=UTF8&psc=1
http://www.amazon.com/gp/product/B0001WW40Q/ref=oh_aui_detailpage_o02_s01?ie=UTF8&psc=1
http://www.amazon.com/gp/product/B00KB8CB9O/ref=oh_aui_detailpage_o02_s03?ie=UTF8&psc=1
(shout out to /u/mcscroggins for posting his build. I referred to it while building. And thanks to other posters in this sub for posting pics of their builds for ideas and such).
hey man, about to build my first heater tomorrow, I have a list of parts I ordered based on several threads and stuff you and others recommend I came up with this:
https://www.amazon.com/gp/product/B0060U92FS/ref=ppx_od_dt_b_asin_title_s00?ie=UTF8&psc=1
https://www.amazon.com/gp/product/B071NCKQFW/ref=ppx_od_dt_b_asin_title_s00?ie=UTF8&psc=1
https://www.amazon.com/gp/product/B01G00GHQY/ref=ppx_od_dt_b_asin_title_s00?ie=UTF8&psc=1
https://www.amazon.com/gp/product/B00VNSO3OM/ref=ppx_od_dt_b_asin_title_s00?ie=UTF8&psc=1
https://www.amazon.com/gp/product/B003TUMDWG/ref=ppx_od_dt_b_asin_title_s00?ie=UTF8&psc=1
https://www.amazon.com/gp/product/B01GDVVANA/ref=ppx_od_dt_b_asin_title_s00?ie=UTF8&psc=1
aside from wires, a box and tools (Ill get tomorrow from work)
am I set or do I need anything else, also if any of those things I bought incomatible?
Baby breakout board uses a 5.5mm OD and 2.1mm ID plug.
This one from Amazon works:
https://smile.amazon.com/gp/product/B0745BZV6T/ref=ppx_yo_dt_b_asin_title_o03_s00?ie=UTF8&psc=1
I have the breakout board and picked up this 5v4A PSU from Amazon:
https://www.amazon.com/gp/product/B01N4HYWAM/
(it was $9 on prime when I got it)
To deliver power to the board I found a snap-on right angle molex connector in my parts bin, cut the barrel plug off the PSU, and attached the connector. I don't know the official name for it but this is what it looks like:
https://i.imgur.com/JvZHl3F.jpg
https://i.imgur.com/8dQJQhy.jpg
So far it has worked great and it frees up the screw down connectors to power accessories. You can see a fan powered there in the second picture.
One of these:
​
Amazon 5VDC 4A Switching supply
I just helped a friend of mine build his own, it's very easy to put together yourself. Here's our component list, that you may find helpful.
Raspberry Pi 3B
Flirc Raspberry Pi Case Gen2
8Bitdo Sn30 Bluetooth Gamepad
SanDisk 32GB Micro SD
AmazonBasics High-Speed HDMI Cable
NorthPada RPi3 Power Supply
Of course, there are many different cases and controllers you can use, you don't need to buy these specifically but it'll give you a good idea what you need to get started and what it will cost you when all is said and done. This is also assuming you just want something to play on TV. If you are a building a handheld, that's a different beast.
SMAKN DC 5V/4A 20W Switching Power Supply Adapter
This one works for mine
[Breakout Board]
Was not looking to use a big atx pc power supply with the molex pins so I searched Amazon and found this $5 adapter:
https://www.amazon.com/gp/product/B07FK5XDY6/
Pairing with this power adapter:
https://www.amazon.com/gp/product/B0745BZV6T/
The barrel end of the molex adapter accepts a 5.5x2.1mm pin so any adapter with this size end that meets the 5V 3A Atomic Pi requirements should work.. I will update this post if have any issues using the above 2 items to power the board.
Currently using:
https://www.amazon.com/gp/product/B0745BZV6T
and I have one of these wired to the breakout board:
https://www.amazon.com/gp/product/B079RCNNCK
​
> 1) Is my keyboard now fucked? It wasnt cheap so this is not ideal
probably, if it doesn't work on another device
>2) Is the KVM now fucked? Should I not plug it in? Again, not cheap
Might be, you should plug it in with the proper adapter though.
>3) How do I prevent this happening again, and test it without killing my machine?
By using adapters suitable for the device you're using. If it says 5V get a 5V adapter. You could get one of the universal ones with tons of endpoints and setable voltage (like this one) but personally I don't trust them.
I originally bought the 3A power supply mentioned below by docwhiz, but my atomic pi would boot, run for a while, and then reboot once anything attempted to use the GPU.
In this document they say that you want to have at least 3.5A if you're using any USB peripherals. I was using a USB wireless keyboard dongle when I had these problems, but I was planning to hook up an external USB drive too.
So, I wound up buying this 8A power supply for $16. My api is now happily running even with a 2TB external drive powered from the USB port. This power supply also comes with a barrel connector, which is handy if you're planning to make your own power connector rather than buying the mini breakout board (or the breakout board isn't available, as was the case when I purchased my api).
I'm using this one:
Satechi 75W Dual Type-C PD Travel Charger Adapter with 2 USB-C PD & 2 USB 3.0 Combined with a USB-C to Surface connector
Although I only need 45W for SP6, This charger lets me also charge up many other USB devices at the same time, and the brick size is comparable to the original Surface powerbrick also.
The Atom PD 4 you linked is Anker's only dual USB-C desktop charger. It would of met your requirements, though was also overkill. It has had availability issues since release.
With your devices you're looking for a charger that supports:
If the Note 10 changes fasting specs it'll go more toward USB-C Power Delivery, possibly up to 25W with PPS. But that's speculation.
Next closest Anker option is the PowerPort Speed 5 PD. Only one USB-C port, but will fast charge any of your devices. The USB-A ports support Apple 2.4A, an older fast charging tech the iPhone 11 should still support. It is a bit slower than USB-C PD or the included charger. But much faster than the old iPhone 5W charger. The Samsung will also charge via USB-A, but slower.
Best non-Anker option is probably the Satechi 75W Dual Type-C Travel Charger. Two USB-C ports, either will fast charge iPhone and Samsung. Top one charges iPad Pro at max rate (bottom works in a lot of cases, too). And two regular USB-A ports.
I am beginning to think these "split" chargers are just not working out. Here's https://www.reddit.com/r/UsbCHardware/comments/bgz4yo/anker_powerport_atom_pd_2_goes_on_sale_april_29th/elpe059/ another. I am not fully surprised , USB PD is complex and if you make a charger like this you can't use a reference implementation and there can be firmware bugs and -- curiously enough , none of these chargers have a firmware update mode.
There are fixed dual port chargers like this or this (these two might be the same electrically) that I'd trust a lot more. The upcoming Maru&Masa is fixed wattage, too.
You need a beefier power supply. I use ones similar to this:
https://www.amazon.com/NorthPada-Raspberry-Supply-Charger-Adapter/dp/B01N336XEU
It also had a switch to prevent having to plug/unplug to power cycle.
I got a molex PSU for the lights and fans inside my bartop.
http://www.amazon.com/Coolerguys-100-240v-Molex-Power-Adapter/dp/B000MGG6SC/ref=sr_1_10?ie=UTF8&qid=1427306536&sr=8-10&keywords=molex+psu
Tons of adapters for it too.
I still see so many people using those bulky power adapters for international trips. Clearly not enough people know about the Kikkerland UL03-A Universal Travel Adapter
http://www.amazon.com/dp/B00210MRGC
It's the about half the thickness & weight of all of those other adapters.
Care to share your database? :)
We're not sure which one (if any) is a 'white label' of the other (they look very similar) but as an alternative we've been very happy with the Kikkerland UL03-A. It's also affordable at about $10 (and currently less than the one above).
https://www.amazon.com/Kikkerland-UL03-A-Universal-Travel-Adapter/dp/B00210MRGC
We're r/Onebag travelers so volume (4 1/8 L x 1 6/8 W x 5/8 D inches, per our measurements) and weight (1.6 ounces, per product page) are very important to us.
We've plugged/unplugged it over ~75 times over the last year and it's as good as new.
First of all, good decision, even alone you'll probably have a great time, meet lots of people and likely become hooked on travel. :-) Here's some things I'd look for in a travel pack:
Some other tips:
Finally, 10 days travelling in a month means your trip will absolutely fly by. You might end up wishing you'd taken longer, which isn't always possible, and you won't be able to stay long in places you love. Mentally prepare yourself for this.
Have a great trip!
Bring your own they are cheap... here are 2 of my favorites
https://www.amazon.com/Kikkerland-UL03-A-Universal-Travel-Adapter/dp/B00210MRGC
https://www.amazon.com/gp/product/B00BLTCHN2/ref=ppx_yo_dt_b_search_asin_title?ie=UTF8&psc=1
---
Just make sure your electronics can handle a 220v input (most modern electronics you will see are rated for 100-220v which means you can use them anywhere as long as you have an adapter)
There are like a million versions of that same basic adapter. You can probably score one off ebay for less than $3.
That said, if you want something super packable and light that works worldwide check out:
https://www.amazon.com/gp/product/B00210MRGC/ref=oh_aui_search_detailpage?ie=UTF8&psc=1
this badboy is awesome and super thin.
Someone lit the TSR signal, and thus I am here :P
I bought the Aura bass shakers and a Lepai LP-168HA 2.1 2 x 40-Watt Amplifier. My Bass shaker is rated for 50W, where the Lepai amp only comes with a 3A PSU, so I picked up a 6A PSU on the recommendation of someone in this subreddit, and it's been working fine (hasn't burned up or anything). I'm currently attaching it to a ford cobra seat, but just from the limited test use I've done so far, it works great. Definitely shakes my entire apartment when I turn it up.
The entire kit came out to about $90 after shipping, which I figured was a great price. I've seen someone recommend getting 4 amps and 4 transducers and mounting them on the corners of my seat, then running SimVibe to simulate each wheel independently, but I haven't tried that personally. Nor have I tried the actual brandname buttkicker, so I can't say how this solution compares. But I will say it adds a huge amount of immersion to Assetto Corsa.
EDIT: Oops, forgot the parts list:
AuraSound AST-2B-4 Pro Bass Shaker Tactile Transducer by Aura Sound - http://www.amazon.com/dp/B0002ZPTBI/ref=cm_sw_r_udp_awd_VjzVtb1MV70BA
Lepai LP-168HA 2.1 2 x 40-Watt Amplifier and 1x68W Sub Output by Lepai - http://www.amazon.com/dp/B0070Z87YO/ref=asc_df_B0070Z87YO3169620?smid=A385A0XNQBW8HY&tag=pgmp-401-100-20&linkCode=df0&creative=395109&creativeASIN=B0070Z87YO
12v 6a Adapter Power Supply for LCD Monitor with Power Cord by LCD AC Power Adapter - http://www.amazon.com/dp/B003TUMDWG/ref=cm_sw_r_udp_awd_tlzVtb1TKD73K?tag=viglink20241-20
I have used and designed several power supplies, so I should have somewhat of an idea in how noisy they are.
Also, if by ultra-cheap you mean the sub $1 supplies with free shipping from China, then yeah, they'll be crap. I've seen flyback switchers with no feedback; they only output the stated voltage when you drew the stated current.
On the other hand, if they are the supplies that came with the devices, then barring rare circumstances, they're fine. Good low-current supplies are inexpensive, because the components are inexpensive. I could build a 1-amp offline switcher with a PCB bill of materials around $1, so it is possible to get a complete assembled unit for around $2, wholesale. They aren't too noisy, because the integrated controllers keep the feedback loops tight.
A high-current switching supply will have discreet components with larger high-current loops, and there is more current going through them, so there is more phase delay in the feedback, making more ripple. The current-carrying components are also often less efficient when they are designed to catty a high current. This can be mitigated by running multiple synchronized lower-current switching circuits, like most PC motherboards have, but the increased cost and complexity is very rare on bench-top supplies. Running a switching bench-top supply well below its maximum current can also put it in discontinuous mode, which will make it really noisy.
A high-current linear supply is going to be noisy with all but the lowest current draw, because 30% of the power it outputs is stored in a capacitor, so it will have ridiculous amounts of noise at 120 Hz.
If you have a really high-current linear bench-top supply replacing a handful of walll-mount adapters, then it could be lower noise, but you are talking a $100+ supply to replace $10 worth of walll-mount adapters. It will also draw much more power and generate more heat.
If you want to trunk all of your 12 VDC wall adapters into one, instead of a bench-top supply, I recommend getting a 12 V laptop/monitor adapter like this. It's essentially the same thing as the wall-mount adapter, but big enough for the multiple loads.
use this or something similar: https://www.amazon.com/LCD-AC-Adapter-3-Prong-Power/dp/B003TUMDWG/
it won't get you the maximum possible cooling power since it'll be 12v instead of 14.5v, but if you really need 14.5v performance you should probably just be adding more peltier modules.
ignore the advice about full wave rectifiers. you don't want to be running your temperature controller on a non-isolated dc supply. also note that 12v power supplies are not the same thing as 12v battery chargers.
furthermore, your schematic seems to have neutral attached to ground. that is probably not advisable. hopefully your 220v powered temperature regulator has separate neutral and ground lines.
No, just a few simple parts.
Tape
Power Supply
Connectors (Technically optional, you can solder the cut ends of the tape. But this is much easier.
Magnetic Switch
Dimmer (Optional)
You'll also need basic wire nuts and spare wire.
I had 3/4" thick shelves with 1 1/4" MDF trim fronstpieces. Then I cut a small 45-degree piece to fit hidden behind the front trim. The tape then goes on that 45-degree piece so it's pointing down and back. I hope that makes sense.
First off, using an ATX power supply is not a mod. That is the original intended power supply for the Printrboard. There is a socket for the six-pin video card power plug right on the board. In fact, the barrel socket power port is just a jumper to that socket and must be unplugged to upgrade to an ATX power supply.
Some ATX power supplies do require a short bit of wire running from the green wire on the large connector to any black wire on the connector before they will turn on, but that isn't scary, is completely reversible, and isn't even required on all power supplies. You can buy a premade jumper for precisely that purpose. Some ATX power supplies even include the jumper connector.
Now to answer your original question: You are looking for a 12 volt power supply with an ampere rating of 6 amps or more and a 2.1mm X 5.5mm, center positive, barrel style plug. Something like this one should work for you.
Let me be clear in why I prefer the ATX power supply. The ATX power supply is SAFER than the smaller barrel plug power supply. If I was going to run my Printrbot and leave the house for a while, I would feel much better using the ATX power supply. For fire safety, the ATX power supply is the better choice. Sure, the wiring harness looks a bit like an octopus, but a few zip-ties or velcro wraps will tame that beast.
If you are looking for something longer, there are these as well
16ft RGB LED strip - $14
And add one of these to plug into your wall...
Power Supply - $7
For 250 my recommendation would be a pair of Philharmonic Affordable Accuracy Monitors paired with a suitable amplifier. They're easily the best speakers I've used. Great imaging, very clear and detailed, and amazing bass for a 2.0 setup.
I got along with a basic Lepai amplifier with an upgraded power supply which did better than I expected to. Otherwise you could probably get away with an SMSL-SA36 if you're not blasting them.
For the money though, I bet you could find a used receiver for a great deal off your local craigslist.
I currently run them with an SMSL SA-160 which does an amazing job of driving them but would push you out of your budget.
Alternatively, I've also used the Micca MB42Xs paired with the same Lepai as above and it's a fantastic budget-oriented setup which doesn't take up too much space.
Make sure you get the upgraded power supply or it can damage your speakers from popping.
Usually people do recommend getting a more powerful power supply (~ 5A) instead of the default 2A one that comes with the Lepai amp. You could try getting it replaced and see if that fixes the problem, though.
Here goes:
Parts list:
Fan- http://www.amazon.com/Cooler-Master-SickleFlow-120-Radiators/dp/B0026ZPFCK/ref=sr_1_1?ie=UTF8&qid=1395795979&sr=8-1&keywords=120mm+fan
Grill-http://www.amazon.com/Rosewill-RFG-120-120mm-Grill-Cooling/dp/B0057JFO9Q/ref=sr_1_4?ie=UTF8&qid=1395796001&sr=8-4&keywords=120mm+fan+grill
Power supply-http://www.amazon.com/Wall-Adapter-Power-Supply-12VDC/dp/B006GEPUYA/ref=sr_1_5?ie=UTF8&qid=1395796047&sr=8-5&keywords=12v+power+supply
Speed controller (optional)-http://www.amazon.com/Manual-Variable-Speed-controller-connector/dp/B002D3DK1I/ref=sr_1_2?ie=UTF8&qid=1395796082&sr=8-2&keywords=12v+fan+controller
Parts Notes:
You can get any 120mm fan locally (or any of these parts), this one isn't special. Make sure to note that its 12v DC and take note the amerage. This is imporant in sizing your power supply and/or speed controller. You may have a 12v DC wall charger to an old something or other laying around. As long as it is 12v DC and is around 1A, you should be all set. 0.7A, fine. 2.5A, fine... etc
Installation- I would put the fan inside the box exhausting upwards so the top of your box stays flush. You could put it on top of the box and have it pulling air out should you wish. The grill is optional to protect stuff from falling in and your fingers. Installation should be straight forward. Use small wood screws to mount both the fan and the grill. Pre-drill depending on wood type and screw size.
Powering it up- If you don't have a volt meter, take note of the positive and negative ends of everything before you cut any wires off. Label them clearly. If the fan has a 4 pin molex connector note the red and black pins. Plug them into the corresponding Load/Device side pins from your speed controller. Cut (or _____) and connect the positive lead from your wall plug to the red wire of the line side of the speed controller. Connect the negative to the black wire. Check your connections, then plug in the wall pack. Your speed control should now be controlling your fan.
To make the fan simply run at full load, connect the positive to the red of the fan, negative to the black of the fan to omit the speed controller.
All of these parts can be found at Frys / Radio Shack / local electronics or computer store.
Written at a (6). Sorry if unclear, just send a message.
You could use a switch like this inside the pantry: LINK
to turn on a small light. I'm not sure about the code as far as running line voltage inside a cabinet (I think it's prohibited), but I'm pretty sure you can run 12VDC inside a cabinet.
Something like this (LINK) is plenty powerful enough to run a 12V led light.
I use two of these when I bring my Vive places since the original power cables are in the wall: https://www.amazon.com/gp/product/B00KZ2ZQE8/ref=oh_aui_search_detailpage?ie=UTF8&psc=1
They work fine.
I personally wouldn't use it. Look for a simple regulated 12V power supply. Something like this should be adequate depending on the amp requirements of the scope.
You need one of [these] (https://www.amazon.com/gp/product/B00KVQPF94/ref=oh_aui_detailpage_o06_s00?ie=UTF8&psc=1) and one of these.
Doesn't have to be expensive. I have had one of these amps for a few months and it works great, plugged into the TV's headphone jack. You will need a 12-volt power adapter for it, but almost everybody has one of these laying around the house.
For less than $50 I am now able to fill my outdoor graveyard with 8 colorful spot lights.
Amazon:
https://www.amazon.com/gp/product/B072BXB2Y8/ref=ppx_yo_dt_b_asin_title_o00_s00?ie=UTF8&psc=1 . (DC Connectors)
https://www.amazon.com/gp/product/B00Q2E5IXW/ref=ppx_yo_dt_b_asin_title_o01_s00?ie=UTF8&psc=1 . (12V Adapter)
https://www.amazon.com/gp/product/B07PVVL2S6/ref=ppx_yo_dt_b_asin_title_o01_s00?ie=UTF8&psc=1 . (120 LED's)
https://www.amazon.com/gp/product/B07DDG7J9K/ref=ppx_yo_dt_b_asin_title_o01_s00?ie=UTF8&psc=1 . (100ft 18-Gauge Wire)
I usually just recycle an old DC power adapter. The math is really easy. Count the A* batteries and multiply by 1.5 to get voltage.
If you wanna be really fancy, get a bunch of these: https://www.amazon.com/ZOZO-Regulated-Switching-Replacement-Electronics/dp/B015PXUHYA/
Different size barrels, yes, but those multi-output adapters usually have a switch that picks what voltage it actually puts out. I've seen a bare few which have the voltage setting as part of the tip, but almost none do that because the form factor is typically not related to the voltage at all. (Well, larger does tend to go with higher voltage, but there's no standard for this at all.)
Random example: https://www.amazon.com/Regulated-Switching-Replacement-Household-Electronics/dp/B015PXUHYA/
Though most I'm seeing now seem to use rotating switches; they used to all use a flat sliding one, heh.
120 isn't more expensive per roll than 135, you just pay more per shot which isn't the worst.
that said i had a friend with many very broken chinese made Seagull TLRs so he turned a few of them into flower pots (just use the waist level finder for that) or, which i like more, into a desk lamp. You can use the tripod thread to make a little stand for it, set the camera to bulb and throw an LED spot behind the taking lens. all you then need is a little transformer and some simple wiring and you're in Pinterest heaven! it won't even damage the camera as the heat output from the LEDs won't be too much. you can even dim it with the aperture lever.
I did something like that for my Lego shelf. Used some LED strips and a motion sensor module to keep it all automatic. I had no idea what I was doing and bought a bunch of stuff I didn't need, but...
And if you're comfortable soldering, that's pretty much all you need to get something up and running. But I wanted to make it all modular so I could take it apart and set it back up without too much hassle. So I ended up buying adapters and coaxial power cable things:
I'm pretty sure I did it as inefficiently and cost ineffective as possible because I have severe amazon impulse control issues and just buy shit to get started on fun projects. I'm sure with a little more research/guidance you could do it a little cheaper. But I'm happy with my setup for now.
and here's a picture of the shelf. The shelf is terrible, and it's all a wreck because I'm in the middle of moving, but it shows the brightness pretty well. Oh and I have about a 1/4 roll of LEDs left, so I'd guess 2 or 3 rolls would take care of your shelf.
Unfortunately, that probably won't work. Hopefully you haven't already ordered it. I'll check in a sec but I want to warn you quickly. This dock needs the same kind of proprietary variable voltage charger that the OEM Switch dock requires to function. I have a 20k mAh pack too, I'll check and see if it will run it.
Edit -
Alrighty, I was wrong, my power pack can indeed run this little dock :) However, it appears that the switch will not charge at the same time. I just played a couple races of Mario Kart and my battery percentage went down a couple points.
This is specifically the charger I own: https://www.amazon.com/gp/product/B01J5P98SK/ref=oh_aui_search_detailpage?ie=UTF8&psc=1
You didn't specify how big you wanted, but may I suggest "Addressable LEDs"?
https://learn.adafruit.com/adafruit-neopixel-uberguide/the-magic-of-neopixels
.
You will need to be able to solder wires.
Here is a 1 meter length strip, 12mm wide is ~ 1/2 inch,
6.9mm is ~ 0.27 inch between centers
https://images-na.ssl-images-amazon.com/images/I/61oiR3Lo5rL._SL1000_.jpg
.
Here's a closeup of all the details:
https://images-na.ssl-images-amazon.com/images/I/61Nxr4h0WHL._SL1000_.jpg
adhesive to mount the strip
when you want a short piece to fit, you cut to length and then rejoin with 3 wires.
See the 3 colored pads? See the Arrows?
Software? look at "Adafruit_NeoPixel" library, there are several examples
Here is an incomplete example of filling a whole string
// Fill the dots one after the other with a color
void colorWipe(uint32_t c, uint8_t wait) {
for(uint16_t i=0; i<strip.numPixels(); i++) {
strip.setPixelColor(i, c);
strip.show();
delay(wait);
}
}
.
$22 144 pixels, Not Waterproof Black flexible PCB
https://www.amazon.com/ALITOVE-Individually-Addressable-Programmable-Waterproof/dp/B019DYZNO6/
$21 for power to the strip
https://www.amazon.com/ALITOVE-Adapter-Converter-Charger-5-5x2-1mm/dp/B01M0KLECZ/
https://www.amazon.com/Coolerguys-100-240v-Molex-Power-Adapter/dp/B000MGG6SC/ref=sr_1_3?ie=UTF8&amp;qid=1524718223&amp;sr=8-3&amp;keywords=molex+power+supply
This is what you want for simplicity, just plug it in.
no no no, that power supply wont work. get the one one the recommended page of the fan page. it needs a molex connector. this one:
http://www.amazon.com/Coolerguys-100-240v-Molex-Power-Adapter/dp/B000MGG6SC/ref=pd_bxgy_pc_img_y
or otherwise youll have to cut the wires and splice them
Read sidebar, etc.
Use compatibility checker to confirm your choice of card will work with the blocks that you have picked out.
Putting blocks on a card is not that tough.
Always leak test! Make sure you get some secondary psu for running the pump. I use
there are power supplies that will give you a molex on the end. that might be your only option.
www.amazon.com/Coolerguys-100-240v-Molex-Power-Adapter/dp/B000MGG6SC/ref=sr_1_1?ie=UTF8&qid=1408998576&sr=8-1&keywords=molex+power+supply
To power the setup you will want an AC to DC converter of some sort. You could use a spare computer power supply but something more compact will work just as well. You will want a fan controller to handle the fan and pump speed, running them direct on 12V will keep them full speed and loud.
https://www.amazon.com/Coolerguys-100-240v-Molex-Power-Adapter/dp/B000MGG6SC
https://www.amazon.com/NZXT-Technologies-Sentry-Controller-SEN-MIX2-M1/dp/B00DN3IT7M
To keep things compact you may want to buy or fabricate a box to hold the radiators. Hang them on the sides with the fans drawing air through the top and blowing through the rads. The pump and reservoir could either go inside or attach to one of the two unused sides.
http://www.mountainmods.com/tower-pedestal-p-565.html - Pre-made and awesome but fairly expensive.
Make sure you get quick disconnect fittings and place them on the lines just outside your case for easy separation.
Get proper fans for your radiators. EK Vardar F4-120ER are about the best that money can buy.
Don't be sloppy with the wiring. Use pre-made connections, or use solder and heat shrink tubing.
I'm sort of toying with putting something like you are talking about together. Here's my part list
A crimped molex->2xSATA power adaptor. The only reason I haven't jumped on it is because of the power supply. Most of the external Molex power supplies don't have the best power regulation on them, so it could be dangerous to use for drives.
if you can solder this is simple.
step 1: purchase fans and LED light strip you want to use
step 2: add together the amperage for both fans and the strip (assuming theyre all running off 12v)
step 3: purchase 12v ac adaptor (also known as a wall wart) that is rated for the combined amperage of your fans and led strip
step 4: solder yellow wires from fans and red wire from led strip to the positive lead coming off of the wall wart. make sure to cover the connection with heat shrink tubing.
step 5: solder black wires from fans and led strip to negative wire on the wall wart. make sure to use heat shrink again to insulate the connection.
step 6: plug it in and test it out. provided you did your math correctly, insulated the solder joints, and didnt solder anything in the wrong place, you should be done.
edit: there is only one premade adaptor ive ever seen for this purpose, and its a 2a maximum current rating. i do not think that will suffice for what youre trying to do, but this why step 2 is so important (it will let you know if you can get away with using the premade adaptor). if you can use the premade adaptor, then you will still need to buy/make a splitter since the premade adaptor only has one 4 pin molex connection on it
link to premade adaptor
I ACCEPT NO RESPONSIBILITY FOR THE DAMAGE YOU MAY CAUSE IF YOU DO NOT ACCOUNT FOR THE PROPER CURRENT DRAW
I use one of these, great for testing lots of stuff.
I have one of these that I use when filling my loop. Works with my Liang D5 vario pump.
My solution that I'm testing this weekend is using a AC -> DC Molex power adapter like this.
Split the Molex into its 5v and 12v rails and power each from both.
This allows for a molex "plug" in the back without sticking the power supply inside the unit as well :)
There's a 2A one over here on Amazon
Some A/V equipment has power out and all you need is the right adapter. Otherwise, something like this works well enough. Pricing varies a lot with adapters, so digging around might find you a better deal.
This is great for filling and re-filling your res with a top entrance.
https://www.amazon.com/gp/product/B01HFTYIMO
This is a nice item to have for powering on pumps without a PSU.
https://www.amazon.com/gp/product/B000MGG6SC
I used these to cut and clean my PETG tubing.
https://www.amazon.com/gp/product/B00PUX9A4Y
https://www.amazon.com/gp/product/B000WT6U8U/
Something with Molex power already on it?
How about this?
Sure!
> Most people don't want to buy a second PSU just for powering a loop.
You don't have to buy a full PSU though. You can find a PSU with a molex head for powering the loop on Amazon, $12.
http://www.amazon.com/gp/product/B000MGG6SC/ref=oh_aui_search_detailpage?ie=UTF8&amp;psc=1
Really helps when filling/flushing the loop.
If you don't mind spending a few extra bucks you can go with something like this.
http://www.amazon.com/gp/product/B000MGG6SC/
you could also buy of of those universal adapters which have multiple plugs and adjustable voltage.
nb: i have never used this particular one. it is just an example i found using google.
One of the included heads should work: http://www.amazon.com/Hosa-ACD477-100-240V-Voltage-Adaptor/dp/B000Z31G3M/ref=acc_glance_hi_ai_ps_t_2
If you have multimeter you could measure what it draws for current, it might be under the threshold but I doubt it. It will most likely run off 5v no problem so you could just get any old cheap 5v cell phone charger and solder the connections to the battery case terminals or get something like this, I just picked up a couple of these (not this exact one) at a Radio Shack clearance for about $1 a piece.
> Since it arrived, i've been trying to find a power supply that fits it, but I can't find one.
That's unusual. 9v jacks are fairly standardized…
Current draw is minimal, so you don't have to sweat that. 9VDC center-negative is the most common adapter there is, and there are a lot of options on Amazon. First one that pops up is a Planet Waves for 9 bucks. That should work just fine for you.
Well the thing is, 200mA is so low that it's rare to be a switcher unless they're trying to go for as compact a supply profile as possible. If you're in the US, you can probably get away with a wall wart IF you can get one with the correct polarity (I think it's center negative with all roland products).
So for example, a pure wall wart like this: https://www.amazon.com/Planet-Waves-9V-Power-Adapter/dp/B00191WVF6/ref=sr_1_8?rps=1&amp;ie=UTF8&amp;qid=1498144064&amp;sr=8-8&amp;keywords=pedal+power+supply&amp;refinements=p_85%3A2470955011
might do.
Oh okay, that's fine. If you have a link to the one you're thinking of, I can check it out and let you know what all you'd need.
Alternatively, if your budget is ~$60 total, here's a link to a ProCo Rat clone for much cheaper. It uses pretty much the same exact circuit, and sounds nearly identical.
For powering that clone (which uses the standard polarity), here is an inexpensive power supply. By searching "9v power supply" on Amazon I was also able to find inexpensive similar units that can power multiple pedals (if you decide to add on later).
Lastly, if you only have one cable to go from guitar to amp, you'll need a second one to go from guitar to pedal, then pedal to amp. If you're looking to buy something inexpensive, here's one that I used to own. It lasted me about five years before it gave out.
Those three together bring you to a total just under fifty bucks.
http://www.amazon.com/Kikkerland-UL03-A-Universal-Travel-Adapter/dp/B00210MRGC
I meant people are reporting the travel adapter to not work in UK, not the charging brick.
https://www.amazon.com/Kikkerland-UL03-A-Universal-Travel-Adapter/dp/B00210MRGC/ref=pd_aw_fbt_107_img_2/145-3904454-2019709?_encoding=UTF8&pd_rd_i=B00210MRGC&pd_rd_r=8a31301a-a387-4ae1-9ef1-ce8be4c5c9f9&pd_rd_w=BSA7y&pd_rd_wg=MHMqP&pf_rd_p=3ecc74bd-d08f-44bd-96f3-d0c2b89f563a&pf_rd_r=32RKHPYZ8H0XRCFMVA82&psc=1&refRID=32RKHPYZ8H0XRCFMVA82
This is about as tiny as you can get: Kikkerland UL03-A Universal Travel Adapter https://www.amazon.com/dp/B00210MRGC/ref=cm_sw_r_cp_api_i_PAhiDbGJ3MY6N
https://www.amazon.com/Kikkerland-UL03-A-Universal-Travel-Adapter/dp/B00210MRGC
I have one and the one time I tried to use it in Malaysia it didn't really work so great.
Just get a travel plug adapter before you leave.
I use this one (converts any country to any country): https://www.amazon.com/Kikkerland-UL03-A-Universal-Travel-Adapter/dp/B00210MRGC
Here's a less fancy product that only works USA-to-Korea: https://www.amazon.com/SF-Cable-Korea-Plug-Adapter/dp/B00A2BAZDY
This one is WAY better https://www.amazon.com/gp/product/B00210MRGC/ref=oh_aui_detailpage_o08_s00?ie=UTF8&amp;psc=1
I bought this one: http://www.amazon.com/dp/B003TUMDWG/ref=pe_385040_30332200_TE_item
No, I don't think it would topple easily.
Case: https://www.amazon.com/dp/B07S7RM4CT
Switch: https://www.amazon.com/gp/product/B07BFVC568
Glass insert: https://www.amazon.com/gp/product/B07DW4JKQK/
Heater: https://www.amazon.com/gp/product/B01GDVVANA
PSU: https://www.amazon.com/gp/product/B003TUMDWG
Someone recommended this once.
So I'm assuming it's the right connector.
This is what I’ve been including with all of my recent builds: https://www.amazon.com/dp/B003TUMDWG
I’ve had a lot of problems with the cheapo eBay junk.
I've bought a few of these -- they're pretty good for $9:
http://www.amazon.com/Adapter-Power-Supply-LCD-Monitor/dp/B003TUMDWG/ref=sr_1_2?ie=UTF8&amp;qid=1417995581&amp;sr=8-2&amp;keywords=12v+power+supply
Battery chargers can be weird. They don't just output some voltage, they follow a charging algorithm for batteries, which isn't what you want to power a simple load.
http://www.amazon.com/LCD-AC-Adapter-3-Prong-Power/dp/B003TUMDWG/ref=sr_1_4?ie=UTF8&amp;qid=1452907243&amp;sr=8-4&amp;keywords=12v+dc+power+supply
If you really don't want to buy anything, you could power that off an old computer power supply. On the big connector, short the green wire to a black wire, so the power supply turns on when switched on, and from one of the power connectors, connect a yellow (+12V) to your positive, and the black to your ground.
Granted, 12V 6A power supplies are $10 with prime shipping from amazon. So that might make more sense.
Edit: for example http://www.amazon.com/dp/B003TUMDWG
No
I bought one of these a few weeks back to power 1 gridseed. At the time it was a prime item and about $8 works great http://www.amazon.com/gp/product/B003TUMDWG/ref=oh_details_o08_s00_i00?ie=UTF8&amp;psc=1
I heard the subpac was good too, as was the buttkicker. But the subpac is expensive and the buttkicker was sold out lol so I bought the budget tactile feedback rig (Recommended by another /r/oculus member.) which included these three things. It also took a few wires and some tweaking but after mounting it to a chair, I love it
I am hardly an expert, but I have been researching this too. The cheapest DIY option I have found are the $5 light strips from Hong Kong, the 5630 SMD LEDs, These need to be powered with 72W power supplies, that sell on Amazon for about $8.
Note, You'll also need a 12v power supply like this... http://amzn.com/B003TUMDWG
You can use reddit markup to shorten the links btw. Replacement Adapter Charger - Benq Monitors
This is the power brick, though you could buy any number of other ones like that one.
This setup (MB42x and Lepai Amp) doesn't really shine until you turn it up pretty loud. I wouldn't discourage you from getting it, but it was only marginally better than my old Logitech z-640 setup at low volumes. At higher volumes it's way, way better.
Yes, you will need an amp. This is the cheapest amp I would recommend, it does not come with a power cable or cables to connect to PC so I have included them as well.
Kinter MA-180 12V MINI Power Car Computer Amplifier USB Port Charging (Red)
by Kinter
Link: https://amzn.com/B006AMF2R8
Replacement 60W 12V 5A Adapter Charger for Benq LCD Monitors
by electree
Link: https://amzn.com/B003Z6ZR5O
C&E 3.5mm Stereo Male to Dual RCA Male (Right and Left) Audio Cable, 1 Foot
by C&E
Link: https://amzn.com/B015N529Z
Ok, if runs on AA batteries, the step-down converter I linked, powered by a 12V 1A wall transformer like this one will definitely work. No additional components needed, just adjust the output voltage of the step-down converter before connecting it to your device.
Side note: you mention the device 'essentially short circuiting', but for a heating element to be effective, it must have significantly higher resistance than the elements in series with it, in this case the battery and wires. I would bet that the heating element has a measurable resistance in the range of 1-5 ohms, measured while hot.
Also, it's pretty obvious you're modding a vaporizer, no need to be so evasive about it.
Oh, so something like this? and this ?
I doubt the poor Uno is able to deliver the amps required to run your transmitter. You should try using a separate power source (12V 1+ Amp Wall Wart like this) to power it.
Most 12V fans won't even start up on 5V, and that's not even counting the dropout voltage from the LM317.
Have you considered just getting a 12V wall wart?
Tube amps have different terminology than I'm used to (filament what now), but it looks like it needs 12V 2A minimum to be safe. You could use anything from a wall-wart like THIS to a custom built DIY amplifier power supply.
https://www.amazon.com/dp/B00KZ2ZQE8/ref=cm_sw_r_cp_api_QIbMxbNFX0YHC This adapter has been reported to work.
ohh yes I forgot it's not included. You're going to need a power thing for it. I heard this works well. Keep in mind that you will also need an extra HDMI and USB (male to male) cables as well.
I think it's really silly they don't include them with the box to be honest.
When I was first trying to get it to work, Radioshack was trying to get me to pick up two battery packs which held 4 AA's each. I didn't want to deal with that so I found a charger online and hardwired it into the LEDs with a small switch.
Here's the charger I used
http://smile.amazon.com/gp/product/B00KZ2ZQE8/ref=oh_aui_detailpage_o02_s00?ie=UTF8&amp;psc=1I mounted a
I also picked up a heavy duty mountable surge protector that I mounted on the back so I would have a convenient place to plug in the fan, freezer and LEDs. This is what I picked up for that one.
http://smile.amazon.com/gp/product/B0000513O4/ref=oh_aui_detailpage_o04_s02?ie=UTF8&amp;psc=1
This BIGGEST thing to remember is to make sure the volts and amps are enough in the plug in you are using. My LEDS need 12v and 2 amps. As far as I know, it's ok to have more amps than you need, but don't go over on volts
For the most part, monitors will either use an AC power cable like this or a DC power cable like this. There's other plug shapes for both AC and DC power, but for the most part, if there's a big block somewhere on the power cable it's DC, otherwise it's AC
If it's taking DC power, the block should have information written on it about what voltage it's outputting (likely, this will be 5v or 12v). In this case, you can just cut off the power block from the plug, and solder the wires to a molex or sata cable
If it's taking AC power, it's slightly more difficult. Generally, there will be an extra PSU board inside the monitor to convert power to DC power, which won't be necessary in the final build. Often, there will be wires between the PSU and control board that are used for other functions like controlling the backlight which aren't needed, and ultimately only a few wires should actually be required to power everything. These wires are normally labeled on the control board's PCB, but they're often hard to read since most people will never need to look at them; it's definitely a good idea to go slowly and prod at the board with a multi-meter
Immoddernation did a tutorial which covers the AC power option a little bit, in his video he narrowed it down to 5v and ground wires to power the control board, which he soldered to a molex connector. On my build, I needed ground, 3.3v, and 5v, so I bought a sata power extension and soldered the wires to that, since sata supports 3.3v output. If you're comfortable making your own PSU cables from scratch, you could alternately make a connector that plugs straight into the PSU, but imo sata and molex are easier to disconnect quickly, and since they're standard plugs they'll work with any PSU once they're made
Here's the one I used.
I grabbed both the wide angle and the long range versions of this, Love them. I look at my camera monitors then out the window on a moonless night and it is somewhat freaky to see pitch black out the window but see a black and white daylight brightness level thru the cameras.
Narrow / Long range version
Wide angle / short range version
Power packs
https://www.amazon.com/gp/aw/d/B00Q2E5IXW?psc=1&amp;ref=yo_pop_mb_pd
ALED LIGHT® 12 Volt 3 Amp LED Strip Light Power Adapter, AC to DC, 2.1mm X 5.5mm Plug, Regulated 12v 3a Power Supply Wall Plug for LED Strip Light https://www.amazon.com/dp/B013SSU92Y/ref=cm_sw_r_cp_api_Ex3YxbZRW02H0
I bought this one from reddit recommendation. The cable is really short though, so you may need an extension cord or adapter cable.
I'm using this one for a 'seated setup'(moving one lighthouse), the cord is a little short, but it meets the specs.
if those are the only connections, you don't appear to have any MIDI output. that might be an issue, but i'm not familiar with the software you want to use.
if you'd care to post the make and model of your keyboard, i can try to look up the manual to figure out exactly what power supply you need. if you don't want to do that, then here's what you could try instead:
from the picture, you definitely need a DC power supply with a center positive barrel connector. does it say "DC 9.5V" on there? if so, i (personally) would try a 9V power supply with it. that's 99% sure to be safe, and 98% likely to work.
find something like https://www.amazon.com/ZOZO-Regulated-Switching-Replacement-Electronics/dp/B015PXUHYA/ for your country, and set it to 9V, make sure to read any instructions so that it is definitely center positive when you plug it in, and then give it a go. if it doesn't seem to work within the first 30-60 seconds, don't leave it plugged in.
I have a similar motor shield. you need a power supply. especially if you are running just 3v instead of the 5 for the Arduino.
you need to know the rating of your Servo/ stepper motors and provide the power for that. for example I supplied I think it was around 1.8 amps at 2.2 volts or something for mine.
if I were you I would get something that provides different voltages like a universal like : https://www.amazon.com/Regulated-Switching-Replacement-Household-Electronics/dp/B015PXUHYA/ref=sr_1_1?ie=UTF8&amp;qid=1486910848&amp;sr=8-1&amp;keywords=universal+power+supply
it will make testing and compatible with other project.
This will work as long as the tip fits
ZOZO 12W 3V 4.5V 5V 6V 7.5V 9V 12V Regulated Multi Voltage Switching Replacement Power Universal AC Adapter for Household Electronics Routers Speakers CCTV Cameras Smart Phone USB Charging Devices https://www.amazon.com/dp/B015PXUHYA/ref=cm_sw_r_cp_apa_i_VHDODbZ20QTVC
Just note it is center negative! (Most are center positive, so for
this you need to make sure the tip is set to the - side not the +)
Edit corrected link
Edit, this one too
[Inner Negative] SoulBay 3V 4.5V 5V 6V 7.5V 9V 12V Multi Voltage AC/DC Adapter Switching Replacement Power Supply with 6 Plugs for Household Electronics Tip Negative Effects Pedals Keyboards - 2A Max https://www.amazon.com/dp/B07GVFKKPR/ref=cm_sw_r_cp_apa_i_jJDODbRN4WHE7
Usually called a barrel or coaxial plug. Somewhere on the label or in the manual it should tell you what voltage and amperage you'll need.
Something like this MAY work, but you need to know the voltage and amperage needed first to make sure that replacement cord will be enough.
What game console is it? Someone can generally tell you what you need with that info.
It looks like just a regular AC wall charger. This thing has tons of attachments and one will definitely fit!
ZOZO 12W 3V 4.5V 5V 6V 7.5V 9V 12V Regulated Multi Voltage Switching Replacement Power AC Adapter for Household Electronics Routers Speakers CCTV Cameras Smart Phone USB Charging Devices
https://www.amazon.com/dp/B015PXUHYA/ref=cm_sw_r_cp_api_i_733.Ab75XZ3PX
In technical terms, converter means AC --> DC. Inverters are DC --> AC. Converters can also refer to voltage adjustments like you are saying (AC to AC converter, or DC to DC converter). There's no such thing as an AC to DC inverter, although many people misuse the term.
The little box that you plug between your laptop and the wall is a converter.
I have a little wall wart universal converter that you can flip a little switch the voltages on, like this one.
Just get a 12V power supply instead of trying to drop a 19V power supply down.
I believe that you would need a 3.33Ω resistor that is capable of dissipating 2.1 watts.
The formulas you need are Power (P)= Current (I) Voltage (V) and V = I Resistance (R). I've gotten used to calling them the Russians PIV and VIR
Edit: I agree with the other poster, the relay isn't needed since there is a switch in the system already and the extra battery could be removed. The relay is just an electrically magnetically operated switch
Power supply was a 12V, 2A AC to DC converter like in the link below. An adapter is available for these power units that convert the 2.1mm x 5.5mm plug to two pins that can then be wired for positive and negative leads (the power supply linked below comes with one of these). Each bulb had it's own +/- wire that ran to the center fitting. All six positive wires were spliced into a ring terminal. The same was done for the negatives. Each terminal was then attached to the power supply adapter.
https://www.amazon.com/Adapter-100-240V-Transformers-Switching-Adaptor/dp/B019Q3U72M/ref=sr_1_3?ie=UTF8&amp;qid=1504216169&amp;sr=8-3&amp;keywords=12v+power+supply
Bought this one and love it. https://www.amazon.com/dp/B019IFIJW8/ref=cm_sw_r_cp_apa_bGEozb1N3AR2K
Didn't like this one because it didn't quick charge. https://www.amazon.com/dp/B01J5P98SK/ref=cm_sw_r_cp_apa_.GEozbVDQYKTA
Never heard of this brand. I trust Anker enough to buy a 20k mAh Quick Charge IQ power bank for $50 on Amazon.
Anker PowerCore Speed 20000 QC, Qualcomm Quick Charge 3.0 Portable Charger, Backwards Compatible With Quick Charge 1 & 2, with Power IQ, 20000 mAh Power Bank for Samsung, iPhone, iPad and More https://www.amazon.com/dp/B01J5P98SK/ref=cm_sw_r_cp_api_att4yb5FRPACK
Not a doctor, but I figure that's probably how it works out -- some loss but probably not an inordinate amount.
This was the one, weighs 14oz, about the size of two decks of cards sitting side by side: https://www.amazon.com/gp/aw/d/B01J5P98SK/
Perfect, that's exactly what I was hoping. So if I were to use something like this to supply the power and split it inside the enclosure, that should work right?
This should work for 5m for power, but do you have a controller?
I can tell you from personal experience that the Flirc case is legit! I use it with an OC'ed pi @ 1350\525 and have yet to see temps rise above 60c! The catch is though, instead of using the thermal pad they include with the case, I use a small copper shim with thermal paste on both sides interfacing the soc and case, respectively. It's solid too, not like those cheapy acrylic cases! Plus you won't have to deal with any annoying fan noise!
As far as a ps goes, I use this:
https://www.amazon.com/NorthPada-Raspberry-Supply-Charger-Adapter/dp/B01N336XEU/ref=sr_1_1?s=electronics&amp;ie=UTF8&amp;qid=1510362231&amp;sr=1-1&amp;keywords=raspberry+pi+power+supply+3a
Edit:
To answer you original question: No, using a 2.5a ps with an OC'ed pi will either work or it won't be able to supply enough juice causing oddities or crashes... it will not "burnout the components" as the pi has a polyfuse so you will pop that before anything else.
if your like me and your constantly adding /removing changing games whatever , this is a must
https://www.amazon.com/NorthPada-Raspberry-Supply-Charger-Adapter/dp/B01N336XEU
Purchase guide? You mean like a list of stuff you need?
You need the bare board, like this, not saying buy this one because the price is a bit high, but just the board like this will suffice. I don't see any reason to get the B+ that just came out, but if it's the same price as a B go ahead. Microcenter has Pi3 B on sale right now for $30. Arrow Electronic often has them for $25-$30 and free overnight shipping on orders over $25.
You need a power supply. A lot of people use phone chargers and that works, but they may not give you a real 2.5a which can lead to more heat and throttling under load. Not sure if that's a problem with Octoprint - I think the bottleneck that limits Octopring performance is elsewhere. I have used this brand of dedicated power supply on several Pi builds and never had a problem. 3a in higher than most chargers. But I normally get a version without the in-line power switch - which seems to be gone from Amazon.
And you need a MicroSD card. Class 10 is preferred, but by no means necessary. And the size of SD card you get will be the size of the library of files you can store on the Raspberry Pi. However, the interface for navigating through a large cache of files through the OctoPrint interface isn't so good, so therefor the size of the card you need may really only be 8GB or less as you'll probably delete files off the card once you print them. 8GB is a crap load of GCode files and scrolling down a list of 10 files is annoying, much less 1GB worth, much much less 6+ GB (on an 8GB card).
And you'll want a case, but you might just want to print one rather than buy one. Cases are really a preference thing. For buyable cases I love C4 Labs acrylic cases.
You might want some heat sinks. Every Pi case I've ever bought (like 7 at this point) came with heat sinks. Here's some over priced copper ones. But I have been running my Octopi for three weeks solid, printing 8-12 hours per day, and I don't have any heat sinks on it. I don't think Octoprint really needs heatsinks, but many people will tell you to get them anyway because cheap insurance and all that. The $16 Flirc case acts as a heatsink itself.
There are appropriate power bricks(2.5a+, 5v) that have a power toggle. Something like this: https://www.amazon.com/NorthPada-Raspberry-Supply-Charger-Adapter/dp/B01N336XEU?ref_=fsclp_pl_dp_2
(Havnt used it, I've just seen it around when looking for the 'same thing' you are)
If your not looking to change the case out for one with buttons, like you had mentioned, your options are a shutdown script macro key/'manual' shutdown + something like that or doing something with the gpio pins and a custom switch to have with the existing case, hope it's something to consider sorry if I wasn't much help
This is the switch I bought and works great:
https://www.amazon.com/NorthPada-Raspberry-Supply-Charger-Adapter/dp/B01N336XEU/ref=sr_1_3?ie=UTF8&amp;qid=1498302064&amp;sr=8-3&amp;keywords=power+switch+for+raspberry+pi+3
Would it be possible to cut off the molex end and splice/attach to something of this nature? Or is that less safe or inferior to usb power?
https://www.amazon.com/Berls-Regulated-Transformer-Controller-Connectors/dp/B0745BZV6T/ref=sr_1_1_sspa?s=electronics&amp;ie=UTF8&amp;qid=1521664940&amp;sr=1-1-spons&amp;keywords=5v+power+supply&amp;psc=1
I use an adjustable power supply I got off Amazon. https://www.amazon.com/gp/aw/d/B01N7RS0NG?psc=1&amp;ref=yo_pop_mb_pd_title
https://www.amazon.com/SoulBay-Universal-Switching-Selectable-Electronics/dp/B01N7RS0NG/ref=sr_1_fkmr0_2?ie=UTF8&amp;qid=1506451136&amp;sr=8-2-fkmr0&amp;keywords=ac%2Fdc+power+adapter+12v+27w
This would get you very close, it's slightly under powered. Do you have the specs on what the adapter is powering?
This one would also work, but it could supply too much amperage if the device is shorting or having other electrical issues.
https://www.amazon.com/Adapter-Transformers-Supply-Output-Listed/dp/B00DKSI0S8/ref=sr_1_1?s=electronics&amp;ie=UTF8&amp;qid=1506451264&amp;sr=1-1&amp;keywords=ac%2Fdc+power+adapter+12v+3a
Edit: Either way, you could replace the end with the one from your adapter if they do not fit, assuming you know how to crimp or preferably solder and shrink tube.
I was all ready to post this https://www.amazon.com/SoulBay-Universal-Switching-Selectable-Electronics/dp/B01N7RS0NG/ref=sr_1_2?ie=UTF8&amp;qid=1520274686&amp;sr=8-2&amp;keywords=variable+dc+power+supply&amp;dpID=51UOyUkeeqL&amp;preST=_SY300_QL70_&amp;dpSrc=srch then I saw it says 16V.
People are buying this.
https://www.amazon.com/gp/product/B0745BZV6T/ref=ppx_yo_dt_b_asin_title_o00_s00?ie=UTF8&amp;psc=1&amp;pldnSite=1
No shit. I just received the barebones board today and must have opened about 30 different browser tabs trying to figure out how to power the damn thing *tonight* with what I have on hand (not much, basically a PC power supply with molex connector.) Can't do it.
&#x200B;
Didn't want to leave a bad review for the seller, but for a while there I was SERIOUSLY thinking about just returning it cuz I could feel my blood pressure literally rising and stress getting to be a little too much.
&#x200B;
Ended up ordering a $10 power supply, $7.50 10-pack of ends for the adapter, and a $6 pack of dupont breadboard wires. So all in all ~$23.50 extra expense JUST TO GET POWER (and JACKLEG power, at that!) TO THE BOARD. Because the easier way, the mini breakout board, is out of stock on Amazon until June 6th or something. We'll see if it's worth it. If not, next step is prolly a Jetson Nano.
&#x200B;
GenBasic 80 Piece Male to Male 4 and 8 Inch Solderless Ribbon Dupont-Compatible Jumper Wires for Breadboard Prototyping
Sold by: LoveRPi - $5.99
Chanzon (10 x Female) 12V DC Power Connector 5.5mm x 2.1mm 24V Power Jack Socket for Led Strip CCTV Security Camera Cable Wire Ends 10Pcs Plug Barrel Adapter
Sold by: Chanzon - $7.49
IBERLS AC to DC Regulated Transformer Wall Power Adapter Supply Cord Plug Charger 5V 3A(Compatible with 5V2A) for LED Pixel Light, USB-HUB, Kindle Fire Tablet, DJ Controller, Nextbook
Sold by: IBERLS - $9.99
I would say just buy a switching power supply off the internet for around $15 or less. They usually have all the protection built in and are easy to use.
Here’s a 5V 8A one but you could easily do with 6A.
8 A Power Adapter
Or you could power the strips isolated from each other with smaller supplies like this. (You could still control them with the same data wire)
https://www.amazon.com/ALITOVE-Transformer-Adapter-Converter-Charger/dp/B078RZBL8X?th=1
Why doesn’t anyone use breadboard (Arduino) wires, 3 red and 3 black and put them in a barrel jack that has screw headers? It should be easy to find a high current 5v power supply with a barrel jack.
universal barrel jack
breadboard (Arduino) wires
power supply for reference
I would second the hard drive situation. I would instead maybe subscribe to a Flickr account or something while I am traveling, and upload photos from my ipad/laptop whenever i get internet. I would maybe keep 1 portable ssd (like the Samsung T5 500gb) as its really lightweight, and wouldnt get damaged from being thrown around. Use that for backing up things when I dont have internet.
Are you planning on taking a laptop? If so which one?Because you can actually get multi-port chargers with USB C Power delivery so you can carry one brick for charging. Alternatively, I have seen Anker with USB chargers with built in batteries
I would say take your gopro with you. Especially if you like anything sporty, kayaking, gokarts, zip lining etc. I have had friends who took their gopro and left their dslrs when they go away.
I agree about the multiple lenses, think about taking a multi zoom (the 18-55 F2.8-F4 will be awesome for this) and maybe a fixed prime (I like the 23mm F2 - the 35mm equivalent focal length is really amazing). If you want to travel light, I would skip the telephoto. Also, dont forget the extra batteries.
If you havent gotten the XT1 yet, consider getting the Olympus EM5ii second hand with the 14-150mm or the newer 12-200mm lens. You will not need anything else, in rains, storms, snow, deserts or anywhere.
I would say pack a GOOD rain jacket. You are traveling to SE Asian counties, rain is going to be very common. You want to make sure you have a good rain jacket. I would say if you can get a back that includes a rain cover, its a good idea. There is nothing as bad as getting somewhere and finding everything in your bag is drenched. On a trip to europe, I was hauling my bags in the rain from a train station to the hostel and my things in the bag did get a little wet.
Did you consider the Peak Design travel pack? Or the Topo designs travel bag? They are also good alternatives if you were still undecided on the travel pack.
Instead of the sweater, get an Icebreaker base layer (something like the 260 is good). You can wear this inside your tshirt and it keeps you warm AF. I am wearing the Icebreaker 200 bottoms as I type. Some of the best in the world.
The issue may not be the voltage or amperage, but transient variations that drop below or above those required by the Atomic Pi.
That PSU has been reported by at least one other user to have caused problems and I had two regular 500W computer PSUs do the same. You have a couple of options: try another Atomic Pi with that PSU OR try another PSU with your current Atomic Pi. I gave up on two expensive PSU's for a cheap ($9 USD ~ https://www.amazon.com/gp/product/B01N4HYWAM/ref=ppx_yo_dt_b_asin_title_o03_s00?ie=UTF8&amp;psc=1) on all 4 of my Kuri boards with a small power board ($7 USD ~ https://www.amazon.com/Breakout-Adapter-2-5mm-Barrel-Supply/dp/B07RPQN1Z7/ref=sr_1_9?)
TL;DR -- However, personally I use a with a "Filtered" small power board (after several power supply problems) ~ (https://www.reddit.com/r/Atomic_Pi/comments/cmy6ix/another_power_board_design/) that uses a Torroid Coil, fuse, protective diode, and 2 capacitors. Since using the latter board, I have had no issues with any of my 4 boards for months.
Try something like this https://www.amazon.com/SoulBay-Universal-Switching-Selectable-Electronics/dp/B01N7RS0NG/ref=pd_sbs_421_1?_encoding=UTF8&amp;amp;pd_rd_i=B01N7RS0NG&amp;amp;pd_rd_r=Z7S0FB64TPV36BEEEMW7&amp;amp;pd_rd_w=I88Fv&amp;amp;pd_rd_wg=fMZ8r&amp;amp;psc=1&amp;amp;refRID=Z7S0FB64TPV36BEEEMW7&amp;amp;dpID=51UOyUkeeqL&amp;amp;preST=_SY300_QL70_&amp;amp;dpSrc=detail
Or just look at old unused power blocks for other electronics to find one that is 12v and minimum 1.8 amp output, the amps could be higher and stilll work but has to b 12v
https://www.amazon.com/SoulBay-Universal-Switching-Selectable-Electronics/dp/B01N7RS0NG/ref=mp_s_a_1_1?ie=UTF8&amp;qid=1541990342&amp;sr=8-1&amp;pi=AC_SX236_SY340_QL65&amp;keywords=variable+voltage+acdc+adapter
This will do, providing your elliptical takes one of the included tips. Set it to 9v and you're good to go.
Haven't seen or touched this model, but this is the site you found yourself, probably
Doesn't say anything about being a smart charger and the specs say:
>Output 29.4V 1.0A
So most likely an 30V 1A charger will work. Only question that remains is what plug it has. I guess it's a standard 4mm?
Anyway, P = V*I, so a 30W universal charger should probably also work. Something like this.
All that's left then is to figure out which pole should be positive and which negative (screw that up and it will probably short out either the board or the adapter or both). It's probably positive inside and negative outside, but any Blink lite owner with an adapter could verify that for you with a multimeter.
https://www.amazon.com/gp/aw/d/B01N336XEU/ref=yo_ii_img?ie=UTF8&amp;psc=1
https://www.amazon.com/gp/aw/d/B078RZBL8X/ref=mp_s_a_1_1?ie=UTF8&amp;qid=1525901106&amp;sr=8-1-spons&amp;pi=AC_SX236_SY340_QL65&amp;keywords=5v+8a+power+supply&amp;psc=1
This. I figured if each servo is drawing a max of 1A, then 8A should be enough
I recently purchased an Atomic Pi with the original breakout board which has a Molex connector. I bought a power charger and an adapter which I thought would work with the board but plugging the 2 of them in does not seem to power on the board. Am I missing something here?
I'm working on an arcade1up mod using linux mint and retropie on the "Atomic Pi" x86 sbc ($40).
https://photos.app.goo.gl/DQnRKGDkdztzrmHTA
It's not easy playing with one hand :)
&#x200B;
Atomic Pi SBC https://www.amazon.com/Atomic-Pi-High-Speed-Peripheral/dp/B07N298F2B
Breakout Board (small) https://www.amazon.com/Breakout-Adapter-2-5mm-Barrel-Supply/dp/B07RPQN1Z7/
Power Adapter https://www.amazon.com/SMAKN-Switching-Supply-Adapter-100-240/dp/B01N4HYWAM/
Arcade1up Killer Instinct Graphics kit https://www.escapepodonline.com/collections/arcade1up/products/arcade1up-killer-instinct-complete-art-kit
optional* Arcade1up Street Fighter control deck https://arcade1up.com/collections/control-decks/products/street-fighter-control-deck
note* lcd controller, joysticks, buttons, audio amplifier can be used from other retropie/arcade1up guides.
How would this work out?
LEDs
Controller
PSU
I use a 5V 8A brick with a USB adapter.
https://www.amazon.com/dp/B078RZBL8X/ref=cm_sw_r_cp_apa_i_jhT4CbEGWSWDQ
https://www.amazon.com/dp/B01GQFVMBI/ref=cm_sw_r_cp_apa_i_pjT4CbQAAKZFM
I have not used those specific ones (I looked at the specs, should be fine), but yes, $18 for 5 is a very good deal!
As far as LED strip those are the ones I got:
30 LED / METER:
https://www.amazon.com/Aclorol-Individually-Addressable-Programmable-Non-Waterproof/dp/B07BGSZLGX/ref=sr_1_6?crid=2ANNEXM84Q95&keywords=ws2812b+led+strip&qid=1563212133&s=hi&sprefix=ws2812%2Ctools%2C144&sr=1-6
60 LED / METER
https://www.amazon.com/Aclorol-Individually-Addressable-Programmable-Non-waterproof/dp/B07BH37JGC/ref=sr_1_4?crid=36ERKIO6X2IRZ&keywords=ws2812b+led+strip+60%2Fm&qid=1563212170&s=hi&sprefix=ws2812b+led+strip+60%2Ctools%2C141&sr=1-4
(you do not always need 60 LEDs per meter!!)
&#x200B;
Power Adapters:
4A:
https://www.amazon.com/gp/product/B01N4HYWAM/ref=ppx_yo_dt_b_search_asin_title?ie=UTF8&psc=1
&#x200B;
2A:
https://www.amazon.com/gp/product/B0777HWN87/ref=ppx_yo_dt_b_search_asin_title?ie=UTF8&psc=1
&#x200B;
And to keep it all clean:
https://www.amazon.com/gp/product/B06XNR1ZVL/ref=ppx_yo_dt_b_search_asin_title?ie=UTF8&psc=1
&#x200B;
I pulled all those from my Amazon orders! Hope it helps.
Thanks, I've seen this one and their shipping is like another 12, do you think a 5v/4a will suffice? Is there harm in trying it? like it will screw up my system?
This is the one I already ordered but I can send it back:
https://www.amazon.com/dp/B01N4HYWAM/ref=ox_ya_os_product
Is it a bad choice?
Get the NorthPada. It is capable of supply 3A, which will easily handle overclocking and any peripherals, and also has an on/off switch so you don't have to keep pulling out the cable. The on/off switch is must have after you use it.
You mean this one? I was just considering buying it myself.
Satechi Dual Usb-C
I bring this to charge my laptop and headphones/phone as theyre all usb c
It's weird, I got a very similar 5V/3A switch cable to yours and it works like a charm - the USB one I used before was giving the lightning bolt symbol all the time, but this one hasn't so much as blinked even after overclocking. It makes me wonder if the problem is with the USB connection to the power block?
I'm using with my 15" MBP - Satechi 75W Dual Type-C PD, and it's amazing.
https://www.amazon.com/Satechi-Type-C-Travel-Charger-Adapter/dp/B07M97XGNZ/
&#x200B;
Photos : https://imgur.com/a/xs9njGk
&#x200B;
This one is also the option : https://www.amazon.com/dp/B07DJC7J5X
But it is way to big.
I just bought this on Amazon:
NorthPada Raspberry Pi 3 Model B B+ A+ Plus Power Supply Charger AC Adapter 5V 3A PSU Micro USB 5 Feet with Power On/Off Switch (1 X Power Supply) https://www.amazon.com/dp/B01N336XEU/ref=cm_sw_r_cp_apa_i_l6hYDb3DGMMPR
I hope it will suit my needs without power issues since it had an on/off switch.
I just bought this - USB C Wall Charger 4-Port, with... https://www.amazon.com/dp/B07Y8H3NB1?ref=ppx_pop_mob_ap_share and was also considering this one Satechi 75W Dual Type-C PD Travel Charger Adapter with 2 USB-C PD & 2 USB 3.0 - Compatible with 2018 MacBook Air, 2018 MacBook Pro, 2018 iPad Pro, iPhone Xs Max/XS/XR and More (USA) https://www.amazon.com/dp/B07M97XGNZ/ref=cm_sw_r_cp_api_i_aHz3DbPT46BQS. I’ve been using mine all week to charge my MacBook Air, IPhone 11 Pro Max and Apple Watch
I have this Satechi. One USB C port outputs 60W, the other 18W, and it has 2 USB A ports on it. I'm very happy with mine, as it can serve as my sole charger on the road.
9V with the center pin negative. They sell universal DC adapters with different connectors on them. You'd need to measure the diameter with some calipers to get the exact one.
OK. Well, a real variable power supply will be very expensive. If you want to save money you would be better off buying a new supply every time you need a different voltage. If you want you could buy several in one package.
The reason for this is simply economics of scale. Millions of people will need a 10V power supply, so they are dirt cheap. Only a couple people need a variable supply, so even though it would be pretty cheap to make a million of them no one will do it since they can't sell a million of them.
If you ask a question, and someone answers it correctly, reply with a thank you, but include this checkmark: ✓ ( or if you cannot enter Unicode, use
!checkinstead )This will score the user whose comment you replied to a 'point'. Currently the points will unlock special flair that will show in all Daily Simple Questions threads.
NOTE: The confirmation message has been removed. The points are still granted, PCMRBot will no longer reply.
In case you missed it, click here for yesterday's Daily Simple Questions thread.
There may be some questions still unanswered! Below are a selection of questions with no replies. See if you can help them out.
If you don't want to see this comment click the little [-] to the left of my username to collapse this comment.
----
> So I have this harddrive enclosure, but I'm missing the power cable. On newegg the specifications are "Dual 12V & 5V DC Adaptor". However, I'm not sure what exactly I need to achieve that. Will a universal power cable work? For example: https://www.amazon.com/SoulBay-Universal-Switching-Selectable-Electronics/dp/B01N7RS0NG/ref=sr_1_3?ie=UTF8&amp;qid=1501625510&amp;sr=8-3&amp;keywords=12V+%26+5V+DC+power+supply
/r/pcmasterrace/comments/6qwgrw/daily_simple_questions_thread_aug_01_2017/dl17ooz
----
> I use auto replay mode, so i can automatically save something i did, but how i can turn off the push to talk mode so it would be continious?
/r/pcmasterrace/comments/6qwgrw/daily_simple_questions_thread_aug_01_2017/dl19m1a
----
> In shadowplay I use auto replay mode, so i can automatically save something i did, but how i can turn off the push to talk mode so it would be continious?
/r/pcmasterrace/comments/6qwgrw/daily_simple_questions_thread_aug_01_2017/dl19mp0
----
> Hi. I am attempting to build the Annihilator from last week, using an i5 and an ASUS TUF Z270 Mark 2.
>
> I got it up and running. While waiting for the graphics card to arrive, I tried to get an older GTX 970 running. It wasn't recognized by the system in BIOS or Windows.
>
> I tried to update the BIOS. This is where it all went to hell. I chose the most recent BIOS. The process started. I left the room. When I came back, the PC was off. When I turned it on, nothing. Blank screen.
>
> The ASUS TUF Z270 Mark 2 has something called Crash Free BIOS 3, where you insert the driver disc or a USB formatted to FAT32 with a previous BIOS. I tried both of these options and nothing. (There is a BD-ROM drive, and it accepts the disc and does something to it, but nothing happens). I tried several USB ports with the USB BIOS and nothing.
>
> I sent tech support to ASUS and they gave me back a useless answer that really didn't address what I said about the problem above.
>
> What can I do here? Any help is appreciated.
/r/pcmasterrace/comments/6qwgrw/daily_simple_questions_thread_aug_01_2017/dl1db56
----
> Is 1920-1950 MHz a good clock speed for a GTX 1080?
/r/pcmasterrace/comments/6qwgrw/daily_simple_questions_thread_aug_01_2017/dl1e7t9
----
> hey everyone, looking for some suggestions for a external hardrive or sdd to connect to my phone. Main purpose is for putting anime,tv shows and movies on it to use with my phone when on long flights and traveling. Has to be small for carrying purposes and in Canadian currency please. Thanks!
/r/pcmasterrace/comments/6qwgrw/daily_simple_questions_thread_aug_01_2017/dl1ic86
----
> How do you guys play games when you don't have anything in the desktop? Taskbar? Search bar? Rainmeter?
>
> And can you tell me how to take the stuff in the desktop?
>
> It does reduce lag right?
>
> Sorry for the stupid question I'm just really curious
/r/pcmasterrace/comments/6qwgrw/daily_simple_questions_thread_aug_01_2017/dl1nglh
----
> Should I get the 1080 ti rog strix or the oc edition? I don't know the performance difference, anyone help?
/r/pcmasterrace/comments/6qwgrw/daily_simple_questions_thread_aug_01_2017/dl1o9ly
----
> Which is the difference between the ASUS GTX 1070 DUAL and the ASUS GTX 1070 ROG? Is it just the extra fan?
/r/pcmasterrace/comments/6qwgrw/daily_simple_questions_thread_aug_01_2017/dl26fn6
----
User | Points
-----|-------
badillin | 432
Sayakai | 285
Luminaria19 | 213
thatgermanperson | 155
motionglitch | 155
saldytuwas | 118
rehpotsirhc123 | 97
095179005 | 92
thecolonelofk | 90
glowinghamster45 | 73
----
I am a bot - This action was done automatically. Please direct any questions or concerns ( or bug reports ) to \/u\/eegras - About /u/PCMRBot
So I have this harddrive enclosure, but I'm missing the power cable. On newegg the specifications are "Dual 12V & 5V DC Adaptor". However, I'm not sure what exactly I need to achieve that. Will a universal power cable work? For example: https://www.amazon.com/SoulBay-Universal-Switching-Selectable-Electronics/dp/B01N7RS0NG/ref=sr_1_3?ie=UTF8&amp;qid=1501625510&amp;sr=8-3&amp;keywords=12V+%26+5V+DC+power+supply
I know Amazon sells universal charging cords with interchangeable plugs. I'm sure as long as it's a common plug you'll find it in the set of plugs they give you with something like this https://www.amazon.com/SoulBay-Universal-Switching-Selectable-Electronics/dp/B01N7RS0NG/ref=mp_s_a_1_4?keywords=universal+charger&amp;qid=1574025475&amp;sprefix=universal+cha&amp;sr=8-4
Just check the specs that should be listed on the brick of your existing charging cord to make sure you properly set the voltage on a universal one like I showed as they have an adjustable voltage.
Set this to 5V and use the plug that fits, call it a day.
https://www.amazon.com/SoulBay-Universal-Switching-Selectable-Electronics/dp/B01N7RS0NG
Edit: If none of the plugs fit, cut and strip the wires from the molex and use the terminal adapter. Top one pictured, green with screws. Make sure you know the polarity, a pin out of the Molex connector will help.
A 5v 1amp phone charger with a barrel connector is probably all it was. Since it's for a couch, distance will drop your output. Something like this will work: https://www.amazon.com/dp/B0745BZV6T/
To control more servos, servo driver such as the one from Adafruit is the best solution. Certainly not a motor driver. This also simplifies power supply: it already has screw terminals for a separate power supply, so you wouldn't need to solder your own board (not that it is difficult, of course...).
&#x200B;
I'd suggest getting a beefier power supply. Every servo which is plugged in draws some power, even when holding still. I'd get at least 3A - it doesn't cost much, and helps avoid problems.
What you are looking for is a universal wall charger, like this ONE.
I have buttons very similar to this. Mine only came with the red and black wires. I had to order these: https://www.amazon.com/gp/product/B075VYG9GT/ref=oh_aui_detailpage_o02_s00?ie=UTF8&amp;psc=1 and this power supply https://www.amazon.com/gp/product/B0745BZV6T/ref=oh_aui_detailpage_o03_s00?ie=UTF8&amp;psc=1 and hook them up to my buttons. Worked out good though. here is a pic: https://imgur.com/H2s5KFe
Oh nice! Something like this?
I should have known products like this would be out there.
raspberry pi 3, SATA add-on board, 120g SSD, 5v 4a power brick, nice case.
add-on board:
https://www.amazon.com/gp/product/B073CGQD9C/ref=ppx_yo_dt_b_asin_title_o03_s01?ie=UTF8&amp;psc=1
ssd:
https://www.amazon.com/Patriot-Memory-Burst-120GB-Internal/dp/B07574MTR4/ref=sr_1_1?keywords=120gb+ssd+patriot&amp;qid=1554437313&amp;s=gateway&amp;sr=8-1
power:
https://www.amazon.com/gp/product/B01N4HYWAM/ref=ppx_yo_dt_b_asin_title_o01_s00?ie=UTF8&amp;psc=1
case:
https://www.amazon.com/gp/product/B07GRZRW7J/ref=ppx_yo_dt_b_asin_title_o00_s00?ie=UTF8&amp;psc=1
Found it, looks good! I guess including "barrel" in my search earlier didn't help me. Doesn't say if it's UL listed or anything though.
Amazon has a Prime-able supply for $9 here that looks like it would fit the 2.5mm jack on the breakout board.
&#x200B;
I don't have the breakout, and had some 2.1mm jacks lying around, so ended up ordering a 5A, 2.1mm supply for $14 that came with an inline jack from Amazon here.
I would go higher than 2.5a
I have had zero issues with this
SMAKN DC 5V/4A 20W Switching... https://www.amazon.com/dp/B01N4HYWAM?ref=ppx_pop_mob_ap_share
Obviously, wrong prongs but at that price + an adapter may be cheaper ?
Sure, typed a long explanation along with pictures at the end.
I powered the hard drive using its own separate power source through a AC molex power adapter. The PS4 when turned off actually powers off the HDD which is great even tho it isn't on the same power source.
Coolerguys 100-240v AC to 12 & 5v DC 4pin Molex 2A Power Adapter https://www.amazon.com/dp/B000MGG6SC/ref=cm_sw_r_other_apa_dpJKxbZ5GQ24E
Since HDDs use SATA as their power port, I got a cable adapter to hook it up to the power.
StarTech.com SATAPOWADAPR 6-Inch 4 Pin Molex to Right Angle SATA Power Cable Adapter https://www.amazon.com/dp/B0047AAM1Q/ref=cm_sw_r_other_apa_qpJKxb0Q0PSJ4
I needed to find a 15 pin female connector without the sata part for the data part of the HDD (since the PS4 hooks the HDD with a 22 pin connector. Decided to get a splitter type cable and just shove the sata cable inside the space that the 2.5" HDD goes. Fit perfectly in.
SATA 22 Pin Male to SATA 7 Pin and 15 Pin Female https://www.amazon.com/dp/B00C9NEY0S/ref=cm_sw_r_other_apa_6nJKxb4JA00CY
Lastly, I needed a very good yet relatively cheap HDD. Decided to go with this one because of its high cache which acts like a SSD in the sense that the cache is flash memory aka SSD speeds. 4 TB meant I'll never have to upgrade ever again (I install everything without worrying about space, even games I don't play, and still have ~2.4 TB left. That's a lot!). Enterprise drive gave it high read/write speeds which I was happy about.
Seagate 4TB Enterprise Capacity HDD 7200RPM SATA 6Gbps 128 MB Cache Internal Bare Drive (ST4000NM0033) https://www.amazon.com/dp/B00A45JEX0/ref=cm_sw_r_other_apa_xmJKxb01NC516
I've bought these back in August of 2015. I have had no major problems by running my PS4 this way however there's two things that I find as cons. The splitter for the 22 pin cable is fairly short in length so the HDD can only sit so far. I haven't looked into a extension type cable as I don't mind it for my setup but I think it's good to mention that.
The other con is that IF your console freezes, crashes, etc. and you need to either unplug the console or shutdown through button, you may need to reset your connections. By that I mean, turn off PS4, then unplug power and data cable, wait 2 seconds, plug back in power and data cable to HDD, and reconnect the PS4 and boot it. It will either start up right away or you have to wait roughly 3 minutes for it to do the "Checking system" because you did a hard shut down. It's happened to me enough times that I know no data will be corrupted by this and you shouldn't worry. I leave my HDD out in the open but you can enclose it if you'd like so long as you give it breathing room and don't block any holes on it.
Phew... What a long reply through my phone 🙂. And... pictures: http://imgur.com/a/tpQCo
That looks exactly what I am looking for.Now to see if I can find it on a website like Amazon or Newegg
Found it: https://www.amazon.com/Coolerguys-100-240v-Molex-Power-Adapter/dp/B000MGG6SC/ref=sr_1_fkmr2_2?keywords=AC+4+PIN+MOLEX+coolerguys&qid=1566142941&s=gateway&sr=8-2-fkmr2
Now that I am reading this, this isn't going to be short on the power output is it? I have this: https://www.ekwb.com/shop/ek-xres-140-revo-d5-rgb-pwm-incl-sl-pump
I ask because I hear the W_Pump+ header is a 3A header for DDC pumps, and this thing is saying "Up to 2A".
Its also not the same model as the one you linked. So I can keep looking.
This is amazing - the best part is I have almost all of the pieces just lying around!
One note: for a little more money ($15), you can get a 110V AC to 12V DC 4-pin molex adapter, which basically gives you a power plug just like the ones coming off of a PC power supply. With a 4-pin to 3-pin adapter to connect to the potentiometer (many fans will even come with these) you could actually do this without any splicing any wiring at all. This is what I plan to do as I have one of these power supplies just sitting around from a past project.
Example power supply
I have one of these. It works great. I used it to power a fan.
http://www.amazon.com/Coolerguys-100-240v-Molex-Power-Adapter/dp/B000MGG6SC
Are they Molex (IDE HDD connector), or small 3 or 4 pin fan connector? For Molex fans/to use with HDDs when needed, I always keep one of these handy - http://www.amazon.com/110v-4pin-molex-Power-Adapter/dp/B000MGG6SC/ref=sr_1_1?ie=UTF8&amp;qid=1313010817&amp;sr=8-1
https://smile.amazon.com/Coolerguys-100-240v-Molex-Power-Adapter/dp/B000MGG6SC/ref=sr_1_1?s=instant-video&amp;ie=UTF8&amp;qid=1474472909&amp;sr=8-1&amp;keywords=usb+molex+power+supply
If the drive is IDE
I have one of these so I don't have to unplug everything from my PSU
Here you are:
https://www.amazon.com/Coolerguys-100-240v-Molex-Power-Adapter/dp/B000MGG6SC/
You might need another adaptor to connect that to your fan. Something like this:
https://www.amazon.com/ModTek-4-Pin-Molex-Connector-Connection/dp/B00MYA3A4C/
Sure thing! This is what I'm using.
I found this, which you can then get a molex splitter for if the fans can't be daisy chained.
Galvanic corrosion will be an issue any time the two metals are connected by something conductive. In this case, water. Even distilled or DI water - it'll snap ions out of the metals in a heartbeat and instantly become conductive again.
Also, that water block you linked is said to be copper in the title, and then aluminum in the description.
If you could get the 10mm thick block to work, that'd be your best bet. Or you could just build a 100% aluminum loop; it won't perform as well as copper but it'll still be fine for your purposes.
As for the power supply, the one you linked might work but it looks a bit sketchy since it doesn't have an output amperage rating. I've got one of these which is rated for 2A on the 12V; that'll be enough for a good pump and a few fans.
Okay, so the Walmart AC adapter is only 500mA. So that's not happening.
On amazon I found this 5A adapter and this 2A adapter.
Combined with this splitter, would these be a good solution? Is it possible to have too many amps and destroy the pump and fan?
I found a solution without having to do any DIY:
Coolerguys 100-240v AC to 12 & 5v DC 4pin Molex 2A Power Adapter + Phobya Adapter Cable, 4-Pin Molex to 4-Pin (PWM), 30cm, Sleeved, Black
Thank you for your advice though. I really hope it will have enough pull to work for me for this purpose.
That depends on which enclosure you have, can you maybe send a link or some example of your encloure? Then i can help you with the power adaptor.
Normally you only need a 12V/2A adaptor for hard drive enclosures, but some take 12V and 5V like yours seems to do, which is slightly unusal.
It could also have a molex plug, if it should really need both voltages, then you can buy something like this: clicky
Well, I think I've answered all my own questions, but I'd love some confirmation.
https://www.amazon.com/Coolerguys-100-240v-Molex-Power-Adapter/dp/B000MGG6SC
plus
https://www.amazon.com/Cable-Matters-2-Pack-3-Fan-Splitter/dp/B01DV1Z0WC/ref=sr_1_6?s=electronics&amp;ie=UTF8&amp;qid=1504181073&amp;sr=1-6&amp;keywords=case+fan+molex
plus 2 of
https://www.newegg.com/Product/Product.aspx?Item=N82E16835200067
Will that all work how I want it to? At 180 CFM, I sure hope it does.
Male molex to male fan adapter should work, and there are also ac to molex power supplies.
https://www.ebay.com/itm/3-Pin-4-Pin-Molex-Male-To-4x-PWM-Male-Sleeved-Fan-Extension-Adapter-Cable-/322899310386
https://www.amazon.com/Coolerguys-100-240v-Molex-Power-Adapter/dp/B000MGG6SC
These are just an example. I didn't look too hard, so you might be able to find better prices or quality, but those together should power it without being hooked up to a psu or motherboard.
the rosewill is something I've considered (similar products)
I was looking more at a getting a single molex and getting a molex to 6 pin for each unit. The 6 pin pcie is the only thing powering the unit. That requires me buying two single molex power supplies and two molex to 6 pin adapters which just seems redundant if theres something out there that can have two molex and that's it or two 6 pin and that is.
heres what i planned to do:
(2)http://www.amazon.com/gp/product/B000JIGJR6/ref=ox_sc_act_title_1?ie=UTF8&amp;psc=1&amp;smid=A3IDT9F5A1GWX6
(2)http://www.amazon.com/gp/product/B000MGG6SC/ref=ox_sc_act_title_2?ie=UTF8&amp;psc=1&amp;smid=A1KINLM6A40SW
using a molex to 4 pin pwm splitter: https://www.amazon.com/gp/product/B071KNT7FW/ref=oh_aui_detailpage_o06_s00?ie=UTF8&psc=1
and an ac to molex psu: https://www.amazon.com/gp/product/B000MGG6SC/ref=oh_aui_detailpage_o04_s00?ie=UTF8&psc=1
You can control them using pwm from a motherboard header based on temp (orange header), but I just run them full blast, since they don't make any noticeable noise
This if i was to buy it would it work too?
Probably, but the trouble with so-called "barrel" connectors is they come in at least 3 or 4 sizes. It's hard to tell from a picture whether a particular power adapter will fit your device.
EDIT: Though, you could buy a universal adapter and set the switch to 12V.
OK, then a good solution is to go ahead and wire it up using an adjustable power supply as this redditor suggests.
All of those pieces are needed for reliability and safety. The solution I just linked above includes those pieces in the plug.
Yes, I thought it might be complicated. Do you suppose it was custom-made, or is that just how they rolled in the '90s? You've spent a lot of time on this already, so I'm thinking it might be easier to go with the universal power supply option. Does this one look like a good bet to you?
Holy cow man, thank you! You've been of so much help! So would something like this do the trick? I just searched Universal Power Supply on Amazon. http://www.amazon.com/Hosa-Cable-ACD477-Universal-Supply/dp/B000Z31G3M/ref=sr_1_2?ie=UTF8&amp;qid=1369441643&amp;sr=8-2&amp;keywords=universal+power+supply
Go to Goodwill. And find a power pack. One of the black boxes that plug into the wall. Check the lable for 9volt dc. Or you can buy new......... Check this out: D'Addario Accessories PW-CT-9V DC Power Adapter - Minimize Need ... https://www.amazon.com/dp/B00191WVF6/ref=cm_sw_r_sms_awdb_t1_RdtjDb0KAYQ36
Most power adapters marketed for guitar pedals are regulated. I haven't seen a pedal that requires an unregulated adapter in years. the last unregulated pedal I bought was a big box EHX holy grail 14 years ago. Any power supply that says it is compatible with a boss PSA adapter will be regulated. also be careful. some of the PSU boxes have unregulated outputs to accommodate those older boss and EHX pedals. But here are some options that I know for certain are regulated and will work. http://www.amazon.com/gp/aw/d/B00191WVF6/ , http://www.amazon.com/gp/aw/d/B0002GZLZQ/ , http://www.amazon.com/BOSS-Audio-PSA-120S-Power-Adapter/dp/B0012BPMHW
alright, last question, will this fit into it (the one i bought doesnt have the power supply) https://www.amazon.com/Planet-Waves-9V-Power-Adapter/dp/B00191WVF6
If size is your primary concern, check out something like the Kikkerland UL03-A Universal Travel Adapter, which I own. While it is small and works in most countries in the world, I find plugging in something heavy like a Mac adapter into it tends to pull it out of the outlet.
TooManyAdapters recommends the Flight 001 4-In-1 Adapter. While on the expensive side, they say it fits snugly into all the outlets they tested.
You're not getting a smaller profile.
This + this = less space than this.
I'm heading out to SEA in a few days, and now I am ready to go. Thoughts always appreciated. I included links to all my gear.
Bags
Clothes
Shirts
Pants
Underwear/Socks
Footwear
Other
Other Items
Electronics
Essentials
Toiletries
8.1 Kilograms so I can always toss on a layer to get it lower for carry-on.
This is what I use and I have never had a problem. It works in the recessed outlets that Europe seems to favor better than the large bricks that others have recommended on this thread.
https://www.amazon.com/gp/product/B00210MRGC/ref=oh_aui_search_detailpage?ie=UTF8&amp;psc=1
So, the good news is that you're overthinking it a bit. That adapter takes 110v from the wall and outputs 12v and up to 50 watts. Something like this or this should solve your issue, you just need to make sure what the size of the barrel connector for the output is.
https://www.amazon.com/dp/B003TUMDWG/ref=cm_sw_r_cp_apa_i_c8ivDbB8AP6VT
Okay this is the one that Amazon said is "frequently bought" with the IH module and it says 6 A, do you think it would be adequate or should I just get a 10 A? Im trying to keep the build as inexpensive as possible
I have a simple cheap setup that i use for VR flight and racing sims. It provides a nice rumble, granted it's not as precise as something like simvibe but it gets the job done.
i have the following hardware:
Then i just use voicemeeter banana to sort out the audio. - https://www.vb-audio.com/Voicemeeter/banana.htm
I take the headphone/soundcard audio + VR HMD audio and route it to the voicemeeter virtual VAIO device, and make that the default audio device in windows. Also, I limit the bass frequencies on the output that goes to the amp/shakers using Voicemeeter EQ.
Yes, that will work, but this is cheaper:
http://www.amazon.com/dp/B003TUMDWG/
I don't sell those plug adapters.
I have not used the power supply and consider you likely need more amps.
Another option are the LP168S amps I use in my lounge, they have 2x40w bass output: https://www.ebay.com/itm/LP168S-Car-Amplifier-Audio-Stereo-2-1-HiFi-Channel-2x40W-Sub-Output-Super-Bass-/301943399029?rmvSB=true
And take a common 12V power convertor like this, you may even have some of these around as they are common for many 12V devices: https://www.amazon.com/Kastar-Adapter-Monitor-Wireless-Security/dp/B003TUMDWG/ref=pd_bxgy_23_img_3/147-8395938-1729948?_encoding=UTF8&amp;psc=1&amp;refRID=JXD0AG6CA2S5NEDJ0X9V&amp;dpID=51GD35m3vPL&amp;preST=_SY300_QL70_&amp;dpSrc=detail
This is what I ordered: 12v 6a Adapter Power Supply for LCD Monitor with Power Cord by LCD AC Power Adapter
http://www.amazon.com/dp/B003TUMDWG/ref=cm_sw_r_udp_awd_Hn2ptb15C8T5B
That's what I got.
So I've also just noticed that my DC -> AC adapater does not have a ground prong, and looks like this. It's now leading me to believe this could be causing me some serious power problems. I am thinking to purchase something like this instead. Do you think that has any protection from voltage drop?
Finding a good one plug & play will be more difficult.
Here is a 6 amp one. you could try.
Is this a Lepai add on or just any old 6amp power supply like this? Sorry if that's a dumb question, just want to make sure I get it right. I appreciate the help.
You'll also need:
I've linked some budget options for each.
I used this power supply with my DIY build and I've had no issues: https://www.amazon.com/dp/B003TUMDWG/ref=cm_sw_r_cp_apa_i_W32HDbPN1BR2V
With that said, I'm using a MOSFET board controlled by a momentary button, so the load on mine at the PSU may be different.
4 of these - you could use cardboard to save more money - $32
1 of these - $5
1 of these - $22
1 of these - $8
Optional: $10 PWM controller for the blower.
So under $50 with cardboard, a bit over $50 with acrylic.
Power supply seems a bit weak. Why don’t you get a 6A power supply? https://www.amazon.com/dp/B003TUMDWG?ref=ppx_pop_mob_ap_share
One last question, what does it mean when it says 5A stall? What's stall? The power supplies I found seemed too big for such a small motor. From what I know, the voltage has to be the same (12v) but the A can be bigger than required without going under. Thanks a lot for your help!
edit: this is one I found: http://www.amazon.com/Adapter-Power-Supply-LCD-Monitor/dp/B003TUMDWG/ref=sr_1_5?ie=UTF8&amp;qid=1421305179&amp;sr=8-5&amp;keywords=12v+5A
Depending on the solenoid it'll probably take more current than a normal 9V battery can provide.
If it doesn't need to be portable, there's plenty of options for cheap 12v power supplies.
If it's going in a car you'll want to just run the wires from the battery.
If for some reason you need it to be portable and don't want to plug it in you're going to need a decent sized battery. If it's a small enough solenoid (i.e. an amp or two max) you could get a battery holder. There's also plenty of 12V RC batteries.
A bass port is the same as a vented enclosure. the 4.5khz crossover will work. D class amps are industry standard for any sound amplification work. Literally everywhere where power, volume, or price is an issue, people use D class. T class aren't as powerful, and AB aren't efficient enough for battery operation.
As far as a battery, this one has 18ah way more than you need but should allow you to run it for quite some time. Or you could go with the 7ah version it won't last as long but it is smaller, and it is about 1/4 of the weight. Any 12V power supply will work to charge it as long as you put a power switch somewhere between the battery and the amp when you wire it. If you are not comfortable/don't have the tools to splice the power cable correctly, don't do it. Blowing up gear, possibly causing fires, and/or electrical shock is not worth it. It's really easy to do, but if you screw it up, it can be disastrous.
I'm actually intrigued to see how this turns out, on paper it should have an output comparable to that of a commercial loudspeaker in a much smaller package, with the added bonus of being battery powered.
Appreciate the info! That’s what I’m struggling with. The guide mentioned 5a for first builds, but if I’m better off with 6a and going the MOSFET route, I’d rather know now. On that subject, what do you think of this?
Power supply
Kastar AC Adapter, Power Supply 12V 6A 72W https://www.amazon.com/dp/B003TUMDWG/ref=cm_sw_r_cp_api_i_vTD0DbWRDYN6
Switch
API-ELE [3 year warranty] All New Design 10 Amp 22mm Latching Push Button Switch 12V Angel Eye LED https://www.amazon.com/dp/B07Q65BMGS/ref=cm_sw_r_cp_api_i_YYD0Db02QYZ2Y
With this setup do I still need the MOSFET?
Thanks!
The receiver gets its power from the server leads that go from the receiver pins to the receiver itself.
You do not need additional power for the receiver from an ESC.
ALso for charger I bought
http://www.amazon.com/gp/product/B00466L0BW/ref=oh_details_o06_s00_i01?ie=UTF8&amp;psc=1
It will work with batteries up to 6s.
It does not come with an AC adapter so I had to buy this as well
http://www.amazon.com/gp/product/B003TUMDWG/ref=oh_details_o03_s00_i00?ie=UTF8&amp;psc=1
They seem to work well together.
I use the accucell 6. cheap, seems to work well. charge times are as expected, but the post about parallel charging from u/fryfrog seems to speed that up.
I use this power supply http://www.amazon.com/gp/product/B003TUMDWG/ref=oh_details_o07_s00_i00?ie=UTF8&amp;psc=1
I use this charger and this power supply.
watch out for good deals on gridseeds. You can get them for 40-50 bucks right now.
I'm using this power supply
http://www.amazon.com/gp/product/B003TUMDWG/ref=oh_details_o05_s00_i00?ie=UTF8&amp;psc=1
This splitter
http://www.amazon.com/gp/product/B00JG7HO52/ref=oh_details_o02_s00_i00?ie=UTF8&amp;psc=1
Amazonbasics 7port USB hub which was for sale on amazon for $18.99
Hooked up to my win7 machine running CGminer, might go to raspberry pi route soon just to get it out of my room. As I said, I don't pay for power so ya... otherwise ROI would be basically unattainable which it pretty much is anyway.
You CANNOT DUAL MINE with this setup. SCRYPT ONLY, Absolutely NO SHA-256. power supply with splitter works, simply because gridseeds use such little power in scrypt only mode.
http://i.imgur.com/G502RoU.png
I use this one: http://www.amazon.com/gp/product/B003TUMDWG/ref=ox_sc_act_title_1?ie=UTF8&amp;psc=1&amp;smid=AS8PCMKEL4RLT
Worked great until it died when I was charging at max power. Getting a 2nd one.
I didn't have good luck with mine (sounded like a capacitor couldn't hold charge, but I didn't open it up), but others have had their noise issues fixed with a three prong NEMA power brick, like so:
https://www.amazon.com/gp/product/B003TUMDWG/
I had been operating the chamber as a son of a fermentation chiller for a while. To upgrade it, I got a regular computer heatsink for inside, a liquid pump heatsink to pipe the heat outside, a 77-watt cooler, and a 6A power supply (the cooler actually pulls around 4.5A). I used the same cooler to repair a broken Craigslist wine fridge, which has better insulation and can hit the mid-50s.
I haven't tested the SOFC too much since the redesign, and I just started my first beer in it. But to be safe during active fermentation, I just stuck some ice bottles in the chamber as usual. The airflow isn't as good as it was before, because now I'm using a fan with a heatsink on it rather than a case fan, but it seems to be working okay. At least until I left the lid ajar this morning... (Fortunately it's a Belgian!)
I think i was using the wrong adapter by accident. Just bought this, hopefully everything works better after. Should i wire the speakers individually to each channel?
OK thanks, I took the plunge and also ordered this power supply http://amzn.com/B003TUMDWG I read about in another thread for $13 on amazon.
This setup is amazingly cheap ($80 to $90) and powerful...
http://amzn.com/B0002ZPTBI
http://amzn.com/B0070Z87YO
http://amzn.com/B003TUMDWG
All it takes is one to make a huge difference. Great with headphones on.
This is the one that I used (i think): http://www.amazon.com/Replacement-adapter-charger-Benq-Monitors/dp/B003Z6ZR5O/ref=sr_1_3?ie=UTF8&amp;qid=1400337656&amp;sr=8-3&amp;keywords=12v+5a I think they come with the barrel plug but need the 12 volt supply
Oh, i got the mb42, great speakers, saw they are now 60 bucks, but were 50 bucks a few months ago, so either they've gone up or typical amazon price fluctuating. Not sure it's worth getting the x version, the regular ones sound great at that size and price point - they have a crossover but not sure it's going to make huge difference in that package.
I got this amp: www.amazon.com/gp/product/B0049P6OTI/ref=oh_aui_detailpage_o07_s00?ie=UTF8&psc=1
lp2020A+
I needed a power supply for an external drive and that one worked so I stepped up to this for the amp to squeeze out most of the watts in the amp: www.amazon.com/gp/product/B003Z6ZR5O/ref=oh_aui_detailpage_o02_s00?ie=UTF8&psc=1
When I got it they were: 50 speakers, 20 amp, 6.50 power supply and it makes a very nice budget system - loud enough for a normal sized room and good quality.
I believe that's only at higher volumes, and it's fixed by replacing the power source/cord. I use this http://www.amazon.com/gp/product/B003Z6ZR5O/
the MB42x - Lepai 2020A+ combo is a good cheap solution. I recommend that you upgrade the power supply on the Lepai though.
http://www.amazon.com/gp/product/B003Z6ZR5O?psc=1&amp;redirect=true&amp;ref_=oh_aui_detailpage_o02_s00
This one works great. I use it on my 2020+ and the sound is definitely improved in the low end.
Also, the 2020+ has and RCA input which should work with most TVs. This would give you considerably better sound than any "in box" 2.1 setups.
In terms of a subwoofer, the Miccas already go pretty low so you might not need a sub at first depending on preference. Also, avoid the aux input on the Lepai... it's a little shoddy.
It is just an alternate powersupply that has more amperage. http://www.amazon.com/gp/product/B003Z6ZR5O/
Something like this
If you're like me, you have about a dozen lying around. Usually the positive wire will have a stripe or dashes printed on it. The best bet would be to test to determine. In this case, if you have it backwards, it probably just wouldn't work.
Let me preface this by saying that I'm not an expert. But if you want this to run continuously, you'll want a DC power supply, maybe something like this instead. The batteries will lose charge over time, meaning the fan will run slower and eventually stop. Also, your fan pulls about 1 Amp, meaning that the internal resistance (?) of the batteries and the fan may mean that you won't be able to run it at all (the required current would be greater than the maximum current available from the batteries). But yes, to answer your question about hooking up, if you connected the red wire to the positive terminal of a 12 volt battery and the black wire to the negative, it would run, assuming it could supply enough amperage to make it run. If you bought something like the power supply I linked, you can just cut the end off of it and wire up the positive wire to the red wire of the fan and the negative wire to the black wire of the fan.
Something like this, maybe?
I'm not entirely sure if the plug would fit.
I dont know why you would get any other type of fan. Computer fans are meant to be run continuously and are virtually silent. just get a 140mm pc fan, and a wall plug with 12 volt 1 amp output and just splice the wires together. With 1 amp you should be able to run two fans in a parallel configuration no problem.
power supply
Fan i use this fan. its quiet and moves a decent amount of air. i only use one since i have no carbon filter. so if you want one you may need two fans in a push pull configuration
Not sure if both power adapters are pushing through the same voltage, but here another redditor bought a replacement power adapter for the lighthouse stations:
https://www.reddit.com/r/Vive/comments/4usa5w/extra_base_station_ac_power_adapters/
He used these ones, they worked perfectly: https://www.amazon.com/dp/B00KZ2ZQE8/ref=cm_sw_r_cp_api_QIbMxbNFX0YHC
Sorry, but I don't completely know what I'm doing. I sent HTC an email asking about getting a return on the adapter, but I think it's going to be exponentially faster to just order one.
I found this one online. Do you think it would work? The one for the Vive has the same input, and the output is 12V 2.5A LPS
Can't completely tell by looking at the picture whether or not the jack is the right size.
Awesome response, thank you!! Follow up question: Lets say I used this guy http://www.amazon.com/Amamax%C2%AE-Wall-Adapter-Power-Supply/dp/B00KZ2ZQE8
Could I simply strip off the barrel jack (which would leave me a power and a ground wire), then branch two wires off of the power wire to power the arduino and both steppers?
I need to make it work off of one dc converter from my wall outlet. Perhaps a better way to do it would be a barrel jack splitter, if that exists?
They are 2 exo-terra tanks - 24in wide x 24in tall x 18in deep. The fans are these 'Gentle Typhoon' bad boys I saw other people recommending on orchid forums. I've had the oldest running since mid 2016 24-7, no issue. They require a little simple wiring - I bought plugs for them like these.
Poke a few holes in the back, mount a 200mm fan on one side as an intake and on the other side as an exhaust, you'll have a sufficient number of air changes per hour as to not have thermal throttling issues.
Use a 12V wall-wart, split open the DC output cable, splice it together with a couple fan connectors, and bang you've got a nice always-on fan power supply.
https://www.amazon.com/TMEZON-Power-Adapter-2-1mm-Supply/dp/B00Q2E5IXW/ref=sr_1_3?s=photo&amp;ie=UTF8&amp;qid=1473678849&amp;sr=1-3&amp;keywords=12v+power+supply+2a
You also need a power supply for the amplifier. Looks like this one would work for the amp suggested: https://www.amazon.com/TMEZON-Power-Adapter-Supply-2-1mm/dp/B00Q2E5IXW/
I use a similar one with an extension because I couldn't find a long enough one when I purchased. I think I may also be using one of these: https://smile.amazon.com/dp/B00Q2E5IXW/ref=psdc_10967101_t2_B01M0XJH1E
I tried powering the motor via a breadboard barrel jack instead of the arduino, but got the same results. The motor whined, the driver started to heat up and smell. All-in-all not expected behavior. This is my first time with steppers and such, so I'm sure I did something wrong, I just don't know where to start with troubleshooting.
Here are the items that I am using:
Arduino Uno
Big Easy Driver
[12V Adapter] (https://www.amazon.com/gp/product/B00Q2E5IXW/ref=oh_aui_detailpage_o04_s00?ie=UTF8&amp;psc=1)
Stepper Motor
Any advice or help would be greatly appreciated!
I do a VR night at a local pub and have used the mounts I'll link below also. They do a great job. Also if you don't want to use your stock lighthouse electric adapters (I can't use mine because I have them ran under wire covers) these work great also. Just will need an extension cord.
Smatree Ajustable Jaws Flex Clamp Mount 13.4" Gooseneck Extension for GoPro Hero 5/4/3+/3/2/1/Session / for Ricoh Theta S, M15 Cameras/ for Compact Cameras(1/4" thread) https://www.amazon.com/dp/B00MWNYGUS/ref=cm_sw_r_cp_api_B-pHybZNRWQJA
ALED LIGHT® 12 Volt 3 Amp LED Strip Light Power Adapter, AC to DC, 2.1mm X 5.5mm Plug, Regulated 12v 3a Power Supply Wall Plug for LED Strip Light https://www.amazon.com/dp/B013SSU92Y/ref=cm_sw_r_cp_apip_a1sWXNPht7UyF
https://www.amazon.com/dp/B013SSU92Y
Thanks for posting
Unfortunately, new and low karma accounts cannot create submissions in /r/Vive. Please participate in the comment sections first. The participation requirement is minimal.
Do not message the moderators asking for an exception or to ascertain the exact requirements
Tip - A good place to start the daily casual conversation sticky post . You can leave comments in there on anything you want. So you may feel like sharing your topic from this thread there or joining in the other casual discussions taking place there.
------------------------
Below is a copy of the removed submission
Set up and use Vive (seated) with only 1 basestation? by 31d3dqdass12
I want to use the vive for Iracing (seated)
Some comments I found online say that you need 2 base stations to even start the setup process.
This is the plan.... get the hmd from a friend who is upgrading. buy a base station(https://www.bhphotovideo.com/c/product/1367576-REG/htc_99hafs002_00_vr_base_station.html) and a power adapter(https://www.amazon.com/dp/B013SSU92Y).
Is this possible? Any disadvantages in doing this? Can I run initial setup and use the vive seated with only 1 lighthouse base station?
Any info is much appreciated.
&#009;
&#009;
&#009;
I am a bot, and this action was performed automatically. Please contact the moderators of this subreddit if you have any questions or concerns.
I want to use the vive for Iracing (seated)
Some comments I found online say that you need 2 base stations to even start the setup process.
This is the plan.... get the hmd from a friend who is upgrading. buy a base station(https://www.bhphotovideo.com/c/product/1367576-REG/htc_99hafs002_00_vr_base_station.html) and a power adapter(https://www.amazon.com/dp/B013SSU92Y).
Is this possible? Any disadvantages in doing this? Can I run initial setup and use the vive seated with only 1 lighthouse base station?
Any info is much appreciated.
I am using these - same reason as you.
https://www.amazon.com/gp/product/B013SSU92Y/ref=oh_aui_detailpage_o07_s00?ie=UTF8&amp;psc=1
That's why I bought one of these: Amazon. It has all the common tips and you just find the one that fits and then connect it to the adapter. Set the output voltage to 12 and you're done.
Buy this and start with the lowest setting, just dialing it up until it kicks on. if it works, but cuts out during use, just dial it to the next setting. It will probably be 9 or 12 volts, possibly 16.
ZOZO 12W 3V 4.5V 5V 6V 7.5V 9V 12V Regulated Multi Voltage Switching Replacement Power Universal AC Adapter for Household Electronics Routers Speakers CCTV Cameras Smart Phone USB Charging Devices https://www.amazon.com/dp/B015PXUHYA/ref=cm_sw_r_sms_apa_i_w3slDbQY6MSRK
The PAL SNES power supply actually outputs AC and not DC. However, the console will still accept DC inout, since the AC is being converted internally anyway.
You need it to be 9V, and at least 1.3A (according to spec, it might be less). Your first link doesn't have enough amps, and the second one doesn't seem to have the information. The polarity doesn't matter since it's expects AC anyway.
The tip needs to fit in the plug, so you might want to get a universal power supply to be sure. I quick search led me to this one (which is 12W, which means that at 9V it is: 12/9=1.33A):
https://www.amazon.com/ZOZO-Universal-Regulated-Replacement-Electronics/dp/B015PXUHYA/ref=sr_1_1?ie=UTF8&amp;qid=1468583528&amp;sr=8-1&amp;keywords=9v+power+supply+universal
(there might be other ones on amazon that are cheaper, I just sorted by relevance.)
And it seems that tip1 will fit. (outer diameter 5.5mm inner diameter 2.5mm). (you might want to make sure this is correct).
If you have other consoles at home, it is also possible that you can use one of their supplies, though I don't think the NES barrel will fit, and it's a little low on amps, so it might get too hot and die.
EDIT:
I've just seen that the power supply I've found doesn't have the option to choose polarity. It doesn't matter in your case, but it's pretty sucky if you wanna use it for other stuff.
Would having one of these for each string be enough? then a separate power for the board?
actually, what i think i might do is get this:
https://smile.amazon.com/ZOZO-Regulated-Switching-Replacement-Electronics/dp/B015PXUHYA/ref=sr_1_3?s=electronics&amp;ie=UTF8&amp;qid=1540834898&amp;sr=1-3&amp;keywords=6v+dc+power+adapter
which will allow me to use the adapter/spacers in different items that would have more/less aa batteries.
You could get a universal power adapter like this.
https://www.amazon.com/ZOZO-Regulated-Switching-Replacement-Electronics/dp/B015PXUHYA
Most electronic stores should have some version of this with different sizes of interchangeable barrel plugs.
In that photo, the 9V is providing power to the Arduino and the AAs are providing power to the servos, or whatever that box is powering. For your setup, you can power the Arduino via USB like you're doing, and then power the servos with a 6V power supply. You can either buy a power supply on Amazon (this one is universal, so be sure to select the 6V setting when you use it) or you can go to a Goodwill and find a power supply that outputs 6V (and at least 1.5A). If you go the latter route, be sure to test the voltage first. You'll need to cut off the end of the cable and put the power wires into the breadboard. As long as the power supply can output at least 1.5A (roughly 4x the stall current of the servos) you'll be able to run them all in parallel.
Edit: To clarify: Get some sort of 6V power supply, take apart the cable, and put the positive and negative wires in the same spots you have your 4xAA battery right now.
For future reference, unless you need something to be portable or want it to survive a power outage, there's no reason to use batteries instead of an outlet.
This power supply works well:
https://www.amazon.com/ZOZO-Regulated-Switching-Replacement-Electronics/dp/B015PXUHYA/ref=mp_s_a_1_1?keywords=zozo+12w+3v+4.5v+5v+6v+7.5v+9v+12v+regulated+multi+voltage&amp;qid=1570668960&amp;sprefix=zozo+12&amp;sr=8-1
This works perfectly for the Connect/Commander connection cable:
https://www.amazon.com/Green-utech-Ft232rl-Ttl-232r-5v-aj-Programming-Windows7/dp/B00XSOELNW/ref=mp_s_a_1_fkmr0_2?keywords=green-utech+ft232&amp;qid=1570669266&amp;sr=8-2-fkmr0
It definitely matters which side is positive or negative. If the plus is attached to the dot in the middle of the circle, it's center-positive. If the minus is attached to the dot in the middle, it's center-negative. If you hook it up to the wrong supply, it can damage the equipment (think putting the gas in your car's tailpipe instead of the tank filler).
You can buy replacement supplies that come with multiple tips. Just make sure you get one with enough amperage/wattage to power the amp. Near where the center positive/negative diagram it should say something like 9VDC 1200ma or 9VDC 3.1w. That means you need a supply that puts out 1200 milliamps, or 3.1 watts.
A universal supply looks like this: https://www.amazon.com/Regulated-Switching-Replacement-Household-Electronics/dp/B015PXUHYA/ref=sr_1_2?s=electronics&amp;ie=UTF8&amp;qid=1482438995&amp;sr=1-2&amp;keywords=universal+dc+power+supply
Having a few different version of these around you don't need to worry about splicing. They come in handy.
https://amzn.com/B015PXUHYA
Here's a simple idea that's electrical rather than mechanical...
Buy this electromagnetic lock and this power supply and this remote controlled outlet.
The bare wires of the lock easily click into the green plug of the power supply. Then you plug that into the remote controlled outlet.
The two metal parts of the lock magnetize together when electricity is present, and come apart when there's no electricity. The remote toggles electricity on/off.
So you build a box or use an existing door, and mount the two metal parts of the lock to it to secure it.
Players find the remote elsewhere in your game. Then upon clicking the remote they unlock the electromagnetic lock. For greater effect, install a spring in the box so that the box lid flies open upon clicking the remote!
So if I order two of these they will work?
There are lot of 12V psu with those 5mm plugs on amazon.
Yours was capable of 300mA. It's no problem if you get a new one that is capable of higher output current.
If the end that goes into the fountain is the same type of plug but male, you can just get one that has an implemented cable with male output plug.
Example.Just be sure about the right plug dimensions, like /u/Pocok5 said.edit: Your psu says 12V AC. That's odd. The one I linked is DC, so nevermind. This one would be an example for 12V AC.
We've historically used computer fans, which obviously don't plug into an outlet, but a simple DC adapter (like this one on Amazon or pick one up at basically any electronics store or like look around your house your old router or whatever likely used one) will fix that. You cited time concerns in not wanting to use an inverter, but honestly this shouldn't add more than, say, 5 minutes, especially if you're already making a trip to the store/waiting on shipping from the internet for the fan.
EDIT: Just to clairify, pretty much any adapter that says "Output: 12 V DC" on the back will work (assuming you have a 12V fan, which most seem to be)
I'd say DC, don't risk using AC. Here's my thought process:
I can't see a rectifying bridge. That type of connector is usually used with DC. It does't have a transformer, so, if it was the case, it would be referring to 12Vrms AC, which is not very common to run by. I think it wants you to use an AC/DC 12v converter.
Use this
Edit: Don't forget to check if it provides enough power (Watts), though.
If you're still looking. I'd recommend using a simple 12V DC power adapter like this, and putting the female port it comes with on the back of the console, then you can wire 12V LEDs and fans to this instead of trying to use the built-in power supply. it's only 24W, so I'm not sure how much you could do with this one, but you can probably find something with more power.
EDIT: I realized fans and LEDs don't use very much power, so that should be fine. Adding in some small 80mm or 60mm fans to the CPU and GPU heatsinks and wiring LEDs to this should be fine. I would even wire switches for the fans and LEDs separately so I could turn them on and off if I wanted.
To power the lights you can just use a 12v power supply like this.
And if you want to use an arduino to turn it off and on, you can just use a simple relay like this
Personally I think this solution is a little simpler and less confusing than messing with a mosfet etc... But the other solutions that people have mentioned in this thread will work too.
My maglock runs off 12 or 24v so I just got a 12v transformer. Something like this: https://www.amazon.com/Adapter-100-240V-Transformers-Switching-Adaptor/dp/B019Q3U72M/ref=sr_1_3?ie=UTF8&amp;qid=1501804560&amp;sr=8-3&amp;keywords=12v+transformer
You have to find out what kind of power your mag lock needs. It's probably listed on the maglock somewhere.
> You can use any 12V power supply 700mAh or above, the screen will just draw what it requires.
This is correct, I've used these power supplies for LED and other 12v projects. This should power it fine.
Based off Inkbird ITC-106RL
Parts:
Controller: Inkbird ITC-106RL
This is 12v so it is easy to use with cheap computer fans and has a built in relay to make for less wiring. Can also be ran off of a battery. Downside of the built in relay is the life span is a little lower, but it is cheap enough and easy enough to replace that I will take the trade off.
https://smile.amazon.com/gp/product/B01MS138DM
Power Supply: 12v. Can be a “wall wort” converter or hooked up to any 12v battery. I used an old power adaptor from an external power supply. Just make sure it is 12v output with at least 1 amp.
https://smile.amazon.com/Adapter-100-240V-Transformers-Switching-Adaptor/dp/B019Q3U72M/
Fan: At least 5 CFM needs to get to the drum, but keep in mind a lot will be lost going down a valve/pipe/elbow. With this controller it will run the fan as need to maintain the temp, so larger will be fine, but too large can cause problems. I did 80mm computer case fan (with LEDs) with a 3” to 1.5” ABS adaptor hacked up get it funneled into my box. I did this because I wanted the look of a big LED fan and a 80mm LED fan was cheap. I think a lot of the 32 CFM of the fan I used is being wasted with my setup with the funnel and riser pipe, and I am OK with that as I love the look. My 32 CFM fan is running about 30% of the time to maintain temp. I want to be able to glance from the house and see it light up. If you are just going for ease of build I would do 2 40mm fans screwed into the cover of the box. Then you don’t need to make the funnel/adaptor which was hard to make.
Mine: https://smile.amazon.com/gp/product/B000S396YU/ref=oh_aui_detailpage_o01_s00?ie=UTF8&amp;psc=1
Easier:https://smile.amazon.com/2packs-0-15A-Brushless-Cooling-AB4010M12/dp/B01CZFUOD0
Temp Sensor: Any “K Type” sensor will do. The controller supports a ton of different types, but a K type is the easiest. I picked this one for the length of the sensor and the spring wire guard for having it on the side of the drum.
https://smile.amazon.com/gp/product/B00899A4LY/
This one looks great if you want to be able to remove it quickly.
K Type Adjustable Compression Spring Bayonet Sensor Thermocouple 5M https://www.amazon.com/dp/B018HX0DLM/ref=cm_sw_r_cp_apa_Ls-VzbD60N3WS
I plan on adding a clip using it on the grate as the sidewall is running about 50 degrees hotter than the air around the meat on the top grate. I think I wouldn't make this one my first choice if you going to have it on the grate because of the spring guard and size.
https://smile.amazon.com/BBQ-Butler-Meat-Thermometer-Probe/dp/B01AS23FHE/
Case: 2" Type LB PVC Conduit Body with a pvc plumbing reducer on the bottom to get down to 3/4” pipe thread that connects to my valve (kept so I can shut it down after cooking) and a solid plug on the back drilled out to allow for a wire connector. I didn't glue either of the plugs in so I could take it off the smoker easily and for future upgrades. The holes in the face of the case were cut with a hole saw and jigsaw.
https://www.menards.com/main/electrical/conduit-conduit-fittings-raceways/pvc-conduit-fittings/carlon-reg-2-type-lb-conduit-body/p-1444444974150-c-6424.htm
https://www.menards.com/main/plumbing/rough-plumbing/pipe-tubing-hoses-fittings-accessories/fittings/pvc-fittings/nibco-reg-2-plug-pvc-schedule-40/p-1444449168970-c-8557.htm
https://www.menards.com/main/plumbing/rough-plumbing/pipe-tubing-hoses-fittings-accessories/fittings/pvc-fittings/nibco-reg-2x3-4-spigot-x-female-pipe-thread-reducer-bushing-pvc-schedule-40/p-1444449164005-c-8557.htm
https://www.menards.com/main/electrical/conduit-conduit-fittings-raceways/metal-conduit-fittings/sigma-3-4-nm-connector-3-bag/p-1444430908358-c-9538.htm
Wiring: Image from facebook.com/boganbbq
The ITC-106RL has the same wiring.

I didn’t add the switches as I am just plugging it in or unplugging it. I think I will add a switch for the fan in the future. https://smile.amazon.com/AutoEC-Rocker-Toggle-Switch-Control/dp/B012IJ35VQ/
I had to flip my probe wiring.
You may need to use a multimeter to figure out which wire is hot vs common coming from the power adaptor. Set your meter to 12v and touch the probes to the wires from the adaptor. If you get POSITIVE number close to twelve your positive/red probe is on the positive/”red” wire. If you get a NEGATIVE number on the multimeter you have them switched. I tested the adaptor on the fan first. My fan would not spin/light up with the wires switched.
My final wiring (not in the case):

Controller Settings:
The manual for the ITC-106 is bad. Luckily the IPC-16 is the same system and the manual is much better.
See: http://pmod79883.pic31.websiteonline.cn/upload/IPB-16UserManualA42.pdf
Press SET button for 3 seconds to enter into the main menu, there are Input Parameters, Output Parameters, Alarm Parameters, PID Parameters and Unit Parameters can be selected. Then press shift button to enter into the submenu if need to change the settings.
Here is what I changed to get it working. Everything else is left on the factory settings.
IP -> SC (Sensor Calibration) AS NEEDED. Once you have it running turn it on and put the sensor in the some boiling water. Use this setting to adjust as needed, keeping in mind water boils at different temps depending your elevation. I had to do a + 3.
PID -> CTL (Control Period) to 15 seconds. Basically, the system will check the temp every 15 seconds and then run the fan for the amount it guesses it will need to keep the temp correct. Lower time is more accurate temp, but on/off cycles for the relay, and it is only rated for 100,000 cycles. I think I will test this at 30 seconds and 60 seconds in the future. 15 worked well and had about a 1-2 degree swing. I am ok with more of swing if it means less wear and tear on the built in relay.
UNITS TO F if think in those terms.
In the future I will play with the autotune/self-tuning function and will add an update for that if I can figure it out and get noticeably better results.
You are done. Light your smoker, power up the controller and set your temp (you can hold the up and down buttons or use the select button and move the decimal point to change by 100s, 10s or 1s). Bottom number is your set point, top is the current temp.
I leave my 2nd valve open till 200 degrees to help the drum get to temp faster, then I closed it and let the controller do the rest, but you can start with just the fan open and walk away if you want. Exhaust open all the way. It ended up running the fan about 5 seconds on, 10 seconds off to maintain 225 degrees.
https://www.amazon.ca/Adapter-100-240V-Transformers-Switching-Adaptor/dp/B019Q3U72M/ref=sr_1_3?keywords=24W+DC&qid=1572325713&sr=8-3
&#x200B;
would something like this work?
Slightly different form-factor, but you could always get a setup like this for less than half the cost:
LED Flexible Light Strip - $8 Prime
Power supply - $8 Prime
I'm betting someone will come along and tell me there are even cheaper options than the one I linked, especially going through a Chinese site :D
I had it plugged in to a 20,000mAh Anker battery: https://www.amazon.com/Anker-PowerCore-Qualcomm-Backwards-Compatible/dp/B01J5P98SK/ref=sr_1_2?ie=UTF8&amp;qid=1484783749&amp;sr=8-2&amp;keywords=anker+20%2C000
Do it!!
Some people carry poles/totems, and hang them on those, and some get the headband or chestband, but I got a little clip that worked great on my camelbak strap: https://www.amazon.com/General-Adjustable-Stabilizer-Action-Camera/dp/B00K3GI8Y6/ref=sr_1_3?ie=UTF8&amp;qid=1484783813&amp;sr=8-3&amp;keywords=gopro+clip+mount
I went to the last winter event.
Like /u/calvinlf2 said, get there early. And you might want sunscreen too for the morning wait. Having water was necessary even in the winter.
I read somewhere else that Goodsmile has an endless amount of the event Mikus and that you can swing by whenever and grab one. This is not correct. When I made it back by, pretty much everything was cleaned out. Thankfully I don't care much for Miku and I did manage to grab Wonda-chan when I went by the booth.
My camera is thirsty on the power so I ended up using 2 batteries and my Power Bank (smaller version of this) really ended up saving my day.
native booth stole the show for me. Well worth the wait in line.
If you have time, you may want to wait for any deals or specials. I got the Anker PowerCore Speed 20000 QC, Qualcomm Quick Charge 3.0 Portable Charger back in March for $35.
Thanks all! I went with the Anker--- but for some reason my prices were much lower than on /u/blackmagician's link. I went with this which was on sale for 49.99 and will be here by Monday.
i just followed the examples in the adafruit neopixel library for the python side. The PHP is pretty self explanatory if you piddle around with PHP any.
i used these LEDs https://www.amazon.com/ALITOVE-Addressable-Digital-Diffused-Waterproof/dp/B06XD72LYM/ref=sr_1_3?ie=UTF8&amp;qid=1509935755&amp;sr=8-3&amp;keywords=ws2812b+led+string
A Raspberry Pi
this power supply to power the Pi and the LEDs https://www.amazon.com/gp/product/B01M0KLECZ/ref=oh_aui_detailpage_o01_s00?ie=UTF8&amp;psc=1
Heres the code https://drive.google.com/open?id=1LkXqiQbU6o7YZ9F1NESZTwvruubY4cTp
its just some PHP to scrape the metar and convert to flight condition and then some python to talk to the LEDs.
Schematics is plug the green wire from the LEDs to GPIO pin 18 on the R Pi.
I used a diode between power and the LED power as well. Cant remember why but I saw it one of the docs.
I run a cron every 15 minutes on the pi to run the PHP script and update the colors.
Do you want/need the ability to change the colors? I feel like adding color changing with mobile control is a bit overkill here. A simple backing board with LEDs hardwired, an on/off button or switch, and a small cord to plug it into the wall would be enough. Even if you want to use an Arduino I'd still suggest plugging in into a wall instead of batteries, especially if you include some form of mobile link.
&#x200B;
Edit: if you are not good with circuits I would suggest starting with something like this, a power supply ( the 5V one they suggest will work) , and an Arduino with a library that works with the WS2811. Plug the lights into holes on a firm thin board behind the planets and light them up or flash them with the arduino. If you don't like the big bulbs and can solder you could also just glue these to the board.
If you get that going then add the mobile control, or don't, later.
Thank you for the reply, I was looking at using ws2812 strips because they give me the option to change colors, so i could hook up a dip switch and have different modes for her use depending on what she wanted it to display. I did the math for this and it seems like it would require 5 amps to power all the LEDs in the strip that I want on. I am struggling to find a 5v 6amp power supply that i could use for both the lights and the arduino.
I was looking for a barrel plug to connect to the arduino for power then i would just strip that and add the lights in parallel to that, would that work or is there a better way to do it?
edit: I found This power supply. Would this work to provide power to the arduino and LEDs?
https://www.amazon.ca/dp/B01M0KLECZ/
it’s that one, still 500 milliamps?
Interesting...
I'm using one of these:
https://www.amazon.com/gp/product/B01M0KLECZ/ref=oh_aui_search_detailpage?ie=UTF8&amp;psc=1
Should I add a capacitor or something to help even out surges or etc? Bigger power supply?
Having some issues getting mine set up, anyone able to help a brotha out?
I noticed you used ws2812b led strip but I have Different wires and I cant get my led strip to light up. I feel like such a noob. I tried following the imgur guide but i guess I'm a little slow and cant figure it out.
Here's what I bought....
Lights
https://www.amazon.com/gp/product/B07B5ZPCTC/ref=oh_aui_detailpage_o02_s01?ie=UTF8&th=1
Power
https://www.amazon.com/gp/product/B01M0KLECZ/ref=oh_aui_detailpage_o01_s02?ie=UTF8&psc=1
Arduino
https://www.amazon.com/gp/product/B01EWOE0UU/ref=oh_aui_detailpage_o01_s00?ie=UTF8&psc=1
My Setup due to my Vanity:
Raspberry Pi 3 Model B:
https://www.amazon.com/Raspberry-Pi-RASPBERRYPI3-MODB-1GB-Model-Motherboard/dp/B01CD5VC92/
NorthPada Raspberry Pi 3 Model B 5v3a Power Supply:
https://www.amazon.com/NorthPada-Raspberry-Supply-Charger-Adapter/dp/B01N336XEU
Buffalo iBuffalo Classic Super Nintendo USB Gamepad:
https://www.amazon.com/Buffalo-iBuffalo-Classic-Gamepad-BSGP815GY/dp/B06XWD8QQJ/
Rasptendo Case:
https://www.amazon.com/Rasptendo-Retro-Gaming-Case-Raspberry/dp/B076F7VDR2/ref=sr_1_1?ie=UTF8&amp;qid=1518438946&amp;sr=8-1&amp;keywords=rasptendo
OR
NESPI Case
https://www.amazon.com/functional-POWER-button-Raspberry-Retroflag/dp/B074DSXF7F/ref=sr_1_3?s=electronics&amp;ie=UTF8&amp;qid=1518438976&amp;sr=1-3&amp;keywords=Nespi+Case
This one specifically:
NorthPada Raspberry Pi 3 Model B Power Supply Charger AC Adapter 5V 3A PSU Micro USB 5 Feet with Power On / Off Switch https://www.amazon.com/dp/B01N336XEU?ref=yo_pop_ma_swf
Definitely stick with PC fans. I'd go with 120mm because the larger fan moves more air while moving slower, so it can stay quieter but still cool your box.
I bought this pack of 4 on amazon, they're almost silent, but you will need 2 or more to cool the cfls. I use 2 of these in my veg cabinet, with some duct on the back of them to lightproof it, to cool 3-4 cfls at the moment, but I don't have to worry about smell from the veg cabinet.
You need to figure out what you are going to do if smell will be a problem. If you need zero smell, then you need to think about a DIY carbon filter and how you will move air through it (more powerful fans would be needed).
For a no-wiring-splicing-needed solution, you can get molex (one type of connector pc fans use) power adapters like this one, and use splitters and adapters, etc to power however many fans you need, or even buy a pc fan speed controller like this one and plug it right in.
note: pc fans have two different kinds of connectors typically, larger molex 4 pins (like I mentioned earlier) and some have smaller 3 pin connector. The ac adapter I linked has a 4 pin molex, and so does that fan controller for power in, but it has the 3 pin for power out to each fan that it controls, and the fans I linked also have small 3 pin connectors. Just something to keep an eye out for if you decide to get more powerful fans than I linked, for example.
To wire mine up, I grabbed a 12v AC-DC adapter (a wall-wart, like a plug for an old router, it says the voltage on the label) and cut the plug on the end off, and cut the connectors on the fans off, then it's one wire to red, one wire to black, if it doesn't work switch them. Some adapters have a white stripe on one of the two wires, that one goes to red. (although I think for most fans it would spin them backwards, arrows on the edges of the fan usually point direction of airflow). Heatshrink it all together (or just electrical tape it really securely) and plug it in.
A molex adapter is not that expensive to buy. http://www.amazon.com/Coolerguys-110v-Molex-Power-Adapter/dp/B000MGG6SC/ref=sr_1_1?ie=UTF8&amp;qid=1345335228&amp;sr=8-1&amp;keywords=molex+adapter
Shouldve got a mac.
Not to be preachy or anything, but seriously. I have a 2008 macbook that runs all djing software and hardware i have ever tried to use on it, and thats after about 200 nights in a club too. You can get an old used macbook pro for about 400-500$ and then put a $100 SSD in it and have a REALLY sweet computer for not a lot of cash, and the metal ones like a pro last forever.
I know i sound preachy, im sorry, its just macs would solve damn near any problem a modern dj would have.
BUT! to answer your question: heres this one from NI for http://www.native-instruments.com/en/products/traktor/dj-accessories/bags-cases-and-control-media/overview/pricing-power-supply/
It is a 9v 1200 mA. Those are standardish.
http://www.amazon.com/Hosa-Cable-ACD477-Universal-Supply/dp/B000Z31G3M/ref=sr_1_1?ie=UTF8&amp;qid=1406735108&amp;sr=8-1&amp;keywords=9v+1200ma+power+supply
If the pedals new it should come with one, if not you can pick them up on online/in alot of of shops :)
Eg; https://www.amazon.com/Planet-Waves-9V-Power-Adapter/dp/B00191WVF6/ref=sr_1_4?ie=UTF8&amp;qid=1536660783&amp;sr=8-4&amp;keywords=pedal+9v
For charging things, you need both a converter and adapter if your electronics aren't dual voltage, one for dealing with the different shapes of the outlets in Europe, and one for dealing with the different voltage. Rick Steves talks about it here. Usually they're now in one piece. I got mine at Bed Bath & Beyond for pretty cheap. Here's an example. I have this, which is only a plug adapter because my electronics are marked dual voltage.
As for overhead room, I've never had trouble, especially if you aren't bringing anything bigger than a standard backpack or duffel bag. Even if it does get crowded, the flight attendants usually go around playing tetris so everyone can find space.
All flights I've been on had front door loading only, boarding by 'zones,' where 1/2/3 are first/business/priority passengers. Your zone will be marked on your ticket. Coach zones (like 3/4/5) have always boarded last. You won't be able to get on first unless you pay extra for the better front seats.
Alright. I am so sorry that I'm being annoying..
how do these
SONY SS-B1000
compare to these
Dayton B652 $42.50
Micca MB42 $59.95
Micca MB42x $79.95
What is the best bang for your buck?
Could you put the speakers in Best to Worst?
I plan on gettin the Lepai 2020A+ unless there is a better amp for the price and then adding a Power Supply Upgrade
You cant power that off the arduino. You'll have to use a relay.
Those numbers sound about right.
The strips usually have the polarity printed on them, follow plus or minus to the wire. Or if you can see it, look at the led and a diagram. Identify cathode and anode.
You could also try a AA battery to find polarity. At 1.5 v it should immediately kill the led.
Here's a 5v 10a power supply.
https://www.amazon.com/ALITOVE-Adapter-Converter-Charger-5-5x2-1mm/dp/B01M0KLECZ
No that's not it. It's definitely caused by unplugging it from the PSC, I ran a multitude of tests to verify.
I get this error sometimes, but it has never caused any real issues, I just let windows do the check and it has never had any problems.
The best thing you can do is let it sit for at least 10 seconds after the orange light comes on. I don't unplug the cable, never have. I have always used one of these and I much prefer it over unplugging the damn thing every time. https://www.amazon.com/NorthPada-Raspberry-Supply-Charger-Adapter/dp/B01N336XEU
Kikkerland UL03-A Universal Travel Adapter https://www.amazon.com/dp/B00210MRGC/ref=cm_sw_r_em_apa_r0BKBb6K5VF61
The cheapest thing to create on your computer is by far the most expensive to restore. If your hard drive fails, professionals can recover data, but that typically starts at about $700.
You need redundancy. That means a minimum of 2 hard drives (RAID 1).
Be aware that if you want to do the same thing to a future Blu Ray collection, it can add up really fast. I've started ripping HD DVD and Blu Ray movies to my server about 9 months ago after a drive failed on me, and I've already filled up nearly 2TB in videos.
Finally, I really recommend that if you plan on leaving your server on 24/7, you do everything you can to reduce its idle power consumption. If you pay 11.4c/kW*hr, then each watt your computer consumes costs you $1 per year. It wasn't that long ago that a common desktop could take up 150W idle, but my home server uses a mere 23W. You can cut out about 20W of overhead by using a picoPSU and DC power adapter. If 72W isn't enough, you can also go for a more expensive 192W model that should be able to handle anything you'll use with the server.
Building for low power consumption on a server will often save you $40-100 per year in electricity bills.