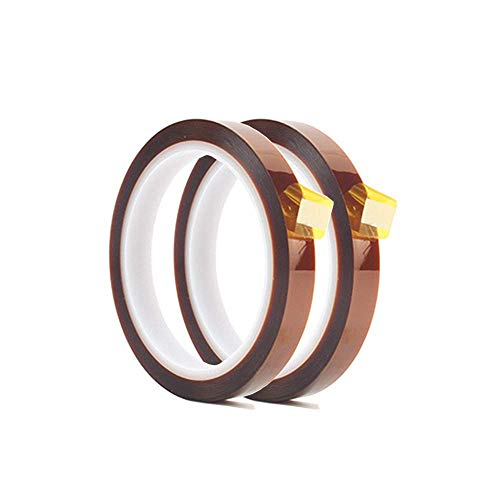
Best adhesive transfer tape according to redditors
We found 92 Reddit comments discussing the best adhesive transfer tape. We ranked the 24 resulting products by number of redditors who mentioned them. Here are the top 20.
We found 92 Reddit comments discussing the best adhesive transfer tape. We ranked the 24 resulting products by number of redditors who mentioned them. Here are the top 20.


get some double sided fasteners :/
http://www.amazon.com/Scotch-Heavy-Duty-Fasteners-Inches-RFD7091/dp/B00347A8GM/ref=sr_1_3?s=office-products&ie=UTF8&qid=1427065456&sr=1-3&keywords=3M+fastener
Congrats, just got mine 2 months ago.
SeeMeCNC forums are awesome. Start reading every new post.
Best upgrade I've done: PEI Bed
http://www.amazon.com/gp/product/B0013HKZTA
http://www.amazon.com/gp/product/B007Y7D5NQ
~$30 in upgrades; all my prints stick and pop off with ease. Also, the underside of every part is glassy and smooth. So good.
Buy "feeler gages" to assist with leveling the bed.
http://www.amazon.com/Stanley-Proto-J000AA-Master-Feeler/dp/B001HWDOK8/
My bed leveling process is kinda like this:
Let's see, what else. If you can spare the cash, I moved to Simplify3d for all my slicing needs ($100~$150 for the license). Love it. If you can't afford it, maybe you'll find a way.
Also, get ready to do a bajillion calibration runs. I mean it, don't be in a rush.
Find a nice 20mm box off thingiverse or whatever, and you're gonna want to print that repeatedly while you dial in your settings. Once that's set, move on to the hollow pyramid, or the 5mm stairs.
I seriously printed at least 20 of each of these while I dialed in my settings:
ASAP, move over to PLA. Prints so much nicer for me than ABS.
Oh, before you go to PLA, make sure you print 3x of the layer fans housings (not just 1x) and order up 2 more of the "squirrel cage" fans (centrifugal fans) from SeeMeCNC. edit: I spliced the single pair of layer-fan wires into three right at the connectors, I didn't bother running extra wire for them.
Oh, and one other big improvement I made was putting connectors in-line with the hot-end and for all the fans. This way, if I have to replace a fan or upgrade the hot-end I don't have to cut and splice wires, I can just pop it off and connectorize another new one. Here are the connectors I used:
That was probably too much info -- just take your time and try not to get frustrated while you get things all set up. It is not a plug-'n-play object, it requires care and feeding.
... oh, and have fun! Whatcha gonna print?
I just bought the official wireless charger from google, and then attached it to my car using very heavy duty velcro. Then, since my car doesnt have bluetooth, I bought one of these and attached it using a spare bit of the heavy duty velcro. All that was left to be done at that point was attach an NFC tag in my car, and program it so that it would turn off wifi, turn on data, and toggle on bluetooth on / off and connect to the receiver, and then connecting to the receiver would trigger it to open GPM and start playing the music
Here is where I originally got it, but here it's available. Turns out getting a rifle Ceraokoted is way more expensive than I had imagined, so the tape was a reasonable compromise and has held up for several months without issue (no rust underneath, no peeling, etc).
For a cheaper option, put some UHMW tape where there's wood-on-wood contact and your drawers will slide smooth as butter.
Best 6 bucks in the garden
https://www.amazon.com/dp/B002CREFIC/ref=cm_sw_r_cp_apa_rA-Iyb2TD3PT3
And dis
https://www.amazon.com/dp/B000HBOYZO/ref=cm_sw_r_cp_apa_lC-Iyb53JPKVN
You can't, I've destroyed mine and installed PEI.
https://www.amazon.com/gp/product/B01KBGJU5S/ref=oh_aui_detailpage_o01_s00?ie=UTF8&psc=1
Stick it down with this stuff here:
https://www.amazon.com/gp/product/B007Y7D5NQ/ref=oh_aui_detailpage_o00_s00?ie=UTF8&psc=1
When you use this stuff you just wipe it with rubbing alcohol to clean the surface. Then it gives you near perfectly smooth prints where it touches the surface. The prints pop off easy after it cools but holds tight when it's warm. Personally I find it a waste of money to buy glue sticks/hair spray if you don't have to. Although I did buy glass I never installed it after this worked so well. It's amazing stuff and you'll never have to replace it.
Wow, I'm jealous of ethernet in each room. Nicely done.
If you already have a switch buy 3 to 5 Unifi AC-Lite APs. If you dont have a switch get a Unifi POE switch & their 5 pack of AC-Lites. As the 5 pack doesn't include the POE injectors.
Once you have the APs tape to walls / ceiling with gaffer tape (like duct tape but less residue) to sort out ideal placement & eliminate dead spots. Then once placement is sorted use Scotch fasteners or screw the base plate to drywall / bookcase.
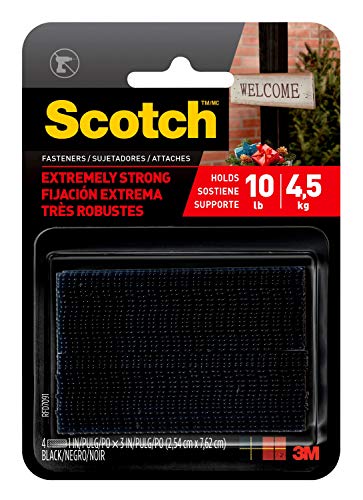
SCOTCH Fasteners Extremely Strong Holds 10lb, 4.5Kg https://www.amazon.com/dp/B00347A8GM/ref=cm_sw_r_other_apa_bwIWBbZ63W8K5
Amazon has them for $22. Match with one of these to attach it.
The actual product doesn't have that weird edge, it's just a flat sheet.
UHMW tape, like https://www.amazon.com/TapeCase-423-5-UHMW-Multiple-Sizes/dp/B01CL91OFM
yup, that's definitely neoprene, it's a great insulation material, I've used this stuff to stick down polycarbonate sheets to my aluminum build plate, might work.
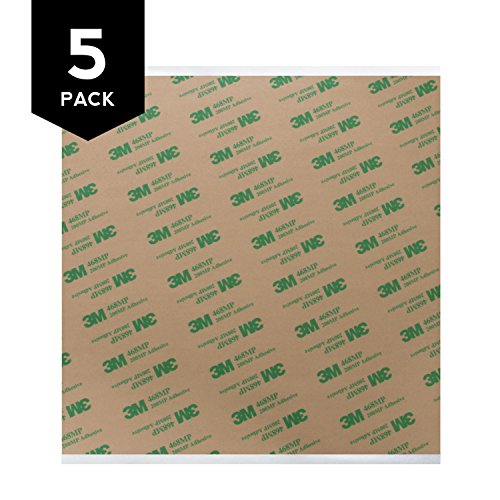
https://www.amazon.com/3M-Adhesive-Transfer-Tape-468MP/dp/B00P7K7T84
You can also buy neoprene with the adhesive already on it.
Unless you plan on touching that dock once in awhile, you should get some 3M based velcro strips and mount it under the desk since it looks like you value minimalism.
https://www.amazon.com/SCOTCH-Fasteners-Extremely-Strong-Holds/dp/B00347A8GM
Duct tape can be used to fix anything! ...except ducts.
I just copied the YouTube dude's parts list and bought them from Amazon. The USB light has several levels of brightness so that's a bonus.
I added an extra Magic Tape at the back before adding the Fastener in case the Fastener leaves a mess when I decide to remove it
I'm not sure, but you can ask for suggestions from whichever place you end up getting the wood dividers from. Take the box in with you, so they can see what you are trying to do. I imagine that if you are wanting to use tape instead of wood glue that they would recommend a double stick wood tape of some kind, like this one that I found on Amazon.
DiiCooler, Z braces, thumbscrews for bed leveling, and the melzi temp fix are all common mods that I can recommend. You could also get the all Metal Hot end from Micro Swiss but I have not done this myself.
As for supplies, I would recommend getting a sheet of PEI and some 3M adhesive to stick it to the print bed. PEI is a great, low maintenance print surface that prints stick to very well even without any form of fixative to improve bed adhesion. If you don't go that route I would say get some buildtak to put on the print bed with washable gluestick depending on the filament you use. Basically you don't want to be printing directly on to the bed as there is a hole where the thermistor comes through.
Other than that, just get extra filament and have fun with it.
UHMW tape 3/4" by 5 yards should do it
https://www.amazon.com/dp/B00823JEUO/ref=cm_sw_r_cp_apa_i_O0xXCb4B6VNZ8
http://www.amazon.com/dp/B0013HKZTA/ref=biss_dp_t_asn
attach to glass or aluminum plate with
http://www.amazon.com/TapeCase-468MP-12in-Adhesive-Transfer/dp/B00P7K7T84/ref=sr_1_4?s=industrial&ie=UTF8&qid=1449086424&sr=1-4&keywords=pei
i used 2" tape i'd suggest 3" or so -- it doesn't unroll clean, teh adhesive sticks
or buy a thick sheet of pei. and just use that. (but thats damn expensive)
First off, PEI is really tough. You can use blades on it, but I usually don't need to since if you wait till it's cold, the parts just pop right off. Secondly, yes you will want to get some 3m adhesive HERE . It is removable if you want to replace the PEI later on. As I said Earlier, PEI is tough. You can sand it with 2000 grit sandpaper every couple of months to get that shiny texture on your prints.
I was going to say get some 3m velcro. Just don't put it on stickers.
http://www.amazon.com/Scotch-Heavy-Duty-Fasteners-Inches-RFD7091/dp/B00347A8GM/ref=sr_1_2?ie=UTF8&qid=1450881554&sr=8-2&keywords=3m+heavy+duty+velcro There ya go OP.
clicking generally means a cable is disconnected. since you broke the clips you aren't completely screwed, but it's a tough "fix-fix". you can try some Kapton tape // make sure it's this it's heat resistant electrical tape // to hold it down so it stay connected, but it can easily be displaced over time meaning you may have to refresh the tape every few month.
If it's still turning on but the display isn't showing, that just means the display cable isn't seated properly. You'll need a pair of tweezers to help you really seat it in there properly. Check out some of these youtube videos for N3DS teardowns to see how they seat ribbon cables.
ifixit teardown
Retro Future Top Screen Repair
Hope this helps you out. I've never broken the plastic connectors but based on looking around and some videos I've seen online the only way to fix the connectors is to buy a new board part on ebay.
While I'm not sure if it'll work for a dreamcast controller, what I've done for a remote for an AV receiver is to buy some foil tape, cut out pieces that'll fit on top of the old conductive pads, and stick them to it. It worked like a charm for the remote, but I'm not sure how it would hold up to constant button presses that video games require.
This was the one I got, and I also got these adhesive pads to hold it to the bed. Right now the PEI is just clipped on since I wasn't sure how well it would work, but I'm planning to throw the adhesive sheet on and make it a little more permanent this weekend.
Get this - http://www.amazon.com/Polyetherimide-Natural-Standard-Tolerance-Thickness/dp/B00CPRDDLY/ref=sr_1_1?ie=UTF8&qid=1421210514&sr=8-1&keywords=pei+sheet
Then get this - http://www.amazon.com/gp/product/B007Y7D5NQ/ref=oh_aui_search_detailpage?ie=UTF8&psc=1
Cut the sheet to the size of the bed. Put the glue on the sheet with the old windex+credit card deal. Put the sheet on the bed the same way.
Adjust your Z height to account for the thickness difference.
Never ever worry about bed adhesion again, ever.
Yup, wikipedia is an authoritative source. So's the company that markets a brand of the stuff, who wouldn't find it useful at all to closely associate their product with being "the original" and "the right way to do it" ...
Anyway, here, have a real source. http://www.boston.com/bostonglobe/ideas/articles/2010/03/14/tale_of_the_tape/ -- it was duck tape before it was known as duct tape, and we haven't as a culture gotten around that stupid error yet.
The reason that I said that Duct tape shouldn't be called it or used on ducts is because it fails quickly in most modern HVAC environments (moisture and heat) and can smolder and cause toxic fumes to spread through the house if it's too close to the heat source. Aluminum duct tape is the proper thing to use if you're going to use tape. But if you are concerned at all about heating or cooling your attic instead of your house, you should probably use mastic instead.
That's scary! There seems to be some ringing issues in the upper layers of the print. I solved the issue on my printer using a couple of z-braces https://www.thingiverse.com/thing:921948 by AzzA. I would also recommend removing the stock buildtak bed and have the, I would presume, PEI adhered directly on the heatplate using https://www.amazon.com/dp/B01HP2C9FE/ref=cm_sw_r_cp_ep_dp_L2CaBb5ZXYWRZ . Happy printing!
https://www.amazon.com/gp/product/B0013HKZTA/ref=oh_aui_detailpage_o02_s00?ie=UTF8&psc=1
AND
https://www.amazon.com/gp/product/B007Y7D5NQ/ref=oh_aui_detailpage_o02_s00?ie=UTF8&psc=1
This should work well for a 200mm X 200mm heater. There are larger versions of 468mp transfer tape if you need that instead. It sucks to have to spend more but this is probably your best option to make sure you don't end up having to spend more on other adhesive options or worse, a new heater.
Sure can!
Get one of these sheets from Mcmaster carr:
12"x12" 3/32nd thick sheet of Ultim PEI plastic
http://www.mcmaster.com/#8685K41
Stick it to the existing glass with this adhesive:
3M 468MP transfer adhesive
http://www.amazon.com/gp/product/B007Y7D5NQ
Trim it to fit, then print on it as you normally would. remember to re-adjust your Z stop to compensate. For ABS at least I have not found anything that works better so far, and I've tried most things. You don't need ABS slurry with it, you can print without brim, things just stick, and then release when cooled off. Polyethalene Tape is garbage compared to this stuff. It's by far the best upgrade you can do for your printer after the heated bed itself, and it costs under $40 to do. If you are having trouble getting things to stick to your bed, this is the way to go. It supposedly works just as well for PLA, though I have not tested that personally.
Just replaced the bed on the Taz with a .06in (1.5mm) PEI sheet. At first I worried that things might not stick as well on a smooth sheet. Ended up having to freeze an ABS part to get it off. Bottom finish is like a mirror.
I'm hoping the thicker PEI will last a bit longer than the thin stock sheet. We shall see.
PEI Sheet
Adhesive
I use 3M's 468MP Adhesive Transfer Tape.
I had trouble using just binder clips when printing large ABS prints, as they would stick so well, but when contracting would warp the PEI sheet.
I guess it comes down to what you are printing and how thick your PEI sheet is.
I use a 0.03" sheet of PEI and would not recommend binder clips.
I stuck my PEI to a piece of Borosilicate glass which I believe you did as well based off your statement "Bit it's stuck to the glass..."
What quality of Transfer tape did you use. I bought this stuff, again stuck to the glass, and I haven't had issues.
I know you said that you removed the protective film. Mine had film on both sides, did yours?
I have several upgrades in the queue for this weekend once my M3 hardware kit comes in:
(Note the above designs are all three by USWaterRockets, who seems to have exceptional engineering skills, but I haven't installed them yet. Hopefully, this weekend and I'll post results)
Another one I'm considering next:
Here is the E3D-v6 adapter I currently have on the printer:
Note the above design is just a quick-and-dirty solution; the author even states this. It works and will get you what you need to get things going with the new head.
Other upgrades I've done:
https://www.amazon.com/gp/product/B007Y7D5NQ/ref=oh_aui_detailpage_o05_s00?ie=UTF8&psc=1
https://www.amazon.com/gp/product/B0013HKZTA/ref=oh_aui_detailpage_o05_s00?ie=UTF8&psc=1
Here's the E3D-v6 printhead I bought and it's worked well: https://www.amazon.com/gp/product/B01H4V2QEK/ref=oh_aui_detailpage_o04_s00?ie=UTF8&psc=1
Disclaimer: I'm new to 3D printing. This is my first printer and the learning curve is steep. I may look back on this posting in a year and think "what an idiot I was doing <this>". Take my advice with a grain of salt, as I'm muddling through this whole thing. YMMV
I went from Gen 5 to 6, get these with some velcro. Stick next to your right knee on the transmission tunnel for a good cell phone holder.
If you need a front plate, ZL1 Addons makes a great one I can vouch for.
I use this - 3M Dual Lock Plastic Velcro along with a typical normal Velcro strap. That battery will not move, I promise. The 3M is incredibly strong for front to back movement and they regular strap also helps prevent it from lifting up.
I've had the battery eject from my quad ONCE, but that's only because it ripped the shrink wrap off of the battery pack! The 3M held it in place lol the shrink wrap was still attached to the quad.
Battery Pic - http://imgur.com/jVvQyWX
Ah, I didn't make that connection. Just hang it instead? Or if you don't need perfect positioning, these are strong enough even with possible cable tension and don't wear out like velcro.
Found the same as original ones on amazon, https://www.amazon.fr/dp/B00K6E0MVM/ref=cm_sw_r_em_apa_i_4kolDbM9YHDCG
I immediately took the stock tape off because I knew it wouldn't hold up well. I also wanted the ability to remove the entire mount whenever I wanted so I used this 3M heavy duty fasteners instead. It's like velcro except that it uses thick plastic prongs rather than fibers to bind itself together. It also has better adhesive on the backing. I've hit my AP countless times with my knee, accidentally yanked on the cord, as well as taken high G force corners and it has never ever fallen off. I've had it mounted like this for almost a year.
I use this stuff, it's fantastic: http://www.amazon.com/Peachtree-Woodworking-Yards-Double-PW3599/dp/B0049RAEA6/ref=sr_1_1?ie=UTF8&amp;qid=1410886770&amp;sr=8-1&amp;keywords=double+sided+tape+woodworking
Before that I used carpet tape, and found it to a big pain - lots of residue left on the wood, difficult to separate the backing, etc.
I have been using e8000 on my PLA and it works like a charm. I've not had any problems with it melting or warping the prints, It has a little more stick initially then Superglue. It takes a little more time to set but is damn strong. If you don't need super strong adhesion its a good choice. But if you needed super strong adhesion you would need pins in the print anyways and e8000 would work close to superglue in that situation anyway. https://www.amazon.com/Purpose-Leveling-Acrylic-Adhesive-Jewelry/dp/B07JGC4G3L
There are ways to squeeze the controller that helped some. My guess there is you might have hit something and it knocked it off center or it's just not fully pressed down.
It could also be that the little rubber bit has just been mashed too far into the housing on certain points. So it doesn't stick up far enough to get a good click. This would explain why it looks centered and in place. Mine disintegrated in the 12-3 o'clock area only.
If the first option doesn't fix it, I'd find something to glue on top of it. I used a piece of sticky foam tabs that are for mounting shit (like these https://www.amazon.com/M-jump-Adhesive-Double-Strong-Mounting/dp/B074RGP99T/. Cut it up and glued it into the housing. Protrudes quite a bit above the original but still works great, and it'll likely never wear down. Cardboard is used by some with success, but I suspect it might mash down too much over time.
Also as cautioned above, I lost haptics in one controller during my fix. I'd rather be able to click though.
I have a sheet on both aluminum and glass. For for both I used 3M 468 adhesive. Works great, just be careful as it loves to stick to itself and once it's down you can't straighten it out.
I used this (Amazon link): [TapeCase 12" squares (pack of 6), Converted from 3M 468MP Adhesive Transfer Tape] (https://www.amazon.com/dp/B007Y7D5NQ/ref=cm_sw_r_other_apa_Ux1sxbDHBG4C0)
Make sure your build surface and PEI sheet are squeaky clean beforehand. Alcohol is your friend (rubbing, not drinking, though that's good too). Take your time laying down the adhesive to the PEI to minimize bubbles (there will be bubbles). Smooth it out as much as you can. You'll end up with a handful of larger bubbles still, but that's OK. Peel of the remaining sheet from the adhesive, and pop those suckers. I used an exacto knife and carefully scored the bubbles, then used a small piece of the discarded backing sheet to smooth them out. Now that that's done, carefully align and lay the stickified PEI sheet onto the aluminum bed. You only get one shot here, so make it work. What I did was lay one edge down and carefully push it down, keeping the farthest edge of the PEI up until the end. Take your time and keep bubbles to a minimum. Once your down, congrats. You now have a a super surface for printing.
Why all the stuff about bubble though? Well, hot air expands. This can cause minor warping of the PEI sheet as it warms up, and can mess up your first layers. You'll have some areas that might not go down smoothly, and others that the nozzle drags on. It's annoying. Trust me, I still need to redo my aluminum the right way.
Side note: if at all possible, I'd recommend getting a PEI sheet larger than your bed. Less work aligning it, then you can cut it to fit after putting it down. Drill holes through it afterwards, hell even counter sink it a bit. You'll have a nice looking print area afterwards!
...shit, time to order a 12in PEI sheet.
[PEI for $17] (https://www.amazon.com/gp/product/B0013HKZTA/ref=oh_aui_detailpage_o09_s00?ie=UTF8&amp;psc=1) this will last you for a long time (Through many many prints) if you are careful with it.
[Transfer tape for sticking PEI to buildplate] (https://www.amazon.com/Gizmo-Dorks-Adhesive-Transfer-Sheets/dp/B01HP2CEG8)
[Here is a site with more information] (http://reprap.org/wiki/PEI_build_surface)
Edit: For immediate printing buy a cut sheet of glass from the glass or hardware store, then spray 2 layers of [Aqua net extra strength super hold unscented] (http://www.walmart.com/ip/Aqua-Net-Extra-Super-Hold-3-Unscented-Hair-Spray-11-Oz/10997068) it must be this brand and product. Or you could match ingredients. This method will work for fairly large prints but is not as good as PEI. After each print just spray another coat of hairspray.
To install it you will need some sort of adhesive. I used these to keep it simple https://www.amazon.com/TapeCase-squares-Converted-Adhesive-Transfer/dp/B007Y7D5NQ Slap it on whatever you want, just make sure it's a solid surface (not directly onto a PCB, because the PCB may flex and this PEI does nothing to prevent that). Adhesive on PEI or adhesive on heated surface first is entirely up to you.
The $15 vs $50 price you're probably just paying for the brand -- I haven't found any reason why this generic Polyetherimide stuff would be inferior compared to the pricey stuff.
The putty knife is probably fine as long as you don't dig in with the corner of it. Unscientifically I'd say the PEI is quite hard. So far the only damage mine has suffered was from the hot nozzle scraping across it. Pretty sure I've dropped few screwdrivers on it over the past months and there's no sign of it.
If you get a 12x12 sheet you will probably have some scraps left over once you cut it to fit. Play around with that to get a feel for how much abuse it will put up with. :)
I'd only recommend that if your sinks arrive with very soft thermal pad material, like that which you'll find on your main Gelid VRM sink, instead of actual thermal tape. I don't know what adhesive you have on hand but most thermal adhesive is permanent, so just be aware if you choose that route.
I ordered these sinks and this tape which is actually 3M 8815. After wasting about 30 minutes installing one sink with the 3M tape, I just went with the OEM applied stuff for the other fifteen. Several months and tons of heat later all 16 sinks are stuck so well they may as well be considered structural. Surface prep and application technique are where the battle is won or lost.
3M 468MP adhesive came with my PEI sheet. I used it to get the sheet on the glass and I ordered some more that I will be using to get the glass to stay on the bed without binder clips.
Gizmo Dorks 3M 468MP Adhesive Transfer Tape Sheets 12" x 12" (5-Pack) https://www.amazon.com/dp/B01HP2CEG8/ref=cm_sw_r_em_apa_i_1V2nDbF6XTMKC
Do yourself a favor and use some 3M 468MP transfer tape and a piece of PEI. You'll never have to worry about adhesion again. PLA and ABS stick to it perfectly and pop off when cool without issue. I've had hundreds of prints without adhesion issues, even when my offset is way off and I'm printing at 0.4mm height instead of 0.1mm. If you want to see what it looks like, check out the post I submitted yesterday
http://imgur.com/CvSGXzO
http://imgur.com/NQiV9iz
The inside is a rat's nest that I need to fix, and I'd like to add a volume control, but it's basically a finished product. I mounted the battery and amp using 3M adhesive Dual Lock, which is great stuff (Its way better than velcro because it locks into place, whereas with velcro your component will start leaning away from the mounting surface), and way better than screws because I can remove the components quickly if need be for a quick fix. One addition I'm contemplating making is adding Dynamat, which I think might help a lot considering it's just a cheap plastic cooler instead of a real speaker box. Oh, and one other thing I need to add is something on the exterior to hold a phone/mp3 player.
I used 12"x12" 3M double-sided adhesive tape sheets to adhere my PEI to 12"x12" mirror tile I bought from Lowes. I use bulldog clips to clip the mirror tile onto my heated bed.
https://www.amazon.com/gp/product/B01HP2CEG8/ref=oh_aui_detailpage_o04_s00?ie=UTF8&amp;psc=1
I have heard many good things about using that for HOTAS. I would recommend using this to secure it. I am pretty sure that the extreme pro will work with that
You could try UHMW tape on the runners. I got some at Amazon and it worked really well for me.
Edit: fixed link
Your secret is safe with me! The tape I got is super super thin. Here's a link... it's .005 mil thick
Are they these ones?
It depends on what you plan on printing. As far as I'm aware, the taz printers are more versatile (direct drive and large plate) so flexible and large prints are easy on the taz. While the ultimaker isn't as versatile, it can be much quicker while maintaining the same print quality. PEI isn't hard to install, just cut a sheet with a box cutter and lay tape on the bed.
I recently stopped using blue tape and switched to PEI sheets on glass. I'll never go back. I think this would be a good thing for you to try, the PEI sheet releases pretty easily once cool.
PEI (Polyetherimide) Sheet, Opaque Natural, Standard Tolerance, ASTM D5205 PEI0113, 0.03" Thickness, 12" Width, 12" Length https://www.amazon.com/dp/B0013HKZTA/ref=cm_sw_r_cp_apa_j.9Dxb7FAEG3J
TapeCase 12" squares (pack of 6), Converted from 3M 468MP Adhesive Transfer Tape https://www.amazon.com/dp/B007Y7D5NQ/ref=cm_sw_r_cp_apa_S.9DxbBW56J7Z
http://www.amazon.com/dp/B0013HKZTA/ref=biss_dp_t_asn
http://www.amazon.com/TapeCase-squares-Converted-Adhesive-Transfer/dp/B007Y7D5NQ/
Do note I am using a rostock, but psi will work on all regardless, it's also acetone resistant, so you could clean really easily
I bought the same thing for my v1:
12"x12" 0.03" PEI
https://www.amazon.com/gp/product/B0013HKZTA/
(6) 12x12" 3M Adhesive Transfer Tape:
https://www.amazon.com/gp/product/B007Y7D5NQ/
At the time there were no practical cheaper/smaller options (although the extra 3M adhesive does come in handy).
... I scored/snapped the sheet into 4 pieces, and I'm still on the first PEI sheet after like 300 hours. It still looks flawless. I only use sharp scraper blades or no tools to remove parts. If you're printing something crazy in a cold room, you can add hairspray, but for the most part, PEI has perfect adhesion on it's own.
I definitely recommend the thicker PEI (0.03"+), as it makes the MPSM bed much more rigid. I don't have to bend the aluminum bed "flat again" anymore. I dont worry about bending the bed when ripping parts off the bed, even with super high adhesion.
Clean it with alcohol, not sandpaper.
Try here: https://www.amazon.co.uk/468MP-Adhesive-Transfer-Sheets-5-Pack/dp/B01HP2CEG8/ref=sr_1_4?ie=UTF8&amp;qid=1492613611&amp;sr=8-4&amp;keywords=PEI+Sheet
If you still have the rubber feet, then a tape like this might stick them back on
https://www.amazon.com/dp/B00JR06418
Don't nail
Clean/sand the area and then use a heavy duty velcro to cover the entire area you are trying to hold (not just a single strip)
https://www.amazon.com/Scotch-Heavy-Duty-Fasteners-Inches-RFD7091/dp/B00347A8GM
have you tried this? https://www.amazon.co.uk/468MP-Adhesive-Transfer-Sheets-5-Pack/dp/B01HP2C9FE/ref=sr_1_5?ie=UTF8&amp;qid=1487539141&amp;sr=8-5&amp;keywords=pei
An inexpensive alternative to "black wrap" or "Black Tack" that could solve your issue would be something like this. It's used primarily by HVAC to seal joints, but should function perfectly for your task. It's also well within your budget.
Scotch(R) Heavy-Duty Fasteners, 2 Sets of 1 x 3 Inches, Strips ,Black (RFD7091) https://www.amazon.com/dp/B00347A8GM/ref=cm_sw_r_cp_api_Gd90AbHHJ859H
Is this it?
Where was this stuff when put my PEI on my borosilicate glass plate? I had to use a separate adhesive sheet (Like https://www.amazon.com/dp/B007Y7D5NQ). That was a serious pain. I think I ruined 3 or 4 sheets before I got it right. Will certainly use this on my next printer.
Velcro and tether, baby
https://imgur.com/a/qKpPy
https://www.amazon.com/Scotch-Heavy-Duty-Fasteners-Inches-RFD7091/dp/B00347A8GM/ref=sr_1_4?ie=UTF8&amp;qid=1520960332&amp;sr=8-4&amp;keywords=3m+scotch+heavy+duty+fasteners
https://www.amazon.com/gp/product/B00JFS1TC6/ref=oh_aui_search_detailpage?ie=UTF8&amp;psc=1
One of the best things I bought along with the CH was a set of velcro fasteners: https://www.amazon.com/Scotch-Heavy-Duty-Fasteners-Inches-RFD7091/dp/B00347A8GM/ref=sr_1_2?ie=UTF8&amp;qid=1497634206&amp;sr=8-2&amp;keywords=3m+velcro+strips
They'll make the CH feel twice as solid.
pei sheet
adhesive
I was thinking to use these
Scotch(R) Heavy-Duty Fasteners, 2 Sets of 1 x 3 Inches, Strips ,Black (RFD7091) https://www.amazon.com/dp/B00347A8GM/ref=cm_sw_r_cp_api_iG22xbGPR59SP
I use them them to mount everything in my house. You can stick one on the back of the base station mount and one on the wall. These things are quite strong as well so they could definitely handle the weight of the base stations.
I guess? (Not really sure) It hasn't popped off on me at all, very secure.
Scotch(R) Heavy-Duty Fasteners, 2 Sets of 1 x 3 Inches, Strips ,Black (RFD7091) https://www.amazon.com/dp/B00347A8GM/ref=cm_sw_r_cp_apa_qD66xbBKF40R4
It sounds like your PMA8084 Power Management IC has been killed. It's really close to the SoC so all that heat probably did it in. It's a common issue, maybe you could find someone to replace it for you. Process looks like this https://www.youtube.com/watch?v=lMmMoyNrxdo
You can buy the IC here: https://www.ebay.com/sch/i.html?_from=R40&_trksid=m570.l1313&_nkw=Pma8084+Power+Management&_sacat=0
You probably don't have the tools or skill to do it yourself, you'll have to find someone local or online to send it to.
&#x200B;
Good luck, depends how important those files were to you if this is worth it. Sorry to bring you bad news. Let me know if you do fix it or the problem was actually something else, always a learning experience.
&#x200B;
You should also open up the phone and place new thermal pads were the old ones were. The thickness of new pads squeezes the SoC against the PCB and usually keeps it working for some time longer if the solder has degraded from overheating. The thermal pad also prevents it from ever overheating again. The thermal pads Samsung put in from factory are absolute garbage, and are what cause the SoC to cook itself alive, or "eMMC errors". Do not put cardboard in your phone against the 100 Celsius surface of the SoC like some people are going around suggesting. I recommend these thermal pads. Any pressure from placing cardboard will also be there with good quality thermal pads.
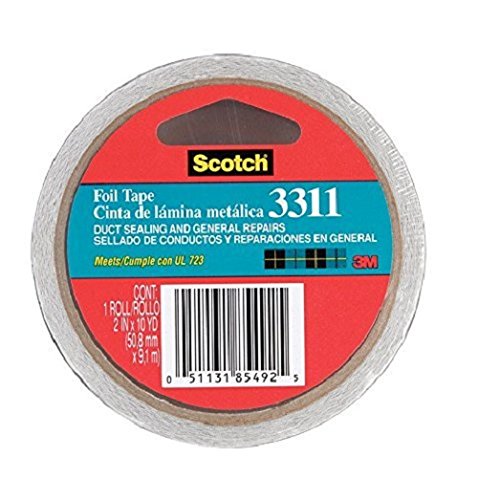
HVAC guy here too. I wear gloves and boom, while I look like a pansy, I never get a cut. Here's an example of foil tape. Duct tape, actually sucks for ducts. What murm87 said is a little incorrect. It's not used to "fix" anything, so much as it's used to completely seal the ductwork. The problem with duct tape, is that it dries out. Foil tape will dry out as well, but not to the same degree, and is a much better seal. If you see foil tape (or even duct tape), it's not that the duct work is broken, just that they're making it air tight.
Non-mobile: 3M Dual Lock Plastic Velcro
^That's ^why ^I'm ^here, ^I ^don't ^judge ^you. ^PM ^/u/xl0 ^if ^I'm ^causing ^any ^trouble. ^WUT?