Best automotive gauges & accessories according to redditors
We found 312 Reddit comments discussing the best automotive gauges & accessories. We ranked the 155 resulting products by number of redditors who mentioned them. Here are the top 20.
We found 312 Reddit comments discussing the best automotive gauges & accessories. We ranked the 155 resulting products by number of redditors who mentioned them. Here are the top 20.


The 6v golf cart batteries from Costco or Sams Club are what people usually recommend. I have them and they work well.
Also, get one of these: https://www.amazon.com/gp/product/B013PKYILS Single best upgrade I've done to my trailer.
Joe's Racing tire pressure gauge
http://www.amazon.com/Joes-Racing-32307-Pressure-Gauge/dp/B00404WDUC
I've had crappy ones for many years until I spent a little bit more and got this. Great quality and should last you a long time.
I'm not sure if there is a pressure gauge that's technically "for life" that's consumer grade and relatively cheap since they are considered to be scientific devices that have parts that wear and/or require calibration at some point.
Without tools, the best you can really do is look for oiliness on the pipe. When you find a joint that feels oily (look for dark colours on the pipe, usually covered in very fine dust. Once you rub the dusty area with your fingers you'll feel the oiliness), spray/pour a small amount of washing up liquid over it and look for bubbles. If there's any refrigerant left in the system, you'll usually see bubbles appear (or over a longer period, foam). Of course if the gas has all escaped already - and we're only talking a couple of hundred grams here - then you won't see any bubbles.
Most domestic gear has no access fitting at all so even locating the leak can be difficult if there's no visual indication. You need to get pressure in there so you can leak test - this means adding a bullet piercing valve (like this).
Then you need to put something in via your bullet piercing valve to raise the system pressure. It's best to use dry nitrogen to leak test to save wasting refrigerant, but since you most likely don't have that on hand you could buy yourself some refrigerant (most likely R134a) and pressurise with that. That's a big no-no here (both disposable cylinders and dumping gas to atmosphere by charging a system with a known leak) but I'm guessing your in the US, and those sorts of laws seem remarkably lax so go for gold. It's not like you'll be ruining MY ozone layer too, right? ;)
You also need to regulate the pressure going in to the system. This is where you need gauges. Connect the yellow line to your bottle, connect the blue line loosely to your bullet piercing valve, purge from cylinder to piercing valve by opening the cylinder tap + gauges tap, and releasing some pressure via the loose fitting, then tighten the fitting and close your gauges tap. Open the bullet piercing valve. Open the gauges tap slowly and give it ~50psi of system pressure.
Then you can go for gold with your soap, or you can lash out and grab yourself some "proper" leak detection fluid (like this), or better yet an electronic leak detector (like this one).
Once you've found your leak, you want to release your nitrogen (or reclaim your refrigerant using a reclaim plant and a spare cylinder), then repair it using an oxy/acetalyne set, or since it's only tiny pipework you can get away with a MAPP gas set.
If it's a copper->copper joint, you're laughing - polish the pipework up with emery cloth, heat the pipe until it's just this side of glowing red, and feed the joint with brown tip silver solder.
If it's a copper->steel joint, then it's a bit more of a pain. You need blue tip silver solder and flux. Clean your joint with the emery cloth, give it a nice coating of flux on every surface you need solder to stick to, then heat it up until it's a fair way short of glowing red. Feed the blue tip solder in and STOP. Unlike brown tip (15% silver) you can't just keep feeding blue tip (45% silver) as it ruins the weld.
Now, since you put on a bullet piercing valve and they leak like a sieve in the long term, we need to replace that with a schrader access valve. Since it's most likely going to be in a straight through piece of pipe, you can save time and grab yourself a pre made access valve in 1/4" pipe. Cut away the hole left by the bullet piercing valve, polish the copper and cut the pipework with a ~10mm gap using a tube cutter. Then slip your access fitting assembly in there, and follow the copper->copper joint procedure.
Of course, now that we've done all that you need to change the liquid line filter drier too. I'd recommend a 1/4" solder in core drier in place of the original copper spun drier because... well, copper spun driers are terrible. Follow the pipe cutting procedure from the piercing valve instructions and the soldering instructions from the copper->copper joint instructions and that's done too. Remember - always try and mount the drier so it's outlet is LOWER than its inlet. This turns the drier into a small liquid receiver and helps ensure a good liquid seal over the capillary tube. Speaking of capillary tubes, if it was inserted straight into the original copper spun drier CUT the capillary, don't try and unsweat it. The chances of blocking it up are about 82.5634% (approximately) when you unsweat capillarys. You're much better off chopping it with a set of capillary tube cutters and ensuring a good clean capillary. The ~30mm of wasted capillary will affect performance, but almost certainly not to any sort of measurable degree.
Then give the system a good evacuation using a vacuum pump and ensure it reaches a good vacuum (sub-500 micron) with a digital vacuum gauge.
Then using a set of electronic scales, charge your freshly evacuated system (remembering to purge!) to the charge recommended by the manufacturer.
Voila! You have just fixed your chest freezer.
..... Alternatively, pay someone to do it for you and/or recycle the components and buy yourself a new one.
Amazon $19.95 prime shipped
http://www.amazon.com/Accu-Gage-H100X-Professional-Pressure-Protective/dp/B00HESFIJ4
For in the car I like the form factor of this one better
http://www.amazon.com/Accu-Gage-RS60XA-Professional-Pressure-Protective/dp/B00VS0T7IC
and down below you can get the rubber guard for it for $5 so $15 total and much more compact and handy for in car usage although only goes to 60psi.
you can get the ribbed sheath for $7.49 and its also prime shipped. (the regular rubber sheath is not prime found it also for $5.07 prime shipped just search accu-gage and you will find it (second page)
and I will be buying a couple of these shortly. did not even know this existed.
http://www.amazon.com/Accu-gage-Chek-Spare-Valve-Extender/dp/B0006O2S8M
you screw onto your spare and then run the other end somewhere convenient so you can both check and fill as needed your spare without digging it out!
I think my favorite is this one
http://www.amazon.com/G-H-Meiser-EZ02-EZ-Gauge/dp/B001CJHU9W
clamps onto your tire chuck AND has a pass through for the compressor. so you can fill at a gas station for example but also use your gauge to know when to stop since many do not have a gauge or its hard to read or inaccurate/broken.
$17
I got the mini k40 (would not do that again). It works great, but I didn't know it at the time that I would be getting a weaker laser. I was about a week too late learning about tube sizes being the better way to know the true wattage.
I have done a series of upgrades and then re-dos. So hopefully you can learn a few things from all my tinkering.
Analog Milliamp Meter
I bought this meter. I followed this link for the install.
Exhaust
I initially went with an inline 3" bilge pump that had a corresponding 3d printed exhaust mount. It was ok, but in the end I just wasn't good enough when I started cutting more leather/wood.
So I went a little overboard, but I am glad I did. I went with this blower instead. I made my own 3D printed mount for it. I printed 2 adapters for the blower to fit 4" ducting and then routed it up and outside my garage.
I also removed the small internal duct thing prior to installing the new exhaust. it gives me a little more cutting room as well.
Air Assist
I went with the Light to Object head and bought a new lens to fit it.
Drag Chain
I bought a 10x10 drag chain off amazon. I had originally printed one, it was ok, but I recently switched up the mounting of the drag chain to run along the X gantry which gave me a little more room to cut.
Laser Aim Assist
I made a mash of 2 different thingverse designs to hold 2 red line lasers and where they intersect is my laser beam. It works well, I made it this way originally when I had an adjustable table. Honestly, now I should switch back to a single red dot, but I am too lazy. The two lines will sometimes move on me so I end up having to do a test fire every so often to ensure they are lined up properly.
Spring Loaded Adjustable Bed
I followed this guide
Hopefully this helps you out a bit.
I use this a Joes racing gauge. Very good reviews in the car racing community, and its has never let me down. Good value, and I cant complain. I use it for my bikes and all the cars we own.
http://www.amazon.com/Joes-Racing-32307-Pressure-Gauge/dp/B00404WDUC?ie=UTF8&keywords=joes%20racing&qid=1463484884&ref_=sr_1_1&sr=8-1
Sure thing!
Radiant Cycles Shorty GP Exhaust for 2017-2018 Honda CMX 500 Rebel BLACK https://www.amazon.com/dp/B0758DZSB3/ref=cm_sw_r_cp_api_Pg80AbXQQ9XC2
IDEA Waterproof Motorcycle Gear Indicator Blue LED Display for Honda Plug & play (Recent year model, Blue) https://www.amazon.com/dp/B074SJRRP2/ref=cm_sw_r_cp_api_lk80AbNYTK18R
This pryometer is single best investment I've made. Testing pressures like you did is basically trying to subjectively measure what this can directly measure. What's the best pressure to run? The one that get's the most work out of the tire. That shows up as relatively consistent temperature distribution across the surface. All changes I've made to the kart correlates in some way to tire temp.
http://www.amazon.com/Joes-Racing-54005-Pyrometer-Adjustable/dp/B005JVFTTM/ref=pd_sim_263_4?ie=UTF8&dpID=414eFGN%2BEtL&dpSrc=sims&preST=_AC_UL160_SR144%2C160_&refRID=0CS2WBZGAA1RVH0YHQQ2
What are you trying to simulate? RC helicopters can run at a wide variety of rotor speeds depending on blade geometry and performance goals. High performance 3D flight will often see head speeds of 3000-4000 RPM on platforms as large as 600 size. If you're going for efficiency you can get asymmetrical blades and run much lower head speed (~1000 RPM or even lower has been done). Any speed between those two is a realistic speed, so the choice of what speed to use is for you to decide depending on what makes sense in the context of your application.
This is true for collective-pitch helicopters. If you're talking specifically about fixed pitch helicopters then head speed is directly tied to lift, in which case it still doesn't do a lot of good to choose a particular head speed because the chosen head speed will vary based on the lift required at any given time.
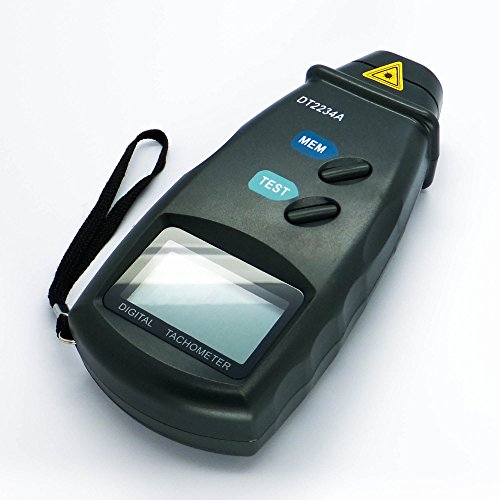
You don't need a strobe though, and tachs aren't that expensive.
They make these small stepper motors just for this type of application. No specialized driver needed, hook up directly up the Arduino ttl output pins. I bought one years ago on eBay for a couple dollars to play around with. This Amazon link are similar but different color. They are useful to make all sorts of analog instrumentation displays.
http://www.amazon.com/Instrument-Dashboard-Silverado-Cavalier-Avalanche/dp/B004PXAUGC
Most excellent. These will work well in my racecar for temp warning lights. Where'd you get that digital display? I like it too, but want something larger and most likely Red. I'll probably end up with something from Autometer.
EDIT: Found the link in your other discussion thread. https://www.amazon.com/WonVon-Speedometer-Accessories-Instruments-Modification/dp/B07QB61XQW/ref=redir_mobile_desktop?_encoding=UTF8&psc=1&ref_=yo_ii_img
Dangerous as is, the battery needs a large main fuse and a manual disconnect switch
https://www.westmarine.com/buy/blue-sea-systems--m-series-mini-on-off-battery-switch-with-knob-black--
Your inverter and fridge aren't fused.
10 gauge wire is not enough to run a fridge and an inverter I would suspect. Also, you might want to run the fridge and inverter on its own, proportionally sized fuse; that way the fuses don't have to be so massive, requiring less potential sparks and fire to blow the fuses. As it is, there's no fuse, and the inverter and fridge share the same cable; the most load hungry devices. That means the cable needs to be double thick from the battery to a bus bar, to the fridge and inverter. Otherwise you will have considerable voltage drop or possibly even melt your wires and cause a fire.
Same thing for the solar charge controller. According to this chart: http://www.affordable-solar.com/solar-tools/wire-sizing-charts/ you can only go 3.5 feet before you get more than 2% voltage drop with 10awg and 30amps - and it says that no more than 2% is acceptable. This might help: https://www.scribd.com/document/334383567/Solar-Setup-by-sprinterpirate
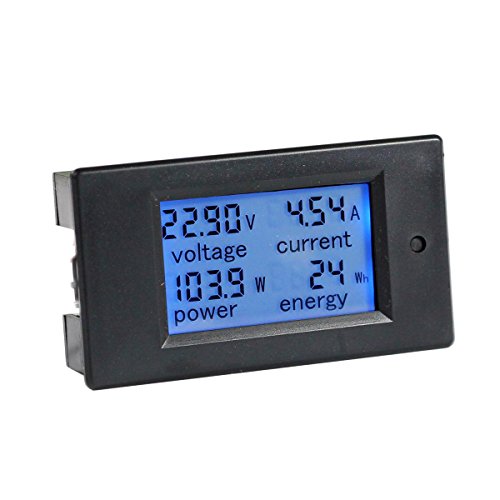
Also I see no battery/amp meter. This is limited to 100a but you get the idea: https://www.amazon.com/bayite-6-5-100V-Display-Multimeter-Voltmeter/dp/B013PKYILS/ref=sr_1_3?ie=UTF8&qid=1495073407&sr=8-3&keywords=battery+meter
And brokedown is correct, you can't just leave different types of batteries always connected whenever the engine is on. You need to disconnect it either with a programmed ACR or manually.
i drive about 90 miles, round trip, every day.
i do it in a 2005 corolla automatic, and get ~30 mpg in the winter, about 35 in summer. that's with about 75% at 75 mph and the rest in town. if i take the slow road to work, going 55 mph, i can get crazy mpg numbers, average 45 on that trip, i think my high was about 58. i use a ScanGaugeE to track my mpgs in realtime. when i fuel up, i double check every time, and it's within 1 mpg. every time.
oh, and i paid $3400 for it with 120k. timing chain, so no need to worry about the timing belt. they're about as reliable as it gets. i haven't had to fix anything since i got it, it now has about 165k. no leaks, no noises (well... it's still a small car...), no problems at all.
they may not be the nicest cars around, but damn, they'll save you some serious money.
This is the one I have, although it might be a little bigger than you want. I picked it up at a local Advanced Auto, but the one on Amazon that I link to seem identical. I like it, but it might be more than you're looking for.
my gauge
I use Torque Pro on my android with a bluetooth ODBII scanner. It has helped me to diagnose some issues on a friend’s car. As well as see some benefits from some small fix-ups that I was not sure would be noticeable (eg. cleaning my MAF)
For tire pressure I use Joes racing gauge
Nice work, this is like a bigger, better version of my light with 1' Q strips and a mix of spectrum. I also oversized mine some, 150 watts total in a 2'x2', and have it so I can turn on and off each group. I'm using just regular switches for the groups and I have to adjust the pot manually to keep the power where I wanted it using one of these to measure. Did you go a more advanced route? I'm working on upgrading and controlling everything via an arduino and using relays to turn the light groups on/off and for autowatering and a digital potentiometer for the % power.
I finished one grow with my light at full power in flower, but ~40 watts are side lighting, 10 watts per corner. My light is only around 10"-12" from the tops, and the side lights are only a few inches away. I didn't see any big advantage to the side light, I'm not sure if I'm going to keep them, but I'm using them again this grow. Maybe I'll move 2 up top and keep 2 low and see what the different sides look like.
I'm curious to try to learn more about if this is wasted energy and if so, how to tell
Sweet. That’s the one I have.
My Mods so far:
MRA Windscreen (Smoke)
IDEA Gear Position Indicator
Yoshimura R34
12V Socket
These are the big ones. Windscreen makes a big difference. Takes a lot of wind off the chest, plenty off the face. I can comment on the others if you like. I agree with t your comment on the suspension as well. Big potholes will bottom out the springs. No fun.
Probe all day . More accurate and more precise
Big fan of Joe's Racing. http://www.amazon.com/Joes-Racing-32307-Pressure-Gauge/dp/B00404WDUC/
the main reason for a tire rotation is mostly due to the tread of the rear tires going out faster than the front ones (not by much) so rotate them to even out the tread wear on your tires.
On mine (3) I have found around 6-7K milage my tread wear is about 1/32 difference (7/32 front and 8/32 rear) this depends on driving habit, road conditions etc.
I always suggest a 2/32 in.+ In difference before rotating so you won't be either doing it yourself so much or taking the car in to have them do it every 6,250 miles.
One of these tread depth gauges are the cheapest and easiest way to measure your tires tread depth (minus the penny method), doesn't have to specifically be this one but it's an easy one to show.
I'd say at least have one on hand in the glove box and if you are ever curious if you need a tire rotation (outside of an up coming 2 year service visit where they can rotate for you with the maintenance plan) you won't pay it of pocket for (in my opinion) unnecessary tire rotation.
You're most welcome! I bought the following:
4x100W Panels
Panel Mounting
Solar Panel Connectors
Tool Crimper
Assembly Tool
Panel Connectors
Power Information
CTEK Charger
CTEK SmartPass
200ah AMG Battery
Fuse Block
300W Pure Sine Wave Inverter
LED Strip
Dometic 35 Fridge
I bought all these items with research into my solar needs and following the advice from here in the vandwelling subreddit and also information I gathered from Amazon. I am probably doing a bit of overkill on my solar setup but I thankfully have the money to do it and don't want to mess with adding anything later.
I will have to do research myself on how to combine the four panels into the battery but that will be a few weeks away so I haven't done much in that area. I do plan to buy 10GA wire from Lowes and use the crimping tool and connectors to form my own wiring harness so it will be clean looking. \
EDIT: Adding info.
And it's really border-line emergency at that point. 2/32 is the minimum by law. It's not going to work so great if wet or snowy. Tires should be replaced around 4/32, before they degrade too much in slippery conditions.
I recommend getting a depth gauge to throw in your glovebox. Under $4 on amazon.
Ran an electrical system in my Subaru with an auxiliary battery charged off the alternator.
80 Amp isolator relay (switches charging on while car is running):
https://www.amazon.com/Stinger-SGP38-80-AMP-Battery-Isolator/dp/B001HC6UJ0
100AH 12V AGM battery: https://www.amazon.com/Universal-UB121000-45978-100AH-Cycle-Battery/dp/B00S1RT58C
2Ga Wire running the length from the Relay in the engine bay to the battery.
Kinda Extra things:
Kill Switch: https://www.amazon.com/Ampper-Battery-Switch-12-Disconnect/dp/B07413JWLD
100A inline Fuse
Multimeter (read current voltage, Amperage, etc): www.amazon.com/bayite-6-5-100V-Display-Multimeter-Voltmeter/dp/B013PKYILS/
How about something like
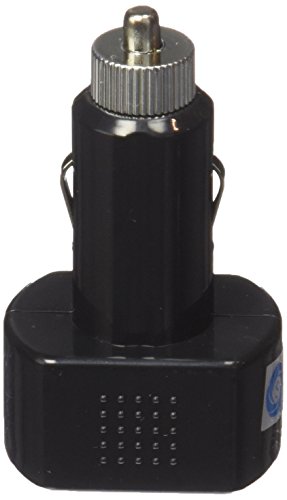
https://www.amazon.com/d/Voltmeter/Cigarette-Lighter-Voltage-Digital-Voltmeter/B0092KVYGI
If your not up to wiring something in.
You can use these and mount under your tank https://www.amazon.com/Auto-Meter-3209-Tachometer-Mounting/dp/B00062YWNI/ref=sr_1_9?ie=UTF8&qid=1519655184&sr=8-9&keywords=autometer+tachometer
I used this although it mounted to the fork and it is works so good and is super tucked in https://www.amazon.com/WinllyAT-Relocation-Bracket-Sportster-1995-2016/dp/B074H7LLNX/ref=sr_1_8?s=automotive&ie=UTF8&qid=1519655244&sr=1-8&keywords=sportster+speedometer+relocation
I have a 2018 cb500x, but they make these specific to a variety of bikes https://www.amazon.com/dp/B07594TBRZ/ref=cm_sw_r_cp_apa_i_-rztDb4BH9YYX
This one says it fits your FZ1, plug and play supposedly.
https://www.amazon.com/dp/B07594TBRZ/ref=cm_sw_r_cp_apa_i_e0BtDbMEG011S
For the price worth a try.
I have been debating buying one of these for my router table. I was hoping someone could tell me if there is a way to connect some kind of tachometer to the motor to display RPM.
edit: Nevermind. Apparently they make this thing
This is the meter, hookup is pretty easy. bayite DC 6.5-100V 0-100A LCD Display Digital Current Voltage Power Energy Meter Multimeter Ammeter Voltmeter with 100A Current Shunt https://www.amazon.com/dp/B013PKYILS/ref=cm_sw_r_cp_tai_Ou3gAb7RH4KPW
Hey, scrotch!
I only now remembered, "Wait, I was supposed to respond to that Redditr's comment!" I am 26 years old with the memory of a perpetually stoned grandpa'.
Onto the nitty-gritty:
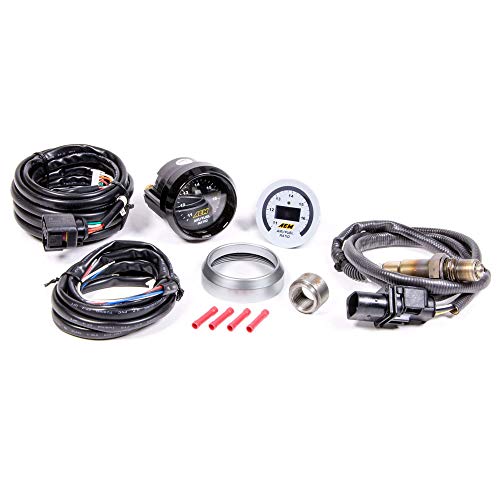
IIRC, I purchased an AEM (30-4110) UEGO. It came with the Lambda Sensor Unit 4.9. All that was required was having a bung welded into the header and a way to mount the gauge.
For us carb'y owners, especially those with split FCRs, this makes tuning our carbs more exact than our butt-dyno, and less costly than hours on the dyno. It's a wide-band, so it gives accurate readings between 10:1 and 20:1.
Do you have amazon prime? http://www.amazon.com/G-H-Meiser-EZ-Tire-Gauge/dp/B001CJHU9W/ref=sr_1_1?ie=UTF8&qid=1323050127&sr=8-1
Yes, that sounds like you need to recharge. You can do it pretty cheaply with a recharge kit like this one or get a cheap set of charge hoses.
However, if you have a leak, that'll need to be fixed or you'll just be doing this over and over. I normally do a charge, and if it doesn't stay, get the system serviced.
Or you can buy the new stepper motors, tear down the instrument cluster, desolder the old ones and solder the new ones in their places. Costs about $15 for parts and isn't too hard if you've got mechanical experience. You do need a soldering iron though.
First, You need to add up all the energy youre going to use in an average day. This is critical and no one else can really do it for you.
Theres a couple of ways to do this. You can buy a kill-a-watt meter and plug a power strip into it and then run everything you would want to run in a day off of it. This is it on amazon It will tell you how many watts everything has used.
Or you can go to a solar calculator on the web.....type in all the things you will use and what their rated wattages are. If you dont know them you can find them ..usually...on a label on the back near the power supply of each appliance. Or just google and use the larger number of their examples. Type in their wattage and how long you will use them. This too will tell you how many watts youre likely to use during a day.
Second, you need to size your solar array and your battery bank.
Lets say in your calculations you find that you use 2000w a day (2kw) that would be about 60kw a month if you want to compare it with your electric bill (which is pretty low but not unrealistic since you arent using a/c or any large appliances). For solar panels the math is pretty simple. If you get 4 hours of direct sunshine you would need 500w of solar panels to get your 2000w for the day under ideal conditions and assuming no loss. (never plan for ideal conditions and never assume zero loss but you get the idea) If you think youre going to get 8 (youre not) then you just need 250w....and so on.
You will probably never achieve this, I would shoot for 60% more solar on the bus than you think need on paper. For this example I would do my best to get 750 to 800 watts of panels. It is fair complicated and very build specific to try and calculate how much loss you will incur in your wiring and in panel placement. Since you can only have two panels the simplest and most elegant solution is to just buy panels that cover as much of the space as you have left as possible.
Panels also are never as efficient as they are the first year. If you size perfectly this year in a year or two you will be undersized.
For batteries you have to consider amp hours. Watts are amps * volts. Batteries are usually 12 v. Lets continue our example that you use 2000w a day and want to have enough reserve power to cover a full day. 2000w at 12v is 167 amps. An amp hour is one amp or one hour. We can take our 167 amps and know that you need 167 amp hours because youre using it over time. Im oversimplifying but thats the smallest amp/hour rating that will suffice. A good rule of thumb is to never drain lead acid batteries below 50% so now you need a 330 amp hours battery bank at the minimum. As an example that means you would need between 3 and 4 of these For lithium ion I think its 80% so thats 210 amp hours of lithium ion.
Your battery will never be as good as it is the first week so in a year's time neither of these banks will provide enough reserve energy if you just do the minimum required right off the bat. You will have to overbuild to account for this or add later.
If you want to work backwards then its a little less elegant. Lets say your coffee maker is 5 amps but its rated at 110 V thats 550 watts. Lets assume you use it for 15 minutes so thats ~138 watt hours. Your inverter will need to draw (138 watts divided by 12 V) about 11.5 amp hours out of your battery. If you have a 100 ah battery bank, that gives you 50 ah effective use...that 15 minutes of coffee making just used over 20 percent of your battery.
Charging your house batteries off the alternator can be very simple. This is what I used Put a switch in the cab and run a wire to the small terminal. When the small pole is energized it will connect the two larger poles. Wire one pole to one battery bank and the other pole to the other battery bank, use thick wire for the large poles 2/0. When the small pole is not energized the two poles will not be connected. When you want one bank to charge the other bank turn your switch on. When you want one bank to not drain the other bank, turn your switch off.
Im partial to this brand but you may find a cheaper one.
There are dozens of gauges that will tell you your battery voltages. Here is one example if you have everything wired correctly when you flip your switch to connect your two battery banks you should see their voltages come together.
Tachometers are overrated. If you need to 'calibrate' a variable speed knob, pickup one of these;
https://www.amazon.com/Digital-Photo-Laser-Tachometer-Contact/dp/B001N4QY66/ref=sr_1_4?ie=UTF8&qid=1523578148&sr=8-4&keywords=tachometer&dpID=511BEAxqKFL&preST=_SX300_QL70_&dpSrc=srch
I have this one: http://www.amazon.com/ScanGaugeE-Multifunction-Computer-Customizable-Real-Time/dp/B004SK5I46/ref=sr_1_1?ie=UTF8&qid=1415596263&sr=8-1&keywords=scangauge+e
No complaints about it. Had it on my car for about 2.5 years now. It survives extreme temps no problem. Just tell it your engine size, gas tank size and tell it how many gallons you fill it up with and how much it cost for the most accurate reading.
I made a Boombox out of a pair of coaxials I had laying around
pic
Amp
spectrum analyzer
6.5s
solar panel
buck converter
battery mount
I have a surplus of m12 tool batteries as well as some coaxials laying around I figured I’d make a portable speaker
With solar panels most output well over 18 volts. Which is fine for that amplifier but not for the battery. With a buck converter it takes it down to a more useable voltage for the lithium batteries.
If you wanted to run something like this on grid power you would need something like this I had planned on getting a 12 volt power supply like the one here later for home use but since with one 9AH lithium battery I have well over 12 hours of listening before the battery needs to be recharged/ swapped out.
Edit: also using this to monitor solar output
https://www.amazon.com/Joes-Racing-32307-Pressure-Gauge/dp/B00404WDUC
Pyrometer
Low profile jack stands (flat feet, safe for tarmac)
Racing gloves
RaceQuip Helmet Support
A GoPro off-brand accessory kit To help mounting that GoPro to whatever you want to mount it to.
Some Mechanix gloves lots of options
Paint markers various colors.
F4 self-sealing silicone tape
Going Faster
Speed Secrets
High-Performance Handling for Street or Track
Another few things would be to find out what the driver uses for brake pads, brake fluid, rotors, oil filter, etc., as those can be pricey and nice gifts. (I use Hawk DTC-60 front, HP+ rear pads, Motul RBF-600 fluid)
Portable battery powered air pump for tires I have one very similar to this. It's cheap and great to use for adjusting pressures before sessions.
A decent tire pressure gauge This is the one I have and have used for several years and I have been very happy with it.
A subscription to Grassroots Motorsports
Torque wrench, +200 ft/lbs This is the one I have been using for a few years and it works well.
I've got lots of other ideas for tools and such; specific socket sets, impact gun & sockets, special bits for your car, magnet, flash lights/head lamp/stick light, channel locks, stubby sockets, various wrenches, extensions, breaker bar, bits, allen wrenches, vice grips, pry bars, adapters, pliers, cutters, etc that would be good to put on your list if you don't have them in your kit.
Happy holidays!
Ac meter: bayite AC 80-260V 100A BYT-VAEM-034 Digital Current Voltage Power Energy Analyzer Meter Ammeter Voltmeter with Open-close Current Transformer Split Core CT https://www.amazon.com/dp/B01D8G9GPW/ref=cm_sw_r_cp_apa_v2hPzb2TNZDNP
Dc meter: bayite DC 6.5-100V 0-100A LCD Display Digital Current Voltage Power Energy Meter Multimeter Ammeter Voltmeter with 100A Current Shunt https://www.amazon.com/dp/B013PKYILS/ref=cm_sw_r_cp_apa_g3hPzbSXR3EHB
I do find that the lack of a gauge is a big downside to the device but I use Fobo bluetooth sensors that give an instant readout when I put the cap back on... does take some back and forth but you get used to the time required per psi rather quickly. Otherwise, I also add a passthrough type gauge for a readout: http://www.amazon.com/G-H-Meiser-EZ02-EZ-Gauge/dp/B001CJHU9W
Usually that's the case. But for this specific amp meter it needs to be on the ground. I tried it the normal way, and it would just give gibberish readings. It's really bizzare.
A bunch of the reviews are complaining about it
https://www.amazon.com/bayite-6-5-100V-Display-Multimeter-Voltmeter/dp/B013PKYILS/ref=sr_1_1?ie=UTF8&qid=1521581494&sr=8-1&keywords=amp+meter+solar
I think the ampmeter works by measuring the voltage change over a fixed resistance.
Edit: Just tested. Anything after the shunt isn't measured. There's probably some sort of correcting it does to take into account the load after the shunt. Probably so it doesn't measure itself. I dunno.
Edit 2: it's included wiring diagramhttps://i.imgur.com/uXCRNyY.png
With this device, probably not, though you could try delivering all the voltage to the inputs for the first cell and see what happens. (And note -- it might fry.)
Buy a new multimeter -- the $3 ones at Harbor Freight Tools work just fine for this.
You could also buy a few of these, or something similar -- these will measure anything from 4.5 volts to 30 volts. There's lots of variations of these, and some are small enough and use so little power that you could easily mount them into your planes and other devices as built-in voltage meters.
You could try:
Air/Fuel gauge $170
http://www.amazon.com/AEM-30-4110-UEGO-Ratio-Gauge/dp/B00N3VGPYS
__
12V Impact wrench $25
http://www.harborfreight.com/12-volt-1-2-half-inch-emergency-impact-wrench-92349.html
__
Cylinder head temperature gauge, $39
http://www.amazon.com/Trail-Tech-Temperature-Meter-72-ET3/dp/B0031BIWX2
__
Roller weight tuning kit $33 (there are different weight sizes, what scooter?)
http://www.amazon.com/Prima-Roller-Weight-Tuning-16x13/dp/B00LESCZHS
__
Or a set of a range of carb jets. Again, need to know the scooter type.
__
Scooter Dyno $12,000 hahaha
http://www.dynojet.com/products/dynamometers/dynomodelsd12/dynojet-dynamometer-sd12.aspx
I've never used most of these, so I can't review them. They look interesting to me though.
If you want to spend a bit more money, tire pyrometer. Something like this one that actually penetrates the rubber. The laser ones are useless for tires: https://www.amazon.com/dp/B005JVFTTM/ref=cm_sw_r_cp_api_i_wQD2Db3KQ5FAG
Also, biggest tote he can fit in his car/trunk with tires and other gear. Makes it nice and easy to have an autox pack to just toss in the car and go and easy to store stuff in at the events.
Hold on there.
ANY changes you make to the pipes need matching changes at the carbs. The ones you've got on there are junk (factory CV carbs) and there's no guarantee they're tuned correctly to the pipes NOW. In fact, getting CV carbs to work right with pod filters like you've got is a tricky proposition. Who tuned those carbs? If it was you, and you're asking the questions you're asking now...um...odds are it's not in a great state as is.
If you're willing to swap carbs, any of the Mikuni VM34 kits will kick major ass over what you've got. Faster overall, faster throttle response, easier to tune to match pipes and genuinely likes pod filters like you have here. Don't go with a VM36 kit unless you're doing big motor mods (cam, big-bore kit, head porting).
Next issue. That pipe isn't the best in terms of cornering clearance. If you want max handling out of this beast you might want to consider cutting those pipes in front of the motor, extending them under the frame, merging them the same distance down as the merge point you have, and then bring the pipe out from under the bike not that far from the rear tire.
I wrote a bit about pipes (and carbs) here:
http://www.motorbikemondays.com/wp-content/uploads/2014/03/CafeRacerGuide-1.pdf
So with all that said, now I can answer your question!
I like SuperTrapp generic mufflers. Measure the diameter of whatever pipe you end up with where the muffler is going to go and order from Summit. This is one batch:
https://www.summitracing.com/search/brand/supertrapp/product-line/supertrapp-s-c-standard-mufflers?autoview=SKU
They also come in chrome and different lengths. Note the differences in inlet diameter.
SuperTrapp mufflers can be tuned as to the back-pressure by removing or adding disks. This also changes the sound. It also changes how the carb needs to be tuned to match the muffler, or if you get it close you can fine-tune the muffler to the carb instead of the more common method of only tuning the carb.
With me so far?
OK. One last thing. When I wrote that guide I didn't know about these:
https://www.amazon.com/AEM-30-4110-UEGO-Ratio-Gauge/dp/B00N3VGPYS
For about $200 (plus you need to weld a nut-thing on the pipe or muffler) you get total knowledge of what the fuel/air ratio REALLY is. You only need this gauge while tuning it (with an exception I'll mention in a sec). It's annoying to try and permanently mount because the cable it comes with from the sensor to the gauge is too damn long and you can't cut it (if you do the calibration will be fucked). But with this, you can absolutely fine-tune the carb's settings to the pipe and get the mixture dead-nuts accurate even if this is your first time tuning this shit :).
---
Now I'll add one more oddity...and this is a setup I'm considering.
These crazy fuckers have a BUNCH of modifications available for Mikuni VM series carbs:
http://thunderproducts.com/
They've got dial-adjustable jetting. You can adjust jetting WHILE RIDING. No shit. You can also add more jets, like the Thunderjet for top-end power.
So. What does this mean?
For one, you can alter the settings for different altitudes, using the Thunder Products Intellajet and Thunderjet stuff to fine-tune the carbs and use the fuel/air gauge to know that your on-the-seat re-tuning is accurate.
That, in theory, would give you the most advanced carb (and pipe!) setup on the goddamn planet.
AEM (30-4110) UEGO Air/Fuel Ratio Gauge https://www.amazon.com/dp/B00N3VGPYS/ref=cm_sw_r_cp_apa_i_a2CPCbXQA9308
The tach can still be off. Laser tachs are pretty cheap.
What RPM are you looking to idle at? 700?
I don't think any of them actually come with it like that. I did the mod myself.
Here is the tach mount I used to hold my speedo in place. All it took was drilling an extra hole in the plate to mount it.
Then you get something like this
to mount the indicator lights on the bar clamp.
Quite simple but makes it look much better in my opinion!
Good luck!
Tires are the most important feature on the car for it's performance and safety. You should educate her on how to monitor, and set her tire pressure at regular intervals for her own safety and the safety of those around her. Get a nice tire pressure gauge with a large glow in the dark analog gauge to make reading simple and clear.
https://www.amazon.com/gp/product/B00404WDUC/ref=ppx_yo_dt_b_search_asin_title?ie=UTF8&psc=1
I bought one off Amazon for 20 bucks. Here it is:
https://www.amazon.com/gp/aw/d/B00062YWNI/ref=ya_aw_od_pi?ie=UTF8&psc=1
If you have an OEM gauge, it'll fit in there. Don't second guess it, just do it.
SECTION | CONTENT
:--|:--
Title | How to Properly Recharge Your AC System
Description | Recharge your AC system properly. I go though all of the steps on how to safely recharge your air conditioning system with refrigerant. First you need to evacuate the system, then pull a vacuum, and then add the correct amount of refrigerant based on weight. Manifold gauge set: http://amzn.to/29fZqu1 AC vacuum pump http://amzn.to/29nr6xS Refrigerant (with no oil or sealers): http://amzn.to/1WMjvuS Refrigerant Can Tap: http://amzn.to/20vQFxc Scale to weigh Refrigerant: http://amzn.to/1TrEQbs Ho...
Length | 0:13:09
****
^(I am a bot, this is an auto-generated reply | )^Info ^| ^Feedback ^| ^(Reply STOP to opt out permanently)
https://www.amazon.com/gp/product/B008KY5ULW/
I mounted one of these with doubled sided tape right below the cig lighter ... put ring terminals on it with a 1A or 2A inline fuse - one goes to airframe one goes to positive post on cig lighter. Easy peasy.
Take it off at annual if you have a dick bag IA - but mine has gone through check rides and annuals with no problem. Guy even commented - "that's nice".
https://www.amazon.com/gp/product/B013PKYILS/ref=oh_aui_detailpage_o00_s00?ie=UTF8&psc=1
This style of meter is useful.
Just run each component individually to get current draw. Cannot vouch for accuracy but numbers I've measured match product specs, so there's that.
For reference, I have around 14,000 miles on my 18" Michelin MXM4 tires that came with the car (and around 7,000 on separate winter tires). When I checked the tread last they were all between 5/32nds and 6/32nds. I don't usually drive too aggressively but EVs are notorious for wearing out tires quicker due to the instant torque. Remember that the factory tires have a treadwear warranty that will get you a discount on your next set.
Also, it's cheap and easy to check your own tread depths using a tool like this that you can find in the automotive section of Walmart or in an auto parts store www.amazon.com/gp/product/B01F5N55B0
Not digital, but this analog gauge has been great: Joes Racing 32307 (0-60) PSI Tire Pressure Gauge https://www.amazon.com/dp/B00404WDUC/ref=cm_sw_r_cp_apa_1mIBybTCYX6MQ
I've gifted it to several relatives. The large dial, half pound accuracy, and bleed off valve are great features.
This is what i use to monitor my power usage. It has an alarm feature that goes off when you hit a predetermined/adjustable voltage level.
bayite DC 6.5-100V 0-100A LCD Display Digital Current Voltage Power Energy Meter Multimeter Ammeter Voltmeter with 100A Current Shunt https://www.amazon.com/dp/B013PKYILS?ref=yo_pop_ma_swf
Your first diagnostic should be to check the high/low pressure to make sure the compressor is compressing something.
Get one of these (or similar): http://www.amazon.com/Mountain-8205-R-134a-Manifold-Couplers/dp/B000JFHNG0
A good book for learning about how the A/C (and everything else) works is this: http://www.amazon.com/Automotive-Technology-4th-James-Halderman/dp/0132542617 ($110) No, it's not cheap-- but if it saves you even one mechanic visit, it will pay for itself.
The service manual for your Civic will have specifics of the pressures you want to see, but the short version is you want to ensure that the base pressure is roughly equal to the vapor pressure of the refrigerant at the ambient temperature. On the gauge set I have this is conveniently included on the gauge itself. The low and the high port should read the same pressure when you start. If not, perhaps the engine hasn't been sitting long enough after having the AC on?
If the pressure is lower than the normal vapor pressure of the refrigerant (less than the 60-80psi range depending on temperature) then STOP. Do not add more refrigerant. You have air in the system which needs to be sucked out with a vacuum pump before you proceed. You probably want a pro to handle that for you and there are likely some other components to be replaced as well.
This guy has great writeup of the recharging process:
http://blarg.introspect.net/cars/7
I have a cigarette lighter voltage meter.
No idea how much amp draw there is. Im also not familiar with a lot of this. Wish I could provide more information.
I run my stereo mainly driving. But I occasionally park and blast it to show off. When I turn it all the way up the voltage drops too about 9 or so. Of course I don't let it run for long, as that can cause damage to speakers.
According to my cigarette volt meter, my battery stays steady at 14 volts unless I turn it all the way up. But I usually only turn it up to 15-25. (max being 62) and that drops it to around 13-13.9 volts.
Sort of. There's sort of a progression going on. It's a good idea to ensure you can cut the power between the two manually as a safeguard.
I used this
last time with a fuse on each battery, and just kept the accessories live to the house battery full-time. Turned it on when I wanted to charge or the odd case of boosting my starter battery from the house. Dead-simple hook up, I just had to pay attention to when I should have it on or not. Mostly cut it on before I start the vehicle, watch the dash voltmeter to know when everything's charged, then cut it off before I start using the house without the motor running.
I'm getting this one next time to replace the one above. I'll have the common on the accessories, and be able to run them off of the starter, the house, or both. "both" would also be used to charge the house off the alternator, and I'll have it there almost all the time, with the addition of a VSR (below). It also has an "off", in which nothing is connected to anything. You'd still want to wait until the engine is running to re-charge a dead house battery, and switch it to only "2" to keep from draining the starter battery, unless you install one of the next two items.
This makes a nice addition wired right alongside either switch. Tells you how much juice each battery has.
To keep everything 100% un-screw-up-able, this is going to go between my starter battery positive and my new manual isolator switch in back. If either side gets to charging voltage, it will connect to the other side. That means the alternator will always charge the starter battery, but also charge the house battery AND if I connect a charger to the house battery (like a generator or plugging in to shore; solar that fits on a van would take several days to charge a battery from dead to van-crankable), then it will automatically charge and maintain the starter battery, too. Neither can drain the other past the point it wouldn't crank the van.
Charging relays are much cheaper than a VSR, and are automatic in a more rudimentary way. This will do the job fine for most cases, and is a little less expensive than a VSR. The big lugs on it hook up just like the two on the VSR above, except it's not automatic - you hook the small poles up to stuff to tell it when to connect the big lugs. The small positive goes to the other, smaller wire going into the alternator, only allowing it to connect if the alternator is charging. The small negative can go straight to the large negative, but I'd run it through a small switch in the dashboard somewhere (and the other side of that switch back to the large negative lug) to allow me to disable charging house battery off the alternator. it's a decent blend of manual and automatic control, with a relatively tiny price tag. This pretty much needs to go under the hood, though, whereas the VSR could actually go in the power center or under the hood. Remember that either would go on the 4 gauge between starter battery and rear isolator, if present; it's the longest fat-wire in the whole system. some people skip the manual isolator switch altogether, and just go with a VSR or charging relay.
Only because I happen to have one of the first switches linked here already, I'd install it between the large lugs of the VSR or charging relay, to bypass it manually. If I didn't already have one, I'd just count on using a set of jumper cables to do that in the rare case I should need to turn that switch on.
Got home late tonight so shitty speedo pics will have to suffice. Here is what I see from riding position. I can see, without moving my head, from about 10-90 mph (which is all I really need, I've never hit above 85). A slight head shift and I can see the whole thing. You can also see the stock handlebar clam that i sawed off the top part. You can see a line where I missed a swipe with the saw lol.
Here is a shot of the autometer casing and where it is attached. I widened the hole in the bracket and just attached it straight to the gas tank bolt. Even with mirrors and handlebar mounted turn signals it just fits (when I park the bike, the forks just touch it.)
[This] (http://www.amazon.com/Auto-Meter-3209-Tachometer-Accessory/dp/B00062YWNI) is the autometer casing I bought. Wrapped the speedo in one coat of electrical tape, one coat of hockey tape, and it fit perfectly. With the rubber pieces on the speedo there was only about one square inch (at the base of the autometer) that was exposed, but I wrapped it once fully anyway.
I ran into this problem and fixed them myself. I have a 2004 Chevy Silverado with this issue. It's a known issue with the GM vehicles in a certain range. They sent a recall out for it but my mileage was too high to have it done for free. It was pretty simple with minimal soldering skills.
If your car is a GM car (which it looks like a GM dash), here are some links. I used these exact stepper motors and instructions similar to this and it took me approximately 30min to complete. It was much easier than I expected.
Good Luck!
Stick to the brand names and you'll be fine. My last few sets were Goodyear Nordics - which are fairly inexpensive and they work great.
You can check out tirerack.com to compare tires. I tend to stick away from tires that have a specific left and right side tread. Other than that, check how many miles they are rated for and the user reviews.
Get a tread depth reader for a few bucks and take the time to check each tire for even wear across the tire. The Goodyear Nordics are 13/32" brand new. It's a good way to gauge the % of life left. For inspection purposes, the tires much be 2/32" minimum, which is way too little for winter.
Update:
The system was empty. Added a little bit of UV oil and a can of refrigerant to diagnose the issue. AC turned on almost instantly, low side pressure around 30 psi by the end of the can; manifold gauges rock.
Plan is to run the AC for just a week or so to avoid long-term issues, just long enough to find the issue.
Hopefully we'll find the leak. If so, we'll buy the parts to replace.
In any event, we'll also get the accumulator and an o-ring set, pay for evac, replace the parts, pull vacuum, and charge it up properly.
Gotta get a vacuum too. Still confused whether the vacuum needs the r134a adapter - the adapter is illegal to ship to california for some reason; the vacuum in question (link) says it's made specifically for r134a but half the people say you need an adapter and half say you don't. (I got the manifold gauges I linked before - this one (link).
I like the ones with a flex hose section like this:
http://www.amazon.com/Joes-Racing-32307-Pressure-Gauge/dp/B00404WDUC/ref=sr_1_3?ie=UTF8&qid=1406822942&sr=8-3&keywords=air+tire+pressure+gauge
or
http://www.amazon.com/Campbell-Hausfeld-MP6000-Inflator-Gauge/dp/B0007ZJ1IK/ref=sr_1_4?ie=UTF8&qid=1406822827&sr=8-4&keywords=air+tire+pressure+gauge
op
> I'll order the screen and magnets from Amazon: http://www.amazon.com/dp/B008PGMG58 http://www.amazon.com/dp/B008KY5ULW OR http://www.amazon.com/dp/B00D7AHMWO
intog
> those screens... I think they're too big.
Here ya go...
Supco BPV31 Bullet Piercing Valve https://www.amazon.com/dp/B00DM8J3MI/ref=cm_sw_r_cp_apa_7tu3AbWW31RXF
InterDynamics RLS-134 13oz. Refrigerant R134a with Leak Sealer https://www.amazon.com/dp/B000COD8R6/ref=cm_sw_r_cp_apa_Kuu3Ab8SRPRGN
FJC 6036 R134a U-Charge Hose with Gauge https://www.amazon.com/dp/B00620PXMW/ref=cm_sw_r_cp_apa_bvu3Ab2FH7N4M
R12 R22 R502 Screw to R134A Fast Conversion Adapter Valve 1/4'' to 8v1 Thread https://www.amazon.com/dp/B01HL55KBU/ref=cm_sw_r_cp_apa_Wvu3AbSJXAZ8H
Something to consider with a PVC shower, is supplementing your heat. Best way I've found to do so is to use a heating element like this one and couple it with a temp controller. This runs off 12v DC so you'd have to take into account electrical capacity, but I figure I could run that while on the move so the vehicle alternator takes the load, or from an onsite generator if you're in a fixed location.
Disclaimer: I have not run this yet, I'm still in the planning phases of a PVC shower. This was found through research.
https://www.amazon.com/Joes-Racing-32307-Pressure-Gauge/dp/B00404WDUC
I have one of these that I consistently use, which is the main thing. Get something that is of good quality, and use it almost exclusively if you can. I like the ease of something with a bleed-off valve, since ease of use will encourage you to check your tire pressure often.
$60ish on Amazon
Unless you're really looking to dig in and learn and aren't afraid of spending $300+ in tools you'll be better off to just drop it by an auto a/c specialty shop to have it diagnosed and repaired. Most commonly the system has developed a leak which has to be identified and repaired then the system has to be vacuumed down and recharged by weight.
feeler gauges are like 10 bucks, stop being a brokeback bitch and man up
I lied, theyre $6:
https://www.amazon.com/ABN-Piece-Master-Feeler-Measuring/dp/B00T85ANNW/ref=sr_1_2?ie=UTF8&qid=1494961039&sr=8-2-spons&keywords=feeler+gauge&psc=1
Ive found this on Amazon: https://www.amazon.com/bayite-6-5-100V-Display-Multimeter-Voltmeter/dp/B013PKYILS/ref=cm_cr_arp_d_product_top?ie=UTF8
Anyone have thoughts on this? Ive you read the reviews, in reference to van power, they're generally positive.
Through the remote monitoring device: https://www.amazon.com/Digital-Photo-Laser-Tachometer-Contact/dp/B001N4QY66/ref=mp_s_a_1_1?ie=UTF8&qid=1549557310&sr=8-1-spons&pi=AC_SX236_SY340_FMwebp_QL65&keywords=laser+tachometer&psc=1
There are a bunch of devices like this. For ac and dc. Amaz, ebay, etc
My solar controller gives me the data via the web. I use one of the above for monitoring what goes to the inverter. i could put in a ac ammeter. hmmm. Probably will at some point.
you would put one between your solar controller and batteries ... and another between battery and inverter.
not sure how to send the data to the web.
Good stuff, thank you all. One more question though, regarding the battery monitor, in order to monitor the discharge rate and not go below 50%, do I need a victron BMV-700 ($150) or can I just use this bayite meter:
r/https://www.amazon.com/bayite-6-5-100V-Display-Multimeter-Voltmeter/dp/B013PKYILS/ref=pd_lpo_vtph_107_bs_t_1?_encoding=UTF8&psc=1&refRID=331JX46ZCP7CH3YT868Q
bayite DC 6.5-100V 0-100A LCD Display Digital Current Voltage Power Energy Meter Multimeter Ammeter Voltmeter with 100A Current Shunt https://www.amazon.com/dp/B013PKYILS/ref=cm_sw_r_cp_apa_i_RRC2CbRANNKNH
That's what I used. I disassembled my power cord where it meets the wires coming out of the power supply. I had the current ring between the power wire. Was pretty simple to do and it keeps track of current and power and total power used.
You'll be surprised that the dial to output won't be linear.
Battery Meter. Ive been toying with making one of these for a friend after I finish upgrading my camper. Someone else may be able to offer some more insight.
https://www.amazon.com/GODESON-88702-Smart-Color-Coded/dp/B01F5N55B0/ref=pd_sbs_263_t_2/137-8617068-0944230?_encoding=UTF8&pd_rd_i=B01F5N55B0&pd_rd_r=a036bac7-2c6f-44e1-ba76-7d40b8a30394&pd_rd_w=Kn0A9&pd_rd_wg=VVTGw&pf_rd_p=5cfcfe89-300f-47d2-b1ad-a4e27203a02a&pf_rd_r=2ATS0B6FGE716G022FK6&psc=1&refRID=2ATS0B6FGE716G022FK6
​
You can usually pick on of these up at an auto parts store for a few bucks.
Generally speaking, around 4 or 5/32 you've got a dry-weather-only tire, and they're legally bald at 2/32
I don't know how much you consider "stupid expensive" but I got something like this, and I'm sure if you look at ebay they're even cheaper than this one.
https://www.amazon.com/Digital-Photo-Laser-Tachometer-Contact/dp/B001N4QY66
Check the water that drips from your AC for Dye. If that's got dye, that'd def your evap core.
There are refrigerant detectors (see /u/Vistandsforvicious 's post). You turn the AC on, and it can detect very small refrigerant leaks. Most AC shops should have one. They look like this And basically sniff to find very small leaks. Beeping when stuck into your vents when the AC is running means your evap core is leaking, no beep... no leak. I'd suggest getting a professional to do it, not the crappy one I linked. Or you can roll the dice and use the el-cheap-o from amazon.
edit: But if it's a leak, you should be able to do it with 0 guesswork involved. It just takes a lot of persistance. Use a q-tip to clean up that spot of oil on the back of the compressor, and see if recharging it makes the oil spot come back.
PS: If you're adding refrigerant, do not use the crap with leakstop. Use something like this with the white cans of only-refrigerant to fill your AC. If you're refilling it yourself, I wrote a long post on how to do it mostly-correctly.
> shunt
cool I got this https://www.amazon.com/bayite-6-5-100V-Display-Multimeter-Voltmeter/dp/B013PKYILS/ref=sr_1_1?ie=UTF8&qid=1482213946&sr=8-1&keywords=shunt+12v
A lot of people will tell you to do the penny trick, but I hate it. Coins wear and that is not an accurate measurement for something like tires, which are a safety device. A tire depth gauge like this is less than 5 bucks and will always give you accurate results. Buy one for each car and one for the house so you always have one around. I would replace around 4-5/32nds myself as I see you already did.
Check battery to chassis electrical grounds. How old is the battery?
Ether connect a digital multimeter to the power port or get one of these:
https://www.amazon.com/Cigarette-Lighter-Voltage-Digital-Voltmeter/dp/B0092KVYGI
I would assume the vehicle voltage is dropping drastically either from a bad ground connection, faulty ground, or a massive short. Inspect any aftermarket stereo wiring very closely.
You might want to snag some feeler gauges to actually measure your neck relief.
Cheap Amazon option
Once you've set the neck relief, then adjust the action by changing your bridge height.
I got something similar myself without the Snap-On premium several years back.
This is the gauge. I was only able to hook up the gas indicator and its backwards because the float switch is normally open instead of closed, so when it indicates a full tank its actually on empty hahaha
As far as the other dummy lights are concerned. I ordered these LEDs. I haven't hooked them up yet because I need to build a housing for them.
https://imgur.com/a/sraBw8u
Added some monitors and shunts to the previous setup. What do you think?
https://www.amazon.com/gp/product/B013PKYILS/ref=oh_aui_detailpage_o00_s00?ie=UTF8&psc=1
Terminating 10# stuff
https://www.amazon.com/gp/product/B06XQ8Q1VM/ref=oh_aui_detailpage_o00_s00?ie=UTF8&psc=1
and terminal fuse
https://www.amazon.com/gp/product/B0019ZBTV4/ref=oh_aui_detailpage_o00_s00?ie=UTF8&psc=1
sorry i confused you I mean't pay close attention to the amount of digits. It actually is doing something. Its just doing it at very fine increments(thats why you got 3 numbers instead of 2). I.e. So like right now im printing abs, mashing the first layer and i've been lazy about calibrating my gcode offset with my probe. I first watch how the initial lines are laying down. Then i poke my head down and if i can see the stream of plastic laying down out of my nozzle, i keep going down until just after i can't see that stream, then check the layers and stop. A flashlight is handy. All off the filaments have a different feel. PETG being the absolute worse. I imagine your first layer looks incredible right now because its kind of mashed. And that it is beautifully mirrored like on the underside where it meets the glass if you haven't used a glue stick. Which is a look i like personally a lot. Looks like fine circuit board traces with the lines right?. But after that first layer keep jacking it up until the stringing stops. Just keep going up man. You may be twisting that knob a lot and thats okay. And when you get where it stops stringing, just add that number to your g code offset in your slicer. Baby stepping is a killer feature to utilize, its not hard at all you just have to get a feel for it. You will notice differences in how the lines lay down vs how much of a filament stream you can see. Im telling you this because I think finding your number babystepping with one print is less frustrating than start prints over and over punching in numbers inside your slicer. Its great to learn babystepping.
I was printing ABS tonight and i went to -150, i was printing PETG the other day and went all the way up to 500-600. If its way off you could be going way up. You will see it in your print, just be patient. I would actually encourage you to keep your first layers as your doing now for better adhesion and make your slicer correct the offset after the first layers. Thats what I do. But do that after you get this figured out.
These help a lot
https://www.amazon.com/gp/product/B00T85ANNW/ref=oh_aui_search_detailpage?ie=UTF8&psc=1
Look at this one also. Voltmeter.
Btw, i did buy this device with my system to monitor battery levels and draw. https://www.amazon.com/gp/product/B013PKYILS/ref=ppx_yo_dt_b_asin_title_o00_s00?ie=UTF8&psc=1
Fridge consumption should be way under that. It sits idle most of the day. The 5.5a is a max rate I believe. At the bottom of this article, they address it a bit. https://www.4xoverlandadventures.com/2017-winter-fridge-shootout/3/
In theory, the solar should be more than enough I think. I think I am going to buy a meter or two so I can measure amp draw from the accessories and another to measure panel production. I wish there was a unit that just displayed both but I don't see one.
https://www.amazon.com/gp/product/B013PKYILS/ref=ox_sc_act_title_1?smid=A1T3LOAKNUUM9N&psc=1
Okay, would this do it?
https://www.amazon.com/gp/product/B013PKYILS/ref=oh_aui_search_detailpage?ie=UTF8&psc=1
Attached in the same way like you recommended?
Also, I have no idea how much current will come out of this thing. Is there any drawback to getting a larger one?
Best advice is to keep it simple. Focus on brakes and tires first! Do some basic setup and then recognize while you are on track when you are at the limit of your basic setup, then go from there.
You already have SS brake lines, good! Fill them with good 600°F brake fluid (several were mentioned already). Do this every few events and be meticulous about doing it RIGHT and making sure there are NO LEAKS. Safety first! This and pads are your #1 safety item. Then an instructor, then good tires, helmet, seat belts, etc. Again, keep it simple.
Parts:
Use whatever rotors are on the car for now, and buy a set of these as backup whenever htey start to warp: Centric 120.40048CRY Cryostop Rotor
https://smile.amazon.com/gp/product/B003K1H2V6
Brake Pads, order a set of Hawk HP+ pads. You will get advice all over the board on what is best and blah blah blah. These are great bang for your buck and you can street them as well.
Hawk Performance HB361N.622 HP Plus Brake Pad
https://smile.amazon.com/gp/product/B000IEYNOM
Fronts are most important, do all 4 corners once you start to get comfortable with the car and/or go to a bigger track.
Think you're done with brakes? NOPE! Now let's talk heat. You're just starting to go on the track and want to be out for as long as possible to work on consistency and technique. If you're going to do any sizeable track with big braking zones you will want some way to keep the brakes cool. A lot of people poo-poo this step and then complain about how the stock brakes suck SO bad. I have had my s2k on CoTA, Road America, and BIR with zero brake fade with the setup I'm describing.
Option one: remove the dust shields, this will help reduce captivated heat
Option two: brake duct kit. DIY worked best for me:
-Lambert spindle mounts: http://www.lapponline.com/index.php?main_page=product_info&cPath=65_66_67&products_id=180
-Front Bumper inlets. WASP makes nice stuff but they SUCK to deal with and idk if they're even in business anymore. Several other options out there.
-Aircraftspruce.com has all the ducts and such you need:
Qty Ship B/O Item Unit Price Total Price
11 05-29910 SCAT-10 DUCTING 2 1/2" 7.500 82.50
6 QS200-40H BREEZE CLAMP 200-40H 1.880 11.28
1 01-00990 RESCUE TAPE 1" X 12' BLACK 9.350 9.35 (helps with rubbing)
3 05-02200 RUBBER "U" CHANNEL 1.350 4.05
50 11-04229 7" 50LB NATURAL CABLE TIES MS3367-1-9 0.040 2.00
50 11-13475 14" 120LB NATURAL CABLE TIES MS3367-3-9 0.150 7.50
50 11-04058 14" 50LB NATURAL CABLE TIES MS3367-2-9 0.090 4.50
Subtotal: USD 121.18
Ok great, now you have good brakes, you already said you have RS3 tires on there, buy a nice tire gauge and keep an eye on pressures & tire wear!
Joes Racing 32307
https://smile.amazon.com/gp/product/B00404WDUC
While you're at it, check the oil. Seriously, these things can (but don't necessarily) burn through a lot of oil depending on conditions and the track. Just keep an eye on it and plan for keeping an eye on it. Not a bad thing.
Get a good basic alignment on the car, max out the stock adjusters for camber front and rear, zero toe front and about .25" total toe in the rear, then you're good to go! If you are feeling DIY-ish pick up a Quick Trick alignment kit to bust this out quick and easy in your garage or at the track.
Once you get comfy with the car however you have it setup today suspension/wheel-wise, you can start to look at a few next-steps. Do all of these at the same time as its the combo that shines over any one part.
-lowering springs/coilovers (I did ohlins, so awesome)
-front swaybar (A simple eibach will do!)
-front bumpsteer correction kit/spacers
-17x8.5 or 17x9 square wheel setup with 255/40-17 tires. RS3's, Maxxis, VR1, are great lapping-day options. RE71R for quick/short/fast hot laps.
1 rule: HAVE FUN!
I have the smaller k40 and the first upgrade I did was printing an exhaust adapter and getting a new extraction fan since I didn't feel like potentially burning my house down with the included fan. I had to fix the wiring out of the box since the fan wiring is crap and would have definitely caught fire at some point after firing it up.
I went with a 440 cfm 6" fan from amazon. The adapter I printed for the back of the k40 was a 4" so I also got 24-6" adapters from amazon to connect it to the fan and then from the fan to the window. I used it on both sides since I had already bought a good length of 4" hose and didn't want to also buy 6" as well. I put weather stripping on all connections in the exhaust line so I have virtually no smell in my office when running it.
I got an air pump on Amazon and3D printed an adapter I got from Thingiverse for it to direct the airflow in line with the laser. I bought my tubing for the air assist at Home Depot.
I also added a drag chain to keep the hose out of the way. I bought mine on Amazon but you can print that and adapters yourself if you're up for it.
The next upgrade I did was to add the mA meter since I have a digital panel on mine. That gives a much more accurate read on the power when using the laser.
I then upgraded my control board to the Cohesion 3D Laserboard ($200)and started using Lightburn ($40) for the software. That software lets you do a LOT more with the machine and you can also add a camera to get a view of the print area in the software to help with laying out materials.
Because the new board has power management built-in I set the k40 to the max power I would want to use on a project and then control the power levels from the software. This also lets you do true grayscale images and 3D engravings.
Because I don't like to have the exhaust and air pump running all the time I also got some wifi smart plugs. Each plug has two outlets and each of those can be controlled individually. They can also be controlled by an echo so I have that setup as well. Since you can also group smart plugs in the Alexa app I have one set up for everything and when I'm done working on a project I can either tell my echo to shut off power to the group or hit the button in the app to shut it all off at once.
For water cooling I'm using a home depot bucket however I have hose couplers installed in the lid for the water lines so if I want to move things around I don't have to completely disconnect everything and pull the pump out of the water. I just pull the hoses off the top of the lid and the pump stays in the bucket. I have the plug for the pump also going through the lid with a rubber seal around it. Depending on how hot it gets in the workspace a water chiller might be recommended.
The latest item I bought is a lab jack which I'm going to use to make a manual adjustable bed. If you can make one yourself or buy one at an affordable price an automatic Z bed would be great if you want to work on larger materials. A manual adjusting bed is fine for me now though.
I still need to purchase a new bed for it and get rid of the crap that came with it. I might try to salvage it though by drilling holes in it and installing metal spikes to rais the material up off the surface.
On my list of to-dos is to get a better lens and upgrade the mirrors. I haven't had an issue with what I have now so it hasn't been a priority.
I hope this helps with your project.
https://www.amazon.com/gp/aw/d/B00T85ANNW/ref=mp_s_a_1_5/135-7703905-1072318?ie=UTF8&qid=1505860478&sr=8-5&pi=AC_SX236_SY340_QL65&keywords=feeler+gauges&dpPl=1&dpID=41hU5y4B3OL&ref=plSrch
https://www.amazon.com/gp/aw/d/B013PKYILS/ref=pd_aw_sim_469_1?ie=UTF8&psc=1&refRID=HG4PM9RREG7NGDCR0Z0V this is the dc ver but you wouldint need a 100 amp one
I think having an accurate gauge is important, I tend to trust the mechanical gauges a little more and I don't worry about dead batteries. I also try to buy American when possible :)
Joes Racing
Get yourself a nice gauge like this: http://amzn.com/B00404WDUC
Makes a world of difference. It's got a pressure release button and a lot more accurate than the pencil style that a lot of people use.
I have no idea where to find that information, but I own one of these http://amzn.com/B001N4QY66 and I would use that and a power drill creatively to compare the ratio. Probably remove the tach and speedo and use the drill to spin the tach/speedo and compare an actual measurement of the drill with the measurement on the speedo/tach. I used my power drill to test out my tach when I had to disassemble and clean it to get it to work when I first bought my bike.