Best beer brewing pots & kettles according to redditors
We found 128 Reddit comments discussing the best beer brewing pots & kettles. We ranked the 44 resulting products by number of redditors who mentioned them. Here are the top 20.
We found 128 Reddit comments discussing the best beer brewing pots & kettles. We ranked the 44 resulting products by number of redditors who mentioned them. Here are the top 20.


Since I actually find the links in the sidebar to be fairly unhelpful, at least for someone as detail oriented as me as a beginner, and I'm still enough of a beginner to remember how hard it was to get started, I'll go ahead and give you a start here.
Equipment needed
Equipment Wanted If you think you'll get really into this, here's some equipment that I have that I feel makes life a lot easier.
Ingredients Needed
To Brew a Mead
NOTE If you're making a 1 gallon batch, you can put your batch directly into your jug carboy and shake instead of stir. You can also use a balloon instead of an airlock. I recommend sanitizing a food-grade funnel to put all your ingredients in if that's the case. To make smaller batches - just divide everything in my recipe (except the yeast, always just use 1 packet of that regardless of the batch size) by 6.5x. For example - for a 1 gallon batch you would use 1.5 cups of pumpkin mash instead of 10.5 cups. etc etc etc.
As time goes by
Jezuz christ you are freaking me out. Get one of these!!!
I've had a 3 gallon, albeit only partially filled, glass carboy slip an inch and hit the cement floor. I almost cried.....
And then this!!!
If you backfilled whatever vessel you were pouring into with CO2 you could use a coffee filter of some sort in theory without oxidation. When the mead flows through the filter it's aerated and oxidation from this is the #1 mead killer for rookies.
The reason it gets shit on (and rightfully) is that it is completely and totally useless and if you are doing it you are doing it for the wrong reasons, either due to having the wrong tools or not enough patience.
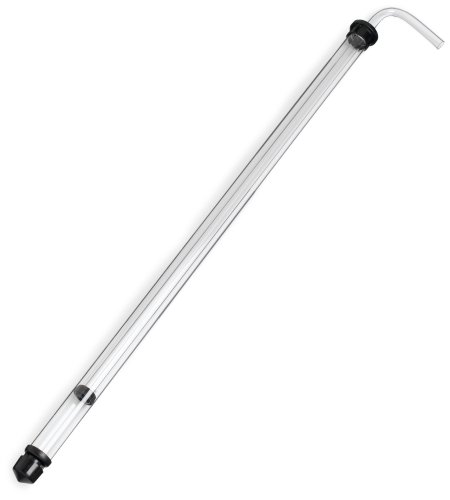
I just racked a 2 no water cherry 5 gal meads with a cane and no filter with no issues. A baffle on the cane prevents the worst of clogging.
https://www.amazon.com/Fermtech-5478-6H-Auto-Siphon-Tubing-Clamp/dp/B00SDLLZDY/
There is a photo of one with a clip. This allows you to not stuff it in the shite in the bottom, and the baffle prevents you from sucking it up.
If you don't want to waste any mead at all, you can toss the tailings in a smaller carboy in the fridge and decant of the sediment and consume right away. You should get 95%+ of your mead that way without fruit.
My cherry meads had 10 lbs of fruit per gallon, and one I bagged the other was free fruit. The free one was slightly more annoying to rack while the one in the bag was set and walk away after the bag of fruit was removed. Bags in a bucket primary are the easiest way to deal with fruit.
If you have piles of fluff from pureed fruit, badly flocculated yeast, or whatever else, cold crashing and bentonite is the proper answer, and failing that time. And don't puree fruit if you are concerned about yields.
Lastly, you won't clarify mead without ~1 micron filtering. Anything larger than that will settle in hours to a few days. Coffee filters are ~20 micron. They will only remove gross solids like fruit skins.
I have a sterile filter rig that steps from 25 micron to .45 under co2 pressure. Filtering has a purpose when it's being used as a good tool, not a crutch.
Buy this and you can use your keg CO2 lines to carb it up in a soda bottle. You just gotta drink it relatively quickly or it'll show signs of oxidation soon: https://www.amazon.com/gp/aw/d/B01039C0Z0/ref=mp_s_a_1_8?ie=UTF8&qid=1505856195&sr=8-8&pi=AC_SX236_SY340_QL65&keywords=carbonation+cap&dpPl=1&dpID=410qbFqxN3L&ref=plSrch
You could just use a plastic bottle and a carbonator cap.
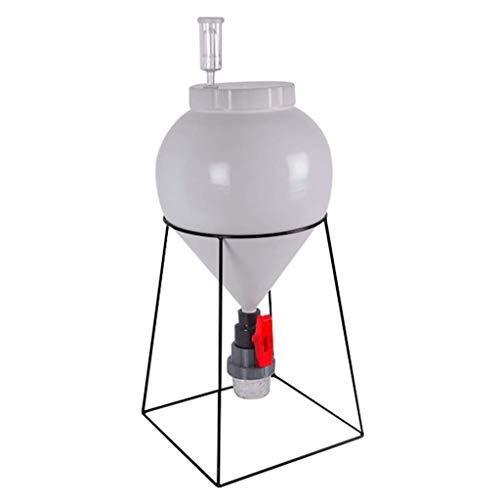
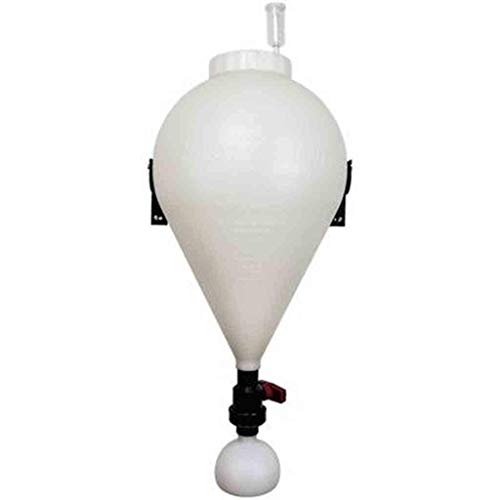
Fastferment. I just bought it. It’s my first batch in it. It has a detachable ball at the bottom to either harvest heats or just get it out the way you lose less bc the yeast cake is in the ball it is a 7.9 gallon with the ball.
FastFerment Conical Fermenter, 7.9 gallon https://www.amazon.com/dp/B00OEDYUZ0/ref=cm_sw_r_cp_api_i_E0D4AbPKBJ19N
Most reviews are good on it.
I bought a basic Fermtech 5478-6H Auto-Siphon Mini with 6 Feet of Tubing and Clamp https://www.amazon.com/dp/B00SDLLZDY/ref=cm_sw_r_cp_apa_i_f1EuDb9WJSGFD
Siphon. Had another sterilized carboy and transferred it. Then added my new spices and fruits.
You're always gonna need two containers in my opion. This is my second time and my first was a fucking failure. So I've done more studying. And what's best for at least 1gl brews. It's more investment. But worth it
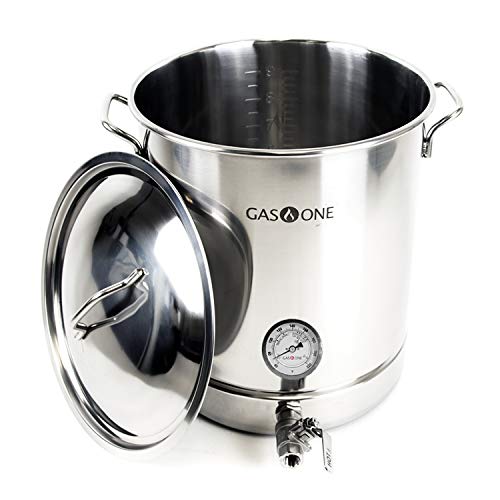
I just got the 64 quart version of:
https://www.amazon.com/GasOne-Gallon-Stainless-Drilled-Brewing/dp/B07DY5V4B6/ref=sr_1_3?keywords=brewing%2Bkettle&qid=1565218264&s=gateway&sr=8-3&th=1
and did my first brew with it. It worked great. Larger than you need for most 5 gallon batches but it also leaves room for larger batches, super high gravity, or super long boil. They've also got a 10 gallon kettle available, which should be good for most 5 gallon recipes. Quite a low price.
you don't have to use a soda stream to make your own soda! I found a 5lb canister of CO2 on craigslist. It came with a regulator. Then I purchased one of these. It screws onto an empty 2 liter bottle. Squeeze all the air out of the 2 liter, put on the cap, turn on the regulator, shake vigorously, an you have soda water. Costs me about 10 cents a bottle.
Mash tun cooler (this is probably cheaper at your local hardware store or wal mart) Also, this isn't the only cooler that works. Pretty much any plastic cooler works. But you'll need a different false bottom if you use a chest cooler, which may allow you to mash bigger batches.
Weldless Ball Valve Just take the plastic valve off the cooler and screw this one on. Will work on most any cooler you choose.
False bottom Put this at the bottom, connecting the silicon hose to the ball valve and the top of the false bottom.
3/8" barb You'll need to screw this onto the ball valve on the inside of the mash tun to connect the silicon hose to.
Honestly, if you've already got a kettle that can boil 6 gallons, you're good to go there, and just add this to the mix. Otherwise, pick up a Stainless Steel Brew Kettle.
This whole setup comes in just under $200 but you'll need some hoses and some hose clamps as well. But I'm sure that if you shop around (even on amazon) you might find better deals than I linked. But that's the gist of it. And there's no need to stick with the specific brands I linked. But just make sure to stick with stainless steel for the kettle, ball valve, and connecting accessories and food-grade plastic for the cooler. And any hoses need to be high temp hoses. Silicon is ideal.
This is by no means the "only" way to do it, but a great start down the road. You may also choose to use a pump. It has advantages and disadvantages. You can make great beer with and without one.
I live in San Francisco and our best local brewcraft store is SF Brewcraft, http://www.sanfranciscobrewcraft.com/. The guys there are super knowledgable. They have several beginner kits, all 5 gallon. There are 3 different options of 2 plastic fermenters, 1 plastic and 1 glass, and 2 glass. I'd suggest going with this one: http://www.sanfranciscobrewcraft.com/product_p/eq101.htm
I got the plastic/glass combo a while back and that was how I got started. You can tell them which kind of beer you want and they'll make recipe recommendations and include everything you need for it.
There are smaller kits on Amazon and other places like MoreBeer if you don't want to go with a full 5 gallon setup.
5 gallon batches is about the biggest you can do on a normal stove top in a kitchen. Any bigger and you can't get enough heat to bring that much water to boil. If you don't have a lot of space in your kitchen, that might also be a reason to go with a smaller kit.
So the kit I recommended is great to get started. In reality, it comes with two plastic fermenter buckets but you only need one for beer these days. The instructions will indicate a traditional two-step fermentation process, but you'll have 2 which is great if you decide to do double batches.
You've GOT to have a pot. If you're doing 5 gallon batches, you need at least a 6 gallon pot with a lid. If you're doing smaller 1-2 gallon batches, you can use a smaller pot. A regular pot is fine, but spending a little more on a kettle that has a thermometer and ball valve is hugely helpful.
Ok but back to specific recommendations since that's what you need:
5 gallon batch recommendations
1-2 gallon batch recommendations
I haven't tried these kits, but they seem to fully be what you need.
http://www.amazon.com/Brooklyn-Brew-Beer-Making-Everyday/dp/B005G20IIG/ref=sr_1_6?ie=UTF8&qid=1415488462&sr=8-6&keywords=homebrew+kit
http://www.amazon.com/Mini-Monster-Bookshelf-Brewery-Amber/dp/B00AKIUIEU/ref=sr_1_10?s=kitchen&ie=UTF8&qid=1415488614&sr=1-10&keywords=homebrew+kit
You will need bottles:
http://www.amazon.com/12oz-Amber-long-neck-bottles/dp/B003X4BO64/ref=sr_1_2?ie=UTF8&qid=1415488782&sr=8-2&keywords=beer+bottles
5 gallons of beer will fill about 48 bottles. Get 2 boxes of bottles. 1-2 gallons, get 1 box.
You will need bottle caps. If you buy from the kit I recommended from SF Brewcraft, caps are included. But if you don't, make sure you get them or that they come in your kit. http://www.amazon.com/Silver-Colored-Polished-Bottle-approximately/dp/B002W2E99C/ref=sr_1_9?ie=UTF8&qid=1415489000&sr=8-9&keywords=colored+bottle+caps
Hope this helps.
When I brew in bulk, I do like the beer homebrew folk do and use an auto-siphon with a bottle filler attachment. The siphon goes into the bucket, held just above the bottom to avoid the dead yeast, and stays far enough below the surface to (mostly) avoid the yeast strands, everything staying still and not mixed around. When a strand does sneak through, it gets caught in the bottle filler tip and can be easily wiggled out if problematic. It makes filling bottles extremely clean and simple. But unless you're brewing 3+ gallons in a single container, it's probably not worth the effort and I end up just using strainer + funnel.
That is a 7.9 gallon Conical Fermenter.
It is a great design for continuous brew because you can evacuate the yeast from the bottom and then proceed to bottling the Kombucha via hose. If you fill it to between 3- 5 gallons it gives the pellicle a large surface area to get massive like the ones in my photo.
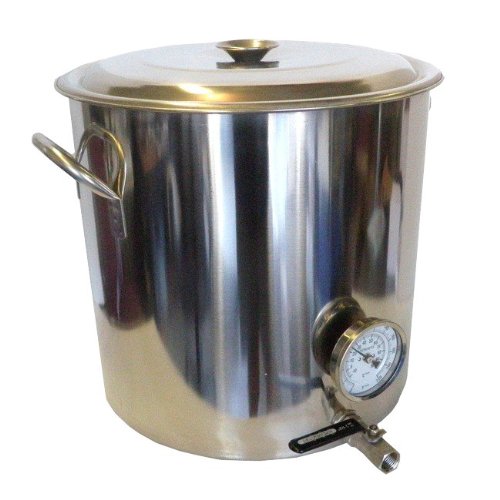
Purchase a 5.5 gallon pot you want but without anything added to it.
https://www.amazon.com/Gallon-Stainless-Steel-Stock-Pot/dp/B000FRJJSM/ref=pd_sim_79_6?_encoding=UTF8&pd_rd_i=B000FRJJSM&pd_rd_r=6PQ2AMFEHC2QZZ0F78MZ&pd_rd_w=34FEi&pd_rd_wg=um6x3&psc=1&refRID=6PQ2AMFEHC2QZZ0F78MZ
Then purchase a weld less ball valve. https://www.amazon.com/Weldless-Stainless-Steel-Valve-Spigot/dp/B0028ZLEE6
and a weld less thermometer
https://www.amazon.com/Bayou-Classic-800-770-Brew-Thermometer/dp/B008FEPE18/ref=pd_bxgy_328_img_3?_encoding=UTF8&pd_rd_i=B008FEPE18&pd_rd_r=222Q1R1CKYW4HFP57VT9&pd_rd_w=m7gkT&pd_rd_wg=pyRcb&psc=1&refRID=222Q1R1CKYW4HFP57VT9
Then purchase a step bit: https://www.amazon.com/s/ref=nb_sb_noss_2?url=search-alias%3Dlawngarden&field-keywords=step+bit
Make sure it has the correct size.
Then purchase this bit for drilling pilot holes in metal: https://www.amazon.com/Century-Drill-Tool-26208-Cobalt/dp/B004UUFAYW/ref=sr_1_1?s=industrial&ie=UTF8&qid=1481229448&sr=1-1&keywords=1%2F8+stainless+steel+cutting+bit
Drill the pilot holes where you want the ball valve and thermometer, then use the step bit to widen the hole to the correct size.
I have been using this exact setup with an 8 gallon pot for 5+ years and it doesn't leak one little bit. Also you can choose whatever size pot you want, just remember that you should probably leave the thermometer at least an inch or so from the bottom and keep in mind the bottom water will be hotter than the top.
Some things I see that you could do are:
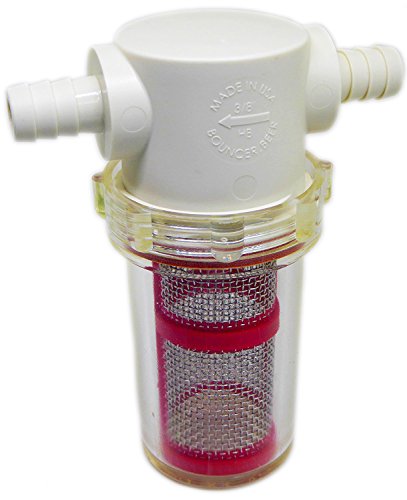
Are these essentially the same product? Is Bouncer double the price for a legitimate reason?
https://www.amazon.com/gp/product/B01JWO5RK2/ref=ox_sc_sfl_title_8?ie=UTF8&psc=1&smid=AXFBTTM28FB1
https://www.amazon.com/gp/product/B00CH2JSIY/ref=ox_sc_sfl_title_9?ie=UTF8&psc=1&smid=APP34LIR2J3LQ
If you have issues getting the seeds out, I picked these up a while ago. It goes inline with your siphon hose and I got the smaller mesh to get out things like pulp or seeds. Works great.
https://www.amazon.com/gp/product/B06XR6M3GB/ref=ppx_yo_dt_b_search_asin_title?ie=UTF8&psc=1
https://www.amazon.com/gp/product/B01JWO5RK2/ref=ppx_yo_dt_b_search_asin_title?ie=UTF8&psc=1
Cone fermenter!
I've heard very, very good things about it.
Your recipe sounds like it'll turn out well if all goes according to plan! You may want to add some sweetness back if it ferments dry, but you've got several weeks to figure that out and read the Wiki to get all caught up on the method and terminology to things like back sweetening and nutrient addition schedules. I admire that you're being industrious with your fermentation equipment, I wasn't brave enough to start fermenting with whatever I had on hand with my first batch.
If you think you'll stick with it, here's the equipment I used for my first batch. I highly recommend looking into it if you think you'll do another batch! (I apologize if you aren't in the US, Amazon is my go-to)
All-in-all, this is just about my current setup excluding yeast, yeast nutrients, and extra carboys and airlocks. The list above comes out to about $127.45 USD before tax, which really isn't too bad considering one gallon should yield just shy of 5 standard wine bottles! Most commercial meads I've seen ranges from $15-$25 with some exceptions (There's a winery near me called Oliver Winery that makes a mead called Camelot Mead that sells for about $8 per bottle. Very good for such a cheap mead, you can probably find it at Total Wine & More if you have one nearby).
​
Sorry for such a long comment! Best of luck in your mead-making adventure!
Edit: If you have a local homebrew store, I would opt for that rather than Amazon. Prices may not be as cheap but you won't have to wait for shipping, you'll be able to support a local business, and employees at homebrew stores are usually really helpful and they can recommend recipes and give you pointers. Nothing beats face-to-face interaction!
I too always recommend the cheapest kit you can find. Get used to doing extract kits, and you can build from there.
the 1002 kit seems like a solid kit. The only thing you'll need yet is a kettle. If you eventually want to do all-grain, I would recommend at least a 6-7 gallon kettle. This one seems like a great deal. That's a kettle you'll be able to use forever.
Hey dude:
I brewed a lot in a small bachelor's barracks in Korea with a shitty coil stove top.
For the record, I did all of this (and got an insulated bag for temperature control) before I did my first batch; if you make it more painful on yourself and get an inferior product, then you'll probably not want to do it again.
>I am doing all grain BIAB. I heat the water to ~150 and then add the grains in the bag, attempting to keep it steady at that temp. That is called mashing, correct?
Correct, that's what I thought you were doing.
>I know they're not the best, but I have one of those 12" dial thermometers that clips on to the side of the kettle. With about 7.5 gallons of water, the last half inch or so of the thermometer is in the water, and I usually clamp the bag around the thermometer so it's in there the whole time. I tend to take the thermometer off the kettle sometimes and stick it directly into the bag to get a reading with more of the stem in the wort.
>Is that largely alright? Do I want to be reading the temperature from the top of the wort or more in the middle?
That all sounds good. Ideally you'd be stirring every 10-20 minutes or so to prevent hotspots.
I guess the concern here is that if your mash (water + grains) is at 170 you're not going to get any sugars.
How hot is the water when you add the grains? Do you use a strike calculator?
I don't know about sexy, but nothing gave me a better instant improvement than one of these MT false bottoms. That was before I had a refractometer too, so my OG was a kind of crapshoot back then. this thing stabilized my efficiency at >75%
You have one of these?
https://www.amazon.com/Fermtech-5478-6H-Auto-Siphon-Tubing-Clamp/dp/B00SDLLZDY/ref=sr_1_2?crid=3FSQTFCNKS7D6&keywords=auto+siphon&qid=1569088031&s=gateway&sprefix=auto+si%2Caps%2C170&sr=8-2
Best to start the siphon in a pot of clean water to get it going, clamp off the hose and then transfer the cane into the mead to begin siphoning it out. If you hold it as you're doing it, you can prevent any of the sediment at the bottom from getting in. Just stop it before it gets there.
making a decent airlock, and getting the sugar in could prove a challenge.
https://www.amazon.com/FastFerment-Conical-Fermenter-Fermenter-fermenter/dp/B077X2261T
I just got one of these, and it's awesome. But don't ever get boiling water on the plastic, it warps and you lose seals.
Live and learn I suppose. Once you use your equipment enough you will be able to start dialing in your volumes. Now you know for this style of beer that you don't need as much bottling volume. I usually have a little bit left over that I'll fill a plastic bottle with then carb using a carb cap. It's nice to have a little sample of it carbonated
Congrats on the wedding! I would assume the culprit is not capping the bottles right away. Unlike traditional bottling that has bottle re-fermentation happening to carbonate the beers, beer guns rely on the carbonation already in solution from the keg, so if those were left out a good portion of that CO2 may come out of solution. As far as salvation goes, I would say either enjoy your cask NEIPA and Saison, or use a PET bottle cap carbonator when you're ready to drink to carbonate up. I bring my beers to my homebrew club like this and I think it would be the best way to get both a carbonated beer as well as avoid oxidation as much as possible, with the caveat that you would have to pour from bottle to bottle, cap and carbonate when you're ready to drink one of those beers. You could do a couple at a time (if you have multiple caps) and just drink the beers within 24hrs of the transfer. If you did go this route, you could even use one cap, leave the cap on while the CO2 dissolves into solution, then swap for a standard PET cap and move the carbonator cap to the next bottle.
https://www.amazon.com/Carbonation-Carbacap-Coupling-Carbonate-Fruit/dp/B01039C0Z0
I use a bucket as my FV, and I transfer to a second container to bottle.
I found that I could easily add a spigot to my FV so that I can get a quick sample mid-fermentation. Would you recommend against it as it may introduce crevices for unwanted critters to grow?
I use a Carboy Hauler that works perfect for both my plastic and glass Big Mouth Bubblers. I picked it up for $11 with prime shipping.
I’ve read here; I think one of the Brülosophy guys, about using a soda bottle with a carb cap to sort of inject the gelatin solution into the keg via the gas in port.
Here’s a plan I’ve been thinking about:
Potential downsides: even a warm solution might quick-chill on contact with cold metal of gas post and cause a gum-up of gelatin?
Edit: there are various kinds of carbonation caps. If using the one with a barbed part, then connect a line of tube to that and hold upright when sending gelatin in. If using the kind without the barb, hold the soda bottle upside down.
Visual Example of barbed:
https://www.beveragefactory.com/draftbeer/couplers/kmcbcp-carbonation-cap.html?catargetid=320012430000341477&cadevice=m&gclid=EAIaIQobChMI2MiP96363QIVUZF-Ch3HewZrEAQYAiABEgI7KvD_BwE
Visual Examples of ones without:
https://www.homebrewing.org/Carbonation-Cap-Stainless-Steel_p_3061.html?utm_source=google&utm_medium=shopping&gclid=EAIaIQobChMI4-7qraz63QIVmKDsCh3m-wsaEAQYAiABEgK5jfD_BwE
https://www.amazon.com/Carbonation-Carbacap-Coupling-Carbonate-Fruit/dp/B01039C0Z0
Edit 2: rewording
To piggy back on u/stormbeforedawn's comment.
This is the equipment I used that I've had good luck with so far. It's what he recommended, I'm just providing links to the specific product I used.
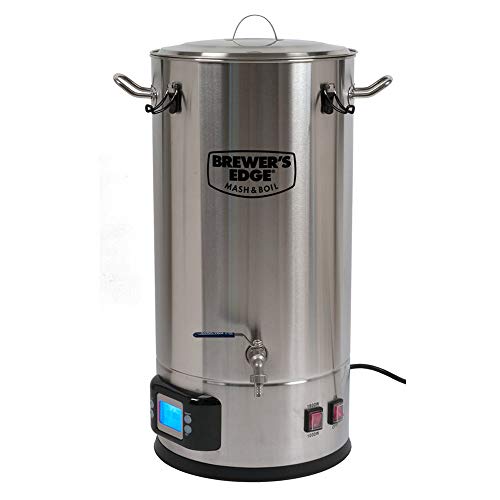
If I were you I would get the Brewer's Edge Mash and Boil https://www.amazon.com/dp/B075NNZ3KT/ref=cm_sw_r_cp_apa_i_Y2UYCbJFKW2Y6
It's an all in one electric kettle that makes all grain BIAB super easy.
Very simple and easy to use.
Goes like this:
At the links above, pretty much everything is shown in the Amazon "frequently bought together" listing down the page.
All you do is fill the 2-liter bottle with cold water, squeeze it (to create some room to expand) and put the cap on while squeezing it.
Click it to the coupler, turn the gas on, and shake the 2-liter bottle for a minute to mix the co2 into the water (or juice, or wine, or beer).
Done!
Put in fridge. Make some more!
First time you set it up, play with the regulator setting to get the level of carbonation you prefer, and after that you don't have to mess with it again. Also, cold water carbonates easier.
These can be nice, re: transfer:
https://www.amazon.com/Bouncer-inline-beer-filter-regular/dp/B01JWO5RK2
I have a tall mesh tube similar to this that I sanitize and gently work down into the mead and fruit when I'm ready to move it to secondary. When I siphon I siphon from inside the mesh.
So far so good and yields are as expected with almost no solids making the way in unless I accidentally let the top of the mesh dip under the liquid level. Very little liquid when I emptied the fruit and cleaned the bucket.
It did take some angling of the bucket to make sure I got as much out as I could though.
If you're not looking to spend much I would suggest some half gallon growlers. You can usually pick them up for 5 dollars empty at your local craft beer brewery. They're great if you have a second fermentation recipe that you enjoy. It is a lot less work filling up one of these instead of multiple grolsch style bottles. Another thing I use is an auto siphon. Also cheap on Amazon. Makes filling bottles a breeze.
Auto-Siphon Mini with 6 Feet of Tubing and Clamp https://www.amazon.com/dp/B00SDLLZDY/ref=cm_sw_r_cp_apa_sJwuybWN82B85
The biggest mistake I made was not getting big enough equipment to grow. I would recommend going for a 52 quart cooler, bazooka screen and 2 valves - 1 for the mash tun and 1 for the boiling kettle . 1/2" silicone tubing - once you use this tubing you'll never go back. Definitely a gas burner and also some sort of fermentation control
I have a decent quality but basic 10 gal kettle (thick stainless, clad bottom, but no ports or extras). I moved to BIAB back in December and find that the 10 gal pot works great. I would probably have to work in a sparge for a batch with more than 20 lbs of grain, but I feel that the 10 gal pot works great for 5 gal batches. There is plenty of headroom for starting with 7 gal pre boil.
I would say you would be much happier with a decent 10 gal pot and a propane burner than trying to work with a 15 gal pot on your electric stove. I cannot physically fit my 10 gal pot on my stove (the microwave is too low). At one point I used to use a large enamel pot that would stretch over two burners, but moving to a propane burner cut at least an hour off a brew day.
There are plenty of pots out there of different quality and such, but mine is similar in quality to this one ( Vigor 40qt Pot ) that goes for about $100 delivered. Looking on Amazon I see a few in the $70 to $120 range. I am curious about some of the "Gas One" brand kettles (like Gas One $70 or Gas One with Port $110 )
I have also been enjoying 2.5 gal stove top BIAB batches using a 5 gal kettle.
3 Gallon FastFerment
Used 3 Gallon Corny
I mostly use 3-gallon frosting buckets that a bakery hooks me up with. I've done a couple of ferments in the 3-gallon keg, but I hope to get a floating diptube because my (uncut) diptube does get clogged with trub pretty easily. I'd love to try the FastFerment, but my free buckets work great so far.
I use one of these bad boys; cheap as heck and never had a problem with it.
Go to home depot and get a cooler (~$50)
Then get these:
http://www.amazon.com/gp/product/B003H83G94/ref=oh_details_o03_s00_i00?ie=UTF8&psc=1
http://www.amazon.com/gp/product/B004L0XTXA/ref=oh_details_o04_s01_i02?ie=UTF8&psc=1
http://www.amazon.com/gp/product/B0064OEUE8/ref=oh_details_o05_s00_i00?ie=UTF8&psc=1
That's exactly what I did to build mine. Works like a charm.
https://smile.amazon.com/gp/aw/d/B06Y2F4BMY
Get a false bottom, a bulkhead fitting, a ball valve, and 5~6" of 3/8th silicone tubing.
I purchased this kettle back when it was on sale. The "bulkhead" they provided was pretty cheap and the gasket kept deforming causing it to leak so I haven't really gotten to use it yet. The one my kettle came with was a total of 6 pieces including a coupler I added in for a bazooka screen. I was wondering if anyone had any experience with this one? It is only 2 pieces so it seems like it should work much better.
Edit: Actually it was this kettle
Well I don't have a drill or drill bit, so I'd have to either find one or buy one in addition to buying the kettle. I'm thinking about just picking up this instead.
I just used one of these for the first time. I used pellet hops. It’s pretty rad!
https://www.amazon.com/dp/B06Y2F4BMY/ref=asc_df_B06Y2F4BMY5266918/?tag=hyprod-20&creative=395033&creativeASIN=B06Y2F4BMY&linkCode=df0&hvadid=198078807540&hvpos=1o1&hvnetw=g&hvrand=17215079381502969390&hvpone=&hvptwo=&hvqmt=&hvdev=m&hvdvcmdl=&hvlocint=&hvlocphy=1020955&hvtargid=pla-319252294200
Hah! That URL! Sorry, on mobile
I'd like to find something that I could pop the ball-lock connector right on, currently I just use a keg filled with sanitizer.
Something like this but works for both gas and liquid disconnects
http://www.amazon.com/Carbonation-Carbacap-Coupling-Carbonate-Fruit/dp/B01039C0Z0
Dudebro. You need one (some?) of these:
http://www.amazon.com/Carbonation-Carbacap-Coupling-Carbonate-Fruit/dp/B01039C0Z0
I'm assuming that if you have a keg, you have a kegerator, and therefore have a CO² tank at the ready. As long as you have proper regulation and a ball lock connector, you're in business.
The way these things work: first, get a plastic bottle--20 oz, 2 liter, whatever. If you're going to serve within a couple of hours, I usually just clean/rinse. If you're going to keep it several days, everything needs to soak in sanitizer. Fill the bottle with however much beer you want to take, but make sure to leave at least some headroom. Take the bottle to the sink, screw the cap on tightly, depress the pin with a screwdriver or your thumbnail or something, and squeeze all of the foam out until you're squeezing beer out. Release the pin while being careful not to let the bottle suck any air back in. Then you just plug your CO² to the cap, the bottle pressurizes, you're in business. I tend to find hitting it with about 20psi works well--you want to be higher than serving pressure.
I can't tell you how much easier and expedient it is to use these carb caps instead of traditional bottling.
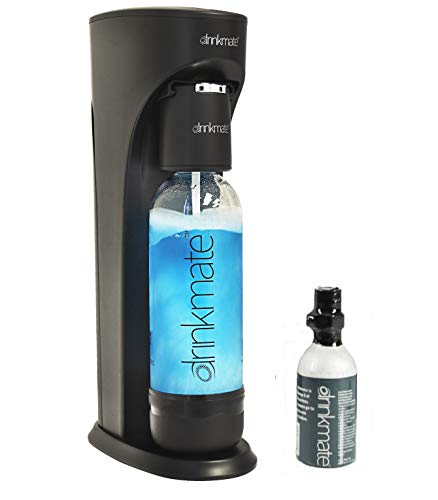
Adding anything to the water will raise the viscosity, which causes more foam to form, and when the pressure is rapidly released, it will fizz everywhere, like shaking up a soda bottle and opening it.
However, if you let it sit there for a long enough time and release the pressure slowly enough, you can do it. The problem is that is really hard to do with the SodaStream.
Enter the DrinkMate. It is very similar to the SodaStream, but unlike that device, with the DrinkMate, you put a cap on it first, then put it on the machine and the Co2 is injected through that cap.
This allows you to take it off the machine without releasing the pressure. It also has both a slow and fast release valve, so for something like wine or a sugary soda, you can slowly release the pressure, and close the valve back if the foam rises too much.
It also mean you can shake the bottle while it is under pressure, which greatly helps with absorption of Co2.
You can pretty much carbonate anything in it, as long as it doesn't have any pulp or particulates in it (those create nucleation sites for the Co2 bubbles, and stop it from absorbing the Co2 properly.
The device uses the same Co2 canisters that the SodaStream does, so you can buy and exchange those instead of the DrinkMate branded ones, or use the same adaptors that are sold for the SodaStream to convert it to use standard Co2 paintball tanks.
*edit: Unsweetened Iced Tea probably doesn't have enough of a raised viscosity to cause huge issues (I could be totally wrong), but be careful if you do try it in your SodaStream. Carefully and slowly remove the bottle, letting the gas vent very slightly and watching for rising foam. If the foam starts to rise too much, attach it back as quickly as you can.
http://www.amazon.com/Carbonation-Carbacap-Coupling-Carbonate-Fruit/dp/B01039C0Z0
Or this
see if you can purchase one of these:
https://www.amazon.com/Carbonation-Carbacap-Coupling-Carbonate-Fruit/dp/B01039C0Z0/ref=pd_sim_328_6?ie=UTF8&dpID=41PaQkKulFL&dpSrc=sims&preST=_AC_UL160_SR160%2C160_&psc=1&refRID=FSRQ012AAS1W8W5868W4
I use a standard CO2 tank, a Taprite pressure regulator marketed for use with beer kegs, and a couple carbonator caps. It's like a soda stream, but with standard interconnects and refills so cheap they might as well be free (I've been using a 20lb tank for 2 years, haven't needed to refill it once)
How about drilling out a small stainless filter like this for the dip tube (https://www.amazon.com/Micron-Filter-Stainless-Cornelius-Brewing/dp/B06Y2F4BMY/ref=sr_1_2_sspa?keywords=hop+filter&qid=1563815355&s=home-garden&sr=1-2-spons&psc=1)
Connecting that to the dip tube, Fermenting in the keg, adding fruit and letting it do its thing, then transferring out to another keg when you're ready to? I bought one of these to do that with my fruited berliners but haven't had the time. I have also removed the poppet for transfers like you're saying but have ended up with clogs from the serving keg to the tap.
This seems fascinating. Does it... take the fun out of it though? Would I be good to go with just this: https://www.amazon.com/Brewers-Edge-Mash-and-Boil/dp/B075NNZ3KT/ref=sr_1_9?keywords=grainfather&qid=1569510160&s=gateway&sr=8-9
That's actually not bad but as mentioned below, a decent pot will go a long way. I bought a 30quart turkey fryer and put in a ball valve and that's been one of the best upgrades I've made. I have a fermentor now, but I got some free 6+ gallon food grade icing buckets from my grocery's bakery. Spigots, air locks, and bottling wands are $6 on Amazon. Tubing can be found pretty cheap online or at LHBS/hardware store.
Kettle - $25
Ball Valve - $22
Bazooka Screen - $9
Buckets - Free
Spigot - $6
Airlocks - $7
BIAB Bag - $5
Bottling Wand - $5
Capper with Caps - $18
Various Tubing - $15
This doesn't include your first beer kit, but you can pull off an all grain BIAB as long as you've got fire. My second favorite piece I own is my mash tun which is just a 10 gallon cooler with a bazooka screen and ball valve. I don't bottle anymore, but I feel like if I were to do it again that's all I would need to start. Oh, and a thermometer and some StarSan.
Why do so many people dry hop in these canisters? They’re an awkward fit in a fermenter, they have holes in top and the space could be cramped 😕
I think I like these bags more. It’s way bigger and I think it seals off better.
Seems like only an OK deal, but a 8-gal kettle is marginal-to-too small. Consider something like this combo (and you can get it cheaper if you follow homebrewfinds or go to The Brew Outlet comparison site and wait):
10-gal kettle from same mfr, $154 (can often get for $99 on sale, or for $209 the Megapot from Midwest Supplies)Snap!: I found this amazing Concord Kettle for $99. I have this kettle and it's sweet. Spike Brewing used it as their base kettle until Jan. 2015 IIRC.I just bought this. Although it's a bit more than those two, it's definitely built to last, has a tri ply bottom and two ports, and graduation markings in it. I'm preparing to convert from extract to BIAB and this seems perfect.
16 Gal. Kettle
I'm not sure what your budget is or where you are located, but maybe something like this could help?
​
https://www.amazon.com/FastFerment-Conical-Fermenter-Fermenter-fermenter/dp/B077X2261T/
​
It has attachments to catch a lot of the lees in a mason jar, and some other "upgrades". Hopefully, this helps. Best of luck on your journey!
Hey I just came across a solution for this problem in a video by the Mad Fermentationist . He uses an inline bouncer filter while transferring. I may order one and see how it goes!
Yep, it happened just a few weeks ago to someone here. Blood and mead everywhere.
You're going to need to move this mead eventually for racking, I recommend getting a carboy carrier (in fact, I double them up because I'm paranoid)
No worries! On cheesecloth in the keg - I did that once and some loose strands of cheesecloth ended up in the valve poppet, which made everything foamy. Not fun.
​
A couple other options:
This is the smaller cheaper one. I've been seeing a lot of either you love it or find it useless. As to the speidel I'll have to look more into it. My wife and dnd group both love fruity so that'll probably be a good investment once I have more space. That'll be down the line though. https://www.amazon.com/dp/B077X2261T/ref=cm_sw_r_cp_apa_i_5QG4CbGK63BKD
You can still purge. Just open it quickly and throw in the hops. I would highly recommend either bagging the hops or using a dry hopper, cause hops will clog up quick disconnects like you wouldn't believe.
I bought a 15 gallon kettle like this and it's been great. I don't mash in the kettle because I have a cooler mash tun from before I did BIAB, so now I just mash in the bag in the cooler. If you resist the temptation to buy from one of the premium homebrew kettle brands like SS Brewtech, Spike or Anvil, you can afford a lot more kettle for your money. Also, if you end up wanting to upgrade or quit brewing later, I think it's a bit easier to sell a kettle than a whole all-in-one system.
I think this is a better option for a pocket Randall
https://www.amazon.com/Bouncer-inline-beer-filter-regular/dp/B01JWO5RK2
Here. Buy a blue screen for it. The red one isn’t fine enough.
I've recently bought a few of these but have yet to use them. After having a few muslin bags get stuck on the tip of the dip tube at the bottom of the keg, I've decided that stainless is probably a better option.
Might want to invest in one of these too:
http://www.amazon.com/Fermtech-Large-0-5-Inch-Auto-Siphon/dp/B001D6KGRW/ref=sr_1_2?s=home-garden&ie=UTF8&qid=1421767516&sr=1-2&keywords=auto+siphon+homebrew
Will make racking/bottling a lot easier.
Fermtech 5478-6H Auto-Siphon Mini... https://www.amazon.com/dp/B00SDLLZDY?ref=ppx_pop_mob_ap_share
This one comes with tubing and a clip to adjust the siphon depth.
White Russians, duh!
Seriously tho, you might consider getting a carbonator cap so you can run thru a few smaller batches before you go all in. I've successfully carbonated stuff like mead, sake, and white whine using this cap and a standard soda bottle. I carbonate at 50 psi or so, which is close to club soda levels of carbonation. 30-40 gives you smaller bubbles like San Pelligrino.
I like the idea of a fizzy Hemingway Daiquiri, myself.
No, I got it at my local hydro shop. It's probably equivalent to this. Plus a couple aeration stones and a small fish tank pump for the top feeding.
I like the setup a lot. I don't have much to compare it to, but it works well for me. Changing the water in the bucket is the only annoying thing, but I have an auto-siphon from home brewing which helps a lot.
How's this?
http://www.amazon.com/Bayou-Classic-gallon-Kettle-Stainless/dp/B00OBMB7CI/ref=sr_1_4?ie=UTF8&qid=1449110759&sr=8-4&keywords=10+gallon+brew+kettle
Just an FYI, you could cut out the sodastream alltogether with one of these:
https://www.amazon.com/Carbonation-Carbacap-Coupling-Carbonate-Fruit/dp/B01039C0Z0
Just pop it on a bottle and attach your CO2 line using the same ball lock that you use to attach it to a keg. I watched my LHB use it to carbonate a 1 liter bottle of water in about 30 seconds.
I'm planning to replace my auto siphon tubing with silicone. But I need more tubing right now, so I need to pick up some vinyl tubing from Lowes/HD.
I typically use the large, half inch siphon. Currently, I use what's recommended, the 7/16" ID tubing. But I don't think I can find that at Lowes/HD. I know I can get 5/16" ID, but I think that would be too small, even with boiling/heating it to soften it. Is my best option to use 1/2" ID and just use a hose clamp with it?? Thanks.
ETA: I can also get 3/8" ID if that's a possibility.
>I am now considering just bottling it where it is. I've prepared the bottles. I'll strain the beer into the bottles through a sieve because there's some debris in what I've pulled out for samples. Tastes gritty, no fun.
No no no! Absolutely do not do this, it will oxidize the crap out of the beer. If anything you can use an inline beer filter, e.g. Bouncer. There's a reason siphons are so popular in this hobby. Draw liquid from the top, don't suck up sediment. Personally I really dislike plastic fermenters with spigots, this being one of the lesser reasons, sanitation being one of the bigger ones.
​
> Also might be worth noting I fermented it in a bucket with a tap. I've been taking samples from. The tap to check gravity.
You should know that every time you take a sample this way, you suck in oxygen from the top, just FYI. I'd limit it to no more than one or two if you're measuring.
Meanwhile, I’m over here saying to people:
Sorry about your https://www.amazon.com/Drinkmate-410-02-3z-Beverage-Carbonation-Cylinder/dp/B018K1C3KK/ref=sr_1_3?gclid=CjwKCAjw3c_tBRA4EiwAICs8Cq0Txl1oIXlDS38JktsmhlcDm5KwPN6N0WW4-rd1BmAXM6jlmSIUqxoCoCUQAvD_BwE&hvadid=241656237791&hvdev=t&hvlocphy=1027028&hvnetw=g&hvpos=1t2&hvqmt=e&hvrand=11460963673256680943&hvtargid=kwd-7301819333&hydadcr=26614_9892225&keywords=drinkmate&qid=1572110868&sr=8-3
Thanks for all the info! Sorry to not reply sooner; I had started a reply at least twice but kept getting distracted.
This past weekend I brewed three 1gal BIABs and they were incredibly simple; just like the partial extracts I was doing without all the extract stirring. In scaling up BIAB I can see it being feasible but your pulley system would no doubt be a necessity; I can imagine how heavy a bag of grain for five gallons could become.
I did notice that temperatures in my pots were dropping quickly down to about 145F in 30 minutes without additional insulation. I think if I do decide to scale up to five gal kettle mashes I will go with the reflectix jacket. I still have some brainstorming/ fund allocation to do; 16gal brewpots w/o falsebottom are expensive!
Thanks again!
I also use a false bottom with a silicone connector hose like this
https://smile.amazon.com/gp/product/B004L0XTXA/ref=oh_aui_search_detailpage?ie=UTF8&psc=1
I've been using this 10G Gas One kettle for BIAB and it's been great. I don't think I'm going to upgrade to a 3 pot setup at all with how easy BIAB is. Either way I don't see any need to brew more than 5-6 gallons at a time.
https://www.amazon.com/gp/product/B07DY66RSL/ref=oh_aui_search_detailpage?ie=UTF8&psc=1
I bought this. Life changer. https://www.amazon.com/gp/aw/d/B018K1C3KK/ref=zg_bs_7956268011_9?ie=UTF8&psc=1&refRID=86X967YFP4238FSCF1A1
these work really good also when you need to move water with less effort.
I am doing all grain BIAB. I heat the water to ~150 and then add the grains in the bag, attempting to keep it steady at that temp. That is called mashing, correct?
I know they're not the best, but I have one of those 12" dial thermometers that clips on to the side of the kettle. With about 7.5 gallons of water, the last half inch or so of the thermometer is in the water, and I usually clamp the bag around the thermometer so it's in there the whole time. I tend to take the thermometer off the kettle sometimes and stick it directly into the bag to get a reading with more of the stem in the wort.
Is that largely alright? Do I want to be reading the temperature from the top of the wort or more in the middle?