Best bike shop tools according to redditors
We found 586 Reddit comments discussing the best bike shop tools. We ranked the 179 resulting products by number of redditors who mentioned them. Here are the top 20.
We found 586 Reddit comments discussing the best bike shop tools. We ranked the 179 resulting products by number of redditors who mentioned them. Here are the top 20.


That's a great bike to start with. I started off with a bike in much worse condition.
I usually start off by giving the bike a quick wash. Just water and some dish soap to get off all dust and loose dirt. After that I dry it with an old towel.
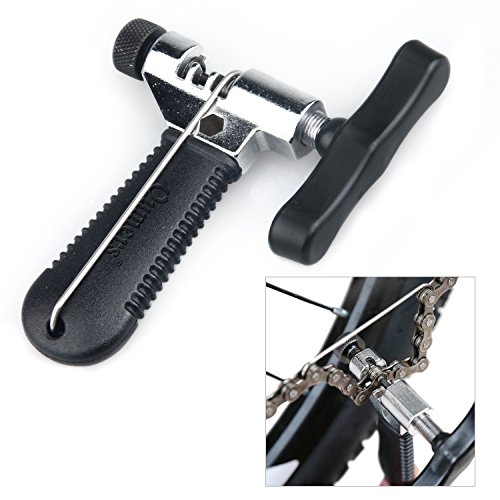
Then comes the tear down. I put it on my stand and remove the wheels and set them aside. Then I just start cutting off all the cables (brakes and derailleur). After that, the chain gets it. I use the Park chain tool.
Then its on to removing the derailleurs, cranks, stem/bars, brakes, etc. Rear derailleurs are mostly removable with a 5mm allen wrench. Front derailleurs, too, although some of the older ones may just have a hex head. The seat post binder bolt is usually 5mm, also. Hopefully it isn't stuck. If it is, just come back and ask for methods.
Onto the stem and handlebars. To remove the stem, just loosen up the bolt up top a couple turns and tap it with a hammer and hopefully it slides out without a fight. Then remove the brake levers from the bar, then the bar from the stem.
I use this tool for the allen bolts. Park AWS 10
To remove the pedals from the cranks, I use a snap-on 15mm wrench. Remember, the pedal on the left side is reverse-threaded.
The bolt (or nut) on the crank arms is most likely 14mm and on much older bikes sometimes 15mm. I use a 14mm socket with a ratchet.
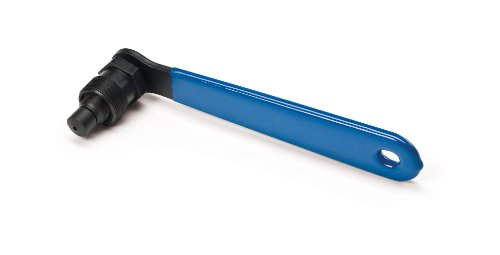
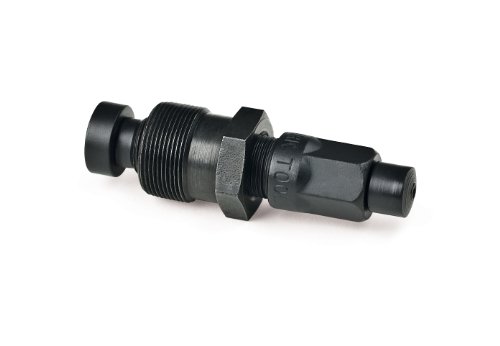
Removing the cranks from the bottom bracket spindle can be a pain sometimes. The tool to remove them is a crank puller. I use the park ccp-22. Make sure the threads are clean on the crank apply a little grease on the tool. Try to make the tool screw in the most it can and don't cross-thread. Aim to get the tool to bottom-out on the crank. Then you start spinning the handle and then you'll get a little workout on your arms.
By this point I usually just have a frame, fork, headset, and bottom bracket left. I'm tired so I'll just stop typing for now, heh.
Ask If you need any help. Someone will gladly help you here and see if you have a local bike co-op/ kitchen nearby. They could be a great asset.
hate flats, learn how to switch out tubes, saved me a lot of hopelessness and the gear required is pretty light to carry around.
lever
tubes
ratchet wrench 15mm
portable air pump
back up and running in 15-20 min.
Bike tire lever for separating the rim and tire.
http://www.amazon.com/Pedros-Bicycle-Tire-Lever-Pair/dp/B000IZGFCE
Posting pictures of the bike would be helpful. If you decide to do this, make sure to post a few high quality shots of your drivetrain which could show us if there's any critical wear.
However, before you post the pictures, it would be helpful to clean the bike. Get a bucket of soapy water, find a sponge or rag that you don't mind sacrificing and get to cleaning your mountain bike. Dry it off, and then post the pictures (that will make any critical deficiencies more obvious).
As others have mentioned, you'll most likely need to remove the chain. Here's a video from one of the best cycling channels on Youtube, Global Cycling Network (GCN), that shows you exactly how to do that. GCN and its sister channel, Global Mountain Bike Network (GMBN) offer a number of fantastic maintenance videos in addition to a variety of other content. If you're wondering where to get a chain tool, I would just spend a bit of extra money and get a good multi tool like the Crank Brothers multi tool which already comes with one.
Pump up the tires to see if they still hold air. If they do, fantastic. Nothing more needs to be done. If not, you'll need to get new tubes (most likely your mountain bike will need 26 in X 1.9-2.125 in tubes). Here's how to install a new tube.
As a bike commuter, you'll need a number of things to stay safe and make sure your bike stays in your hands. Here are the essentials:
However, staying safe is only the first part. You'll want or need a number of other items to make sure that your commute isn't frustrating. Here are some of the items off of the top of my head.
/r/bikecommuting can be a helpful resource if you have other questions.
With the right BB, Yes. Take the R-der as well, you can use it for parts. Looks like a square tapered BB.
https://www.amazon.com/Park-Tool-CCP-22-Crank-Puller/dp/B001VS1M20/ref=sr_1_2?keywords=Tool+for+removing+square+tapered+BB&qid=1562026322&s=sporting-goods&sr=1-2
This the tool to remove it
Without a tool it is almost impossible, and the correct tool will cost significantly less than the damage you might cause attempting without it. Especially if you borrow the tool from (for example) a bike co-operative.
They can be very cheap too
Or
https://www.amazon.com/dp/B006UMFUES/ref=cm_sw_r_cp_awdb_t1_HfqSBbP6WDM5H
This is cheap and works for me.
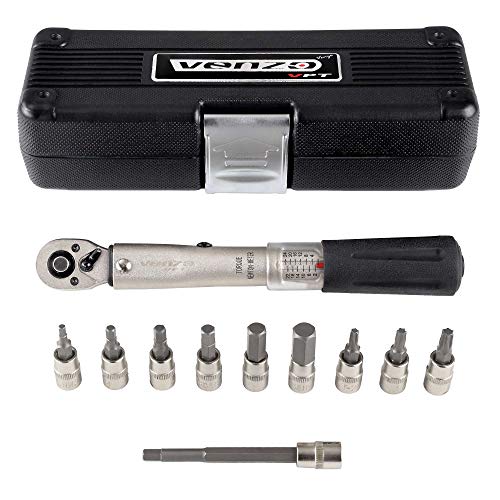
https://www.amazon.com/2-10NM-Bicycle-Basic-Torque-Wrench/dp/B00V4CQEGW/ref=sr_1_2?s=sporting-goods&ie=UTF8&qid=1526053021&sr=1-2&keywords=venzo+torque
Looks like a bike chain tool
https://www.amazon.com/Oumers-Universal-Mountain-Bicycle-Splitter/dp/B0179JC31I
You have a loose crank arm there, and what looks like probably a loose bottom bracket too (the part at the bottom of the bike that the crank arms attach to, it spins).
It's very possible that that bottom bracket doesn't need replaced, and just needs taken apart, cleaned out re-lubed and tightened. Then you would clean up those rusty crank bolts with barkeeper's friend to make them shiny again, and put them back on pretty tight.
It depends how expensive the bike is. If it's a $300 or less bike I would bet relubing and tightening the bottom bracket and then just tightening the crank arms would put it back to working like new.
You'd need a bottom bracket wrench to remove the bottom bracket, and a crank puller. For both those tools that's gonna be about $23. These are cheaper ones but you will only use them once so it's fine.
Then you need some marine grease at Walmart for about $4, and some bar keepers friend (at Walmart or grocery store for about $3).
This is a total of about $30 to fix your bike on your own.
You could follow a video on removing the crank arms
And removing and relubing your bottom bracket.
You would take the bolts off your crank arms, pull both crank arms off with the crank puller, and then remove the bottom bracket. You'd clean it out real good with rubbing alcohol or brake cleaner, and then relube it with marine grease, and then tighten everything down. Then you would clean up those rusty crank arm bolts with bar keepers friend and an old tooth brush, and then tighten the crank arms back on. Bike would be good as new for $30. So long as you're patient, careful, and follow the videos. Look around online for things if your not sure.
If you have access to a torque wrench that would be great to follow torque specifications, but you can do without if you follow a video. I mean, your bike will be much safer afterwards than it is now. Fixing it well (instead of perfect) is better than not fixing it at all.
If you are not a d.i.y. fix-it kind of guy, you can go to a bike shop. Not sure how much they will charge. I wouldn't know, I rarely go unless I'm buying a bike. I only wrench at home 🔧
You require a tire lever good sir. This is especially true for the particularly narrow road tires (25-28ish) where it's basically a necessity.
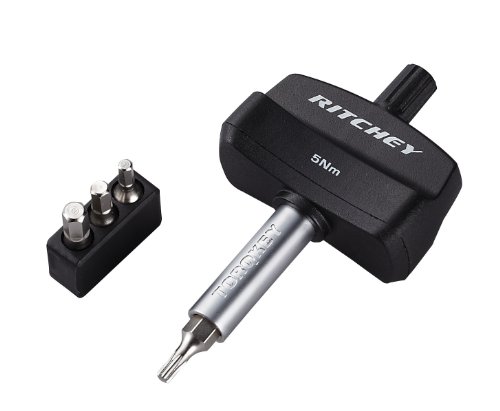
The non adjustable torque keys are great for folks in your position. they're usually less than $20 and give you some piece of mind. Carbon Trek bikes usually come with one that's a 4mm at 5nm. (that's size, and torque) A lot of times the shop keeps these tools when they assemble your bike - it's worth asking them to fork them over. https://www.totalcycling.com/en/Bontrager-5Nm-Preset-Torque-Wrench---4mm-Hex-Allen-Fitting/m-17367.aspx (this says the bits are interchangeable, but all the ones my shop got only had a 4mm that was non-removable)
There's another similar one that's sold branded as Ritchey that is 5nm and uses interchangeable "bits" so you can put a 4mm, 5mm or T25 on there. pretty handy. https://www.amazon.com/Ritchey-5Nm-Multi-Torque-Key/dp/B009F93S9C
If you need a different torque spec, park tool has a small semi-adjustable one that is pretty good with settings of 4, 4.5, 5, 5.5, and 6. http://www.parktool.com/product/adjustable-torque-driver-atd-1?category=Torque%20Tools
any of these is great for stems, seat binders, etc. For bigger things like crank pinch bolts, etc you'd need to get a full on adjustable torque wrench, but honestly, for most of those bolts, the precision isn't as big a deal as it is for your carbon fiber contact point accessories.
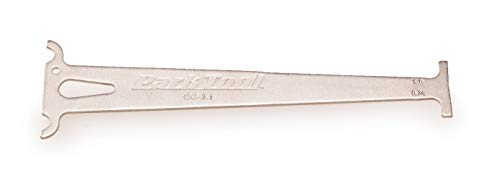
Noticeable stretch. How are you computing this "noticeable" stretch? Are you using a chainwear tool?
Dusty conditions = dry lube. Dry as possible. I recommend Rock & Roll Extreme.
Even with cleaning and lubrication you will replace the chain. And yes, worn chains (those past 75%) will start to wear the cassette, and then the chainrings once the chain goes past 100%. I wouldn't be concerned with derailer cogs.
https://smile.amazon.com/Park-Tool-BBT-22-Shimano-Cartridge/dp/B001A0AIAG/ref=sr_1_3?keywords=bbt-22&qid=1565128333&s=sporting-goods&sr=1-3&th=1&psc=1
https://smile.amazon.com/Oumers-Bike-Crank-Extractor-Professional/dp/B0716NX7KC/ref=sr_1_8?keywords=bbt-22&qid=1565128333&s=sporting-goods&sr=1-8
It lookes rusted in, consider a bolt and washers to hold the tool in so you can crank on it with a breaker bar. Might save your knuckles that way.
Also, one side may be a plastic cup.
If the taper on the cranks is screwed up, most likely so is the taper on your bottom bracket. You should replace that as well.
Is your BB a cartridge bracket? Square taper brackets are inexpensive on Amazon, and the Park BBT-22 is less than $20.
Alternately, you can put a piece of wood on the old crank arm and smack the shit out of it with a hammer to wedge it on tighter. Sometimes that works, sometimes it doesn't. Don't do it with the new set you bought though.
For example: https://www.amazon.com/Park-Tool-CC-3-2-Chain-Checker/dp/B000BR3LHQ/. A $10 chain measuring tool like this could save you much more money in drivetrain components in the future.
You'll probably want a park tools repair stand (i have that one, it's cheap and it gets the job done), and the big blue book.
You'll also probably need a bottom bracket tool depends on your type of bottom bracket though. You might want to get a breaker bar as well (leverage is very important when removing these bottom brackets).
You'll need a chain whip and lockring spanner.
If you are going threaded fork, you'll need the relevant spanner wrenches.
Make sure you have a good multi-tool/allen wrench set. A nice tube of waterproof grease, and some triflow or other chain lube, and a degreaser. Also a good pedal wrench is good to have.
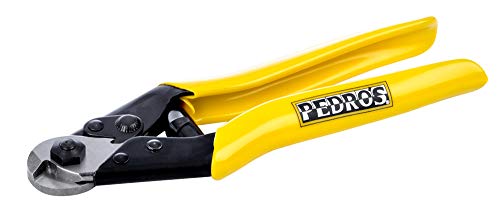
A 4th hand tool is really good to have if you are running your own brakes, plus you'll need a good housing/cable cutter.
If i can think of anything else, i'll get back to you, but that should pretty much cover it.
On the x-posted thread someone was asking about gear load out... so thought I'd put it here as well..
In the saddle under the seat:
In the snack bag on the top tube:
On my person:
As for clothes at work, I have a locker so stock up once a week on them.. and also keep toiletries at work. HTH!
Everyone knows you need Pedro's.
Agree, Pedro's are the best.
They even handle my Marathons easily.
I have this one and really like it. It lets me transfer all the goods from one bike to another easily.
What I have in mine:
Remove the 8mm bolt on each side, then use an ISIS/Octalink-style crank arm puller (or get one that does both ISIS/Octalink and square taper) to remove the arms. Use a Shimano Hollowtech style BB tool (i.e. Park BBT-9) to remove the BB cups. Replacement BB is a Truvativ Howitzer. You'll need to check the chain line number - it should be printed somewhere on the old BB, or you can measure it yourself. It's the distance between the center of the seat tube and the center of the chainring - should be either 51mm or 56mm.
I got this torque wrench, I like it as it takes out the guess work.
I would also request some carbon assembly paste, as sometimes the required torque isn't enough without it.
Buy tools as needed, no need to stock up with everything right away. Most park tools I buy on Amazon and get them within two days. Tools I would get right away though would be
As for cabling
Universal Brake Cables on Amazon, just make sure you cut of the correct end.
Here is a shift cable set.
As for cutting the cables and housing, do NOT use standard wire cutters. You need a parrot style nosed set of cutters, like this Pedros set. I bought a cheap set of cutters on eBay that work great. When I cut housing I use a little sand paper to flush up the ends.
The 4th hand is not really needed, I get by fine without it.
3 tools that I would recommend getting are a cable cutter made for bikes, a cable puller and a pokey spoke. Without a proper cable cutter you will just crush the cables/housings when trying to cut them. Even with a proper cable cutter you will slightly deform the housings- which is why you want a pokey spoke. Use the pokey spoke to make sure you have rounded out the cable housings nicely after cutting em. The cable puller is invaluable when adjusting tension on the brakes and derailleurs. Sure, you can bumble along fine without one, but holy hell it is a headache. Also- Make sure you have ferrules and cable ends. You can pick these up at your LBS for next to free.
Remember- Derailleur cables/housings are smaller than brake cables! They are not interchangeable. I usually just start with the shifter cables and run those, then do brake cables(this is definitely dependent on the bike). Don't cut the cables until you have tested your brakes and shifters/derailleurs. Sorry for the wall of text. Hope it helped a tad, tho.
You'll probably need:
Park Tools is basically the Canon/Nikon of bike tools; always quality parts and they won't break down on you.
Your weight isn't the problem, a poorly installed pedal can easily work itself loose, damaging both itself and the crank, for riders of any size.
The threads on the pedal and crankset are damaged and will need replacing. These aren't difficult jobs but removing the crank (assuming you have a 3 piece set this link should help you find out) will need a special tool you are unlikely to have. Pedals you can do with a regular spanner though you need to remember that the left hand pedal has a left hand thread, this guide explains what to do.
So you need an Allen key/Hex wrench (regionalism) to remove the crank arm retention bolts.
You need a $14 or less crank puller.
You need a $6 (The park tool one is no better and $14) 22-spline driver for Shimano 22-spline BBs (COUNT YOUR SPLINES FIRST).
And a 3/8" socket wrench to drive the tool or an appropriately sized box wrench (can be driven from the inside square or the outside faces).
Make sure the assembly that holds the hex head screw is pushed all the way down. It can move with the seat post as you are adjusting but it should be all the way down inside the housing behind the top of the seat tube before tightening.
Also, get a torque wrench. I have this one which is relatively inexpensive and great for low-torque adjustments.
I would look at getting a chain checker to see, and for cabling I would reset the cable at the derailer and adjust it if it really is stretched.
1500 miles seems low, not unheard of just low. Maybe take it to another shop for a second opinion or learn to do the work yourself. Save money and gain skill in the long run.
Just Riding Along.
chain checker will check for pin wear (sometimes called chain stretch. It's one dynamic of wear that can be measure. Lateral slop can't be measured as it were but can affect shifting and performance.
You can spin chain rings and cogs to see if they're straight.
Edit: Take two with some input thanks to u/LukeWarmCage for teaching me some Reddit knowledge. We all learning lessons today...
My same post from before:
I was gonna suggest something similar. I've always been mechanically inclined, taking apart things like RC cars as a kid to see how they worked. But I got into road biking with zero experience working on bikes. I now have 6 bikes and do 90% of the maintenance on all of them myself. I learned most things from books and Youtube, when I would get stuck I'd take a bike to my LBS and make sure to ask them what I was doing wrong. Usually they are happy to offer advice and direct me toward a tool or technique I was missing. The only thing now that I'm not comfortable working on myself still are things involving bearings, especially if they are press fit. I don't have the tools to work on them and don't want to damage something trying to go without. I've been slowly converting my bikes from hubs with open bearings to cartridge bearings because I hate repacking hubs, and cartridge bearings last long enough that I don't mind taking a wheel to a shop for new bearings when needed.
u/dinkinflickin (great name BTW) While by now I have a pretty sizable selection of bike tools and a stand, you can do a lot of the stuff your bike needs regularly with really basic tools: a set of Allen wrenches, screwdrivers and maybe an adjustable wrench. Do invest a couple bucks in those plastic tire levers for fixing flats and get a chain gauge, which is a helpful little tool that tells you when you should think about replacing your bike chain. A worn out bike chain will still work fine for a while, but it is increasing the wear on your gears and they are more expensive to replace.
Things like your shifters and brakes are most likely to need occasional fine tuning. These are also both things that many new cyclists can mess up because they require some feel to get right. I've seen a lot of cyclists who notice their shifters aren't shifting smoothly and they adjust the wrong thing and make the problem worse. Here's GCN's video on indexing a rear shifter. "Indexing" is the term for getting the shifter to be properly lined up with the rear gears. This process is not easy as it takes some trial and error to learn at first, having someone show you how it's done is really helpful. Lastly since your bike is new you are unlikely to have to replace any components for a while, but as cables break in you may need to fine tune shifters. Chains, brake pads, and tires all have a finite lifespan and one of them is likely to be the first thing you replace in the first year or two.
The best thing you can do now IMO is leaning to clean and properly lubricated your bike. The grease and oils on your bike collect dirt and other contaminants and eventually turn into a gritty paste that starts doing more harm than good to the components. Keeping the bike clean and lubricated will reduce wear and protect your bike from corrosion. GCN also has a bunch of videos about cleaning and oiling bikes. Too much oil can be just as bad as too little because it picks up dirt. A chain cleaner like this one makes cleaning your chain much easier as you don't have to remove it from the bike.
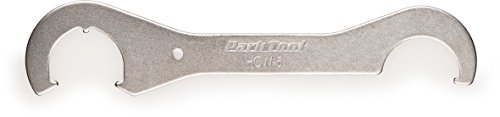
Not sure what you mean by strange bottom bracket - it looks pretty standard to me. You need something like this to remove the lockring and a large spanner should be able to remove the actual shell.
As for the cranks personally I would just take an angle grinder and cut the axle near the cup, OR after removing the bolts just take it for a nice ride up a steep hill and with caution knowing that the crank arm will fall out. If it doesn't fall out after your ride go again or literally give the crankarm a good kick with the frame on the ground (has worked for me before).
My first fixed gear! Yeah all you need is a cog and a lockring, make sure the measurements are the same! buy a lockring wrench too and you can do it yourself.
Compatible Cog, Lockring, Wrench(spanner)
Or Amazon UK.
looks to be a mid-70s Frenchie, so 2x5 friction gears, probably a Sachs-Huret rear derailleur and (this is the bad bit) weird french dimensions and threading on the BB. That's not necessarily a deal breaker if everything is in place, it just means replacing bits can be a little bit difficult.
It probably is worth a $100 or so if everything works and there's minimal rust, but if you do buy this, you'll need a 4th hand tool to set the brakes up properly, and I would also suggest some modern brake pads.
3rd/4th hand tool
http://www.amazon.com/gp/aw/d/B000IZGF6A/
Make it go completely flat first to make it easy and pry a section of the tire away then just squirt sealant in. Get yourself a couple of these to make it easy.
Decided to do something a little different. This is the first video of this type I've made.
In the order they appear in in the video:
Bag
Writing
Tech
Bike Stuff
I just wanted to remind you to position the saddle parallel to the ground, and to Google some basic bike fitting tips (correct saddle height, and positioning). It's simple to do and will make biking even more comfortable.
As for the tube, you're going to need some tire levers, try prying off the tire & tube from the opposite side of the valve. once you have the new tube in the tire, inflate it a little and attach the tire back to the wheel starting with the valve. work the tire gently onto the wheel, and use the levers to pry / push it all the way on. (be careful when using tire levers, they may pinch the tube against the wheel and cause a puncture in a new tube.) I'm glad you're getting back into cycling, have fun!
Good call. I typically carry some of these...
https://www.amazon.com/gp/product/B000IZGFCE/ref=oh_aui_detailpage_o09_s00?ie=UTF8&psc=1
I also carry a patch kit...
https://www.amazon.com/gp/product/B0016HSA4O/ref=oh_aui_detailpage_o07_s01?ie=UTF8&psc=1
Looks like a socket should fit in there either 14mm or 15mm. If you don't have space you might need a Crank wrench or peanut butter wrench.
Park Tool CCW-5 Crank Bolt Wrench https://www.amazon.com/dp/B0012Q5XAS/ref=cm_sw_r_em_apa_ObkcAbCKWHW5Z
I use this - Park Tool CCW-5 Crank Bolt Wrench https://www.amazon.com/dp/B0012Q5XAS/ref=cm_sw_r_cp_api_VTUlzbT7RY36V
If you live in the states I would treat every road the same. Keep oncoming traffic to your left, and pass slower traffic, moving the same direction as you, on their left. <- edited.
Here is a video that shows you the general idea about adjusting a front derailleur. I would suggest searching youtube to see if you can find a video that addresses your exact derailleur.
Give your chain, chain rings, and cogs a look over. If they appear to have a lot of sand/grit in them brush it off. I would then run the chain thru a cloth with some degreaser on it. Then reapply some chain lube like this stuff as shown in this video.
> I keep seeing people post about how they'll never ride after a rain because of their brakes. Why not?
I am at a loss for this one. Riding in the rain is wonderful.
I would highly recommend spare inner tubes or a patch kit, a tire pump and bike tire levers. I have been unfortunate enough to have both my tires pop while on a long ride. If you plan to go on longer rides get a cage or two and water bottles.
I would inflate the tires to 65-70 for a firmer ride.
How is the chain slipping? Is is dropping down or hopping up a rear gear, or is it slipping forward across teeth of the same gear?
Just based on your language, and how I perceive your knowledge of how everything is working, you might be best served by visiting a bike shop. Please don't take that as a knock against you, but if you want to take it in, you will be well served.
That being said, where's the fun in that? Let's do this ourselves!
If the chain is slipping forward, it may be stretched. Check out Sheldon Brown's article on chains. You can measure the chain stretch using a ruler, since every full link (that's two half-links, the individual swiveling parts) is 1" pin-to-pin. Measure twelve inches and the whole 12" should be pin-to-pin on a brand new chain. If your chain is 1/16" past 12" measuring twelve full lengths, replace it. If it gets more gone, it will start wearing down the teeth of your rear gears, and you'll need a new cassette or freewheel, depending on your rear wheel. That will cause slipping and skipping for sure, even with a brand new chain!
If you replace the chain, you will need to get a cheap chain breaker. There are many kinds at different price points, but I can vouch for that one as I carry it with me.
For a new chain, you have to get one that is the right width. This generally depends on the number of rear "speeds" you have. Up to 8 speeds in the rear is a standard chain. 9, 10, and 11 speeds in the rear require a chain that is thinner to fit in between the close spacing between gears.
You can also get a master link and replace a link in your chain with it - you can then remove the chain and reinstall it (for cleaning and work) without using a breaker. That's just a random one I found on amazon, which happens to be for 10-speed chains.
Measure your chain, check your gears for wear. If you have to replace your chain you just need a chain breaker and new parts. If you have to replace the rear gears as well you need a new set of gears and the appropriate freewheel/cassette removal tool. There a few common types of freewheel tools and just one cassette removal tool. They lock in to splines and allow you to use a standard wrench or socket to remove the tool.
EDIT:
Here's a video about removing a cassette
Here's a video about removing a freewheel
Here's a video about measuring a chain
You may already know this, but thought I would mention it anyway, since you're here asking for advice. If you're upgrading from a square tapered BB and don't already have this tool, don't forget to pick-up a crank puller.
you need something like this http://www.amazon.com/Bike-Bicycle-Cycle-Crank-Puller/dp/B006UMFUES/ref=sr_1_3?ie=UTF8&amp;qid=1411831580&amp;sr=8-3&amp;keywords=crank+tool which is a combination of a socket/wrench (one end) that removes the screw and a puller (the other end) that removes the crank.
here's a video - https://www.youtube.com/watch?v=kQoGS3YjBXk (doesn't matter whether it's a mountain bike or not - i am pretty sure what you have is a square taper crank).
Venzo Bicycle Bike 1/4 Inch Driver - Torque Wrench Allen Key Tools Socket Set Kit 2-24Nm - Small Adjustable
I have this one and it's good so far. I think the nashbat wrench is probably decent quality too
VENZO Bicycle Bike Torque Wrench Allen Key Tool Socket Set Kit https://www.amazon.com/dp/B00811WQT8/ref=cm_sw_r_cp_api_hD4gAb17GQC54
I transitioned into working on my bikes almost entirely by myself (Wheel building/suspension service/bearings excluded) and this is the exact path I went down as well. Here is everything I bought from Amazon:
The same $50 tool kit
Torque wrench
Cable/housing/wire cutter
Chain/quick link pliers
Wet/Dry Chain lubes
Park Tool grease
Degreaser
Blue Loctite
Carbon grip paste
And some additional small things like cables, cable end caps, ferrules, zip ties, etc. A set of needle nose pliers can be handy to help push/pull stubborn cables/housings as well.
Also, to make working on the bike 10x easier, I recommend getting a stand. I use this one because I am space constrained and it folds up nice and small, but there are probably better ones out there.
It seems like a lot of $$ to lay out at first, but it pays for itself pretty quickly compared to taking the bike to a shop every time you need to do something to it. Basically everything you need to do can be found on YouTube as well.
I have this one http://www.amazon.com/VENZO-Bicycle-Torque-Wrench-Socket/dp/B00811WQT8
This looks like it could fit in my shirt pocket http://www.amazon.com/CDI-Torque-Products-TorqControl-Screwdriver/dp/B00IQBIHA0
You're not building a rocket. The torque specs on cockpit components are not about achieving a specific clamping force, they're about not crushing the CF tubes. Extreme accuracy is really not important -- the specs have tons of margin. I really like something like the Ritchey Torque Key (https://www.amazon.com/Ritchey-TorqKey-5Nm-bits-T-15/dp/B009F93S9C) for this. No settings, no readings, almost impossible to screw up, accurate enough for what you're trying to do.
For things where torque specs are actually related to mechanical function (cassette lock ring, external BB cups, SRAM GXP cranks, etc.) any inexpensive 1/2" beam-type wrench will be good enough.
I have this exact one. It is great. Small enough to fit in your pack, in an under saddle bag, or even in a pocket. It will work on most of the screws on your bike.
1/4" 2-10NM Bike Bicycle Basic Torque Wrench https://www.amazon.com/dp/B00V4CQEGW/ref=cm_sw_r_cp_api_NbVMzbJYWC1YW
No special tools to remove the derailleur.
You'll have to "break" the chain. If it doesn't have a master link (sometimes called a quick link), you'll need a chain splitter tool. However, once you split the chain, don't try to re-press in the rivet. You'll need to get a quick link to re-join the chain.
Order the parts and bring them in to install.
cassette $25
chainring $9
chain $21
koolstop pads pair $8
EDIT: Or do it yourself...
BB tool
cassette lockring tool
chain tool
allen wrenches
Is that the same one as is $9 on Amazon?
Real Avid .223 Pivot Pin Tool https://www.amazon.com/dp/B078KSDGZ1/ref=cm_sw_r_cp_api_O7j9BbPT15A68
That's interesting, I'm riding an internal hub bike now, similar 22km commute in city.
With my non-internally geared bikes, I'm getting maybe 3500km per chain, but single speed I was getting closer to 11,000km per chain, probably helped by the always-straight chain-line and never mashing gears. Hoping with the reduced tension in the chain on my new internal hub I could push chain life further.
Get a chain checker tool, they're great for figuring out when you need to get a new chain without much fuss.
With achain checker if the thing on the end doesn't slide into the chain, your chain is still good enough.
I would do it in the spring, if you can get away with it but it is a risk. Winter weather is tough on the transmission.
you run the risk of breaking your chain if you don't get it changed. Happened to me on my commute home and walking the bike through the snow was awful. How long is your commute? If you don't have one already, I suggest buying a chain checker. They are $10 or so and will tell you how much wear you have on the chain. I would not go through winter if you are at 50% or less.
https://www.amazon.com/Park-Tool-CC-3-2-Chain-Checker/dp/B000BR3LHQ/ref=asc_df_B000BR3LHQ/?tag=hyprod-20&amp;linkCode=df0&amp;hvadid=312111916046&amp;hvpos=1o2&amp;hvnetw=g&amp;hvrand=14744392110579954068&amp;hvpone=&amp;hvptwo=&amp;hvqmt=&amp;hvdev=m&amp;hvdvcmdl=&amp;hvlocint=&amp;hvlocphy=1016367&amp;hvtargid=pla-493478287143&amp;psc=1
FYI you can get a chain wear indicator to check you chain. this takes the guess work out of when you would need to replace your chain. The tool only measures for wear on the chain so rear cog replacement can still takes some guessing.
link for chain wear indicator.
https://www.amazon.com/Park-Tool-CC-3-2-Chain-Indica/dp/B000BR3LHQ/ref=sr_1_2?ie=UTF8&amp;qid=1499892870&amp;sr=8-2&amp;keywords=chain+checker
link explaining chain wear
https://www.sheldonbrown.com/chain-wear.html
http://www.amazon.com/Park-Tool-CC-3-2-Chain-Indica/dp/B000BR3LHQ/ref=sr_1_4?ie=UTF8&amp;qid=1377578171&amp;sr=8-4&amp;keywords=chain+checker+tool
When you pick up your new chain, also pick up a chain checker. Replace when the chain gets to .75 slack... http://amzn.com/B000BR3LHQ
Please note that the links provided are just quick-n-dirty suggestions. Some of the Park Tool sets would cover a lot of these things, but when building from frameset up... you may want to seek out a shop with the odd tools you might only use once or twice in your life.
----
Aside from the standard tools, like box wrenches, cone wrenches, Allen wrenches (aka hex keys), flathead and Phillips head drivers, Grease... you'll need tools for:
In addition, you may need:
----
I'm sure you could "get away" with less, or perhaps the Park Tool Advanced Kit but there's a reason for these tools. Good luck.
Unsure what exactly your post is asking. Please clarify?
You should check your threads first before considering getting a new rear wheel.
If the threads are alright, go ahead and tighten everything down (as recommended by bikesdirect). First the rotafix method to tighten down the cog. Then use a lockring tool to tighten down the lockring.
If the threads are trashed, you can easily find a wheel that is less than $150 (assuming you mean this since >150 means greater than $150). There are some typical "favorites" on FGB like velocity deep v or mavics.
OK, here's what you need:
As for the shifters, it's not totally clear. You should first try removing the MicroShift bar-end shifters and see if you can disassemble the bar-end mounting piece from the shifter lever. Ultimately you need shifters that look like this: https://www.amazon.com/Shimano-Dura-Ace-SL-7900-10-Speed-Shifters/dp/B001LPK8JG (or you can just buy those). Or, you might decide you want the shifters on your bars instead, in which case: https://www.amazon.com/Shimano-SLX-RapidFire-Mountain-Bicycle/dp/B007Q4M8RQ - if you go this way you may also need a new front derailleur (a Shimano mountain one, instead of the Tiagra road one you have).
You may also need new cables but probably you can cut the existing ones down (either way you need the cutters above).
If the bike you have fits you and hasn't been terribly abused it might be worth just keeping it. 550 is going to buy another entry level-ish bike. $200 in tools and parts can fix most issues, and you can keep up on your own maintenance from then on.
A 9 speed chain and chain tool. 30 bucks
[Brake and Shifter Cables and housing ]
(https://www.amazon.com/dp/B01LXV23A7/) and cable cutter $50
9 speed cassette HG400 and Lockring tool $35
Cone Wrenches 13/14 13/15 15/16 17/18 $20 for repacking hub grease $11
allen wrenches $11
None of this is very difficult to do if you watch a youtube or 2. The hardest part is getting the derailleurs working again, and that isn't really that bad.
Tube
Levers
Frame pump (or alternatively CO2 inflator)
Patch kit (optional)
Saddle bag
You can use the levers to mount the tire as well, in fact I don't think I could do it without them on some really tough tires. You basically use it like a wedge. Stick the hook on the rim of the wheel, with the tool under the tire, and lift up.
I don't know how well it'd work with the ones he posted, I'm more used to ones that look like this:
http://www.amazon.com/Pedros-Bicycle-Tire-Lever-Pair/dp/B000IZGFCE/ref=sr_1_3?s=sporting-goods&amp;ie=UTF8&amp;qid=1322857939&amp;sr=1-3
You are correct -- the only difference between the 11 speed KICKR and the 10 speed KICKR is the cassette. They even share the same freehub, which is the thing the cassette sits on.
You'll need to replace the 11 speed cassette with a 10 speed one. You will need some special tools to do this, though. Are you having your KICKR delivered to your LBS? If so, I'd have them do the swap. If not, you'll need this (or it's cheaper alternative here), one of
[these]these, and a large adjustable wrench.After you collect those things, here's a nice video showing you how to do the swap. Instructions are the same even for your KICKR.
If you haven't already purchased a new cassette, get the cheapest one. Weight is of no concern for indoor training -- no need to be a "weight weenie." If there's any guidance to be had with choosing a cassette for a KICKR, I'd stick with the same gearing (i.e., if your rear wheel is a 11-25, get an 11-25 for the KICKR. That way there won't be any adjustment issues between the KICKR and your rear wheel.
You linked to a freewheel remover. What you actually need is a cassette lockring tool.
Tools. Most people don't have proper bike tools, so that would be a great surprise. You can either get a decent multi-tool (get one with a chain-breaker and tire wrenches) or a variety of Park Tools. Here are some Park Tools that I find invaluable: 3-way hex, chain cleaning tools, pedal wrench, and/or a chain whip
This bar tape is amazing 3mm Fizik performance. Tape should be replaced semi-regularly, but most people don't, so it would be a great surprise gift. Black looks good on almost every bike.
Google defines conviviality as A jovial nature.
That is what this contest has put me in.
I would love this wrench. I've gotten much more serious about my bike riding recently and this would greatly help me out.
Thanks for holding this contest! Keep being awesome :D
It sounds like you installed the pedals incorrectly. The pedal, if installed correctly, can no way shift in the thread. Remember that the left pedal is threaded in the opposite direction so lefty tighty. The right pedal is normally threaded. As such, the pedals are marked left and right and it’s important you install the right pedal on the right side.
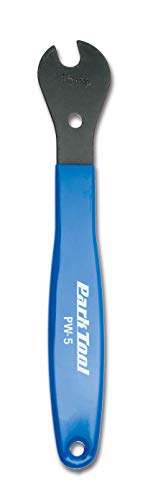
Given you may have already messed up the crank arm, you might as well try to get it off. I would first get a pedal wrench. You can easily get one on amazon or a local bike shop. Park Tool PW-5 Home Mechanic Pedal Wrench https://www.amazon.com/dp/B000YBEID0/ref=cm_sw_r_cp_api_i_yd1PCb2BS39QV
This will give you much more torque. Then just try to take the pedal off.
It is possible you lucked out and the crank arm is fine. Otherwise, you should beg Peloton to allow you to buy a new arm. It isn’t hard to install the crank arm, but you’ll need a tool to pull it off. The tool is called a crank arm puller. Park Tool Crank Puller for Splined Cranks https://www.amazon.com/dp/B001N883JS/ref=cm_sw_r_cp_api_i_O31PCb86HWRPA
I don't think I'd waste money buying another bottom bracket. The one that's on there is probably fine, unless the guy that stole your crank sawzall'd the spindles off or something.
If you want to practice installing one just remove that one and clean/regrease the threads and put it back in. You'll need one of these.
If the bottom bracket is loose, you need to remove the crank arm(s) and tighten it. I'm guessing you don't have a crank arm remover or the correct adapter for the BB cups.
Although it'd be extremely helpful down the line to own all the tools you need for this, it'll be a lot faster and cheaper just to take it to a shop and let them figure out what's loose and what needs to be done to fix it. If you want to do it yourself, you need the following:
Use the torque wrench! If you don't, you can over-tighten and crack the BB cups, and press the crank arm onto the spindle too far.
Looks like it's a typical square taper crankset and bottom bracket. In this case you'll need this for the bottom bracket:
http://www.amazon.com/Park-Tool-Shimano-Cartridge-Bracket/dp/B001A0AIAG/ref=pd_sim_sg_1
You'll also need a crank puller to take off the cranks if they aren't on already.
You just need some plastic tire irons, some tires are really hard to just get on by hand, they only weigh a handful of grams and you can easily pack them in a saddle pack. https://www.amazon.com/Park-Tool-TL-1-Tire-Lever/dp/B001B6NFH2
I run a bar of soap and a wet finger along the inside of the bead when I'm trying to install a difficult tire (e.g. Gatorskin).
I also pry pretty hard with the Park Tool tire levers. They're made of durable plastic which
Mine are older and milky white but look close.
http://www.amazon.com/Park-Tool-TL-1-Tire-Lever/dp/B001B6NFH2/ref=pd_sim_sg_1
As others have said get only what you need. However, unless you are going to frequently use the tools it may be cheaper to pay labor at the LBS for easy jobs than buying a tool you'll use once every year or two.
For flywheel you'll need
For the chainrings it's a whole new can of worms. It'll really depend on the crankset you have. Keep in mind though in most situations you can replace just the worn chainring and not the entire crankset. Cheaper and no special tools except an allen wrench. You wont even need to remove the crankarms from the bike.
Any crank puller works. I used this one to fix one of our bikes this morning.
Your best bet would be to take it to a bike shop. They likely have a crank arm in stock that would work, assuming they used a normal size and the classic square taper interface. If you can't get the whole bike to the shop, you can probably remove the crank arm using one of these, and take that to the shop:
https://smile.amazon.com/Park-Tool-CCP-22-Crank-Puller/dp/B001VS1M20
They're pretty easy to use, you can find youtube videos that explain it in a couple minutes.
The new crank arm should not cost more than $30 at a shop. Online they are really cheap, and this one is a known good brand:
https://smile.amazon.com/SR-Suntour-Replacment-Square-Taper/dp/B00GHTQ7YQ
Do you really need/want to replace your bottom bracket?
Looks like a square taper crankset. That should be easy to find and replace without touching the bottom bracket. You'll need a crank puller, something like this
>Here, it says that a brake sensor is recommended.
It's a good idea on mostly any ebike, but PAS more then hand-throttle. It's because you really don't have a super amount of control over the motor output and it's easy to accidentally trigger a bike by moving the pedals around and getting read to go at a stop light. That sort of thing.
A torque PAS is more typically going to combine a cadence sensor and torque sensor into one thing. This is done to improve responsiveness as the controller can be aware of pedal movement immediately and give a starting boost. It's hard to balance out responsiveness so that you eliminate the 'laggy' feeling, but not so much that the bike jumps out by mistake.
&#x200B;
>I don't want to use a throttle, but I want to have the temperature sensor installed.
I am pretty sure the temperature sensor people talk about goes into the motor and is independent from the throttle.
https://www.youtube.com/watch?v=Wb8Omk6e7GI
But I suggest getting a low profile thumb throttle unless there is some sort of legal prohibition against it. You can put it on your left side of the bike, which is a nice setup since you won't need your front derailleur controls anymore and it won't get in the way.
It's less useful then on a hub motor (which can help you get going if you are in the wrong gear), but you'll find situations were it's handy to have.
&#x200B;
>Should I keep the nylon blue gear until it fails, or should I replace it with a brass one right away?
Keep the nylon gears. They are very tough and help make up for some of the sloppy tolerances in the bike motor.
If people are regularly stripping them it's more then likely because they are allowing the motor to get too hot. A overheating motor won't get hot enough to melt the gears, but it'll get hot enough to get the nylon soft.
&#x200B;
>How do I figure out which tool I need to remove the existing bottom bracket and cranks on my bike?
The main thing you'll need is a crank puller. Otherwise getting the crank off is a nightmare.
https://www.amazon.com/Park-Tool-CCP-22-Crank-Puller/dp/B001VS1M20/
You'll need a chain breaker tool as well to size your new chain to your bike. Some multi-tools have one built it. They are pretty cheap things.
Bottom bracket tool is probably needed, but it depends on your BB.
https://www.parktool.com/product/bottom-bracket-tool-bbt-22
https://www.amazon.com/BlueSunshine-Bicycle-Bracket-Removal-Remover/dp/B07MFLJJBZ/
You don't necessarily need it 100% if you are creative... https://www.youtube.com/watch?v=GKWWwhRH3cg But it'll make the job a lot easier. Get down and look closely at the BB, though, and make sure that yours is that 20 spline style. Most are.
And watch a couple videos on it. The drive side is reverse threaded which can be confusing.
&#x200B;
>What is the more resistant and weatherproof connector for the battery? XT60 or XT90?
They are both the same connector, more or less. Xt90 is just physically larger and handles more current, but otherwise the same.
I use Xt90s for the battery connector (the S stands for 'anti-spark'). Otherwise xt60's are sufficient for your bike.
Good news bad news. A longer allen tool will get that bolt out, but once it is removed, the crank will not come off unless you use a crank removal tool like this one.
I prefer this one because I can use a socket wrench with it and it takes up less space in the bike tool box.
http://www.cheapbikeparts360.com/products/truvativ-isoflow-3.0-crankset/
plus
https://www.amazon.com/TOOGOO-Bicycle-Cycle-Crank-Puller/dp/B006UMFUES
plus
Allens and spanner wrenches. 15mm + crescent wrench will do it.
Don't fuck it up and strip the threads or something dumb. You could probably do this cheaper but since you seem unsure about it, this is probably the most foolproof and cheap way to go about it. Also the quickest way for me to give you an answer and move on.
Just need one of these in addition to the crank puller. A nice big 1/2" torque wrench from HF will make removing it and torquing it up correctly a breeze.
watch a video "how to install a square taper bottom bracket"
you need something to install the crank bolts 8mm alan or 14mm socket
a bb tool
https://www.amazon.com/BIKEHAND-Bicycle-Shimano-Bracket-Removal/dp/B00811WQJS/ref=sr_1_2?ie=UTF8&amp;qid=1478280822&amp;sr=8-2&amp;keywords=bb+tool
and grease
Thank you. Does this tool work for either of them?
Thank you!
Do I have to buy the Parktool BBT-9? I have this one, does it not work?
https://smile.amazon.com/gp/product/B00811WQJS/ref=oh_aui_detailpage_o01_s00?ie=UTF8&amp;psc=1
That is a loaded question. It depends on the parts you will be torquing since it is highly unlikely you will find one torque wrench that covers all ranges. I personally have a bunch and my favorite brand is the Wera 1-25nm, but they are expensive. I would probably just get the this for lower torque values since it does 2-24nm https://www.amazon.com/VENZO-Bicycle-Torque-Wrench-Socket/dp/B00811WQT8/ref=sr_1_12?s=power-hand-tools&amp;ie=UTF8&amp;qid=1485446361&amp;sr=1-12&amp;keywords=torque+wrench
and then if you want to do cranks and cassettes you may need a larger one.
A set as in multiple Allen keys in different sizes. For handlebars, all you really need is a 4mm, or 5mm.
I recommend to purchase a torque wrench whenever you have some extra cash. If you over tighten bolts down, components pay the ultimate price.
I purchased this kit and have been really pleased with it:
http://www.amazon.com/VENZO-Bicycle-Torque-Wrench-Socket/dp/B00811WQT8
Assembled a carbon mountain bike with it and have had no problems. It's worth having quality tools.
I was thinking about buying this one. It looks fairly compact, maybe in the 30cm range.
Yes, get a torque wrench. I have this one and it definitely doesnt feel cheap. Only works in one direction to you cant use it one pedal
I have this one, it works quite well
https://www.amazon.com/gp/product/B00811WQT8/ref=oh_aui_detailpage_o03_s00?ie=UTF8&amp;psc=1
On Amazon US, this seems to be the best deal. I own it and it works pretty fine. It's also a must if you ever want to build a frame up from scratch.
I agree with tylerbcoaching
However, I have this (https://www.amazon.com/Ritchey-5Nm-Multi-Torque-Key/dp/B009F93S9C) they come in different Torque settings. That should work.
I also share your fear. I recently over tightened the water bottle cage bolt on a day old Speedmax. Pulled the the rivet right out of the frame. Called canyon and they wanted 1k to replace the frame. My fault completely, just sucks. The torque wrenches I had did not fit into the Torhans VR cage.
I was just thinking about cycling gifts yesterday - trying to figure out what I should ask my wife for for Christmas. Here is a short list that I came up with:
lezyne travel drive floor pump: http://www.amazon.com/Lezyne-CNC-Travel-Floor-Silver/dp/B005UZMUDA
chain checker: http://www.amazon.com/Park-Tool-4000362-Chain-Checker/dp/B000OZFILW
cygolite 720: http://www.amazon.com/Cygo-Lite-Expilion-720-USB/dp/B00LXTP2FA/ref=sr_1_1?s=sporting-goods&amp;ie=UTF8&amp;qid=1416395043&amp;sr=1-1&amp;keywords=cygolite+720
ritchey torque tool: http://www.amazon.com/Ritchey-TorqKey-5Nm-bits-T-15/dp/B009F93S9C/ref=sr_1_6?s=sporting-goods&amp;ie=UTF8&amp;qid=1416259667&amp;sr=1-6&amp;keywords=park+tool+torque+wrench
leather pouch: http://www.eleven.cc/shop/cycling-ride-pouch/
50mm carbon clinchers...haha...I'm puttin em on there last, and don't even know which to suggest but we'll see what happens
I've got one of these
https://www.amazon.com/2-10NM-Bicycle-Basic-Torque-Wrench/dp/B00V4CQEGW/ref=sr_1_2?ie=UTF8&amp;qid=1484319140&amp;sr=8-2&amp;keywords=bicycle+torque+wrench
It is adorably small, cheap and fits in pretty much any tool kit. I really only worry a lot about cockpit and carbon for precision torques, so I just have a low range torque wrench.
Larger torques I am comfortable with going by feel.
My old Transition Bottlerocket was a small frame, so I crossed my fingers and went with a small. It's spot on. I'm 5'5" with more torso than inseam.
That medium frame will work like magic.
So I'm still tuning the fork & shock, so they're not as plush as my old ride yet. The extra rotational torsion from the larger wheels makes it feel heavier in the air, but that's a feel and tuning thing, so I'm getting used to it.
I really can't say enough good things about the bike, the Level Link is Santa Cruz's VPP, so its totally loose in the corners, no brake jacking. Huge value for the $$$.
Does REI sell DB (in the USA)? You could try that if it's too risky, but check out their return policy and give DB a call with your concerns.
Also, it comes with a cute torque wrench that's accurate enough. I like this one better, it has less wiggle.
Sorry to hear about you getting hurt.
I'm not familiar with the assembly paste Shimano ships with their carbon fiber parts, but here's what I use: Finish Line Fiber Grip
With barely any torque it locks my bars in place better than full torque spec did without it, and it gets a lot better with additional torque. I also carry this tiny torque wrench on longer rides so I have no excuse for my bars coming loose.
You will need to not only buy a new chain but you will need to shorten it in order to fit on your bike. This requires a specialized tool. Something like this Park Tool one or a cheap equivelent
There are many more on this sub with greater experience, but nothing to avoid, but consider these in your PSA choices:
Splurge on this: https://www.amazon.com/Real-Avid-223-Pivot-Tool/dp/B078KSDGZ1/ref=mp_s_a_1_1?ie=UTF8&amp;qid=1541706293&amp;sr=8-1&amp;pi=AC_SX236_SY340_QL65&amp;keywords=pivot+pin+real+avid&amp;dpPl=1&amp;dpID=51RDpc%2BiG5L&amp;ref=plSrch
Other than that, make your own post and many helpful people will answer your questions. One never wants for help or advice on this sub.
Real Avid .223 Pivot Pin Tool https://www.amazon.com/dp/B078KSDGZ1?ref=ppx_pop_mob_ap_share
You probably favor that chainring thus it has more wear. The more wear on the chainring the more space there is between the teeth.
When you put a new chain on it will not align perfectly with the teeth on your worn chainring (or your cassette cogs as your chain "stretches" over time, causing a little bit of a mismatch between chain links and teeth).
Since there is a little bit of a mismatch you will hear pops, creaks and your chain might slip occasionally. You can usually ride it out over time and allow your drive train to re-align itself (it can take a couple hundred miles if it's bad), but it's not a best practice. Ideally when this happens you would replace your cassette with your chain and any chainrings which are too worn. Chainrings tend to last quite a bit longer than cassette cogs.
Also, you can mitigate this in the future by buying a chain checker tool (like this). This tool will measure your chain elongation and when it becomes too elongated you simply replace the chain and avoid additional wear on the rest of your drive train, giving you a bit of added life (though I still replace my cassette about every ~5 chains and chainrings when they need it)
The following will get you out of most mechanical issues:
workstand
mini ratchet
set of hex bits for ratchet
1-10ish Nm torque wrench
10-100ish Nm torque wrench with adapter for 1/4" drive bits
Park spoke keys
homemade bearing/bb press out of plumbing odds and ends
Park chain checker
Park mini chain tool
Park chain whip
Park master link pliers
Park hollowtech crank cap tool
I'm 5' 10" 160lbs
Last 6800 ultegra chain got replaced at 2k miles.
Might have been work before that but if I recall was still good at 1500.
Used this wear checker and replaced when it fell through .75
http://www.amazon.com/Park-Tool-CC-3-2-Chain-Indica/dp/B000BR3LHQ
Chain checker. Or you can measure distance between pins.
Those cogs look fine man, if you suspect chain wear theres a tool for that
Park Tool CC-3.2 Chain Checker https://www.amazon.com/dp/B000BR3LHQ/ref=cm_sw_r_other_apa_i_BMtSCbQXRJKF6
Buy or borrow a simple chain checker, and re-index your gears. In addition, two simple cleaning steps can make things a lot smoother: wipe the gunk off your jockey wheels and clean between the cassette cogs by using a cloth and "flossing" between the cogs. Those steps can really make things work a lot better, especially if they've built up a lot of gunk.
Good luck!
Oh, for that, you want something like: https://www.amazon.com/Park-Tool-HCW-5-Lock-Spanner/dp/B000C17KRI
e: aaaand you already found it in the video
loose bb cup and cone are still made, but thats besides the point.
a lockring spanner would be the best route, a flat head & hammer would work, but you likely damage the lockring
Park lockring tool is the standard for this kind of stuff. I like the Hozan version of the tool myself since it's forget but the park one works fine. Nashbar and other discount shops should have a similar one too.
I've got a park HCW-5 tool. If it's a stubborn ring, the three tooth end can grab three notches at once and I've been able to pop off all lock rings without too much difficulty. It's cheap and effective.
Quick tool question hopefully. Looking to further flesh out my bike tool box with more fixed-specific tools so that I can work on the bike more independently. What lock-ring tool(s) would be the most versatile to pick up? Is this one the go-to? I have a Crew District, with the stock wheelset and have had bike shops swap cogs and freewheels for me up until now, but want to get a bit more hands on with it. Also, the freewheel I currently have on their is an ACS crossfire, fwiw. From what I am seeing, that one needs it's own removal tool, also? Or do there exist more universal options?
https://www.amazon.com/Park-Tool-Mini-Chain-Brute/dp/B00781WVE2
This has been my go-to chain tool for over a decade (the same one). The shop I worked at also used this model as it's everyday chain tool.
Cutter, I use the Park one. If I were to buy again and on a budget, I wouldn't hesitate on the Pedros one here:
https://www.amazon.com/Pedros-131839-Bicycle-Cable-Cutter/dp/B000IZEH3S/ref=sr_1_13?s=sporting-goods&amp;ie=UTF8&amp;qid=1466189527&amp;sr=1-13&amp;keywords=wire+cutters#Ask
Well if you're gonna link to something why not link it to the item. Linking to an image for some bike related stuff can be kind of specific and not available everywhere.
The link to the item can help people learn more about the product and give them ideas for more terms to use google to find the item with.
and it is pedro's tools http://www.amazon.com/Pedros-6451250-Bicycle-Cable-Cutter/dp/B000IZEH3S
and for future reference - http://tinyurl.com/632hcv
OK, I'm thinking we do this in stages.
Stage 1 which will allow you to get it riding now and will be perfectly capable of a 4-5mi round trip.
Cable Cutters ($20) stick to the better units but probably no need to go for Park Tool. BBB make a nice one, although I currently have an IceToolz cable cutter because I can't find my good ones.
For the brakes you will need a 4th hand cable stretcher like this Pedros ($17) unit which is a third the cost of a Park Tool unit.
Will also need cables, easiest way is to grab a DIY Jagwire ($24) kit which has both brake and shift cables.
These Vittoria Zaffiro tyres are a good compromise of value, durability and performance. I use these a lot and they're on my training bike. Will also need tubes, and being a commuter, flats are not your friend so these Schwalbe tubes are a good idea. ($60)
Arundel cork bar tape ($20)
A new chain for your bike is probably the only way forward, and this KMC is perfect ($6)
The brake pads on your calipers will now doubt be old, and also a 30yo pad compound, so not overly efficient. Would strongly recommend these Kool Stop Continental brake pads as a starting point before we get to Phase 2 ($10)
Grease for the Bottom Bracket and Headset (and wheel hubs) is also needed, but there's absolutely no need to buy bike-specific grease, so this Valvoline tub as an example would be ideal ($10) .
The chain needs to be lubed, and in dry conditions I like Finish Line dry lube. Others will have their own preferences, but this is a good starting point.
Also should think about replacing the saddle, but this is very subjective and not something that can be recommended in terms of which saddle to buy. Maybe scoot around Craigslist for your area and see what comes up..
In terms of learning the skills, the Park Tool video channel is surprisingly good although heavy on product placement and endorsement although this is to be expected. There are lots of alternatives to Park Tool tools though, including Pedro's, BBB and others. None of the skills associated with your era of bike are all that difficult, and refurbishing this to be usable in your context is completely feasible in your garage.
May also want to consider buying one of the entry-level bike toolkits like this tool kit as a starting point ($40) although this is just an example however is the same kit as others sell just rebranded.
So phase 1 (not including the tool kit) is about $160-ish and watching a bunch of videos.
sorry for the essay, but once I started it just sort of kept going. Phase 2 is removal of existing driveline, and upgrading to a Shimano 2x8sp indexed group with modern dual pivot calipers and modern alloy wheels. But we can cover that later.
Like /u/jrm2191 said, Park Tool make some... comprehensive tool sets. Those prices are enough to make me choke, though. Your son's riding a ~$400 bike - I don't know how I would wrap my head around buying an $800 tool set, or even a $300 one.
But the tool sets are a good way to think about what tools you should buy. I'd get a basic tool set, fill in gaps, and upgrade selectively. What I'd do, in no particular order, would look like...
At this point I would start thinking about upgrading the tools that your son will use all the time. The thing that stands out for me is hex tools. He might use Torx screws, but he'll definitely use metric hex tools
Then probably nice meaty tire levers to make replacing tires and tubes easier
If you were looking to spend $300 or that range, then you'll notice you're way under that target. Feel free to start adding on some random nice things, like a portable multi-tool, which will pay off if he has an issue while out on a ride.
I'm running out of things that aren't "consumable" (like brake cables, housing, etc...), so for my last recommendation, nitrile work gloves! (they'll make cleanup a breeze)
There are tons of other things you could get (a bike stand, for instance) but at this point I'm getting a bit out of control. and there are tools I assume you have (e.g. a good screwdriver), but at some point I need to stop.
And obviously feel free to mix and match whatever components you can afford/feel comfortable spending that much money on. One thing that might help would be to talk with him about what kind of work he does on his bike. He might be in desperate need of hex tools, but not treating himself to nice hex wrenches. That could be your quick, easy, cheap answer. Or similarly he might be nervously tightening bolts without a torque wrench, even in places that call for very precise amounts of torque. Again, easy answer regarding what to prioritize.
Best of luck
edit: totals didn't add up right, sorry!
You will also need a good floor pump with a gauge(you should go for a good name brand one from a shop, but in a pinch one from academy or wally world should work) and a pair of tire levers like these(doesnt have to be those exact ones, any shop worth a grain of salt will have some).
And if you need help fixing the flat itself, Youtube is a great resource.
Did you know that some stingrays can swim at speeds up to 30 MPH? Go Stingrays!
I have a Park I Beam multi-tool, a spare tube, 3 Pedro tire levers, a patch kit, and a co2 inflater in a saddle bag I never take off.
Hey nice bike! If I were you I would add a saddle bag with some tubes, tire levers, and maybe get a small pump, and since you're just commuting the whole "it ain't aero" thing doesn't really fucking matter in my opinion ;) I would recommend this and these and this. Also read up on sites like Sheldon Brown for basics, and also I would recommend the GCN youtube channel for repair and maintenance. Also as far as locks go get a U-lock like this for most security and use this locking method. Have fun and stay safe, and feel free to ask any questions to me or any of the other people on this sub!
Shorts with liner, gloves, multi-tool, spare inner-tube, and maybe a pair of glasses, a set of tire levers, pump or C02, and a wicking T-shirt from any retailer.
That's what I started out with at least.
I cannot recommend the Rocket Ratchet enough for all-around, single tool efficiency. It's gotten to the point where I don't actually use the tools in my toolbox even when I'm at home. I just use the ratchet and it's way better. Any multi-tool with a chain-breaker will work, I've just had a really good time with that one.
After that a set of Pedro's. For my money, they're the best levers around. Great durability, can spoke-lock from both sides, and I've never ripped a tube with them, even on bullshit 23 tires.
After that basic patch kits, they'll use them all the time until they throw their hands in the air five years from now and scream "FINE I'LL GO TUBELESS."
Those are kind of the basics, and will allow them to work 90% of the stuff on their bike. The other 10% becomes more expensive and more specialized.
EDIT: oh, and a spoke wrench is the other cheap and highly useful item to have around.
Those should be sweet, though obviously with slicks you'll want to take it more cautiously if riding offroad with turning and braking, especially if it's not a harder surface. But as long as it's not muddy or loose sand/dirt you should still have a decent amount of grip from a 2" tire.
Get a pair of tire levers so you can get your old tires off and the new ones on, get a spare inner tube or two as well in case you get a puncture, and a decent pump with a gauge if you don't have one already as it's important to pump the tires up to the correct pressure, running them too soft means punctures are far more likely and the bike can handle badly in corners and need more effort to pedal along.
Here's a cheap tool to help you guide the tire on and off the rim, LBS's carry them as well as online obviously
Just be careful not to pinch the tube outside the tire.
So if I get this tool, I'll also need something like this chain whip and this cassette remover?
Thanks for the info!
You'll need a lockring tool and a chain whip. (You need the whip to hold the cassette in place and the lockring tool to take off the cassette itself. Park Tools is the brand I have, and probably the most reputable. (I'd link it, but apparently Amazon doesn't want to cooperate...)
The biggest difference between cranksets is roundness, a more expensive crank is going to be rounder which means there's a smaller difference in chain tension which means it "absorbs" less energy is more silent. Expensive cranksets are also stiffer, but unless you're putting out 3000 watt that isn't really an issue.
That conversion kit looks like a bad idea, it's a bunch of the cheapest components being marketed as "hip".
They're called riser bars, as long as you find a bar with same diameter (probably 25.4 or 26 mm on older road bikes) you can keep the stem and headset.
Park makes super nice tools, and that stand is a great choice. But I'd really consider buying tools along the ride, instead of shelling out big time for this huge set. Since you are a tool guy you probably already have a good part of those wrenches and keys, so it'd be better to move a bit of that budget towards your bike.
For this conversion you'll need these tools:
This totals about half of what you'd pay for the complete set, so I'd go for the complete set if you need all the wrenches, but otherwise you can put an extra $100 into your conversion.
For pedals just get these. They're well-built, light, and work just as well as the more expensive variants (plus that bike is all 105 components so you might as well have the pedals be 105 as well). You'll need a pedal wrench obviously. You'll also need SPD-SL compatible shoes. Get these on amazon to save money. These are a pretty good starter shoe.
Yeah, if you're 6' a 57 should fit. I'd inspect it to make sure shifting, brakes, etc. are in working order and once you have the bike go to a place that does bike fitting (here is a good place to find locations). It'll run you around $100 but they'll be able to adjust heights, swap out the stem for a proper length, etc. Totally worth it to prevent injury (plus your bike will feel much better).
You need one of these: http://www.amazon.com/Park-Tool-CCW-5-Crank-Wrench/dp/B0012Q5XAS/
Many bicycle tool manufacturers have it in their set.
Agreed. This tool will definitely come in handy.
Park Tool makes a specific fixed wrench just for this application, the CCW-5. Not that it's necessary for it to be bike specific or anything. Only $12 on amazon
Hmmm, I know those bolts. So the wrench I linked to isn't going to work. This one will, but doesn't have the pedal wrench (but is overall a slightly nicer tool.
Did you try using a cheater bar slipped on the end of the wrench? Did you try all this with two people--one holding the bike secure and upright, one wrenching on the wrench?
You are wrenching in the right direction, correct?
Sorry its giving you so much trouble.
As a side note, I was taught to never grease the BB shafts. This is because the spindle is hardened steel and the crank arms are (99.9 percent of the time) aluminum, and the grease combined with the torque of the bolt will actually allow you to bring the crank arm too high on the ramped spindle, leading to just this issue--as well as disfiguring the crank arm (all this assumes you have square tapered crank arms and bb).
You can get one from Amazon for $15.00
http://www.amazon.com/Park-Tool-Shimano-Cartridge-Bracket/dp/B001A0AIAG
A simple tool to help got the tire off and on when you need to change a flat.
Here is a shot of a tire lever in action...
http://www.amazon.com/Park-Tool-TL-1-Tire-Lever/dp/B001B6NFH2/ref=sr_1_2?ie=UTF8&amp;qid=1372116179&amp;sr=8-2&amp;keywords=park+tool+tire+lever
I did not purchase the repair stand but that would make working on your bike a hell of a lot easier. I'm pretty satisfied with the purchase I made although the multi tool is a bit of a pain to use. Always good to have one handy though. Upgrading from a pair of $15 headlight/taillight combo, the difference is incredible. Unless you do off road riding, the metro and hotshot get the job done pretty damn well.
Park Tool or Pedro. Last forever, can't go wrong.
http://www.amazon.com/Park-Tool-TL-1-Tire-Lever/dp/B001B6NFH2/ref=sr_1_1?s=sporting-goods&amp;ie=UTF8&amp;qid=1335817776&amp;sr=1-1
http://www.amazon.com/Park-Tool-Freewheel-Remover-Freewheels/dp/B001B6RGXG?tag=viglink20261-20
As everyone already said, you need a new freewheel.
I cant tell if thats a 6 or 7 speed freewheel, but here is the 6 speed and
here is the 7 speed part you want.
and you need this to get it off.
There are a million freewheel replacement videos on youtube that you can watch to see how its done. Once you get the old one off ( and it will be a bitch to get off... most freewheels are) popping on the new one is stupid easy.
That's great. I would bet any LBS would make the switch for you if you bought the kit there or you will need these
This
, probably this but different manufacturers have different ones
, And this guy
the tools are Super worth having but I here you're on a budget. Call up you LBS and see what they say.
You have a square taper bottom bracket. It's a common standard, they'll fit. Your biggest concern will be making sure the crank length is the same (probably 175mm, you'll want to measure though) and the same or similar tooth count on the chain rings, although if you wanted to change that up to bigger or smaller rings now would be the time. To know what size your current chain rings are, just count the teeth.
If you do the work yourself, you're going to want a crank puller - there are cheaper versions of this tool, but I've not had good luck with them. You'll also need a 15mm crescent wrench to get the other pedal off, a set of hex keys or metric sockets to get at the crank arm fixing bolts, and a torque wrench to set the torque on the bolts when you reinstall (if you're in the US, an auto parts store like Autozone will loan you the torque wrench). And watch a couple Youtube videos to get oriented, I like RJ The Bike Guy.
Two options to replacing it yourself are to take it to your LBS, and if you do that then probably just best to take them the bike and let them order the part. OR, and this is my favorite, find your nearest Bike co-op. In return for a small donation of time and/or money, they will likely have the correct crankset in their used parts bin for cheap or free, and a fully stocked repair station for you to use and somebody to show you what you're doing. Bike co-ops rock, if you're lucky enough to have one near by.
I'm new to this so am probably not the best person to ask, because I'm not sure I know what you mean. They come with crank arms though. I think the puller depends on the kinda bike you have, but here's the one I ordered.
That video was super helpful, thanks! I was worried about reverse threading like the pedals have, but the dust caps were just really stuck from age. I was able to remove them and uncover what looks like a square bottom bracket. So I'm gonna grab this tool from amazon to get them off. Does that look right to you?
It's pretty easy, I just swapped out the crank on my S1 after an accident. You'll need a crank puller, adjustable wrench, some grease, and a torque wrench to install the new crank.
I totally agree, I would strip the bike down and replace the headset and bottom bracket bearings and repack them with grease, then replace the brake pads and put new cables on.
Then if that goes smooth I would retension the wheels just to know that you can true your wheel in the middle of no where. After that is done maybe service the hubs they are probably cup/cone so not too hard.
After that you get into more expensive consumables of Freewheel/Cassette, chain, chain rings, jockey wheels. But then your bike is basically rebuilt.
I think the only two special tools for all of that are
Crank Puller
and Spanner Wrench And those are the cheapest I have found and are probably junk but should work once or twice at least.
I think some time and inexpensive consumables are worth it, you get to know your bike and how to fix it.
It should be easy to find what brakes will give you enough reach to run a set of 700c wheels which would expand your tire selection.
try a tool like this. costs nothing
https://www.amazon.com/TOOGOO-Bicycle-Cycle-Crank-Puller/dp/B006UMFUES
So this one then?
I’ve been happy with: Venzo Bicycle Bike Torque Wrench Allen Key Tool Socket Set Kit https://www.amazon.com/dp/B00811WQT8/ref=cm_sw_r_cp_api_i_EYx4Cb9SHZ6J7
I know some might disagree with me, but I bought this: https://www.amazon.com/VENZO-Bicycle-Torque-Wrench-Socket/dp/B00811WQT8/ref=sr_1_1?ie=UTF8&amp;qid=1493642589&amp;sr=8-1&amp;keywords=venzo+torque
It seems to do a great job. I am not sure of its accuracy, but even if it is slightly off I am okay with that. If I torque something to 5nm, and it is actually 4 or 6 I think thats okay. My main concern before getting it was that I was torquing things that should be 5nm to 15nm because of not having a way to gauge how hard I was pushing. I think it only "clicks" in one direction so it is not perfect for torquing lets say my BB on the drive side that threads opposite. But for daily use it seems to be great and not super expensive. But if you have the disposable income to spend, get the park tools version.
Yeah, I've never seen a preset wrench for the higher Nm that cassettes/hubs are rated for. Admittedly, I've always used a regular wrench for my cassettes and just gone on feel, as I also don't have the expensive full sized wrench. It's one of those things I keep meaning to buy when one is on sale, but I never do.
The preset wrenches are usually rated for 4-6 Nm, which is good for handlebars, stems, etc. For $59, this torque wrench has good reviews, although I have no personal experience. I just saw it while looking for a 9 Nm preset that I could use on my saddle.
I use one of these on my bike, mostly for stuff attached to my carbon fork. Cheap and puts my mind at ease a bit.
$46 with socket set
Got this one https://www.amazon.com/gp/product/B00811WQT8/ref=ppx_yo_dt_b_asin_title_o00_s00?ie=UTF8&psc=1 from amazon. It's a bit cloudy today, I will try to upload better photos tommorow!
Thanks for the help!!
Thanks so much for all of the feedback!
I ended up purchasing VENZO Bicycle Bike Torque Wrench Allen Key Tool Socket Set and BIKEHAND Bike Bicycle Repair Tool Kit with the addition of cable cutters.
Last night I watched this guy assemble a bike which allowed me to see which tools were needed:
How to Build a Bike Series
I will keep everyone posted on my progress. All the necessary parts and tools should be delivered by March, 20th! Stay tuned.
This is the best thing I ever purchased for home (I worked in a shop in college): https://www.amazon.com/BIKEHAND-Complete-Bicycle-Repair-Tools/dp/B005KWRITO/ref=sr_1_3?ie=UTF8&amp;qid=1501081214&amp;sr=8-3&amp;keywords=bikehand
Add in this: https://www.amazon.com/Ritchey-5Nm-Multi-Torque-Key/dp/B009F93S9C/ref=sr_1_26?ie=UTF8&amp;qid=1501081299&amp;sr=8-26&amp;keywords=bicycle+torque+wrench
All you will realistically ever need.
No problem! If you broke your last stem over- torquing it, I would actually recommend you get your fork checked out. Lots of times voids/cracks can propogate without you seeing anything. This is a company that is highly regarded for their non-destructive testing methods- expensive, but a fork snap can end your life (someone just died in the US a few weeks ago from fork steerer failure). Or buy a replacement fork if that's cheaper.
As far as fitting the stem, I would suggest to the mechanic that he measure the internal diameter of the stem with digital calipers, and then measure the outside diameter of the steerer tube. The fork may say 1.25 on it, which he might interpret the wrong way and could be what is causing confusion. That measurement only refers to the bottom OD of the fork at the crown race, NOT the top of the fork where the stem mounts.
I'm going to say this again though- if he can't figure out how to put a stem on a bike, it is probably better to find someone else or do it yourself. Please use a torque wrench though this time and follow all the manufacturer's instructions. You can get torque keys with preset torque values very inexpensively and they will save you so much trouble.
Good luck!
She's a beauty!
Also, if it's your first time with a carbon frame, I love this tiny torque wrench. It's not any bigger than any other multi-tool you might carry for stuff, but it'll keep you from overtightening something on that precioussss carbon frame.
Week by week a chain whip, cassette removal tool, crescent wrench, a set of allen keys, a chain cleaning tool, and a little torque wrench (https://www.amazon.com/gp/product/B00V4CQEGW/1) are what I use weekly to maintain my bikes.
Everything else I really only use once or twice a year. Things like bottom bracket tools, cable cutting tool, 4th hand tool, larger torque wrench. There are probably some other specialty tools I'm forgetting that I only use every couple of years.
I realized I need to buy some stuff to maintain my bike, and was looking for some input on what to get for the 'essentials'.
I need a repair stand. I was thinking about this model from Amazon. Seems to have decent reviews. I have a step-through bike so I guess I just hold it by the seat post and that's fine?
I also wanted to adjust my saddle position and the seat post length, do I need a torque wrench for this? I found this one. Should I just get a fixed torque one? Or just use normal hex keys and save my money?
For cleaning the chain and drive train, is it worth getting one of those special chain cleaning tools and cycle specific degreaser or can I just use "LA's Totally Awesome" cleaner and degreaser from Dollar Tree and a couple of floor scrub brushes held together? The Dollar Tree product I have already because I use it diluted as a general cleaner. At full strength it can soften certain plastics and remove some paints so it's pretty strong.
Is there any other stuff that I'm missing that I need for basic maintenance that I'm missing?
Definitely a good decision by attempting to do the repair yourself instead of taking it to the LBS, you'll be saving a lot of money.
You can get the tools and parts for cheap on Amazon. you'll be paying triple+ if you buy them from the LBS, though the trade off is you won't be helping support "the little guys".
i'd hold off on replacing the front chaining since they wear at a verrrry slow rate compared to rear cogs, and only do so if you have similar problems after riding on a new cassette & chain.
You'll need a chain breaker tool to get the old chain off, this is one I purchased about 2 years ago, used it on 6 or 7 chains and it's still is going strong, under $10 - https://www.amazon.com/gp/product/B0179JC31I/ref=oh_aui_search_detailpage?ie=UTF8&amp;psc=1 and a new chain- https://www.amazon.com/KMC-Bicycle-6-7-Speed-32-Inch-Silver/dp/B074YZGKKQ
also when was the last time you had your rear hub repacked? i'm not sure if just slapping a new cassette on that wheel given its state is a good idea, you might want to consider repacking with new grease and bearings and lubricating the free-hub first, which is more involved.
personally i'd say either get a new rear wheel, chain & cassette, then tinker around with the old wheel on the side, experiment with it, and ultimately keep it as a back up, or take the wheel to the LBS and let them overhaul the hub / lubricate the freehub before putting a new cassette on yourself, unless you want to spend the time learning how to do all that yourself, on-top of having to buy additional tools, bearings, grease, etc.
The whole premise of the video is that the tools are expensive. They cost only $10-$15 though! https://www.amazon.com/Oumers-Universal-Mountain-Bicycle-Splitter/dp/B0179JC31I/ref=pd_lpo_vtph_468_bs_t_1?_encoding=UTF8&psc=1&refRID=T6E2334BYPSVJQS43KMK
I got mine off Amazon and it's brilliant. It's $9.99, comes with a chain measuring tool and a nice little holder to keep your chain together when you're breaking links
$9.99 chain tool
Ah; no, that’s not what I meant...that’s just a roll pin punch, which IS certainly a good tool to have.
I was thinking something more like this:
https://loadoutroom.com/thearmsguide/roll-pin-pusher-rpp-ar-15-tool-review/
That should almost certainly help your situation & is worth investing in if you see yourself building even a couple AR’s.
This “Real Avid” company makes some awesome, awesome tools...I could have sworn they had one specifically for the BCG & Trigger Guard roll pins, but I can’t find it... this is close & gives you an idea of the type of tools I’m talking about that are available out there:
Real Avid .223 Pivot Pin Tool https://www.amazon.com/dp/B078KSDGZ1/ref=cm_sw_r_cp_tai_dN9yDb52YF4M8
Hope this is of some use to you.
Agreed, learning from other's experience helped me the most. The Midway YouTube videos will walk you through a typical build process too. There's a tool to help with the front takedown pin that someone on here suggested to me and it's a life saver Real Avid .223 Pivot Pin Tool https://www.amazon.com/dp/B078KSDGZ1?ref=ppx_pop_mob_ap_share plus decent vice blocks are good to have. This was good to have on hand too https://www.amazon.com/dp/1530568455?ref=ppx_pop_mob_ap_share.
Also if your safety selector is so tight you rub your fingers raw trying to click it on and off (like it won't budge and acts stuck) then take out the spring. If it moves freely without the spring, then the spring is putting too much tension on the detent. I clipped about 3 coils off mine and inserted the clipped end into the grip. Works perfect with a satisfying click now. Also, on that note I learned it's good to have extras of some of the minor parts in case something bends, breaks, or flys off into nowhere.
I do pivot pin installs for all of my buddies and they think I possess the magic of the gods.
https://www.amazon.com/Real-Avid-223-Pivot-Tool/dp/B078KSDGZ1
Shucks, your barrel adjuster looks pretty backed out already. Screw that guy back to a mid point, put your wheel back on so the caliper can bite the rotor and buy a tool to complete the job. This is kind of a bargain brake so there are limits on how perfect it will become without modulation.
May be time for some new pads also :)
Bicycle cable puller (11-45$), rarely need to use them but very handy for a pinch like this.
With the cable puller one one end and squeezing your brake lever on the other , you can see if maybe it is a cable housing issue (if it doesnt slide easily, water and debris can get in the line). Cable and housing is inexpensive 3-5$ cable, housing less than 1$ per foot. Jagwire makes teflon cables that seem to slide on anything (upper end).
Should help :)
If its still fussy after all of this , get a new brake 35$.
Never heard of your brand before.
https://www.rei.com/product/808779/avid-bb5-disc-brake-160mm?sku=8087790013&amp;store=13&amp;cm_mmc=PLA_Google_LIA%7C404_174403%7C8087790013%7Cnone%7C_kenshoo_clickid_%7Cpla-453412225845&amp;lsft=cm_mmc:PLA_Google_LIA%7C404_174403%7C8087790013%7Cnone%7C_kenshoo_clickid_&amp;kclid=_kenshoo_clickid_&amp;gclid=EAIaIQobChMItpSw0q_85AIVsx-tBh2cxA0EEAQYBSABEgIFvPD_BwE
https://www.amazon.com/Pedros-138900-Bicycle-Cable-Puller/dp/B000IZGF6A/ref=asc_df_B000IZGF6A/?tag=hyprod-20&amp;linkCode=df0&amp;hvadid=312125954623&amp;hvpos=1o1&amp;hvnetw=g&amp;hvrand=17308526862538999545&amp;hvpone=&amp;hvptwo=&amp;hvqmt=&amp;hvdev=c&amp;hvdvcmdl=&amp;hvlocint=&amp;hvlocphy=9032926&amp;hvtargid=pla-442155551981&amp;psc=1&amp;tag=&amp;ref=&amp;adgrpid=63589537658&amp;hvpone=&amp;hvptwo=&amp;hvadid=312125954623&amp;hvpos=1o1&amp;hvnetw=g&amp;hvrand=17308526862538999545&amp;hvqmt=&amp;hvdev=c&amp;hvdvcmdl=&amp;hvlocint=&amp;hvlocphy=9032926&amp;hvtargid=pla-442155551981
Here's a wheel. It has a quick release axle, but will work well.
You could either buy this tool to remove the freewheel (gears) and switch them to the new wheel or you could buy a new freewheel set.
You need something like a crank puller such as
(assuming its a square taper or similar)
http://www.amazon.com/Park-Tool-Puller-Square-Cranks/dp/B001VS1M20/
to remove the old crank. Depending on the prices of your local bike shop, its probably cheaper to buy the tool and DIY.
It should be a fairly straight forward job, assuming that you are fairly handy. The key thing to look out for is making sure you put the cranks on tight enough, but not overly so that it cracks the crank. Then there are some other minor adjustments that you might need to make. E.g the front derailluer/shift probably need to be adjusted, it might be as simple as to playing around with the cable and limiting screws, or you might need to adjust the height of the derailleur.
If you are new at this, you probably need to spend a good afternoon to swap it over.
So it depends on $$$$ vs time.
hot damn theyre taking you for a ride. here is a replacement on niagra cycle. if youve got a freewheel removal tool you should be able to transfer everything over. only downside is that it might be slightly out of true when you get it.