Best car amplifier power cable terminals according to redditors
We found 35 Reddit comments discussing the best car amplifier power cable terminals. We ranked the 24 resulting products by number of redditors who mentioned them. Here are the top 20.
We found 35 Reddit comments discussing the best car amplifier power cable terminals. We ranked the 24 resulting products by number of redditors who mentioned them. Here are the top 20.


internal shot
Parts list:
Tools:
STL for 3d printing:
All three files
Wiring diagram:
Terrible MS paint Diagram
You can use a propane torch or something, those work great. Go to auto zone and get copper if you can.. but your best bet is to order some off Amazon.
What a cunt for charging you for that. . He has absolutely no skill or knowledge with installs.
Honestly, This is why everyone stopped using MR. It is a very flaky system. That being said, there are a few things you can do to try and help yourself.
Check your batteries after/before each round, anything lower than 13 Volts and you will start seeing issues. Anything below 12.5 and you will likely be fighting the hardware constantly.
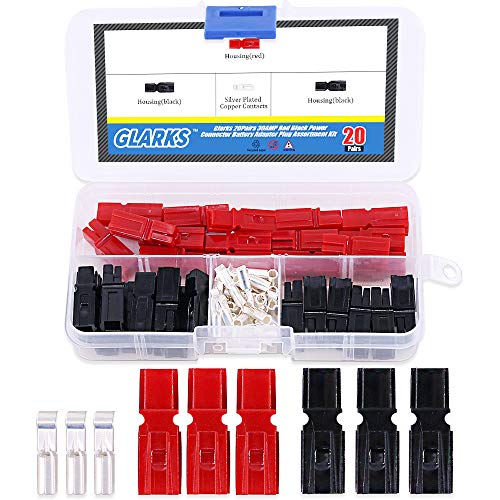
Also, change your battery connectors. If you have these, swap the connectors to something else. I (and most other teams) recommend Anderson power-poles. The reason is that the trimex connectors tend to become lose, and when they do any little bump will cause the hubs to use power and disconnect things. Unfortunately the MR hardware does not have the recovery ability that REV does when the power blinks.
Here is one example of the captured screw down style I'm referring to, designed for uncrimped terminations and good for both stranded and solid wire.
Your worry is exactly the issue, yes, and you also perfectly elaborated the SOP for it.
I would suggest going to a junk hard and cutting off a new connector with plenty (a good foot) of wire so that you have plenty to work with. That connector seems to use crimp-style pins, so you will want another connector.
Use these connectors:https://www.amazon.com/TICONN-Connectors-Waterproof-Electrical-Automotive/dp/B07HCPFPD2/ref=sr_1_4?keywords=waterproof+splice+connectors&qid=1566094004&s=gateway&sr=8-4
You will have to trace each wire as they don't appear to be color coded.
Nevermind, they are color coded. I just looked again. Post back here or PM me and I'll walk you through the process to match new pins if the new connector doesn't have the same wire colors.
There's a size in this kit from Amazon that will likely work:
Swpeet 240Pcs Bullet Connectors Kit, 3.9mm Brass Bullet Male & Female Wire Terminals Connector with Insulation Cover for Motorcycle Scooter Car Truck with Insulation Sleeve https://www.amazon.com/dp/B07GGSRH59/ref=cm_sw_r_cp_apa_i_hQBVDbE01P9P0
I would put two rows of pin headers (of 6 pins each) on a PCB, and then solder a wire along each of them. It is ugly but it is simply the quickest, cheapest and easiest way to do it.
If you want to be fancy you can use 2.35mm screw terminals, but they cost quite a bit more than the pin headers or the 5mm screw terminals.
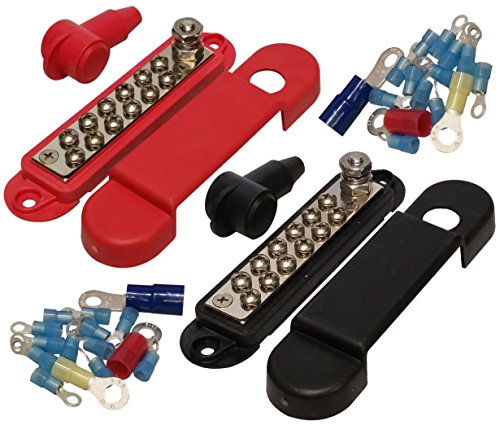
The actual name of this part is a "bus bar". There is a million different kinds made, in all sizes from tiny to huge. But they cost money and take time to order, so I don't bother with them unless a project MUST look 100% perfect. https://www.amazon.com/Pair-Terminal-Distribution-BUSBARS-Terminals/dp/B07C4W7YKG/ref=asc_df_B07C4W7YKG/?
Something that looks like a bus bar but isn't is called "terminal blocks", where each pair of screw terminals is not connected to the others. You can run a piece of wire lengthwise to connect them however. https://www.superbrightleds.com/moreinfo/wire-connectors/12-position-barrier-terminal-block-14-22-awg/3126/
There is also a PCB version called "strip board", that has rows of holes connected by a copper trace: https://en.wikipedia.org/wiki/Stripboard ...The usual way you use these is you build your circuit on them and you physically cut the traces where you don't want the power/signal to run.
The Adafruit Proto Boards are a small single version of a PCB style called "bus board", that has connected strips in various lengths and orientations: https://www.jameco.com/z/SB404-Busboard-Prototype-Systems-Solderable-Prototyping-Board-SB404_2191402.html?
instead of epoxy and a single sheet metal screw, a bolt would be better. If you can't use a bolt, 3 sheet metal screws is better. Even 2 sheet metal screws is better.
That epoxy would isolate the body of the terminal from the ground relying solely on the single sheet metal screw to carry the current.
They are all over Amazon and work surprisingly well. I was skeptical at first, but as long as you make a decent mechanical connection with the wires first they work great.
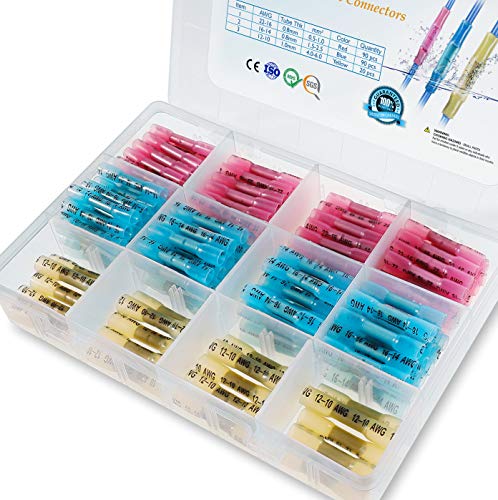
To add to what paxtana said, if you plan on riding in wet conditions I'd recommend using some waterproof heat shrink connectors like these. In my experience, the silicone covers that come preinstalled on those connectors don't really hold up long term in wet conditions and can sometimes vibrate loose to expose the metal they're supposed to protect. I've personally used these on all of my builds and have never had them fail.
My team got 1st in Virginia for hovercraft (division C), and what we did was much safer than cutting the wires of the battery off. Also when you cut the wires off and clip the alligator clips in, there is not really a way to recharge the battery anymore. What I do is I get male and female bullet connectors, and connect the wires that way. Here's a link of some good bullet connectors. https://www.amazon.com/dp/B01E5T81TI/ref=cm_sw_r_cp_apa_2kE-ybNTCRTCX
On any vehicle I buy I replace those immediately. Get some 6 gauge ring terminals off amazon (negative is 5/16 and positive is 3/8 ring diameter), a pair of military terminals and some 3/4” heat shrink (harbor freight is dirt cheap). Cut the old ones, peel back the insulation and crimp the lugs. Amazing how much better they run without the corrosion and a solid connection.
I think they have a 25 pack of ring terminals for $10ish bucks. Can use a 3/8” ring on both of you want to. Out the door for $20 and have room for accessories to be added later.
Links:
Ring Terminal
Military Terminal
Bullet Butt Connectors?
>I'm fairly ignorant of electric systems on boats.
I hope you're comfortable with how basic 12VDC electrics work and are asking about how to wire them in a marine environment.
Preface, I'm not a certified marine electrician but I've done a ton of work re-wiring, custom work on all kinds of sail and power boats.
Tools:
>I do have a cheap harbor freight multi-meter
good, now you're going to need a way to crimp those shitty connectors and some dielectric grease.
Unless of course you want to solder all your connections (this is my preference as it doesn't vibrate loose or corrode as quickly), then follow NASA's soldering method s and yuu'll need some rosin cored solder and and a soldering iron, you'll also need to use a crimp connector without the pre-molded shrink wrap and some heat shrink tubing
Ok... got your tools? great, now for supplies.
You'll need a buss bar on your ground
Measure how much wire you need, (are you re-wiring the mast?) and use 14/2 AWG marine grade wire.
If you're only using 1 battery you can get away with a simple switch like this. From the devices & lights you listed It sounds like you can use 10AWG to connect your battery to your switch then to the 14 gang panel.
You'll need a way to label your wires, I use one of these but if you're doing one job you might want to use something cheaper.
Ok... now on the to the fun part
Plan where you're going to mount your panel and pull a single RED 10AWG from there to your battery shut off switch and another strand from you battery to the switch.
Pull 10 AWG from the battery to the buss bar.
pull all the 14awg from the lights to the panel labeling each 14/2 wire as you go
red goes to the fuse block, black goes to the buss bar then to the negative on the gang block, label everything at the connection points, big red wire goes from battery switch to the bolt on the 14 gang, big black wire goes to the buss bar.
install new things, as each device is hooked up test the fuse and switch, then install the new thing.
Edit: I forgot to mention, use dielectric grease on all metal fittings to reduce corrosion.
edit 1: put a fuse between your battery and shut off ont the red wire
According to the Wikipedia AWG wire size chart AWG 18 is good for 10 amps. The amazon ad says that it is 8 amp cable. It could be very small wire but my guess, with no actual information, is that it's probably AWG 16 or bigger.
If your fridge is within 6 feet of a power source you could just cut off the cigarette lighter plug and hard wire it. That eliminates the cigarette lighter plug bad contact issue. That bad contact is usually the main problem, not the wire size.
Before you cut off the cigarette lighter plug use a multimeter and determine the 12 volt polarity at the fridge end of the cable. After you hard wire it verify the polarity before you plug it in to the fridge.
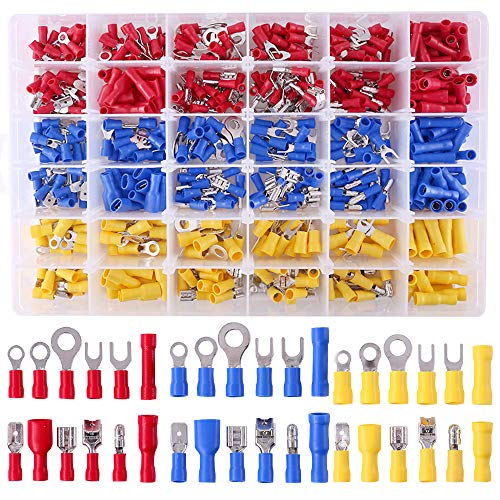
To do the hard wire connection you need crimp terminals. You can probably get a kit with fewer than 540 parts for less money.
https://www.amazon.com/Glarks-Disconnect-Electrical-Solderless-Connectors/dp/B01E4RAVI0?SubscriptionId=AKIAILSHYYTFIVPWUY6Q&tag=duckduckgo-d-20&linkCode=xm2&camp=2025&creative=165953&creativeASIN=B01E4RAVI0
For AWG 10 and 12 you need yellow. Blue and red are smaller.
I use a tool like this cheap one:
https://www.amazon.com/Gardner-Bender-GS-67K-Terminal-Stripping/dp/B0000BYC2F/
In your fuse box each circuit needs to be fused to protect the wire. For example, if you have an AWG 18 wire to some LED lamps the fuse must be less than 10 amps. If the wire chafes on a sharp edge you want the fuse to blow to keep the wire from getting too hot and starting a fire. If you make a fridge cable with some AWG 16 wire and the majority AWG 10, good for 30 amps, you want a fuse appropriate for the smallest wire in the circuit. AWG 16 is good for 15 amps. AWG 12 is good for 20 amps. The wire, of course, must be big enough to carry the load current.
If you wire it direct to the battery you still might want a fuse. If it is ok for the fridge wire to burn your van then that's your choice. You really only need a fuse to protect wires that you don't want starting fires. GM and Ford run big fat wires from the battery to the starter motor with no fuse. Those wires are usually not bundled in a harness with other wires. The main issue is that 500 amp fuses and fuse holders are expensive. Besides, GM and Ford only own the van until they sell it. What are the odds?
For searching on the internet I use www.duckduckgo.com. If you use that and search for "you tube crimp terminals" you will find videos showing how to crimp wire terminals.
My power and ground wires are 4awg but the amp terminals are 8awg. I got a 4awg to 8awg reducer, would that have anything to do with it?
http://www.amazon.com/Sound-Quest-Ga.../dp/B005A4SBPW
You can save some money, and get a better fit, by using this to power the A118C: http://www.amazon.com/gp/product/B00L3XXRI0/ref=oh_aui_detailpage_o03_s00?ie=UTF8&psc=1
As for the connectors, I used this style: http://www.amazon.com/Absolute-USA-SPL2218R-Scotchlock-Connectors/dp/B00M6J4B1W/ref=sr_1_11?s=automotive&ie=UTF8&qid=1426009973&sr=1-11&keywords=tap+connector (get them from an auto parts store or Walmart... you only need 2, and get the red style as that is for smaller wire)
I just hardwired an A118C into a Trailblazer last night, using power from the wires going to the OnStar mirror... The A118C is on the windshield behind the mirror, the little power supply is double-side taped to the back of the mirror, and I tucked the excess USB cable length into the headliner. It's all black, so it's still a fairly stealth install, despite all that being out in the open.
Fuses are good, and I wouldn't trust the higher amperage fuse that's powering Homelink / OnStar / whatever to blow when something goes wrong with a lower amperage circuit like the dashcam or its power supply, but in my case both components are right in front of my face and are controlled by the ignition key. If it has an issue, I'll pull over and turn the key off. If the electronic parts themselves were behind or very near a combustible material (like a headliner), then I'd use a fuse.
Hi, thanks for the suggestions. Actually, by shopping for din rails i got recommended a "bus bar" which seems to be what I need. See
https://www.amazon.com/Pair-Terminal-Distribution-BUSBARS-Terminals/dp/B07C4W7YKG/ref=mp_s_a_1_4?keywords=busbar&qid=1573749715&sr=8-4
Thanks for your help.
Yes there are ferrules and these "reducers"... Never really got the use for them but they're available.
Harmony Audio 1/0 to 4 Gauge Wire Reducer - Nickel Plated https://www.amazon.com/dp/B00W5SGRI4/
A wire size reducer?
https://www.amazon.com/gp/product/B00W5SGWRU/ref=oh_aui_detailpage_o08_s00?ie=UTF8&psc=1
I would actually get these: (Real 18AWG 43x2pcs Strands) 10 Pairs DC Power Pigtail Cable 12V 5A Male & Female + 10 Pairs DC Power Jack Plug Adapter Connector for CCTV Home Security Surveillance by MILAPEAK (2.1mm x 5.5mm) https://www.amazon.com/dp/B07CWQPPTW/ref=cm_sw_r_cp_api_i_LmT0Db7G21FSE
I like them better because there are less exposed wires and they are higher quality for pretty much the same price.
To connect a single wire to two things, you split the wire. Take a higher gauge stranded wire, strip it a fair amount (a couple inches) then take half the conductors and twist them together, same with the other half. Use heat shrink so now you’ve got one wire that splits into two wires. Solder additional lengths of wire to your split ends if you need the individual split sections to be longer.
Protip: use these to make soldering wires together dead simple. Kuject 120PCS Solder Seal Wire... https://www.amazon.com/dp/B073RMRCC3?ref=ppx_pop_mob_ap_share
Buy yourself a heat gun if you think you’ll do this more than ~5 times, it makes soldering wires together a 30 second task, very easy.
These are what I used
I have (4) Aura's in chassis mode running on one of these:
https://www.rockvilleaudio.com/rxm-s20/
Yes, it is a car audio amp and I power it off of a modded 650 watt computer PSU under my rig. It has been working flawlessly for almost a year now.
In addition to that, I power all 5 of my surround sound speakers with another one of their amps:
https://www.rockvilleaudio.com/rxh-f5/
And I drive it with another 650 watt (converted) computer PSU.
Both amps cost me less than $200.00 total (combined) with free shipping, brand new.
Both PSU's are silent and I have a 200mm 12v fan that keeps everything cool whenever the chassis is powered up.
I used 2 pairs of these to combine all 12v and all -12v (ground) cables coming from the PSU's to make one solid connection to the amp(s) power and ground connector blocks.
https://www.amazon.com/Conext-Link-GAD48-Gauge-Reducer/dp/B01K1INH82/ref=sr_1_1?s=electronics&ie=UTF8&qid=1536122430&sr=1-1&keywords=Conext+Link+GAD48+4+Gauge+to+8+Gauge+Wire+Reducer+2+Pack
​
The system sounds and feels absolutely amazing and I would never run without it. It has never once given me an issue. I race several hours a day, sometimes 5 days a week on it.
​
If you want more info, just ask. But basically, there is no reason to spend big money on fancy amps for a chassis mode set up. All they do is shake and as long as you can provide clean 50w power to each shaker, you have more than you need.....ever.
​
​
Nice van!
Don't be too intimidated with adding a house battery. You can do it.
Very in-depth guide for adding a house battery with solenoid: https://www.youtube.com/watch?v=1zrwHyy4qyY
This is the battery I used, it ROCKS. (smaller and cheaper options from same company available)
Other items I used...
Twist caps are not that great. They have come out with much better options however North American code hasn’t caught up. This style of connector is far safer and easier for the diy to use properly. 20Pcs 2/3/5 Way Spring Terminal Block Reusable Electric Cable Wire Connector (2 Ways) https://www.amazon.ca/dp/B073TY1R25/ref=cm_sw_r_cp_api_i_ANqiDb8VBKX6J
Nuts can feel secure but fail. Quite a few tests on YouTube that are pretty cool to watch.