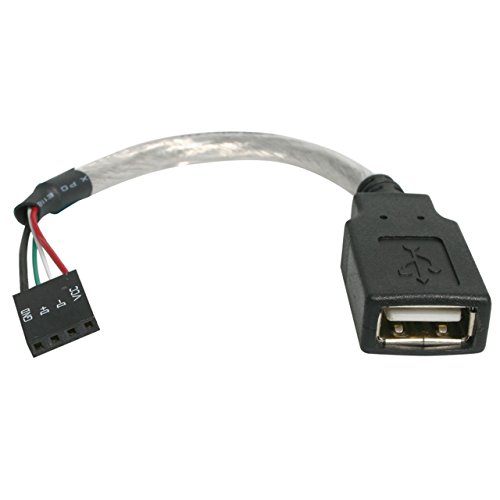
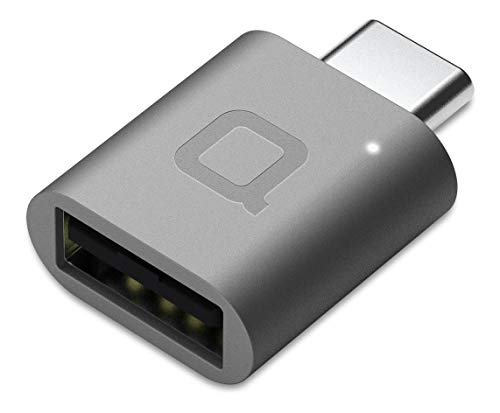
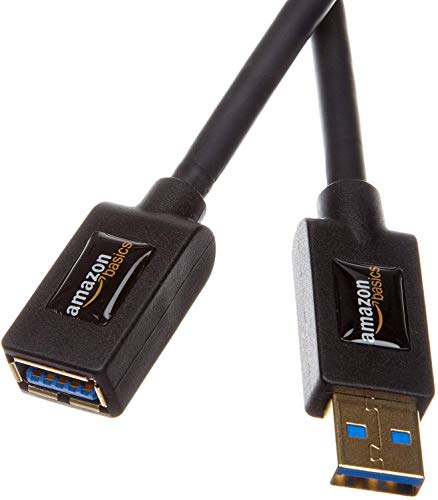
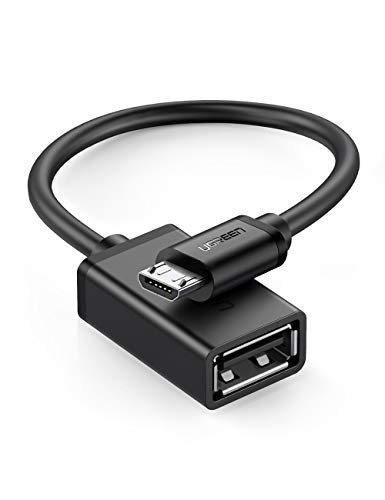
Best computer cables & interconnects according to redditors
We found 18,776 Reddit comments discussing the best computer cables & interconnects. We ranked the 4,523 resulting products by number of redditors who mentioned them. Here are the top 20.
We found 18,776 Reddit comments discussing the best computer cables & interconnects. We ranked the 4,523 resulting products by number of redditors who mentioned them. Here are the top 20.


The setup:
EDIT1: these are the RetroArch 'Cores' I run with this setup: NES: Nestopia, SNES: Snes9x, Genesis: Genesis Plus GX, N64: Mupen64Plus, Arcade: MAME, Doom: PrBoom. Enjoy :)
EDIT2: rooting is not required, my phone is not rooted it's stock Android.
EDIT3: this setup is not limited to smartphones. It works on laptops, tablets, or Android TV boxes (e.g. Nexus Player, Mi Box, OUYA, Nvidia Shield, Amazon Fire TV, etc.)
EDIT4: here's a post I've done on my RetroArch config: https://www.reddit.com/r/gaming/comments/54qf9d/finally_found_a_use_for_the_old_nexus_7/d85u1kc
PSA for anyone like me with a ton of random cables accumulated over the years:
Before I went out to buy a new cable, I just tested a bunch of crazy cable combos from my closet and found out that this one actually works with Oculus Link! Amazon Basics USB 3 9-foot extension cable + the USB-C to USB-A cable that came with my phone. Routed the cable over my head with a velcro shoulder pad I use for VR.
Really impressed with Link! I switched from CV1 to Quest, and it feels good to be back into PCVR! Link isn't quite perfect (at least not with this cable setup) but it's the closest thing to native I've seen on Quest yet.
It only costs an extra 5 bucks.
https://smile.amazon.com/StarTech-SATA-Drive-Adapter-Cable/dp/B00HJZJI84?sa-no-redirect=1
Easily solved for under $7 https://smile.amazon.com/AmazonBasics-Input-Output-Adapter-Cable/dp/B014I8UQJY/
<sigh>
You have anger management issues.
Not subject to debate. Not a question.
You have anger management issues.
You should do something about that.
> my little sister accidentally spilled a glass of water on my computer at home and it wasn’t working
This isn't /r/techsupport or /r/computertechs but I can tell you with moderate confidence that your data is still on the hard drive, and can be recovered pretty easily.
If it's a slightly older, or value-oriented laptop, it probably has a 2.5" drive inside.
You just need a nerd to open the laptop, remove the drive, hook it up to something like this and bada-bing-bang-boom your old laptop will show up like a giant USB-Stick.
If it's a modern, higher-performance, or super-mega-ultra-thin laptop it may be glued shut, in which case the level of difficulty just went way the hell up - but if the laptop is already dead, and if you are writing the laptop off as unworthy of repair, then we can use destructive methods to open the laptop to remove the storage device with all your stuff on it.
SOME laptops do not use a removable internal storage device. These are pretty much always the super-ultra-thin devices. You might be in a real pickle with one of these devices.
But if we're talking about a $600 Acer from BestBuy, it's a really easy task you could probably do yourself with a little Googling.
I don't want to delve any deeper into this in this community. Please feel free to engage the nerds in /r/techsupport or something for guidance on what to do.
But I wanted you to know the situation may not be unsalvagable.
Now, back to your intended LOR teacher. Odds are fair that you just inflicted serious damage on your relationship with them.
I wouldn't write you anywhere nearly as positive a LOR after this event as I might have before this event.
And if you're being honest with yourself, neither would you.
Anger Management. Get some help.
needs to be sold by Store4PC and Fulfilled by Amazon, try this link (not a referral):
https://www.amazon.com/gp/product/B011M8YACM/ref=ox_sc_act_title_1?smid=A29Y8OP2GPR7PE&amp;psc=1
If you don't want to watch the video that's cool, here's a summary;
Over the last few months I've been testing various cables for use with my four sensor setup. What I quickly discovered was that not all cables are created equal in the eyes of the Oculus Rift!
The Rift and Sensors can be a bit stubborn when it comes to cables. Some work intermitantly, some report USB 3.0 as USB 2.0, some give audio issues when using with the Rift and some just point blank refused to work.
I think I've finally nailed down the best cables which I've personally tested and would recommend to use with your Rift.
Due to the summer sale I know we have an influx of new Rift users so hopefully this guide helps.
Here's the links where you can buy these cables for yourself;
Cable Matters USB 3.0 3M /10FT Extension Cable:
UK - https://www.amazon.co.uk/dp/B00C7SA21U/ref=pe_1909131_77697001_tnp_email_TE_AMZLdp_3?th=1
US - https://www.amazon.com/Cable-Matters-SuperSpeed-Female-Extension/dp/B00C7SA21U/ref=sr_1_1?ie=UTF8&amp;qid=1503739950&amp;sr=8-1&amp;keywords=cable+matters+superspeed+usb+3.0
KabelDirekt 2m / 6FT HDMI Extension Cable:
UK - https://www.amazon.co.uk/dp/B013ICN59Y/ref=pe_1909131_77697001_tnp_email_TE_AMZLdp_2
US - https://www.amazon.com/KabelDirekt-Extension-Cable-1080p-Ethernet/dp/B012ASNHIG/ref=sr_1_fkmr0_1?ie=UTF8&amp;qid=1503740842&amp;sr=8-1-fkmr0&amp;keywords=kabeldirekt+2m+extension
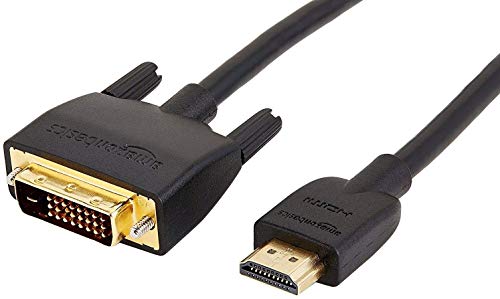
DVI to HDMI Adapter:
UK - https://www.amazon.co.uk/dp/B00ZMVGTA2/ref=pe_1909131_77697001_tnp_email_TE_AMZLdp_1
US - https://www.amazon.com/Rankie-2-Pack-Gold-Plated-Adapter-Converter/dp/B00ZMVGTA2/ref=sr_1_1?s=electronics&amp;ie=UTF8&amp;qid=1503740883&amp;sr=1-1-spons&amp;keywords=DVI+to+HDMI+adapter&amp;psc=1
CableCreation 5M / 16FT USB 3.0 Active Extension Cable (Fine For Sensors BUT Causes Audio Issues When Using With Rift):
UK - https://www.amazon.co.uk/CableCreation-Active-Extension-Extender-Female/dp/B0179MXKU8/ref=sr_1_7?ie=UTF8&amp;qid=1503740956&amp;sr=8-7&amp;keywords=cable+creations+usb+3.0
US - https://www.amazon.com/CableCreation-Active-Extension-Extender-Female/dp/B0179MXKU8/ref=sr_1_1?ie=UTF8&amp;qid=1503740977&amp;sr=8-1&amp;keywords=cablecreation+usb+3.0
UGREEN 5M / 16FT USB 3.0 Active Extension Cable (Additional Power Micro USB Port isn't required when using the Rift. Do not use this with the Rift as may cause damage)
UK - https://www.amazon.co.uk/UGREEN-Extension-Amplifier-PlayStation-loudspeakers/dp/B01FQ88CE6/ref=sr_1_2?ie=UTF8&amp;qid=1503741031&amp;sr=8-2&amp;keywords=ugreen+oculus+cable
US - https://www.amazon.com/UGREEN-Extension-Repeater-Amplifier-Superspeed/dp/B01FQ88CE6/ref=sr_1_5?ie=UTF8&amp;qid=1503741078&amp;sr=8-5&amp;keywords=ugreen%2Busb%2B3.0%2Bextension&amp;th=1
AmazonBasics High-Speed HDMI 4.6M / 15FT Cable:
UK - https://www.amazon.co.uk/gp/product/B014I8TOTC/ref=oh_aui_detailpage_o08_s01?ie=UTF8&amp;psc=1
US - https://www.amazon.com/AmazonBasics-Rated-Wall-Installation-Cable/dp/B014I8TOTC/ref=sr_1_2?ie=UTF8&amp;qid=1503741177&amp;sr=8-2&amp;keywords=AmazonBasics+High-Speed+HDMI+CL3+Cable
Mini HDMI Repeater Extender:
UK - https://www.amazon.co.uk/Repeater-Extender-130FT-Support-Switch/dp/B01MDS8DJH/ref=sr_1_11?s=electronics&amp;ie=UTF8&amp;qid=1503740907&amp;sr=1-11&amp;keywords=hdmi+repeater
US - https://www.amazon.com/COWEEN-Repeater-Amplifier-Extender-Transmission/dp/B01GHL72XS/ref=sr_1_3?ie=UTF8&amp;qid=1503740927&amp;sr=8-3&amp;keywords=hdmi+repeater
Hope this helps :)
USB to SATA cables are $10 on Amazon.com problem solved.
https://www.amazon.com/dp/B00HJZJI84/
This is what I have experimented with and works great on multiple systems... For you look at step 2 and 3.
1st GET A THIRD SENSOR IF YOU WANT TRUE ROOMSCALE "they are on backorder at the moment"
2nd Get three of these for your sensors to make sure they can reach anywhere you want them too: https://www.amazon.com/gp/product/B0179MXKU8/ref=oh_aui_detailpage_o05_s00?ie=UTF8&amp;psc=1
3rd Get 2 of these to completely isolate all of you VR components from the sometimes janky unreliable USB ports on A LOT of motherboards that cannot supply enough power and/or bandwidth for all of the cameras and HMD to work properly I chose this card because it only has two ports and both of those ports work no matter if you plug in 2 sensors or 1 sensor and the HMD. The Inatek card DOES have issues for somewhere some ports work and others do not and are still only being able to run 2 sensors off the Inatek card and having to run the HMD and 3rd sensor off the motherboard. The Orico card just works and you don't have to think about experimenting with ports just plug everything into the two Orico cards in any configuration and go. Also use the default Windows drivers whether you go with the Inatek or Orico card only upgrade after trying the defaults drivers without success: https://www.amazon.com/gp/product/B01AVSN2YG/ref=oh_aui_detailpage_o02_s00?ie=UTF8&amp;psc=1
4th This is optional. One of these for extending your HMD HDMI cable by 15ft for a total of 28ft: https://www.amazon.com/gp/product/B008D5EUD2/ref=oh_aui_detailpage_o05_s00?ie=UTF8&amp;psc=1
5th This repeater is required to make the HDMI cable above work, but with this repeater, the extension is flawless: https://www.amazon.com/gp/product/B01GHL72XS/ref=oh_aui_detailpage_o01_s00?ie=UTF8&amp;psc=1
6th To extend the Rift HMD USB I use the USB 2.0 Active Extension Monoprice Repeater Cable that comes with the 3rd sensor it is 16ft long, works perfectly. Then I used a small piece of electrical tape every 6 inches from the HMD to the PC to make the extended HMD cable one piece leaving about 2 ft of cable loose at the end to be able to plug in wherever I want.
I did a lot of research bought the Inateck and Orico USB add-on cards, multiple active USB extensions, multiple different HDMI adapters and extensions of varying lengths, Display port to HDMI adapters, DVI to HMDI adapters, and did all the experimentation and testing required to make all this work. The list I listed above works every time on multiple systems in different environments, rooms, and households.
If you need clarification on anything and/or want more information, feel free to respond or message me. I will gladly help.
After you get your USB cards installed and you sensors plugged in with the hardware I listed above reboot the system and the follow the below instructions.
Also when you get your stuff after everything is installed and setup do this as a last step for good measure:
Once the sensor setup has fully completed, search for PowerShell in the Windows start menu, right click it, and click 'Run as administrator'
Copy all of this PowerShell script (hit Ctrl-A, then Ctrl-C), then paste it into the PowerShell window (Ctrl-V), then hit Enter
Once it has completed, close PowerShell and restart your computer (this is important)
Here is the link to the script, just copy all the text on the page and past it into powershell: http://pastebin.com/raw/9f9MMny1
This basically sets all of your usb cards and ports to a high power no sleep mode and assures that Windows doesn't try to manage your usb's at the wrong time in the wrong way. I am not sure if I needed to do this but I just did it for good measure. I did all of the manually until I found this script that somebody else on reddit made. Just makes it quicker and easier than changing all the settings one by one.
Note if you haven't done this already you can do it now with your current setup to see if it helps "Probably won't but it may"
Literally copy-pasting from your pastebin because it'll look better here and I don't have to worry about looking like I'm hijacking because I didn't write it, aha! Having more resources in one thread can only be a good thing. Aim your upvotes at /u/senichi
~~
What game should I speedrun?
You should speedrun a game that you love to play. If you're serious about speedrunning a game, that could mean practicing for possibly upwards of hundreds of hours to beat your time. You might be playing the same segment of a game over and over again before you're finally happy with your performance in that section, and you could be playing for many hours before that happens. For this reason, you want to pick a game that you won't get bored of quickly. A game that you're happy playing for possibly hundreds of hours so you can get a time that you're happy with before you get bored of it.
How do I start speedrunning?
Once you pick a game, there are different ways you can start speedrunning. Here's the method I like to use after picking a game.
I'm getting bored of my game! What do I do?
Don't worry, that's not abnormal. Since speedrunning requires so much dedication towards a single game to get a good time, it's common for people to get burnt out or bored before they're happy with their personal best. If you're getting burnt out, I recommend simply taking a break. There's no harm in leaving your game alone for a month or longer and playing other games. Maybe even learn a new game for fun if you still have the speedrunning itch you want to scratch. If you continue to play a game that you're starting to get bored of, you risk getting bored of it on a much longer term, and possibly resenting the game or even outright start to hate it. Who knows, maybe when you come back to the game feeling refreshed, it might be even easier to get a new personal best.
What capture device should I use, and how do I set it up?
First ask yourself this question: Do you want a cheaper capture device, or would you rather have a good quality device?
If you want a cheaper device, many people recommend the GV-USB2. It's considered the best SD capture device on the market, so if you're recording the older consoles that don't need HD video, then this should work perfectly.
If you want a higher definition device, I recommend the Elgato GameCapture HD. It's very easy to use and the output is excellent. Keep in mind that, at the moment, if you use the GameCapture HD, you might have to use XSplit instead of OBS to stream. OBS currently has an issue with the GameCapture HD that causes it to desync, and in my experience XSplit doesn't have this issue
In addition to the capture device, you will need TWO Composite Video Cables, and you will need THREE splitters.
Here's a picture of how to set up your capture device using the GameCapture HD and a Nintendo 64 as an example. The setup would be the exact same using the GV-USB2 and any other console that uses composite cables. If using the GameCapture HD and HDMI cables, the GameCapture HD has an HDMI in and HDMI out port, so you would just use two HDMI cables, one going from your console to HDMI in, and another going from HDMI out to the TV.
Who currently holds the world record for <game>? How can I find more information about <game>?
There are multiple ways to figure this out.
Can I use an emulator?
This varies a lot from game to game. Different communities deal with emulators in their own ways. The usual answer to this question is yes, but it's considered a different category. The reason for this is because emulators are often not perfect in their emulation, so there might be differences in framerate, which affects your time, or sometimes even entire tricks are possible only on emulator.
Some games don't accept emulation at all, but that only means that any runs that you do on emulator won't be able to go on the leaderboard. You still might want to use an emulator for exclusively practice because emulators let you use save states that make it easier to repeat the same part over and over again. Just keep in mind that while using an emulator you might be practicing at a different framerate than on console, or you might be dealing with slight input lag.
The FAQ on SpeedRunsLive has a list of emulators that are commonly used and banned.
In the end, the answer to whether or not you can use an emulator is specific to whatever game you're playing. These are only general guidelines and may vary on your game.
What's that timer program I see on peoples' streams, and how can I get it?
There are multiple timer programs that are listed on the Tools sections of SpeedRunsLive. The most popular timer program at the moment is LiveSplit, but in the end it's personal preference.
I keep this guy around for just that.
https://www.amazon.com/gp/product/B000J01I1G
I use these to USB Host off the SNES Classic:
https://www.amazon.com/gp/product/B00LTHBCNM
https://www.amazon.com/dp/B007JR5304/
This site does an okay job at explaining steps in a manner that's more quickly understood: http://snesclassicmods.com/
Works great, and I can keep the SNES Classic itself only storing its original games on it with a lot of room for saves, while the flash drive has everything else. Surprisingly, PS1 emulation works very, very well on the SNES Classic(a little input delay but very playable using Wii Classic Controller which has the same plugin). I don't think I got any N64 games running properly. The emulation for that is either garbage or I need a different core.
PCIE risers are a thing you can use. I did something similar, had to cut a chunk out of the back, but turned the graphics card sideways so the case could be closed.
https://www.amazon.com/XRP-Express-Extender-Flexible-Extension/dp/B008BZBFTG
I also bought a 128GB flash drive to keep some common repair program on and it has saved me a lot of time and trouble.
Put it all in a small backpack and you have a nice repair kit on the go!
edit/
Software! I use these weekly and it saves me a lot of time and trouble. I am open to suggestions on what you can also use, and would recommend using google for tutorials if you need help :)
edit//
If anyone else has suggestions on programs/tools to use i'm all ears. I've been doing repairs for the past 6-10 years (personally and for business) and these are the best things i've found so far. You can never have too much info/tools though :)
And make sure you upvote everyone else who is giving you ideas/suggestions. A community that grows together knows more :)
It looks like it's actually inside the ship. One of the PCIE lanes has an extender plugged into it. It would make more sense to have it under the motherboard because:
You can also see one of the pipes coming out of the hull of the ship, leads me to believe the video card is also being water cooled.
That is indeed a model F. I think you could use a combination of any DIN5 to PS2 adapter with the bluecube adapter that Model M users swear by.
Amazing find, by the way.
FAVOLCANO Easycap ($11). See capture quality here.
i-o Data GV-USB2 ($35). See capture quality here.
Diamond VC500 ($36). See capture quality here.
Dazzle Video Capture ($44). See capture quality here.
Hauppauge 610 ($49). See capture quality here.
To capture from these you would need a computer, an AV splitter, and some software to capture video (like OBS).
Even cheaper: https://smile.amazon.com/dp/B014I8UQJY/
I did a group test on USB3 extenders here is what I found out :
I tested using an Asus z170 Deluxe motherboard it has both Intel and AsMedia USB3 ports. I also used the Oculus recommended Inatek 7 port USB 3 Card.
——Worked——
Cables in this category mean the sensor detected as USB3 in Oculus devices and didn’t lose connection and provided solid tracking testing with the headset on, no matter what brand of USB3 port it was connected to (Intel, AsMedia,Inatek).
MutecPower 5m active USB3 extension cable £22
(picture seems to be wrong on amazon website, also note this cable seems to be sold as various brands but I'm pretty sure its all the same cable, it should look like this
https://www.amazon.co.uk/gp/product/B01BLPSU2W/ref=od_aui_detailpages00?ie=UTF8&amp;psc=1
CableCreation 5m active USB3 extension cable £12
https://www.amazon.co.uk/gp/product/B0179MXKU8/ref=od_aui_detailpages00?ie=UTF8&amp;psc=1
Amazon Basics 1m Passive USB3 extension cable £4
https://www.amazon.co.uk/gp/product/B00NH13UFQ/ref=od_aui_detailpages00?ie=UTF8&amp;psc=1
——Sort of Worked——
Cable Matters 3m Passive USB3 extension cable £7
Detected as USB3 when using the InatekCard (which has extra power from a SATA power connector)
Detected as USB2 when using motherboard Intel or AsMedia USB3 ports
https://www.amazon.co.uk/gp/product/B00MPMFKSI/ref=oh_aui_detailpage_o04_s00?ie=UTF8&amp;psc=1
Cable Matters 5m Active USB3 extension cable £11
Only worked as USB 3 in one of the AsMedia ports and only when everything else was disconnected. Was USB2 or has an error in other AsMedia or Intel ports. Detected as USB3 in the Inatek Card and seemed ok testing in Oculus home loading area.
https://www.amazon.co.uk/gp/product/B00MPMFKSI/ref=oh_aui_detailpage_o04_s00?ie=UTF8&amp;psc=1
——Didn’t work——
Belfen Superspeed 5m active USB3 extension cable £7
https://www.amazon.co.uk/gp/product/B0179EPUEK/ref=od_aui_detailpages00?ie=UTF8&amp;psc=1
detected as USB2 on every USB3 port including Inatek card
On break at work so i’ll make this quick. Most motherboards come standard with these but there are outliers. Looked these up quick just to give you an idea. The right angle side of the cable would plug into your drives and should help you keep away from bending your cables with the back panel. Hope this helped.
Data cables
Power cables
Edit: These are also good to use.
I run on SNES and use this little beauty, works like a charm. https://www.amazon.com/gp/product/B00428BF1Y/ref=oh_aui_detailpage_o08_s02?ie=UTF8&amp;psc=1
PCI-E riser cables are amazing.
link
$7 on Amazon: https://www.amazon.com/dp/B014I8UQJY
I bought these to test with:
Amazon Basics USB 3.0 A to C cable
Right angle USB C adapters
And I have this left over from my Oculus CV1 accessory kit wishlist I put on amazon. I'll report back here with what works and what doesn't. I'm also going to get a public google sheet going of cables, adapters (right angle) and active/passive extensions that work so that people can use that as reference.
EDIT: Link to sheet. Anyone with link can edit. Don't make me regret that. I will lock it. (Though if you want to fix my terrible formatting, feel free.)
EDIT: Had to disable open edit permissions. Going to add a form that will add unformatted data at the bottom, then I'll format it properly into the thread. Here's the form: https://forms.gle/uzyHvmgyXJGuVkKM9
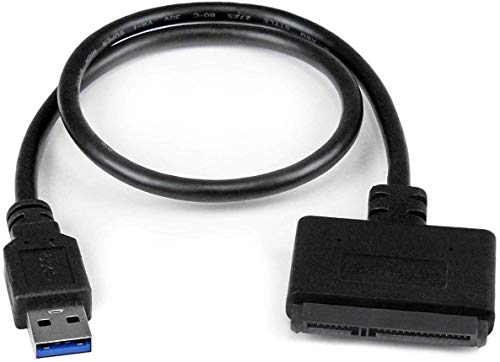
Grab one of these: https://www.amazon.com/StarTech-SATA-Drive-Adapter-Cable/dp/B00HJZJI84/ref=sr_1_3?ie=UTF8&amp;qid=1478567410&amp;sr=8-3&amp;keywords=usb+sata+adapter
Of course make sure it's the right connector for your HDD. You will need USB 3 for that one to work too, since it needs more power than USB 2 can deliver.
And then boot up a linux machine and see if it's recognized. If Linux is no good, I've had luck with Mac as well, Windows seems a lot more finicky about whether it will take a shot at figuring out a broken harddrive or not.
Getting data off a drive this way works a lot more often than booting the device, since you're just trying to get raw data off of it rather than needing it to boot first then get data off of it.
GameCube and Game Boy Player is the standard setup. The startup disc for the Game Boy Player can be a bit pricey these days, but you can softmod the GameCube and use the free Game Boy Interface software as an alternative.
From there, you can get an HDMI adapter and HDMI capture card (lots of those to choose from). Or if you need to save some money, a good S-Video capture device like the IO Data GV-USB2, an S-Video splitter, and a GameCube S-Video cable will still get you a pretty decent-looking capture. Either way, set it up in OBS and you're good to go.
I'd suggest also getting an SNES controller adapter. I find it way nicer than using the GBA as a controller. There's also one for Wii Classic Controllers if you prefer.
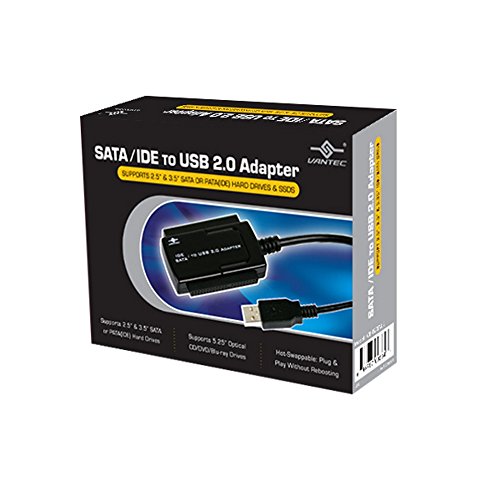
We have to deal with old machines all the time at work. If you have to do this often, "invest" in some sort of IDE/SATA/USB converter, for example this. I say "invest" because it really is cheap, especially if you get free shipping.
$20 my ass. This is $4.50 with Prime shipping.
I know that Samsung SSDs come with software (data migration) to handle this process for you. Just need to get something like this so you can have both drives hooked up at the same time to the same machine.
It is a 44 pin ATA drive. 4 of the pins provide power. If you are going to attach it to a PC that has IDE on board, you are going to need an adapter like this one... http://www.amazon.com/gp/aw/d/B0072UKJ3O
Otherwise you are going to need something like this... http://www.amazon.com/gp/aw/d/B000J01I1G/ref=mp_s_a_1_1?qid=1383047362&amp;sr=8-1&amp;pi=AC_SX110_SY165_QL70
Definitely - though I can literally take 0 credit for coming up with anything myself....but I am happy to write a quick summary here with the relevant links that helped me out and then if people want something more formal I can do that somewhere too and hopefully u/MrChromeBox will be kind enough to link to it on his site.
&#x200B;
so here goes
&#x200B;
Step 1: Drink a beer or two
You need some steady hands for this but also need to give yourself some confidence before potentially destroying your beautiful £1000 glorified web browser....
&#x200B;
Step 2: Make sure you have the right tools for the job
&#x200B;
Specifically you will need:
&#x200B;
- 2 USB C / USB 2/3 Flash drive (or an adaptor plus 2 flash drives)
- something like the basic tool kit from iFixit
- BUT you will also need a stupid T3 Torx screwdriver for 3 of the screws which isn't included, still it is cheaper just to buy that seperately rather than spring for the full 'ultimate repair kit' from iFixit
&#x200B;
Here are the links for what you need on amazon:
&#x200B;
Basic iFixit kit: https://www.amazon.co.uk/dp/B01MRNIFR6/ref=cm_sw_r_tw_dp_U_x_0fV5BbX0RZQS4
T3 Torx Screwdriver
https://www.amazon.co.uk/dp/B013703EG6/ref=cm_sw_r_tw_dp_U_x_CjV5Bb0ZWXH04
&#x200B;
Or this kit actually probably has everythign you need, the ifixit one just has a few nice extras for any future repaires
https://www.amazon.co.uk/dp/B00445Y48G/ref=cm_sw_r_tw_dp_U_x_WiV5Bb3S6AT6
&#x200B;
Flash Drives
- You need two flash drives, 1 for the elementary os iso to install on the pixelbook at the end and a second one for when you use the awesome UEFI firmware developed by u/MrChromeBox to backup your chromeOS in case everything goes to shit...
&#x200B;
You may be able to use regular USB 2/3 flash drives with a USB C adaptor, but in my opinon since the Pixelbook only has USB C ports, you might as well invest in dual USB C / USB 2/3 drive now as you will end up needing it at some point (I used this for the elementary OS iso and a regular USB flash drive with an adaptor for the firmware backup)
Amazon links:
&#x200B;
- USB C/USB 3.0 Flash drive:
https://www.amazon.co.uk/dp/B07H24MCRQ/ref=cm_sw_r_tw_dp_U_x_etV5Bb6JP78KC
&#x200B;
-USB C / USB 2/3 Adaptor
https://www.amazon.co.uk/dp/B015Z7XE0A/ref=cm_sw_r_tw_dp_U_x_muV5Bb0Z1KDDQ
&#x200B;
Step 3: Download Elementary OS Juno and donate some money to the developers
You can get the iso from www.elementary.io and if you don't know how to flash it to one of the flash drives mentioned above, you should probably stop now - but there are instructions on the website and Etcher is a good cross platform tool for the job (www.etcher.io)
&#x200B;
Step 4: Pray to the linux gods, drink a beer and back up any data you care about on your pixelbook
&#x200B;
Step 5: Put your pixelbook into developer mode (fairly safe)
Again, I can't take credit for this but there are great instructions for how to do this on https://mrchromebox.tech/#devmode
&#x200B;
Enabling Developer Mode
>
Entering Developer Mode requires you to first boot into Recovery Mode. For Chromebooks, this means pressing [ESC+Refresh+Power];>
>
Once at the recovery screen, press [CTRL+D] to enable developer mode, then confirm when prompted. As a security measure, transitioning to/from Developer Mode will wipe out all ChromeOS user data, essentially powerwashing (resetting) the device.>
>
Exiting Developer Mode is as simple as following the instructions on the Developer Mode boot screen (usually pressing [SPACE]), but may require resetting the firmware boot flags if you've changed them. As with entering developer mode, exiting will wipe all ChromeOS user data, so if you plan on keeping your device in developer mode, it's a good idea to set the firmware boot flags to prevent accidental exiting and loss of data.&#x200B;
&#x200B;
Get a GV-USB2 capture card! It's basically the go-to for standard definition console gaming.
He'll also need a video/audio splitter. I use this one and it works wonderfully. You'll need an extra set of composite cables as well. (That's just an example. Get whatever will ship on time for you)
If he wants to stream on twitch, consider getting him a webcam and mic. Let me know what your budget is and I can recommend some options for you.
Will MSI or another manufacturer be releasing ITX versions of the GTX 770/780?
EDIT: Second question, Will a PCIe Flexible Extender like ths affect performance?
If it's the MacBook Pro 2012 13" non retina then you may be experiencing the extremely common hard drive cable failure as described here https://beetstech.com/blog/prevent-a1278-mid-2012-hard-drive-cable-failure.
If you happen to have a USB to SATA caddy/connector then you can plug your SSD into your Mac via USB, if it boots then that pretty much proves a hard drive cable issue.
&#x200B;
You can buy the hard drive cable from Beetstech with a lifetime warranty https://beetstech.com/product/hard-drive-cable-923-0104.
You're looking for
this adapterthis adapter.Edit: The hard drive is probably formatted as NTFS. If that's the case, then basically, all you can do on it is copy things from it to your Mac (which is what you said you wanted to do, so you should be fine). You can't actually change anything on the hard drive unless you get some software to fix it (you can also fix it yourself; I'll link you to a tutorial for that if you run into the issue). If the hard drive is formatted as FAT32 or exFAT, then you shouldn't run into any problems.
Don't really know what you are talking about but something like this could be used with every machine which has a internal USB header and every standard USB drive.
You could take off the plastic case and use something like this: StarTech.com SATA to USB Cable - USB 3.0 to 2.5" SATA III Hard Drive Adapter - External Converter for SSD/HDD Data Transfer (USB3S2SAT3CB) https://www.amazon.com/dp/B00HJZJI84/ref=cm_sw_r_sms_apa_i_zMPYDbY41HJJ5
I use these spliters for more SATA power connectors and These hotswap cages for housing the drives. They are often on sale at newegg for $40-60, this card Flashed to IT mode will add another 8 sata connections via two sas connectors(sff-8087) via a breakout cable
Currently I am running 8x3tb drives in my pc with a gtx 970 and my 550watt PSU handles it just fine.
A fast and easy option is get a sata power spliter. Just snip the last wire which disables the 3.3v pin and they work perfectly fine. It is what I did.
There was some guy who tested a bunch of extenders with the Rift sensor on youtube.
I ended up ordering this one because as I recall he determined this was the best passive extender:
https://www.amazon.com/gp/product/B0179MXKU8/
Just buy a SATA III to USB connector, plug it into your Xbox, and install Destiny on it. Crisis averted.
Trying to back up a hard disk after it fails usually ends up in partial or complete data loss.
Your best bet would be to buy an inexpensive external hard disk adapter, plug it into the usb port of a working computer, and run a program to attempt to recover any data off the drive. You'll have to hope for the best, but expect the worst. If you're lucky (read: very lucky), only boot partitions of the drive have failed, and your data is mostly untouched.
You would need an adapter similar to this one, but of course make sure that the HDD adapter is for your hard disk in particular, i.e. 2.5" v.s. 3.5"
Can't believe this took a year.
That said they should add the following ASAP.
Yep. They're way more durable and pretty much just as fast as an internal SSD. I use this connector:
https://www.amazon.com/StarTech-SATA-Drive-Adapter-Cable/dp/B00HJZJI84
120gb SSDs are cheap these days. I recommend going this route.
That's awfully expensive for what you get. You could buy any 480GB 2.5" SSD on the market, and replace the HDD with that. I've replaced several unibody MBPs and MBs with standard SSDs with very good results.
Since average SSDs of that size are on average around $130, you're practically paying $90 for an enclosure for the old HDD and some cheap tools. You can get all of those off Amazon if you really wanted to, and also pick up a USB to SATA cable for $10 to transfer your old stuff, and still save money.
As for reliability of SSDs like the Sandisk or Crucial, I have SSDs ranging from a few cheap Sandisks SSDs to Samsung 960 EVOs, and unless you're constantly transferring GBs of files you won't see an appreciable difference, from boot up times to load speeds. Hope this answered any concerns you had.
Okay, finally back at my computer. This is the one I recommend for PS/2. If you don't have a keyboard with PS/2 on the end of the wire, ask on this subreddit (or search the subreddit using the search box (or send a pic and send it to me)). If it isn't PS/2, it's likely 5 pin DIN or 9 pin DIN if it's larger. If it's the same size, it's whatever Sun Microsystems used in the 90s, which is like PS/2 but not, though I doubt you have that.
Send a pic or post one when you get it working (or now, so I can verify if you have the right connector)!
PS/2 is 275mA max. USB 1.0 is 500mA.
Most should work. This one on Amazon has a lot of comments saying that Model M keyboards work fine with it.
I've used them at work for old machines that needed to be recovered. We made image backups of all hard drives using this converter since it works with IDE drives.
IDE/SATA to USB
Fellow broke college TO here. My weeklies average around 15 too so i feel like we're in a similar situation. My venue doesn't have good enough internet in the basement to stream to Twitch, so we only record and upload to youtube.
For my laptop, I use a pretty ok, free laptop my college gave me. You don't need anything fancy if you're not streaming.
I use this as a capture card, I got it on sale for like $15. It's far from the best but it really gets the job done and serves its purpose.
http://www.microcenter.com/product/315700/USB_20_Video_and_Audio_Capture_Device
I've also had one of my players recommend me this capture card. I've never used it but I hear it's cheap and it's good.
https://www.amazon.com/I-connection-video-capture-GV-USB2/dp/B00428BF1Y
For the player cam, I use a used camera on got on sale for $11. Once again, it's not great. But it gets the job done on a budget.
For the actual stream layout I found free overlays online, and my homie who's good with photoshop hooked us up with a logo for free.
If you wanna see what we're working with, how it looks, and what the quality looks like here's our Youtube channel.
https://www.youtube.com/channel/UC1bW6_nKMnvljeFXHpogkhw/playlists
If you have any questions just hit me up. I'd love to help another little local scene like mine grow!
gv-usb2 is generally known the give the best quality s-video capture
For anything with the traditional red, yellow and white plugs, this thing here is king. I-o DATA USB connection video capture GV-USB2 https://www.amazon.com/dp/B00428BF1Y/ref=cm_sw_r_cp_apa_1bNMzb9C8YEM9
You will need this, a splitter, and two extra sets of cables (look in the "frequently purchased together" section below). Plug the console into the splitter, then run the extra cables from the splitter to your tv/monitor and to the capture card. The capture card is USB, just plug it in to your computer.
All the software instructions will be in Japanese, but just Google the name of the product and you will find some very easy to use installation guides.
From there, just use your choice of recording or streaming software! I'm an xsplit guy, but OBS is popular because it's totally free.
EDIT: Also, if you're going to run Mario 64 specifically, make sure you have the proper version of the game! I'm fairly sure it's primarily played in Japanese, and I'm not sure if there are glitches missing from the US release.
Just an FYI that cable may be a replacement for a modular power supply.
This may be more what you're looking for
http://www.amazon.com/gp/product/B0086OGN9E/ref=pd_lpo_sbs_dp_ss_1?pf_rd_p=1535523722&amp;pf_rd_s=lpo-top-stripe-1&amp;pf_rd_t=201&amp;pf_rd_i=B003ZDNY02&amp;pf_rd_m=ATVPDKIKX0DER&amp;pf_rd_r=0NHBRPMN3PC3VKZQKPRK
Or this
http://www.amazon.com/IO-Crest-SY-CAB40018-Molex-15-Pin/dp/B003AVN6D4/ref=sr_1_3?s=electronics&amp;ie=UTF8&amp;qid=undefined&amp;sr=1-3&amp;keywords=molex+to+sata
If you care about your disks or are using certain enterprise drives you should be using decent quality sata to sata splitters such as https://www.amazon.com/StarTech-com-Power-Splitter-Adapter-PYO4SATA/dp/B0086OGN9E
Some drives have issues if they don't have the extra 3.3v leg.
I'd recommend a premade solution such as the Gameduino. It takes a SPI interface and uses an FPGA to generate a VGA output.
It's meant for use with an Aduino, but it's just a standard SPI interface which can be bit-banged with a variety of 8-bit chips. Here's an example of a Gameduino being driven with a Commodore 64.
edit: You'd have to combine the gameduino with something like this VGA to HDMI adapter. If you are particular about DVI, you'd have to chain a HDMI to DVI cable to that as well.
For everyone in Germany. I can confirm these two cables work flawlessly, giving together 6.8 meters of freedom.
&#x200B;
Tested link with Doom VFR and i was impressed with the quality in direct comparison with my Rift S. I would say it has 80% of the picture quality, but quests Oled has better blacks. i could not see any latency in native oculus games. In steamvr there was a slight handtracking latency, but it was absolutely fine to play.
So i am really considering selling my Rift S.
I bought a Kingston SATA 250GB SSD with a SATA to USB adapter. Works great.
SSD
Adapter
You can get SAS to SATA breakout cables. SATA hard drives can work with SAS and SATA backplanes/ports, but SAS drives cannot work with SATA backplanes/ports (only SAS).
An SAS controller will work just fine along with any controller running on your mother board. You can have multiple controller cards running along with the built-in controller cards. I don't have experience with the card you listed, but you can get fairly cheap used/refurbished cards off ebay. I prefer LSI SAS chipsets. There are many rebranded versions of the LSI SAS cards.
More than you need now, but you can also get SAS expanders that work kinda like a network switch, but for hard drives.
The setup:
You can install Hassio on Raspbian on an SSD, which is what I do. More reliable, you have all the Hassio addons, and you can install other things on the SSD. Not all adapters will work with the Pi, but I found this USB-SATA adapter works.
Depending on which Pi you have, you might need to manually enable USB boot. See here for more info.
You can purchase something like this and then buy two of these breakout cables to add 8 HDDs without using any of the sata ports.
Good news and bad news:
The bad news is that the onboard 3008 is SAS1. The good news is that the backplane is a TQ, which means it's just passthrough. It will work with any size drive, you just need an SAS2 (or better) HBA that can supply 8 seperate SATA connections. I recommend finding a cheap H310 (usually around $40 used on ebay), flashing it to IT mode, and getting a pair of breakout cables.
I'd recommend taking the hard drive out to see what size it is and then ordering a SATA to USB connector lead online. You can then plug the hard drive into any computer. That way you can have a look for yourself to see if there is anything 'dodgy' on there, and if you don't find anything, you could put back the hard drive and get it computer fixed with out worrying about it.
I picked up this SATA to USB lead recently off of Amazon for $12 and it works great: http://www.amazon.com/gp/product/B00HJZJI84
Here, I'll do it for you
Depending on when you deploy you might have enough time to buy a PCI-e Riser Cable. This would allow you to move your GPU down a tad and still have it connected to the mobo.
http://www.amazon.com/PCI-E-Express-Extender-Flexible-Extension/dp/B008BZBFTG
You need the dazzle and a couple splitters (if you want to play on the tv). With that you can use obs (open broadcast software) to stream.
edit: I doesn't have to be a dazzle. Cosmo uses this one for n64:
http://www.amazon.com/DATA-connection-video-capture-GV-USB2/dp/B00428BF1Y/ref=sr_1_1?s=electronics&amp;ie=UTF8&amp;qid=1415515983&amp;sr=1-1&amp;keywords=i-o+data+gv-usb2
the splitters can be found at:
http://www.amazon.com/gp/product/B00H4L6UO8/ref=oh_aui_detailpage_o01_s00?ie=UTF8&amp;psc=1
with the splitters you will need a male to male av cables:
http://www.amazon.com/Premium-Audio-Video-Composite-Cable/dp/B001VJ465O/ref=pd_sim_e_1?ie=UTF8&amp;refRID=1KV4BF0YP4E0PYEC1A0T
To get the capture card to work on obs, you create your scene and source a video capture device. You need to make sure all the drivers are installed for the capture card.
Other than the capture card linked, elgato makes good ones, dazzle, and there are probably others. DO NOT BUY CHEAP CAPTURE CARDS. They are shit, trust me.
> For starting out, cheaper options include the dazzle or elgato.
Oh geez please don't recommend these two to people
Dazzle is just trash quality and has audio issues, and Elgato (I'm assuming you're talking about the Elgato HD?) has that audio delay issue which is just something that absolutely should not be present in a supposed "high-quality" and fairly expensive device.
The GV-USB2 should be the go to starting/budget capture device. It's cheap, it's decent quality, and most importantly, it just works without any glaring issues.
There's also a million copies of it which can be had for cheaper but many of them have issues, so it's not worth it.
> Bit rate I use is 2500
This is fine for streaming but if you're local recording I hope you record at a higher quality.
I can't recommend the ioData GV-USB2 enough. It plays really nicely with OBS and a lot of other software. The driver installer is in Japanese, but there are guides and installation is really quick and easy. You'll need some sort of splitter cables or Y-splitters to connect your N64 to both a television and the capture card, but that should only run you around $15 extra at the most.
Oh. The cable doesnt have to be expensive or fancy. I have a dual monitor setup and I bought one of these cheapos from amazon. It works great.
Just make sure you monitor takes display port and your gpu has display port. Your monitor MAY take mini display port which is a smaller version but again you can easily find a mini display port cable on amazon for $10 or so if you need it.
Do not buy a monster cable or any expensive cable. They are disgustingly deceptive in their marketing info and are overcharging for a cable that costs them less than a dollar to make.
I have that same HDD, make sure you get a USB Y cable to help power it from 2 ports.
This is the HDD that I have been using for 9 months without issue. With this y cable. Works perfect.
Sure, this one. I needed 4 sets to get enough connectors for all my drives. Take the back cover off of the connector, its just clipped on. Pull the wire up from both sides to keep the metal connector in place. Repeat for all the connectors. Then put your drives in your caddy or whatever you're using, put the empty connectors on the drives, then run your new wire across all of them for perfect spacing. I used new 18ga wire, but you could reuse the old too. Skip the wire for the 3.3v line, then get a flathead screwdriver out and push the wire into the connectors. Do the same for the female connector with however much spacing you want, then just put the back covers back on and you're all set.
All in all I think it took me an hour or so to do my 3 caddies. Once you figure out how to do it it goes pretty quick. Super easy as well, just make sure to double check you have the female connector the right direction so you're not reversing the pins power and killing your drives.
That'll work fine. Brands don't matter much - they're all going to be a big step up.
For installation you'll need a small (P1) phillips screw driver, and a Torx T6 driver. I'd also recommend a can of Compressed Air Duster - if you're in there, clean it up. Any semi-good multi-bit precision screw driver set will have both. If you want to keep your data, you'll also want to have a USB SATA cable (something like this: https://www.amazon.co.uk/Sabrent-2-5-Inch-Adapter-Optimized-EC-SSHD-USB-3-0-SSD-SATA-2-5/dp/B011M8YACM/ref=pd_sbs_23_3/258-6658474-5826456?_encoding=UTF8&pd_rd_i=B011M8YACM&pd_rd_r=bb016fd2-3304-11e9-88d3-9bfb40e6fdf8&pd_rd_w=OEqZv&pd_rd_wg=5R3O5&pf_rd_p=18edf98b-139a-41ee-bb40-d725dd59d1d3&pf_rd_r=HSN8B74MBPD7Z1J2SCSJ&psc=1&refRID=HSN8B74MBPD7Z1J2SCSJ) which will let you migrate your data back after you install your new drive.
On a clean surface shut down the machine and flip it over, undoing the 8 screws on the bottom (3 will be longer, and 5 will be short) on the bottom case. Should just pop off then. On the right-hand side of the device closest to you is the battery - a short cable with a black plastic cap on the top right is the battery connector. Disconnect the battery. (Not absolutely required, but safer).
Once open, give the inside a dusting, then look for the hard drive in the lower left hand corner. Right above it will be a small plastic holding bar, held in with two locking Phillips screws. Remove them and the bar and set aside.
Slide the drive out of the IR bracket on the opposite side and disconnect from the Hard Drive Flex SATA Cable. Be careful - break this cable, and you're adding another 25$ cable to your repair.
Remove the 4 T6 Torx screws from the original drive and put them into the matching holes on your new drive. Attach to the flex cable and reseat into the IR bracket and settle in. Replace the holding bar and screw it back in, making sure it's secure. Reconnect the battery.
Replace the bottom case and replace the screws. The 3 long ones are on the top right as it's sitting in front of you. The short screws you might need to angle slightly - they should sit flush.
If you have an OS install disk you're good - if not, reboot holding Command and R to get to Internet Recovery to install a fresh copy of mOS. It will let you connect to wifi (or auto-connect to your Wired network if you have an ethernet connection). When it boots (it will take a while, it's downloading most of an OS) open Disk Utility, format your new SSD (choose Mac OS Extended Journaled for the format) and you'l be able to then install mac OS.
Once installed, if you have a SATA cable you should then be able to go into macOS setup and use Migration assistant to copy your data - if it gives an error saying it was created on a newer version of macOS, you can back to the point, create a temporary user called Administrator or Update or something like that, then update your system. With a Mid-2012 with an SSD there's no reason not to be on 10.14 Mojave, so create a temporary user, update your system using the App Store to Mojave, and then you can go into Migration Assistant again (it's in the Applications/Utilities folder).
I hope this helps you out!
You can definitely stick with the Fractal series. I did because I couldn't have a loud, unsightly machine setup anywhere in my home. I have my main system w/ 10 Drives + 2 SSDs + 3 NVME drives in an R6. That has a DAS connected with 19 drives inside an R5; 8 stock bays + 3 in 2x5.25 bay adapter + extra 3 drive cage + extra 5 drive cage.
As you are in Europe, you might not even have to pay crazy shipping charges to buy spare drive cages from https://www.fractal-design-shop.de/Define-R5_1. In the US I had to source the extra drive cages from r/hardwareswap but that proved to be easier than I expected. Here is a pic I took before I added the 2nd 5-bay drive cage: https://imgur.com/a/TWL8IB1
Edit: Request for more info...
I have not done a build log as I am not yet "finished" with the build, but it looks like there is sufficient demand for parts info so here it goes:
I have an R6 for my main NAS server loaded with the motherboard, 10 3.5 drives and one SSD. The R5 has two extra drive cages (3 + 5) as well a 2x5.25-to-3x3.5 bay adapter.
The expansion cards I use are:
Additional parts I used:
More inspiration can be found here: https://www.serverbuilds.net/16-bay-das
Warning: wall of text ahead. I'm going to recycle an older comment and make it more specific to your post.
It kind of depends. What CPU and GPU do/will you have? Do you have enough room to swing your arms while standing stationary? Do you like simulations, such as racing games or flight/space sims? These actually have an impact on the best headset (HMD) for you. I own the Vive (non-Pro), Rift, and Samsung Odyssey so my comments are based on use of all three.
Oculus Rift:
Lighter and easier to deal with. Has built-in audio. Some really nice platform exclusives, though there is a way to play those on the Vive. (More on that shortly.) Cheaper than the Vive, and cheapest option in general other than some Windows Mixed Reality HMDs that you should probably avoid. Tracking is, in my opinion, a little inferior to the Rift, even if you get a 3rd sensor. However, you can "fake it 'til you make it" on the Rift with only two sensors by mounting them in opposite corners of your play area. The Rift requires at least 3 USB 3 ports, or 4 if you add a 3rd sensor, so that's a lot of requyired ports. Seated/standing experiences work slightly better than roomscale, though this is something they've overcome with time. Games/apps purchased through the Oculus Store won't work on another HMD (barring 3rd party hacks/apps), limiting your future hardware upgrade options so buy any non-Oculus exclusives through the Steam store. Touch controllers are the current king for controllers, but Knuckle controllers for Vive/SteamVR are pending. (More on that shortly.) MUCH more pronounced "god rays" than the Rift. The business practices and politics of Facebook/Oculus are questionable, if you care about that sort of thing. Customer service is ticket-based only and there's no option for phone-based support.
HTC Vive:
The regular Vive is $100 outside your price point. The Vive Pro is more than double so I won't go into it much here. The Vive has significantly better tracking than the Rift unless you get at least a 3rd sensor, and even then there are sometimes issues. No built-in audio on the regular Vive but this is resolved with the Deluxe Audio Strap, albeit for $100 more. The Vive offers a better Roomscale experience, in my opinion. Games are purchased through Steam, which means you can take advantage of Steam sales, buy games at a discount (sometimes 80-90% off!) from third-party sites like Humble Bundle, Green Man Gaming, etc. Note, however, that the Rift is compatible with most VR games on Steam, too. You can also play Rift exclusives using free, third-party software called ReVive, but that this is not officially supported and YMMV. Not every game works. (Essentially, it tricks Rift titles into thinking a Rift is connected, and remaps the buttons to the Vive controller. However, since there are differences between the controller control types, this isn't always perfect.) Controllers are meh but work fine; just not as intuitive or comfortable as the Rift's. When (might be a while) the Knuckles controllers finally come out, they'll probably be the best. The Vive is more glasses-friendly but those who are just nearsighted won't necessarily need to wear glasses at all. There's a new wireless adapter that's nice but only applies if you're driving it with a desktop PC because it uses a PCIe card rather than USB. For non-wireless, however, one nice thing about the Vive is that the HMD only uses one USB 3 and one HDMI, and that's it. The Lighthouses (base stations) only need power and don't require USB. HTC support is both phone and ticket but is terrible either way. Some people have resorted to public shaming via YouTube/social media. YMMV.
Samsung Odyssey (WMR):
Higher resolution display, on par with the Vive Pro, which equates to a much less pronounced "screen door effect" (seeing the gridlines between pixels) than other HMDs. This is very nice for more detailed games like racing games or flight/space sims where you have to read a lot of small dials or text. Significantly lesser support for games and experiences. That said, just because an app doesn't explicitly state it works with WMR doesn't mean it won't work... but it might not. Controllers are pretty bad compared to the others. Tracking is also worse (uses inside-out tracking, so no sensors), but still significantly better than I thought it would be. This won't matter much if at all for seated or standing experiences; just for roomscale. The benefit is that you can do VR on the go with a gaming laptop. (At least a 1070 Max Q, though a full 1070 or 1080 is recommended.) The cable is significantly shorter than the others so, realistically, it's just a seated/standing experience. Roomscale is technically possible but severely limited. Also, there are specific cases (for example: archery games) where the controllers will end up out of view of the HMD's cameras, which will break tracking. Samsung's phone-based support is usually pretty decent, though I haven't needed it for the HMD yet.
Other Windows Mixed Reality HMDs:
The Lenovo Explorer gets some good reviews and sometimes goes on sale for as little as $170 with controllers. (Note: it can be found cheaper without controllers but you need controllers for most VR experiences, so...) It's important to note that the Lenovo Explorer (and all other WMR HMDs other than the the Samsung Odyssey) lacks IPD adjustment. IPD stands for interpupilary distance, which is the distance between your eyes. Everyone's eyes are a different distance apart but most WMR manufacturers didn't include this feature to keep costs down. However, using an HMD without the right IPD can cause nausea, blurriness, and headaches and can ruin your VR experience. I'd strongly recommend going with one that does. I haven't generally heard good things about any of the other WMR HMDs other than the Samsung Odyssey or the Lenovo Explorer. The others are relatively cheap but lack features, perform poorly, or both.
A note about VR graphics:
It really depends on the game. To avoid nausea, VR generally has to run at about 90 Hz, which can necessitate less comprehensive textures. However, people have done absolutely amazing things with VR to the point that you simply don't notice. A prime example of this is Lone Echo (Oculus only). The visuals are stunning, though I'd be remiss if I didn't mention the incredible story, method of teaching game mechanics, and the pure immersive feeling they pull off. Lone Echo is VR done right, and it feels like an AAA title. The Climb is another example of incredible visuals and reasonable immersion. That's the game currently making the rounds (again) of Reddit via this GIF. Skyrim VR is another example of impressive visuals in VR. Skyrim is somewhat dated, but yes; those incredible photorealistic immersion mods from desktop Skyrim work in VR and you can totally play Skyrim VR seated. All of that said... you are looking at a 1080p monitor magnified by relatively cheap optics no matter which rout you go. It's like looking at 1080p on a 70" screen from <4 feet away. You are going to notice the pixels, but you're also going to forget about it pretty quickly as you get distracted by the incredible experiences and other visuals. The only exception to this will be games with lots of detail like flight and space sims. Unfortunately, games like that really need higher res than VR can realistically provide right now. This may change with 20-series GPUs. For everything else, you'll probably mostly forget about the issue.
Roomscale:
Your roomscale abilities are going to be hampered by your small play area. Generally, the recommended minimum area is roughly 2x2.5 meters, if I remember correctly. Some roomscale games will refuse to launch with such a small area marked off. Others will launch, but you'll be unable to reach some things. Your play area will probably just barely suffice but you might need to "cheat" and mark off a slightly larger are than you actually have. The Vive and Rift both do Roomscale and seated/standing VR. WMR only does seated/standing VR reasonably well and is terrible at roomscale (due to the restricted cable length, not to mention poorer tracking) whenever you are able to make more room for it, and the controllers are much worse.
Cable lengths:
All VR HMD cables are a bit shorter than they could be. You can buy some extension cables, but some work and some don't... sometimes with no explicable reason. I've found that this HDMI cable and this USB extension cable work to extend the HDM for both the Vive and the Rift, and this USB extension cable works to extend the Rift cameras. If you decide to get both a Vive and a Rift, the extension cables I linked for the HMDs are able to go to the Vive's breakout box and then either the Vive or Rift can plug into that with success. The Samsung Odyssey does NOT work when plugged into the Vive's breakout box but I haven't yet tested the extension cables so it might work if the breakout box isn't present.
TL;DR:
At this point, my recommendation for first-time VR on a budget is the Oculus Rift. If you know you'll get into/stick with VR and can afford the Vive (so long as you can also afford the Delux Audio Strap), I'd recommend the Vive. The Samsung Odyssee is also a decent solution but at its price point I'd generally recommend the others unless the majority of your usage will be in highly-detailed simulators or similar games.
Sure!
I'm a touch typist, and I really enjoy the feedback of the old mechanical keyboards. This one is a 1984 IBM Model M that I tracked down on eBay a few years ago, and is a bit odd because it has combination English and Cyrillic keycaps. It's built like a tank - I've dropped a monitor on it by accident with the only damage being a popped keycap, which snapped right back into place.
This Model M is a 6-pin ps/2 keyboard, and I use this adapter to connect it to my computer. Most ps/2 to USB adapters are simple pass-throughs for the wires, and modern computers can't really make sense of that. This one has an integrated circuit to convert the ps/2 signal so the computer will recognize it as a standard USB keyboard.
The Blue Cube works perfectly for all of my Model Ms. It will also work natively if your motherboard has a PS/2 port.
Just a side question, if you shake it around, does it sound like there's anything loose on the inside?
I hate viewing amazon mobile links on the desktop, the page is so blank and the pictures are uselessly small. Heres your list with normal links:
Adapters:
As others noted, yes, a relatively easy thing normally. There are a few possible difficulties however.
Low cost machines from Dell. HP, etc. tend to not anticipate an end user wanting to upgrade so the machine has just what it needs, nothing more. Sold with one drive? Then no room to mount a second drive, no additional power connectors for a second drive.
So, does the new machine have an open cage to mount the drive in? Does it have the needed SATA power connection and is it near where you'll mount the drive?
Additionally, when the machine boots will it see the OS on old drive and try to boot from it (which will fail)?
All of these issues can be bypassed by using a USB adapter such as this one on Amazon: [Vantec USB adapter](https://www.amazon.com/Vantec-CB-ISATAU2-Supports-2-5-Inch-5-25-Inch/dp/B000J01I1G/ref=sr_1_2?
ie=UTF8&qid=1502495463&sr=8-2&keywords=usb%2Bdrive%2Badapter&th=1) or, if you're going to keep it plugged in, a dock like this one: USB Docking Station.
With either of those there's no need to open the machine, just connect via USB.
Remember also that old machine is most certainly recoverable. If nothing else a fresh Win 10 install will have it working unless, unlikely but possible, you actually caused physical damage of some sort to the motherboard. If you want to get it running again post here and we can work on it.
I use this Cable Matters USB-C to 4K HDMI hub - https://www.amazon.ca/dp/B01M0K0DL2
This AUKEY USB-C to HDMI Cable - https://www.amazon.ca/dp/B06XW5JGSN
This nonda USB-C to USB 3.0 Mini adapter - https://www.amazon.ca/dp/B015Z7XE0A
This 8Bitdo Zero Wireless Gamepad - https://www.amazon.ca/dp/B0185M7EVM
Along with a Logitech Bluetooth keyboard and mouse and an Xbox One S Bluetooth controller.
You can get a single cable that is dvi to HDMI. No need for an adapter.
AmazonBasics HL-007347 HDMI Input to DVI Output Adapter Cable - 6 Feet https://www.amazon.com/dp/B014I8UQJY/ref=cm_sw_r_cp_apa_i_HdUZCb09VYV5Y
https://www.amazon.com/Benfei-Bidirectional-Female-Adapter-Gold-Plated/dp/B07CXY79KR/ref=sr_1_1_sspa?keywords=hdmi+to+dvi-d+cable&amp;qid=1551277579&amp;s=gateway&amp;sr=8-1-spons&amp;psc=1
or
https://www.amazon.com/AmazonBasics-Input-Output-Adapter-Cable/dp/B014I8UQJY/ref=sr_1_3?keywords=hdmi+to+dvi-d+cable&amp;qid=1551277579&amp;s=gateway&amp;sr=8-3
if it's USB-c I believe you can just use a USB-C to USB adapter
Something like this would do the trick.
nonda USB Type C to USB 3.0 Adapter Aluminum with Indicator LED for Macbook Pro 2017/2016, MacBook 12-inch and other Type-C Devices (Space Gray) https://www.amazon.com/dp/B015Z7XE0A/ref=cm_sw_r_cp_api_.9QTBb1F54EFE
Well in that case you might want to have a look at this cable on Amazon. The design is, as far as I can see, 100% identical to yours. You might want to have a lawyer look at that.
For what it's worth I have one of each and for me the Cablecreation one is currently proving more reliable than the Tether Tools one so if it's an imitation they haven't done a terrible job.
Lots have used them and reported working on here:
https://docs.google.com/spreadsheets/d/1pjMerZPmJgkqwMKeYzvy4yGzWu2bu_1T_6m3nNmJkBU/edit#gid=0
mine will be delivered today (I'll be testing it tonight), I will report back once I find out if it works or not.
These are the cables I purchased, both are confirmed to be working from others, if it works I will have a total of 26 feet for my Quest to PC setup. I will be testing them in about 5 hours from now:
Cable (10 ft version, which is sold out): https://www.amazon.com/dp/B01MZIPYPY/
Extension: https://www.amazon.com/gp/product/B0179MXKU8
&#x200B;
Edit: these both worked great for Link on the quest. I now have a 26 ft setup for only $24 total! The Anker cable even came with a Velcro cable tie i'm using to secure the cable to the headstrap so it doesn't yank out of the USB port on the Quest while playing a game.
Just remember to buy SFF-8087 to SATA Forward Breakout cables, not Reverse breakout.
https://www.amazon.com/Cable-Matters-Internal-SFF-8087-Breakout/dp/B012BPLYJC/ref=sr_1_3?keywords=sas+to+sata&qid=1556200941&s=gateway&sr=8-3
Few useful links to get you started.
Oculus Rift Room Scale Setup Guide
List of recommended cable extensions
I'm using 3 Sensor setup in L configurations with CableCreation CD0034 and Inateck Superspeed 4 Ports PCI-E to USB 3.0 Expansion Card. My sensors are mounted about 10 inches and 40 degrees away from the ceiling. Perfect tracking in the play area. Good tracking out of usual play area, when in bed playing seated games in view of only two sensors which are 12 to 15 feet away.
I never thought cable quality was a thing but purchasing this wire made me understand what a high-quality cable is like. It fits firm in my phone, and it has great velcro straps to keep them organized!
Probably not. A-C is typically much safer because the A side of the port doesn't deliver nearly the power that C can. That said, a bad cable could still do damage in theory.
Grab one of these and you should be set.
Anker makes good ones for a good price. I have this one:https://www.amazon.com/gp/aw/d/B01A6F3WHG/ref=mp_s_a_1_5?ie=UTF8&amp;qid=1512071781&amp;sr=8-5&amp;pi=AC_SX236_SY340_FMwebp_QL65&amp;keywords=usb+c+to+usb+3.0&amp;dpPl=1&amp;dpID=31vbRV42GGL&amp;ref=plSrch
There's a good chance the cable you're using might not be sufficient for Android Auto. Try another cable if you have one available. I recently bought a new one and can confirm this one works perfectly.
https://www.amazon.com/gp/product/B01A6F3WHG/
GVUSB2 is generally considered the best price to quality ratio.
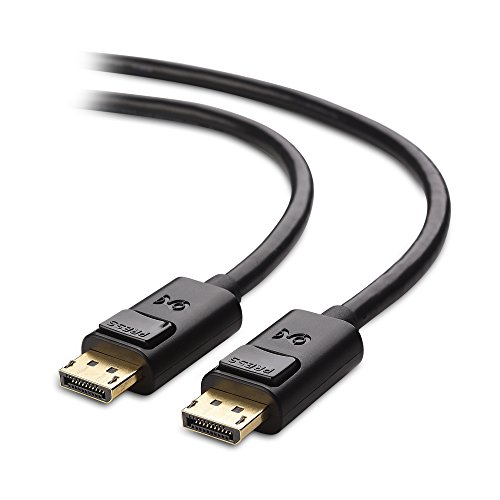
[this] (https://www.amazon.com/Cable-Matters-Gold-Plated-DisplayPort/dp/B005H3Q59U) is what you want
https://www.amazon.com/dp/B0086OGN9E/ref=cm_sw_em_r_mt_dp_U_MSWBCbH62Y3RM
I got that it's been working great on my shucked easystores.
Have you thought about using a pci-e riser to mount the card horizontally?
http://www.amazon.com/PCI-E-Express-Extender-Flexible-Extension/dp/B008BZBFTG/ref=sr_1_1?ie=UTF8&amp;qid=1405793995&amp;sr=8-1&amp;keywords=pci+extension+cable
If you mean it has the large 5 pin DIN connector and not the ps/2... you will need a couple adapters.
First is the AT (DIN) to ps/2 adapter. Now you can use a blue cube to convert it to usb.
You might be able to use one of the cheap ps/2 to usb adapters but they don't work for all keyboards when the bluecube seems to work on everything..
This is the blue cube in case you didn't know. http://www.amazon.com/PS2-Keyboard-To-USB-Adapter/dp/B000BSJFJS
Fujitsu Leaf Springs; absolutely lovely linear switches and THICC doubleshot caps.
To use it on a modern computer is quite simple:
daisy chain it together and it should work, unless the keyboard is using some weird terminal language.
You can get a DIN to PS/2 adapter (they are the same electrically) and then use a PS/2 to USB adapter. The Blue Cube is a good bet for compatibility with old AT boards (specifically, the Model M works well with this adapter).
5 pin DIN.
You need one of these: https://www.amazon.com/kenable-AT-Keyboard-PS-Adapter/dp/B003OSTBZA
and one of these: https://www.amazon.com/SANOXY-SANOXY_USB-PS2-PS2-Keyboard-Adapter/dp/B000BSJFJS
Trying again. My previous attempt was removed by mods, not sure which link was in violation but I changed one of them:
Wow. Good going.
How about:
BTW I have NO IDEA if that would work. But in theory you would think it would.
Power cable into the adapter at #1 above is separate, but seems like that would be a legacy standard.
Also, there is this:
https://www.mouser.com/ProductDetail/Olimex-Ltd/ARM-JTAG-20-10?qs=DUTFWDROaMbVQp3WoAdijQ%3D%3D&gclid=CjwKCAjwibzsBRAMEiwA1pHZrlxfq0xcms8HD_Vkh7lJCE2a9WGWQwkaVUBkFDo8g9iZXoZaFDNKKBoCQF0QAvD_BwE
Datasheet PDF on that page is super-vague, so very much in the theme of 1995 All-Over-Again.
If you get both 3.5" drives up and running, you should stripe them together into a RAID 0 !!!
I've been using this thing forever. I like your contraption as well. Installing mine upside-down results in frying your flash-drive. heh
I put together a machine just a couple of months ago to replace my little consumer-grade router at home. I look at all of the options (the various ARM families, Atom, etc.) and wound up deciding that the best option was to go for the low end of the current generation of Intel x86 parts.
Here's what I threw together:
| Category | Part Name | Price Paid | Current Price |
|---------------|-----------------|-----------------|-----------------------|
| Motherboard | GA-H61M-HD2 | $49.99 | $54.99 |
| CPU | Celeron G1610 | $42.99 | $42.99 |
| Memory | 2x2GiB DDR3-1333 DIMMs | $30.78 | -- |
| Power Supply | Solid Gear Mini ITX 180W PSU | $26.78 | $26.78 |
At this point you've spent $150.54 and you have a small (9" by 9" or so) system (minus a hard drive) that will blow any of the more exotic options out of the water... and that runs your favorite OS just fine. It's got a gigabit network adapter onboard, as well as onboard video, which is at least a nice fallback if you have any trouble getting it set up as a server.
I spent $3.77 on a motherboard-header-to-female-USB adapter and $6.99 on a well-reviewed 8 GiB thumb drive and called it quits, since my usage (as a router) doesn't really need any storage.
Then I splurged for a passive CPU cooler; it's made by Supermicro for their 1U servers, installed very easily, and was all of $24.23. Now the only fan around is the tiny one in the PSU!
I added some of these network cards which add two gigabit ports for $30 each, but since it has the onboard gigabit port, you don't need to do that unless you need more than one port.
I had intended to put it in one of these cases, which comes with a questionable PSU, but it showed up broken and I never got around to re-ordering. It sits very happily on a little cardboard tray without a case. (Also, even the smallest cases are much larger than just the board, since they assume you might want to mount hard drives or optical drives.) One of these days I'll bust out the woodworking tools and build a teeny little case for it.
As a tiny little finishing touch, I spent $2 or $3 on a power button (and reset button, power LED, and hard drive LED; they came as a set) from someone on eBay.
By my count, my configuration was a total of $150.54 + $38.00 = $188.54 before the extra network adapters. If you like, add about $20 (for a total of ~$205) to remove the PSU and add a cheap case that comes with a PSU. (You can also skip buying the buttons and LEDs if you do this.)
I don't know how much power the machine itself uses, but the whole power strip (with Roku, Raspberry Pi, DSL gateway, a dual-band wireless access point, and probably some other things) uses about 100 watts.
I've been using devices exactly like that, with sata in addition, to back up data for customers for over 7 years now, with no problems.
I wouldn't worry about it.... the ones I use are from vantec, and come with a power supply that gets very heavy use... I think we have 4 of these in my shop right now, I've only ever seen one die, and never seen one cause problems.
I highly recommend that particular brand, and that particular device; don't settle for cheap imitations.
Something like this is super useful. I've gotten data off a couple drives with these.
http://www.amazon.com/Vantec-CB-ISATAU2-Supports-2-5-Inch-5-25-Inch/dp/B000J01I1G/
http://www.amazon.com/Vantec-CB-ISATAU2-Supports-2-5-Inch-5-25-Inch/dp/B000J01I1G/ref=sr_1_4?ie=UTF8&amp;qid=1418483541&amp;sr=8-4&amp;keywords=hd+usb+adaptador
look around Amazon there are more like it.
I am not sure if this will work with a TV or not
Trying to repair it as an external drive is likely to fail. You are far better off getting something like this.
http://www.amazon.com/C2G-Cables-30504-Serial-Adapter/dp/B000UO6C5S
or
http://www.amazon.com/Drive-Adapter-Converter-Optical-External/dp/B001OORMVQ/
Or you can just open up your computer (if it is a tower, not a laptop) and install it inside.
Find an older pc, or get an adapter this thing doesn't come out of the drawer much. But it's damn handy when it does.
Get the GV-USB2. Its the go-to for speedrunners and I've heard great things. Probably the best bang for your buck.
I do not recommend Easycap's solely off the fact it is impossible to find a "real" one. Almost every one of them on amazon now are fake Easycap's. With them being fake half the time you could get one that does not work or that just does a horrible job and then randomly stops working.
While it may be a little bit more I highly recommend the GV-USB2 It is $40 which is about the pricerange for any legit capture card. Usually if they are under $40 you tend to get fake ones.
Here is some sample gameplay from my PS2 : https://www.youtube.com/watch?v=Ve-VOWIny8U
It is in a dark section of the game so you can see how darks handle. Do not judge me for my bad gameplay :)
If you get a USD to SATA adapter you can clone/transfer files directly from the HDD to SSD.
Buy (or borrow) a USB to SATA cable https://www.amazon.com/StarTech-com-SATA-Drive-Adapter-Cable/dp/B00HJZJI84
This will allow access to the harddrive if the data is not encrypted.
Best of luck.
https://www.amazon.com/dp/B00HJZJI84/ref=cm_sw_r_cp_api_a3LSAbPG98N78
If you don’t have an Amazon Prime account, do yourself a favor and get one.
It's super easy. Maybe 5 minutes to get the screws out, 5 minutes to put the drive in, 5 minutes to put the screws back. Most of the time will just be cloning your HDD to the SSD, or copying your data over if you want a clean install of macOS.
Pop the bottom off, unscrew some bracket, pull a cable off. Move the screw/pegs from the HDD to the SSD, then pop it in.
iFixit Guide:
https://www.ifixit.com/Guide/MacBook+Pro+15-Inch+Unibody+Mid+2009+Hard+Drive+Replacement/1715
You can skip the part about removing the battery. It isn't necessary to pull the HDD. Just make sure to lift the hard drive slowly so that you don't pull its cable.
I recommend the Samsung EVO, 250GB, 500GB, etc. And don't forget to enable TRIM.
You can use the built-in Disk Utility to clone ("image") your HDD to the SSD. You just need a USB adapter for that.
250 GB SSD, $93:
https://www.amazon.com/dp/B00OAJ412U/
Port-powered SATA/USB (should work fine for external SSDs), $12.50:
https://www.amazon.com/dp/B00HJZJI84/
500 GB SSD, $170:
https://www.amazon.com/dp/B00OBRE5UE/
Powered SATA/USB adapter (may be needed for some external HDDs), $22:
https://www.amazon.com/dp/B005B3VO24/
HDDs are not hard to pull from a desktop and you can get a cheap USB adapter to access it on a new computer. Youtube should have plenty of directions.
https://smile.amazon.com/StarTech-SATA-Drive-Adapter-Cable/dp/B00HJZJI84/ref=sr_1_1?ie=UTF8&amp;qid=1504234904&amp;sr=8-1-spons&amp;keywords=sata+to+usb+adapter&amp;psc=1
Assuming that it's a normal 2.5in HDD, you should just be able to remove it and connect it to another device. You can either connect it internally to another PC or you could get a HDD to usb adapter like this You should also be able to find a YouTube video on how to remove the HDD from your specific laptop, if you're unsure.
I'm glad you asked!
I could list more, but I think that's a pretty good start.
PCIe Riser
I have the Odyssey plus and had this issue. This fixed it:
Hub for power: https://www.amazon.com/gp/product/B00TPMEOYM/ref=ppx_yo_dt_b_search_asin_title?ie=UTF8&psc=1 and
Data repeater (active cable): https://www.amazon.com/gp/product/B00DMFB5OK/ref=ppx_yo_dt_b_search_asin_title?ie=UTF8&psc=1
Active c goes to computer USB port; then use the hub; connect your headset to a hub port
You don't need to spend that much. This Sandisk 240GB model along with this SATA III to USB 3 cable will do just as well for less money, but it won't look as pretty lol.
I would think so, I know /u/Cybereality (Oculus staff) listed various successful cable extenders [here] (https://forums.oculus.com/community/discussion/30513/yes-extension-cables-do-work-w-cv1/p1) I personally got active extenders [here] (https://www.amazon.co.uk/gp/product/B00MPMFKSI/ref=oh_aui_detailpage_o00_s00?ie=UTF8&amp;psc=1) or in the USA I think people were having success with [this one] (http://www.amazon.com/Cable-Matters-SuperSpeed-Female-Extension/dp/B00DMFB5OK/ref=sr_1_1?ie=UTF8&amp;qid=1462293641&amp;sr=8-1&amp;keywords=active+extender+usb+3.0)
Get powered USB extension cables.
They have an amplifier build in.
Used them in other applications up to 15m.
http://www.amazon.com/Cable-Matters-SuperSpeed-Female-Extension/dp/B00DMFB5OK/ref=sr_1_1?ie=UTF8&amp;qid=1462274816&amp;sr=8-1&amp;keywords=usb+3+cable+active
http://www.amazon.com/CableCreation-Active-Extension-Extender--Female/dp/B0179MXKU8/ref=sr_1_2?ie=UTF8&amp;qid=1462274816&amp;sr=8-2&amp;keywords=usb+3+cable+active
My mobile setup is as follows:
MSI GT73VR- nvidia 1070 – Samsung 960 pro’s – 32 gigabyte memory – processor under volted using Throttle top 850 to reduce heat.
Laptop stand for airflow-
https://www.amazon.com/gp/product/B00VIZ60QY/ref=oh_aui_detailpage_o03_s00?ie=UTF8&amp;psc=1
Powered USB-c hub-
https://www.amazon.com/gp/product/B013P0JU66/ref=oh_aui_detailpage_o04_s00?ie=UTF8&amp;psc=1
Display port to HDMI adapter (saves wear/tear on HDMI port) -
https://www.amazon.com/gp/product/B00PJ3LSIG/ref=oh_aui_detailpage_o02_s00?ie=UTF8&amp;psc=1
Extension cables 15' headset and 3rd sensor-
https://www.amazon.com/gp/product/B008D5EUD2/ref=oh_aui_detailpage_o01_s01?ie=UTF8&amp;psc=1
https://www.amazon.com/gp/product/B00DMFB5OK/ref=oh_aui_detailpage_o01_s01?ie=UTF8&amp;psc=1
Active HDMI repeater for headset-
https://www.amazon.com/gp/product/B01GHL72XS/ref=s9_acsd_hps_bw_c_x_1_w
Facial replacement-
https://www.amazon.com/gp/product/B01GHL72XS/ref=s9_acsd_hps_bw_c_x_1_w
Some items picked up over time. While at times I think a tower system would be great…. This allows me the flexibility to setup at other locations in / outside the home and still have normal laptop while not in VR.
No backup? How dead is the drive, it could be recoverable (or at least some of the data)
I'd suggest getting this SATA to USB 3.0 adapter and pick up/buy/torrent Wondershare Data Recovery
Best of luck, I'll miss your terrific gifs in the interim
(you never have to start from scratch -- use a USB-to-IDE/SATA cable and mount your dying drive like its external storage. Rescue documents from there.)
Apparently the spreadsheet has affiliate links in it and my previous post got removed, so here's hoping this one will stick.
Here's a spreadsheet with various accessories: https://docs.google.com/spreadsheets/d/1wJwqv3rTNmORXz-XJsQaXK1dl8I91V4-eP_sfNVNzbA/htmlview?usp=sharing&amp;sle=true
You can also test cables yourself with the following app by connecting your phone to a computer with the app open: https://www.apkmirror.com/apk/in-sight-labs/checkr/
I can personally recommend these: http://www.amazon.com/Anker-PowerLine-Resistor-Including-ChromeBook/dp/B01A6F3WHG/ref=sr_1_2?ie=UTF8&amp;qid=1462298101&amp;sr=8-2-spons&amp;keywords=Anker+USB-C&amp;psc=1 bought several, scattered them around the house and use them with different chargers.
No problem! There's been a lot of confusion around here and it would be a shame if someone's Switch blew out within the first week because of improper cables =(
The Amazon reviews also say that it was approved by Benson and that's really my only litmus test =P
> The Monitor has hdmi, its the big hdmi that looks like this:
> https://www.amazon.com/dp/B014I8UQJY?aaxitk=wm4DHPoK6Ch3i6FApZf6Bg&amp;pd_rd_i=B014I8UQJY&amp;pf_rd_m=ATVPDKIKX0DER&amp;pf_rd_p=54dc821a-0937-4e6f-9da9-f8dd5443145d&amp;pf_rd_s=desktop-sx-top-slot&amp;pf_rd_t=301&amp;pf_rd_i=hdmi+cord&amp;hsa_cr_id=9375033550001&amp;sb-ci-n=asinImage&amp;sb-ci-v=https%3A%2F%2Fimages-na.ssl-images-amazon.com%2Fimages%2FI%2F41xlr1IK3JL.jpg&amp;sb-ci-a=B014I8UQJY
That's not HDMI, that's DVI. I'd say that's your first problem.
Get an HDMI to DVI adapter. Problem solved.
Yeah, one of these (supported by
urtwn) in one of these. Not ideal, but hopefully temporary.Here’s what I settled on for my wife’s 2018 MBP:
I organized it all into a small zipper case for her. The only thing she’s used so far is the magnetic charging cable, which she absolutely loves. The other two will come in handy some day, but she mostly works in an environment where files are shared via Google Drive and things are printed wirelessly. She enjoys it so far, but her usage case may not be typical.
I used these for the USB (5m or ~16ft) works with both Rift and Sensor): https://www.amazon.com/CableCreation-Active-Extension-Extender-Female/dp/B0179MXKU8
And a passive 3m (~10ft) HDMI 2.0 extension: http://www.ebay.co.uk/itm/Microconnect-HDMI-M-F-3m-HDMI-Cables-HDMI-HDMI-Male-Female-Gold-Black/191955932795
They are connected to and work well with my ASUS Z97-K motherboard for the USB and a Sapphire R9 290X GPU (on of the Tri-X OC'd ones).
Ymmv.
Might be a difference in hardware, but I'm actually floored at how little latency there is. Any latency I felt I could effortlessly compensate for. Via Link, I played my usual Beat Saber Expert + maps on Steam VR. It felt damn near identical to my CV1 (tri-sensor setup) allowing me to get my usual scores. What really surprised me was the lack of occasional stuttering in Beat Saber I normally got from my CV1 setup. I can only describe what team Oculus has done as pure black magic! Like you said though, it's not on the level of an Index PCVR setup. But holy crap, at the price point and added portability, it's more than good enough for most!
For reference, my setup is: i5-3570K, GTX 1060 6GB, Inatek 4-port USB 3 PCI card, CableCreations USB 3 Active extension cable, and Anker 6ft USB C-to-3.0 cable. Might order the 10ft cable for more mobility.
It seems not all dvi to hdmi adapters will work, the cable matters works for some people at least. There is also the cable matter display port to hdmi adapter https://www.amazon.com/gp/product/B00K0UDYLM
You can also try use a HDMI repeater instead of extension https://www.amazon.com/dp/B01GHL72XS/
I personally just use the AmazonBasics hdmi on gtx780ti and usb extension connect to the Inateck Superspeed 4 Ports
https://www.amazon.com/gp/product/B00B6ZCNGM
https://www.amazon.com/gp/product/B01D5H91KE
https://www.amazon.com/gp/product/B00NH12O5I
I've had my AmazonBasics 6ft Cable since 2014. I also bought this AmazonBasics USB 3 9.8ft Extender Cable. So when I need it, I have 6 feet or 16 feet of reach. Really no wear and tear yet.
Sorry for pic quality! There's a light in the way XD. I used a 10ft cable extension, command strip hooks, zip ties, and a dog leash to make my Oculus cord retractable!
Purchased items(US):
Total: ~40$
I use a 320GB Western Digital hard drive that I salvaged from a TalkTalk YouView box. I use this Sabrent SATA to USB adapter that I got off Amazon (v.good quality). I think that this is the drive that WD use in their Passport as it runs off 5V 500mA (what USB supplys) and it is quite small. But the Pi supplys slightly less than 5V 500mA. I connect the drive to a powered USB hub (powered by this external power supply) connected to the Pi. I keep this plugged into my Pi 24/7 as I use a Pi instead of a desktop computer. I leave it in during boot and shutdown. It works well and I use it to store all of my data and I have set a folder on it as my Chromium downloads folder.
I think you had a faulty USB. Hope you didn't lose too much data.
Yep, if anything, just take out the battery and plug it in and see if it turns on.
Worst case scenario, you can just pull the hard drive and use this sata to USB adapter to get your files off and use it as an external drive. GL!
that's more work than the usb3.0-sata adapters, grabbed two of these on sale a while back for a few bucks each, life savers. https://www.amazon.com/Sabrent-2-5-Inch-Adapter-Optimized-EC-SSHD/dp/B011M8YACM/ref=sr_1_13?crid=2DLCJ2XTFADGR&keywords=sabrent+usb+3.0+to+sata%2Fide+hard+drive+adapter&qid=1568915797&s=gateway&smid=ATVPDKIKX0DER&sprefix=sabrent+usb%2Caps%2C173&sr=8-13
Use a cable like this to plug your hard drive into another working computer and transfer the stuff out. Then you can wipe it and reinstall the fresh OS once you have it plugged it into your new motherboard.
I use an older Samsung Evo SSD with a plain SATA-USB adapter. No case. The adapter has an LED.
Sabrent USB 3.0 to SSD / 2.5-Inch... https://www.amazon.com/dp/B011M8YACM?ref=ppx_pop_mob_ap_share
That 9211 is like the gold standard. You shouldn’t have to flash to IT mode, but you do want to upgrade the firmware (which accomplishes the same thing). The real ones are trivial to flash, versus like an H200, so I wouldn’t sweat that.
If you want the “modern” version, the LSI-9207-8i has the most recent chipset.
You can get them new, and quite a bit cheaper, on eBay .
Then you just need a pair of breakout cables
My first reaction is, you have 760 gb of data that apparently... isn't backed up? Because if it was, you wouldn't be asking this question... so , that's something really you should deal with.
Second thought it a crossover cable will do exactly what you want to do, but what might be easier (and definitely faster) would be to purchase a sata toaster or at least a sata to usb cable, pull the drive from the old computer, connect by cable and copy the data over.
Edit -> something like this
https://www.amazon.com/StarTech-com-SATA-Drive-Adapter-Cable/dp/B00HJZJI84
Git is awesome, but switching to Linux is its own project. Limit your scope and focus on one thing.
I would strongly consider getting a new hard drive, like an SSD if you don't already have one.
Take out your old drive and install Linux fresh on the new one. Then access your old files from the old drive via a stata cable.
Invariably there will be stuff you forget, like you personal macro workbook in Excel, or that one folder that you put right on your c drive.
Your total investment will be less than $100 and you'll be a lot happier (and you can switch back if you have an unexpected problem, options are valuable!)
Stata cable example StarTech.com USB 3.0 to 2.5” SATA III Hard Drive Adapter Cable w/ UASP – SATA to USB 3.0 Converter for SSD/HDD - Hard Drive Adapter Cable
If you're encrypting your drives and even you can't pull the data if the drive is removed, you're not doing a good thing imo. The data should just be a SATA-to-USB cable and security key away.
Recently did this very thing on my wife's laptop.
This cable http://www.amazon.com/gp/product/B00HJZJI84?psc=1&amp;redirect=true&amp;ref_=oh_aui_detailpage_o04_s00, and a thumb drive with Clonezilla installed is all it took (http://clonezilla.org/). Took about 30 minutes to clone the drive, then physically swapped in the new SSD. 0 problems encountered.
There are plenty of youtube videos that will walk you through the clonezilla process step by step.
Sarcasm aside, you can buy microUSB male to USB female adapters on amazon for pretty cheap, I EDC carry 1 and have more on order. This allows you to plug a USB drive, wifi card, USB keyboard/mouse, etc into your phone or tablet.
These are the ones I use right now and I have these being delivered to me in a few days.
Inateck or the octopus one, they are adding network support in future so want more then one USB port
TUSITA Micro USB HUB Adaptor with Power, 3-Port Charging OTG Host Cable Cord Adapter for Raspberry Pi 2 3 Pi Zero Android Smart Phone Tablet Samsung Galaxy HTC Sony Google LG/Linux https://www.amazon.com/dp/B00LTHBCNM/ref=cm_sw_r_cp_api_i_1iUnDbT337521
Inateck Micro USB Card Reader Hub, USB OTG Adapter with SD/TF/MS/M2 Card Slot and 3 USB 2.0 Ports, HB3001G https://www.amazon.com/dp/B00OCBXIY8/ref=cm_sw_r_cp_api_i_hjUnDbR6HBKJ7
You can go the SD route and get a GV USB2, which is the best quality you'll get out of a SD capture card. This is the best choice.
For sub-$50 I like the GV-USB2. However, you'll need to purchase three RCA female-to-2-male splitters if you want audio and video to go to both the capture card and the TV (they're cheap though), and your computer will need a CD drive to install the capture card's drivers (unless you find them online, which is also a possibility).
Well you could but adaptors like that are directional. There is an active conversion chip in them that only works to convert one to the other.
So a DP -> HDMI cable can't be used for HDMI -> DP.
DP can also do passive conversion if it is a DP++ port (basically the GPU is outputting HDMI not DP to begin with then). Again those passive adaptors will really not work the opposite way.
So you could use what you have, a DP -> HDMI adaptor and then one of these to do HDMI -> DP on the other side. I think you will agree that it would be much simpler (not to mention better for the signal), and far cheaper, just to use a DisplayPort cable.
I get stuck on "Checking USB storage device..." when I try to format an HDD, even after purchasing a y cable. This has been a week-long saga getting this to work. Why is this so difficult?
I saw that the Seagate Expansion external drive was recommended by Nintendo, so I picked up a 500 gb. I saw someone else on a forum say it worked for them. However, my y-cable just came in and it's still not working. This is the y cable I bought: http://www.amazon.com/eForCity-dual-Micro-B-Cable-Black/dp/B005M0ICG2 I have a white 8 gb wii u if that matters.
I tried plugging it into my computer with 1 cable and it works fine, so it's not the drive. I made sure it wasn't partitioned out of the box. I have it plugged into the front two USB ports. What do I do? Did I waste $50? (I bought it on clearance at Target--I don't think I can return it).
Edit: Turns out I needed to use the back USB ports. Problem solved.
Get a couple of these and turn one sata power to four.
https://smile.amazon.com/StarTech-com-Power-Splitter-Adapter-PYO4SATA/dp/B0086OGN9E
In no circumstances should anyone use molex to sata use this instead.
Those look pretty molded to me too. I use these ones, myself:
https://www.amazon.com/StarTech-com-Power-Splitter-Adapter-PYO4SATA/dp/B0086OGN9E
The connector is upside-down, so it's a bit of a pain to use, but I'm only using 2 of the 4 slots at the moment.
https://www.amazon.com/Express-Riser-Extender-Flexible-Extension/dp/B008BZBFTG
Some cases come with them.
as long as he doesn't need his case to close, this'll let him plug it in: https://www.amazon.com/Express-Riser-Extender-Flexible-Extension/dp/B008BZBFTG
You might need an active adapter such as the blue cube.
An active adapter, like the blue cube.
Nice, congrats on the sweet attic find! PS/2 keyboards always require a reset after being plugged in/out. To avoid that, you can get what's commonly referred to as the blue cube PS/2 to USB adapter which will make your Model M behave as a modern USB keyboard. I hope you enjoy the board, it'd definitely a great first (and for some final) step into the world of mechanical keyboards!
I use them all the time. Works without issue.
https://smile.amazon.com/StarTech-Motherboard-4-Pin-Header-USBMBADAPT/dp/B000IV6S9S/ref=sr_1_3?ie=UTF8&amp;qid=1525708548&amp;sr=8-3&amp;keywords=usb+to+motherboard
Edit: derp 3.0 not 2.0
Yeah, just pull the hard drive, plug it into an external HD adapter (USB should work fine), put that into another computer, and you're golden.
edit: Something like this should work fine.
Or use something like this
The GV-USB2 is a relatively cheap but is considered to be better than the Dazzle DVC100. Downside is that the manual and software is in Japanese, but using the device is relatively straightforward and is supported by free capture tools such as Virtualdub and OBS.
If you do get this, to install the driver software, put the CD in your computer (you can also download the drivers from the manufacturer's website). Select the box to the right, then select the box with a 1 next to it.
The GV-USB2 is probably one of the best cheap cards out there. If you want an example of the quality, here's a recording from back when I was using it. I'm pretty sure it can look even better, as I was only using the RCA cables, and not the S-Video input. Just make sure you get a powered splitter like this or this (for S-video) so you can send the signal to both the TV and the recording device without lag.
Just make sure you set the device up properly and use some kind of deinterlacing. For ease of use I'd just recommend using the built in de-interlacing options in OBS.
Edit: If you're short on money and don't want to spend extra on a splitter for live capture, then you can just save your match replays using Legacy TE, and then record them through the recording device using your computer screen to navigate the menus. This requires extra work though, and it can be easy to forget to save your replays. I'd just recommend getting the capture device and the splitter so you can record it all in one go.
No, but you need two adapters:
If you really wanted to you could chop off the current plug and solder the leads into the BlueCube permanently, but I really don't see any benefit to doing this.
This is a pretty popular ps/2 to usb converter, if you don't mind having something like that at the back of your PC. It's possible to embed something similar inside the shell of the keyboard if you want to run a USB cable out of it and have it easily portable, but that's up to you.
Roommate here! It's PS/2. I ordered one of these (based on reviewers mentioning compatibility with the Model M). And yes, this keyboard is solid!
There are two PS/2 adapters that are confirmed to consistently work for the model m, because many don't:
This Belkin (which I have).
and the "Blue Cube."
Correct, you need to make sure it's an "active" adapter.
https://www.amazon.com/SANOXY-PS2-Keyboard-USB-Adapter/dp/B000BSJFJS
If your Model M has a PS/2 connector, you'll need a PS/2 to USB adapter. Many people like this one.
I use one similar to this.
I'm connecting mine to Linux machines, but it should work the same for your Mac.
The blue cube is probably your best bet, let me get a link.
Link:
SANOXY SANOXY_USB-PS2 PS2 Keyboard... https://www.amazon.com/dp/B000BSJFJS?ref=yo_pop_ma_swf
This one works well enough for me.
Rewiring won't work as it needs active conversion, USB and PS/2 are entirely different protocols.
Sure you can post on Keyboard forums and try and find the best $1.99 USB/PS/2 adapter but who has time for that.
Other Sources:
CyberGuys LINK (while there pick up the 6" USB extension cable LINK)
Ebay UK has usually at least one seller shipping WorldWide
This is the one tested by Clickykeyboards (see sidepanel) on 100's if not 1,000's of IBMs and other vintage keyboards. The OTHER alternative is a Belkin but you have to find a particular model number and it has a fairly useless mouse port.
From the WW SHopping Wiki lost by GH ಠ_ಠ
>[H="2"]PS/2 to USB Adapters[/H]
There are two that appear to be the most compatible and both share the same Cypress Semiconductor chip.
>Blue Cube - [URL="http://www.cyberguys.com/product-details/?productid=4850&amp;core_cross=SEARCH#page=page-1"]Cyberguys for$8.20[/URL] (get this [URL="http://www.cyberguys.com/product-details/?productid=4632&amp;core_cross=SEARCH#page=page-1"]extension dongle[/URL] while you are there). Canadians can buy from here: [URL="http://sewelldirect.com/Active-USB-to-PS2-Adapter.asp"]Sewell Direct for $11 including shipping[/URL].[URL="http://www.amazon.com/PS2-Keyboard-To-USB-Adapter/dp/B000BSJFJS/ref=sr_1_13?ie=UTF8&amp;qid=1286890114&amp;sr=8-13"]Amazon.[/URL] Ebay: UK Seller Cable_Star Ships Worldwide - - search for terms "USB A Male to PS/2 Female PS2 Active Keyboard Adapter".
Belkin Mouse and Keyboard F5U119-E - [URL="http://www.amazon.com/Belkin-F5U119--PS-USB-Adapter/dp/B0000A2QBI/ref=sr_1_1?ie=UTF8&amp;qid=1289780629&amp;sr=8-1"]Amazon[/URL]. Be sure to get the F5U119-E version. [URL="http://www.amazon.com/Belkin-USB-PS-2-Adapter/dp/B000ELSXFY/ref=dp_cp_ob_e_title_0"]Note that this version V1[/URL] has been [URL="http://geekhack.org/showwiki.php?title=PS2-to-USB+adapters&amp;viewfull=1&amp;page=16&amp;do=comments#post408346"]reported to have problems.[/URL]
Previous /r/mechanicalkeyboards/ toolkit items:
ITEM #6 - Foam Cleaning Swabs for cleaning between and under the keys. http://www.reddit.com/r/MechanicalKeyboards/comments/xcpvh/rmechanicalkeyboards_toolkit_item_6_want_to_clean/
ITEM #5 - IBM Model M socket driver. http://www.reddit.com/r/MechanicalKeyboards/comments/x0rpw/rmechanicalkeyboards_toolkit_item_5_someday_you/
ITEM #4 - Lube the stabilizers to fix that squeak because there is ALWAYS time for lube: http://www.reddit.com/r/MechanicalKeyboards/comments/wx9bv/rmechanicalkeyboards_toolkit_item_4_there_is/
ITEM #3 - clean your dirty keys with denture tabs:
http://www.reddit.com/r/MechanicalKeyboards/comments/wtvy2/the_mechanical_keyboard_modder_kit_item_3_denture/
ITEM #2: Contact Cleaner for that inevitable liquid spill:
http://www.reddit.com/r/MechanicalKeyboards/comments/wra4r/the_mechanical_keyboard_modder_toolkit_part_two/
ITEM #1: A key puller for cleaning and putting some spiffy new keys on your new keyboard:
http://www.reddit.com/r/MechanicalKeyboards/comments/wr9uy/the_mechanical_keyboard_modder_toolkit_part_one/
This perhaps?
I just bought a PS/2 to USB adapter for my windows 95 PC compaq keyboard.
http://www.amazon.com/Ziotek-PS2-Keyboard-USB-Adapter/dp/B000BSJFJS/ref=pd_sim_e_5?ie=UTF8&amp;refRID=1GCM69CV4BD43QVSW6QT
The key part being active.
I have used this one on a Dell AT101W with success.
https://www.amazon.com/gp/aw/d/B000BSJFJS/
It's really a matter of personal preference, tbh, so if you like alps, keep them. And the lack of a PS/2 port could be easily remedied with a [converter] ( http://www.amazon.com/gp/aw/d/B000BSJFJS/ref=mp_s_a_1_2?qid=1425989165&amp;sr=8-2&amp;keywords=blue+cube). I kept my Focus 2K1 in hopes of acquiring the coveted noodle cover someday, but I don't like the alps as much as some other boards. It's up to you, if you want to sell, /r/mechmarket can probably help.
You don't HAVE to have a gadget, or even an ETC device, with the nomad key dongle you can also output to sACN or Artnet. These nodes can be had for about half the price of the gadget II!
I also suggest doing what ETC does with their PUCK. They put the nomad key dongle inside the NCU to keep it from being lost or stolen. You can use something similar to this: https://www.amazon.com/StarTech-Motherboard-4-Pin-Header-USBMBADAPT/dp/B000IV6S9S.
As for the security of the USB port, moving the flash drive into the case can deter accidental or casual mischief.
If you have a spare USB header inside something like this lets you relocate the USB to inside.
After 2-3 years I have no problem using some ordinary SanDisk sticks. There is also a section in the FreeNAS manual for mirroring the boot device on 2x USB drives.'
EDIT: FreeNAS is unlikely to preserve the data from a Linux software RAID. In fact, probably can't read data from pretty much any other filesystem. May need to restore from a backup in order to load up the NAS.
You can try a SATA/IDE to USB adapter. Basically, what you have to do is to take the HDD out of the laptop and connect it to another computer that works through this adapter, the same way you do with a flash drive.
You need to pull back on the green tab so that it's in the same position as the others, then pull the hdd out. They fit pretty snug in those caddys so it may take a little force. Check around the 1:40 mark in this vid.
Also, I've used this for a long time to connect ide-usb.
No. The way you would do that, is to open the computer, take the hard drive out, and then use a USB to SATA hard drive adapter to connect it to the working PC.
Something like this:
https://www.amazon.com/Vantec-CB-ISATAU2-Supports-2-5-Inch-5-25-Inch/dp/B000J01I1G
(And I will add, you already have the answer to "how to fix my PC" which is to wipe the drive and do a fresh OS install)
No, probably not. I assume you are looking at one of those USB to PS2 mouse adapters. You can try it, but I doubt anything will happen. You might be better off getting a PCMCIA SD card adapter.
Does your laptop have a network connection? Access to the Internet? If so, you might be able to copy files to or from your laptop over the network, either via a local network share or something like Google Drive or Dropbox.
If none of those options are viable, you could pull the laptop's hard drive and transfer your files using an IDE to USB adapter and another computer.
If you're gonna use it on a PC made in the last decade, you're gonna need something like this: https://www.amazon.com/Vantec-CB-ISATAU2-Supports-2-5-Inch-5-25-Inch/dp/B000J01I1G
A cheaply or incorrectly made adapter could send too much power to the drive. This happened recently with faulty USB-C cables, which resulted in phones being fried. Just select one based on good reviews, and you should be alright. This one looks almost identical to the on I purchased at Tigerdirect ~10 years ago, which has worked great.
http://www.amazon.com/gp/product/B000J01I1G/ref=ox_ya_os_product_refresh_T1
^ Just bought one of these to have on hand. Thanks to the people who suggested this to me. I didn't even think about getting one.
Edit: And for anyone wondering, no that is not a referral link.
Shouldn't need a second computer. If anything (if you have a laptop or a strange desktop without connectors), you might need a sata/pata to usb adapter.
Yes, there are easy ways to transfer Windows. Well, easier than re-installing and starting from scratch.
http://www.amazon.com/gp/product/B00E3W15P0/ref=oh_details_o04_s00_i00?ie=UTF8&amp;psc=1
I've used this in the past, which comes with a utility to clone your hard drive to your new SSD. I believe the tool requires something like this to move the data. It wasn't listed as required when I purchased this SSD, but luckily I had one lying around.
Full disclosure, I did this from one SSD to another, but you should be able to use it from an HDD to an SSD. You'll need to trim down the data on your HDD until it's roughly 75% of the capacity of the new SSD before cloning it over.
Obviously keep your old HDD for a while after you've started running of your new SSD just in case you run into any problems.
Edit-- Just realized that it's your secondary drive that's failing, meaning you may not have a holding space for the data on your primary drive when you trim it down. If you're going to use it as a secondary drive later, I'm assuming it's a larger drive--not sure how full it is. You may need an external drive to temporarily hold the stuff from your primary drive if you don't feel like trusting that data, even temporarily, to the failing secondary drive. The tool I suggested does not, as far as I'm aware, allow you to copy over JUST your OS files and leave your other files in place. You wouldn't be able to hook up your new drive, boot into the old drive, and copy the Windows files over because most would be in use by your current drive. I'm guessing you could use a Linux ISO on a USB stick to boot into Linux and use their file tools to copy over all of the Windows files from the old drive to the new one, but I have suspicions as to how well that would work. My suspicions could be unfounded.
Ah, I was wondering how your files remained intact. Best option your have is to grab one of these:
http://www.amazon.com/SANOXY-A12940-Drive-Adapter-Converter/dp/B001OORMVQ
You can pull out your hard drive, attach it to the above adaptor then plug into another computer via USB and back your files up that way. Once you have your files backed up, put the hard drive back into the laptop and do a fresh install (delete all partitions and format)
That adapter will work fine for a laptop hard drive. If your old computer was a tower you will need to get a kit with a power adapter like this one.
If the system won't POST with the IDE drives then it has nothing to do with Windows. The best solution, if you just need the data off, is to leave them removed from the system and get an IDE-to-USB converter like this one, boot from the SSD, and then pull the data off each drive as if it was just an external drive (because it is, that's all externals are).
Stop what you are doing.
While you wait for your package:
EDIT: Formatting
Remove the hard drive and get one of these to connect it via USB to another computer.
If you aren't able to get an external display working, you can manually remove the HDD and extract data by hooking it up to a SATA/PATA/IDE to USB converter.
http://amzn.com/B001OORMVQ
Buy that, plug the drive into it, and use it like a flash drive.
No clue. Probably because it's a workaround. If you have 35 bucks to drop, I'd highly recommend this card:
https://www.amazon.com/dp/B00428BF1Y/ref=wl_it_dp_o_pd_S_ttl?_encoding=UTF8&amp;colid=19PXRWYDINS8Q&amp;coliid=I2SHEBGBZQJW43
It's amazing quality, easy with drivers, etc. Works perfectly with OBS once you install the drivers, which there's a tutorial on how to do it in the amazon reviews (it's click a couple boxes, but it's all in Japanese lol).
I use that, with this splitter, and S-video. Here's an example of what it looks like with my setup: https://www.youtube.com/watch?v=RN9E1OSVgHo
When you're just getting into it, you don't need to record. You could also just use the ol' webcam-at-the-screen. If you're serious about posting your times to leaderboards, get a capture card. This one is good and cheap https://www.amazon.com/DATA-connection-video-capture-GV-USB2/dp/B00428BF1Y
Easycap clones ($5-10~)
If you're extremely short on funds you can play the easycap clone roulette and hope you get one that kinda works maybe.
You might end up getting one that just happens to suite your needs fine.... or you might not.
Not Reccomended, but cheap
Used Dazzle DVC100 ($20~)
Dazzles can be somewhat cheap used, they're still not the best capture cards money can buy and have some driver issues, but it's a popular choice and works for a lot of people well enough. Can be found on ebay for pretty cheap.
Probably the cheapest option aside from the "Easycrap" clones
KWorld ($30~)
/u/TLoZSR mentioned a while back that he was a fan of This KWorld Capture card.
I've seen a few of his videos with it and they look perfectly fine.
EZCaps ($30-$35~)
I've heard ok things about the legit EZCaps (not the cheap clones)
If you go this route make sure you're not ending up with a fake!
I don't have any personal experience with them.
GV-USB2 ($50~)
This defiantly deserves an honorable mention, although isn't anywhere as cheap as a used dazzle. Default settings out of the box are great, picture quality is very good, good drivers, and pretty much no complaints. Oh and here's an amazon link I guess (can be hard to find elsewhere). Box / driver installation is in Japanese, but not too difficult to figure out.
I use it personally and I really like it
These are all SD capture cards with composite/S-video, composite will look not so great regardless of a powered splitting setup, however it's defiantly recommended if you use S-Video (powered splitters can cost $30-50~), alternatively you may be able to get by without splitters if you have a video cable with both S-Video and composite (s-video would go into your capture card), but you may also lose a bit of quality that way if the cables aren't too good.
https://kb.speeddemosarchive.com/Splitters explains a fair bit
Good Luck!
Order a GV-USB2 if you need a capture card for your console. It's $50 and works great.
https://www.amazon.com/I-connection-video-capture-GV-USB2/dp/B00428BF1Y
As for recording Faster Melee, use nVidia ShadowPlay if you can (as it will take frames directly from the GPU and have little-no impact on your CPU) or some sort of software that can screen capture (OBS, Fraps, XSplit, Gameshow, etc)
It's a small investment to be able to help each other. Reviewing sets is huge.
Note: SCART is hopelessly outdated and will not, even if you got an adapter, provide any usable image quality for a PC.
If your PC has DVI, a DVI -> HDMI (male DVI, female HDMI) adapter will work.
If it has Displayport, a Displayport -> HDMI (male Displayport, female HDMI) adapter will also work.
You might also find straight DVI-HDMI and Displayport-HDMI cables. If so they both need to be male. Note that the Displayport one must go FROM Displayport TO HDMI.
https://www.amazon.com/AmazonBasics-HDMI-DVI-Adapter-Cable/dp/B014I8UQJY/ref=sr_1_5?ie=UTF8&amp;qid=1466097382&amp;sr=8-5&amp;keywords=hdmi+adapter
https://www.amazon.com/Cable-Matters-Plated-DisplayPort-Adapter/dp/B005H3I38Q/ref=sr_1_12?ie=UTF8&amp;qid=1466097382&amp;sr=8-12&amp;keywords=hdmi+adapter
as examples of either.
Kind of weird question, but I need help finding the right HDMI adapter.
I have a really old Edifier 3300 set, and my cables that plugs into the headphone jack finally snapped. I have no idea where to get a replacement though. I've looked online and the closest I got to was this https://www.amazon.com/dp/B014I8UQJY/ref=cm_sw_r_cp_taa_UrMNBb4JYA74T
This cord doesn't have the right number of pins however, mine has 9 pins, 5 at the top 4 at the bottom and the same screw in connection.
I'm not sure if I'm explaining this accurately but what I want to know is what cable and I looking for here? (I want it to be HDMI for use with my PS4)
Just get a DVI to HDMI cable for your GPU to monitor...
https://www.amazon.com/AmazonBasics-Input-Output-Adapter-Cable/dp/B014I8UQJY/
This is what you want to get audio to your speakers, it's called a DAC, (better, more expensive options are available, but that's the best you're gonna do for under $100 lol) and this is the cable to connect the two devices (you'll also need RCA cables)
This will get you video to your projector.
Unfortunately since it looks like you're using powered monitors, you'll need a pre-amp to control the volume.
You may be thinking wow that's a lot of stuff, and it doesn't even come with a remote! And you're absolutely right. Unfortunately, the only thing that does all that is a full blow receiver, which get quite expensive and are usually aimed at surround sound systems. Most receivers don't like powered monitors though, so you'd have to get a very special one.
This is where you realize that passive speakers are what you really want, and you blow hundreds of dollars on speakers and equipment and you become an audiophile. Luckily there's a bunch of guides to get you started over on /r/zeos. But the stuff I listed earlier should let you jerry-rig a working set up while you save up :P
You seem to misconstrue what a smartphone actually is. A smartphone is a computer in your pocket. So:
1: Can a computer be used productively without becoming a distraction?
This is on you. If you load up a computer with games and browse facebook all day you can do the same thing on a smartphone and be just as time wasting.
2: In terms of being used for work, how useful are computers?
Extremely, especially a small handheld computer you can take with you to lunch in case of emergency calls at work, or on the train when you're traveling you can respond to emails, or even tether to your laptop if you opt for that in your plan.
3: What are the things that I probably don't know a computer can do for me?
Remember, you are holding a fully functional computer that just happens to be very small in your hand. If you get a USB host adapter for your phone (either USB-C for the latest phones, or MicroUSB for older phones, or Lightning for an iPhone) then you can literally plug in a keyboard and a mouse and go to town. Actually, you can even plug in USB external monitors on Android devices and use a bigger screen!
That is the premise of the Superbook, which is coming out in a few months. I plan to completely replace my laptop with my cell phone and the Superbook, which is just a fancy dock for a cell phone.
4: What's the point of a computer if I do everything on a sheet of paper?
This is the Galaxy Note 4. See the fancy little pen right there? It lets you write on the screen, just like a piece of paper. I have this phone and love it so much I refused to upgrade to the (famously explosive) Note 7.
This is the OneNote app. It's free. There is a similar app available for your computer, both Windows and Mac. You can literally do the same exact thing you do right now, what with the binder and calendars and whatnot else, only with a device that weighs less than a pound. What happens if you don't have your binder with you? What do you do if you need to add something to your calendar right now but don't have the binder handy? Have you ever misplaced the binder? OneNote syncs all of your notes up to the cloud. You could throw the phone in the shredder, get a new phone, install the app, log in, and have all of your notes handy.
The point of a smartphone is to do everything a computer can do, in a small and portable form factor. That has always been the point of the devices. If you do not know how to efficiently use a computer to organize yourself, you probably won't see a lot of benefit out of it. But if you spend some time learning to use the (mostly free) software out there designed for the workflow you have, you will find them to be invaluable.
I can do everything I need to do while traveling from my phone. Email, phone calls, calendar, checking into flights, google research, chatting, everything. To the point where I'm buying that Superbook I mentioned above simply so that my phone is easier to use if I need to write a long email.
Yeah that's what he's saying. You need an adapter such as this one (do your research, I just picked the first one). You would then plug the ethernet adapter into that. Think of the dock as a gigantic version of the product above that can also do HDMI to your TV.
This works well for me
nonda USB-C to USB 3.0 Mini Adapter [World's Smallest] Aluminum Body with Indicator LED for Macbook Pro 2016, MacBook 12-inch and other Type-C Devices (Space Gray)
https://www.amazon.com/dp/B015Z7XE0A/ref=cm_sw_r_cp_api_7XuvybQNBN02G
If you travel or commute with your shiny new laptop, how about a second power supply like this one. Also there are a million port replicators, HDMI dongles, etc. so I ended up buying this one, which has just what I need. And you can't go wrong picking up one or two of these.
Try a different adapter. There’s some cheaper ones that don’t do data and some that do. Official Apple ones will do the trick. There’s even some amazon basics adapters that don't work with data. Lemme dog for the third party I use that works well. One sec.
edit: found it https://www.amazon.com/gp/product/B015Z7XE0A/ref=ppx_yo_dt_b_asin_title_o04_s00?ie=UTF8&psc=1
I use this type myself: https://www.amazon.com/gp/product/B00AA0U08M
These should work to: https://www.amazon.com/CableCreation-Active-Extension-Extender-Female/dp/B0179MXKU8
1.) Buy some:
You might want to extend Rift's cables. I use:
https://www.amazon.co.uk/gp/product/B00NH12O5I/ref=oh_aui_detailpage_o00_s01?ie=UTF8&amp;psc=1
2.) My Rift lays on the table. I cover it with a towel (with a moomin on it xD)
They do come a lot cheaper than that though.
https://www.amazon.ca/CableCreation-Meters-Extension-Extender-Female/dp/B0179MXKU8/ref=sr_1_3?crid=1P9H9B7CK4OM4&keywords=usb+3+0+active+extension+cable&qid=1551396803&s=electronics&sprefix=usb+3.0+a%2Celectronics%2C242&sr=1-3
My existing CV1 setup already had wiring for 4 sensors, 3 of which required active extension, so I tapped into the far one that went across the ceiling with the 10 foot USB-C Anker 3.0 cable recommended by Oculus, and it works flawlessly.
The visuals were excellent. For me this looks better than the Rift S (personally, since I have an IPD of 59, along with the beautiful OLED displays this has). I didn't notice any artifacts or compression when playing, but I do think this thing is sensitive to having a very good USB port, so results may vary.
The lower refresh rate is definitely noticeable compared to the CV1 and I played worse than usual in beat saber (on expert). The tracking is also obviously more limited than the CV1 with more than 2 sensors (which this would beat), especially in games like Echo VR, but I also had some issues with the S in that game when I tried it. This is comparing to a perfect 4 sensor setup with a $120 quad channel USB card, so it's not exactly fair.
You can't beat the simplicity this provides for just getting into PCVR.
Here is the link the the extension cable. It's cheaper than it was back when I got them for my sensors: https://www.amazon.com/CableCreation-Extension-Extender-Booster-Compatible/dp/B0179MXKU8
Just order it from here: https://www.amazon.de/dp/B01LNAAEJ2/ref=mp_s_a_1_3?keywords=Anker%2Busb%2B3&amp;qid=1574498811&amp;sr=8-3&amp;th=1&amp;psc=1
I live in Sweden too and on Monday I should be getting it. Its 1.8m long but I ordered an active extension like this: https://www.amazon.de/dp/B0179MXKU8/ref=mp_s_a_1_3?keywords=cablecreation&amp;qid=1574499015&amp;sprefix=CableC&amp;sr=8-3
I take it you didn't know these existed:
http://www.amazon.co.uk/PCI-E-Express-Extender-Flexible-Extension/dp/B008BZBFTG
(or that the metal backplane from the card itself is removable)
Well that sounds great, but I just realized I built the cable from the recommended 15 ft cables on this(yours?) video.
Watch "EXTRA-LONG 15' Oculus Rift Break-Out Cable - IT WORKS!" on YouTube
https://youtu.be/uuNTtSQg02w
Using these:
https://www.amazon.com/dp/B00DMFB5OK/ref=cm_sw_r_cp_awdb_t1_NU0GAb2ATKYJJ
And
https://www.amazon.com/dp/B008D5EUD2/ref=cm_sw_r_cp_awdb_t1_iW0GAbDF13ZN7
It does not work on 2 of my 3 motherboards.
Order some wall mounts (generic tripod thread - tons of amazon) - a USB 3.0 Extension cable for each sensor (5M Cable Matters active model for $16 works great) and you'll be good. This will allow you to mount your two sensors in opposing corners for Roomscale tracking - provided your room is of adequate size.
You can extend the rift's own cable(s) with a 6ft HDMI extension cable, and 6ft passive USB 3.0 extension cable. Anything beyond that will likely give you problems. Get some velcro straps to tie both of those extensions together and it'll double as a breakaway cable were you to tug on it too hard.
Maybe consider grabbing an add-in PCI-E USB 3.0 card. I ordered this Startech.com USB 3.1 card for $35 because USB 3.1 controllers can handle 10Gbps of throughput, which theoretically means both of these ports should be able to run at the full 5Gbps 3.0 mode, so it could handle both sensors with ease.The amazon reviews have some Rift users implying it works great.
Also - you'll get Robo Recall for free, it's a great action game to get started in. It'll set the bar pretty high for you - but it's a very comfortable (and often intense!) experience.
This HDMI and USB extenders should give you enough.
> In the best case scenario i can only get 10 linear feet (16 ft cord, 6 foot tall person = 10 feet)
Also the Math says in best case you'll get 14.8 linear feet.
This is what I use on my room scale setup, it all works flawlessly:
https://www.amazon.com/gp/product/B00DMFB5OK/ref=oh_aui_detailpage_o06_s00?ie=UTF8&amp;psc=1
https://www.amazon.com/gp/product/B00FPIMJEW/ref=oh_aui_detailpage_o02_s00?ie=UTF8&amp;psc=1
https://www.amazon.com/gp/product/B01NCQS2C7/ref=oh_aui_detailpage_o00_s02?ie=UTF8&amp;psc=1
And of course, the third sensor :)
you can use this teardown to get to the harddrive and stick it into a desktop or use a Sata to usb adaptor, or a enclosure to get at your files from another computer
I have this same laptop and it's working perfectly well after upgrading both the RAM and the SSD. Upgrading to an SSD will greatly decrease the boot time of the laptop and adding more RAM will help to make the laptop snappier overall. The first step I would take would be to put an SSD in the laptop, especially considering the horribly long boot times you're experiencing, but both will
Adding RAM will be the easiest change for your laptop, as it doesn't require any transferring of files. I personally have 16 GB of ram in my laptop (2 x 8GB) but in the interest of saving money, you may want to get one 8GB stick of RAM and upgrade again down the line if you desire. When shopping for RAM, you want to make sure that you have a SODIMM sized stick, and that it's running at 1600 MHz speed. Here is an option from Amazon, but you may be able to find other options for cheaper (this was just the first thing I found). You just want to ensure that the RAM you buy is a SODIMM module and is running at 1600 MHz. Assuming the 4GB is in the form of 2 x 2GB sticks, you will have 10 GB of RAM total after installing the new module.
You can easily find videos on how to install RAM on the internet, but as a quick explanation:
You should now be able to go to "About the Mac" then to Memory, and see a 2GB and 8GB (if you get an 8GB stick) module show up.
As for the SSD, it can be a bit more complicated depending on how you want to go about doing it. If you care about all of the data on your old drive, you can clone it using a cloning software. If not, you can copy important files onto a flash drive or external hard drive to paste back into the new installation of macOS.
But first, you need to get the SSD itself. The Samsung 850 Evo is very well liked across the internet and the drive that I personally used. You can get it in whatever capacity you need. That being said, there are other options of SSDs that will be less expensive while still being a massive upgrade over the spinning disk drive that you likely already have. If you do searching around the internet, the only thing you need to be careful of is that the SSD has a SATA connector and isn't a m.2 drive. You'll also need a SATA to USB cable like This
The way I would recommend replacing the drive would be to do a fresh install of macOS, keeping a backup of your important files.
You want to start by plugging the SSD into the SATA to USB cable and the cable into your laptop. Then, open Disk Utility (either by using a spotlight search or finding it in the "Other" folder of the application display (hit the F4 function key)) Once you have disk utility open, you want to find the SSD on the left drop-down menu and erase it. This will format it to be usable as a boot disk for macOS. Note: it's possible that it will work without doing this but I am unsure and think it would be good to be safe here to save the time of having to change it.
As with the RAM, you can probably easily find a video showing how to do it, but I will also list the rest of the steps as I remember them.
Once the new drive is in, you can reboot the laptop and hit the Option key to bring up a boot menu. You should see something that says "Choose a Network" and you can sign into your WiFi to continue. From there you will able to use network recovery to reinstall macOS.
I hope this is helpful and good luck! I'm glad I'm not the only one still using a 2012 MBP :)
edit: formatting, a word
That’s pricey, but I have to say it’s worth it.
My setup is:
Improvement is seen when the game is searching for DLC, though my main motivation was loading times in “The Witcher 3”
That cable I can’t recommend because after a couple of years, it needs a replacement, apparently it broke internally and it works only when placed in a certain position.
Your solution looks like a better idea if you don’t mind the price. Make sure the cable for that device is easily replaceable.
Yes and no. That one wouldn't work but there are products like it that have the 22-pin sata connections that HDD and SSDs use. Also make sure to get a USB 3.0 or 3.1 model.
They also make enclosures that fit 2.5" (laptop size) drives so that you can turn them into portable hard drives.
Let's see I should have the one that i bought in my amaz history...
Yep. It's out of stock now. But here's a similar one.
https://www.amazon.com/StarTech-com-USB3S2SAT3CB-Drive-Adapter-Cable/dp/B00HJZJI84/
Out of curiosity what are you using it for?
Looks like Crucial gives you free access to Acronis.
https://www.acronis.com/en-us/promotion/CrucialHD-download/
https://www.amazon.com/StarTech-com-SATA-Drive-Adapter-Cable/dp/B00HJZJI84
Being a laptop I am assuming it is a 2.5 inch sata drive this right here would save you a big head ache. https://www.amazon.com/StarTech-com-SATA-USB-Cable-USB3S2SAT3CB/dp/B00HJZJI84/ref=sr_1_3?keywords=sata+to+usb&qid=1565207854&s=gateway&sr=8-3
It would allow you to remove that drive and plug it into a different computer allow you to hopefully recover your data.
Why not just an ssd with a USB adapter? Would certainly be better for lifespan.
Something like this: StarTech USB 3.0 to 2.5" SATA III Hard Drive Adapter Cable w/ UASP - SATA to USB 3.0 Converter for SSD/HDD - Hard Drive Adapter Cable https://www.amazon.com/dp/B00HJZJI84/ref=cm_sw_r_cp_apa_IuftxbXK8EBP4
I have a friend that uses one of those for a Windows 10 install that he can carry around for when he needs it.
well, there actually are SATA to USB cables, but I suppose it'll be easier (and cheaper, duh) to do what Graguan suggested
P.S. dont refer to a laptop as PC, as PC stands for personal computer, or a desktop (that's why i suggested that idea im the first place)
Could be that your CPU is dead. It would allow the laptop to show a power light but never actually turn on in any way.
Just get a basic external sata connector and take the hard drive out of the laptop, connect it to a different computer and transfer the files. Something like thisshould work perfectly fine.
Or it could just be a cable adapter like this.
I use this one to test laptop drive pulls at work from older machine that are getting tossed to see if the drives can be reused. Windows just sees an external drive plugged in, and you can run SMART or any other drive testing software you want, or just use the drive as a spare. This also works for adding external drive space on your PS4 or XB1 as well.
You will need to remove the hard drive and put it in an enclosure or use a USB sata adapte. Here is a link for removing the drive. https://www.ifixit.com/Guide/MacBook+Pro+13-Inch+Unibody+Early+2011+Hard+Drive+Replacement/5119
Here is a link for a cheap USB sata adapter for $12. StarTech USB 3.0 to 2.5" SATA III Hard Drive Adapter Cable w/ UASP - SATA to USB 3.0 Converter for SSD/HDD https://www.amazon.com/dp/B00HJZJI84/ref=cm_sw_r_cp_api_QFKPybZWC5D1P
You could also buy this external drive for $80. It is fairly easy to open and remove the drive. Then when you have recovered your files you can reinstall the new disk and continue using it as a backup drive so you don't have this issue in the future. You may have to formate the new drive for mac. Seagate Expansion 2TB Portable External Hard Drive USB 3.0 (STEA2000400) https://www.amazon.com/dp/B00TKFEE5S/ref=cm_sw_r_cp_api_uJKPyb5C9BAPK
You can buy one of these, works like a charm:
https://www.amazon.com/StarTech-SATA-Drive-Adapter-Cable/dp/B00HJZJI84
Bro just get an actual 2.5" adapter, they're like $10
StarTech.com USB 3.0 to 2.5” SATA III Hard Drive Adapter Cable w/ UASP – SATA to USB 3.0 Converter for SSD/HDD - Hard Drive Adapter Cable https://www.amazon.com/dp/B00HJZJI84/ref=cm_sw_r_cp_apa_wtc9BbG8K3VR0
Thanks very much for suggestion,
This worked for us as well.
&#x200B;
Here is what we used from Amazon USA:
https://www.amazon.com/gp/product/B01IE3IAIS/ref=ppx_yo_dt_b_asin_title_o00_s00?ie=UTF8&psc=1
https://www.amazon.com/gp/product/B07HCZCVF8/ref=ppx_yo_dt_b_asin_title_o01_s00?ie=UTF8&psc=1
https://www.amazon.com/gp/product/B0179MXKU8/ref=ppx_yo_dt_b_search_asin_title?ie=UTF8&psc=1
&#x200B;
And since there is enough cord for ceiling mount now:
https://www.amazon.com/gp/product/B07GV8CNPW/ref=ppx_yo_dt_b_search_asin_title?ie=UTF8&psc=1
&#x200B;
Total of $175, but closest I can get to wireless for now.
MRTV got this 5M active extender working https://www.amazon.com/gp/product/B0179MXKU8
He also plugged a 1M C to A cable in to connect it to the headset, total of 19 bucks. Does anyone know a longer cable I can plug into this extender? Like 2 or 3M? Just want to know before I order.
26' for $26. Works a dream.
CableCreation Active USB Extension Cable (Long 16.4 FT), USB 3.0 Extender Male to Female Cord with Signal Booster for $13 — this was the extension cable for the other one I purchased:
Anker Powerline USB-C to USB 3.0 Cable (10ft) with 56k Ohm Pull-up Resistor for $13.
Lone Echo
Brass Tactics
Chronos
Star Trek Bridge Crew
Elite Dangerous
Project Cars 2
Hellblade: Senua's Sacrifice VR Edition
Alien Isolation (Mother Mod)
Also, according to the pinned thread, this extension cable works:
https://www.amazon.com/gp/product/B0179MXKU8/ref=ppx_yo_dt_b_asin_title_o00_s00?ie=UTF8&psc=1
I haven't tried it yet since I just ordered it, but others have verified that it works.
I had the same exact problem--I also have a VW Golf. I bought this cable and it works like a charm: Anker PowerLine USB C to USB 3.0 Cable (3ft) with 56k Ohm Pull-up Resistor https://www.amazon.com/dp/B01A6F3WHG/ref=cm_sw_r_cp_apap_ELuQRDeHM44vi
I have this Anker cable and can confirm it is good quality: Anker PowerLine USB-C to USB 3.0 Cable (3ft) with 56k Ohm Pull-up Resistor for USB Type-C Devices Including the new MacBook, ChromeBook Pixel, Nexus 5 https://www.amazon.com/dp/B01A6F3WHG
I bought this one and although it arrived faulty, Anker immediately sent me a replacement because their customer service is awesome.
The replacement is perfect.
I ordered the cable /u/Devil_Vagina_Magic referenced earlier: https://www.amazon.com/gp/product/B01A6F3WHG/ref=oh_aui_detailpage_o04_s00?ie=UTF8&amp;psc=1
When I get it I'll report back if I'm getting the same issue with no data transfer when connected to a 3.0 port.
Not sure if it will help, and don't have your phone, I have the Pixel 2 XL, but cables make a massive difference. Not 100% sure if the cable is your problem or the OS, but I do have the two similar Pioneer decks (2330NEX and 4200NEX). Make sure your firmware on the Pioneer is updated. The 2330NEX used to take minutes to connect to AA, and now it is under 2-3 seconds. If USB-C, this cable has worked well for me, and eliminate the same error message above: https://www.amazon.com/gp/product/B01A6F3WHG
&#x200B;
This is the Cable I bought that works great with my 2017 Subaru Impreza
Yes, its a USB-C to USB 3.0 anker cable that has velcro.
I purchased it from Amazon: https://www.amazon.com/gp/product/B01A6F3WHG/ref=oh_aui_detailpage_o02_s00?ie=UTF8&amp;psc=1
Most (windows) laptops are equipped with the normal USB-A or USB 3.0. You need to buy a cable that has USB Type C to normal USB.
Any products with the same two ends are suitable. Here is just one example:
https://www.amazon.com/gp/aw/d/B01A6F3WHG/ref=psdcmw_2407774011_t1_B0119EIHTG?th=1&amp;psc=1
I think the Wii U should output an HDMI signal, but for older consoles like the N64, I've heard great things about the GV-USB2. Most N64 speedruners I know use it. It's (relatively) cheap too! $35 USD on amazon: http://www.amazon.com/DATA-connection-video-capture-GV-USB2/dp/B00428BF1Y. I believe it's imported from japan.
From what I've been told and read on, most everyone recommends getting a GV-USB2. Dazzle DC100 is also an option but it needs some workarounds to get proper sound working in OBS. I used to use a Sabrent VR-GRBR for a few years. It was 20 bucks at the time with pass through (read: no splitters) and the cables so the deal was worth the money. However, the quality was kind of ass. It would have random artifact problems and slowly degraded over time now it just plain doesn't work anymore. I know some people stream with EZCap which is basically the budgety version of a GV-USB2.
If you really want to go all out though, you'd be looking at running RGB out into an upscaler for a HD capture device, but that gets pricy depending on which systems you own and everything.
This adapter is a good one for the price.
Edit: Linked the wrong one
Since you say you're not tech savvy, I'm gonna assume you'd rather not hard-mod your N64 to output a component (480p) signal. Also, N64's output resolution is remarkably low so it doesn't take much to capture good looking N64 gameplay.
What you probably want is an S-video cable (this is the kind I use). I know it says for gamecube, but video cables for gamecube, n64 and snes are universally interchangeable, so you're good.
For capture, the best bang for your buck is gv-usb2. For streaming a composite or s-video signal it's pretty much the universal standard.
Hope this helped.
I wrote about this on an FAQ I made some time ago. The GameCapture HD seems to be a bit cheaper than the Avermedia Extreme, and I have one and enjoy it and I see other people recommend it as well. Here's the section that mentions capture cards so you don't have to click the link:
tl;dr: I recommend Elgato GameCapture HD, and you shouldn't need a special graphics card at all.
How do I record my gameplay? What capture device should I use, and how do I set it up?
If you're playing a game on a console ask yourself this question: Do you want a cheaper standard definition capture device, or would you rather have a more expensive high definition device?
If you want a cheaper device, many people recommend the GV-USB2. It's considered the best SD capture device on the market, so if you're recording the older consoles that don't need HD video, then this should work perfectly.
If you want a higher definition device, I recommend the Elgato GameCapture HD. It's very easy to use and the output is excellent. Keep in mind that, at the moment, if you use the GameCapture HD, you might have to use XSplit instead of OBS to stream. OBS currently has an issue with the GameCapture HD that causes it to desync, and in my experience XSplit doesn't have this issue. However, this could change at any time. Some people are able to use OBS with their GameCapture HD without any problems, but I was getting a lot of delay and couldn't find any fix for it within OBS.
In addition to the capture device, you will need TWO double sided composite video cables, and you will need THREE splitters.
Here's a picture of how to set up your capture device using the GameCapture HD and a Nintendo 64 as an example. The setup would be the exact same using the GV-USB2 and any other console that uses composite cables. If using the GameCapture HD and HDMI cables, the GameCapture HD has an HDMI in and HDMI out port, so you would just use two HDMI cables, one going from your console to HDMI in, and another going from HDMI out to the TV.
Note that recording handheld games can be pretty difficult and sometimes expensive. For recording GameBoy games, you can use any capture device and the GameBoy Player for the GameCube. If you're recording on one of the newer systems like Vita or 3DS there are ways to add a capture card to the systems, but that can be risky, expensive, or both. I believe Vita players can opt into PlayStation Now to record Vita games as well.
Once you have the capture device setup, you can continue to the PC section below. Since the point of the capture device is to put the output on your computer for easy recording, most any livestreaming program or recording program should be able to grab your console output and record it for you. Some capture devices might come with their own programs to record with as well, and you're free to use that.
If you're playing a game on PC then recording is much cheaper and simpler, mostly because all you need is just one program. For local recording you can use something like FRAPS or you could use OBS, and if you want to livestream then the popular choices are OBS and XSplit. I don't recommend XSplit if you want to focus on local recordings only because it saves files as .flv and I find those more difficult to work with than what FRAPS or OBS can output. I won't go into depth with the setup for those as there are many tutorials elsewhere for that kind of thing.
TOTAL noob question but would this work with the GV-USB2 for SD consoles to OBS?
Or would I still need to go the route of grabbing two male/male cables and three splitters?
Might be mistaken, but I’m fairly certain DP cables can be limited to certain refresh rates based on the quality.
So for example, one like this:
https://www.amazon.com/Cable-Matters-DisplayPort-Feet-Resolution/dp/B005H3Q59U
Compared to one like this:
https://www.amazon.com/Fusion4k-DisplayPort-Cable-1-3-Professional/dp/B01M1LERDT
This might be the problem, but it looks like it depends on your monitor’s size
My VG248QE came with a Dual-link DVI-D cable in the box, so if you have that then you should be good to go. Otherwise, something like this should be what you are looking for. You can also use Displayport cables, like the one found here.
edit: Also, another thing to be aware of is that you will need to tell windows (I'll assume you're on windows) that you want your monitor to display at 144hz (truthfully I don't know if this is a global setting i.e. it will affect your games too, or if it is specific to the windows GUI). Navigate to the screen resolution settings, click on your monitor, go to advanced settings --> Monitor --> Screen refresh rate and choose 144hz.
2.0 3.0
This is the one I have, it's worked perfectly for me for over a year: http://www.amazon.com/dp/B005M0ICG2/
A y cable might work?
https://www.amazon.com/dp/B005M0ICG2/ref=cm_sw_r_other_awd_pXR2wbSV88XBF
Or a Brand Flash Drive 128gb ~ $25 - $50 amazon and ebay
EDIT: For $56.99 you can get a 1TB (~960gb) HDD but you need a Y cable which is $6 more ($63 semi-total for HDD)
Have a great day!
Links:
Y-Cable, HDD
and the FlashDrive
There's no real good summary in the comments here, and I just looked into all of this since I'm in the same situation.
Nintendo recommends you use an externally powered hard drive, like this. The single USB port doesn't have enough power to use a more portable hard drive, like this, unless you have a Y-cable, like this. The Y-cable provides enough power to the hard drive for proper operation since there are two usb ports. The problem is that Y-cables can be hard to find locally, and you almost always have to order them online. Mine is taking 3 weeks to get here.
Flash drives can also be used, but Nintendo says that the constant writing and re-writing that occurs on the drive as a result of gameplay can eventually corrupt what is on the flash drive, possibly deleting data and save files. Of course, it's up to you what you do, but the general consensus is that externally powered hard drives are the most reliable way to go.
If you google "Nintendo Wii U Hard Drives" Nintendo has a whole page on it. Can't link to it since I'm at work.
Here ya go: http://www.amazon.ca/eForCity-Micro-B-USB-Cable-Black/dp/B005M0ICG2
No, flash drives aren't built for constant read-writes like other drives. It will greatly shorten the life span of the device.
Sounds like you already have an hard drive. Just look for an USB 3.0 external case for it, kinda like this 10$ case
Then a Y-cable
https://www.amazon.com/Micro-B-External-Seagate-Toshiba-Hitachi/dp/B005M0ICG2/ref=sr_1_2?s=pc&amp;ie=UTF8&amp;qid=1479001234&amp;sr=1-2&amp;keywords=mini+usb+3+y+cable
You'll need a Y-Cable to power it with the Wii U, but it will work just fine.
Lightning provides little power - you'll need to provide external power either through a Lightning dongle supporting it or Y-cable like this -
https://www.amazon.com/gp/product/B005M0ICG2
Here you go. I've been using this one for 2 yrs with no issue. It's USB 3.0 $6.99 & Prime Eligible.
https://www.amazon.com/gp/product/B005M0ICG2/ref=oh_aui_detailpage_o07_s00?ie=UTF8&amp;psc=1
I just ordered this along with a y cable:
https://www.amazon.com/gp/product/B00CRZ2PRM/ref=oh_aui_detailpage_o00_s00?ie=UTF8&amp;psc=1
https://www.amazon.com/gp/product/B005M0ICG2/ref=oh_aui_detailpage_o00_s00?ie=UTF8&amp;psc=1
I wanted to keep it to a terabyte or lower since the hard drive has to be dedicated to the Wii U due to Nintendo's encryption. I read reviews for both the hard drive and y cable and multiple users stated they worked well with their Wii U.
The old 500GB drive from your PS4 will make an excellent hard drive for your Wii U if you don't have one yet. If you follow this guide, you'll put your PS4's old drive in the enclosure of the replacement drive, so it's almost ready to go. Just get a Y-cable for it (if it's a USB 3.0 drive, use this one), and remove all the partitions from it (no need for even format it), and plug it into your Wii U, go it its settings menu to finish the setup.
https://www.amazon.com/StarTech-com-Power-Splitter-Adapter-PYO4SATA/dp/B0086OGN9E/
The easiest solution is to get a SATA splitter. Modular PSU power cables must match the PSU model.
i have used regular tape aswell as gaffa tape...
a better and proper solution (if you have multiple drives like this) would be to get a sata splitter and then remove the cable that "covers" the pins for 1-3... i just got myself these https://www.amazon.com/StarTech-com-Power-Splitter-Adapter-PYO4SATA/dp/B0086OGN9E
Now where each "sata plug" is... you can open the cap remove the wire so it only have 4 wires and then you dont need to do the 3.3v mod anymore and then pop the cover back on.
I recommend using SATA power splitters.
All that stuff is.
Something like this is crimped. This too
I have 3 of these for my drives.
https://www.amazon.com/StarTech-com-Power-Splitter-Adapter-PYO4SATA/dp/B0086OGN9E/ref=mp_s_a_1_5?ie=UTF8&amp;qid=1541457720&amp;sr=8-5&amp;pi=AC_SX236_SY340_QL65&amp;keywords=sata%2Bpower%2Bsplitter&amp;dpPl=1&amp;dpID=41xGVoXngPL&amp;ref=plSrch&amp;th=1&amp;psc=1
These are crimped.
https://www.amazon.com/StarTech-com-Power-Splitter-Adapter-PYO4SATA/dp/B0086OGN9E/ref=sr_1_1_sspa?keywords=sata+power+splitter&amp;qid=15512362
But before going further...
If you have 4 wires in your power cable it shouldn't be the 3.3v issue as the 4 wires are 12v, 5v, and two ground leads.
If you have 5 wires, the wire closest to the notch in the connector is the 3.3v lead.
https://imgur.com/a/tW8NDP4
For the sata power you just need something like this;
StarTech 4x SATA Power Splitter Adapter Cable https://www.amazon.co.uk/dp/B0086OGN9E/ref=cm_sw_r_cp_apa_C-eczb8V3CKRY
Here is my custom SATA power splitter. The top (5th) connector was added afterward. Notice how the rightmost wire is missing, that's the 3.3v wire. https://i.imgur.com/w7FqbFy.jpg
Some folks add the main male connector in between the drive connectors, instead of leaving a short length at the top or bottom (like mine).
Keep in mind that the splitter comes with 4x connectors, so you have to order an extra one in order to complete the row of 5x connectors. So if you have the Rosewell 15x bay chassis, you'll need to order four splitters.
No need for that:
https://www.amazon.com/StarTech-com-Power-Splitter-Adapter-PYO4SATA/dp/B0086OGN9E
StarTech.com 4x SATA Power Splitter Adapter Cable (PYO4SATA) https://www.amazon.com/dp/B0086OGN9E/ref=cm_sw_r_cp_api_lkZxybFHC9CZ1
I just bought one of these for that exact reason. Use it as an extension for the optical drive
You can buy a bunch of these, dismantle, and reassemble without the 3.3v wire. Makes for a really clean cable too.
StarTech 4X SATA Power Splitter Adapter Cable https://www.amazon.com/dp/B0086OGN9E/ref=cm_sw_r_cp_apa_i_pQDTCbTN3408G
https://images.app.goo.gl/wbW4z7TGCrhF8bZn9
While the capacitor in those Silverstone cables are suppossed to help even out power as drives spin up, the capacitor quality apparently isn't good (eg ChengX).
I used to use those cables until I read a post on the unraid forums where a user was experiencing multiple drive failures and solved it by removing the CP06 adapters.
I ended up swapping the silverstone adapters out for 1x4 StarTech adapters:
https://www.amazon.com/gp/product/B0086OGN9E/ref=ppx_yo_dt_b_search_asin_title?ie=UTF8&amp;psc=1
I've heard there's not many options for this:
http://www.amazon.com/PCI-E-Express-Extender-Flexible-Extension/dp/B008BZBFTG
No, take a look at this https://www.amazon.com/Express-Riser-Extender-Flexible-Extension/dp/B008BZBFTG
I posted it a few days ago, http://eleccelerator.com/aquarium-computer/
I do have one picture of the riser wrapped in foil
My riser cable only cost $6, http://www.amazon.com/PCI-E-Express-Extender-Flexible-Extension/dp/B008BZBFTG , even $30 sounds like too much
First I think it's a waste of an NES, but only if you are destroying the electronics (assuming they are not already dead). I hope you'll keep the electronics or give them away to someone so that the actual system won't be dead. Maybe your next project could be building a custom NES.
Anyways, I think I know some parts that might help you.
First, A slim 7750
For something like this you should also want a pci-e riser cable/ribbon/kajigger.
Here's another thing you'll definitely want/need for a build of this size. The largest pico psu I can find and an appropriate power brick/adapter to go with it.
However, if you are going to use this for old NES games and such, you won't need the graphics card. The onboard graphics will be more than enough.
There is a significant issue though The pico psu is meant only to run at 160 watts, 200 peak. I pretty sure that pcpartpicker.com is going to estimate power usage to be at max, but the issue is that at max, this system draws 163 watts. Now, I don't know if this would be sustained for long periods of time if you ran the system under full load, but I feel like it would be an issue.
When I say this system, I am referring to this. The psu is not on pcpart picker so it isn't on that, but you can imagine it being there.
https://www.amazon.ca/AmazonBasics-Extension-Cable-Male-Female/dp/B00NH12O5I/ref=pd_bxgy_63_img_2?_encoding=UTF8&amp;psc=1&amp;refRID=2XD0PP5ZN2VZF7FB2XTB
https://www.amazon.ca/AmazonBasics-High-Speed-Female-Extension-Cable/dp/B01D5H91KE/ref=pd_bxgy_63_img_3?_encoding=UTF8&amp;psc=1&amp;refRID=2XD0PP5ZN2VZF7FB2XTB
These two extension cables are what I use to extend my Rift, and they work flawlessly. This is Canadian amazon though so you can prob get them even cheaper on American site or where ever you are from.
After reading the reviews, I feel the same way.
Most of the 5 star reviews from the United States look kind of fake because none of them seem to speak English properly.
Examples:
>factory cable and charges with dash....like get than stock cable.
>
>did not tried yet
>
>I'm very satisfi3ed with this short cable...
I would just get the charger from OnePlus themselves (click here).
Although the one from OnePlus is only 150 cm, you can always use a cheap USB extension cable from Amazon (click here) to make the cable longer. The one I linked can extend your cable about 300 centimeters.
I ended up putting my PC in the corner with the middle sensor and purchased 3 10ft USB 3.0 extensions and a 10ft HDMI extension.
If curious, here is what I got.
2x USB 3.0 extensions for 2 of the 3 sensors.
https://www.amazon.com/gp/product/B00NH12O5I/ref=oh_aui_detailpage_o05_s00?ie=UTF8&amp;psc=1
1x USB 3.0 extension for HMD
https://www.amazon.com/gp/css/order-history?ie=UTF8&amp;ref_=nav_nav_orders_first&amp;
1x HDMI extension for HMD (2 pack but I only used 1 of them)
https://www.amazon.com/gp/product/B00GBBSZFE/ref=oh_aui_detailpage_o08_s00?ie=UTF8&amp;psc=1
I used these every foot of the USB/HDMI cables for the HMD to bind them together.
https://www.amazon.com/gp/product/B001E1Y5O6/ref=oh_aui_search_detailpage?ie=UTF8&amp;psc=1
Headset HDMI Extender - 10' - https://www.amazon.ca/gp/product/B004C4SECG/ref=oh_aui_detailpage_o08_s00?ie=UTF8&amp;psc=1
Headset USB Extender - 10' - https://www.amazon.ca/gp/product/B00NH12O5I/ref=oh_aui_detailpage_o08_s00?ie=UTF8&amp;psc=1
Two Sensor USB Extenders - 15' - https://www.amazon.ca/gp/product/B00AA0U08M/ref=oh_aui_detailpage_o00_s00?ie=UTF8&amp;psc=1
Was playing Arizona Sunshine last night, zero issues with this setup.
Well then...
I'd rather not have an enclosure then.
Here's a USB3-Sata3 interconnect:
https://www.amazon.com/Sabrent-2-5-Inch-Adapter-Optimized-EC-SSHD/dp/B011M8YACM/ref=sr_1_2?ie=UTF8&amp;qid=1468656048&amp;sr=8-2&amp;keywords=usb+3+to+sata
Cables: 2x of these: https://www.amazon.com/Cable-Matters-Internal-SFF-8087-Breakout/dp/B012BPLYJC/
SAS/SATA Controller Card: https://www.amazon.com/SAS9211-8I-8PORT-Int-Sata-Pcie/dp/B002RL8I7M/
You might find it on eBay for less. Just posting the Amazon links for clarity.
Plug the card into a free PCI-e slot on your mobo.
Plug the Mini SAS SFF-8087 connectors into the two ports on the HBA card.
Plug the SATA connectors into the back of your 5-drive hotswap bay cage.
Insert the HDDs into the hotswap trays (if it uses trays).
Turn things on. Bob's your uncle.
P.S. if you want PCI-e 3.0 version of the HBA card, you'll need to look for "LSI 93xxx" versions of the card. They're more expensive. Also, some others go for different manufacturer cards. I prefer LSI brand.
If you just want to RAID the whole thing, there are cheaper alternatives, but hardware level RAID HBA cards suck IMHO. With this type of HBA SAS/SATA Controller, you can basically pass-through the drives straight to your computer, and they'll show up as individual drives. Later you can then RAID them via software, or not.
Assuming you have PCI express 3 in your computer expansion slots, Get a card like this:
LSI Logic SAS 9207-8i Storage Controller LSI00301 https://www.amazon.com/dp/B0085FT2JC/ref=cm_sw_r_cp_apa_i_xQ-jDbVZ3R30V
It will feed data connections to 8 sata drives all by itself.
It has 2 sff-8087 ports. Then get the special 'forward breakout' cable. Well two really. One end goes into the sff-8087 port and then it splits out into four sata data cables. Which go into the hard drives of course.
https://www.amazon.com/dp/B012BPLYJC/ref=cm_sw_r_cp_apa_i_2T-jDbHFP0FHC
The card can support hardware raid, but fewer and fewer folks do that. After all, hardware raid usually requires identical drives, and us folks at home often have a motley collection of drives of various sizes, speeds, and geometries. So software raid it is. In linux, folks often use freenas or unraid. In windows 10 you can use something called 'storage spaces'. Using raid will allow you to treat all those drives like one device... And have some tolerance for failure (which happens with so many)
Next question.. does your case have room? Do you have enough power connectors?
It would really be more beneficial to just shell out 300 buck for an r710. I'm pretty sure you'll save more money in the long term since like you already know, that thing uses a ton of power. Around 300w idle which depending on your electricity that adds up! r710 can idle at a 3rd of that.
If you insist on keeping it, the h200 is a great card and can be crossflashed if needed. You'll just need some breakout cables like these https://www.amazon.com/Cable-Matters-Internal-Mini-SAS-Breakout/dp/B012BPLYJC
You get a PCI-express SAS controller to install. They come in 2 and 4 port varieties, and you get SAS to SATA cables (turns one SAS port to 4 SATA connectors) to plug into it to connect your hard drives. That could be 16 drives per card, a couple of PCI-Express slots and you'll have more SATA connectors than you have room for hard drives.
Edit: I'm in no way recommending this specific one, but here is one example of what I'm talking about:
https://www.amazon.com/LSI-Logic-9207-8i-Controller-LSI00301/dp/B0085FT2JC/ref=sr_1_4?keywords=SAS+controller&qid=1567797015&s=gateway&sr=8-4 (it's a 2 port variety).
and for cables:
https://www.amazon.com/Cable-Matters-Internal-SFF-8087-Breakout/dp/B012BPLYJC/ref=sr_1_3?keywords=SAS+SATA+cables&qid=1567797027&s=gateway&sr=8-3
I've used pcie sata expanders with mixed success, sometimes the hard drives would disappear and reappear on a reboot, you definitely don't want that to happen on a raid setup. An HBA flashed to IT mode with breakout cables works really well, I use it in my server and it is rock solid.
HBA
Cable
I would suggest an LSI 9211-8i flashed to what is known as IT mode. This mode does not use any RAID and passes the disks directly to the operating system. The 9211-8i has 2 internal SFF-8087 SAS ports. SAS can support SAS as well as SATA. You can buy a breakout cable like this one which has 4 SATA connectors on it.
Here's a link to the 9211-8i itself, already flashed to IT mode. You can flash IT mode yourself, it is just a little "involved".
LSI 9211-8I 8PORT Int 6GB Sata+sas Pcie 2.0
Get a card like this and you can add plenty of drives. Note: you can find these much cheaper on eBay and often times will include a couple sas-to-4-sata adapter cables Also bare in mind they come in two flavors. One is raid-controller mode and the second is a simple expansion. But you can change that depending on how you plan to use it.
Consider a cheap SSD for your boot drive. Not necessary considering your needs but booting from an HDD gives me a migraine :)
If running to a SAS backplane (Internal Mini SAS 36-Pin to SFF-8087):
https://www.amazon.com/gp/product/B00S7KU3PC/ref=s9_acsd_top_hd_bw_b7Ps60B_c_x_w?pf_rd_m=ATVPDKIKX0DER&pf_rd_s=merchandised-search-3&pf_rd_r=GE3B55QHG241C2CC6F5Q&pf_rd_r=GE3B55QHG241C2CC6F5Q&pf_rd_t=101&pf_rd_p=0664bd6f-3961-5d2e-b87d-fbb64789498e&pf_rd_p=0664bd6f-3961-5d2e-b87d-fbb64789498e&pf_rd_i=6795231011
If Running to a sata backplane (SFF-8087 to SATA Forward Breakout):
https://www.amazon.com/gp/product/B012BPLYJC/ref=s9_acsd_top_hd_bw_b7Ps60B_c_x_w?pf_rd_m=ATVPDKIKX0DER&pf_rd_s=merchandised-search-3&pf_rd_r=GE3B55QHG241C2CC6F5Q&pf_rd_r=GE3B55QHG241C2CC6F5Q&pf_rd_t=101&pf_rd_p=0664bd6f-3961-5d2e-b87d-fbb64789498e&pf_rd_p=0664bd6f-3961-5d2e-b87d-fbb64789498e&pf_rd_i=6795231011
Make sure to grab a battery for the h700. If you are going to use this for FreeNAS, it will not work and you will be upset.
edit: added more info
I did the same thing and built my PC in the middle of July and still am only missing my card. I bought a cheap $10usd gpu to make sure everything worked properly and install all my other drivers and software.
And that way, I can make myself be a little more patient knowing my build is stable and running.
In case you go that route, I had to also purchase a cheap DVI to HDMI to use it, FYI.
You'd use an adapter like this(assuming its a sata drive) https://www.amazon.com/StarTech-com-SATA-Drive-Adapter-Cable/dp/B00HJZJI84/ref=sr_1_3?s=pc&amp;ie=UTF8&amp;qid=1540897474&amp;sr=1-3&amp;keywords=sata+to+usb&amp;dpID=41RlR-Q1siL&amp;preST=_SY300_QL70_&amp;dpSrc=srch
You could also use a flash drive and manually transfer everything.
What you can do is take the hard drive out and use a cable like this:
https://www.amazon.com/StarTech-com-SATA-Drive-Adapter-Cable/dp/B00HJZJI84/ref=mp_s_a_1_1?ie=UTF8&amp;qid=1539453286&amp;sr=8-1-spons&amp;pi=AC_SX236_SY340_QL65&amp;keywords=sata%2Bto%2Busb&amp;psc=1&amp;th=1
to connect it to your new laptop to transfer the files via USB.
What you have described is installing a SSD and putting a fresh install of windows on it. This means that you will have to reinstall any programs, reconfigure preferences, settings, etc. that are on your computer now.
Contrary to some of the below comments, you do NOT have to reinstall windows like this if you don't want to. Cloning the drive will work 100% and will potentially save you time and headache.
I have personally used (4 different times) the Samsung Data Migration software when installing a Samsung SSD into a current system and it has been successful 100% of the time and is VERY easy to use.
> Also I want to remove and install the old hdd or even a new ssd what adapter would I need?
No adapter needed for the install itself. Drives of 2.5" form factor fit right in. You are going to need a screw driver and the drive, nothing else.
However, I assume you want to clone your current OS to the new drive or create a Time Machine backup before installing the new drive, don’t you? In this case, you are going to need a SATA-to-USB adapter like this:
There are two different ways to go about this:
> And last but not least the ram he told me that Kingston HyperX 8GB RAM 1600MHz is compatible but I have this feeling that my Mac will not work with that one? Maybe a different RAM anyone could recommend me?
Your MacBook Pro will need RAM modules that match the following specification:
PC3-10600 DDR3 1333 MHz, 204-pin
Those RAM modules should work, for example:
Your MacBook Pro supports up to 16 GB RAM (2 x 8 GB RAM modules). A higher amount won’t work due to a limitation in the logic board. Make sure you use both RAM slots instead of just a single one, as using a single one when you could use both comes with a (albeit small) performance penalty. So it is better to go for e.g. 2 x 4 GB modules instead of just 1 x 8 GB module.
These videos show you the procedure:
HDD replacement:
RAM upgrade:
In case you want to replace the DVD drive with your old HDD, here is how to do that:
I would play it safe--if you're concerned about data, before doing anything with the laptop, pull the HDD out, assure it has no liquid and keep it in a warm dry space for a little while. Then use a SATA -> USB connector to back the files up to another computer before attempting to power it on inside a potentially wet/damaged laptop.
As for the laptop itself, I'd look into potentially disassembling it as much as you can (look for guides on this and be very careful of thin, breakable cables), and wiping down components that you see beer on carefully, with 91% isopropyl alcohol and a lint/dust free cloth or q-tip. Beer is yeasty and sticky, so you'll want to get it off any components. Isopropyl alcohol as pure as possible is my go-to for component cleaning because it's generally safe on plastics and dries very quickly from electrical components.
https://www.amazon.com/dp/B00HJZJI84/ref=cm_sw_r_cp_api_6ky9ybBQY30XS
Then Google "sata III ssd 256gb"
For that price you can almost get an external 500GB SSD.
An Internal 500GB you can get from about ~140 USD, maybe you are lucky and find an external on sale somewhere.
250GB SSD is most definitely in the budget.
Edit: Haha, just maybe this combination works: Sata to USB3 + 500GB SSD
That should be fine, usually if your boot record is trashed you can still get the data off with a sata to USB cable which you can buy from Maplins or Amazon for decently cheap. (https://www.amazon.co.uk/StarTech-com-SATA-Drive-Adapter-Cable/dp/B00HJZJI84)
Even if your boot record is FUBAR'd then you can learn up on Ubuntu and usually get anything back with that.
This would be a two piece setup but it supports PCIe m.2 nvme drives. It also has m key support. The first part is the drive adapter and the second is the adapter from the adapter to USB. It comes out to about 45.96 not including shipping for both parts.
https://www.amazon.com/Startech-M-2-U-2-Adapter-Interface/dp/B073W65QX6/ref=sr_1_1?s=electronics&amp;ie=UTF8&amp;qid=1504427625&amp;sr=1-1&amp;keywords=pcie+m.2+enclosure+nvme
https://www.amazon.com/StarTech-SATA-Drive-Adapter-Cable/dp/B00HJZJI84/ref=pd_bxgy_147_2?_encoding=UTF8&amp;psc=1&amp;refRID=G63VTGMKHZPAMDF3K5BS
you need something like this: sata to usb 3.0 cable or if you intend to use the harddrive as an external something like this*
That's a SATA drive so you need a USB to SATA cable. Something like this.
Man, I just did this a few weeks ago. I got rid of the DVD drive and moved the 1TB HDD that it came with over to where the DVD drive was at and installed the Samsung 850 EVO 500GB SSD where the 1TB drive is now, that's because the connector where the HDD is now connected to is SATA III vs SATA I where the DVD drive is at. In other words if you want to better speeds remove the HDD and put the SSD in, then if you want the extra storage space (1TB) remove the DVD drive and put in the HDD there using a caddy.
I found myself needed the DVD drive ZERO (0) times since I've bought the laptop but everyone is different. By the way I highly recommend upgrading the RAM as well, it cost an extra $58 but it's totally worth it. My laptop, fully loaded with Norton 360, Office 2013 Pro, Adobe Acrobat X Pro, and all my other programs boots up in about 7 seconds. Here is the parts I used..
USB to SATA III cable
RAM
You need a T5 screwdriver to remove the screws to get into where the components are, I bought this set because it's handy for other things as well. BE CAREFUL WHEN YOU LOOSEN AND TIGHTEN THOSE SCREWS, THEY STRIP EASILY. Don't tighten them like the lug nuts on your car, TRUST ME!
Just use the cable and the software that came with the SSD to migrate the OS over from the HDD to the SSD, it's that easy!!
If you want I can find the caddy that I used to replace the DVD drive, mine fits perfectly but I had to buy 2 because the first one was the wrong one. The outer plastic shell would not fit on the first one, but the second one fits perfectly. I can even post pictures showing you where the parts are located once you open the laptop.. Let me know, and I hope this helped!*Edit - Found the Caddy
https://www.amazon.com/UGREEN-Adapter-Samsung-Controller-Smartphone/dp/B00LN3LQKQ/ref=mp_s_a_1_4?keywords=otg+cable&amp;qid=1566161199&amp;s=gateway&amp;sprefix=otg+&amp;sr=8-4
Or
https://www.amazon.com/Adapter-JSAUX-Compatible-MacBook-Samsung/dp/B07L749R9R/ref=mp_s_a_1_6?keywords=otg+cable&amp;qid=1566161236&amp;s=gateway&amp;sprefix=otg+&amp;sr=8-6
That's not a powered hub, as it doesn't plug into the mains power supply (e.g., your wall power socket), so you'd be back to square one.
Just about any powered hub will work, including this one. The most important thing about selecting a hub for your Pi is that the hub is powered. If the hub doesn't plug into your power socket in your wall, then it's not powered and will not work with your Pi. You can tell the one I linked to is good-to-go by looking at the fifth picture on that Amazon page -- there's a power adapter that plugs into the hub and then into the wall to supply the USB ports with power. If you select a hub that doesn't plug into the wall, then the USB ports will need to get their power from the Pi, and they just can't do that because the Pi's USB ports don't put out enough power to power the USB peripherals connected to the hub (unlike a desktop or laptop computer, whose USB ports usually do put out enough power to power 2 or 3 USB devices).
Then, you'll want one of these adapters so you can actually plug it into your Pi Zero's micro USB port.
That's the exact setup I have going with my Pi Zeroes. Plug USB hub into the wall power socket, plug the hub's USB cable into the OTG adapter, then plug the OTG adapter into the Pi's USB port. Voila, 7 powered USB ports for your Pi.
Edit: I'm not Spanish, but I live close enough to Spanish-speakers that I may as well be. Let's just say I've dodged my fair share of chankla headshots.
Edit #2: Ok, so I did some research on the hub you linked to and it appears that it is, in fact, a powered hub, where the power plugs into the micro-USB slot next to the regular USB slots. So, in fact, that hub will probably work!
I think you're looking for a USB On the Go cable.
I use a USB OTG cable
I would use Solid Explorer personally but I already own it. Has a Chromecast extension. If don't have USB-OTG cable need one of those too.
https://play.google.com/store/apps/details?id=pl.solidexplorer2
http://www.amazon.com/Ugreen%C2%AE-Adapter-Samusung-Android-Function/dp/B00LN3LQKQ/ref=sr_1_2?ie=UTF8&amp;qid=1451313146&amp;sr=8-2&amp;keywords=usb-otg
I'm going on a cruise in May and would like a way to backup my pictures and to edit on the fly, preferably with my tablet. My camera doesn't have Wi-Fi capabilities, but even if it did the Wi-Fi on a cruise ship is so amazingly slow (think dial up speeds lol). I know I may need two different things to do both of these. Any suggestions?
Right now, I'd like to look into a cord to transfer to my tablet, can I edit raw on an app on an Android tablet (Lightroom?).
I'm also looking at an external hard drive for the main backup, do they make ones that hook up to the camera (sl1) or that accept sd cards?
I don't want to spend too much, but I'll probably have $100-200 or a smidge more if necessary.
Any suggestions would be great!
Edit: For anyone who's interested, I did end up getting a card reader and I had an OTG cable that was recommended to me previously to connect my camera to my phone so I could do a time-lapse (I should have realized it would have worked fine, but I had tried my dad's cable that looked exactly the same before that and it didn't work for what I wanted it to). So, it worked perfectly! Nothing else needed and I can transfer pics from my SD card to my phone/tablet. I'm still looking into an external drive or something for storage, but as long as they're on the SD and tablet I feel a lot more comfortable. Thanks everyone for your help!
What I purchased:
OTG Cable $4.99 USD http://www.amazon.com/gp/product/B00LN3LQKQ?psc=1&amp;redirect=true&amp;ref_=oh_aui_detailpage_o04_s00
SD Card Reader $6.29 USD http://www.amazon.com/gp/product/B009D79VH4?psc=1&amp;redirect=true&amp;ref_=oh_aui_detailpage_o01_s00
Not expensive at all!
Otg cable
TUSITA Micro USB HUB Adaptor with Power, 3-Port Charging OTG Host Cable Cord Adapter for Raspberry Pi 2 3 Pi Zero Android Smart Phone Tablet Samsung Galaxy HTC Sony Google LG/Linux https://www.amazon.com/dp/B00LTHBCNM/ref=cm_sw_r_cp_api_i_vkulDb6D4SD5P
http://www.walmart.com/ip/Sandisk-SDCZ60-128G-AW46-128-GB-Cruzer-Glide-Flash-Drive-USB-2-0-Black/49674146
TUSITA Micro USB HUB Adaptor with Power, 3-Port Charging OTG Host Cable Cord Adapter for Raspberry Pi 2 3 Pi Zero Android Smart Phone Tablet Samsung Galaxy HTC Sony Google LG/Linux https://www.amazon.com/dp/B00LTHBCNM/ref=cm_sw_r_cp_api_i_xLAlDbCM31BFK
MG Chemicals 838AR-P Total Ground Carbon Conductive Pen, 4g https://www.amazon.com/dp/B01LZX06PL/ref=cm_sw_r_cp_api_i_ROAlDb6DREBQK
Here’s what I used to get started, a good and reliable usb that I had no issues with, the otg you’ll need to free up the ports in front along with extra ports on the otg if you wanna add online later on possibly. The final most important thing is the conductive ink pen to perform the power limiter mod so you have no issue performing with the front ports if you wanna do multiplayer or wireless controllers. I would link guides but a bit lazy atm. A quick search on the subreddit like power limit or conductive and you’ll find the post with the video. My recommendation is bleemsync. Restalgia has a good video for a fresh install.
https://youtu.be/ydLKv1HUd0A
Hope this helps!
What you have in the picture is USB type C. Will not work.
I'm using this
https://www.amazon.com/dp/B00FGKXY9S
This one is compact
https://www.amazon.com/dp/B013ENUF0Y
And I see a lot of these.
https://www.amazon.com/dp/B00LTHBCNM
A micro usb to 2+ usb adapter might work. I haven't tried it since I only use a dac and amp with my PC, but I wonder if something like this could work.
https://www.amazon.com/dp/B00LTHBCNM?psc=1&amp;ref=ppx_pop_dt_b_product_details
I bought this one from Tusita. It loaded my games perfectly fine and connected to WiFi with my adaptor perfectly fine. Doesn’t feel cheap either.
Correct, a powered USB Hub should work without the physical power mod.
Most people go on to mod the system with BleemSync v1.1+ firmware, which enables the rear power port as an OTG USB port after which you can use an OTG adapter to plug the flash drive and power into the rear port, giving you full use of the two front ports.
If you have some flash drives around, particularly some older USB2.0 drives, you may be able to install the BleemSync v1.1+ firmware without needing to do the power mod or needing a powered USB hub. After that all you'll need is a OTG adapter like this one or an OTG USB hub like this one.
The HDD pic you linked looks like a like a caddy. Have you removed the drive from the plastic housing? If you have removed post a pic of the connections.
Considering the age of the laptop my guess is the drive inside the caddy uses a 2.5" 44pin IDE type interface. If it does, you have some options to access the data.
You can use this: https://www.amazon.com/Sabrent-INCH-Drive-Converter-EC-AHDD/dp/B0758RP5V8?th=1
Or this adapter: https://www.amazon.com/Laptop-Drive-Adapter-Female-Connect/dp/B0185LC04Y
Combined with this adapter: https://www.amazon.com/StarTech-com-SATA-Drive-Adapter-Cable/dp/B00HJZJI84/
You could also just use the 2nd adapter and connect it to a PC's internal SATA connectror.
Looks like normal 2.5" SATA connectors to me. You might also need this cable to transfer your old files from the HDD to the SSD.
Yes, you need to either buy a USB to SATA cable or an external hard drive dock. The cable is for a temporary connection while a hard drive dock will allow you to install any 2.5" hard drive / SSD or a 3.5" hard drive for extra storage and is a more permanent solution. The Samsung SSD comes with cloning software.
&#x200B;
Here's an example of a USB to SATA cable for $11 which is for 2.5" SATA drives and USB 3.0 USB-A).
https://www.amazon.com/StarTech-com-SATA-Drive-Adapter-Cable/dp/B00HJZJI84/ref=sr_1_3?ie=UTF8&qid=1542081067&sr=8-3&keywords=usb+to+sata+adapter
&#x200B;
Here's an example of a dual bay hard drive dock which allows you to insert 2.5" or 3.5" drives and supports drives up to 8TB for $34. It seems the make and model I purchased earlier this year has been discontinued.
https://www.amazon.com/d/Laptop-Docking-Stations/WEme-Dual-Bay-External-Duplicator-Tool-Free/B00PTUQE4M/ref=sr_1_2_sspa?ie=UTF8&qid=1542081231&sr=8-2-spons&keywords=unitek+hard+drive+dock&psc=1
&#x200B;
The steps should be pretty simple.
&#x200B;
That means the hard drive cable is bad, or the hard drive is so broken that OS X can't detect it.
Replacing the cable is less straightforward than the hard drive, but still possible. iFixit have a guide and sell the replacement part.
You can connect the drive to another computer with something like this adapter, but if it's connected to a Windows computer, you won't be able to access the contents without a third-party utility, due to the Mac OS filesystem.
The first result I can find is this: https://www.amazon.com/QNINE-Adapter-Performance-Portable-Support/dp/B07JKWHFRC/ref=sr_1_3?s=electronics&amp;ie=UTF8&amp;qid=1550066145&amp;sr=1-3&amp;keywords=nvme+adapter
It seems a bit expensive but a company should really have that cash.
Alternative you'd need an extra step in between with this: https://www.amazon.com/StarTech-com-M-2-U-2-Adapter-SFF-8639/dp/B073W65QX6/ref=sr_1_3?ie=UTF8&amp;qid=1550066243&amp;sr=8-3&amp;keywords=nvme+to+sata+adapter
And that:
https://www.amazon.com/StarTech-com-SATA-Drive-Adapter-Cable/dp/B00HJZJI84/ref=sr_1_3?ie=UTF8&amp;qid=1550066276&amp;sr=8-3&amp;keywords=sata+to+usb
If you didn't have any surge protection, it is very likely toast.
You can always pull it out and try something like this:
https://www.amazon.com/StarTech-SATA-Drive-Adapter-Cable/dp/B00HJZJI84/ref=sr_1_1?s=pc&amp;ie=UTF8&amp;qid=1499811816&amp;sr=1-1-spons&amp;keywords=sata+to+usb&amp;psc=1
to see if you can recover anything.
yep that should do the trick as well. your data will be fine, assuming theres nothing wrong with the drive. usb feeds enough power for it to see the hard drive is there, it just doesnt supply enough to physically spin up the platters to read the data. i assume you are using something similar to this? https://www.amazon.com/StarTech-com-SATA-Drive-Adapter-Cable/dp/B00HJZJI84/
I assume it has your old files on it. It wouldn't make sense if it were anything else.
You need to buy this cable. If you need to find it somewhere else, the search term you need is "usb to sata". You do not need the full dock/enclosure that others have recommended; the cable is fine and more convenient to use.
The easiest way to transfer the data from the old macbook is to pull the hard drive out and connect it to an external USB to SATA adapter like this one i've linked below. Bestbuy also has an enclosure that does the same. Also if I'm correct, you wont be able to access the data from the Mac's hard drive on a windows PC and therefore will require the hard drive be plugged into another mac. From there the data can be copied to an exfat formatted USB or external hard drive, then transferred to the Asus.
https://www.amazon.com/StarTech-SATA-Drive-Adapter-Cable/dp/B00HJZJI84/ref=sr_1_3?ie=UTF8&amp;qid=1493534934&amp;sr=8-3&amp;keywords=usb+to+sata:
Looking for a sata to usb 3.0 adapter for ~$15. I found this:
https://www.amazon.ca/StarTech-com-3-0-Inch-UASP-SATA-Converter-USB3S2SAT3CB/dp/B00HJZJI84
Just wondering if there's anything else
Check if the laptop has a 2nd drive bay if you intend to clone your current drive to it.
If it doesn't have a 2nd drive bay you can use a USB to sata adapter temporarily.
USB supplies up to 5v, that's all you need to power SSD. Not sure what cable do you have but on far end, it needs to cover both data and power connector. like this
If I were you I would buy a device like this https://www.amazon.com/StarTech-SATA-Drive-Adapter-Cable/dp/B00HJZJI84/ref=sr_1_1?ie=UTF8&amp;qid=1478523093&amp;sr=8-1
Or if you already have a SATA external harddrive, you could replace the hdd in that with the one from your pc.
eSATA and mSATA is not what you have. And the 1,2,3 is just different speeds.
Ok, I really like the advice of /u/zottelbeyer
, but I will try to give my own. Just remember: There is never enough storage space.
My current setup: TS-673 with 2x512GB M.2 SSD RAID 1 as system volume + 4x10TB HDD RAID 6 ad storage volume, with intention of expanding up to 6x10TB as I need more space. Synology DS218J with 1x10TB+1x3TB HDD JBOD used as backup unit.
First: I personally don't think I'd use RAID 10 when I can use RAID 6. RAID 6 offer better drive protection than RAID 10, so yes, I'd also switch to RAID 6.
Second: Backup in the same machine is not considered backup. There are tons of things that can destroy all drives in a case at same time. For example:
https://old.reddit.com/r/DataHoarder/comments/dc8hda/nearly_lost_all_my_data/
So, The fact that you are backuping your main RAID 10 data into a different 8TB drive inside the same NAS means that you are in fact not performing any backup at all. One ransomware infection will destroy the totality of your data.
Ok, now, let's dive in.
Currently, the sweet spot of cost/storage are located in 8TB drives, but slowly switching to 10TB. Personally, I'd go with 10 or 12 TB drives. You can get 10TB WD red drives for 189€ (WD element drives shucked). With 5x10TB drives in RAID 6 you get 30TB (27.3 TB of usable space). If you use RAID 5 (more about that later), you can bump up to 40TB (36.4 TB of usable space). That is 5 times what you currently have, and without need to buy a new enclosure. That is leaving your 6th bay as offsite for the other user.
Right now, IMHO there is no reason to stick with lots and lots of low storage drive. Get fewer with higher capacity. Prices have dropped enough.
You have also to take into account that bay space is also an important issue. That makes in the end bigger drives more valuable that small drives.
You can start increasing your drive count slowly, and adding more drives as your space needs increase.
About backups: I really encourage you to move your backup outside your TVS-673. If you go the bigger drive route you will have 4TB drives spare (your current RAID array) that you can use to perform backup. I used this:
https://www.amazon.com/Cable-Matters-Docking-Station-Support/dp/B0099TX7O4/
or a cheaper version:
https://www.amazon.com/StarTech-com-SATA-USB-Cable-USB3S2SAT3CB/dp/B00HJZJI84/
Connect your drive, then you can create a backup job to store your important files on it, and then disconnect it and store it away. Repeat with each drive you want. Perform a new backup once a week. In case of NAS destroy, you have full backup available.
I personally prefer to use another cheap NAS to automatically perform backups, but that means spending some more money. About RAID 0 backups, it's not ideal, but it is doable. RAID is not backup, is intended to reduce downtime. Strictly speaking, you don't need RAID if you are willing to assume downtime while you restore from your backups. So, RAID 0 (or JBOD) is acceptable as backup plan. Yes, if one drive of your backup fails, you lose everything, but it is a backup. All you have to do is switch the failing drive and recreate the backup from scratch. Pretty straight forward and it doesn't risk your data. Since your main data is a RAID array, in case of failure of your backup RAID 0, you still have tolerance for at least another drive failure (RAID 5) or even two (RAID 6) in your main array.
Finally, if you decide to go "full datahoard mode" (rack server, +10 bays, ZFS or BTRFS , etc) then by all means, go to /r/DataHoarder and /r/homelab. Tons of useful advice there.
In case you go this route, then yes, get a nice rack, set ZFS, and use your TVS-673 as an expensive backup NAS to keep your data safe. I personally use borg backup, but ZFS has a nice snapshot backup utility with incremental copy.
Sorry for the wall of text. I think I addressed most of your concerns, right?
This is the one I bought that works well. I went through reviews before I bought it to confirm that it works with Samsung SSDs.
https://www.amazon.com/StarTech-com-SATA-USB-Cable-USB3S2SAT3CB/dp/B00HJZJI84/
Physically remove the hard drive, buy or borrow a USB to SATA adapter, hook it up to another windows computer, and pull your files. Then run a chkdsk to scan the drive
This is what you're looking for.
There are other options but this one is pretty inexpensive.
If it's going in to startup repair, the drive itself is not dead... Yet.
When you get your computer rebuilt with the new hardware, you can use something like this to connect your old HDD so you can browse it and recover your files.
> Is there a way to quickly connect the HDD to my laptop,
You'll need something like an external enclosure or a SATA to USB adapter to be able to connect it to your laptop. The enclosure/docking station I listed is a bit overkill as it works with both 2.5" and 3.5" disk drives. You can save almost half the price if you get a dedicated 2.5" OR 3.5" dedicated enclosure.
> permanently delete the already deleted files, then disconnect it and put it back where he had it?
Assuming you can get the HDD connected to your laptop, the free version of CCeaner has the capability to permanently remove those "deleted" files that still reside on the drive. Here's a youtube video showing how it's done (sorry the guy is a little hard to understand, but I think you'll get the idea). Good luck and feel free to ask questions should you have any.
Time Machine restores the backup to a fresh install of MacOS, to make it easy to reinstall, and migrate your data to a new computer. The backups are not bootable, so you you need to install the OS before restoring.
If you want to port your disk from you HD to and SSD in one move, you can use Superduper and copy the whole drive to the SSD before installing it using a USB to SATA cable, keep in mind the HD and SSD needs to be the same size if not more as to fit all of the data.
The SATA connection is standard on most drives these days. (some manufaturers, Apple....I'm looking at you....have proprietary connections)
The Connections on your drive are standard. I use a SATA drive docking station on my desk at work for data transfers, but if you're only looking to copy the data off the drive, a SATA to USB cable would be fine. This is the one that's in my tool bag for when I go on site.
Actually, I suppose it would depend on the hard drive, if you have a really old one, it would be IDE like that one, but if it's from the past ~10 years, it'd be SATA, and you'd want something like this: https://www.amazon.com/StarTech-SATA-Drive-Adapter-Cable/dp/B00HJZJI84/ref=sr_1_3?s=pc&amp;ie=UTF8&amp;qid=1503217452&amp;sr=1-3&amp;keywords=SATA+to+USB
Even if the laptop is dead you might still be able to recover the drive. Dependent on the drive you can pull it and use something like [this] (https://www.amazon.com/StarTech-SATA-Drive-Adapter-Cable/dp/B00HJZJI84/ref=sr_1_2?ie=UTF8&amp;qid=1503458323&amp;sr=8-2&amp;keywords=sata+usb+adapter) for a SATA drive, or [this] (https://www.amazon.com/Cablecc-22pin-Combo-Adapter-Converter/dp/B00S6AHQBM/ref=sr_1_11?s=electronics&amp;ie=UTF8&amp;qid=1503458482&amp;sr=1-11&amp;keywords=pcie+ssd+adapter) for mSATA/M.2 drive.
I've pulled a drive from a surface that went in the wash for the whole cycle. It still worked.
> How are you planning to connect it though?
Using StarTech's cable with speedier UASP, but if you have a better suggestion, I'm all ears:
https://www.amazon.com/StarTech-SATA-Drive-Adapter-Cable/dp/B00HJZJI84/ref=sr_1_1?ie=UTF8&amp;qid=1506778558&amp;sr=8-1&amp;keywords=sata+iii+cable+usb+3.0
You mean something like this?
This is an even cheaper option I got for xbox one. Just remember if purchasing for xbox one, the drive must be in the 256gb class/range or larger in order to store games. I'm not sure about PS4:
http://www.bestbuy.com/site/samsung-750-evo-250gb-internal-sata-solid-state-drive-for-laptops-black/5393201.p?skuId=5393201&amp;ref=212&amp;loc=1&amp;ksid=67e91dbd-ac78-450e-9ddb-7235235ca87e&amp;ksprof_id=8&amp;ksaffcode=pg199034&amp;ksdevice=c&amp;lsft=ref:212,loc:2
https://www.amazon.com/StarTech-SATA-Drive-Adapter-Cable/dp/B00HJZJI84/ref=sr_1_1?ie=UTF8&amp;qid=1479301012&amp;sr=8-1&amp;keywords=USB+3.0+to+2.5%22+SATA+III+Hard+Drive+Adapter+Cable+w%2F+UASP+-+SATA+to+USB+3.0
I am always the first to load into SWBF or BF1, the difference is incredible.
get this
and plug it into this
I haven't heard any noises come from the drive in, ever. That's why I'm so surprised. It hasn't degraded over time, no performance issues before this. Wasn't running slow or anything, it just suddenly went poof and it's just gone.
I got recommended by a friend to get one of these (https://www.amazon.com/StarTech-com-SATA-Drive-Adapter-Cable/dp/B00HJZJI84/) to try it outside of my case while my machine is running. Not sure if trying this would be worth it or Data Recovery could be worth it either. I'm not entirely sure of the price point of Data Recovery versus how important the stuff is on my drive. It's definitely inconvenient that it doesn't work anymore, but from what I recall right now there's nothing that's mission critical on it.
Thank you all so much for the advice. I finally pulled the trigger this weekend and upgraded my mac and the difference is incredible. It would normally take up to 5 minutes for my mac to fully turn on and login. Now its under 30 seconds!
For those looking to do the same thing here's what I did:
&#x200B;
How to upgrade your Mid-2012 15-Inch MacBook Pro
Step 1 - Backup your files
For me this took the longest, I'm not the most organized person. I also saved my keychain, apple mail logins, stickeys, etc. I was in the middle of projects that I needed to jump right back into after the upgrade.
Step 2 - Create a macOS installer on the USB drive
Follow this ---> https://9to5mac.com/2018/10/22/how-to-create-macos-mojave-usb-installer-easy-video/
Step 3 - Plug the new harddrive in via Sata cable usb
This is where my first issue came into play. I skipped ahead and swapped out my harddrives only to try and boot up and my system not recognize the new SSD. I first thought I purchased a dud. The truth is you need to format the new drive for the computer to see it. Plug in the new SSD and follow these instructions to erase and format. I chose Mac OS Extended (journaled) https://support.apple.com/en-us/HT208496
NOTE::: you dont have to use the usb drive, you can install the new SSD first if you want and format from the bootable USB.
Step 4 - Install the new SSD
Follow this video: https://www.youtube.com/watch?v=cfiGF_pjqvM
When installed, hold Option on your keyboard and then turn on. Select the USB macOS installer and follow instructions. Install onto the new SSD. Should take 20-30 min
&#x200B;
Step 5 - The Battery
Follow the instructions in the videos on this page: https://eshop.macsales.com/item/NewerTech/BAP15MBU78W/#owctabs
Make sure you set aside some time to do this. The install is very fast however its the calibration that takes some time. After you install your new battery, turn the computer on to test, there should be a little charge in it. Shut your computer down and then plug in. Let it fully charge, the light on plug should turn green. Then leave it for another 2 hours. Turn the computer on, unplug, turn all power settings off (follow video) and let the computer run until the battery is completely dead. Then wait a number of hours. This will calibrate your battery with your system.
&#x200B;
Then plug in and enjoy your new laptop!
Non-mobile: http://www.amazon.com/dp/B00HJZJI84/ref=mp_s_a_1_1?qid=1427610497&amp;sr=8-1&amp;keywords=sata+to+usb&amp;pi=AC_SY200_QL40&amp;dpPl=1&amp;dpID=41RFQc9vgIL&amp;ref=plSrch
^That's ^why ^I'm ^here, ^I ^don't ^judge ^you. ^PM ^/u/xl0 ^if ^I'm ^causing ^any ^trouble. ^WUT?
I was pretty nervous too about the upgrade, but just take your time watch a bunch of youtube how-to's and I would suggest taking a look at this walk through: https://www.ifixit.com/Guide/MacBook+Pro+15-Inch+Unibody+Early+2011+Hard+Drive+Replacement/5895
Things you'll need that aren't on that page are one of these, SATA III Hard Drive Adapter Cable
the tools I bought this one. Comes in a nice case and has everything you need
the hard drive. I already linked to the one I chose, but there are other options
and if you want to keep the old drive as a back up, you'll need one of these
I got my ram a while back so I don't have a direct link, but make sure you're getting the kind that will work with her machine. There are plenty of online guides and the question has been asked/answered here more than a couple times, but if you get overwhelmed just throw up another post. People here are generally great.
Not really endorsing any of these things over the competition, just trying to be helpful. Good luck. It's an AMAZING improvement once it's done!
I'm not 100% sure, but can't you just get a temporary SATA - USB cable?
Like this http://www.amazon.com/StarTech-com-SATA-Drive-Adapter-Cable/dp/B00HJZJI84
I know this does not directly answer either one of your questions, but it will address both of the concerns you have.
Just use something like SuperDuper to copy your current drive onto the drive you want to replace. The free version should do the job just fine.
This way, when you install the new drive it will be like nothing has changed. It's the least amount of hassle.
In order to be able to write to the SSD before you physically install it, you will need either a disk enclosure, or a SATA to USB cable. Should not cost more than $15.
Let me know if that makes sense and if you need any help with any of the steps.
I use these with 2.5"SSDs
StarTech.com USB3S2SAT3CB 3.0 to 2.5" SATA III Hard Drive Adapter Cable w/ UASP - SATA to USB 3.0 Converter for SSD/HDD https://www.amazon.com/dp/B00HJZJI84/ref=cm_sw_r_wa_apa_i_3dn.AbWBZTAF8
You can remove the hardrive and get something like this. Connect it to your Macbook and it transfer the data.
First thing is to format the SSD using Disk Utility. That's already on your Mac.
Use Time Machine to backup your existing drive. Then clean install OS X on the SSD, and restore from Time Machine.
One of these cables will make it all much easier, especially if you don't have a spare external drive. With this cable, you can skip several hops when moving stuff.
I upgraded my Mid-2010 15" MBP earlier this year, added 4 more GB of ram and added a 1 TB SanDisk Ultra II SSD. Let me tell you - the damn thing runs like a new computer, and still does almost a year later. Starts up in seconds, almost never have lag, it's never crashed, etc. It's lifechanging.
One of these will be your best bet for transferring between your old hard drive to your new hard drive. There are plenty of step by step instructional guides on doing the replacement yourself, it was actually much easier than I thought it would be.
If you have the ability to upgrade your RAM, I'd recommend going ahead and doing that while you're at it. Good luck!
SSDs
https://smile.amazon.com/gp/product/B01N6JQS8C/ref=ppx_yo_dt_b_asin_title_o02_s00?ie=UTF8&amp;psc=1
via USB to Sata adapater
https://smile.amazon.com/gp/product/B00HJZJI84/ref=ppx_yo_dt_b_asin_title_o02_s00?ie=UTF8&amp;psc=1
If you can avoid using the laptop until then, no. I'd recommend getting a sata to USB adapter like this:
https://www.amazon.com/gp/aw/d/B00HJZJI84/ref=mp_s_a_1_1?ie=UTF8&amp;qid=1498148482&amp;sr=8-1-spons&amp;pi=AC_SX236_SY340_FMwebp_QL65&amp;keywords=sata+to+usb&amp;psc=1
Remove the HDD from the laptop and use the desktop to transfer to the new external. That way you aren't relying on the laptop HDD to also run the OS.
That's probably your best bet.
I am guessing your SSD is a SATA drive and not PCI...I use these when transferring data from drives
http://www.amazon.com/gp/aw/d/B00HJZJI84/ref=mp_s_a_1_1?qid=1417113394&amp;sr=8-1&amp;pi=AC_SY200_QL40
I bought a Samsung 850 EVO and converter cable (didn't bother with the enclosure), works great!
https://smile.amazon.com/gp/product/B00OBRE5UE/
https://smile.amazon.com/gp/product/B00HJZJI84/
Ouch. Lots of drive failures today.
OK, unplug it & let it rest and cool down a bit, then try again.
Next step after that would be to remove it from the case & connect it with another adapter - if you're lucky, could be that something in the enclosure just went bad. You'd need a cable like this one: http://www.amazon.com/gp/product/B00HJZJI84?ref_=sr_1_4&amp;qid=1449153864
I use two Kingston 240gb SSDs in mirror once booting from flash drives were no longer being recommended. I know 240gb is way too big for what I need, but compared to smaller sizes - it didn't make sense to me to buy smaller.
My Dell R720XD has internal SATA ports but they are disabled... and I didn't want to dedicate two drive bays for boot disks - so I bought a pair of these SATA to USB cables, and haven't had an issue. One is attached to the server's internal USB port and the other SSD is inside the chasis too, plugged into a back USB port - and the cable is fed through an empty PCIe slot.
You definitely can plug in any old SSD. I'm connecting my old Samsung EVO 840 to my Xbox via a USB 3.0 to SATA adapter and some duct tape.
I haven't gone out of my way to do any timed testing, but anecdotally my buddies and clanmates all notice that I load in considerably faster than they do.
U can do a fresh install on the ssd but I wouldn't boot with both plugged in you can get one of these http://www.amazon.com/gp/aw/d/B00HJZJI84/ref=mp_s_a_1_1?qid=1427610497&amp;sr=8-1&amp;keywords=sata+to+usb&amp;pi=AC_SY200_QL40&amp;dpPl=1&amp;dpID=41RFQc9vgIL&amp;ref=plSrch after the install is done and you boot to get your files off hope this helps
This is the fastest method.
It's also one of the safest methods and the easiest method. Plus, you get to verify that the new drive is working before putting it into your Mac. That's not really such big deal on a MBP 2011 since the drives are so easy to swap, but on other Macs making sure the drive is working properly can be a really good idea.
Also, you can get an external drive cable/adapter for like $13. This works great if you don't want an enclosure for the drive, but not advisable if you want a portable drive, in which case you want an enclosure.
Another option if the OP no longer wants the optical drive is to remove the optical drive and swap it with a HDD bracket and the old HDD drive. Then they can just clone from the old HDD drive internally to the new SSD.
You can also get an enclosure for the old optical drive making it a portable external optical drive.
get a cable like this (no specific reason for linking this one, it was just first on the search), you can plug in a computer mouse to unlock your phone, install the SMS Backup and Restore app, and backup your text messages to your phone's internal storage. Then plug into a PC and copy everything to your PC.
OTG is USB on-the-go; an adapter like this that changes the micro USB port on your phone to a full USB port. Not all phones will actually acknowledge devices plugged in via the adapter though. Easy enough to google "does [insert device model] support USB OTG" to find out if your phone or tablet supports it.
UGREEN Micro USB 2.0 OTG Cable On The Go Adapter Micro USB Male to USB Female for Samsung S6 Edge S4 S3 Android or Windows Smart Phones Tablets with OTG Function 6 Inch Black https://www.amazon.ca/dp/B00LN3LQKQ/ref=cm_sw_r_cp_api_NPhuzbXPHT3PR
MYLB Right Angled Lightning Sync and Charge Cable for Apple iPhone 5, 5c, 5s, 6, 6s, 6 Plus, 6s Plus, iPad Pro, iPad Air 2, 4th Generation and iPad Mini (All Generations) (0.2m, Black) https://www.amazon.ca/dp/B071759GHW/ref=cm_sw_r_cp_api_jQhuzbRK69DGT
I was having range issues that even with the controller after about 100m the video feed was laggy controls were laggy it was basically unusable I was so pissed. Once I hardwired my device it was absolutely perfect got full range and no lag
The HP-A4's RCA plugs are for sending music out to speakers, not for sending your music into the amp. For android phones, you'll need a USB-B 2.0 to USB-A cable and a USB-A to USB-C adapter assuming you're using a phone with USB-C like Samsung S8, or Note8, or a USB-A to Micro-USB adapter if you're using a older/cheaper android phone like Samsung S7, J3, etc.
USB-B to USB-A cable: https://www.amazon.com/dp/B00NH11KIK
USB-A to USB-C Adapter: https://www.amazon.com/dp/B01GGKYYT0/
USB-A to Micro USB Adapter: https://www.amazon.com/dp/B00LN3LQKQ/
I already said this on another post, BUT if you ask me, for the money and build quality you can't beat Schiit Audio.
Pick up a MAGNI "HEADPHONE AMP AND PREAMP" for $99, a MODI "DAC" for $99 - $249 for the multibit version. So between $198-and $348 you can have an outstanding smi-portable DAC and Headphone/Preamp.
You will need a set of RCA cables to connect the DAC to the Headphone amp. As for connecting your smartphone you will need this USB 2.0 OTG Cable On The Go Adapter and then you will then need to connect that to a USB A-B Cable. Plug the "B" end of the USB A-B cable into the Dac. Additionally you could have skipped the DAC altogether and ran a RCA-to-3.5 cable right into the back of the headphone amp. But if you are aiming to take advantage of the HiFi/master audio I would recommend you use the DAC method. Connecting your laptop is just as easy and you can just run the USB A-B cable into the DAC. Or, if your computer has an optical audio output you could use a Toslink cable to connect direct into the DAC.
your all set man. get after it.
This is it
Most Androids are very much USB OTG compatible! However, I have not yet tested whether FireOS is, CyanogenMod certainly is. I would recommend downloading USB OTG Checker (non-Play Store link.
This will let you check whether the OS you are running (FireOS or CM) has USB OTG compatibility!
If it does, you can buy a cable like this one from Amazon that lets you plug any USB device into your phone.
If the app says it isn't compatible, you can sometimes add USB OTG functionality if you are rooted, using apps like USB OTG Helper
I hope this explained some things for you!
Edit: emphasised "sometimes"
What kind of phone do you have?
If it is an Android, you can use a USB OTG cable Micro USB or USB C and plug in any mouse.
A cursor will show up on the screen and you can click and drag as if the cursor were your finger.
I can't imagine what this cable is made for but I can (almost) guarantee you it won't work for your tablet. USB and your standard audio jack are completely different (e.g. USB is digital and audio jack is analog) and can't easily be converted by a simple cable. If you want to hook up a USB mic to your tablet you need some kind of active (powered) adapter if you want to use the audio jack.
EDIT: AFAIK newer Android tablets support USB audio(apple user here so don't quote me on this). In this case you would use an USB adapter. Just make sure your tablet supports USB OTG
UPDATE: ok guys and gals I finally got a cable that worked. I purchased an OTG micro USB to USB female and then plugged my USB C cable that came with the phone into that. I'll link the cable I purchased and it's not an affiliate link: https://www.amazon.com/gp/product/B00LN3LQKQ/ref=oh_aui_detailpage_o01_s00?ie=UTF8&amp;th=1
Hey man I had the exact same problem as you. This worked like a charm: http://www.amazon.com/gp/product/B00LN3LQKQ?psc=1&amp;redirect=true&amp;ref_=oh_aui_detailpage_o01_s00
this, get an OTG cable and a USB card reader https://www.amazon.com/gp/product/B00LN3LQKQ/ref=ox_sc_act_title_2?ie=UTF8&amp;smid=AKXVBT49GGF3B&amp;th=1
and
https://www.amazon.com/gp/product/B006T9B6R2/ref=ox_sc_act_title_1?ie=UTF8&amp;psc=1&amp;smid=A294P4X9EWVXLJ
yep, here is one from amazon https://www.amazon.com/gp/aw/d/B00LN3LQKQ/ref=mp_s_a_1_1?ie=UTF8&amp;qid=1482163611&amp;sr=8-1&amp;pi=SY200_QL40&amp;keywords=usb+otg&amp;dpPl=1&amp;dpID=41Zb82axrFL&amp;ref=plSrch , but if you are willing to wait a little while, banggood, eBay, and Aliexpress also have them. once you get your otg, download the app ezgui, and plug the cable into your phone, then plug another usb cable in to the female end of the otg and connect that cable to your flight controller, you can now program your quad (or other multicopter) from your phone! Happy flying! btw sorry for bad formatting, im on mobile.
So, first things first, do you already know how to have access to the bootloader/bootmenu? Does the tablet have a micro/SD slot from where you can boot the OS? If yes to both, and the tablet has a micro-usb port, then attach the keyboard via OTG and you should be able to install more or less any linux distro.
It's a lot of ifs though, and I don't guarantee that even this will work or that the drivers will be available
trying to do the exact same thing! I'm thinking about using my phone as the googles in a cardboard setup. Here's my parts list, please critique!
transmitter tutorial http://flitetest.com/articles/diy-micro-5-8ghz-fpv
receiver tutorial http://copterwars.com/blog/?p=64#tutorials
frequency stuff http://blog.oscarliang.net/5-8ghz-frequency-bands-b-e-f-different-brand/
another tutorial http://blog.oscarliang.net/diy-micro-fpv-setup-vtx-camera-v2/
On the quad:
fpv transmitter | bangood | 12.99
fpv camera | bangood | 10.89
3 way DIP switch | optional
antenna | use wire?
On the ground: (with google cardboard + phone)
usb capture adapter | bangood | 6.59
micro usb adapter | amazon | 4.99
rca to rca coupler | amazon | 2.19
receiver | amazon | 17.14
power adapter | HK | 1.99
2S battery | HK | 5.04
2s battery charger | HK | 27.47
Battery cable | HK | 2.99
Costs:
HK total | 37.49
amazon total | 24.32
bangood total | 30.47
TOTAL | 92.28
This seems like a lot of money to drop for what seems like it will be a fairly janky set up. Will this even produce a good experience?
OTG replaces it. The kind of OTG adapter/cable/hub you get can cover all scenarios.
If you plan on playing game with more than 2 players you can get the Inateck OTG hub or the TUSITA "octopus" OTG cable.
https://www.amazon.com/Inateck-Adapter-Compact-Compatible-Smartphones/dp/B00OCBXIY8
https://www.amazon.com/TUSITA-Adaptor-Charging-Adapter-Raspberry/dp/B00LTHBCNM
If you just are going to be playing 1-2 player games and only want a minimal OTG adapter I recommend the 90° left angled OTG adapter or the standard OTG cable.
https://www.amazon.com/CHENYANG-Adapter-Galaxy-Tablet-Angled/dp/B00M7X6XNG
https://www.amazon.com/DSYJ-Micro-Samsung-Player-OTHERS/dp/B00CXAC1ZW
I've tried this one on my first attempt and it simply just doesn't work with the snes mini.
Instead of that one try this:
https://www.amazon.ca/Adaptor-TUSITA-Charging-Adapter-Raspberry/dp/B00LTHBCNM/ref=mp_s_a_1_17?keywords=usb+otg+cable&amp;qid=1565822608&amp;s=gateway&amp;sprefix=usb+otg+&amp;sr=8-17
This was the one I ended up purchasing and works like a charm. Supplies power, allows additonal usb storage, and has the ability to add player 3 and 4.
I bought this one, I just hope it works, but I can't do it until a couple of weeks...... sometimes I hate to work, but if I do not, I cannot buy more stuff!!!!
> otg cable, then usb hub
This part can be done in one product
I'd suggest using a USB-OTG hub with charging passthrough, like this one.
for me i have it https://www.amazon.com/Adaptor-Charging-Adapter-Raspberry-Android/dp/B00LTHBCNM/ref=sr_1_1?s=wireless&amp;ie=UTF8&amp;qid=1522053075&amp;sr=1-1&amp;keywords=kirin+adapter+micro+USB+OTG
Well depending on what version Fire you have, then this might work.
https://smile.amazon.com/TUSITA-Adaptor-Charging-Adapter-Raspberry/dp/B00LTHBCNM/ref=sr_1_6?keywords=usb+otg&qid=1574907194&s=amazon-devices&sr=1-6-catcorr
Popular configuration.
Install BleemSync, which enables OTG support.
Connect OTG HUB to power port. 3 devices can be attached at the same time. This one is highly recommended.
https://www.amazon.com/TUSITA-Adaptor-Charging-Adapter-Raspberry/dp/B00LTHBCNM
Run AutoBleem from flash drive inserted in the OTG HUB.
2nd controller will run just fine from the OTG HUB.
Hope this simplifies things.
or you could've just copied the list here...
OTG Adapters for the NES/SNES Classic: Inateck:
https://www.rakuten.com/shop/inateck/product/HB3001G/
https://www.walmart.com/ip/Inateck-3-Port-USB-2-0-OTG-Hub-Adapter-Cable-SD-Card-Reader-for-Smartphone/602986265
https://www.amazon.com/dp/B00OCBXIY8
Note: Only the USB 2.0 version is compatible with the NES/SNES Classic out of the box. You would need an adapter for the USB-C version to connect to the NESC/SNESC, and whether it actually would work is currently unknown.
Also, be aware that it uses its own power cable instead of the NES/SNES Classic's USB cable, and it is very short (roughly 12-14 inches long).Consider getting an extension USB cable or using an extension cord.
TUSITA ("octopus" style): https://www.amazon.com/gp/product/B00LTHBCNM
This one has been reported as working for many people, but can also reportedly break easily.
Simpler OTGs:
https://www.amazon.com/gp/product/B07FY9Z9GD
https://www.amazon.com/gp/product/B00JCZ2FQQ
OTGs like these have only one port for USB. A simple choice if you only want to use USB and not wifi...or vice versa.
We do not recommend the small angled adapter featured on snesclassicmods.com and elsewhere. It looks great, but easily loses data connection at the slightest nudge.
In order to make this work, you'll have to buy a PCIe extender because there's no way a graphics card is going to fit in there. And you'll need a new monitor, the monitor included in the all-in-one will always pull from the integrated graphics, there's no way around this. While a new graphics card is active in your machine, the old built in monitor will be blank and unusable.
In the end, with a custom proprietary motherboard like this, there's no guarantee that a graphics card will even work with it even if you can get it plugged in. At this point, you're better off just getting a new computer.
https://www.amazon.com/XRP-Express-Extender-Flexible-Extension/dp/B008BZBFTG
try some of the suggestions for 6950s on this site https://github.com/litecoin-project/litecoin/wiki/Mining-hardware-comparison#wiki-ATI_AMD_GPUs
and to keep heat down especially with 3 cards I would recommend the use risers on either every other card or all of them and spread them out for better airflow.
http://www.amazon.com/PCI-E-Express-Extender-Flexible-Extension/dp/B008BZBFTG/ref=wl_it_dp_o_pC_nS_nC?ie=UTF8&amp;colid=2S236SVHXZ1XV&amp;coliid=IGWD09SV4853G
edit: formatting
Also I just looked it up and pretty much really slim cases, I found one by Silverstone RVZ01. Another one is evolv itx
And lastly Sugo SG13.
Out of the 3 I think I'm going for the Silverstone. Instead of using a hard pci-e extension (because of the way the gpu goes) I am buying a cable one so it's easier to deal with.
Linus made a video of the Silverstone RVZ01
here is one for the sugo
And lastly the evolve itx case
Like I said I prefer the Silverstone and will be using something like this, but I'll make sure I find a good one.
The active extender I have does not require a wall wart at all, they use the USB power on the cable to basically add another hub to regen power on the line back. Some do have the option to plug in a wall wart, but the one I have and many I see on Amazon do not need a wall wart at all.
This one says it does not need the power adapter unless you are connecting multiple of these cables together I guess, and your PC supplies enough power to the extender its self.
https://www.amazon.com/Cable-Matters-SuperSpeed-Female-Extension/dp/B00DMFB5OK/ref=sr_1_1?ie=UTF8&amp;qid=1484412332&amp;sr=8-1&amp;keywords=active%2Busb%2Bextender&amp;th=1
I lot of the ones over 20' seem to be USB 2.0 which should still work. It may be best to have the wall wart so you know the camera is getting good power though, maybe get one that allows you to connect the wall wart optionally and see how it does without it?
I currently am using a 16' USB 3.0 cable that seemed to power my camera fine.
Things to do while your waiting.
&nbsp;
Keep in mind, you'll want at least a foot around your playspace with no obstructions. It really breaks the immersion when you reach out and hit the wall!
&nbsp;
If the 15 foot cables that come with it are not going to be enough, start planning for your extension now.
You'll need an additional USB extender cable, and an additional HDMI or Display Port to Mini Display Port cable of the same length to extend the vive connection from your PC to your breakout box.
This is how I successfully extended my vive 15 feet.
&nbsp;
Extension Kit:
https://www.amazon.ca/dp/B00C7RM2TG/ref=twister_B00HG1N6OS?_encoding=UTF8&amp;psc=1
https://www.amazon.ca/Cable-Matters-SuperSpeed-Female-Extension/dp/B00DMFB5OK/ref=sr_1_2?ie=UTF8&amp;qid=1467058952&amp;sr=8-2&amp;keywords=Cable+Matters+SuperSpeed+USB+3.0+Active+Extension
&nbsp;
Play space (9 Packs of these work out to 9.6 X 13.6 , pretty darn close to the perfect max playspace for the vive):
http://www.walmart.ca/en/ip/red-and-black-connect-a-mat-4-pack/6000016933486
&nbsp;
Good luck, and be prepared ... because you wont want o be missing out for any longer than you already have :)
You can use an active usb 3.0 extension cable for longer distances.
Edit: By active, i don't mean an ethernet conversion. I mean something like this
Both of these work
http://www.amazon.com/Cable-Matters-SuperSpeed-Female-Extension/dp/B00DMFB5OK?ie=UTF8&amp;psc=1&amp;redirect=true&amp;ref_=oh_aui_detailpage_o03_s00
http://www.amazon.com/Cable-Matters-SuperSpeed-Female-Extension/dp/B00C7SA21U?ie=UTF8&amp;psc=1&amp;redirect=true&amp;ref_=oh_aui_detailpage_o02_s00
There was a thread here exactly the same as this one today and I replied there that I tested one of those cables with no issues on my PC when my amazon basics one didnt work at all. Here you go 12 hours ago someone posted exactly the same thing you did =P https://www.reddit.com/r/WindowsMR/comments/7ulmch/functional_usb_extension_cable/
This is the cable I used. https://www.amazon.com/Cable-Matters-SuperSpeed-Female-Extension/dp/B00DMFB5OK
Seems it varies by PC though as it worked fine in my USB 3.1 port and the amazon basics would just connect and disconnect constantly but never allow the headset to work. Gave one of the long -120342834034etc errors.
If you have the room/ability, I'd mount the sensors on the ceiling or corners of the room. I got two (VideoSecu 2 Pack 2-6 inch Metal Wall Ceiling Mounts Adjustable Pan Tilt Video Camera Mounting Brackets https://www.amazon.com/dp/B001D49TU4/ref=cm_sw_r_cp_apip_bYfm6J1rX8VQH) to mount them cheaply and securely, and three (Cable Matters SuperSpeed USB 3.0 Type A Male to Female Active Extension Cable 5 Meters/16.4 Feet https://www.amazon.com/dp/B00DMFB5OK/ref=cm_sw_r_cp_apip_z9Cm45OtYiwYz). Purchasing a third sensor nets you a USB extension cable, and I also got an HDMI extension cable to give my Rift some extra room. Sorry for all the links! The ceiling setup gives me pretty flawless tracking.
I dual boot Ubuntu 18.04 with Windows 10 and have an Oculus Rift.
I really just use Windows for gaming, and it takes make a minute to get over there. I mean, to me it's not a huge hassle.
If I were you, if it's not too out of the ordinary for you to ask, ask his thoughts on dual booting and using a Windows 10 for gaming. If he says it's not a bad idea, and he REALLY wants the headset, I would highly suggest getting it. Worse comes to worst, if he doesn't want it before he opens it, you can simply refund it and get another gift.
I recommend getting the rift with a third sensor, as well as an HDMI extender and USB 3 Active cable. It'll run up your costs to about $530-$550 after tax, but the third sensor is essential if you want the tracking to work well.
Edit: This is the active cable I got that I have not tested yet. I will return with a response, just remind me if I don't have it up by tomorrow afternoon.
And this HDMI female to female looks good paired with this HDMI cable.
If you have any other questions just let me know. I'll try to help out best I can.
I grabbed the 5m one of these
https://www.amazon.com/Cable-Matters-Active-Extension-Female/dp/B00DMFB5OK/ref=redir_mobile_desktop?_encoding=UTF8&amp;ref=yo_pop_d_pd_title&amp;th=1
I did the 10 ft from one of these
https://www.amazon.com/Aurum-Ultra-Extension-Ethernet-Supports/dp/B0069A75JE/ref=redir_mobile_desktop?_encoding=UTF8&amp;psc=1&amp;ref=yo_pop_d_pd_title
I would NOT get anything longer.
https://smile.amazon.com/gp/product/B00DMFB5OK
i use these on my rift to have my desktop in the office and rift in my garage. as for DP, no clue. i use
https://smile.amazon.com/gp/product/B014I8TC4E
and https://smile.amazon.com/gp/product/B01GHL72XS for the hdmi, i imagine something similar would work for rift s
I bought 6ft extensions for the headset on recommendation from the Oculus Wiki here on reddit, I also have a GTX 1080, so far so good.
USB 3.0 6ft extension
[HDMI 6ft extension]https://www.amazon.com/gp/product/B00JJ519KC)
I then used twisty ties to bind the new extension cables together so I don't trip over them.
EDIT: I also bought a 16.4ft USB 3.0 extension for one of my sensors, which also works great (plugged into USB 2.0). Worth noting, this sensor is also extended using the included usb extension that came with the Oculus Rift/touch controller boxes. So it has 2 extensions on it and it still works.
EDIT 2: Fixed the HDMI link
So I'm assuming that this is your personal laptop. There are two things you can do
1- Take out the hard drive and put it in another pc then transfer what you need over. You will not be able to boot from this drive so you will need to be able to plug this in along with the hard drive that runs the pc you are using to transfer files. (Use sata cables and a sata power cable)
2- If you don't have access to another pc where you can plug the hard drive in using sata cables buy one of these: https://www.amazon.com/StarTech-SATA-Drive-Adapter-Cable/dp/B00HJZJI84/ref=sr_1_2?ie=UTF8&amp;qid=1485322519&amp;sr=8-2&amp;keywords=hdd+to+usb. Use that to transfer it to a different pc.
Both of these options are assuming that you have another pc to use.
First of all back up the data BEFORE you run any diagnostics on the drive.
Diagnostics essentially runs a stress test and can push the drive into unrecoverable territory.
If it has dual drives then the data on the larger HDD may be fine.
(Some manufacturers install the OS on the larger HDD though...)
Buy a Sata to usb adapter.
Like this
https://www.amazon.com/StarTech-SATA-Drive-Adapter-Cable/dp/B00HJZJI84/ref=sr_1_3?ie=UTF8&amp;qid=1483853961&amp;sr=8-3&amp;keywords=sata+usb+adapter
Plug it into another PC to recover the data.
you can just get a USB to SATA adapter and plug it in. of course the enclosure offers some protection.
https://www.amazon.com/StarTech-SATA-Drive-Adapter-Cable/dp/B00HJZJI84
Something like this will do the trick
https://www.amazon.com/StarTech-com-USB3S2SAT3CB-Drive-Adapter-Cable/dp/B00HJZJI84
You can use any sata to usb converter. For example this would work https://www.amazon.com/Sabrent-Tool-free-Enclosure-Optimized-EC-UASP/dp/B00OJ3UJ2S/ref=pd_lpo_vtph_147_bs_lp_t_1?_encoding=UTF8&amp;psc=1&amp;refRID=N0E5KKN95A4T4RFWQR06
Or this if you want to spend more money and not get a case: https://www.amazon.com/StarTech-com-USB3S2SAT3CB-Drive-Adapter-Cable/dp/B00HJZJI84/ref=pd_bxgy_147_img_3?_encoding=UTF8&amp;pd_rd_i=B00HJZJI84&amp;pd_rd_r=HM89910NCVYQFQV4AYAE&amp;pd_rd_w=P4XbG&amp;pd_rd_wg=OUSIV&amp;psc=1&amp;refRID=HM89910NCVYQFQV4AYAE
There are various cloning softwares (and hardware) that would make an identical version of your current install on the new SSD, it would be easiest if your laptop has two HDD bays, else you will likely need to spend at least a little bit of money on a USB to sata adapter, which would be cheaper than a windows key.
There's an adapter on there already as part of the tray. Take the drive out of the tray, it looks like it'll have regular SATA data and power connectors, and something like this would work.
I just found out there are SATA to USB 3.0 cables. So the Samsung 860 Evo is SATA III 2.5 and it doesn't look like there is any circuitry exposed except where the adapter would go. So if I wanted to use it as external I could just plug it in with this
https://www.amazon.com/StarTech-com-SATA-Drive-Adapter-Cable/dp/B00HJZJI84 , format the drive and it's ready to go? Could it be that easy?
> The enclosure is this: https://www.amazon.com/Sabrent-NGFF-Aluminum-Enclosure-EC-M2MC/dp/B0765D6NJV and the SSD is the Western Digital Blue 500GB M.2 SATA.
The traditional 2.5" version of the drive is basically the m.2 version but already inside a case, you could save $10 by getting the traditional 2.5" version and a usb/stata cable:
https://www.amazon.com/Blue-NAND-1TB-SSD-WDS100T2B0A/dp/B073SBZ8YH/
https://www.amazon.com/StarTech-com-SATA-Drive-Adapter-Cable/dp/B00HJZJI84/
About the same size as the enclosure as well.
> will it be able to achieve the same speed as the SSD would perform if it was used as an internal one OR will it significantly underperform?
It will either perform exactly the same, or nearly the same. Source: I am using this setup for my backup drive, it's several times faster than the hdd I was using before.
In my expirence at least Samsung and Crucial do. You might also want one of these adapters to actually do the cloning.
or an adapter if you prefer
https://www.amazon.co.uk/StarTech-com-SATA-Drive-Adapter-Cable/dp/B00HJZJI84/ref=sr_1_1?s=computers&amp;ie=UTF8&amp;qid=1468421426&amp;sr=1-1&amp;keywords=usb+3+hdd+adapter
https://www.amazon.com/StarTech-com-SATA-USB-Cable-USB3S2SAT3CB/dp/B00HJZJI84 or similar if it's a standard 2.5" hard drive
This is my setup:
https://www.amazon.com/Samsung-2-5-Inch-Internal-MZ-75E500B-AM/dp/B00OBRE5UE/ref=sr_1_1?s=pc&amp;ie=UTF8&amp;qid=1509571940&amp;sr=1-1&amp;keywords=samsung%2Bevo&amp;dpID=41fw65-8tpL&amp;preST=_SX300_QL70_&amp;dpSrc=srch&amp;th=1
and cable:
https://www.amazon.com/StarTech-SATA-Drive-Adapter-Cable/dp/B00HJZJI84/ref=pd_bxgy_147_3?_encoding=UTF8&amp;pd_rd_i=B00HJZJI84&amp;pd_rd_r=20TGCA5AEN9VTN3KPA5J&amp;pd_rd_w=T8XnN&amp;pd_rd_wg=ee8nu&amp;psc=1&amp;refRID=20TGCA5AEN9VTN3KPA5J
You can take out the hard drive from the laptop and get a SATA to USB adapter and just connect the old HDD as a usb device and copy paste whatever you need.
Also why do you capitalize every new word in the title?
You can purchase a docking station/adapter depending on the SSD's interface. Examples {no endorsement(s) implied}:
Then it is pretty much plug and play, providing the formatting on the SSD is something that your OS recognizes.
Generally speaking, you should be able to plug the old SSD back into your current system as another SATA device depending on how many you currently have connected/how many your mobo supports, but without your system spec info my statement may be fallacious.
edit for linkage
There's no real straight forward way I can think of to do this without an enclosure or a USB to SATA adapter.
If you don't care about retaining your personal files or settings, why don't you just create a bootable USB OS X installer to install OS X on the SSD once it's put in the Mac Mini? Then reinstall Office from the install disk or downloaded installer (assuming you still have the license key).
Well at least getting a old hard drive out of a laptop is easy enough, all you need is one of these suckers
That error usually means something is going wrong with the hard drive itself. With any luck it is just a corrupt file system and can be repaired, worse case however is an actual mechanical failure in the hard drive.
What you want to do is pull it from the laptop and using something like this: https://www.amazon.com/dp/B00HJZJI84, plug it into another computer and see if you can access the files. If you can, save the files to that computer.
Next open command prompt and run a check disk, it’ll look of file system errors and fix them if it can. It will also look for physical damage to the hard disks and display them on the final output log as “bad sectors” if it has bad sectors, trash the hd, they will never get better and will only get worse until the drive completely dies.
The command for check disk you should use is:
Chkdsk D: /f /r /xReplace the “D” with whatever it’s drive letter is in the computer
What brand/model is the external HDD? Then do a search for this online and add in you need an AC adapter for it.
Or, you can open it and take the drive out and plug it into your PC. You can also get a SATA to USB adapter and go that route.
You could get something as simple as this to access the drives. https://www.amazon.com/StarTech-SATA-Drive-Adapter-Cable/dp/B00HJZJI84/
Edit: That adapter will only work for laptop drives. You will need something with more power for a 3.5" desktop hard drive. Something like this fore example https://www.amazon.com/UNITEK-Converter-Adapter-Cable-Drive/dp/B00GLL41MA/
Or if you want a more permanent solution you could get an enclosure. Which is basically the same thing but in a box. Just make sure you get the right size for your particular hard drive.
Edit: To answer your other question. I'm not really sure what you mean by "the Bookmark", but in theory everything should still be on the drives if you know where to look.
Remove the hard drive from the computer. After it's out, you can connect it to your computer either through SATA internally, or though a SATA to USB connector like this one.
StarTech USB 3.0 to 2.5" SATA III Hard Drive Adapter Cable w/ UASP - SATA to USB 3.0 Converter for SSD/HDD - Hard Drive Adapter Cable https://www.amazon.com/dp/B00HJZJI84/ref=cm_sw_r_cp_apa_0qh1xbNRS6B7E
I've used this before for this very same thing. Worked great for me! Assuming the drive is in serviceable condition, of course.
That special cord is cheap and is just a sata to USB adapter like so StarTech.com SATA to USB Cable - USB 3.0 to 2.5" SATA III Hard Drive Adapter - External Converter for SSD/HDD Data Transfer (USB3S2SAT3CB) https://www.amazon.com/dp/B00HJZJI84/ref=cm_sw_r_cp_apa_i_RU1iDbHZ5T79J
I believe on the older Macs target disk mode only works over firewire. So you'd need a firewire adapter for the new Mac if you want to connect it that way. Really the easiest way is to just get a SATA to USB adapter. But if you don't want to do that and the old Mac is working except for the screen/keyboard you could just plug in an external display and keyboard and network them together.
If you want something without an external case you could just get a cable like this: https://www.amazon.com/StarTech-com-USB3S2SAT3CB-Drive-Adapter-Cable/dp/B00HJZJI84/ref=sr_1_3?s=pc&amp;ie=UTF8&amp;qid=1523015274&amp;sr=1-3&amp;keywords=sata+to+usb
Get a USB-SATA adapter like https://www.amazon.com/StarTech-SATA-Drive-Adapter-Cable/dp/B00HJZJI84, hook it up to a computer, and wipe the drive from there.
A trick to this if your chassis is out of HDD / SSD ports is to use a USB to Sata converter and then use a sata SSD.
https://www.amazon.com/dp/B00HJZJI84/ref=cm_sw_r_cp_api_i_.N5EDb9WDTKRB
Buy a SanDisk or Samsung. Don't buy Pny or Kingston. Look at your current disk USAGE and get the appropriate size for that. If you have a 1tb and have 820gb free, you just need to buy a 240gb SSD.
Step 2. Order a USB to sata cable for $10
https://www.amazon.com/dp/B00HJZJI84/ref=cm_sw_r_cp_awdb_t1_xKTEDbXSJQ8TM
Step 3. Use the free version of mini part tool to migrate to SSD.
So the Aorus RX580 8GB is the best one for my build?
&nbsp;
I plan on continuing to use my laptop and I wanted to upgrade my laptops HDD size too so I don't want to install my laptop drive as well. Someone else said this is what I would have to do to transfer the contents of my laptop to my new HDD
> get the parts you have listed for your new build
> take a screenshot(s) of you Programs and Features window to remember all the crap you installed
> grab this 10 dollar adapter
> when your parts come, use that adapter to copy everything you need off your old system onto your new 1T hdd (docs, pics, video, downloads, steam games, etc)
> install a fresh windows 10 onto your new machine with just the ssd plugged in, after you have windows installed add the 1T hdd to your build and all your files will be there
> install previously referenced crap on new pc
>and then you're back to 100% without cloning errors
Is this the right way to do it?
Describe a bit more about the unit you want. Is it supposed to be a PC of its own? In that case one would get an ITX case that fits three 5.25" drives, like https://www.amazon.com/iStarUSA-S-35-Compact-5-25-Inch-mini-ITX/dp/B00DJ7T3YK. If you want something that connects to other PCs I'd glue three external drives together and just use USB. And yes, connecting those to an USB hub is a good idea (maybe an USB 3.1 Gen 2 hub to avoid any bandwidth issues).
If you have to use the internal drives without a PC of their own I'd get three of https://www.amazon.com/StarTech-com-SATA-Drive-Adapter-Cable/dp/B00HJZJI84/ + a powered USB 3.0 hub like https://www.amazon.com/AmazonBasics-Port-USB-Power-Adapter/dp/B00DQFGH80/.
But I haven't build something like that yet. When I still used optical disk writers there was always the issue of having to keep the system calm to not produce write errors. I'm not 100% certain having three connected to a hub won't be without issues - but it's not too expensive to try out.
Okay, so I dug my adapter out and it is an older style adapter, not SATA 3, so it won't work with the HDD I took out of my Pro when I upgraded to a 2TB drive. Sorry!
However, I did a bit of digging, and this cable on Amazon has reviews from people who say they bought it specifically to work with an external HDD on their PS4 and had no issues.
BUT, I would recommend simply buying an enclosure. This enclosure is actually cheaper than the cable I linked above, and your HDD will look neater and stay cleaner if it's inside a case instead of having a bare drive connected to the PS4's USB ports.
This is the exact enclosure I am using right now with the PS4 Pro's 1TB drive. It costs a bit more, but I like that it includes a place to plug in an AC Adapter in case the HDD you're using needs more power than the PS4's USB ports can provide.
I'm sorry I have outdated cables and couldn't test that for you after all, but I hope you find something that will work for you. Good luck!
This is all you need.
https://www.amazon.com/StarTech-com-SATA-Drive-Adapter-Cable/dp/B00HJZJI84/ref=sr_1_3?ie=UTF8&qid=1549405700&sr=8-3&keywords=hard+drive+to+usb+adapter
&#x200B;
Yes, anything connected through a USB will just act like removable media/flash drive.
Either a Docking Station or SATA to USB cable should suffice. They both do the same thing, but the station has the ability to power up 3.5" drives.
Your husband probably already knows, but instead of opening the laptop back up twice, consider something like this.
Would this work? https://www.amazon.com/StarTech-SATA-Drive-Adapter-Cable/dp/B00HJZJI84/ref=pd_lpo_147_bs_t_2?_encoding=UTF8&amp;psc=1&amp;refRID=R62HJS8RW2R53CPMX0TN
I'd return it but the cost will be $8 to return a $20 items i might as well keep it for when i get a new case but for the mean time.
No enclosure, but would give you significantly faster speeds for close to the same price. Also it's easier to move (no need for external power.)
Idea for a combo:
https://www.amazon.com/StarTech-SATA-Drive-Adapter-Cable/dp/B00HJZJI84/ref=sr_1_1?s=pc&amp;ie=UTF8&amp;qid=1486254856&amp;sr=1-1&amp;keywords=sata+usb3
https://www.amazon.com/SanDisk-120GB-SDSSDA-120G-G26-Newest-Version/dp/B01F9G414U/ref=sr_1_2?s=pc&amp;ie=UTF8&amp;qid=1486254905&amp;sr=1-2&amp;keywords=128gb+ssd
The disk that came with the SSD is probably a data migration tool to help you make the process easy by directly transferring the files to the SSD from the HDD. In this case, you do need a SATA to USB connector (https://www.amazon.com/StarTech-SATA-Drive-Adapter-Cable/dp/B00HJZJI84/ref=sr_1_3?s=pc&amp;ie=UTF8&amp;qid=1486406967&amp;sr=1-3&amp;keywords=sata%2Bto%2Busb&amp;th=1) in order to transfer the files (Windows OS will be included so you don't have to have a separate install). The following video is great in telling you how to go through the process of using the Samsung Data Migration tool (https://www.youtube.com/watch?v=M_Mu5TuXgXo) (plug in the SATA adapter to the SSD and computer, then use the software, then remove the old HDD after you turned off the computer, then put in the new SSD in and you should be good to go [remember to read through the description box for the YouTube videos I link because there is IMPORTANT information there, especially the video on using the Samsung Data Migration tool]). Good luck!
If you have another computer you can make an El Cap USB installer and reinstall it from there.
&#x200B;
To get your data you can get a SATA-USB external adapter, pull the drive out of the Macbook, and copy your data to another computer.
&#x200B;
Adapter:
&#x200B;
https://www.amazon.com/StarTech-com-SATA-Drive-Adapter-Cable/dp/B00HJZJI84
&#x200B;
Same thing but a full enclosure:
&#x200B;
https://www.amazon.com/gp/product/B00OJ3UJ2S/ref=s9_acsd_top_hd_bw_bAqpP1_cr_x__w?pf_rd_m=ATVPDKIKX0DER&pf_rd_s=merchandised-search-3&pf_rd_r=CRVP86GZMSG9D9WY4W3X&pf_rd_r=CRVP86GZMSG9D9WY4W3X&pf_rd_t=101&pf_rd_p=4f3a3e36-c598-581a-bdda-6635ea8feafa&pf_rd_p=4f3a3e36-c598-581a-bdda-6635ea8feafa&pf_rd_i=160354011
&#x200B;
Sorry for your loss. As the other user mentioned for the PC you should be Able to remove the hard drive from it , (generally located for easy access by removing a few screws on the underside of the laptop.) A USB to Sata adapter cable would make this a simple process, you simply plug the hard drive into the sata adapter and the usb into another PC. It essentially enables you to read the drive like a flash drive. This will only work providing the drive isn’t encrypted, by encrypted I don’t mean the windows password, I mean something like BitLocker. But it’s certainly worth a shot. Good luck.
This is what you need.
https://www.amazon.com/Transcend-TS256GSSD230S-Information-256GB-Solid/dp/B01MEGCFEP/ref=sr_1_9?ie=UTF8&amp;qid=1538495909&amp;sr=8-9&amp;keywords=256+gb+transcend+ssd
And this cable adapter:
https://www.amazon.com/dp/B00HJZJI84?aaxitk=xb.8k-asJnXFbTJHRCBvCQ&amp;pd_rd_i=B00HJZJI84&amp;pf_rd_m=ATVPDKIKX0DER&amp;pf_rd_p=54dc821a-0937-4e6f-9da9-f8dd5443145d&amp;pf_rd_s=desktop-sx-top-slot&amp;pf_rd_t=301&amp;pf_rd_i=startech+usb+3.0+to+2.5%22+sata+iii+hard+drive+adapter+cable+with+uasp&amp;hsa_cr_id=2065800560301&amp;sb-ci-n=productDescription&amp;sb-ci-v=StarTech.com%20USB%203.0%20to%202.5%E2%80%9D%20SATA%20III%20Hard%20Drive%20Adapter%20Cable%20w%2F%20UASP%20%E2%80%93%20SATA%20to%20USB%203.0%20Converter%20for%20SSD%2FHDD%20-%20Hard%20Drive%20Adapter%20Cable
That's what I have on my xbox one and it works perfectly. Sorry about the long links.
EDIT: Sorry, didn't see you already had the SSD.
Have you tried something like this:
https://www.amazon.com/StarTech-SATA-Drive-Adapter-Cable/dp/B00HJZJI84
You will need to convert the drive from SATA to USB. Some thing like this would work. Then it will act just like an external drive. From there you can install whatever you want on it. Just set the BIOS to boot from USB and you should be good.
You just need a simple SATA to USB cable to connect to computer.
Atombios is the firmware that interfaces directly with your video card. Either your firmware is corrupt, or the video card (most likely the RAM on it) is borked.
It's a T400, so that's pretty old. RAM does fail, but I believe it's more likely that your firmware is corrupted and re-installing it would fix the problem.
Theoretically, you should be able to boot from a LiveCD/USB and get into a normal desktop environment. From there, back up your files to a USB disk or a network location before doing anything else, then (to keep the process simple) try to re-install Linux.
However, it's possible that even booting from a LiveCD/USB won't work if it's a RAM issue (RAM is shared between the CPU and GPU on these), so in that case you'll need to remove the drive from your laptop to back it up to another computer.
If you have access to a computer with a USB3.0 interface, you can pull your hard drive out of the T400 and use one of these to plug that drive into your other computer. They make versions of this that don't require USB3.0, if you want to go on a little search for it. I used to use these pretty frequently back in the day to back up client hard drives.
Any 5-pin DIN to PS/2 should work then I use this for my boards PS/2 to USB
I have a Sanoxy "blue box" adapter and it works like a charm.
This should work well, or the "Blue Cube".
If you don't have a PS/2 port, you'll need a blue cube adapter https://www.amazon.com/SANOXY-PS2-Keyboard-USB-Adapter/dp/B000BSJFJS
Standard PS/2 to USB adapters don't have enough power.
If I recall this keyboard is just a rubber dome from Honeywell.
Converting to USB is very easy:
Done!
Omnikey 102 owner here.
Uses an AT port, easy to convert to ps/2.
No Windows key because of it being an early model. Mine is a later model hence it has a Windows key
Probs uses white or blue alps.
I suggest after getting a competend AT to ps/2 converter you ought to get a competent ps/2 to usb converter if you're looking to use it on a newer machine. Nice score though! If you need any other help let me know.
The AT converter I got
ps/2 to usb converter I have
My 102 if you're interested
> which kind of ps2 to usb adapter should i get?
People usually recommend the blue cube, but I prefer and use the Newlink adapter. It's cheaper, works just as well and doesn't block any other USB ports, which can be an issue with the cube.
Unfortunately I don't have a means of testing it as none of my rigs have a ps2 port. I ordered this adapter which should arrive tomorrow.
I will say, though, I opened it up to clean it and was shocked at how little dust and grime there was inside. The PCB appeared pristine and the capacitors do not appear to be bulging. I guess I'll know for sure tomorrow :)
Nope mine is a PS/2. I use an adapter like this so I can plug it in via USB. There are some Model Ms out there though that use an older IBM terminal-style connector that need some circuit bending to be able to be used on a modern PC.
The "blue box."
http://www.amazon.com/gp/offer-listing/B000BSJFJS
This is the one to get for keyboard use. I'm using one right now with an ancient IBM Model M, works grrrrrreat. "Just works", with Linux anyway.
That Game Boy Player would absolutely not work, I mean.. it would allow you to play gameboy games, but you need to have the physical game disks.
It won't allow you to play WoW or something like that.
---
If you can paint out your vision?
I don't really understand much of what you have in mind. I would likely advise against the "roof". This will make it very complicated and also pretty difficult, based on the
---
You want to place this adapter inside it? That's possible when you use an internal USB adapter cable like that one.
But again, space is the big issue.
I looked at the BRIX as best as I could since that seems to be the best & smallest option you've got. Here is the inside of it. It's tiny, but it also got 2 small fans next to it, to keep the CPU & GPU cool under load. Without those fans, the temperatures of both the CPU and GPU will not stay in check..
Those fans are also pretty annoyingly loud.
You could perhaps find replacements for these fans, to get the noise down. It are 40x40mm fans, which Noctua also produces. These fans will be a lot more silent, but I think that they might not push enough air.. Especially because of the fact that the GameCube is not extremely well ventilated. This is something you'll have to likely test out yourself.
This Sycthe fan is 10mm thicker but also pushes a bit more air compared to the Noctua. It also is a bit louder (on paper) compared to it because of it.
Do you already have the GameCube with you? If so, it's time to pull out a venier caliper and start measuring. You really need to know everything.
Put it on a piece of paper or excel document or something.
---
You could even simply consider to use the program SketchUp. It's a free program that allows you to design whatever you want. I would recommend to at least have a look at some beginners guides so that you can do the very basic things, without going crazy.
You can use this to sketch out and design this whole thing from the ground up in software, before you start to even touch the GameCube in real life. To see if it would actually fit or just to see how much space you would have. SketchUp got a lot of GameCubes in it's 3D warehouse. But they're all in different sizes and I don't think anyone is actually in the right scale.
The closest one that's correct in terms of actual size / scale is that tiny one in the middle.
Dunno if freenas benefits from usb 3. If it does not you can get one of these for a completely internal install of your flash drive.
http://www.amazon.com/StarTech-Motherboard-4-Pin-Header-USBMBADAPT/dp/B000IV6S9S/ref=sr_1_1?s=electronics&amp;ie=UTF8&amp;qid=1395548208&amp;sr=1-1&amp;keywords=internal+usb3+plug
If you want it to be entirely internal, buy a cable similar to this:
https://www.amazon.com/StarTech-Motherboard-4-Pin-Header-USBMBADAPT/dp/B000IV6S9S/
Then make sure to route it so that the dongle is outside of the metal area of the case (in the front panel if plastic, or near a glass window), to not block the radio.
Flash drives and SSD's are almost exactly the same technology. There is really very little difference in the two if you buy a quality flash drive. I use the flash memory plugin on my SSD. I'm not sure it's 100% required since most SSD's support TRIM, but it doesn't hurt anything.
If you don't want to have your flash drive hanging outside the case.. and you have an internal motherboard header.. you can get a cable to plug the flash drive right into the header.... Obviously you would probably lose an external USB port, but it would protect against someone just snatching the flash drive out of your NAS. That is always my chief concern with external flash drives for the OS. To easy for someone to be looking for a flash drive, "find" the one on your server, then when windows can't write to it, formatting it and maybe not even realize what they done (if they aren't tech savvy)
For USB 2.0
https://www.amazon.com/StarTech-Motherboard-4-Pin-Header-USBMBADAPT/dp/B000IV6S9S/ref=mp_s_a_1_3?keywords=usb+flash+drive+header+cable&amp;qid=1564302415&amp;s=gateway&amp;sr=8-3
For USB 3.0 Headers
https://www.amazon.com/Female-Screw-Panel-Mount-Motherboard/dp/B010NBLRHK/ref=mp_s_a_1_14?keywords=usb+flash+drive+header+cable&amp;qid=1564302415&amp;s=gateway&amp;sr=8-14
That is a great idea! Never thought of that. Is this what you are referring to? https://www.amazon.com/dp/B000IV6S9S/ref=cm_sw_r_awd_IE8pub177ZKM8
You mean something like this?
Here's the Google search I used.
Yes! As long as the BIOS will support booting from USB. Some older machines might not.
You could maybe use an adapter to put a thumb drive inside the case: https://www.amazon.com/dp/B000IV6S9S
Heck, it might also have an IDE controller, so you could run the OS off IDE and storage off SATA.
The world is your oyster: https://www.amazon.com/StarTech-Motherboard-4-Pin-Header-USBMBADAPT/dp/B000IV6S9S
&#x200B;
Damage it? How? Is it a lan rig?
Also are you more concerned about how the case looks from behind than the cable mess that will be added inside the case?
Anyway it's your decision, you can get something like this.
https://www.amazon.com/StarTech-Motherboard-4-Pin-Header-USBMBADAPT/dp/B000IV6S9S/ref=sr_1_2?ie=UTF8&amp;qid=1493676184&amp;sr=8-2&amp;keywords=internal+usb+header
If you have extra USB headers on your motherboard I would get a USB port internally instead of using Molex. This will allow you to power and program the Arduino/LED strip. Something like this, https://www.amazon.com/dp/B000IV6S9S/ref=cm_sw_r_sms_awdb_t1_S7FMAb43HCRV7
So I see you're using that usb dongle for your internet. I feel ya, I've got one too, and it's not only unsightly but annoying to lug around when moving. I have yet to purchase this but I feel it'd be nice to have so I can hide the dongle in my case. It also helps because it frees up more usb space on your front I/O. just a thought I'v been having lately about my setup.
Why go to all that trouble when you buy an adapter for like $4?
http://www.amazon.com/StarTech-Motherboard-4-Pin-Header-USBMBADAPT/dp/B000IV6S9S
> -First question involves booting it and running off a flash drive. While this feels like salvation in a lot of ways in contrast to dedicating a boot drive, my concerns are this: How would I go about 'booting' the USB drive from internally in the system? This would come from avoiding a physical environment of tampering/nudging/whatever? I understand after the initial boot, writes to the flash happens only through configuring, but it seems odd to me that a critical piece of the setup is outwardly accessible to whomever in a non-lockdown interface like a USB port.
Some motherboards, especially with server motherboards will have an onboard USB port. Mine has one and that is where one of my two boot USBs is.
Another option you can do is a SATADOM, although you lose a SATA port to this, but depending on your environment may be worth it.
Third option if you want would be to take the USB header on the motherboard that you would usually plug the front panel USB ports to and get something like this to connect to it and then leave the output inside the case: http://www.amazon.com/StarTech-Motherboard-4-Pin-Header-USBMBADAPT/dp/B000IV6S9S
As explained elsewhere in the thread, USB ports do have a bandwidth limit - you can't just use hubs to run an infinite number of devices simultaneously off a single port. Think of how much video data needs to flow through that single cable at the base of the Christmas tree every second...
Anyway, in response to your edit: yes, running a cable from the motherboard header may indeed help. You need more actual USB host controllers, not just more sockets, and the unused headers on your motherboard may provide that. No point installing additional USB controllers on a PCIe slot if you aren't making full use of the controllers on the motherboard.
Now, I don't know the internal configuration of your motherboard; there might be whole controllers you aren't using and there might just be an on-board hub.
lsusb -tcan help with that, as it will show you if there are any totally empty buses.In case you didn't know, the header on the motherboard will use a different type of connector, and you'll need an adaptor a bit like this, or this if you want to make it neat. I'm not necessarily recommending those specific products, just showing you what they should look like. Note the different styles of header connector for USB2 and USB3.
Each header should support two USB ports without using any hubs, so with your motherboard you can gain six extra ports beyond those on the rear IO panel.
However, is there any chance of you telling us what you are ultimately trying to achieve here? I'm getting the feeling there might be an easier way...
Here are the amazon.ca links. The LED strip is a bit different but it is almost the same. You can control the colors on the litle dongle connected to it. As for USB power to the LEDS, there should be an option in your motherboard's BIOS to turn of USB power when you shutdown. Most motherboards today have that option.
http://www.amazon.ca/StarTech-com-USBMBADAPT-6-Inch-Female-Motherboard/dp/B000IV6S9S
http://www.amazon.ca/Lemonbest-120leds-Flexible-Changing-Waterproof/dp/B015R44RZC
You could use something like this. I haven't heard of USB to SATA and even if there was you'd be limited by your flash drives transfer speeds.
EDIT: Oops, didn't see the laptop comment. The thing I posted won't work :/
Transcend and PNY used to make them, called Internal USB Flash Module. Model fro the transcend was UFM-H. They are really too small to use these days, and expensive.
https://www.amazon.com/SanDisk-Cruzer-Low-Profile-Drive-SDCZ33-032G-B35/dp/B00812F7O8
plus
https://www.amazon.com/StarTech-Motherboard-4-Pin-Header-USBMBADAPT/dp/B000IV6S9S
Is a cheaper, better replacement (specifically, those cruzer fits are known to be very good.)
Might be too late for this, but I use the pictured controller dongle.
I recently bought one of these internal USB port adapters to connect it inside my case, and stuck it to the inside wall with velcro. Since my controller is already connected to it, theres no issues with is losing sync or anything. I might change my tune if I begin to have disconnection issues, but for now it seems like a good solution.
EDIT: The point being because of its size I'm always worried I'll accidentally snap it by brushing past my pc or something. With it secured inside the PC, that can't happen.
Basically.
Let's assume you have a 1 year old computer laying around. It will have a SATA drive, which is a connection standard the drive uses to transfer data to and from the PC. Assuming the computer only has one hard drive, this will be the OS disk. As such, you can't disconnect it - you'll need it to run the OS while you grab your data at the end.
So look at the XP hard drive from the XP machine, and compare them to this picture. Not all modern computer have IDE connections any more, so if your hard drive has an IDE connector, you may need an adapter, like this one on Amazon. Connect the IDE and a female Molex connector and start the computer up. If ithe XP drive is SATA, just find an open SATA port on the motherboard and a free female SATA power connector and start up the computer. (Again, if you cannot find a free SATA port, that adapter I linked should have one.)
Either way, eventually you should reach your modern Windows install, and the OS should register the old HDD as a generic hard disk. From there, you may recover any data you like, or just leave the drive connected (I wouldn't recommend it without a wipe first, but that's personal preference).
Nonsense. It's not like they stopped having equipment in the world to get the data off of the drives.
You can get USB IDE connector. Then all you need to do is pull the drive out and copy it to newer medium. I have one of those and find it handy for imaging drives on laptops.
Mike Mike Mike Mike Mike Mike
As seen on my electronics WL
For anyone who doesn't know what it is, it's an AWESOME tool that allows you to take any hard drive and connect it to your computer via USB. This is extremely useful for computer techs when a drive is dying, a machine won't boot, or you need data from a drive and don't have the password to get in. There's one in my office, but I also need one for myself, as I do a lot of work on the side.
Thanks for the contest!!!
I have one of those things http://www.amazon.com/Vantec-CB-ISATAU2-Supports-2-5-Inch-5-25-Inch/dp/B000J01I1G/ref=pd_bxgy_pc_img_z , except an different version without that nice on/off switch, it saved my life a lot of times already when I had to backup a hdd or use an external cd to install windows/linux on older notebooks.
By your post I'll assume this isn't what you want, but I have one of these and its way more useful. If you get an enclosure for a 2.5" hdd, that's all you can use it for. The adapter I got can do 2.5 and 3.5" IDE HDDs, sata HDDs, as well as sata and IDE optical drives (damn near anything).
I've always had good success with data migration kits such as this one , you could always get a USB 3.0 model as well.
Older mechanical hard drives have much higher failure rates. If you want to use one though you can get a USB enclosure with a built in power supply or get an adapter with an external power supply. Here is an example https://www.amazon.com/Vantec-CB-ISATAU2-Supports-2-5-Inch-5-25-Inch/dp/B000J01I1G
That's an IDE drive.
https://www.amazon.com/Vantec-CB-ISATAU2-Supports-2-5-Inch-5-25-Inch/dp/B000J01I1G
I'd just go with something like this:
https://www.amazon.com/Vantec-CB-ISATAU2-Supports-2-5-Inch-5-25-Inch/dp/B000J01I1G
PATA/IDE enclosures are not too common anymore. This is a decent solution for pulling data off old drives.
I use this all in one Sata and iDE
http://www.amazon.com/Vantec-CB-ISATAU2-Supports-2-5-Inch-5-25-Inch/dp/B000J01I1G/ref=sr_1_1?ie=UTF8&amp;qid=1420917433&amp;sr=8-1&amp;keywords=Vantec+2.5%22%2F3.5%22%2F5.25%22+SATA%2FIDE+to+USB+2.0+Adapter
You can, but no guarantee it'd boot. I was able to swap a W10 drive to another laptop also running W10, but W7 on a made for W10 device might have driver issues.
Best bet is to buy something like this and just plug it into the new laptop via USB and just move it all over that way.
get a usb to ide/sata cable like this http://www.amazon.com/Vantec-CB-ISATAU2-Supports-2-5-Inch-5-25-Inch/dp/B000J01I1G/ref=sr_sp-atf_title_1_1?ie=UTF8&amp;qid=1382998317&amp;sr=8-1&amp;keywords=usb+ide+sata+adapter
and then run file recovery on the hard drive with a file recovery program
Free version for windows: http://www.piriform.com/recuva
Good luck!
Get yourself a Hard Drive Transfer Kit, this little guy has saved me more times than I care to remember! It allows you to plug any HDD (IDE or SATA), into a USB port on any PC, and transfer files as needed. Now the HDD has to be functional for this to work, but it's great for situations just like you are in, best $20 I ever spent!
you could plug it into the computer with an audio cable, but it would just be the analog mixed/mastered tracks. You may need a usb input device like this http://www.sweetwater.com/store/detail/UFO202
Otherwise it looks like the hard drive itself can be removed from the BOSS and accessed directly on a PC. http://thestudiofiles.com/?p=241
You would need something like this http://www.amazon.com/Vantec-CB-ISATAU2-Supports-2-5-Inch-5-25-Inch/dp/B000J01I1G to connect the internal IDE hard drive to a USB input. Inside should be all the raw WAV recordings.
Yes. That works great. Or if you want to go the external route, get one of these IDE or SATA to USB adapters.
Oh. Then it may be IDE. You'll need to convert 2.5" IDE to USB.
I have one of these and it can convert most things to USB (except mSATA) http://amzn.com/B000J01I1G
If you get that, you'll be able to use it, whatever the drive type is.
Ah, yeah, I'm more than half-way across the state from you, or I'd be happy to lend you one.
This is the one I have. $9.40
THIS! Because my laptop died last night, I can send a picture if you want, and I have to rescue the hard drive! I need those files!!! I'm on Reddit using my tablet but I need my files :(
Thank you for the contest!
Get these hard drive cables for $8 and free shipping. It will connect just like an external hard drive without all of the trouble.
You would need something along the lines of this USB Drive Adapter You will be able to browse the drive and hopefully get some of your files back.
If what you need it for is temporary, such as transfering the files from the old hard drives to the new one, I would suggest using something like this instead of an actual enclosure.
If you want something more permanent, you could look around for something like this, just look up 3.5 inch enclosures for standard hard drives. They make other sizes if your hard drives are different.
I'd recommend picking up this kit then; Or if you're connecting it to a desktop, just open the tower case and connect it directly to the SATA controller with a SATA cable.
OP, you could do a clean install(which is best when moving to an SSD), and then get one of these and just transfer over what stuff you really need from your user profile.
It might be fixable depending on what exactly is broken, but it's hard to tell without opening it. This kit on Amazon or a dozen others like it can be used to plug a hard disk on your computer through USB, bypassing that circuit in the external drive. But you still need to open the drive enclosure and extract the hard disk. If you do it carefully, you can't really damage it more than it already is.
I got an IDE to usb converter like this. Quality control doesn't seem to be great with these, but mine works fine and it lets me loan people files on an old drive that I don't have to worry about getting back anytime soon.
Sorry I don't have any experience with fixing damaged drives.
When trying to pull data from a failing drive I've had much better luck attaching the drive via a kit or adapter to another PC via USB and pulling the data that way. If the bad sector contains OS data it may struggle to boot but pulling your data off shouldn't be an issue. I personally have this cheap adapter from Amazon and have used it many times in this kind of situation.
Best of luck.
If you end up going the enclosure method, and don't know anyone that has one - [use this cable set] (http://www.amazon.com/Drive-Adapter-Converter-Optical-External/dp/B001OORMVQ/ref=sr_1_2?ie=UTF8&amp;qid=1344519708&amp;sr=8-2&amp;keywords=SATA+to+USB+cable) - $8 on Amazon with free shipping if you have Amazon Prime. Not an enclosure, but still lets you hook the drive up USB and is much cheaper than an enclosure.
This will connect almost any disk type to usb so you can hook it up to your pc.
[(http://www.amazon.com/Drive-Adapter-Converter-Optical-External/dp/B001OORMVQ/ref=pd_cp_pc_0)]
Buy this, plug the hard drive to the laptop:
http://www.amazon.com/Drive-Adapter-Converter-Optical-External/dp/B001OORMVQ/ref=sr_1_2?ie=UTF8&amp;qid=1341912989&amp;sr=8-2&amp;keywords=sata+ide+usb
Found this for $8 on Amazon http://www.amazon.com/SANOXY-A12940-Drive-Adapter-Converter/dp/B001OORMVQ/ref=sr_1_5?s=electronics&amp;ie=UTF8&amp;qid=1454258291&amp;sr=1-5&amp;keywords=IDE+to+USB
TIL not every tech has one of these with them at all time.
http://www.amazon.com/Drive-Adapter-Converter-Optical-External/dp/B001OORMVQ
For sure:
The way I do it is I remove the hard drive from the computer (you should be able to Google "<computer type/model> harddrive removal" and find documentation for it), then you would need the appropriate usb cables to connect that computer to another. Once it's connected, it'll act like an external harddrive, from there you just copy it to the computer you're on.
The cables vary depending on the type of harddrive (laptop/desktop), but something like this bundle is cheap and has them all: http://www.amazon.com/Drive-Adapter-Converter-Optical-External/dp/B001OORMVQ
So basically you're turning the harddrive into an external harddrive temporarily so you can access/copy the files from the user account. Make sense? Happy to answer more questions.
Depends on if your old laptop hard drive has IDE or SATA interface. If they are both SATA it should be easy and quick.
If your old laptop has an IDE interface, go and order one of these and then use it to connect to your new computer.
That should be the fastest. But transferring anything other than save data across computers is screwed now days. If you don't understand any of these steps, use Google. Good luck.
Do you or someone you know have another computer?
What I would do is remove the hard drive from your laptop, and use an external hard drive reader, kind of like this (on mobile forgive the bad link): http://www.amazon.com/gp/aw/d/B001OORMVQ/ref=redir_mdp_mobile/183-6987695-8583560
It's essentially a cable you connect to your hard drive, then to another computer so that it registers as just another drive. From there you can browse the drive and pull off your data.
I use one of these.
Setup is Japanese though, so here's a translation.
Edit: I should mention there's a noticeable delay, maybe 1/3 of a second on the capture. So I wouldn't recommend playing off the capture alone. You'd need to split it to a display.
I tried that exact setup with the same equipment. I only tested it with Melee but the results were not good. Older 3D games do not upscale well. I honestly regret not going with the elgato HD for PM streaming, it can't do 1080p60fps but it can do composite/svideo/component connections. Save your money or buy a gv-usb2 for svideo capturing.
Use a HDMI cable to connect the GPU to the monitor, or use a cable/adapter like this and connect to DVI on the GPU and HDMI on the monitor.
HDMI to DVI will always be just a single DVI-Link as HDMI doesn't have enough pins to carry the data from DVI dual-link.
If you plan to adapt DVI to HDMI (or vice versa) I'd always recommend a complete cable instead of a short adapter. It puts less strain on the used ports and isn't really more expensive. They should work both ways as it's a passive adaption (just connecting pins).
Acer V226HQL Full HD monitor over AmazonBasics HDMI-DVI Converter working perfectly. Can select all resolutions just fine.
The 570 has only hdmi and displayports so you have to use a converter like this one : https://www.amazon.com/AmazonBasics-Input-Output-Adapter-Cable/dp/B014I8UQJY/ref=pd_sim_147_7?_encoding=UTF8&amp;pd_rd_i=B014I8UQJY&amp;pd_rd_r=2M0NM234VJSM7X7MCSJ7&amp;pd_rd_w=IkChP&amp;pd_rd_wg=KD9U6&amp;psc=1&amp;refRID=2M0NM234VJSM7X7MCSJ7
DVI and HDMI are electrically compatible - you need an adapter or a cable. Neither is very rare.
> is it possible to have my TV (I use a TV as a monitor) show what I am seeing in VR while I am using it?
Get a DVI -> HDMI adapter or cable for your TV.
https://www.amazon.com/AmazonBasics-Input-Output-Adapter-Cable/dp/B014I8UQJY/
or
https://www.amazon.com/Rankie-2-Pack-Gold-Plated-Adapter-Converter/dp/B00ZMVGTA2/
Not much...
This for DVI port on your PC to you HDMI Port on old TV.
AmazonBasics CL2 Rated HDMI Input to VGA DVI Output Adapter Cable - 6 Feet https://www.amazon.com/dp/B014I8UQJY/ref=cm_sw_r_cp_apa_i_6YS7CbGJPWQVJ
Or this to use a display port on your PC to an HDMI port that you can then use your spare HDMI cable to connect to your TV.
BENFEI DisplayPort to HDMI Adapter, Benfei DP Display Port to HDMI Converter Male to Female Gold-Plated Cord Compatible for Lenovo Dell HP and Other Brand https://www.amazon.com/dp/B017Q8ZVWK/ref=cm_sw_r_cp_apa_i_H0S7CbBPD8K7P
The terms male and female relate to which side of the plug you are referring to. Males plug into females (reproductive biology). So the port that end plugs into is female, and the side of the cable that plugs into the port is the male end.
Three questions:
HDMI->DVI as /u/PWMeany said. https://smile.amazon.com/dp/B014I8UQJY/ref=cm_sw_em_r_mt_dp_U_UShvCb38ZJ761
it uses multi-stream feature of displayport, a RX 550 might be a idea with a DP>HDMI adapter and DVI>HDMI cable
if your only using it for desktop work the rx 550 is way newer than 5450 and GT 710 and will do 4K HEVC/AVC video decoding and encoding etc so perfect for media
https://www.amazon.com/Gigabyte-Radeon-Graphic-Cards-GV-RX550D5-2GD/dp/B06Y43NJ3D/ ($89)
https://www.amazon.com/Plugable-DisplayPort-Supports-displays-3840x2160/dp/B00S0C7QO8 ($20)
https://www.amazon.com/AmazonBasics-Input-Output-Adapter-Cable/dp/B014I8UQJY ($6)
https://www.amazon.com/AmazonBasics-Input-Output-Adapter-Cable/dp/B014I8UQJY
;)
One solution would be to use a dvi-hdmi cable, which are really cheap (7$ for a long and high-quality cable like this and use the dvi port, see if that works. If it does, just stick to that, it's virtually the same as hdmi except no monitor audio. It might just be the hdmi port, since b350 motherboards are all crap and have rushed designs, you might expect something to not function properly.
You could do this too
I've got a 27 inch on dvi + a 50 inch tv on hdmi.
There are also Displayport to Hdmi converters that work too for what you're trying to do.
Gotcha, you probably just need a DVI cable like this: https://www.amazon.com/dp/B00IHMFIBY/
However if you're GPU does not support the DVI required by your monitor you may need a dvi to hdmi adapter like so: https://www.amazon.com/dp/B014I8UQJY/
You could get a cable like this one or an adapter from amazon for your monitor.
DVI is not Display Port at all lol. I mean it's a video/audio output interface haha.
https://www.amazon.com/AmazonBasics-Input-Output-Adapter-Cable/dp/B014I8UQJY/ref=sr_1_3?s=electronics&amp;ie=UTF8&amp;qid=1505175324&amp;sr=1-3&amp;keywords=dvi+to+hdmi
There's a cable for ya, do make sure that it matches up with the holes on the DVI port on your monitor though!
This is possible without a capture card, assuming you're not using a laptop. If you're trying to use a laptop's screen it's capture card or nothing.
So assuming you're using a regular PC and monitor it's a few fairly inexpensive adapters and\or cables.
To get video to you're monitor you've got a couple options and it depends on what inputs are available. If your monitor has a second HDMI port you should use that, but most don't. If it has a DVI port use a HDMI to DVI cable to plug it into your monitor. If neither of those are available you can use an HDMI splitter to have two devices plugged into the same HDMI port on your monitor.
You can run the Switch's sound through the computer and have it act as a mixer so that both the Switch sound and your computer's sound comes out of the same headphones\speakers. Saves you from needing to plug and unplug speakers or headsets all the time. You'll also be able to use Discord\Steam\whatever voice chat while playing Switch games if you're using a headset.
Note: This is assuming you're running Windows 10.
To do this you'll need an aux cable.
What you would need to do is find the Line-In jack on the back of your computer. Plug one end of the aux cable into the headphone jack on the Switch and the other into the Line-In on your computer
On your computer go to Sound Settings in the Control Panel. You can also use the search bar on your computer and search for "Sound".
In the main Sound settings there's a section for Input where you can choose your Input Device. Choose Line-In there.
Then click on Device Properties right below Input Device
Then click Additional Device Properties on the right
Now we're in Line-In properties, go to the Listen tab and check 'listen to this device'. Click on the drop down labeled "Playback through this device" and set it to your headphones\speakers.
You may also want to go to the Levels tab and turn up the volume coming from line in.
Press "OK" to close Line-In properties. You should now be hearing both your computer and the Switch audio through the same pair of headphones\speakers.
You can use an HDMI/Displayport to DVI cable if needed.
DP to DVI
HDMI to DVI
They are! That monitor has a dvi-d input so in a modern computer something like this dvi to hdmi cord would be needed if no dvi ports exist on the graphics output.
Get this: https://www.amazon.com/AmazonBasics-HDMI-DVI-Adapter-Cable/dp/B014I8UQJY
Great! Okay, so according to a quick Google search, you can run both the DVI and VGA ports concurrently.
You CAN go from DVI-D, which is what you have next to the VGA port, straight to HDMI, with a cable like this.
Now, the only thing to worry about is that DVI cannot carry audio, whereas HDMI can do both audio and video. There are some TVs out there with a PC input that allows you to have audio come over a separate cable (3.5mm stereo mini, optical, RCA, etc).
If your TV does not have that, you might be better off using your PC speakers, or looking at something like this. (I have never used that part and can't vouch for its efficacy, although Monoprice is perfectly fine as a parts seller) If you can just use your PC speakers (as it sounds like the displays won't be far apart), then that would certainly be the easiest solution.
Some monitors have HDMI ports on the back. If yours does, I think you know what to do from there. If not, your monitor should have a DVI port on the back. I have a simple adapter that I bought on amazon that you can buy for about $5.00-$7.00.
https://www.amazon.com/dp/B014I8UQJY/ref=cm_sw_r_cp_api_4iQyybG3GQ7CK
https://www.amazon.com/AmazonBasics-Input-Output-Adapter-Cable/dp/B014I8UQJY/ref=sr_1_3?ie=UTF8&amp;qid=1501734291&amp;sr=8-3&amp;keywords=hdmi+to+dvi+adapter
Or
https://www.amazon.com/Rankie-Gold-Plated-Active-Adapter-Converter/dp/B00ZMV7RL2/ref=sr_1_1?s=electronics&amp;ie=UTF8&amp;qid=1501734325&amp;sr=1-1&amp;keywords=hdmi+to+vga+adapter
Take your pick.
What ports do your monitors use? You can get cheap cables like this:
https://www.amazon.com/AmazonBasics-Input-Output-Adapter-Cable/dp/B014I8UQJY/ref=sr_1_3?s=electronics&amp;ie=UTF8&amp;qid=1505922534&amp;sr=1-3&amp;keywords=hdmi+to+dvi
Plug the HDMI in the GPU, and the DVI in your monitor if your monitor only supports DVI (or vice versa)
Yes, you can just get an HDMI to DVI cable or adapter:
https://www.amazon.com/AmazonBasics-Input-Output-Adapter-Cable/dp/B014I8UQJY/
You need an adapter or a cable. I suppose your card is like this, there is a direct HDMI output, use that to connect one of your monitors, and then buy and adapter or cable from DVI to HDMI, or DisplayPort to HDMI cable or adapter, whatever is cheaper or in your store.
There are 5 different DVI connectors.
The rx460 uses DVI-D
So to connect to rhe monitor you want youll need an adaptor
hdmi to vga
https://www.amazon.com/Cable-Matters-Active-Adapter-Micro-USB/dp/B00879DM56
DP to VGA
https://www.amazon.com/VicTsing-Gold-plated-DisplayPort-Adapter-Macbook/dp/B00K49SZTK/
display port to dvi-d
https://www.amazon.com/Cable-Matters-Gold-Plated-DisplayPort/dp/B004C9M7UG/
Or
hdmi to dvi-d
https://www.amazon.com/AmazonBasics-HDMI-DVI-Adapter-Cable/dp/B014I8UQJY/
Any of these would work.
Yes, I used to use one of these to output from PS3 (HDMI) to computer monitor (DVI).
https://www.amazon.com/gp/aw/d/B014I8UQJY/ref=mp_s_a_1_1?qid=1466546942&amp;sr=1-1&amp;pi=SX200_QL40&amp;keywords=dvi-d+to+hdmi&amp;dpPl=1&amp;dpID=41-O%2BZoRjZL&amp;ref=plSrch
I just looked through the reviews of the adapter. There are actually many people with the same issue.
https://www.amazon.com/AmazonBasics-DVI-to-HDMI-Cable/product-reviews/B014I8UQJY/ref=cm_cr_arp_d_paging_btm_next_2?ie=UTF8&filterByStar=one_star&reviewerType=all_reviews&pageNumber-reviews-filter-bar
An actual cabe with dvi on one end and hdmi on the other. This specifically https://www.amazon.com/gp/aw/d/B014I8UQJY/ref=mp_s_a_1_1?ie=UTF8&amp;qid=1482695488&amp;sr=8-1&amp;pi=SX200_QL40&amp;keywords=dvi+to+hdmi
Among the Elgato products, I chose the Cam Link because it is very small (it's basically a USB drive, 8cm x 3cm) with an HDMI input on one end and an USB output on the other end. So small enough to be added to your backpack without trouble. For your Macbook, you'll also need some USB-C to USB3 adapter, though, if you don't have one already. Maybe something like this.
Elgato also has a high-end external game capture card with an HDMI output so that you can output your feed to a TV at the same time as capturing it with a computer, but I didn't need that. And it's more expensive. I bought the Cam Link on Amazon Canada so you can look up the price there.
Enjoy your portable setup!
Price you pay for portability, but most people only use the port to charge anyways. If you need adapter a mini usb-c is small enough. https://www.amazon.com/dp/B015Z7XE0A
You can, but Remote Play won’t pick it up if you connect directly to the MacBook’s Bluetooth stack (the Windows RP app works the same way; I assume it’s because Sony is doing some weird low-level BT stuff to support low-latency audio on the controller’s headphone port).
You can buy a USB-C to micro-USB cable and connect the controller directly to your MacBook instead.
The other option is to buy a USB-A to USB-C adapter so you can plug in either the official Bluetooth dongle (which is expensive and kinda bad) or a standard USB cable.
I have an RTX 2080, was having tons of issues with the USB port. Now using this adapter and it works perfect.
nonda USB Type C to USB 3.0 Mini... https://www.amazon.com/dp/B015Z7XE0A?ref=ppx_pop_mob_ap_share
This one would do. I actually have it on my to-order-at-some-point list since I just got a new Macbook Pro in that color - it's designed to match it. But since all I really use the USB ports in my laptops for is USB drives and charging, for the moment I just ordered a thumb drive that has both USB-A and USB-C connectors. It'll do for now.
nonda USB Type C to USB 3.0 Adapter Aluminum with Indicator LED for Macbook Pro 2017/2016, MacBook 12-inch and other Type-C Devices (Space Gray) https://www.amazon.com/dp/B015Z7XE0A/ref=cm_sw_r_cp_apa_ZZMXBb98PE6B8
A dock with USB ports would be a good way to do it, but apparently the GameCube adapter will work even if you only use one of the USB ports (the black one).
https://www.reddit.com/r/smashbros/comments/2n2ypj/so_you_only_need_to_plug_is_one_usbthe_black_one/
You won't get any rumble, but all four controller ports should still receive input. As such, you can use a much cheaper USB C to 3.0 adapter, however this of course means you'll need some way to prop the Switch up unless you're fine with it lying flat, and you won't be able to charge the console while using a GC controller.
Hey, I know this thread is older but did you ever figure this out? I just got my SR2 today, and am running Mojave on a 15" touch bar MacBook Pro. I think I'm having the exact same issue - installed the drivers and said it was successful, and it will even work, but it will randomly disconnect and then the touchbar freezes and I have to completely reset (not just restart) my computer.
&#x200B;
https://support.serato.com/hc/en-us/articles/236084867-KNOWN-ISSUE-Using-Serato-DJ-with-Macbook-Pro-models-w-Touchbar-can-result-in-connection-issues
\^it seems like this is exactly what's happening
&#x200B;
The USB C adapter I'm using at the moment is:
https://www.amazon.com/nonda-Adapter-Thunderbolt-Aluminum-Indicator/dp/B015Z7XE0A/ref=sr_1_5?keywords=usb+c+to+a&qid=1558085861&s=gateway&sr=8-5
&#x200B;
Thanks for any input!
Shit sometimes the makers of the consumer laptops are so stingy they won't even add USB Type-A ports. You know, the port EVERYONE's been using for 10+ years for many things. Not that Ethernet ports aren't good to have or anything.
I really don't want to have a dozen of these floating around:
https://www.amazon.com/nonda-Adapter-Thunderbolt-Aluminum-Indicator/dp/B015Z7XE0A/ref=sr_1_3?keywords=usb-c+to+usb-a+adapter&amp;qid=1556863620&amp;s=gateway&amp;sr=8-3
Dell disappointed me with their XPS 2-in-1 laptop when the boneheads decided to not put a single USB Type-A port. Like what's the point? If I wanted no USB Type-A ports I'd get an iPad Pro. Oh well, at least the HP Spectre x360 15t has one, ONLY ONE! Those are laptops that cost a bit over $1000 too, so I don't understand the lack of Type-A, I understand the want for Type-C and Thunderbolt 3 but 95% of my peripherals are USB Type-A whether it's USB 2.0, 3.0, or whatever the fuck USB calls it anymore.
Sorry, I wasn't thinking about the Primenowness of it. It's the nonda USB Type C to USB 3.0 Mini Adapter. The regular Amazon link: https://www.amazon.com/nonda-Adapter-Thunderbolt-Aluminum-Indicator/dp/B015Z7XE0A/
I have used several of Apple's adapters and this Nonda adapter with no issues. Your mileage may vary.
Yes – you can use your MacBook Pro with any Bluetooth mouse. If the mouse requires connecting it via a cable to pair it initially, you can get a fairly inexpensive USB-C-to-USB-A adapter on Amazon in order to accomplish that.
Yeah, you can get this adapter for your MacBook or step up to 500GB Samsung which uses USB-C
https://www.amazon.com/dp/B015Z7XE0A?aaxitk=sOh9ScuhbKC2lC9hWwVjfw
https://www.amazon.com/Rankie-USB-Cable-Type-Feet/dp/B01KXAZNEE/ref=sr_1_3?keywords=15+ft+usb+3.0+data+cable&qid=1573372484&s=electronics&sr=1-3
What about link 1 plus link 2?? I don't see why it wouldn't work tbh - thoughts?
Hmm interesting......I still would not buy the preloaded SD card....very sketch; it's possible Nintendo hasn't set their eyes on it yet, but to each his own I guess.
Well I literally just switched a couple days ago from a 400GB card to a 512GB card because I was low on space.....so take that as you will. I have a lot of games on my cards plus I also have the entire pFBA and pSNES romsets as well as the NES, N64 and a few PSX games on my card which is well over 100GB to begin with. So it's up to you how big you want your card depending on what games you get of course.
Not sure if you already knew, but SX OS has the capability to load External Hard Drives or flash drives from the Switch dock and/or the Switch itself. If you get something like THIS, you can just plug an ExtHDD into it and SX OS will read from it. You need to get the SX Installer from their main site which basically has an internal file browser in it. So what I do is put my XCI games (Which are basically the Switch cartridge format for games) onto any flash drive I have and plug it into the OTG adapter I showed you here.........Then, I can either load them off the flash drive through SX OS or I'll go into the SX Installer file browser and copy them from the flash drive into the SD card that is in my Switch.......that's up to you if you'd rather carry around a flash drive or just copy them to the SD card that is already in your Switch. This way I never have to remove my SD card.
&#x200B;
Make sure you also get the most recent "boot.dat" file from the SX site as well which needs to be on the root of your SD card when you boot SX OS.
Whatever you do, steer clear of Mosiso. Worse case maker ever.
I would suggest you try something like Moshi iGlaze cases. And use adaptors like this one:
https://www.amazon.com/gp/aw/d/B015Z7XE0A/ref=mp_s_a_1_6?ie=UTF8&amp;qid=1524063774&amp;sr=8-6&amp;pi=AC_SX236_SY340_QL65&amp;keywords=usb+c+adapter&amp;dpPl=1&amp;dpID=31Q57GvJiSL&amp;ref=plSrch
Don't use a hub. just get a usbc to usba dongle. use it for a sensor, not the headset.
a to c
I've recently returned my 15" 2016 tbMBP because whenever I connected devices to any of the USBC ports my WiFi just completely cut off. Almost like an on/off switch it happened immediately. I was told it was a defective product and am expecting my replacement. What should I do if the same thing happens again? Worth noting I tried 2 different devices, the first one was this hub: https://www.amazon.co.uk/gp/product/B00ZWKI7T4/ref=oh_aui_detailpage_o06_s01?ie=UTF8&amp;psc=1
The second one was an EastWest 1TB hard drive, USB-A 3.0 going through this adapter: https://www.amazon.co.uk/gp/product/B015Z7XE0A/ref=oh_aui_detailpage_o06_s01?ie=UTF8&amp;psc=1
There are some things you could try out, if you haven't already.
I advise you to restart your computer after you've done your adjustments and connected your Rift, so that the computer will prioritize the USB power-draw correctly on startup.
Chances are you've tried these options already, but if not, give them a try. Unfortunately, I can't think of any other alternatives. The VR-tests I can find of your laptop seem to have been done without extensions. Feel free to contact Asus support - they might have some recommendations, as I doubt you'll be the first with the issue.
Good luck!
So I had this issue with rift on and off for a year
My end game solution, after wasting tons of money on failed solutions, was buying an 4 independent bus usb 3.0 pcie expansion board (plugged into pcie 16x slot)
I tried a cheap 1 usb bus cards with 4 USB ports and it just is too much strain for 1 bus with all these cameras plus everything else on my PC. Even with that extra bus on that expansion card it’s simply not enough.
what finally worked was the 4 independent 3.0 buses on that card.
I have 3 rift cameras and the headset plugged into the card each one with a dedicated usb bus and none of on my mobo
I’m on mobile at the moment but lemme try to find the link.. if I can’t it was from Startech
Here think this is it https://www.amazon.com/StarTech-com-Express-SuperSpeed-Dedicated-Channels/dp/B00HJZEA2S
Make sure you select quad bus or you will be wasting your time.
The last part of this usb disconnect drama for me was a proper usb 3.0 repeater extension cable (on my 3rd and furtherest rear camera). I did a lot of buying and experimenting with these too but this one is the one that finally played nice with rift
https://www.amazon.com/CableCreation-Extension-Extender-Repeater-Booster/dp/B0179MXKU8/
After this combo I now finally have flawless no random disconnect usage of my rift
Took a damn year to sort all this out.
I hope it helps
For the basic kid if you have 3 empty USB3s and one empty USB2, the basic kit will work. However if you want to expand to mroe sensors you should get yourself a PCIe expansion card for sure.
&#x200B;
I would say you will most likely need extension cables but really only you can tell. Depends on where your computer is in relation to where you want to put sensors but typically you'll need extensions for at least the rear sensor. For the basic kit you'll want the sensors diagonally across your play space from each other for 360 degree tracking most likely.
&#x200B;
This is what I use on the sensors
https://www.amazon.com/dp/B0179MXKU8/ref=cm_sw_em_r_mt_dp_U_SJezCbYXW3QG7
and this is what i use on the hMd
https://www.amazon.com/dp/B07C2KWVG1/ref=cm_sw_em_r_mt_dp_U_yKezCbV90DRGG
&#x200B;
But if you start extending the HMD cable you'll also need a repeater
https://www.amazon.com/dp/B0777SCQZX/ref=cm_sw_em_r_mt_dp_U_0KezCb26FRGZY
And then just a good quality longer HDMI cable (not an extension) like this
https://www.amazon.com/dp/B003XM9774/ref=cm_sw_em_r_mt_dp_U_MLezCb73XVA8C
&#x200B;
&#x200B;
Ah a good question. I was using the included extended (2.0) but switched to using 2x CableCreation USB 3 extension cables
https://www.amazon.com/dp/B0179MXKU8/ref=cm_sw_r_cp_api_.IM6BbZDFMMWN
If there are any specific tests or benchmarks you’d like me to run I am open to help :)
No. This is what you need: CableCreation (Long 16FT) Super Speed Active USB 3.0 Extension Cable, USB 3.0 Extender USB Male to Female Repeater Cable with Signal Booster for Oculus Rift,Xbox,PS4 and More, Black https://www.amazon.com/dp/B0179MXKU8/ref=cm_sw_r_cp_apa_0eJWBb05A2Y2S
Your mileage will vary based on your computer hardware but personally I'm using an unpowered cheapo hub that supports USB 2.0 from Wal-Mart
(which only has my Warthog throttle + stick + TRP pedals plugged in), and I'm using a long USB 3.0 extension that has a repeater (which was leftover from my Oculus setup. My flight sim setup is too far from my desktop to reach). It's plugged into a USB 3.0 port on my computer, as 3.0 supports a higher current draw. Have had zero issues so far, though I plan to upgrade to a cheapo 3.0 hub (only using the 2.0 temporarily as I had it laying around).
If you have an unpowered hub laying around, it's worth trying. But if you want a guarantee of no issues (especially if your computer power supply is on a tight margin), a powered hub may be the way to go.
If you're in no hurry and have stores nearby with good return policies, you could even buy a cheap unpowered and return it if it doesn't work.
I am using these USB 3 Active Extension Cables. It gives you an extra 16 ft. I have my sensors mounted to the ceiling so I just run the cable across the ceiling using screw eyes and s-biners.
does anyone know if these would work as well for the sensor?
https://www.amazon.com/dp/B0179MXKU8
I had a similar problem with my rooms about 10' apart and had to move my PC to the VR space and running extensions back to my desk for my monitor and peripherals.
I got a powered USB hub mounted on my desk with a 16' active USB 3.0 extension plugged into the back of the PC down the hall. I wanted 3.0 because I am using that Ethernet port on the USB hub too. I also got a 15ft DVI extension for the monitor so I ended up with only have two cables to hide in the hallway. The cable clips aren't invisible but they are at least neat and clean. The 16' of cable for 10' of hallway was just enough length so make sure you get enough to make a few turns or go up and down walls.
https://www.amazon.com/dp/B01IDI9V3W/ref=cm_sw_r_sms_apip_EqmdpgNxHP8EJ
https://www.amazon.com/dp/B0179MXKU8/ref=cm_sw_r_sms_apip_d3IqEJrUAvYdL
https://www.amazon.com/dp/B003WGTL0Y/ref=cm_sw_r_sms_apip_e9KeYg4pNLDgb
https://www.amazon.com/dp/B071Y1RGPP/ref=cm_sw_r_sms_apip_uUBWLUVkBZQLL
Check this out: CableCreation Gold (Long 16FT) Super Speed USB 3.0 Active Extension ... https://www.amazon.ca/dp/B0179MXKU8/ref=cm_sw_r_sms_awdo_A7SGzbTM1WHXB
It extends the sensor as USB 3.0 without issues.
The officially recommended one, plus this extension: https://www.amazon.com/dp/B0179MXKU8/
Buy an active extender, then you'll have 22 feet!!
CableCreation Active USB Extension Cable (Long 16.4 FT), USB 3.0 Extender Male to Female Cord with Signal Booster Compatible with Oculus Rift, Xbox, PS4, USB Printer etc, Black https://www.amazon.ca/dp/B0179MXKU8/ref=cm_sw_r_cp_apa_i_a8X3DbJGG24WF
Maybe, but I refunded the UGreen and got the CableCreation extender instead. It works, but it doesn't have added power so it won't charge as well. Still works for me though!If the Ugreen doesn't work for others, try this one: https://www.amazon.com/CableCreation-Extension-Extender-Booster-Compatible/dp/B0179MXKU8/ref=sr_1_13?keywords=cablecreation&qid=1574475246&sr=8-13
Edit: Using it with the 10ft Anker Powerline USB3.0 cable recommended by Oculus, btw.
I got my cable in and grabbed one of my Cable Creations 3.0 5m cables out of the closet and it seems to be working fine. Got to soften up this anker cable and get some more velcro tiedowns but it worked great in some pavlov matches.
&#x200B;
https://smile.amazon.com/CableCreation-Extension-Extender-Booster-Compatible/dp/B0179MXKU8/ref=sr_1_3?crid=3PS4KD79BRGYI&keywords=cable+creations+usb+3.0+extension&qid=1574390846&sprefix=cable+creations%2Caps%2C134&sr=8-3
https://www.amazon.de/CableCreation-Aktives-Verl%C3%A4ngerungskabel-Extender-Weibliches/dp/B0179MXKU8/ref=sr_1_3?__mk_de_DE=%C3%85M%C3%85%C5%BD%C3%95%C3%91&keywords=usb+3.0+aktiv&qid=1574109191&sr=8-3 german amazon, but you'll find the exact same cable under a number of different brand names.
If you intend to do that, you'd likely need an active USB extension cable such as https://www.amazon.com/dp/B0179MXKU8/.
If you want to go much longer than 3m you're probably gonna need an active extension cable. This 5m one works, according to tests by some other users: https://www.amazon.com/dp/B0179MXKU8/
Then you can plug it into a shorter A-to-C cable for even more length.
I am using a 16 ft. USB 3.0 active adapter and also have a 6 ft. USB 3.0 (non active) plugged into the same sensor (totaling in 22 ft.) no issues and shows up as USB 3.0 on Oculus Home.
These are the ones I used:
Update: The USB mod still does not work.
I have done:
A clean install of Hakchi CE 3.5.2 (Debug)
A clean install of cores
No unnecessary mods even downloaded at all.
The OTG adapter is the same one patton is using in the videos on his youtube channel:
OTG: https://www.amazon.com/gp/product/B00LTHBCNM/ref=oh_aui_detailpage_o00_s00?ie=UTF8&psc=1
and the USB stick is a 64gb sandisk from the approved list online here:
USB: Sandisk64GBSDCZ33-064GYES - u/Negativitee
I have also tried another memory stick and another format (fat32) and it had no effect.
Everything is working besides the USB storage.
The best inatek OTG adapter is on it's way and will be swapped out to see if that is the culprit. That is my only idea at this point. Been thinking by this point it would be easier to install an internal sd card mod.
The SNES Classic is very picky on what OTG cables will work with it. I personally would not trust something for 35 cents. I got this one and it hasn't failed me yet.
https://www.amazon.com/gp/product/B00LTHBCNM/ref=oh_aui_detailpage_o00_s00?ie=UTF8&amp;psc=1
I recommend getting a USB OTG adapter also if you want to connect usb items (thumb drive, keyboard/mouse, ethernet, etc):
The one I have:
http://www.amazon.com/gp/product/B00LTHBCNM?psc=1&amp;redirect=true&amp;ref_=oh_aui_search_detailpage
It also has built in bluetooth, so you can use bluetooth stuff with it (gamepads, mouse/kb). I havent tested, but apparently you can use bluetooth headphones with the nexus player. Apparently, more BT support was added in Marshmellow 6.0
https://www.amazon.com/Monoprice-Commercial-Premium-Female-Extension/dp/B004C4SECG
https://www.amazon.com/AmazonBasics-Extension-Cable-Male-Female/dp/B00NH12O5I/
I've had an Odyssey for three weeks now with a 10 ft. HDMI and USB 3.0 extension. I had to use a powered 3.0 hub because I was having horrible tracking issues without one and random blue screens. I believe USB 3.0 is rated for a max of 900mA which I think can be tedious when using passive extensions. Here's what I bought :
Sabrent USB 3.0 powered hub: Link
AmazonBasics USB 3.0 extension : Link
AmazonBasics HDMI extension: Link
I just have the cable running along the floor adjacent to the wall that my desk sits next to so I haven't had the need for any mounting applications, can't help there I'm afraid. I'll be happy to try to help if you have any questions.
My 360 setup works great with just 2 cameras, my space is 2.5 x 1.8 meters. Both my cameras are up high near the ceiling pointing down in opposite corners of the room. I had problems when I tried running both cameras and the rift through my USB 3 card, but running the rift on USB 3, and the cameras on USB 2 ports works great. I use this extension cable on one of the cameras: https://www.amazon.co.uk/gp/product/B00NH12O5I/ref=oh_aui_detailpage_o00_s00?ie=UTF8&amp;psc=1
Manitoba here, these worked for me:
UGREEN HDMI Extension Cable 6ft
AmazonBasics USB 3.0 Extension Cable - A-Male to A-Female - 9.8 Feet
Depending on your computer placement you might need a usb3 extension cable for one of your sensors, your 3rd sensor you purchased comes with one but I needed a second one for my other sensor due to placments. This is also option but I grabbed a 10ft HDMI and 10FT usb3 extension cable fro my headset as well to help give me better range with more slack. Also some camera mounts for mounting your sensors on the walls helps alot.
For referance these are what I ordered, im in Canada so these are all Canadian links so you may need to find your local equivalent
10ft USB 3 extension cables (I use two of them, one to extend a sensor and oen for my hmd)
https://www.amazon.ca/gp/product/B00NH12O5I/ref=oh_aui_detailpage_o06_s00?ie=UTF8&amp;psc=1
10ft HDMI extension for my hmd
https://www.amazon.ca/gp/product/B004C4SECG/ref=oh_aui_detailpage_o07_s00?ie=UTF8&amp;psc=1
Wall mounts for my sensors
https://www.amazon.ca/gp/product/B072KGHX8X/ref=oh_aui_detailpage_o09_s00?ie=UTF8&amp;psc=1
And because I had a lack of proper USB 3 ports on my computer I needed a PCI to usb 3 expansion card
https://www.amazon.ca/gp/product/B00ME7454O/ref=oh_aui_detailpage_o09_s00?ie=UTF8&amp;psc=1
I am using this combo HDMI/USB 3.0 extension cable (10 feet). Don't need to worry about passive/active stuff, just plug and play. I have been using these for 3 weeks now and they are flawless.
https://www.amazon.ca/gp/product/B00NH12O5I/ref=oh_aui_detailpage_o00_s00?ie=UTF8&amp;psc=1
https://www.amazon.ca/gp/product/B01D5H91KE/ref=oh_aui_detailpage_o00_s00?ie=UTF8&amp;psc=1
Gotta put it in the DVI port by all accounts to make it work and keep working.
https://www.amazon.com/gp/product/B00ZMVGTA2/ref=oh_aui_detailpage_o02_s00?ie=UTF8&amp;psc=1
https://www.amazon.com/gp/product/B00GBBSZFE/ref=oh_aui_detailpage_o02_s00?ie=UTF8&amp;psc=1
https://www.amazon.com/gp/product/B00NH12O5I/ref=oh_aui_search_detailpage?ie=UTF8&amp;psc=1
Sorry that some are just available in 2 packs, but it's cheap and it works. Turns out I was misremembering. It was 10 feet extension and not 6, heh. I pulled these links from my amazon order history.
No problem--I'll include them all, plus what I used to mount the cameras if interested. Again, no tracking or lag issues whatsoever. Works like it's plugged directly into the motherboard.
Headset Extension:
https://smile.amazon.com/gp/product/B00JJ519KC/ref=oh_aui_detailpage_o00_s00?ie=UTF8&amp;psc=1
Sensor Extension: https://www.amazon.com/gp/product/B00NH12O5I/ref=od_aui_detailpages00?ie=UTF8&amp;psc=1
Sensor Mounts:
https://smile.amazon.com/gp/product/B00R96X9DS/ref=od_aui_detailpages00?ie=UTF8&amp;psc=1
thanks
https://www.amazon.ca/gp/product/B00NH12O5I/ref=ox_sc_act_title_1?smid=A3DWYIK6Y9EEQB&amp;psc=1
with this usb cable, it should be good I suppose.
I have a Zotac 1080
Apparently it's a "common question" despite me never seeing this issue on this sub.
This is my setup:
https://www.amazon.com/gp/product/B00YFPM2CU/ref=ppx_yo_dt_b_asin_title_o05_s00?ie=UTF8&amp;psc=1
https://www.amazon.com/gp/product/B00NH12O5I/ref=ppx_yo_dt_b_asin_title_o04_s00?ie=UTF8&amp;psc=1
https://www.amazon.com/gp/product/B079736Z53/ref=ppx_yo_dt_b_asin_title_o05_s00?ie=UTF8&amp;psc=1
Both of these work fine with my Samsung Odyssey:
https://www.amazon.com/gp/product/B00NH12O5I/ref=oh_aui_detailpage_o01_s00?ie=UTF8&amp;psc=1
&
https://www.amazon.com/gp/product/B014I8T0YQ/ref=oh_aui_detailpage_o01_s00?ie=UTF8&amp;psc=1
Using this for HDMI connection:
https://www.amazon.com/gp/product/B06XR9PR5X/ref=oh_aui_detailpage_o01_s00?ie=UTF8&amp;psc=1
Wanted to make a quick post - using the Anker recommended cable (3M).
I tried the AmazonBasics USB 3.0 Extension Cable along with Cable Matters USB to USB Extension Cable - Both 3M - neither worked.
Finally, I tried CableCreation Active USB Extension Cable (Long 16.4 FT) - THIS WORKS, and it's way longer than the others.
I bought a 500GB Samsung Evo SSD card the other day along with a new GPU. The new GPU I have installed and updated and working awesomely however I have a few problems with the SSD.
I have the Samsung CD which comes with the Data Migration software however I don't have the leads to connect it - will this or this work? But would that mean the SSD will be external to me case? In which case would it benefit me to just get this?
If I get the latter will that enable me to transfer data from my current HDD (which is staying inside my PC)? Or will I have to get one of the first SATA cables, transfer data and then install it internally?
Thanks for your help!
No, it's firmware for overburning DVDs to utilize more than the capacity listed.
I used this cable, and made it so I can easily unplug it if I want to connect a hard drive temporary. I thought about fixing the cable in place with the design but I thought removable was better.
Sabrent USB 3.0 to SSD / 2.5-Inch SATA I/II/IIIHard Drive Adapter (EC-SSHD) https://www.amazon.com/dp/B011M8YACM/ref=cm_sw_r_cp_apa_i_k6roDbM2GSSWZ
https://www.amazon.com/Sabrent-2-5-Inch-Adapter-Optimized-EC-SSHD/dp/B011M8YACM
All you need is one of these and then plug the thing in your Xbox like a usb stick
https://www.amazon.com/Sabrent-2-5-Inch-Adapter-Optimized-EC-SSHD/dp/B011M8YACM/ref=sr_1_4?s=pc&amp;ie=UTF8&amp;qid=1523884458&amp;sr=1-4&amp;keywords=sata+to+usb
I use that for reading hard drives. Suggested in another comment as well.
If you clone it, you can use dd on a Linux live USB. You either need an external drive with at least 128GB of free space, or a SATA to USB adaptor to plug the new drive into. (such as this: https://www.amazon.com/Sabrent-2-5-Inch-Adapter-Optimized-EC-SSHD/dp/B011M8YACM) Once you've cloned it, you have to expand the partition to make use of the extra space. This can be done with GParted, also on a Linux live USB.
Wow, I just looked up that Xbox branded SSD. It's a really bad deal; I feel like Seagate is counting on console players not realizing how much SSD prices have dropped over the last few months.
Almost $100 for 500 GB is nuts.
For comparison, I paid $80 for a 1 TB Crucial MX500, which probably one of the top one or two non-Samsung SATA SSDs
I'd suggest OP look for SATA SSD deals on /r/BuildaPCSales then buy a SATA to USB adapter for less than $10 on Amazon.
Example of what I'm talking about. Plug one end into the SSD and one end into your Xbox.
If you have an old SSD and a console that has USB 3.0, you can pick up one of these and just plug the bare drive in. Works great on my X.
Sabrent USB 3.0 to SSD / 2.5-Inch SATA I/II/IIIHard Drive Adapter (EC-SSHD) https://www.amazon.com/dp/B011M8YACM/
I agree if the budget allows that, but this has a USB adapter because RPi lack SATA. SATA->USB adapter cable isn't that expensive although slightly more bulky than WD's solution.
You'll want something like this:
or
And you'll need cloning software. Crucial and Samsung have cloning software that you can use for free when cloning to their drives:
If you haven't yet purchased an SSD I'd recommend the Samsung 850 Evo.
------------
You'll also want to checkout a site like ifixit.com or simply lookup youtube videos on how to go about opening up your laptop.
No worries.
If you just want to do a full reinstall of windows you take out the HDD, put in the SSD, and install windows from scratch.
If you want to clone from the HDD to the SDD you need software and either a USB to SATA cable or a drive enclosure.
If you go with a M.2 you will insert it and use the cloning software to clone your HDD to the M.2 drive.
Something else to look into, if you have a smaller SSD and larger secondary drive, is to move the search index, Windows temp files, and such onto the larger, slower drive. Doing this frees up the precious space on the M.2 drive while reducing the overall read/writes.
Personally I would save up for the M.2 drive, make that primary, and keep the HDD as a secondary.
Samsung Data Migration software is free with a Samsung drive so you just need a dock. Its also fast and easy.
Samsung download page
EDIT: Also this USB to SATA is EXCELLENT for SSD transfers:
Sabrent USB 3.0 to SSD / 2.5-Inch SATA Hard Drive Adapter
Second edit: You said you have a dock lol use that with the Samsung software and you are solid.
I have 5 of these:
https://www.amazon.com/ORICO-Tool-Free-External-Lay-Flat-Enclosure/dp/B00A5323NO
They'll accept both 3.5 and 2.5 drives.
I have one of these and it works well:
Sabrent USB 3.0 to SSD / 2.5-Inch SATA Hard Drive Adapter
https://www.amazon.com/gp/product/B011M8YACM
Having stuff like this makes cloning drives easy, I use Paragon hard disk manager suite 14 but I'd imagine that Macrium Reflect or Clonezilla would work just as well.
I may have to invest in one of these to have all my bases covered!
https://www.amazon.com/StarTech-2-5in-Adapter-Converter-SAT32M225/dp/B00ITJ7U20
> Is the SSD with my OS toast?
Maybe, maybe not. Assuming you can't just plug into a SATA port in another PC: do you have, or at least have access to, another computer, running Windows, that you can use, with USB 3.0 ports? If so, try this guy in one, with the SSD:
https://www.amazon.com/Sabrent-2-5-Inch-Adapter-Optimized-EC-SSHD/dp/B011M8YACM/
Also, how does it bootloop? If it gets to the Windows starting animations, or Windows 7 bottom loading bar, then the SSD is likely fine.
As old as the system is, my bet is on age-related RAM, PSU, or mobo failure.
I would create a clone of that disk immediately, using clonezilla, if possible. Also is the drive showing up in disk management. Also use this teardown guide to make sure the hdd isnt loose. Also use a external sata adapter https://www.amazon.com/Sabrent-2-5-Inch-Adapter-Optimized-EC-SSHD/dp/B011M8YACM/ref=sr_1_2?ie=UTF8&amp;qid=1500618312&amp;sr=8-2&amp;keywords=usb+to+sata, to make sure its not the sata port on the motherboard that is failing. If it still doesnt work the sata connector on drive is likely failing which means you need a new drive.
If you have a desktop PC that you know has an available SATA data port and power connector, you could temporarily install the drive to get the data off of it. You might have to manually set the boot order in the BIOS so that your computer boots from its hard drive and not the laptop drive.
Alternatively, you could get a SATA to USB adapter, regardless of what computer you have. I have this $10 Sabrent one, although there are much cheaper ones available like the one /u/jamvanderloeff linked.
Do you have a 5.25" disc drive laying around? If so, I use
one of these.Just buy an adapter from Sata to USB, and it will work like a charm.
https://www.amazon.fr/Sabrent-Adaptateur-Optimisé-support-EC-SSHD/dp/B011M8YACM/ref=sr_1_3?__mk_fr_FR=ÅMÅŽÕÑ&crid=2IJCI7Y0UJWBU&keywords=sata+to+usb&qid=1570130783&sprefix=sata+to+%2Caps%2C205&sr=8-3
https://amazon.com/Sabrent-2-5-Inch-Adapter-Optimized-EC-SSHD/dp/B011M8YACM/ref=sr_1_7?crid=OSKT5WHZVKU9&amp;keywords=sata+to+usb+adapter&amp;qid=1573933619&amp;sprefix=sata+to+usb+a%2Caps%2C240&amp;sr=8-7
> as easy as popping a few screws loose and everything is right there
It's ridiculously easy. Usually 3 to 5 screws to remove a plastic cover and another 2 screws holding the drive in place.
Buying a Samsung SSD makes it even easier because they have a program called Samsung Data Migration. You just need to either order one of the SSDs that comes with a USB-SATA interface, or buy a cheap one.
Done. That's all there is to it. If you want to get fancy, or honestly just be smarter about it, get this instead of the adapter cable. When you're all done, you can reformat the HDD that came with the computer and use it as an external drive.
Get this!
you don't necessarily need to use the software that came with your SSD, but I guess it wouldn't hurt. I see that your laptop has USB 3.0 ports which means the transfer process shouldn't take more than 20 minutes. Just follow the instructions and it should be painless. I use Macrium Reflect, but use whatever program you feel most comfortable with.
Sometimes people report that their computer isn't recognizing the SSD connected to the USB port. That is usually fixed by running disk manager and the computer will now discover the SSD connected via USB. (press the windows key + R, then type in diskmgmt.msc)
Once your finished cloning your HDD to SSD, remove the HDD, pop in the SSD and you should be good to go. In some cases you may have to manually set the new drive as the boot drive in your BIOS, but that laptop is fairly new so I doubt you would have to do so.
Why not just pull the HDD/SSD out and connect it to another computer?
Go to resnet, ask nicely, and they will probably do it for you if you bring them an external hdd or big enough flash drive.
$9.99 Sabrent USB 3.0 to SSD / 2.5-Inch SATA Hard Drive Adapter [Optimized For SSD, Support UASP SATA III] (EC-SSHD) https://www.amazon.com/dp/B011M8YACM/ref=cm_sw_r_cp_api_5u5jybMFGDXEM
Yea you can get a wire like this.
Sabrent USB 3.0 to SSD / 2.5-Inch SATA Hard Drive Adapter [Optimized For SSD, Support UASP SATA III] (EC-SSHD) https://www.amazon.com/dp/B011M8YACM/ref=cm_sw_r_cp_api_vSJmybWWV43KP
Or an external enclosure like this
AUKEY 2.5" Hard Drive Enclosure, USB 3.0 External Disk Case for SATA HDD and SSD https://www.amazon.com/dp/B01J3NM642/ref=cm_sw_r_cp_api_eUJmybVD73H0B
Of course!! Ahh yes, I forgot the most important part, haha. Sorry :) Get the below cable as well and once you have all your parts, download the free trial of Carbon Copy Cloner to the current HDD (link below - no payment/credit card needed and you get full application access during the 30 days i.e. no features are disabled). You'll use the cable to attach the SSD via USB and then open CCC and clone the current drive (instructions below). It can take a bit since the HDD is so slow so just let it run. Once it's done then you can start the steps from the IFIXIT articles. You can keep the current HDD as a backup if you'd like.
Let me know if you have any other questions!
Cable - https://www.amazon.com/gp/product/B011M8YACM/
CCC - https://bombich.com/
CCC Instructions - https://bombich.com/kb/ccc5/i-want-clone-my-entire-hard-drive-new-hard-drive-or-new-machine
It'll work fine. Just need an adapter/housing for SATA to USB. Like this.
Crucial SSD 500 Gb: https://www.amazon.com/gp/product/B0786QNS9B/ref=ppx_yo_dt_b_asin_title_o04_s00?ie=UTF8&psc=1
USB to SSD SATA adapter: https://www.amazon.com/gp/product/B011M8YACM/ref=ppx_yo_dt_b_asin_title_o04_s01?ie=UTF8&psc=1
And the YouTube video: https://youtu.be/-LB9TqfQrsA
Edit: Forgot to mention the software I used: https://www.disk-partition.com/free-partition-manager.html
Edit: Some SSDs will only work in PCs, but if you stick to getting what's called a SATA type SSD you will be fine :)
I was having issues with multiple microSD cards unmounting themselves. Annoying. I went with Samsung 250GB SSD and this $10 adapter: https://www.amazon.com/gp/aw/d/B011M8YACM/ref=ya_aw_oh_bia_dp?ie=UTF8&amp;psc=1
It's more storage than I need but oh well but it just works.
I put a $70 antenna:
https://www.amazon.com/gp/aw/d/B00CXQO00K/ref=ya_aw_oh_bia_dp?ie=UTF8&amp;psc=1
in my attic and bought an HDHomerun Connect. I get free OTA HD with DVR. I just used an old 1.5TB USB2.0 drive for the recordings. So far so good!
It's this one I got from Amazon - Sabrent USB to SSD; it's only a USB 3.0 though; idk if that will affect the speed greatly or not.
Board and CPU combo is good, enough single thread performance for the Minecraft server, enough multi thread for transcoding 3-4 1080p streams in Plex. (Rule of thumb is 2K passmark score per 10mb/s of video)
The board is just standard ATX size. It does only have 6 SATA ports, so you will need buy an HBA card to add more ports, or use fewer storage devices.
https://www.amazon.com/SAS9211-8I-8PORT-Int-Sata-Pcie/dp/B002RL8I7M
That card can handle 8 drives total, 4 per cable.
https://www.amazon.com/Cable-Matters-Internal-SFF-8087-Breakout/dp/B012BPLYJC
PCPartPicker Part List
Type|Item|Price
:----|:----|:----
CPU Cooler | ARCTIC Freezer 34 CO CPU Cooler | $31.95 @ Amazon
Memory | G.Skill Ripjaws V Series 16 GB (2 x 8 GB) DDR4-3200 Memory | $64.99 @ Newegg
Video Card | Zotac GeForce GT 1030 2 GB Video Card | $84.99 @ Newegg
Case | Antec Three Hundred Two ATX Mid Tower Case | $94.58 @ Walmart
Power Supply | SeaSonic FOCUS Gold 650 W 80+ Gold Certified Semi-modular ATX Power Supply | $79.90 @ Amazon
Case Fan | ARCTIC ACFAN00119A 56.3 CFM 120 mm Fan | $8.52 @ Amazon
Case Fan | ARCTIC ACFAN00119A 56.3 CFM 120 mm Fan | $8.52 @ Amazon
| Prices include shipping, taxes, rebates, and discounts |
| Total | $373.45
| Generated by PCPartPicker 2019-07-26 08:45 EDT-0400 |
CPU cooler to keep the CPU quiet. Bit of overclocking headroom if you want the extra performance. Compatible RAM. Basic GPU that will be able to handle any 4K 60Hz HEVC video decoding. Case with tons of storage room. Efficient power supply for low noise, and a long warranty. Extra 120mm fans for front intakes, to keep the storage cool.
I got these forward breakout cables.
I'm thinking I may get an SFF8088 to SFF8087 (like this) converter and try running through port #8. If that still doesn't fix it, at least I can still use the cable to double my bandwidth once I fix the other problems.
Try an LSI raid controller https://www.amazon.com/SAS9211-8I-8PORT-Int-Sata-Pcie/dp/B002RL8I7M/ref=sr_1_2?crid=P5PBSXR61CYV&amp;keywords=lsi+raid+controller&amp;qid=1569558454&amp;sprefix=lsi%2Caps%2C171&amp;sr=8-2
You will also need these https://www.amazon.com/Cable-Matters-Internal-SFF-8087-Breakout/dp/B012BPLYJC/ref=pd_bxgy_147_img_2/136-5105212-8833038?_encoding=UTF8&amp;pd_rd_i=B012BPLYJC&amp;pd_rd_r=89475179-7e61-4fe7-915a-198096ed13b8&amp;pd_rd_w=QQkz9&amp;pd_rd_wg=B6Ezg&amp;pf_rd_p=479b6a22-70ae-47a0-9700-731033f96ce8&amp;pf_rd_r=0A6F6Y69MVNJQX5XC257&amp;psc=1&amp;refRID=0A6F6Y69MVNJQX5XC257
Be sure to back up the data on your current raid because they will get formatted. After installing it you will see different boot process from the card when starting up your computer. It should tell you to hit ctrl-h (I think). After that just read carefully, choose your hard drives that you want to combine and choose the raid you want. After that boot your computer normally and install the software I linked below. Be sure to extract it before installing and use the complete installation. It might give you a login screen for the software. It will request your window's login credentials. I was wary of it at first too but its what it wants. My memory is a bit fuzzy. But I believe this is where you finish setting up the raid for windows to be able to format it.
I'm using an LSI Logic SAS9260-4I for raid 6. The only issue I've had with it is while I was installing windows I had to disconnect it. But once that was done once I reconnected it and moved on like normal.
edit: Went to the website for you and searched for the card's software management https://docs.broadcom.com/docs/12354760 that should be it.
edit2: added more information.
One of my debian setups is still in an old desktop case too :)
I run this raid card: http://www.ebay.com/itm/DELL-HV52W-RAID-CONTROLLER-PERC-H310-6GB-S-PCI-E-2-0-X8-0HV52W-/201657131656
I flashed mine to be in IT mode so that it doesn't act like a RAID card anymore, just acts like a bunch of lonely SATA ports: https://techmattr.wordpress.com/2016/04/11/updated-sas-hba-crossflashing-or-flashing-to-it-mode-dell-perc-h200-and-h310/ Help with this can be sought in the #DataHoarder IRC room, there are a few of us there who have done this on a few different models of cards now.
Got 2 of these cables so I can slap 8 disks in that sucker: https://www.amazon.com/dp/B012BPLYJC/ref=cm_cr_ryp_prd_ttl_sol_0
Then I installed ZFS as my filesystem and run my disks in a glorious 50TB array: https://github.com/zfsonlinux/zfs/wiki/Debian
I even slapped an SSD off a mobo SATA channel as a caching disk. Happy building! :)
So, in the server world, they're obviously not using SATA for high-density storage. One solution they use is SAS (Serial Attached SCSI). There are many different types of SAS ports, the most common in the homelab community (and with specific types of servers) being the SFF-8087 connector (mini-SAS) for internal storage. HBAs / RAID controller cards usually have 2 SAS connectors on them. They can be flashed (or bought pre-flashed) to what's called IT mode which allows them to operate as JBOD (Just a bunch of disks). Something like this. If you shop around a bit you can find better deals on used ones (which you shouldn't be afraid to buy, these things are rugged as hell and kept in nice server environments). You can then pair this with one of two cables, Mini-SAS 8087 to SATA or Mini-SAS 8087 to SFF-8482. If you by the latter of the two, it will work with any SATA drive you have as well, with the added compatibility for SAS drives (2 in 1!). SAS drives sometimes come in good deals on ebay @ 4TB for $50 so I'd go with the latter if you ever feel like you want bulk storage for cheap. No real harm in it.
Something like this, but bought on eBay for cheaper and flashed to IT mode to just "passthrough" the drives to the OS and not do any management by itself.
And a couple of these to connect your hard drives. :)
https://www.servethehome.com/ibm-serveraid-m1015-part-4/ I recommend having one of these on hand and https://www.amazon.com/Cable-Matters-Internal-SFF-8087-Breakout/dp/B012BPLYJC
I have 2 LSI SAS cards.
The first is this 9212-4i4e card which has 4 internal SATA ports and an external mini-SAS port. I use normal SATA cables to 4 internal SATA drives and then an SFF-8088 external cable to my SAS expander card in another case.
https://www.newegg.com/Product/Product.aspx?Item=N82E16816118133
I ended up changing to this card instead which is an LSI 9201-16i which has 4 internal SFF-8087 SAS connectors.
https://www.newegg.com/Product/Product.aspx?Item=N82E16816118142
I then use these SFF-8087 to 4-SATA breakout cables.
https://www.amazon.com/Cable-Matters-Internal-SFF-8087-Breakout/dp/B012BPLYJC
I spent almost a day trying to flash the firmware on my 9212-4i4e card and finally gave up after having so many issues. The card works perfectly fine as individual disks. I can pull a drive out and put it in a USB dock and it works just fine. No hidden hardware RAID formatting or anything.
When I got the new 16i card I didn't even bother to check the firmware. I put it in and the drives work fine as individual drives.
So if you look at the R720 Owner's Manual, you'll see that there are two SATA ports on the board. One is labeled
J_SATA_CDand one isJ_SATA_TBU, numbered 2, and 3 respectively. These are both standard SATA ports, but they're unfortunately SATA II, so only 3Gb/s. There is also a spot on the board listed asJ_SAS_PCH(24) which you can plug in a SFF-8087 breakout cable into to give you an additional 4 SATA connections. This port is attached to the built in S110 "RAID" controller. This is sadly also SATA II.You can buy a SAS9211-8i card for under $100 that will allow you to connect 8 SATA III devices (you'll need a breakout cable), but you'll have to figure out how to power those internal 2.5" SSDs -- I didn't have to. I already had an m.2 SATA SSD, so I bought StarTech PCI card which has two m.2 SATA slots on it. Because this thing is bus powered, I didn't have to worry about how to power it.
This is the cable you'll be looking at, and you'll need two of them because they have 4 SATA cables each - https://www.amazon.com/dp/B012BPLYJC
As far as the LSI 9211-8i goes, it's one of the most recommended RAID cards. You can also look at the PERC H310 as it is just a re-branded version of that card and may be a bit cheaper. What RAID configuration are you looking at?
They are sas/sata compatible on the HDD side. You would need 2 of those lsi cards with 3 sff8087 to sata plugs.
Cable Matters Internal Mini SAS to SATA Cable (SFF-8087 to SATA Forward Breakout) 3.3 Feet https://www.amazon.com/dp/B012BPLYJC/ref=cm_sw_r_cp_apa_i_bVg4Db0FS37N2
That card you linked has 2 sff-8087 connectors if thats what you have you can use that if you wanted. Each sff-8087 sas port has 4x sata ports basically. Both of your SSDs (and 2 more) should be able to hook up to just one of those ports. The breakout cable that goes from 1 to 4 looks like this: https://www.amazon.com/Cable-Matters-Internal-SFF-8087-Breakout/dp/B012BPLYJC
You can get a sff-8087 to sff-8088 adapter that converts the internal 4x connection to a external one to connect something like that ds4243, but for about the same money I'd still recommend the LSI adapter if you can verify you can use one more of the pcie slots. Its better to have a non raid card if your going to use something like zfs file system.
What i mean about the eSATA is that its a single sata port, vs the sas ports that are 4x sata ports. The DS4243 and others like it have a multiplexer that lets all 24 connect with that 4x connection. Those istar esata boxes have some kind of multiplexer or a controller as well, but how good/reliable are they vs something enterprise grade i dont know.
There are lots of other used SAS disk shelfs around as well (dell etc) its just about finding a good deal on one that has all its caddys etc. If your lucky maybe you can find one local on craigslist since they are so heavy and shipping is usually half the price.
Here is the HBA I use with FreeNAS.
LSI Logic SAS 9207-8i Storage Controller LSI00301 https://www.amazon.com/dp/B0085FT2JC/
You will also need these to connect drives to that card.
Cable Matters Internal Mini SAS to SATA Cable https://www.amazon.com/dp/B012BPLYJC/
For sure dude get after it, I've been having a ball with a stack of 170GB 15K RPM drives that I won from /u/storagereview over on the /r/homelabsales sub, still getting my post together for them like 3 months later lol.
Picked up one of these for the machine housing everything: https://www.amazon.com/gp/product/B01C5TG82C as a hot swap rack, it's pretty excellent. Then you just need something like these: https://www.amazon.com/gp/product/B012BPLYJC breakout cables and you're ready to rock. Do yourself a favor and get the 1.5 ft. ones though, 1 meter is too damn long.
Have been having so much fun with this project and I don't even store any data on this array lol, just building and breaking and rebuilding RAID configs.
Use something like this
https://www.amazon.com/AmazonBasics-HDMI-DVI-Adapter-Cable/dp/B014I8UQJY?th=1&amp;psc=1
Do you have DVI? Can get a DVI to HDMI adapter for your monitor.
https://www.amazon.com/AmazonBasics-Input-Output-Adapter-Cable/dp/B014I8UQJY
This
http://www.amazon.com/dp/B014I8UQJY/ref=pd_lpo_sbs_dp_ss_2?pf_rd_p=1944687502&amp;pf_rd_s=lpo-top-stripe-1&amp;pf_rd_t=201&amp;pf_rd_i=B0002CZHN6&amp;pf_rd_m=ATVPDKIKX0DER&amp;pf_rd_r=1MW7VF53FMCWG2GD7NM3
I've used both of these cables to successfully extend my Vive and Index
&#x200B;
Display port extension:
https://www.amazon.com/gp/product/B00L1K1KDE/ref=ppx_yo_dt_b_search_asin_title?ie=UTF8&psc=1
&#x200B;
USB 3.0 extension:
https://www.amazon.com/gp/product/B0179MXKU8/ref=ppx_yo_dt_b_search_asin_title?ie=UTF8&psc=1
Exactly. I'm using this 16ft cable along with an additional 1.5ft male to male cable (in order to have a male connecter on end to plug into vive link box):
https://www.amazon.ca/gp/product/B0179MXKU8/ref=oh_aui_detailpage_o03_s01?ie=UTF8&amp;psc=1
My setup is like this
PC > 1.5ft USB 3.0 male to male > 16ft active USB 3.0 Extension > Vive Link Box > Odyssey+
Works flawlessly. No issues whatsoever. Only thing is you have to power cycle the link box after you plug the Odyssey in otherwise it won't be detected.
No problem. Best stick to the cables & cards etc in the FAQ here if you can, especially if using long cables at the usb max lengths. FWIW my more distant two sensors are fed by a single active 5m USB3 cable
https://www.amazon.co.uk/gp/product/B0179MXKU8/ref=oh_aui_detailpage_o01_s00?ie=UTF8&amp;psc=1
Into a powered USB3 hub
https://www.amazon.de/gp/product/B00ZQFYWJY/ref=od_aui_detailpages00?ie=UTF8&amp;psc=1
& are the only thing on that particular usb controller.
I would get a USB wireless dongle, USB extension, and a directional antenna. To make this work, the dongle must have a removable antenna. If shipping is not an expense, I would buy step-by-step, starting with the dongle, then extension, finally the antenna (and antenna mounting solution).
I have no personal experience with this equipment. It was chosen because of features (like replaceable antennas) and Amazon reviews.
Alfa AWUS036AC Long-Range Dual-Band AC1200 Wireless USB Adapter With 2x Dual-Band (2.4GHz / 5GHz) external antenna for Extreme Distance Connection - Up to 300 Mbps - USB 3.0 - AC1200 Wireless chip - USB desktop Dock Included
CableCreation Gold (Long 16FT) Super Speed USB 3.0 Active Extension Cable, USB 3.0 Extender USB A-Male to A-Female Cable, 5Meter/16ft, Black
Alfa APA-M25 dual band 2.4GHz/5GHz 10dBi high gain directional indoor panel antenna with RP-SMA connector (compare to Asus WL-ANT-157)
All together, this is 95 CAD, but I expect the first item will solve the problem. If you do get the high-gain antenna, try it as a replacement of each of the side antennas on the USB dongle. This is because one antenna might be more important to the device then the other.
PSA: I was having issues with the sensor constantly disconnecting using the OP's active cable and Oculus' recommended Intateck card. Just purchased the CableCreation extension after reading this post and it seems to have solved my problem.
Just a reminder, you need a VR-ready PC to play PC VR games, so it needs to be a powerful gaming PC.
And you don't have to cancel your Anker cable necessarily. There are extensions you can get that make up for the length until the official Link cable comes out. I've heard from several people this one works for example.
https://www.amazon.com/gp/product/B0179MXKU8
That one will add 16 extra feet for a total of 22 feet for yours. And it's quite cheap.
I use my Rift about 10 ft from my PC so I purchased the recommended cable and PCIe card. Only needed if youre playing away from you main PC
THESE ARE PERFECT https://smile.amazon.com/gp/product/B0179MXKU8/ref=oh_aui_detailpage_o00_s00?ie=UTF8&amp;psc=1
I got the recommended cable and got this to give me 20+ ft
https://www.amazon.com/gp/product/B0179MXKU8/ref=ppx_yo_dt_b_asin_title_o00_s00?ie=UTF8&psc=1
I am using this one:
https://www.amazon.de/gp/product/B01FQ88CE6/
Also people are having luck with this:
https://www.amazon.de/gp/product/B0179MXKU8/
This is my setup:
PC (Asus ROG STRIX Z390-I + EVGA RTX 2080 XC)
v
https://www.amazon.it/gp/product/B01FQ88CE6/ (5m USB 3 active cable)
https://www.amazon.it/gp/product/B07KBTH6TS/ (USB 3 Hub)
https://www.amazon.it/gp/product/B07D7N96FL/ (3m USB-c 3.1 cable)
https://www.amazon.it/gp/product/B078YRKTKM/ (USB-c 90 adapter)
v
Quest
Seems kinda janky. Some games run well and uh some really do not lol
Not faulting anything since well AMD isn't supported to begin with, and well it's a beta that JUST came out, but I'm hoping that it gets ironed out as the beta goes along. Really see the potential and it could be a great thing once it all gets sorted out.
Oh I should probably list specs? We're all probably running around trying to figure out exactly what cable to get so figured it'd help posting em.
GPU: PowerColor Red Dragon RX 5700
CPU: Ryzen 2600 OC'd to 4.1
Cable: JOTO USB Type C Cable Extra Long 10ft, USB-C 3.1 Type-C to USB 3.0 Type A Charging Data Cable [Heavy Duty Nylon Braided] for iPad Pro 12.9/11 Galaxy S10 S9 Note 10+ 10 9 Tab S4 Nintendo Switch (Black)
Extender (which is just for extra length both cables work): CableCreation Active USB Extension Cable (Long 16.4 FT), USB 3.0 Extender Male to Female Cord with Signal Booster Compatible with Oculus Rift, Xbox, PS4, USB Printer etc, Black
However, it will be VERY obvious to you when you need the third sensor.You'll find yourself frequently facing the direction without sensors and visual glitches everywhere, trying to turn around and deal with whatever in game objective you were dealing with previously.
If your not experiencing this then wait :)
As a List (That you didn't ask for) for what I bought for Roomscale:4 port /w controller USB 3.0 card (https://www.amazon.com/gp/product/B00XPUHO10)Additional Sensor (https://www.amazon.com/gp/product/B0727WDPX6) - Note this includes an 2.0 USB extension cable, 2.0 can stretch farther without signal loss.
**Extra Equipment**10 Ft HDMI extension (https://www.amazon.com/gp/product/B01D5H91KE) - For the Oculus Headset16 Ft USB Active extension (https://www.amazon.com/gp/product/B0179MXKU8) - For the Oculus headset
Hangers for the Oculus cable (https://www.amazon.com/gp/product/B06XY5WKXW) - this just gets the cables from under your feet, it is my favorite
https://www.amazon.com/Anker-PowerLine-Resistor-Including-ChromeBook/dp/B01A6F3WHG/ref=sr_1_1?s=pc&amp;rps=1&amp;ie=UTF8&amp;qid=1485031398&amp;sr=1-1&amp;keywords=anker+usb-c+cable&amp;refinements=p_85%3A2470955011
And if you want a new wall charger;
https://www.amazon.com/Anker-Charge-Charger-PowerPort-PowerIQ/dp/B016LO4UTA/ref=sr_1_1?ie=UTF8&amp;qid=1485031273&amp;sr=8-1&amp;keywords=anker+powerport+1
Just get a third party USB-A to USB-C cable from a reputable brand.
I have this one from Anker and it's good. https://www.amazon.com/dp/B01A6F3WHG/ref=cm_sw_r_cp_apa_i_lV8CCbH7QPW50
I just searched "nexus 5x usb cable" on amazon and it was the first result. It allows me to plug my device directly to my PC, or chargers like the Nexus 6 one I mentioned.
http://www.amazon.com/Anker-PowerLine-Resistor-Including-ChromeBook/dp/B01A6F3WHG/ref=sr_1_1?ie=UTF8&amp;qid=1456937709&amp;sr=8-1-spons&amp;keywords=nexus+5x+usb+cable&amp;psc=1
I have used my Anker one before to charge it.
You need usb A to usb C
https://www.amazon.com/Anker-Powerline-Pull-up-Resistor-Samsung/dp/B01A6F3WHG/ref=sr_1_6?ie=UTF8&amp;qid=1541656222&amp;sr=8-6&amp;keywords=USB+a+to+usb+c
Or if you are feeling in a dongle mood
https://www.amazon.com/Acessorz-Hi-Speed-Charging-Connector-Interface/dp/B079DN8HTY/ref=sr_1_20?ie=UTF8&amp;qid=1541656283&amp;sr=8-20&amp;keywords=usb+a+to+usb+c+adapter
It needs to be a USB-C cable. Just make sure you check out the Benson Leung USB-C approved chart before you buy any new ones. A lot of USB-C cables out there might cause harm to your phone.
If it helps I picked up this cable and this charger and they work great together and charge pretty fast. Nowhere near as fast as DASH but that's fine.
I'd recommend Anker for USB cables, they can be a bit pricey but IMO it's worthwhile because I've had bad experiences with cheap cables. They make USB-C to USB 3.0 cables like this one.
I've already purchased several USB-C cables and power bricks in anticipation for the Switch. Went Anker for their manufacturing quality, so it wasn't the cheapest, but the fact that it will be more common in the coming years made me feel less skittish about investing in it.
I hate the fact that my 3DS is so difficult to charge, and I just know that solving that issue will greatly improve my love for the consoles.
&nbsp;
In case anyone is interested, I purchased this charger as it is 2.4 amps per port, which is close to what the Switch spec is. Essentially it is enough to charge the console in a timely fashion in a room away from the dock.
I purchased this cable since flexibility is more important when gaming plugged in versus the external protection that braiding provides.
Yes, The Nexus 5x port is USB 2.0. You can use 2.0 cables with no issues, as they should perform equally well on the 5x. I find that since USB C is also new tech, they are marketing largely to macbooks with USB 3.1 compatible USB C ports. You might not find significant price differences between 2.0 and 3.0 cables. These Anker cables are really nice, Benson Leung approved, and not super expensive, while being 3.0 cables (https://www.amazon.com/gp/product/B01A6F3WHG).
That's still micro-USB bro. And you're welcome.
Here you go- 6ft cable: https://www.amazon.com/gp/aw/d/B01E9W8KYC/ref=mp_s_a_1_8?ie=UTF8&amp;qid=1495282300&amp;sr=8-8&amp;pi=AC_SX236_SY340_QL65&amp;keywords=anker+usb+c&amp;dpPl=1&amp;dpID=41k7fHZTdrL&amp;ref=plSrch
3ft cable: https://www.amazon.com/gp/aw/d/B01A6F3WHG/ref=mp_s_a_1_1?ie=UTF8&amp;qid=1495282380&amp;sr=8-1-spons&amp;pi=AC_SX236_SY340_FMwebp_QL65&amp;keywords=anker+usb+c&amp;psc=1
Double reply so you get a notification about this.
Using an old car charger (2.4A) with a proper USB-A -> USB-C 3.0 cable (this one https://smile.amazon.com/gp/product/B01A6F3WHG/ref=oh_aui_detailpage_o01_s00?ie=UTF8&amp;psc=1) charged my phone from 60% to 100% in roughly 1 hour. The phone never said "charging rapidly" either, so you're not getting Power Delivery with that. I am buying a proper USB-C car charger later this week, I can DM you with an update on that.
Edit: Adding this as well in case someone else is looking for this info, but this what I dm'd OP:
Alright so I bought this cable: https://smile.amazon.com/gp/product/B01A6G0CTQ/ref=oh_aui_detailpage_o01_s00?ie=UTF8&amp;psc=1 and this car charger https://smile.amazon.com/gp/product/B079MWXSS8/ref=oh_aui_detailpage_o02_s00?ie=UTF8&amp;psc=1
They both work great, fast charging and everything.
For what it's worth, this is also a good power bank: https://smile.amazon.com/gp/product/B079Z4RHZZ/ref=oh_aui_detailpage_o02_s00?ie=UTF8&amp;psc=1
I have a Kenwood DMX7705S with a Pixel 1 and don't have any issues. The best advice I could give would be to make sure you have a high quality USB 3 cable. There are a number of USB 3 cables out there that work fine for charging but have issues with the more data intensive operations. I am using this one - https://www.amazon.com/gp/product/B01A6F3WHG/ref=ppx_yo_dt_b_asin_title_o00__o00_s00?ie=UTF8&amp;psc=1 and have had no issues.
Good luck!
My recommendation would be to throw down a bit of money and get a good usb capture card, some RCA Splitters, extra cables and a TV or Monitor that has inputs. Total cost should be around $50 on Amazon before the TV/Monitor. The analog signal only degrades slightly (can barely tell on a CRT or stream) and is super easy to set up. There are cheaper options out there but I wouldn't recommend using them - a few of the USB capture cards I have seen that are cheaper than the GV-USB2 don't have drives that work passed windows 7, and even on Win7 they are super janky to get working. The GV-USB2 has a bit of lag when going into OBS so I wouldn't recommend playing straight off of it, hence the splitters. An alternative capture card would be a Dazzle, but I have heard multiple people having issues with audio on those, your mileage may vary regardless of which option you go for.
There are also more expensive options such as getting an internal card but you will probably be stuck with having to get one for digital or one for analog at an increased price.
Okay you basically have two good options on that budget. You can get a GV-USB2 for about $30 and have a really easy setup with your wii (plug the S video in to the capture card and the yellow cable in to the TV, split the audio, and you're done), or you can get a black magic intensity shuttle which allows you to capture 480p video and will get you way better capture quality and is a little more complicated to set up.
Composite capture card example
BMI Shuttle example
This stuff is complicated so feel free to ask me more questions.
It'd probably be cheaper to just buy a capture card and play it off Amarec on your computer, if you don't have a TV. Then you'll have a larger screen to play on!
GameCubes are like $25, cables should be $5 each, controllers are $20. A good first party memory card is like $10.
This is the capture card I use. If you do this I'd suggest an s-video cable because the picture quality is worth it.
I'm going through some old family tapes myself and though I would share what I'm doing.
I'm totally not sure this is the best way to do it, because there seems to always be a better way to squeeze more quality out of it the more I look, but what I did is use a capture card like this:
https://www.amazon.com/DATA-connection-video-capture-GV-USB2/dp/B00428BF1Y/ref=sr_1_1?ie=UTF8&amp;qid=1539027006&amp;sr=8-1&amp;keywords=i-o+data+usb+connection+video+capture+gv-usb2
Some people buy really good old VCRs with time based correction, but that is just out of my league at the moment, in both money and effort, and I'm happy with the quality I have so far.
I personally capture it using virtualdub with the lagorith lossless codec, though I think there are better ones out there that require more processing power. The files still tend to be quite huge though as raw files tend to be I think. I then use Staxrip to finish it up by trimming it up and applying QTGMC, which is supposedly a very high quality deinterlacer that bumps it up to 59.98 fps, and it denoises the video fairly well too. At the end of this process I have a decent MP4 that I can watch and relive some memories.
At the end of the day though, there is only so much you can do with VHS, and this is just the culmination of me spending way too much time scouring the internet for ways to preserve VHS footage. Its probably not the best way to do it, as I'm continuously finding posts that say one way is better, some its evidence based, some of its subjective. Its a huge headache, depending on how far you want to jump down the rabbit hole, but I hope this helps you if you just want to see how some else has done it. If anybody has any questions, or has found a better and simpler way of doing it let me know though! Still learning. This video got me started
GV-USB2 is a really solid little device for how cheap it is. Just pair it with the Monoprice Wii S-Video Cable and you'll be good to go. You can plug the S-video end into the capture card and the composite video into the TV. solid capture setup for only ~$40
EDIT - you should also get some RCA piggy back cables so you can run the audio to both the capture card and the tv
I recorded it straight from the N64 with an I-O Data GV USB2 capture device. I'm glad you liked the video. :D
This is the one I use, but any av to usb would work.
You do need one splitter at least for the video to go to both the crt and the capture card. You can just have the sound from the TV (that's what I have on my stream) or you can do another splitter like in the drawing above.
To add to the other two suggestions, I'll add what I believe are two far better solutions: The GV-USB2 and USB3HDCAP
The GV-USB2 is a USB dongle-style capture card that only captures composite/RCA video and S-video, which is the best you'll get from the Gamecube without expensive cables. It's about $35 USD.
The Startech USB3HDCAP is more expensive, but it will capture HDMI for newer consoles and PCs, as well as composite, S-Video, Component (the best video signal out of a Wii and easy to get cables for), and even RGB. It's probably the best quality card there is at its price and it's offered me a far better user experience than Elgato's devices have for me. I also know PJ DiCesare uses it for his runs and he has excellent capture quality. It's currently on sale for $182.
Importantly, both will capture video at 60fps which I'm not convinced the standard def EZcap will do, and without the added noise and delay I find Elgato devices tend to add.
Hopefully this helps.
A great way to do it would to be to use an old capture device like this: https://www.amazon.com/dp/B00428BF1Y/ref=cm_sw_r_cp_apa_i_IpABCb992NSQJ
It has essentially no lag so you could play it in your streaming software, but if you really wanna get down and dirty with some old games, you could get a video splitter along with that and plug it into an old monitor, haha, but I imagine you won't be going pro neccicarily with a cheap sponegbob plug and play game - that being said, that's a rad niche you've got there, sounds like it'd be a really fun time!
Buy a gv-usb2 , #1 recommended capture device for N64 speedrunners( also great for converting VCR, great for SNES, havnt tried GC yet with it, but others say its good for it too), only problem, all in Japanese. But there are plenty of English tutorials and installation is simple. You can capture directly in OBS or use the included software capture window. Hope that helps.
As a recent owner of an easycap I couldn't recommend against it enough. Mine was a pain to setup and the quality went from bad to really glitchy and awful in the span of a day. I think the dazzle is supposed to be okay, and I know that Cosmowright uses this for his sd capture.
[edit]
I think that the dazzle and that both do 60fps capture while the easycap does not
This is what you want
Guide
Just grab an io-data GV-USB2, it's decent and has S-Video in. Good cheap option for streaming, and the quality is good enough if you're doing 720p and below. Since you said you're not taking streaming seriously yet, I don't see why you would spend more than $35: http://amzn.to/2jmInxC - combine that with a component splitter/amplifier and a component-to-SVideo converter, and you're golden.
Since your gameplay will be on a CRT, you won't have to worry about input lag for the stream.
There's also this for $50 that does component video, but I can't personally vouch for it because I'm just an SVideo pleb. https://express.google.com/product/9513734564785364365_6855387360727611182_6136318?mall=Rockies2&amp;directCheckout=1&amp;utm_source=google_shopping&amp;utm_medium=product_ads&amp;utm_campaign=gsx&amp;dclid=CMr968SWu9cCFdINgQodJ0oAaQ
Old spec = DP 1.1. (Can only run 4K @ 30hz).
New spec = DP 1.2 (Can run 4K @ 60hz).
You want 60hz.
I stand behind this recommendation. https://www.amazon.com/gp/aw/d/B005H3Q59U/ref=mp_s_a_1_sc_2?ie=UTF8&amp;qid=1468899658&amp;sr=8-2-spell&amp;pi=AC_SX236_SY340_QL65&amp;keywords=display+oort+1.2+cable
Could possibly be it, it was one of the things I was reading about that could be the probable cause.
This is what I'm currently using: http://www.amazon.com/Cable-Matters-Gold-Plated-DisplayPort/dp/B005H3Q59U/ref=sr_1_2?s=electronics&amp;ie=UTF8&amp;qid=1463007696&amp;sr=1-2&amp;keywords=DisplayPort+1.2+Cable
Is the one you provided a better cable?
You're definitely missing out if you have a GTX 970, 1080p monitor and still using a VGA cord.
Pick up an HDMI 2.0 cable or a Displayport cable ONLY if the monitor supports Displayport.
I'll add this as well: https://www.youtube.com/watch?v=f38sotYHqtA
I can't seem to find 1.3 or 1.4 These 1.2 will do just fine though https://www.amazon.com/Cable-Matters-Gold-Plated-DisplayPort/dp/B005H3Q59U/ref=sr_1_2?ie=UTF8&amp;qid=1466724586&amp;sr=8-2&amp;keywords=display+port+1.2
The cable your friend is using is a cheap DisplayPort cable that utilizes RBR (Reduced Bit Rate). Get a quality DisplayPort cable and he won't have those problems anymore.
I use this Cable Matters DP cable and have no issues with 1440p at 165Hz on my S2417DG. For the record, 1440p at 165Hz has a higher bandwidth requirement than 4k at 60Hz.
I got this 6ft cable from amazon and has worked perfect since I got the monitor in December.
http://www.amazon.com/Cable-Matters-Gold-Plated-DisplayPort/dp/B005H3Q59U/ref=sr_1_1?s=electronics&amp;ie=UTF8&amp;qid=1456984500&amp;sr=1-1&amp;keywords=displayport
https://www.amazon.com/Cable-Matters-Gold-Plated-DisplayPort/dp/B005H3Q59U/ref=sr_1_3?s=electronics&amp;ie=UTF8&amp;qid=1521648860&amp;sr=1-3&amp;keywords=displayport+cable
Yes anyone should work. I don't know which cable I bought, but here's a good one: https://www.amazon.com/Cable-Matters-Gold-Plated-DisplayPort/dp/B005H3Q59U/
Something like this?
http://www.amazon.com/Cable-Matters%C2%AE-Gold-Plated-DisplayPort/dp/B005H3Q59U
Are you using the DP cable that came with the monitor? If so, try a different one to see if this fixes the issue. My best friend had this issue and I ordered him this DP cable and everything went back to normal.
https://www.amazon.com/Cable-Matters-Gold-Plated-DisplayPort/dp/B005H3Q59U
http://www.amazon.com/gp/product/B005H3Q59U?gclid=Cj0KEQjw3cKeBRDG-KKqqIj4qJgBEiQAOamX_V3p2VB7jmXNcTdF5mB6ZS2w0S5ytDX9IQaPp_IGB8QaAt3L8P8HAQ From what I've read, this should do you, assuming your GPU has a DisplayPort.
had the same issue, bought this https://www.amazon.co.uk/gp/product/B005H3Q59U/ref=ppx_yo_dt_b_asin_title_o01_s00?ie=UTF8&psc=1 and my x34p hold 120hz like a champ for 7 months now
Something like this should work as long as both monitor and GPU accept display ports. https://www.amazon.com/gp/aw/d/B005H3Q59U/ref=mp_s_a_1_3?ie=UTF8&amp;qid=1521092039&amp;sr=8-3&amp;pi=AC_SX236_SY340_QL65&amp;keywords=displayport&amp;dpPl=1&amp;dpID=41nracJKgBL&amp;ref=plSrch
http://www.amzn.com/B005H3Q59U
You could also use a USB Y cable. That way it draws power from the second USB port as well. Just make sure it is the right one that will fit the port on your hard drive.
I bought this drive along with a USB Y Cable to power it properly. It would not work with the single USB that came with it....not enough power, the Y cable fixed that.
Couldn't find information on Nintendo's site, but after reading your description, I'm guessing it's something like this for the mentioned drive?
Non referral link.
Hey, looked into the product you linked to, but I have a quick question.
The one you linked has a microUSB (which I would have to stick into the hard drive). Thing is, my hard drive doesn't have a microUSB, it has an extended version, like the one here:
http://www.amazon.com/eForCity-dual-Micro-B-Cable-Black/dp/B005M0ICG2/ref=pd_cp_e_1#customerReviews
So the one I found LOOKs like a better choice, except that this one needs two USB 3 when I only have 2.0. Would it still get enough juice from my laptop?
Given you showed what model you bought that isn't the right cable due to being a fat usb port and not a y-cable port.
https://www.amazon.com/Micro-B-External-Seagate-Toshiba-Hitachi/dp/B005M0ICG2/ref=sr_1_1?s=electronics&ie=UTF8&qid=1537650486&sr=1-1&keywords=y+cable+usb
This is the correct one.
You need a USB Y cable, something like this www.amazon.com/eForCity-dual-Micro-B-Cable-Black/dp/B005M0ICG2/ref=sr_1_1?ie=UTF8&qid=1419514397&sr=8-1&keywords=usb3+y+cable
Sounds like the drive isn't always getting enough power (USB 2 power < USB 3 power) - because compatibility issues between the 2 basically shouldn't happen unless the device has extra drivers it needs.
I haven't read you mention the size of the passport, but I see this regularly with any external drive over 1TB.
Sometimes, the issue is the USB cable itself, not passing on the power as efficiently as before. Often the drive will still seem to start up and spin, but simply doesn't get all the juice it needs to "boot up" all the way.
When a drive isn't getting enough power, a common occurrence is a soft clicking sound because the plates' headers keep alternating between "Read mode" and "idle mode".
Possible solutions:
Spinning all the time? Not a problem. Constantly starting up/hibernating? That could definitely be a problem.
The problem you may be thinking of was with older spec USB (usually on ports on the front of a PC case) and older more power-hungry 2.5" drives.
Older 2.5" external drives would come with a USB "Y" cable which would plug into 2 ports on the host machine - one to provide power and the other for power & data transfer.
Older (USB 2.0 and before) ports had a max amperage of 500mA (and some provided even less than this). USB 3.0 specs call for 900mA @ 5V which should be enough juice to power an external hard drive.
This article on a HGST Travelstar (which, incidentally, is probably the same drive OP's using) shows some important specs:
>Power requirements:
Startup (peak, max) 5.5W
Read/Write (avg) 1.8W
Low Power Idle 1.0W
Performance Idle 1.7W
So we know the power requirements of the drive. How about the USB ports? We know the USB 3.0 specs (from above: 0.9A @ 5V), so some high school calculations using I(current, amps) = P(power, watts) / V(voltage) rearranged to P=IV gives us 4.5W.
Which is more than enough to power an external 2.5" drive while spinning. For Peak power draw it's a watt less, but should be fine once started. The motherboard/port can handle that briefly.
Making it even less likely that there's not enough juice for the drive is that I don't have the issue, yet I'm using a functionally identical setup by having a HGST Touro S plugged into my Xbox One with no problems at all. That's the same drive as well.
tl;dr: it's not the ports or the drive (unless they're faulty). Could be the enclosure. Can try a USB Y cable to check, I guess...
*Edit: Added a word and caveat for faulty port/drive.
I use
http://www.amazon.com/dp/B00CI3BLPA/ref=cm_sw_r_fa_awdm_uvIxwb8NV3SGQ
and I got a Y cable so that the power draw isn't a issue.
http://www.amazon.com/dp/B005M0ICG2/ref=cm_sw_r_fa_awdm_zwIxwbVZJQE8M
It's small and I love that I got this thing to death. Being able to just download a game when I want it and not worry about space has been great.
I just bought these three items to expand my Wii U storage. It works great! Load times are marginally faster in Smash
Internal memory 37.7sec load time
SSD 35.6sec load time
External drive enclosure
SSD
USB Y-cable
To be honest, just about any external hard drive you get should be fine. The price difference between a 1TB and a 2TB is so small that it shouldn't be a factor.
I got one of the WD Passports and it works great. It doesn't use external power, just a USB 3.0 cable, but I got a USB Y-adaptor from Amazon and haven't had any issues.
It's definately not BTX but it also doesn't look standard ATX. I would get this or this and call it a day
This will allow your PSU to turn on without a mobo.
https://www.amazon.com/CRJ-24-Pin-Supply-Jumper-Bridge/dp/B01N8Q0TOE
A lesser known but significant issue is that you don't want to mix and match cables from different power supply brands and sometimes even different power supplies of the same brand, it could possibly fry your HDD. These cables can be tough to find and order separately, so I just use a power splitter extension instead.
https://www.amazon.com/gp/product/B0086OGN9E/
Some other things below for fans that I used for mine, but you might already have stuff laying around. You'll also need a molex to 4 pin or you could opt for a fan power supply to wall outlet, only if you don't overload the 2A.
https://www.amazon.com/gp/product/B075NPZ94N/
https://www.amazon.com/gp/product/B0763FGH6S/
https://www.amazon.com/gp/product/B01MQ42KMV/
https://www.amazon.com/gp/product/B071V9CQ5H/
You'll also need to buy 2x SSFF port for the R5 box and your main, plus extra SFF-8088 cables (1m-2m length), this starts $$$ adding up fast unless you can place both devices very close and snake the SFF-8087 forward breakout cables through the R5 case then through the main system case to the HBA unless you have a card with external 8087s. I haven't seen any SFF-8087 forward breakout cables longer than 3.3ft though and you'll probably have these both connected internally so these boxes will have to be right next to each other...
https://www.amazon.com/gp/product/B01GPD9QEQ/
I didnt search extensively, but I did see a SFF-8088 to sata 6ft cable, but it had no reviews and the title showed 8087(maybe so it gets noticed on search results), but the description was correct as 8088. Depending on your card then this might be an option. This is where nas boxes come in with network connections for farther distances or you invest in all these cables and adaptors so it doesn't look janky with cables snaking in and out of the cases.
No, I didn't mean if your mobo supports the processor. Every processor has a different cooling requirement. So you have to use the correct heatsink and fan with it to ensure that the CPU cools correctly. Your current CPU's sinck and fan may not be suitable for the new CPU. You need to do some research on this.
I got confused about the power part. You just need to buy ONE power cable that can support 2-3 HDD. Something like this one. (And make sure your SMPS can provide enough power).
I don't know of any guides, but for the home user, it's really not expensive or difficult.
What you need, besides HBA in your host machine, is just a bunch of cabling. If you don't have an HBA...cheap and available on ebay.
Just an FYI: Most hard drives don't use a lot of power. (you can look up the max power requirements for specific drives through their manufacturer spec sheet) A 500 watt power supply can often supply the vast majority of that over the 12v rails. Your power supply can run many more disks than it has provisions for, so splitter cables are often the only way to maximize your chassis disk space. As I mentioned before: don't use cables with molded connectors. Cables like https://www.amazon.com/gp/product/B0086OGN9E - you can see they are plastic and snap around the cables themselves and aren't a molded piece.
The super quick and dirty to expand your storage past your server computer's space or power capabilities is:
GL fellow data hoarder
My computer only has 2 sata power plugs, but I have 8 drives that use sata power. I got a couple of these
https://smile.amazon.com/StarTech-com-Power-Splitter-Adapter-PYO4SATA/dp/B0086OGN9E/
You can get one of these, that isn't molded, and just remove the 3.3v wire, if you want to have it handy for this kind of drive, if you dont want to use a molex adaptor
StarTech 4X SATA Power Splitter Adapter Cable https://www.amazon.com/dp/B0086OGN9E/ref=cm_sw_r_cp_apa_i_kZE3CbNH7J2V8
The 3.3v wire is the one closest to the "L" on the plug part.
With this kind, you can always keep the wire, and put it back in later if you need it.
You can buy this kind and take the plugs off. And add them to your existing wires too! That's how I made mine that are exactly the right length for all 6 drives in my case. You just need a small flathead and patience. Or a normal punch down tool
here you go
https://www.amazon.com/StarTech-com-Power-Splitter-Adapter-PYO4SATA/dp/B0086OGN9E/ref=pd_lpo_vtph_147_bs_tr_t_2?_encoding=UTF8&amp;psc=1&amp;refRID=3JQ9KGX4KQGAF3PX0Y42
use splitters. https://www.amazon.com/StarTech-com-Power-Splitter-Adapter-PYO4SATA/dp/B0086OGN9E
That makes it a bit more difficult. I would need to see a picture of the inside of your computer.
Basically you are looking to see if there is an additional power cable in the case that looks like this. It should be attached to the chord that is attached to your SSD that is already in the computer.
If there is an extra power port already available then you will just need to buy an additional data cable to install the new HDD.
Here is a pretty simple brake down on how to do the rest. I would watch a YouTube video as well to see the whole process in action. You will need to buy some screws to secure the HDD to the slots in the computer. Ask a local computer store, they will be able to help.
It is basically close to plug and play, like an external drive, but a few extra steps and it is internal.
What wattage is your PSU? SSDs don't take much power, so you could probably use a splitter. Also, don't your SATA power cables have multiple connectors on each cable? The ones that came with my PSU look like the ones in this picture:
https://www.amazon.com/StarTech-com-Power-Splitter-Adapter-PYO4SATA/dp/B0086OGN9E/ref=pd_lpo_147_lp_img_4?_encoding=UTF8&amp;psc=1&amp;refRID=MXNGKRM3TBJEM0N5YYM4
That power supply has a whopping 6 SATA outputs. You should be able to use 2 or 3 of these with no problem: StarTech.com 4 Outlet SATA Power Splitter Adapter Cable - SATA Splitter Cable - SATA Adapter - Black - SATA Splitter - (PYO4SATA)
I would be hesitant to chain them all together into an 11x cable. Is there some particular reason why you need a single cable for all your drives?
You want to get well made ones. Look for brand names, not the cheapest you can find. The problem ones are the really cheap ones, which are characterized by molded SATA connectors - the wires terminate inside the molded SATA power plug. [These ones are very unreliable.](
https://www.amazon.com/Cable-Matters-3-Pack-Molex-Power/dp/B00STNUB04/ref=mp_s_a_1_3?crid=3D7AP1AE1TFLT&amp;keywords=molex+to+sata+power+adapter&amp;qid=1555423096&amp;s=gateway&amp;sprefix=molex+to+sata&amp;sr=8-3)
Edit: I use "cheap" too much here, there are good inexpensive ones such as I link below, so don't use price as a rating.
The good ones sort of clamp onto the wires. or have crimped pins.
Here's a video that shows what to look for: https://youtu.be/TataDaUNEFc
Not saying you should do it, just showing you you can get up to 4 way splitters: https://www.amazon.co.uk/StarTech-B5196-Power-Splitter-Adapter/dp/B0086OGN9E
I would put it in a small(ish) case and get something like this
https://www.amazon.com/dp/B008BZBFTG/ref=cm_sw_r_cp_api_46hZxbM1XD2RQ
And lay the GPU down so that way the weight of the GPU won't stress the mobo.
PCI-E Extender
> Is there anything special to prevent static/errant fingers getting into fans/etc.?
Static is handled just like any other case, it's still a grounded frame touching the PSU. Fingers, on the other hand (heh), are handled through sheer force of will. Don't touch it!
You'll want a PCIe riser cable to connect the GPU to the motherboard if you want mount it securely to the underside of the desk away from the motherboard.
FYI: to get around the crossfired GPUs, there are such things as PCIe slot extenders.
If Your card is having trouble fitting, you can get a PCIe riser like this (https://www.amazon.com/Express-Riser-Extender-Flexible-Extension/dp/B008BZBFTG) Before that, your problem may be with drivers. Please put your HD 7950 back and install Intel Driver Update Utility to check if you have proper chipset drivers, and then make sure you have the newest driver version for AMD. If you don't, upgrade and place the 480 in and it should work!
If that does not work, please, before you do this, enable Intel Integrated Graphics so you will not have to do a CMOS reset in case you are left without a a video output (keep Intel Integrated as a backup for now). Take your HD 7950 out (use integrated graphics) and this time uninstall all AMD drivers (if you cannot do it from Windows Control Panel, use http://support.amd.com/en-us/kb-articles/Pages/AMD-Clean-Uninstall-Utility.aspx). Put the RX 480 in, and this time, it should work. Make sure your display connector is in the card's output.
Ah, that's where my confusion is coming from. The board you have listed on PCPartpicker is the full size ATX MSI Z87-G45 with 3 PCIe slots. If you have the MATX version, you could do well to get some more space between those cards. That 980ti is a real cooker.
Alternatively, you could get a PCIE extender cable and move it down a slot or two.
You won't be able to use the riser for anything new. The PCI signals are different from PCI-E.
I would re-use the metal bracket, but switch to flexible PCI-E risers if you are using a newer motherboard: https://www.amazon.com/Express-Riser-Extender-Flexible-Extension/dp/B008BZBFTG
This will allow you to use the metal bracket, but connect modern cards/GPU's.
You have a couple of options. These are the things you will absolutely need:
That's about all I can think of. It's daunting at first when you're trying to imagine how everything would be set up, but I promise it's not as difficult as it sounds. If you have any other questions, just reply here and I'll do my best to answer.
https://www.amazon.com/DATA-connection-video-capture-GV-USB2/dp/B00428BF1Y
This is what I use to capture the composite output for NES, SNES, and GameCube.
https://www.amazon.com/RadioShack-4-Output-Component-Distribution-Amplifier/dp/B010EIK6K6/ref=pd_aw_sim_147_1?_encoding=UTF8&amp;psc=1&amp;refRID=K1A3NZAMXQP3GN77DATJ
This is what I use to split the output of the console (1 to the TV and 1 to the gv usb2).
Edit: changed component to composite because I had a lapse of thinking when I wrote it initially
According to SpeedRunsLive, the go-to capture card for non-HD consoles is available on Amazon, if you are capable of ordering anything online.
Dazzle is more expensive than GV-USB2.
http://www.amazon.com/Dazzle-DVD-Recorder-VHS-Converter/dp/B00EAS14KI
http://www.amazon.com/DATA-connection-video-capture-GV-USB2/dp/B00428BF1Y
I-o DATA USB connection video capture GV-USB2 https://www.amazon.com/dp/B00428BF1Y/ref=cm_sw_r_cp_apa_i_bWaECbY4GMA30
Looks like the price has gone up a little bit, but still not bad for under $40. Just keep in mind that you'll want a powered composite splitter with any composite capture device so you don't get screen dimming/muddy picture. There's a radio shack branded one on Amazon for $20 that splits 1 to 4, which is excellent for me because I play a lot of light gun games on stream and the Guncons require composite video to work.
would I get that as well as the hdmi cable or instead of?
edit: heres what I found on amazon https://www.amazon.com/I-connection-video-capture-GV-USB2/dp/B00428BF1Y
this is what you meant, yes?
I use Elgato HD60 (not the new S variant) for PS2, PS3, PS4 and Wii. Whenever pound decides to makes a new version of the hdmi cable for OG Xbox then I'll be using it on there as well. For the consoles without an HDMI output I use a converter/upscaler (component to HDMI). If you want to capture from from a PS3/PS4 you need a HDCP stripper: https://www.amazon.com/ViewHD-Powered-Splitter-1080P-Model/dp/B004F9LVXC
The viewHD splitter I've had for over 4 years with no issue.
Just so you know if you plan on using the PS2 with a converter or upscaler while playing 240p games (Megaman X Collection) you need FMCB with GSM to "upscale" the game to a resolution supported by Elgato HD60 (and perhaps your TV).
Alternatively, I see a lot of speedrunners on twitch use https://www.amazon.com/DATA-connection-video-capture-GV-USB2/dp/B00428BF1Y for capturing from Genesis, SNES, Dreamcast etc.
The standard elgato may not be a great choice for twitch, since there is a ~2 second delay that can be a bit of an annoyance.
You basically need:
A capture card
GV-USB2 is pretty great quality for SD, but installing the drivers is entirely in japanese. They're pretty easy to figure out by just hitting random buttons and guessing, but people have made guides for "hit these buttons in this order". Once you set it up, it'll work perfectly from then on. The Dazzle DVC 100 used to be a pretty common choice, but I think the GV-USB2 is honestly better (I have a Dazzle, and even I'll admit the GV-USB2 is better).
As far as a splitter/switch, unpowered splitter cables would be fine, such as these plugged into the side of your NES, just make sure you get RCA cables that match up to go to your TV and to your capture card. If you want to get the best picture quality, a powered splitter/switch like this one will give a slightly better picture and will give you room to hook up more consoles as well (since it is a switch as well).
As for software, the standard entry-level streaming software is OBS, and for free software, it honestly is pretty great. If you want to spend money, there's some other good stuff out there, but OBS does everything you'd probably want to do. If you want something a bit better for a timer than your iPhone, try LiveSplit. You can setup splits to keep track of your pace (though considering how short the WR is, just a basic timer is probably fine, this will just allow you to let people watching on youtube or twitch see your timer too).
If you need any help otherwise, let me know.
If you just want something cheap, about any USB capture dongle will do.
I have heard good things about the I-o DATA capture device and the reviews says it works natively with OBS. You won't get any HD video from it but it will work fine with your WiiU if you have the composite video cables (yellow, red and white cables)
If you want to go even cheaper you're on your own. There are USB capture cards on amazon that's less than 10 dollars but I cannot guarantee it will work with your Windows version or OBS.
I use a GV-USB2. It's a Japanese capture card, setup is a tad tricky but I paid $40. Has worked flawlessly for two years
I actually know a good RCA to USB adapter on Amazon. It's Japanese, but as long as your computer has a CD drive, installation is self explanatory (though you can google it too). I'll include the link to help.
https://www.amazon.com/DATA-connection-video-capture-GV-USB2/dp/B00428BF1Y
https://www.amazon.com/I-connection-video-capture-GV-USB2/dp/B00428BF1Y This one?
Many streamers who speedrun SNES and N64 games use this: https://www.amazon.com/I-connection-video-capture-GV-USB2/dp/B00428BF1Y
I have one and it's pretty good. The only downside is that the driver is in Japanese, but it's still pretty easy to install.
Or you can use a Dazzle, which won't be as good but would be cheaper. Whatever you do, I would definitely not recommend getting some $10 AV capture device. I had one and they are pretty bad.
Sort of depends what you mean by "stream well", what content you're streaming, and how serious you are about the whole endeavor. Some top streamers that play modern competitive PC games use two computers, both with very high specs, because it gives them the best FPS to eke out a competitive edge. On the other hand, there are people who just buy a $30 capture card and use whatever old PC to stream themselves playing analog console games. They don't get famous, or a ton of money (usually), but they have a good time.
If you just want to stream for fun, it's very easy to get started. If you want to build an audience, a name for yourself, cashflow, etc., then it's much harder. Being a professional streamer is essentially running a business - you're an independent celebrity and video producer. But if you're not worried about all that, all you really need is a capture card (if you're playing games) or camera (if you're vlogging), and any reasonably modern computer.
I can't vouch for the quality of that particular capture card, but I do know that the one many speedrunners currently recommend is the GV-USB2:
http://www.amazon.com/DATA-connection-video-capture-GV-USB2/dp/B00428BF1Y
Very easy to set up, and the recording quality is good.
Here is some S-Video footage I've captured from my own setup, resized to the correct aspect ratio:
https://www.youtube.com/watch?v=LRRJ3HTr7kM
Keep in mind the quality is likely slightly less than the originals, because I've had to re-encode once to gain the correct aspect ratio, and because youtube may implement additional compression.
I could upload a video that's only been encoded once(For resize purposes) from a lossless file, but only if there's interest. Quality would be slightly higher.
Ok, the absolute cheapest way to record gameplay is probably buying a used DVD recorder from a thrift shop. You can get them nowadays for $5-$10 (especially look for DVD recorders that also have a VCR built in, they often get priced even lower for some reason). Then you'll need some blank DVD-Rs, which are like 10 cents a piece in a spindle. Basically, what you do is take your output from your AV switch into the DVD recorder, then the recorder outputs to TV. Record to discs then rip the discs on a computer when you have the footage you want. This ripped DVD video can then be used in most video editing programs, or just straight put online, etc. That's actually how the large majority of AVGN episodes got gameplay footage, incidentally.
The downside is having to deal with discs and the extra time involved in ripping, you also can't livestream with this setup. It can be nice to have the burned DVD as a backup though.
Second cheapish option, use a USB capture card to your PC and composite splitters. Basically, you buy a good USB capture card for about $30: I-o DATA USB connection video capture GV-USB2 https://www.amazon.com/dp/B00428BF1Y/ref=cm_sw_r_cp_apa_WycSzb8SNAZ9C
There is a cheaper device, like $10 to $15, called EZ Cap, but the more expensive one has much better quality.
Then you buy AV splitters for under $10 like these: Cable Matters 5-Pack, Gold Plated RCA Split Adapter https://www.amazon.com/dp/B0141KPHR0/ref=cm_sw_r_cp_apa_ECcSzbXKPBG3B
Though annoyingly you'll need 6 of those little things, not 5. You'll also need two extra sets of those red/yellow RCA cables, possibly one very long one depending on where your computer is located.
Essentially, you plug the output from your switch into those little splitters, then run one RCA cord out of them to the TV, and the other to the capture device plugged into your computer. Then while you play on the TV, you can record on your computer.
Downside of this method, splitting the cable can result in a bit dimmer video signal, depending on how your TV handles it. Also, extra cable has to be dealt with, and if you don't have a computer nearby may be impossible.
Hope that makes sense. It's a bit of a pain, but not crazy expensive at least.
That model doesn't support VHS to DVD. I personally use a GV-USB to do VHS captures. There are better options but this one has a good value.
I was already looking at the GV usb2 (this one) that they mention about 12 minutes in. However I'm concerned about it using some copyright protection and not recording tapes over 20 years old. I don't know if this is a thing or not, but my mom, who wants me to do this for her and is paying for this, read somewhere that that's a thing. Also because that's a Japan import it can't really be returned since we'd only get back like $10 because of shipping.
I'm probably going to be buying this capture card: https://www.amazon.com/gp/product/B00428BF1Y/ref=crt_ewc_img_dp_1?ie=UTF8&amp;psc=1&amp;smid=A165P864A8QJ3J
But im really confused about what kind of splitters I should buy. Most guides say that I should get s-video splitter, and a auidio + svideo cable that comes from the wii. Is there another option? Because If I wanna take it to a tournament then I would need to bring s-video cables for gamecube and wii and would only be able to use it on tvs that have svideo
When I record from an N64 (or anything that's composite-only), I use a GV-USB2. When I record anything component or higher, I use a Roxio Gamecap HD Pro.
This capture device is far superior for composite/s-video than the Elgato in my experience, and much less fuss. I understand you may not want to purchase a whole new device for streaming but if you plan on streaming more retro consoles (especially if any have S-video) this thing is worth a look.
Cable Matters Gold Plated DisplayPort to DisplayPort Cable 6 Feet - 4K Resolution Ready https://www.amazon.com/dp/B005H3Q59U/ref=cm_sw_r_cp_api_9zHGyb3M0XA90
A lot of other people say this works
https://www.amazon.com/Cable-Matters-Gold-Plated-DisplayPort/dp/B005H3Q59U this is the cable im using for the middle and im using 2 dvi cables for the side.
Ahhh okay. Would something like these cables work? DVI
You don't need a splitter. You need a Display Port cable to drive the 144Hz display. From there, you can use whatever cable you want to connect the other monitor.
You can use DVI, HDMI or Display Port (if it supports it) for the 1080p display.
Yes, just pull out the black dust plug. Here's a link to the type of cable you need: https://www.amazon.com/Cable-Matters-Gold-Plated-DisplayPort/dp/B005H3Q59U
I've seen many choose this one too, https://www.youtube.com/watch?v=EYoghrQH4MI
Watch this, and remember the plus goes with plus, minus with minus and so on.
http://www.tomshardware.co.uk/forum/id-1995782/144hz-asus-vg248qe-monitor.html
There's a reason the best answer was chosen as the best answer. I'm getting it too, and I have tried to look fir all problems.
My friend has this one and all you should do is just to configure it to your liking. https://www.amazon.com/Cable-Matters-Gold-Plated-DisplayPort/dp/B005H3Q59U/ref=pd_sim_147_1?_encoding=UTF8&amp;psc=1&amp;refRID=KP6RM0SB2AMVXQ9H5YGQ
These were recommended, just choose the length you'd like and you'd be good to go. And don't ask reddit next time.
That's a Displayport cable. You can see one on Amazon here.
Here.
https://www.amazon.com/Cable-Matters-Gold-Plated-DisplayPort/dp/B005H3Q59U/ref=sr_1_3?ie=UTF8&amp;qid=1473003972&amp;sr=8-3&amp;keywords=display+port+cable
By the way they are pretty much all the same.
Ok I meant DVI on my main. but my GPU only has 1 DVI input
Why can I not use an HDMI on my 2nd monitor into my GPU. Im only running the 2nd moinitor on 60hz
Would this cable work?
https://www.amazon.com/Cable-Matters-Gold-Plated-DisplayPort/dp/B005H3Q59U/ref=sr_1_3?ie=UTF8&amp;qid=1473139591&amp;sr=8-3&amp;keywords=display+port+cable
I got mine used so I had to buy the cable separately. https://www.amazon.com/Cable-Matters-Gold-Plated-DisplayPort/dp/B005H3Q59U
Well, you could also do for example 1x DVI Male to Male and 1x DisplayPort Male to HDMI Male if you want to connect both the PC and console. The monitor has both connections, so you can use for example the DVI to connect the monitor to the PC and the DisplayPort to connect the monitor to the console.
BTW, because DisplayPort can also output audio, it's the same thing to connect using a normal HDMI cable or a DisplayPort to HDMI cable.
http://www.amazon.com/Cable-Matters-Gold-Plated-DisplayPort/dp/B004C9P9TM/ref=sr_1_1?ie=UTF8&amp;qid=1411636327&amp;sr=8-1&amp;keywords=displayport+to+hdmi
EDIT:
Just remembered the video source needs to be DisplayPort for the cable I linked to work. So you'd need to use an HDMI to DVI cable and the DisplayPort. You'd connect the console with the HDMI to DVI cable and the PC with a normal DisplayPort cable, like this:
http://www.amazon.com/Cable-Matters-Gold-Plated-DisplayPort/dp/B005H3Q59U/ref=sr_1_1?ie=UTF8&amp;qid=1411636837&amp;sr=8-1&amp;keywords=displayport+cable
That should do it.
You need a display port cable!
Edit: https://www.amazon.com/Cable-Matters-Gold-Plated-DisplayPort/dp/B005H3Q59U/ref=sr_1_1?s=electronics&amp;ie=UTF8&amp;qid=1468720213&amp;sr=1-1-spons&amp;keywords=displayport+cable&amp;psc=1
Some games only have 30-60-unlimited so I pick 60 fps
I'm not sure, I was going to purchase a longer than the included cable with the new monitor but the 1070 is taking forever in step-up queue. (It's been at least a month now)
Atm it's 45 degrees right after playing some Witcher 3 but it's not running atm.
I moved Witcher 3 to the SSD directly but it still plays from the HDD. I ended up deleting it from the HDD and reinstalling it via Steam (it discovers existing files).
How come it's labeled as 250GB but it's really 233GB? I used SpaceSniffer to find out what's taking up space and the entire disk is labeled as 233GB big, with the parts adding up to 233 GB (including free space). It's also 233GB in "This PC"
Yeah, don't use the HDMI cable, it's limited to 60Hz. From what I see this monitor comes with a DVI cable so use that (if you have a DVI port on your graphics card) or ideally buy a DisplayPort cable
In the meantime HDMI will work but you won't achieve 144Hz. See here how to enable 144Hz in Windows. https://www.howtogeek.com/267650/how-to-make-your-120hz-or-144hz-monitor-use-its-advertised-refresh-rate/
I use a display port cable and an HDMI for my set up.
https://www.amazon.com/Cable-Matters-Gold-Plated-DisplayPort/dp/B005H3Q59U/ref=sr_1_4?s=electronics&amp;ie=UTF8&amp;qid=1510164891&amp;sr=1-4&amp;keywords=displayport+cable
https://www.amazon.co.uk/Cable-Matters-Plated-DisplayPort-Metres/dp/B005H3Q59U
I've been using these. They have worked perfectly well every time. They are available in different lengths. I forget where I had to check, but I did confirm that they were VESA certified before I started purchasing them.
Whichever you might choose, it should be listed as certified
I need help understanding what cable to use for this monitor I'm getting. I'm getting this monitor and obviously want to use it at 1920x1080 at 144hz. So far I think these cables are what I need but I'm still not sure.
Anyone help would be appreciated!
I'm using a cable off of amazon
Cable Matters Gold Plated DisplayPort to DisplayPort Cable 6 Feet - 4K Resolution Ready
I personally use this one and haven't had any problems: Cable Matters Gold Plated DisplayPort to DisplayPort Cable 6 Feet - 4K Resolution Ready https://www.amazon.com/dp/B005H3Q59U/ref=cm_sw_r_cp_api_NdgAxbFADEBB0
Similarly to HDMI, it's digital (I'm 95% sure), so cable quality doesn't really matter. It either works or it doesn't. Durability wise though, that cable has held up well for me. Displayport cables are pretty thick anyway (thicker than they look in pictures), so it breaking shouldn't really be a problem.
haha at the same store im getting the monitor http://www.microcenter.com/product/436861/66_feet_UltraAV_Display_Port_12_to_Display_Port_12_Cable
but i found this on amazon so cheap https://www.amazon.com/Cable-Matters-Gold-Plated-DisplayPort/dp/B005H3Q59U/ref=sr_1_3?ie=UTF8&amp;qid=1475206892&amp;sr=8-3&amp;keywords=display+port+to+display+port
is this type good enough for free sync?
Oh, I didn't know Displayport worked with 144hz. Just to make sure would this work as well as the dvi connection? Also would it be better to just run both monitors through Displayport then? Thanks! https://www.amazon.com/Cable-Matters-Gold-Plated-DisplayPort/dp/B005H3Q59U/ref=pd_sim_147_1?ie=UTF8&amp;psc=1&amp;refRID=TWP5JVN1VHR2Z2NHVCNP
Any cable really will do.
https://www.amazon.com/Cable-Matters-Gold-Plated-DisplayPort/dp/B005H3Q59U/ref=sr_1_3?s=electronics&amp;ie=UTF8&amp;qid=1517982738&amp;sr=1-3&amp;keywords=displayport+cable
is this good is this what im looking for? http://www.amazon.com/Cable-Matters-Gold-Plated-DisplayPort/dp/B005H3Q59U for my predator x34?
Really sorry I realized how i should put up some specs. Alright so I'm using 3 monitors. 2 of them are Acer G226HQL 21.5-Inch (1920x1080 they only have a dvi and a vga) and then one is Acer XB270HU 27-inch (2440x1440) and as for the wires I usually use 2 DVI-D one of which was plugged-in to the gpu and the other to the motherboard (Z77 EXTREME4) The 2440 monitor is plugged in with DisplayPort. However, I noticed that the Acer monitor plugged into the gpu was the only one running during boot-up so i thought to myself I will try using a HDMI to DVI and it didn't work but either way it works on windows. All running on a EVGA GeForce GTX 980 Ti.
Thank you for answering back.
I feel you on the whole 'no cable blues'. Bought mine in 2014, didn't have a cable - had to make do with 60 Hz while I waited for This cable.
I've had good success with Cable Matters(Amazon) cables, but some have said that it didn't work for them. I am currently using them with my 144hz monitors.
Ugh I don't think you really understood what I suggested.
It doesn't work by just plugging the speakers in the screen because DVI cables don't transmit sound. That's why you HAVE to use HDMI or DisplayPort if you want to use my solution. The picture quality would be exactly the same!
> I don't suppose that will change if I connect my Wii U to the monitor via an HDMI cable?
Yes, yes it would change if you did that, but you have to also plug the PC through HDMI or DisplayPort to hear the PC's sounds too.
Indeed there are alternatives, but they all involve buying a separate adaptor. If you insist on keeping DVI between the PC and the screen, I could make another diagram for that but it will have to wait a little bit: I have to go to work.
Note: there is probably a DisplayPort cable in the box of your Asus screen. There was one in mine... Just use that.Edit: Actually, there is no DisplayPort cable included with this screen, so you should just buy a DisplayPort cable. That's all you will need. Use DisplayPort, not HDMI, for the PC, or you will be stuck at 60Hz while this screen can do 144Hz. This also solves the problem that it only has 1 HDMI port.
The kind of cable you need: http://www.amazon.com/dp/B005H3Q59U/
I could try and check when I get home but that was on the receipt. (GeForce® GTX 1060 6GB GDDR5 (Pascal)[VR Ready] (Single Card))
The cable I got
Would something like this work? https://www.amazon.com/Cable-Matters-Gold-Plated-DisplayPort/dp/B005H3Q59U
I dont have a displayport cord but Im happy to order one and give it a shot!
Thanks for the help =)
Thats weird. What brand is your gtx 970?
On my zotac gtx 970, I have a vga, hdmi and a display port
So in my setup, the vive uses the hdmi port and i bought a display port to hdmi converter to use for my monitor
The displayport will look something like this
https://www.amazon.com/Cable-Matters-DisplayPort-Feet-Resolution/dp/B005H3Q59U
EDIT: refer to image 4 on the sale page
It's this cable https://www.amazon.com/Cable-Matters-Gold-Plated-DisplayPort/dp/B005H3Q59U
I checked before purchasing and it said it should support 144hz
This is a DVI cable and will work fine. However Display Port (this) is faster. Happy building and Merry Christmas!
Cable Matters Gold Plated DisplayPort to DisplayPort Cable 6 Feet - 4K Resolution Ready
Will this cable suffice? States it supports 2k resolution at 120 and 144hz and below
Idk if it's representing the resolution or Hz lol
Get a Display Port cable, or an HDMI 1.4a capable cable. Both standards support 4k/8K video, and up to 240Hz.
They are pretty cheap to. 6' cable on Amazon for $10.
Anywhere that sells monitors would have them. This would be fine http://www.amazon.com/Cable-Matters%C2%AE-Gold-Plated-DisplayPort/dp/B005H3Q59U/ref=pd_bxgy_147_2?ie=UTF8&amp;refRID=0F6Q0MM9S20XFMN8QJJ9
It is actually very important to get an approved DisplayPort cable. HDMI cables don't matter, any cheap cable will work. But DisplayPort cables are a little more complicated and it's possible to buy a cheap one that doesn't work correctly.
I bought this cheap cable because I didn't know it was possible to buy a bad DisplayPort cable. I ran into all sorts of issues with FreeSync not working and my screen flickering/glitching. I thought for sure my monitor or my GPU was broken until I ran into this review for the cable. Turns out the cable isn't DisplayPort compliant and it doesn't meet specs listed at www.displayport.org 's list of qualified devices.
So I bought this DisplayPort cable that is officially approved by DisplayPort. Once I used that cable everything worked flawlessly.
TL;DR: All you need to know is ONLY buy a cable that has DisplayPorts logo on it. Anything else and you risk the chance of the cable not working correctly.
Hi, thank you for the info. I am pretty new to all this as you can tell. Can you tell me if this is the right cable I need ?
https://www.amazon.com/Cable-Matters-Gold-Plated-DisplayPort/dp/B005H3Q59U/ref=pd_bxgy_147_2?_encoding=UTF8&amp;psc=1&amp;refRID=9H1KV2DJFHZ6QRH5WEMB
Thank you!
If you want >60 fps @ 4k you'll need to shell out for the titan. your cpu also plays a huge role in this as well.
the 1070 will do all right in terms of 4k. you will reach >60fps but you will have to tone down settings. Again, cpu matters.
Try to use DDU to uninstall your current nvidia drivers and then reinstall the latest (if you do not know how to use DDU, all the information necessary is on the sidebar to your right).
After you have used DDU and installed the latest drivers, try it with just your 4k monitor first. Since you're using a display port, it should support this resolution.
But please, use DDU first :)
EDIT: Please give me the full name of the monitor. Make sure you have a display port 1.2 cable as well. Looking at some of the 4k monitors with that brand, they only support 4k @ 60hz with a DP 1.2 cable.
Here's a link to a fairly inexpensive one: https://www.amazon.com/Cable-Matters-Gold-Plated-DisplayPort/dp/B005H3Q59U/ref=sr_1_1?ie=UTF8&amp;qid=1481154713&amp;sr=8-1&amp;keywords=displayport+1.2
Ya, [this cable] (https://www.amazon.com/Cable-Matters-Gold-Plated-DisplayPort/dp/B005H3Q59U).
I don't remember the first DP I used, but this was my most recent one.
Cable Matters Gold Plated DisplayPort to DisplayPort Cable 6 Feet - 4K Resolution Ready https://www.amazon.com/dp/B005H3Q59U/ref=cm_sw_r_cp_api_0eayyb9JPF82Z