Best cutting tools according to redditors
We found 368 Reddit comments discussing the best cutting tools. We ranked the 178 resulting products by number of redditors who mentioned them. Here are the top 20.
We found 368 Reddit comments discussing the best cutting tools. We ranked the 178 resulting products by number of redditors who mentioned them. Here are the top 20.

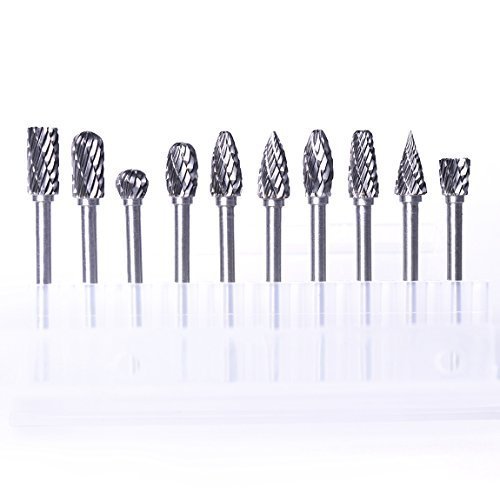
![ZJchao 10 pieces Tungsten Carbide Rotary Burr SET 1/8" shank [Misc.]](https://m.media-amazon.com/images/I/41bp02MiFXL.jpg)


A little how-to:
General advice, some obvious, some not, in no particular order -
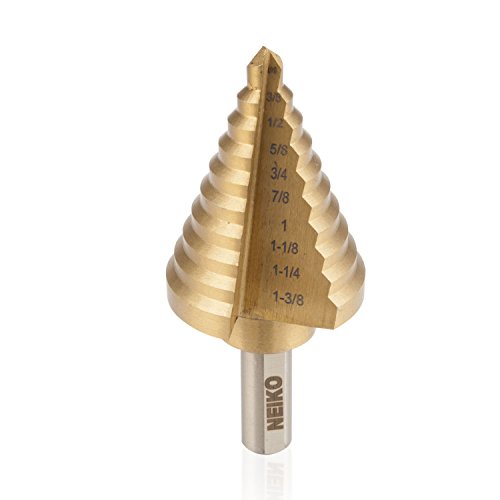
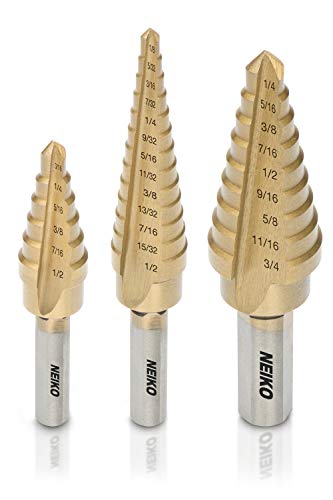
Get a step bit. I can recommend this set of 3, which is $9 shipped -
http://www.amazon.com/Neiko-10193A-Titanium-Drill-3-Piece/dp/B001OEPYWK
They are great for aluminum. If you want to drill through something harder than aluminum, they will do the trick but use a drop of WD40 or oil where you drill.
Drill BEFORE you paint and sand as it's easy to hose your paint job if you drill after painting. If you must drill a painted enclosure, drill through blue masking tape so the little curls of aluminum don't cut spirals through the finish.
Measure a lot and make sure your stuff is going to fit and be centered. Pencil and a ruler and blue tape are helpful. If you are doing it a lot you can make a wooden drill template.
Make a starter dent with a punch as mentioned below.
Clamp your enclosure in place before drilling. If you're using a drill press and value your fingers you really gotta do this.
That's all I got. Good luck!
You're going to have a hell of a time keeping the hole round with a dremel. If you don't have a drill press available, hand sand it with some coarse (80 grit or coarser) sandpaper, it'll take a while, but it's much easier to control. Another option is to drill it out with a drill press, clamps and a forstner bit; just have to be sure it's clamped down well and you have it perfectly centered before you start drilling. Easy way to do it is to start with a step drill bit, knock down the top lip to the size you want and drop the forstner bit into the recess at the top before you hog the rest out with the forstner.
Giant mousepad protip:
You can use MTG playmats as mousepads. They're larger, the same material, machine washable and cheaper than an equivalent steel series. I can fit my 10keyless keyboard and mouse on this while browsing and move my keyboard off while CS:GOing.
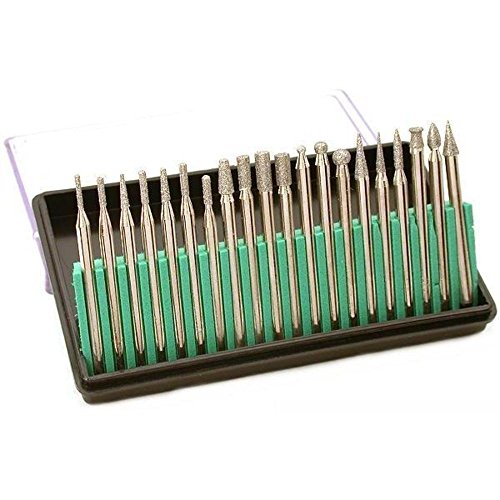
I start my hole with a Dremel and the round (ball) bit of a diamond Burr set found here: http://www.amazon.com/gp/product/B000MOI9G6/ref=oh_details_o07_s00_i00?ie=UTF8&psc=1
Once that's through I finish up with a cone shaped 1/2" Diamond Burr set made for a real drill: http://www.amazon.com/SE-82323DB-6-Piece-80-Grit-Diamond/dp/B0019N7YL0/ref=sr_1_3?ie=UTF8&qid=1394225745&sr=8-3&keywords=diamond+burr
I haven't used the second ones, cause I bought mine off ebay but I used the exact dremel bits on the first link
River Country!!! To install in the WSM, I had to purchase a unibit and drill out the hole to 13/16" to fit it in, but this thing is affordable and bang-on accurate!!!! Stole the idea from T-Roy Cooks on youtube. Additionally, there's a set-screw type deal in the back where you can calibrate it - so if you wanted it to sit in the hood like I have but actually read what the temp is at the grate level, you can stick a probe in at grate level and calibrate the River Country to read what that reads- so even though it's placed in the top of the smoker, it will read the correct transcribed temp from the grate level. Couldn't recommend this therm enough.
River Country Therm
Unibit Set for drilling
Oh man, I wish I were crafty and skilled enough to machine metal...
My Fiancee got this for me as a gift and I love it, here's the link: Jewelers Universal Holder
I was looking at mini holders and couldn't find anything I liked. The top is a hex grid with circular holes for pegs and you can adjust it for all kinds of base sizes under 50mm
There's even a Desktop Version of the Jewelers Holder (though its a little more expensive)
Outside of the things others have mentioned (springs, tubing, couplers, SKR, BMG, etc.) - if you don't already have some good tools/spare parts you can use this time to invest in some.
Absolutely! Just make sure you have either ceramic, diamond, or carbide bits otherwise you're gonna destroy all the bit heads. If you don't have them I may suggest either of these...
http://www.amazon.com/gp/aw/d/B000P49BX8/ref=aw_1st_sims_1?pi=SL500_SS115
http://www.amazon.com/gp/aw/d/B0012DLA3U/ref=aw_1st_sims_2?pi=SL500_SS115
...they ain't the worlds best bits but the price is just right and they've lasted me at least 3 projects, and will probably make it another 3 for sure. And they're cheap to replace!
Dremel is a name brand for hand held rotary tools. I have and have had several so I will give you my .02
Vacuum powered - You connect it to a shop vac or other vacuum and the suction powers it, while this may sound good on the surface I can't see this having anykind of power from this I suggest avoiding it.
Cordless - Battery powered, I have had several. You get less torque than with a corded version, and they run down. I do have their new micro version and I like it so far, but cordless will always be a balance between power and battery life.
Corded - Best bet IMHO, get more features for less money than with the cordless and do not have to worry about waiting for one to charge.
Suggested Features -
Bits - This will depend on what you want to use it for. I use my Dremels for everything from mixing epoxy to cutting and sanding everything (metal, wood, foam, fiberglass, etc). You can get more for your money if you buy a family of bits in a kit (example) but a few bits I have found most useful are:
NOTE Like most power tools, a rotary tool takes a bit of practice, they can get away from you and eat up material (including your jeans and leg) if you are not careful. I have found that 90 percent of the time a light touch.. pull back.. and light touch.. pull back is the best method.
edit: spelling and format
A fairly simple method:
Just drilled holes in the same kettle.
I used this step bit along with some 3 in 1 oil. It was a breeze! Nowhere near as hard as I had anticipated.
Start out drilling a small pilot hole. For the pilot hole I used a faster drill speed and a small amount of pressure. After that the step bit will easily get through the stainless steel. For the step bit, drill slowly, take breaks to add oil, and use a decent amount of pressure. Each rotation should be making progress, otherwise you are just heating and hardening the steel. Finish stepping up the correct size drilling from the inside of the kettle, this will deburr and flatten the hole.
Good luck!
I am mostly recommending tools rather than consumables (like a truck load of filaments :P)
A digital caliper, use it every single day, must have. A $20 Chinese made should be more than sufficient for the tolerance we are printing at.
A pair of good quality side cutter. Prusa printers don’t come with them.
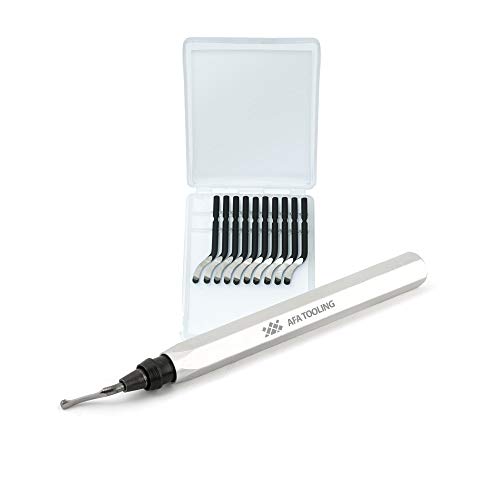
Hakko Micro Cutter
A Noga deburring tool. Very useful for finishing a print and trim sharp edges (brims for example). Cuts plastic like butter.
Noga Deburring Tool
A set of taps. Can’t get very strong thread in plastic, but often good enough. I would prefer a metric set.
A vise. Depends on how much space you have. I use a drill press vise and I find it ok so far.
I used a stepped drill bit designed for cutting through sheet metal to cut my NMO mount in the roof of my pickup. Like, one of these:
http://www.amazon.com/dp/B000FZ2UOY/ref=cm_sw_r_tw_dp_9p94tb0NVTVVW
Way easier than trying to align a punch, and no bending of the edges, etc. Took about 10 seconds to line it up and step it out to the right size.
Cut the crack down with a round file, sandpaper on a 1/4" dowel, dremel..burr might work best or a bench grinder. If it's the alum block and not the stick, just use the other side.
Standard Ultrapro playmat tends to run around $20. You can get cheaper ones that are plain if you want.
Inkedplaymats.com creates custom playmats for $25. I personally recommend them, as I've enjoyed every mat I've gotten from them.
For your viewing pleasure, I present Tolarian Community College's Playmat video.
Some trees and a sleepy sun!
Thanks for the contest! This is a drill set for cutting into stone and glass to make my own beads!
Get the Kyocera reamer recommended on other threads
KYOCERA MR34-0921.438 Series... https://www.amazon.com/dp/B01L9U5VSA?ref=yo_pop_ma_swf
Ooznest is great, they actually used to sell an i3 kit that was quite good, and my goto for Great Britain recommendations insofar as cheap-ish kits were concerned. Last I checked they're a genuine reseller, so what you got should be the correct component. Anyway, if you want to upload a picture, the easiest way is to upload it to an external image host, like imgur, for instance, then link it in your comment.
So, by broken in half, do you mean it looks like this? If so, it is possible to overtorque the two halves against each other inside an M6 nut. It'll be pretty wobbly, and it definitely won't last for more than a couple of prints, but it should work enough to get it through a single print. Actually, since you ordered from Ooznest, you're probably in the UK, or nearby in Europe, right? That means hardware stores should just carry most kinds of metric fasteners, and you can get ahold of an M6 coupler nut, which would definitely join the two halves together long enough for you to get a print off of it. In addition, you could get an M7 tap of some sort, and drill out the Anet's original heatsink. The E3Dv6's heatbreak is an M7 on the top, M6 on the bottom, so that could work. You'd have issues with heat creep long-term, since the E3D uses a metal interior instead of PTFE like the Anet does, but you'd probably be able to get the mounting adapter for an E3D off of it before it gunked up too much.
https://www.amazon.com/Loc-Line-Coolant-Circle-Nozzle-Piece/dp/B00065UDB0/
Only thing of concern to me is that it says max temp is 170° F. Strike and sparge temperatures are very borderline there.
Should be using a stepper bit anyhoo.
Or a reamer.
Or even a file.
Auger bits are for drilling holes, not enlarging holes. Especially in sheet metal / tubing.
I applaud the ingenuity and OP should be happy they got the job done, but others should consider best practices.
Dremel has some attachments that would work (like these). If you don't have a dremel, you can run them in you drill.
You'll need a pencil grinder (or a Dremel, if you don't have an air compressor), and a small teardrop 1/8"-shank carbide burr (something like THIS... 5th or 6th from the left). You'll also need a steady hand, because you'll be grinding that bit out. If you're careful enough in removing the broken bit, you should be able to drill the hole a little larger, and use the next-size-up extractor. I don't know if you used an form of Loc-tite on the bolts, but you may have to use a bit of heat as well.
Source: Aircraft mechanic for 10 years, and have removed many bolts/screws in this fashion.
Warm the surface up. I use a heat gun for a few seconds, but a hair dryer will work as well. It cracks because the plastic is brittle. Give it a little heat and it gets a little more pliable. Not too far or you create a whole different problem. There are also different drill bits you can use. I've had great luck with Forstner Bits
and an almost perfect record with Step Bits
As u/FungalScripture (great name BTW) says, go slow. Keep pressure on the tool very light, and some support on the back side of the plastic you're drilling through can help too. Best of luck.
Or just buy one of these
https://www.amazon.com/Universal-Work-Holder-CLAMP-VISE/dp/B000RB547G/
or
https://www.amazon.com/Hand-Free-Universal-Holder-HOL-173-00/dp/B0058EDVXQ/
I would also recommend picking up a set of these:
https://www.amazon.com/gp/product/B00Y01TJ6G/ref=oh_aui_detailpage_o02_s01?ie=UTF8&psc=1
They are invaluable for shell work.
Thank you, I'm glad you liked it. They're not my highest quality work but I'd call them good enough for tabletop. Especially if I was doing an army of these. This is the vice I use. It's pretty handy, especially for filming.
There's a decent one for like $25 that you can buy.
It's not quite as fancy and smooth to use, but it's highly functional for irregularly shaped objects such as rings that can be difficult to hold in place.
friction fit tips are something like a cherry vapes cloud chaser or the ones I got on ebay. It just depends if you like it really airy or not, some don't. Here's the underside of 3 of my tips, the ones with the smaller holes are standard and the same size as the hole in the Stillare. The big hole is a Cherry Vape tip, the hole happens to be around 5/16, so I opened up the stillare to match. Just make sure the hole in the stillare is the same size as your tip, or the top cap will be the limiting hole. To do the actuall drilling I used the long skinny bit from these bits
I'm not sure about foods, though imagine some exercises could be beneficial. Years back I injured my hand, nothing serious but a bit of scar tissue limited how much I could bend my finger. I ended up seeing a physical therapist that specialized in hands. Perhaps you can talk to one or just find out information through online searches for exercises to help steady your hands. I know, not a ton of help, but maybe it's a start.
In terms of things specific to mini painting, a good holder can help. I use something like this. You can also get a table mounted version which sometimes I'll use for very fine detail freehand work. That allows me to also use my other hand to help steady the brush if needed. Place the index finger of your other hand against the brush just below the bristles and apply a light amount of pressure. I think you'll find this gives you an increased amount of control.
When I paint, I find I often extend my pinky (on the hand holding the brush) and will rest it on either the figure or the figure's holder while I paint. It's something I do without thinking most of the time. It helps my hands (the one holding the figure and the one holding the brush) move together and gives me a sense of greater control.
The shape is similar but I think those bits might be a lot smaller. These have a 1/8" shaft
You could try a step bit.
http://smile.amazon.com/Neiko-10194A-Titanium-Drill-Speed/dp/B000FZ2UOY?ie=UTF8&keywords=stepper%20drill%20bit&qid=1464629613&ref_=sr_1_2&sr=8-2
Truthfully, that is all you need. If you don't have a way to make proper holes in your pot you'll also need a step bit.
On my pot, the rubber that came with the element was enough but you may need separate o-rings (AS568A Dash Number 217).
That's all!
Small to none. You would have better luck at a local machine gun. Harbor Freight might have one, since they import everything from China, but a for warning they suck. They are cheap on Amazon and Ebay.
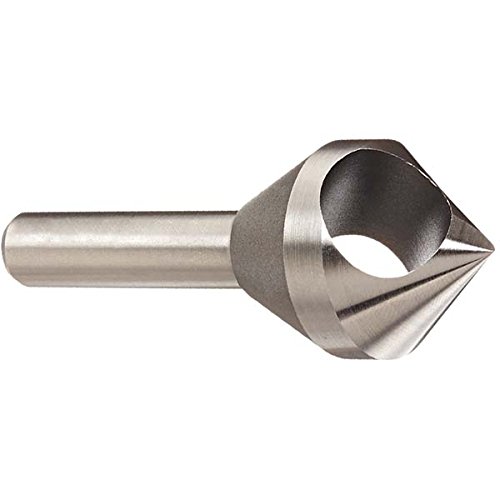
If you're working with soft materials, you want something called a 0-flute countersink. They're designed for merely deburring metals, but in wood and plastic they make beautifully clean countersinks. There are several brands, but Keo is the one I'm most familiar with and can endorse.
82° if you mostly work with Imperial hardware
90° if you mostly work with Metric hardware
Both of these sets work well. You do get what you pay for....keep that in mind.
Expensive
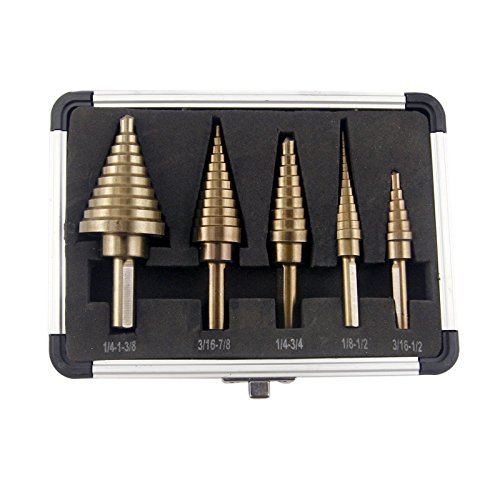
Norseman Uni-Bit Set https://www.amazon.com/dp/B0036YZWLE/ref=cm_sw_r_cp_api_PdTyzb1GGBTKB
Cheap
CO-Z 5pcs Hss Cobalt Multiple Hole 50 Sizes Step Drill Bit Set with Aluminum Case https://www.amazon.com/dp/B0177PN6SI/ref=cm_sw_r_cp_api_reTyzbBCBYFH1
Take a look at getting one of these, they're wonderful.
https://www.amazon.com/Noga-NG8150-Heavy-Deburr-blades/dp/B001O62V56?ref_=fsclp_pl_dp_3
I use a deburring tool to remove brims. Works great.
something like this
Well I love Rick and Morty as well, and I think your giftee would like a replica of Ricks portal gun $12https://www.amazon.com/Funko-Toy-Rick-Morty-Portal/dp/B071GVGFQF/ref=sr_1_1?ie=UTF8&qid=1543448056&sr=8-1&keywords=rick+and+morty+portal+gun
And as I am also a harry potter fan that owns one of these, I think your giftee would like a Replica of the Marauders Map $27 https://www.amazon.com/The-Noble-Collection-NN7888-Marauders/dp/B0026PW67W/ref=sr_1_1_sspa?ie=UTF8&qid=1543448110&sr=8-1-spons&keywords=harry+potter&psc=1
​
I'm a woodworker, and If I win I would love this set of wood carving burrs Wood Carving Burrs
Coincidently I also make Harry Potter inspired wands from time to time, Here's my most recent wand
I used a crack injection kit to fix a similar crack in my basement. Took me an afternoon and hasn’t leaked a drop since.
Simpson Strong Tie 9oz CRACK-PAC FLEX H2O KIT W/ACCESORIES (CPFH09KT) https://www.amazon.com/dp/B00QKZEWW6/ref=cm_sw_r_cp_api_DqcXBb05WKZ5Y
Check out the sight glasses at Brew Hardware. I've purchased many items from Bobby, and have had good experiences.
Assuming a weldless application, you'll need a step bit for your drill. The one linked worked great for me. When drilling, use oil to cool the bit and go SLOW or you'll harden the steel.
Bobby's install/calibration videos can be found here and here.
Good luck!
For my longer jobs like drilling and grinding the air holes on kayfun lite clones I actually hold it under dripping water in the sink. For smaller quick jobs I've used old e liquid, since it can be a pain in ass to wash out machine oil and I have a bad full of e liquid that I don't use. If you use the automotive sand paper you can just wet it with water, the paper I got is made for wet sanding. I think I got it from Walmart it was years ago when I was panting truck parts so it may have come from an auto parts store.
This is the last diamond bits I bought
Just take it slow on the glass and smooth the sharp and I think you'll be happy with the difference it makes. Oh and if you try to mod any metal parts don't force the bits down into tight holes like small air holes because they can overheat and break of in the hole and it sucks trying to get them back out. I learned how important patience is real quick doing that, and keeping your work cool and lubed.
For those interested, here's a pic of the inside.
Here's a list of my mods.
SE DT220R 180 Grit Diamond Burr Set, 20-Piece https://www.amazon.com/dp/B000MOI9G6/ref=cm_sw_r_cp_apa_3N6MAb31N6WZ0
Use the egg-shaped bit. Hold the bottle under a small stream of cold water in your sink so that it is rolling over the spot your going to drill. Use a dremel on highest speed. Go slow and occasionally lift the bit off the glass while you're drilling. Once the bit is through the glass, use the sides of the spinning bit to sand away the glass and open the hole to to desired size. Bob's your uncle and you got a pipe. I'm currently in a pipe/bong making phase and this is my method.
I'm particularly proud of this one... Recycled Coca-Cola bottle 2-chamber glass bong https://imgur.com/gallery/ZHAt8
clean bbs with a chisel and use a dremel with 1/8" shank burr bit to knock the ugly off the rest https://www.amazon.com/YXGOOD-Pieces-Tungsten-Carbide-Double/dp/B01MXURLTG/ref=sr_1_4?ie=UTF8&qid=1505753798&sr=8-4&keywords=1%2F8%22+shank+burr
Card game playmats are pretty similar to that. Check this out. 24" x 13.5"
https://www.amazon.com/Solid-Black-Play-Card-Game/dp/B00D8K2J30/ref=sxts_k2p_hero1?pf_rd_m=ATVPDKIKX0DER&pf_rd_p=2668835602&pd_rd_wg=0qCjV&pf_rd_r=KW3697AMEJWS1FJNSM86&pf_rd_s=desktop-sx-top-slot&pf_rd_t=301&pd_rd_i=B00D8K2J30&pd_rd_w=XPvtc&pf_rd_i=Magic+playmat&pd_rd_r=0K06AW679KHH166D2421&ie=UTF8&qid=1479080047&sr=1
It's easy to do yourself. If you don't have drill, find a friend who does. Definitely don't pay someone to do it though. it will take 5 minutes. stepbit drill
A diamond tipped bit like these ??
It's working great! Electronics wise the only thing I would change is going with all Auber PID's, but I have the Mypin ones tuned pretty well now.
On the mechanical and equipment side I have added a hop spider, and I am considering adding some sort of automated stir thing to constantly stir the mash and increase efficiency. But thats about a year down the line to be honest.
I also added one of these to help prevent tunneling in the grain bed, it works great after enlarging all the holes in it. I have also been playing around with a plate chiller, but it is proving to be more trouble than it's worth. I bought a new chiller a while ago but haven't gotten around to playing with it yet.
You're looking for someone to buy you this and then ship it to you?
If so, I can possibly help you out as long as you're covering cost of item/shipping to me in the USA and then shipping to you from US to Hungary.
Let me know if you don't find any less expensive/more direct method in a few days.
15 feet of 12 gauge line should be plenty for the amp pull of the unit.
​
Mash recirc line thing is a loc-line hose. They are typically used to deliver cooling liquids to CNC mills while machining metal. They are made of Acetal Copolymer ("Delrin") so they are food safe. Works great. https://www.amazon.com/gp/product/B00065UDB0/ref=oh_aui_detailpage_o08_s00?ie=UTF8&psc=1
​
My girlfriend got me a set of cheap chinese tungsten carbide carving burs off of amazon. I find myself using them and a few of the sanding drums very often.
I can't find the exact set anymore, but they're very similar to these:
http://www.amazon.com/gp/product/B0097QA7OW/ref=s9_wsim_gw_p469_d63_i2?pf_rd_m=ATVPDKIKX0DER&pf_rd_s=desktop-1&pf_rd_r=1KHDGF05W4NZ4NY2PTV9&pf_rd_t=36701&pf_rd_p=1970559082&pf_rd_i=desktop
I'm planning on using this step bit. I have various hole saws, but I've been instructed to use this instead.
I've not tried it myself, but using a hand tool would seem to be the safer bet.
I believe i have also read someone say they used the Diamond Bur set that you can get on amazon. Google'd: This one maybe?
DN 32 - 1¼ - 1.660 in (42.16 mm)
Would be a 1 1/4" hole punch like.
https://www.greenlee.com/products/DIE%2540c-RD-1%2540.250-(43%2540c2)-CONDUIT-(735).html
https://www.amazon.com/Greenlee-730BB-1-1-Standard-Knockout-4-Inch/dp/B002NQZ0J0
Are you soldering in or using a bulkhead fitting on your boiler? You could use a step bit to drill out a hole.
https://www.amazon.com/Neiko-10194A-Titanium-Drill-Speed/dp/B000FZ2UOY/ref=sr_1_3?s=hi&ie=UTF8&qid=1518546407&sr=1-3&keywords=step+bit+for+stainless+steel
Depends on the material the face plate is made of. If it's metal get a step bit, a decent drill and a drill guide
https://www.amazon.com/Neiko-10194A-Titanium-Drill-Speed/dp/B000FZ2UOY
https://www.amazon.com/wolfcraft-4525404-Muilt-Angle-Attachment-Drills/dp/B000JCIMEA/ref=sr_1_5?s=hi&ie=UTF8&qid=1519142267&sr=1-5&keywords=drill+guide
those should work.
If it's plastic I'd get some forsner bits depending on what size buttons you want
Yup. I just got done using one of these abaout an hour ago on some AL plate. Works like a charm. Don't get the Harbor Freight ones though they are garbage.
Amazon has them too.
Something like one of these?
FWIW, I love my Tall Boy kettle, but I did have to invest in a step bit, a bit of cutting oil, and a bulkhead, ball valve, and thermometer and install them myself. Rough total ~$200 and some elbow grease. I also added a whirlpool return and etched some volume markings with this little guy. But I'm a big DIY-er. (and sorry for all the links)
Oh, guess I misread it. I'm gonna buy one of these but I can't swing it until friday. Any chance you have any green meters left?
http://www.amazon.com/Neiko-3-Piece-Titanium-Drill-Steel/dp/B001OEPYWK/ref=sr_1_2?s=industrial&ie=UTF8&qid=1411584929&sr=1-2 Is this step drill bit good enough? I have everything else unless a simple single-setting plugged in=on soldering pen isn't good/accurate enough and I need something fancier.
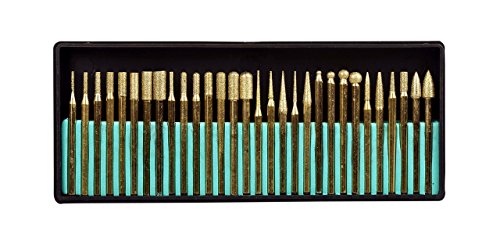
[this is what i used because i have a dremel] (http://www.amazon.com/SE-82331TF-pieces-8-Inch-Diamond/dp/B000P49BX8/ref=sr_1_1?ie=UTF8&qid=1370366072&sr=8-1&keywords=diamond+dremel+bit) (if you dont have one, id suggest getting one they are great for anything)
I did something similar a few months ago, but I used a drill press. They're kind of expensive so I'd ask around for one you can use. You need a step drill bit. Just mark out where you want your holes to be and make sure the cymbal is clamped down nice and tight, then drill away.
Is this correct?
7mm X .5 Metric HSS Right Hand Thread Tap M7 X 0.5mm Pitch
http://www.amazon.com/dp/B00C88E0IA/ref=cm_sw_r_an_am_ap_am_us?ie=UTF8
i have a set thats a bit larger than this
main thing you have to look out for is if the bits you want will fit the chuck of the drill you are using
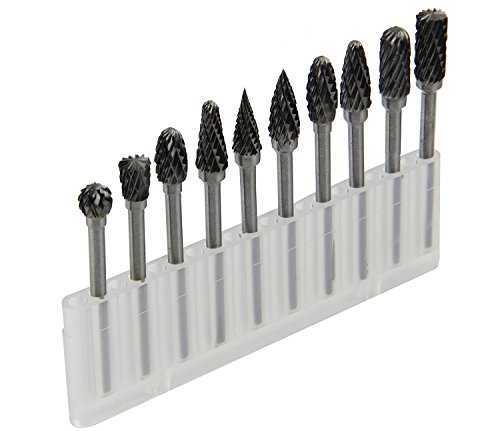
I bought a cheap chinese set of carbide burrs from Amazon. $11
I used the cylindrical one with the round head to grind out two bolts that held the sway bar clamps on one of my W163 MLs. The bolt goes through the control arm and the two clamp halves and is a colossal pain. The head breaks off of the bolt almost every time.
Very time consuming and it takes a lot of pressure on the drill to make it cut but it worked great. I used a 2x4 as a level and was probably putting close to 100lb of pressure on the drill. Took forever but it worked.
I like these types of drill bits, step drills for small metal projects.
They are great for thin metals, especially since I don't do lots of drilling into metals, I can have many different sizes on a few bits.
If you have a dremel or electric drill just get these: http://www.amazon.com/Pro-Quality-20-Piece-Diamond-Point-Rotary-Tool/dp/B000MOI9G6/ref=sr_1_1?ie=UTF8&qid=1331352860&sr=8-1
https://www.amazon.com/Ultra-Playmat-Games-Workstations-84082/dp/B00D8K2J30/ref=sr_1_6?keywords=black+ultra+pro+play+mat&qid=1569245806&s=gateway&sr=8-6
Looks like it is $9 right now, sometimes is a bit cheaper
Now that I’m home and have a minute to type, here’s how I made it:
-I used a step drill bit to cut two 3/4” holes in the mason jar lid. I kept the lid on the jar while drilling, held the jar with one hand and the drill with the other and it worked just fine (I marked the holes with a sharpie before drilling)
-I put in one hookah hose grommet and one “downstem grommet” (I get these from my local ace hardware. You just ask for a rubber grommet with an inner diameter of 1/2”, an outer diameter of 31/32”, and a 3/4” groove, I think the stock number is 55059) in the holes I drilled
-downstem time. I get them from a local smokeshop and I use just regular ol’ glass on glass downstems that work with a 14mm bowl. Before you fit it into the grommet, lube them both up with whatever cooking oil you have on hand (I use coconut oil). Getting the downstem in is the trickiest and scariest part to me but it goes relatively easy if you coat it in oil first
-all set, just put in a 14mm bowl in the downstem and a regular hookah hose in the hookah grommet and you’re good to go
Eta link for hookah grommet
I'd give something like one of these a try.
https://www.amazon.com/dp/B009K8HNOE?psc=1
https://www.amazon.com/Simpson-Strong-CRACK-PAC-ACCESORIES-CPFH09KT/dp/B00QKZEWW6/ref=sr_1_1?ie=UTF8&qid=1493124180&sr=8-1&keywords=crack+pack
To make it easier to remove the brim, get yourself a deburring tool. Makes it so much easier to trim your parts.
Noga NG8150 Heavy Duty Deburr Tool, with 10 S10 blades https://www.amazon.com/dp/B001O62V56/ref=cm_sw_r_cp_apa_i_sQmBCbWRS5914
It's called Loc-Line
Amazon has them
Drilling the hole is super simple. You just need to know the OD of the drain valve and then get a step drill bit https://www.amazon.com/Neiko-10194A-Titanium-Drill-Speed/dp/B000FZ2UOY?ref_=Oct_BSellerC_256287011_0&pf_rd_p=0c52eddb-bf3e-5079-a600-1a1baeabeb0f&pf_rd_s=merchandised-search-6&pf_rd_t=101&pf_rd_i=256287011&pf_rd_m=ATVPDKIKX0DER&pf_rd_r=FYR4GJFVCFM1TC7P2MP3&pf_rd_r=FYR4GJFVCFM1TC7P2MP3&pf_rd_p=0c52eddb-bf3e-5079-a600-1a1baeabeb0f
That will give you a perfect circle hole for the size that you need.
I have 2 and I prefer my Dremel brand one because it has 5 speed settings whereas my B&D only has 3.
My Dremel is a 3000 but there are lots of options in the Dremel world. I would say to avoid wireless/battery operated ones if you plan to ever use it for metal cutting because battery operated ones tend to lack the speed and power of a corded model.
Also consider investing in a rotary file bit or 3 (https://www.amazon.com/dp/B00Y01TJ6G/ref=cm_sw_r_cp_apa_QyHszb8B7NJ72) - the circular cutting bits are a pain to angle sometimes and are useless for rounding corners, etc. A rotary file bit is great for when you want to shave away a surface instead of cut INTO a surface. Kinda hard to explain in text. You'll see what I mean if you ever try them in person.
https://www.amazon.com/Noga-NG8150-Heavy-Deburr-blades/dp/B001O62V56/ref=olp_product_details?_encoding=UTF8&me=
or
https://www.amazon.com/Noga-RotoDrive-NG3400-Cranked-Countersink/dp/B01BH7ERYY/ref=sr_1_1?crid=1YS1TDD11TX56&keywords=noga+chamfering+tool&qid=1558196992&s=gateway&sprefix=Noga+cham%2Caps%2C245&sr=8-1
playing card mats are the same thing but cheap
Bud-boxes, some step drills, and a hand nibbler. Done and done.
And here you go:
SE 82331TF 30-Piece Set of Titanium-Coated Diamond Burrs, Grits 120-150 https://www.amazon.com/dp/B000P49BX8/ref=cm_sw_r_other_awd_w8I7wbTKQKNKS
I've been pretty happy with those so far. I think I might try my hand at engraving sometime soon.
The following are the parts I'll be purchasing for this build. I think I've covered everything, but as this will be my first custom loop if someone could give it the once over and make sure I'm not forgetting something it would be GREATLY appreciated!
Link to current build
Item | Vendor | Price | Quantity |
---|---|----|----|----
[CE 280](https://www.ekwb.com/shop/ek-coolstream-ce-280-dual","EK-CoolStream CE 280) | EK | 75.99 | 1 |
[PE 360](https://www.ekwb.com/shop/ek-coolstream-pe-360-triple#ow_alert_box","EK-CoolStream PE 360) | EK | 79.99 | 1 | 1
Corsair SP 120 2-pack | Amazon | 27.99 | x2 |
EK 140 Revo D5 | EK | 163.99 | 1 | text
EK Supremacy EVO | EX | 78 | 1 | text
EK Pump Bracket | EX | 13.49 | 1 | text
MSI GTX 1080 Sea Hawk EK| Newegg | 569.99 | 1 | text
ATX Bridging Plug | EX | 2.49 | 1 | text
Alphacool Silicon Bending Cord | Amazon | 8.49 | 1 | text
EK-CSQ Plug | EK | 3.49 | x2 | text
EK-AF 6mm M-M Extender | EK | 2.99 | x2 |
EK Ball Valve | EK | 19.99 | 1 | text
EK X Splitter | EK | 8.99 | 1 | text
Heat Gun | Amazon | 17.71 | 1 |
Step Bit | Amazon | 10.85 |1| text
Pipe Cutter | Amazon | 7.99 | 1 | text
EK-HDC 16mm Gold Fitting | EK | 8.99 | x10 |
EK PETG 12/16 Tube | EK | 8.49 | x4 |
Sorry, went to bed. As long as you are slow and deliberate, I wouldn't think you would have a problem with cracking. There are some issues with the glass flaking off where you cut it, but that can be fixed with sanding.
https://www.amazon.com/Pro-Quality-20-Piece-Diamond-Rotary-Tool/dp/B000MOI9G6/ref=sr_1_1?ie=UTF8&qid=1499440765&sr=8-1&keywords=diamond+tipped+dremel+bits
I used these bits to finish the edges after cutting. The "globe" bit, 7th from the right, is what I used to drill a drainage hole in the glass.
edit: also, for sanding the edges, get Emery Cloth, it's in the sandpaper isle at home depot. It's sandpaper that is bound with cloth, so you aren't going to cut through on a sharp edge when you are sanding it down.
Not OP, but you just need a set of set drill bits and a cordless drill to drill through enclosures. Takes a few seconds to drill through to your desired size!
I picked up a WinWare aluminum boiling pot for $40 last year, drilled a hole in it (I think that the bit was $20) and installed a $20 valve. Since purchasing it, I've used the bit for two valves, a thermometer, and two sightglass installs.
Edit: The pot
The Bit
The valve
Holiday Deal Valve Alternative
You might be able to find better deals on Cyber Monday, though.
All you need is a drill gun and dish soap (the soap is a nice lubricant so you don't wear the bit down quickly)
I'll agree with skunk in that I think the sanitary fittings was a bit overblown. I use threaded fittings on everything and have never had a problem. I take them apart about every 5 batches or so to clean them more thoroughly, but they stay pretty clean.
You are absolutely going to need diamond tipped bits. This is not at all easy to do. This IS going to result in a ton of broken attempts. Please make sure you wear really good eye protection AND a respirator. I have not made any designs on/in glass with a dremel but I have had to drill several half inch holes in the side of bottles before. If you go to fast it will break. If you let the dremel bounce or get out of control it will probably break the glass. If you look at it wrong it will break the glass...seriously though, it is something that is going to take some practice and a steady patient hand. I wish you the best of luck!
Bits
Depending on how big a hole you are making, it might be easier to do it yourself. If you have a decent drill (preferably corded by a nice cordless one will also work), you can get a step drill bit and some cutting oil. You do not need a punch unless you are doing a ton of holes or are doing something very large.
I bought these:
CO-Z 5pcs Hss Cobalt Multiple Hole 50 Sizes Step Drill Bit Set with Aluminum Case https://www.amazon.com/dp/B0177PN6SI/ref=cm_sw_r_cp_apa_i_3utODbTY8GTG0
And turned them by hand or very slowly in a drill.
I highly suggest picking up a step drill bit for making holes in cabinets. Makes a cleaner hole then a hole saw and easier too,
https://www.amazon.com/Neiko-10194A-Titanium-Drill-Speed/dp/B000FZ2UOY/ref=lp_256287011_1_4?s=industrial&ie=UTF8&qid=1573329070&sr=1-4
*A hole that would take me 10 min of frustration with a hole saw is basically as easy as drilling a normal hole with a step drill bit.
Here's a picture of a hole I drilled with that same bit at work. The top "hole" was done by whoever did the installs here. The bottom hole was with that drill bit I linked.
https://photos.app.goo.gl/zMBmttDrVssS6h63A
Thank you so much for this info, c0nduit. I really appreciate it. I aim to do carving in the round. I'll see if I can get away with a generic big hook instead of the stand. Would a hook > spring > motor help keep the motor's sound down / keep it from rattling or vibrating the wall/cabinet the hook is connected to? Or is that a non-issue? My bench doesn't support any of the elevated stands they sell.
Thanks for letting me know the big burrs that come with the kit are functional and I had no idea fire is the best medicine for a clogged burr. Thank you also for a look into your workflow. I will pick up the detail diamond files. I anticipate them being very helpful. I'll also get the diamond "detail" burrs cause they're also cheap and it sounds like small diamond burrs will work well enough in moderation. Hopefully those and a basic detail knife set for edges will get me through the first few projects and aim me towards a stronger detail game-- hopefully without acquiring another power tool :]
Am I right to think the small diamond, almost engraving burrs might be OK for very limited detail work? Or would they get clogged immediately and be a huge pain to repeatedly clear out?
Thanks again for 1 -validating my research and 2 - your thorough answers. This is a really big help.
Well this + this(1.75L) should work ok. At least its what i plan on using shortly.
that one seems a bit big, possibly smaller ones are cheaper?
hole saw set - says diamond tipped
http://www.amazon.com/SE-Diamond-Hole-Saw-Set/dp/B000SJ2TL6/ref=sr_1_6?s=hi&ie=UTF8&qid=1334198775&sr=1-6
hole saw - 1 bit 3/4 inch
http://www.amazon.com/DEWALT-DW5582-4-Inch-Diamond-Drill/dp/B000VRBENO/ref=sr_1_1?s=hi&ie=UTF8&qid=1334198775&sr=1-1
dremel kit - must have a dremel for sufficiENT speeds
http://www.amazon.com/Pro-Quality-20-Piece-Diamond-Point-Rotary-Tool/dp/B000MOI9G6/ref=sr_1_4?s=hi&ie=UTF8&qid=1334198775&sr=1-4
ALWAYS MEASURE TWICE and CUT ONCE
I used a half inch spade bit and it kinda cracked my first one
http://i.imgur.com/T9w9t.jpg
Has slide to bottom and then removable bowl
stuff at neck is hot glue for a air tight seal, glass was to thick for gromit that came with the slide
bottle cutter - for other fun things
http://www.amazon.com/Generation-Green-g2-Bottle-Cutter/dp/B004ZRV3AU/ref=pd_bxgy_hi_text_b
> M7x0.5 tap or thread follower
Like this? http://www.amazon.com/Metric-Right-Thread-0-5mm-Pitch/dp/B00C88E0IA
Haha sure thing, its a rather simple mod. All you need is a through hole fitting.
Basically, it allows you to create a pass through on the case where you can screw any type of G1/4 threaded fitting into it. For the plug, you can use any type of G1/4 stop fitting.
The best way to drill the hole is to use what is called a step bit. So you drill a pilot hole with a standard 1/4" bit, and then you use this step bit to step up the size of the hole. If you are only going to be doing it for this build, I would recommend getting the link I provided as most of these bits go for $55 at your local hardware store.
All in all it's easy-peasy. Just be sure you know for sure where you want the port to be before you drill ;).
Thanks everyone for the advice everyone, I probably would have bought them had I found them yesterday, but I decided to go the DIY route. Since picking must be a very budget conscious hobby for me, I went ahead and took the plunge and bought the important tools. I figured making my own pins would be difficult and require a lot of crazy equipment, but I looked into it and realized it was a lot easier than expected. So just for anyone who's curious, here's what I got:
 
So in total $112 for all the components needed to make as many locks as I can imagine, many of which can be used for other projects.
 
To add supplies for a few other DIY projects I also added:
 
So another $21 brings it to $133 plus $2 per 2-3 tools that you need. Add in this $6 case and a few $4-$6 practice locks around aliexpress (1st, 2nd, 3rd, 4th 5th, 6th, 7th), and you've got a great starter kit that sets you up to DIY anything you might need in the future. I also took advantage of Peterson's mega christmas sale (plus the 10% discount code they gave us) and got a ~$25 order of $1-$3 picks to start me off
Rookie mistake to buy a $20 drill bit, when you can get 20 for $4
Amazon is a good choice. Inked Gaming has ones with custom art if you're into that.
Here it is on Amazon. Try searching "thread die" for other shops. CCW are also referred to as "left hand" threads
Try using a deburring tool to chamfer the edges of the cut.
I think it's definitely worthwhile to drop a few bucks on glass drill bits. There about $15 in a hardware store or you can look online. I got this set and immediately made a nice steamroller. Be aware that they're too small for most downstems.
He gives an instruction sheet with it. Let me snap a picture.
https://imgur.com/a/YMTTaj1
Sorry about the cell phone pictures. I don't have a scanner anymore since I went to a cheap color laser printer.
edited to say: I need to break down my MK3s and put in those tubes but haven't done it yet as I'm waiting to finish doing upgrades to my ender3 and setup my anycubic photon, basically I can't be without a 3d printer and have been limping by with my MK3s with the jamming issue. I currently follow this guide: http://projects.ttlexceeded.com/3dprinting_jams.html
and bought these brass rods on Amazon which is working perfectly: https://www.amazon.com/gp/product/B01C6LUO5Q
I was using a variety of tips (bought from amazon
And yes I was using sulfur lime for treating peach curl
This might be a silly question, but why do people pay so much money for these large mouse pads when you can get a playmat with a rubberized bottom for ~$10?
Links to the items used in this build:
https://amzn.to/2SDTHmE Breadbox - available in many colors!
https://amzn.to/2Yd5ARK Multi Charger
https://amzn.to/30OXCjw XT60 Charging Cables
https://amzn.to/2LGBcgH LiPo Balance Boards
Tools to cut the tidy holes:
https://amzn.to/2LGYqTQ Drill Bit
https://amzn.to/2LNxIJF Knockout Punch Kit
Here's a link to a set on Amazon for $6.50. Thanks for the heads up OP.
Edit: or this one. Which to get?
You could thread it yourself easily, Amazon sells -14mm dies
The Chassis: Most of the handle is MHS v2 (where the leather wrap is), and then both ends adapt up to MHS v1. Because of this I ended up going with Goth 3D chassis parts that are 0.99 OD. But they are modular pieces, so you pick and choose which ones you want. I needed to use spacers between some of the parts so that I could route the cables through, so I put spacers between all of them to look cohesive. Other than the Goth 3D parts, there are a few Skywampa, TCSS, and other various hardware bits. Everything is linked below.
Goth 3D
Excluding the crystal chamber parts, the Goth 3D chassis parts were all white, which was a mistake. Should've done black. So I painted all of them in a few steps. 1st was paint them flat black. 2nd was paint them graphite. 3rd was a layer of silver leaf Rub'n Buff thinned with enamel thinner and applied to just the outside to help it look more like metal.
Here are the other pieces of the chassis with explanations:
The Skywampa and TCSS discs are treated with a combination of Aluminum Black and Ebony Rub'n Buff to give them that "weathered" look.
Here are the various hardware bits to connect all of it: