Best electrical cleaners according to redditors
We found 301 Reddit comments discussing the best electrical cleaners. We ranked the 16 resulting products by number of redditors who mentioned them. Here are the top 20.
We found 301 Reddit comments discussing the best electrical cleaners. We ranked the 16 resulting products by number of redditors who mentioned them. Here are the top 20.


I too had this issue, and completely fixed it with some electrical contact cleaner. Compressed air didn't work, I had to use this stuff. You lift up the rubber base of the sticks and spray this stuff in there on all the sides, wiggle around your sticks a bit to get it all around in there, let it dry for a an hour and then they'll be back to normal. I have to repeat this process every few months depending on how often depending on how much I'm using my switch, but it's super easy and takes very little time. I still have the same can of cleaner, and it seems like it has plenty left in it.
This has fixed mine https://www.amazon.com/dp/B000BXOGNI
Found it from a switch mod bot post
It looks beautiful, obviously stored in good conditions. I'm not sure how it works, but my bet is it will take very little to get it going. The tubes are likely OK because these amplifiers are used very few hours compared to commercial equipment. The main thing to check is the filter capacitors. The other capacitors and resistors are likely OK if it's been stored in an air conditioned area. Also, changes in values of these will not cause damage when the unit is powered up. It will likely be necessary to clean all the controls and switches, too.
Having restored a lot of older equipment, here's what I would do before turning it on:
I recently refurbished a 14-tube receiver from 1964 and all it required was a good cleaning. Absolutely no tubes or capacitors were bad.
Good luck with the project!!
Amazon is what we're gonna do.
http://www.amazon.com/CRC-05046-Technician-Terminal-Protector/dp/B000CIPUNC
I use a similar product after cleaning a customers battery up with some baking soda and water, works great but this guy used way too much.
Okay, it might still be fixable. Go get some "contact cleaner". This is the electronics stuff, not the stuff for your eyes. A local electronics store, or digikey in a pinch. Huh, amazon carries it, so there you go. This should do: http://www.amazon.com/WD-40-Specialist-Electrical-Contact-Cleaner/dp/B00CMT9TFY
Clean the board with the contact cleaner and a toothbrush (you'll throw it out later; a cheap one works awesome, flat style, not the ridgy ones with rubber). You'll have to get in and scrub the board a little, making sure you get all the goop out, especially around the chips.
Use common sense. You're getting rid of gummy residue, it won't require scrubbing until the bristles fall out.
Believe it or not, static with this cleaning method is usually not a problem; the wetness of the cleaner keeps your board protected.
Let dry, put back together, hope for the best.
If all else fails, pick up another one at a pawn shop. (I found my PS2 on the side of the road. Gave it to a GF who's now my ex, womp womp.)
Source for cleaning instructions: I'm an electrical engineer.
If anything, remove the CMOS Battery and the housing for the GPU and you can wash the boards with water. Immediately pat it dry and place in a 200*F 90*C degree oven or an oven set on Warm (WM) to help it dry quickly. (the GPU PCB and the Motherboard can be there and be safe.) Any higher and you're going to risk melting connectors. To be extra safe, wrap in some paper towels and set on the racks after the oven gets to temp. Turn off the oven and then let them sit there for about an hour or two.
From there you can use a corrosion removal spray or solution to try and undo any damage.
CRC contact cleaner - Plastic Safe.
Deoxit contact cleaner and corrosion removal.
Pen style Deoxit.
If not, you can no confidently say that you need to spend the money on the now more expensive GPU and Motherboard. Clean the contacts of the ram as well as the power supply connectors with rubbing alcohol just incase.
Edit: Reddit had a stroke when I used autocorrect and doubled a bunch of shit.
Take the battery out. Get a toothbrush. Some of this stuff. https://www.amazon.com/CRC-05103-Electronic-Cleaner-11/dp/B000BXOGNI/ref=sr_1_2?crid=T9K663XMBYF5&dchild=1&keywords=crc+electronic+cleaner&qid=1575079801&sprefix=crc+ele%2Caps%2C128&sr=8-2
Scrub off the board and rinse with highest concentration of alcohol you can get. I use 91%. Repeat until it looks good. Replace the battery, because I'm sure that one is a gonner.
Spray this stuff under the flap and it fixed the drift: WD40 Company 300554 Specialist Contact Cleaner Spray - 11 oz. with Smart Straw https://www.amazon.com/dp/B00AF0OFVU/ref=cm_sw_r_cp_api_i_g27JDbR7VP0TY
https://www.amazon.com/WD-40-Specialist-Electrical-Contact-Cleaner/dp/B00AF0OFVU
Sounds like you just need to Deoxit the volume pots in the KA-400 to get rid of the scratchy sound. I did the same thing in two of my vintage Harman Kardon receivers, and to pitch controls in two of my turntables. Deoxit is like audio magic, I kid you not!
The one I've seen mentioned the most is CRC.
You're going to have to go to r/NintendoSwitch or YouTube if you want more info because I haven't used it, but I did get a free official fix which I'll write about in this thread.
https://www.amazon.com/CRC-05103-Electronic-Cleaner-11/dp/B000BXOGNI
https://www.walmart.com/ip/CRC-5103-Quick-Dry-Electronic-Cleaner-11-Wt-Oz/16817418
If compressed air and a toothbrush don't work, you can hit it with a plastic safe solvent.
Take knobs off fader
Get WD-40 electrical contact cleaner, spray it on a qtip and scrape the gunk out. You can use a bunch of this stuff and even directly blast it in the fader channel. It evaporates very quickly.
Then, get silicone grease on another qtip and use the tiniest amount to lube the fader. A little of this goes a long way. Too much and you’ll end up with more debris.
https://www.amazon.com/WD-40-Specialist-Electrical-Contact-Cleaner/dp/B00AF0OFVU/
https://www.amazon.com/Super-Lube-92003-Lubricating-Translucent/dp/B0081JE0OO/
I don't have experience with your specific turntable, but on many turntables with a manual pitch control, the potentiometer(s) (aka "pots") will become dirty over time, which will lead to inconsistent voltage being pushed through them. You can clean the pots out by using an electronics cleaner (see below), followed by a lubricant. There may also be some small rheostats that are used to set the pitch range that have succumbed to the same problem. For both issues you will probably need to get at the underside of the turntable to effectively clean them. (Be sure to remove the platter and secure the tonearm before turning the turntable over to access the internals).
Should that not work, it may be that some of the capacitors have drifted from their values, or have failed completely.
Audiokarma.org cleaning guide (for receivers/amplifiers, but generally applies to all pot cleaning):
http://www.audiokarma.org/forums/showthread.php?t=207005
I recommend Deoxit electronics cleaner followed by Deoxit fader lube. If you can't get that, then CRC QD Contact Cleaner (BLUE can NOT red can) and their lube work well. For reference:
http://www.amazon.com/Hosa-Cable-Deoxit-Contact-Cleaner/dp/B00006LVEU
http://www.amazon.com/Hosa-F5S-H6-CAIG-DeoxIT-Faderlube/dp/B00006LVF1
http://www.homedepot.com/p/CRC-QD-11-oz-Contact-Cleaner-02130-6/202262505
http://www.homedepot.com/p/CRC-2-26-5-oz-Multi-Purpose-Lubricant-02004/100398344
Oddly, for such a basic maintenance necessity, there aren't that many good cleaning videos, but this one for a guitar amp has good shots of where you need to get at the pots when cleaning them. You shouldn't need to use that much fluid when cleaning though.
https://www.youtube.com/watch?v=0QvOepREO4k
better use a contact cleaner instead of lighter fluid. Costs about the same. Deoxit is a cleaner you can spray into the pot, twist the pot repeatedly, and then (optional) blow out with canned air. Works like a charm, it's made specifically for this purpose.
http://www.amazon.com/Hosa-D5S-6-Deoxit-Contact-Cleaner/dp/tags-on-product/B00006LVEU
try electronic cleaner worked for me and i just used the tiniest spray of it i could i think someone wrote a guide on here at some point
https://www.amazon.com/CRC-05103-Electronic-Cleaner-11/dp/B000BXOGNI
There was a post about this a couple of weeks back. People recommended this cleaner because it is safe for the plastic. Also if you look at the joycon carefully you will see a little plastic flap that can be lifted, you need to lift that flap and spray the cleaner under it. So far since using the spray linked above I haven't had an issue, however I really haven't been playing my switch enough since to properly test (sekiro is taking all my time).
https://www.amazon.com/WD-40-Specialist-Electrical-Contact-Cleaner/dp/B00CMT9TFY
​
Deoxit is the first step.
Access the backsides of the volume knobs and switches, and clean them with the Deoxit. I can guarantee that this will improve the situation.
You might try some quick dry electronics cleaner.
Remove the batteries, liberally spray that stuff up in there and let it dry.
Make absolutely certain that it's 100% dry before you try to insert the batteries back into it.
If you can't find quick dry electronics cleaner, locally, Amazon carries a few brands.
https://www.amazon.com/CRC-5103-Quick-Electronic-Cleaner/dp/B000BXOGNI
Couple things to check that I can think of. Check all of your fuses. Disconnect the battery, then go ahead and just replace them all, they're probably all ancient anyway. Make sure to replace with correct amperage fuses. Check for corrosion on the contacts while you're at it. Clean with contact cleaner and wire brush/emery cloth.
The brake light switch on my '62 was a pressure switch mounted on the brake Master Cylinder, '61s are the same. It's ten bucks from rockauto and wouldn't hurt to replace it, since it's 56 years old.
But the main thing I would look at is the bulkhead connector that goes from the fuse block under the driverside of the dash through the firewall into the engine compartment. My car had some weird electrical gremlins that were intermittent and super annoying. That bulkhead connector is hiding under the Master Cylinder and is held in place with a single bolt. Disconnect the battery to be safe, disconnect that bulkhead connector and inspect the contacts. Mine were corroded bad enough to cause my issues. If yours are corroded, spend some time cleaning both ends of the connector with contact cleaner and a wire brush/emery cloth. When you bolt it back together and it still seems loose (like mine did), pull the bolt out and put a small washer or two on it to help keep the connector tight.
If none of this helps, you might have a bad ground somewhere which will be more a bitch to fix since you'll have to start chasing down grounds to make sure they're all still connected and not corroded. And as has already been mentioned, check and replace all the bulbs. Relatively cheap and probably should be replaced anyway.
All that being said, invest in a Shop Manual for your car. They are worth every penny! Those old books are like the Big Bible o' Buick and will show you how to diagnose, repair and replace almost every part of your car. I highly recommend that anyone with an old car find the one they need and buy it immediately, you'll be glad you did. It will also include highly detailed wiring diagrams ;)
Lastly, sign up on www.v8buick.com, the single best and most comprehensive Buick messageboard on the interwebs. It's always active, the folks are nice and helpful, tons of info and a large classified section. I highly recommend it.
Contact cleaner
Hijacking your comment for visibility, although I'm a bit late to discussion here.
I had the same problem many in here have experienced, and this stuff below is specifically made to evaporate dirt that cause unwanted inputs in electronic devices.
https://www.amazon.com/gp/product/B000BXOGNI/ref=oh_aui_detailpage_o07_s00?ie=UTF8&psc=1
I have two joycons that drifted. One was terrible, and nothing I did helped. The tester thing would be full-blown stuck to the right, but after a couple of sprays of this stuff it was good as new. It came back a bit once or twice, but I think there was some residual dirt in there and it's been perfect for the past few months after being completely unusable. After I did this another joycon started to drift a little and one spray has completely fixed it.
Just make sure the joycon is not on when you use it. The spray is liquid for about 10-15 seconds so you don't want anything to be running in there or it could cause damage.
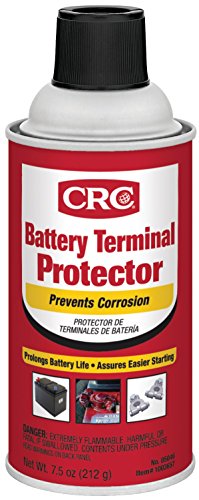
Battery terminal protector instead. I've had the same can for about 8 years. It has lasted many a car.
Clean the terminals and clamps with a wire brush, spray a coat of the protector on everything and add some fiber washers. I've never had terminal corrosion issues.
Don’t spray canned air into it. Make sure it’s contact cleaner for electronics. This is the one I used and it has fixed 2 of my joycons: https://www.amazon.com/WD-40-Specialist-Electrical-Contact-Cleaner/dp/B00AF0OFVU/ref=mp_s_a_1_2?keywords=wd40+electrical+contact+cleaner&qid=1557692939&s=gateway&sprefix=wd40+&sr=8-2
The rubber flap can be propped up with a little object like a toothpick or safety pin (just be careful), and spray the contact cleaner into it, rotate the stick a few times, and let it dry.
Get Electrical Contact Cleaner. It's meant for this and plastic safe.
Something like this: https://www.amazon.com/WD-40-Specialist-Electrical-Contact-Cleaner/dp/B00AF0OFVU/ref=pd_sim_263_3?_encoding=UTF8&psc=1&refRID=B1NEN2YVCYPJ0RPVXTDP
I wouldn't call it a fix as such, but have you tried spraying some electrical contact cleaner eg. into the pots and faders?
I've got a beat up A&H Xone:32 and an occasional spray has kept it ticking along nicely.
I'd hit it with some Deoxit and see if it helps the problem. http://www.amazon.com/Hosa-Cable-Deoxit-Contact-Cleaner/dp/B00006LVEU
Are you sure it's a coil split and not series/parallel or OOP?
Because those require the middle position.
For the other thing, your pots need cleaning. Some DeOxit will clear that up.
They make cleaner specifically for electronics: http://www.amazon.com/CRC-05103-Quick-Electronic-Cleaner/dp/B000BXOGNI
I used to have one of electronic cleaners to fix my old sega dreamcast gamepads :D, if it persists or anything worse happens ,I'll probably use them again.
https://www.amazon.com/CRC-5103-Quick-Electronic-Cleaner/dp/B000BXOGNI/ref=sr_1_1?ie=UTF8&qid=1487592743&sr=8-1&keywords=contact+cleaner
Spray this stuff on it and enjoy. Its /r/oddlysatisfying for me.
I never had the drift but I do use my pro controller more. I heard spraying this stuff into the joystick part fixes a lot of drift problems.
For people who have problems with their JoyCons drifting, I highly recommend trying this. This is not a permanent fix by any stretch of the imagination; however, after attempting numerous different fixes this has easily shown the best and longest lasting fix for JoyCon drift.
Best move here is to use special electrical contacts oil.
I'm living in Europe, so I'm using a European brand (actually French...)
: http://www.kfsolution.fr/kf/KFproductdetail.csp?division=&product=F%202%20SPECIAL%20CONTACTS&ilang=fr&plang=fr
You have different brands in USA, like this one :
https://www.amazon.com/gp/offer-listing/B00AF0OFVU/ref=olp_twister_child?ie=UTF8&mv_size_name=0
Most of the time, it will cost you 15 USD / EUR (without transport).
You could find those special electrical contacts oils in a good electronic component shop, if you live a big city.
I have one bottle for now 8 years so you can use a bottle for many years !!
Believe me : it changed a lot of things for me :
N64 cartridge working again, unrecognised joypad on PSX... recognized, boring USB key.. working again, etc.
On your picture, your cartridge isn't clean !
Take a q tip, put some special oil on it and.... clean. do this with 2 Q tips for a good measure.
Spray some oil on your 62Pins Slot, inside the SNES , and you are good to go.
Except for the battery, cartridges can last practically forever....
Sorry man, that is a bad day.
you have to specifically add Computers to most policies or they are not covered. if you don't end up making a claim, i would consider upgrading the policy to add computers. Its not much to do (you may already have).
I just made those calls today pricing out a policy for my next mini data center.
I agree with Duck - As long as they didn't short circuit they may recover just fine. Key is:
The key is to let the cards dry completely before you power them again as others stated. The PSU should have shut off right away at first sign of overload or tripped a fuse.
once you get rid of obvious water - WD40 can be used to displace water and prevent corrosion.
https://www.amazon.com/WD-40-Specialist-Electrical-Contact-Cleaner/dp/B00CMT9TFY/ref=sr_1_2?ie=UTF8&qid=1499524042&sr=8-2
Go over your connections (including where the cartridge plugs in) with this:
Hosa D5S-6 CAIG DeoxIT 5% Spray Contact Cleaner, 5 oz. https://www.amazon.com/dp/B00006LVEU/ref=cm_sw_r_cp_api_i_7R3jDbDW9HXR4
You’ll need it again and again in the future if you are in the process of learning electronics repair. Cleaning electrical connections with isopropyl alcohol is misguided and can accelerate problems recurring.
Either the selector itself is dirty/broken (in which case, the Deoxit treatment should do the trick) or there is a problem with one channel of the phono stage's circuitry.
Try the contact cleaner first. If you can get ahold of an oscilloscope--or hell, a piezo earpiece and a quiet room--you can measure the output of the phono stage to track down where the signal from the bad channel is getting lost. I have a feeling it's either a dried-out capacitor or a failed transistor.
Well, if you can use the lab and it has a scope in it then you just scored big time.
As far as $100. I would get:
(amazon links for convenience, use any supplier you wish)
EDIT: Light bulb socket, 100W + 60W real light bulbs (not the hippy engery saving kind), electrical outlet - these are for making a dim bulb tester.
All I can think of right now.
This stuff works very well. I think Radio Shack sells it.
Also, I had trouble with the Roomba not making a good connection the charging base. It would keep backing up and trying again. Cleaned it with this that I had laying around and it charges on the first attempt
Hosa D5S-6 CAIG DeoxIT 5% Spray Contact Cleaner, 5 oz. https://www.amazon.com/dp/B00006LVEU/ref=cm_sw_r_cp_apa_i_objiDbFHZFX8Y
Deoxidizer spray is also good for those volume knobs that make the speakers crackle when you turn them. Potentiometer contacts inside are just oxidized.
You'll want contact cleaner. Deoxit is great for cleaning potentiometers, as well as other electronic connections. Look at the picture of the pot that seb_m posted; see that little notch on the bottom, right-hand of the picture? That's where you'll want to spray the contact cleaner. Then you just turn the pot back and forth a few times to work it around.
A few that have come up a couple times
Radio interference
Radio in amps is a common problem, especially if you're near a transmitter.
First thing you want to do is rule out pieces of gear that aren't contributing to the problem. If the instrument isn't shielded you can have issues there, try another bass if possible.
If the shielding on your instrument cable is breaking down this can cause problem, try another cable if you can.
If you are using any pedals start with none and add them in one at a time until you get the issue to reoccur. If the problem is a pedal, you can solder a treble bleed cap across the hot/ground connections on the output jack of that pedal, use something like a 5 or 10pf and it should only filter off the very very high frequencies (like radio frequency).
If the issue is before the amp you can try a ferrite bead on the end of the cable before the amp. I tried this once and it didn't work for me, but it's a common recommendation.
If it is definitely the amp there are a few things you can try. The small cap trick I mentioned above for the pedal can work if you do it across the terminals of the input jack on the amp. If the amp is a tube amp make sure that there is a tube shield on the first gain stage. Check to see if there are grid stopper resistors on the first gain stage, you can change the value of the resistors to lower the frequency cutoff.
If there is no grid stopper and you want to add one, you can calculate what resistor to use. R = 1/ (2 PI f C). C is the input capacitance of the tube in farads, f is the low pass cutoff frequency in Hz, PI is constant 3.14, R is in ohms. The input capacitance C = CGK + (CGA A) where A is the voltage gain of the stage, CGK is the grid-to-cathode capacitance and CGA is the grid-to-anode capacitance of the tube. The latter two values are found in the tube's data sheet. For a 12AX7 with a gain stage designed with A to be 60, C is about 103 pF. Let's say you want to cut off everything above 20 kHz. R = 1/(2 3.14 20000 103 10^-12), which is about 80 K ohms.
Some amps just have an issue with internal wiring layout, you can try to move wires around to limit noise, but it can be tricky and dangerous because you have to have the amp open and on.
Don't poke around inside an amp unless you know what you're doing. Some of these things will likely need to be done by a tech.
Rattles
The easiest thing to try is moving your setup to another room or another position in the room to rule out sympathetic vibrations. If you've ruled out room issues check all the mounting screws on the speaker/cabinet and your amp. Check to see if the vibration is frequency specific (does it happen at octaves of different notes) or if it only occurs at low frequencies. With a frequency specific vibration you issue is something resonating and once you can find the problematic component you can try to alleviate that issue. If the rattle is only caused by high levels of low frequency and not specific to a frequency then it could simply be a loose panel or bad seal around the speaker or jack plates. Check the speaker mounting seal, it should be tight against the baffle. If needed you can add some gasket tape to ensure a good seal.
Tubes
There is a fantastic primer on tubes available on the Talkbass Portaflex Wiki that covers all of this in far greater detail, but for some basic troubleshooting there are a few things that are worth mentioning.
With any tube amp, the tubes are the primary suspect for weird noises and other issues. They're more likely to have issues than other passive and mechanical components. It's always a good idea to keep a known good spare of each type of preamp tube in your amp available for troubleshooting purposes. Preamp tubes in general can last many years to decades in most amps, but a good place to start if you suspect that you have tube issues is replacing the first gain stage (V1) of the amplifier. From there try swapping tubes one at a time until you reach the power tubes. If this has not solved your problem there may be an issue with a mechanical component (pots, jacks, switches) or a failing passive component (caps, resistors, etc). If the amp blows a fuse, especially a high voltage (often labeled HT) fuse, the usual suspect is failing power tubes. Swapping the tubes can be a good first step, but fuses blow for a reason and the amp should be checked over by a tech. If a power tube fails suddenly it can damage the screen, plate, or cathode resistors and simply replacing the tube with a new tube would put that new tube at risk for similar failure. In general, if the amp has a tube power section and has started to sound bland or has issues with the power dropping off you should check and possibly replace the power tubes.
Scratchy/static noise
A simple starting point for any kind of static noise is to check for loose jacks or bad cables. Frequently this kind of noise is due to bad or dirty contacts. A product like Deoxit in combination with a small brush or swab is good for cleaning contacts and connections. You can go simple and spray some onto a jack and use a 1/4" plug to run across the contact surface a few times, but a more thorough cleaning is better. With scratchy pots you can spray deoxit/contact cleaner into the mechanism and move the pot a few (hundred) times to clean the contact surface. If this fails to address the issue you may need to replace the pot. If the amp has an effects loop or speaker output that is unused these contacts can get dirty from time to time and a cleaning may be beneficial.
I've brought back a few under performing motors by spraying them out with Deoxit.
Use Deoxit spray on the volume control, and wiggle the volume up and down
here's a link for some if you don't have any
https://www.amazon.com/Hosa-D5S-6-DeoxIT-Contact-Cleaner/dp/B00006LVEU
Pickups almost never fail - they're just a big coil of wire, there's not really anything to go wrong with them.
The first thing to check is obvious - is your volume or tone control rolled off? It sounds silly, but it's easy to overlook if you rarely use the neck pickup.
The next most likely problem is the pickup selector switch. Les Pauls use an open type of selector switch that's prone to corrosion, especially if it's infrequently used. Plug your guitar in, strum the open strings, then click the pickup selector switch up and down and listen to your amp. If you can hear crackling or intermittent sound, it's probably the selector switch.
Most switch problems can be fixed with a squirt of DeoxIT, but the switch may need to be replaced. If you can solder, it's a ten minute job and a six dollar part. If you can't solder, this is a good opportunity to learn - you can buy a basic soldering iron kit for less than $20.
Failing that, take it to a competent luthier. Guitar electronics aren't particularly complicated, so it should be a cheap and quick fix.
Hey! I've taken apart and fixed more joycons than I can count at this point.
Under the buttons are a rubber contact pad, followed by the contacts themselves. There are three potential issues I can think of right off the bat.
Regardless of the issue, you're gonna need to open it up and clean it. The toolkit I use it the iFixit Mako toolkit. It'll have all the bits and tools you need save for some needlenose tweezers, and while some other brands like Wera will have higher quality bits, the iFixit kit is more than enough for your needs, especially if this is the only thing you plan on repairing.
Opening up a joycon can be quite challenging, and to get to the buttons requires taking the entire thing apart due to how everything is sandwiched together. As daunting as it may be, it IS possible as long as you have the right tools, a little confidence, and a lot of patience. JerryRigEverything has an excellent tutorial on how to take apart the Switch, but you only need to worry about the section regarding the right joycon.
While you're buying everything you need (the toolkit, some tweezers [preferably angled], your favorite brand of ice cream to celebrate after), I also recommend getting [a can of Hosa contact cleaner.] (https://www.amazon.com/dp/B00006LVEU) This stuff is like magic. Spray a tiny bit on the contact for the A button and let it dry, and it'll probably work good as new! Although you don't NEED to get this, it can help with old or damaged electronics, and if you plan on fixing any other controllers I definitely recommend it.
Now, if you're buying literally everything I recommend then it's gonna come out to >$40 most likely, which is about the price for a single joycon. You can save some money by forgoing the contact cleaner and just buying the triwing and phillips head bits online yourself, but these are all tools that will help you in the future. Think of it as an investment. If you ever have a joycon acting up again, you'll be able to fix it yourself and not have to worry about a warranty. Plus, you can fix your friends' controllers like I have many times! Then again, I'm weird. I enjoy modding joycons. I'm still proud of my most recent mod I made as a birthday gift.
Whatever you decide, best of luck! I'd love to hear how the repair goes if you decide to go through with it!
Hosa D5S-6 Deoxit Contact Cleaner 5% Spray http://amzn.com/B00006LVEU
I just bought a can of this myself for my amp
> Hey thanks for answering!
No prob!
> I had no idea DC trains shouldn’t run on DCC, TIL!
Yah. The DCC signal more resembles AC than it does DC. Square wave, not sine wave, and the frequency weeble-wobbles all over the place to transmit the data. It's a bit of an oddball signal, really, because it's trying to pass data along and pass actual power along at the same time. There's also a rather surprising amount of current on tap, moreso than the typical DC pack will provide. My command station puts out ~1.3 amps but I can fit boosters to it that go up to 8 amps each.
> How should I clean the tracks?
Ask a thousand modellers, get a thousand responses. I've had excellent luck rescuing filthy tracks with a lint-free shop cloth and this stuff. I'll spray it onto the cloth, then wipe that along the railheads. Dose a snazzy job of gettin' the schmoo off and dries super quick so no slippery residue is left behind. You might also want to look into a bright boy, given how long your tracks have sat, because while the cleaner I use is great at getting dirt off the railheads it won't really touch actual corrosion. For that, an abrasive will be necessary.
> And what exactly are fish plates? It is mostly peco track.
Fishplates...rail joiners...fiddly little bastards that stab the fuck out of your fingers as you work on your track...they have many names, but they're all pretty cheap and it won't hurt to replace them. Make sure you grab a pair that have wires attached if you already have a pair like that, those'll need replacing too for the same reason.
Get a can [of this](CRC 5103 Quick Dry Electronic Cleaner - 11 Wt Oz. https://www.amazon.com/dp/B000BXOGNI/ref=cm_sw_r_cp_api_0vj0AbX7S15PQ).
Or get the WD-40 Contact Cleaner. Either will work.
Take good pictures of all sides of the stun gun. You’ll use these to reassemble it.
Remove the batteries. Hold down the stun button for a full minute.
Remove all the screws from the stun gun and gently open it up. Don’t worry, it’s not powered, anything in here is safe to touch.
If you can see both sides of the green circuit board, spray them down with the contact cleaner.
If you can’t see both sides of the circuit board, take more detailed photos of the inside of the stun gun. Note where the screws are, and especially where wires go through the case. Remove any screws from the board and set them aside in a different place from the other screws. You don’t want to mix them up.
Pull the board up just enough to see both sides and spray it down. Be generous with the cleaner. Let it drip off the board onto some paper towels. The oil will be carried off along with the cleaner.
Air out the room when you’re doing this, or do it in a garage.
Put the board back in place and wait at least a few hours for the cleaner to evaporate.
Reassemble the board and case, putting each screw back in the reverse order you took them out. Pay close attention to any wires, and make sure they’re going through the case the same way.
Put batteries in and test. If it sparks you’re good.
And then throw it away and get quality pepper spray you can carry and use easily. A stun gun only irritates and it only works as long as you’re there actually pressing the button. What you want is something you can quickly use, throw away, and then run. The pepper spray will take a moment to really kick in, but it’ll pain and blind your attacker for a while, and make it hard for them to chase you.
Breakfree CLP should dissolve that crap. Then spray it with CRC QD Electronic Cleaner to degrease it. You can get it at an automotive store for cheap. It looks like this:
https://www.amazon.com/CRC-05103-Electronic-Cleaner-11/dp/B000BXOGNI
Contact cleaner, $4.77 @ Amazon, but you can buy at probably any store like Lowe's.
CRC 05103 QD Electronic Cleaner -11 Wt Oz https://www.amazon.com/dp/B000BXOGNI/ref=cm_sw_r_cp_api_m1G9Bb2YS6DMT
And the place on the pot to spray it (about halfway down on the page)
http://www.mtdkingston.com/thezone/repair_and_maintenance.html
Here is a link to the Amazon one I got.
I know there's tutorials and videos and all that, but I went with this for the cheapest and simplest possible solution and it definitely helped my drift problems with my left joycon which was awful. Just a tiny tiiiiny spritz around a couple sides of the joystick and it was good to go after putting down/unhooked to dry for a little bit.
Jesus, NO!. The guy said electrical parts cleaner not alcohol. Buy this crap, take your drill apart and douse all the oil off with this shit.
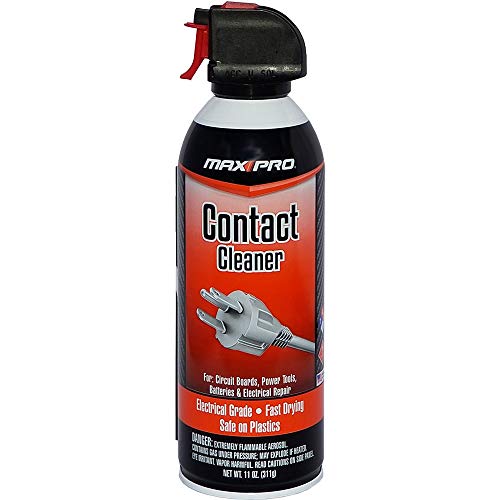
Spray tuner cleaner into the potentiometers
https://www.amazon.com/Max-Professional-2053-Contact-Cleaner/dp/B0030MKAV4/
edit: Extremely common and has been for many years. But cleaning the pots will have them good as new in almost all cases.
This should fix that issue in most knobs:
http://www.amazon.com/Max-Professional-2015-Contact-Cleaner/dp/B004PHDLQY?ie=UTF8&psc=1&redirect=true&ref_=oh_aui_search_detailpage
You have to take the plastic covering off and spray it inside the knob thing on the circuit board. Should look like this: http://ecx.images-amazon.com/images/I/512sGRdBjgL.jpg. If it's covered there is usually a hole for spraying into.
Next time use contact cleaner; not wd40. I use this. Good stuff.
https://www.amazon.com/gp/aw/d/B00AF0OFVU?aaxitk=uPOduJFJ9VJWctk9.GsbGw&pd_rd_i=B00AF0OFVU&pf_rd_p=30dbdc00-03a0-42f0-976a-08a7c08bd014&hsa_cr_id=7484699300401&sb-ci-n=productDescription&sb-ci-v=WD40%20Company%20300554%20Specialist%20Contact%20Cleaner%20Spray%20-%2011%20oz.%20with%20Smart%20Straw&sb-ci-a=B00AF0OFVU
https://www.amazon.com/gp/product/B00AF0OFVU/ref=as_li_qf_asin_il_tl this is the perfect fix for drift more people need to know about it
This isn't horrible. $25 gift card, but more importantly, it should be the version2 switch with better battery life - https://slickdeals.net/f/13642192-nintendo-switch-v2-25-amazon-promo-credit-298-99?src=frontpage
if you buy it and actually use it enough you'll probably want this - https://www.amazon.com/gp/product/B00AF0OFVU/ref=ppx_yo_dt_b_asin_title_o02_s00?ie=UTF8&psc=1
then follow this.
https://nintygamer.com/switch-controller-drift-fix/
I didnt read your specific problem but I know for a FACT Deoxit is the gold standard for cleaning electric components. I have used it on electric guitars and vintage stereo receivers with great results.
http://www.amazon.com/Hosa-Cable-Deoxit-Contact-Cleaner/dp/B00006LVEU/ref=sr_1_1?ie=UTF8&qid=1398794582&sr=8-1&keywords=deoxit
Pioneer Andrew Jones SP-BS22 for $140 and a craigslist or thriftstore integrated amp or reciever with the other $60.
Cheapest deals will be 70's Japanese stuff. Kenwood, Pioneer, Teac, and a lot of others I can't think of off the top of my head.
Then go to Amazon and get some Deoxit to spray on the knobs and switches every couple of years. This will knock off any corrosion on the controls to keep you from getting scratchy knobs or loosing channels.
Glad to assist. I'm a tremendous fan of the suspended Pioneers of that specific vintage, and have two PL-630s and a PL-600 in my turntable collection that I've restored as needed. I don't sign up for that kind of work without feeling some love for the design.
Once you're at a level of turntable that precludes obvious audible misbehaviors, like unsteady speed, noisy drives, or insufficient weight and deadness to combat vibration feedback, then probably 95% of the sound you get will be cartridge dependent. Switch your carts and the Pioneer will be the warmer one.
Failure of the tonearm to move and a whirring sound from the small motor = bad tonearm belt. Sometimes it'll just be sluggish or it'll squeal, but the fix is the same.
This is the cleaner you need. The one you linked was a cleaning solution, but this is a contact cleaner. (Less diluted.)
I fixed my stuck button by simply unplugging the deck and spraying in the tiny gaps around the button, and working it over and over until it freed up. I had to pry it up at first until the DeoxIT started doing its thing. In my experience it's a fix that'll last for many years. If that doesn't do it, there are people over at Audiokarma.com who've disassembled the buttons, and a strong search will take you to that topic. I can help you get there, because if there's anything restoring turntables has taught me, it's how to search the shit out of Audio Karma and Vinyl Engine for those who've been there before.
Any electronics repair shop with an old experienced guy is a good bet. It would take some calling around and perhaps a half-day drive. There aren't many turntable repair shops left, if any. If you're handy and can wield a soldering iron when the chips are down, I'll bet you can fix it. I did my first TT restoration with nothing but basic auto mechanic experience and I got through it. If you enjoy this sort of thing, you'll find working on the Pioneer rewarding due to the quality and cleverness of the design. It will quickly become apparent why it sold for twice the money of the Dual. The $400 it cost then is $1200 in today's money, and that was a mass production price. Aluminum plinth with no plastic in sight. Booyaaa.
If the platter and armboard move at all, your transit screws have been removed. The Japanese used short suspension travel, whereas the Brits and the Germans favored Baja trophy truck suspension. All that matters is that it is truly suspended during normal use, and not up against either the high or low limits. If it is, it can be adjusted.
http://www.amazon.com/Hosa-Cable-Deoxit-Contact-Cleaner/dp/B00006LVEU
you're welcome
You could try this:
​
get control contact cleaner (not eyeglass contact cleaner- this stuff is meant for electronics) like this
​
(do this stuff with the car off)
​
remove the volume knob.
​
spray contact cleaner where the twist part of the volume control meets the rest of the car
​
spin the volume knob a lot
​
replace knob
​
repeat as necessary. Try to keep the contact cleaner out of your cd player. Also, I would wear plastic gloves. edit: maybe even shield the area with a rag- the contact cleaner almost always splashes back, this stuff sprays way harder than it needs to. I've got it in my eye more than once, even with glasses on.
If the volume (trim) knob on the back of the monitors is a potentiometer, which it likely is, perhaps it is a bit corroded. Potentiometers have copper contacts which oxidize.
This was problematic in my Mackie HR824 monitors- The Frequency response was compromised in one of them, due to this corrosion. You could tell because, when you adjusted the volume knob while a song was playing, you could hear scratchiness, and certain freqs would fade in and out. I Fixed it by spraying a small amount of deoxit around the edges of the potentiometer (WHILE THE UNIT WAS OFF), and then rotating the knob to its two extremes a few times to clean off the gunk. Problem solved.
If you don't hear dips in volume or scratchiness when you adjust the volume (trim) knob while sound is playing, then I don't think its an oxidation problem.
Another point where this can happen is in the output stage of your audio interface. In some cheaper or defective units, the outputs may not be properly balanced, leading to asymmetrical volume response. And still another: The cables themselves. I can imagine that one cable may have a poor connection and suffer some signal loss, so its worth ruling that out as well.
If that's the case this stuff solves every problem I have ever had.
https://www.amazon.com/dp/B00006LVEU
This problem sounds like you may have some dirty or oxidized contacts on your hdmi ports and/or plugs, which can definitely cause the symptoms you're seeing.
Whenever you remove a plug and plug it in again the friction of that action does a little cleaning, which would explain the temporary improvement you see when you do that.
Removing the plug and plugging it in (say 20 times in a row) may make your problem disappear for a much longer time. However, that action, preceded by spraying "contact cleaner spray" into both the hdmi ports and the hdmi plugs, will provide the best solution. (Assuming that dirty/oxidized contacts are the source of your problem.)
I do think that's like to be the answer. I had similar problems years ago, and the solution I described has kept me problem free ever since, without needing to repeat the process.
amazon.com/Hosa-Cable-Deoxit-Contact-Cleaner/dp/B00006LVEU/ref=sr_1_1?ie=UTF8&qid=1415131866&sr=8-1&keywords=contact+cleaner+spray
I was able to solve this by removing the tubes and using DeoxIT on the pins. Careful not to get any on the glass; it will remove the ink markings. Some fine sandpaper on the pins might help, as well.
Deoxit D5 is the best contact cleaner for dirty pots. I tried substitutes (radio shack...) and they just don't cut the mustard. I haven't cleaned a twin, but on other amps and guitars I've gotten it to work without taking the chassis out. Turn the amp off, spray a good amount between the knob and the amp. Turn the knob back and forth a few times and leave it to dry for a minute or two. Power it on and see if it worked.
First thing is the "registers values when it is not even being engaged." issue. You need to get some Caig Deoxit to clean the potentiometers. That will resolve that issue. I'm not sure you'll be happy with not hard mounting the pedals if you have a really heavy brake pedal; I know I wouldn't be.
First, make sure you're using Ammonia/VOC free glass cleaner. It's much less likely to screw up your electronics, or your nice HDTV screen.
If it's just the contacts on the SD card reader, you can try cleaning it with alcohol like said. Better would be to purchase an Electronics Contact Cleaner and see if you can revive it that way.
There are tiny slots in the EQ sliders where you would spray the contact cleaner order Deoxit D5 on Amazon. Use the link below to learn how to use it to clean the volume control.
https://audiokarma.org/forums/index.php?threads/the-idiots-guide-to-using-deoxit-revisited.207005/
Hosa D5S-6 CAIG DeoxIT 5% Spray Contact Cleaner, 5 oz. https://www.amazon.com/dp/B00006LVEU/ref=cm_sw_r_cp_api_i_H26SCbP1TAWD1 I love you too.
Source: electronics technician
Along these lines: since you're going to the trouble of pulling the dash apart and getting to the back, you should hit your electrical connections with some contact cleaner to help prevent this from happening in the future.
If you can get a part number or the specs you may find it on digikey.com or mouser.com.
Also you may be able to revive your old pot if it's just jittery or spiky with DeoxIT D5
Sheesh, actually I just checked and it is like $15 a can now, price must've gone way up. I bought mine like 5+ years ago and it's still got plenty left but I have used it on lots of stuff.
https://www.amazon.com/gp/aw/d/B00006LVEU/ref=mp_s_a_1_1?qid=1459267926&sr=8-1&pi=SY200_QL40&keywords=deoxit&dpPl=1&dpID=41esA2w9C%2BL&ref=plSrch
I was able to read the signs for the streets on the corners around my neighborhood at night for the first time. The beam pattern kicks up to the right, and so do HID projectors, which is done so signs like that can be read. I used to bring a custom made 5000 lumen flashlight with me to shine at signs like that, but I won't need to do that anymore. That's all I can tell you so far. I literally only have about five miles with them so far, and no highway driving yet. Deer are a big concern for me too, so I'll be paying close attention to that when I drive outside of town at night.
Yes, glass lens.
Some people have had issues with the relays that come with the Putco harness, so I ordered a couple spares. Here's the products I ordered. All from Amazon, all with Prime shipping. Unfortunately some of the packages arrived in three days instead of two, but that should still give you plenty of time for your trip.
Hella 55/100W bulbs
IPF H4 housings
Pilot relays
Putco harness
This video can help tell you where to run the harness. Btw, the video says it, but there's a spare plug that goes into the old harness bulb socket. All it does is get the signal to flip on the low or high beams.
One extra thing I did was spray all the contacts with Deoxit to get a cleaner connection and prevent corrosion.
Since it's an all in one deal, does the tinnyneas only happen when playing vinyl? Or is it there with the tape deck and am/fm tuner? If so, your eq might be hosed. Sometimes a good squirt of deoxit will help.
If it's only the table, then probably the needle needs to be replaced. It's actually a fairly simple fix.
You can find parts here.
I don't intend to contradict the above answer, because it is certainly a viable and good solution. I would go one step further and purchase electric contact cleaner.
This is what I use
This contains no water and will clean it up with no issue. It is more expensive, but I have been happy to have it on more than one occasion. Make sure you don't get any on the joysticks though, it leaves a white residue on soft plastic. The residue can easily be cleaned, but it is annoying.
I have had a memory socket go bad once, it happens. It could also be some crap on a contact. Worth trying some contact cleaner (get a can, you'll find other places to use it), gently spritz down a dimm edge, and work it in and out a bit. Give the stuff a little time to dry off before turning your system on again.
​
https://www.amazon.com/CRC-05103-Electronic-Cleaner-11/dp/B000BXOGNI/
CRC 05103 QD Electronic Cleaner -11 Wt Oz https://www.amazon.com/dp/B000BXOGNI/ref=cm_sw_r_other_apa_i_lfmjDb174YANM --- what I use. Lasted me a year now and pretty good use. Still feels full.
to get to the camera you need to remove the lining on the inside of the trunk (the tailgate, movable piece). You have to remove both tail lights attached to the movable piece of trunk (3 11mm bolts each), then remove the long piece of body that stretches between the tail lights under the ford logo. This is held in by 4 10mm bolts that can be seen through the little openings in the metal (you'll know what I am talking about once you get this far). Then you can pull on the long piece of bodywork that the camera and trunk release button are attached to. Then you should have access to the camera. If its working about 30% of the time, it could be a loose or dirty connector. I'd pick up some electronics cleaner (such as this) at walmart and spray the connections and see if that helps. Good luck!
Use this: https://www.amazon.com/dp/B000BXOGNI/ref=cm_sw_r_cp_apa_i_VBwACb7TGRNY8
Have you tried using Electronic Contact Cleaner (somthing like this)? It's like some sort of magic drift fixing fluid. Just use the nozzle that comes with it, put it underneath the thin rubber sheet between the stick and the inside of the joycon and spray. Once I did this and after it dried the single worst case of joystick drift I've ever seen in my life was fixed.
I had a similar issue. Not sure what controller you have, but on mine, a Logitech F710, the sticks are not digital, they are analog potentiometers.
https://en.wikipedia.org/wiki/Potentiometer
Basically its a variable resistor. It has the disadvantage of mechanical arm that sweeps against a surface to vary the voltage output. This contact point can become dirty, or in extreme cases, wear off.
I took mine apart, and even though I couldn't open up the potentiometer to inspect it, there were enough gaps in the case of the thing that I could get a squirt or two of electrical contact cleaner into it, and then rotate the stick around to "scrub" off any dirty spots on the arm/surface contact point. It has worked fine now for over a year.
This is what I used.... found it at a auto parts store near by, but you should be able to find it at some hardware stores or online:
https://www.amazon.com/CRC-05103-Electronic-Cleaner-11/dp/B000BXOGNI
Just look up your controller's model number and "teardown" or "repair" on youtube, and if its a popular enough controller, there should be tons of videos on how to take it apart safely.
You need this: http://www.amazon.com/CRC-05103-Quick-Electronic-Cleaner/dp/B000BXOGNI or a similar product.
There are little particles of dust between the male and female parts of the jack, which prevent them from making a good connection on one side, and therefore lowers the volume by increased resistance in the circuit. Just spray a little in the hole occasionally, and wipe the jack. If that doesn't fix it, and it's not a software issue, then you likely have some of the wire strands breaking on one side, which increases resistance on that side and lowers the volume. This usually happens right near the jack where you do the most bending. Sometimes you can fix that by moving the jack up a few inches, but it isn't necessarily easy, and you have to know how to solder wires. An electronics repair shop can do it, but it may not be worth the cost.
Get some electrical contact cleaner (I used this), spray a little bit in each side, roll/click it a couple times, wait for a half an hour. Mine's been working flawless since. I received a replacement and it developed the same issue, but this fix works.
I don't like using Brasso unless it's my last option. It definitely can leave a residue.
Pop open the cart and clean the contacts with fast evaporating contact cleaner. Set the PCB on a spongy mousepad and use a high polymer white eraser to loosen up the gunk.
I picked up mine from a RC hobby store, and it's branded for RC stuff:
T. A. Emerald Performance Plus 4, TAE4200 https://www.amazon.com/dp/B00BMQGE24
I don't really have a preference for this brand. I'd just get something like this, since they are all pretty similar:
https://www.amazon.com/dp/B000BXOGNI
Have you tried contact spray? It has worked for a lot of people. Blast it with this stuff https://www.amazon.com/CRC-05103-Electronic-Cleaner-11/dp/B000BXOGNI
Like this?
CRC 05103 QD Electronic Cleaner -11 Wt Oz https://www.amazon.com/dp/B000BXOGNI/ref=cm_sw_r_sms_apa_i_G5QRDbE4F92RA
First ive heard of this but looks like it has other uses.
Thanks for the tip!
You could always attempt to fix it yourself. Here's two methods to basically try the same thing; the thorough and proper method, and then quick and dirty (and easier) method. No promising this will definitely fix it, but it's what I would do first in your case.
If you're comfortable disassembling the phone (iFixit has great disassembly guides) you could always take the switch out and thoroughly clean it with something like this by basically spraying in in to the switch, switching it all the way up and down a number of times, and repeating that two-step a few more times. Give it a little blast of compressed air to help it dry (that stuff already dries fast but may as well help it out) and reinstall it once it's dry. If you dropped it in water there's likely some residue in the switch that's shorting it in one position.
Optional method if you really don't want to take it apart: take a few minutes and just slide the switch all the way up and down a whole lot. If there's residue it might scrape it clean. Both of these processes are assuming the contacts inside the switch aren't corroded, in which case it definitely would have to be replaced.
That's how they're supposed to look, don't worry. The pins don't look corroded, so if you've already cleaned them with alcohol, try to use contact cleaner, but if that doesn't work, than polishing them with Brasso will usually do the trick.
But, I do t think the pins are the problem, I took a closer look at your traces and there seems to be two black spots on #9 that could possibly be a break in the traces. Try and check the conductivity if you have a multimeter.
It would require complete disassembly of the psu and a cleaning of every component.
The best cleaner is something like quick drying CRC contact/electronic cleaner. I've used this many time, and it works really well.
https://www.amazon.com/gp/aw/d/B000BXOGNI/
I don’t think I’ve seen one that’s blue but I’m smart enough to know I haven’t seen everything lol.
It’s not a bad thing, usually they’re red
I wouldn’t worry about it.
I’m not going to say that there aren’t any good, trustworthy mechanics, but I will say I spent a year in automotive school to learn it myself.
Why pay someone to fuck my shit up for me? I can do that myself for free was my reasoning lol.
I never wonder anything now about repairs that I have done and, surprisingly, I’ve fucked my shit up very little, though, lessons were learned along the way. 😌
Thanks for posting this. I wish there were more posts like this!
>I trust these guys a lot
And here you are.
-Lower ball joints seeping grease: They can do that for a while. Your shop doesn't seem to want to replace them though, so.
-Leaking pan gasket: You can afford to have a lot of oil leaking for $350. Are you leaking enough to have to add oil because of the leak between oil changes? No? Then unless you are a Rockefeller (or are damaging the surfaces you park it on) I'd leave it alone.
-Struts and mounts--Because they are 'weak' and the boots are torn. Don't care about the 'torn', but weak? Maybe. Does it drive and handle ok? Are your tires wearing funny?
-Alignment: Yeah, if you do the struts, you might want to align it.
-Battery service: For $50, you can probably disconnect the battery, clean the terminals yourself. Oh, don't forget the corrosion protectors
https://www.amazon.com/CRC-Electrical-Liquid-Cleaner-Aerosol/dp/B000P1HKFW
The potentiometer sounds dirty. With the unit off, turn the knob back and forth quickly like 10 times. Also you can try a cleaner like this. http://www.amazon.com/CRC-Electrical-Liquid-Cleaner-Aerosol/dp/B000P1HKFW/ref=pd_sim_263_2?ie=UTF8&dpID=41FxRuH94WL&dpSrc=sims&preST=_AC_UL160_SR107%2C160_&refRID=1PG9HT6R2ZEX5926CDQR
Would contact cleaner work in this instance?
https://www.amazon.com/Max-Professional-2015-Contact-Cleaner/dp/B004PHDLQY
If he's electronically inclined I suggest checking out this link
http://rellinger.blogspot.com/2012/12/replacing-middle-button-on-logitech.html
If not willing to solder and replace the switch, get one of these
http://www.amazon.com/Max-Professional-2015-Contact-Cleaner/dp/B004PHDLQY/ref=sr_1_1?ie=UTF8&qid=1420242985&sr=8-1&keywords=electronic+contact+cleaner
And spray liberally so that it can seep in and do the job and hope for the best.
It might be contact cleaner. I got this one from amazon to use on my camera's jog wheel since it was unresponsive at random times. If there's a Fry's or Micro Center nearby, I'm pretty sure they carry some in store
The fact you had to jiggle it indicates a bad connection. The soldering looks fine from the photo but take a real good look with a magnifying glass and see if there are any hairline cracks. I'm picking it's oxidation of the contacts inside the switches. Get some CO Contact cleaner, get it inside the switches and give them a good workout while it dries. Make sure the power is off of course.
FYI the switches connect both left and right A speakers together and the left and rights B speakers together. I always thought they were parallel but a comment on your pics could be right. Anyway if you connect the left speakers in series and connect them to just the left A terminals you're doing exactly what the switch does. And same for the rights to the right B terminals.
Hit it with this stuff it works wonders and will show you right where any hidden corrosion is on solder points.
Electrical Contact Cleaner Amazon Example
Don't use regular WD40. The electrical contact cleaner is a separate product sold by them. I am not sure what would happen if you sprayed the regular stuff on it but I'm sure nothing good. I've edited my comment to include the link, but here it is again
WD40 Company 300554 Specialist Contact Cleaner Spray - 11 oz. with Smart Straw https://www.amazon.com/dp/B00AF0OFVU/ref=cm_sw_r_cp_apa_i_FTnJDbM1B9S8V
Hey, that’s progress!
Try resoldering the connectors on the back of those. They might have come loose from the mechanical pressure over time.
As for cleaning the buttons themselves, I have some stuff that I use for dodgy buttons and scratchy pots. Not exactly this, but it’s from from RadioShack which doesn’t exist anymore. Probably this is similar and would do the job:
https://www.amazon.com/WD-40-Specialist-Electrical-Contact-Cleaner/dp/B00AF0OFVU/ref=mp_s_a_1_2?ie=UTF8&qid=1541714656&sr=8-2&pi=AC_SX236_SY340_QL65&keywords=electrical+contact+cleaner&dpPl=1&dpID=41yj73g%2B%2BlL&ref=plSrch
I’d resolder the connections, then spray this stuff in there and click the buttons like a hundred times.
Worst case scenario, those little black buttons are a standard part you can replace.
Not all joycons who wander are lost.
Seriously though, try some electrical contact cleaner, use a toothpick or tiny flathead screwdriver to pry up the dust cap under the analog stick (it's a very thin rubber material), stick the nozzle inside, and spray a few times, then move the analog stick all around for a minute. Let it dry, and then that should, at least for a while, fix the problem.
There's a rubber covering at the base of the analog stick, just lift it up, poke the plastic straw on the nozzle of the WD-40 electrical contact cleaner can under it, and spray it. Don't go crazy, just make sure to get a little bit on all sides. Also, make sure to use the WD-40 electrical contact cleaner, not regular WD-40. Here's a link to the correct product on Amazon. If your drift is caused by dust or dirt getting into the analog stick, this should fix it. However, if it comes back, then the stick itself is worn out and you'll need to send it in to Nintendo for repair.
Electronics cleaner worked for me. No issues in 3-4 months of moderate use.
https://www.amazon.com/gp/aw/d/B00AF0OFVU?psc=1&ref=ppx_pop_mob_b_asin_title
Just shoot it under the rubber dust covers and let it dry for 20-30 min
Look for a bad bias resistor on the driver card, bad/broken solder joint on the wires leading to the diode mounted on the heat sink, or (most likely) a bad output transistor.
Check and spray for corrosion at every connection you can get at as well.
Here's a link to the spray I use
​
I spray it under the little flap thing of the joycon(no disassembly) and let it dry for an hour and it's back working!
For the joycon's drifting, I found a little spray from WD-40 specifically their ELECTRICAL CONTACT CLEANER (not their other stuff which would melt plastic), really helped eliminate the drift. This is what i used, its $6.75 on amazon right now, which is much cheaper than $70 for new joycons
https://www.amazon.com/gp/product/B00AF0OFVU/ref=oh_aui_search_asin_title?ie=UTF8&psc=1
This, and you can actually get some from a Chrysler/Dodge dealer, but here is an Amazon link:
https://www.amazon.com/Genuine-Chrysler-Accessories-5018045AA-Electrical/dp/B00BV4D98Y
I've used this on electronic components (car and computer) for over a decade.
You can try:
It's your lucky day!
I happen to have that set and it's easy to fix. While it's possible that you're having a different problem, a very common problem with old computer speakers (and Klipsches in particular) is a problem with the volume knob itself.
There's a very good chance that all you need to do is pull off the volume knob and spray some of this into it. https://www.amazon.com/WD-40-Specialist-Electrical-Contact-Cleaner/dp/B00CMT9TFY
Google for more so you don't think I'm crazy :)
https://www.google.com/search?q=dirty+potentiometer+contact+cleaner&ie=utf-8&oe=utf-8
For starters, don't put it in soapy water. Water and electronics don't mix well, and you may end up with an even less functional device.
What you could try is is a contact cleaner like this one by WD-40.
Not a problem!
https://www.amazon.com/WD-40-Specialist-Electrical-Contact-Cleaner/dp/B00CMT9TFY
This is basically a cheat when it comes to cleaning bearings in my honest opinion. Expose the bearing (remove the caps), aim the nozzle angled to the bearings as if you were drying them with compressed air. Get a good spray for one second. Shake to remove excess, and screw buttons back together. Can't recommend it enough!
I'm trying my best to help, i have no idea what the Firefly is.
I just looked it up. Holy shit, theres a USB cable the lights it up.
YOu can "cross fingers" try this: WD 40 Electrical Cleaner
DOnt use water since theres a circuit board inside.
For # 5 you're on the right path, but get some of these.
https://www.amazon.com/uxcell-Plastic-Handle-Circuit-Static/dp/B00CQIA22U
and this
https://www.amazon.com/WD-40-Specialist-Electrical-Contact-Cleaner/dp/B00CMT9TFY/
I actually use BW-100 instead now. Which doesn’t have lubricant so it completely evaporated without any residue. BW-100 Nonflammable Electronic... https://www.amazon.com/dp/B07FNBW47M?ref=ppx_pop_mob_ap_share
Buy a can of deoxit and clean around the analog sticks really well allowing some to leak into the gaps, then use as normal and the drift goes away almost immediately.
https://www.amazon.com/Hosa-D5S-6-DeoxIT-Contact-Cleaner/dp/B00006LVEU
Clean the switch with Deoxit.
Maybe try some Deoxit.
Have you tried buying contact cleaner spraying your button with it? (mechanical contact cleaner, not eye contacts!)
Alternative, 99% isopropyl alcohol. A high percentage (not 70% meant for sterilization)
Well this info is for whoever you gift the phone too.
With the new Razer announcement, I would get that over the Pixel. (for me, much better front loudspeakers are more important than a step up in camera quality)
Did you save the old switches? A spray of some electronic cleaner (deoxit) and cycling then several times might bring the switches back.
https://www.amazon.com/Hosa-D5S-6-DeoxIT-Contact-Cleaner/dp/B00006LVEU/ref=sr_1_1?ie=UTF8&qid=1469990583&sr=8-1&keywords=Deoxit
http://www.amazon.com/Hosa-Cable-Deoxit-Contact-Cleaner/dp/B00006LVEU/ref=sr_1_1?s=electronics&ie=UTF8&qid=1408995039&sr=1-1&keywords=contact+cleaner+electronics
Something like that would be good for cleaning contacts on things like potentiometers (non-digital volume sliders / knobs) and the inside of connections or plugs or any other metal to metal contacts that carries signal or power.
Using water is a bad idea on any kind of internal parts, but should be OK if used on the outside of equipment, with NOT TOO MUCH water and quick drying afterwards.
I used contact cleaner on my ps3 controllers when they ever have buttons that stick, don't work properly, or have that issue where pressing one button somehow presses other buttons. It works everytime. Link to the contact cleaner I use
I lived with those for a couple years and the degradation of connection quality was pretty rapid due to the small contacts. Now I cherish the stronger magnetic connection and larger contact area of the circular connectors, since the need for data connections is so rare, even on my phone where I use them most. I imagine most of my trouble came from the phone and connector living in my sweaty/dusty pocket, though.
If you do suffer connection degradation, use Deoxit and a toothbrush to clean the contacts out. That stuff is magic and I use it for any electrical connection issue.
For cleaning the switches get Deoxit D5. All of my guitar/amp techs use it and it works wonders. Had a old Peavey amp with no output, sprayed all the pots which resulted in a green liquid streaming out of each one and bam, full functional amp. https://www.amazon.com/Hosa-D5S-6-DeoxIT-Contact-Cleaner/dp/B00006LVEU/ref=pd_lpo_vtph_328_bs_tr_img_2?_encoding=UTF8&psc=1&refRID=8EA7PTBRTZ95FHRRG0KN
deoxit is even better for dirty scratchy pots. Also works on battery connectors and anything metal. It's not something you use every day. Depends on the humidity and salt where you live (ocean), how much you gig, if outdoors or not. Lots of fog/snow/bubble machines Etc. Also it depends on the type of metal in your connectors and jacks. If they are dissimilar it increases corrosion (science man!). In the studio it's a once every six months chore if the head tech is cool. Once a month if he's an asshole.
Surprised this doesn't get talked about more on here. Someone who has some oxidization on their pedal/guitar/amp jacks and a decent pair of ears can hear the difference after using a burnishing tool and some Deoxit. if you have oxidized jacks this will improve your tone whereas buying a $50 cable will do absolutely nothing.
> spraying canned air
Air doesn't remove corrosion. You could try a contact cleaner spray like everybody's favorite, CAIG DeoxIT D5.
For the crackly jacks, a contact cleaner should work -- https://www.amazon.com/dp/B00006LVEU/
I've used WD40 with plenty of success on old locks. With antiques, it is often less about the lube and more about cleaning out all the old gunk.
I would recommend getting over your kitchen sink and giving it a healthy spray, don't worry about using too much. If you have a rake, you can roughly rake in and out to get all the spray worked into the pin stacks. You should also mess with you tension wrench to work the plug a little bit. I would expect to see some dirty discharge from the lock when you do this. If you really want, you can repeat the process a couple of times until there is no more rust/dirt/oxidation coming out.
Recently I've been using DeoxIT D5, and it is quite effective. It is available on Amazon.
This stuff? http://www.amazon.com/Hosa-Cable-Deoxit-Contact-Cleaner/dp/B00006LVEU/ref=sr_1_1?ie=UTF8&qid=1421870112&sr=8-1&keywords=deoxit&pebp=1421870115536&peasin=B00006LVEU
Never heard of it, looks interesting. How/where exactly do I use it?
Isopropyl helps, I'd get some of this stuff too. It's great for exactly what you need.
What about some DeoxIT Contact Cleaner?
I spilled soda on my numpad a few months ago my 0 key was completely gunked up. I used some of this on it and after two or three applications it was back to functioning order. Note my board has MX Browns on it. It would be worth the try though because that stuff has hundreds of uses around the house (much like WD-40).
This worked on mine, but only for a short period of time. I fixed it permanently with DeoxIT. Just take off the back cover (you'll need a tri-wing screwdriver) and spray this stuff into the buttons a few times (work the button a bunch between sprays). I did this a couple weeks ago and they've been working great since.
Something like this?
Here's a list of basics that I bought recently to give you an idea:
Feeler Gauges
Hex Key Wrench Set
String Action Gauge
String Winder
Contact Cleaner for Electronics
Neck Rest
I already have various sized screw drivers, but if I didn't that would be on the list as well.
The above would be enough to do a basic setup: adjust truss rod, adjust action, get into the guts and clean the electronics. Everything will fit in a beat up old shoe box haha.
Along with YouTube videos, this book is a good reference guide. It has everything from basic repair and maintenance information all the way to repairing a broken neck or trying to repair a messed up truss rod.
New belt, plus flip it over and get inside the table to squirt some deoxit into the speed control potentiometers. Then twist the knobs in both direction as far as the knobs will go a bunch of times. Well, sliders I should say, not pot and knobs.
I have an SL-23, had to do the same thing for the same problem. Speed problems are now gone.
Get a can of DEOXIT it's actually made as metal contact cleaner! Works wonders on contacts, cart slots, etc.
You should ask santa for an ultrasonic cleaner from harbor freight. The large one. Pull out your entire wireharness and soak each cluster of connectors in a mix of LA Awesome and distilled water. They'll come out brand new. Swing it like an old sling shot to the the water out, then immediately hit the metal contacts inside the plastic connectors with deoxit d100L that'll keep the metal shiny. And soak the next chunk of connectors. If you need to rewrap the harness don't use electrical tape. Use self fusing silicon tape from harbor freight. I think its called super tape and its $4 for 10 feet x 1 inch. But it stretches so its more like 20+ feet. Don't over stretch it tho.
I'd probably spray and scrub the battery case with brake cleaner and a brush, then spray it with brake cleaner again.
Broken plastic connectors can be bought for cheap at 4into1, link is on the right side. You remove the metal connectors by using a very small flat head jeweler screw driver. Make sure all your connectors lock in together. Most people hate electronic work on bikes. But if you do it right its fun and easy.
here you go
No, I used this generic stuff:
https://www.amazon.com/CRC-05103-Electronic-Cleaner-11/dp/B000BXOGNI/ref=sr_1_4?keywords=electronic+cleaner+spray&qid=1562732859&s=gateway&sr=8-4
I had the same issue with one of the linear bearings for my Folger 2020 too. Just like you I had put some oil and grease to try to help it, but it didn't work. I started over and wash it all out with some electric parts cleaner spray and blew it dry with light compressed air (get the QD for plastic safe) and that improved it.
Also try orientating it so the lines of bearing balls sit at 45 degree angles on the smooth rod like in the left example of the first attached picture in this post. I did this for my x and y axis. For z I just lined up both bearings. it really helped.
Was it plugged into the wall? Even when "off" there is usually power still going through the motherboard...
i would remove every component from the case and completely dissemble it. Then I would go to an auto parts store and buy some CRC Electronic cleaner and spray everything down good. Don't focus on one area for too long as it will get cold FAST with this stuff. Then reassemble and give it a try.
CRC 5103 Quick Dry Electronic Cleaner - 11 Wt Oz. https://www.amazon.com/dp/B000BXOGNI/ref=cm_sw_r_cp_apa_JjJ0xbP4E4THK
I use that stuff but anything you find that's safe on plastic is also fine.
https://www.amazon.com/CRC-05103-Electronic-Cleaner-11/dp/B000BXOGNI
I used CRC QD (quick-dry):
https://www.amazon.com/CRC-05103-Electronic-Cleaner-11/dp/B000BXOGNI
Seems kind of overpriced on Amazon. I got it from an Ebay store for about $6. It should also be at places like Walmart and Home Depot.
There has been a lot of good advice. One I can offer is, disconnect the battery, open the fuse panel, and spray QD electronic cleaner in there. https://www.amazon.com/CRC-5103-Quick-Electronic-Cleaner/dp/B000BXOGNI
If the carpet got soaked and the foot wells are wet, you may want to think about pulling the seats and the carpet out and letting it dry, as anyplace that water pools may lead to rust at worst, or a moldy smell eventually.
Any exposed electrical connection can be given a quick covering of di-electric grease after they are cleaned: https://www.amazon.com/Permatex-22058-Dielectric-Tune-Up-Grease/dp/B000AL8VD2/ref=sr_1_1?s=automotive&ie=UTF8&qid=1497446596&sr=1-1&keywords=di-electric+grease
Any metal on metal contact areas that got wet, such as hinges, seat sliders, etc hit with some WD-40 to displace water and prevent rust.
Pull the horn fuse for now to stop it from sounding all the time. The headliner removal is a bitch, since you need to remove all the pillar trim, which may mean removing seat belt shoulder bolts, which normally requires a big torx socket bit. If it is a hot dry day, unplug the battery and leave your car fully open (all doors, hatch) all day. It will really help drying it out.
I can weigh in. My girlfriend and I have almost exactly the same home-built PCs. Mine is below my desk, and hers is on her desk. We both vape at our desks.
One day her computer stopped reacting at all when the power button was pressed, just like if it was unplugged. I busted out my power supply tester and multimeter and it tested fine. After quite a bit of troubleshooting I discovered that the area of the board with the north bridge and power control circuit, along with the bottoms of the RAM slots, and the entire back of the GPU, were coated in VG.
I should mention, I suppose, that we both almost exclusively vape my DIY ("Creamy Nuts") which is 3mg max VG with a little TFA bavarian cream and TFA hazelnut praline, no sweetener.
I pulled the mobo and GPU out of the computer, ran to the local auto parts store, and bought a can of CRC electronics cleaner which I used in conjunction with an air compressor and Q-tips to blow/scrape most of the VG residue off the boards.
The machine is working fine now but the whole cleaning process took several hours. When I got to trying to figure out exactly how it happened, I realized that she does have a higher-than-normal-flow 120MM intake fan in the lower front of the case, and everything that had residue on it was in direct line with this fan. This build up happened over the course of about 9 months.
PLEASE be aware of where you are exhaling, when you're around electronics! After this incident I checked my desktop and my server and they are both fine. This happened just because of a crappy combination of factors, but it can absolutely happen to anybody.
Maybe it's just an exception what happened for me, but the electrical contact cleaner I used left a little bit of a sticky residue, so it's possible it did not dry properly after ending up on the pins.
https://www.amazon.com/CRC-05103-Electronic-Cleaner-11/dp/B000BXOGNI
I used the same contact cleaner consistently recommended here, and I can't say it evaporates completely as suggested. On the back it even says "Allow to dry thoroughly and vent before reactivating. Product may collect and pool in unseen areas."
I worked a few years in electronic retail and tech support, and have an IT certification, so I promise I've tried to do my research in troubleshooting my own issues. I've heard of the tape method, and read about replacing the plastic latches with metal latches at the top; but in my case, I do believe I needed more than anything to clean the pins. Any combination of these can only help.
Seconding this. Electronic contact cleaner is the only thing that has fixed my drift issues on my left joycon, after trying compressed air and a toothbrush to no success. Thankfully it’s pretty cheap (around $5). The drifting occasionally returns every few months on my joycon, but every time it does, I just apply some cleaner, and the problem is resolved.
You can try some electronic contact cleaner from the auto section of walmart, if its stuck that will free it, but if the button is broken ... its broken.
Here is a amazon link so you can see what it looks like but it will probably be half the price at your local walmart.
https://www.amazon.com/CRC-05103-Electronic-Cleaner-11/dp/B000BXOGNI
Make sure you're not suffering from a combo-problem:
.
I clean switches by doing a combination of sandpaper and electronics spray cleaner. I found the WD-40 electronics cleaner spray to be hands-down better than CRC Quick Cleaner spray. But neither one would remove corrosion from inside the switch itself. The sandpaper (facing upwards) did remove both the green battery leakage crap and the brownish corrosion from inside the switch. I slid the sandpaper in and then sprayed the electronics contact spray on. Be careful not to leave any paper shards get loose from the sandpaper itself. Just move it straight back and forth without angling. Keeping it at a simple 90° angle from the face of the power switch itself will save it from tearing off at the edges.
.
Check and clean the battery contacts in the battery compartment. Even after cleaning the switch a bunch, the on/off flickering continued. It was a crudded battery contact that was making it happen.
.
The GBA unit I was working on looked brand new on the outside. The inside had battery leakage on both sides of the battery compartment. Funny how the battery compartment itself was sparkling clean. There's not much you can do when buying electronic units online, especially when a previous owner somewhere in its lifespan wanted to move the unit down the line from themselves. But after many hours of steady work, the light is solid as a rock and doesn't flicker one iota when touching any part of the power switch.
.
edit: also want to mention that the unit I was talking about above did not have any power or lights at all when I first received it. It took a long time to get it to start flickering a small amount of red light. Then the green light started to flicker at times, too, when moving the switch back and forth rapidly. I had to repeatedly disassemble, clean, partially reassemble, put in batteries and flick the switch a bunch.... just to try and get a sign of life out of the thing. Up until yesterday morning, I would've sworn on a stack of H.P. Lovecraft novels that the motherboard was blown. But I had some time last night and decided to play around with different cleaning methods. So glad that I did.
This kind of thing: https://www.amazon.com/CRC-5103-Quick-Electronic-Cleaner/dp/B000BXOGNI
I don't know about that particular brand. That's just the first one that came up when I googled. Should be fine, though. I imagine it'll still void your warranty much like opening it up would. But you'll probably fix it in seconds instead of months...
https://youtu.be/0QvOepREO4k?t=5m55s
That's a video of a guy cleaning knobs on a guitar amp. But cleaning a knob is a cleaning a knob, so it should explain what I'm talking about. I haven't watched it though, so it might be boring.
Mine did this exactly. [This is the contact cleaner I used] (https://www.amazon.com/CRC-05103-Electronic-Cleaner-11/dp/B000BXOGNI/ref=sr_1_3?s=electronics&ie=UTF8&qid=1535827404&sr=8-3&keywords=electronic+contact+cleaner+crc) and many others have had success with it too. It's also in the automotive section of walmart for the same price.
There's a dust cover at the base of the joystick. Make sure the controller is off, tilt the stick and lift the doughnut cover with a credit card or toothpick. Then spray some of the cleaner in. Move the joystick around then repeat from the other side. Keep the cover lifted while the cleaner is drying.
The solution which seems to have worked for most people (including me) is to use just a little bit of this quick dry electronic cleaner under the stick's plastic sheath. As the instructions were given to me, lift up the sheath enough to spray in a bit using the included straw attachment, then circle the stick around a bit. Do the same on the opposite side, to make sure it's getting everywhere. Give it just a little time to dry before using the controller. Since it's hard to spray out just a tiny amount you might get some outside of the stick, but it's harmless and also will give you an indication of how fast it dries.
​
EDIT: And yes, this is a very common problem. One of Nintendo's biggest engineering screwups this go around.
Mine started drifting a bit a few weeks ago and I bought some electronics cleaning spray off amazon that someone recommended. Sprayed into the stick housing, waited for it to dry, problem solved :)
CRC 05103 QD Electronic Cleaner -11 Wt Oz https://www.amazon.com/dp/B000BXOGNI/ref=cm_sw_r_cp_api_i_ymPPCb1SAVTVQ
http://www.amazon.com/CRC-05103-Quick-Electronic-Cleaner/dp/B000BXOGNI
http://www.amazon.com/gp/aw/d/B000BXOGNI/ref=mp_s_a_1_1?qid=1415633454&sr=8-1
I use this stuff. Like a hot knife through butter even on 10 year old oem paste.
6 bucks https://www.amazon.com/gp/product/B000BXOGNI/ref=ppx_yo_dt_b_asin_title_o05__o00_s00?ie=UTF8&psc=1
Electric contact cleaner took care of my joycon drifting. Only 5 bucks on amazon.
https://www.amazon.com/gp/product/B000BXOGNI/ref=oh_aui_detailpage_o00_s00?ie=UTF8&psc=1
The main worry with rubbing alcohol would be water content. I would not try to work 70% alcohol into the switch. Higher alcohol content is more likely to dry out perfectly in a tight space like that.
Electrical contact cleaner is nice because the pressurized bottle will be easier to spray into the switch than alcohol. You can try alcohol, but definitely be sure to use some compressed air and be confident that you have completely dried out everything before applying power.
https://www.amazon.com/gp/aw/d/B000BXOGNI/ is the electronics cleaner I personally like using.
> flush the button component on the circuit board with 99.9% pure electronics grade isopropyl alcohol
This stuff is the bomb!
https://www.amazon.com/gp/product/B000BXOGNI/ref=ppx_yo_dt_b_asin_title_o00_s00?ie=UTF8&psc=1
I wouldn't put that chemical on my tires or get it anywhere near my bike. It's practically lacquer thinner in a can and will eat up your paint and plastics if it splashes on them.
I use CRC QD electrical cleaner. It makes the oil drip right off of anything, is plastic safe, doesn't hurt painted parts of my engine or wheels, and it doesn't leave a residue. It's the best on my old bike when I'm trying to track down an oil leak. clean the whole engine with it, start the bike and see where the oil starts seaping from first. I pick it up on amazon when it drops below 4 or 5 bucks a can.
Dish soap is the best alternative though.
Electronic Parts Cleaner spray and hope: http://amzn.com/B000BXOGNI
Next time apply MAX a grain of rice sized amount on the CPU and then spread across the top with something flat. The goal isn't to drown the CPU, it's just to fill in any small spaces between the CPU and heatsink to improve thermal conduction and avoid hot spots.
I usually spray whatever I have handy, most often CRC eletronics cleaner or WD40 brand silicon spray which is awesome because its got built in nozzle that doesn't fall off...
https://amzn.com/B000BXOGNI
https://amzn.com/B00631GSSI
Anyways I spray something just to get hardened dirt a bit moist, or in general any liquid will help cut down on friction ... spray motor, then point datavac into motor best I can, not using any attachments or anything and then start rotating motor back and forth. I try not to force, like I'll just start turning other direction if it gets stuck a little... just back and forth is the goal.
Combination of lube + airflow + rotation to sorta nudge stuff / change direction of airflow on a piece of dirt, usually after like 30s motor is pretty dirt free. If after 30s it still can feel dirt, like my lazy side will make me just to force rotation more... might scratch up stuff but will also break up whatever little rocks or whatever stuff is stuck in there. Just try to avoid it as much as possible but in the end motor is like $20... not worth babying it.
Battery Tender 021-0123 Battery Tender Junior 12V, 0.75A Battery Charger https://www.amazon.com/dp/B000CITK8S/ref=cm_sw_r_cp_apa_qEgJAbVJNNSB0
You can get these at pretty much any hardware or autoparts store. They aren't for recharging a dead battery but they will keep it topped up during the off season. I would also recommend getting some terminal protective spray to help limit terminal corrosion.
CRC 05046 Technician Grade Battery Terminal Protector - 7.5 Wt Oz. https://www.amazon.com/dp/B000CIPUNC/ref=cm_sw_r_cp_apa_bKgJAb9PBFC9P
I use the CRC battery terminal protector and it works well.
Does the car start normally and how long have you had it? Sometimes corrosion accumulation (the green powdery stuff) can be a sign of failing battery.
Usually a silicone dielectric grease, but I like the spray stuff like this: http://www.amazon.com/CRC-05046-Technician-Terminal-Protector/dp/B000CIPUNC better.
The last time I spilled a bit of soda on my board I got a sticky key. I had some of this exact DeoxIT on my desk and used that problem solved. This particular DeoxIT will also add a bit of lubrication.
Other options.
I would use either of these products.
contact cleaner
or
electrical parts cleaner
These exact products can also be had locally in Home Depot and Lowes.
I have used both of these products for years and have never had a problem. Of course make sure there is no power.
I use this on keyboards and Remote Control hobbies, you can literally spray it all over the PCB and in the keys switches and just watch the crap come out. Be aware though that any lube that my have been in the key switches will of course be cleaned out as well.
But other than completely taking it apart (as in soldering if its plate mounted) this will do the trick.
Take out the joystick circuit board (just remove the restrictor plate, disconnect the 5-pin cable, and the board should slide right out), pry open the microswitches, and spray some contact cleaner on the metal parts inside. http://www.amazon.com/gp/product/B0030MKAV4
I'd try some electrical contact cleaner before I tried anything else.
It's probably corrosion or deposits built up on the PCB from the liquid damage causing inconsistent contact.
You can try blasting it with contact cleaner - like https://www.amazon.com/Max-Professional-2015-Contact-Cleaner/dp/B004PHDLQY
Just blast it in there, probably won't have to take it apart if the slim nozzle will reach. But make sure to hit all affected areas.
Note though that it might be corroded so badly that no amount of cleaning will help, but fingers crossed.
> pots are crackly
https://www.amazon.com/WD-40-Specialist-Electrical-Contact-Cleaner/dp/B00AF0OFVU
We had the drift issue as well. After reading about the fix using an electrical contact cleaner, I figured I'll give it a try. It worked. Just use a knife to lift up the rubber flap under the joystick, spray the cleaner inside, rotate stick a few times, let it dry. No more drifting. Not sure how long the fix will stay in place, but I'll keep doing this to avoid buying a new controller.
https://www.amazon.com/WD-40-Specialist-Electrical-Contact-Cleaner/dp/B00AF0OFVU/
I used WD-40 Electrical Contact Cleaner spray you can get it at homedepot for like $5. Make sure NOT to use regular WD-40. A quick 1 second spray under the flap of the analog and it will be as good as new. Heres a link to the right one if you want to get it from amazon.
https://www.amazon.com/WD-40-Specialist-Electrical-Contact-Cleaner/dp/B00AF0OFVU/ref=pd_lpo_sbs_328_t_0?_encoding=UTF8&psc=1&refRID=1HRH2926M4M7210XZ89H
Use this:
https://www.amazon.com/dp/B00AF0OFVU/ref=cm_sw_r_cp_awdb_t1_OcuIDbVK9CH95
I’ve had two drifting joycons and using this sprayer under the rubber cap and waiting for 5 minutes worked both times. Much easier than dealing with Nintendo support each time.
Something like this: https://www.amazon.com/WD-40-Specialist-Electrical-Contact-Cleaner/dp/B00AF0OFVU
Probably available at your local hardware store.
Not sure about not spending anything but I’ve read some people with other controllers, when they have problems with analog sticks, swear by this spray, it’s like WD-40 electrical contact cleaner and they say it works wonders. Maybe vita stick is different and doesn’t get fixed as well, I don’t really know. But it’s worth a try for 6-7$ I guess.
WD-40 Specialist Electrical Contact Cleaner Spray - Electronic & Electrical Equipment Cleaner. 11 oz. (Pack of 1) - 300554-E https://www.amazon.com/dp/B00AF0OFVU/ref=cm_sw_r_cp_api_i_B5PCCb7P9Y03Y
If it starts to happen again try using Electrical Contact Cleaner, I used this one. I was having major drift issues and this has resolved it (for now at least).
I cleaned my pc with compressed air, but it doesnt look like everything went away, I still got this [Contact cleaner]( https://www.amazon.com/WD-40-Specialist-Electrical-Contact-Cleaner/dp/B00AF0OFVU/ref=sr_1_1?keywords=contact+cleaner&qid=1558717635&s=music&sr=1-1-catcorr) from WD-40 which has more power and is kind of a "liquid that evaporate" you probably know what I mean. Is it safe to use this on the top side of my GPU to clean it?
here
I'm assuming you're trying to clean the PCB. That shiny coating is an electrical varnish; a sealant to protect the board, mainly the circuit traces. Any type of Isopropanol (Isopropyl Alcohol, Acetone, etc.) will strip that varnish. What you'll want to use is Contact Cleaner (here). It's as simple as spraying down the PCB lightly with the cleaner, and then taking a non-abrasive brush to work it around and remove the dirt/oil/dust. Once you're satisfied, wipe down the PCB with a clean microfiber cloth. Good luck!
Price dropped on Amazon. https://www.amazon.com/GIDDS-302932-Specialist-Electrical-Contact-Cleaner/dp/B00AF0OFVU/ref=mp_s_a_1_1?crid=3PN9JM3ZL8H0J&keywords=wd40+electrical+contact+cleaner&qid=1554541248&s=gateway&sprefix=wd4&sr=8-1
I recently had a similar problem, due to smash. I used compressed air and that only helped for a short while. I recently bought this electronic contact cleaner, gave it a couple sprays under the flap, rotated the stick a couple times and let it dry. And it's been working like new again. Hasn't given me problems anymore.
Get this: https://www.amazon.com/dp/B00AF0OFVU/ref=cm_sw_r_cp_api_i_OBGPCbF0J6K7T
And look on YT. There are tutorials to fix this with that spray. Worked for me
wd40 makes a line of contact cleaner. http://www.amazon.com/WD-40-Specialist-Electrical-Contact-Cleaner/dp/B00AF0OFVU
Tilt the board on its side and from the underneath hit the motor with http://www.amazon.com/WD-40-Specialist-Electrical-Contact-Cleaner/dp/B00CMT9TFY/ref=sr_1_1?ie=UTF8&qid=1462970375&sr=8-1&keywords=Contact+cleaner+spray and let the gunk drop out .. Wait five minutes and do the same on the other side.
I do this on my boosted board once a month havent tried it on my marbel yet as it hasnt made any grinding noises yet
Key is you want gravity to pull the cleaner and dirt out
humm, try to use something like this https://www.amazon.com/WD-40-Specialist-Electrical-Contact-Cleaner/dp/B00CMT9TFY/ref=sr_1_5?ie=UTF8&qid=1501009941&sr=8-5&keywords=contact+cleaner
and use a old toothpaste to brush it..
This is what I, and other members here use:
https://www.amazon.com/WD-40-Specialist-Electrical-Contact-Cleaner/dp/B00CMT9TFY
If you really need to spray something into your computer (protip: you don't), use a specially designed electric contact cleaner. https://www.amazon.com/WD-40-Specialist-Electrical-Contact-Cleaner/dp/B00CMT9TFY
this stuff works well: https://www.amazon.com/WD-40-Specialist-Electrical-Contact-Cleaner/dp/B00CMT9TFY , just be slow and careful with the cleaning
The part is either this one or this one but I couldn't find which one the Eco trim uses. Check with your VIN and it should tell you.
I couldn't find anything to that specific vehicle, but this is one for a 2011-2016 Elantra and looks to be similar. It doesn't look like a difficult swap.
I've never tried it in this application but you could also try some electronics cleaner if the issue is a dirty contact, it might help.
I actually got some stuff from Amazon that’s supposed to clean it. I also just got a power supply that will be here tomorrow
WD-40 has an electrical contact cleaner that could clean everything nicely.
My friend and I had drifting issues on our joy-cons, and I fixed them both by spraying electrical contact cleaner into the bottom of the stick (under the rubber flap).
https://www.amazon.com/GIDDS-302932-Specialist-Electrical-Contact-Cleaner/dp/B07H8VFTST
I don‘t know if it‘s broken, i had this and cleaned mine. After that it didn‘t happen.
The rubber cap has to be lifted up to get some air or this spray inside.
Just a little bit, then you should be fine again
Use this and all the mineral oil will be gone in no time.
I always keep a spray can of Contact Cleaner in case of keyboard accidents. This will solve (and dissolve) your problem.
I recently spilled a cup of coffee (with sugar) into my brand new Magic Keyboard. Oops. I sprayed contact cleaner into it immediately and forced all the coffee out. I sprayed the solution under all the keys, then tapped it keys-down onto paper towels until the solution came out clear instead of brown. My keyboard came out perfectly fine (I'm typing on it now). Accidents like this, with sugar in the coffee, usually cause permanent damage. But not if you're well prepared.
Warning: I suggest you do not buy this brand, which will only cause further confusion.
Contact cleaner i wouldn't put alcohol water or anything remotely conductive on it.
http://www.amazon.com/CRC-5103-Quick-Electronic-Cleaner/dp/B000BXOGNI/ref=sr_1_2?ie=UTF8&qid=1458003092&sr=8-2&keywords=contact+cleaner
This stuff worked for me. Just spray it in there and let it dry
WD-40 Specialist Electrical Contact Cleaner Spray - Electronic & Electrical Equipment Cleaner. 11 oz. (Pack of 1) - 300554-E https://www.amazon.com/dp/B00AF0OFVU/ref=cm_sw_r_cp_api_i_OBGPCbF0J6K7T
Get this and spray it under the caps of your joysticks, they will work like they're brand new again.
https://www.amazon.com/gp/product/B00AF0OFVU/ref=oh_aui_detailpage_o00_s00?ie=UTF8&psc=1
Hey I have some.
I would use a spray electronic cleaner like this or this.
I have found the WD-40 brand stuff at local hardware stores like Home Depot or Lowe's and it works great. Have cleaned off old motherboards and a GPU that had sticky soda all over the back of it.
Otherwise, as others have suggest, alcohol with wipes or q-tips. I just think the can and spraying the fuck out of it is the best first step to get the majority of it cleans and then using qtips for detail work if you find residue.
Also, as other have suggested, take all the components apart and clean them all separately, making sure the contacts and sockets are as clean as you can get.
How does somebody sit on a computer and piss in it? I've been blackout drunk before, but I can never understand how people can't find a toilet or bathtub/shower to piss in. Otherwise, wouldn't you just piss your clothes wherever you happen to pass out?