Best epoxy adhesives according to redditors
We found 319 Reddit comments discussing the best epoxy adhesives. We ranked the 81 resulting products by number of redditors who mentioned them. Here are the top 20.
We found 319 Reddit comments discussing the best epoxy adhesives. We ranked the 81 resulting products by number of redditors who mentioned them. Here are the top 20.


![CEMEDINE 30 minutes epoxy adhesive high super 30 80g set CA-193 [HTRC9] (japan import)](https://m.media-amazon.com/images/I/51IzkFTDDZL.jpg)
Go pro and use JB Weld. Superglue is amateur.
As long as this doesn't go in the oven (or get hotter than 180ºF / 80ºC) of course it can be glued, and with fine, strong (but still slightly visible) results.
u/GondorUr is probably right, it would be easiest to return it and that would have the best results, but...
u/pobroin has the right attitude, considering their appreciation of kintsugi, and so do you, I presume, since you are asking about repairing, rather than replacing.
u/BcookieOmonsterB is right, that cyanoacrylate (Super Glue, Krazy Glue, etc.) works well with ceramics, but cyanoacrylate works best on nonporous surfaces, and when the surfaces fit really well with the least possible gap. On ceramics, especially if not fired to the point of being vitreous, there's often a few grains that will get dislodged in the glue, while fitting the pieces back together, that will stand in the way of ever getting a truly close fit. So...
As this job is a nice clean break, and a simple two pieces. It's the perfect job for a two-part epoxy, which is plenty strong and will fill any small gaps with virtually no loss of strength, unlike cyanoactrylate.
Your best option to repair (rather than replace) is a two-part clear epoxy. Since you're asking about this, I assume you haven't worked with glues much, and are unfamiliar with the process, and may be a bit slower than someone more practiced. Different epoxies have different working or handling times, and since you don't want to rush it, look for longer than 5-minute epoxy (this one gives you a full 30 minutes, but that's a lot longer than you should need for this simple job - look for a 10-minute epoxy).
Edit: Yay! Silver! Thanks for the alms, secret Samaritan.
Edit 2: Clarification added to taping procedure
Great project, looks great!
As a suggestion for future work (one I used on my own desk)
look into epoxy. Something like this:
https://www.amazon.com/Clear-Epoxy-Encapsulating-Casting-Gallon/dp/B00IT0APVM
Cheap, easy to use, and gets a great finish with much less sanding/recoating. It can discolor if exposed to UV, but generally, that isn't an issue for indoor applications.
Edit: You made me want to post mine https://www.reddit.com/r/DIY/comments/5nysq1/my_custom_bambooplywood_desk_build/
The adapter pack you'd need to mount to any rail is $5 on Amazon - https://www.amazon.com/dp/B0006O1ICE/
I've posted this tutorial before, and I'm gonna do it again, for anyone wanting to know how to mount this bad boy. Other people have messaged me saying they've used different adapter mounts and a dremel instead of the JB Weld method. About two weeks now, and still doing great!
 
 
I used this guy's Amazon tutorial on how to put the adapter on, although I got the non-quick set version that comes in seperate tubes.
These are the items I purchased:
Here are the pics of my setup. Please note, I waited a full 24 hours before mounting them. I know people get antsy, but just wait!!! Also, when adjusting the monitors for the first time, don't use too much torque, or you might detach the adapter from the monitor. The scratch marks you see on the back of the monitor, next to the adapter are where I sanded it down. I don't care about the way it looks, since my desk is against a wall. You can probably be a bit more careful if you actually care about the looks. I also sanded off the paint from the adapters so I can get good contact between the rough plastic surface and the bare steel plate. The screws that came with the adapters, as long as I washered them out a little, were perfectly fine to use.
There are still some small adjustments I need to make to the way they are lined up, but this is pretty much 99% done. I highly recommend anyone looking for more desk space to give this a shot.
Three variations on the theme:
Mountain Creek:
Shopping List
This will provide enough material to do hundreds of bases. Really the only limit is how many of the Hollow Blank bases you buy.
Instructions:
In either case, paint the texture over the entire surface of the epoxy, then go back and using a wide brush (a cheap #4 Filbert is perfect) create waves by making short, quick strokes. You want these brush strokes to go in the direction that the water is flowing, but you want to work your way backwards from the outflow point to the inflow point so that the crests of your "waves" overlap properly. Here's an image showing what I mean.
Swampy Pond
Shopping List:
Instructions:
OCEAN BEACH
Shopping List
Instructions:
Easiest way to fix it. Go to wal-mart or target and buy this or order it from amazon. clean the edges and follow the directions. works perfectly. I did this for 3 of my pieces that broke. It's very clean and will be as good as new. Make sure you don't overapply it so that it oozes out inside. Might be bad for the downstem. It's the cheapest and easiest way to do it. Best of luck! toke on
Edit: Epoxy does not melt or dissolve by acetone so you can clean it with acetone after fixing it too! Source
>There are two broad classes of plastics, thermosets and thermoplastics. A thermoplastic can readily be dissolved or melted, while a thermoset cures and changes. Once cured, it forms a tough, crosslinked network which resists solvents and will degrade instead of melting. Epoxy is a thermoset. The advice to trim or slice it off is good. Solvents like acetone or whatever, unless extremely powerful and dangerous, will have little effect on a cured epoxy. Things that easily swell and dissolve epoxies will do the same with rubber or plastic gloves or portions of your anatomy.
Looks like the solder pads ripped off the PCB. You can attempt to scrape away the green mask and solder a new jack there, but its pretty difficult and you need to be good with a soldering iron.
Do you have any soldering equipment?
There are also conductive epoxies avaliable which you can use to glue the connector to what's left of the trace, but they are expensive and you haveto be careful to no short anything out: https://www.amazon.com/MG-Chemicals-Two-Part-Conductive-Adhesive/dp/B008UH4DB2
A dresser: $350
A circular saw: $100
Gorilla glue: $5
A face-cord of firewood: maybe $100 delivered, unless you have a chainsaw, in which case probably free.
Brutally ripping off your customers: priceless
Yeah, this is recommended on another 3d printing thread I'm probably going to buy some and try it out myself :)
Amazon links, you are looking for FDA safe epoxies.
[link1] (https://www.amazon.com/CLEAR-GRADE-Epoxy-Resin-System/dp/B01J16MYSE/ref=sr_1_6?ie=UTF8&qid=1474585448&sr=8-6&keywords=FDA+epoxy)
[link2] (https://www.amazon.com/Alumilite-amazing-clear-cast-resin/dp/B013H6OTPK/ref=sr_1_4?ie=UTF8&qid=1474585448&sr=8-4&keywords=FDA+epoxy)
edit: I wonder if copper infused filament would be food safe? It is naturally antibacterial.
If it's a metal break, you might be able to fix it with some JB Weld.
What you want is called "potting compound" or "potting epoxy." It's usually black. Here's some cheap stuff in a small quantity: https://www.amazon.com/MG-Chemicals-832HD-Black-Encapsulating/dp/B073JNDRXJ/ref=sr_1_3?keywords=potting+epoxy&qid=1564158629&s=gateway&sr=8-3
They sell single-component potting epoxies that cure with heat or UV as well.
If we're not talking crazy stuff (in terms of heat, voltage, etc.), then regular old "five minute" epoxy from the hardware store will work fine. Just don't use JB weld or other "reinforced" epoxies, since the reinforcement media might be conductive. You can check the material datasheets to be sure - it usually contains info on heat resistance, dielectric properties, etc..
If you are working with high voltage and/or high-power stuff...well, you probably know what you're doing and don't need my help, haha.
Personally, I usually use this stuff. It's not even a true "epoxy", but it works fine for what I do: https://www.walmart.com/ip/Amazing-Goop-144100-Trim-Repair-Adhesive-1-fl-oz/
???
It’s pretty common. I’ve made belt buckles out of it.
Simple amazon search:
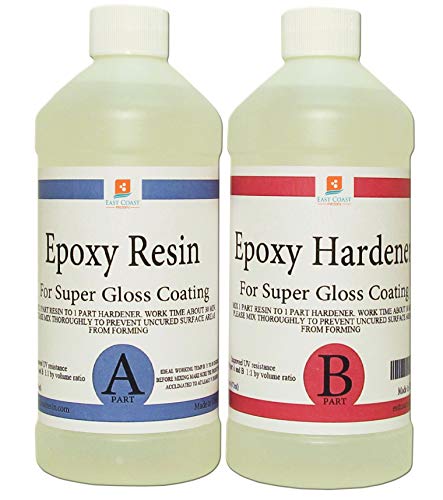
EPOXY RESIN CRYSTAL CLEAR 16 oz Kit. FOR SUPER GLOSS COATING AND TABLETOPS https://www.amazon.com/dp/B01LWT156B/ref=cm_sw_r_cp_api_DguHzbHFXJ16E
This is a really precarious spot on the X230 and X220 lids. I've managed to repair a few that had this same issue.
I used a small spot of J-B Weld imbedded with a small finishing nail laid across the break for extra reinforcement in the area shown in the photograph here.
You just need to remove the screen bezel and temporarily push aside the antenna wires. Make sure everything is aligned and let it set up for about 24 hours and the bond will be virtually impossible to break.
Epoxy Putty
It will dry gray, so you might want to grab a little bit of black paint to.
You could give this a try for attaching it to your smoker.
One-day shipping available. ;)
Equipment:
4 oz clear-top tins
3 small 6mmx1.5mm neodymium magnets per tin
Epoxy
A little JB Weld to patch the leak up a bit. I wouldn't recommend using it as a serving keg due to the higher pressure, but could use it as a fermenter. It should be able to hold a few PSI's from the fermentation process or pressurize it 1 or 2 PSI to do a transfer.
The glass doesn't get extremely hot, but it does get pretty warm when you're lighting the bowl, so I don't trust glues. I would use JB Weld, it's extremely strong, water resistant and heat resistant up to 500 degrees F. It won't last if you put the flame right to it, but it will easily handle the low heat from the bowl. Make sure to lather it on thick on the the broken edges, and around the outside to create a support. it won't be super clean, but if you lather on enough it can be sanded down to be smoother.
Victorinox SwissTool. Like a leatherman only much sturdier.
QuickSteel epoxy. You knead it. sets in second. I've repaired broken engine cases with it on the side of the road. https://www.amazon.com/Blue-Magic-16002TRI-QuikSteel-Reinforced/dp/B000FW7UOM/ref=sr_1_4
Two part epoxy does the trick!
This is what I use:
https://www.amazon.com/Gorilla-Epoxy-Minute-ounce-Syringe/dp/B001Z3C3AG/ref=sr_1_4?crid=1BBHFWDACZ0G9&keywords=two%2Bpart%2Bepoxy&qid=1564781122&s=gateway&sprefix=two%2Bpart%2Bepo%2Caps%2C202&sr=8-4&th=1
Definitely not cheap, but not that expensive.
EPOXY RESIN CRYSTAL CLEAR 16 oz Kit. FOR SUPER GLOSS COATING AND TABLETOPS https://www.amazon.com/dp/B01LWT156B/ref=cm_sw_r_cp_api_mF4MBb28WHGH6
I've done a few guerrilla-style repairs to brass and woodwind instruments in my day.
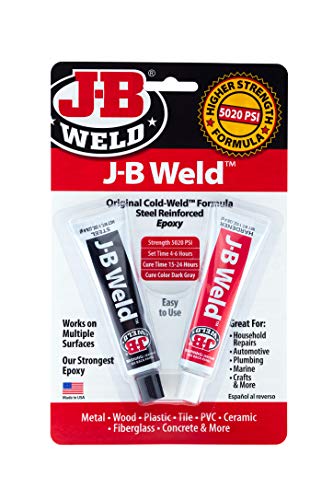
A cheap and easy fix is some "JB Weld", a steel reinforced epoxy. Just put a pea-sized drop under that joint and clamp it down overnight. Done and done. No need for solder, and it's under $10.
http://www.amazon.com/J-B-Weld-8265S-Original-Reinforced/dp/B0006O1ICE
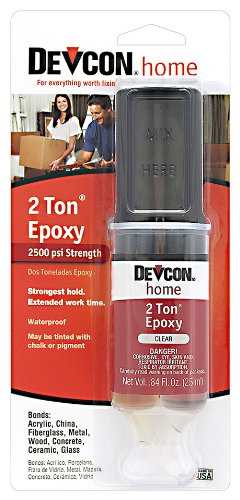
Epoxy. I like Devcon 2 Ton. Bonds anything to anything. Just make sure you don't use too much; a little really goes a long way.
Be sure to fill the key hole with JB Weld.
http://www.amazon.com/J-B-Weld-8267-S-SteelStik-Reinforced/dp/B000786GLM/ref=sr_1_2?ie=UTF8&qid=1411669575&sr=8-2&keywords=jb+weld
syringes? This is what you need man https://www.amazon.com/Clear-Epoxy-Encapsulating-Casting-Gallon/dp/B00IT0APVM
They do. https://www.amazon.com/CLEAR-GRADE-Epoxy-Resin-System/dp/B01J16MYSE
MAX CLEAR GRADE Epoxy Resin System - 48oz. Kit - Food Safe, FDA Compliant Coating, Crystal Clear, Stain Resistant, Countertop and Tabletop Coatings, Wood Coatings, Fiberglassing Resin https://www.amazon.com/dp/B01J16MYSE/ref=cm_sw_r_cp_api_i_lgB6CbQBNK2DX
I would glue the heck out of that junk.
https://www.amazon.com/J-B-Weld-8265S-Original-Reinforced/dp/B0006O1ICE
Great list!
just placed an order for the Instamorph, I can think of a lot of things I can use it for.
another good thing to keep handy is JB Weld, it has saved me countless times.
http://www.amazon.com/J-B-Weld-8265S-Original-Reinforced/dp/B0006O1ICE/ref=sr_1_1?s=automotive&ie=UTF8&qid=1416784847&sr=1-1
I bet that J B Weld would hold that. That's a "cold welding" substance, you mix the stuff in the two tubes together and stick the broken sections back together with it.
That stuff does have its limitations under loads, but I've used it for things before that carried more weight and it held just fine.
I was able to repair the magnesium base of my X220 using J-B Weld.
It was a bit tricky to get the pieces to sit in the proper position while it cured, but the resulting bond has been really sturdy.
That's too funny. This stuff
http://www.amazon.com/gp/aw/d/B0006O1ICE/ref=redir_mdp_mobile
this was the epoxy we tried, this is another kind we have on-hand that is just too unwieldy/thick to do a job like this.
Is this the kind you're referring to that does work? I never really tried it, thinking it would be similar in effect to the epoxy glue. There's just so much torsion on that location, I worry about how well it would hold.
I should also mention that this is a college help desk and we provide our services 100% free of charge--the only thing the students pay is for the actual cost of parts. It's all about getting them back up and running as economically as possible, since most of the students are broke and just want it back to a functional level so they can write papers, skype, and facebook again. So while negative goodwill (badwill?) is something I'd like to avoid, it's not like we're worried about losing profit or anything as a result.
This, only with epoxy instead of super glue.
here it is. You should be able to get it at any hardware store. It will work fine for what you want to do. I'd recommend you get the kwik set version.
Devcon 2-Ton
https://www.amazon.com/Devcon-31345-Ton-Clear-Epoxy/dp/B0006O8QQ0
Seriously..
I just tried it myself for the first time and was quite proud of the results...
Imgur
I used 30-minute epoxy to give me plenty of working time and applied just a tiny bit at a time to give it a chance to spread over the entire area I wanted it to cover. Use a toothpick to both apply and remove any excess epoxy.
Here is the tutorial I watched before I tried it myself.
Super Glue will either frost look or not glue to painted points.
I use http://www.amazon.com/Gorilla-Glue-4200101-Epoxy/dp/B001Z3C3AG put a dot of glue -- enough to not smoosh out then wrap a rubber band the head. Let it set for how ever long the written directions say for. Thats how we glue parts on GKs but minus drilling a hole and putting a pin joint to glue it steady, but I don't think its necessary at the moment.
Gorilla 2-part Epoxy Clear
I guess you can use Super Glue if you are not comfortable with epoxy. Maybe better would be the gel type of super glue. It's just that super glue by nature is not as sturdy when it comes to "shock" strains like should it get dropped or of you slam the detolf door hard enough. Just make sure the superglue is well and dry before putting it in the detolf case as superglue has a tendency to fog up glass.
lead weights
glue
Alternatively, you can just buy the epoxy and glue the toaster to the table.
depending on how rough it feels I would suggest starting with an 80g or 100g and then finishing with 120g and 220g. You can skip the first one if it is not super rough. Get one of those sanding sponges with the different angles on them. That will be easier on you hand than just sand paper. Becasue of the shape you'll want something that you can wipe or spray on. Use 4-5 thin coats. The easiest/cheapest option would be a wipe on poly or even better an Aerosol Spar Urethane. EDIT Also, sand lightly in between coats with 220 or higher. This helps the next coat stick.
You might also consider trying to fix a few of those larger cracks by filling them in with a two part epoxy
Good luck! It will be a nice surprise for her when she returns.
I made one but I decided that I was going to go balls deep and try one of the most difficult designed mau5 heads out, the disco head. Long story short it cost me about ~$300 to make, not counting 2 others that I messed up on.
Materials:
-Head
-Eyes
-Head Mount
-Mouth Mesh
-[2] Led lights for coloring the eyes
-Superglue for mouth
-[2] Plastic glue for Headmount
-About [6-10] Rhine stone glue bottles
-[3] bags of Rhinestones
-Foam Ear material ---> With Ear template
-Washers -[4] Threaded Rods -Wing nuts
-Chrome Spray paint
-Lastly, Insulation Strips [White]
+++++++++++++++++++++++++++
Stuff I had: Dremel, stubbornness, no life, sharpies, too much free time.
+++++++++++++++++++++++++++
Use any of the above tuts to get the general idea.
The template for the ears, (mine are huge).
Once the mouth is cut and you accounted for the eyes (pop the eyes in half and trace them on.)
Spray paint the whole head chrome, in light mist layers. The more layers the smoother the finish.
Once that's done, enjoy the 90+ hours of putting each rhinestone on, one by one.
Profit.
Thank you for reminding me, I wanted to put up a link.
http://www.amazon.com/J-B-Weld-8297-Epoxy-Putty/dp/B007PP26RI
Me too; googled it and it's not. This is though
The pegs are plastic on those right? If gluing them doesn't work (since the peg will lack lateral stability at the break) you could drill out the broken pegs and use epoxy to put in replacement loom pegs. They might be a different color and shape, but at least you could still use the loom and since the base of the peg would be set in epoxy and surrounded by the loom body, it would have much greater strength against shearing forces.
Alternatively, you could use drywall or self tapping metal screws to just screw into the spot where the broken pegs are. Pre-drill the hole with a bit that is just a tiny bit smaller than the screw to prevent splitting the loom plastic.
I just googled food saw epoxy and this one here is supposed to be FDA compliant.
Why did the chemical engineer say he wouldn’t want to eat out of anything with epoxy?
https://www.amazon.com/CLEAR-GRADE-Epoxy-Resin-System/dp/B01J16MYSE
Not just any epoxy. Should be good grade. And if you’re using the glasses from alcohol or acidic drinks, I’d be careful not to use them too regularly, as (I’m not 100% certain) it may degrade the epoxy a bit, and it’s probably not a great idea to ingest those particles.
Spiffy! Have you considered painting on an epoxy to seal it and improve structural integrity/longevity?
I bought this to coat 3d prints for watertightness and improved finish: "EPOXY RESIN CRYSTAL CLEAR 16 oz Kit. FOR SUPER GLOSS COATING AND TABLETOPS" https://www.amazon.com/dp/B01LWT156B and it seems like it would be ideal here.
If the cracked lid casing is the common problem shown in the photograph here there's a pretty easy fix:
Apply a small spot of J-B Weld embedded with a small finishing nail laid across the break for extra reinforcement in the area shown in the photograph here.
You just need to remove the screen bezel and temporarily push aside the antenna wires. Make sure everything is aligned and let it set up for about 24 hours and the bond will be virtually impossible to break. I've done this on a number of X220 and X230 units and it holds up really well.
some stuff you might want to think about bringing:
>lock and chain/bike chain.
you're going to be leave your campsite for ~12 hrs if no one goes back for a break. it takes about a minute to run a chain through your cooler handles, foldable chairs and other stuff. it's also easy to jb weld a metal loop onto an ez-up so they dont walk away either, i've never heard of someone ganking an entire ez up at roo, but i'd be pissed if mine was gone when i came back after the first night.
its easy for someone to walk off with one chair, its almost impossible for someone to carry your entire campsite away without anyone saying anything about it. and if you bring enough chain you can loop it around the wheel of your car, and i doubt thieves are going to go through all that hassle when no one else is locking their shit down.
>rug/carpet
grass might be super long at your campsite
>battery powered fan and string
hang the fan from the middle of your tent and itll be cool enough to get a few more hours sleep in the morning
>battery powered camp lantern
flashlights are good, but a handsfree light that illuminates everything around it is really nice if you dont go to sleep as soon as you get back to your camp.
>extra socks into centeroo
i prefer sanucks and going sockless, but if you're wearing socks bring an extra pair with you in your camelpack/backpack. wet socks suck and can mess up your whole weekend if you're stuck wearing them
The $6 fix; JB Weld epoxy.
The bond will end up being stronger than the plastic. It might look a little ugly, but for $6 it's the best option as far as price/performance.
is it aluminum body or carbon fiber if its an alloy get some jbweld, i used it to weld fittings to 2 stroke rc car mufflers that had high temps and it held grate
https://www.amazon.com/J-B-Weld-8265S-Cold-Weld-Reinforced/dp/B0006O1ICE
apparently there marine weld is good for composites
I’d take it apart a little bit, so you can easily get to the areas you need to, and use some J-B Weld to glue it back together.
This is a really precarious spot on the X220 and X230 lids. I've managed to repair a few that had this same issue.
I used a small spot of J-B Weld imbedded with a small finishing nail laid across the break for extra reinforcement in the area shown in the photograph here.
You just need to remove the screen bezel and temporarily push aside the antenna wires. Make sure everything is aligned and let it set up for about 24 hours and the bond will be virtually impossible to break.
Since your title specifies low cost you can save some money by using a wired lav mic like this Audio Technica or this Olympus lav mic. You simply plug it into the camera's mic input. A 3.5mm extension cable might be needed to reach the camera. Use the lav mic with an inexpensive voice recorder if you need the subject to move around. Smart phones have decent audio recording apps too. Syncing the audio in post can be a hassel so only do this if the shot requires being untethered. If you record audio with a separate recorder it helps to mark it by saying a scene number and making a clap sound so you can find it and sync it with the video editing software.
For lighting you might consider an inexpensive LED light and a second battery. Charge one battery while using the other.
I've used clamps like this and this for quick and simple mount of camera and small lights to a chair, windowsill, cupboard, etc. You can use JB Weld to put a 1/4-20 nut-coupler on the light if it doesn't have it already.
edit: I like Canon equipment and their line of Vixia Camcorders starts at around $300 and has a mic input. The lens and image stabilization gets you a nice picture compared to a camera phone or similar "cheap" camera.
IIRC Premiere has a basic mode that uses a simpler timeline more like Apple's iMovie. You can download 30 day trial versions of the latest Adobe products. Give Premiere Elements a try.
They would be a hell of a lot cheaper if they were;
Official Leica Cufflinks: $970 USD
DIY Leica Cufflinks
DIY Cufflinks Guide: $0 + Replacement Leica M Shutter Speed Dial $99.98 + 2 Silver Cufflink Blanks $16+ 2 Silver Contact Screws $15.80 USD to fill in the screw hole and be trimmed flush, + JB Weld to really nail it down $12.96 USD = $144.74 USD
You can make a genuine pair, with pure silver posts, and at most an hour of time for $825.26 less.
It might be a little overkill but.... JB Weld would work.
hope grad school is going well gabs
I've had the same issue before, fixed it with this stuff: http://www.amazon.com/J-B-Weld-8265S-Compound-Twin/dp/B0006O1ICE/
JB weld is an epoxy. You can buy a tube for like 6 or 7 bucks. It doesn't require welding. I've removed dozens of stripped screws with this stuff.
This question doesn't have enough information in it to provide any type of answer beyond a list of handguard manufacturers so I'm going to assume no budget and no mounting preference.
http://www.amazon.com/UTG-MNTP503-Tactical-Picatinny-Weaver/dp/B002GNYCNU/
http://www.amazon.com/J-B-Weld-8276-KwikWeld-Reinforced/dp/B0006O1ICY/
You could get some 2-ton epoxy and carefully apply it around the hinges with a small disposable brush (like the ones that come with kid's watercolor paint sets). This stuff cures to be hard as a rock, clear, it adheres nicely to metal, and should provide the support you need. Don't get 5 minute epoxy because that isn't as strong and turns yellow.
Just be sure to carefully measure out equal parts resin and hardener and THOROUGHLY mix them. I mean mix them for like a full 2 minutes. Otherwise the epoxy may not cure properly and might come out tacky.
The epoxy starts to set up in about 30 minutes after you have mixed it, so you will have enough time to apply it to the hinges. After you apply it however, you will want to keep turning the glasses over in your hands otherwise gravity will cause the epoxy to sag. 2-ton epoxy is frequently used as a protective clear coat on custom fishing lures, and lure builders like myself make "turners" like this to prevent sagging. Obviously you're not going to want to build one but you can accomplish the same thing by slowly rotating the glasses around by hand for a minimum of 30 minutes, an hour would be better. After that is done just let it cure however long it says on the package.
The inexpensive Whippeddog Handle at $6.00 and The Golden Nib Standard Silvertip Badger Knot at 20.95 or any of their other knots would be a good choice. You can glue the knot into the handle with Waterproof Epoxy - Setting a Brush Knot. I have several brushes with TGN Knots, they are great, soft tips and good backbone. A 24mm Silvertip Badger brush for $26.95
EDIT: My first knife BUILD
This was an awesome experience! The most important thing I learned was to make sure to tape far enough down the blade to prevent the epoxy from getting on the blade. :/
Blank: https://www.amazon.com/Condor-Knife-Bushlore-Blade-Silver/dp/B00WTH01K6/ref=sr_1_1?ie=UTF8&qid=1465848087&sr=8-1&keywords=condor+bushlore+blank
Scales: http://www.rockler.com/bolivian-rosewood-by-the-piece-1-4-thickness?utm_source=google&utm_medium=cpc&utm_term=&utm_content=pla&utm_campaign=PL&sid=V9146&gclid=CN7e6_m3yM0CFUFehgodNFUMkA
Epoxy: https://www.amazon.com/gp/product/B0006O8QQ0/ref=oh_aui_detailpage_o00_s00?ie=UTF8&psc=1
Pins: https://www.amazon.com/Unpolished-Finish-Extruded-Standard-Tolerance/dp/B00CNLVD1E
Finish: Natural Danish Oil
It looks like there isn't any screws in that hinge. Whoever made this likely just used an adhesive.
This Devcon glass epoxy dries clear, and is pretty strong for glass to metal joints.
Whichever route you take, please post pics here. I'm interested in it myself
A hardware store. It's this stuff. Not expensive at all.
That kind of plastic can be screwed and held together with 2" drywall screws. And it will hold. Pre drilling is an option, but only drill with a very skinny bit. You don't have to pre drill that shit, unless you decide upon fatter screws than drywall. In fact you can practice screwing through the plastic on another area of the chair. And because it may be impossible for the plastic to be brought together for the repair without removing the base, which you must do, (because thinking that you can rely on the screws to bring the plastic together is a bad idea) you probably need to separate the chair and base. Separate the base by removing and sliding the top clip off, and the washer pictured, and the black metal tube will then slide off. This will allow you to hold only the plastic base for the repair. You need to close the gap of the torn plastic before and while you put the screws in. A small clamp, or a pair of vise grips. Or pull together 2 ends of the star where the wheels are, and tape or string them together. Then with a drill, in an x pattern, put 4 screws into it, 2 from each side, at 3/4 of an inch from the top, and then 3/4" further down. After your 4 screws are in place, remove your clamp device, and mix this putty and force it into the entire cavity and down over the screws, for additional solidity. Reinstall the chair to the base because it's ready to be used. The putty will begin doing its job soon enough. You can also put a 1 inch drywall screw into the other smaller crack. From the thinner piece into the heavier, or right to left.
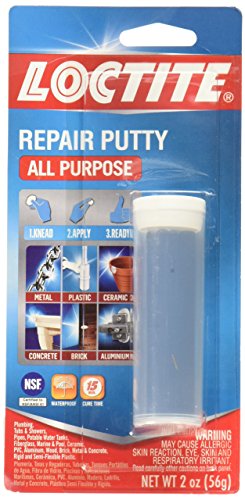
https://www.amazon.com/Loctite-431348-Multi-Purpose-Repair/dp/B000BOB8P6/ref=sr_1_sc_1?ie=UTF8&qid=1474483504&sr=8-1-spell&keywords=loc+tite+putty+epoxy+stick
If you are looking for something more cost effective than Sugru (which is great, but not cheap) you can try an epoxy putty.
you can use this shit to bond metal. it would be stronger than thin solder, imho. you can sand this when dry, with a fine sandpaper to a smooth finish. it’s nasty to work with, mixing it with the fingers, but it’s amazing stuff. rough up any metal surfaces that will come into contact with the product by scraping it on cement or a metal file or sandpaper first.
https://www.amazon.com/gp/product/B000BOB8P6/ref=oh_aui_detailpage_o05_s00?ie=UTF8&psc=1
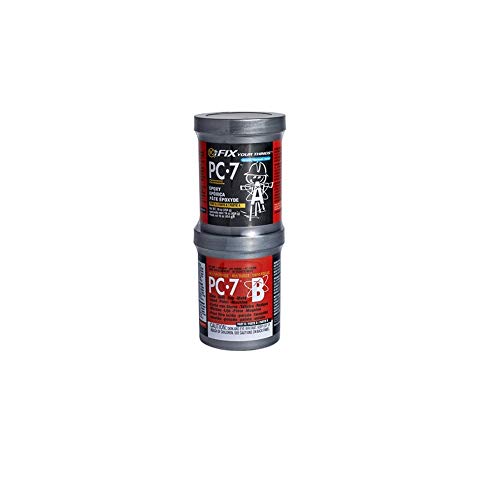
PC-7 and PC-11 are amazing epoxies. I always keep some handy in case I need something to stuck to something else. Forever.
http://www.amazon.com/PC-Products-Two-Part-Multipurpose-Adhesive/dp/B000BOHJJ0
http://www.amazon.com/gp/product/B008DZJJGU/ref=pd_lpo_sbs_dp_ss_1?pf_rd_p=1944579842&pf_rd_s=lpo-top-stripe-1&pf_rd_t=201&pf_rd_i=B000BOHJJ0&pf_rd_m=ATVPDKIKX0DER&pf_rd_r=1KRJW33VM2QC1GVP85R7
Epoxy. I had some extra PC-7 sitting around, this stuff bonds anything and everything.
Edit: looks like this doesn’t bond well to polyethylene so ymmv. Worked for me
Edit 2: scratch that. A bit of extra force and the adhesive popped off. Threw on a couple wood screws and hoping that’ll be the end of it.
Get a can of bud light and put it under the monitor that is sagging. Then put some epoxy around that joint and wait for it to set.
As everyone (including OP) has pointed out, this is not the best choice. According to the official site (http://www.loctiteproducts.com/p/sg_glass/overview/Loctite-Glass-Glue.htm) it is not recommended for use above 176°F.
If you absolutely need to make a repair/weld, I would suggest using QuikSteel. It's rated to be safe up to 500°F. I would avoid using it within a few inches of the bowl.
http://bluemagicusa.com/index.php/blue_magic/products/164/
http://www.amazon.com/16002TRI-QuikSteel-Reinforced-Repair-Blister/dp/B000FW7UOM/ref=sr_1_1?ie=UTF8&qid=1413473327&sr=8-1&keywords=quiksteel
Pro tip: use this stuff called Quiksteel it's a epoxy/putty and it's exactly what you need and it won't fuck your lungs up when you smoke. Good luck!
If the contact cement will hold it there shouldnt be any shifting.
I use 5 min 2 part epoxy for most of the work amazon link. You can find at most big box stores as well. Its probably overkill but it works well and holds for ever (at least I have never had a flogger fail when using it).
(I also tend to have a tube or two laying around in the wood shop for various projects I end up using epoxy on)
I don't know how handy you are or if the board is still rideable but if it does maybe you can try mending it with a shitload of this. I repaired snowboards with it in the past. If they send you a deck they you can use the old deck to make a DIY board
https://www.amazon.com/Loctite-Epoxy-0-85-Fluid-Syringe-1395391/dp/B000PSAKAW/ref=sr_1_3?ie=UTF8&qid=1467684446&sr=8-3&keywords=epoxy
I've had a few pairs of shoes do this to me, including a pair of platform Demonias. I found that epoxy (this stuff) worked really well to keep the sole on. When mine did it, only the sole came off, and the bottom part of the place where you put your foot stayed whole. Hopefully yours didn't rip or anything. If they did, I don't think epoxy will help without creating uncomfortable bumps under your feet. Good luck!
You probably should use something like this then:
https://www.amazon.com/2-Part-Electrically-Conductive-Silver-Adhesive/dp/B003BDMJSY
But you may need to search for some other options. Not sure how hot you think your mosfets will get, but that particular epoxy should hold up to like 300F.
Epoxy won't be conductive if you're buying regular epoxy. The stuff that is conductive is specifically labeled as such. Silver is a precious metal. They aren't going to add it to normal epoxy glue just for fun.
Compare these for an example:
MG Chemicals Silver Epoxy Adhesive - High Conductivity, 10 min working time, 14 g, Dual Syringe https://www.amazon.com/dp/B003BDMJSY
Bob Smith Industries BSI-201 Clear Quik-Cure Epoxy (4.5 oz. Combined) https://www.amazon.com/dp/B0166FFFD4
You can get Cemedine epoxy on Amazon, but there are lots of 30 minute epoxies out there.
If you can just pop it back on, and you really want to salvage the lid, I'd try high-temp epoxy before giving up. I wouldn't personally worry about it being food-safe, since it's not going to be in direct contact with the contents of the pan.
Just pop the handle back on, mold a decent amount of the putty over the connections, and let it cure thoroughly before use.
Alternately, there's food-safe silicone, which might be easier to work with, though it might not hold up as well under use.
Just don't put either in the oven. They're both supposed to hold up to 400-500F, but I wouldn't trust 'em.
JB Weld works great, once it dries it is very strong. It has little to no odor.
https://www.amazon.com/J-B-Weld-8265S-Original-Reinforced/dp/B01FWGF9L6/ref=sr_1_11?hvadid=241629233883&hvdev=t&hvlocphy=9024550&hvnetw=g&hvpos=1t1&hvqmt=e&hvrand=4321946538073873986&hvtargid=kwd-581086181&keywords=jb+weld&qid=1550378163&s=gateway&sr=8-11&tag=googhydr-20
The only drawback is it is grey when mixed and it is hard to make it not ooze when you push the parts together. So it can be messy.
They have a clear version but haven’t tried it myself, been meaning to order some and try it:
https://www.amazon.com/J-B-Weld-50112-Clear-0-85/dp/B009EU5ZM0/ref=sr_1_10?hvadid=241629233883&hvdev=t&hvlocphy=9024550&hvnetw=g&hvpos=1t1&hvqmt=e&hvrand=4321946538073873986&hvtargid=kwd-581086181&keywords=jb+weld&qid=1550378453&s=gateway&sr=8-10&tag=googhydr-20
I found the same on my Mini Hilal. I'm going to try using JB Weld.
J-B Weld 50112 ClearWeld Quick-Setting Epoxy Syringe - Dries Clear - 25 ml https://www.amazon.com/dp/B009EU5ZM0/ref=cm_sw_r_cp_awd_PppRwbFNCJ3H8
Just off the top of my head, Epoxy Resin. I used it on a bar top and it looks great and very durable. Amazon link
Says you can use it for counters but it's not the easiest thing to apply. You have to be very careful not to get air bubbles while it dries and be careful with the sides.
It's usually something along the lines of bar top epoxy.
hahaha, you can find decent deals I've been using this stuff: https://www.amazon.com/gp/product/B00IT0APVM/ref=oh_aui_detailpage_o07_s00?ie=UTF8&psc=1 which is actually not bad so far. Can't speak to it's longevity yet.
Awesome thank you so much! I'm just starting to watch videos and learn what I can. I am wanting to start attempting to make the exact size and kind of "coaster" you have in this video for Christmas gifts.
So, far I have the following in my "Shopping List"
Are there any of these you would go with or without or a different brand? Am I missing any key ingredients? I've been trying to watch only videos where they list what they are using. I also need to get my head wrapped around how much resin to use and how each color reacts with it.
What I'm doing doesn't need to be fancy. I just want to create something unique and nice for coworkers and family.
Oh yeah. If you need more filling and/or stronger joint, you can get some fiberglass cloth and cut it/tear it into a bunch of 1/4" loose fibers and mix it into the epoxy. Be sure to scuff up the plastic with sandpaper and clean with alcohol for good adhesion.
Epoxy: https://www.amazon.com/Bob-Smith-Industries-BSI-201-Quik-Cure/dp/B0166FFFD4
Fiberglass cloth: https://www.amazon.com/Bondo-20128-Fiberglass-Cloth-sq/dp/B002JRGOT8/
PETG is actually food safe, but the lamination lines will trap food that will spoil.
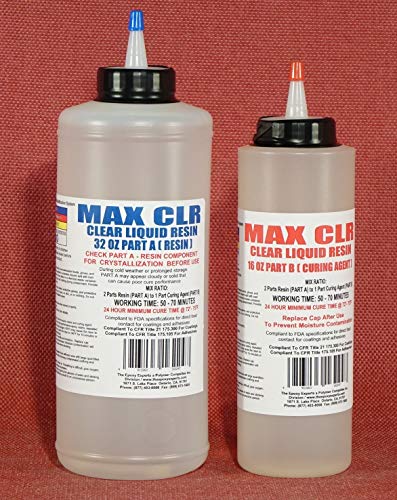
This epoxy resin is food safe, as are several others
https://www.amazon.com/MAX-CLEAR-GRADE-Epoxy-System/dp/B01J16MYSE/ref=mp_s_a_1_1_sspa?keywords=food+safe+resin&qid=1567106734&s=gateway&sprefix=food+safe+resin&sr=8-1-spons&psc=1&spLa=ZW5jcnlwdGVkUXVhbGlmaWVyPUFPNEk5MjY4MERTTEsmZW5jcnlwdGVkSWQ9QTA5OTA1MjIySTQ3WEpURE5HREREJmVuY3J5cHRlZEFkSWQ9QTAzODQ4NDhLRUM1RDJUSldPSjYmd2lkZ2V0TmFtZT1zcF9waG9uZV9zZWFyY2hfYXRmJmFjdGlvbj1jbGlja1JlZGlyZWN0JmRvTm90TG9nQ2xpY2s9dHJ1ZQ==
I'll take a look. I toyed with the idea of selling cookie cutters on Etsy earlier this year, but got super depressed midway during the design phase and never made it to sealing. I got close to a finished model for a few of my designs, but found the gaps around the edges discouraging.
Something like this should work, but you can probably find a cheaper version at Michaels or somewhere.
I second the PETG idea, though. PETG is usually food-safe (we've got a PETG neti pot we bought at the pharmacy, and that goes in your nose), and it holds up to higher temperatures better than PLA so you could totally throw it in the dishwasher.
The other thing you want to be careful of is the brass nozzles might sometimes leach bad chemicals into your cutter. You can get stainless steel nozzles, but they're a bit pricier? They'd be a lot safer, though if you're extremely worried you might want to do the old "into a pot of boiling water" trick to sanitize them.
You could always coat it with clear food grade resin. Here is on I found on amazon.
Edit- Make sure you read the labels to see what kind of food contact it can have. Some things are fine for dry food but not liquids.
Do not use super glue. This will look like garbage, especially if this a plastic or acrylic surface. You can try applying drops of clear epoxy with a fine point as water droplets OVER a matte spray. If its over the spray then it should come clear again (All of the little cavities in the matte spray will be filled in assuming you do this in warmer temps).
Link for clear resin epoxy:
https://www.amazon.com/EPOXY-RESIN-CRYSTAL-COATING-TABLETOPS/dp/B01LWT156B/ref=sr_1_3?ie=UTF8&qid=1510181305&sr=8-3&keywords=Clear+epoxy
https://www.amazon.ca/MG-Chemicals-Black-Encapsulating-Compound/dp/B073JNDRXJ/ref=sr_1_9?crid=2UIWXI428VZR7&keywords=potting+compound&qid=1569736805&s=gateway&sprefix=potting+co%2Caps%2C237&sr=8-9
Okay thanks. I'm leaning towards this one since it says its temp resistant up to 500F, waterproof, and is nontoxic after setting.
Just spend a couple bucks and buy yourself some JB Weld. Fix that shit right up.
http://www.amazon.co.uk/J-B-Weld-Original-Epoxy-Adhesive/dp/B0006O1ICE
Any decent two part epoxy will do. You can order some insanely strong ones from lab stores if you really need it, but start with this.
edit to say: You may want to get a pair of thin plates to sandwich the joint so the epoxy can attach to the surface rather than edge. You can get all sorts in tiny quantities from ebay with no problem.
Do you still have the pieces? If it didn't shatter into tiny pieces, you could definitely try to reconstruct it and glue it back together with JB Weld.
Check out JB Weld. Best damn epoxy ever. Used it to fix a similar problem on an old Dell. Just make sure you clean and sand each piece you apply it to. The sanding is to rough up the surface so you get a better bond.
So. That holder doesn't seem to be the right one for that shower head.
How nice are you wanting this to look vs. the level of function vs. cost and effort you want to put in?
If you want FUNCTIONAL only... I would recommend a big-ass carabiner and some good 2-part epoxy for metal. put the carabiner on that hangar with the epoxy and let that operate as your holder from now one.
Alternative 2: Find a new showerhead mount. Look at the measurements of the products vs. those of the handle on your showerhead. Make sure it fits. Follow the instructions to mount it. TAKE SPECIAL CARE that you either use drywall anchors (which should probably come with the device), or drill it directly into a stud.
Shower Curtain: This is a bit more difficult, because of the positioning of the window and the sink. I would recommend mounting your shower curtain from the ceiling using these. Again, use the mounting instructions that come with them. And for god's sake, when mounting into the ceiling, use drywall anchors. Past that, just get a rod and curtain.
Tools needed for this endeavor include: Small batter operated drill/screwdriver. They are all over amazon for <$50. In fact, if you are TRULY a beginner, here is a cool little set for you. You aren't going to be building any houses with it, but it has some basics you will need around the house. If any of these break, that shows you that you use it enough to warrant something more expensive.
https://www.amazon.com/dp/B0006O1ICE/ref=cm_sw_r_cp_api_7VgCxbJXY6KS5
Use this, buy a new block later when the thermistor dies.
https://www.amazon.com/J-B-Weld-8265S-Reinforced-Hardener/dp/B0006O1ICE/ref=sr_1_2?ie=UTF8&amp;qid=1492996945&amp;sr=8-2&amp;keywords=metal+epoxy
Get some JB Weld and epoxy it back together. I did this with a microwave oven handle and it lasted over ten years. Available at your local *Mart store.
You're looking at $125 to fix it. #8 in the diagram
I would get an adapter like this and epoxy it into the hole using JB-Weld or something similarly temperature resistant.
you can solder the snapped cable if you can get enough exposed to make a good joint, but the frame is broken at a point that is constantly under pressure (which is probably why it broke) and if you use solder to join the ends it will just shear again.
I wonder how the broken frame will hold up with something like this. I have never used it to fix headphones but have been pleased with how well steel-reinforced epoxy works in other high-stress applications.
https://www.amazon.ca/Weld-8265S-Compound-Epoxy-Twin-Pack/dp/B0006O1ICE
First of all, are the cracks down near the bottom corners? If so, there is something you can try. I've seen a "repair," but it was on a polycarbonate container, not on the Tritan material, which your container is, assuming it is a home model from 7-10 years ago. So I'm not if it will work, but you could try it. The repair I saw used JB Weld to reinforce the outside of the corners. I don't know if the JB Weld sticks better to polycarbonate than Tritan, but it's worth a shot if you are looking for a repair.
The other thing you can do is look for a container without blade and lid, and transfer over your blade assembly. There's a wrench you can buy specifically for the task, or you can jury rig something. You have to be careful not to under or over tighten.
KennKatastrophe is right that Vitamix would just replace the container shell.
If you must use super glue, then Loctite is my favorite. However it is brittle and sometimes has problems binding to certain types of plastic.
Epoxy works much better for metal or pewter figurines. For most plastics Tenax 7r is the best.
Maybe some jb weld stuff: https://www.amazon.com/J-B-Weld-8265S-Cold-Weld-Reinforced/dp/B0006O1ICE
I would advise against welding, mainly because of the low melting point of brass. I don't know how your piece is laid out, but I imagine that it would be difficult to keep the heat away from the brass while trying to weld the steel together.
Soldering could work, I don't see why it wouldn't albeit a little frustrating. Brazing is something that came to mind. Another is J.B. Weld. I haven't used J.B. Weld for sealing jump rings, but I've used it as weld filler in a pinch.
Good luck!
I had a thin 4 inch long crack in my XC70 oil pan which leaked oil within 20 minutes. I drained the oil out of the car, let the crack drain out fully, cleaned the outside of the pan and coated almost the entire outside of the oil pan with JB weld. This was 20,000 KM ago and the JB weld is holding strong with no sign of giving up. I also fixed a snow blower engine which had a crack in the head with JB weld many years ago, that snow blower still works.
http://www.amazon.com/J-B-Weld-8265S-Original-Reinforced/dp/B0006O1ICE
Superglue is not a good choice for repairs like this.
Use an industrial epoxy like JB Weld
https://www.amazon.com/J-B-Weld-8265S-Cold-Weld-Reinforced/dp/B0006O1ICE
That's quick curing so I wouldn't use that, but I also have never used that product before either, I just know in general the faster curing stuff is more brittle. just the old school JB weld is what i was thinking.
If you go the plug route, the hot glue on the plug is bound to come loose eventually so I picked up some of this.
Only downside being that the plug will be in there forever
jb weld that shit
It won't have the same texture and will look a bit ghetto. But it will get the job done.
This is a popular method. Also, if it doesn't work, you can use something like JB Weld Epoxy (thanks /u/Boomerkuwanga) to attach another small screw to the top of it, let it set, then screw it out with whatever normal driver works for the screw you attached. I'd heard of this method using superglue, but apparently the JB weld is much better!
I bought this a few min ago. http://thistothat.com doesn't even have epoxies so I figured that epoxies are probably just as strong if not stronger than those.
Buy the Jeff Bezos model
Garden Torch
JB Weld
Airsoft Rifle
If you want an actual flame thrower then give your money to these people X15
Or fill a super soaker with gasoline and save $500.
Try using jb weld or some other type of concrete paste and paste the rod to a drum key. You'll have to throw away the drum key, but it is just an idea.
Get some JB Kwik. Sets up in 6 minutes and cures in 6 hours. Nothing beats good ol' JB weld for gluing stuff to metal.
Thank you a lot for the tip. How do I remove the previous adhesive?
And is this the stuff you're talking about?
https://www.amazon.com/J-B-Weld-8276-KwikWeld-Reinforced/dp/B0006O1ICY
J-B Weld 8276 KwikWeld Quick Setting Steel Reinforced Epoxy - 2 oz. https://www.amazon.com/dp/B0006O1ICY/ref=cm_sw_r_cp_apa_i_4M5UDbA0DT7Q4
Do you mean that the frame is actually cracked? I just managed to glue back a similar frame with J-B Weld 8276 KwikWeld Quick Setting Steel Reinforced Epoxy if that helps. You can see the machine here while the product is setting.
I haven't tried to pull hard on it after glueing it, but so far it seems to hold.
Slow-setting epoxy is an alternative. This one has been serving me well.
What about that 2-part clay compound that hardens into an almost metal like toughness? It could be molded over the bow where its broken and would hold it pretty fast.
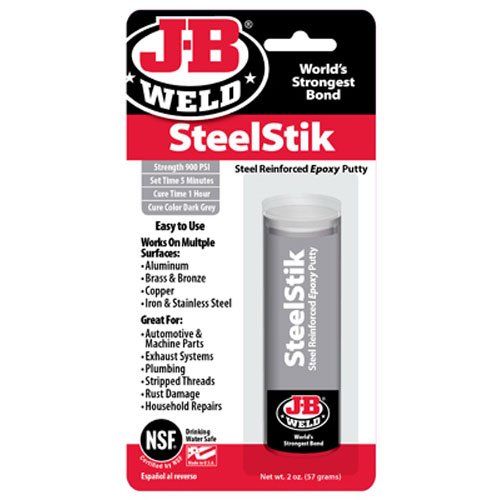
https://www.amazon.com/J-B-Weld-8267-S-SteelStik-Reinforced/dp/B000786GLM
The hole was about the size of a quarter right near the slot for the trigger on the bottom. I had this JB weld putty that is more like clay than the regular liquid JB weld. It was this stuff -
https://www.amazon.com/J-B-Weld-8267-S-SteelStik-Reinforced/dp/B000786GLM/ref=sr_1_6?ie=UTF8&amp;qid=1496607157&amp;sr=8-6&amp;keywords=jb+weld
I'm guessing it's very cheap materials.. I actually had it in a bike shop about 3 weeks back, as I had a recurring puncture problem! And the guy said so much then! I'm hoping I can at least get it to last till the summer, as I'm in my final year of Uni, so as soon as I start working properly, I'll be able to invest in something a bit nicer!
I think it has a square taper, as that's the shape of the bit that slots into the gear bit, if that makes sense?? But I have minimal access to tools, so haven't even managed to get the dust covers off the crank or anything!
I think I might try the epoxy way, and see if it can last the next few weeks at least, as money is really tight at the moment, and I won't be able to afford to get it repaired/ replaced for a few weeks!
At the moment, I've wrapped some fabric tape I had lying around around the thread on the pedal, leaving the top half uncovered, and screwed it back in, and it's holding a lot better than it was! I'm almost not happy to try using it though, as I cycle in Glasgow, and if it did fall off when I was flying down a busy road, then it could be pretty dangerous!
Will look into the epoxy route for now though, with aims to get it replaced when I can! Cheers for the help!
Just been looking and found this:
http://www.amazon.co.uk/J-B-Steel-Reinforced-Epoxy-Putty/dp/B000786GLM/ref=sr_1_3?s=diy&amp;ie=UTF8&amp;qid=1416764708&amp;sr=1-3&amp;keywords=J-B+Weld
Is this the sort of thing I should try?
Ah, I have never dealt with any Fractal cases. Looking at the pics on their site, I see it's not to simple to put a rad on the front since they just use that plastic bracket to hold the fans in. A 280 rad would fit, problem would be how to mount it. If still want it there, you could try some epoxy putty to fill in the gaps and get it to stay after removing all the bracket. Just mount the rad to the case, not the fans attached to the rad to the case.
Has anyone used plumber's putty on higher-draw weight bows to modify the grip?
https://www.amazon.com/Loctite-1999131-Purpose-Repair-Ounces/dp/B000BOB8P6/ref=pd_day0_60_1?_encoding=UTF8&amp;pd_rd_i=B000BOB8P6&amp;pd_rd_r=S17AZ1QRQP3XHQ8KA3MM&amp;pd_rd_w=xNmzf&amp;pd_rd_wg=Qfnqa&amp;psc=1&amp;refRID=S17AZ1QRQP3XHQ8KA3MM&amp;dpID=51eSZk39EIL&amp;preST=_SY300_QL70_&amp;dpSrc=detail
Alternatively, would I be better off using something like Sugru and just build up a bunch of it?
I've got a 60 lb. takedown longbow that I'll be putting this on (it's got a high-wrist grip, I want to change it to a low-wrist grip)-- just want to make sure that it's not going to crack in half as I draw the bow!
You mean the little keyboard feet that raises up the back?
Just repair it
https://www.amazon.com/Loctite-1999131-Purpose-Repair-Ounces/dp/B000BOB8P6/ref=lp_256244011_1_10?s=industrial&amp;ie=UTF8&amp;qid=1524385833&amp;sr=1-10
Yes, get some epoxy putty, like this: http://www.amazon.com/Loctite-431348-Multi-Purpose-Repair/dp/B000BOB8P6 Used it to fix a very similar problem on my 7509HDs, solid as a rock now. Make sure to scrape the plastic a bit before you apply it so it binds well - wrap it around the broken area. I also painted it black afterwards, doesn't look too bad.
Edit: Here's a decent tutorial: http://www.instructables.com/id/Cheap-Fix-Bose-Headphones/
Ding All is overkill for this repair. This is very easy to repair with Epoxy putty that is cheaper and just as durable (if not more) with this size ding. You can get it from a paddle/surf shop for $12 to $15 a tube or get the exact same thing from HomeDepot or Lowes for half the price under Loctite or JBWeld. I keep a tube with me whenever I go out for emergency repairs to keep it water tight.
https://www.amazon.com/Loctite-1999131-Purpose-Repair-Ounces/dp/B000BOB8P6
https://www.amazon.com/J-B-Weld-8277-White-Pack/dp/B000BRQ0TW/
&#x200B;
BluePlanet has decent video showing how to do it. Their Ding Stick is the same stuff as above.
https://www.youtube.com/watch?v=_5SPbD-te7o
&#x200B;
After it dries give the area some sanding. Start around 150 - 180 grit then finish ultra fine, like 220 grit or higher. I've used it a few times on a yellow Naish board, then hit the spot with some Krylon and it's hard to see the repair.
&#x200B;
It's fairly easy if you are just replacing a standard plate with another standard plate. (Mounting on virgin boots, doing a short-forward mount, or things like that get a bit more technical)
Chances are you will need to drill new holes in your boot (often you can get 1 or 2 holes to line up, which is a good starting point). What you want to do is match the centerline of the old plate (kingpin-to-kingpin in the case of a non-symmetrical plate) with your new plate, and marking the axle and toe stop locations on the side of the sole is a good reference for the front-to-back placement.
I use a two-part epoxy stick to fill the old holes.
There was a good beginner's guide that was published in Five on Five a few years ago.
I was speaking specifically of epoxy putty like this, this or this. Will that stuff not work because it might get too hard when dry? Would the silicone actually be better in this case?
Use some putty stuff like this.
I love that stuff, use it on all kinds of shit. Even fixed a crack in my upper intake manifold.
Yup, available at your regular auto parts stores like AutoZone and Pep Boys.
Here is the mobile version of your link
Anyone else think the epoxy (glue bump) is the stinky part of their badger brush? I use 2 part fast-set epoxy from loctite. amazon link. Has that heavy metal stank mixed with sun roasted shit. My brush smells fine until I submerge it in warm water.
Any non stink two part epoxies?
Just today I am carrying my Vista modded to an eyedropper. You would love it!
Then you'll have that gorgeous slosh like this dude
Hmm... yeah it sounds like a dowel won't work. The only other thing I know of that would fill a cavity, bond two surfaces, and hold a screw would be epoxy. Depending on the situation, you may need to do this in steps, and I would definitely pre-drill for the screw, but not sure how to do that if you don't have a drill. I've personally never used epoxy, but something similar to this should work for you:
https://www.amazon.com/Gorilla-Epoxy-85-oz-Clear/dp/B001Z3C3AG
You might be able to find a video or other tutorial showing the use of epoxy on furniture repairs.
I'll definitely make a post and show it off once I'm done, I think it's going to look pretty badass if it turns out like I'm hoping.
Also just went ahead and ordered a tube of this...
https://www.amazon.com/dp/B001Z3C3AG
Not sure I trust the name as much as JB Weld or Loctite, but it supposedly dries crystal clear and I like the idea of that.
This one stupid trick will actually protect you against all exploits spread by USB devices.
this
Epoxy gorilla glue, https://www.amazon.com/Gorilla-Epoxy-Minute-ounce-Syringe/dp/B001Z3C3AG
I waited 24 hours after application to move her.
https://www.amazon.com/Gorilla-Epoxy-Minute-ounce-Syringe/dp/B001Z3C3AG/ref=mp_s_a_1_1?ie=UTF8&amp;qid=1541767455&amp;sr=8-1&amp;pi=AC_SX236_SY340_FMwebp_QL65&amp;keywords=gorilla+glue+5+minute+epoxy
Its kinda expensive so i dont recommend for large terrain. But it dries crystal clear. Adding a drop of paint will give it more than enougj color and make it much easier to pour
they basically used the equivalent of this on a priceless ancient Egyptian artifact.
I'm not sure what he used. There's a ton of them out there. You could try the Gorilla Epoxy for example.
If the arm is about to break after only one day, your best bet would be to contact the seller and see if they'll arrange for a replacement. If the toy is breaking after a day, you could argue that it was defective.
If you really want to fix the toy yourself, your best bet is to use something like Gorilla Epoxy.
https://www.amazon.com/Gorilla-Epoxy-Minute-ounce-Syringe/dp/B001Z3C3AG
This will make a much stronger bond than any superglue.
You'll want to lightly sand the peg and the surrounding area, and then mix up a small amount of epoxy and coat the peg (not the ball). Use a toothpick or something to apply the epoxy to the peg. Let it dry and it should be stronger, but you'll need to be careful with it going forward.
like this? https://www.amazon.com/Gorilla-Epoxy-85-oz-Clear/dp/B001Z3C3AG/ref=sr_1_1?ie=UTF8&amp;qid=1482113709&amp;sr=8-1&amp;keywords=two+part+epoxy
Would something like this do the trick? http://www.amazon.com/dp/B001Z3C3AG
Some kind of epoxy maybe, but when it comes to gluing things, the materials involved are really important.
Some sort of epoxy might work.
https://www.amazon.com/Gorilla-4200101-Epoxy-85-oz-Clear/dp/B001Z3C3AG/ref=sr_1_3?ie=UTF8&amp;qid=1525929780&amp;sr=8-3&amp;keywords=plastic+epoxy
Would this work?
https://www.amazon.com/gp/product/B001Z3C3AG/ref=s9_acsd_top_hd_bw_bHLAlv_c_x_1_w?pf_rd_m=ATVPDKIKX0DER&amp;pf_rd_s=merchandised-search-3&amp;pf_rd_r=RRZQ030G27SHF15P8SYW&amp;pf_rd_t=101&amp;pf_rd_p=0a3c6581-feb2-509a-bd74-91d7d12a5759&amp;pf_rd_i=256244011
This sounds like you only had one problem - you don't have epoxy - you should always have, if anything else, a little dual squeeze tube of locktite (or any) two part oil resin based epoxy. This is basically a pantry item, like (quality) duct tape or super glue
https://www.amazon.com/gp/aw/d/B001Z3C3AG/ref=mp_s_a_1_1?ie=UTF8&amp;qid=1487817131&amp;sr=8-1&amp;pi=AC_SX236_SY340_FMwebp_QL65&amp;keywords=epoxy
Use an epoxy that can withstand high temperatures. i. e. Gorrila Glue Epoxy
I used the following: https://www.amazon.com/gp/product/B003BDMJSY/
TBH, I mostly used it cause the archeology lab in my department happened to have it lying around and one was about to expire. I would have soldered the connections but that would have required drilling two tiny holes into each buttons to gain access and I was feeling lazy. That would have been a more reversible option, which I honestly wish I did just in case I want to change the switches out in the future.
> First - you follow the traces back from the pads, there's a possibility that they go to other, larger, more accessible pads.
the two power traces lead into a pretty chunky component (the rectangular black thing in the youtube) that is pretty accessible, but the two data traces lead into a teeny tiny component (not shown in the youtube, is further south, offscreen) that is in an even tighter spot than the original port location unfortunately.
I guess I could just expose the two data traces somewhere along the line and bridge the gap with very thin wire, but the hardest part would be securing all those little wires to all the tiny pins on the usb micro port, which are placed pretty close together, which makes me nervous.
although if I used the conductive paint to connect these wires rather than solder, it could be much easier. hmmm.
>I've used this technique, complete with silver loaded paint, and it does work. The paint - came in a kit for mending electrically heated car windows.
hm, that's good to hear.
I just bought some of this 2-part silver epoxy off amazon. it got pretty good reviews, and the 10-minute curing time probably gives me enough time to carefully apply it.
I'm going to see if I can use it to connect the port directly to the original trace pads and exposed trace ends, and if that doesn't work, I'll pick up some super thin 40 AWG wire and try to bridge things with that.
http://www.amazon.com/CEMEDINE-minutes-epoxy-adhesive-CA-193/dp/B003F9VWXW
https://www.google.com/search?q=CEMEDINE+high+super+30
I managed to translate the brand as Cemendine (characters in the middle white strip) and while the green characters after the brand name (in black) were partly obscured by glare) knowing that "30" was part of it led me to
Cemedine 30 high super (30 minute epoxy).
Big tube (like OP's): http://www.amazon.com/CEMEDINE-minutes-epoxy-adhesive-CA-193/dp/B003F9VWXW
small tube: http://www.amazon.com/Cemedine-High-Super-30-15g/dp/B0036WCG56
/u/encaseme , I used the handwriting option to write out the Japanese characters with my mouse. image translate can be quite iffy. (I know Chinese, not Japanese).
JB High Heat I've used JB Weld and JB Kwik a lot, but I haven't tried JB High Heat. The cure time is slow enough that you'd need to clip or support the metal strips in place somehow, but it will easily withstand the temperature. JB Kwik cures fast enough that you could probably hold the pieces in place while it sets up, but 300 is the upper limit of its temperature tolerance from what I've read.
Hand vise: IRWINQUICK-GRIPOne-Handed Bar Clamp, Heavy-Duty, 6", 1964711 https://www.amazon.com/dp/B001VND4X0/ref=cm_sw_r_cp_apap_SKWbD2mBTHRZ9
Steel plates: Round Hot Rolled Steel Plate 1/4" x 4" Diameter Circle (Pack of 2!) https://www.amazon.com/dp/B00YWBU1P2/ref=cm_sw_r_cp_apa_Mdufzb3Q4YDXK
Epoxy: J-B Weld 8297 HighHeat 550 Degree Epoxy Putty Stick - 2 oz. https://www.amazon.com/dp/B007PP26RI/ref=cm_sw_r_cp_apa_ieufzbQD017AS
And turns out my stove is way easier to heat up the steel plates. But if you're interested in a heat gun I bought this one: Genesis GHG1500A Dual Temperature Heat Gun Kit, Grey https://www.amazon.com/dp/B00EU2T8GG/ref=cm_sw_r_cp_apa_pfufzbAPGCZ11
Sorry about the formatting, I'm on mobile
Do you think something like this [high heat putty expoxy] (https://www.amazon.ca/Weld-8297-HighHeat-Degree-Epoxy/dp/B007PP26RI) would work well?
> Hey guys, I'm a self-educating DIY electronics fan (not yet too experienced) and I am going to be a volunteer on a makers fair with a goal to lead a workshop for about 40 kids.
> Time: 60 minutes, Budget: about $4, Difficulty: complete beginners, Age: 11+
Fuck, dude. 40 kids, on a $160 budget, all at once... that's a tough ask and it's gonna suck. That's a ton of kids.
I TA'd college sophomores for E&M lab- around 40 kids, 3 hours. You'd be amazed how little progress people make if they're just a little too confused. Even with parents there it's gonna be very hard to get everyone the help they need in one hour, and I'm gonna assume you don't have 40 soldering irons (or even 10-20). If 5 parents have never heard of a soldering iron, 5 more won't pay attention, and 5 will somehow end up grabbing it by the hot end. Anyway, you'll probably want to buy a bunch of mini breadboards. They can also reuse it for other things. Remaining budget: $3.16.
Speaking of reusability- given passives are so cheap, I'd buy plenty extra and give them a goodie bag with a resistor chart and maybe even some basic formulas and diagrams. That way they can keep experimenting at least a little. Generally, I think kids should be using passives and maybe op amps. BJTs are just too hard to use without math, and even 555s are pretty complicated for an 11YO. NAND gates are simple conceptually, but even a large percentage of grown-ass adults in a workshop are gonna lack the focus to figure out which of the 8 indistinguishable pins is the right one to wire up to the other indistinguishable pins. So I'd avoid adders as well, unless they're pre-wired.
Passives at DC are boring. Sorting resistor values is boring. You've gotta try pretty hard to overcome the first and minimize the second. I'm not sure how nerdy and boring this is, but I think one neat idea would be to make an LED controlled by a resistor ladder ADC. It'll require some pretty talented explanation, but if you can successfully do that and build the steps to make it obvious the voltage is halved each time, you're literally showing them how binary works. They can see that and know how a computer translates a binary number into an actual value. You'll have to actually test resistor values to see what visibly changes the LEDs resistance, and it might be better to label the different ladder points by 10s instead of 2s (ie 1 + 10 + 100 + 1000).
I don't think you have enough time and even if you open by stressing that wall voltage will kill you parents may not be a fan of high voltage, but one more complex but way more stunning example would be a Cockroft Walton multiplier. For $2.50 per kid you can get an 18 V supply, which you can turn into AC with a 38 cent LM324N or similar set up as a multivibrator. The remaining 28 cent budget isn't enough to get 5 stages worth of resistors, capacitors and diodes, but if you can swing that then that's ~140 V at the output, and I think it should be able to produce a visible but basically safe arc. It will destroy pretty much any electronics it gets near though. Also if you really tried to get them to understand how it all worked, a multivibrator is like an hour on its own and a doubler cascade is probably another 90 minutes.
Aside from those two I'd try to go for lights (sound would just be cruel to parents) and interactivity. Also, it's too expensive and too slow for this, but NB that conductive epoxy exists- it's actually low enough resistance that you can use it to pass small amounts of current through glued joints.
I wouldn't recommend using that particular adhesive, for decent conduction you'll want an epoxy-style adhesive I've found.
That stuff is even more expensive. http://www.amazon.com/MG-Chemicals-Two-Part-Conductive-Adhesive/dp/B008UH4DB2
Some of the drugs I'm on cause pretty severe hand tremors and I'm still able to solder pretty easily. I think you'll live. Soldering burns hurt like a motherfucker, but they don't hurt very long.
Though this is marketed as conductive, without testing others you don't know that they're not conductive.
Before you replace it, I would attempt to repair it using 2 part epoxy.
I am partial to the "JB Weld" brand, and this variety is perfect for a repair such as this...
Same here.
Adapter: $8
JBweld: $8
Cheap and horrible case for my phone: $5
JB Weld is my go to for epoxy or adhesives: https://www.amazon.com/J-B-Weld-50112-ClearWeld-Quick-Setting/dp/B009EU5ZM0
I've used epoxy from the same syringe probably 5 or 6 times without issue. Note that you will have to mix the stuff from both sides before use - this is likely why it is reusable.
This:
http://www.amazon.co.uk/J-B-Clear-Quick-Setting-Epoxy/dp/B009EU5ZM0/
Drill some holes on each side of the broken part and file the plastic down to be thinner. Get some 4000psi+ epoxy like this ( www.amazon.com/dp/B009EU5ZM0 ) and shape it to how it should look. Make sure to get it through all the holes you drilled so that it has places to hold onto for strength. Wrap it in wax paper and clamp it to hold the broken part together.
Once it dries just file it down to size.
Maybe look into JB weld, or some kind of epoxy?
https://www.amazon.com/J-B-Weld-50112-ClearWeld-Quick-Setting/dp/B009EU5ZM0
use epoxy, they sell it on amazon for a good $8.
http://www.amazon.com/gp/product/B009EU5ZM0/ref=oh_aui_detailpage_o08_s00?ie=UTF8&amp;psc=1
That is the link to the one I used in my down stem repair on my bong.
http://www.reddit.com/r/StonerEngineering/comments/2f2lpz/repaired_my_broken_downstem_on_bong/
Been using this JB weld epoxy without an issue, but I dont want or need instant seal but a strong seal: https://www.amazon.com/gp/product/B009EU5ZM0/
Here is a totally off the wall idea. I have never worked with it myself. But what about creating shallow molds and using poured clear acrylic resin to create your own resin sheets? I have no idea if this would work for you, but people make clear countertops out of the stuff.
https://www.youtube.com/watch?v=w0B9O-o5bMs
http://www.doityourself.com/stry/how-to-cast-acrylic-resin
https://www.amazon.com/Clear-Epoxy-Encapsulating-Casting-Gallon/dp/B00IT0APVM/ref=sr_1_2?ie=UTF8&amp;qid=1495379484&amp;sr=8-2&amp;keywords=acrylic+resin+kit
You need what's called an epoxy resin. They usually come in two parts that you mix together and pour before it hardens. They can be a bit tricky to work with too, so you might want to do some research before you dive in. Something like this (sorry for the link, on mobile).
Clear Epoxy Resin for Bar Tops, Encapsulating, or Casting (1 Gallon) https://www.amazon.com/dp/B00IT0APVM/ref=cm_sw_r_cp_apa_wx2SzbZVJH54W
http://www.amazon.com/Clear-Epoxy-Encapsulating-Casting-Gallon/dp/B00IT0APVM/ref=sr_1_3?ie=UTF8&amp;qid=1453945308&amp;sr=8-3&amp;keywords=clear+acrylic+resin This one says for casting.
You're thinking of something like a resin tabletop? (This is one of the most often referred to)[https://www.amazon.com/Clear-Non-toxic-ArtResin®-Resin-Starter/dp/B011T3CWPC]. It is doable, but honestly I don't think enough people would be willing to pay for how expensive they would need to be. Using the stuff is a very time intensive task.
Disposable or a couple solutions. (with creativity and persuasion). I've seen some FDA approved food safe resin. acetone smoothing, or a polymaker polysher. personally i would go for the resin or some xtc3d
You could try hobby epoxy. Idk about how the heat generated from it will affect the headphones, or if it even will, but the epoxy I use is significantly stronger than hot glue.
(I crashed my RC plane and ripped the tail completely off and repaired it with epoxy. I crashed it again the next week, and the tail ripped off again, 1 inch away from where it had previously been ripped off. Pretty impressive imo.)
Edit: Here are 2 glues I'd recommend: Epoxy, Super Glue. Watch your fingers, this stuff WILL stick them to anything if you get some on them. (speaking from experience)
They make foam safe Super glue but I prefer two part epoxies it’s not as runny and forms a much stronger bond. https://www.amazon.com/Bob-Smith-Industries-BSI-201-Quik-Cure/dp/B0166FFFD4
You may be able to fill it with epoxy. Find a food-safe one. https://www.amazon.com/CLEAR-GRADE-Epoxy-Resin-System/dp/B01J16MYSE
Maybe dip them in epoxy like this stuff
hmm might make the paper too floppy maybe spray and then brush on some epoxy.
EPOXY RESIN CRYSTAL CLEAR 16 oz Kit. FOR SUPER GLOSS COATING AND TABLETOPS https://www.amazon.com/dp/B01LWT156B/ref=cm_sw_r_cp_api_jAc7yb325RB6G
While I know it exists and the process I haven't tried enough types to have much of an opinion.
But this stuff works pretty good: https://www.amazon.com/dp/B073JNDRXJ/ref=cm_sw_r_cp_apa_i_R.7KDbW2FPV8T
Of course someone can make it on their own. You don't even have an argument there. All that is is a bump. I'm pretty sure I could make a bump I'm for banning bump stocks too, but I'm not naive enough to think it'll do that much
and lets not forget that to even get to this point we have banned all semiautomatic firearms, and are now placing additional restrictions as well. Pretty close to repealing the second amendment.
It's not made for metal. You could use jbewld but far warning the stuff can get messy
https://www.amazon.com/J-B-Weld-8265S-Cold-Weld-Reinforced/dp/B0006O1ICE
Super glue maybe? Maybe check out an adhesive called JB Weld . It’s an all-purpose adhesive that works surprisingly well, especially on items that don’t take a lot of strain or pressure.
Stronger repair - http://www.amazon.com/J-B-Weld-8267-S-SteelStik-Reinforced/dp/B000786GLM/ref=sr_1_1?ie=UTF8&amp;qid=1465149984&amp;sr=8-1&amp;keywords=epoxy+putty
Local hardware stores should have putty epoxy sticks like this for $2-3