Best faucet aerators according to redditors
We found 42 Reddit comments discussing the best faucet aerators. We ranked the 23 resulting products by number of redditors who mentioned them. Here are the top 20.
We found 42 Reddit comments discussing the best faucet aerators. We ranked the 23 resulting products by number of redditors who mentioned them. Here are the top 20.


you can get a sink hose nozzle adapter if you would like to use a hose:
https://www.amazon.com/Multi-Thread-Garden-Adapter-Female-10513/dp/B008M6KFD6/ref=sr_1_7?crid=8K7470NSMC5P&keywords=sink+hose+adapter+to+garden+hose&qid=1567541768&s=gateway&sprefix=sink+hose+adapter+%2Caps%2C335&sr=8-7
Depending on the brand, if purchased new, there should have been one included in the carton with the faucet. But then again you wouldn't have posted here if it were in your possession.
Neoperl has a 4-key kit, designed to fit most concealed aerators, available through Amazon: Neoperl 11 9110 5 Cache Plastic Clip with 4 Keys
Of course, you could always contact the manufacturer if you know the brand of the faucet.
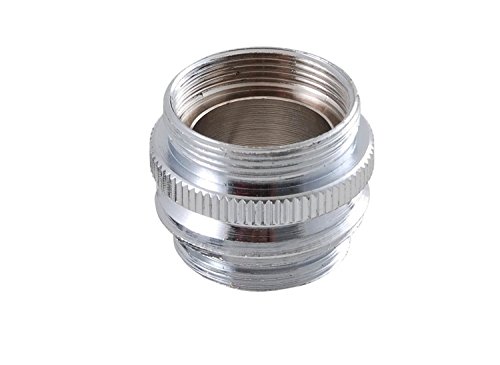
You will need to remove your aerator and replace it with a 15/16 thread x make hose thread faucet adapter.
Like this one.
https://www.amazon.com/gp/aw/d/B00BHZLR4K/ref=dp_ob_neva_mobile
From there you can leave that on and install a new aerator on that too allow for easy switch outs.
I actually just ordered this for a utility sink in my basement.
https://www.amazon.com/gp/product/B008M6KFD6
While REALLY not made for this, I would put one of these on as a half-joke.
preventative maintenance aint hard.
and after 5 seconds of research, heres an AC option
Moen 169031 Optional AC Adapter Service Kit for Moen Kitchen Faucets with MotionSense https://www.amazon.com/dp/B01CNBSLTK/ref=cm_sw_r_cp_apa_i_fSVlDbNY4NCK7
I bought one of those, but my threads are buried in the faucet, so the flange on the one i got prevents me from using it! do you know of one that is a bit longer? FTR i got this one https://www.amazon.com/LDR-530-2050-Aerator-Adapter/dp/B00BHZLR4K/
here ya go
good tidings
They make adapters to do exactly what you're looking for. It requires removal of the aerator on your faucet and then screwing the new adapter on on. Here's a link to one on Amazon.
https://www.amazon.com/Multi-Thread-Garden-Adapter-Female-10513/dp/B008M6KFD6/ref=sr_1_9?crid=B1MW83MF9BEW&keywords=faucet+to+hose+adapter&qid=1563902791&s=gateway&sprefix=faucet+to+hose%2Caps%2C158&sr=8-9
nm, i guess I could use something like this
Hardware stores sell those metal mesh filters (that are meant for faucets and whatnot) for real cheap. If I remember correctly. Something like this, although the link seems expensive
https://www.amazon.com/dp/B00R1IIX5S/ref=asc_df_B00R1IIX5S5111052/
It will be something like this.
Make sure to use natural gas line tape and not pipe tape.
Check it with soapy water for leaks when done.
Hey, sorry about that! I'm messing around with some scripts and was using an autodelete script as a guide. I ran the wrong one and walked away without noticing what it was doing :)
The link is here https://www.amazon.com/American-Standard-923002-0070A-Adapter/dp/B002J3KY5W
I found it via Google. I did a search and came up with a bunch of nonsense but Google was kind enough to suggest "did you mean 923002" and it came up.
GAME CHANGER
https://www.amazon.com/gp/product/B00BHZLR4K/ref=oh_aui_detailpage_o02_s00?ie=UTF8&psc=1
Connect this to a faucet in your hose (preferably the sink by the tub, so you can drain there) and connect your hose connection on the wort chiller tubing to it.
Pretty sure this is what you're after
LDR 530 2050 Faucet to Hose or Aerator Adapter Lead Free https://www.amazon.com/dp/B00BHZLR4K/ref=cm_sw_r_cp_api_mVAKzbPBW7GZP
If you can verify that there's pressure behind those caps, i.e. that they're plumbed into the main system but sealed, then it will be very easy to finish. Any plumber could do it in 45 minutes max.
The drain too, just requires a fitting glued on to accept the chrome or plastic P-trap from the sink. That's even easier...like 10 minutes.
If you're wanting to get into this a little, go ahead and do this:
Buy a drain trap, and a suitable adapter for your drain pipe (probably 1.5" PVC, but possibly 2". Can't tell from the photo. Measure the outside, and tell the home labyrinth attendant, he'll get you the right one.). That'll get your drain attached, as long as there's one in the sink. If not, you need a sink drain to attach to as well.
Then get yourself this sink kit. This is what lets you connect your hot and cold supply lines to the faucet. No soldering required, just a clean end, push on, and you're done.
If you want to be sure this is hooked up right: turn off the water to the whole house and relieve pressure by turning on a faucet that runs. Make sure no other faucets run at all. Take a hacksaw and cut off the cap, staying as square as you can. Have a bucket ready, and have someone else SLOWLY turn on the water. If you get water out of both pipes, you're golden, and you're ready to proceed with the sink kit above. If not, slap a couple of these end caps back on the pipes and call a plumber...it needs more work.
A 0.28 second Google Search would have shown you they have...
Since you said you're interested:
After many hours of research and planning, I have concluded the cheapest, and, strangely enough, easiest solution for a basic setup, assuming you are starting with nothing, is simply to get one of these. Unscrew the aerator from the kitchen faucet, screw on that part, and attach the water hose to the other end.
Again, assuming you're starting with nothing like me, all parts combined when going with other solutions would cost approximately $40 and up, including using 3/8 tubing and fittings. And that's for the absolute bare bones food safe setup.
I didn't have a garden hose, so that was the most costly expense. I decided to go with this one. Those two parts put me at $24 and some change, plus another $7 for shipping. For about another 50 cents, which would put me over the $25 total, I could get free shipping. So I got some desoldiering wick.
Total project cost: $27.xx
Estimated time to install: About 5 minutes (rounding up for estimated time spent goofing off)
Final note: There were several people reporting sharp edges on that adapter. If you get it, my advice is to wear thick leather gloves, and attach the adapter to the hose first. Then wrap it in several layers of duct tape so when you need to attach/detach it from the faucet, you won't need gloves and it won't cut up your hands.
Probably something like this, along with a garden hose faucet adapter kit for your sink.
Often RO systems require a minimum pressure to operate and require a booster pump.
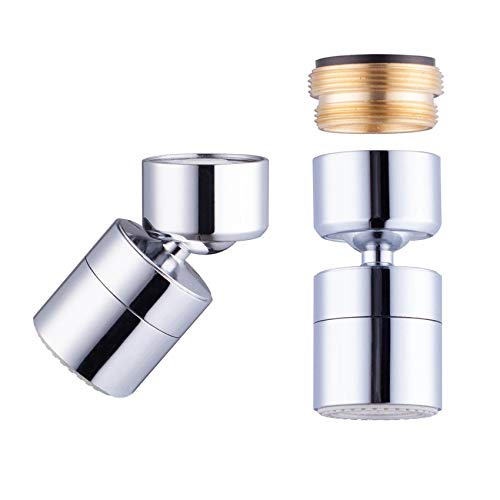
May not look the best but the make an aerator that swivels and this would redirect the water flow .
Hibbent Dual-function 2-Flow Faucet Aerator, 360-Degree Swivel Aerator with Dual Spray, with Gasket Faucet Replacement Part - 15/16 Inch - 27UNS Male Thread - Swivel https://www.amazon.com/dp/B01LCPXAKS/ref=cm_sw_r_cp_api_SOMoyb0EEX8D1
BrassCraft SF0320 Dual Thread Double Swivel Spray Faucet Aerator with 1.5 GPM Low Flow https://www.amazon.com/dp/B00K3VS44A/ref=cm_sw_r_sms_c_api_vPMoybSC1VWJ3
They have I have seen them before in a resaturant or bar or something (I was drinking so it was the best thing ever for a good while), but I just gave a quick look and they have similar thing on Amazon http://www.amazon.com/Hands-Toilet-Flusher-Pedal-Adapter/dp/B0018RVWZ6
They can be, for $10. That's what we have and it's awesome.
T&S Brass 015425-45 Dual VR Aerator Key https://www.amazon.com/dp/B00DVSJD5Q/ref=cm_sw_r_cp_api_i_obBrDb7V8CTNJ
Sorry I'm late to respond, but if you want to reply to someone, you need to click the "reply" link under their comment. Then add your comment as a reply to them, it will notify them you replied, and they'll know the reply is for them.
This reply is probably a bit long, lol. But I'm bored, so I go into some detail, and give some suggestions on tools n' such you can use for various things. You don't have to use them, obviously.
===
====
I do my mashing in a 5gal stainless steel pot, and I do my fermenting in these 5gal buckets (foodsafe from Home Depot). I use these lids, as it has an extendable spout which is the perfect diameter for a No. 7 size drilled rubber stopper, which I stick the airlock in.
For the actual mashing process. I do the following. So, not far off from what you do, except the starting temperature, since going above 161F can damage some of your enzymes and slow things down. These steps haven't failed me yet.
I mix up the yeast culture as soon as I hit the 150F temp of the mash, by pouring the yeast (1tbsp) into 2cups of warm water with a pinch of sugar, a pinch of DAP (aka diammonium phosphate), and a pinch of Magnesium sulfate (aka epsom salt, I bought at walmart in a large jug). Then I just let it sit while the yeast rehydrates and starts doing it's thing. When the mash is down to around 80F, I pour that mash into a sanitized 5gal bucket, then when it hits between 75F to 70F, I pour the yeast mix into the mash in the bucket, close the lid, put in the stopper+airlock, and leave it alone for about 3 days, before I check on it.
When I check on it, if it has slowed down significantly, or is stuck. I do the following:
That usually accounts for all the stuck fermentation issues.
===
===
Hope this helps!
You can insulate pex just as easy as copper, just an FYI. But more to the point, it sounds like you're being energy conscious which I think is awesome.
What's the flow rate of your sinks faucets?
If you're remodeling maybe it's time to reduce the pipe size to a minimum for the flow rate and run separate home runs from each device to a manifold.
Take a read through this.
http://www.garykleinassociates.com/PDFs/15%20-%20Efficient%20Hot-Water%20Piping-JLC.pdf
Another alternative, if you're using really low flow faucets, might be able to put in faucet aerators with a switchable flow rate, such as this.
https://www.amazon.ca/Niagara-Conservation-N3610CH-Water-Saving-Standard/dp/B0096C2IVC/ref=mp_s_a_1_1?ie=UTF8&qid=1538264957&sr=8-1&pi=AC_SX236_SY340_FMwebp_QL65&keywords=Niagara+faucet+aerators&dpPl=1&dpID=418PdF5l0XL&ref=plSrch
I wish they made one of these for the kitchen that would go down to 0.5gpm and up to say 5gpm for things like pot filling.
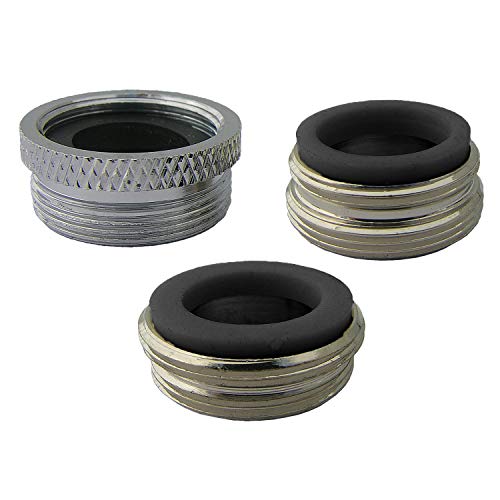
$10 sink adapter would have worked, or this adapter for even cheaper depending on your sink
These might help you out.
Is this correct? https://www.amazon.com/Danco-Multi-Thread-Aerator-Adaptor-10513/dp/B008M6KFD6
DANCO Multi-Thread Garden Hose Adapter for Male to Male and Female to Male, Chrome, 1-Pack (10513) https://www.amazon.com/dp/B008M6KFD6/ref=cm_sw_r_cp_api_i_lxD5CbBNCCHWR
I use this to fill up the kids’ splash pool. Maybe it could work? Depends on your sink.
Otherwise, I’ve taken a big pitcher and slowly filled it. Not fun!
Are you sure that you can't unscrew the aerator from either the kitchen or bathroom faucet and use a hose adapter?
Or perhaps there is a clothes washer hookup you could tap into.
https://smile.amazon.com/dp/B0074II66G/ref=dp_cerb_2
different one that does the same thing.
Thanks, appreciate the input.
Any chance you could help me find the HDPE 1" brass barb fitting online? I'm going to check my local hardware stores on the way home but not sure how common this fitting is.
And just so I'm sure, I'll need this 1" brass barb to go into the well's HDPE pipe, then the other ends threads into a 1" brass 90, then it would be whatever PEX connection to the other end. Does that sound right?
So far, just for reference, I've found a barb fitting, brass 90, PEX from 90
Am I close?