Best firewire cables according to redditors
We found 35 Reddit comments discussing the best firewire cables. We ranked the 26 resulting products by number of redditors who mentioned them. Here are the top 20.
We found 35 Reddit comments discussing the best firewire cables. We ranked the 26 resulting products by number of redditors who mentioned them. Here are the top 20.


Ok!
So it's a late 2018 (December) Ender 3 Pro. I got it from Mech Solutions. They have been super helpful with some warranty stuff. (Magnetic bed delaminated and heat break/throat tube was broken.) https://www.mechestore.com/collections/ender-3-pro
Galactic Empire gears here:
https://www.thingiverse.com/thing:3422334 (I remixed this one!)
https://www.thingiverse.com/thing:3005278
The braided cable stuff is from Amazon, here: https://www.amazon.ca/gp/product/B071WF5NTN/ref=ppx_yo_dt_b_asin_title_o01__o00_s00?ie=UTF8&psc=1
I bought three sizes, 1/4", 1/2", and 3/4". I hated the Pi camera cable, luckily it fits perfectly in the 1/2" stuff. I found uses for all three sizes in different locations. The 1/4" looks cool on the bowden tube. I used heat shrink (or electrical tape) at the ends.
Hotend cooler is Hero Me with a velocity stack (stack purely for my own entertainment)
Hero Me: https://www.thingiverse.com/thing:3182917 - I used the stock 4010 blower version in the end. I was going to do the dual 5015 mod but the two Amazon fans I got were both defective.
Fan is a Noctua 4020 - from here: https://www.amazon.ca/gp/product/B071W93333/ref=ppx_yo_dt_b_asin_title_o07__o00_s02?ie=UTF8&psc=1
** tech note - I added a 12v system running in parallel with the OEM 24v Ender system - more below
Velocity stack:
https://www.thingiverse.com/thing:2211780
Someone spotted it, on the left I have a Raspberry Pi 3B+ running OctoPi (Octoprint):
https://www.amazon.ca/gp/product/B07BD3WHCK/ref=ppx_yo_dt_b_asin_title_o03__o00_s00?ie=UTF8&psc=1
and a 3.5" touchscreen TFT LCD:
https://www.amazon.ca/gp/product/B07KLDKM5D/ref=ppx_yo_dt_b_asin_title_o06__o00_s00?ie=UTF8&psc=1
and a Pi compatible camera:
https://www.amazon.ca/gp/product/B0759GYR51/ref=ppx_yo_dt_b_asin_title_o03__o00_s00?ie=UTF8&psc=1
with longer cables:
https://www.amazon.ca/gp/product/B07DNYM8KC/ref=ppx_yo_dt_b_asin_title_o02__o00_s01?ie=UTF8&psc=1
The camera needed a mount:
https://www.thingiverse.com/thing:2886101
and an off-brand sleeve:
https://www.thingiverse.com/thing:2994762
The Pi needed a mount too, and I found one I love that just happened to fit the screen I bought:
https://www.thingiverse.com/thing:2530258
** user note - this thing is massive, and tricky to print. Worth it, though.
OH. THIS IS A MUST:
https://www.thingiverse.com/thing:2943218 xD
All metal extruder, conveniently in red, from here: https://www.amazon.ca/gp/product/B07JVJWC5B/ref=ppx_yo_dt_b_asin_title_o04__o00_s00?ie=UTF8&psc=1
** tech note: if nothing else, do this upgrade. This, and the one just above it. Mine was under extruding, and I poured hours into trying to calibrate/test/bla bla bla... it ended up being a broken heat break and crappy plastic extruder.
Filament guide (top rail)
https://www.thingiverse.com/thing:3003807
At extruder:
https://www.thingiverse.com/thing:3303562
Z-Axis bar cable management:
https://www.thingiverse.com/thing:2761965
** user note: this is one of my favorites!!!!! I covered it in LEDs, white for the bed, and red for the wall/bowden tube!
Ok, so, something that made getting good fans difficult is the Ender 3 uses 24v fans (except the power suppy, it uses a 12v fan. Bonus.)
To get some 12v power, I used a buck converter to step 24v down to 12v from here:
https://www.amazon.ca/gp/product/B01FQH4M82/ref=ppx_yo_dt_b_asin_title_o07__o00_s01?ie=UTF8&psc=1
and basically I run all the fun stuff off it.
JST and XT60 connectors are all from www.hobbyking.com. Same with 22AWG three wire servo wire, super handy. I already had this stuff kicking around, but hobbyking is good if you need this stuff.
The PSU has some open ports, I added another XT60 cable with 24v service. I made it the same as the OEM, and they are backwards compatible and nothing will fry. One of them goes to my buck converter, the other to the Ender main board.
** tech note: I used a 3.5A BEC from hobbyking to power the Pi, off the 12v side of the buck converter. I ended up cutting the power supply cable that came with the Pi (and added JST connectors to the whole thing so I could reuse it one day.) The BEC steps the voltage down to 5.1v from 12v. 3.5A has been plenty. I think it might use .8A with my giant RGB keyboard plugged into it.
This is super worth it, a must do. https://photos.app.goo.gl/AEXNqvTXE5ZZhnhi8
Oh, the nice little platform the buck converter and Pi cooling fan is sitting on is this thing:
https://www.thingiverse.com/thing:2539545
more below: (above?)
USB to FW isn't a thing.
This is what you want: https://www.apple.com/ca/shop/product/MD464LL/A/apple-thunderbolt-to-firewire-adapter
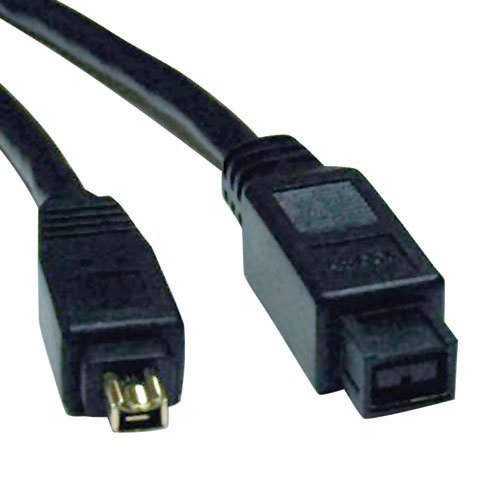
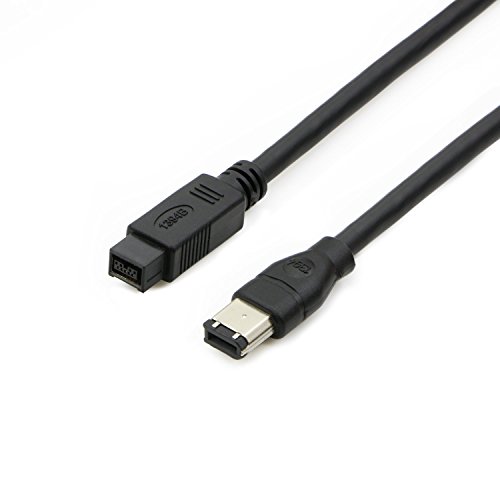
Then a Thunderbolt 400 -> 800 cable. Like this: https://www.amazon.com/PASOW-FireWire-Cable-Firewire-9-pin/dp/B00X65XHZG
Given that the file system on a Windows-formatted iPod is FAT32, Macs should have no problem accessing it, both reading and writing data to the drive.
Connecting said iPod to a modern Mac is another story.
It will require three items:
DV uses Firewire for transfer, so you need a Firewire to Thunderbolt adapter and a 4-pin Firewire to Firewire 800 cable.
Plug the cable into the DV Output of one of your camcorders, open up an NLE in tape capture mode on your Mac, and you're good to go.
The USB output on DV camcorders is usually for using them as very low-resolution webcams and/or transfering still images off memory cards.
DONGLE^3 - Thunderbolt 3 to Thunderbolt 2 - Thunderbolt 2 to FW800 - FW800 to FW400
This is kinda a dumb way to do it, there are also Thunderbolt 3 Docks that will give you a Firewire port.
You can get an interface with native USB-C/TB3, I just went with a cheap USB-C to A cable for my old USB 2 interface.
The original iPod uses a FireWire 400 cable. It's highly unlikely you got one of those, but if you did: good job.
Assuming you mean iPod Classics or older touch models, you just need an Apple 30-pin dock connector.
[7th gen iPod Nano](https://i.ebayimg.com/00/$(KGrHqZ,!j!FBt9yFqU9BQh,vUd0sw~~_35.JPG?set_id=89040003C1)s and 5th and 6th gen iPod Touches use the same lightning connector that the iPhones do.
Side note: Apple products are typically stylized as camel case with the i lower case and the name upper case: iPod, iPhone, iMac etc.
its really easy,
below is an image that might be a better example.. from hasu (guy who makes TMK firmware and keyboard converters) ..the difference is in the ibm example the wires arent coming out of a coiled cable, but from a connector on the pcb within the keyboard where the cable connects to ( as seen here, the breadboard part isnt needed, it is just the method i used, his method below is much better! http://i.imgur.com/YuIYoQx.jpg )
hasu example of how easy it can be done: http://i.imgur.com/Z29rhW1.jpg
you need a teensy 2.0 with pins (suggested easiest choice), some 1K ohm resistors, and breadboard jumper cables that have female ends on both sides.
should be able to get this for for around $30
https://www.amazon.com/royfee-LYSB01LZ98KUX-ELECTRNCS-Teensy-with-Pins/dp/B01LZ98KUX/
https://www.amazon.com/Breadboard-Jumper-Wires-Aoyoho-Multicolored/dp/B01GK2Q4ZQ/
https://www.amazon.com/Watt-Carbon-Film-Resistors-pack/dp/B00EV2QC96/
now, you could probably get this junk much cheaper ordered from china on ebay..... or by avoiding a teensy and going with a different microcontroller.....
but for ease of use and not waiting 6 weeks for delivery..this is the easiest.
with this, you get the wires and the teensy..... hook it up sort of like in the picture (the pins are different locations for the ibm4704)
then you make your layout here:
http://www.tmk-kbd.com/tmk_keyboard/editor/unimap/?ibm4704_usb_alps
it spits out a hex file
and you upload it to your teensy using the software here:
https://www.pjrc.com/teensy/loader.html
no compiling needed, no 'toolchains' needed, no soldering needed.
if you want to compile firmware to get more options, you can, if you want to solder you can...... but you dont need to.
if you run into troubles reply here, or message me., ..i can help.......
also, on geekhack, hasu (and others) are really helpful
https://geekhack.org/index.php?topic=54706.0
the page below shows what pins go to which on the teensy, in the 'connector/connection' section, by taking off the cover of the big fat 'IBM' logo plastic on the end of the db9 cable (as seen here, its easy two screws: http://i.imgur.com/FmFcSQz.jpg ) you will reveal the colors of the wires, knowing the colors and location of the wires/pins youll know which pins on the teensy to connect up on the pcb connector (shown as the first image of this reply) on the keyboard:
https://github.com/tmk/tmk_keyboard/tree/master/converter/ibm4704_usb
If you can find a working "Canon MiniDV Camcorder ZR50MC," I can assure you the bottom two methods will work. It is super important that you get a miniDV camera that supports SP/LP and ESP/ELP (the one listed above does)- the two tapes on the right have the "SP/LP" symbol on them and getting a regular miniDV camcorder that can only record in "SP" won't be able to read the tapes if they're recorded in LP or any of the other formats. The one I listed is the same miniDV camera that I use from time to time to back up old family videos and have a vintage/home-style look for newer videos.
Best Method (for Best Quality)-
If you're lucky and they're all recorded in SP (which would be the most "convenient"), then you can connect the miniDV camcorder to an old MAC laptop that has a firewire port (now a discontinued port).
You would need this cable, should you use the same camcorder: https://www.amazon.com/dp/B00403XML2/ref=psdc_3236443011_t2_B000SMZDIY
SP stands for "standard play," which is the highest quality mode for these tapes and the one that can actually be read by the old Mac laptops. Old tech needs old tech. It be like that sometimes.
Then, you'll have to transfer them into iMovie, put them into the timeline, arrange them, and finally export the final clip/s.
Other Method (Lower Quality):
If they're all recorded in LP or "extended" SP/LP modes, then you're gonna have to use a capture device like an Elgato that connects to the standard RCA plugs from the miniDV (yellow, red, & white). This is because LP and extended SP/LP are different formats that can't be read through the Firewire port, or anything, really. They'll only be read by the camcorder, playing on the little screen or acting as a VCR to transmit it to your television. You can also use this method with the Elgato capturing device for the regular SP mode if you don't have an old MAC, but it will lower the quality. This is because you're basically recording a recording.
I hope this helped! I had a struggle learning all of this the hard way. Elgato really is one of the best ways to go if you can't do the first method.
Looks like a FireWire 400 in the picture in the lower right.
Lower left looks like a power source.
If that cable in the lower right is a FireWire 400 you will probably need some kind of adaptor to plug the camera into your laptop. Something like this
https://www.amazon.com/Firewire-Adaptor-Converter-Connections-Computer/dp/B01LZDIL2C/ref=mp_s_a_1_15?adgrpid=53543425622&gclid=CjwKCAjw5pPnBRBJEiwAULZKvhfhODzlJThDnvFS40rR31lKA_TcqqvELI-Mb1oz0hRLdMi6Ln3AwBoCvXoQAvD_BwE&hvadid=274736596003&hvdev=m&hvlocphy=9030984&hvnetw=g&hvpos=1t1&hvqmt=e&hvrand=12410723355872354868&hvtargid=aud-647846986441%3Akwd-301897564495&hydadcr=19029_9444901&keywords=firewire+400+to+usb&qid=1558555397&s=gateway&sr=8-15
Skip the msata. I have the msata adapter, and at one point used a 1TB msata drive. The reliability was terrible and the drive constantly currupted.
Plus I needed this cable just to sync it with 130gb of music. The firewire plugged into the wall adapter, the USB plugged into the computer. Only then could it draw enough power to write 130gb of music in many hours of continuous syncing. I vote for skipping msata, and going IFlash quad. Easier, saves space for battery, and more reliable.
New For iPod Firewire 1394/USB Y Cable - Dock Connector https://www.amazon.com/dp/B000S6CEC8/ref=cm_sw_r_cp_apa_i_9AOQDbCBCQQRD
Well man, I don't know what your budget's like...but there's this thing on Amazon.
It's not cheap, but seems to do exactly what you're looking for.
That is a Firewire 800 port.
https://images-na.ssl-images-amazon.com/images/G/01/electronics/detail-page/B000AAZQM2-F019-006-features-LG.jpg
No, it has a 4pin CPU but it does have the 8pin GPU. Right now I only have the 4pin CPU connected to the board which hasn't been an issue, but that might explain why the R5 3600 is slightly underperforming in benches. Thanks for the reminder! I'll be getting this 4pin to 8pin adapter: https://www.amazon.com/uxcell-Power-Extension-Cable-Motherboard/dp/B0725VRN3B/ref=sr_1_9?crid=3A02QMGW22Z5N&keywords=4pin+to+8pin+cpu+power+cable&qid=1574876377&sprefix=4pin+to+%2Caps%2C141&sr=8-9
For the GPU I looked all over for it, and found one on Ebay that I bought for $600 USD; Gigabyte Aorus Gaming Box RTX 2070. The enclosure box I'll likely sell separately as it'll support pretty much any GPU if you only use the internals. Fetches maybe about $150-200. https://www.ebay.com/itm/GIGABYTE-AORUS-GeForce-RTX-2070-GV-N2070IXEB-8GC-8GB-256-Bit-GDDR6-Gaming-Box/333403796181?epid=11031083053&hash=item4da06a32d5:g:dAoAAOSw3F5d050W So if you tabulate that, it's about 400-500 for the card, which is not so bad. It's extremely hard to find these days even the Retail version and I found them upwards of 700-1000 because of the lower volume. I even considered the 2060 Super, but that was about $600 new.
For the Scythe Kaze Hachi 80mm fans, I have found them on AliExpress. https://www.aliexpress.com/item/4000025852422.html?spm=a2g0o.productlist.0.0.df7d49e7R290SU&algo_pvid=677c12ac-a015-40e1-a548-c9f87cdbfb93&algo_expid=677c12ac-a015-40e1-a548-c9f87cdbfb93-0&btsid=ee7cd2fd-cd8f-4e41-acd9-1ee4e1bc70fd&ws_ab_test=searchweb0_0,searchweb201602_9,searchweb201603_55
Also, is this what I want?
http://www.amazon.co.uk/FireWire-Gold-Plated-1-5m-Cable-IEEE/dp/B0044M0CWQ/ref=sr_1_1?ie=UTF8&qid=1408835742&sr=8-1&keywords=firewire+400+to+800
I have solved this problem for myself. New iMac instead of MBP, but still using a USB-C port. It may seem a little intense, but this method works, and it works better than any cheapo Chinese VCR to USB dongle you can buy online.
Here's the hardware and software you'll need to get a good capture:
Hardware
If you're looking to just capture the VHS, ignore all the uber-elite perfectionista online. Get a working VCR, and clean the video heads if you feel confident enough to do so.
This is the box that your Mac will recognize as video playback hardware, and that MacOS will support for capturing without paying extra for software. Worth the price, I promise you. This is the investment part of the process, and is what enables your Mac to even see your VCR. This is the most important piece of hardware.
Don't be tempted into buying composite to HDMI/DVI/USB/USB-C/Thunderbolt. Plugging these into your VCR then into your Mac will result in failure -- your Mac won't detect that it's connected into a VCR. You'll be plugging this into your ADVC,
Capture Software
Hooking Everything Up
Capturing
Here's a video of the Capturing process in action: https://youtu.be/VFy-gAJ3wtk
Good luck!
https://www.amazon.ca/Ribbon-Flexible-Raspberry-Module-Camera/dp/B07DNYM8KC/ref=mp_s_a_1_2?crid=31H39GB6FEDKX&keywords=pi+camera+cable&qid=1555453102&s=gateway&sprefix=pi+came&sr=8-2
Here man! This is what i bought for my pi 3 b+, you get 3 set of cables with different lengths.
I would think that firewire to USB would be awful.
http://www.amazon.com/Firewire-Ieee-Ilink-Adapter-Cable/product-reviews/B0049DJ0JG/ref=dp_top_cm_cr_acr_txt?ie=UTF8&showViewpoints=1
Your milage may vary, but it looks like your laptop doesn't have a PCMCIA slot either, so I'd say you're pretty limited. Not sure what your best bet is.
https://www.amazon.com/Firewire-Ieee-Ilink-Adapter-Cable/dp/B0049DJ0JG
A cable such as that should be all you need to connect a MiniDV deck to your iMac, Apple also makes adapters that’ll allow you to go from FireWire to thunderbolt.
A FireWire port Forgot about this?
this is an add on item but its exactly 1.11
EDIT: if that one doesn't work because its an add on there's always this one
I found this
peanut butter and jelly sandwich
What his camera has is a 4 pin FireWire 400 jack.
FireWire (unlike USB) could control cameras.
What you need is a converter to your existing mac.
The age of your mac will dictate what you need on the other end.
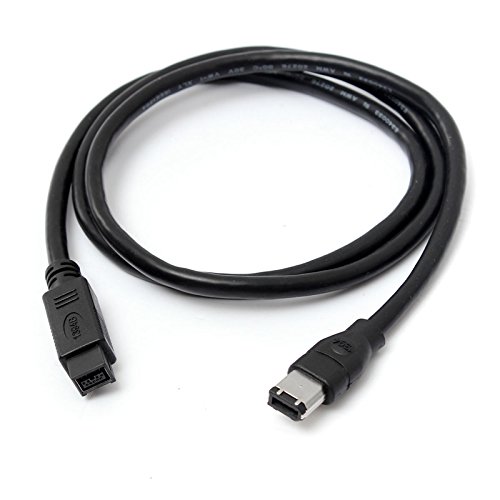
Here is from Amazon, a 4 pin to firewire 400 cable.
Same thing, but to FireWire 800
Most Macs no longer have firewire, but rather have thunderbolt. If your mac runs into that category, you need the 4 pint to firewire 800 AND the Apple firewire to Thunderbolt cable.
Some kind of firewire video cable.
https://www.amazon.com/SANOXY%C2%AE-4-pin-iLink-FireWire-Cable/dp/B000SMZ9E2
This is the cable you would need but you need to have a firewire port on your computer
Is this the right cable? question. I wish to connect them correctly the first time. All I want is a single mic input to my DAWs. (Studio One 3/Reaper) Thanks for your time.
iMac is Firewire 400 ports.
The Digidesign Digi 002 Rack has 1394 ports.
There are some other brands of cables on this page, too. I'll need to get from Amazon directly and in-stock.
https://www.amazon.com/foot-silver-Firewire-Cable-devices/dp/B000E8HUNS/
The camcorder does have a DV out port. Why does it have to be Firewire though? I'm on a notebook computer with no expansion slots, so I can't add any more ports. Could I use a Firewire to USB 3.0 adapter?
EDIT: I found this cable which says it is compatible with Sony iLink, which my camcorder uses. Does this mean that I can use this cable to connect my camcorder to the Firewire 800 port on my MacBook? Will this work? I have Windows running on my Mac, so Windows software wouldn't be an obstacle.