Best flooring & tiling accessories according to redditors
We found 130 Reddit comments discussing the best flooring & tiling accessories. We ranked the 56 resulting products by number of redditors who mentioned them. Here are the top 20.
We found 130 Reddit comments discussing the best flooring & tiling accessories. We ranked the 56 resulting products by number of redditors who mentioned them. Here are the top 20.
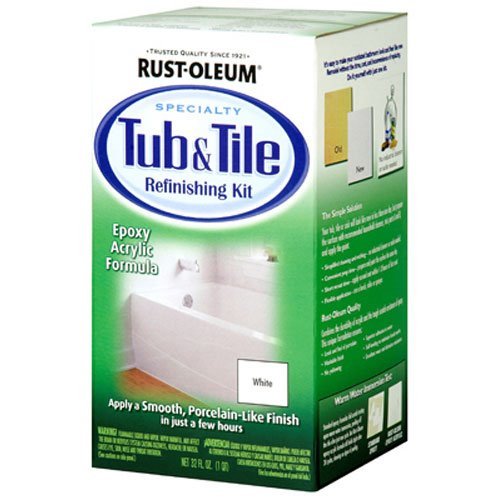


Rust-Oleum 7860519 Tub And Tile Refinishing 2-Part Kit, White https://www.amazon.com/dp/B000PTSBKW/ref=cm_sw_r_cp_apa_i_2jm1Bb4AAERTQ
I got both from amazon. They work so well.
Chemical Guys CARPET BRUSH W/DRILL ATTACHMENT - MEDIUM DUTY - YELLOW https://www.amazon.ca/dp/B003TU662Y/ref=cm_sw_r_cp_apip_k3zKwCmEwanvm
ULTIMATE GROUT CLEANER: Best Grout Cleaner for Tile and Grout Cleaning, Acid-Free Safe Deep Cleaner & Stain Remover for Even the Dirtiest Grout, Best https://www.amazon.ca/dp/B000Y232BI/ref=cm_sw_r_cp_apip_EIDdNrQ4jYuhS
Found on Amazon
That's hardwood, my man! Refinish that floor!
Rent a drum sander and a floor edger, start at 60 and sand in line with the boards, 80 diagonally across, then 120 in line. Stain it up (I prefer Old Masters - avoid Minwax), wait 72 hours, then seal with a catalyzed two-stage sealer like StreetShoe NXT. Anything from General Finishes is also great stuff (both their stains and sealers are great).
After you do your first pass with 60 grit, fill any gaps, nail holes from the tack strip, or imperfections with a trowelable wood floor filler like Bona Pacific Filler or Rust-Oleum Parks (NO PLASTIC WOOD ON FLOORS). If you need to plug holes where wiring may have been passed through in the past, use corks.
Also a good time to refinish or replace baseboard. The whole project will add good value to your home and will look so much better than carpet.
Hah, I like them but I understand that other people don't. The finish is really simple, just a few coats of this Osmo oil/wax.
Tell your pops I used this stuff on my tub and it came out nice.
Couple tips: The directions say to use like 400 grit sandpaper, screw that, I tried that for almost 20 minutes and it wasn't doing a thing. I went down to like 150 grit. Real rough stuff. And it gouged the surface right up. I would periodically wipe the dust off with a damp cloth, then dry the surface and start sanding again. I think I sanded for just over an hour, taking a lot of short breaks to catch my breath since it was a pretty good workout. Once most of the gloss was gone and it was pretty well gouged up I applied the epoxy. People in the reviews complained about the vapors from the epoxy. So I setup two fans, a box fan blowing out the window and another fan blowing right at my head (the toilet's at the perfect height for this ;-)) And I felt completely fine breathing normally. It's been about a year and it's holding up great. Though we have babied it, just cleaning it with soap and water and a soft sponge, but it stays clean fairly easily and still looks great. Highly recommended easy DIY job for an old tub.
Ive used one a few times:
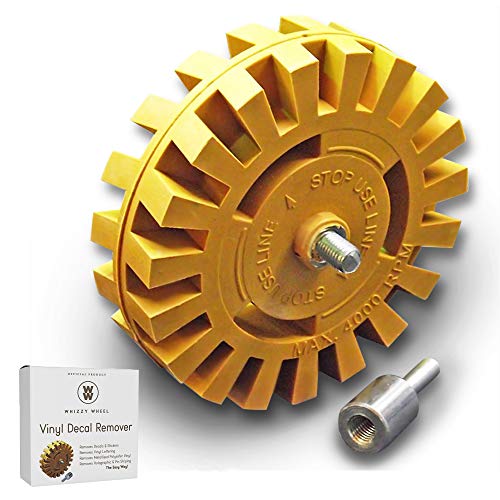
(https://www.amazon.com/Whizzy-Wheel-Sticker-Remover-Adapter/dp/B00FJF0O2K/ref=sr_1_3_sspa?keywords=3m+eraser+wheel&pd_rd_r=0a9f7541-1a45-45ff-b163-c6cfab173a0e&pd_rd_w=dQLT6&pd_rd_wg=DYqgw&pf_rd_p=7be70e42-b5c0-4077-873a-35a472a6fbd4&pf_rd_r=TN1R5CFFCVTP7YSH9NFG&qid=1569271761&s=gateway&sr=8-3-spons&psc=1&spLa=ZW5jcnlwdGVkUXVhbGlmaWVyPUEzUEs2R1pMWkdYQ1o1JmVuY3J5cHRlZElkPUEwNjM0MTAxMkpLN1hVUFcyTlQxSSZlbmNyeXB0ZWRBZElkPUEwODk5MDg0TkZNTzVXR0RSSVhFJndpZGdldE5hbWU9c3BfYXRmJmFjdGlvbj1jbGlja1JlZGlyZWN0JmRvTm90TG9nQ2xpY2s9dHJ1ZQ==)
They make a big mess (imagine using a pencil eraser x 1000), but get they job done. They mark up the wall a little, but not enough you should have to patch it.
My vinyl guy gave me one of these: https://smile.amazon.com/Whizzy-Wheel-Sticker-Remover-Adapter/dp/B00FJF0O2K to remove my decals, but mine were older. Also, these: https://smile.amazon.com/Ehdis-Visibility-Plastic-Scraping-Windshields/dp/B01HLWB0BM for scraping. Acetone and/or alcohol to remove any residue. This will also remove wax, so re-wax when you're done.
If you do have a shadow, try Hops143 polishing, but I think I'd skip the Heavy Duty compound. Try a small area with just the Finesse-It first, and see if that's satisfactory. You don't want to create more work for yourself, and it doesn't look oxidized. Here's more than you ever needed to know about compound/polish/wax - https://www.sailnet.com/forums/gear-maintenance/52772-tips-compound-polish-wax.html
Whizzy Wheel Car Decal and Sticker Remover with Drill Adapter Kit https://www.amazon.com/dp/B00FJF0O2K/ref=cm_sw_r_cp_api_i_sTNmDbM3E6BNS
This made the job on mine SO much easier.
>can I just add new caulk on top of the old cracked painted stuff while the tub is filled with water and call it a day?
No you can't. If you try to add caulk on top of that, it'll look like absolute shit.
Use this to remove the old caulk: https://www.amazon.com/ALLWAY-TOOL-CT31-Caulk-Tool/dp/B004BGAER8/ref=pd_lpo_vtph_60_bs_t_1?_encoding=UTF8&psc=1&refRID=0KXKZVQRM0Q7PMYDZSTD
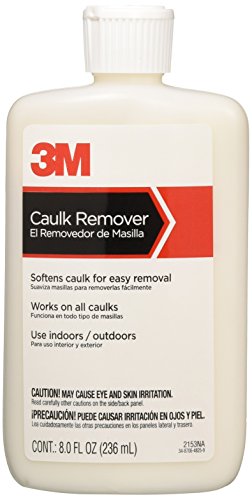
If it's really hard to remove, you can use some of this to losen it up and make it easier:
https://www.amazon.com/3M-Caulk-Remover-8-oz/dp/B000H5VNG8
​
When you recaulk, make SURE that you use caulk rated for bathrooms (it'll say on the tube). It needs to be silicone caulk. Not latex. If it's not specifically rated for bathrooms, it WILL get mold on it.
​
>I am worried this won't be enough though. I have never seen a tub with just drywall above it like this. So my next question is what are my options if caulking is not enough?
​
It should be enough if you're not showering in the tub, or bathing kids in there. A grown up isn't going to splash the water up that high.
If you want to waterproof it more, and then tile, without making a height difference, use this:
https://www.amazon.com/CUSTOM-PRODUCTS-LQWAF1-2-Redgard-Waterproofing/dp/B000NZ73SE/ref=sr_1_1?s=hi&ie=UTF8&qid=1535824995&sr=1-1&keywords=redguard&dpID=51Zf43NjFPL&preST=_SY300_QL70_&dpSrc=srch
​
It's a paintable waterproof membrane. Just paint it on (two coats) and it'll form a layer of 'plastic' protrecting the drywall. Then you can tile right on top of it. Use actual tile set and NOT mastic glue for the tiles. Mastic will grow mold.
​
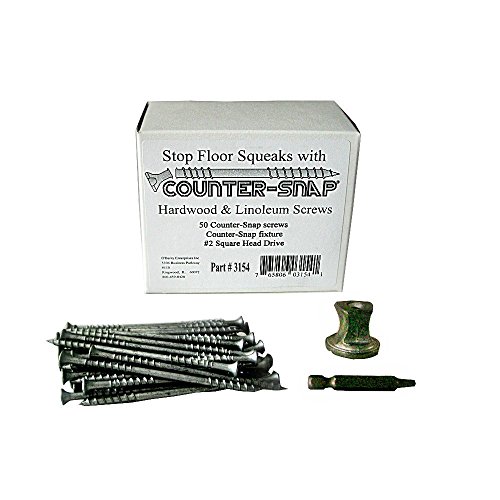
Squeek-no-more is the brand name for some snap-off screws that you can drive in from above. If you have carpet, you can drive right through it and they'll snap off below the pad. I have hardwood, so I had to drill pilot holes and use wood filler and/or a wax pencil to cover up the holes.
I used these, since most of my squeaks were at the joists (typically higher pitched from the wood rubbing on a nail): https://www.amazon.com/dp/B009HEPESS/
But, if you have carpet or you have floor boards that are groaning from rubbing against one another, you probably want these: https://www.homedepot.com/p/Squeeeeek-No-More-Floor-Repair-Kit-19594/203429611
With either, you have to be standing on top of the squeaky area to hold it tight to the joist as you screw, or it may not be very effective.
That's not AC at your doorbell. It's DC. That's what a doorbell transformer does, converts to DC and steps down the voltage. No different than a wall adapter. Use the DC mode.Actually, I think I had a brain fart here. I think it in fact remains AC. Ignore me.
Rug tape
Next time, drill a pilot hole and/or rub bar soap on the screw before driving it in.
There are special 2 part epoxy paints that are used for this.
We used this paint to refinish a green bathtub, and it was easy to apply, and looked great until it started to scratch, peel, etc.
It is super smelly and requires proper ventilation and a respirator type mask.
I used these to remove hundreds of square feet of decals off my 5th wheel, they are amazing and I wish I found them sooner. Doesn’t hurt the finish at all.
Whizzy Wheel
edit: also, not sure if you forgot to mention it, but i used [flooring wood glue] (http://www.amazon.com/gp/product/B003DKSWK4/ref=oh_aui_detailpage_o05_s00?ie=UTF8&psc=1). I didn't go crazy with it, but i put a bead on each board (in the area where it locks together) in higher traffic areas/near sinks just in case something got spilled. I'm not sure how much it can prevent a catastrophe but for $12 it was piece of mind
grout removal tool
anyone thinking of a similar job should look into DITRA. Truly awesome subfloor product. It might cost more, but you will NEVER have cracked tile or grout with a proper subfloor and DITRA. The subfloor and the tile are allowed to move independently.
I am amazed at how straight your lines are.
I do have to say the layout is strange. But if the product had that much variable, what can you do.
There is a product, still expensive in the states, called hard wax oil:
http://www.amazon.com/OSMO-Polyx-Hard-Wax-125L/dp/B0055T61H2/ref=sr_1_1?ie=UTF8&qid=1404454077&sr=8-1&keywords=hard+wax+oil
I feel you want something really special in the finish; this stuff gets in the wood and leaves the surface very un-coated feeling visually; it is rich in tone but not slippery in sheen.
I would really -- for you specifically -- recommend finding a piece of the wood your existing floor is, bleach it, stain it gray, and use this on top. I believe you will find something very special, and you will still save so much money and time over buying into a blank-slate engineered solution.
Finish examples (your tone would be far more consistent after bleaching and staining):
http://media-cache-cd0.pinimg.com/originals/c8/6b/1a/c86b1a352cd7dcd45aed6d1489786eac.jpg
http://www.restoremyfloor.co.uk/media/gfx/gallery/31.jpg
http://www.pollmeier-flooring.com/pollmeier_e/bilder/p_waxoiledfloor.jpg
That cherry is going to complicate things. Normally I'd suggest a tinted or pigmented paste wax, to fill in and hide the scratches. But cherry is not popular, and I cannot find a vendor that makes it.
So on to Plan B. Get some of these:
http://www.homedepot.com/p/Rejuvenate-Wood-Furniture-and-Floor-Repair-Markers-RJ6WM/202676224
They have a cherry pen in the set. The next part sucks, You are going to have to go over each and every scratch. Sorry, but it has to be done. Because you need to hide them to the best of your ability, before you use an acrylic wax over top of the floor, to make it shine.
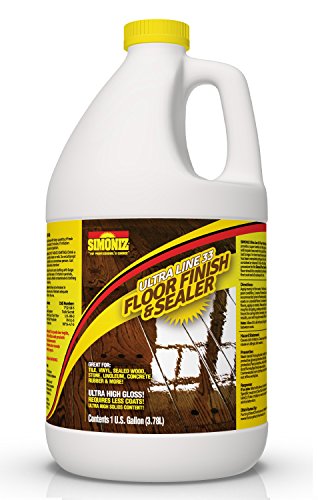
I use a 33% solids formula, such as this:
https://www.amazon.com/ULTRA-GLOSS-Solids-Floor-Finish/dp/B013RDGZU0
I pour it straight onto the floor, and work it in. The instructions say to dilute it with water. I do not. I want as much material between me and the floor as I can get. I know it goes against the instructions, but that's what works for me.
I've had good results with this, and it's waaaay cheaper than hiring someone: Epoxy Refinishing Kit
There are a few options out there for counter snap screws that will snap off just below the surface of the floor, allowing you to fill a tiny hole with a filler pencil.
Here is a how-to from one of the original reality shows.
[this old house] (https://www.youtube.com/watch?v=3iAseVZZKlY)
Some more links:
[counter snap screws] (http://www.squeakyfloor.com/counter-snap)
[Squeeeek-More screws] (https://www.amazon.com/Squeeeeek-More-Counter-Joist-Starter/dp/B009HEPESS/ref=sr_1_3?s=hi&ie=UTF8&qid=1478974735&sr=1-3&keywords=counter+snap)
[Google Search for counter snap screws] (https://www.google.com/#q=counter-snap%20breakaway%20screws)
https://www.amazon.com/3M-2153DC-NA-Caulk-Remover/dp/B000H5VNG8
If it's not caulk, this suggestion won't help, but I recently used 3M caulk remover to get the gunk off after we removed (horrible, hideous, ugly) metal shower doors. You squirt it on, let it sit for awhile, and then come back and scrub it off. It took some elbow grease, but it worked pretty well.
https://www.amazon.com/Wheel-Pinstriping-Removing-Diameter-Whizzy/dp/B00FJF0O2K
those will do the trick, just need to be careful so you dont burn the paint
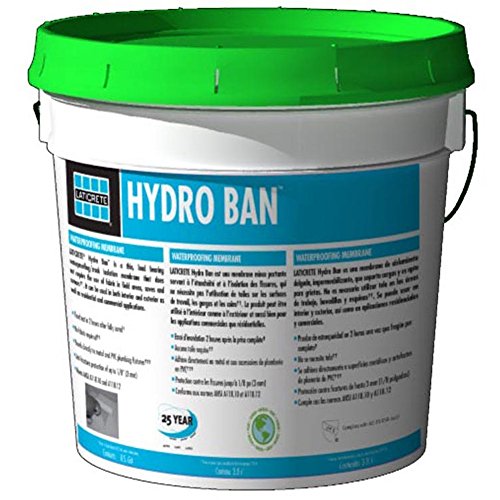
Hydroban (you may find it cheaper at your local tiling store - and/or be able to buy "cuts" of the fabric for only as much as you're actually needing) is a paint on membrane that has some insane expansion capabilities (iirc around 9:1). I've used hydroban effectively as a crack isolation membrane before (it also has other uses) - it's probably one of if not the best product on the market at its price point. We don't really typically use crack iso a lot in NZ (some tilers have never touched the products with such intentions), so again, take that with a grain of salt.
Kerdi is a sheet membrane. I'm not familiar with it's expansion characteristics.
Applied directly to the concrete - under the SLC.
One other thing you could consider doing is chasing the crack with an angle grinder and masonry blade, then filling with a low viscosity polyurethane adhesive. But that's probably going so far above and beyond what you're needing to achieve.
My fiance recently did our toilet and tile with no experience. We did take a free tiling class at a local store. It was a nice hands-on class and they gave us 20% off of all of the equipment. Borrow equipment (float, trowel, mixer) from friends and family if you don't plan on tiling again in the future.
We bought a really nice Toto toilet from homeclick.com for less than $200. There was free shipping and no sales tax. My dad has purchased two toilets from them (both Toto) with no issues.
If you can't afford a new tub now and the issue is mostly cosmetic, Rustoleum makes a tub and tile paint that works pretty well. I purchased from Amazon here. It's a good way to put off the really large purchases (tile and the needed supplies can be expensive). To give you an idea of cost, we tiled the floor of a 30 sf room with high-quality tile and it was over $400 for the cement, mat (we used the mat instead of backer board), grout, tile, and supplies.
We put the tile in before placing the toilet. We didn't replace our tub, but there isn't any tile under it, it just goes up the edge and there's a line of caulk.
I painted porcelain wall tile in our bathroom that was avocado green about 2 years ago and it's held up brilliantly.
I used this stuff
Food Grade 85% .. insanely strong when not diluted.. you can dilute 5 to 1 water to acid or 10:1 water to acid easily. I have put rusty bolts in the undiluted and they come out like they were sandblasted in about an hour.. the threads all cleaned out like new.
https://www.amazon.com/Gallon-Grade-Phosphoric-Remover-Clean/dp/B06XZSW3QX
or you can buy a quart of rustmort which i always use to use as an autobody tech .. its great .. I would say its probably a 10:1 dilution
https://www.amazon.com/SEM-69504-Rust-Mort-Quart/dp/B000HI690U/
this is why I will never drink cola drinks again
https://jillcataldo.com/wp-content/uploads/2017/04/cokeingredients.jpg
This one has good reviews and seems fairly simple to apply.
http://www.amazon.com/Rust-Oleum-7860519-Refinishing-2-Part-White/dp/B000PTSBKW/ref=cm_cr_pr_product_top#productDetails
I used two kits of this on my dark pink tub about a year ago and it doesn't show any wear yet. http://www.amazon.com/Rust-Oleum-7860519-Refinishing-2-Part-White/dp/B000PTSBKW/ref=sr_1_fkmr0_1?ie=UTF8&qid=1426613305&sr=8-1-fkmr0&keywords=rustoleum+bath+refinder
I realize it may begin to wear eventually - but we will probably sell the house later this year. If I knew I was going to be in a house for more than ten years, I'd go for professional resurfacing - but for my purposes the DIY worked great. Just be sure to ventilate and follow the directions to a T. Read the amazon reviews and understand the process before you jump in.
Good luck!
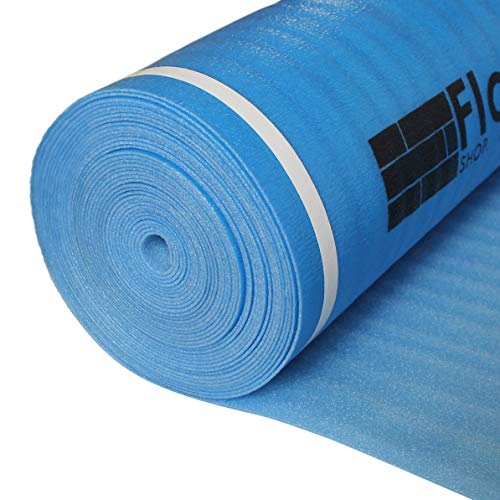
Just did it this past weekend. Used this 2-in-1 highly reviewed inexpensive underpayment:
Laminate Flooring UNDERLAYMENT with Vapor Barrier 3in1 Foam 3mm Thick 200 sq.ft https://www.amazon.com/dp/B00YTB6SO8/ref=cm_sw_r_cp_apip_dBS7tocYyrQoO
Also I'd definitely get an installation kit:
Floorlot Flooring Laminate and Engineered Floor Installation Kit https://www.amazon.com/dp/B01FTAE1T6/ref=cm_sw_r_cp_api_thyIzbA8ZA6NR
Edit: *underlayment
Use this stuff:
http://www.amazon.com/Rust-Oleum-7860519-Refinishing-2-Part-White/dp/B000PTSBKW
I used it on my stained shower pan, and it made it like new. Follow the directions TO THE LETTER.
I've been using this grout cleaner with the Fuginator brush to clean the horrible grout in my apartment. It's not perfect, but it's still super effective.
In the Barefoot Running Step by Step book, Barefoot Ken Bob talks about a friend who uses Plasti Dip to coat the bottom of his socks. Plasti Dip is just liquid rubber so once it dries the socks will have a light layer of protection/padding on the bottom.
Apparently these allow for a more barefoot-like feel of the road as compared to VFF or Minimal shoes and they allow you to run in the winter while still being as close to barefoot as possible. The best part is you choose the socks that fit you best or that you want to use (can even use toe socks). The book suggests wearing the socks when you coat them (use a foam paint brush) which means hanging out in a well ventilated area for 45 min. or so.
For less than $10 you can get a jar of Plasti Dip and a pair of socks, and the jar will last for multiple pairs of socks. Sounds like a good deal to me, I've been thinking about trying it.
EDIT I missed the part where you can't wear the VFFs at work and are looking for a replacement. The rubber coated socks probably aren't a good solution for your problem.
I'm going to try this on my acrylic bathtub.
I have the same style sink as you in my kitchen, so I'm going to use that too. I think it's worth a try. Also, I would probably youtube a few videos before attempting it.
Edit: Seems like a few people have fixed cracks just like yours. (Check out the review pictures.)
https://www.amazon.com/Whizzy-Wheel-Decal-Remover-Adapter/dp/B00FJF0O2K
You might be interested in this tub paint.
Hue or LIFX will be your best choice but since you want to avoid a hub and I am assuming you are on a budget these wifi bulbs might do:
https://www.amazon.com/gp/product/B07471CG5Q/ref=oh_aui_search_detailpage?ie=UTF8&psc=1
I primarily use hue but I got a couple of these cheap ones to mess around with and haven't been too disappointed. They work with Alexa and Google Home. Will do all the colors and dim on voice command, no need to change any switches. In google or alexa you would just have to group them all into one room and you could say things like "turn on/off kitchen lights", "turn kitchen to 50%" to dim/brighten, "turn kitchen red" for color. Now being cheap these obviously don't work as well as hue or lifx, color control tends to be better controlled through their app or google home/alex app and not over voice. I haven't been dissapointed for 15 dollar COLOR smart bulbs.
This really depends on the dimensions of the room you'll be moving into. Honestly, less clutter is better, and the ideal layout maximizes the amount of useable space. If you really need something to spice it up, just get a single piece of wall artwork or some smart RGB LED bulbs.
This, otherwise you risk additional water damage down the road. The waterproofing membrane should also be covered up with a thick later of Hydro Ban or some other waterproofing agent. This is what I used when I did my DIY shower.
​
https://www.amazon.com/gp/product/B003CZIHR8/ref=ppx_yo_dt_b_asin_title_o05_s00?ie=UTF8&psc=1
I just did this, and I used this: http://www.amazon.com/gp/product/B000PTSBKW/
Basically, it's a 2-part epoxy paint which you brush on (they also have a spray paint version). It comes in 3 colors, white, almond, and bisque.
It'll take a lot of prep work, you basically need to clean the entire bathroom several times over, and scrape off all old paint and such from the tiles. It also smells really bad, I had to take breaks every 5 minutes, and that was with a heavy duty rebreather mask. It will probably smell worse for longer if you go with the spray paint version.
It came out quite nice though, and it seems to be holding up well.
Assuming this is vinyl, I use one of these for decal removal at work. I then use this product for any cleanup. With those, i can strip off commercial truck door signage in just a few minutes with no paint damage.
I was pretty happy with these engineered wood planks from Lumber Liquidators (around $2 sq ft):
https://www.lumberliquidators.com/ll/c/Capstone-Grey-Beech-Mayflower-Engineered-HSQCCGB5/10035671
Used this underlayment (.32 sq ft):
https://www.amazon.com/Roberts-70-193-Underlayment-360-Feet-Absorbing/dp/B008N6Q7HI
Photo: https://imgur.com/a/Apulv
Here's another grout tool:
ABN Carbide Tip Grout Removal Hand Tool, Soft Grip & Reversible Triangle Blade for Detail Work https://www.amazon.com/dp/B01KN0FDL2/ref=cm_sw_r_cp_api_zBHlybZ1VRAXN
Color match can be a bitch of a job (and pricey to get it done right unless OP can get a deal on a vinyl wrap), if they threw chrome centre caps on and blacked out the lighting it could work well with the chrome since he has the gloss black wheels.
The chrome/white lighting just never looked right on anything but the white and silver trucks imho.
Debadge +1! Get some fishing line with a blow dryer to remove them, then power polish. I used this thingy to get any glue residue off: https://www.amazon.ca/dp/B00FJF0O2K/
You might try this It is supposed to allow the tile to float somewhat to prevent popped tiles or cracking.
Something like this will work: Rust-Oleum kit That's a link to Amazon just because it's easy to find on there. You can probably find a similar product almost anywhere that sells home improvement stuff. As with most any paint type thing, preparation is key. Get the tub as clean as possible and carefully follow the directions.
Take a look at this stuff, worked great on making our tub look new. You can probably just use it on those specific spots.
http://www.amazon.com/gp/product/B000PTSBKW/ref=oh_aui_detailpage_o04_s00?ie=UTF8&psc=1
this is the stuff I went with -- yes it's a little more expensive but it made for a perfect (silent) installation of my 12MM laminate.
https://www.amazon.com/gp/product/B00YTB6SO8/ref=oh_aui_detailpage_o02_s00?ie=UTF8&psc=1
It's still way cheaper than anything you'd buy at a local floor store too.
I assume this was targeted at me, just fyi since you didn't reply directly I didn't get alerted!
Things like a fan (~$60) dedicated to him in his room, and an elevated bed (~$21) to better facilitate keeping him cool that we managed to fit in his crate (orange may have pics?).
Some items to save US headaches include rug tape (~$15) to keep him and our stuff from getting slid around as he plays, a light-weight crate (~$86) for when we bring him with us to places and need a place for him to lay down and relax, mainly for when we are doing stuff with our other dog.
LOTS of clickers were purchased just so they are always handy. Some other oddities, like balance balls and stuff just to get him used to being on strange surfaces. This is mainly to set him up for future competition success, though.
Bitter Apple spray to make sure he doesn't chew things he shouldn't (rugs, shoes, couches, chairs, base board, electrical wires...basically anything that isn't his toy got sprayed daily for the first few weeks). Lots of Natures Miracle & paper towels to clean up any accidents.
http://www.amazon.com/Rust-Oleum-7860519-Refinishing-2-Part-White/dp/B000PTSBKW
This stuff works well. I can't say for sure how it will work if you're only going to be refinishing only the area around the drain -- it might appear obvious to the landlord that you had to do the refinishing there because it will almost certainly appear whiter than the rest of the presumably oldish tub.
Here's the thing: if you tell the landlord, you risk him saying "I need to buy a new tub, and you have to pay for it." That might also include needing new tile too, because removing a tub probably means retiling around it. This will be expensive.
It might be best to try to use this refinishing stuff to hide it and hope the landlord doesn't notice. The landlord or you could also use this stuff to refinish the entire tub, but then you'll have a brand-new looking tub.
If you use this, make sure you first sand the areas that you're going to paint!
Did my tub using this - helped quite a bit with the scraping.
(Insert your own "big, hard caulk" joke here).
wonder if this would do the trick http://www.amazon.com/Plastic-Dip-Intl-18201-Plasti-Dip/dp/B000HE9VV8
Look at this stuff, it's cheaper on Amazon but they have it at Home Depot for a little more. Works nicely when done fully and should work just as nicely as a patch to keep the peeling down. Just make sure to take out the drain cover first since the flipper might not have done it correctly.
I took my time gathering a the parts etc. Painting was a pain and not really my forte. The decals were under a previous paint job so I used this
Car Decal Removal Tool - Whizzy... https://www.amazon.ca/dp/B00FJF0O2K?ref=ppx_pop_mob_ap_share
to strip the bike.
Worked awesome but made one hell of a mess. So I sanded and painted over a few weekends (at my GF's house) since I don't have the space for that in my suite. Took a few weeks to build everything back on the bike and add the electrical system (wire management OMG)
Pretty much everything was done in a 5'x8' storage space within my suite that I converted into a "garage" to maintain my bikes. Somehow I make it work, lol.
Whizzy Wheel Car Decal and Sticker Remover with Drill Adapter Kit https://www.amazon.com/dp/B00FJF0O2K/ref=cm_sw_r_cp_apa_i_9JqmDbXMBJMVK
I've had really good luck with these. You can get much more aggressive without damaging the finish.
Not so sure I follow everything you laid out here but I'll give it a shot.
Noted as layer #1 is 1/4" plywood? Are you sure it isn't 3/4" plywood? If it's only 1/4" plywood your 2x4 support spacing would need to be like 6" on center. Even then I would place 3/4".
What you're looking for is self leveling concrete. I just used this in my bathroom renovation so I know all about it! They sell it at Lowe's/Home Depot in 50 lb buckets. You'll have to figure out how much you'll need based off of the average depth etc.
Steps are basically:
https://www.lowes.com/pd/High-Performance-Cement-by-Quikrete-50-lb-Cement/50146060
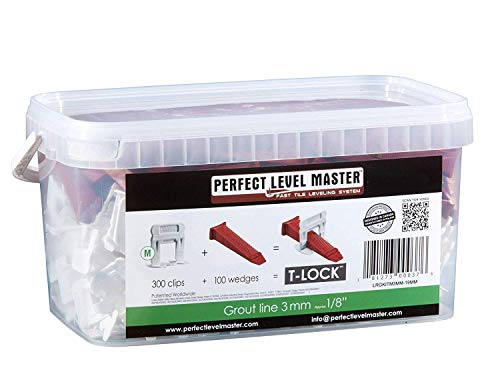
If you are using large format tiles on uneven walls/floors I also am using a leveling system to help make sure the tiles don't have lippage. They say that it's to only "help" with imperfect tiles and minor differences, but honestly these things have saved me from some truly crappy uneven surfaces.
https://www.amazon.com/T-Lock-TM-Complete-lippage-leveling/dp/B01D2FQ3SM/ref=sr_1_4?ie=UTF8&qid=1524001767&sr=8-4&keywords=perfect+level+master+1%2F8
Pictures of my install:
https://imgur.com/a/chvIG
Note that I did my self leveling concrete above the hardibacker. It was only where the shower pan was to be installed though.
Good luck!
You can buy this:
https://www.amazon.com/Gallon-Grade-Phosphoric-Remover-Clean/dp/B06XZSW3QX
will last you a while (notice it's 85%), so 8.5 times more potent. Acid malt is also not that much more expensive than regular malt, about $2 per pound vs $1 for regular malt and I would usually use 1/2 pound for corrections, so comes to 50c per 5g batch - I don't think it's worth the effort with the sparging.
Let’s see.
https://www.amazon.com/Gallon-Grade-Phosphoric-Remover-Clean/dp/B06XZSW3QX
There we go.
I used https://www.amazon.com/Rust-Oleum-7860519-Refinishing-2-Part-White/dp/B000PTSBKW/ref=sr_1_sc_1?ie=UTF8&qid=1486332059&sr=8-1-spell
Lasted 2 years... if that.
First off, i seriously doubt it is caulk (in the traditional sense). I t is most likely a contruction adheasive. From the looks of it, probably Power-Grab. This is a polyurethane adheasive that is pretty much permeneat. You could try a caulk remover, but it may not do much. The one I linked is water based so it's probably a bit milder than some of the other (more effective) removers like McKanica. Realistically, those adhesive can be dissolved though. The manufacturers basically recommend using a thin wire to 'cut' the adhesive free. I would try the plastic razor and heat. You MIGHT be able to soften it some with mineral oil which will also give the benefit of lubricating your razor. Good luck!!!
I was using this stuff: (http://www.amazon.com/Rust-Oleum-7860519-Refinishing-2-Part-White/dp/B000PTSBKW/ref=sr_1_1?ie=UTF8&qid=1412731731&sr=8-1&keywords=rustoleum+tub+and+tile+paint) which requires bleaching as the first step. Just following directions, boss. Only issue is a distraction kept me from rinsing down a wall causing me to inadvertently mix the bleach still on the wall with the next step.
Use a 2 part finish because it will last a whole lot longer and generally be better. Something like this
https://www.amazon.com/Rust-Oleum-7860519-Refinishing-2-Part-White/dp/B000PTSBKW/
Other than perhaps wanting to dilute a bit to get the sulfate down with some beers you can make that water work. My water is fairly similar (though I don't have quite as much sulfate) and my tactic is phosphoric acid to get my pH in line since it purported to be more flavor neutral than lactic. Due to how much I need to add I use 85% phosphoric. https://www.amazon.com/Gallon-Grade-Phosphoric-Remover-Clean/dp/B06XZSW3QX
I use Bru'n Water for my calculations and after many brews of my mash pH being right on I trust it completely.
Haven’t tried it, but saw this
Whizzy Wheel Car Decal and Sticker Remover with Drill Adapter Kit https://www.amazon.com/dp/B00FJF0O2K/ref=cm_sw_r_cp_api_i_WMXjDbNQSV8ZH
What sander are you renting? It's most likely an ez-8 which are absolutely useless. 110v machines are not aggressive enough and will take forever. Also if you cant get your hands on a multidisk or trio or even a varathane sander you will want to buy screens and rent a buffer. Finish big machine at 80 grit. Then finish all edging and then palm sand anywhere you edged making sure to get all scratch out. I would not suggest staining as that is extremely difficult for a beginner to pull off with no scratch and no lap marks etc. Also any imperfections you made with the drum sander or edger will show up way more. Don't use any stain or finish found at big box stores, it is honestly useless and not durable at all the minwax stains take like 3 days to dry and fine print on can says not for use on floors. The varathane stains have compatibility problems where if you use a water based finish on top it will peel. If you are going to stain do not do more than one coat, that will also cause adhesion issues with the finish and it will peel. This is a very good finish, extremely durable and will last. Use the basic coatings sealer underneath or you'll end up with aide bonding and get while lines everywhere with the movement of the wood. I would suggest some oil based finishes such as bona woodline or Sampson wood armour but those products can't really be shipped because of VOC issues. Itll cost a lot more. Your local hardwood distributor may sell some to you, but usually you have to be a flooring contractor with an account with them to buy products, but you may get lucky if you ask. If you can get some oil based finish I would recommend bona dry fast sealer and bona woodline or Sampson wood armour. Much much much tougher than anything home depot or Lowe's sells, but ultimately the streetshoe 275 will be the toughest finish without going moisture cure or UV cure.
Hey OP. I just installed 12 mm laminate over my concrete floor and I ordered this stuff off Amazon: Laminate Flooring UNDERLAYMENT with Vapor Barrier 3in1 Foam 3mm Thick 200 sq.ft https://www.amazon.com/dp/B00YTB6SO8/ref=cm_sw_r_cp_apip_n92aRLcND9wgZ
It has 3mm padding and vapor barrier built in and it's a killer price. I've only had the floor installed for a few weeks but I have had no issues with the quality so far.
Those aren't stains. That is damage to the protective clear coat. You can probably make it disappear by using acrylic wax on it.
https://www.amazon.com/ULTRA-GLOSS-Solids-Floor-Finish/dp/B013RDGZU0
You can go to Home Depot or online and buy an epoxy finish for your bathtub, I did it for mine. You just have to sand down your tub first to make sure it’s smooth. Then you paint it, wait 6 hours, apply a second coat. And then let it sit for 24 hours. (If I remember correctly, it’s been about a year) and then it will be good as new! We also used it on a window seal in our shower to keep it from molding. epoxy paint
even with double layered 5/8 ply while its structurally meets the strength you need for tiling. it will expand and contact every winter/summer season. those movements will cause the grey thinset he used to crack and come apart. even with flexible grout. One type of solution is to use a flexible mortar base like http://www.wayfair.com/Custom-Building-Products-VersaBond-Flex-Fortified-Thin-Mortar-Set-50lb-MTWS50WHT-L6911-K~YFY1086.html?refid=GX54801249780-YFY1086&device=c&ptid=80545458060&gclid=CNr8jrOuu8oCFQ8taQod8DQCFA
or using an uncoupling membrane like schluter ditra in place of hardibacker http://www.amazon.com/Schluter-Systems-Ditra54-Underlayment-54sqft/dp/B003VKYKWA/ref=sr_1_3/185-3466943-4132966?ie=UTF8&qid=1453395109&sr=8-3&keywords=schluter-ditra
No impact at all, it's been in the same spot for over a year. Since the printer frame is rigid it doesn't cause me any issues. They're about a 1/4 inch thick. They're actually those things meant to hold rugs in place. Similar to these, I just folded them in half and put them under the the feet. (I'm not endorsing these, just a reference point).
https://www.amazon.com/Gripper-Curling-Reusable-Removable-Washable/dp/B07PKH7B51/ref=asc_df_B07PKH7B51/?tag=hyprod-20&linkCode=df0&hvadid=295599246147&hvpos=1o1&hvnetw=g&hvrand=17163831905955713148&hvpone=&hvptwo=&hvqmt=&hvdev=m&hvdvcmdl=&hvlocint=&hvlocphy=9003699&hvtargid=pla-679160536482&psc=1
I got mine off amazon. These here are similar, not sure if same seller or “brand” but look identical.
I know it's a rental, but if you're feeling up to it, Rust-Oleum has those Tub refinishing kits for $25. Yellow tub gone. http://www.amazon.com/Rust-Oleum-7860519-Refinishing-2-Part-White/dp/B000PTSBKW
The solution.
You can tint it with colored acrylic. Paint with some of the base and mix some (blue?). No more twitching!