Best food processor parts according to redditors
We found 28 Reddit comments discussing the best food processor parts. We ranked the 14 resulting products by number of redditors who mentioned them. Here are the top 20.
We found 28 Reddit comments discussing the best food processor parts. We ranked the 14 resulting products by number of redditors who mentioned them. Here are the top 20.


This should be what you need.
https://smile.amazon.com/dp/B00112BXIO/
Like this?
Without tools, the best you can really do is look for oiliness on the pipe. When you find a joint that feels oily (look for dark colours on the pipe, usually covered in very fine dust. Once you rub the dusty area with your fingers you'll feel the oiliness), spray/pour a small amount of washing up liquid over it and look for bubbles. If there's any refrigerant left in the system, you'll usually see bubbles appear (or over a longer period, foam). Of course if the gas has all escaped already - and we're only talking a couple of hundred grams here - then you won't see any bubbles.
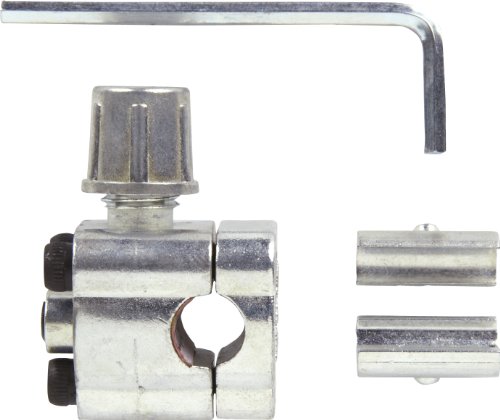
Most domestic gear has no access fitting at all so even locating the leak can be difficult if there's no visual indication. You need to get pressure in there so you can leak test - this means adding a bullet piercing valve (like this).
Then you need to put something in via your bullet piercing valve to raise the system pressure. It's best to use dry nitrogen to leak test to save wasting refrigerant, but since you most likely don't have that on hand you could buy yourself some refrigerant (most likely R134a) and pressurise with that. That's a big no-no here (both disposable cylinders and dumping gas to atmosphere by charging a system with a known leak) but I'm guessing your in the US, and those sorts of laws seem remarkably lax so go for gold. It's not like you'll be ruining MY ozone layer too, right? ;)
You also need to regulate the pressure going in to the system. This is where you need gauges. Connect the yellow line to your bottle, connect the blue line loosely to your bullet piercing valve, purge from cylinder to piercing valve by opening the cylinder tap + gauges tap, and releasing some pressure via the loose fitting, then tighten the fitting and close your gauges tap. Open the bullet piercing valve. Open the gauges tap slowly and give it ~50psi of system pressure.
Then you can go for gold with your soap, or you can lash out and grab yourself some "proper" leak detection fluid (like this), or better yet an electronic leak detector (like this one).
Once you've found your leak, you want to release your nitrogen (or reclaim your refrigerant using a reclaim plant and a spare cylinder), then repair it using an oxy/acetalyne set, or since it's only tiny pipework you can get away with a MAPP gas set.
If it's a copper->copper joint, you're laughing - polish the pipework up with emery cloth, heat the pipe until it's just this side of glowing red, and feed the joint with brown tip silver solder.
If it's a copper->steel joint, then it's a bit more of a pain. You need blue tip silver solder and flux. Clean your joint with the emery cloth, give it a nice coating of flux on every surface you need solder to stick to, then heat it up until it's a fair way short of glowing red. Feed the blue tip solder in and STOP. Unlike brown tip (15% silver) you can't just keep feeding blue tip (45% silver) as it ruins the weld.
Now, since you put on a bullet piercing valve and they leak like a sieve in the long term, we need to replace that with a schrader access valve. Since it's most likely going to be in a straight through piece of pipe, you can save time and grab yourself a pre made access valve in 1/4" pipe. Cut away the hole left by the bullet piercing valve, polish the copper and cut the pipework with a ~10mm gap using a tube cutter. Then slip your access fitting assembly in there, and follow the copper->copper joint procedure.
Of course, now that we've done all that you need to change the liquid line filter drier too. I'd recommend a 1/4" solder in core drier in place of the original copper spun drier because... well, copper spun driers are terrible. Follow the pipe cutting procedure from the piercing valve instructions and the soldering instructions from the copper->copper joint instructions and that's done too. Remember - always try and mount the drier so it's outlet is LOWER than its inlet. This turns the drier into a small liquid receiver and helps ensure a good liquid seal over the capillary tube. Speaking of capillary tubes, if it was inserted straight into the original copper spun drier CUT the capillary, don't try and unsweat it. The chances of blocking it up are about 82.5634% (approximately) when you unsweat capillarys. You're much better off chopping it with a set of capillary tube cutters and ensuring a good clean capillary. The ~30mm of wasted capillary will affect performance, but almost certainly not to any sort of measurable degree.
Then give the system a good evacuation using a vacuum pump and ensure it reaches a good vacuum (sub-500 micron) with a digital vacuum gauge.
Then using a set of electronic scales, charge your freshly evacuated system (remembering to purge!) to the charge recommended by the manufacturer.
Voila! You have just fixed your chest freezer.
..... Alternatively, pay someone to do it for you and/or recycle the components and buy yourself a new one.
First, if you want to be healthy, then you need to feed your body properly. Learn about macros here:
Second, what's your daily eating scheduling like? Ex. just breakfast, lunch, and dinner, or with mid-morning & mid-afternoon snacks, or with dessert, and so on? I'd recommend picking one category & then working on building up a week's worth of recipes for that meal or snack eating period, so that you can add some rotation & variety into your diet. Then move on to the next category, do the same thing, and repeat until finished. That gives you a really solid foundation of recipes with a variety of flavors to choose from on a week to week basis. You can build up to more than just a week's worth of recipes as you find new recipes that you want to keep in your collection!
Slowly adopting a dietary change like this also allows your gut bacteria to catch up at a normal pace; a lot of people just dive right into it & have a rough first few weeks because their GI tract isn't used to all of the fiber & other stuff flowing into it. It's like when you eat bean chili after not eating it for a long time...it can cause havoc on your system, not because it's bad for you, but simply because you don't have the right gut flora built up so that the good bacteria in your system can properly manage your new standard diet.
Third, I would recommend investing in some high-quality tools. Note that you don't have to buy any of these, and if you do want them, you don't have to buy them all at once - totally okay to piecemeal it & save up for them! Here are what I'd consider the "essentials":
If you have the budget available or are willing to save up, here are a few extra tools that are really good:
part 1/2
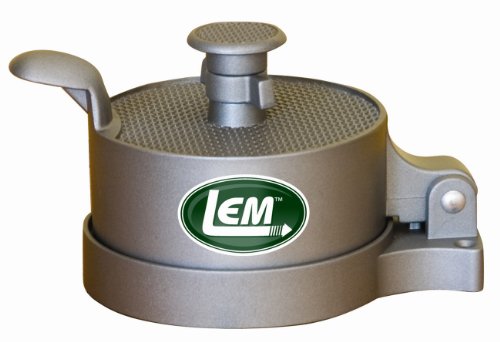
Your typical middle-class burger joint serves burger patties they bought from their food service provider that are preshaped by a machine and frozen. If you want to replicate this at home you need a ring mold or a burger press. Your local sporting goods store should sell a burger press in the hunting/food prep section.
http://yourmomsburgerbar.com/wp-content/uploads/2014/02/nonestick-burger-press.jpg
http://www.acookblog.com/wp-content/uploads/2012/07/IMG_42581.jpg
1 Scoop Vanilla, Handful of frozen strawberries, rest lemonade.
1 Scoop Chocolate, 8-10 Ice cubes, I use high protein 2% milk
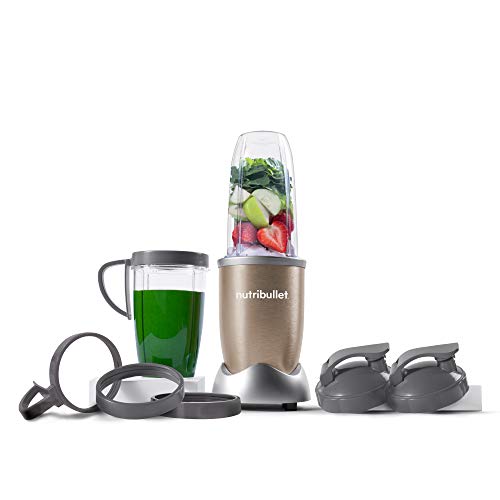
However, I went on Amazon and got the larger (32 oz) blending cups for the Nutribullet.
https://www.amazon.com/Replacement-Nutribullet-Parts-Nutri-Bullet/dp/B077SDRG7F/ref=sr_1_3?keywords=nutribullet+cup&link_code=qs&qid=1563393751&s=gateway&sourceid=Mozilla-search&sr=8-3
Supco BPV31 Bullet Piercing Valve https://www.amazon.com/dp/B00DM8J3MI/ref=cm_sw_r_cp_api_ny8Kyb72996YJ
They sell these things for exactly this application. My fridge already has one on it. I've been charging it monthly for a few months and finally broke down and ripped out the evap to find the leak.
As stated, Mr Beer was the starting point for a lot of brewers. The main drawback is that if you like it, you're stuck with low-par equipment. If you like brewing, this will be put on a shelf after the first use, or end up getting trashed. You can get a real carboy for $40. Get a 6 gallon one, you'll regret getting a 5 gallon. http://www.northernbrewer.com/brewing/6-gallon-glass-carboy.html . Next up is a large kettle. you may already have one, if not, a 5 gallon's a good starting point for $38. http://www.northernbrewer.com/brewing/5-gallon-stainless-kettle.html . This brings the total to $78 so far. Now since you're a beginner, I'd suggest sticking to an easy batch kit such as one of these http://www.amazon.com/True-Brew-Amber-Ale/dp/B002BTZZ7G/ref=sr_1_2?ie=UTF8&s=grocery&qid=1299122546&sr=8-2-spell . So we're just over $100 at this moment and you have the basics of what you need (if budget's the main issue). I strongly suggest spending a buck and getting this kit http://www.amazon.com/Superior-Home-Brew-Making-Equipment-Kit/dp/B000GRP408/ref=sr_1_cc_2?ie=UTF8&qid=1299122613&sr=1-2-catcorr . It's been the perfect starter for everyone I've recommended it to, and then, you're done. You've made the investment and have everything you need (minus the brew pot). If you don't like brewing, you can sell the equipment easier than a used Mr Beer, or just use the stuff for other things. The kettle can become a turkey frying pot. The bucket can clean your fishtank. The Carboy makes an awesomely heavy change jar.
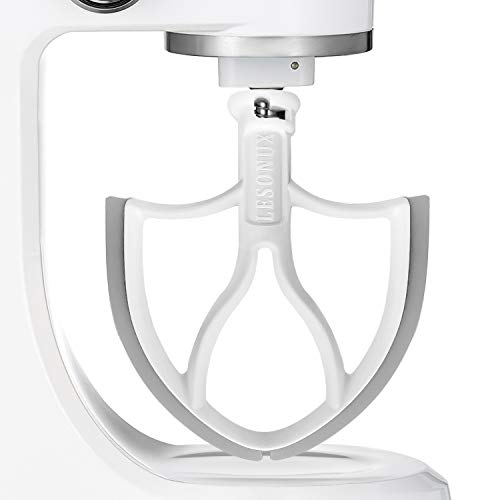
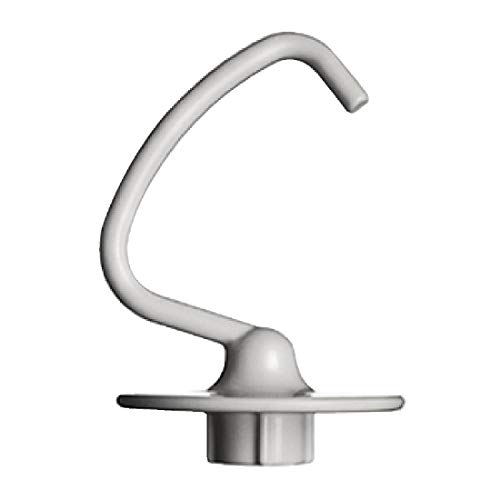
I spent weeks looking and researching different food processors. Something to keep in mind: I don't do a ton of dessert baking, but bake bread once a week - so I needed something with a dough hook AND high wattage/horsepower. I also wanted something that could shred a sweet potato (because fuck doing it on a box grater).
The smaller bowl, which is good for hummus and guac, unfortunately has to be used inside of the larger bowl. The larger bowl doesn't get dirty but it was different from what I expected.
When grating/slicing, the food feeder chute has to have the secondary part in it or the unit won't turn on (for safety). Hard to explain but essentially the feeder chute is smaller than I thought, so I have to cut a sweet potato into fourths to shred it.
It has been a workhorse, and it handles my bread dough no problemo. It saves me a TON of time and mess from doing in a bowl or on the counter. The Cuisinart doesn't struggle at all. (Here's a super easy baguette recipe I make once a month).
My only major reservation as far as "buy it for life" are the buttons. Not sure of the name, but it's a soft plasticky material you press inward to toggle the button, versus a flip-type switch. I feel like these buttons won't last quite as long, but who knows.
It is heavy, and big, but I am 5 feet of 100lbs lady. All in all, I do recommend it.
Edit: Also, you HAVE to get this organizer. It sucks it doesn't come with the unit but it is a pain in the dick to keep track of the different discs and blades.
Edit2: For the price, I actually found mine cheapest ($50 cheaper) at Costco of all places. They were having a temporary sale and I just went with a friend who had a membership. Keep an eye out at places you wouldn't expect.
If you don’t have the proper tools to braze, these would be a much cheaper and easier option for you.
Supco BPV31 Bullet Piercing Valve https://www.amazon.com/dp/B00DM8J3MI/ref=cm_sw_r_cp_api_i_p9gRDbMD92GKC
I use a vitamix. Works well but like €500.
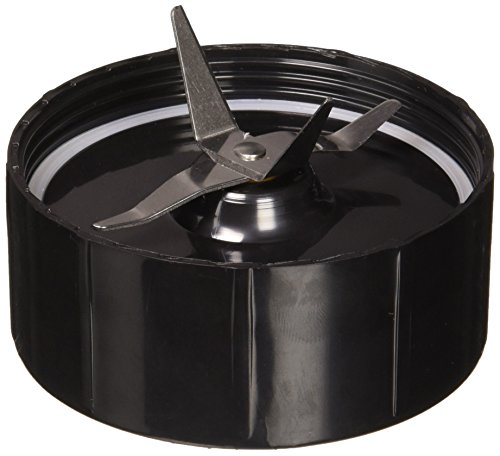
Have you tried one of these blades.. http://www.amazon.com/Shaver-Blade-Magic-Bullet-Processor/dp/B009QUZBXQ I think they're just sharper and stronger, might be better for oats?
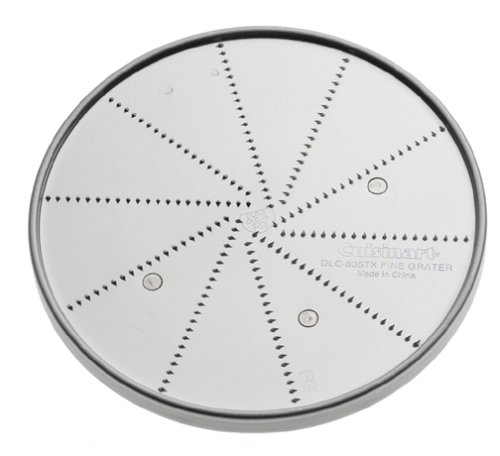
When I was a kid we made sno-cones similar to the Hawaiian ones using a grater blade in our food processor. Blade was similar to this one.
The Amber Ale kit from True Brew.
I think you have a defective product. I bought the Ninja Kitchen System 1100W model BL700 about 8 years ago on sale for a good value at Big Lots. It's loud but not abnormally loud and doesn't vibrate "like crazy". It does have suction cups for stability, but we don't normally even lock them down with the lever. It's still going strong and is continuing to be used on a daily basis by my family this year. I notice that Best Buy has a similar system, the more powerful Mega System model BL770 for 50% off at $99, compared to $159.99 right now on Amazon. If I needed to buy another blender, I wouldn't hesitate to buy that system at that price. Amazon also sells replacement motor bases for my model for only $52, although I'd probably just buy the whole system for $99 because it would be a better value to get the extra 72oz pitcher, 64oz bowl and two single serve smoothie cups for $47 more.
I have a Nutribullet pro, and would not recommend it. The flip-top lids have a flimsily designed locking mechanism that breaks off very easily- I've had 3 of them break on me. Now whenever I take a smoothie with me on the go, I have to make sure it's in a vertical orientation and in a secondary grocery sack in case of leakage. I have no idea why they don't just use a blender bottle-esque design.
If anybody knows of replacement flip-top style lids for the nutribullet that actually work, I'd love to buy some.
I used to have this problem, then I got these
http://www.amazon.com/Think-Bleed-Arrest-Sponge-sponges/dp/B004TAN5VS/ref=sr_1_1?ie=UTF8&qid=1348252818&sr=8-1&keywords=bleed+arrest
They're called Bleed Arrest - it clots the blood almost instantly.
I went from having to deal with these for 20 minutes at least to at most 1-2 minutes.
Have you sharpened a blade like this?: http://www.amazon.com/Robot-Coupe-27055-Blade/dp/B00HNQBM3S
Our restaurant was just given a used r2, and I would really like the blade to be sharp.
here's the link
http://www.amazon.com/Supco-BPV31-Bullet-Piercing-Valve/dp/B00DM8J3MI/ref=sr_1_1?ie=UTF8&qid=1375293003&sr=8-1&keywords=carto+punch
5.99 shipped.
just regular 35mm boge cartomizers that have been punched. i was getting them from ivape.net, but they have since stopped carrying them. you can get them here, but the punches look too small for my taste.
you can also just buy regular boge 35mm cartos that aren't punched and then get this thing and punch them yourself.
Here ya go...
Supco BPV31 Bullet Piercing Valve https://www.amazon.com/dp/B00DM8J3MI/ref=cm_sw_r_cp_apa_7tu3AbWW31RXF
InterDynamics RLS-134 13oz. Refrigerant R134a with Leak Sealer https://www.amazon.com/dp/B000COD8R6/ref=cm_sw_r_cp_apa_Kuu3Ab8SRPRGN
FJC 6036 R134a U-Charge Hose with Gauge https://www.amazon.com/dp/B00620PXMW/ref=cm_sw_r_cp_apa_bvu3Ab2FH7N4M
R12 R22 R502 Screw to R134A Fast Conversion Adapter Valve 1/4'' to 8v1 Thread https://www.amazon.com/dp/B01HL55KBU/ref=cm_sw_r_cp_apa_Wvu3AbSJXAZ8H
I've personally got a Phiniac. I like them so much I bought 2 of them on Black Friday last year. But if they are out of your price range, you could get a Texas Tuff Tank. The guy that I bought mine off of is out of business, but he was the guy that created the ones that VapeDudes sells. Texas Tuff Tanks are going to be harder to change the cartos in due to the rubber caps. That's why I like the Phiniacs. If you ever get a Phiniac, be sure to pick up one of the tank filler tools - amazing.
Also, SureVapes always has great deals on cartos. Boges are the way to go on cartos. You can get them pre-punched for a little more, but I always punch my own. I punch my cartos with the Supco Bullet Piercing Valve.
I bought my VAMO from here. $39.95 for a non-stainless version. I bought the stainless. I think it's like $6 more. Or pick you up an MVP for $39. Beware though, the iClear 30 that comes with it is garbage. They've since improved the iClears, but those were never that good.
I can't guarantee any of these mods obviously, everyone has different experiences. As you know, vaping is like rolling the dice. I can only relay my experiences. We know a bit more about where the MVP comes from for instance, than we know about who/what/where the VAMO is made.
Let me know if you have any more questions, I'll be happy to answer.