Best garden netting products according to redditors
We found 52 Reddit comments discussing the best garden netting products. We ranked the 24 resulting products by number of redditors who mentioned them. Here are the top 20.
We found 52 Reddit comments discussing the best garden netting products. We ranked the 24 resulting products by number of redditors who mentioned them. Here are the top 20.


![Bird Netting [Heavy Duty] Protect Plants and Fruit Trees - Extra Strong Garden Net Is Easy to Use, Doesn't Tangle and Reusable - Lasting Protection Against Birds, Deer and Other Pests (7.5ft x 65ft)](https://m.media-amazon.com/images/I/51sGaqfR0bL.jpg)


Thanks everyone for the support, advice and comments! We didn't realize we'd get such a response so here are the promised additional info and pics!
Supplies (Total = $4153)
Planning steps
Construction steps
Future plans
Knowledge resources
"15 ugly ideas to make your neighbors hate you for ruining the attractiveness of the area."
FFS, these were horrible.
Here's a legitimately cheap garden fence:
Drive .5 inch-thick 4-foot long rebar 2-feet into the ground, space 5-10 feet apart, these will be the foundation for your vertical posts. Slide .5 inch EMT conduit over the top of the rebar, creating vertical posts, and cut the conduit to whatever vertical length you desire. On the top, install a T-joint and use more EMT conduit as horizontal spanners. Paint the EMT conduit (if you so desire) and put a weather resistant clear coat over the top. Next, use Nylon Trellis of any length and size you want. If you want privacy, go for nylon trellis that has smaller openings (the 5-inch opening is the smaller size), tie the trellis to the EMT conduit to make sure it's taught. Finally, plant some sugar snap peas every 3 inches, or any other climbing plant. Most summer squash works well too. If you want it to last through the winter, ask your nursery what ivy or other climbers work in your area.
10-foot lengths of EMT conduit are about $1.90 each, the rebar is about $2, and the T-joints about $4. So, you can do a decent sized backyard for about $50-$100, including seeds.
As long as the nylon stays taught it looks aesthetically good. The nylon I've used has lasted 3 summers without any signs of breakdown, and the EMT conduit is just fine. Even spaced 10-feet apart and 10-feet high, these can support nearly 100 pounds of produce. If you want a stronger fence, put your vertical posts closer and use concrete to set in the rebar foundation posts. If you want more privacy, consider planting a larger variety of plants, and give your plants nutrients to make sure they're thriving.
In case you are feeling like building more barriers.
For indoor use, you could also use this for material.
https://www.harborfreight.com/5-ft-6-in-x-7-ft-6-in-blue-all-purposeweather-resistant-tarp-69136.html
I'd fence them in and then cover the area with bird netting. That's what we did with the 90' x 30' area that my girlfriend's chickens live in. It's a hassle to put up, but will keep anything from above from getting them. Plants will still grow through the stuff and it ends up sagging over time. Ideally you'd want to replace it every year or two.
You can see the netting in this pic
We used something just like this: https://www.amazon.com/BOKNIGHT-Netting-Poultry-Aviary-Square/dp/B076PYYLMH/ref=sr_1_4?keywords=bird+netting&qid=1556405241&s=gateway&sr=8-4
We also have that foil stuff up. No idea if it actually helps at all. The chickens don't seemed bothered by it at all.
3.5" netting.
> Are potatoes and peas a best bet?
Yes, and they complement each other really well as companions in the same bed/pot. Add some squash and corn in the mix, then you'll really be cooking with fire. The best way to optimize peas and squash is to grow them on a nylon trellis. You'll get stupid amounts of squash.
If calories is your primary goal, think about livestock. You can easily do rabbits, chickens, ducks, geese, and pigeons locally with little effort. If you have space, think about pigs and goats or lamb.
The other option is processing and preserving your food. A handful of tomatoes is going to have a low caloric output, but if you grow 125 pounds of tomatoes and reduce that to 12 pounds of tomato sauce or 6 pounds of tomato paste, those are very calorie dense. Same with squash: cook it to break down the fibers, slow heat to boil off the water, then add some curry powder and spices - you've got calorie dense pumpkin curry to throw in the freezer.
This spring I started a garden on my deck in Philadelphia. This was really the first time I gardened anything seriously and I’ve enjoyed myself immensely. Skip to the bottom for the album of it all.
I primarily started my plants from seeds without researching how they grow:
I quickly realized that I needed to be creative about how to manage these plants as a lot of them grow out instead of staying compact. Once the plants outgrew their medium sized pots, I needed a different solution. The major unlock for me was finding CaliKim's container gardening videos on YouTube that recommended planter bags. She also has a great method of making cage trellises that work perfectly in the bags she recommended.
With this starting point I was able to get these plants into a compact space and still be able to thrive. Because I’ve got everything on top of each other there is some inter-mingling but for the most part things stay in their cages.
My deck faces south and with the egregious Philadelphia summer I sometimes have to water twice a day to keep everything happy. I have done a lot of pruning to keep the plants reigned in and not way overgrow their plot.
As the project progressed I realized I needed bamboo stakes to stabilize the cages and my non caged plants, and a few other random items listed below:
The watermelon needed hammocks to fend off gravity in this system, pole around YouTube for different ways people have done this
In my research I got disheartened several times because many said growing watermelon or cucumber or squash in a compact space is extremely challenging and arguably not worth it. At that point I had already started the plants and I decided to give it a try anyway. To my delight things have turned out very well, and I wanted to share with any other urban gardeners who think they don’t have enough space for veggies.
Next year I would grow more cucumbers and cage them instead of stake them (or maybe both). For the winter my plan is to leave the bags and soil outside and see how they hold up. It seems like they are able to handle snow / excess moisture without too much issue.
https://imgur.com/gallery/jCqiEQH
Yeah, those are all looking pretty good. You could probably harvest a lot of that big kale leafs.
Also, for cucumbers, try growing them vertically by constructing a trellis above them. Cucumbers and pumpkins do best when growing vertically as it exposes more flowers to the air (and pollinators).
I like this style: https://www.amazon.com/Gardeneer-Dalen-Trellis-Heavy-Duty-Tangle-Free/dp/B000BZ8FXS/
Also: sweet pad.
my go to
Bird netting will help you get a bigger harvest next year.
Congratulations on these beauties!
Fa sho man here it is
https://www.amazon.com/VIVOSUN-Elastic-Trellis-Netting-Dimensions/dp/B07RRTJFHD/ref=mp_s_a_1_1?keywords=2x4%2Bscrog%2Bnet&qid=1567168942&s=gateway&smid=A2PQGFJXAT8J9K&sr=8-1&th=1&psc=1
It should be ok, most cats know not to jump. However, you could always install mesh fencing like this.
I tried to control by picking last year (my first year), and it is a lot of work for very little success. This year, I bought this row cover, which I'll support with wire hoops I bend out of yard scraps and garden staples. I haven't tried it, but everyone says BT works really well. You may still have time to fashion some row covers, though.
I had mine over a bed, it is supposed to work as you can see in the link I sent, but I found it shaded off too much. I don't know. You may have a thought as the lettuce likes it cooler. I mean this kind.
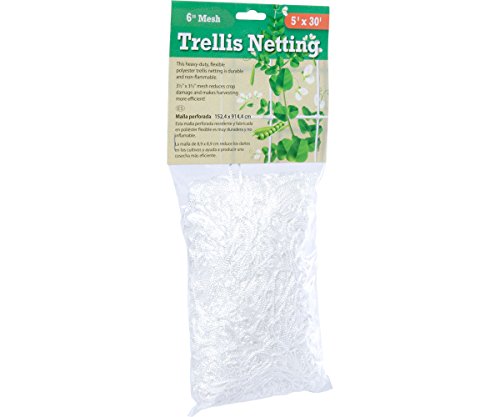
https://www.amazon.com/Tcamp-Heavy-Duty-Polyester-Trellis-Netting/dp/B07NV6B1Z2/ref=sr_1_2_sspa?crid=39WAVNIV092E1&keywords=trellis+netting+for+climbing+plants&qid=1562173058&s=gateway&sprefix=trellis+nett%2Caps%2C136&sr=8-2-spons&psc=1
Grapes need sun, the fruit. I have to pull off leaves tomorrow. Fungus attacks the fruit as well as the leaves, so sun helps keep the fungus down. Other than that, I don't know of any. Peppers and tomatoes get sun burnt actually.
https://www.amazon.com/Hydrofarm-HGN30S-Flexible-Trellis-Netting/dp/B00CJJ7WV0/ref=mp_s_a_1_4?keywords=trellis%2Bnetting&qid=1573568535&sprefix=trelli&sr=8-4&th=1&psc=1
I like it, worked well enough I think for my first grow, but I'm still quite the amateur.
GROWNEER Flexible Net Trellis for Grow Tents, Fits 4x4 and More Size, Includes 4 Steel Hooks, 36 Growing Spaces https://www.amazon.com/dp/B0773HHBK7/ref=cm_sw_r_cp_apa_i_gLfWDbHJS90K2
https://imgur.com/a/a7SQ8zs
Here’s also the link for the trellis netting.
https://www.amazon.com/dp/B078RHZTVK/ref=cm_sw_r_cp_api_i_p-h5CbGTTMPCC
Like I said, this netting made for very easy installation in my tent as all I needed to do was hook them on to the frames . In your case, you could possibly build your own frame using pvc and the netting or with some other materials you prefer. Hope all works out.
If it helps, this is the best value for a small garden that I found while searching for some anti-hail netting. ( So much of what I found would be like 50'x100') NE CO here, so I'm trying to be prepared for my first hail season!
Mitef Anti-Aging Orchard Anti-Hail Netting Vegetable Garden Hail Protect Netting,16.3x10ft https://www.amazon.com/dp/B078ZJ3TQQ/ref=cm_sw_r_cp_apa_i_G3RRCb147GWXM
Better option is noseeum netting. Something like this.
Tent link
Light link
Ventilation link
Ducting link
CO2 bag link
Timers link
Extension cords link
Netting link
And a few other things.
I think so. Plastic bags can be reused, but if you use cheap thin ones they kinda fall apart in the sun and only one time use.
I know there is paper bags with I think a wax coating. I believe people have used pantyhose.
Amazon sells these:
https://www.amazon.com/YGDZ-Protect-Insects-Mosquito-Shipping/dp/B07434J8DK/
https://www.amazon.com/Alltripal-Reusable-Protection-Vegetable-7-87X9-84inch/dp/B07SS92MQ6
Which are more reusable and mesh. I have never used them so I can't say how good they are/aren't.
https://www.amazon.com/Gardening-Vegetables-Durability-Think-Crucial/dp/B07259RWNT/ref=sr_1_1?s=lawn-garden&ie=UTF8&qid=1497473153&sr=1-1-spons&keywords=trellis+netting&psc=1
Listen to the GrowBoss.
https://www.youtube.com/watch?v=IHqRutet2yA&t=217s
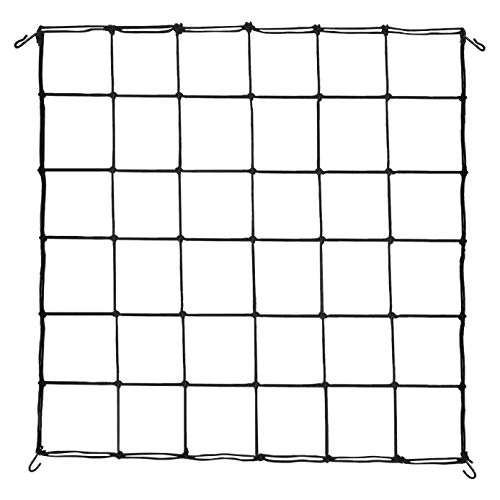
4X4 tent, HLG 600 H Quantum Board, 707 soil watered/fed every 3 days. The clips are plant clips I normally would use on some bamboo... but hold to netting well too, The trellis is a bungee one off of Amazon:
( https://www.amazon.com/VIVOSUN-Elastic-Trellis-Netting-Dimensions/dp/B07RRVHHDK/ref=mp_s_a_1_9?keywords=trellis%2Bnetting&qid=1564796808&s=gateway&sprefix=trel&sr=8-9&th=1&psc=1)
Hope that helps!
I don't have many pictures to share, but to prevent deer from getting into my 60' x 20' garden, I did the following:
I bought 18 seven foot long metal U-posts from Lowes ($6.98 each), and drove them into the ground (with a damn sledgehammer, while standing on a plastic chair set on cardboard so it wouldn't sink into the ground, since the post driver tools I had access to weren't big enough for the size of the U-post). Once in the ground, that left about 5.5 feet of post above ground. I have seven posts on each side (the 60 foot lengths) and then two additional posts on the 20 foot ends to provide a doorway/gate opening.
I had purchased 7.5 foot high wildlife netting (about $20/pack, and I bought 3 packs), which I'd thought would work well with the 7 foot posts (leaving some extra to pin to the ground to prevent animals from digging under it), but while I was aware of the fact that driving the posts into the ground would result in less height, I don't think I knew it would be a foot and a half less. I had read deer can jump over fences less than 8 feet high, so--while I wouldn't go to 8 feet--I wanted more height than the 5.5' I had. So I bought 36 eight foot long treated pine furring strips ($1.97/piece so about $72 total), to fasten to each of the metal posts to provide additional height.
I positioned the posts on the long side at ten foot intervals, and the gate openings are about 8 feet from each corner. I then took two furring strips and would lie them on the ground, and cut a piece of netting to the necessary length to go between each set of posts, and then stapled the netting to the posts. I then took the "panel" of netting, and using zip ties, fastened the furring strips to the metal posts.
I had initially been thinking the netting would run as one continuous length for the full 60 foot length of each side, but I decided to put it together in "panels," if you will, both because I thought it would be less likely to sag (since the lengths would only be about 10 feet long, and because I thought it would be easier to keep them taut at shorter lengths), and also because I realized I could also conceivably remove the 10 foot panels of netting (while still fastened to the furring strips), and roll them up for winter storage (figuring the weight of snow and/or ice on the netting would likely cause problems).
When I started making the panels, I left about 12 inches of netting hanging below the bottom of the furring strips, thinking it would be useful in preventing animals from crawling/digging under the net, but I later realized that the extra netting at the bottom would likely just make my life harder when it came to weeding, and that my neighboring gardeners (I'm at a community garden) would be more likely to step on it, get caught on it, inadvertently pull it out, etc. I was also losing an extra foot in "fence" height by leaving that extra net hanging off of the bottom. So about halfway through my panel construction, I started keeping the net flush with the bottom of the furring strips, and instead putting it up about a foot higher on the strip. I need to go back and re-staple the ones at the lower height, so that they're all the same height.
The doorway/gates are just smaller panels, one size zip-tied to a metal post, and the other with a zip tie left loose so that it can slip over the top of the metal post on the other side to allow for opening/closing the door/gate.
Some pictures....it's hard to even see the netting, but trust me, it's there.
The plot before any fencing.
After the fence was in place, looking toward the back of the garden. "Gate" at left corner.
After the fence was in place, looking toward the front of the garden. "Gate" at center.
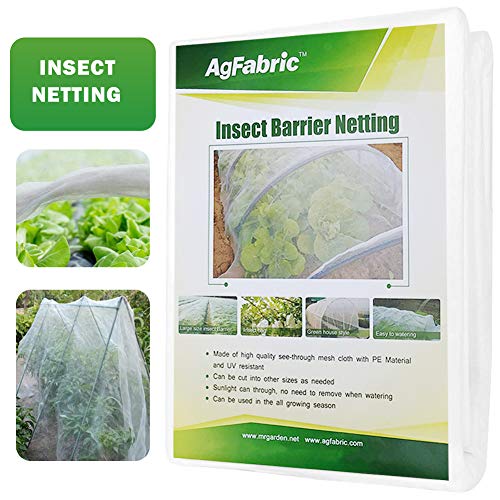
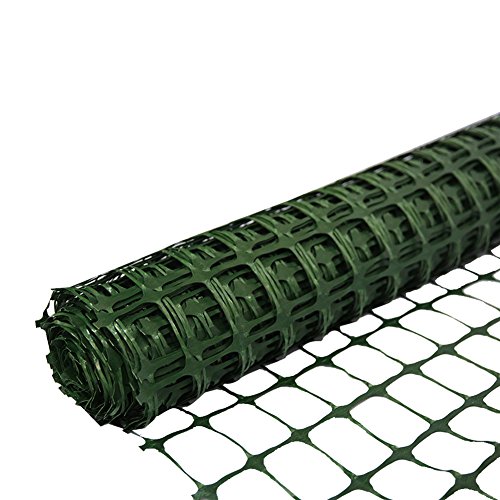
If you have small trees you’ve recently planted, make sure you put 1/4” or smaller garden mesh over them. [Here’s one I just ordered] (https://www.amazon.com/Agfabric-Standard-Netting-against-Squirrels/dp/B00X3AXS6W/ref=aw_st_pd_dx_piup_1/142-8814630-1479961?_encoding=UTF8&pd_rd_i=B00X3AXS6W&pd_rd_r=3d5ff29c-d2e5-436d-8248-a33760db4c9f&pd_rd_w=w2VVE&pd_rd_wg=74rJZ&pf_rd_p=ba1e24cc-8b1a-400c-95be-f22d87d23cfd&pf_rd_r=0KYT38MAY7E83K1CFNPR&psc=1&refRID=0KYT38MAY7E83K1CFNPR)
I cover plants that already have cages or supports. Individually or sometimes in pairs. The netting drapes over the top and I secure the bottoms with a few garden staples. I just pull out a staple or two and lift the netting when I want to access the plant.
I use this type of netting, cut to fit. If I were going to try to do a wider area, I would use something more like a micromesh with hoop supports. That allows you to do a bigger area and the birds and animals won't get stuck in it like they would in a netting.
Build an H-shape target frame from PVC, and use fine netting to catch your brass.
If you don't want to fiddle with stuff, here is a manufactured option: http://www.bubca.com/index.html
The fabric was pretty stretchy on the trellis to begin with, so it was just a matter of pulling it tight enough when I setup the bungee cords, then cutting the leftovers. Here is the one I used: https://www.amazon.com/gp/product/B00CJJ7WV0/ref=oh_aui_search_asin_title?ie=UTF8&psc=1
I only started it in early flowering but it's been helpful to keep the 3 strains a similar height. That cheese in the front left wants to take off for the sky.
So something like this?
http://www.amazon.com/Gardeneer-Dalen-Trellis-Heavy-Duty-Tangle-Free/dp/B000BZ8FXS/ref=sr_1_1?s=lawn-garden&ie=UTF8&qid=1457595755&sr=1-1&keywords=trellis
And then try to weave through there so anymore stretching goes sideways instead of up?
The LEC seems great. With my Hyperfan on 35% it stays between 5-10 deg. F warmer than the room the tent's in.
edit: Or maybe this would be a better idea since the mesh is smaller.
http://www.amazon.com/Hydrofarm-HGN15S-Trellis-Netting-3-5-Inch/dp/B00CJJ7WV0/ref=sr_1_1?ie=UTF8&qid=1457596396&sr=8-1&keywords=Hydrofarm+trellis
I've had good success with this, a little pricey depending on yard size but it gets the job done
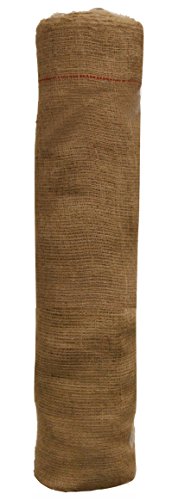
Easy Gardener 3103 3x150 Natural... https://www.amazon.com/dp/B000HQOGLQ?ref=ppx_pop_mob_ap_share
My dogs and my turtles keep eating my mom's vegetables so I think she would like this [Garden Netting] (http://www.amazon.com/Dalen-Gardeneer-30-Foot-Trellis-TP-30C/dp/B000BZ8FXS/ref=wl_it_dp_o_pd_nS_nC?ie=UTF8&colid=2CCD8H3KKWZ5A&coliid=I2K8ZVBFE6KYVX).
Thanks for the contest! :D