Best glue sticks according to redditors
We found 57 Reddit comments discussing the best glue sticks. We ranked the 29 resulting products by number of redditors who mentioned them. Here are the top 20.
We found 57 Reddit comments discussing the best glue sticks. We ranked the 29 resulting products by number of redditors who mentioned them. Here are the top 20.


Here are the PDFs of the artwork for easy printing on 8.5” x 11”. You should be fine printing at 100% and make sure it's Landscape mode.
RIGHT ARM
LEFT ARM
Supplies you’ll need:
Color printing capabilities for 8.5”x 11” paper (standard Letter size)
Two (2) qty. 20” x 30” foam core boards—I went with this size because they are most readily available at stores like Michaels and Staples or even Amazon
20"x30" Foam Core Boards and here is a 10-pack on Amazon if you wanted to do your entire row (DO IT)
Spray Mount or glue stick
Scissors and a boxcutter
A cutting mat would be helpful but is optional
•Feel free to ask questions. If I can, I’ll try to answer but I hope you find it pretty easy. Only the cutting part takes attention but I found that easiest to hack large parts off in straight cuts and then get progressively smaller with the cuts. Good luck and let’s surprise the ALCS with #LETBRETTBANG signs everywhere! LFG
EDIT: You don't need to use foam core. You can probably use a large cardboard box or poster board. That might even be easier to cut. I just recommend the foam core because for its lightweight not much matches its rigidity.
Have you heard of sugru? It's a moldable glue that I imagine has a similar feel to that toy. It's pretty strong stuff, too. It's not exactly what you were asking for, but I bet your son could probably recreate the toy in blue sugru.
This is what everybody is using.
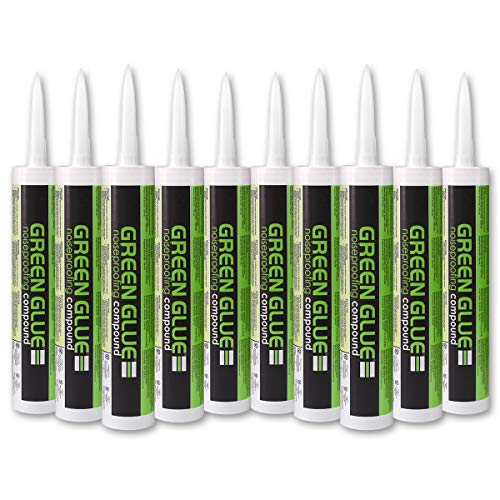
I'm not OP, but it's another layer of soundproofing. You apply it between the layers of drywall.
http://www.amazon.com/Case-Green-Glue-Noiseproofing-Compound/dp/B000SKWD8Y
Yup, link worked fine. Lets figure this out.
You've got a M3D, which as /u/Keebie81 said isn't the best. If I understand it has proprietary software which could make things difficult, but we'll see what we can do.
So first off lets get some background information. What kind of filament are you using? ABS, PLA, or something else? Can you get us some idea of what settings you're using? Take screenshots of every setting page you can find so we can see what settings you have now and what extra things we have to tweak.
Just taking a look at it, it seems like you're having adhesion problems (which can be fixed with treating the print surface appropriately and fine-tuning your Z-height) and warping problems (which are usually material and temperature related).
*
We can try to take a crack at adhesion first. There's three big parts to this: making sure you've got a good surface, making sure the surface is treated with the right stuff to get maximum stick, and then making sure your nozzle is close enough to the printer to get the filament down right.
On the first point: painter's tape is a good, cheap bed surface that seems to work great for a lot of people. I use this stuff. There might be blue painter's tape somewhere in a janitor's closet or shop room somewhere, but you might have to go get some yourself. First clean off your bed surface with alcohol and a good cloth that won't leave anything behind, then lay down your strips nice and flat with no air bubbles and as little gap between them as possible. I also use a putty knife to smooth it all flat.
On the second point: getting your bed surface (and z-height) can be enough, but you can get extremely good sticking with a good bed treatment. There are two popular methods: glue sticks or hair spray. (Take a look at the "Customers who bought this also bought..." for the hair-spray, it's not what you'd expect for a beauty product.) I use that hair spray, and spray a cloth which i then wipe onto the painter's tape for a nice, even coat. You can pick some up at CVS, and I'm sure you have glue sticks laying around at school.
Finally: adjusting your z-height. This is going to be slightly hardware dependent so I may not be a ton of help here, but you have to be really precise in where your nozzle homes to. Heat up your printer (so it's thermally expanded to it's "printing" size), take a piece of white printer paper, put it under the nozzle, then land the nozzle. Now grab one edge of the paper with two hands and try to push and pull the paper. If you can easily move it without feeling any resistance from the nozzle, your nozzle tip is too high and needs to be lowered. If the paper is pinched in place and only bunches up when you try to push it, you are too low and need to raise the nozzle. If you can move it but feel a slight resistance** from the nozzle without it actually bunching up, then you're golden.
https://www.amazon.com/E-6000-Industrial-Adhesive-Medium-Viscosity/dp/B00WIY5IUI/ref=sr_1_2?s=industrial&ie=UTF8&qid=1486241848&sr=1-2&keywords=e6000
I use this to bond my works to painted canvas. i have demonstrated to people buying them and worried about how strong they are by slamming on the piece a lot and then holding it upside-down, i swear by this stuff.
When I do labels, I have them printed from a PDF at some place that does the color laser printing, onto a good paper stock.
Then I use these - https://www.amazon.com/Elmers-Purpose-School-Washable-0-24-ounce/dp/B001E69WBW/ref=sr_1_5?ie=UTF8&qid=1486578385&sr=8-5&keywords=school+glue
They come off with a simple soak, and do not change or run the color. I don't use my inkjet as the moisture build up from chilling the bottles will cause the ink to run.
One of the cheapest ways to significantly cut down on sound leakage is to double up the sheetrock on the walls with a layer of Green Glue in between them. Make sure to caulk all corners, joints, and anything that could possibly let air leak through it. If you can, get a door that seals shut when you close it, but if you're on a budget, just try to get a heavy, solid door, and put weather stripping around it, sealing off all the cracks.
As far as filling the walls with insulation, I know Roxul makes some great sound baffling insulations like Safe N' Sound, or other similar ones that will also help you cut down on sound leakage significantly. And if you have the time and effort, I've heard it helps to put staggered cross braces between studs to break up the large number of identical resonant chambers in the walls to several smaller, different sized resonant chambers. Granted, I've never done it before, but adding some cross braces between studs doesn't seem like a whole lot of extra work if there's a potential for it to make the room sound better. Maybe someone can chime in on how effective it really is.
Floating the floor will help a lot for isolating the bass, but you can also build some smaller platforms for things like bass and guitar amps and drum kits. Or you can get something like the Auralex Gramma pads for them if you don't want to build them yourself. They won't isolate as much as an isolated floor, but they'll help.
Then finally work on acoustic treatment to make the room sound "nice" for rehearsal and recording. Make some corner bass traps out of thick rockwool panels or Owens Corning 705/703 (depending on what you can get your hand on), hang some scattered absorption panels on the wall, leave some scattered wall surfaces bare, and maybe add some diffusers to the room to add some natural reflections and break up the big, empty, rectangular space. But acoustic treatment for a live room depends on a lot of things, so that's something you'll probably have to figure out on your own.
Luckily the 15 degree roof pitch will help a lot in taming the room and creating a more acoustically even space, which is convenient. Often studios will design all of their walls and flat surfaces to be at different angles to reduce the prominence of room modes that can create some odd sounding spots in the room. The angled roof won't make it perfect, but it will make it better than a roof that's parallel to the floor.
https://www.amazon.com/Elmers-Disappearing-Purple-School-E1591/dp/B00ATJLLC8/
I usually use a few pieces of UHU Patafix. Press with them on the case, or even on the AirPod its self and the dirt came off.
Here’s the amazon link:
https://www.amazon.com/Patafix-Sticks-Again-Repositionable-Quick/dp/B0090L5RIK
I use one of these these... Frequently. I haven't tried purple. I've got about a 0.1mm thick layer of it on the bed from frequent usage. The coating seems to prevent the need to print wet, and it gives me a bit of a "scraper buffer" on the glass.
There is actually hotglue in a lot of heatshrinks. You can also use hotglue to make connectors for your cables if you don't have access to some injection method. Really, hotglue is the basically the same plastic as used in many industrial applications. Hotglue is great. You can use it to insulate three-way connections and to make your heatshrink look more even. Just make sure it doesn't have sparkly metal bits in it.
>I can imagine you doing that XD (having a sticky note on my hammer)
I always laugh at myself when I do, but it works! : )
>I don't keep sticky notes at home.
We were talking about adhesives. This is a fun one. It makes any paper into a sticky note. : )
>I'll figure out the sandwich thing. It's in my enormous list of food bookmarks XD
Perfect!!
Here's a quick tutorial! Do give me a shout if you need clarification of any parts of it!
To make a cover for your cth480 you'll need to find a glass supplier that can cut you a sheet of 2mm glass sheet to 123x205mm.
The prices, quality and precision of the cutting can vary a lot between suppliers and you may need to search around for one that doesn't have a minimum order size.
If you search google maps for glass suppliers, you should be able to find a fair few local suppliers close to where you live!
.
When you get the glass cut, the edges will be very sharp, so you'll need to smooth over everything to make it safe/comfortable to use.
I've experimented with different ways of doing this, but on a small scale, the most effective method I've found has been to use some fabric backed wet/dry sandpaper in the 300-350grit range stuck with double sided tape to a hard smooth surface such as a granite chopping board, or a hard kitchen work surface.
Ideally you'd want some sort of diamond abrasive, but they're more expensive, and harder to get hold of. Sandpaper will work fine for a one off though, but you may want at least one or two spare sheets, as the hard glass sheet will wear down the sandpaper very quickly!
Also, be sure to have something soft to put the sheet down on when you're working so that you don't inadvertently scratch the surface by putting it down on a piece of grit from the grinding process.
.
When it comes to sanding, first off wet the sand paper, this helps the sand paper cut more smoothly as well as keeping the glass dust down. You want to avoid breathing any of the dust if possible!
Hold the glass sheet at around 45 degrees to the sand paper and, applying light pressure, make circular motions to grind the edge down. Your first aim should be to dull all of the sharp edges of the sheet left over from the cutting! This should only take a few strokes over the paper to do!
Decide which side of the sheet you want to be the top. This side will need to be beveled so that it's comfortable to use! Depending how much beveling you want, you can remove as much or as little of the edge as you want.
You can also round off the edges and corners of the cover. I'd recommend doing so if you can work out how to, but I'm not sure how to describe the process without making a video about it.
Once you're done with the grinding you'll want to clean off the cover the same way you'd clean normal glassware!
.
If you want to have the low friction surface finish, then you'll need to get hold of some silicone spray lubricant, you can spray it on the surface and then buff it on with a glasses cloth or some kitchen towel.
The main advantage of the surface finish is that it gets rid of the 'break in' period for the cover. The clean glass cover can start off a bit sticky and takes a little while to become nice and smooth without the silicone finish. You could alternatively rub some candle wax over the surface as a substitute for the spray though.
.
As for attaching the cover to the tablet, so long as the cover doesn't slide around on the tablet it's fine, you could use glue, double sided tape, or any other method you want to stop it moving around.
You could even use something like this on the corners of the cover if you wanted it to be easily removable!
.
hopefully you'll understand some of what I've said in the wall of text that this has become, but do feel free to ask me about any parts of it if you need some clarification or more info!
so im looking to get into 3d Printing, and unless someone has some better option, im going with the MP Select Mini.
My question is on the other things i need. Here is the list of the things im looking to buy along with the printer:
I have a set of exacto knives and a screw bit set. Is there anything else im missing?
I use Elmer's All Purpose School Glue Sticks, Clear, Washable, 4 Pack, 0.24-ounce sticks https://www.amazon.com/dp/B001E69WBW/ref=cm_sw_r_cp_apa_.UmGAbVBPRXYY
Dirt cheap and since using them I've never had a print break loose.
You will probably need a powered usb hub to connect the drives. Not absolutely necessary but the Pi only has two usb ports (the micro b port is just for power to the Pi) and cannot power notebook drives directly. Plus, the extra ports on a hub will allow you to connect your drives, a mouse, a keyboard, and a Wi-Fi card; all at the same time.
The case I have been using is the [Punnet printable case.] (http://www.raspberrypi.org/archives/1310)
I did not have any heavy card stock to print it on. So I printed the case on regular paper and glued it to some thin cardboard from a box of crackers. To keep the glue from wrinkling the paper, I used a "school glue" style glue stick. You can find glue sticks almost anywhere that sells office or craft supplies. Then I cut it out with scissors and a razor knife.
These glue sticks would be awesome. My kids go through glue sticks like crazy, especially doing crafts for the holidays, lol.
pay attention in class!
you know those crappy elmers glue sticks they had us use in kindergarten get some of those and apply a coat to the bed(usually in the general area you will be printing). Also grab yourself some isopropyl alcohol to clean the bed. So before a print you apply some gluestick then after the print give it a quick rub down with isopropyl alcohol. Rinse and repeat.
​
EDIT: https://www.amazon.com/Elmers-Glue-Stick-E4062-sticks/dp/B01JZYM6GC/ref=sr_1_3?keywords=glue+sticks&qid=1566011379&s=gateway&sr=8-3
elmers is great, six pack dirt cheap (http://www.amazon.com/Elmers-Disappearing-Purple-School-E1560/dp/B00143UIC2/ref=sr_1_2?ie=UTF8&qid=1453149823&sr=8-2&keywords=elmers+stick)
I'm in Australia and use a blue gluestick, but if you're in the US I've seen a lot of queens using the Elmers purple sticks. I buy the smallest size so that it's not much wider than my brow, so less clean up haha. https://www.amazon.com/Elmers-Disappearing-Purple-Washable-0-21-ounce/dp/B00143UIC2
Easiest and most cost-effective way is to use this stuff:
http://www.amazon.com/Case-Green-Glue-Noiseproofing-Compound/dp/B000SKWD8Y
If your attic doesn't have existing drywall, you'll need to hang two sheets of drywall with GreenGlue applied (as per instructions) between. Do the same with the floor and whatever door is up there. Don't forget to seal.
If you've already got drywall you'll need to strip the walls to the drywall, clean it, apply the glue, and hang another sheet (then of course refinish the walls and seal).
I would advise against the whole process though. It's going to be absurdly hot/cold in an attic. There will be sound bleed. It'll be cramped. I just don't think you're going to be happy with the results after going through the cost and effort to professionally soundproof your space.
I'm no sound expert or anything, but the expanding foam is much less dense than whats in the solid core doors, so I'd imagine less effective.
Upon further research, it seems like expanding foam isnt well regarded as a noise dampening solution in general. There is a product called Green Glue (which I could only find in 12 packs for $200...), that some people seem to revere as a gift from the soundproofing gods. Price aside, I'm not really sure how you would apply it inside a door, since it looks pretty thick (would be hard to distribute evenly).
Personally, I'd go with the simple option of a new door. But, you have some options now, and its up to you.
Buy
($6)Wires:For the MOFSET mod
($1o)MOFSET
($6)Wire spades:For the MOFSET mod
($8)Assorted M3 Bolts:You need some for a few mods and for the bolts you will inevitably strip on this
cheapwonderful machine($13)Longer assorted M3 Bolts:For a few mods
($9)M4 Bolts:For one of the mods
($9)Metric allen wrench set:Had to order one of these since metric tools aren’t common round these parts
(~$20) PLA of preferred choice- You’ll run out of the sample bit quick so go ahead and order a roll or two to be prepared. You will note some upgrades require ABS so a small spool of that to your order will also help.
($6)M3 Lock nuts:Critically needed for a simple mod
($10)Threaded rod and nuts:Please note that this item seemed difficult to find online. I recommend going to your local hardware store and getting two 5/16” rods of at least 16” in length. They should have an assortment of threaded rod in various lengths available. Also note that the pitch of the threading matches the nuts you buy. Further instructions regarding this can be seen in Azza’s Z-Axis braces below.)
($6)9mm Wrench for the nozzle: Don’t wait for your first clog, go ahead and have this on hand to remove/change the nozzle. Note to only tighten/loosen the nozzle when heated.
Below is the order of printable upgrades I recommend but I suggest you mix in a few other prints along the way because this is a hobby after all and you should be having fun. It helps to have your quality as tuned in as much as possible for some of these so be patient and keep trying if you need to.
Print
Spool holder- temporary : Until you can mount your spool on top of the enclosure or any other personal preference.
Belt tensioner- print x2
Z-brace
Shielded stop button
Cable relocator : It’s a pain, but if you spend the time to do this and turn your extruder motor 90 degrees then you can get the full Z height without ruining your cables. It does involve opening all the cables to the PSU and feeding a few extra inches back through the cable chains.
Cable shroud : Looks nice if you do the cable relocator.
The following need to be printed in ABS:
M3 Bed Nut retainer: 10/10 upgrade. I know they look worse than the nice metal stock ones, but these help keep your bed level longer.
CiiCooler
Glass bed Holder
Now that the first major round of printed upgrades is done it’s time to shift to a few more supplies to pick up to really fine tune the machine.
Buy
($5)Radial fan: For CiiCooler
($5)Glue sticksThis and a glass bed is magic
($25)Borosilicate glass 8” x 8”
($26)Y-Carriage plate upgrade: This has been a nice upgrade as I now only need to relevel the bed every couple weeks instead of every print. Check out this guide for a ‘how to’ as well as a free upgrade by shifting your Y pulley over.
($15)rechargeable dehumidifier: For keeping in the bin with your opened filaments
($9)Extruder gears: Might be able to hold off on these, but will need eventually. If for some reason you have a Maker Select with metal X-axis blocks (V1 and V2, but not V2.1) then this is a must. You can follow this guide for a how to.
($28)Metal extruder plate and lever: Not needed, but nice.
($14)Noctua 40mm fan: Not needed, but makes the printer a lot quitter. A LOT quieter.
($50)MicroSwiss All Metal Hot End: The destruction of my PTFE tube by this point pushed me to doing this upgrade. If needed you can follow this guide for replacement. Remember to tighten/loosen when the nozzle its hot.
($6)Ceramic cotton: Tore off the stock one when replacing for the all metal hot end by accident. At least its thicker than stock
Now that the printer is in its final form, its time for the enclosure which is a stacked Ikea Lack hack.
Print
Spool holder
Pi Case
120mm fan cover
Fan grill
120mm fan PSU modification: I edited this to fit upside down since my PSU is mounted on the underside. This was nice since I blew the 40mm fan anyways so it made everything a lot quieter than before.
IKEA Lack filament guide
Webcam holder: This is one I designed specifically for the webcam I happen to have lying around. The camera mount piece can be changed out no problem though for what ever webcam you have or buy. The SketchUp file is included on Thingiverse for such purpose.
Buy
($20)2x Ikea Lack: Luckily there is one right down the street from me. I am located in North America though, so we do not have the STUVA, if you live literally anywhere else you may check in to this as an alternative.
($80)Plexi glass for enclosure: Could be cheaper alternatives, but it looks cool
($9)Foam pads for feet
($42)Raspberry Pi3: For OctoPrint. I also suggest using a different USB cable than the stock one provided by Monoprice or you will have issues.
($9)2x 120mm fans: Used for the power supply cooling and enclosure
($6)Rocker Switches so that the enclosure fan can be on for PLA, but off for ABS
($15)Dimmable LED lights
($10)8mm LED light connectors
Total:
$250 printer + $452 upgrades/parts + ~$80 PLA/ABS to date
Hey! I was totally in this situation 6 months ago. Figuring out technique is a sort of "figure it out as you go" situation and tons of videos on youtube can help you figure it out. What I can help you with is your purchases. Figuring out what you'll need is extremely overwhelming, so here's a dirty rundown of what I've gathered so far:
​
Again, you don't need EVERYTHING listed above, but for my personal complete look, I require everything I mentioned. Starting off, I blew about around 300 dollars, so save money when you can. When queens joke about how they spent a lot of money to look "this" cheap, they really aren't lying. ALSO, don't be discouraged if you don't have the coin. There are tons of other resources available out there and if possible, you can always slowly acquire items over time.
​
Good luck! ✨
While lots of people recommend various build surfaces, I've always found glass to be the most durable and versatile surface to use. Plus you know you're getting a perfectly flat build surface, and nothing beats that shiny mirror finish bottom layer. I've been using this type of glue on a glass bed for a few years now:
https://www.amazon.com/Elmers-E588-Glue-Stick/dp/B00ISZZ48W/ref=zg_bs_1068996_6?_encoding=UTF8&psc=1&refRID=GSZBXX6SADSPZ2XA7RN6
as long as the bed is even close to level, pla sticks to it great at 45-50c and petg works just as well at 85-90c.
What are you using to level the bed? Also where are you leveling it to? (above the bed screws are the right spot) I use a piece of receipt paper folded in half to level it.
It may be worth using a bed level gcode to assist with the human error or placement problems)
Also the stock springs may be bad these should help with the frequent bed leveling.
A glass bed may also help with adhesion with these
The best solution you can get for printing PETG without any warping is a glass bed with PVA glue. I would highly recommend getting a borosilicate (Pyrex) glass plate. Borosilicate glass has a VERY low coefficient for thermal expansion so it extremely resistant to thermal shock and the breakage that comes with it. I had the piece of glass for my CR-10 cut to size at a local glass shop as glass beds were not offered anywhere for the CR-10 at the time. However now you can go on Amazon and pay a very reasonable price for a nice glass bed. Such as this which is less than half the price that I had to pay about two years ago. Ooof!
Take your glass sheet and attach it directly on top of the metal heated bed that the CR-10 has with binder clips. It is a very simple but extremely effective way to keep the glass tightly attached without issue while also allowing a quick and simple process for removing prints and swapping print surfaces.
Then, it is time for the star of the show, the PVA glue! Now, before you get intimidated by the exotic sounding glue (like I did when I first heard about having to use it), just know that it is literally just Elmer's Disappearing Purple Gluestick. This is seriously one of the BEST tools for anyone who prints somewhat exotic or finicky materials. Uncap the glue and evenly coat the glass with a light coating and you are ready to go. When I say light, I mean just one pass over each spot, do not do more than one coat, that one coat is plenty! The best part is that it is disappearing, so when you apply the glue and it still has a bit of moisture, it is a dark purple, however once it sits for about 30 seconds on a bed that is heating up it loses its color and becomes more translucent so you can see exactly what parts of the bed are coated well and which parts you may need to touch up. When the glue has lost its color and the glass looks like it is a bit hazy or foggy then you are ready to print!
PETG can be a bit tricky to print if you are coming from PLA but it is very rewarding once you dial it in.
I would suggest that you either use a low fan setting of 25% or less (except when bridging which should be 100%) or do not use the fan at all (again unless bridging). PETG is a material that wants to stay hot and slowly cool on its own. It does not like to be hit with a fan instantly after being laid down like PLA. PETG actually fuses itself together at the layers which makes it have extremely strong layer adhesion, whereas a properly formed PETG print cannot be separated at the layer lines because of this fusing effect. (This is why you NEVER print PETG directly onto PEI as it can fuse with the PEI and tear the PEI off of the bed.)
​
I would also suggest that you run a hotter bed temperature. I personally print PETG with a bed temp between 85 and 100, depending on the brand of PETG I am using.
There is one VERY important end of print step to safely and successfully print PETG. When the print is finished, DO NOT let the bed cool to ambient temperature while the print is still attached! You MUST set your end of G Code to reduce the bed temperature to about 60% of the temperature it was while printing. This is a very important step so that your piece does not break your glass bed! This is especially important as the printed pieces get larger and have a larger contact surface with the bed. If you allow the print and glass bed to cool to ambient on their own then you are dramatically increasing the chance that the print will cool too rapidly and shrink while still attached to the glass and end up breaking the glass.
This may seem like a lot of things to do to print PETG but when you see the final result and how strong and beautiful PETG can be printed it is all well worth the effort.
​
One final tip about PETG is that it is very hygroscopic (not as bad as Nylon but still noticeable and much worse than PLA) and needs to be taken care of for it to print well. PETG needs to be stored in airtight bags with desiccant packs while it is being stored. PETG should never be left out in the open air for longer than it needs to be. If the roll is not currently supplying a print then it MUST be stored properly. If you allow your PETG to sit out and absorb the water from the air, it will print very poorly and never give good results. If you are printing PETG and can hear a crackling or hissing sound at the nozzle, then your PETG is too wet and needs to be fixed! The crackling and hissing sound that can be heard is the water that has been absorbed by the PETG being instantly boiled and turned to steam when it hits the hotend. This is most noticeable with Nylon but poorly kept PETG will also exhibit this same behavior.
​
If you have any questions or need me to clarify something please ask and I will gladly do my best to help! PETG is well worth the hassle and learning curve as the results that can be achieved with it are truly amazing.
I also disagree, I print ABS all the time with a bed temp of 80C. I recommend [Elmers Glue stick] (http://www.amazon.com/Elmers-Jumbo-Glue-Stick-Pack/dp/B00MZ5Q5QG?ie=UTF8&psc=1&redirect=true&ref_=oh_aui_search_detailpage) to coat the bed as it's warming up. Let each layer dry prior to the next, but you'll want a couple layers before the print starts.
+1 Purple glue stick and a proper bed level.
Elmer's Glue Stick (E579), Disappearing Purple, 3 Sticks https://www.amazon.com/dp/B00MZ5Q5QG/ref=cm_sw_r_cp_api_3wDYBb443TTSR
I have 3 I use for different applications. First being mentioned here a few times, because best.
Tacky glue. I use the gold bottle it's great, sicks nearly instantly, stays tacky for a few minutes in case of adjustments or removal. I use it for structural building. Most used glue. Applied with a toothpick. https://www.amazon.com/dp/B002NHGYZI/ref=cm_sw_r_cp_apa_i_KCkVCb7WCDCNA
Gorilla glue gell. I use this super glue for small details. Places where I don't really have a tab. I use this glue to make the paper solid and stronger. Great glue, the gell makes a difference. I only buy gell now. Applied with a piece of wire. https://www.amazon.com/dp/B01MQTG9E8/ref=cm_sw_r_cp_apa_i_KEkVCbTVSCR3Y
Classic Elmer's glue. I use this for parts that dont matter. If I need to layer some pieces. I dont use this often but its nice to have when I dont wanna waste my nicer stuff. https://www.amazon.com/dp/B012XO26AW/ref=cm_sw_r_cp_apa_i_LFkVCbP7T0FX0
I (the OP) always just use Elmer’s White Glue-All and it works perfectly. It sticks well to both the foam edges and the paper tops of the foam board, it’s super easy to wipe off if you use too much, and if you get it on yourself you can just rub it right off with friction. It’s cheap, effective, and you can find it virtually anywhere.
Also, make sure you use good foam board (again, I prefer Elmer’s 5mm) and you shouldn’t have much issue with warping.
Museum putty I use that for everything, all my Action figures have them on there feet (if they dont have a stand on them)
And when using a glue stick like these on AmazonUK, it's hard to go wrong. To make things even easier to clean your glass, a bit of isopropyl alcohol on the glass while its warm makes clean up a snap.
This!
Thank you for the contest!
Neon
Thanks, man.
I usually use 600 grit followed by 1200 grit sandpaper to lightly shape the tip of my ken. I do this every time before I reapply the super glue. This helps remove any old glue and reduce any uneven surface.
I normally use Scotch Super Glue Liquid in Precision Applicator (http://www.amazon.com/Scotch-Liquid-Precision-Applicator-AD124/dp/B004O49F7M) as my glue of choice. And apply about 3 layers. The precision tip really helps you control the amount and you can use it to slow spread the glue over the tip of your ken.
I recommend practicing on a chopstick or something with a wooden tip first to get a feel for it.
Our lab swears by Uhu Stic. Works awesome and the huge tubes and fat tips make application a breeze.
Yeah, I was going to go with putty and cardstock, but I'm just trying to think if there was some other kind of paper that would be easier to stick on. I actually just found this restickable glue stick that apparently has an adhesive similar to Post-it notes, so I may look into that! Have to see how long the adhesive lasts tho
There's removable/restickable glue sticks similar to what is on Post-It's.
So you’re using just normal glue sticks? Like these?
https://www.amazon.com/Elmers-Purpose-School-Washable-0-24-ounce/dp/B001E69WBW
Oh gosh, my little boy is starting Kindergarten, then my fiancé and I both attend college which is starting back up.
Any of these things would be great! erasers, dry erase markers, or glue sticks
My guesses for your questions. Orange is the new black for the show,maybe Hunger Games for the movie. Animal Crossing for the game, and The Road for the book.
This contest is great. Bill Hader
Codename Duchess What what a great contest! That's some great gifting and very generous! Here's my add ons based on the prices they are today:
=25.47
Thanks for the contest!
I'm also battling nylon adhesion on a PEI bed. Best lead I've found so far is PLA glue.
Let us know if you get it sticking!
For sound dampening, I've read that Green Glue is the best.
Do you own the condo?
In additoon to upgrading the doors and windows, you could tear down the drywall and make sure the insulation is high quality. Then install new drywall by hanging it on whisper clips which separate the studs from the drywall. Then you apply anti vibration green glue and a second layer of drywall.
I'd recommend glass, some binder clips to hold it to the bed, Elmer's purple glue sticks for adhesion, a heat gun if you live somewhere like the South and it takes forfuckingever for things like glue stick to dry (I don't have this exact one but I'm sure it'll work just fine), and a spray bottle of water and squeegee to clean all of that off every few of prints.
Also as everyone else suggested, a Pi 3 for Octopi. I'm using a 32 GB microSD that I had laying around. Just send prints from Cura to Octopi! A camera is pretty cool for time lapse shots too! I'm pretty sure this is the one I've been using, but I really don't like the one mount I've found for it so I'm going to switch to my Logitech C615 after my daughter goes to bed and I can fuck around with my setup... ;P
For gluesticks, use Elmer's washable Purple school gluesticks. I've found that 2 coats of it seems to work best. It's usually good for several uses, no need to clean and reapply after every print. When it starts showing a bit of wear, or has sat and collected dirt/dust, just wipe it off with a wet rag. The rag will also turn it purple again so you can easily tell when it's all gone.