Best household cleaning products according to redditors
We found 2,039 Reddit comments discussing the best household cleaning products. We ranked the 788 resulting products by number of redditors who mentioned them. Here are the top 20.
We found 2,039 Reddit comments discussing the best household cleaning products. We ranked the 788 resulting products by number of redditors who mentioned them. Here are the top 20.


http://www.amazon.com/Cyber-Clean-25055-Office-Pop-up/dp/B00375JBL4/ref=sr_1_1?s=electronics&ie=UTF8
Only because it looks like you might have stripped the paint and might be sanding and that looks like older paint
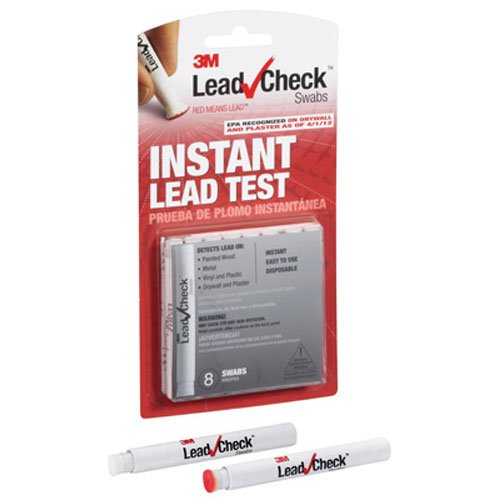
use $20 and buy some EPA lead test swabs to check the paint for lead https://www.amazon.com/3M-717834209102DUPE-LeadCheck-Swabs-8-Pack/dp/B008BK15PU
lead is a powerful neurotoxin and if inhaled or absorbed through your skin - you won't finish the last tread before you start feeling the effects of lead (you'll find other things to do than finish the treads)
Grunge Off
Infinitely better than the alcohol/salt routine, and the stuff is even reusable. I've been using the same two bottles for about a year now. I have no idea how it works, but it does.
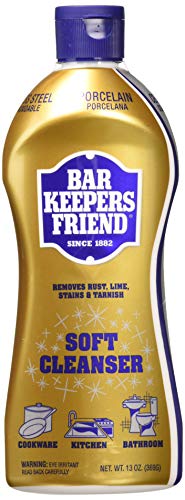
Use Barkeeper's Friend. Will take it right off and look brand new.
*Edit: Fixed link, sorry!
I used one of these and a 5 gallon bucket to wash clothes for a couple of years. That was for two adults, a toddler, baby, and included cloth diapers. It’s quite an arm workout, but was doable. It was tedious to hand wring everything out before hanging it to dry, but overall saved us so much money in laundry costs. It’d be a really great option for a single person.
One day the customs investigators came to my office because my coworker ordered lye for making pretzels. Apparently you also use it to manufacture roofies. The packaging doesn't help.
http://www.amazon.com/Bar-Keepers-Friend%C2%AE-Cleanser-Polish/dp/B000V72992
Supposedly the 8th miracle of the world.
I can’t tell if you’re joking or not, but barkeepers friend is a cleaning powder product lol
https://www.amazon.com/Bar-Keepers-Friend-Powdered-12-Ounces/dp/B000V72992
I've seen this recommended on the Tesla Facebook discussion. It depends a bit on whether the color is removed or the material is actually scratched - and I can't tell from the photos.
https://www.amazon.com/Solution-Finish-Black-Plastic-Restorer/dp/B006NZRAFE/
If the material underneath is actually scratched away you might need some sort plastic/vinyl repair.
If this is sort of scratch mark made by the material being left behind - like chalk or something leaving a mark behind - then I'd clean it with something like this:
https://www.amazon.com/dp/B071XB18BF
My wife got some sunscreen on her interior (SR+). We use this to clean the inside of our cars:
https://www.amazon.com/dp/B071XB18BF/ref=cm_sw_r_sms_c_api_i_PWCnDbQ8CGK4K
I haven’t noticed it since.
Barkeeper's Friend will remove the scratches:
Bar Keepers Friend® Cleanser & Polish: 12 OZ https://www.amazon.com/dp/B000V72992/ref=cm_sw_r_cp_apa_96FeAb3K8H79A
find yourself some barkeepers friend
get about a teaspoon of powder with an equal amount of water and make a paste. Work it into the burn marks and leave it overnight. should loosen it up really good.
Alternatively you could use some steel wool and elbow grease, but that might scrape off your nonstick coating.
So I took the recipe a mixture from here (for core recipe) and here (for some advice on technique).
The recipe I used was this:
Some thoughts about the process:
> You put lemon juice and/or 'Fruit Fresh' (powdered citric acid
...or if you're like me, you buy a 5lb bag of citric acid powder ridiculously cheap and then get Looks of Disapproval from the wife because now we have a 5lb bag of citric acid taking up cabinet space. But it was so cheap!
Try Barkeepers friend!
https://www.amazon.com/Bar-Keepers-Friend®-Cleanser-Polish/dp/B000V72992
Assuming that is solid metal and one color all the way through, I would try something made for polishing metal. Looks like brass but I can't tell for sure from that photo.
https://www.amazon.com/Brasso-76523-Multi-Purpose-Metal-Polish/dp/B00BILDIU4
If you want to try something you already have sitting around the house this article has some suggestions:
https://www.diynetwork.com/how-to/maintenance-and-repair/cleaning/how-to-clean-brass
Not OP, but Barkeeper's friend is a miracle product for otherwise completely destroyed stainless steel cookware.
Barkeeper's Friend Powder Cleanser, 21 oz-2 pack https://www.amazon.com/dp/B008EN9XUI/ref=cm_sw_r_cp_api_Z3SlzbFBCFYDY
So I've done a lot of mopping in my day. Over 2 decades combined working at vet clinics and restaurants, both of which are mopped daily.
Throw out the cheap sponge mops, twirl mops and gimmicky mops. Get a mop bucket with a wringer and a mop handle with a detachaable, washable mop head. I prefer the plastic attachment to the metal on the mop. I've seen the metal get all rusty. This is the mop bucket I got.. It's decent, just feels a little cheap compared to the more commercial ones I'm used to. I would rather a bucket like this which is more sturdy, but I was trying to save money.
For mop heads, do yourself a favor and spend a couple extra dollars and get the kind with the loopy ends that are stitched across like this, instead of the ones that are all loose and cut like this.. The loose ones come apart in the washing machine and get all tangled. I like to have 2 mop heads that I rotate.
Now for the mopping. Make sure you sweep/vacuum before mopping. I find dust mops work best for cleaning up fur and hair. Use hot water in the bucket, and the add your cleaner according to the instructions on the bottle. I've used Pinesol/Mr. Clean/Lysol all with about the same results. Thoroughly wet your mop and then ring it out in the mop bucket. Mop your floors in an figure eight pattern going with the grain of the wood for wood/laminate floors. For wood and laminate floors, it's important not to have too wet of a mop. You do not want puddles of water on your floor as this can damage the floors in the long run. Rewet and ring out the mop frequently.
If I have time, I will sometimes go over my floors a second time with something like Pledge floor cleaner. for shine. These cleaners are not meant to be diluted with water, but applied directly to the floors.
This is not the most exciting video, but it shows the two cleaner process I use as well. You may notice that her mop head attachment is rusted, and she does not use the loopy mop head. Obviously it's not wrong, I just prefer slightly different tools. (She does have the better mop bucket).
If you are a visual learner, there are a bunch of YouTube videos with professional cleaners showing good mopping techniques.
Barkeepers Friend and a scotch pad should clean that right up, along with almost any other surface in your house.
This is lame, but I love doing laundry! First off, use all of the settings on your washer. Take the time to switch the water temperature, spin speed, etc if your washer allows it.
For whitening clothes, I like using some Borax (I put it in the spot for the prewash detergent), and then when they seem to be getting dinging some liquid bluing. That will usually do the trick with tee shirts, towels, sheets, etc.
For hand washing I usually, resolve a little bit of the same Borax in my sink. I used to use woolite, but I always forget to buy it, and the Borax seems to work the same (so one less thing to remember at the store).
There are lots of other things I use daily:
etc.
But the point I guess I'm making is that you can get lots of good, cheap stuff to start with.
They have a liquid version!! Bar Keepers Friend Soft Cleanser Premixed https://www.amazon.com/dp/B00B28ZYPU/ref=cm_sw_r_cp_api_i_woKgDbDZTJYG3
Yoo. My dude. Fuck Ajax. Get your hands on Barkeeper. That stuff had my bathroom looking like I first moved in. I'm never going back.
Pledge floor wax, under plastic wineglasses from Walmart to keep the dust out while drying.
Put the pledge into a dropper bottle, you can apply a drop directly to the area you want to work with and push around with a brush. Because it takes a few minutes to dry, it self levels out the brush strokes, but you should cover it while drying to keep clean of dust and hair.
Use as protective layer, mix with paint as glaze, apply before doing chipping, or seal whole mini and then airbrush, because overspray is much easier to remove from clear coat than from paint.
Thin coats, and try to leave surface level while it dries, since it dries slower than other products, you don't want it sliding down hill.
Frankly it has so many uses I'm still exploring.
Use anywhere you would use lahmian medium, and most places you would use ardcoat. It's about seventy times cheaper, so you can afford to experiment.
https://www.amazon.com/dp/B000ARPH4C/ref=cm_sw_r_cp_awdb_t1_xSd8BbJQS4J8Q
Lodge Cast Iron Skillets are great but you have to make sure you clean them immediately afterwards.
For something more practical (and cheap), take a look at these guys (depending on what size you are looking for. You can sautee something, throw it in the oven, and when they start to get ugly, take some Bar Keepers Friend and go at it. It will look good as new in no time. P.S., please don't pay $5 for BKF, it is at your grocery store for only a dollar or two.
Edit: Here is a test of this one vs. the expensive All Clad version.
Scrub with Barkeepers Friend http://www.amazon.com/gp/aw/d/B000V72992/ref=redir_mdp_mobile
This is the test I used:
3M LeadCheck Swabs, 8-Pack
https://www.amazon.com/dp/B008BK15PU/ref=cm_sw_r_cp_apa_i_fynyCbE7MCHC7
Barkeeper's Friend, this stuff is a life saver!
https://www.amazon.com/Barkeepers-Friend-Powder-Cleanser-oz-2/dp/B008EN9XUI/ref=sr_1_2_a_it?ie=UTF8&qid=1495302948&sr=8-2&keywords=bartenders+friend
I believe its going by "Pledge Floor Gloss" now. Pledge 11182 Revive It Floor Gloss, 27 Ounce, Clear Transparent Liquid https://www.amazon.com/dp/B000ARPH4C/ref=cm_sw_r_cp_apa_i_mdqtDbTEVY54R
Here's an amazon link to the floor polish you're looking for. It's the same stuff, they just took the "future" off the packaging.
Overview
Time to finally do my car during the weekend of July 30th. This car had not been detailed since July 2014 and has had a lot more miles added on it. Sunday, 7/16/17, this car turned 5 years old and is now at 53k miles.
This car is garage kept at home for most of the time. Parked in an open parking lot during work hours. Sometimes street parked. It experiences full Chicago winters though and all elements. Sees all driving modes from stop-and-go traffic to 130mph+ highway cruises and local streets.
The goal was to get everything I wanted done on a Friday, Saturday, and Sunday. Friday it decided to rain several times during the wash, but that was all good. I still kept washing in the rain and used the rain as some of my rinses. I had to get out of dodge by 4pm Sunday so I could avoid the country bugs on my drive back home to the city.
I left the following on the table to get done before winter comes:
---
Work Done
The goal was to get it done so now I don't have to worry about it again for another 2-3 years. I wanted to get the paint corrected to an acceptable level and then put a good amount of protection on it to survive at least 2 winters and 2 summers.
As the title states, I tried to accomplish a lot here.
Services described here
The entire detail is outlined in the album, but I will share the gist of it here so I can link products.
The exterior was properly washed with our 20-stage decontamination and wash process. Here is the fire hose nozzle I use tied up with a quick shut-off valve. TRIX was awesome as always. It turned a good amount of purple all over and made the claybarring step go smoothly. The entire car was 1-step corrected with the PC and a Blue Wool Pad/orange 4" foam pad/hand orange pad and Menzerna Heavy Cut Compound 400 (formerly FG400).
The car was around a 85% for paint quality. I'd say this 1-step easily got it to ~93%. It removed the majority of glaringly obvious defects and it would only take a detailer's mindset now to see that final 7% of defects.
The exterior was completely wiped clean with CarPro Eraser. The car was then coated entirely with CarPro CQuartz (2 layers) and then topped with CarPro Reload.
The interior was vacuumed and then was completely cleaned with McKee's 37 Total Interior Cleaner. This product is my go-to for interiors. It works flawlessly and it has a great smell that does linger and just smells naturally clean. I use these types of interior clothes for working with that product. This brush was also utilized to help really get around the leather pores and locations like air vents and the steering wheel.
All interior hard surfaces were treated with Lexol Premium Protectant. Glass was all cleaned with glass MF towels and Stoner's Invisibile Glass.
I cleaned the engine. Finally. The engine was completely cleaned using Chemical Guy's All Clean+ and just general microfiber clothes from a place like AutoZone. The engine was then dressed with Adam's In & Out Spray to enhance the appearance of all plastic/rubber parts.
Door jambs were cleaned up with an MF and P21S Total Auto Wash.
Paint chips were fixed up with the Dr. Colorchip kit. Felt good to finally clean that rust chip on the hood and fix the trunk damage up some more.
The honeycomb grills were cleaned up with a foam application, MF towel, and Klasse All-in-One. Topped with Adam's In&Out Spray.
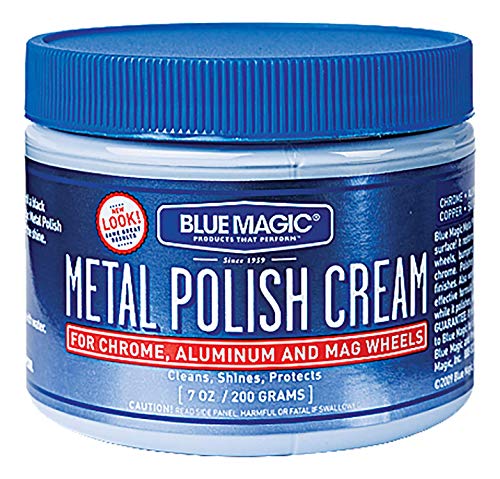
The exhaust tips were cleaned up using 0000 Steel Wool and Blue Magic Metal Polish and Adam's Metal Polish #1. I used a metal polishing microfiber towel to aid in this process.
The trim was cleaned with the CG All Clean+ and then dressed with Chemical Guys Natural Matte Shine Dressing.
The tires were dressed with AMMO MUD and the wheel wells shined up with Adam's Undercarriage Spray. Wheels were cleaned up with a very soft microfiber and P21S Wheel Cleaner.
---
Response
I loved it. It feels so good to drive it again like this. Just want to touch up a few more things and I'll be fully satisfied. I absolutely am so much happier now that my engine is clean again.
---
Reflection and Lessons Learned
Not much here outside of just taking care of the car more. I neglected that engine bay for too long but thankfully it was mostly dust. The exhaust tips should have been taken care of more. At least every spring/fall. I will continue to take care of them now 2x a year so they can maintain where they are at and not get worse.
Preventative maintenance very much applies to detailing as much as it applies to anything mechanical.
---
Total Time: 17 hours on exterior, 3 hours on interior
Total Cost: Obviously free for me, but to give an idea of what I would have charged for this...it would have been $1,933.98. The 2 layers of coating and Reload would have been $900 alone. The rest of my prices you can see on my site.
www.chicagosdad.com
www.facebook.com/chicagosdad
Former Chicago's DAD /r/AutoDetailing Detail Write-Ups
Depends. I had a bubbler that didn't matter how many times I salted, boiled, iso'd, or any of the other normal tricks it would not get clean. At least not clean enough to have all traces removed visibly (it was a hand me down and really gross). I ended up buying this stuff: http://www.amazon.com/Grunge-Off-Super-Soaker-Cleaner/dp/B002LURISY?ie=UTF8&psc=1&redirect=true&ref_=oh_aui_search_detailpage
Took 2 days of sitting and the glass was perfect.
We need more of these types of do-it-yourself tips, thank you!
More details with a list of materials and links (Amazon?) please :-).
I might have tried Bar Keepers Friend :-).
https://www.amazon.com/Bar-Keepers-Friend-Powdered-21-Ounces/dp/B008EN9XUI/
I bought some Cyber Clean last week and hadn't thought to use it on my keyboard yet.
So here's an album depicting its effectiveness.
I went through this with my son around one as well, For 6 months his levels where elevated.
Call your doctor and ask who they would recommend you speak to about lead being in the home. My doctor sent me to my local county health authority. They came out and inspected my house from the floor up. We discovered our issue was an old built in cabinet and had it removed. Other options are avail even though.
They explained that you can buy lead test sticksamazon carries them as well as most hardware stores and can test the house yourself. You will want to start in areas your toddler frequents, and start low aka their level. Document all areas that pop positive for lead.
Pledge floor polish https://www.amazon.com/Johnson-Pledge-Floor-Multi-Surface-Finish/dp/B000ARPH4C/ref=sr_1_1_a_it?ie=UTF8&qid=1505500753&sr=8-1&keywords=pledge+multi+surface+finish
https://m.youtube.com/watch?v=Y54nqFbXz4o
Worked great on the loose ankle of my Mezco Commander Rogers 👍
You can buy citric acid on Amazon and coat anything* to become a 'sour' verison.
^^^*Don't ^^^put ^^^it ^^^on ^^^or ^^^in ^^^your ^^^penis
https://www.amazon.com/Bar-Keepers-Friend%C2%AE-Cleanser-Polish/dp/B000V72992
barkeepers friend is a handy stainless steel polish
I used Renaissance wax. I also sanded the band up to 4000 grit to a matte finish. click
Ceramic you say? Get some barkeeper's friend and clean that nasty bowl.
Bar Keepers Friend Works awesome on porcelain and metals for removing rust and discoloration. I use it on any stubborn stains. Best way to clean burnt stainless steel pains and bring them back to new.
Agreed, it's your business. She can hire her own inspection done if she wants.
That being said, maybe not a terrible idea to purchase a lead detection kit to make sure there's no lead - for your own peace of mind if nothing else. Lead chips taste sweet so young children really will eat them.
It's also not unusual especially for first time moms to overworry about their kids. If you think she's a good tenant and want to keep her I'm sure there are some basic reassurances you can provide. If not, I agree with u/NetWareHead that you maybe just don't renew the lease.
Good luck!
I use Bar Keeper's Friend and it works well for me.
Either this or this and use with these. I prefer the liquid... good on ALL pans regardless of finish. (I use it on my semi-high end set with no problems... makes them look like new).
My wife and I spent a year in rural parts. Without power and water, there isn't the ability to wash clothes. Something like this would be invaluable: https://www.amazon.com/dp/B00YQCOCAM
Also, without running water look at various camping shower options. Some paracord and laundry pins are good too to dry out clothes in case they lost theirs in the storm (its not uncommon to use a washer but hang dry your clothes)
Edit: oh and tape and mosquito netting. I bet all the mosquito screens on windows are trashed, so the ability to tape up netting over the windows will help
Unless you know absolutely that the balls have no lead in the plastic, which is all too common, I would get a lead test for every differently colored ball. Because sometimes lead is one color, and not another. One can never be too careful.
You should get get Future Floor polish (this is the current version) and apply it according to these instructions.
It doesn't damage the plastic, it's reversible and one bottle is enough for the rest of your life.
Can take up to a day to dry, though.
Bar keeper's friend mate
Another endorsement for Barkeeper's Friend right here!
Edit: If you don't have some, get some.
This ad was brought to you by Subway™
Subway: Eat Fresh!
I guess people can't buy concentrated all purpose chemicals and spray bottles so they can save an assload of money.
http://www.amazon.com/Simple-Green-11001-All-Purpose-Concentrate/dp/B0017D1GG6
http://www.amazon.com/Proforce-Commercial-Spray-Bottles-Ct/dp/B006SVSH9Q
http://www.amazon.com/Ivesco-One-Ounce-Dispensing-Pump/dp/B0024J2VO8
For a steep $17 you get 256 spray bottles full of all purpose cleaner. $0.0664/spray bottle of cleaner.
A total of $42.71 for everything pushes the total cost to $0.1668/spray bottle of cleaner.
https://www.amazon.com/dp/B002LURISY/ref=cm_sw_r_awd_PetLub0DZ8DQ1
Here it is for anyone interested. Don't know why I felt obligated, I'm baked. Solid [7] and climbing.
vinegar solution will do the trick, guaranteed, along with some patience, elbow grease, and a few microfiber cloths.
if you haven't cleaned them in a while, get some leather honey and work that in after cleaning them thoroughly. let them rest for 24-48h and you'll be blown away with the end result.
You can buy lead test kits: https://www.amazon.com/dp/B008BK15PU?ref=ppx_pop_mob_ap_share - so far all the tableware I've bought from taobao is safe (nothing from this list though).
there's really no way to know without a lead tester or you can just rub it off with nail polish remover and not try to figure out if it's lead.
https://www.amazon.com/3M-717834209102DUPE-LeadCheck-Swabs-8-Pack/dp/B008BK15PU/ref=sr_1_4?s=hi&ie=UTF8&qid=1500494688&sr=1-4&keywords=lead+test
to be honest, though it's not going to kill you. i live in america and when i shoot guns i get lead dust in my lungs, much more dangerous than lead paint: http://www.npr.org/sections/health-shots/2017/05/10/527648768/lead-dust-from-firearms-can-pose-a-silent-health-risk
Whatever you decide to do...make sure you brasso the shit out of it when your done to make it shine like new.
Don't waste your time with a grinding wheel! Ah! There are sooo many better ways that are substantially easier and are much less harsh to the stove and to you. I would highly suggest just getting a large tub (rubbermade stuff) and putting any piece you can remove (top, legs, doors, etc) in it with a few gallons of white vinegar. Plain old vinegar does an amazing job on at removing rust. Literally eats it right off and doesn't hurt the metal. Even just using a mild acid like lemon juice or soda with some tin foil will be easier then a grinding wheel. Look up some rust removal videos on Chrome parts on youtube, same logic.
Check out this steel tank I cleaned up.
http://imgur.com/a/eb8Wv
Photos almost don't do it justice. The first photo I had already started cleaning it. I just let it soak for a couple hours and used the stainless steel dish scrub and the rust started coming right off. put the tank back in overnight and it came out as you see in the second photo. again, scrubbed it more and hit it with some baking soda to stop the acid reaction. cleaned it with a towel and dried it in the oven. 0 tools used. no grinding and the metal came out gleaming.
for anything that's to big to soak, can also use this:
https://www.amazon.com/gp/product/B00GRSOJSS/ref=oh_aui_detailpage_o00_s00?ie=UTF8&psc=1
very safe and isn't harsh to work around. a grinding wheel will take you hours and is going to eat away a lot of good metal. it's also going to potentially ad brush marks. even if you paint over it, still might see them.
good luck!
edit: just wanted to mention, in the second photo, the bottom half of the tank was sitting in the vinegar over night. that's how clean it came out without evening touching it with a scrubber.
This is in my Christmas cart, wish me luck.
Cleaning putty
https://www.amazon.ca/Cyber-Clean-25055-Office-Pop-up/dp/B00375JBL4
Just my $0.02 after years of fiddling with electronics and various gadgets. This goes for a lot of cleaning questions and tips here.
DON'T use a toothpick or compressed air unless there is a route/path of egress.
Sure, if you're careful you may be able to brush out some of the dust and grime, but forcibly doing so (using a toothpick or compressed air) is also very likely to push dust and dirt into areas where you really don't want it.
Unless you've disassembled your device and are cleaning it from the inside out, you are pushing junk into the device.
If you have some loose-ish stuff that won't come out by gently tapping the device face-down against your palm, for example, then you can try a soft-bristle brush. Again, though, this introduces a force that can push debris into the device.
You can try something called Cyber Clean , which is a putty that is specifically meant to lift stuff off/out of surfaces and crevices.
For prevention, the best option is probably a case (that wraps around/covers the gap. This will still introduce a little 'nook' between the front panel and the front edge of the case, but this is much easier to clean. Just take off the case and wipe away the 'frame' of grime left behind. Make sure not to wipe it over the gap between the front panel and the phone body, though.
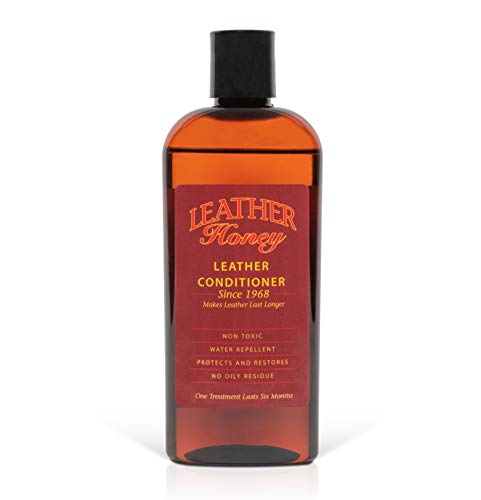
Leather needs to be moisturized, otherwise it will crack and ruin. I can't imagine your bag will last longer than 10 years in the Saudi desert.
I use this on my shoes, daresay you can probably use something similar (leather conditioner) on your bag. I use a spongey type of material to apply it, works surprisingly well.
This stuff is highly rated on Amazon, and according to their website:
>Leather Honey is free of animal products, silicone and solvents as well.
People would melt lead ingots in them and use the melted lead to make fishing weights or bullets, most commonly. It's not terribly common, but it definitely happened and is possible. [This] (https://www.amazon.com/3M-717834209102DUPE-LeadCheck-Swabs-8-Pack/dp/B008BK15PU) is one of the better ways to check if your pan is contaminated- ideally when restoring and it's stripped down to bare iron.
https://www.amazon.com/3M-717834209102DUPE-LeadCheck-Sawabs-8-Pack/dp/B008BK15PU/ref=sr_1_3?ie=UTF8&qid=1543161919&sr=8-3&keywords=lead+test+kit
knowing china, yeah, i bet many parts (hopefully just internal) have lead dust.
Can always buy a test kit and see what it comes up with. For here is what I found on Amazon, comes with 8 tests. Probably not a bad idea to have around if you are into buying vintage cast iron.
3M LeadCheck Swabs, 8-Pack https://www.amazon.com/dp/B008BK15PU/ref=cm_sw_r_cp_apa_q7FWBbMX65CXD
Bar Keepers Friend Powdered Cleanser 21-Ounces (2-Pack) https://www.amazon.com/dp/B008EN9XUI/ref=cm_sw_r_cp_api_i_Da4kDbFFAS8JD
Helps clean the exhaust tips
CarGuys Super Cleaner - Effective All Purpose Cleaner - Best for Leather Vinyl Carpet Upholstery Plastic Rubber and Much More! - 18 oz Kit https://www.amazon.com/dp/B071XB18BF/ref=cm_sw_r_cp_api_i_4m10CbSFZ3KAD
well, the most important part of this is how thin do you want your paints to be? Most advice on the internet says to aim for "milky" consistency. This results in the paint being just thin enough that it takes multiple coats to apply a color, but not so thin that it just runs off of the model. Something you could do to acquaint yourself with the way this looks is to buy a small bottle of 2% milk, pour it into a plastic cup and use your paintbrush to "paint" it up the sides of the cup. This should give you an idea of what your final goal could be.
As for materials to thin paint with, you can use several different products:
As you may have noticed, water is a fairly consistent theme. I've hear that you can also use windex + water, but that seems like a waste of a good bottle of windex ;)
Another option, if you are finding it hard to consistently thin the paints, is to use a wet palette. If you keep the wet palette fairly full with water, it will automatically thin down the paint to a certain degree, after which you can add mediums or more water to push it further. It also has the added benefit of keeping the paints wet for an extended period of time. Here is a guide for making your own wet palette to try out: http://www.miniwargaming.com/content/Zpt5gLOoldY1
Get this stuff. It's FANTASTIC!! Best results are when you get a good amount of rags tho. Apply some of that scrub, clean rag, clean off. Repeat until it's to your liking.
Here's how mine came out, not a drastic difference because I don't let it build too much, but it works wonders!
I have beaten this infestation before!
Get Borax, the laundry booster. It's hard to find these days, but it does exist. Sprinkle it on your carpet and use a push broom to brush it down into the carpet so it disappears. Wait two days before vacuuming. It'll sit down in the very base of your carpet where fleas like to live and you can ignore. Vacuum and live your life normally. Re-apply annually.
Not only does this chemical dehydrate adult fleas, it dehydrates flea eggs. Therefore, you're killing the next generation before it can hatch. You win this fight is by eliminating their ability to breed. As I understand it, DE only works on adult fleas and by then, it's pretty late in the game.
You can do this in your car carpet, but because it doesn't have a thick pad underneath it, it won't be as easy/clean/long lasting. It might be worth it for an initial shock treatment, though.
EDIT: Borax! https://www.amazon.com/Borax-Mule-Team-Detergent-Booster/dp/B000R4LONQ/ref=sr_1_1_s_it?s=hpc&ie=UTF8&qid=1466110819&sr=1-1&keywords=Borax
EDIT 2: I was taught this in the mid 1990's when my parents had a professional company come do this treatment. I was home alone and talked to the guy and said, "What is that stuff?" and he told me straight up what it was and how it worked. I've never called the pros again.
I didn't think you'd need to give any reason. It's a type of laundry detergent. We played with it in elementary school to make slime by mixing it with glue.
Amazon:
http://www.amazon.com/Mule-Borax-Natural-Laundry-Booster/dp/B000R4LONQ
The warped bottom you can't really fix. If you have a gas stove, it probably won't matter much, but it's annoying for sure. The other stuff... you can try some bar keeper's friend, or you can try the boiled salt water again... assuming you actually pay attention to it. What you're doing is basically deglazing the pan. I typically do that every time I cook, makes cleanup a breeze and sometimes is great for an awesome pan sauce.
Use bar keeper's friend. It will clean it up quick and easily with just a bit of scrubbing.
I used a Dremel rotary tool with one of these buffing wheel attachments and some Barkeeper's Friend mixed with a little water to form a paste. I just used a low speed and tried to be patient. The crystal is pretty tough but I did manage to get one really fine scratch (barely noticeable) so be careful.
Soak in [simple green] (http://www.amazon.com/Simple-Green-11001-All-Purpose-Concentrate/dp/B0017D1GG6/ref=sr_1_1?ie=UTF8&qid=1410081846&sr=8-1&keywords=simple+green) and it will look brand new.
I got mine from Amazon.
This is the shit you need:
http://www.amazon.com/Grunge-Off-Super-Soaker-Cleaner/dp/B002LURISY
It's 100% natural, and it's reusable for a long time.
Pour it in, wait an hour, pour it back into the bottle and rinse. It dissolves everything.
Edit: The Amazon reviews speak for themselves.
Wow I love the look of that kit!!! I'll tell you right now, Pledge clear will be your best friend for removing any stress marks or scratches from removing/sanding nubs
http://www.amazon.com/SC-Johnson-Pledge-Multi-Surface-Finish/dp/B000ARPH4C/ref=sr_1_1?ie=UTF8&qid=1451352679&sr=8-1&keywords=pledge+clear#Ask
As far as clean decal work goes, make sure to clean the surface of the model with a degreaser before applying the decal. Then, after you cut out the decal and soak it, take it out of the water, still on the paper, and slide it straight on to the model.
27oz Pledge Futureshine
If it's metal of some sort, you can produce a mirror finish by following these steps.
Notes:
Links:
Not OP, but I use this for polishing.
Considering citric acid is in citrus fruits you could likely just use lemon juice. A small enough concentration that it won't affect the taste.
Or you could buy a 5lb bag of citric acid in powder form from Amazon and dilute it yourself. http://www.amazon.com/Spicy-World-Citric-Acid-5-Pound/dp/B000OZFECU
This is the best stuff IMO. Works on almost any set-in-stain.
https://www.amazon.com/Bar-Keepers-Friend%C2%AE-Cleanser-Polish/dp/B000V72992
Bar Keepers Friend.
I've heard really good things about Bar Keeper's Friend for cleaning stainless steel.
You can pour a layer of vinegar in the bottom of a pan and heat it up. Once it gets hot, turn it off and let it sit for 15 minutes, then scrub like crazy. It removes most spots.
Try this stuff....Barkeeper's Friend. It will get rid of a lot of that deposit stuff. It's an acid/cleaner...you make a paste out of it with a little water, rub it in for a minute or two and then...well let's just say that I've seen it work miracles. Better than any other normal cleaner I've used (and I've tried them all). It's fine for tiles too. Try it before you try anything else.
$0-$5
Bar Keepers Friend - This stuff is magic for cleaning. It gets rid of all kinds of stains on tile or porcelain and makes sinks look awesome.
$5-$10
Magic Erasers - These are obviously sorcery
$10-$20
Power Squid - Helps deal with the situation around my computer and tv.
$20-$50
14-Piece Knife Set - Not a great knife set, but better than a drawer of miscellaneous knives, which is what I have now! Decent reviews, too.
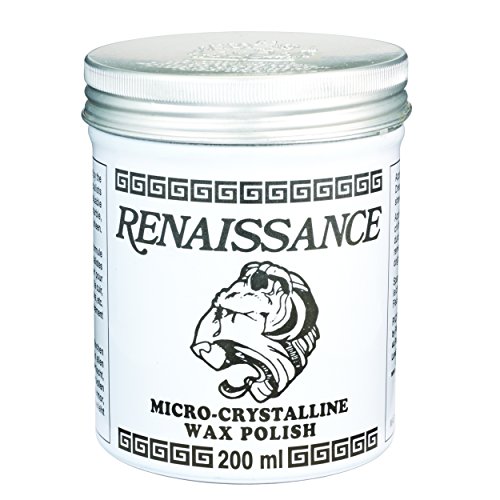
Probably the best product to coat your barrel with to prevent rust is Renaissance Wax. This is what museums use to protect metal, and other, objects in their collections.
Get a belt sander and some low grit for the flat surfaces. Have one of these for the detail work: Triangle Scraper
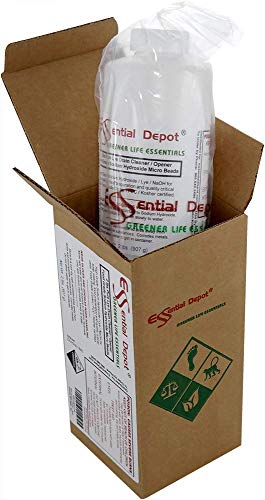
And sometimes good old fashioned NaOH for the older paints AKA Lye worked the best on our base layers of paint, which we thought might be milk paint.
God speed.
Amazon sells it, and it's pretty cheap: http://www.amazon.com/Grade-Sodium-Hydroxide-Micro-Beads/dp/B001EDBEZM/ref=sr_1_1?ie=UTF8&qid=1381245711&sr=8-1&keywords=cooking+lye
http://www.amazon.com/Grunge-Off-Super-Soaker-Cleaner/dp/B002LURISY
This shit works like a charm, and its reusable!
Find some Grunge Off. Not only can you re-use the stuff, but it's extremely effective. I've cleaned my pieces with the same bottle multiple times. The Grunge Off is motor-oil black now, but it still does the trick!
I usually pour it through a fine metal strainer to get all the resin out while returning it to the bottle.
edit: Here's a link
Cyber Clean
It's amazing! Your keyboard is fresh and not at all disgusting ever, I wouldn't want to go without it \^\^
I know it's not a LPT solution... but there's this thing called Cyber Clean
And it is freaking amazing. You should check it out.
After using Bar Keeper's Friend, I'll never use another cleaning solution for my hookahs. Works fantastically - especially for the base (make sure you've got some hookah brushes too) and the HMD.
Bathtub or giant rubbermaid bin, some muscle and this https://www.amazon.ca/Amazing-Washing-Wand-Apartments-Emergencies/dp/B00YQCOCAM/ref=sr_1_2?ie=UTF8&qid=1491484861&sr=8-2&keywords=washing+wand
As for drying you can get a drying rack that folds out or one that hangs on a door.
Edit: this is what i have but I only paid $30 for it https://www.amazon.ca/Greenway-Stainless-Steel-Laundry-Drying/dp/B01MXTQYAX/ref=sr_1_2?s=kitchen&ie=UTF8&qid=1491490271&sr=1-2&keywords=over+door+drying+rack
Use a cleaner that works for multiple fabrics, and not specifically for leather. Example: Car Guys has a multi-purpose cleaner that is highly rated. At $17 I feel it's a little expensive, but might be worth picking up when it goes on sale: https://www.amazon.com/CarGuys-Super-Cleaner-Effective-Upholstery/dp/B071XB18BF/
Same with the "conditioner", I use a multipurpose spray which gives the seats an additional layer, but also makes the seats sound squeaky: https://www.amazon.com/gp/product/B00KN0UOEE/
I asked my mobile service tech and he reminded this but I haven't tried it yet: CarGuys Super Cleaner - The Most Effective All Purpose Cleaner Available on The Market! - Best for Leather Vinyl Carpet Upholstery Plastic Rubber and Much More! - 18 oz Kit https://www.amazon.com/dp/B071XB18BF/ref=cm_sw_r_cp_api_N9gaCb5ST6WSK
https://www.amazon.com.mx/3M-717834209102DUPE-LeadCheck-Swabs-8-Pack/dp/B008BK15PU/ref=sr_1_1?ie=UTF8&qid=1485809462&sr=8-1&keywords=LeadCheck
I recently bought this set on Amazon: https://www.amazon.com/gp/product/B008BK15PU/ref=oh_aui_detailpage_o06_s00?ie=UTF8&psc=1
I don't know if anyone has a better suggestion. It's expensive, but I figured it was important enough to do right.
two pack
Brasso
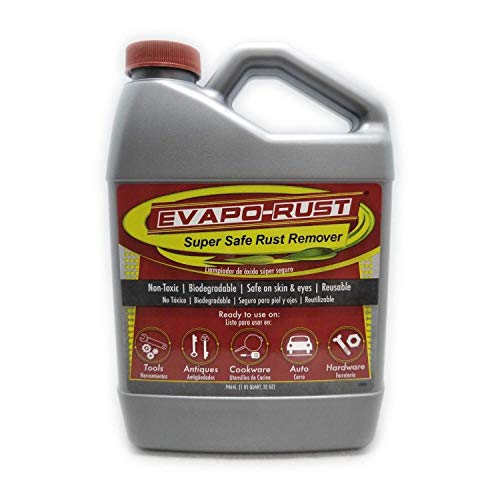
I'll throw in Evapo-Rust as a #5. It's non-toxic and isn't nearly as harsh as naval jelly, but it works pure magic at removing rust.
My first six months at site I hand washed. One tub for washing, one for rinsing, then hang to dry. It'd take at least an hour for a week's worth of clothes.
Then I got smart, I came across this website by one of those doomsday preper/apocalypse type guys. He had this idea for washing clothes without electricity and it changed my life. Basically you need just a toliet plunger and large tall bucket, what we call a 5 gallon bucket in the USA. The plunger can be substituted with a number of instruments but I've found if you can get ahold of a plunger, it works best. You cut some holes in the plunger so water can through. Then to do laundry, put a couple handfuls of soap in the bucket, add the plunger, and put all your clothes in around the plunger. Then add water to pretty much the top. I always add about a 2 liters of hot water too as I find that is extra effective. Let soak about an hour. The to wash simply move the plunger up and down for a about 10 minutes. Then rinse in a separate tub and hang to dry. Before each piece of clothing took about 5 minutes. Now all of them take about 10. I'm able to fit a pair of pants, couple shorts, couple shirts, t-shirt, 3 underwear and 2 pair socks all in one load.
My clothes have never been cleaner and it's super easy. Maybe 20 minutes tops per week for all my clothes. This works exactly like an electrical wash machine except you provide the power. The water and clothes and soap all mix together and agitate each other and rub against each other just like they do in your mom's wash machine back in the good old USA. It's brilliant.
After I made the plunger I found out there's actually a whole line of commercial
products you can buy on Amazon to replace the plunger. Look up "magic washing wand" or something like that and read the reviews yourself. I love my little plunger washer. Highly recommended if you can find the materials.
Also side note, I always do my washing inside now whereas before I did it outside. It can get a bit messy, but hcns here would laugh at me if they saw my style (Im a guy). They generally think I have no idea how to do household chores and scrutinize basically everything I do already. But for me at least and my skill set, my clothes are 10 times cleaner than when I was hand washing.
EDIT: link to the commercial version you can buy on Amazon. Fwiw, I still use a toliet plunger and its fine
https://www.amazon.com/EasyGoProducts-Hand-Powered-Clothes-Washing/dp/B00YQCOCAM
I keep my 105lb lab/Pitt mix in my back seat. Sometimes will double him up with my brother’s 100lb Bernie’s Mountain dog.
I use a dog hammock. I’m a clean freak too, so with this, ppf on the door sills, interior sprays and microfibers, and a battery dust buster, the interior stays flawless.
https://www.amazon.com/dp/B0769YMHSC?ref=ppx_pop_mob_ap_share
https://www.amazon.com/dp/B071XB18BF/ref=cm_sw_r_cp_api_i_0SM1Cb81N347Z
I've never regretted it for a second. I have two kids (1 and 4) I wasn't sure if the white dash would be broght/ distracting but it's not at all and I love it so much. Also EVERYONE thinks it's awesome. Plus it cleans very very well.
I use chemical guys CarGuys Super Cleaner - Effective All Purpose Cleaner - Best for Leather Vinyl Carpet Upholstery Plastic Rubber and Much More! - 18 oz Kit https://www.amazon.com/dp/B071XB18BF/ref=cm_sw_r_cp_api_i_-yEZDbPHFR6W5
Works like a magic. I just spray on microfiber and whip down a few times a month. KEEP THE WHITE😎
CarGuys Super Cleaner - Effective... https://www.amazon.com/dp/B071XB18BF?ref=ppx_pop_mob_ap_share
What spray cleaner do you guys use to clean the alcantara?
I was wondering if this $20 Sonax cleaner was worth it: https://www.amazon.com/Sonax-206141-Upholstery-Alcantara-Cleaner/dp/B00BBWJ16U/ref=sr_1_sc_1?ie=UTF8&qid=1494953995&sr=8-1-spell&keywords=alcnatara+cleaner
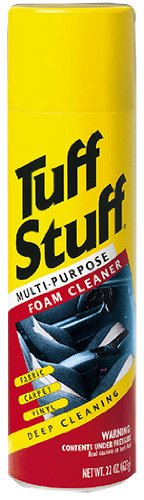
or can I get away with a $3 bottle of Tuff Stuff? https://www.amazon.com/Tuff-Stuff-Purpose-Cleaner-Cleaning/dp/B0009PCPNQ/ref=sr_1_4?ie=UTF8&qid=1494953867&sr=8-4&keywords=fabric+cleaner
edit: or can I even get away with just vacuuming and using a damp microfiber cloth?
I prefer washes and usually use Vallejo washes. Usually Vallejo oil. If you want to use gloss coat by had, check out this. It can be used both by hand and in an airbrush. It will give you a gloss coat to use with a wash. It is acryllic so don't scrub too hard but it can work very well.
I usually put the wash down and let it sit for a couple seconds then wipe away with my finger. If you want to get really fancy, wipe in the direction you would think rain would move the oil stain down the suit. Example 1 and Example 2. This will give you a pretty good looking run mark for the rain pushing oil or rust down from the site. Take into account where it may gather, then go from there. You can use water and a q-tip if you don't want to use your finger. If you scrub too hard with that it will also strip away the gloss coat. It does take a bit to do that though.
"Pledge" or "Future" refers to a certain brand of floor finish that (surprisingly) can be used as a gloss coat. This stuff.
For a guide:
http://otakurevolution.com/content/laymans-gunpla-guide-top-coat-guide (it's a bit far down)
Use citric acid instead. No funky smell or foaming to worry about. $20 for 5 pound may be a bit expensive initially, but you only need a couple tablespoons each time so it'll probably last you a lifetime. It's exactly what's inside these.
I get zero residue on my dishes. The recipe I use calls for citric acid, which really helps to get rid of that residue. I bought a giant bag of it on Amazon for pretty cheap, though honestly I didn't need to buy that much - the recipe I have only calls for 1/2 cup at a time, and each recipe lasts for several months.
It is definitely old-school:
https://www.amazon.com/Borax-Mule-Team-Detergent-Booster/dp/B000R4LONQ
Bar Keepers Friend
I've done the same thing and no long term damaged. Clean with Bar Keepers Friend and it will be good to go for many more years.
http://www.amazon.com/Bar-Keepers-Friend%C2%AE-Cleanser-Polish/dp/B000V72992
A few ways to get rid of this, a melamine sponge (the same thing that Magic erasers are made of), Bar Keepers friend, vinegar, baking soda, or anything that will scrub the hard water deposits from the ceramic.
Oxalic acid to the rescue.
I usually get this and then dilute it for different needs
Simple Green Industrial SMP11001 Clean Building All-Purpose Cleaner Concentrate, 1gal Bottle https://www.amazon.com/dp/B0017D1GG6/ref=cm_sw_r_cp_api_i_5cWtDbTY0YKJG
Grunge Off. Total game changer. Just soak it. No shaking. And you can reuse it multiple times.
Grunge Off Super Soaker Glass Pipe Cleaner, 16 Ounce https://www.amazon.com/dp/B002LURISY/ref=cm_sw_r_cp_api_zpQYBb1MEY6H0
https://www.amazon.com/Grunge-Off-Super-Soaker-Cleaner/dp/B002LURISY
My friend who details cars recommended this stuff: https://www.amazon.com/Tuff-Stuff-Multi-Purpose-Cleaner-ounces/dp/B0009PCPNQ
It works great. You can use it on pretty much any surface in the car. It got cream cheese out of the perforated leatherette seats, and glue that dripped when I got a new windshield installed off of the steering column.
Does that brand of floor polish work? I've always been told that the floor polish of choice for tightening joints and protecting/clarifying clear plastics is Pledge with Future Shine (which is now called Pledge Revive It Floor Gloss).
This is the stuff I use.
Yep! Also, for the record, Future floor polish is an amaaaaaaaaazing clear coat paint if you have an airbrush.
Here's the Future stuff via Amazon
Pledge future floor finish -- works great as a gloss coat (as well as for tightening loose joints). Just load it into your airbrush and spray. I've always wondered.. how did the first person figure that out?
http://www.amazon.com/Johnson-11182-Future-Acrylic-Finish/dp/B000ARPH4C/ref=pd_sim_hpc_1?ie=UTF8&refRID=0V7FEZ3QPJY6C4AH1R4S
This is what I have — not sure what the current equivalent is.
Maybe this: SC Johnson Pledge Floor Care Multi-Surface Finish
You've done a great job, especially considering it's your first and you chose an airplane - they're generally a little more difficult than armor. Is that a Typhoon? What's next in your build queue?
Like another commenter here said, before applying decals, put down a gloss coat. I've found that [this] (https://www.amazon.com/gp/product/B000ARPH4C/ref=oh_aui_search_detailpage?ie=UTF8&psc=1) and this work well. After getting the decals on, then seal them in with another coat, and you can do your weathering without worrying about damaging them. You might want to use Microsol or Markfit when doing the decals - those solutions soften the decal and you don't get the "draping" effect over little surface details. Just be careful and test with the least important decals first, some kits have really thin decals that get destroyed. Other kits have thick decals that need repeated applications of Markfit strong to soften.
https://www.amazon.com/gp/product/B000ARPH4C/ref=oh_aui_detailpage_o04_s00?ie=UTF8&psc=1
This is the correct floor wax. Got this, two weeks ago. And have been running it through my airbrush gloss coating everything with out issue.
Your method is good, and that polish is fine. I use BlueMagic metal polish (http://www.amazon.com/BlueMagic-400-Metal-Polish-Cream/dp/B000BO8Z9I) and love it but the Mothers stuff will work fine too.
Atrium Anniversary! 🥳
In honor of today’s Drop of the Abacus I decided to polish up my Copper Atrium and carry it today at work. I can’t believe it’s been two years since the original Atriums dropped. Preorders started 10/22/17.
After receiving it I ordered tritium vials in Green and Purple and added them with UV resin. Have been real happy with how they turned out and a delightful display in the night.
I have been letting my Copper pieces patina. But about once a year I have been repolishing them with Blue Magic and then recently started applying Renaissance Micro-Crystalline Wax Polish. I have been super impressed with this wax and how long Copper and Brass/Bronze items remain shiny. Some are free from patina even when they come back around in my rotation a month later.
Blue Magic 400 7 Ounce 7OZ MTL Polish Cream
https://www.amazon.com/dp/B000BO8Z9I/ref=cm_sw_r_cp_api_i_5h2PDbNMVKHCA
Renaissance Micro-Crystalline Wax Polish (65 ml)
https://www.amazon.com/dp/B001DSZWEM/ref=cm_sw_r_cp_apip_PosSl7D59dCRQ
Bar Keeper's Friend--sprinkle some on, and then scrub with a damp sponge. It's magic, I tell you. Magic.
I'm not sure since I haven't compared them in so long. I would play it safe and assume about 1/3 or 1/4th as much to start if you're worried about damaging things. Another awesome one I found that gets rid of hard water stains and caramelized oil on pans is this. (It's about half that price in the store) and no added fragrances or other garbage.
I soak them in hot water and use some powdered Bar Keeper's Friend surface cleaner, it really seems to work better for me than Goo Gone and doesn't carry that cirtusy smell. It also does wonders for dirty stoves, sinks, and counter tops.
As nice as cast iron is, if you ever want to make any kind of pan sauce after you've cooked your protein that might involve wine or vinegar or lemon juice, you'd be out of luck. I'd go with a good, heavy traditional-finish skillet with some sort of clad construction for optimal even heating across the surface. As far as that sticking issue goes, you don't have to use as much oil as long as your skillet is already heated before you put any food in it. In some cases (not all), meat in a traditional finish skillet will stick at first but release from the surface right around the time it's supposed to be flipped or turned, which is perfectly normal anyway.
One of the other perks of a traditional finish skillet is fond -- a.k.a., the stuck-on brown bits left in the pan after you've cooked your food. All those brown (not blackened, that's too far) bits = flavorful awesomeness, and are key in making a good pan sauce to go with whatever you're making. Deglaze the pan with a bit of broth or wine or whatever and scrape up the brown bits with a wooden spoon, throw some butter and herbs in there, baby, you got a sauce goin'. (Plus, this makes cleaning the pan later a lot easier, since you're using what would otherwise be "mess" to your advantage.")
Problem is, good-quality stainless steel skillets are expensive, and the drop-off in price represents a really steep drop-off in quality, which would of course give you worse results in cooking and make you less likely to want to use one anyway. One thing to watch out for is skillets with disk bottoms, where the only place the manufacturers put the highly conductive aluminum core which appears in most stainless steel cookware in a disk on the bottom of the skillet. These are the cheapest options, but the problem is the sides of the pan don't heat up as evenly or as well as the bottom, which results in uneven cooking if you're using the entire surface of the pan. Better to go with a "clad" pan -- one in which the entire skillet is made out of a layer of aluminum sandwiched between stainless steel. Better conduction, more even heating, better performance, better food. Yes, clad skillets are more expensive (~$110 versus ~$50 for a disk bottom), but 1) Cooking.com, etc. run sales on these things all the time, and 2) as long as you take good care care of them (Bar Keeper's Friend works wonders for me), there's no reason why they shouldn't last a lifetime -- definitely worth the investment.
Looks like it could be some hard water staining. I agree with the barkeepers friend. it will bring it back to life. it won't even take much scrubbing to clear that up. You can get it at Walmart or most grocery stores.
You want the powder cleanser. the liquid cleaner is shite! this is what it looks like. it's really cheap like a dollar something per canister.
https://www.amazon.com/Bar-Keepers-Friend-Powdered-12-Ounces/dp/B000V72992/
Bar-keeper's friend and elbow grease.That is sure to clean this up real nice.
https://www.amazon.com/Bar-Keepers-Friend-Powdered-12-Ounces/dp/B000V72992
I came here to say this. All of my pots look brand new! Barkeeper's Friend is a staple in my kitchen.
I have All-Clad. Pick up some Barkeeper's Friend it'll clean up the pans fast!
Also, medium heat for steak is a little low. I have an electric range and end up setting 7 out of 10. Basically, let the pan heat up. Then toss a few drops of water into the pan. If the water dances around on the surface, then it's ready for your oil and within a few seconds of heating up the oil, the steak.
For stainless you need bar keepers friend, takes off anything on stainless steel cookware with minimal elbow grease (burnt egg, milk, w/e just a minute of scrubbing). A magic eraser works wonders as well.
That's a lovely piece, and an inventive way to decorate some pretty labradorite.
I use Renaissance Wax polish (Amazon) to finish all my oxidised work. It was was developed by The British Museum for protection of fine art and will not stain or discolour with aging. It is acid neutral, water and alcohol resistant. You may wish to re-apply this coating in time due to wear / usage.
Most oil is corrosive to iron-based metals. Use either WD-40 (good) or Renaissance Wax (better)
This is the answer. If you've got a lot of minis, just buy a big jug of it. If your minis are plastic, this is really the only answer. Put them into a glass jar filled above their heads with SG and give it a good swishing around every 24hrs. The longer you leave it in, the easier the paint will come off. Most stuff is easily taken care of by 24-48hrs, but if your model has a lot of deep nooks and crannies you might want to consider giving it a week. But as /u/Grammar_Cowboy pointed out, you can always clean them, then throw them back in for another soak too. Of note, the SG doesn't need to be drained after each batch of minis. You can reuse a full container multiple times.
I you want to break the minis down to re-glue, re-pose, or whatever, leave them in the SG for about a week. It'll make the glue very brittle and the pieces can then be carefully snapped off and the dried glue removed with a hobby knife or needle-nose pliers (my weapon of choice).
If the minis are metal, acetone (nail polish remover) works even better. It'll strip the paint and turn the glue into a soft, almost gel-like consistency. Which can then be easily cleaned off. The only downside it acetone will literally dissolve plastic. If your minis are on a base, the base will turn into a soggy, soupy mess.
Essential Depot Pure Lye Drain... https://www.amazon.com/dp/B001EDBEZM?ref=ppx_pop_mob_ap_share
Amazon.
http://smile.amazon.com/gp/product/B001EDBEZM/ref=oh_aui_detailpage_o00_s00?ie=UTF8&psc=1
Thanks for the tips!
I found this stuff on amazon and @ my local shop called Grunge off super soaker. Iso and salts work great if you let it sit, but that white stuff caused by hard water and the spots caused by smoke dont always come off. With this stuff, just let it sit and after a couple hours drain the liquid back in the bottle and just run warm water through the pipe. No need to scrub.
http://www.amazon.com/Grunge-Off-Super-Soaker-Cleaner/dp/B002LURISY/ref=sr_1_1?ie=UTF8&qid=1412015574&sr=8-1&keywords=super+soaker+pipe
If I could tell my family I smoked and just had to worry about fixing the smell I’d just invest in getting a smell proof case and using mason jars to store my bud. There’s also reusable cleaner for bongs and water, like peace water, that keeps the bongs relatively clean. Keep your pieces clean and your mom happy. I can only dream of the day I can tell my parents.
Grudge Off
Grunge Off Super Soaker Glass Pipe Cleaner, 16 Ounce https://www.amazon.com/dp/B002LURISY/ref=cm_sw_r_cp_api_i_UPx6Cb3JT8HV9
(I'm just copying and pasting from my other comment)
Screw that isopropyl or 420 cleaner stuff. It never works 100% and you always have to scrub and make a mess. I highly recommend using Grunge Off
You do not need to scrub AT ALL and it's re-usable. Just pour it into a zip lock bag or a big bowl, drop your piece in and let it soak overnight. Pull it out in the AM and it's completely spotless. Just pour the stuff back in the bottle and re-use it. I'm still on my first 2 bottles (got the 2 pack) and I've been using it for months. I rarely go more than 3 session without cleaning my pipes, I just let them soak as soon as I'm done with em, and the more often you do it the less time you'll need to let it soak.
This...
http://www.amazon.com/Grunge-Off-Super-Soaker-Cleaner/dp/B002LURISY
Pop a wine cork in the stem, fill with Grunge Off and let it sit overnight. Next morning, rinse thoroughly (Grunge Off can be used multiple times, per its label) with water. Glass will be like new.
Have you tried this putty stuff? I have heard it works quite well, but I haven't used it myself.
http://www.amazon.com/Cyber-Clean-25055-Office-Pop-up/dp/B00375JBL4
No major problems here but Cyber Clean works wonders
Probably Cyber Clean or something similar. https://www.amazon.com/Cyber-Clean-25055-Office-Pop-up/dp/B00375JBL4
Use silly putty or something like this. DO NOT USE compressed air anywhere. Not on the mics or speakers, it can blow out their diaphragm.
Amazon has everything!
If you haven't tried this stuff, I can highly recommend it. I treated my Clark's leather boots with it, and when I accidentally brushed against paint, it cleaned right off. I haven't tried it on serious scratches, but it might be worth a try.
This is actually quite a timely post. I just bought a bunch of leather cleaning products and conditioning for my leather jackets and boots.
My goods:
Most of this is for the leather jackets I own and have been abusing to heck with some water damage and snow damage. Boots that need a good cleaning and conditioning. And my old leather wallet that is looking like an old leather rag.
Leather Honey for regular maintenance and Bickmore No.4 after thorough cleaning with Bickmore No.1
Have you done anything to treat your bag? I got one of these last year, and immediately it started to stain all of my clothes. I've washed it with saddle soap and retreated it with Leather Honey, but I still have the same problem...
Get something a long these lines.
Barkeepers Friend: Bar Keepers Friend Powdered Cleanser 21-Ounces (2-Pack) https://www.amazon.com/dp/B008EN9XUI/ref=cm_sw_r_cp_api_i_pZiADbGKDFJQZ
I use the liquid pre-mixed formula (Amazon Link). You can find this at most stores that sell cleaning supplies too. I put a small amount on a sponge and then just rinse it off after.
I just tried bar keepers friend on one of my pots and it looks like new, was shocked at how well it worked
https://www.amazon.com/dp/B00B28ZYPU/ref=cm_sw_r_cp_api_i_jy1YDbF6H84PZ
I spent the past week cleaning all of my NES, SNES, Super Famicom and Famicom cartridges. Taking the cartridges apart just makes it easier to get leverage while polishing the pins, and it just helps with wiping down the PCB and the inside of the cartridge shells.
I mostly followed this guide I found on Ars Technica.
I happened to have a can of Brasso metal polish laying around so I used that instead of the polish the article recommends. I also picked up a pack of Target brand magic erasers to use to clean the outer part of the cartridge shells.
In my experience, polishing the pins does more than just wiping the pins down with isopropyl alcohol. It's also a judgement call. If the pins look pretty clean then you probably don't need to polish them. Here's a before pic of a NES cartridge. And here's what it looks like after I polished the pins. This is was one my cleaner games before polishing. I wish I took before and after pics of one of my dirtier games.
I can see at least one contact that looks like it has some gunk on it.
99% of problems with old carts is the contacts.
Upgrade from alcohol to Brasso, which you can get at any Wal Mart for like $3.
https://www.amazon.com/RECKITT-BENCKISER-76523-Brasso-Polish/dp/B00BILDIU4/ref=pd_lpo_121_bs_lp_t_2?_encoding=UTF8&psc=1&refRID=XSK1DDXG29WY11BMN6AG
It smells horrible but it really gets the job done.
Source: Restored a yard sale NES and several games recently.
Edit: Brasso Link
Evaporust works:
https://www.amazon.com/Evapo-Rust-Original-Water-based-Non-Toxic-Biodegradable/dp/B00GRSOJSS
https://www.amazon.com/Evapo-Rust-Super-Remover-Non-Toxic-Removes/dp/B00GRSOJSS
I would suggest washing in a bucket because it's easier to swirl around and scrub the clothes. This should help with the musty smell. You can wash your clothes with a bar of Zote or Fells Naptha which is $1 at Walmart and should last a few months. In the longer term, you might want to invest in a washing board, washing wand or manual washer.
Can you line dry? I think it's one of the best ways to dry clothes and your only costs would be a line and some clothes pins. If you can't line dry, maybe a drying rack would work. In the long term a port
If line drying isn't an option
I often wash my by hand like you describe if there's only a few because I hate to waste so much water using the washing machine. I recently bought a hand wash plunger type thing to prewash my towels in a 6.5 gallon bucket. I like it a lot!
I have this one and really like it so far, I just spray it on microfiber and wipe down
car guys super cleaner
This stuff: https://smile.amazon.com/gp/product/B071XB18BF
Rubbing alc + salt to get rid of the bulk of the garbage. After that, I really can't recommend Grunge Off enough. This is the best cleaner on the market, you really won't find many glass aficionados speak out against it sans the fact it might remove a label if you rub it against it enough. If you can't get grunge off this works well too which has the same active ingredient limonene-d (which is just a terpene from oranges). Soak your pieces over night, depending on your tube if its not a pipe you can get a glass stopper instead of a bowl so you can fill it to the top. You can reuse the stuff quite a bite before having to buy more. It's maybe 5 - 10 minutes of extra work every night for perfectly clean like you bought it new glass (with that new-shine look because it removes hard water).
http://www.amazon.com/gp/aw/d/B002LURISY/ref=mp_s_a_1_1?qid=1454264254&sr=8-1&pi=SY200_QL40&keywords=grunge+off&dpPl=1&dpID=41sL95SN5lL&ref=plSrch
https://www.amazon.ca/Cyber-Clean-High-tech-Cleaning-Compound/dp/B00375JBL4
http://www.amazon.com/Cyber-Clean-25055-Office-Pop-up/dp/B00375JBL4
Cyber clean is my best friend.
Cyber Clean 25055 Home & Office Pop-up Cup - 5.11 oz. (145g) https://www.amazon.ca/dp/B00375JBL4/ref=cm_sw_r_cp_api_i_sIGOCb5Q90FRS
So this is me using "GateWayXs" solution of that putty, while cleaning my keyboard. Didn't even know it happened. I wonder what else I did...
You can use this lye to make soap (or clean your drains). After you make soap, keep part of it for yourself and give the rest away as gifts to make others happy!
How to make soap
The old man is snoring.
Or, you know, don't be a chicken and use lye, because it tastes much better.
http://www.amazon.com/Sodium-Hydroxide-Grade-Devil-Caustic/dp/B0039CPO34/
I keep a jar of lye around and sprinkle a tsp or so in drains when they start to drain slowly. Let it sit for 30 mins or so, rinse with cold water, good to go for another six months.
Seriously caustic though so handle with extreme care. Also I find it gets caked up from the tiny amount of moisture that gets in the jar when opened. So after a few years I have to buy another jar.
Leather honey leather conditioner
Saddle soap is soap + oils. If the leather you're working on is dirty, you should use saddle soap (or a different leather soap) to begin with, and then switch to just a conditioning (oil) product and keep applying layers until it stops soaking it up quickly. The soap is relatively mild, but should be avoided when unnecessary.
I currently use Lexol conditioner because it's cheap and easy to find locally (I was out and needed some STAT), but I've heard great things about Leather Honey and I've also gotten good results from mink oil. Honestly, the brand isn't nearly as important as just doing it regularly.
http://www.amazon.com/Leather-Honey-Conditioner-Since-Bottle/dp/B003IS3HV0
Can I get a good, concises overview of leather shoe care?
As I understand, it's along the lines of:
Would this be a good choice for the shoe polish and brush/rag? Then this for the conditioner?
Also, some sites mention applying waterproof paste every year or so. Is that necessary for shoes that don't aren't expected to withstand rain (such as a pair of oxfords, which will readily leak water by the lacing regardless if the rest of the shoe is water proof or not)? If so, what's a good product to use?
Ack, best to try a lighter conditioner then. Cadillac is great! Personally I like this stuff a lot as well https://www.amazon.com/Leather-Honey-Conditioner-Furniture-Accessories/dp/B003IS3HV0/ref=sr_1_1_sspa?keywords=leather+honey&qid=1562611575&s=gateway&sr=8-1-spons&psc=1
I don't have a schedule, I just apply it when the leather is starting to look dry. I tend to apply at the beginning of the season
I use Lexol (um...but the much smaller bottle? haha) and Leather Honey
A generic Leather Honey off of Amazon. It really made a difference!
The elastic actually isn't damaged, just frayed! I used Leather Honey, but I don't know much about the different types as I am brand new to this. It seemed to work well.
As other people have said, saddle soap to clean. I like Leather Honey Leather Conditioner as a conditioner/protector. It does darken the leather a bit, though.
Link for the lazy
http://www.amazon.com/gp/product/B003IS3HV0/ref=as_li_ss_tl?ie=UTF8&camp=1789&creative=390957&creativeASIN=B003IS3HV0&linkCode=as2&tag=amaznile-20
https://www.amazon.com/3M-717834209102DUPE-LeadCheck-Swabs-8-Pack/dp/B008BK15PU
I doubt it but you can test it
I don't know how well I can answer your questions, as I'm new to lead issues and abatement. You've probably educated yourself on a lot of what I'm going to say, but I'm going to throw it all in this comment, anyway.
I live in a 110 year old house that is basically a ball of lead. The plumbing had lead joints, the service line is old and lead, the windows have lead, the doors have lead, the walls have lead, and the city is concerned that our water mains are shedding lead. And now, my child has a very slightly elevated lead level. Prompted by her most recent blood test, we are attempting a sensible lead abatement plan for our home.
First, figure out where the lead is. You can pick up water testing kits as well as swabs for surfaces. Once you know where the lead is, you can assess your risk and choose an abatement plan.
For instance, we have a small amount of lead in our water, which is likely a consequence of the service line. We got a bid for replacing it, and that was about $10k, plus the cost of fixing the yard that would be torn up. We went with a 10 year filter for the whole house, and that was about $900 including tax and installation.
Use the surface swabs on your windows that were installed before 1980, and if you have woodwork that was painted white, check that, too. It became popular to paint dark woodwork white in the 50s/60s to brighten up houses, and people used lead paint. We have solid wood doors and a ton of trim that is absolutely smothered in many coats of paint, and sure enough, it's super leady.
With windows, the act of opening and closing the windows can cause friction on the paint, which produces inhalable dust. If your family isn't experiencing significantly elevated lead levels, you have the option to simply wipe down the windows with a damp cloth to remove the dust. If you are more concerned, have the budget, or just want new windows, you can replace them. Check to see if your local municipality has a lead abatement grant for windows. In my city, they offer a $350/window grant to replace windows that test positive for lead (along with a few other qualifiers), and that really puts a dent in that cost.
With other painted surfaces, you're likely to be fine with encapsulation, which is a fancy way of saying painting over it. Lead is only really dangerous if you inhale the dust or eat the chips, so if you paint over it, it can't create dust. This will likely mean that you'll need to do a little scraping, which will obviously create dust, so you need to use a quality mask, and then clean like mad when you are done. Wet mop, dry dusting/sweeping is not good enough.
I'm in the process of restoring the woodwork because I prefer a stained finish, and for all the trim that isn't especially decorative or historically significant, I'm just replacing it. For our lovely doors, I sent them out to be dip stripped because it just wasn't worth the risk of my daughter sucking in all the dust while I removed the paint.
Because I have a young child, I'm not fucking around with lead, but the majority of people with lead paint in their homes are going to be just fine if they don't sand lead paint, carefully wipe up the dust with a wet cloth in areas that have lead paint (like windows), and prime/paint over the lead paint.
Get yourself some lead test strips. and also get an actual respirator. Dust masks don't do shit to protect against lead.
Lead can fuck you up, protect yourself.
Yes
There are lead test kits you can get pretty cheap on Amazon. You'll get results within a minute
http://www.amazon.com/3M-717834209102DUPE-LeadCheck-Swabs-8-Pack/dp/B008BK15PU
You can test the paint you're worried about with a kit at home. It's not very accurate, but will definitely tell you if there is lead in those paint chips.
If there is lead in there, get your blood tested. If you don't have symptoms of chronic lead poisoning, there's probably not much to worry about. But it's always nice to know for sure.
You can also use one of these to test for lead
http://www.amazon.com/3M-717834209102DUPE-LeadCheck-Swabs-8-Pack/dp/B008BK15PU
Also available at your local hardware store for a little more.
These are the test strips, they're mostly used for lead paint and sold at most hardware stores too. The blood lead test is a simple blood draw, just tell your primary care doctor that you may have had some chronic lead exposure recently and want to be sure you didn't get too much in you. You're probably fine, but it's best to get checked so in case you were significantly exposed via your clothes/toiletries/etc it can be treated.
get some Bon Ami powder cleaner or Bar Keepers Friend. Use with lots of water and see if that will take it off. It MUST be one of those two. DO NOT USE COMET OR ANY OTHER POWDERED CLEANER IT WILL SCRATCH YOUR GLASS. You can find it at Walmart or Target or any major retailer.
Bar Keeper's Friend sells several liquids too. This would be similar to the polish: https://www.amazon.com/dp/B00B28ZYPU/
I used Barkeeper's Friend.
This has gotten out a lot of things that I didn't think would come out. If it really is a scratch in the glass, though, I don't think you can do anything with it.
Amazon has a 2-Pack of the 13oz liquid for $7.63 shipped with Prime:
https://www.amazon.com/gp/aw/d/B00B28ZYPU/ref=mp_s_a_1_1_a_it?ie=UTF8&qid=1504563114&sr=8-1&keywords=barkeeper%27s+friend
Try Brasso - http://www.amazon.com/Reckitt-10116-Brasso-Metal-Polish/dp/B00BILDIU4.
The coin is already ruined, like you said, but this stuff will at least make it pretty.
https://smile.amazon.com/Brasso-Multipurpose-Metal-Polish-8-oz/dp/B00BILDIU4
This stuff did wonders for the old iPod backs.
Yep, its not a great lubricant but its perfect for getting rust off tools. If that doesn't work, Evapo Rust will do the trick. I use it for restoring old tools, but its probably overkill for something like this. WD-40 should work fine.
https://www.amazon.co.uk/Evapo-Rust-C700-Rust-Remover-946/dp/B00GRSOJSS/ref=sr_1_2?ie=UTF8&qid=1517864682&sr=8-2&keywords=evaporust
Put some in a spray bottle and hose the area, soak a rag and put it against the rust. Take a piece of painters tape to hold the rag in place. Let it sit overnight. Wash with soapy water and dry. Repeat as required. Any parts you can pull off and dunk overnight will remove a lot more. This will remove the surface rust but will not undo any pitting. As to the chain don't try to remove the rust. Leave it obvious or replace the chain that is a safety issue.
Evapo-Rust
They sell it at Harbor Freight as well.
Check out some Youtube videos as well.
I've heard nothing but great things about it.
Let us know how you make out bud.
There's a lot of stuff out there you can use. But given that you're indoors and can't easily remove the bar to take it outside, there are fewer options, but still some. My personal recommendation is Evapo Rust:
https://www.amazon.com/Evapo-Rust-ER004-Super-Safe-Remover/dp/B00GRSOJSS
It's a lot safer and less toxic than other common chemicals used to remove rust, which is important because you're using it indoors.
You may want these other tools in case abrasive action is needed:
You might not need all of them, but just see how it goes.
Edit: Make sure you soak the rusted areas of the rod as much as you can. If it's light rust, most should disappear in 30 minutes, but if it's heavy it's supposed to sit overnight (preferably soaking in the stuff, but that might not be possible unless you can remove the bar). Wipe off with water, and use a wire brush to clean up anything left on.
Additionally, protect the shower from future rust by applying a thin layer of mineral oil to it periodically.
Edit 2: I found some information on the internet that suggested you can even use vinegar to remove rust. Use what you want. I think Evapo Rust is superior. Some people say vinegar can kind of turn metal kind of a gray matte and not shiny. To keep the rod soaked, you can saturate paper towels, wrap them around the shower rod, and then wrap aluminum foil around it and leave it there for however long (preferably overnight).
If you decide to replace it, maybe go with something low maintenance like plastic or something corrosion-resistant like galvanized steel.
Dowels and chopsticks with sandpaper wrapped around them, and a Dremel with a variety of stones. It's gonna be a labor of love.
Proluxe is good, but it's really just a deck stain. And the semitransparent is a water based acrylic... you're not gonna like the finish it gives you on that beautiful old hardwood. It'll look like plastic. I'd personally go with an Old Masters penetrating stain (you can go with a wiping stain if you wanna tone down the grain a little... wiping stain will give you a little more of the semitransparent look) followed by a spar finish (3 coats, applied with sponge brushes, light sand with 220 between coats - juuuuust kiss it with the sandpaper). It'll give the door a richer and longer lasting finish than a simple coat of deck stain, and the spar is UV protectant.
I'd use Evaporust or Metal Rescue on any of the ironwork that can be removed and allowed to soak (with both products, you strain the soak and pour it back into the jug - it's reusable several times). After the rust removal soak, clean with acetone and use a self-etching primer. For anything you can't remove and soak, use Rust Reformer after wire brushing instead of a simple primer for tough surfaces - it converts surface rust to magnetite to stabilize it. Then proceed with your black color coat. After the black, spray with a couple coats of satin clear. All the paints I linked are available at any auto parts store and Walmart, and I believe Home Depot carries Metal Rescue.
That's a gorgeous door. Take pictures and post a project gallery!
Edit: added that Proluxe semitransparent is water based.
Yep...as soon as I saw it I thought of this doohickey I considered buying at one point.
​
CarGuys Super Cleaner - Effective All Purpose Cleaner - Best for Leather Vinyl Carpet Upholstery Plastic Rubber and Much More! - 18 oz Kit https://smile.amazon.com/dp/B071XB18BF/ref=cm_sw_r_cp_apa_i_s-GvCbG820P3M
I've never used the RainX foam, so I have no way to compare.
For the interiors, I use Car Guys Super Cleaner. Works great. I have been avoiding touching the sound bar fabric out of fear of damaging it, so I'm afraid I haven't got any advice on how to clean it.
Car Guys All Purpose Cleaner and the micro fiber towel it comes with!
I wear black jeans and sometimes I see greyish marks on the seats and this cleaner makes everything go away. Make sure you spray the microfiber cloth then wipe down. You probably could spray the seats directly but I always just use the cloth.
I had the beige cloth in my 2015 and had to clean them a lot. Water left spots on those seats! My favorite product I found is this cleaner from The Car Guys.
I bought it mostly for the dash, but came to find it worked great on the seats as well. Some set in stains came out super easy. Has a really light smell too, so doesn’t leave your car smelling of cleaner.
I can't speak for using it on suede, but Tuff Stuff is my go-to for cleaning carpet stains. You should be able to find it locally, just linking so you know what to look for.
this is what i use on my seats. works pretty well and gets a lot of weird stuff off. i had these weird white marks from the factory and the tuff stuff did the trick. cheaper at walmart or home depot though. might want to try those places before amazon
https://www.amazon.com/Tuff-Stuff-Multi-Purpose-Cleaner-ounces/dp/B0009PCPNQ
this
https://www.amazon.com/gp/product/B0009PCPNQ/ref=oh_aui_detailpage_o03_s00?ie=UTF8&psc=1
and these
https://www.amazon.com/gp/product/B001GJ3EJS/ref=oh_aui_detailpage_o03_s02?ie=UTF8&psc=1
worked pretty well for me
I started typing and this ended up being really long, hopefully it helps. I might have gone overboard, so if you need / want a TL;DR or more info on anything just say the word and I'll do what I can :)
My personal preference is to add details and touch-ups to my figures. I've done a few full repaints, and I'm working on my first airbrushed figure, but I really like adding in details where the factory didn't :)
---
Paints:
I've had good results using alcohol based acrylics like Tamiya, Model Master, or Testors Acrylics (I think Enamels are Testors' main line, so make sure to check what type it is). Alcohol-based acrylics thin and clean up nicely with 91% isopropyl alcohol, I usually pick it up from whatever pharmacy is nearby (don't get the 70%, it doesn't work at all).
Citadel and Vallejo make nice water-based acrylic paints in additional colors, you'll definitely need a primer if you're working with Vallejo (I've only used a couple of Citadel paints, so I can't really speak to them).
You'll want to stay far away from acrylic craft paint, I've tried it in the past and it doesn't come out well at all (I just use some empty glass or plastic jars from stuff like sour cream or salsa since they're not too big).
Some folks like enamel paints, and there might be another kind of model paint, but the chemicals in those paints and their thinner tends to be quite strong so I avoid them. I used un-thinned enamels when I first started painting, and when I tried to use the thinner it ended up melting my paint tray and making a mess, so I'm not too keen to give them another try.
---
Tools are going to differ a bit depending on how you want to paint (hand painting vs airbrushing or spray painting).
---
Hand Painting:
You'll need paints, some soft bristle brushes (I have a set like these), something to stir your paint (I use a Badger Paint Mixer and love it to bits), thinner (depending on your type of paint), a mixing tray, some pipettes for measuring paint and thinner, something to hold your parts while painting (I like these Aligator Clips), something to stick the clips into (I use a styrofoam block wrapped in plastic from a craft store, but I've seen folks use taped together cardboard like from Amazon boxes or the cheap foam coolers), some fine grit sand paper or nail buffing blocks to help rough up the surface slightly to help the paint stick, and something for topcoat (I absolutely love Pledge Multisurface Floor Care, aka Future Floor Wax, it's a clear acrylic wax that dries to a semi-gloss to gloss shine, it brushes on nice and self-levels for a smooth finish, and one bottle will last a REALLY long time; I got a bottle a few years ago and I've used it on a LOT of gundams and TFs and the bottle is still half full). You may also want some smaller containers or jars to hold your thinner, brush cleaner (alcohol or water), and topcoat if you're using Pledge just so you don't need to keep the big bottle out on your workspace.
---
Airbrushing:
You'll need an airbrush and compressor, and then a lot of the same supplies as above. You'll also want some small-ish jars to store your thinned paint so you can re-use your leftover paint instead of having to toss it, and some painter's tape to mask off parts you don't want to paint and to keep your paint lines clean.
You can airbrush inside the house, but you'll want to do it in a well ventilated area if you don't have a spray booth (box with a fan and air filter to help move the fumes out the window and help keep the paint from spraying everywhere). I'm still learning to paint with my airbrush, so I don't have too many tips here.
---
Spray painting:
You'll need your choice of spray paints, alligator clips, fine sand paper, and some painter's tape to mask off areas so it doesn't get everywhere. I definitely wouldn't advise using spray paints indoors, the fumes tend to be really strong. I haven't really used spray paints in a long time, so I'm not a lot of help here either.
---
Markers:
Some folks might recommend sharpies or paint pens / markers, but I've never had good luck with them.
I do highly recommend using a Micron, Graphix, or Prismacolor marker / pen for highlighting panel lines in .005 thickness for most figures. The .01 and even .05 markers can work well too, but they might be too thick for some figures, so a couple different thicknesses can't hurt (I've got a pencil case full of lining markers from those brands). Don't use sharpies for panel lines, unless things have changed, even the thinnest ones tend to dry a purpley-blue instead of black, and the lines are still really thick compared to the Micron.
---
Painting Tips:
https://www.amazon.co.uk/Pledge-Future-Surface-Protect-Restore/dp/B000ARPH4C/ref=sr_1_1?ie=UTF8&qid=1509921459&sr=8-1&keywords=pledge+floor+care+finish
Cheers mate. Simple green over here doesn't exist, variation of is rubbish. I've read so many things to use, dettol, cheap disinfectant, nitromors, meths. I just want an easy solution, I don't want to have to scrub the buggers. I've a memory from being a kid and using nail varnish remover and the paint just going a smudgy mess that came off in strings, it was such a pita I never attempted it again.
I'm also struggling to find some future at a decent price, I'm pretty sure this is the stuff but it's quite pricey.
I'm wondering whether this is the same. Reviews on both say they're both the right stuff. I'm annoyed as thought it was easy to get in the UK and left two massive bottles of it in Aus when I moved. I've got an empty Tamiya paint pot of it and then it's gone.
Time to have a crack at my exhaust! Once again it's a pity to strip as she looks pretty good to me!
Ich möchte Dir diesen Artikel bei Amazon.de empfehlen
S C JOHNSON WAX - Floor Care, 27-oz.
von BIC WAREHOUSE
Weitere Informationen: https://www.amazon.de/dp/B000ARPH4C/ref=cm_sw_em_r_mt_dp_U_jdo0AbNRAT8DZ
https://www.amazon.com/dp/B000ARPH4C/ref=cm_sw_r_cp_taa_BKGLBb4NB363Q
This is the latest branding of the original formula
Pledge 11182 Revive It Floor Gloss, 27 Ounce, Clear Transparent Liquid https://www.amazon.com/dp/B000ARPH4C/ref=cm_sw_r_cp_apa_eVvZBbA92KC50
Same with Future Floor Polish - do people actually use that stuff on floors...
To seal metallics the secret is to use Pledge acrylic clear floor finish. you can put it on as soon as the paint dries and it will dry to a hard shiny clear coat that won't dull the metallic sheen. https://www.amazon.com/Johnson-Pledge-Floor-Multi-Surface-Finish/dp/B000ARPH4C/ref=sr_1_3_a_it?ie=UTF8&qid=1496411036&sr=8-3&keywords=pledge+floor+care
https://www.amazon.co.uk/27OZ-FUTURE-FLOOR-FINISH-Kitchen/dp/B000ARPH4C
SC Johnstons floor wax, depending on where you live there might be a different name for it, and harder or less hard to find.
Clean out your airbrush thoroughly with Windex (or any cleaning agent of choice) and then water (to remove any ammonia from the Windex) afterwards.
If you ever want to make more transparent masks, I highly recommend Future...oh right they changed the name. [Johnson bought it off] (https://www.amazon.com/Johnson-Pledge-Floor-Multi-Surface-Finish/dp/B000ARPH4C/ref=sr_1_1_a_it?ie=UTF8&qid=1478320050&sr=8-1&keywords=Future+shine+floor+wax), but it's the same formula. What you do is pour a bit into a cup, mix in a little dye/acrylic paint to your desired color, and then dip the mask in and leave it in there. No chance of mask melting/deforming, and a nice and clean process.
I don't believe that's the same. This is what you're looking for. And as far as I know, you can use a paintbrush.
Np. They keep changing the label - I guess this is what it looks like now: https://www.amazon.com/Johnson-Pledge-Floor-Multi-Surface-Finish/dp/B000ARPH4C
I lose track because one bottle will last you forever so it's changed a couple of times since I needed to buy any.
I've heard that a dip in this is helpful (dip and dry; don't polish).
If they are too loose you can tighten them by applying a super thin layer of clear nail polish on the peg and letting it dry for 48 hours.
However personally I use future floor polish aka pledge floor polish
http://www.amazon.com/SC-Johnson-Pledge-Multi-Surface-Finish/dp/B000ARPH4C/ref=sr_1_1?ie=UTF8&qid=1451296160&sr=8-1&keywords=pledge+floor+shine
dip the peg in it vertically [hand up, peg down] and then just tap the end of the peg on a paper towel. let it dry 24 hours.
if its too loose still, repeat!
> How would I make the Primer smoother without sanding and just out of the Airbrush? Like those Mr. Surfacer or near their quality
You're not. Hobby paints are made using much finer pigment that gives it that smooth finish. That's why they cost more money. If they didn't have an advantage over $1 spray cans no one would buy them. Straining might help, but it's never going to be as smooth as the expensive hobby primers.
>How would I make the Gloss Coat more glossier?*
If you are looking for a cheap gloss coat buy some Future Floor Polish. You can spray it straight out of the airbrush or thin it with rubbing alcohol. I don't know of a way to make an existing paint glossier. Maybe try buffing afterwards?
Is this the brand you use?
https://www.amazon.com/gp/aw/d/B000ARPH4C/ref=mp_s_a_1_1_a_it?ie=UTF8&qid=1493221253&sr=8-1&keywords=future+floor+wax
What kind of paint did you use? Do you have an airbrush? Do you plan to sand with 800+ grit before coating?
There's a lot to learn about paint jobs and sealing them. After a few failed attempts and weird reactions, I tend to keep same brand paint throughout a piece (for primers I hop around, but let it dry completely before top coating).
If you're using a different brand I HIGHLY suggest you wait until it has gassed out (it doesn't smell like paint anymore lol). This can take several days depending on how many coats you used, and whether you applied them too thick.
Sanding allows for better grip of the clear coat to the paint. Wet sanding is best since it removes the debris of paint and prevents most deep scrapes. It is easy to sand through your paint, especially if you only did one coat (which is why you should do 2-3 with some light 600 grit sanding in between)...
I hate sanding before a clear because I suck at it and tend to create a deep scratch or two because I'm too strong for my own good :P What I have found to work wonders is Floor polish/wax.
This is the ONLY one that a lot of modelers suggest:
https://www.amazon.com/gp/product/B000ARPH4C/ref=oh_aui_detailpage_o04_s00?ie=UTF8&psc=1
It was known as "Futures" before, but after re-branding and all that, it is now what I linked. You'll need an airbrush for this. Do a light misting of the entire part you're working with, then apply several thin coats allowing them to dry in between (usually 1-2 minutes or less if you have good air circulation). It smells great, self leveling, you can dip small parts into a little cup filled with this stuff... it's fantastic. It's slightly flexible as well. If you wait 38 hours (i think that's what the bottle says) you can apply a second coat for added protection. Make sure to clean your airbrush with ammonia (I use windex), to prevent it from curing inside it.
Essentially, floor polish is more forgiving, but offers slightly less protection than a well applied clear coat. If you don't have time for all that prepping crap (wet sanding before and between clear coats), then definitely go this route.
Here is where I got mine.
I use Blue Magic 400 and #0000 Steel Wool. Does a great job making those tips look new. It's also very cheap! Apply the steel wool with light to moderate pressure. Wipe it down with a microfiber towel that you don't care about being stained and you're all set.
http://www.amazon.com/BlueMagic-400-Metal-Polish-Cream/dp/B000BO8Z9I
Aluminum Cleaners are popular in automotive and marine aisle, Blue Magic works nicely
https://www.amazon.com/Blue-Magic-400-Ounce-Polish/dp/B000BO8Z9I
This will help with the oxidization. I like to use it with a wool buffing head on my drill. Saves elbow grease. I can get a nice finish this way.
if you want a more highly polished finish, get some wet dry metal sandpaper above 800. I use it in steps from 800 to 2300 to get a mirror finish on vintage pots and pans.
[presently working on a book on restoring vintage kitchenware]
Recently I cleaned up the exhaust headers on my KZ1300 build before installing them.
One before-and-after
The whole set of 6
It took several hours -- probably about 10 total -- and a lot of elbow grease.
I started with Brasso to remove the rust, rubbing it along with a #1 steel wool pad (#3 if it was really nasty). Then I cleaned that off and repeated as necessary.
Once I had a good foundation I switched to a milder metal polish (here), rubbing that on with a Scotts towel and letting it sit. I then gave it some elbow grease with a #00 pad until it turned black, wiped it off, applied more, and rubbed it with a #0000 pad and then wiped that off.
The results were quite good, but it definitely took a bit of time. I spent a lot of time listening to Hardcore History while working at my bench!
I noticed the exhaust tips could use some polish. I highly recommend this [metal polish](Blue Magic 400 7Oz Mtl Polish Cream https://www.amazon.com/dp/B000BO8Z9I/ref=cm_sw_r_cp_api_i_1AZ5AbHD4C68K). Great job overall!!!
This shit is magic: http://www.amazon.com/BlueMagic-400-Metal-Polish-Cream/dp/B000BO8Z9I/ref=sr_1_2?ie=UTF8&qid=1414037817&sr=8-2&keywords=metal+polish
Blue Magic Metal Polish
or
motorcycle shops carry chrome polish wadding-its long strips of cloth with the polish in it. It's for spoked wheels, you wrap it around the tube and pull back and forth on it. I used it on a bike I bought with rusty wheels and it worked great.
Decided to not be lazy, here's the link:
Luster Lace
I second commiecat's suggestion of the metal polish and dental floss. I've used it on numerous razors however I would caution that some razors can get loose at the pivot pin, especially older razors that don't have washers on the outside of the scales and just have the pins peened over. If this happens you can use a (4oz preferably or an 8oz if that's all you have) ball peen hammer to very lightly tap the pin and try to peen it some more and tighten it up. Also, I've tried a few metal polishes and I prefer Blue Magic to Maas or Flitz. It really works on getting tarnish off but does have a powerful stench so use in a well ventilated area.
To prevent rust from occurring again, you should try to get some oil into the hinge and even wipe down the blade if you have multiple razors and won't be using one for a while. Mineral oil is great for this and you can find it in the pharmacy for cheap, it's sold as a laxative, lol. Moisten a q-tip and try to work it around the hinge area. If you want something fancy, look for a Tuf-Glide pen. I found them for sale at an antique store while I was hunting for razors but I would assume they are sold at hardware stores and such.
some tricks i know for cleaning up rust are: Fold a small piece of aluminum foil up and flatten it as smooth as possible. (a rolling pin or pen help) then dip it in water and rub over the rust lightly, keeping it wet. Next a little bit of 0000 steel wool. then finish with a good polish like blue magic or wizards metal polish.
I am not sure how the side view mirror is actually mounted on this model but I can give a general idea.
On the inside of the door there is a plastic triangle trim right on the opposite side of where the mirror is and usually it pops off by pulling on it. This will give you access to some screws that hold the whole assembly to the door.
From there you will have to work your magic to figure out how to get it secured nice and tight as I don't know how bad it is.
The bumper is usually held in with screws or some clips or slid into something. Once again I don't know exactly how it is on this model, hopefully some one can tell you how to fix it correctly for this model. But for now you can go and inspect around to maybe figure out how it should be mounted.
The side trim on your TDI should be held on with tabs build into the side trim, inserted into the holes on the door and locked in some way. Either the tabs have broken off so one way would use some double sided tape made for side moldings/body work.
For the headlights I use Blue Magic Polishing Cream that a friend left at my previous house years ago. It works well and only removes surface oxidation. If it's there deep this polish won't be enough and very fine grit sandpaper is what you will need to use. I have to warn that this polish has ammonia in it so work in a well ventilated area. You will need to follow up with a sealant or it will turn yellow again in a month or two.
I used this product from amazon (honestly i just picked one semi randomly when I couldn't find the same brand I was told to use), It worked just fine. As for the dremel bit, I used the white fuzzy round thing you probably get in every dremel kit you've ever seen.
http://www.amazon.com/Spicy-World-Citric-Acid-5-Pound/dp/B000OZFECU/ref=sr_1_1?ie=UTF8&qid=1397684913&sr=8-1&keywords=citric+acid
$1.97 for 7.5 oz is $4.02/lb.
If you wanted to buy from Amazon you can get 5lbs @ $2.98/lb and not have to worry about finding it in stock.
(not trying to criticize you - just wanted to provide a link that may be helpful to others)
You can also try Borax, which is a slightly different form of Boric acid, and may be easier to find. Also, some ants are more attracted to protein than sugar, so try mixing one batch using jelly and a second batch with peanut butter, and see which one the ants go for.
Get borax here https://www.amazon.ca/Mule-Borax-Laundry-Booster-00368-136549/dp/B000R4LONQ/190-1372441-8275909?ie=UTF8&tag=diynatural02-20 and powdered sugar here https://www.amazon.ca/Domino-Powdered-Confectioners-Sugar-16oz/dp/B0019N2EQU?ie=UTF8&tag=diynatural02-20. Its a little bit on the expensive side.
First, clean out the car. Be meticulous.
Next, get a shitton of borax. Spread it EVERYWHERE. That stuff is abrasive and will scrape little holes in an exoskeleton, leaving the roaches to dry out.
The borax will be gross and it will get all over the place, but it's the most reliable way to get the job done.
this stuff? http://www.amazon.com/Borax-Laundry-Booster-76-Box/dp/B000R4LONQ/ref=sr_1_1?ie=UTF8&qid=1381027469&sr=8-1&keywords=borax
I'll add to this reply with saying you should isolate a problolmatic cartridge, open it up, clean the contacts with 99% alcohol and a cotton swab. If the contacts aren't shiny then I take a little Bar Keepers Friend, dab a paper towel with it and scrub over the same area. This picks up any residue preventing a proper connection to the contact pins. In my experience my pins have always been good but the cartridges contacts had a residue on them that was nearly impossible to clean off without Bar Keepers Friend.
Anyways, I'm still looking for a place that sells Bar Keepers Friend. If anyone here knows where to buy one, please let me know :D Cheers.
Bar Keeper's Friend works really well too.
Pick some up some Bar Keepers Friend (https://www.amazon.com/Bar-Keepers-Friend%C2%AE-Cleanser-Polish/dp/B000V72992) and some copper or steel wool.
Get in there good, then season. You'll need to dry it immediately after use.
https://www.amazon.com/dp/B000V72992/ref=cm_sw_r_other_apa_i_UFOiDbH7BM527
Bar Keepers friend. Should work.
Cleaning:
I've gotten cleaning down to two products: Bar Keepers Friend and 7th Generation Powdered Dish Soap. These products are basically magic, if you allow them time to work. BKF works on things that are baked or burned in and for use on metal (except aluminium) and glass. Sprinkle BKF over the area to be cleaned, wet it until it's paste like, then walk away for 30 minutes or so. When you come back, re-wet it if it's not still wet, and use a paper towel to polish off the stain. Usually comes right up with very little elbow grease. Same principle applies to 7thGen. Fill your kettle/carboy/whatever with water and add about a tablespoon of powder per gallon of water. Let it sit overnight. I've yet to find grime that will stand up to it. It's magic works on a combination of what is basically oxyclean free and enzymatic cleaners. Much in the same way enzymes break up starch in malt to make it into sugar, these enzymes break up proteins and junk to release it from whatever is clinging to it. The only gotcha here is the enzymes have a shelf life, so you can't let it sit around forever. If you use it in other household cleaning, you can go through it at a fair pace and always have an opportunity to freshen up your supply.
Sanitation:
StarSan is clearly everyone's favorite sanitizer, but I do worry a bit about it's effectiveness over the long term with organisms building up resistance to it. I currently try to cycle in Saniclean every now and again, which has some of the same ingredient as StarSan, but uses a slightly different chemical to help keep the foam down while still sanitizing. I'd love to find out if someone has found another product as effective as these two that isn't iodine or chlorine based. In the mean time, to help keep things shaken up, I use heat where ever possible to add in an additional layer of sanitation. A pro brewer once told me cycling 180F water through your system for 15 minutes will kill just about anything you have to worry about. Seems solid and I like the fact it isn't an additional chemical.
Sterilization:
I only really use this for canning wort right now, but a pressure cooker is a nice thing to have. I've also been known to use tyndallization on items that might not quite make it through the pressure cooker. If anyone is regularly sterilizing things, I'd be interested in hearing what you're sterilizing, what method you're using (heat, steam, gas, ultrasonic, etc.), and why.
edit : Fixed the linking I think.
Barkeeper's Friend. Works like a charm.
Seriously Barkeeper's Friend is my favorite cleaner. I use it on my glasstop, my stainless steel cookware, my knives...it's amazing!
This is what I have always done. It cleans them well. I have also used Bar Keepers Friend and had great results. I have the cheap Orgreenic pans and have been using them for the last three years or so and they still work great. My only real complaint about them is that I wish they were a bit thicker.
Highly rated pan right here. Remember to use wooden or plastic spatulas if you want to keep it looking pretty. Metal spatulas will scratch the hell out of it, but honestly doesn't affect the performance of the pan. Also, Barkeeper's Friend is the best thing for cleaning it.
Did you try scrubbing it or did you just pour the bleach/cleaners in and let them soak. That pink stuff looks like biofilm. Most of that should come off with some comet or other cleaner and some scrubbing.
If not, drain the toilet by shutting off the water supply and flushing it. Then scrub it with a pumice stone like someone else suggested or Bar keepers friend. http://www.amazon.com/Bar-Keepers-Friend%C2%AE-Cleanser-Polish/dp/B000V72992/ref=sr_1_1?ie=UTF8&qid=1420410568&sr=8-1&keywords=bar+keeper%27s+friend+cleaner
if it's rust then bleach wont work as it just further oxidizes the iron.
Girl you need to get some Barkeeper's Friend pronto. It is amazing stuff and so cheap too.
Also works really well in the kitchen, like for anything covered in cooked-on grease or even for stainless steel cookware that is discolored.
It appears it's only available in the U.S., Canada, and Puerto Rico.
However, if Amazon will ship to you... http://www.amazon.com/dp/B000V72992
Everything else, crock pots, even measuring cups, is optional. Slow cookers, microwaves, electric kettles, and rice cookers are all nice, but there is nothing you can make in them that you can't make in a pot, like humans did for thousands of years. You'll want measuring cups for baking, but for cooking you're adjusting on the fly anyways.
Bar Keepers Friend
I just got a stainless set for Christmas this past year. I was really excited but also terrified, then I did some research. The key to stainless steel cooking is heat the pan first before adding ANYTHING. I believe the adage is hot pan, cold fat.
So, say you want to cook something over medium-high heat.
I can even scramble eggs in my skillets and they slide out like nothing. You'll notice after a little practice that these babies are, when used properly, less prone to stick than something with a non-stick coating, unless of course you burn the shit out of it. :)
Also, for cleaning, let the pan cool before you wash it. My favorite things to use are either no scratch Scotch Brite pads or Scotch Brite Dobies but in most cases I don't really need to scrub. That being said, you're going to encounter situations where you burn things or the fat oxidizes on your pans and for this, hands down, get some Bar Keepers Friend. It's the best thing ever.
You can get it on Amazon cheap:
http://www.amazon.com/gp/product/B000V72992/ref=ox_ya_os_product_refresh_T1
I bought some after I burned oil in my stainless steel pan.
You're very welcome; I'm just a mere nomo who's happy to help.
All of that said in my original post, if I were you I'd try something a little less permanent on the first try. I'd also want something that would have no chance of flaking off and making a big mess of my mod (lacquer will eventually fail). After polishing and a solvent cleanse, I'd probably apply a wax. It's not a forever solution, but it should reduce how often you'll have to polish and it's pretty easy to remove/polish/reapply.
Renaissance Wax is a museum quality product renowned protecting antiques/collector items and it works great on all metals and more. Amazon carries 65ml and 200ml containers at a fairly reasonable price.
That's probably where I'd go first, but my experience with applying coatings is very limited...I spec them all the time, but never have to actually use them. :) I hope your experiment goes well!
"Renaissance Wax" - https://www.amazon.com/Renaissance-Wax-200ml/dp/B0012S1XBO
used by museums worldwide.
otherwise, plain simple 3-in-1 oil and a soft cloth.
I just wipe it down with some Ballistol or oil after cleaning. Lots of people recommend this stuff for polishing blued guns: https://www.amazon.com/Renaissance-Wax-Polish-200-ml/dp/B0012S1XBO
This stuff is pretty good: http://www.amazon.com/Picreator-Renaissance-Wax-200ml/dp/B0012S1XBO/ref=sr_1_2/185-1115514-7925907?ie=UTF8&qid=1397488317&sr=8-2&keywords=renaissance+wax+polish
A museum would use Renaissance wax., I've spoken to maritime archaeological conservators, they actually do use it. My uncle, a coin dealer who specializes in ancient coins (Roman and earlier) says that Johnson paste floor wax is the same thing as renaisance wax, and much cheaper. It smells quite a bit like car wax, for whatever that is worth.
The grips are Ivory and can be worth a huge amount. You should get the two 1862's (not quite sure that's what they are, would need better view of them) lettered from colt. They could be worth potentially 10,000 or more each, especially if that's factory engraving.
DO NOT CLEAN THEM. You do not know what you're doing, you will fuck them up. Your best bet would be to find a professional restorer or gunsmith (not just some jackass that can change a shotgun barrel either) and have them clean them properly. More antique guns are ruined by "I'll just scrub this rust off" and "how could this possibly harm the finish, it's made for guns" than by anything else. If you must do anything, a careful brushing with a firm bristled toothbrush (and nothing else. No copper brushes, steel brushes, steel wool, brass brushes or cleaners on the toothbrush) to remove dust and dirt followed by the use of a product like renaissance wax to impede further degradation is what I would recommend. The ivory needs to be treated especially carefully, as it gets older, it gets very fragile.
I would suggest contacting someone like Turnbull or another well recommended restorer as soon as possible.
http://www.amazon.com/Picreator-Renaissance-Wax-200ml/dp/B0012S1XBO
http://www.turnbullmfg.com/
Simple Green is your friend.
http://www.amazon.com/gp/product/B0017D1GG6?ref_=wms_ohs_product&redirect=true&psc=1&pldnSite=1
This ^ will last you a long time. I clean my discs with it to remove the squeak also.
This http://www.amazon.com/Park-CM-5-2-Cyclone-Chain-Scrubber/dp/B007HDNOT2/ref=sr_1_cc_1?s=aps&ie=UTF8&qid=1398709921&sr=1-1-catcorr&keywords=park+tool+chain+cleaner plus simple green = a super chain cleaning.
Also a little car paint detailer keeps it shiny shiny.
http://www.amazon.com/gp/product/B0009IQXAE?ref_=sr_1_cc_2&s=aps&qid=1398709624&sr=1-2-catcorr&keywords=meguires%20detailer&pldnSite=1
Just spray it into a rag and not directly onto the frame to prevent over spray on the discs/pads.
As others have mentioned, a good lube (Boeshield T9 for example) should be matched to your riding conditions and applied.
http://www.amazon.com/Boeshield-Corrosion-Protection-Waterproof-Lubrication/dp/B001447PEK/ref=sr_1_1?s=sporting-goods&ie=UTF8&qid=1398709998&sr=1-1&keywords=boeshield+t-9
This is what I use. But my understanding is that any degreaser concentrate works, but some can eat or deteriorate plastic.
Simple Green 11001CT Clean Building All-Purpose Cleaner Concentrate, 1gal Bottle https://www.amazon.com/dp/B0017D1GG6/ref=cm_sw_r_cp_apa_yx3RybSCJ4WEJ
I understand completely. I've had a couple of dragon figures for 15+ years that I'm too intimidated to paint. Don't be too afraid of messing up. There's always the option of a bath in Simple Green if you need to start over. Just let them soak overnight and the paint will come right off without hurting the plastic.
fool proof, get a Vallejo wash and just brush it on real fast. I would buy a can of primer from wal-mart first and go over them real fast prior to doing the wash though, krylon is easily the best spray on primer for minis.
alternatively you can dip it in some wood stain and that works pretty well.
and if you mess up, just submerge the messed up mini in a simple green bath overnight and clean it with a toothbrush, and it is ready for a redo.
edit: if you want more detailed info /r/minipainting may be a good resource for you
Why do you need lye?
If you want it for pretzels, you have to use "food grade" lye, you don't use laboratory sodium hydroxide.
http://www.amazon.com/Grade-Sodium-Hydroxide-Micro-Beads/dp/B001EDBEZM
>introduce me to no more toxic metals than eating fresh fish or drinking tap water
The toxic metals aren't the problem. It the random other crap that could be in there. I don't know what's in there, but is it really worth the risk?
I mean, you're probably right and all[Edit: After reading remidiality's reply, I'm not as sure about this], but even if there's a 1% chance that you're wrong, is that worth it? 1% is still a pretty high chance. Then you might also run into issues like the Zicam thing where they put Zinc in their 'homeopathic' nasal spray, which caused people to lose their sense of smell.I'm assuming you live in the US, in which case I'll point you to this which was the first thing I found. That's a crap ton of lye for <$20. Seriously, how much could you possibly save by going for the lab stuff? Is $20 really that much that you would risk serious illness or worse?
Edit: By the way, if my tone seems a bit harsh or critical, I'm sorry, but I don't want you to accidentally kill yourself.
https://www.amazon.com/gp/product/B001EDBEZM/
I've had it for 5 yrs, and I'm maybe halfway through it.
I recommend this. let is soak overnight, voilà
https://www.amazon.com/Grunge-Off-Super-Soaker-Cleaner/dp/B002LURISY
This stuff, Grunge Off, my friend uses is unbelievable. http://www.amazon.com/Grunge-Off-Super-Soaker-Cleaner/dp/B002LURISY he first uses an alcohol-Epsom salt-420cleaner mix then rinse with water and does a final rinse with the grunge off to keep the glass smelling nice and looking shiny.
Grunge Off and its reusable.
All you need in life is Grunge Off. It's amazing, just plug up the downstem hole with a rubber stopper, fill up yer piece, let it soak for a bit, pour the grunge off back into the bottle, then rinse with water. You can reuse it a ton of times before it gets too gross. We'll use it for awhile in the bongs then relegate the kinda gross grunge off to a giant glass beer stein to soak slides etc. Absolute must have. https://www.amazon.com/Grunge-Off-Super-Soaker-Cleaner/dp/B002LURISY
Seriously-this works amazingly-
Tuff Stuff Multi Purpose Foam Cleaner for Deep Cleaning - 22 oz. (1.37 lbs) https://www.amazon.com/dp/B0009PCPNQ/ref=cm_sw_r_udp_awd_8DuZtb0NSFYV3SN8
Try TuffStuff cleaner, good for upholstery!
Goo Gone. I also really like Tough Stuff. It's cleaned crap that Goo Gone didn't.
Tuff Stuff Multi Purpose Foam Cleaner for Deep Cleaning - 22 oz. (1.37 lbs) https://www.amazon.com/dp/B0009PCPNQ/ref=cm_sw_r_cp_api_kyQExb7DNPAA4
Griot's Garage would be my go to general interior cleaner. Virtually no odor, no residue and cleans phenomenally.
Chemical Guys make a decent product as well. I wouldn't say it's an as effective cleaner as Griot's but does offer UV protection. CG's cleaner does have a fruity smell (fades after a few hours) and is colored as well.
Haven't had to use it in the BRZ (thankfully) but in past cars and friends, for the suuuuper filthy or large stains, Tuff Stuff's Foam Cleaner is a go to.
Other than that, compressed air for the nooks and crannies.
when you clean fabric seats you certainly dont want to soak the seat when the shampoo dries alot of times the dirt will float back up to the surface
i would reccomend tuff stuff its foam so you coat the seat, let it sit for like 30 seconds and scrub with a towel. you may need several applications to get the seat clean...tuff stuff is also the only thing ive found to actually clean suede and not ruin the material
This took some really old stains out of my Jeep before I sold it
Last week I was doing a food delivery and this curry sauce leaked all over my passenger seat. Was a ton of it.
When I got home I soaked it all up with paper towels.
Then I took some laundry detergent and water and rubbed it in the stain with a towel. After just used a wet towel to get the detergent off.
My fabric still smells... What can I do? I just bought this car a month ago.
Is this permanent? If not is there a product I can buy to get the smell out?
I found this but not sure if I should waste my money on it : https://www.amazon.com/Tuff-Stuff-Purpose-Cleaner-Cleaning/dp/B0009PCPNQ/ref=sr_1_7?s=automotive&amp;ie=UTF8&amp;qid=1497076610&amp;sr=1-7&amp;keywords=interior+cleaner
Nothing fancy, just a good brush and couple fabric cleaners. You might have to experiment a bit if you're doing it yourself.
I don't know if this is the same thing, but this is what it is called in the US:
https://www.amazon.com/Johnson-Pledge-Floor-Multi-Surface-Finish/dp/B000ARPH4C/ref=pd_ys_sabia_8?_encoding=UTF8&amp;pd_rd_i=B000ARPH4C&amp;pd_rd_r=CW9AAWMC30ZWVK35FC7G&amp;pd_rd_w=nalg6&amp;pd_rd_wg=OIdH9&amp;psc=1&amp;refRID=CW9AAWMC30ZWVK35FC7G
Which part is floppy?
You can cover the floppy joints with layers of this stuff till it's no longer floppy.
Well, in that case, if you are going to do that, I don't recommend buying an airfix starter set (it's discussed below for completeness, but while the set of paint and cement is appealing, you'll end up throwing it all away later on aside from the paintbrush). The paints included in there almost certainly will not work well.
Go to a hobby store or something, buy a cheap airfix kit (I recommend either the Harrier FRS.1, Zero, Spitfire PR.XiX (all in 1/72), go to an art store to buy some Golden Talkon brushes (it's the name of the material; its' a super soft orangey bristle), and buy some paints (acrylic, plus a bottle of spray primer), while you're there.
See this old thread below of another beginner (though he was interested in sci fi), of tools you would need.
**That list is configured for the UK.
If you want to build plastic models, I recommend a recently issued spitfire model from Airfix, a few bottles of good, brushable paint (Model Master Acrylic is good, if you use a spray primer), and a few "golden talkon" synthetic brushes, plus tweezers and an exacto knife.
The basic starter sets you can buy are these:
Italeri: http://www.austinsmodels.co.uk/product.php/italeri_jas_39_gripen_172_scale_starter_kit/?k=:::6142968
Airfix: http://www.airfix.com/uk-en/shop/starter-sets-and-gift-sets/small-starter-sets.html.
These are gear towards children, and the quality of the paints are marginal at best. However, what it will do is give you an idea of the challenge ahead.
And some liquid cement.
As for why the long list below, there is an alternative:
Airfix, Revell Germany, Heller, and Italeri ALL make starter kits with paint and cement. However, the stuff in those are generally designed to appeal to children and would have to largely be replaced once you are "serious" about this.
The tools I recommended are more for if you're investing in the hobby for the long run with reusable, useful items you can continue to use for long periods of time.
However, if you are unsure, there's nothing wrong with one of those complete package kits. Warning though, Airfix's start kit paint is absolute garbage. but water soluble and easy to clean up. Strippable with alcohol, at least in the formulation I got a year ago.
And here's how I'd set it up:
OR: Airfix FRS 1 Harrier: http://www.amazon.co.uk/Airfix-A04051-BAe-Harrier-FRS1-x/dp/B0021L9BU6/ref=sr_1_4?ie=UTF8&amp;qid=1442370019&amp;sr=8-4&amp;keywords=1%2F72+FRS.1
**you'll notice a theme developing. These are all mostly single color builds, minus some detail work.
Or, this: http://www.amazon.com/Royal-Langnickel-Taklon-Brush-Super/dp/B001ARHH7G (probably the better choice).
http://www.amazon.co.uk/Humbrol-150ml-Acrylic-Spray-Primer/dp/B004T8TD0C/ref=sr_1_1?ie=UTF8&amp;qid=1442369901&amp;sr=8-1&amp;keywords=humbrol+primer
or: http://www.amazon.co.uk/Vallejo-Model-Color-Polyurethane-Primer/dp/B004BN5RYG/ref=sr_1_1?ie=UTF8&amp;qid=1442369935&amp;sr=8-1&amp;keywords=vallejo+primer
Other items:
**Future can be found in hardware and places like walmart in the US, there is no need to order it online except for convenience.
That same product has been renamed/rebranded several times over the years.
Good thing though, once you buy a bottle you won't need to buy another one for probably 20 years :)
And yes, Pledge Revive It floor gloss. I grabbed some at Walmart, but it's available all over.
https://www.amazon.com/Pledge-11182-Revive-Transparent-Liquid/dp/B000ARPH4C
SC Johnson Pledge Floor Care Multi-Surface Finish 27 OZ https://www.amazon.com/dp/B000ARPH4C/ref=cm_sw_r_cp_apa_zNDgAbMQ8BW87
If it has become foggy from micro-cracking as larwk mentioned you may want to try Future floor finish. It is an acrylic coating that will fill scratches and cracks amazingly well and self-levels beautifully leaving a crystal-clear surface on plastic. It is a tried and tested procedure in the model-making world. Check out this page for a lot more info on its use. Obviously you'd want to try it out on a small area first, but even if it doesn't work for you it is easy to remove with a quick alcohol wipe. You'd also want to use nothing more than a mild detergent to clean it after it is applied and dried.
honestly I have found that brushing on future floor wax aka fledge multi surface works about 2-3x better than mr mark setter
amazon link http://www.amazon.com/SC-Johnson-Pledge-Multi-Surface-Finish/dp/B000ARPH4C/ref=sr_1_1?s=hpc&amp;ie=UTF8&amp;qid=1411885856&amp;sr=1-1&amp;keywords=pledge+multi+surface+wax
I'd advise against plastic cement. This will degrade the plastic, as it welds two pieces of plastic together rather than merely adhering them. Instead, get some Future Floor Polish (an acrylic that is no longer called 'Future' but is always referred to as such) and brush it onto the piece you want to thicken:
https://www.amazon.com/SC-Johnson-Pledge-Multi-Surface-Finish/dp/B000ARPH4C/ref=sr_1_1_a_it?ie=UTF8&amp;qid=1464798175&amp;sr=8-1&amp;keywords=future+floor+polish
After painting, I recommend you spray a glosscoat, apply decals, and then spray a final glosscoat; imo I think Sinanjus look better with a glossy shiny finish, but that's just me.
If you have an airbrush or handbrushes, I recommend Future Floor (previously Pledge) as the first (before decals) and last layer of glosscoat.
If that's not your style, there's spray cans as well, such as Mr. Hobby Topcoat.
There's much more info in the sidebar, so if you really want to make it look good, refer to those links if you're on a computer. Really helpful stuff!
I use acrylic paints so I use my airbrush to seal it with Pledge Ultimate Floor care (Used to be called Pledge with Future and is much cheaper at Lowe's than Amazon) acrylic sealer. I then add my decals and weathering then spray the entire model with the varnish I will be using. Either glass, matte, or satin.
The major modeling paint companies all have good top coat and varnish options out. Also, check out some videos on YouTube. There are some great resources out there too.
Not sure why this hasn't been suggested yet, but Pledge Future floor polish works as an amazing gloss top coat. It's cheap and comes in large quantities. For about $5, you will have all you need for year.
Here's a link to what I bought, and here's a link on how you should use it!
Future is used rather often as a clear coat. A bottle of the stuff will effectively last a lifetime.
Concerning decal solutions, either one should be fine. I've used both microsol/set or Tamiya Mark Fit Strong, depending on how cooperative the decals are.
NO!! it is laquer based and may cause the acrylic paint to run. A lot of people use this Future floor care its cheap and lasts for ever and will not damage acrylics.
I have one dwarf whose like that. If you want to try to fix it, put a drop of super glue or plege floor finish on his hips and work the joints for a few minutes to get it inside and it'll dry while your still moving the legs and that should help tighten them up.
It's called Pledge Floor Care Multi-Surface Finish in the US, and goes by various names around the world. Walmart carries it, costs around $6 for a bottle that could clear coat hundreds of models.
It also works pretty well on floors :)
https://www.amazon.com/Johnson-Pledge-Floor-Multi-Surface-Finish/dp/B000ARPH4C/ref=sr_1_3_a_it?ie=UTF8&amp;qid=1493385925&amp;sr=8-3&amp;keywords=pledge+floor+care
That's not the same as I use, from the looks of the back it's not an acrylic like the "Floor Finish". You might want to look for this bottle. Or just order it online.
http://www.amazon.co.uk/27OZ-FUTURE-FLOOR-FINISH-Kitchen/dp/B000ARPH4C
I also remember it being called klear in the uk but I'm not 100%
I've heard that Pledge is a good gloss coat but I'm not sure what I should be buying in the uk.
Is this the right stuff https://www.amazon.co.uk/Pledge-Klear-Multi-Surface-Wax/dp/B008HFVO32/
Or should I get this which costs quite a bit more https://www.amazon.co.uk/27OZ-FUTURE-FLOOR-FINISH-Kitchen/dp/B000ARPH4C/
the absolute cheapest route, and safest for paint compatability, is Pledge (aka Future Floor Polish). https://www.amazon.com/Johnson-Pledge-Floor-Multi-Surface-Finish/dp/B000ARPH4C/ref=sr_1_1_a_it?ie=UTF8&amp;qid=1504883161&amp;sr=8-1&amp;keywords=future+floor+polish
It is super tough, doesn't yellow, and will not react poorly with any type of paint. Oh, and you can brush or spray it on.
Will this work? I also have some loose joints to fix
https://www.amazon.com/Johnson-Pledge-Floor-Multi-Surface-Finish/dp/B000ARPH4C/
Thanks!
I was thinking of putting some airbrush advice on here, but I figured that most newbies are a long way off from getting an airbrush.
Regarding thinning for airbrushing: I use future floor polish. It's a really thin, clear acrylic that I learned about during the hours of research I did before buying an airbrush. I think it's an old scale modeler's trick.
Here's a link to the product on Amazon.
https://www.amazon.com/gp/aw/d/B000ARPH4C/ref=mp_s_a_1_3_a_it?ie=UTF8&amp;qid=1509879400&amp;sr=8-3&amp;keywords=pledge+floor&amp;dpPl=1&amp;dpID=415e8X8G5yL&amp;ref=plSrch
This right here is what I'm using. It doesn't say future on the bottle but it's the exact same formula, just reskinned. https://www.amazon.com/gp/product/B000ARPH4C/ref=oh_aui_detailpage_o03_s00?ie=UTF8&amp;psc=1
I can't find any information on this pledge on the swammymodels future guide. Is this the same as the 2015 formula of the multi surface finish? https://www.amazon.com/gp/product/B000ARPH4C/ref=ox_sc_act_title_4?smid=A1AKT0EVAUPPAX&amp;psc=1
I ordered this a couple days ago https://www.amazon.com/gp/aw/d/B000ARPH4C/ref=ya_aw_od_pi?ie=UTF8&amp;psc=1. According to one of the answered questions, this is the same product, just renamed yet again.
Future floor finish.
If it works on figures, it probably works on gunpla.
https://www.amazon.com/gp/aw/d/B000ARPH4C/ref=ox_sc_act_image_1?ie=UTF8&amp;psc=1&amp;smid=A1AKT0EVAUPPAX
Metal polish also works.
They are called finger pump oil cans. Thanks for making me look that up!
First thing I did was scrub it down with some 000 steel wool and Goo Gone. I've never honestly seen anyone else use this combination but it works amazing on aluminum, steel, plated metals and tons of other stuff.
After I got all of the grim off I wiped it down with some all purpose cleaner.
Next I put a buffing ball on my drill and used some Mothers Aluminum polish. After a few pases with the mothers I cleaned off the ball, and finished out with some Blue Magic 400. The Mothers polish has a small amount of abrasive which helped smooth out what the steel wool did and the Blue Magic 400 has no abrasive and leaves a longer lasting protective coat then the Mothers. I have found you can make just about anything look new with this quick and easy method. Check out how nice it cleaned up the shocks on my bike Album.
This is magic deoxidating polish. Buy it. Its cheap. And will last forever
i've had good results with a non-abrasive metal polish like this one
Super simple. Just get a microfiber cloth or old rag or whatever, some non-abrasive metal polish like Flitz or, I like to use this stuff
Apply polish to cloth and just scrub until it is all shiny and sexy. Alternatively, you can use a dremel with a buffing attachment, but I really enjoy polishing by hand.
That's all there is to it, other than taking a toothpick and getting into the grip serrations to scrape out the years of accumilated Isreali soldier finger crud.
Try those with MAAS or a similar product:
https://www.amazon.com/Blue-Magic-400-Polish-Cream/dp/B000BO8Z9I
:) Blue Magic Metal Polish, felt polishing wheels and a dremel.
I just got some of this stuff off of Amazon. How am I supposed to go about using it?
Do I try to get my pipes as clean as possible with soap/water, and then use this as a finish? What parts of my bike can I use this on? What parts am I not allowed to use it on?
Do you have any hints or tips about how to use it in the best possible way?
Thanks!
It is super cheap, but any way you do it, you're going to need a lot of acid. You could probably just make a smaller amount and just use a ladle or something to make sure all surfaces stay wet
Yeah, the only difference is that I used the Fluval diffuser. The glass diffuser is a lot more fragile - I dropped mine and it shattered. The Fluval one is a clunky piece of plastic, but holds up well. I've been re-evaluating my setup and will be replacing my DIY system with something more robust. Before I get into why, let me go share some advice with they DIY system...
&nbsp;
First off, I'd also get a check valve. This will prevent siphoned water to back up into your CO2 setup. There are bubble counter/check valve combinations, even a diffuser/counter/check valve combo.
I haven't purchased these, so I can't comment on the quality. I will say - I purchase most if not all my supplies from Amazon with great success. I always buy the least expensive equipment. Most of it I can tell comes from China, but the quality is still pretty good - it gets the job done.
&nbsp;
Second, the DIY setup is good, but does not last. The DIY kit you can get on Amazon is awesome - fits right on any standard soda bottle and has a nice needle valve and pressure gauge. My problem is durability, the setup I used to create the tank I have in the picture has recently broken down. The pressure gauge ripped off (because the tubing wore down) and although I tried to reattach and seal it, there was a slow leak that I wasn't willing to try and repatch. This is the second DIY kit I've broken, they both broke at the tubing piece that connects the gauge and the bottle cap. The main reason why it breaks down is because I shake the shit out of those bottles to stir up the Baking Soda and/or Citric Acid. I never really paid attention to the pressure gauge flopping to and fro, but now I realize that after enough "fros", the tubing worn down until it tore off. So if you stick with the DIY setup, try to either not shake it like a polaroid picture - or hold the pressure gauge steady.
&nbsp;
The DIY system is cool because it makes you look like Walter White and also provides a "cheap" way of getting CO2 into your tank. All you have to buy after you have your setup is Baking Soda and Citric Acid. Baking Soda, I get at Costco for cheap and is so big it will last forever. Citric Acid - I haven't really looked in depth at purchasing local - but Amazon sells these 5lb bags for $15. I think it's the best deal on Amazon. I've only bought two bags total (I tried it in my 75 gallon tank - STUPIDEST IDEA EVER - but that was when I was really new to the hobby). I'd say for a 5-10 gallon tank, 1 5lb bag of Citric Acid should last you for maybeee a year - depends on your bubbles per second obviously.
&nbsp;
One major con I have for the DIY system besides durability is that it's all manual. Sure - you can figure out how to rig up a solenoid of some sort and what not to get it on a timer- but seems like more trouble than it's worth for a DIY system. I let my CO2 run 24/7 which isn't ideal - but as the picture above clearly shows - it works. The other downside of it being manual is that baking soda surprisingly doesn't mix all the way with water. So when you introduce it to the citric acid solution (which mixes well with water) - the entire reaction may not occur until you shake it and baking soda then reaches the citric acid. Having to periodically check my CO2 system isn't terribly difficult, especially if you chose the DIY setup to save money - but sometimes if too much citric acid is transferred into the Baking Soda side - a fuckton of CO2 is created and now either is pumping into my tank or my soda bottles look like they're ready to explode. I will say - this has happened to me very rarely. I've seen my soda bottles build a lot of pressure before - but never bursted. So it's not the end of the world, just an unexpected inconvenience.
&nbsp;
The other major con I have is refilling. Sure refilling doesn't take that long, empty the neutral baking soda/citric acid solution and add a the the right amounts of the new solutions in. But after doing it so many times - I'm kinda tired of it. I sometimes have extra soda bottles at the ready with the solutions and unscrew the old ones and pop in the new ones. Good plan, but still takes time and effort.
&nbsp;
If you're careful not to shake the tubing of the pressure gauge, content with either having CO2 run 24/7 or manually turn it on and off AND are willing to periodically refill soda bottles, then I'd say give the DIY system a shot.
&nbsp;
I chose the DIY setup when I first started the hobby and wasn't sure how dedicated I would be. Also - I didn't have a great paying job that would warrant me paying more for a convenient/foolproof CO2 setup.
&nbsp;
Which brings me to what I plan on doing now. Now that I'm more interested in the hobby, I've decided to step my game up. For starters, I have a 75 gallon tank rigged up to a 20 lb CO2 tank that I have to refill every 3-4 months. I live by a small hydroponics shop that refills my CO2 tank for $20. I don't know if $20 is cheap, but the store is close, convenient and gets the job done. I also attached a $40 solenoid to it so I could connect it to a timer. This setup has been AWESOME. Very simple, and 100% reliable. I just take my empty 20 lb tank to the store and get it filled and plug it back into the solenoid.
&nbsp;
Because my 20lb CO2 tank setup has been so successful in my 75 gallon, I've decided to do something similar for my 5 gallon. While a 20lb CO2 tank is complete overkill - there are pretty good alternatives out there. I've looked at using the Fluval 20G CO2 kit and using Threaded CO2 Bike Tire Cartridges. The diffuser that comes with the Fluval system is huge and I would never use it. So basically I'm paying $30 for a regulator that can't even easily attach to a solenoid. Also those 16g bike tire cartridges seem small and wasteful. So your costs are $30 for the setup and ~$30 for the CO2 cartridges - which who knows how long those last. The main benefit to this setup is that it's super small. This seems like a good setup for sure and was very close to going for it, but I've decided to go with something else.
&nbsp;
I'm buying a 24 oz Paintball CO2 tank ($25) , a CGA 320 Adapter (CGA 320 is the size of the standard CO2 tank threading) ($10), and a regular solenoid ($40). The prices seem reasonable except for that CGA 320 adapter piece. $10 for a piece of metal. Unfortunately, I couldn't find the same piece at Home Depot or Lowe's and I'm also lazy. So I'd rather pay the $10 then figure out how to jerry-rig my own. The adapter allows the threading of a Paintball tank to connect with the threading of a standard CO2 solenoid. Considering the Fluval setup is $60, I'd say this $75 paintball setup is worth it - especially since it now has a solenoid! The main difference is CO2 refill. Dick's Sporting Goods (also local for me) refills 24oz paintball CO2 tanks for $5 and every 5th fill is free. I think 24 oz will last me a long time anyway. In any case - I think the main obstacle whether it is using a 20lb CO2 tank or using a 24oz Paintball tank is where you're going to get that CO2 filled. You can search for a local Airgas or like a place that sells/refills Fire Extinguishers. Bars use CO2 as well for beer - but you don't need food grade CO2, that's just overpaying.
&nbsp;
I know I went a little overboard, but this is all information that I've recently researched and figured I'd share it. I can't comment on the performance on the paintball tank setup just yet, but I assume it will work fine.
&nbsp;
TL;DR DIY systems are cheap and good, but not 100% reliable/consistent and must be manually turned on/off/. You may or may not marry a woman named Skyler White during the process. Major costs are $15 for DIY rig, $15 for a 5lb bag of Citric Acid. I'd recommend using a 24oz Paintball CO2 tank because they can attach to a solenoid and are reliable and consistent. Major costs are $25 for a 24oz Paintball Tank, $10 for a CGA 320 Adapter, a $40 solenoid. $5 fill ups at Dick's Sporting Goods.
I really need some citric acid to finally start making bath bombs, but I'm afraid that it's too expensive (around $20) so I also need these storage containers for making yummy lip balms.
https://www.amazon.com/gp/aw/d/B000OZFECU/
Just saw this pop up on Slickdeals. Citric acid, which a lot of people have been recommending around here for hard water to help build a better lather. I can't comment on its effectiveness since I've never bothered to try it, but figured I'd throw it up on here in case anyone is interested, since it's apparently .30 cheaper than last time it went frontpage: https://www.amazon.com/gp/product/B000OZFECU/
cheap diy indicators and treatments;
simple double sided tape along bed legs.
https://www.amazon.com/dp/B002O16SHW
use this powder as directed
https://www.amazon.com/gp/product/B0085HRWI8
it may be fleas not bb.
fleas leave fewer indicators behind.
for fleas wash everything around bed with borax.
https://www.amazon.com//dp/B000R4LONQ
including floors walls in:outsides of furniture.
What you want is a compound with boric acid in it.
It's a desiccant meaning that when ingested, it will cause the ants to dry up from the inside-out.
Borax is a name for a commercial version of it: https://www.amazon.com/Borax-Mule-Team-Detergent-Booster/dp/B000R4LONQ
However, you can also find it in most ant-traps like this: https://www.youtube.com/watch?v=Hyv4r0gRtVo
Most roach powders also have boric acid as the main ingredient.
It works really well, but to get them to eat it, you need to mix it with sugar/honey. What I like to do is to take small amount of flour, dissolve small amount of sugar/honey in water, and a tiny amount of boric acid and mix it into a dough. You make small balls of the stuff and leave it around where you see ants.
They eat the boric acid and bring it back to the colony and the entire colony dies by desiccation.
Ugh. For ants I do two things.
I put it in tubs poked with hole large enough for the ants to get in but way too small for the bees to get in.
After a week or so, no more ants.
Sometimes ants don't want sugar though, so you have to use a protein bait instead.
Washing soda and borax.
You can probably find 'em cheaper, those are just the first search results.
Bar keepers friend is what i use to remove surface rust on old wheels and components. it'll do wonders and is pretty cheap.
If the vinegar does not work for you, use a product with oxalic acid.
I use https://www.amazon.com/Bar-Keepers-Friend%C2%AE-Cleanser-Polish/dp/B000V72992?ie=UTF8&amp;*Version*=1&amp;*entries*=0
It's Barkeeper's Friend, and don't you forget it. :P
This guy?. How do you use it as a powder? I'm assuming just mix it with water to make a paste?
Unless that's anodized aluminum, you can clean it up to look nearly brand-new with some barkeeper's friend. Don't get it from Amazon, though. You can get it cheap from your local supermarket, in the cleaning products aisle. This stuff is pretty much mandatory in restaurant kitchens. It's surprising how many people don't know about it for home use, so their pots and pans get pretty tarnished over the years, especially stainless steel and copper.
I say "nearly" brand-new because there's naturally going to be some scratches and dings. But that's what gives these things character :)
Second this
I soak my parts in this stuff and scrub after a few hours.
http://www.amazon.com/Bar-Keepers-Friend®-Cleanser-Polish/dp/B000V72992
For clean up, Try using bar keeper.
Are you adding the protein when the pan is too cold?
Another option is to deglaze the pan with wine or chicken broth and make a pan sauce.
I only use my all clad when I intend to make pan sauce. Otherwise, I use a non stick pan.
A little elbow grease and Bar's Keeper can clean anything.
http://www.amazon.com/Bar-Keepers-Friend%C2%AE-Cleanser-Polish/dp/B000V72992/ref=sr_1_1?ie=UTF8&amp;qid=1411255518&amp;sr=8-1&amp;keywords=bars+keep
Darn. It sounded cool. I'm not sure what area you're in, but I use Bar Keepers Friend on just about everything I can, and it works great. I don't have any cool copper stuff I can test it on, but it might be worth a shot.
Try this:
https://www.amazon.com/Bar-Keepers-Friend%C2%AE-Cleanser-Polish/dp/B000V72992/
RUST!?
Do you have a water softener? That may help alleviate the problem.
To clean the porcelain bowl, try Bar keepers friend... this stuff is friggen magic (works wonders on stainless steel too). https://www.amazon.com/Bar-Keepers-Friend%C2%AE-Cleanser-Polish/dp/B000V72992
IMO for cleaning copper I would use Bar Keepers Friend You can get it locally at walmart or your local grocery store usually. Don't have to let anything soak or screw with ammonia which fucking reeks. Put on some rubber gloves (or use a plastic bowl) and pour some powder in there. Pour some water in there to get yourself a nice paste/liquid mixture and then just cover the copper with it. I do this in my hand because its much easier to work over the mod (heh) with. It cleans almost instantly. Threads may need to be cleaned with a toothbrush. Otherwise rinse it off with water and let it dry and you're ready to roll.
Please excuse the Sayid nails
Before and After
There is a product called Barkeeper's Friend. It's very cheap and it is a miracle worker for stainless. Will make it shine like brand new with very minimal effort. This is what you are looking for, but honestly you can get it at most grocery stores or even Home Improvement stores for about $1-2.
As far as cooking with it, just make sure you have enough fat/oil/butter/etc. to keep things from sticking. I like using avocado oil because it has a really high smoke point and a very mild flavor. I can get it pretty hot without smoking and doesn't alter the flavor of whatever I'm cooking. But the great thing about stainless is that no matter how bad you burn things or screw them up, barkeeper's friend will make that sucker shine like new pretty easily.
We had it tested but I cant remember off the top of my head what was in it. Yes the hot water smelled like sulphur and it would leave rust colored streaks where it was left to dry. I ended up having to buy this in order to clean it.
Bar Keepers Friend
Use this Bar Keepers Friend® Cleanser & Polish: 12 OZ https://www.amazon.com/dp/B000V72992/ref=cm_sw_r_cp_awd_95A9wbH8GGD0X
To polish
Bar Keepers Friend
Works so good.
Nothing cleans stainless steel like a scrub pad and some Bar Keepers Friend
Couple this with boiling and scraping method (to take off the big chunks) and your stainless steel will have a mirror coat finish. Even takes of decade old burn marks without any furious scrubbing.
Useful add-on item from my wishlist might even be useful for you.
Looks like this: https://www.amazon.com/Bar-Keepers-Friend®-Cleanser-Polish/dp/B000V72992/ref=sr_1_4_s_it?s=hpc&amp;ie=UTF8&amp;qid=1520100723&amp;sr=1-4&amp;keywords=BAr+keepers+friend
Add just a little bit of water to make a paste. Works for a bunch of different things- also awesome on stainless steel cookware too if you get food stuck or burnt on.
I use these for quick wipes: https://www.amazon.com/Weiman-Stainless-Steel-Wipes-Count/dp/B00Q8VI480/ref=sr_1_1_sspa?ie=UTF8&amp;qid=1520100859&amp;sr=8-1-spons&amp;keywords=stainless+steel+wipes&amp;psc=1
Maybe there's a similar brand in the U.K.?
I would think barkeepers friend and a sponge would work very well
https://www.amazon.com/Bar-Keepers-Friend%C2%AE-Cleanser-Polish/dp/B000V72992
You can get it at Target or on Amazon or I bet you could find it at Wal Mart. It works incredibly well on copper pans.
Usually I just clean it normally with a sponge like any other dish. If something gets burned on I'll soak it or boil some water in it. Maybe once every year or so I soak it in Barkeepers Friend paste(http://www.amazon.com/Bar-Keepers-Friend%C2%AE-Cleanser-Polish/dp/B000V72992) and then scrub with a sponge and it gets any stuff that was burned on the bottom or tough stains off. That brings the shine back and makes it look brand new. All in all very easy to keep clean. No seasoning to fuss with or teflon coatings to be careful with.
This stuff is cheap, and removes rust very well, without leaving scratches:
http://www.amazon.com/Bar-Keepers-Friend®-Cleanser-Polish/dp/B000V72992
Don't buy it online, though - it's like $2 in the grocery store!
you can try this also:
http://www.amazon.com/dp/B000V72992
"Get a container such as a cup. Put some BFK and mix it with warm/hot water until it gets pasty, then brush it on to the mesh and lightly scrub. Dont let it sit too long. Finally wash it off.
From what Ive noticed in pictures, BFK seems to dull the shininess of the nylon mesh in XIs.
Also, there has been cases where black/blue spots appearing on the mesh. Im not quite sure what causes it, but it might be from the black liner from inside the shoe bleeding through the mesh. Thats the main reason why I havent personally tried it. "
http://niketalk.com/t/14110/the-official-cure-for-yellowing
keeping your shiny bits shiny has 0 to do with taking care of the car. You can have the shiniest car ever, but if your oil is low or hasn't been changed in 15k miles... congrats?
But. Post a pic. What you consider unusually dirty isn't what i consider unusually dirty, how many miles etc.
VW GTI people love barkeepers friend(amazon.com). I've also heard really good things about some elbow grease and a houshold cleaner like comet or simple green.
/r/AutoDetailing is where you're going to get the best answers to something like this.
As far as it being a sign of a failing hpfp, idk. I'm not sure how they fail, only that they do. I'd imagine if it was failing it would provide less fuel, not more therefore causing lean conditions vs overly rich. And the cars o2 sensors would measure this fuel ratio and adjust to keep everything in the set parameters.
Mine were chrome, and still are. I also had my hpfp replaced, but never noticed it on my exhaust tips. cause ya know, they're amazingly filthy.
but keep the chrome. blacked out is boring, and exhaust tips should be chrome not black regardless.
You could try Bar Keepers Friend. I've used it on my SS before and it works.
I purchased this Cooks Standard set 4 years ago for $225 and I've been loving it. No need to worry about using metal or scrubbing hard. I do occasionally use Bar Keepers Friend to polish up the pans for a brand-new look.
If you don't want this brand/set specifically, for sure get at least tri-ply like already mentioned. I think metal pans (vs non-stick coating) are better for all around cooking. Sure, you need to use more oil/butter in your cooking, but moderate amounts of fat are important in a diet. Its highly processed, added sugars, and excess salt you need to worry about.
For when I needed a non-stick, like for eggs, I picked up this T-fal and the non-stick is fantastic, even after a few years of careful use.
I also have a Lodge cast iron dutch oven set which is great for when I use it, but I find it difficult to use effectively. Perhaps I'm just not using the proper techniques, so I don't get much use of it... but I do love to use it when I get around to it. Learning proper care for cast iron is essential - read up before you use (and possibly ruin!)
I use Zep Heavy Duty Oven and Grill Cleaner from HD or Amazon, works quite well. Bar Keepers Friend also works fine. Preheated cookware cleans up even faster.
Being that the paint is dry, something abrasive is probably your best bet, vs. a solvent. I always use Bar Keepers Friend on my white ceramic sink to make it absolutely shine. It will likely remove your paint. It can be had at most grocery or general stores. http://amzn.com/B000V72992
http://www.amazon.com/Picreator-Renaissance-Wax-200ml/dp/B0012S1XBO
People use it to finish wood-turned objects, or do-dads of some description, I've seen it on guitars and saw a post about some guy who said he uses it in museums.
I use Gundam Marker Erasure to remove , and Renaissance Wax to prevent further color transfers.
If there's discoloration on the body, etc, Weathering Master works wonders.
If you want more info, there's a NSFW Japanese blog post about it.
I know sword, gun, and other antique collectors use Renaissance Wax to protect their metal items, especially for long term storage. It dries quickly, and provides a very hardy rustproof coating.
http://www.amazon.com/Picreator-Renaissance-Wax-200ml/dp/B0012S1XBO
That stuff might work for you
I use this stuff on metals, including occasionally on pens I want to protect:
http://www.amazon.com/Picreator-Renaissance-Wax-200ml/dp/B0012S1XBO/ref=sr_1_1?ie=UTF8&amp;qid=1418940793&amp;sr=8-1&amp;keywords=renaissance+wax
My jar is 20 years old, but seems to work fine and looks just like the one @ amazon. I originally got it to keep swords from rusting while unused.
Renaissance Wax is one of my favorites. You could possibly get Rottenstone and a little mineral oil to rub it out but I don't know how you are expecting it to look as far as sheen. Poly isn't a finish I ever mess with too much once it's on. I will usually spray it and forget it because it doesn't usually respond well to reworking (as you can tell). The wax should even things out for you and if you need to refinish it some day you can clean it with Denatured Alcohol before you sand it.
Simple Green 11001 Clean Building All-Purpose Cleaner Concentrate, 1gal Bottle https://www.amazon.com/dp/B0017D1GG6/ref=cm_sw_r_cp_apa_ucz0AbWFNN8Y4
I wash my hands a lot and my keyboards still get a little grimy after a while; usually just use a microfiber cloth and some diluted Simple Green to clean them up (far faster than taking all the keys off)
Simple Green
You can buy this stuff at home depot for cheaper than amazon generally as well. Re-usable as well and way cheaper than the gimmicky stuff advertised specifically for bongs. Same shit. Just let it sit overnight then rinse with hot water after. Glass will seriously look brand new.
Are you talking this? How long does it take, and what do you have to do?
http://www.amazon.com/Grade-Sodium-Hydroxide-Micro-Beads/dp/B001EDBEZM/ref=sr_1_2?ie=UTF8&amp;qid=1356213606&amp;sr=8-2&amp;keywords=lye
If you're confident in yourself, use lye. You can see there difference in post from a while back.
I found Essential Depot on Amazon, free shipping with Prime makes it seem more reasonable. Silly question, but with Palm Oil I was told it had to be warmed up in the original container... How can you tell if the container can benuked in a microwave? It doesn't say microwave safe on the Amazon site. (http://www.amazon.com/dp/B001EDBEZM/ref=wl_it_dp_o_pC_nS_ttl?_encoding=UTF8&amp;colid=3V9M1NOX9PQ89&amp;coliid=I1XGC0BKGY2U8V)
I noticed the molds around between $50-100, is that normal? Seems rather extravagant to me.
The local chemical factory is a great idea! I have no idea if there is one near me, but still.. Major kudos on creativity.
For anybody wanting to do this.
US: https://www.amazon.com/Drain-Cleaner-Opener-Sodium-Hydroxide/dp/B001EDBEZM/
Canada: https://www.purearome.com/fr/produit/soude-caustique-naoh
Mix about 100-150g/L in a plastic container, put in your light, and watch it.
Home Depot, at least in California doesn't sell 100% lye. Lowe's and Ace Hardware do though. Better to get it online, much cheaper.
http://www.amazon.com/Grade-Sodium-Hydroxide-Micro-Beads/dp/B001EDBEZM
DON'T DO THIS
^but If you're dumb enough to do this, do it outside and wear eye and ear protection
Get some lye and some magnesium shavings, a large wax candle or wax block, and a granite crucible. Mix the lye and magnesium together at about a 1:1 ratio in the crucible, and melt the wax in a separate container. Light the magnesium and let it burn for a while, and then put it out after the blinding light and sparks stop by pouring the wax over it. There will be chunks of metal left over, these are elemental sodium. Just the tinyest bit in water will create a similar reaction.
You know now that you mention it I don't even know how pure it is. Here's its listing on Amazon, where I bought it from. I was under the impression that food grade means it's very pure, but now I'm not so sure. That's weird.
This is the brand/where I get mine from
I got mine on Amazon. It's actually cheaper now than when I bought it. https://www.amazon.com/gp/product/B001EDBEZM/ref=ppx_yo_dt_b_asin_title_o01_s00?ie=UTF8&psc=1
Definitely makes a big difference using lye vs baking soda. It's really not that big a deal to work with, just use common sense. If you do get a little bit on you, put some vinegar on it right away to neutralize it.
I've been adding 2tbsp lye to 32 ounces of water (never water to lye!), then dropping pretzels into boiling water for a few seconds. Sorry for crappy pic: https://i.imgur.com/8SBXWIa.jpg
This is what I got. I still have so much left over https://www.amazon.com/gp/product/B001EDBEZM/
Try this shit—no joke: https://www.amazon.com/Grunge-Off-Super-Soaker-Cleaner/dp/B002LURISY
I swear by Grunge Off. It eat res. It don't give a fuck.
This is 18$. Look at how high the reviews are.
http://www.amazon.com/Grunge-Off-Super-Soaker-Cleaner/dp/B002LURISY/
No seriously, read how high the reviews are.
Try giving it a soak in Grunge Off! It'll make it look shiny and new, and the cleaner is reusable!
2)Isopropyl alcohol evaporates pretty quickly.
I'm not sure about you guys, but I use [Grunge off] (http://www.amazon.com/Grunge-Off-Super-Soaker-Cleaner/dp/B002LURISY/ref=sr_1_1?ie=UTF8&amp;qid=1371789965&amp;sr=8-1&amp;keywords=grunge+off). This stuff kicks ass. It has teh viscosity of glycerin and you pour it in. Let it sit for 15-20m (I just empty the bong before I sleep and pour the stuff in) No shaking or anything necessary. Anything in contact with the solution is clean as the day you bought it. And the best part is, it's reuseable. I've used mine at least once a week for the last 5 months and have yet to notice any degradation in potency.
I've used alcohol and salt before, and I find this method much easier and safer. Rock salt can get stuck to certain kinds of percs, and vigorously shaking my bong trying to agitate salt, while probably at a [8] can be a recipe for disaster.The only slight inconvenience is while cleaning it out, the solution may develop bubbles. Now its not gonna be like soap, but there will be a bit. And trying to rid your bong of bubbles is a bitch. Luckily my bong is small enough to fit under the sink tap, and I can just force all the water out the top thru the downstem. If you have a taller one it may take several rinses to remove the trapped bubbles.
Grunge Off
Grunge Off is the best cleaner, plus its super cheap because its reusable. The bottles I have i've been using for 4 months are pitch black and still clean my pieces like new.
clean your piece!! May i recommend Grunge off
Grunge off
get yourself some grunge off let it soak overnight. stuff is amazing and reusable.
I've had really good luck with Grunge Off. It's a cleaner made with citrus oil and unlike the iso method or Orange Chronic, this is meant to soak your pieces in. If you take the bowl and soak overnight it should clean a lot of the build up away. Rinse with hot water. You may have to rinse it out and soak again the following night but it will eventually break down any build up you have on there. It smells great to! Amazon link below so you can see what it looks like but don't buy from there because that price is stupid! I think i pay $18 a bottle. It's reusable many, many times.
https://www.amazon.ca/Grunge-Off-Super-Soaker-Cleaner/dp/B002LURISY/ref=pd_lpo_vtph_121_tr_0?_encoding=UTF8&psc=1&refRID=ZM0MZ1HD5MKQ514V37SH
&#x200B;
And once you get it clean use a few drops of Rez Block in the water to prevent it from getting dirty again. This stuff works wonders!!!
https://www.amazon.ca/RezBlock-Concentrate-420-Science-Cleaner/dp/B00C6L66CC
&#x200B;
Good luck!
It may not clean it super well, but I usually use this to clean. I'm sure it's not the safest cleaner, but you can reuse it over and over and over. Once the liquid gets black, all I do is pour it through a filter and it's good again.
Since it leaves a little bit of a pungent smell, I run vinegar through after and then a little water. It seriously cleans it Brand Spankin' New.
However, coarse salt and alcohol/vinegar is always a solution too.
Grunge Off
I never actually cleaned mine in the dishwasher. I’d use Grunge Off because it’s nice smelling and you can reuse it after cleaning!! I think every stoner should use it, it’ll take stripes off a zebra!! https://www.amazon.com/Grunge-Off-Super-Soaker-Cleaner/dp/B002LURISY
Or maybe I should say it’ll strip resin as aggressively as I’d strip you. 😉😋
Actually they make this cleaner that gets every ounce of resin off of glass pieces. Works amazingly well.
Grunge Off
http://smile.amazon.com/Grunge-Off-Super-Soaker-Cleaner/dp/B002LURISY/ref=sr_1_1?ie=UTF8&amp;qid=1451963359&amp;sr=8-1&amp;keywords=Grunge+Off
Grunge off
Best shit out there no messy salt every where and smells like oranges, just submerge, for 20 min and good as new.
I speed up the process just a half cup and swish it around till all is gone 10 min max, brand new.
Can I make a suggestion?
Pick up a bottle of Grundge Off.
It's a little more pricey, but it works way better with way less effort...AND its reusable! I've been using the same bottle since last July on a weekly basis and it still works great! It works way better than iso and salt ever worked for me, is cheaper in the long run, and no weird after taste.
mos def, pick up some of this shit, I soak my glass in this stuff all the time keeps it looking new and smellin fresh http://www.amazon.com/Grunge-Off-Super-Soaker-Cleaner/dp/B002LURISY
honestly, this stuff works wonders
http://www.amazon.com/Grunge-Off-Super-Soaker-Cleaner/dp/B002LURISY/ref=sr_1_1?ie=UTF8&amp;qid=1374728391&amp;sr=8-1&amp;keywords=grunge+off
let it sit in the bong for 30 minutes or so then pour it out and rinse with hot water, works sooooo much better than isopropyl. The best part is you can pour it back into the bottle and reuse it, I have been using the same bottle for ~6 months.
Personally I don't like this stuff cause of the residue left behind. It's also been a long time since I've used it and I know a lot of ents that swear by it.
I prefer to use a product called Grunge Off which has always worked well for me and is a great value for what you get.
I use these and zen pipe cleaners, good stuff... also this
I use this electronic goop stuff https://www.amazon.com/dp/B00375JBL4
Cyber-clean cleaning thing
I doubt that.
(...but, yes, I do realize fully I'm much more of the exception than the rule.)
As a more expensive alternative to chewing gum: Cyber Clean Putty?
Relevant user review here.
http://www.amazon.com/Cyber-Clean-25055-Office-Pop-up/dp/B00375JBL4
Maybe??
lipgloss is a oily crappy substance.
https://www.amazon.com/Cyber-Clean-25055-Office-Pop-up/dp/B00375JBL4
good for mixing boards too (lots of knobs)
https://www.amazon.com/Cyber-Clean-25055-Office-Pop-up/dp/B00375JBL4/ref=sr_1_5?ie=UTF8&amp;qid=1485918676&amp;sr=8-5&amp;keywords=keyboard+putty
The way i do it, i turn my keyboard upside down (keys facing the desk) and i shake it (left to right, up down) which brings a lot of dirt out. I don't think there is any other way without ruining warranty. This might work as well
I remember trying a product called [Cyber Putty] (http://www.amazon.com/dp/B00375JBL4) a while back and I found that that worked really well. Sometimes there was remaining putty on the keyboard but nothing you couldn't get rid of with another roll of the putty. It was always difficult to get in between the keys but this pretty much did the job. The best part was that it was reusable...up to a certain point.
I haven't tried it but this putty seems pretty cool:
Putty
IMHO antistatic cleaning putty (like this https://www.amazon.com/Cyber-Clean-25055-Office-Pop-up/dp/B00375JBL4 ) is by far the best thing to clean controllers, especially when they're greasy from chipsfingers or have little dust or other particles in the tiny slits you can't regularly clean.
The putty costs like 10 bucks and usually lasts around a year before it dries out (depending on how often you clean I guess).
You can try something like this: https://www.amazon.com/gp/aw/d/B00375JBL4/
I don't guarantee that it doesn't damage your MacBook though.
This stuff. You may need to do a little rubbing with a paper towel, but it does work well.
I recommend this.
Yup, same as your second link. Pure Lye.
I think the 5% might mean percentage of total solution?? I used this, which is 99% pure and works just fine (it's also what most ppl use as a base): http://www.amazon.com/Sodium-Hydroxide-Grade-Devil-Caustic/dp/B0039CPO34/ref=sr_1_1?ie=UTF8&amp;qid=1412634843&amp;sr=8-1&amp;keywords=red+devil+lye
Did not dilute the lye. Added it just like the tek says (sort of, I wasn't using 1kg of bark).
I think you're confused about the precipitation part. After you add the lye, you shake and let it set for a minute (the jar will get really hot because of the exothermal reaction, so I unscrew the lid a bit to release any pressure during this phase). While the "soup" is still warm, you add the naptha. Shake for about 20 seconds every couple of minutes.
You should start to see your mix seperate into 3 layers. Bottom layer will be base and plant matter, middle layer should be thin and is only emulsion, the tope layer will be naptha with your DMT suspended in it.
The precipitation part happens once you extract the naptha (top layer) and cool it down to allow the DMT to crystallize.
The step you're thinking about (cooling off in the fridge) happens after the acid boil, and before you add any lye.
Its actually not that hard to purchase, my dad recently opened a Bavarian bakery. After moving to the States from Germany and being depressed for not being able to get good bread, and Pretzels of course. So now he just makes them and sells them.
Amazon has it all!
http://www.amazon.com/Sodium-Hydroxide-Grade-Devil-Caustic/dp/B0039CPO34/ref=sr_1_2?s=home-garden&amp;ie=UTF8&amp;qid=1417367758&amp;sr=1-2&amp;keywords=lye
Got mine here. Shipping adds a bit to the price, but I still have a bunch and I've made many dozens of pretzels.
Just read up on using the stuff before hand. It is very caustic. I know from experiance that a small amount of solution splashed on your skin can go unnoticed for several minutes and result in a nasty "burn" and a permanent scar.
As an alternative you can bake regular baking soda (sodium bicarbonate) to form sodium carbonate using the method outlined here. Not nearly as dangerous but still stronger than simple baking soda.
Lye is definitely the way to go. Especially for flavor. It's really not that expensive. please please please use gloves and be careful handling it. Read up on it first.
I use leather honey on all my leather goods. Shoes, my couch, motorcycle gear, sword handles, etc, etc.
Hello all, I have been wearing faux leather all my life from Zara and I just got my 1st real leather jacket, Koopes Leather Bomber Jacket!
Need some advice on leather cleaner and conditioner since I never cleaned or conditioned my faux leather jackets before. There didn't seem to be a good search results on leather cleaning and conditioning or I must have missed it. From most of the threads I read, it seems like the brand name doesn't matter as much for cleaner and conditioner, but sounds like it is important to NOT use my boots conditioner due to silicone.
My lamb skin jacket did not feel as stiff as my faux leather which I really liked since I want something comfortable for usual wear rather than a stiff jacket with a bit more durability.
My research shows Saddle soap may be a great cleaner and Lexol cleaner and conditioner seem to be a great option too. I read Leather Honey is a great conditioner, albeit the premium price!
I wanted to ask the experts at r/MFA what they personally recommend for lamb skin leather:
Edit: Also, I just wanted to confirm that Dry Cleaning leather jackets is NOT okay. I read it may dry and/or crack the leather. Is this true? Sounds like I should just use the cleaner and conditioner once or twice a year?
This will help with the dry and wrinkled leather.
https://www.amazon.com/Leather-Honey-Conditioner-Furniture-Accessories/dp/B003IS3HV0
can i use this to care for by Clarks db beewax? Anything else besides applying this once in a while?
http://www.amazon.com/Leather-Honey-Conditioner-Since-Bottle/dp/B003IS3HV0/ref=sr_1_1?ie=UTF8&amp;qid=1396921175&amp;sr=8-1&amp;keywords=leather+oil
This stuff will be used right after its dry..
What you are looking for is Leather Honey. I do mine about once every four months. Before conditioning, brush off dirt and then wipe with damp cloth until the leather darkens just a bit. A little goes a long way.
Amazon. Thousands of good reviews.
Hi girls! So I bought a black Gucci Soho Disco from Joy about a year ago. Honestly do not love the quality because when compared to an auth. the leather isn't as supple/buttery, and a well used auth. sort of falls into itself whereas my version is still super stiff and boxy, even after I've used it a lot. I'm not even sure if it's real leather, but it just goes with SO many outfits, so I still wear it quite a bit.
I was wondering if anyone had any advice on how to try to condition the leather on your reps to make them look more authentic/improve the look of the leather? I was looking on Amazon and found this, which has a bunch of good reviews but wanted to know if anyone had any better suggestions?
https://www.amazon.com/Leather-Honey-Conditioner-Furniture-Accessories/dp/B003IS3HV0/ref=sr_1_1_sspa?ie=UTF8&amp;qid=1519753442&amp;sr=8-1-spons&amp;keywords=leather+conditioner&amp;psc=1
Thanks so much!!!
Good to know, thanks. So if I used this one the shoes maybe twice a year:
https://www.amazon.com/Leather-Honey-Conditioner-Since-Half-Pint/dp/B003IS3HV0
They could last for 3-4 years?
https://www.amazon.com/Leather-Honey-Conditioner-Furniture-Accessories/dp/B003IS3HV0
I saw this from another post on RL. Works pretty well.
There is also an
all naturalnon-toxic product called Leather Honey. It's been around for a long time.I've found it to be very useful on all types of leather, from my cowhide backpack, my SO's new winter boots, and my deerskin moccasins. It does tend to darken the leather you apply it to significantly. I've applied it to several of my things several times each and have not yet used a quarter of the bottle. However, I keep a small rag about 2x2 inches in a zipped bag and it's well saturated. I think this helps with not wasting the product.
I think you need to be careful with what you use to condition and recondition leather, especially old leather. Sometimes you might apply something and it works great, but you discover in a couple of years that the leather has begun to rot.
Do what you wish, but be aware that the tanning process (a preservative) can break down over time. When you try to restore your leather, you want to penetrate it with leather-friendly moisture that will not chemically undo the tanning.
Finally, whatever method you decide to do, test an inconspicuous area and wait a few hours. If you like what you see, gently apply your conditioning product (boughten or home made) and let it sit overnight. Sometimes I'll set the item a few feet in front of a space heater to gently warm the leather for a few hours.
I've also been known to use a hair blow dryer on seams to make sure it's penetrating well. Too close will just make it dry and crack. Reapply the next day, and let it soak in. Keep doing this slowly and patiently, until you see that your leather is not absorbing any more. Let it sit another day, then heat it a bit and begin to gently buff away any excess reconditioning material.
You should be left with something pretty amazing.
Best of luck!
I am also new to leather boots! Mine were getting scuffed/discolored from normal wear and tear, so I used Meltonian boot cream to a) restore the color and b) provide a bit of waterproofing (since it's wax-based).
I also have Leather Honey leather conditioner, which I've used on a purse and my Birkenstocks. It definitely does darken the leather, so if you're attached to the exact shade you have now, I wouldn't recommend conditioning.
Leather Honey is pretty well reviewed as a leather conditioner: http://www.amazon.com/Leather-Honey-Conditioner-Since-Bottle/dp/B003IS3HV0
I've used this as a cure-all so far, and it has never let me down. Perfect on all smooth or rugged leather (although careful with the raw leather, it will become smooth after 2 coats!).
http://www.amazon.com/Leather-Honey-Conditioner-Best-Bottle/dp/B003IS3HV0
So should I use mink oil, or not? Is it for something completely different?
So far, it looks like I'm getting this, this, and this. Should I get a shoe conditioner like this, too?
Sounds like a good answer. I'm assuming that you can't go wrong with either, as the design is fairly simple/similar. My only regret for not going with aliengear was the price so far, but I'm perfectly happy with my galco.
Something you might be interested in:
http://www.amazon.com/Leather-Honey-Conditioner-Since-Bottle/dp/B003IS3HV0
Is this the same as neatsfoot oil for CXM upkeep?
Simple question: Any consensus on using Leather Honey for good boots? I've used it and it worked fine on some leather items, but I managed to over-condition some pieces and it really darkened some veg-tanned leather.
What conditioner/cream should I be looking at if I want to make sure not to darken brown/tan leather?
I recently got this beeswax shoe polish and I really like it!
http://www.amazon.com/Robsons-Beeswax-Polish-Small-black/dp/B002PINOZI/
I also use this to condition my leather:
http://www.amazon.com/Leather-Honey-Conditioner-Furniture-Accessories/dp/B003IS3HV0/
Most mink oil will do. I have had great success with this, and this, it also helps that it is free shipping with amazon prime.
I am lucky enough to supervise a lab that has the instrumentation to check a sample for lead. The downside is that I did have to work with heavy metals (with proper protective equipment) while pregnant. If you do not have access to an environmental lab, try THIS.
https://www.amazon.com/3M-717834209102DUPE-LeadCheck-Swabs-8-Pack/dp/B008BK15PU/ref=sr_1_3?ie=UTF8&amp;qid=1511894741&amp;sr=8-3&amp;keywords=lead+test+kit
>lead in the sliding tracks of the old double hung wooden sash windows (which we are leaving closed for now).
Old windows like that are the worst for lead dust production.
Wet mopping followed by tack cloth is one of the ideal ways to ensure you're cleaning up the site as best as possible.
The "trick" we're taught in the cert class regarding swab testing:
But a lead test kit like this. Instead of dabbing the end of the tester on the scores in the paint you've made (you do know that in order to test for lead paint you have to score down to the base material, because testing the top layer of paint alone doesn't give accurate results), you squeeze out the testing liquid onto q-tips and then swab the q-tips onto the surface you desire to test.
It is possible to get up to about 8 q-tips sufficiently wet with the test liquid to perform tests, which means you can perform about 8 tests per tube of test fluid.
If in doubt about the results, retest a spot directly with a full tube.
Regarding your vac, just to be clear...did it come with a certificate stating what RRP tests it passed?
The way HD's description reads doesn't clearly indicate that. Want to make sure you're not being mislead by the vendor.
You should be able to find something like this in your vac literature:
>Certified to meet EPA RRP standards: IEST-RP-CC001.5 insuring a minimum filtration efficiency of 99.97% at 0.3 micron
The write up for the Rigid vac just says it "Meets the EPA's definition of a HEPA vacuum under the RRP rule for lead paint renovations".
It doesn't state that it is certified for use. I would follow up on that if I was in your position.
Buy a test kit
This is the test kit. It's the 3M LeadCheck Instant Lead Test Swabs. I believe they're in one of the paint aisles.
You can also order them from Amazon.
Lead tests are cheap and easy to get - https://www.amazon.com/3M-717834209102DUPE-LeadCheck-Swabs-8-Pack/dp/B008BK15PU/ref=sr_1_2?ie=UTF8&amp;qid=1496777788&amp;sr=8-2&amp;keywords=lead+test
You can get lead check test strips from places like Amazon and some hardware stores. I don't know how accurate or precise they are. I think I've also seen kits that are more water quality tests that you can send off for analysis available in hardware stores.
You may want to test for lead in
Paint
and Tap Water
Get some of these
Splurge on a $25 LeadCheck kit. It will tell you in about a minute if there is any lead there.
If you're buying a set from the late 1800s, it's most likely a 95%Silver/5%Copper alloy, but who knows?
Pure silver was really big in the late 19th century, when the Comstock Lode was discovered, and suddenly there was so much pure silver that it was cheap enough to make dishware out of. Some shady merchants sold fake silver also, so it's worthwhile to spend a few bucks on a test.
https://www.amazon.com/3M-717834209102DUPE-LeadCheck-Swabs-8-Pack/dp/B008BK15PU/ref=mp_s_a_1_3?crid=27P4O5BC3N1XW&amp;keywords=lead+test+kit&amp;qid=1554428106&amp;s=gateway&amp;sprefix=lead+&amp;sr=8-3
Would these lead strips work to test my kratom? I must admit, this is concerning.
This is the one I use:
amazon.com/gp/product/B008EN9XUI
That'll work. Or Barkeeper's Friend.
Have you ever used Barkeeper's Friend? I use it to clean my stainless steel pans, and it works great. I haven't used it on chrome, so I don't know if it would damage it. It's worth googling around to see if people have tried it.
Hi there, I used Bar Keepers friend and a cloth rag.
https://www.amazon.com/Bar-Keepers-Friend-Stainless-Porcelain/dp/B00B28ZYPU/ref=sr_1_2_a_it?ie=UTF8&amp;qid=1473564827&amp;sr=8-2&amp;keywords=barkeeper%27s+friend
I think everyone else has the basic cleaning tips covered already. I listen to an audiobook, podcast, or other such things when I clean. I find it makes the work go easier because I have this fun and interesting thing to listen to and if I get into it enough I want to keep cleaning so I can listen more. Music doesn't usually have the "I want more" aspect and doesn't work as well for me.
Good luck with your spring cleaning! I hope you keep feeling better and don't get sick again!
Edit: Oh! Bar Keepers Friend is amazing. It is the only thing I have found to clean my flat ceramic stove and it works wonders on the shower floor too. That floor was stained yellow when we moved in and this turned it white again. Amazing stuff.
[Bar Keepers Friend] (https://www.amazon.com/gp/product/B00B28ZYPU/ref=pd_bxgy_121_img_3?ie=UTF8&amp;psc=1&amp;refRID=5Y1KKYTAE1PTTDJBKD6P)
Get some Brasso and polish it.
https://www.amazon.com/RECKITT-BENCKISER-76523-Brasso-Polish/dp/B00BILDIU4
https://en.wikipedia.org/wiki/Brasso
Use brasso to clean copper.
Try using Brasso.
Put a dab of Brasso on a towel, and pressing softly, use a circular motion to polish the contacts on both sides, and then wipe it clean.
This has fixed even my most impossibly stubborn games and now they work first try 90% of the time.
I even made a post about it a while back.
If you're having trouble with a lot of games still you might want to look into replacing the 72 pin connector inside the NES, though this takes a bit more work.
Yep! There's some kind of UV coat or something on the lens and it oxidizes. It's not dirt, don't bother with windex,
Best way to clean it is to get some of this shit and a q-tip or cotton ball. Takes 15 seconds, your camera will work like new again.
I bet polishing the scale with Brasso will take the branding right off. I used to use it on legos to remove printing from pieces. Worked great.
This
Or this
Both of which are available at your local grocery store or Walmart.
yeah, i was doing some research and that seemed to have the best reviews.
my next additions will be:
Simple Green for the engine bay.
Brasso + 0000 steel wool for the exhaust.
EDIT: actually i heard Brasso isn't very good anymore so I'll have to find another metal polish.
Seems to be available on Amazon: https://www.amazon.de/EVAPO-RUST%C2%AE-C700-Rostentferner-946-ml/dp/B00GRSOJSS
From the picture, it seems completely serviceable. Get a bit of evaporust solution and it should take care of all of the rust problem.
http://www.amazon.com/Evapo-Rust-ER004-Super-Safe-Remover/dp/B00GRSOJSS/ref=sr_1_2?ie=UTF8&amp;qid=1450302322&amp;sr=8-2&amp;keywords=evaporust
Soak your Spyderfly in this shit: https://www.amazon.com/Evapo-Rust-Super-Remover-Non-Toxic-Removes/dp/B00GRSOJSS.
I did the same thing and the rust was removed, and the VG-10 finish was left in perfect condition.
Evaporust is incredible stuff.
Actually...yes, assuming you have your own bathroom and/or very understanding roommates :
Use a detergent that has both water softener (to counteract the hard water) and enzymes in it.
The easiest one to find is probably Tide.
But of course, there's a catch.
The catch is that you'll need to soak them for several hours, and because you don't have your own washer, you'll need to soak them at home and wash them by hand. And you'll probably need a second set of sheets if you don't already have one.
If you want to make a small investment that will keep you out of the laundromat and let you wash all your laundry at home (not just sheets) you might consider something like the "wonder washer" https://www.amazon.com/dp/B002C8HR9A and a folding drying rack.
If you want to go the cheaper route, some folks use a 5 gallon bucket (from Home Depot or similar) to wash by hand, but I find a big plastic storage tub works better. Use a small amount of detergent (about 1/3 of what you'd use for a normal sized load). If you're using powdered detergent, dissolve it with hot water, then use whatever temperature water you want. Put your sheets in and add enough water to cover the sheets by a few inches. I use a 15 gallon storage tub and usually fill it 2/3 of the way.
Take a clean laundry only plunger (I use this one and love it https://www.amazon.com/EasyGoProducts-Hand-Powered-Clothes-Washing/dp/B00YQCOCAM ) or your hands or clean legs and feet and squish the sheets around in the water for about 5 minutes or so. Then let the sheets sit. The longer they sit, the better the enzymes will work. If you can soak them either overnight or while you're away at work, that would be awesome, but even just two or three hours will make a big difference. When the soak is done, use the plunger (arms/legs/whatever) to squish them around again for about 15 minutes. It's ok to take a break if you get tired, but you want to agitate them for about 15 minutes total. Then empty the water out, and start the first "rinse cycle". Put clean water in the tub and squish the sheets around to rinse. Empty the water and rinse the sheets again.
Then wring them out using your hands and hang them to dry.
TL;DR Wash at home and soak your sheets in a detergent that has water softeners and enzymes.
I don't know of any drill option. But here is another solution. I've never used one and don't own one. But it's worth a shot. https://www.amazon.com/EasyGoProducts-Hand-Powered-Clothes-Washing/dp/B00YQCOCAM/ref=sr_1_5?keywords=hand+washing+machine&qid=1569200809&sr=8-5
You can get plunger + 5 gal bucket washing machine substitutes to clean those reusable diapers. You could reasonably hang them in the tub or out the window.
Added bonus of having this in your backup is that you've prepped for washing your own unmentionables, and you won't have to deal with any mystery rashes that baby might develop in reaction to all that extra shit going on with disposable diapers that you haven't experimented with previously.
This thing has 5 stars on Amazon. I use it whenever I want to wash something gently or I only have one white or dark thing I want to wash and don't want to pay a whole $3.50 on an extra load of laundry at the laundromat.
Comfortors are another thing notorious for disintegrating in the laundry. Check reviews online before you wash one for the first time.
I got some car guys super cleaner
https://www.amazon.com/CarGuys-Super-Cleaner-Effective-Upholstery/dp/B071XB18BF
Works well. Recently found some blue jean stain transferred on the driver seat and it wiped off easily with some dog wipes I had in the car (probably the same as baby wipes, but 10x more expensive, haha).
Enjoy the X! I almost went there, and I think eventually I’ll have one too :)
Here’s the product I used, this thing has replaced almost all my other cleaning products
https://www.amazon.com/dp/B071XB18BF/ref=cm_sw_r_cp_api_i_jbMhDbYA7VC7N
I use this: https://www.amazon.com/dp/B071XB18BF/ref=twister_B074NBKCH1?_encoding=UTF8&th=1
On all surfaces and a nonammonia glass cleaner on the interior class.
So this may not be the perfect solution, but this worked-
&#x200B;
&#x200B;
Results- not perfect, but much much much better
End result- PHOTO
I've been loving this:
CarGuys Super Cleaner - Effective All Purpose Cleaner - Best for Leather Vinyl Carpet Upholstery Plastic Rubber and Much More! - 18 oz Kit https://www.amazon.com/dp/B071XB18BF/
I don't have dogs but I've been super pleased with this and have seen several people speak highly of it.
This works fine for me
This stuff looks like it will do the trick. I haven't used it, but it's worth a shot.
https://www.amazon.com/gp/aw/d/B00375JBL4/ref=mp_s_a_1_4?ie=UTF8&amp;qid=1527548557&amp;sr=8-4&amp;pi=AC_SX236_SY340_FMwebp_QL65&amp;keywords=electronics+cleaning+putty&amp;dpPl=1&amp;dpID=41ihUlKj7hL&amp;ref=plSrch
Cool beans! Thanks for the info.
Would this work for conditioner? Or is there another product that would be more bang for buck?
In regards to polishing the shoe, would regular kiwi brown shoe polish work?
there are many leather treatment products, find one that fits your needs and try not to slide around the leather at that spot. The left thigh support on the drivers seat is commonly worn out from getting in and out of the car.
ArmorAll
Amazon Leather Honey
Clean them with some saddle soap. Use good brushes. Then apply some leather honey on the brown parts. It'll help bring back some of the original color quality, but boots that old, and that worn, are going to be hard to get back to the original finish.
On the plus side, boots that old and that worn are supposed to look like that. Clean them up a bit and take care of the soles and you should have no problem getting another 15 years out of them.
Pick up Brasso or a similar contact cleaner at your local grocery store, it takes about 5 minutes to use. Or order it here.
Grunge Off Super Soaker Glass Pipe Cleaner, 16 Ounce https://www.amazon.com/dp/B002LURISY/ref=cm_sw_r_cp_api_i_2s1hDb08W048Q
Nope
You want something that has only lye in it.
https://www.amazon.com/Sodium-Hydroxide-Grade-Devil-Caustic/dp/B0039CPO34?th=1
personally I just stick my cast iron in the oven for a self cleaning cycle (none of it is collectable just like yours). Trick is this has a higher chance of warping the cast iron if anything goes wrong. Course for me if anything goes wrong I stroll over to the 3 second hand stores near me and get another one for $5 so it is all about costs.
https://www.youtube.com/watch?v=pf_gnyxyKKw
this is my favorite seasoning video... and please PLEASE dont smooth out your pan to season it every time... just skip that part and follow the seasoning parts.
Scrub with bar keeper’s friend, mild dish soap, and a toothbrush.
Simple green?