Best household furnace parts & accessories according to redditors
We found 181 Reddit comments discussing the best household furnace parts & accessories. We ranked the 121 resulting products by number of redditors who mentioned them. Here are the top 20.


My experience with dust and RVs is summarized here. This approach keep the RV reasonably clean the entire burn, and I usually can get it spotless in less than 4 hours post Burn (2 people working).
​
Here's most of the post -- formatting is better on the link and there's info re the issues with bike racks covering license plates, etc. on the link as well:
​
Preparing the RV for Burning Man
The best thing you can do to make sure your RV doesn’t get damaged at Burning Man or require extensive cleanup is to do the right prep work.
Floors. First, protect the floors. If you have wood floors, use red rosin paper like this. If you have carpet, use disposable carpet protection like this. Bring enough to change the protection a few times during your burn. One roll of the red rosin paper allows us to change the main area three times during the event in our 34' RV.
Windows. Next, cover all rubber molding on the outside of the RV with either high quality painters tape or (better yet) gaffer tape. Cleaning molding is very challenging, and the tape will not only keep it clean, but also keep dust from getting under it. Make sure it’s wide enough to the edges of the molding - at least 2”. The gaffer tape is significantly more expensive, but is easy to remove and won’t leave a film. If you are using painter tape, be sure to test it on a small area before going by affixing it to some molding and then running a hair dryer on it to heat it up. If it passes the test, be sure to also check once or twice during the Burn to ensure it doesn’t leave a sticky residue when you remove it.
An alternative technique is to entirely cover the windows with some type of plastic film and tape it on. People typically use a clear plastic film. We avoid doing this because the high winds can very easily tear the film at the time you need it most.
We do this stage while waiting in line at the entrance gate. Be sure to have a ladder or tough bin you can stand on to reach all the windows.
Outside Vents and Seams. Once on the playa, if your RV expands, tape up any seams around the pop outs after you are fully extended. Here’s where extra wide painters tape (4”) works great.
Finally, cover any vent holes that aren’t used during your Burn, being careful not to obstruct any working vents. A note on roof AC vents. We used to use a hammock filter on our outside AC vents. In normal conditions, these can be used to keep dust out of AC vents, and will permit airflow so can be in place while AC is running. Problem is, we have never gotten them to stay in place long in the high winds in the playa. So we gave up. We’ve seen very few people with these in place so our advice is to skip this step.
Inside Windows. You will want to cover all of the inside of your windows with insulated bubble wrap like this Reflectix product. Cover every inch of window on the inside, and tape it down. It makes a huge difference.
Some people swear by also using Reflectix on the roof of the RV. This will absolutely reduce the temperature of your RV. But you must be sure to affix the wrap so it won’t blow off. And we have seen many examples of well taped materials blowing away. If you are going to go this route, consider supplementing an excellent taping job with some 20 lb weights or the like to ensure that the material stays in place during a dust storm.
Finally, cover all the chairs and couches. We use a combination of fitted bed sheets taped or clipped in place and Press n’ Seal cling film. A little experimentation will tell you which works best where. Press n’ Seal will work on the dash board and other surfaces you won’t be using and want to keep clean.
Keeping Your RV Clean
Get an old stained rug….. people will sell these for next to nothing or give them away. 6x6 feet is big enough, but larger works too. Put this in front of your RV, and either weigh it down or use lag bolts to screw it to the playa. Place a non-shedding door mat on the carpet right when you walk in to the RV, so you can scrape your shoes. (Don’t use a mat with small fibers - they will shed, and leave you a heck of a cleanup job…hard learned life lesson). Have a bucket at the door so you can immediately remove your shoes on the steps of the RV, and place them in the bucket. Consider also hanging a sheet from the ceiling over the inside of your RV door creating an “air lock” entrance which will reduce dust blowing into the RV. We’ve moved away from doing this, as we haven’t found it necessary if you just open and close the RV door quickly (in all conditions!). But if you are more casual about getting in and out, this approach will help reduce dust blowing in.
This setup significantly reduces any dust you will track in on your feet. But your clothes may also be covered in dust, so consider having clean clothes available to change into. Our RV also has a chair right when you walk in, which we cover in a sheet that is changed several times during the Burn - it’s the place we sit when we are dusty but don’t want to change our clothes immediately.
A few times during the Burn we will do a good cleaning of the RV, dusting surfaces, and removing the paper from the floor, cleaning the floor and putting down new paper.
We use a high quality broom to sweep out the RV, which we have found to be more effective than using a portable vacuum. We also have an electric leaf blower and small air compressor, which with practice can be used to move dust around… it takes some skill to move it where you want to move it, so proceed with caution and avoid just creating a huge dust cloud. The leaf blower is really reserved for blowing out external storage areas, and blowing dust out of the engine compartment of the RV before driving home.
We keep a sheet over our bed when we aren’t sleeping in it, and carefully fold it up before getting into bed to catch any dust that has settled during the day. We usually change the bed twice at the burn.
We keep our dirty clothing in clear plastic trash bags, to contain the dust, and often remove and put on really dusty clothing outside the RV in our external storage compartments.
All these efforts combine to our RV being quite clean upon our return home.
Cleaning Up After
Once we leave the playa we pull over and remove all the external tape, so it doesn’t blow off on the drive home. We stop at the guy with the pressure sprayer in Cedarville. Gerlach has a wash as well that benefits the community. In Cedarville, we like to just do it ourselves rather than risk him damaging the glass or molding, and he’s more than happy to take a break while we do it. It’s cheap….something like $15. It’s not a perfect cleaning, just getting enough dust off the RV so when we get home we can wash it well without leaving a layer of mud on the street.
Once home we slowly and carefully remove all the sheets and cling film covering the furniture in the RV, as well as stripping the bed. We then carefully roll up the paper off the floor and dispose of it. This effectively removes almost all the dust in the RV.
We then use our air compressor to blow dust out of all the crevices.
Next, we wipe all surfaces down. If they are fairly dusty, we start with wiping everything down with a dry huck towel (the brand in the link is our favorite by far). Next we wipe with a dry microfiber cloth. By getting almost all of the dust off before any water is used, you make the final sponge cleaning very simple…no muddy smears.
We use a 50-50 mix of water and white vinegar to wipe down all the other surfaces and to do a final cleaning of the floor, cleaning our sponges regularly. The entire cleaning process typically takes around 2 hours on the interior. We pressure wash the outside, which adds another hour to do it well. Three hours of cleaning and the RV looks close to perfect.
Note: Renting, borrowing or buying a large air compressor is a great way to clean all of your burner gear. Our bikes look almost new every year after spending an hour with the air compressor and an oil bath for the chain. Be careful not to blow dust into bearings, etc., just work the non-lubricated areas. A leaf blower is great for a first pass, and between the two you will be shocked how clean you can get all your gear.
Some people recommend going to a laundromat to clean clothing, but we have never had a problem washing in our own machine. Your mileage may vary! We generally do small loads of all machine washable stuff, and then re-wash a second time with standard size loads. Wiping down the machine and then re-washing my white socks using white vinegar leaves the washing machine spotless and the socks surprisingly white.
Other resources.
The official Burning Man RV page
Good pointers for an RV at Burning Man
They need to be able to filter wood smoke, which is unfortunately one of the smaller particles (1 micrometer), so the filter needs to be super dense. It needs to be at least MERV rating 17.
I don't think you can buy MERV 17 right away. It's typically achieved by two-stage filtration. There are some MERV 14 filters, like this one https://www.amazon.com/dp/B00TUDHBWS/ref=cm_sw_em_r_mt_dp_U_ZM10CbKXP458M
It's better than nothing, but it wont reliably filter all wooden smoke particles.
If you're susceptible to smoke (allergies or something), buy a standalone filter unit with HEPA filter (and carbon prefilter for odors). Typical HEPA is MERV 18-20+, but you cant put HEPA into the typical AC unit. Like this one - https://www.amazon.com/dp/B01D8DAYII/ref=cm_sw_em_r_mt_dp_U_8U10Cb3QSG2QB
Edit: added links
Materials:
Gut this wall clock
Cut this in half and adhere around board. I used carpet tape
Stick these LEDs around the inner perimeter
note that these LEDs were intentionally chosen for their brightness and color, you can use others but I can't guarantee you'll like the illumination
Plug this guy in between the power supply and LEDs for a power switch
That's it! Now just pressure fit that bad boy on top of the foam you adhered around your board and this thing stays put, it's super sturdy and super sleek, way less intrusive than the retail options available right now I think.
I own both a gen 4 and a gen 5 FSL hobby laser, and I really like them both. There's a decent community forum here:
http://fslusers.freeforums.org/
You'll get some good answers there.
For 1), I don't know; I don't have their exhaust fan. They didn't have it available when I bought mine, but it looks decent enough. Without seeing it in person I can't comment on if it's worth $200 or not, but I use this one on one of my lasers: http://www.amazon.com/gp/product/B000O8D0IC?psc=1&redirect=true&ref_=oh_aui_search_detailpage and it's loud but works well. On my other I use this one: http://www.amazon.com/gp/product/B005XNNYMU?psc=1&redirect=true&ref_=oh_aui_search_detailpage and it's much quieter and also works very well. Granted my ducting is 6" to match, but I like it.
For 2), what diameter items? I got my rotary for free from some promotion/preorder/I can't remember and I actually have barely used it. It's hard to fit into the machine, as it raises items up off the floor of the laser, and there isn't much vertical height left over. I'd estimate you could only do roughly 1/2" diameter stuff without removing the floor of the laser (which isn't hard), but even then you'll likely only get to 1" or so. You'd need to remove the floor and set it up on something to get anything bigger. The removable floor is pretty nice; I took mine out and haven't looked back.
For 3), I can't comment on the cost of the 45W tube, as I didn't get one with mine, but I don't see it being worth it. You can get a whole second tube from LightObject for less than the cost of "upgrading" that first tube: http://www.lightobject.com/SP-35W-CO2-Sealed-Laser-Tube-for-Small-K40-laser-engraving-machine-P208.aspx Note that, despite being labeled as a "40W" laser, most of these small machines are actually about 30-32W. 40W refers to the peak pulse power when starting up; it's not a continuous run rating.
As far as compressors go, I haven't ever run without one. It helps TREMENDOUSLY when vector cutting and helps a LOT to keep your lens clean. Their compressor is OK but it's a bit pricey; I'd look around and see if I could find a continuous-duty-rated compressor for cheaper than that.
Don't get their water chillers either. The $600 one is just a radiator and a fan, and won't chill your water much. You get WAY more bang for your buck from a 5 gallon bucket. If you run it for a long time, freeze gallon jugs of water and put them in the bucket. I've run 100% power vector cutting jobs for 2 hours at a time with a gallon of ice in there, and it's just about right. You might need another half gallon; it's been a while since I've used that method. Their "Advanced chiller" looks decent, but it's WAY overpriced. An equivalent unit from here: http://www.vminnovations.com/search/index.html?q=AACH25 is $425 for a brand new one, and less than $300 for a refurb, and it's actually a refrigerant based unit. I installed an 80W tube in mine (not their official kit) and use that chiller and it works great.
Last, don't get their 90W upgrade kit either unless you have a REALLY good reason to. A tube and PSU cost around $1100, so you're paying nearly $2000 for brackets and a wiring harness. It's just not a good value, but then again installing your own 80W tube isn't exactly a walk in the park if you don't have some fabrication tools handy.
I hope that helps. For what it's worth I really like my lasers and they have served me well. If I get another laser it'll probably be a direct import from GWeike, but that's only because I've been using the FSL lasers for so long and have learned a TON from them.
https://www.amazon.com/dp/B07HMKKLPV/ref=cm_sw_r_sms_apa_i_Zi8MDbW8X3WWS
$60 and is compatible with 3M filters.
Y'all are over-thinking this... Get this
Ah, gotcha! I used these 25x25x1 air filters on mine, but I lack a door so I understand now.
But it looks like the same air filters I bought do exist in smaller sizes such as 14x14x1 and similar.
But nice to see someone else trying to prevent dust lol
Have you tried emailing Noctua and asking them if the Z-height difference can be adjusted for in their cooler?
One thing you can do while you wait is to do a simple pressure test, but unfortunately this costs money since you need to buy the die frame. Delid the CPU, install the die frame, install the 1151 mounting bracket, put a small dot of -normal- (Kryonaut, NT-H1, which you should have already) thermal paste in the center of the CPU, install the heatsink, screw it down, then immediately unscrew it and lift it up.
If the small dot has spread evenly and nice and flat and did not bunch up, then it's compatible. If it didnt spread, it's not compatible. It depends a lot on what is 'preventing' the heatsink itself from touching the die. The heatsink block itself -should- touch it since there's nothing blocking it.
I'll leave you with two threads to research on your own as you wait from an email from Noctua.
(tl;dr: may require a washer mod).
https://hardforum.com/threads/noctua-nh-d15-cpu-cooler-review.1868746/
https://forums.anandtech.com/threads/mounting-noctua-heatsinks-to-bare-die.2488386/
different CPU and socket but: https://www.reddit.com/r/overclocking/comments/9fssrk/7980xe_direct_die_frame_weight_of_heatsink_on_top/
One thing I can tell you is it should be easier to do this on a 9900K than an 8700K since --both-- the PCB and die are thicker, so you have that in your favor at least.
What stops the heatsink from going lower Z-height tightness (mounting pressure) are the two metal bracket posts that you screw the heatsink screws into. However the heatsink base itself should touch the CPU without being screwed down.
If you don't want to spend $30 buying the die frame, just buy the delid/relid kit. Make sure you buy the "10 CPU" version of the quicksilver (Trust me--just do it. 1 CPU is not enough for complete removal if you want to avoid sanding/razer riskiness), and grab an extra flitz polish pack for $1 (One comes with the quicksilver). If you want to save money if you think you may need more polish in the future (or you have other stuff to clean,, you can get a much bigger bargain here: https://www.amazon.com/gp/product/B0025QZMRI/ref=ppx_yo_dt_b_asin_title_o01_s00?ie=UTF8&psc=1 but I'm getting off topic). You will also need some RTV silicone to relid and reattach the IHS, in a way which will make future delids VERY easy--apply four VERY VERY tiny dabs on each corner of the IHS (after you cleaned and sanded the IHS edges, assuming you have sandpaper), when relidding and let cure for 2 hours. If you apply the absolute minimum possible to stop the IHS from moving (its important not to apply too much; it expands as it hardens which can raise the IHS and ruin LM contact!), then you can actually remove the IHS with your fingers next time.
Anyway I'm curious what Noctua says about the direct die frames. If you email them and they give you an answer (They're in Germany I think), post back or tag me and let me know.
Regardless of what you use with a direct die frame, I do recommend foam dams in general around the CPU to stop LM runoff danger of going into the socket, but this depends on if the direct die frame contacts the green substrate and thus acts as a dam itself. If it does, you're good (although since you also should paint the heatsink as LM needs to be applied to BOTH surfaces to insure proper tension and protect against gallium absorption,a foam dam on the outside (protecting LM runoff on the heatsink) won't hurt either. I used this cheap stuff.
https://www.amazon.com/gp/product/B002GKC2US/ref=ppx_yo_dt_b_asin_title_o03_s00?ie=UTF8&psc=1
You got it my friend!
Shelving - $90
Shelf Cover - $30
Landscape Fabric - $33
Storage Totes (6 pack) - $50
Local Temp/Humidity Gauges (12 pack) - $23
Incubation Tote Filters - $10
Sterlite Medium Stacking Basket (6 pack) - $15
Humidifier - $26
Standard Fan - Already Owned
Sonoff R2 Wifi Switches (4 pack) - $23
Sonoff TH16 Sensor Switch - $20
1500W Immersion Heater - $45
Standard Cooler w/ Drain - Already Owned
In total, it was a $350 project that could definitely have been done for cheaper, but I wanted to design it in a way that made it as painless as possible to turn my cardboard into mushrooms.
Also, I have an old space heater/fan combo that I intend to use when the temperature starts to drop. I plan to automate it with one of the Sonoff Wifi switches and control it with the Sonoff temp sensor.
https://www.amazon.ca/Furnace-Surface-Replacement-Carrier-LH33ZS004/dp/B00E3CDPLM/ref=mp_s_a_1_3?ie=UTF8&qid=1539210563&sr=8-3&pi=AC_SX236_SY340_QL65&keywords=hot+surface+ignitor&dpPl=1&dpID=511UGaXJAIL&ref=plSrch
You need this
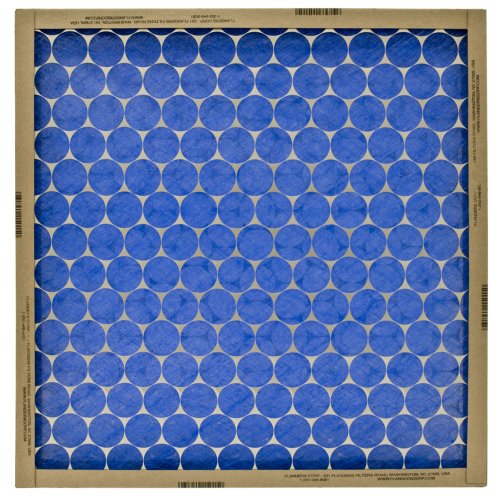
Buy cheap MERV-2 AC/furnace filters (non pleated high air flow fiberglass filters). Attach to air intake and change monthly. (Could even cut them to size, making them even more cheap.)
Here's a cheap 12-pack for $20 that will last you a year: http://www.amazon.com/Flanders-PrecisionAire-10255-011414-Filter-12-Pack/dp/B008LR895C/ref=sr_1_1?ie=UTF8&qid=1452030728&sr=8-1&keywords=spun+glass+filter
https://www.amazon.com/Duck-Conditioner-Insulating-2-25-Inch-284423/dp/B002GKC2U8
Cut it in two, put it in both front seats cracks. Shit works like a charm, and hella cheaper. Isn't even noticeable if you have a dark interior.
Duck Brand 284423 Window Air Conditioner Insulating Strip Seal, 2.25-Inch x 2.25-Inch x 42-Inch
Not a MOSFET, this DC-DC SSR. I have it bolted to the frame for heat dissipation, but no forced cooling on it atm. I do have 2 fans on the RAMPS board
If you can see the supply duct work, and it is indeed zoned, there should be some sort of electric motor visible from the outside of the duct. Sometimes there are 1 or 2 large dampers and sometimes there are a bunch of smaller dampers for each individual supply run. Pictures would really help to confirm. Models of your furnace and AC would also be really helpful to determine what features/functions they have. Because you already have 2 thermostat it is likely that you have zoning. The NEST and Lyric thermostats would work but you would definitely need 2. Some other brands include sensors that are controlled by 1 central thermostat. Models of you existing system will help determine.
example of smaller damper
example of zoning panel that controls dampers, you would have something like this installed on or near the furnace if you have zoning
https://www.amazon.com/Filtrete-Ultrafine-Particle-Reduction-Throughout/dp/B00TUDHVDW this one goes down to 0.3 micron... and the price goes up respectively.
https://www.amazon.com/Accumulair-Diamond-30x30x1-Furnace-Filters/dp/B000NNZ0QS/ref=mp_s_a_1_3?keywords=30x30x1+air+filters&qid=1559265013&s=gateway&sprefix=30x&sr=8-3
https://www.amazon.com/Protection-Allergen-Reduction-Increases-29-5x29-5x1/dp/B07FQWJPB1/ref=mp_s_a_1_1_sspa?keywords=30x30x1+air+filters&qid=1559265044&s=gateway&sprefix=30x&sr=8-1-spons&psc=1
One search away
For the cooling, I have had a very good experience with this Tjernlund M-10 inline fan.
I doubt I require near the cooling you need (I'm running a 7x 1080 ti enclosed case plus some other network gear in a closet) but I can run the fan at about half speed with a variable switch and maintain the same temp as the HVAC thermostat.
I find these air conditioner filters to work better, and they are cheaper. Just cut to size and use duct tape to hold it in place.
http://www.amazon.com/gp/product/B002GKC2US/ref=oh_aui_detailpage_o00_s00?ie=UTF8&psc=1
http://www.amazon.com/gp/product/B002GKC2US/ref=as_li_ss_tl?ie=UTF8&tag=inpurofmys-20&linkCode=as2&camp=217145&creative=399369&creativeASIN=B002GKC2US
I cut a peice of this stuff out for my intakes. Cheap and reduces dust
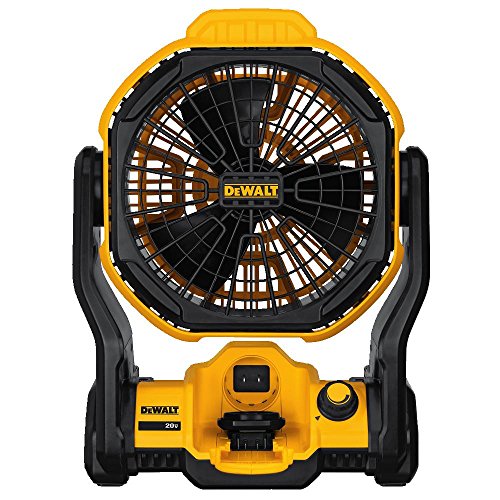
Before I even searched I kind of knew you had to be wrong: https://www.amazon.com/DEWALT-DCE511B-Corded-Cordless-Jobsite/dp/B075RFBTS3
Dewalt makes anything :D
I'm thinking a washable filter media like this might be what's supposed to fit in there. Nothing about this looks right for standard filters.
For an intake filter you can just buy some of the filter cloth used for household vents, cut it to size and tape it to the end of your intake ducting, cheap and easy to replace and will keep all the crap from entering your tent.
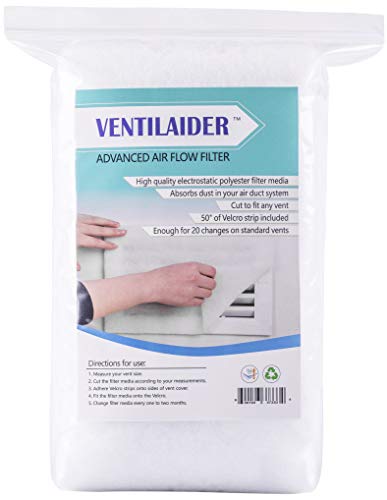
Something like this https://www.amazon.com/Ventilaider-Complete-Installation-Electrostatic-Allergies/dp/B079MCBJWR/ref=mp_s_a_1_3?keywords=Air+vent+filter&qid=1565015194&s=gateway&sr=8-3
Also you can usually connect your outtake filter directly to your fan for maximum efficiency.
I’m using foam padding for window unit A/C like this stuff. You can get it from Lowe’s/Home Depot/etc.
https://www.amazon.com/dp/B002GKC2U8/ref=cm_sw_r_cp_api_i_W0cCCbJXFZ6AG
I just cut off a 1x1x1 cube and feed my filament through it before I load filament into my printer.
Inside is bad asbestos. They make cuttable filter you can put behind the supply grills.
https://www.amazon.com/30x60-cut-Filtrete-Hammock-Filter/dp/B003DWE3OQ
Remove a supply grill and wrap the back with filter before reinstalling.
They will work for about 6 months .
This might be useful? DEWALT DCE511B 11" Corded/Cordless Jobsite Fan
Skimped out in what way? Telling you about what I do, or not managing effectively?
​
Here's what I did with the rack. I've sealed the front and back of the rack. I then mounted a 6" Tjernlund Blower (https://www.amazon.com/dp/B005XNNYMU/) capable of 530 ft\^3 /min of airflow (major overkill, the rack is only 32ft\^3). Attached to it is a Duct Fan Speed Controller (https://smile.amazon.com/dp/B007TFTITS/) that I have to throttle down the airflow. I use it mostly to balance out the noise to heat ratio. The blower is amazingly effective, but it is also amazingly loud when running full-tilt. To that, I attached a long length of metallic dryer hose that basically dead-ends into the drop ceiling and runs a few feet. Ideally I'd like to exhaust it to the outside, but it doesn't currently. I think this is why I still have heat issues.
run your furnace fan.. and get some ultrafine particle filters.
​
https://www.amazon.com/Filtrete-Ultrafine-Reduction-Throughout-Inhalable/dp/B00TUDHBWS
​
>Captures micro-particles including: PM 2.5 air pollution, exhaust, soot, smoke, cough/sneeze debris, bacteria, viruses, and lint, dust, and pollen
​
Same thing mine did. Looks like you may have the same igniter. Bryant/carrier etc. It's a pretty universal igniter.
http://www.amazon.com/gp/product/B00E3CDPLM/ref=oh_aui_detailpage_o00_s00?ie=UTF8&psc=1
If its not the same, you should be able to Google the right one using your unit's model#.
If it's the same one, only one screw holds it to the bottom of the burner assembly.
Obviously, I should tell you that only qualified individuals should work on a gas furnace. BUT, if you decide to look into replacing the igniter yourself, it's not too hard. Unplug electrical power. Shut off the gas at the hard line. I like to wait a few minutes after that. The igniter has a molex-type connector that should wiggle off. One small screw holds the igniter's plate in, and the igniter tips and slides out.
You might want to do this before ordering a replacement. Inspect the element for imperfections and burned spots. If any exist, it's probably bad.
To reinstall, do the same in reverse. I like to take a few pics in case I had to move or remove anything else to get to it.
AFAIK, it isn't possible with Wink/ecobee right now. But this is a great idea for ecobee to implement.
I run my blower for 5 mins/hr, but I also have an in-duct fan that comes on/off with the blower. Temperatures stay within 1-1.5F in my 2-storey townhouse.
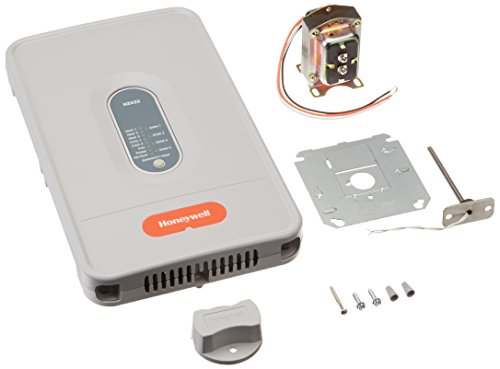
Honeywell damper system.
These things (in various circumference) driven by a Honeywell zone control board. https://www.amazon.com/Honeywell-ARD12-Automatic-Damper-ARD-12/dp/B000LDIK7G
Here's the control board: https://www.amazon.com/Honeywell-HZ432K-Truezone-Zone-Panel/dp/B003IQVKDO
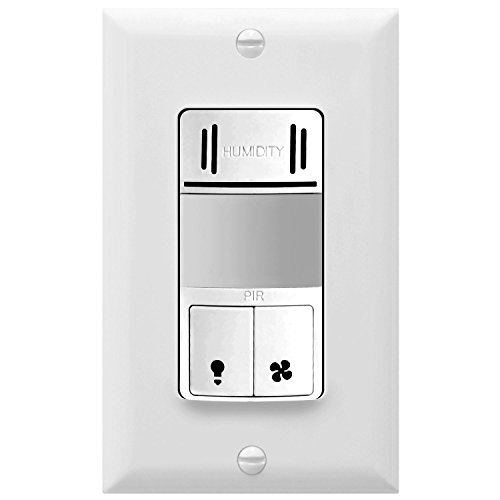
Sorry I don't need it to be motion triggered, I just mean the ones I was looking at were under a search for motion sensor bathroom fan switches. (Ideally I'd just want one of the switches to be humidity triggered and the other have the option for vacancy mode, which looks like this does: https://www.amazon.com/TOPGREENER-TDHOS5-Humidity-Separate-Bathroom/dp/B06XPTH4YX except that it can do manual on and vacancy mode for a light, and I'm not sure if I can hook the heater fan into those wires).
I use this 530 CFM fan to ventilate my two rooms totaling ~175 Sq ft. Yes, it's quiet enough now that it is rubber mounted (don't mount these suckers right to a rafter. Vibration echos through the whole house).
530 cfm $90
440 cfm $73
Just search inline fan
I've got the exact same machine.
- I run my Air pressure at about 100-120 PSI.
-Be sure the keep your lenses clean. I cracked one in my first week due to stupidity.
-Be sure your air is on. The machine wont run if the chiller isn't running, so you don't have to worry about that.
-Be sure to pull your collection tray before it is full, otherwise you are going to be pulling bed slats to get the excess out.
-Spend $100 bucks on amazon and get a different blower for exhaust. The one that comes with it is super loud. I got one like this: https://www.amazon.com/Tjernlund-M-6-Booster-Hydroponic-Conditioning/dp/B005XNNYMU/ref=sr_1_13?keywords=6%22+blower&qid=1564068420&s=industrial&sr=1-13
-If you are cutting metal, be sure you are using oxygen and not compressed air
-Have Fun. The boss is a great machine. Just start playing and learning and if you get really really stuck, boss laser tech support is awesome
Thanks! I was probably going to use one of these or these. I'm thinking building a duct and sending air through one 20x25 filter for each wall unit, and also for my air intake. Really sure how it will affect the units, although I was thinking I could add a boost fan later where needed.
...or maybe this one: better MERV
​
Update Oct 17::::::::::::::::::::::::::::::::::::::::::::::::::::::
https://www.reddit.com/r/HomeImprovement/comments/diwk1p/air_exchange_upgrade_intake_filter_boost_fan/
​
Nov. 4 Update::::::::::::::::::::::::::::::::::::::::::::::::::::::
Ok, I've made some tentative new progress fixing my problem. I've basically decided I need to rebuild my crawlspace, and perhaps expand it in the process. I've come to realize that I think the vapor barrier was ripped when I had my initial problems with the groundhog, and at this point, doing a patch fix will be a major pain, and perhaps not good enough. Also I think some of the other groundhog proofing that was done DIY is probably causing some extra wood rot problems, and really should be removed. So I've come up with the plan to tear up the old crawlspace, and build a new one that goes the full width of the building, in the process installing a new vapor barrier, and adding a couple extra features to help with pest-proofing. In the end I should be left with a new 8'x25' tall crawlspace.
I've been in touch with a few contractors at this point, and have had a couple out to look at the site. I had one guy was obviously just trying to talk up the price, I was not able to get a quote from the other. I tried to get a quote from the concrete supplier although they couldn't quote me without a final plan. (I'm probably leaning more toward getting some handymen types to help me, at this point, as my initial contractor interactions have been mediocre to bad). In the mean time I've been looking into what materials I need. I went and bought some heavy duty plastic from Lowes the other day, and my roll of vapor-barrier-seam-tape just arrived today. I'm also thinking of getting a portable cement mixer, incase I decide to the project with bags(probably much cheaper that way). My local concrete supplier did provide some interesting ideas however about details/best-practices of doing the job: basically that it is a 2 part job, with a poured foundation, and then a masonry wall on top. Below is some "napkin math": I think I can probably get all of the materials for less than $2k, not including tool rentals(cement-pump, mixer, picks&shovels).
Pump trailers are not cheap: looks like the average cost to own is $30k-$50, although I guess it's just a question of how much a contractor would charge on the job. Also, I'm not sure if I actually need a pump, although pouring from the truck might be difficult(actually leaning more towards bags and a mixer at this point).
I'm still not sure about exactly what we want to do about the back wall. Does it need a back wall? part of the problem i'm trying to fix was that groundhogs dug around behind the old wall, and came in, ripping the plastic in the process. thinking perhaps I could do something clever with pavers on the outside to discourage this. and then there is the difficult quesiton of how to make the new plastic vapor barrier seamless with the old? looks like I've got my work cut out for me ;P
i'm looking at this one:
http://www.amazon.com/dp/B005XNNYMU/ref=wl_it_dp_o_pC_nS_ttl
and:
http://www.amazon.com/Active-Air-720-Inline-8-Inch/dp/B002JQ4K1I/
would these be considered good quality? or do i need to spend roughly twice as much?
thanks for the info.
On this heading, given all the smoke of late, it may be worth it to spring for a higher-end air filter the next time around. Standard air filters don't do that great a job at filtering smoke out of the air. I recently changed air filters over to these (obviously get the size you need) and the difference in how they look when they are ready to be changed versus my old ones is massive. These look filthy when I go to change them after the same time period the old ones just looked dirty. The difference is all the stuff the standard ones were letting through. I don't tend to link-drop or promote specific products, but given the recent air quality concerns, wanted to make people aware not all air filters are created equal, or equally capable of handling smoke.
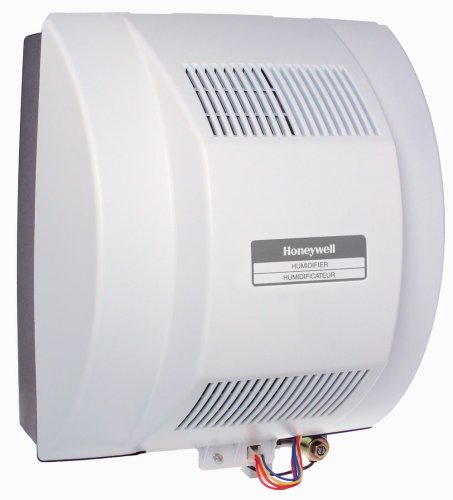
Powered humidifiers do not require a return (i.e. they can be installed on only the supply side). Some people like the stand alone humidifiers better.
There is great debate as to whether or not whole home humidifiers like this actually do much to increase the humidity in many homes.
Much depends on how tight your house is, and how long your furnace runs (for the ones that humidify inside the ducts).
This one combines an occupancy sensor, humidity sensor, and countdown timer into a single dual-control unit. Should do the trick.
Ed: fixed link
So one like this or this work? Whats the difference between the two?
There are lots of installation comments at Amazon.
Just throwing this in here in case anyone was looking for case fans also. There is a group buy going on in /r/massdrop for 120mm case fans.
http://massdrop.com/nzxt-fz-120mm-nonled-fan
Also to add i got the DEMCiflex magnetic covers for my antec 900 and they all fit nicely except the one for the rear fan since the rear fan grill bulges out of the case. I'd recommend their filters if you just want to buy and use.
If you want to make your own which might work better for some people use "polyurethane foam" as your material since it filters small particles fairly well and is reusable. If needed buy some magnetic tape to stick it where you want it to go otherwise you can just screw it into the fan and It'll work just as well.
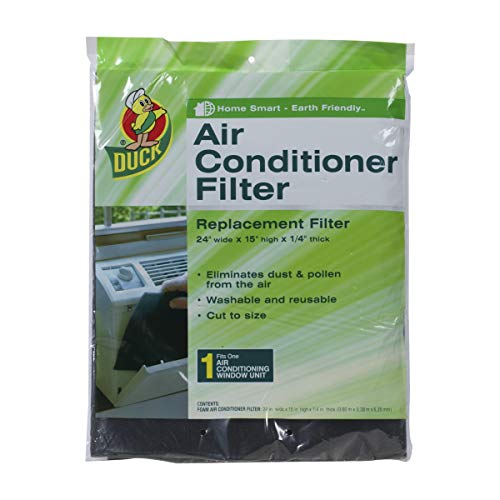
http://www.amazon.com/Duck-1285234-24-Inch-15-Inch-Conditioner/dp/B002GKC2US
DEWALT DCE511B 11" Corded/Cordless Jobsite Fan https://www.amazon.com/dp/B075RFBTS3/ref=cm_sw_r_cp_api_OATTAbPCSVMAE
Are the plastic filters like this technically electrostatic as well? It doesn't claim "electrostatic" anywhere on it and appears to have a much finer mesh.
Gas or electric? I had a similar problem once with gas heater. Issue was flame sensor. Quick fix was to use some steal wool to take off the soot.
Or just replace it.
Flame Sensor
> Trane XE80
The manual says that is a flame sensor error. So you can try cleaning the flame sensor or just replace it. It looks like this, although I can't confirm that this is the exact part you need. https://smile.amazon.com/Trane-SEN01114-Flame-Sensor/dp/B00ECEENHG?sa-no-redirect=1