Best iced beverage dispensers according to redditors
We found 162 Reddit comments discussing the best iced beverage dispensers. We ranked the 66 resulting products by number of redditors who mentioned them. Here are the top 20.
We found 162 Reddit comments discussing the best iced beverage dispensers. We ranked the 66 resulting products by number of redditors who mentioned them. Here are the top 20.


For 100 miles you'll want at least two of these: https://www.amazon.com/Igloo-Gallon-Beverage-dispenser-Dispenser/dp/B000F6SHTK/ref=pd_bxgy_468_2?_encoding=UTF8&psc=1&refRID=XVM0Y4YPMGS0W6SG53RN
In seriousness, it depends on the trail. If you have an idea of where the water sources are and what condition they are in, you can plan to carry just as much as you'll need each time you fill up.
Wow there's one on Amazon.ca too! It's only $126! (plus $92.40 shipping)
Oh FFS Canada...
Check out /r/Homebrewing and just start saving. Even 2 dollars a day with you and a friend and you could be rolling in a couple months.
edit: also start saving glass bottles that require a bottle opener. Those are reusable.
edit2: Things you'll need. Feel free to find similar products.
cooler with spigot
valve(I'm not sure of the size on that igloo)
bazooka screen
bottles(make sure they're brown)
caps
capper
some sort of gas stove. say a propane stove, a turkey fryer, or a kitchen stove.
a large pot
starsan
I'm probably forgetting things.
Here is the amazon link.
or
If you're in the UK like me.
I'm assuming you already have a kettle, burner, brew paddle, and thermometer. Also assuming you have good water. You will have to buy crushed grain until you get your own grain mill. The ball valve can be upgraded with a cam lock quick disconnect and tube. I like to mash on my kitchen counter, so I have to move the kettle outside for the boil and a platform dolly is a big help with that.
I would go to all grain. for 100 you can get a 10 gallon cooler, false bottom, valve and bulkhead. There are tons of youtube videos on how to convert a cooler to a mash tun
http://www.amazon.com/12-Stainless-Domed-False-Bottom/dp/B004B7GIV8
http://www.amazon.com/Igloo-Gallon-Beverage-dispenser-Dispenser/dp/B000F6SHTK/ref=sr_1_1?ie=UTF8&qid=1419666384&sr=8-1&keywords=igloo+10+gallon+water+cooler
Here is a tree fiddy alternative to the drink dispenser: https://smile.amazon.com/Gijoki-Durable-Dispenser-Kitchen-Coolers/dp/B07P5LGG43/
No worries. With that in mind, you'll want to do a few things before anything else.
You'll have a few challenges ahead of you, but if you're willing to put in some elbow grease and a bit of cash, and your friends are amiable to you making a few modifications, you can have a nice tiny house. The fact that you're looking at living there for the next few years implies you're willing to do some work to make it nice. Your immediate challenges include:
One thing missing is plumbing. I am hopefully correct in assuming that your friends will allow you to use their bathroom, shower, etc.
First, you'll need to insulate the place. This is to keep your space warm during cooler times and cool during warmer times. The easiest way to accomplish this is with foam sheeting insulation, available at Home Depot, Lowes, etc. You simply cut the foam to size and press it in between the studs that make up the walls; friction holds it in place. Cut as carefully as you can as any gaps means a space where heat can bleed through. If your friends are okay with it, you can patch up small gaps between the foam and the studs using expanding spray foam insulation. Insulating the roof is a little more challenging but can be done in much the same way. I'm not a contractor so you'll want to do some research into installing insulation and vapor barriers.
Once insulation is in place you can finish the walls with drywall or other wall coverings, nailed into the studs. Drywall has higher cost and is harder to work with; you might want to consider something simpler like wood paneling. If you want to go on the cheap and are willing to work a bit, start collecting and disassembling shipping palettes. Remove all the nails from the boards, sand the boards smooth, then nail the boards between the studs to cover the walls. When you're done you can paint it or stain it or seal it.
The bare plywood floor is going to be a turnoff, and I would avoid carpet since you won't have a way to clean it. On the plus side, since the shed will be a small space you can get a couple of boxes of good quality vinyl plank flooring and lay it all down in a single afternoon. It'll be durable, attractive, and easy to clean.
For electricity, don't even think about running an extension cord as there's too many ways that could go wrong. I might consider two options. A couple of solar panels on the roof connected to a couple of simple car batteries can provide reasonable DC power for indoor LED lighting, charging your phone, running a fan or Bluetooth speaker, and other low-load devices. Supplement that with a gas-powered generator for higher load items like an air conditioner. Gasoline generators are cheap and run for up to eight hours on a tank of gas. When shopping, find one that's QUIET and reliable (read: Honda).
If the shed has any windows you'll want to install something that will keep light from bleeding out and prevent people from peeking in. The last thing you want is for a cop car to drive by and wonder why there are lights on in a shed late at night. Consider applying mirrored blackout film (allows light in, doesn't allow light out) to the windows and installing blackout curtains on the inside.
Air circulation is going to be key to your comfort. A hang-out-the-window air conditioner isn't in your future, nor is lighting a fire. Consider a small portable heater/AC unit that you can connect to your generator for power. Some of the better ones also act as dehumidifiers (if you're in a damp area) which can be helpful. If your shed has cross ventilation grates near the roof, consider changing them out for powered fans that can be connected to your solar batteries, and are reversible so that you can have good airflow as needed.
A convertible bed or futon would likely be your best approach for sleeping arrangements. If your shed's roof has horizontal beams inside like the green boards pictured here then you might even be able to get creative with some plywood and build a loft bedroom up there. Screw down the plywood, cover the floor with more vinyl planks, put a small mattress up there, and set up a ladder to get up and down.
Then it's just an exercise in minimal living. Forget about a big TV or high-end gaming computer; use a laptop as your "entertainment center" and stream everything. (Oh, right: If your wifi isn't strong enough from the house you may want to bump your data plan to "unlimited" and use your phone as your internet access point for your laptop.) Be careful with appliances as they often consume a lot of electricity (you don't want to be running your generator 24/7). An insulated water cooler filled with ice and water from the house can provide a convenient and cool water source for several days.
This is the cooler I use for a mash tun. It works great. It's selling for a record low Amazon price and ships for free. I link to some pictures of it in that post. The seat top makes it easy to run a thermometer under the lid to monitor mash temps. The product link in that post helps support hbf. Thanks in advance if you use it. If you do not want to help support hbf here is a direct link.
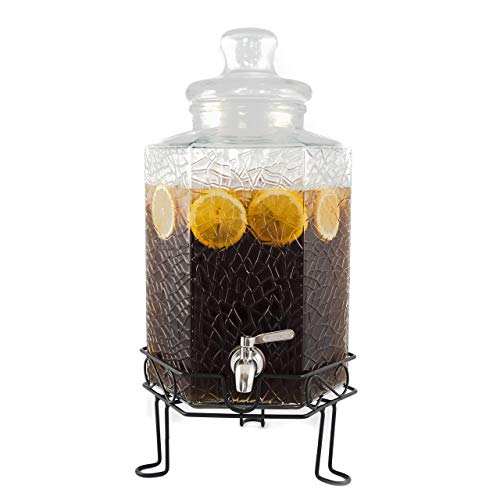
https://www.amazon.com/Home-Essentials-1842-Hammered-Dispenser-x/dp/B003LTF7U0/ref=mp_s_a_1_4?ie=UTF8&qid=1549166587&sr=8-4&pi=AC_SX236_SY340_FMwebp_QL65&keywords=large+iced+tea+dispenser&dpPl=1&dpID=51Kr5IMaf%2BL&ref=plSrch
I'm starting to realize from a lot of these ratios that some tastes are very different! I'm sure that a "recommended" ratio is out there but an ideal ratio is what tastes best to you.
As you've noticed, you definitely need to increase your steep time, especially if you're using the fridge.
I've tried many methods but the one I've been using for a while now is the following (just a suggestion if you're into that sort of thing):
I was very skeptical about the CoffeeSock's ability to filter properly as I was using Chemex filters before this which obviously filters well. I spoke to CoffeeSock about this and they said "you will pass some fine silt only" and they were correct, much to my surprise.
The french press definitely had some fine grinds coming out of it, as did most of the popular products I've tried. Some people don't mind this but I did. :)
The product tastes fantastic, in my opinion, and comparable to the concentration of many shops I've purchased cold brew from. Just play around and at some point you'll settle on the method that works for you.
Happy brewing!
Anybody who wants to do similar, here's my recommendation:
A large glass empty jar. Square and short are better for fridges. Pickle jars are a good one to find.
1 glass cutting drill bit (5/8)
stainless steel spout https://smile.amazon.com/gp/product/B07JZ6KJQJ/ref=ppx_yo_dt_b_asin_title_o07_s00?ie=UTF8&psc=1
1 plastic 2 liter bottle
Most of these things except the spout should be gotten as byproducts or local.
Here's how to cut the spout:
https://www.youtube.com/watch?v=U_NtTBTGp20
To prevent vacuum, you need to either drill a hole in the lid, or leave the lid loose.
You might screw up the first, don't sweat it. Toss into recycling and find another.
$600? Let me see what I can do here.
Brew Kettle:
Mash Tun:
Propane Burner:
Wort Chiller:
That's $540 and would be a pretty incredible setup.
Mash tun cooler (this is probably cheaper at your local hardware store or wal mart) Also, this isn't the only cooler that works. Pretty much any plastic cooler works. But you'll need a different false bottom if you use a chest cooler, which may allow you to mash bigger batches.
Weldless Ball Valve Just take the plastic valve off the cooler and screw this one on. Will work on most any cooler you choose.
False bottom Put this at the bottom, connecting the silicon hose to the ball valve and the top of the false bottom.
3/8" barb You'll need to screw this onto the ball valve on the inside of the mash tun to connect the silicon hose to.
Honestly, if you've already got a kettle that can boil 6 gallons, you're good to go there, and just add this to the mix. Otherwise, pick up a Stainless Steel Brew Kettle.
This whole setup comes in just under $200 but you'll need some hoses and some hose clamps as well. But I'm sure that if you shop around (even on amazon) you might find better deals than I linked. But that's the gist of it. And there's no need to stick with the specific brands I linked. But just make sure to stick with stainless steel for the kettle, ball valve, and connecting accessories and food-grade plastic for the cooler. And any hoses need to be high temp hoses. Silicon is ideal.
This is by no means the "only" way to do it, but a great start down the road. You may also choose to use a pump. It has advantages and disadvantages. You can make great beer with and without one.
Don't let your dreams be dreams!
EDIT: Even better option, 10 gallon for same price
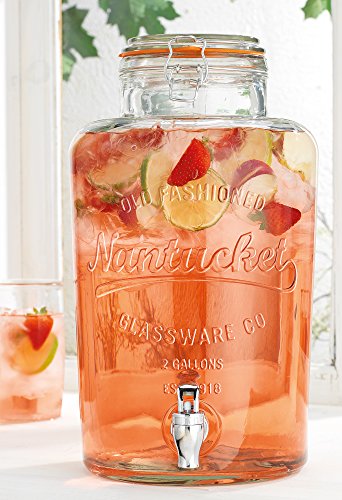
I got the container and spigot from Amazon.
Home Essentials 2 Gallon Nantucket Drink Dispenser https://www.amazon.com/dp/B00G8SE35Q/ref=cm_sw_r_cp_apap_iWLSI79AwUlJr
1 X Stainless WorksTM Stainless Steel Beverage Dispenser Replacement Spigot(Polished Finish) https://www.amazon.com/dp/B00IX87W1Q/ref=cm_sw_r_cp_apap_uBiUYY3aaLXgU
I'm going to blow your fucking mind
Wanted to contribute to the thread, so I did a quick pass on amazon for "glass beverage dispensers", with the following parameters:
Basic Jars
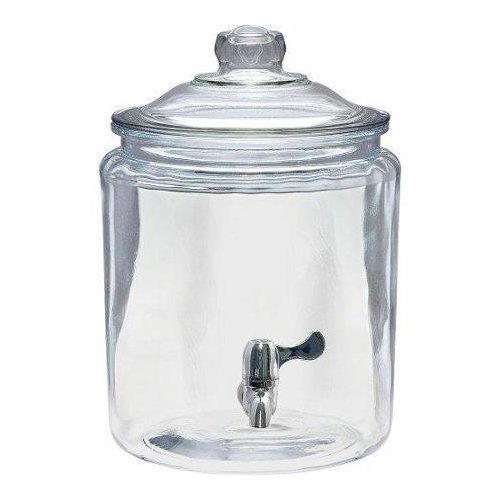
Anchor Hocking #1
Anchor Hocking #2
These two are the same brand, I used the non-spigoted version of this brand for my low-tech shrimp tank. This is a known and respected homewares brand so I kinda trust it. Also, for the second one:
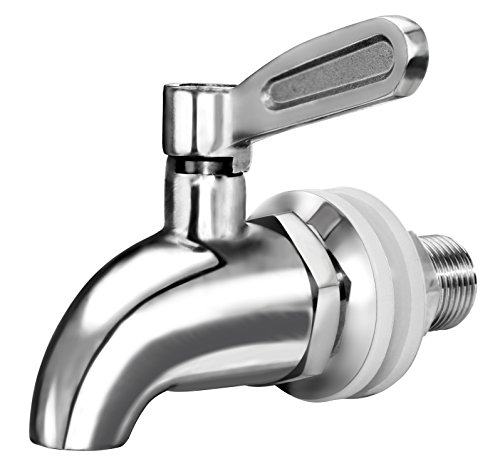
> The extra metal spigot is a must. The one it comes with is useless plastic.
Everyone replaces the spigot it seems. That's a recurring theme in the comments for most of these that come with plastic spigots. Keep that in mind for whatever you purchase.
[Circleware] (https://www.amazon.com/Circleware-Dispenser-Glassware-Serveware-Drinkware/dp/B01HOUE874/)
Has wording on the front, maybe that doesn't bother you though. Drillable lid, goes up to 2 gallons, and has a 4 star rating despite 647 reviews. I saw this brand a lot so I assume it's good quality.
Good but more expensive jars
[Artland 1 Gal] (https://www.amazon.com/dp/B00C40TXYI)
[Artland 2 Gal] (https://www.amazon.com/dp/B00DSC998Q)
[Artland 3 Gal] (https://www.amazon.com/dp/B00QNI2XIK/)
Come in 1-3 Gallons. The 1 Gal has a (likely) drillable top, although the lid is loosely threaded according to some users. Apparently someone had the same idea to make a tank out of a jar... with a Betta shudders
> I purchased this as a betta fish tank for my kitchen(easy clean with spigot). It not only is adorable, but it works wonderfully and does not leak one bit. I would definately recommend this product.
To be clear, I was shuddering at her spelling AND the cramped tank. Many people recommend changing the spigot, and I would use the space under the stand to hold / hide extra fish stuff.
2 and 3 both have an infuser, and stand. The infuser could be useful
as a place for fry to hide maybe? I'm new, but maybe there are other uses for it that would justify the price.
[Emenest Glass] (https://www.amazon.com/Emenest-Glass-Beverage-Dispenser-Spigot/dp/B01JK1VSHS)
The major note for this one is that it has especially thick glass, which is supposed to help maintain temperature. Comes with a nifty chalkboard, useful for reminding your snails to clean up. The lid might make wiring a hassle but I'm including it nonetheless.
Farmstand
Costly, but comes with a handle to pick up the tank for water changes to your desired water source. I would use the inverted bucket to hide fish stuff. TONS of reviews and it maintains a 4.5 rating.
The above is just a starting point, you can use the same search string to find your own, if you haven't made an irl purchase already.
If it isn't clear by now, I really like this idea. I did something similar with a plain glass jar after reading Diana Walstad's Ecology of the Planted Aquarium and tried my hand at a low tech dirt tank. It smelled awful but the red cherries loved it -- so I might do it again someday.
edit: sigh formatting
We brought one of these and filled it with water. We also brough a little scrub brush and some soap. Precooking as much stuff as you can is definitely the way to go. And if you are going to cook bring foil and it will make it a little less messy if you put that down first.
Walmart for the jars, Amazon for the 304 stainless steel spigot. This is the one I use
There is a pretty thick SCOBY in there but it doesn't show up in the photo I will post a photo of the scobies on my next go round.
Someone on here posted a link to this and I think I might go and buy one soon. But note that if you buy one of these with a plastic spigot you will want to be sure you purchase a replacement stainless steel spigot to swap them out.
Jar
https://www.walmart.com/ip/35588833
Spigot
https://www.amazon.com/Beverage-Dispenser-Replacement-Stainless-Polished/dp/B00RPBQBQ4/ref=sr_1_5?ie=UTF8&qid=1484377655&sr=8-5&keywords=stainless+steel+spigot
I bought mine at a department store and I replaced the spigot and it works like a champ now. =)
I've burned myself on liquid from one of these 24 hours after it was filled.....
https://www.amazon.com/Zojirushi-AASB-22SB-74-Ounce-Dispenser-Stainless/dp/B0000CEUQK/ref=sr_1_1?ie=UTF8&qid=1483293440&sr=8-1&keywords=airpot+zojirushi
This depends primarily on how much you want to brew and what style (batch vs continuous). The easiest first step would be to go with a glass gallon jug. If you want to go a little bigger, get a 2 gallon with a non metal spigot (plastic and stainless steel are ok). Spigots make it way easier to pour for 2F. Not sure it’s worth it for a 1 gallon jug but for sure for 2+ G.
Pakkon Wide Mouth Glass Mason Jar with PlasticLid/Ferment & Store Kombucha Tea or Kefir/Use for Canning, Storing, Pickling & Preserving Dishwasher Safe, Airtight Liner Seal, 1 gallon https://www.amazon.com/dp/B012BAWVU8/ref=cm_sw_r_cp_api_sjiIAbZAY63RN
Anchor Hocking Heritage Hill Glass Beverage Dispenser with Spigot, 2 Gallon https://www.amazon.com/dp/B00BWC0E42?ref=yo_pop_ma_swf
http://www.amazon.com/Godinger-Gas-Pump-Liquor-Dispenser/dp/B00073RP6M/ref=sr_1_1?ie=UTF8&qid=1396192881&sr=8-1&keywords=gas+pump+liquor+dispenser
I'm building a new brewing system, and today I built a 10 gallon cooler mashtun using all SS fittings. Having learned from past experiences, I came up with this build, which is just about the simplest way to make a mashtun.
What you'll need:
10 gallon Igloo cooler $41
Bayou Classic 1/2" SS Bulkhead $30
1/2" MTP Bazooka Screen $9
1/2" Male hose barb $8 (you can probably find one of these cheaper at your LHBS, I had one lying around)
Tools: Teflon tape, and a crescent wrench.
Total Cost: $88
drink dispenser
Getting married in a couple months, and we've scaled it back a lot, down to cake and drinks now. This is of course for drinks.
https://www.amazon.co.uk/Del-Nantucket-Gallon-Beverage-Dispenser/dp/B00G8SE35Q'
We have about four of these lying in our storage locker, the taps are a bit dodgy, and they've not fun to fill,but they work.
My round 10gal Igloo cooler keeps temps within 1deg-2deg for 60mins with no issue.
It's this one: http://www.amazon.com/Igloo-Gallon-Beverage-dispenser-Dispenser/dp/B000F6SHTK/
I do 5-6 gal batches and the 10gal cooler is definitely worth it because it gets close to full on high ABV (8%+) mashes.
>from krisbrad via /r/Charlotte/ sent 1 minute ago
>
>Well good luck finding it, I'm sure with that attitude you won't have any problems.
You've just got your head in the sand, eh? Alternative Beverage is the local place, VS Goliaths like More Beer, Midwest Supply, and Amazon:
Here
are
some
examples...
Well would you look at that... the local place has better prices on some of that stuff. Huh, and here I thought you could only get better prices online.
I know you were asking about pumps but a counter top filter might be a better option for that glass of water and gives you the ability to use water that might not be potable otherwise. (This is a prepper forum.)
Here is a pump.
https://www.amazon.com/Bottles-Pressure-Drinking-Fountain-Coolers/dp/B07KVDGDTN/ref=sr_1_11?
​
Here is a company that sell the stainless steel bodies that hold filters. They sell filters also.
https://stpaulmercantile.com/stainless-water-filter-bodies
Mine came from my local grocery store. I replaced the plastic spigot with a stainless steel one from Amazon.
https://www.amazon.com/dp/B00RPBQBQ4/ref=cm_sw_r_cp_api_xiFJBbF2YB9QQ
Consider replacing the plastic spigot with something like this like I did with my similar setup.
More Durable Beverage Dispenser Replacement Spigot,Stainless Steel Polished Finished, Water Dispenser Replacement Faucet, fits Berkey and other Gravity Filter systems as well https://www.amazon.com/dp/B00RPBQBQ4/ref=cm_sw_r_cp_api_i_yul7Cb2BVPTW8
Because water is super-heavy. Sure it has high heat capacity, particularly ice, but a fridge sized cooler would weigh an unacceptable amount. Small specialized gadgets work that way, but it's not feasible for large scale solutions.
You sya you don't have the tools to make the mash tun and brew pot. I assemlbe my mash tun, HLT, and brew pot with two 10inch adjustable wrenches, a standard dewalt drill, a carbonate cutting bit, a stepped cutting bit, and some cutting oil. If you have the drill everything else would cost around 50 bucks, then you also gain tools with your equipment. The hardest part is cutting holes in the pot for a thermometer.
Either way to make the Mashtun and MTL you would only need 2 10 inch adjustable wrenches.
Up to you, but here is some all grain kits you could look at:
http://www.austinhomebrew.com/10-Gallon-Igloo-Cooler-Mash-Tun-With-False-Bottom-AND-Hot-Liquor-Tank_p_6699.html
https://www.amazon.com/Gallon-Cooler-Stainless-Steel-Screen/dp/B013KJKAC0/ref=sr_1_9?ie=UTF8&qid=1486068034&sr=8-9&keywords=10+gallon+mash+tun
You can make a 10 gallon mash tun for under 100 dollars:
10 Gallon cooler (~$50)
https://www.amazon.com/Igloo-Gallon-Beverage-dispenser-Dispenser/dp/B000F6SHTK/ref=sr_1_1?ie=UTF8&qid=1486068151&sr=8-1&keywords=10+gallon+cooler
Ball Valve(~$15)
https://www.amazon.com/Eagle-Brewing-Wl301-Stainless-Weldless/dp/B00OC8DXPA/ref=sr_1_sc_2?ie=UTF8&qid=1486068175&sr=8-2-spell&keywords=wedless+ball+valve
Screen (~$8)
https://www.amazon.com/Stainless-Steel-Bazooka-Screen-Fitting/dp/B003ISY2DC/ref=pd_sim_468_4?_encoding=UTF8&pd_rd_i=B003ISY2DC&pd_rd_r=45GNPGH763R20241728C&pd_rd_w=MCZcu&pd_rd_wg=n4Wsv&psc=1&refRID=45GNPGH763R20241728C
1/2 female npt fitting(~$5)
https://www.amazon.com/Stainless-Steel-Fitting-Coupling-Female/dp/B003GSKXUU/ref=pd_sim_328_6?_encoding=UTF8&pd_rd_i=B003GSKXUU&pd_rd_r=SMJAVJR6CYZ7P9ZBQBQQ&pd_rd_w=h6v7j&pd_rd_wg=eclPX&psc=1&refRID=SMJAVJR6CYZ7P9ZBQBQQ
Total: 78 dollars. You can buy 2 10 inches adjustable wrenches for 20 dollars (https://www.amazon.com/Stanley-90-949-10-Inch-MaxSteel-Adjustable/dp/B000NIDIXA/ref=sr_1_1?ie=UTF8&qid=1486068379&sr=8-1&keywords=10+inch+adjustable+wrench)
so even having to buy tools its still under 100 dollars to make the Mash tun. The hot liquor tank will be the same price minus the screen, npt fitting, and tools. I personally made mine even cheaper buy using a 5 gallon htl instead of a 10 gallon and that will drop the price 25 more dollars. There is 0 drilling involved you simply unscrew the old plastic tap and put the weld ball valve in its place, it took me less than 10 min to make my new HTL on Monday.
Also, and this is really important to why I say build yourself, any mash tun you buy is going to be put together the same way it just matters whether you put it together or someone else does, either way the quality will be identical.
If you need a sparge arm for fly sparge you can make that out of pvc pipe: https://www.youtube.com/watch?v=Q-jgmgbwvg4
My two cents, even though you don't believe in you. I do, if you feel like saving money you can absolutely make all this stuff yourself and it doesn't require you be good at anything more than thinking like a logical person.
Can you link to that Amazon deal? I don't see it there. A friend of mine is looking for a mash tun and that would be perfect for him.
Edit: Never mind... I found it. Was looking for Gott and it is an Igloo.
buy a cooler to be converted into a mashtun!
http://www.amazon.com/Igloo-Gallon-Beverage-dispenser-Dispenser/dp/B000F6SHTK/ref=sr_1_9?ie=UTF8&qid=1418931908&sr=8-9&keywords=igloo+cooler
or a kettle and ballvalve!
http://www.brewinternational.com/8-5-gallon-stainless-steel-kettle-with-weldless-valve-thermometer/
or burners!
http://www.northernbrewer.com/shop/brewing/the-dark-star-burner.html
From Amazon here's the link https://www.amazon.com/dp/B0755JJTF3/ref=cm_sw_r_cp_apap_1gcC1MrbxjNZk
Looks like they went up to $33. Still a great deal. https://www.amazon.com/dp/B004B7GIV8/ref=cm_sw_r_cp_api_EPZOAbDVCD667
No problem! If it makes any difference, my opinion is to get a 10 gallon round water cooler. $47 bucks with free shipping:
http://www.amazon.com/Igloo-Gallon-Beverage-dispenser-Dispenser/dp/B000F6SHTK/ref=sr_1_1?ie=UTF8&qid=1344623228&sr=8-1&keywords=10+gallon+round+cooler
Stand by:
Ball Valve
False Bottom
10 gallon cooler
False Bottom - Valve adapter
Please shop around. I have no doubt you could get some of this stuff for cheaper. I was restricted in that my only form of currency was Amazon gift cards. Especially the adapter could be built / constructed for much cheaper than I paid.
Additionally, instead of the false bottom / adapter, one could simply employ a Bazooka Screen instead of a false bottom, I have just read that false bottoms are more effective and less prone to problems.
DISCLAIMER - Always do your own research and make sure the parts that you are buying are all compatible and properly sized, etc. etc.
Having said that, the parts I listed above are exactly what I ordered and all fit together perfectly, I just needed to go out and buy a female coupler (to attach the valve to the hose from the false bottom) and a washer (per the included instructions with the valve, which had a additional washer for my configuration).
I always think the ice spheres are awesome or the wedge. Paired with a couple highball tumblers.
Or just something funny. Lastly, just spend your money on a half way decent whiskey. If you have a good liquor store, get a middle shelf beauty, they should be able to help you.
Hi,
Caveats to below:
Interesting you bring up glass...I used a Walmart 2 gallon glass jar for months (no problems with mold due to use of grow mat with thermostat...at least this is why I think I did not have mold) and decided I like continuous brew (had this going in a 2.5 gall glass lemonade dispenser seperately) So I went to kombucha Kamp to see what they were selling for continuous brew...NO glass...they had porcelain, 304+stainless and one other material if I recall correctly, but no glass. This made me really start to wonder....why???...why are the kombucha experts not selling glass. I knew about glass possibly containing lead (no relationship to your original post...I think)...but this fact alone...that kombucha Kamp was not selling glass for their kombucha continuous brew made me retire all my glass when I switched over to continuous brew. I decided on porcelain...and found 2.5 gal continuous brew setups for very cheap online.
In my opinion the biggest reason for mold is temps too cold...glass, without insulation looses heat quickly....especially in winter.
My setup: Brew Container: https://foryourwater.com/collections/water-dispenser-crocks/products/solid-black-crock-dispenser-porcelain-silver-faucet-fyw-cksblk?variant=5588511457311
Germination mat: VIVOSUN Durable Waterproof Seedling Heat Mat Warm Hydroponic Heating Pad 3'' x 20" for Kombucha Tea & Beer Brewing, Fermentation, Seedlings & Plant Germination https://www.amazon.com/dp/B073PTZCJ4/ref=cm_sw_r_cp_taa_Y0QMCbVKHEB93
Thermostat: VIVOSUN Digital Seedling Heat Mat Thermostat Controller 68-108℉ https://www.amazon.com/dp/B015F4VFGI/ref=cm_sw_r_cp_taa_81QMCb2K5YSWK
Stainless steel dispenser: Oak Leaf Replacement Spigot for Beverage Dispenser,Water Dispenser Faucet, Stainless Steel Spigot for Drink Dispenser, Food Grade, 2-Pack https://www.amazon.com/dp/B07JZ6KJQJ/ref=cm_sw_r_cp_taa_T2QMCbJTK12ED
And insulation in colder weather...Reflectix for inner and outer layer and middle layer of thick insulating fabric...velcro to hold it all together....insulation saves money in cold weather....cutout where the spigot is.
Place germination mat wrapped around upper part of brewing container.
Hope this post is not too long.
Due to their low price relative to weight/volume, shipping out a case or two of water bottles is pretty cost-inefficient so stores like Amazon have a shipping premium baked into the price. You see it with other stuff on Amazon that would normally be dirt cheap at the grocery store, but water is probably the most egregious example.
You could try picking up some water storage containers (something similar to this) and fill them up yourself. I picked up a couple after Irene made me realize I was woefully underprepared for a bad storm. Just make sure they're well cleaned and sanitized before filling them up with anything you plan to ingest.
Making a mash tun out of this 10 gallon cooler. What ball valve should I buy to insure it fits?
Hey mahm0udin
I use the 5 gal version now, but I think the 10 Gal would be perfect for both methods because you get a healthy grain bed for filtering when brewing big or small.
You will want to install a Weldless ball valve with a Nipple on the inside of the mash tun.
You will also want one of these false bottoms and a piece of silicon pipe to join it to the internal ball valve nipple
Woo, that was a lot of links :) This is my setup and it works a treat :)
https://www.amazon.com/dp/B00E58AU2Q/ref=dp_cerb_1
and the upgraded spigot
https://www.amazon.com/Stainless-Works-SSS010-Dispenser-Replacement/dp/B00IX87W1Q/ref=pd_bxgy_79_2?_encoding=UTF8&pd_rd_i=B00IX87W1Q&pd_rd_r=PHD3PQHTJ8DCN27WQFT4&pd_rd_w=jvTjE&pd_rd_wg=JrLUy&psc=1&refRID=PHD3PQHTJ8DCN27WQFT4
i signed up for the free trial of prime to get free shipping
I just started making it myself. I got a SCOBY from Amazon and here's my general recipe:
Boil the water. Once the water is boiling, add in the sugar and stir until dissolved. Add the tea bags (I usually use 12 tea bags/Gallon) and brew to desired strength. I like mine strong, so I leave the tea bags in the pot until the tea is to room temperature. You can put it in the refrigerator if you want to cool it off quicker. This is very important since hot tea will kill your SCOBY.
Sterilize your brew container by swishing some vinegar around or running it through the dishwasher on the hot cycle. I bought one of these to use as my brew container since it makes bottling into these bad boys easier. This is also very important since you don't want any "bad" bacteria to get into your controlled fermentation environment. Pour the tea into your brew container, add the vinegar/starter liquid, and add the SCOBY. From this point on, do not let the kombucha touch anything metal or any non-sterilized equipment. Cover your brew vessel with a clean dish cloth/coffee filter/paper towels and let sit 7-10 days, depending on how vinegar-y you like it.
That's pretty much it. Just make sure everything is clean and sterile when handling the SCOBY and you will be fine. There are a bunch of recipes and how-to's out there as well, I've just summed them up in this post. Happy Brewing!
Edit: spelling
Thanks! I love them too. All credit goes to LootCaveCo. He's the one who originally made this post of his brewing station and I asked him where he bought his stuff. So i'll just show what he told me:
"Here is my list of stuff
Jars (the valves that come with them are apparently flimsy so he recommended replacement valves):
https://www.amazon.com/gp/product/B07W21D2B6/ref=ppx_yo_dt_b_asin_title_o02_s00?ie=UTF8&th=1
Stainless valve
https://www.amazon.com/gp/product/B00RPBQBQ4/ref=ppx_yo_dt_b_asin_image_o02_s00?ie=UTF8&psc=1
Brewing cap
https://store.kombuchakamp.com/Brewer-Cap-3-pack.html
"
​
​
hope this helps! :)
Actually my sister bought it for me from amazon.com. I had seen similar at Walmart. Here is a link to the item if you're interested.
Here's the hardware I ended up with for a simple continuous brew setup. For me, two gallons is a lot for a batch brew mostly just handling the vessel. Good luck! You're mostly limited by your imagination here.
Beverage dispenser Target is supposed to carry it also, but I never found one in the store.
Stainless spigot
Rubber bands
Heater
Temp controller outlet
Adhesive thermometer
You can find this in local stores for like $24. http://amzn.com/B00E58AU2Q edit: FYI lid comes off, spigot is plastic.
I've heard of the [Zojirushi Airpot](Zojirushi AASB-22SB Premier Air Pot 74-Ounce Beverage Dispenser, Brushed Stainless https://www.amazon.com/dp/B0000CEUQK/ref=cm_sw_r_cp_api_..yJyb2E4YBMW) which is 74oz, easy for traveling, and keeps water very hot.
Pricy, but enough water for 1+ gongfu sessions and a great long term investment. Zojirushi lasts for life.
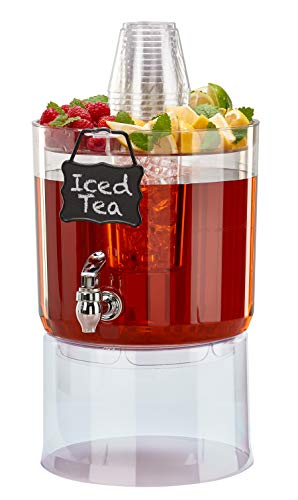
Some of those drink dispensers have their own ice container that keeps the ice and drink separate. If you're anticipating it sitting there a while, you might make a super cold icewater/salt mixture to put in there, or freeze the ice container so that you maximixe the volume of ice.
Other than that, you could probably freeze the same kind of fruit used in the drink and drop those in the drink. or premake some of the drink and freeze it to use as ice cubes.
The night before I brew, I pour 10 gallons of water into my 10 gallon Igloo cooler mash tun. I then treat the water to get the profile I want. The next day, I gravity feed the water to my HLT to heat. I use the markings inside the cooler that came with the cooler to determine how much water I am putting into the HLT (it has both gallons and liters).
Anchor Hocking Heritage Hill Glass Beverage Dispenser with Spigot, 2 Gallon https://www.amazon.com/dp/B00BWC0E42/ref=cm_sw_r_cp_api_f4uhAbF8X8STT
1 X Organic Kombucha Scoby - Live Culture by Scoby Kombucha https://www.amazon.com/dp/B009ZW8RP4/ref=cm_sw_r_cp_api_.5uhAb83TMN5D
Unbleached Cheesecloth 9 Sq ft 100% Cotton Reusable-Great Filter or Strainer for Cheese/Kombucha scoby/Glass jar/Wine making https://www.amazon.com/dp/B01M612PJU/ref=cm_sw_r_cp_api_j7uhAbFHCHX7S
Adhesive Temperature Strip https://www.amazon.com/dp/B0079JZLP4/ref=cm_sw_r_cp_api_i9uhAbJBGF75D
Red Baron Bottle Capper https://www.amazon.com/dp/B001D6KGTK/ref=cm_sw_r_cp_api_xbvhAbFY4CJN3
Beer Bottle Crown Caps - Oxygen Absorbing for Homebrew (Gold) https://www.amazon.com/dp/B00ZSEH8VW/ref=cm_sw_r_cp_api_YcvhAbCE0836F
Bottles Free: Just start saving old beer bottles (not the twist on style bottle) submerge them in hot water for 5 min, labels peel right off.
Sanitizer: White Vinegar, I prefer Star san.
Prince of Peace Tea, Black, 100 Count https://www.amazon.com/dp/B00AP70BKC/ref=cm_sw_r_cp_api_divhAbY9D73AP
With these products, you will be good to go and your volume is 2 gallons, so by the time your upgrading after your first batch. For me a 1 gallon container never cut it. With the capper you don’t have to worry about giving your friends a bottle of your Kombucha and never seeing your $4 swing cap bottle again. Just save old beer bottles or ask your friends for them.
To answer your question, the temps you listed are to low. For all brewing temperatures are very important. You want to keep your fermentation in the 70s. Here’s how you fix the problem without keeping your home heater on 24/7.
Round Kombucha Heater Kit for Continuous Brew Crocks & Dispensers. 10" Brewing & Fermentation Heat Mat, Works with any Ceramic, Glass, Stone or Porcelain Containers (10"-120VAC 7-Watts) https://www.amazon.com/dp/B072S6XBQJ/ref=cm_sw_r_cp_api_1tvhAb04PYXBK
Enjoy... In the long run you will spend less by starting off with the right equipment.
Go with the false bottom. I've used both, but had a difficult time getting consistent volumes once the braid got mangled.
Edit: I picked this one up from Amazon when it was on sale for $30:
https://www.amazon.com/dp/B004B7GIV8/ref=cm_sw_r_an_am_at_ws_us?ie=UTF8
I would advise against getting the NB cooler kits because of the crazy markup on the coolers themselves. If you look at the products, you have to assemble everything yourself anyway. They charge $100 for the igloo coolers, but you can get them for $42 on Amazon. Actually, the fittings that NB offers are a pretty comparable price to other places. Maybe just get the fittings, but uncheck the cooler and order it separately.
Also, as others have said, you may not really need the HLT. Just try to visualize your brew day and see how you can finagle things optimally. Personally, I use my boil kettle as my HLT, and things work out well.
Side question - how to keep it cold? I was thinking about getting one of these and dropping a big block in there so it doesn't get too watered down https://www.amazon.com/Redfern-Elegant-Beverage-Dispenser-Stainless/dp/B0755JJTF3/ref=sr_1_35?keywords=punch+cooler&qid=1566348045&s=gateway&sr=8-35
I have not. Sounds like a good idea though. Something like this maybe? (Edit: I looked a little deeper, and there seem to be multiple options, many at lower price. I think I'll get this one
Hey,
Yup, it's this one - https://www.amazon.com/HomeBrewStuff-Stainless-Bottom-Silicone-Tubing/dp/B004B7GIV8
Added this high-flow connector to it, I should be able to dig up the original elbow as well - https://www.brewhardware.com/product_p/fbelbow.htm
I have a piece of silicone tubing that is sized well for a Rubbermaid 10gal cooler, I'd throw that in too in case it would work for you.
It's all stainless and in good shape. I can take a pic after work later. I'm thinking shipping/packaging should be ~$10 depending on where you live, and if you could include enough extra to buy me a pint at a bar that'd work for me.
Anchor Hocking Heritage Hill Glass Beverage Dispenser with Spigot, 2 Gallon https://www.amazon.com/dp/B00BWC0E42/ref=cm_sw_r_cp_apa_i_siO5AbTBD97N9
I replaced the spigot with this guy:
Beverage Dispenser Replacement Spigot,Oak Leaf Stainless Steel Polished Finished, Dispenser Replacement Faucet https://www.amazon.com/dp/B013FWX4HA/ref=cm_sw_r_cp_apa_i_OjO5AbW7CJM7M
If you don't want to do BIAB get yourself a 5 gallon cooler, throw on a weldless bulkhead, and get a paint strainer bag as your filter. It'll maybe cost you 40-50 bucks max. Links below.
1/2"x10mm Stainless Steel Ball Valve Weldless Bulkhead for Home Brew Kettle https://www.amazon.com/dp/B075M2KL5B/ref=cm_sw_r_cp_apa_i_y-73Ab9B9J8XY
Igloo 5 Gallon Seat Top Beverage Jug with spigot https://www.amazon.com/dp/B000FDXEN2/ref=cm_sw_r_cp_apa_i_bb83AbPCZY0XB
5 Gallon Elastic Opening Paint Strainer Bags 6 Pieces https://www.amazon.com/dp/B00C2A9L0Q/ref=cm_sw_r_cp_apa_i_Ib83Ab8YSXHGR
You can probably find a cheaper 5 gallon cooler at your local home improvement stores. They usually run 20-25 at my local Home Depot during the summer.
No, it had a plastic spigot I changed out for a stainless steel spigot. Got both items on Amazon.
Glass Beverage Dispenser
Spigot
I will the hubs to be sure but this is how it goes. We use an gallon iced tea container with the pour spout at the bottom like this but after the kombucha kloset incident we use a plastic one from WalMart.
Then he puts it in the bottom of the closet in a paper bag to do its magic.
Once it's ready (that's a matter of taste) I fill mason jars to put in the fridge so that it doesn't vinegar-ize. Leave the scoby and enough liquid to completely cover it plus an inch or so and make new tea and fill 'er up. The scoby keeps growing. When the scoby gets too big I take half of it and add it to my scoby hotel which is another big jar with kombucha and scobys but you don't want to drink from it because it's all vinegar-y. We give away the scobys.
I will ask him exactly how much sugar.
Do a 10 gallon round cooler. You will need that much of you ever do a mid to high alcohol beer, as the amount of grains increases. I have used this cooler for the past 10 years as a mash tun. Seriously, 10 years.
http://www.amazon.com/Igloo-Gallon-Beverage-dispenser-Dispenser/dp/B000F6SHTK
These and others like it should work.
Does she do continuous fermentation? If not a great gift would be to buy a 2-3 gallon glass iced tea/lemonade dispenser such as this
https://www.amazon.com/Circleware-Beverage-Dispenser-Glassware-Yorkshire/dp/B00CVUL7S6/ref=mp_s_a_1_8?ie=UTF8&qid=1543340276&sr=8-8&pi=AC_SX236_SY340_FMwebp_QL65&keywords=iced%2Btea%2Bdispenser&dpPl=1&dpID=41jN0k82KiL&ref=plSrch&th=1&psc=1
to make bottling wayyy easier.
i use the heat delay and heat the strike water and sparge water together. then before i mash i use the pump and take out the sparge water and put in a cooler ( https://www.amazon.com/Igloo-Gallon-Seat-Beverage-spigot/dp/B000FDXEN2/ref=sr_1_12?crid=1BNXXYIJMXUF3&keywords=igloo%2Bcooler&qid=1558019690&s=gateway&sprefix=igloo%2Caps%2C127&sr=8-12&th=1&psc=1 ) it keeps it hot. its not 167 degrees but its close and i figure its better than sparging with cold water.
If you want no further dilution from melting ice, these two options (or similar concepts) seem your best choices.
Party Top New Beverage Dispenser - Amazon
Thornton's Reusable Plastic Ice Cubes - Amazon
Have fun!
~Cheers
I've been shopping around for coolers so I can DIY myself a set. These were some of the deals I took advantage of.
$33 70qt chest cooler
$40 10 gal igloo cooler
Regarding the tea, maybe get big beverage containers like this (http://www.amazon.com/Anchor-Hocking-Beverage-Dispenser-Heritage/dp/B00BWC0E42/ref=sr_1_2?ie=UTF8&qid=1420985567&sr=8-2&keywords=glass+beverage+dispenser) and brew a whole bunch at once? You can probably just stick it in your fridge so it doesn't go bad and only have to brew it once every few days.
Get two of [these(https://www.amazon.com/Anchor-Hocking-Heritage-Beverage-Dispenser/dp/B00BWC0E42/ref=sr_1_3?ie=UTF8&qid=1505181882&sr=8-3&keywords=2+gallon+glass+jar+with+spigot)] jars.
Get two gallon stock pot to brew your tea with sugar. Fill a jar with the sweet tea almost full leaving room for the gallon you are adding.
Wait about 7-10 days and then brew another two gallons of sweet tea. Pour half of the first ferment jar into the second empty glass jar and then split the two gallons of sweet tea between the two glass jars..
The first jar is your continuous brew jar. The second jar you may sweeten with whatever juices. I been doing Honeydew Jalapeño with great results. Bottle the second jar for a few days. I use growlers and honey jars and recycled beer bottles with a bottle capper.
In another 7-10 days you can repeat the process.
From a previous poster: https://smile.amazon.com/Gijoki-Durable-Dispenser-Kitchen-Coolers/dp/B07P5LGG43/
I'm trying to make a keg cooler for my 2.5 gallon keg. The keg has dimensions of 9.125in diam x 14.5in tall. This water cooler thing has dimensions of 14.5x13x19.5in. It seems like the keg is small enough but I'm not sure why there's two measurements for the keg and three for the cooler.
Currently I just use a picnic tap so I'm unfamiliar with shanks and stuff like that. Would this work if I just put the keg in the cooler, drilled a hole in the side wall and attached a shank and a faucet to the keg?
I also have a mini regulator like this that I plan on using for a CO2 source.
I havent run into this issue yet. I use a high output stainless steel spigot.
[Updated] More Durable Beverage Dispenser Replacement Spigot,Stainless Steel Polished Finished, Water Dispenser Replacement Faucet, fits Berkey and other Gravity Filter systems as well https://www.amazon.com/dp/B00RPBQBQ4/ref=cm_sw_r_cp_apa_f-SPAbCA9WFKH
instead of those coolers, you can get this one, then add this and have an almost complete mash tun
I've seen people using these: http://www.amazon.com/Circleware-Dispenser-Glassware-Serveware-Drinkware/dp/B00CVUL7S6/ref=sr_1_4?ie=UTF8&qid=1453839647&sr=8-4&keywords=laundry+soap+dispenser
You may have to clean out the spigot periodically though.
Amazon! There are plenty of options but this is the one I purchased: https://www.amazon.com/dp/B00BWC0E42/ref=cm_sw_r_sms_awd_rIJxwbSZFN1VY
Very happy with it so far
If the spout is a concern you could look into a pump-action pot like this. http://www.amazon.com/Zojirushi-AASB-22SB-74-Ounce-Dispenser-Stainless/dp/B0000CEUQK/ref=sr_1_7?s=home-garden&ie=UTF8&qid=1422447856&sr=1-7&keywords=zojirushi+carafe
As much as I love Canada, sometimes it really sucks for getting access to goods at a decent price. I see so many posts of people picking up brewing supplies off of craigslist for cheap, and there is nothing in my neck of the woods like that.
This cooler on .CA : http://www.amazon.ca/Igloo-42021-Beverage-Dispenser-10-Gallon/dp/B000F6SHTK/ref=sr_1_3?ie=UTF8&qid=1422645011&sr=8-3&keywords=igloo+10+gallon $106 CAD (approx $83 USD)
We have something like this ours was a gift but we use it 2-3x a year totally worth it!
Buddeez Cold Beverage Dispenser, 1.75 gallon, Clear - https://www.amazon.com/dp/B0153DJUS6/ref=cm_sw_r_cp_api_i_a3w.AbZ1GFF79
Here is my list of stuff
Jars:
https://www.amazon.com/gp/product/B07W21D2B6/ref=ppx_yo_dt_b_asin_title_o02_s00?ie=UTF8&th=1
Stainless valve
https://www.amazon.com/gp/product/B00RPBQBQ4/ref=ppx_yo_dt_b_asin_image_o02_s00?ie=UTF8&psc=1
Bottles (not a great option for cost effectiveness)
https://www.amazon.com/gp/product/B00I0YNYSI/ref=ppx_yo_dt_b_asin_title_o01_s00?ie=UTF8&psc=1
Brewing cap
https://store.kombuchakamp.com/Brewer-Cap-3-pack.html
I would recommend bottles form here https://www.containerandpackaging.com/catalog/glass-containers/glass-bottles?gclid=CjwKCAjw1rnqBRAAEiwAr29II0Oe4vUh5C7rvnfqRKQaHJOFxO4fFJWvYcxibwmRDP_hJKp2GNsOBBoCiPgQAvD_BwE&capacity=12%20oz&sort=products&page=1 or HDPE bottles like naglene as the high density poly ethylene is so chemical resistant it wont leach into your booch.
I use these
get an all stainless spigot - this is the one i use:
https://www.amazon.com/gp/product/B013FWX4HA/ref=oh_aui_search_detailpage?ie=UTF8&psc=1
I paid a tile/stone installer to drill my crock with his specialized equipment (diamond bit and a water cooling spray tank) so I could install a stainless steel spigot: http://imgur.com/a/LTlPv
Came out nice, works great, and no leaks: http://imgur.com/PpPneYC
It's an excellent quality spigot: http://imgur.com/QqnhXad at a great great price: http://amazon.com/gp/product/B00RPBQBQ4/
Solid valve, good flow control: http://imgur.com/Hbs7P0x
Nice finish and build: http://imgur.com/sb1XEeT
The diamond tile bit which worked fine on the stoneware didn't work so well on my 2.5 gallon glass jar: http://imgur.com/J8WRDTh Whoops! Almost made it through. Oh, well.
Also, can I do the second ferment in the same container as the first? https://www.amazon.com/gp/aw/d/B00BWC0E42/ref=ya_aw_oh_bia_dp?ie=UTF8&psc=1 this is what I bought, per the advice of some kombucha website online.
I use a 2 gallon glass jar, like this, fill it with sweet tea, and add kombucha. A scoby will form in week or so. Leave it alone for a couple of weeks, and that's really all there is to it for the first ferment. For the second ferment, I put it in 2 liter soda bottles and add what ever I'm using for flavor- really like raspberries. It will be nice and fizzy in a week or so.
Wait, you mean something like this?
https://www.amazon.com/Chill-Matic-Automatic-Beverage-Chiller/dp/B0148K37K2/ref=mp_s_a_1_5?keywords=instant+wine+chiller&qid=1571583080&sr=8-5