Best metal & alloy raw materials according to redditors
We found 331 Reddit comments discussing the best metal & alloy raw materials. We ranked the 175 resulting products by number of redditors who mentioned them. Here are the top 20.
We found 331 Reddit comments discussing the best metal & alloy raw materials. We ranked the 175 resulting products by number of redditors who mentioned them. Here are the top 20.


40 G is $15 on Amazon
$10.50
https://www.amazon.com/Instant-Cold-Pack-Kit-POUNDS/dp/B07CZK913Y/ref=sr_1_3?crid=1IKXCAGFDNXZK&keywords=tannerite&qid=1571616531&sprefix=tannerit%2Caps%2C155&sr=8-3
​
https://www.amazon.com/2-Pounds-Aluminum-30-micron/dp/B00KF598X0/ref=sr_1_2?crid=1IKXCAGFDNXZK&keywords=tannerite&qid=1571616531&sprefix=tannerit%2Caps%2C155&sr=8-2
​
True to ACME, enjoy your grievous bodily harm.
I don't know what it's primarily used for, but it's a metal that melts at just above room temperature. You can play with a solid piece in your hands and it will melt into a puddle in seconds, it's also non-toxic (to touch at least) and you can buy it online. It will also eat through certain kinds of other metals like aluminum, if you put some on a can of soda for a while it'll go right through it. It's an interesting metal for sure.
https://www.amazon.com/gp/aw/d/B01MR0MLFA/ref=mp_s_a_1_3?ie=UTF8&qid=1518824972&sr=8-3&pi=AC_SX236_SY340_FMwebp_QL65&keywords=bismuth&dpPl=1&dpID=517-ItNPlbL&ref=plSrch
To make this easier in a practical way, you could roll your dice into something like a 90 degree piece of aluminum (like this).
Once the dice are settled, you can always see which two numbers you got. It also makes it easier if orientation doesn't matter, which gives you 12 possibilities instead of 24.
Edit: One disadvantage I see with this strategy is that you can't use the values of the faces as numbers. Getting 1,4 and 2,3 are both possible. So you'd have to assign numbers to each combination (e.g. 1,2 = 0; 1,3 = 1; etc.)
This was my preferred secure wipe method when I still worked in I.T. My second career as a chemist is a much better fit.
WARNING: THIS PROCESS IS PROVIDED FOR INFORMATIONAL AND ENTERTAINMENT PURPOSES ONLY. PERFORM THIS METHOD AT YOUR OWN RISK. THIS GENERATES TONS OF HEAT, BLINDING UV LIGHT, MOLTEN IRON, AND FUN. NEITHER I, NOR REDDIT, NOR YOUR PARENTS WILL BE HELD RESPONSIBLE FOR INJURIES, DEATH, PROPERTY DAMAGE, OR OSHA RECORDABLE INCIDENTS.
I did self adhesive led strips mounted to 1/4" aluminum angle stock. I screwed the aluminum stock to the face frame under the cabinets and oriented it so the led strips were facing the wall and one side of the angle stock was facing towards the countertop.
I used a dimmable 12vdc power supply and put it on a standard 120vac dimmer switch. The aluminum acts as a heat sink and when you look down at the glossy counter top, you can't see the leds. Worked pretty well.
Yep, AFCI for everything but the 30amp appliance circuits.
Here are the led's and channel:
https://smile.amazon.com/gp/product/B071FT9SXK/ref=oh_aui_search_detailpage?ie=UTF8&psc=1
https://smile.amazon.com/gp/product/B01N5U2CN4/ref=oh_aui_search_detailpage?ie=UTF8&psc=1
Not OP, but these are the ones I have in my living room.
If you don't mind going the DIY route, you could probably come in under $100 for parts for the strips:
Instead of the flat channel, you might be better off with angled channel for mounting the strips above the cabinets, since they'll throw more light on the wall, which is what you'll actually see - https://www.amazon.com/LEDwholesalers-Aluminum-Mounting-Installations-1901-V/dp/B00PJSSD7K/
There's a ZWave RGBW controller but it's more expensive than the wifi one and can take some more configuration: https://www.amazon.com/Fibaro-Micro-Controller-Z-wave-Strips/dp/B00P1N68FW/
If you get the snap-on connectors, I recommend putting a small amount of solder on all of the pads where you'll be connecting them on the strips, so that they make a good connection.
As for the puck lights, you could probably get something like this and wire the distributor to the wifi/ZWave controller, instead of plugging it into the controller it comes with: https://www.amazon.com/Changing-Christmas-Furniture-Ambiance-Lighting/dp/B01N2I47VH/ref=sr_1_2
I wasn't expecting it to be this easy.
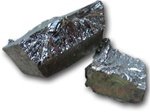
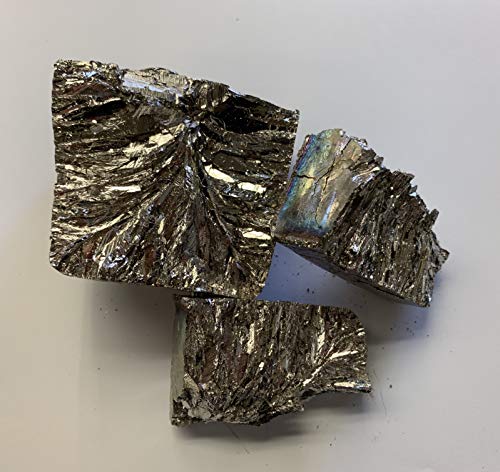
You can buy a kg of bismuth for $30 with Prime shipping.
This is the listing I used when I purchased it in 2013 (the price and quality were fine for me, I'd probably buy this again if I wanted to experiment more).
https://www.amazon.com/gp/product/B001QUVMC8/ref=ppx_yo_dt_b_asin_title_o04__o00_s00?ie=UTF8&psc=1
Granted, I'm a geologist that works in the metal's mining industry, so my idea of what is "cheap" for a metal ingot might be a little skewed, as I'm comparing it to the prices of other metal ingots like platinum, silver, zinc, etc.
[~$20 for the steel; 1/8"x2"x 18"](
http://amzn.com/B000FMYFVI)
Everything for the jig ~$40; I bought two files and rod for the files. I am going to rebuild it with wood-plastic composite.
Micarta- ~$10 for the resin, and 5 minutes of convincing my SO to let me cut up one of her blur shirts :)
Forge ~$80 because of the MAP gas torch.
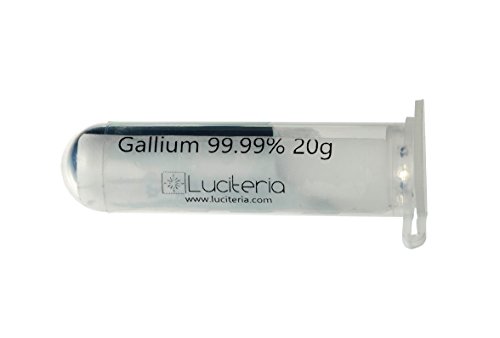
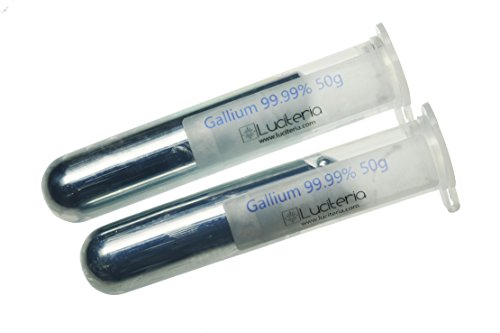
Gallium. It's like mercury, but it is safe. Melting point of 85 degrees so it will liquefy in your hands but then solidify on a regular surface. One thing you can do with it is pour it on a table and let it dry flat like a mirror http://www.amazon.com/Gallium-99-99-Pure-15-grams/dp/B0051GWA3S
> Gallium
Now I kind of want to buy some. I expected it to be irrationally expensive, but it's not.
https://www.amazon.com/Gallium-99-99-Grams-Melting-Point/dp/B00F3IXF9M
https://www.amazon.com/Precision-Ground-Annealed-Thickness-Length/dp/B00CZDPAI2/ref=sr_1_2?ie=UTF8&qid=1518120890&sr=8-2&keywords=o1+tool+steel+flat+stock
EDIT: If you go this route, most options are prime eligible, but make sure you check stock sizes a little bigger or smaller than your ideal size. The price can vary wildly. For example, I was buying 3/16x1x36 for $50, then found that 5/32 was $25.
I would start on some tool steel blanks. Some generally like this. https://www.amazon.com/Steel-Precision-Ground-Standard-Tolerance/dp/B00CZDPAI2
Or cut up a steel circular saw blade, some things like that before you try a firearm.
Easiest way? check out aaron gough's videos on the filing jig. You can make really good knives with real steel and some files and a jig. Take it slow and you won't mess it up. Get some o1 steel, you can even get it from amazon, and it will make a good knife.
Easiest way to heat treat? Peters heat treat, 30 bucks. If only making a few knives, this is actually cheaper than anything you can do, and you will have a good heat treat, unlike what you will probably manage with coal/wood. Doing it yourself, even using the two brick forge, you will probably screw up a few knives and lose them completely.
http://www.petersheattreat.com/blades/pricing/
edit:
amazon o1 steel: https://www.amazon.com/dp/B000FMYFVI
30 bucks, enough to makes 2 or 3 knives. A lot of the videos on amazon people are making knives from junk steel, quite literally. Rebar doesn't have enough carbon content, etc.
It's available on amazon. I'm all over it.
How about Amazon you pansy.
Hi, I recently have installed a bunch of light strips under cabinets. I am not sure if this helps you, but I also didn't like the light strips "bare". I purchased these:
https://www.amazon.com/gp/product/B01NCS0WE8/ref=oh_aui_detailpage_o00_s01?ie=UTF8&psc=1
And the plastic cover helps to diffuse the light and make the whole thing look a bit more like a continuous light instead of individual squares. I know it's kinda expensive at $50 US (currently), but I think they look really good, much better than they did "naked".
Nope, very easy by the sounds of it (I haven't tried). It's non toxic so not too many issues getting it.
http://www.amazon.com/Gallium-99-99-Pure-grams-GalliumSource/dp/B0051GWA3S
First search on amazon, 15g for $26
It might be gallium which is pretty much non-toxic and can be bought on amazon
http://www.amazon.com/Gallium-99-99-Pure-grams-GalliumSource/dp/B0051GWA3S
http://www.amazon.com/dp/B00LBGHU2S/ref=wl_it_dp_o_pC_S_ttl?_encoding=UTF8&colid=1DKI5KNZ5CY83&coliid=I1V06DZZB9737Z&psc=1
http://www.amazon.com/dp/B009P8ARHY/ref=wl_it_dp_o_pC_S_ttl?_encoding=UTF8&colid=1DKI5KNZ5CY83&coliid=IM9D7WHABIFEP
http://www.amazon.com/dp/B0051GWA3S/ref=wl_it_dp_o_pd_nS_ttl?_encoding=UTF8&colid=1DKI5KNZ5CY83&coliid=I2GNHRONA3TAKX
I'm just gonna have to start recommend this to everyone with LEDs lining their ceiling. LED TRACK WITH DIFFUSER
It improves the look by 4000% at least, and is much easier on the eyes than bare diodes.
You can buy aluminum conduit with a diffuser included as well. Here's one. I like OP's idea, I might buy some myself.
I put in Hue lightstrips under my kitchen cabinets. I highly recommend installing them in diffusers. They help soften the light, but more importantly they make for a very clean looking install. I used these ones: https://www.amazon.com/dp/B01NCS0WE8/ref=cm_sw_r_cp_api_i_dYoQDbQ7HADKX
The connectors made by this company are also very useful for splitting and joining strips together: https://litcessory.com (also available on Amazon)
No. You'd need aluminum powder. That link goes to Aluminum Oxide. It's exactly like the difference between iron and rust.
This, on the other hand...
These channels fit 2nd gen lightstrip almost perfectly!
https://www.amazon.com/gp/product/B01NCS0WE8/ref=oh_aui_detailpage_o08_s02?ie=UTF8&psc=1
http://www.amazon.com/gp/aw/d/B003ES5T9C/ref=mp_s_a_1_1?qid=1421831858&sr=8-1&dpPl=1&dpID=41FJmWTK50L&ref=plSrch&pi=AC_SX200_QL40
That should get ya to it, sorry for the messy link I'm on mobile.
It has a weird enamel coat that chips off easily so the horn in the front isn't too useful, but $20 shipped for a 9lb anvil is too good to pass up.
Okay, maybe not quite that small. This one Might not be bad though.
Hold up. So you're saying non-crystalline, amorphous bismuth? Like this? https://www.amazon.com/Kilogram-Bismuth-Metal-99-99-Pure/dp/B01MR0MLFA That's what you've been talking about this whole time? Why did you not say that at the beginning?
Because you've been talking in other threads about the metal under the surface of a bismuth crystal. . . which IS crystalline.
Gallium. I have no use for this but I think it's freaking cool.
Gallium
I tried that a while back. Don't waste your time. The steel is VERY low quality and won't harden. If you want to go a simple route, use a reciprocating saw blade. That steel is already hard. You have to be very careful shaping it not to overheat it, but you won't need to harden it after.
Using good quality steel makes a BIG difference. You can get it from McMaster Carr, or even Amazon. I found this hunk on ebay and paid 3 dollars for it.
This site says it's about as common as silver. Here's a chart that seems to confirm. (Ag-silver, Au-gold, Bi-bismuth) You can definitely make your own bismuth crystals at home, and can buy it from amazon.(not a referral link)
https://www.amazon.com/dp/B01NCS0WE8/ref=cm_sw_r_other_apa_i_Y15XDb0DV7TXP
Eat to cut, looks great, would buy again.
There are two knifemaking subreddits, /r/knifemaking and /r/Bladesmith. If you want to get him steel Amazon stock O1 tool steel which will be much nicer for him to work with than leaf springs - https://www.amazon.com/Precision-Ground-Annealed-Thickness-Length/dp/B00CZDPAI2/ref=sr_1_1?ie=UTF8&qid=1482297534&sr=8-1&keywords=o1+steel. If you go with that I would suggest getting 5/32 inch thickness and 1.5 or 2 inch width, and whatever length you prefer.
>I change it to a “bench anvil”, which is basically a smaller anvil that weighs ~30 pounds, meant to be used one a table to support lighter work.
Which is what I attempted to do here. Any sort of flat steel or cast iron surface can qualify as an anvil in a pinch, even a simple block of steel. Immunity to malleability is the primary goal, because then it can act as a suitable working surface.
I understand why it'd be strange to have a standard sized anvil, and I agree, but I also imagined a smaller, portable sized anvil.
Here is an example of what I had in mind: https://www.amazon.com/Olympia-Tools-38-789-Hobby-Anvil/dp/B003ES5T9C
It may have the same drawbacks as you mentioned, as it is smaller for the sake of portability, but I personally think it fits with the tool kit.
Amazon
I bought it in preparation for an experiment that I was going to run on making some very large lab-grown samples of my own.
I used these as they defuse the led and screw into place
Similar but slightly different, I went with these. Two of those fit a single light strip just about perfectly.
https://www.amazon.com/Gallium-99-99-Pure-Grams-RotoMetals/dp/B005DRQRZM/ref=pd_bxgy_79_2?_encoding=UTF8&psc=1&refRID=3BB0YEDTMM81GQ0V998J
Not OP but mine were too bright, and reflected off the granite countertop which wasnt great. I got some of these to mount them which helped though they arent cheap. I'd recommend warm white instead of cool as well.
I tried several different brands. If your countertop is glossy you will see the lights with or without a diffuser. These fit perfectly:
Litever 6-Pack 3.3ft/1 Meter 9x18mm U Shape Aluminum Channels With Diffuser, End Caps and Mounting Clips LED Strip Channels for Max 16mm Wide LED Lightstrip Light Mounting--LL-007-M https://www.amazon.com/dp/B01NCS0WE8/ref=cm_sw_r_cp_api_6IlKAbJYC67EG
Here's free shipping on amazon. https://www.amazon.com/Gallium-99-99-Pure-Grams-RotoMetals/dp/B005DRQRZM
100g for $23.70 is a good deal.
http://www.amazon.com/Gallium-99-99-Pure-grams-GalliumSource/dp/B0051GWA3S
My first instinct was to link to the textbooks on my list I need for my internship. But they're more something I really need, rather than really want lol. So something I really want is Gallium! Because I'm a chemistry nerd!
it looks like its not that difficult to make your own crystals. amazon even sells pure bismuth by the pound! Gotta try this sometime
This was a long time coming, as I was making do with a shitty L shaped desk in my shed and some poorly supported shelves for years. I didn't have enough room to spread out complex projects and my tool storage was non-existent. Further I was constantly hitting my legs on the desk and it was too low; thus hard on my back.
As I had a 10' long back area, I wanted a wall supported work bench with shelves of test equipment and storage above it. The rubber maid twin rack was ideal as it would go into the wall studs and was avialbe in up to 24" deep support arms.
I stacked a countertop on this and it was perfect for working on. Heat resistant and cheap enough to replace if it gets damaged. The best part is no supports under it to hit my knees on. I did add some small reinforcing 1" wide strips under it to distribute the load.
Protip: when installing the shelves and countertop, leave a 1.5" space from the wall to the shelf as this will allow cords/coax to go behind it and space to tilt the whole thing up if need be and remove/reposition it.
Also the Grip Rite screws are fucking awesome. I used a electric torque driver to put them in and the star drive prevents torque out like with the phillips screws. I'll never use the old phillips wood screws again.
During all this I got a cheap tool box from harbor freight and solved my tool organization problems once and for all. I installed some channel with double sided tape under the shelves and put RGB LED strip lights under them.
I'm very happy with the almost 10' of work space now, it's such a step up from my 50" wide desk.
There's also channels with diffusers for mounting LED tape strips. I just bought these to mount strips in my teardrop trailer galley.
One of the accessories for these channels is a longer clip that lets you join two sections. I think I also saw a corner clip.
You’re not bugging me at all! I know how it is starting out, and there is a lot to learn, so no worries. When I started I had a few really awesome people help me, and I just want to pass it on.
Unfortunately that kit only comes with the key pins, and a few keys that are already cut to the new key pins that would be placed in sequential order. If you want cheap pins I’d look on that website, or if you have a Dremel you can buy these: 3mm Brass Round Rod, Favordrory 20PCS Brass Round Rods Lathe Bar Stock, 3mm in Diameter 100mm in Length https://www.amazon.com/dp/B07H1C4888/ref=cm_sw_r_cp_api_i_rM3gDb24KJ9ZE these are brass rods that can be fashioned into pins. Driver, or key pins. But fair warning, they won’t work on American locks, Master lock, and maybe one or two other brands. But you can look up what size mm the Schlage takes, or kwikset, etc...
That Bosnian Bill video on turning pins for a CL is pretty much what you’d be doing with the brass rods, but you can just cut them to length. You’ll need a set of needle files ~$6-$8 US (sorry, I’m not up on US Canadian currency exchange rates) and you’d use them to cut yourself some new driver pins, or make a serration, etc...
best... no clue, havent tried them all
​
what I used
​
https://www.amazon.com/gp/product/B075YS3THJ/ref=ppx_yo_dt_b_search_asin_title?ie=UTF8&psc=1
https://www.amazon.com/gp/product/B076HCXHT2/ref=ppx_yo_dt_b_search_asin_title?ie=UTF8&psc=1
https://www.amazon.com/Muzata-Aluminum-Mounting-Installations-Diffuser/dp/B01M09PBYX/
​
Im pleased, the wifi control works with alexa to go on as scheduled, retains its setting if you flip the power by a switch. The lights are bright enough, the track diffuses the light, I mounted it at a 45degree angle under the cabinets, though I probably could have bought a track made for that.
​
However, my one gripe is that the LEDs have a noticable flicker to them sometimes... not sure if its the PSU, controller, or LEDs. They dont all do it though, so thats strange.
​
Hue just looked ridiculously expensive for the same thing... there were even complaints about its quality, which for $100+ should not be a concern.
Olympia Tools 38-789 9 Lb. Hobby Anvil, Cast Iron https://www.amazon.com/dp/B003ES5T9C/ref=cm_sw_r_cp_api_i_ZMVEDbZDCADG2 ;)
https://www.amazon.com/dp/B071FRFQVZ/ref=cm_sw_r_cp_api_i_ZxODDbZQFCMN8
https://www.amazon.com/dp/B071FRFQVZ
I have 50 meters of this under the soffit on my house. It’s not a good choice for that much because wiring entry points don’t exist, but would be a lot better for indoors. It’s pretty small. Just barely fits the width of 10-12mm LED tape. Check the list of sponsored related products for other designs, including a really nice looking corner piece under the muzata brand.
http://www.amazon.com/Non-Coated-Ammonium-Nitrate-34-0-0-Fertilizer/dp/B00O6EY5BG/ref=sr_1_1?ie=UTF8&qid=1458036582&sr=8-1&keywords=ammonium+nitrate
http://www.amazon.com/Pounds-Aluminum-Powder-30-micron/dp/B00KF598X0/ref=sr_1_1?ie=UTF8&qid=1458036592&sr=8-1&keywords=aluminum+powder
Here you go!
I used these, there are lots of size and positioning options if you search amazon...
https://www.amazon.com/Litever-Aluminum-Channels-Lightstrip-Mounting-LL-007-M/dp/B01NCS0WE8/ref=sr_1_10?ie=UTF8&qid=1543432240&sr=8-10&keywords=hue+light+strip+diffuser
I have retrofitted two kitchens with LED under cabinet lighting, both before tiling the backsplash, each at a cost under $100 USD. The first has been going strong for almost 10 years.
First, IMO under cabinet lighting is task lighting. It doesn't need to be dimmable and doesn't need to be RGB, just go with a warm or cool temperature depending on your preference.
This is what I suggest - I assume you are in the U.S...
I used these items. This setup is simple and inexpensive, any one component can be replaced easily if it fails, and it can be controlled by a smart switch of your choice.
If you want mood lighting, then you can wire 110v outlets above the cabinets and use one, or two of Philips - Hue Play White & Color Ambiance Smart LED Bar Light to shine on the ceiling, or use Philips Hue bulbs in your recessed light cans.
Amazon ships globally?
A2-
01-
Here is an Ebay link at $30/lb +$9 shipping. That's just from a google search, I'm sure you can find it cheaper.
Edit: Of course it's cheaper at Amazon
These(or similar) with this over it! Make it flush with the ceiling on one side or all sides of the room. You could also get a flat version of that to put along floorboards in hallways, and all you'd need to keep it up is some small screws. That's all I can do to help!
Either that of you could just find some paper lantern covers for your lights and put them on each bulb.
DIY technique would be use parchment paper but for a cleaner approach you could use something like this
Try looking for something similar but shorter for your use case.
Amazon has 01 6"x18" in either 1/8" or 1/16" for < $70
http://www.amazon.com/Steel-Precision-Ground-Standard-Tolerance/dp/B00CZDPAI2
It is not that hard to do it yourself with alum tube and connectors. All you need is a saw to cut. No welding. I imagine welding would be cheaper as the connectors can get expensive. There was a post about using steel tubing and welding. Interesting idea. I don't know how to weld but to have a welder make a simple bed frame apparently is not too expensive.
META: From a Professional welder, please consider using metal for your built rather than wood. It's smaller, lighter (per unit of strength) and won't creak.
https://www.reddit.com/r/vandwellers/comments/6pql3y/meta_from_a_professional_welder_please_consider/
Aluminum 80/20 Inc., 1010, 10 Series, 1" x 1" T-Slotted Extrusion x 97"
https://www.amazon.com/80-20-Inc-T-Slotted-Extrusion/dp/B001F0F112/ref=sr_1_2?ie=UTF8&amp;qid=1502713897&amp;sr=8-2&amp;keywords=extruded+aluminum+t+slot
Are the LED strips laid out relatively straight? Because if so the easiest solution is to just encase them in something. They sell Aluminum Channel for LEDs, like this: https://www.amazon.com/LEDwholesalers-Aluminum-Mounting-Installations-1902-U/dp/B00PJSUZSK/ref=pd_bxgy_60_img_2?_encoding=UTF8&amp;pd_rd_i=B00PJSUZSK&amp;pd_rd_r=REHQ9GGMNA7XK7GZ8S12&amp;pd_rd_w=gycAr&amp;pd_rd_wg=Q27T8&amp;psc=1&amp;refRID=REHQ9GGMNA7XK7GZ8S12
That example might not be durable enough for your application, but something along those lines would definitely be better than just an exposed strip. I have used it before and the plastic is fairly durable and flexible so hopefully it wouldn't crack from impact.
$14.99 + $7.70 shipping from [RotoMetals via Amazon](http://www.amazon.com/Roto-Metals-BISMUTH-1-Pound-Ingot-99-99-Pure/dp/B001QUVMC8/ref=sr_1_1?ie=UTF8&amp;s=industrial&amp;qid=1256265176&amp;sr=8-1 "shipping in the U.S. I think")
$12.99 + $6.38 shipping (to Utah) directly from [RotoMetals](http://www.rotometals.com/ProductDetails.asp?ProductCode=BISMUTH&amp;CartID=1 "not sure about shipping rates to other places")
I'm no pro, but here's my suggstion.
Marking and measuring are important. Get a knife of some sort. This marking knife is cheap and well regarded. Get a combination square (lot available at all sorts of price points). For a longer straight edge, you can use extruded aluminum or angle aluminum which is cheap, lightweight, and straight enough. Then learn to create a knife edge and a handsaw (either western push style, or japanese pull style) and you can cut wood accurately to size.
You're planes will then get you to flatten and surface your boards (you can use the aluminum as winding sticks). Lots of resources available for rehabbing planes. Then the next step is joints. For this, chisels and a comfortable mallet are great (and a rabbet plane if you can find/afford one). To make life easier, a coping saw and a drill (electric or brace and bit) can clear out waste for you. It makes life easier. But the key here is keeping your planes and chisels sharp. I don't know of a budget way to do this. I've got a few Ezelap diamond stones (coarse, fine and extra fine) that I use, but there are other methods as well (sandpaper on glass, waterstones, oil stones, tormeks). But sharpening is critical to handtool woodworking happiness. You might want a sharpening guide as well. The cheap ones work great (I'm not sure why these are so expensive. I think I paid $8 for mine). Then build one of these and you're all set for sharpening. Finally, you need stuff to stick together, so glue and glue applicators are worth looking into. I also use my cabinet scrapers quite a bit, but that's just me. They're cheap so I think everyone should have one.
After that, you can spend all sorts of money on other stuff as you progress. But most anything square can be built with this setup.
After a quick search i found some on amazon. Even has a few people who say they made the crystals from it
I didn't want my strips just glued on so I used these strips:
https://www.amazon.com/gp/product/B01NCS0WE8/ref=ppx_yo_dt_b_search_asin_title?ie=UTF8&amp;psc=1
While it is a bunch of extra work cutting and attaching these, once done the install is not ever going to fall apart.
Added bonus: the diffuser actually makes the light better in my opinion as it decreases the visibility of each light's reflection on the counter.
I used https://www.amazon.com/gp/product/B07HRHDV1T/ref=ppx_yo_dt_b_asin_title_o09_s00?ie=UTF8&psc=1 for strips, https://www.amazon.com/gp/product/B071FRFQVZ/ref=ppx_yo_dt_b_asin_title_o09_s02?ie=UTF8&psc=1 for light diffusion, and the board is just a piece of large plywood I cut a little larger than the star pattern and painted black with two layers of spray paint. I applied polyurethane sealer on top to give it a clean finish. It has a wire on the back so I can move it around the house.
Sorry, I meant the following products (examples):
https://www.elementalled.com/products/diode-led/aluminum-led-strip-light-channels.html
https://www.amazon.com/gp/product/B01NCS0WE8
Basically you enclose the bare ledstrip in an aluminum profile with a (semi) transparant cover of choice so the strip itself is protected and glued one time only. You only have to mount the profile itself so therefore it's easier to move the profile than to undo the glueing.
Correct...typo, ws2812b.
LEDs:
https://www.amazon.com/gp/product/B07BGSZLGX/ref=oh_aui_detailpage_o05_s02?ie=UTF8&amp;psc=1
NodeMCU:
https://www.amazon.com/gp/product/B010N1SPRK/ref=oh_aui_detailpage_o06_s00?ie=UTF8&amp;psc=1
Diffuser:
https://www.amazon.com/gp/product/B01M09PBYX/ref=oh_aui_detailpage_o03_s00?ie=UTF8&amp;psc=1
2A power adapter (x2):
https://www.amazon.com/gp/product/B0777HWN87/ref=oh_aui_detailpage_o04_s00?ie=UTF8&amp;psc=1
someone posted a link to these a few days ago, i bookmarked it but dont remember what redditor posted originally... you might be able to use these on the ceiling and put the strips in. https://www.amazon.com/gp/product/B01NCS0WE8/ref=oh_aui_detailpage_o08_s02?ie=UTF8&amp;psc=1
I use these aluminum rails for my LED strips https://www.amazon.com/gp/product/B00PJSUZSK/ref=oh_aui_search_detailpage?ie=UTF8&amp;psc=1
Easy to mount, diffuse the light nicely.
Amazon and $30. This one: http://www.amazon.com/gp/product/B003ES5T9C/ref=oh_aui_search_detailpage?ie=UTF8&amp;psc=1
This guy is right.
Do this outside. Maybe set up a fan blowing this shit away from you.
http://socratic.org/questions/what-is-the-molarity-of-muriatic-acid
A cursory search says muriatic acid from the store is around 10M which is dangerous. Skin burns would suck, but accidentally inhaling a bit too much of the fumes will burn your lungs and send you to the hospital.
Dilute the stuff down before use. Use a glass beer bottle since hydrochloric acid seems to attack a variety of plastics. Measure out nine parts of water then add one part acid to it. Measure out water. Add acid. ORDER MATTERS. If you do this in the opposite order, the acid could boil and splash.
In my opinion, you guys should just source the bismuth from an online supply store. That acid is dangerous shit. (http://www.amazon.com/gp/aw/d/B001QUVMC8/ref=pd_aw_sims_2?pi=AC_SX230_QL60)
Gallium for $68
I've made some out of aluminum sheets, and used expanded aluminum for the front and top of them:
https://www.amazon.com/Aluminum-Expanded-Sheet-Unpolished-Finish/dp/B00CNLVB3E
Cost me about $25 -$30 in metal, and the fab time. On the other hand, they'll last 'till the end of time......
I had undercabinet florescent with power coming directly into them, and I replaced them with a combination of led strip lighting, diffusers and individual power supplies. Then I changed the switch to a GE z-wave. Here's a list of the products I used:
Power Supply: ($14 x 3)
https://www.amazon.com/gp/product/B017R17YQC/ref=oh_aui_search_detailpage?ie=UTF8&amp;psc=1
LED Lights: ($8) https://www.amazon.com/gp/product/B00HSF64JG/ref=oh_aui_search_detailpage?ie=UTF8&amp;psc=1
Diffusers: ($26)
https://www.amazon.com/gp/product/B00PJSUZSK/ref=oh_aui_search_detailpage?ie=UTF8&amp;psc=1
Zwave Switch (now they are $38, but I got some on clearance for $21)
https://www.amazon.com/GE-Wireless-Lighting-Required-14291/dp/B01M1AHC3R/ref=sr_1_2_sspa?ie=UTF8&amp;qid=1519156674&amp;sr=8-2-spons&amp;keywords=ge+zwave&amp;psc=1
All in all I replaced lighting under the three main cabinets and the total cost was under $100. I'm not sure it was the best way to do it, but it works! For my application dimming wasn't what I was looking for, but I think you could swap out some parts for the dimmable versions.
Litever 6-Pack 3.3ft/1 Meter 9x18mm U Shape Aluminum Channels With Diffuser, End Caps and Mounting Clips LED Strip Channels for Max 16mm Wide LED Lightstrip Light Mounting--LL-007-M https://www.amazon.com/dp/B01NCS0WE8/ref=cm_sw_r_other_taa_JwoJAbT72Z211
Really recommend getting these too: https://www.amazon.com/Muzata-Aluminum-Mounting-Installations-Diffuser/dp/B01M09PBYX
Helps mount to the bottom of the cabinet and the cover will diffuse the light a bit for a nicer look, especially if you have reflective countertops.
they have anvils too
https://www.amazon.com/Olympia-Tools-38-789-Hobby-Anvil/dp/B003ES5T9C
I was hoping for a goldmine but it seems like it's just cheep tools
Look around for aluminum square tube stock. The big box stores would be a start to get your hands on it easily but thier supply is meager and expensive. Perhaps welding supply shops? Hell, might even be able to find it on Amazon.
https://www.amazon.com/80-20-Inc-T-Slotted-Extrusion/dp/B001F0F112/ref=mp_s_a_1_11?keywords=aluminum+tube+stock&amp;qid=1564780297&amp;s=gateway&amp;sprefix=Aluminum+tube+stock&amp;sr=8-11
You can weld it or use fasteners. Cutting can be done with wood saws using the correct blade and normal safety procedures.
Easy, buy these two items for a total of 45 bucks and you have the ingredients for tannerite. Fun stuff.
https://www.amazon.com/Dynarex-Instant-Cold-Inches-24-Count/dp/B004CQ5NUK/
https://www.amazon.com/Pounds-Aluminum-Powder-30-micron/dp/B00KF598X0/ref=sr_1_1?ie=UTF8&amp;qid=1512053748&amp;sr=8-1&amp;keywords=powdered+aluminum
This Zombie Plant is pretty awesome. Galluim has an extremely low melting point for a metal and will turn to liquid in your hand! This Stegosaurus Skeleton plush is one of my favorites. I love stegosauruses and skeletons and plushes, so its a godly combination. Hopefully you're a dinosaur fan!
you can buy a pound of bismuth on for 20 bucks and make dozens and dozens of your own on a kitchen stove. You can google up directions, but a basic summary. 1) melt all your bismuth in one container, pour into a second (leave the silvery oxidized film behind) 2)cool as slowly as possible 3) as it begins to turn solid again pour off the liquid, leaving crystals formed around your container.
Have you thought about diffusing those LED strips using something like this? IMO exposed LEDs like that look a bit tacky, but hey, different strokes and all.
Thanks! I bought the linked diffusers here, as they were on sale: https://www.amazon.com/Aluminum-Channels-Diffuser-Lightstrip-Mounting-LL-007-M/dp/B01NCS0WE8/ref=sr_1_fkmr2_1?s=lamps-light&amp;ie=UTF8&amp;qid=1494108486&amp;sr=8-1-fkmr2
I'll update based on the results, but it'll be a few weeks till they get installed.
You could probably stand on that aluminum, but that's really expensive. Take a look at these:
https://www.amazon.com/Aluminum-Expanded-Sheet-Unpolished-Finish/dp/B00CNLVB3E
Probably have to just search on Amazon, but I found one at least that reviews say fits it: http://amazon.com/Litever-Aluminum-Channels-Lightstrip-Mounting-LL-007-M/dp/B01NCS0WE8/
This company also seems to have a bunch that might be higher quality than the generic chinese ones on Amazon: https://www.solidapollo.com/led-strip-profiles/
Shit is cheap too http://www.amazon.com/Gallium-99-99-grams-GalliumSource-LLC/dp/B0051GWA3S
Depends were you live and it may take a visit to the place to see what they really have. I found a local store that had tool steel, O1 and W2, in both round bar and flat bar for reasonable prices BUT that isn't listed on their website. They also had a bunch of small cut off pieces of various metals for art projects which was really handy as well.
I know you didn't want to buy on line but Amazon has O1 with free shipping. Might be able to get a better deal locally if you look around.
There are holders (LED Channel) meant for holding LED strips. You can get flat or angled holders.
https://www.amazon.com/hunhun-Aluminum-Mounting-Installations-Installation/dp/B071FRFQVZ/ref=sr_1_1_sspa?
I have the Bessey vise and it opens enough to grab onto the dremel when it is flipped sideways, putting the power switch facing right. The harbor freight one says that it opens to 2 & 1/2" and my 4300 is about 2" on the side, so it will work.
The 1100 and the LOTO are great locks to learn with! They will frustrate you for sure but they will teach you how to feather your tension and how to deal with counter rotation.
If you haven't already, pick up 3mm brass rod stock from Amazon to make custom pins. That will give you just the right size to fit inside of most locks. American Lock and Master Lock pins are smaller in diameter, so you can't use use it on them unless you really reduce them.
If the 100 watt 4.5 pound flexible panels are used, AL expanded metal can be attached to the 80/20 framework to support the panels.
Ok sooo... I just googled around for "frosted acrylic" as you suggested, and I did learn some things. On price, for the 4 sq ft of FA I'd need for my project, I'm looking at ~$20 for the sheet. Most offered are X by 2X dimensions, eg 24" x 48", so I'm pricing off roughly half of that.
And that's for one big piece that I'll need to cut and mount up somehow. Which I'd be willing to do if it was super cheap. However....while googling stuff this morning on your search term suggestions, I discovered THIS product on Amazon. This is absolutely perfecto for what I'm wanting to do, which is to mount the LED strips at the top corner of my 11.5' x 11.5' apartment living room area, encircling the room. These rails are V-shaped, with an inside mounting surface that will orient the LEDs at a 45-deg angle to both ceiling and walls. This is even better than the typical rails I've been seeing which all mount flat to the surface and face the LEDs straight out. Which would be ok, but the 45-deg downward angle of this new thing is perfect for lighting up the room from the top corner.
Price: Seller is selling these 1-meter/3.3' rails in 6-packs for $18.59. That's just right to do 2 walls' worth of rails since each wall is 11.5'. 3 m is just shy of 10', so splitting the difference on either end will leave like 10" of bare wall on both sides which is fine. Two 6-packs of rails then will be 18.59 x 2 = $37.18. This is slightly less than 2x the cost of the raw sheet of frosted acrylic, but for the already-fabricated rails, plus the nifty V-shaped design and ideal 45-deg angle, springing the extra $17 immediately becomes a no-brainer.
TLDR: Thanks u/lasserith! You definitely helped me get to the best answer for my little DIY project here, even though it wasn't the answer I had originally been looking for. Life's like that sometimes isn't it :)
Not sure if this is what you mean...
https://www.amazon.com/Kilogram-Bismuth-Metal-99-99-Pure/dp/B01MR0MLFA
https://www.amazon.com/Educational-Innovations-TRTV2282-Bismuth-Crystal/dp/B008MB1MCE
Besides fix as many world problems fixable by money (hunger, shelter, health) as possible, which I don't think is what you are asking about...
http://www.amazon.com/Precision-Ground-Annealed-Thickness-Length/dp/B00CZDPAI2/ref=sr_1_fkmr3_1?ie=UTF8&amp;qid=1421860628&amp;sr=8-1-fkmr3&amp;keywords=starrett+o-1+tool+steel+precision+ground
Here you go sorry I'm a little new to reddit I haven't quite figured out how to post tiny links like the other guy. Also for small-med size knives basically 10 in. and under I really like 3/32 for something bigger like a chopper go 3/16-1/4 in.
http://www.amazon.com/Gallium-99-99-Pure-grams-GalliumSource/dp/B0051GWA3S
its called gallium, its a metal that's when its at room temperature its a solid, but at body temperature is turns to a liquid. so you can make molds and fill them up with gallium then when someone picks it up it melts all over them, and you can do lots more with it!
for the games, i would love medal of honor, i have never played it and it looks like a lot of fun.
https://www.amazon.com/Muzata-Aluminum-Mounting-Installations-Diffuser/dp/B01M09PBYX/
These would fix that and help diffuse the light better
https://www.amazon.com/Olympia-Tools-38-789-Hobby-Anvil/dp/B003ES5T9C/ref=sr_1_3?ie=UTF8&amp;qid=1520018931&amp;sr=8-3&amp;keywords=anvil
cough I checked UK because that's where I am, but that stuffs cheaper and easier to get in the US!
You might consider putting it in a diffuser. i.e Diffuser
OP, 80/20 (and some other vendors make this) is for sale on amazon in a lot of different sizes. The call it the "industrial Erector set." Here is one
Kids, make your own at home:
http://www.amazon.com/Roto-Metals-BISMUTH-1-Pound-Ingot-99-99-Pure/dp/B001QUVMC8/ref=sr_1_1?ie=UTF8&amp;s=industrial&amp;qid=1256260735&amp;sr=8-1
http://www.amazingrust.com/Experiments/how_to/Bismuth_Crystals.html
http://www.amazon.com/Gallium-99-99-grams-GalliumSource-LLC/dp/B0051GWA3S
Gallium. The metal that melts in your hands. Not really related to your wishlist, but definitely cool. This is my item.
http://www.amazon.com/gp/product/B0051GWA3S/
Sorry I don't have personal recommendation because I don't have a battlestation myself or even a proper bedroom yet. Trying to move really soon here and start remedying that. I just lurk this sub in the meantime to get ideas on what I'm gonna do when I finally move.
Found these though and they seem to have good reviews. But I don't know if they work for the type of lights you have or not so I guess you need to do a bit of research on that.
On Amazon I bought some of these:
https://www.amazon.com/gp/product/B0721744QQ
My lightstrips were Sylvania, not Hue (I now regret that decision) but these quarter-round diffusers have worked perfectly. I used rubbing alcohol on them before adhering the strips to them. I also mounted them to the front of the cabinets behind the lip so the lights face the counter and backsplash - that way, if you're sitting in an adjacent room and you're low enough able to see the bottoms of the upper cabinets, you still don't see the lights themselves.
I decided to route around the microwave and no regrets there. I actually used the outlet in the cabinet above the microwave as the power source, so there are no visible wires anywhere with my installation. I then used splitters to route lights left and right from there. Hope this helps.
kataderple is right, thats what I did. Here is what I used for a hammer
https://smile.amazon.com/gp/product/B001BHGC6M/ref=oh_aui_search_detailpage?ie=UTF8&amp;psc=1
Also used this anvil
https://smile.amazon.com/gp/product/B003ES5T9C/ref=oh_aui_search_detailpage?ie=UTF8&amp;psc=1
First time doing it and I just randomly hammered away sometimes hitting harder but mostly just using the required amount of force to make the dimples.
http://www.amazon.com/gp/aw/d/B000FMYFVI/ref=mp_s_a_1_1?qid=1450143196&amp;sr=8-1&amp;pi=SY200_QL40&amp;keywords=o1+tool+steel&amp;dpPl=1&amp;dpID=31xGT3DXKzL&amp;ref=plSrch
This is where I've gotten my o1 for a long time. Look through the many different size combinations, you'll often find nonsensically cheap steel at certain dimensions. I recommend 1/8 thickness.
you could always take a rotary tool, a pointed diamond bit, a ruler and a gold,silver or bronze sharpie (if your i beam is dark in color if its somewhat shiny you can just use a normal black sharpie) and make that drilled round hole into a square one.
for a horn a i just thought up a mod for a I-beam anvil. what you will need, get a good thick piece of round stock (a axle or thick spring from a car would work as its good high carbon steel), a blowtorch head, a small bottle of MAP gas, and if you do not have it a angle grinder with a proper abrasive disk for grinding and a cut off head.
First Grind the round stock into a proper tapered horn leaving a bit of a original materials size on the back end. Next switch to the cutting disk and cut off a appropriate amount of the middle section of the I beam off. Next using the Map gas get top of the beam to a nice orange color,(it will take some time) take your hammer and hammer it to a 90 dgree angle. let it cool fully. then drill a hole into it the size of the horn. now the extra material should stop it from falling out and also serves to hold it in place for the next step. Next reheat the section back to orange and hammer down on it to hot form the extended piece to the horn. you may need to do some hardening to and tempering at the end to make sure it will not brake under the strain of working it.
Keep in mind I have not tried this out as I came up with it as I was writing it. I just use a Vise anvil hybrid and use the face of the vice as a shaping horn. However i am a Hobby bladesmith not a blacksmith.
Or you could shell out 15.05 for this Or you could ju st buy this https://smile.amazon.com/gp/product/B003ES5T9C/ref=oh_aui_search_detailpage?ie=UTF8&amp;psc=1 and mod the horn to your liking.
and just grind down the horn. i use this one, however i kinda need to buy new nuts and bolts for it as I lost 2 well moving it to install the vise anvil hybrid i am now using.
I haven't flown or driven in VR on a motion sim, but have flown full-motion 6dof sims and the motion really does add to the sensations.
I keep thinking about building my own 6dof sim but was stopped by the power draw until I figured out I could charge batteries and then run the motion motors off them. Totally takes out the peak loads and still lets you run with powerful motors for the bumps and shakes.
I was thinking of going with this kind of structural aluminum (https://amzn.com/B001F0F112) since they have all sorts of lengths, it would be easy to cut, lots of fittings and brackets, and ideal to bolt stuff to.
There are also chairs available from a company that instead of rocking and tilting just apply pressure with boards and such to simulate G forces. Unlike 6dof chairs, they can apply the pressure and hold it for extended forces like driving around a skid pad. (https://www.youtube.com/watch?v=PzwfRqSbLzo)
I'm still trying to decide which is the better way to go overall since neither is perfect. This one is about the closest to perfect I've seen but doubt my wife or bank would let me build it: https://www.youtube.com/watch?v=cJCsomGwdk0