Best metal filled epoxies according to redditors
We found 142 Reddit comments discussing the best metal filled epoxies. We ranked the 19 resulting products by number of redditors who mentioned them. Here are the top 20.
We found 142 Reddit comments discussing the best metal filled epoxies. We ranked the 19 resulting products by number of redditors who mentioned them. Here are the top 20.


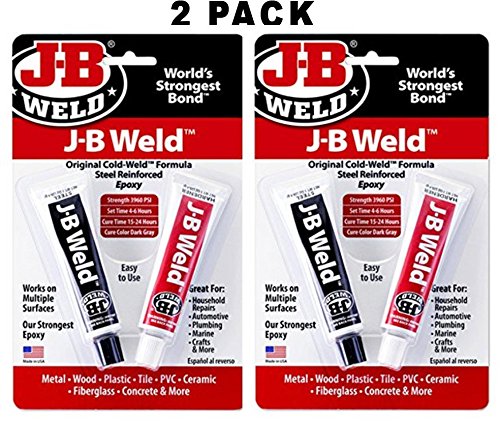


Go pro and use JB Weld. Superglue is amateur.
The adapter pack you'd need to mount to any rail is $5 on Amazon - https://www.amazon.com/dp/B0006O1ICE/
I've posted this tutorial before, and I'm gonna do it again, for anyone wanting to know how to mount this bad boy. Other people have messaged me saying they've used different adapter mounts and a dremel instead of the JB Weld method. About two weeks now, and still doing great!
 
 
I used this guy's Amazon tutorial on how to put the adapter on, although I got the non-quick set version that comes in seperate tubes.
These are the items I purchased:
Here are the pics of my setup. Please note, I waited a full 24 hours before mounting them. I know people get antsy, but just wait!!! Also, when adjusting the monitors for the first time, don't use too much torque, or you might detach the adapter from the monitor. The scratch marks you see on the back of the monitor, next to the adapter are where I sanded it down. I don't care about the way it looks, since my desk is against a wall. You can probably be a bit more careful if you actually care about the looks. I also sanded off the paint from the adapters so I can get good contact between the rough plastic surface and the bare steel plate. The screws that came with the adapters, as long as I washered them out a little, were perfectly fine to use.
There are still some small adjustments I need to make to the way they are lined up, but this is pretty much 99% done. I highly recommend anyone looking for more desk space to give this a shot.
Three variations on the theme:
Mountain Creek:
Shopping List
This will provide enough material to do hundreds of bases. Really the only limit is how many of the Hollow Blank bases you buy.
Instructions:
In either case, paint the texture over the entire surface of the epoxy, then go back and using a wide brush (a cheap #4 Filbert is perfect) create waves by making short, quick strokes. You want these brush strokes to go in the direction that the water is flowing, but you want to work your way backwards from the outflow point to the inflow point so that the crests of your "waves" overlap properly. Here's an image showing what I mean.
Swampy Pond
Shopping List:
Instructions:
OCEAN BEACH
Shopping List
Instructions:
Easiest way to fix it. Go to wal-mart or target and buy this or order it from amazon. clean the edges and follow the directions. works perfectly. I did this for 3 of my pieces that broke. It's very clean and will be as good as new. Make sure you don't overapply it so that it oozes out inside. Might be bad for the downstem. It's the cheapest and easiest way to do it. Best of luck! toke on
Edit: Epoxy does not melt or dissolve by acetone so you can clean it with acetone after fixing it too! Source
>There are two broad classes of plastics, thermosets and thermoplastics. A thermoplastic can readily be dissolved or melted, while a thermoset cures and changes. Once cured, it forms a tough, crosslinked network which resists solvents and will degrade instead of melting. Epoxy is a thermoset. The advice to trim or slice it off is good. Solvents like acetone or whatever, unless extremely powerful and dangerous, will have little effect on a cured epoxy. Things that easily swell and dissolve epoxies will do the same with rubber or plastic gloves or portions of your anatomy.
A dresser: $350
A circular saw: $100
Gorilla glue: $5
A face-cord of firewood: maybe $100 delivered, unless you have a chainsaw, in which case probably free.
Brutally ripping off your customers: priceless
What you want is called "potting compound" or "potting epoxy." It's usually black. Here's some cheap stuff in a small quantity: https://www.amazon.com/MG-Chemicals-832HD-Black-Encapsulating/dp/B073JNDRXJ/ref=sr_1_3?keywords=potting+epoxy&qid=1564158629&s=gateway&sr=8-3
They sell single-component potting epoxies that cure with heat or UV as well.
If we're not talking crazy stuff (in terms of heat, voltage, etc.), then regular old "five minute" epoxy from the hardware store will work fine. Just don't use JB weld or other "reinforced" epoxies, since the reinforcement media might be conductive. You can check the material datasheets to be sure - it usually contains info on heat resistance, dielectric properties, etc..
If you are working with high voltage and/or high-power stuff...well, you probably know what you're doing and don't need my help, haha.
Personally, I usually use this stuff. It's not even a true "epoxy", but it works fine for what I do: https://www.walmart.com/ip/Amazing-Goop-144100-Trim-Repair-Adhesive-1-fl-oz/
You could give this a try for attaching it to your smoker.
Epoxy Putty
It will dry gray, so you might want to grab a little bit of black paint to.
This is a really precarious spot on the X230 and X220 lids. I've managed to repair a few that had this same issue.
I used a small spot of J-B Weld imbedded with a small finishing nail laid across the break for extra reinforcement in the area shown in the photograph here.
You just need to remove the screen bezel and temporarily push aside the antenna wires. Make sure everything is aligned and let it set up for about 24 hours and the bond will be virtually impossible to break.
Two part epoxy does the trick!
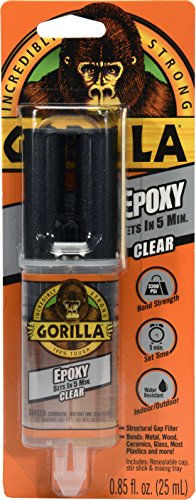
This is what I use:
https://www.amazon.com/Gorilla-Epoxy-Minute-ounce-Syringe/dp/B001Z3C3AG/ref=sr_1_4?crid=1BBHFWDACZ0G9&keywords=two%2Bpart%2Bepoxy&qid=1564781122&s=gateway&sprefix=two%2Bpart%2Bepo%2Caps%2C202&sr=8-4&th=1
One-day shipping available. ;)
Equipment:
4 oz clear-top tins
3 small 6mmx1.5mm neodymium magnets per tin
Epoxy
A little JB Weld to patch the leak up a bit. I wouldn't recommend using it as a serving keg due to the higher pressure, but could use it as a fermenter. It should be able to hold a few PSI's from the fermentation process or pressurize it 1 or 2 PSI to do a transfer.
The glass doesn't get extremely hot, but it does get pretty warm when you're lighting the bowl, so I don't trust glues. I would use JB Weld, it's extremely strong, water resistant and heat resistant up to 500 degrees F. It won't last if you put the flame right to it, but it will easily handle the low heat from the bowl. Make sure to lather it on thick on the the broken edges, and around the outside to create a support. it won't be super clean, but if you lather on enough it can be sanded down to be smoother.
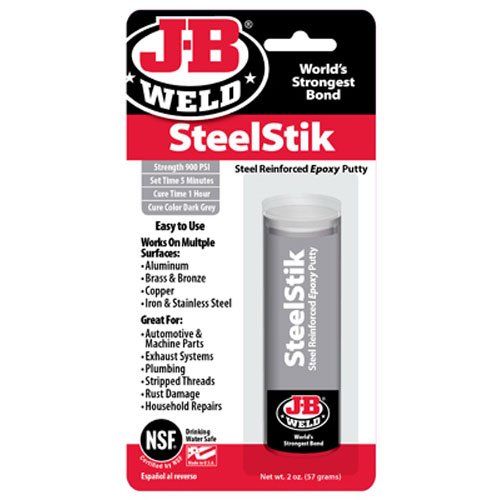
Be sure to fill the key hole with JB Weld.
http://www.amazon.com/J-B-Weld-8267-S-SteelStik-Reinforced/dp/B000786GLM/ref=sr_1_2?ie=UTF8&qid=1411669575&sr=8-2&keywords=jb+weld
I've done a few guerrilla-style repairs to brass and woodwind instruments in my day.
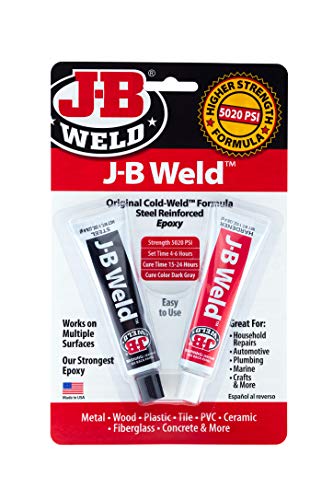
A cheap and easy fix is some "JB Weld", a steel reinforced epoxy. Just put a pea-sized drop under that joint and clamp it down overnight. Done and done. No need for solder, and it's under $10.
http://www.amazon.com/J-B-Weld-8265S-Original-Reinforced/dp/B0006O1ICE
Super Glue will either frost look or not glue to painted points.
I use http://www.amazon.com/Gorilla-Glue-4200101-Epoxy/dp/B001Z3C3AG put a dot of glue -- enough to not smoosh out then wrap a rubber band the head. Let it set for how ever long the written directions say for. Thats how we glue parts on GKs but minus drilling a hole and putting a pin joint to glue it steady, but I don't think its necessary at the moment.
I would glue the heck out of that junk.
https://www.amazon.com/J-B-Weld-8265S-Original-Reinforced/dp/B0006O1ICE
Gorilla 2-part Epoxy Clear
I guess you can use Super Glue if you are not comfortable with epoxy. Maybe better would be the gel type of super glue. It's just that super glue by nature is not as sturdy when it comes to "shock" strains like should it get dropped or of you slam the detolf door hard enough. Just make sure the superglue is well and dry before putting it in the detolf case as superglue has a tendency to fog up glass.
lead weights
glue
Alternatively, you can just buy the epoxy and glue the toaster to the table.
Great list!
just placed an order for the Instamorph, I can think of a lot of things I can use it for.
another good thing to keep handy is JB Weld, it has saved me countless times.
http://www.amazon.com/J-B-Weld-8265S-Original-Reinforced/dp/B0006O1ICE/ref=sr_1_1?s=automotive&ie=UTF8&qid=1416784847&sr=1-1
depending on how rough it feels I would suggest starting with an 80g or 100g and then finishing with 120g and 220g. You can skip the first one if it is not super rough. Get one of those sanding sponges with the different angles on them. That will be easier on you hand than just sand paper. Becasue of the shape you'll want something that you can wipe or spray on. Use 4-5 thin coats. The easiest/cheapest option would be a wipe on poly or even better an Aerosol Spar Urethane. EDIT Also, sand lightly in between coats with 220 or higher. This helps the next coat stick.
You might also consider trying to fix a few of those larger cracks by filling them in with a two part epoxy
Good luck! It will be a nice surprise for her when she returns.
I bet that J B Weld would hold that. That's a "cold welding" substance, you mix the stuff in the two tubes together and stick the broken sections back together with it.
That stuff does have its limitations under loads, but I've used it for things before that carried more weight and it held just fine.
Thank you for reminding me, I wanted to put up a link.
http://www.amazon.com/J-B-Weld-8297-Epoxy-Putty/dp/B007PP26RI
I made one but I decided that I was going to go balls deep and try one of the most difficult designed mau5 heads out, the disco head. Long story short it cost me about ~$300 to make, not counting 2 others that I messed up on.
Materials:
-Head
-Eyes
-Head Mount
-Mouth Mesh
-[2] Led lights for coloring the eyes
-Superglue for mouth
-[2] Plastic glue for Headmount
-About [6-10] Rhine stone glue bottles
-[3] bags of Rhinestones
-Foam Ear material ---> With Ear template
-Washers -[4] Threaded Rods -Wing nuts
-Chrome Spray paint
-Lastly, Insulation Strips [White]
+++++++++++++++++++++++++++
Stuff I had: Dremel, stubbornness, no life, sharpies, too much free time.
+++++++++++++++++++++++++++
Use any of the above tuts to get the general idea.
The template for the ears, (mine are huge).
Once the mouth is cut and you accounted for the eyes (pop the eyes in half and trace them on.)
Spray paint the whole head chrome, in light mist layers. The more layers the smoother the finish.
Once that's done, enjoy the 90+ hours of putting each rhinestone on, one by one.
Profit.
I was able to repair the magnesium base of my X220 using J-B Weld.
It was a bit tricky to get the pieces to sit in the proper position while it cured, but the resulting bond has been really sturdy.
That's too funny. This stuff
http://www.amazon.com/gp/aw/d/B0006O1ICE/ref=redir_mdp_mobile
this was the epoxy we tried, this is another kind we have on-hand that is just too unwieldy/thick to do a job like this.
Is this the kind you're referring to that does work? I never really tried it, thinking it would be similar in effect to the epoxy glue. There's just so much torsion on that location, I worry about how well it would hold.
I should also mention that this is a college help desk and we provide our services 100% free of charge--the only thing the students pay is for the actual cost of parts. It's all about getting them back up and running as economically as possible, since most of the students are broke and just want it back to a functional level so they can write papers, skype, and facebook again. So while negative goodwill (badwill?) is something I'd like to avoid, it's not like we're worried about losing profit or anything as a result.
If the cracked lid casing is the common problem shown in the photograph here there's a pretty easy fix:
Apply a small spot of J-B Weld embedded with a small finishing nail laid across the break for extra reinforcement in the area shown in the photograph here.
You just need to remove the screen bezel and temporarily push aside the antenna wires. Make sure everything is aligned and let it set up for about 24 hours and the bond will be virtually impossible to break. I've done this on a number of X220 and X230 units and it holds up really well.
The board in your picture is typical of what is contained in the typical plug-in USB chargers. The key is the circuitry must be in a solid, well-insulated enclosure. In the case of the project you're building, keeping the power supply after the vacuum cleaner switch solves the problem of leaving it plugged in and unattended.
If you're really worried, take the guts out of a brand-name USB charger. Alternatively, you could encase the circuitry in electronic potting compound with only insulated wires coming out.
some stuff you might want to think about bringing:
>lock and chain/bike chain.
you're going to be leave your campsite for ~12 hrs if no one goes back for a break. it takes about a minute to run a chain through your cooler handles, foldable chairs and other stuff. it's also easy to jb weld a metal loop onto an ez-up so they dont walk away either, i've never heard of someone ganking an entire ez up at roo, but i'd be pissed if mine was gone when i came back after the first night.
its easy for someone to walk off with one chair, its almost impossible for someone to carry your entire campsite away without anyone saying anything about it. and if you bring enough chain you can loop it around the wheel of your car, and i doubt thieves are going to go through all that hassle when no one else is locking their shit down.
>rug/carpet
grass might be super long at your campsite
>battery powered fan and string
hang the fan from the middle of your tent and itll be cool enough to get a few more hours sleep in the morning
>battery powered camp lantern
flashlights are good, but a handsfree light that illuminates everything around it is really nice if you dont go to sleep as soon as you get back to your camp.
>extra socks into centeroo
i prefer sanucks and going sockless, but if you're wearing socks bring an extra pair with you in your camelpack/backpack. wet socks suck and can mess up your whole weekend if you're stuck wearing them
>as little bubbles as possible
You'll want a heat gun or good hair dryer to burst the bubbles before they set. Search /r/diy for bottle cap tables to see how others have worked with epoxy.
>how to get the epoxy to release cleanly from the mold
There are mold release agents intended specifically for this purpose.
>i am debating on laying plastic wrap in the mold
You could also try lining your mold with wax paper or parchment paper rather than plastic wrap. Those papers won't wrinkle to the same extent as plastic wrap, so you should end up with a smoother surface that won't require as much work to finish.
My thinking is that the stronger the glue, the more crud i get out of the records. I've had good results with this epoxy. Most of the time it comes off the record. Off course, it gets kind of expensive (two packs per record), so I just ordered some of this stuff. You kind of want to work in large batches, so it's not uncommon to have every flat surface in the house covered in drying records. There was only the one time that the cat sat on one and had to go to the vet; lucky it wasn't one of my grailz.
The $6 fix; JB Weld epoxy.
The bond will end up being stronger than the plastic. It might look a little ugly, but for $6 it's the best option as far as price/performance.
Epoxy won't be conductive if you're buying regular epoxy. The stuff that is conductive is specifically labeled as such. Silver is a precious metal. They aren't going to add it to normal epoxy glue just for fun.
Compare these for an example:
MG Chemicals Silver Epoxy Adhesive - High Conductivity, 10 min working time, 14 g, Dual Syringe https://www.amazon.com/dp/B003BDMJSY
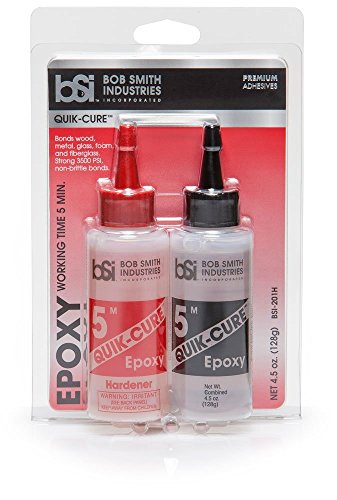
Bob Smith Industries BSI-201 Clear Quik-Cure Epoxy (4.5 oz. Combined) https://www.amazon.com/dp/B0166FFFD4
JB Weld works great, once it dries it is very strong. It has little to no odor.
https://www.amazon.com/J-B-Weld-8265S-Original-Reinforced/dp/B01FWGF9L6/ref=sr_1_11?hvadid=241629233883&hvdev=t&hvlocphy=9024550&hvnetw=g&hvpos=1t1&hvqmt=e&hvrand=4321946538073873986&hvtargid=kwd-581086181&keywords=jb+weld&qid=1550378163&s=gateway&sr=8-11&tag=googhydr-20
The only drawback is it is grey when mixed and it is hard to make it not ooze when you push the parts together. So it can be messy.
They have a clear version but haven’t tried it myself, been meaning to order some and try it:
https://www.amazon.com/J-B-Weld-50112-Clear-0-85/dp/B009EU5ZM0/ref=sr_1_10?hvadid=241629233883&hvdev=t&hvlocphy=9024550&hvnetw=g&hvpos=1t1&hvqmt=e&hvrand=4321946538073873986&hvtargid=kwd-581086181&keywords=jb+weld&qid=1550378453&s=gateway&sr=8-10&tag=googhydr-20
Sorry to hijack, This is what I use and it’s been great.
https://www.amazon.com/MG-Chemicals-Black-Encapsulating-Compound/dp/B077SCBR8Q
A+B epoxy works in wet environments. No need to drain. You would only did a bit of that, and the rest keeps for quite a while.
And I wasn't laughing at the picture, but the fact that the picture was perfect. Such a BOOM! moment.
If you can just pop it back on, and you really want to salvage the lid, I'd try high-temp epoxy before giving up. I wouldn't personally worry about it being food-safe, since it's not going to be in direct contact with the contents of the pan.
Just pop the handle back on, mold a decent amount of the putty over the connections, and let it cure thoroughly before use.
Alternately, there's food-safe silicone, which might be easier to work with, though it might not hold up as well under use.
Just don't put either in the oven. They're both supposed to hold up to 400-500F, but I wouldn't trust 'em.
is it aluminum body or carbon fiber if its an alloy get some jbweld, i used it to weld fittings to 2 stroke rc car mufflers that had high temps and it held grate
https://www.amazon.com/J-B-Weld-8265S-Cold-Weld-Reinforced/dp/B0006O1ICE
apparently there marine weld is good for composites
I’d take it apart a little bit, so you can easily get to the areas you need to, and use some J-B Weld to glue it back together.
This is a really precarious spot on the X220 and X230 lids. I've managed to repair a few that had this same issue.
I used a small spot of J-B Weld imbedded with a small finishing nail laid across the break for extra reinforcement in the area shown in the photograph here.
You just need to remove the screen bezel and temporarily push aside the antenna wires. Make sure everything is aligned and let it set up for about 24 hours and the bond will be virtually impossible to break.
https://www.amazon.ca/MG-Chemicals-Black-Encapsulating-Compound/dp/B073JNDRXJ/ref=sr_1_9?crid=2UIWXI428VZR7&keywords=potting+compound&qid=1569736805&s=gateway&sprefix=potting+co%2Caps%2C237&sr=8-9
Oh yeah. If you need more filling and/or stronger joint, you can get some fiberglass cloth and cut it/tear it into a bunch of 1/4" loose fibers and mix it into the epoxy. Be sure to scuff up the plastic with sandpaper and clean with alcohol for good adhesion.
Epoxy: https://www.amazon.com/Bob-Smith-Industries-BSI-201-Quik-Cure/dp/B0166FFFD4
Fiberglass cloth: https://www.amazon.com/Bondo-20128-Fiberglass-Cloth-sq/dp/B002JRGOT8/
I use potting epoxy.
MG Chemicals Translucent Epoxy Encapsulating and Potting Compound, 12 oz Kit https://www.amazon.com/dp/B005T8S0PA/ref=cm_sw_r_cp_apa_n1dPzbDXPFWET
You can build a small form or mold and put the electronic component in it. Pour the epoxy over it and let it cure. It'll be encapsulated in epoxy and unable to get wet. I use it on castle mamba Max pros. Have done 3 for me and one for my friend with no failures yet. Balloons and grease etc will fail over time because the water can wick down the wires inside the jacket of the wire. I spend lots of time and ruined many escs before learning about epoxy. It's way better. Potting epoxy won't shrink or expand which can break your electronics.
The other method I've not tried is conformal coating. It's a thin layer of waterproofing. It supposedly works well too but I've not tried it.
For servos or BECs I use the same epoxy but when it sets up and get thick like syrup, paint it onto the circuit board several times as it drips
For a receiver I had one fail after using potting epoxy so I use liquid electrical tape. I get it from Lowe's. Same deal paint it on let it dry. Had no failures with that.
I always confidently sink any of my trucks and they work every time. Let me know if I can help. Best of luck!
Since your title specifies low cost you can save some money by using a wired lav mic like this Audio Technica or this Olympus lav mic. You simply plug it into the camera's mic input. A 3.5mm extension cable might be needed to reach the camera. Use the lav mic with an inexpensive voice recorder if you need the subject to move around. Smart phones have decent audio recording apps too. Syncing the audio in post can be a hassel so only do this if the shot requires being untethered. If you record audio with a separate recorder it helps to mark it by saying a scene number and making a clap sound so you can find it and sync it with the video editing software.
For lighting you might consider an inexpensive LED light and a second battery. Charge one battery while using the other.
I've used clamps like this and this for quick and simple mount of camera and small lights to a chair, windowsill, cupboard, etc. You can use JB Weld to put a 1/4-20 nut-coupler on the light if it doesn't have it already.
edit: I like Canon equipment and their line of Vixia Camcorders starts at around $300 and has a mic input. The lens and image stabilization gets you a nice picture compared to a camera phone or similar "cheap" camera.
IIRC Premiere has a basic mode that uses a simpler timeline more like Apple's iMovie. You can download 30 day trial versions of the latest Adobe products. Give Premiere Elements a try.
This can be fixed.
Use some epoxy do not use glue. Glue sucks, even gorilla or super glue hasn't got shit on epoxy.
I swear to you, if prepared and applied properly, the bond with the JB Weld linked for you will be stronger than the damn plastic after you let it set for 24 hours.
If the plastic breaks again, it won't be where you used the JB Weld. The shit is insane.
They would be a hell of a lot cheaper if they were;
Official Leica Cufflinks: $970 USD
DIY Leica Cufflinks
DIY Cufflinks Guide: $0 + Replacement Leica M Shutter Speed Dial $99.98 + 2 Silver Cufflink Blanks $16+ 2 Silver Contact Screws $15.80 USD to fill in the screw hole and be trimmed flush, + JB Weld to really nail it down $12.96 USD = $144.74 USD
You can make a genuine pair, with pure silver posts, and at most an hour of time for $825.26 less.
It might be a little overkill but.... JB Weld would work.
I've had a few pairs of shoes do this to me, including a pair of platform Demonias. I found that epoxy (this stuff) worked really well to keep the sole on. When mine did it, only the sole came off, and the bottom part of the place where you put your foot stayed whole. Hopefully yours didn't rip or anything. If they did, I don't think epoxy will help without creating uncomfortable bumps under your feet. Good luck!
hope grad school is going well gabs
I've had the same issue before, fixed it with this stuff: http://www.amazon.com/J-B-Weld-8265S-Compound-Twin/dp/B0006O1ICE/
JB weld is an epoxy. You can buy a tube for like 6 or 7 bucks. It doesn't require welding. I've removed dozens of stripped screws with this stuff.
Hmm... yeah it sounds like a dowel won't work. The only other thing I know of that would fill a cavity, bond two surfaces, and hold a screw would be epoxy. Depending on the situation, you may need to do this in steps, and I would definitely pre-drill for the screw, but not sure how to do that if you don't have a drill. I've personally never used epoxy, but something similar to this should work for you:
https://www.amazon.com/Gorilla-Epoxy-85-oz-Clear/dp/B001Z3C3AG
You might be able to find a video or other tutorial showing the use of epoxy on furniture repairs.
Okay thanks. I'm leaning towards this one since it says its temp resistant up to 500F, waterproof, and is nontoxic after setting.
I'll definitely make a post and show it off once I'm done, I think it's going to look pretty badass if it turns out like I'm hoping.
Also just went ahead and ordered a tube of this...
https://www.amazon.com/dp/B001Z3C3AG
Not sure I trust the name as much as JB Weld or Loctite, but it supposedly dries crystal clear and I like the idea of that.
Just spend a couple bucks and buy yourself some JB Weld. Fix that shit right up.
http://www.amazon.co.uk/J-B-Weld-Original-Epoxy-Adhesive/dp/B0006O1ICE
Any decent two part epoxy will do. You can order some insanely strong ones from lab stores if you really need it, but start with this.
edit to say: You may want to get a pair of thin plates to sandwich the joint so the epoxy can attach to the surface rather than edge. You can get all sorts in tiny quantities from ebay with no problem.
Do you still have the pieces? If it didn't shatter into tiny pieces, you could definitely try to reconstruct it and glue it back together with JB Weld.
Check out JB Weld. Best damn epoxy ever. Used it to fix a similar problem on an old Dell. Just make sure you clean and sand each piece you apply it to. The sanding is to rough up the surface so you get a better bond.
This one stupid trick will actually protect you against all exploits spread by USB devices.
Since everyone else is weighing in: where are the weapons failing? If you tell us what you have to fix over and over we might be able to offer some advice on that in specific.
My generic club advice:
So. That holder doesn't seem to be the right one for that shower head.
How nice are you wanting this to look vs. the level of function vs. cost and effort you want to put in?
If you want FUNCTIONAL only... I would recommend a big-ass carabiner and some good 2-part epoxy for metal. put the carabiner on that hangar with the epoxy and let that operate as your holder from now one.
Alternative 2: Find a new showerhead mount. Look at the measurements of the products vs. those of the handle on your showerhead. Make sure it fits. Follow the instructions to mount it. TAKE SPECIAL CARE that you either use drywall anchors (which should probably come with the device), or drill it directly into a stud.
Shower Curtain: This is a bit more difficult, because of the positioning of the window and the sink. I would recommend mounting your shower curtain from the ceiling using these. Again, use the mounting instructions that come with them. And for god's sake, when mounting into the ceiling, use drywall anchors. Past that, just get a rod and curtain.
Tools needed for this endeavor include: Small batter operated drill/screwdriver. They are all over amazon for <$50. In fact, if you are TRULY a beginner, here is a cool little set for you. You aren't going to be building any houses with it, but it has some basics you will need around the house. If any of these break, that shows you that you use it enough to warrant something more expensive.
https://www.amazon.com/dp/B0006O1ICE/ref=cm_sw_r_cp_api_7VgCxbJXY6KS5
What about that 2-part clay compound that hardens into an almost metal like toughness? It could be molded over the bow where its broken and would hold it pretty fast.
https://www.amazon.com/J-B-Weld-8267-S-SteelStik-Reinforced/dp/B000786GLM
Once that wears out I recommend PC-11 for the adhesive. It is absolutely ideal for this application.
Use this, buy a new block later when the thermistor dies.
https://www.amazon.com/J-B-Weld-8265S-Reinforced-Hardener/dp/B0006O1ICE/ref=sr_1_2?ie=UTF8&amp;qid=1492996945&amp;sr=8-2&amp;keywords=metal+epoxy
Get some JB Weld and epoxy it back together. I did this with a microwave oven handle and it lasted over ten years. Available at your local *Mart store.
You're looking at $125 to fix it. #8 in the diagram
this
Epoxy gorilla glue, https://www.amazon.com/Gorilla-Epoxy-Minute-ounce-Syringe/dp/B001Z3C3AG
I waited 24 hours after application to move her.
JB High Heat I've used JB Weld and JB Kwik a lot, but I haven't tried JB High Heat. The cure time is slow enough that you'd need to clip or support the metal strips in place somehow, but it will easily withstand the temperature. JB Kwik cures fast enough that you could probably hold the pieces in place while it sets up, but 300 is the upper limit of its temperature tolerance from what I've read.
you can solder the snapped cable if you can get enough exposed to make a good joint, but the frame is broken at a point that is constantly under pressure (which is probably why it broke) and if you use solder to join the ends it will just shear again.
I wonder how the broken frame will hold up with something like this. I have never used it to fix headphones but have been pleased with how well steel-reinforced epoxy works in other high-stress applications.
Thanks!
I use this fairly generic 2-part epoxy which just about every hobby and craft store has. The whole blaster is glued with it and cyanoacrylate.
There was just enough room in front of the trigger mechanism for a few hex nuts.
I’ve heard some people mix BBs or lead shot with epoxy which will fit into more books and crannies. I may try that next time.
Also, Hatchbox wood PLA works great wood stain.
https://www.amazon.com/Gorilla-Epoxy-Minute-ounce-Syringe/dp/B001Z3C3AG/ref=mp_s_a_1_1?ie=UTF8&amp;qid=1541767455&amp;sr=8-1&amp;pi=AC_SX236_SY340_FMwebp_QL65&amp;keywords=gorilla+glue+5+minute+epoxy
Its kinda expensive so i dont recommend for large terrain. But it dries crystal clear. Adding a drop of paint will give it more than enougj color and make it much easier to pour
https://www.amazon.ca/Weld-8265S-Compound-Epoxy-Twin-Pack/dp/B0006O1ICE
The hole was about the size of a quarter right near the slot for the trigger on the bottom. I had this JB weld putty that is more like clay than the regular liquid JB weld. It was this stuff -
https://www.amazon.com/J-B-Weld-8267-S-SteelStik-Reinforced/dp/B000786GLM/ref=sr_1_6?ie=UTF8&amp;qid=1496607157&amp;sr=8-6&amp;keywords=jb+weld
First of all, are the cracks down near the bottom corners? If so, there is something you can try. I've seen a "repair," but it was on a polycarbonate container, not on the Tritan material, which your container is, assuming it is a home model from 7-10 years ago. So I'm not if it will work, but you could try it. The repair I saw used JB Weld to reinforce the outside of the corners. I don't know if the JB Weld sticks better to polycarbonate than Tritan, but it's worth a shot if you are looking for a repair.
The other thing you can do is look for a container without blade and lid, and transfer over your blade assembly. There's a wrench you can buy specifically for the task, or you can jury rig something. You have to be careful not to under or over tighten.
KennKatastrophe is right that Vitamix would just replace the container shell.
If you must use super glue, then Loctite is my favorite. However it is brittle and sometimes has problems binding to certain types of plastic.
Epoxy works much better for metal or pewter figurines. For most plastics Tenax 7r is the best.
they basically used the equivalent of this on a priceless ancient Egyptian artifact.
I'm guessing it's very cheap materials.. I actually had it in a bike shop about 3 weeks back, as I had a recurring puncture problem! And the guy said so much then! I'm hoping I can at least get it to last till the summer, as I'm in my final year of Uni, so as soon as I start working properly, I'll be able to invest in something a bit nicer!
I think it has a square taper, as that's the shape of the bit that slots into the gear bit, if that makes sense?? But I have minimal access to tools, so haven't even managed to get the dust covers off the crank or anything!
I think I might try the epoxy way, and see if it can last the next few weeks at least, as money is really tight at the moment, and I won't be able to afford to get it repaired/ replaced for a few weeks!
At the moment, I've wrapped some fabric tape I had lying around around the thread on the pedal, leaving the top half uncovered, and screwed it back in, and it's holding a lot better than it was! I'm almost not happy to try using it though, as I cycle in Glasgow, and if it did fall off when I was flying down a busy road, then it could be pretty dangerous!
Will look into the epoxy route for now though, with aims to get it replaced when I can! Cheers for the help!
Just been looking and found this:
http://www.amazon.co.uk/J-B-Steel-Reinforced-Epoxy-Putty/dp/B000786GLM/ref=sr_1_3?s=diy&amp;ie=UTF8&amp;qid=1416764708&amp;sr=1-3&amp;keywords=J-B+Weld
Is this the sort of thing I should try?
Maybe some jb weld stuff: https://www.amazon.com/J-B-Weld-8265S-Cold-Weld-Reinforced/dp/B0006O1ICE
You could try hobby epoxy. Idk about how the heat generated from it will affect the headphones, or if it even will, but the epoxy I use is significantly stronger than hot glue.
(I crashed my RC plane and ripped the tail completely off and repaired it with epoxy. I crashed it again the next week, and the tail ripped off again, 1 inch away from where it had previously been ripped off. Pretty impressive imo.)
Edit: Here are 2 glues I'd recommend: Epoxy, Super Glue. Watch your fingers, this stuff WILL stick them to anything if you get some on them. (speaking from experience)
I'm not sure what he used. There's a ton of them out there. You could try the Gorilla Epoxy for example.
Hand vise: IRWINQUICK-GRIPOne-Handed Bar Clamp, Heavy-Duty, 6", 1964711 https://www.amazon.com/dp/B001VND4X0/ref=cm_sw_r_cp_apap_SKWbD2mBTHRZ9
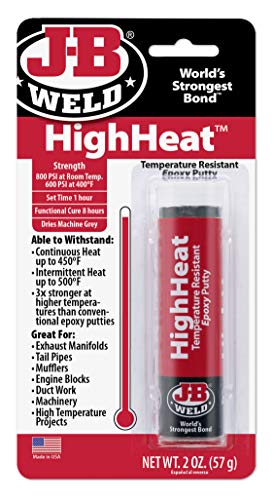
Steel plates: Round Hot Rolled Steel Plate 1/4" x 4" Diameter Circle (Pack of 2!) https://www.amazon.com/dp/B00YWBU1P2/ref=cm_sw_r_cp_apa_Mdufzb3Q4YDXK
Epoxy: J-B Weld 8297 HighHeat 550 Degree Epoxy Putty Stick - 2 oz. https://www.amazon.com/dp/B007PP26RI/ref=cm_sw_r_cp_apa_ieufzbQD017AS
And turns out my stove is way easier to heat up the steel plates. But if you're interested in a heat gun I bought this one: Genesis GHG1500A Dual Temperature Heat Gun Kit, Grey https://www.amazon.com/dp/B00EU2T8GG/ref=cm_sw_r_cp_apa_pfufzbAPGCZ11
Sorry about the formatting, I'm on mobile
Edit: Parent comment is gone, oh well - most of it is quoted here anyway.
> You opened the post? You’re not op. What are you even talking about.
And I never claimed to be. The act clicking on a link is often known as "opening".
> Are you going to suggest these amazing food-safe coatings or are you just another who is commenting and actually has no clue what they are talking about? (I’m guessing the later)
https://www.amazon.co.uk/dp/B006JYQA82/ref=cm_sw_r_sms_apa_i_B51JDbE9W1WG9
> I’m sure there are one of two who don’t know about it out there, but it doesn’t take 40 of you to brigade every single post and offer NOTHING besides bullshit scorn. You aren’t helping the community.
I had no intention of brigading the post, however I will call out agro bullshit like yours.
> Edit: my comment was downvoted in 5 seconds. You haven’t even finished reading it and you’ve downvoted it. This really isn’t the place for you.
Have another downvote, this time, actually from me.
If the arm is about to break after only one day, your best bet would be to contact the seller and see if they'll arrange for a replacement. If the toy is breaking after a day, you could argue that it was defective.
If you really want to fix the toy yourself, your best bet is to use something like Gorilla Epoxy.
https://www.amazon.com/Gorilla-Epoxy-Minute-ounce-Syringe/dp/B001Z3C3AG
This will make a much stronger bond than any superglue.
You'll want to lightly sand the peg and the surrounding area, and then mix up a small amount of epoxy and coat the peg (not the ball). Use a toothpick or something to apply the epoxy to the peg. Let it dry and it should be stronger, but you'll need to be careful with it going forward.
I would advise against welding, mainly because of the low melting point of brass. I don't know how your piece is laid out, but I imagine that it would be difficult to keep the heat away from the brass while trying to weld the steel together.
Soldering could work, I don't see why it wouldn't albeit a little frustrating. Brazing is something that came to mind. Another is J.B. Weld. I haven't used J.B. Weld for sealing jump rings, but I've used it as weld filler in a pinch.
Good luck!
They make foam safe Super glue but I prefer two part epoxies it’s not as runny and forms a much stronger bond. https://www.amazon.com/Bob-Smith-Industries-BSI-201-Quik-Cure/dp/B0166FFFD4
I had a thin 4 inch long crack in my XC70 oil pan which leaked oil within 20 minutes. I drained the oil out of the car, let the crack drain out fully, cleaned the outside of the pan and coated almost the entire outside of the oil pan with JB weld. This was 20,000 KM ago and the JB weld is holding strong with no sign of giving up. I also fixed a snow blower engine which had a crack in the head with JB weld many years ago, that snow blower still works.
http://www.amazon.com/J-B-Weld-8265S-Original-Reinforced/dp/B0006O1ICE
Superglue is not a good choice for repairs like this.
Use an industrial epoxy like JB Weld
https://www.amazon.com/J-B-Weld-8265S-Cold-Weld-Reinforced/dp/B0006O1ICE
That's quick curing so I wouldn't use that, but I also have never used that product before either, I just know in general the faster curing stuff is more brittle. just the old school JB weld is what i was thinking.
If you go the plug route, the hot glue on the plug is bound to come loose eventually so I picked up some of this.
Only downside being that the plug will be in there forever
like this? https://www.amazon.com/Gorilla-Epoxy-85-oz-Clear/dp/B001Z3C3AG/ref=sr_1_1?ie=UTF8&amp;qid=1482113709&amp;sr=8-1&amp;keywords=two+part+epoxy
Do you think something like this [high heat putty expoxy] (https://www.amazon.ca/Weld-8297-HighHeat-Degree-Epoxy/dp/B007PP26RI) would work well?
Sounds like a plan. Thanks for taking the time out. Now I just need to source the materials you have described.
Would something like this do? https://www.amazon.co.uk/J-B-Wood-Weld-Epoxy/dp/B004NB3OMS/ref=sr_1_7?ie=UTF8&amp;qid=1480846597&amp;sr=8-7&amp;keywords=jb+weld+2+part+epoxy
or perhaps I get something white so that I don't have to bother with paint etc.
https://www.amazon.co.uk/UniBond-2002387-Repair-Express-Epoxy/dp/B019CXIO1C/ref=sr_1_3?ie=UTF8&amp;qid=1480846752&amp;sr=8-3&amp;keywords=white+wood+epoxy
Would something like this do the trick? http://www.amazon.com/dp/B001Z3C3AG
jb weld that shit
While I know it exists and the process I haven't tried enough types to have much of an opinion.
But this stuff works pretty good: https://www.amazon.com/dp/B073JNDRXJ/ref=cm_sw_r_cp_apa_i_R.7KDbW2FPV8T
Ah, I have never dealt with any Fractal cases. Looking at the pics on their site, I see it's not to simple to put a rad on the front since they just use that plastic bracket to hold the fans in. A 280 rad would fit, problem would be how to mount it. If still want it there, you could try some epoxy putty to fill in the gaps and get it to stay after removing all the bracket. Just mount the rad to the case, not the fans attached to the rad to the case.
It won't have the same texture and will look a bit ghetto. But it will get the job done.
This is a popular method. Also, if it doesn't work, you can use something like JB Weld Epoxy (thanks /u/Boomerkuwanga) to attach another small screw to the top of it, let it set, then screw it out with whatever normal driver works for the screw you attached. I'd heard of this method using superglue, but apparently the JB weld is much better!
Some kind of epoxy maybe, but when it comes to gluing things, the materials involved are really important.
Some sort of epoxy might work.
https://www.amazon.com/Gorilla-4200101-Epoxy-85-oz-Clear/dp/B001Z3C3AG/ref=sr_1_3?ie=UTF8&amp;qid=1525929780&amp;sr=8-3&amp;keywords=plastic+epoxy
I used some store brand two part epoxy, with a 5 minute cure time. Doesn't give much time for assembly, so you have to mix small bits at a time, but when it cures, its solid.
Something like this will work just fine: https://www.amazon.com/gp/product/B000BQWY8Y/ref=oh_aui_detailpage_o00_s00?ie=UTF8&amp;psc=1
I bought this a few min ago. http://thistothat.com doesn't even have epoxies so I figured that epoxies are probably just as strong if not stronger than those.
Buy the Jeff Bezos model
Garden Torch
JB Weld
Airsoft Rifle
If you want an actual flame thrower then give your money to these people X15
Or fill a super soaker with gasoline and save $500.
Would this work?
https://www.amazon.com/gp/product/B001Z3C3AG/ref=s9_acsd_top_hd_bw_bHLAlv_c_x_1_w?pf_rd_m=ATVPDKIKX0DER&amp;pf_rd_s=merchandised-search-3&amp;pf_rd_r=RRZQ030G27SHF15P8SYW&amp;pf_rd_t=101&amp;pf_rd_p=0a3c6581-feb2-509a-bd74-91d7d12a5759&amp;pf_rd_i=256244011
This sounds like you only had one problem - you don't have epoxy - you should always have, if anything else, a little dual squeeze tube of locktite (or any) two part oil resin based epoxy. This is basically a pantry item, like (quality) duct tape or super glue
https://www.amazon.com/gp/aw/d/B001Z3C3AG/ref=mp_s_a_1_1?ie=UTF8&amp;qid=1487817131&amp;sr=8-1&amp;pi=AC_SX236_SY340_FMwebp_QL65&amp;keywords=epoxy
Try using jb weld or some other type of concrete paste and paste the rod to a drum key. You'll have to throw away the drum key, but it is just an idea.
Use an epoxy that can withstand high temperatures. i. e. Gorrila Glue Epoxy
Of course someone can make it on their own. You don't even have an argument there. All that is is a bump. I'm pretty sure I could make a bump I'm for banning bump stocks too, but I'm not naive enough to think it'll do that much
and lets not forget that to even get to this point we have banned all semiautomatic firearms, and are now placing additional restrictions as well. Pretty close to repealing the second amendment.
Stronger repair - http://www.amazon.com/J-B-Weld-8267-S-SteelStik-Reinforced/dp/B000786GLM/ref=sr_1_1?ie=UTF8&amp;qid=1465149984&amp;sr=8-1&amp;keywords=epoxy+putty
Local hardware stores should have putty epoxy sticks like this for $2-3
It's not made for metal. You could use jbewld but far warning the stuff can get messy
https://www.amazon.com/J-B-Weld-8265S-Cold-Weld-Reinforced/dp/B0006O1ICE
Super glue maybe? Maybe check out an adhesive called JB Weld . It’s an all-purpose adhesive that works surprisingly well, especially on items that don’t take a lot of strain or pressure.
hi. i'm not a fan of granite counter tops. for me it's either carrera marble or soapstone. neither of which i have. for your counter top, you could maybe fill and coat the top with this. it might heal it. it comes in different sizes, and is seriously easy to make, and thicker than any product i‘ve ever used. you would not be able to cut on this product.
https://www.amazon.com/Environmental-Tech-Envirotex-Finish-Gallon/dp/B001E1TQM2/ref=sr_1_6?ie=UTF8&amp;qid=1467243163&amp;sr=8-6&amp;keywords=pour+on+high+gloss+finish
edit; just found this. https://www.amazon.com/dp/B00S9R8E8Q?psc=1
this is what I would use if you want strength
Any two part Hysol will work for you!