Best paper craft supplies according to redditors
We found 697 Reddit comments discussing the best paper craft supplies. We ranked the 421 resulting products by number of redditors who mentioned them. Here are the top 20.
We found 697 Reddit comments discussing the best paper craft supplies. We ranked the 421 resulting products by number of redditors who mentioned them. Here are the top 20.
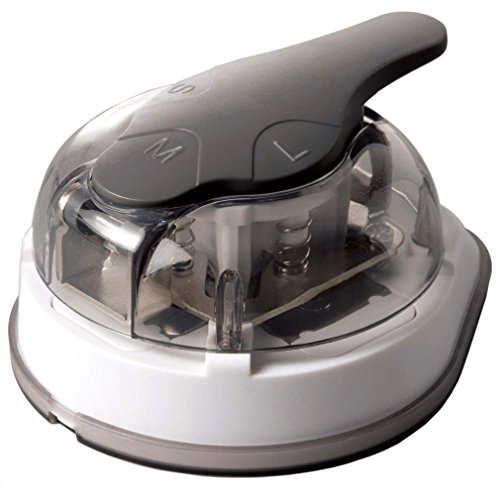


Here's an image of a print-and-play (cardstock, laminated, corner-cut) I did. I used one of my Kadomaru Pro cutters. Great device! (It's not heavy duty like that other link, but I did try something heavier duty and messed up a few cards as they didn't cut right. That's just the one brand, though, not the one someone else linked to here.)
Hi everyone! Here is the link to these Ecoline brush pens on Amazon.
The paper i'm using is here. It's super smooth and perfect for brush lettering.
The nail polish is Superchic Lacquer Trap Queen ($14).
This is the exact paper I used: http://amzn.com/B000GTSF1Q
However I bought mine in store from Kinokuniya Bookstore in NYC. They also sell it at Pearl River Mart in SoHo. They're like $2.50 there.
Copics are going to be very different from microns.
First off, the kind of paper you pick matters. I recommend either this specific hammermill or cardstock. Paper size doesn't matter, though smaller will save ink.
You don't want paper with a tooth, you don't really want marker paper, and you don't want sketchbook. You want completely smooth, even paper, with enough absorbency to not bleed, but not enough to soak all the ink out of your marker, hence the previous recommendations.
Secondly, there are blending families. I'm gonna give you a few examples here. Colors 2-3 steps apart will blend very easily. Like... N1, N3, N5, N7. Or RV11, RV14, RV17, RV19. If you try to blend RV11 and RV19 without a step in between, you'll have a hard time and it's not gonna look good.
Similarly, it's harder to blend colors of different color families. But if you keep the intensity close, it'll work (last number in the color name). Another example of what I mean.
See how the V09 doesn't really blend at all with the YR04? 4 and 9 would be a hard sell on their own, but with them being complementary colors, it's nearly impossible.
To blend, you put down your first (lightest) color ONCE. Then, for subtle blending, you go over some of that area again with the same color. Areas with 2 coats will be slightly darker than ones with just one.
To blend two colors, again put down one coat of your lightest color. Then take the slightly darker color and put it adjacent to the first one. Then, where they meet, go over the darker color with the lighter one. This will move the ink around and result in a blend. You can keep alternating until you have a mix you're happy with, though paper will reach maximum saturation sooner or later, at which point more layers won't do much.
Copics aren't really used to gently put down colors next to each other and leave a lot of white. If you're gonna leave white spots, have the adjacent color be either a 0000, 000, or end with a 0 or 1.
Then layer, layer, layer. Don't want till the first color is dry. Blend it while it's still wet. You almost always want to work with two colors at a time. Hope that helps!
Edit: note that I didn't push my examples to full blend. The strokes are still fairly noticeable in some. You can do circular motions to avoid having the strokes show, or go over them enough times to get more even color.
Here on Amazon for $45.
Courtesy of /u/pseudolobster
here, this is how it can burn so long:
There is a spindle in the center, and a very long candle coiled around it. Attached to the top of the spindle is a holder, which grasps the candle and can rotate around the spindle. It looks like it probably also pinches the candle, making it so if you forget about it, it will go out rather than burning down to the rest of the candle.
When the candle burns down, you can feed more into it by rotating the holder. This lets you choose the length of the candle. This was used as a type of timer, by knowing how long a certain length of candle takes to burn.
I think these were used as what's called a "courtship candle", where a father, allowing his daughter to go out on a date, would say you are allowed to see my daughter for one hour, or whatever, so he'd light a candle of a specific length to know when it's time to leave.
^^^^^I ^^^^^know
it's a smart choice to start with cubone. drawing the marowak's will help your confidence as well.
from purely an artistic standpoint many earlier gen pokemon have more intuitive proportions than later designs. As you get more confident challenge yourself with a few of the more recent gen pokemon.
for ground, rock and reptilian shaped pokemon Toned Paper has really improved my sense of light and contrast in my work
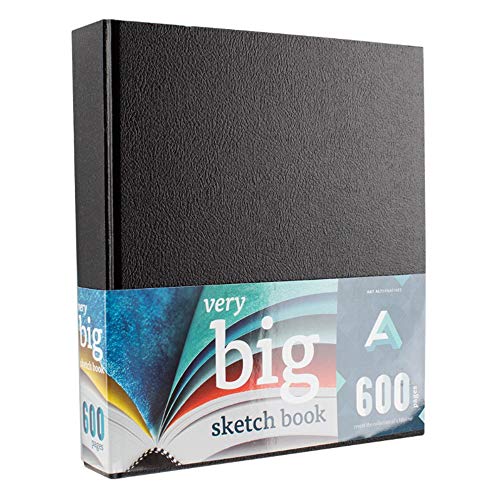
I have this Very Big Sketchbook as my Book. I hot glued in scrapbook paper from michaels, those are like .87 cents. And I print off all my work (spells pictures rituals) because I’m not sitting here writing everything down when I’ve already made my documents look nice.
I like this method because I can tear the paper out and the scrapbook background may be damaged a little, but I can always glue something back over it and tada like new. Also, I’m the only one whose ever gonna see it so I do what I want.
Edit: I LOVED watching charmed and always wanted a Book as thick as theirs so I really love this sketchbook and it was only $27.
Trace the size(s) you're using onto nonwoven fabric-y Swedish tracing paper, then work with that for alterations, etc. The tissue pattern stays in the envelope for easy storage.
https://www.amazon.com/dp/B008D2TU76/ref=cm_sw_r_cp_api_i_7MkzCb7FF1CTQ
You're right
https://smile.amazon.com/Candle-Hour-144-Hour-Eco-friendly-Natural/dp/B001MTRBIC/ref=smi_www_rco2_go_smi_g2609328962?_encoding=UTF8&%2AVersion%2A=1&%2Aentries%2A=0&ie=UTF8
OHhhhhh there are a ton of things you could get your friend. Price is going to be the biggest thing.
Low end
Quality sketch books
http://www.amazon.com/Art-Alternatives-Sketches-Making-Hardcover/dp/B0025TZ30G/ref=pd_sim_201_64?ie=UTF8&dpID=41P-a-zm7QL&dpSrc=sims&preST=_AC_UL160_SR160%2C160_&refRID=0F10SP8YX71YXCMRXJG9
Micron Pens (LOVE THESE)
http://www.amazon.com/Sakura-30062-6-Piece-Pigma-Micron/dp/B0008G8G8Y/ref=pd_bxgy_201_img_3?ie=UTF8&refRID=0F10SP8YX71YXCMRXJG9
Mid-Range
Nice drafting table for illustrations
http://www.amazon.com/gp/product/B004N7AXF8/ref=s9_top_hd_bw_bFfK7_g196_i4?pf_rd_m=ATVPDKIKX0DER&pf_rd_s=merchandised-search-3&pf_rd_r=1RZ31XD1YQWR6679ZWZ7&pf_rd_t=101&pf_rd_p=e2586643-3e21-5a6c-aba3-4d8d6e8d97c8&pf_rd_i=3733771
Nice tracing table
http://www.amazon.com/Artograph-12-Inch-17-Inch-Light-Pad/dp/B003QMAUSQ/ref=sr_1_8?s=arts-crafts&ie=UTF8&qid=1463621722&sr=1-8&keywords=led+light+table&refinements=p_36%3A2638329011
Amazon gift cards for reference material. We look at a lot of stuff.
High end (sorry for the big jump in price just a suggestion)
Wacom tablet. This thing is sexy!!! I would love to have one of these myself.
http://www.wacom.com/en-us/products/pen-displays/cintiq-22-hd-touch
I'm going to throw this one in there anyways even though it's by far the most expensive thing here, but still. 27-inch iMac with Retina 5K display if you choose to go this way, I'm willing to help give you some specs that would help your friend out so they will be happy to be doing this forever and ever!
There are so many other options you could go with and if you choose to, your welcome to bounce ideas off me. The more special your piece I feel as though the more inspired your friend will be to be something big. I know I would!!
Good luck!!!
For ink (markers, dip pens, paint markers) I use this paper: Hammermill Paper, Premium Color Copy Cover Cardstock 8.5 x 11 Paper https://www.amazon.com/dp/B00SN0PI88/ref=cm_sw_r_cp_apa_i_ivNgDbJKG1176
It's a lot cheaper than artist paper, is easy to bind, and comes in different sizes so you can get the paper grain going the right way.
For watercolor I like bee paper (bee is the brand name) because it's a good balance of quality and price, though I've only ever bought small sheets so I'm not sure about finding it in large sheets to cut down for a sketchbook. If you're going through the trouble of binding a book I'd use a high quality paper like this one (or better).
These are doing well for me.
It looks like tan toned sketch paper. You should be able to find both tan and gray toned sketch pads at your local art supply store. Example
I've got some ideas. What exactly do you need a laminator for? And are you in a decent sized city?
The Pixma Pro-100 handles cardstock perfectly. It's not going to be the most amazing print quality on most cardstocks. You need special inkjet paper which tends to be expensive. But I find it is more than adequate for my purposes using regular cardstock. I got mine on sale + a big mail in rebate that came with a Visa cash card. Overall I paid about $130 for it which is pretty good imo. I print on both sides of some real thick cardstock and then just cut them out with the paper cutter I'm going to link below. The other good thing about the printer is it handles larger paper sizes. I have 13x19 inkjet paper that it takes and the prints come out incredibly good. And that's a pretty decent size for printing the stuff I'm going to attach to chipboard.
(If you go the Pixma route, I suggest looking at some bulk inks. It has reduced my costs significantly)
I use this for a paper cutter. Works fine. You might do well to find a way to shine a light from underneath the swing arm to line up cuts but it's plenty good enough without it.
I use this corner rounder. I've done thousands of cards with it. Still good. I think if I had to buy it again though I'd look for something that was more like a traditional hole punch in using your whole hand. The one I linked gets your fingers sore after a while.
The reason I asked about where you live is because if you live in a good sized city, you may have access to fab labs. My public library has one with a laser cutter. It makes making tokens a breeze. And because it's at the library for me, it's freeeeeeee. Print on some label paper. Slap the fronts and backs onto a sheet of chipboard. Stick it in the laser cutter and voila, perfect tokens. They'll come out slightly singed but overall they're great.
How much are you going to print and play?
If it's not a lot, I would say just skip the printer. It's $130 at its cheapest and that's not even counting the cost of replacing the ink. If you're only going to print a few games and they're not that intense, just go to a local printshop and use their high quality business laser printers. They print super sharp into label paper and card stocks. Print the fronts on one, the backs on the other, stick em together, cut it out with the paper cutter. It's a bit of work but the finished product looks great.
How did you make the corners super round?
I'd really like that. My current cards are sharp and pointy.
Aha! Found out.
https://www.amazon.com/Sunstar-Kadomaru-Corner-Cutter-S4765036/dp/B0076FJ7SS
Which opening did you cut with?
Yes! I trace most of my patterns onto tracing paper, and then modify and cut out that. My pattern tissues get folded back up and put away, unharmed. I use Burda Style tissue paper which I buy locally, but a lot of people swear by Medical paper, Swedish tracing paper, or freezer paper, which you can buy at the grocery store.
we use this to punch holes in the tape we use for our son. Its the perfect size..
https://www.amazon.com/Ek-Tools-Tag-Punch-Classic/dp/B017JIPZZU
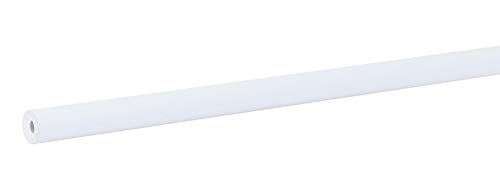
For large pieces, you can get a roll of white paper and hang it somewhere in the shop. Roll some paper down, put the furniture on it, and roll it back up when you're done. If it's larger furniture, you can get a 107" roll. Smaller furniture like end tables can get away with smaller rolls.
http://www.amazon.com/Pacon-57015-Fadeless-Paper-White/dp/B00006IDXW
Put a wood dowel through and some hooks on the wall and it's done.
Example:
https://pixc.com/blog/wp-content/uploads/2015/09/Furniture.jpg
Toned Tan paper, White Conte pencil, and a mechanical pencil. Thanks so much.
For the 2.5mm one:
https://smile.amazon.com/gp/product/B00G08PEXO/ref=ppx_yo_dt_b_asin_title_o01_s00?ie=UTF8&psc=1
For the 3mm one:
https://smile.amazon.com/gp/product/B0076FJ7SS/ref=ppx_yo_dt_b_asin_title_o03_s00?ie=UTF8&psc=1
2.5mm is closer to American corners. 3mm is closer to Japanese corners.
Printing: 9€
Punching tool: 8€
576 cuts, 576x pressing the puncher amazon link
300g/sqm paper.
I’ve got the one on the right of this set. I can’t find it separate right now but it’s nice to have some shapes. I like the process flow stencils the most in it.
Stainless stencils
If you use this punch tool with the tape, it cuts out a hole nearly the exact size of the sensor. I use it with a roll of opsite, it's awesome. Ek Tools Tag Punch Classic https://www.amazon.com/dp/B017JIPZZU/ref=cm_sw_r_cp_tai_XvRmxbHMQMP8V
Ok, this is what got me through engineering undergrad:
ifwhen you get handouts in class that you want to put in your notebooks chronologically, but hasn't been punched.All of this will probably fit in your cool zipper binder.
This was kinda fun, actually.
This isn't a journal but might still work, really big sketchbook I've been eyeballing.
It’s just translucent paper used for arts and crafts, which is useful for aligning your drawings to your grid. You can get a lot of mileage over big rolls like this.
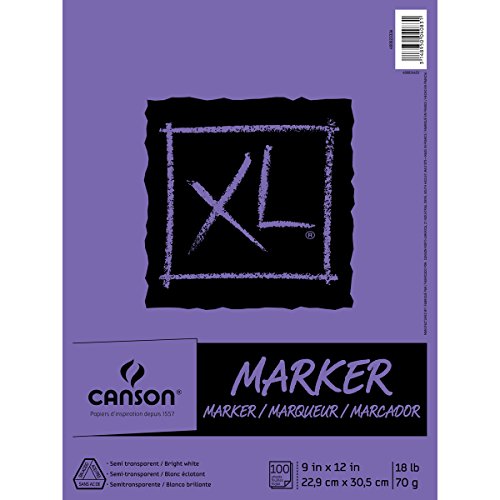
I have been very happy with Canson Marker Paper. Very transparent and thin for easily visible guidelines behind. Very little absorption so the ink sits on top, no feathering/bleeding. Cheap too. Not the best for a finished work, but it is wonderful for practice. I don't like how expensive and thick good watercolor paper is. Plus it seems to be fairly rough and gets fibers caught in the pen.
I am new to this though, so take it with a grain of salt. Today I have been working on this on the marker paper :)
Swedish tracing paper.
https://www.amazon.com/Swedish-Tracing-Paper-Sewing-Transfer/dp/B00E3DG2KW
Or for $30 you can get one of these and make your own. Ek Tools Tag Punch Classic https://www.amazon.com/dp/B017JIPZZU/ref=cm_sw_r_cp_apa_e9pnybRNBC2MF
Dexcom used to fight me about using my arms/legs then i had my doctor put it in my notes that i should be using alternate sites and they haven't complained since. I also use this over the sensor adhesive: https://www.amazon.com/gp/product/B001SIQCRI
i'm able to get 3-4 weeks out of each sensor now; i used to get some that would peel off after 3 days and the "good" ones would fail at day 10-11.
I use thisa punch to cut out a spot for the transmitter:https://www.amazon.com/gp/product/B017JIPZZU
http://www.amazon.com/gp/product/B0076FJ7SS/
For a matte, super thick feel I have used Accent Opaque Cover Smooth 100# White, my printer is able to pick up the thickness, sometimes I need to hand feed it but with clean rollers it’s fine.
I also really like Hammermill Smooth 100lb Cover, it’s got a nice velvety smooth feel to it, not as mega-thick as the Accent Opaque but still a substantial card thickness to feel elegant. This one tends to feed a little easier in my printer the Accent Opaque is very very sturdy.
I did try a single sided gloss once...the only inkjet compatible one I was able to find is from Desktop Publishing Supplies here though in the end I just really liked the look that a matte card gave and because the papers I use were thick already, the quality seemed to be very good without it needing that shiny look on the outside.
I fold everything by hand - since my file is set up 2/page I actually fold the whole letter paper in half (vertically) once by hand, then press the crease down more a second time using a bone folder, and then trim the folded sheet into two cards so the edges aren’t as staggered.
I got it 2 years ago from Amazon! This is the brand, though, not sure about size and cost: http://www.amazon.com/gp/aw/d/B00006IDXW/ref=mp_s_a_1_7?qid=1449545190&sr=8-7&pi=AC_SX110_SY165_QL70&keywords=white+wrapping+paper&dpPl=1&dpID=21KImFTrVuL&ref=plSrch
You can buy them here. You have to buy them in packs of 50 for like $70. I believe they're priced that way because they own a patent for the matte finish laminate and they are "industrial" grade. It works amazingly well with thicker mecahnical pencil lead (0.9mm or thicker). It almost looks like you're writing with a marker, and then completely erases with no trace.
They sent me a free sample of them, so I did a couple for AQ, too:
I bought a corner cutter to clean the corners up. Works very well, too. I got that from Amazon here: https://www.amazon.com/gp/product/B0076FJ7SS/ref=oh_aui_detailpage_o01_s00?ie=UTF8&psc=1
I found metal ones pretty similar to those on Amazon Here
I've been using this sketchbook. It has bleedproof pages that I've been really impressed with.
yup something like this
https://www.amazon.com/PFT-Transfer-Stencil-Sheets-Pirate/dp/B0036WEBLI/ref=sr_1_4?ie=UTF8&qid=1484869140&sr=8-4&keywords=tattoo+transfer+paper
i like using it to make sure the size and whatever are going to fit body lines and such
This mainly because I used up every sketchbook I had from October 2015 to October of last year for my self imposed yearlong Inktober.
The company is called Oh Boy Artifacts and they’re not currently making any products. I found one similar here but I think it might be bigger than yours
This cardstock works great with copics.
https://www.amazon.com/dp/B00SN0PI88/ref=cm_sw_r_cp_apa_i_jKIvDbR069HHH
I like Strathmore Recycled Sketchbooks https://www.amazon.com/dp/B002469OFU/ref=cm_sw_r_cp_api_DVkhAb6W7MZP8. Good tooth and edges are perforated if you want to remove them. They come in many sizes but I like 9x12. Fits in a backpack or on a scanner
I used to sell art supplies. Moleskine notebooks are expensive for what they are and imho are a fad. Plenty of hardback thin notebooks on the market. I personally don’t like hardbacks because I use sketchbooks to experiment with. Hardbacks feel better for documenting and creating finished work (even if it says in s book). For me sketchbooks aren’t supposed to be fancy. They’re for me to get out my thoughts, and some of my thoughts are shit. Judy turn the page and start again
Edit, oh saw you don’t like wirebound. In that case check stillman amd birn
http://www.jerrysartarama.com/stillman-and-birn-sketchbooks?gclid=EAIaIQobChMIpYiPk4Hg1wIVHoezCh3dzA9nEAQYBSABEgKRXfD_BwE
If you like to use inks or watercolor, go for the 270 gsm, which is comparable to 100 lbs paper. Less likely to bleed through.
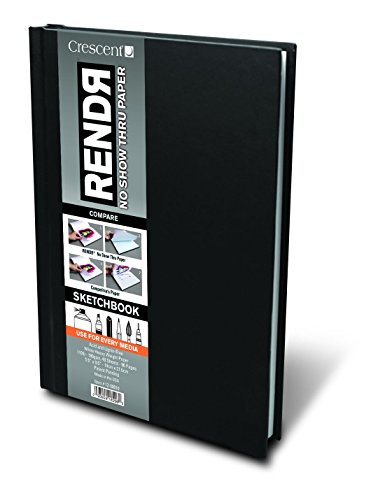
There’s also Rendr Hardbound Sketchbooks https://www.amazon.com/dp/B00915UUUU/ref=cm_sw_r_cp_api_r4khAb5F8R4CN
This paper is specially designed for markers and inks. You can draw on both sides without bleeding (and I have tried) these books come in multiple sizes and you can also find this paper on a roll. Texture is very smooth.
Hope that helps
I like pans, so if I had your budget I'd buy this and this, doesn't get any better. I have a paint tin like that was my uncle's, it's fifty years old and still in use, they are lovely things.
I forgot about the epic adventure part until I had already drawn and uploaded the images, so if you could just imagine the two drawings together, maybe swimming in a fish tank full of outer space, or riding on the backs of eagles, that would be great. Heh.
Anitaxjffdskjarizard and 186394.
I will probably end up photoshopping these pictures onto an eagle once I get back from work. Or the fish tank thing. Because that sounds really neat.
Edit: I also forgot to link an art thingie from Amazon. Look at me go today! I have to do it when I get home from work though, 'cause I have to leave, like, this minute.
Edit again: Okay, art thingie. Wasn't sure if it had to be art supplies, or a piece of art to display, so I'll link one of each type of thing just to cover the bases.
Big ass damn sketchbook. The price is listed at $28, but there are offers for $19, which I dunno if that still qualifies. If it's null, just, like.. yell at me or something.
This is art. Stare at the art. You should now feel mentally reinvigorated. If you suspect staring at art has not provided the required intellectual sustenance, reflect briefly on this classical music.
Edit again again: Here you both are in a fish tank full of space.
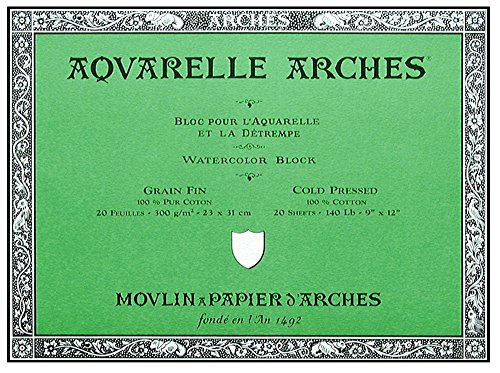
Use 140 Cold Press if you like even consistent washes.
Here are:
Good Better Best
Otherwise just look for dual-sixed drawing paper and talk to the store clerk. You can get something you can paint on that will be less expensive than actual watercolor paper. It will just be a little less forgiving to use.
Lately I've had a lot of luck with the Crescent Rendr paper, since it doesn't bleed. I've tried all sorts of papers and Crescent Rendr is most definitely my favorite!
Next to that I really like using a moleskine, or the standard copic marker pad! Both tend to bleed though.
https://www.amazon.com/Crescent-Creative-Products-12-00010-Sketchbook/dp/B00915UUUU/ref=sr_1_1?ie=UTF8&qid=1473735938&sr=8-1&keywords=crescent+rendr
Well you can still use the notebook, it seems high quality and smooth paper and i don't see any bleeding. If you make the width between 2 lines your x-height, it will work out. A set of 6 lines would then be your guidelines for 1 rule of text. Here is a diagram, based of the scribblers ratio and slant. So just count your lines and add in the remaining guidelines and you're set to go.
(And don't mind my crappy, drawn in letters, again i'm not doing pointed-pen calligraphy.)
If you do want to use other paper in the future then cheap options are Laser printer paper, Marker paper or a Rhodia pad.
These are also smooth surfaced, bleedproof options. You want smooth paper, because your nib is less likely to get snagged or dig in the paper and tear it. Bleedproof, because your ink will stay put and not run out & ruin fine hairlines.
Finally, your nib is also an important factor in writing pointed-pen calligraphy. Each nib is different, some are more flexible than others. Take your nib out off the holder and see if you can find a brandname and number; from what i can see i think it's a Brause Steno 361 (I could be wrong). Other options are A Nikko G, a Nikko G Zebra, Hunt 512, Hunt 101 and 103 (both flexible but very delicate), Brausse 66EF (it's smaller and more flexible) and so many others. Everyone has their own favorite nib, so experiment if you have the chance. And do clean your nib when your finished with writing, then they'll last much longer, otherwise they'll corrode and rust.
That's all i can say, and much of it was picked up here on the subreddit or plucked of the internet. Have Fun!
Crescent rendr sketchbook, completely bleed proof, watercolors, spray paint, you name it. It's great and cheap. Like 12 bucks on Amazon.
Rendr Hardbound Sketchbook https://www.amazon.com/dp/B00915UUUU/ref=cm_sw_r_cp_api_.AFOybV9C9X58
Peter Draws has a really cool video of this sketch book, he uses a lot of ink in it so if your skeptical just check that out.
I honestly don’t know. You might want to consider buying one of these. I have one. Ofc, you would have to hole punch few papers at a time but sometimes, when I print almost 1000 pages worth. I hole punch them using these while watching tv. Could take an hour though. https://www.amazon.com/Bostitch-Binder-Sheets-Assorted-RBHP-4C/dp/B005MWPJWU
​
No worries, I'm happy to answer any questions. The adhesive that the sensor comes with is ok, but it doesn't even last a full week for most people. I like to secure it with Opsite Flexifix. I'm still on the first roll I purchased back in 2015, make sure to get the one that is 4" across. I cut out a patch like this, except I use a tag punch to cut out the center hole (I got mine on ebay for $9). I also use [Patch Peelz] (https://pumppeelz.com/collections/patch-peelz) sometimes. Some people use GrifGrips or Rocktape. Lots of people swim and do all sorts of sports/ physical activity and the extra adhesive helps keep the Dexcom secure. I've heard of people who wear it on their arm using an additional arm band over the sensor/transmitter when playing contact sports to ensure it doesn't get knocked off.
Use the song "We Didn't Start the Fire" to create a timeline of historical events and how those events shaped popular culture at the time. You could make it look really great visually if you use one continuous roll of paper and you could include lots of little known details and obscure facts.
You're welcome! This has me wanting to draw siblings more, trying to get the differences and similarities right was a fun challenge. It's one of the best pictures I've seen here in a long time.
This is the paper I used, toned gray is good too.
Are you also into print and play then?
Thanks for the link, I'll go for this one instead. https://www.amazon.co.uk/Sunstar-Kadomaru-Corner-S4765036-Japanese/dp/B0076FJ7SS/ref=cm_cr_arp_d_pdt_img_sims?ie=UTF8
https://www.amazon.com/Strathmore-412-9-Toned-Sketch-Sheets/dp/B008D2TU76/ref=sr_1_2?keywords=strathmore+paper+toned&qid=1573612951&sr=8-2
I love Dexcom. You'll get way better control without even trying... at least to the mid 8s short term. You'll be subconsciously learning how each individual food/insulin reacts with your body.
You can leave the sensor on after 1st session, just restart it (7 days). They typically last 14-20 days to me, before the numbers are EVERYWHERE.
If you do the adhesive will be the first to come off. Get some opsite flexifix ^^disclaimer: ^^I ^^did ^^not ^^receive ^^any ^^compensation ^^for ^^this.
If you get the Opsite, consider this hole punch ^^See ^^disclaimer ^^above.
The CGM can be put on your upper arm, legs, etc.
The CGM gives you a general idea of how your sugar is going, but not exact numbers. It tends to lag behind BS a little bit (5-10min?) due to the way it works. Don't calibrate right after you eat/dose.
When you take a shower (especially hot ones) your blood sugar will spike. Yes, it's normal. It's temporary. It's not a sensor issue. I have witnessed it on a Freestyle Libre and Good old finger pokes as well.
Don't leave your receiver in your pocket when you go swimming. I made this $200 mistake... (Dexcom is graceful enough to give you a "first time oops" discount of $200 instead of full price) Similarly, be ready to explain to kids what a pager is.
For "prints" - I'm able to make 300 that have substantial amount of white space...as in not completely full color edge-to-edge, but illustration, or lots of colored text & boxes on white background. But I find to print 2 A2 cards on a sheet with a full bleed is about 30-40 seconds or so. I haven't used a stopwatch or what not, but I usually just let the printer do it's thing, I run off and do errands like the dishes, and just come back to make sure the ink isn't streaking if it's warned me that it's low. Usually a sign the ink is low is if there's like a skip in the print, or a very thin line...or if a color like magenta is done then the print will be lacking the pink tones.
-------------
I get everything from Amazon, and currently I've found these to work great:
I've also found great color with the other following papers:
I make at least one (and usually a couple) of copies of the patterns I use a lot on Swedish Tracing Paper. It is easy to write and draw on, can be folded and refolded a million times without tearing and comes in a nice, big, wide roll. Oh and it can be sewn - and so useful for muslin-ish draping and testing.
Not quite an inch, but close enough?
Origami Paper- Mini Mini Set of 500 Sheets 1-1/16 Inch Square
http://www.amazon.com/dp/B000GTSF1Q/ref=cm_sw_r_an_am_ap_am_us?ie=UTF8
Oooh this is a fun game:
https://www.amazon.com/MEEDEN-Empty-Watercolor-Palette-Paint/dp/B01MRYR1VI/ref=sr_1_40?ie=UTF8&qid=1526303405&sr=8-40&keywords=watercolor
https://www.amazon.com/Winsor-Newton-Cotman-Water-Studio/dp/B000XYHYI4/ref=sr_1_43?ie=UTF8&qid=1526303405&sr=8-43&keywords=watercolor
https://www.amazon.com/Field-Artist-Watercolor-Journal-Hardbound/dp/B075ZN6XT3/ref=sr_1_66_sspa?ie=UTF8&qid=1526303688&sr=8-66-spons&keywords=watercolor&psc=1
https://www.amazon.com/Artify-Watercolor-Miniature-Carrying-Flannelette/dp/B078SQT3NW/ref=sr_1_72?ie=UTF8&qid=1526303688&sr=8-72&keywords=watercolor
https://www.amazon.com/Daniel-Smith-285610005-Essentials-Introductory/dp/B00WT5VRF6/ref=sr_1_94?ie=UTF8&qid=1526303776&sr=8-94&keywords=watercolor
https://www.amazon.com/Moleskine-Watercolor-Album-Sketchbook-Spanish/dp/8883705629/ref=sr_1_107?ie=UTF8&qid=1526303816&sr=8-107&keywords=watercolor
https://www.amazon.com/Paint-Brush-Brushes-Watercolor-Painting/dp/B00ZO90S1I/ref=sr_1_114_sspa?ie=UTF8&qid=1526303816&sr=8-114-spons&keywords=watercolor&psc=1
https://www.amazon.com/Watercolor-Block-Cold-Press-X12/dp/B0007XDHGO/ref=sr_1_115?ie=UTF8&qid=1526303859&sr=8-115&keywords=watercolor
https://www.amazon.com/Dr-Ph-Martins-400262-XXX-Watercolor/dp/B005TFSDF0/ref=sr_1_147?ie=UTF8&qid=1526304003&sr=8-147&keywords=watercolor
sorry for stupid long links
If you're in the US, Michael's arts & crafts carries the 9x12 [Canson XL Marker Paper] (http://www.amazon.com/Canson-Xl-Marker-Pad-9X12/dp/B00BN9PFRK), 100 sheets for about $10. It's semi-translucent, so you can slip a guide sheet underneath.
protip: they sell hole punchers that fit IN a 3-ring binder.
Worthless kids today.
Alright I am home now.
These are the needles I bought and have lasted me 6 tattoos (5 of which took two sessions). There are some in there I will probably never use but you never known when you decide to do some fat lines and need those 9rl's.
Washing your hands is nice but gloves are another layer of safety on top. Unless you are going to the doctors soon to swipe some.
This is the ink I use. Small but has lasted me.
Dettol for stencil transfer paper because I am not about to fuck up the bad on something that is gonna stick around for a bit. I also just have alcohol wipes at home from a kit, dollar store plastic shot glasses I wash, and paper towels to complete my kit. Should set you back 50 but last you through a ton of stick and pokes.
modular designs often work well with small sheets and are nice to hang up with tassels or decorative knots
plain printer paper is fine; but you can also print/paint designs onto the paper before cutting (im sure theres websites with free designs if you arent inclined to create your own) or cheap single colour (i love this paper for small simple modular units)
hah yea. I got a corner punch just for this campaign. I print on cardstock so they have some thickness to them. All my HotAC printed cards are cut that way :)
Its time consuming, but looks really good.
[edit] Wow. I made a list in Excel of all the extra pilots and i totally missed Braylen :| feels bad. Glad you got it in your list tho haha.
Oh yeah, that stuff isn't great for pens at all. It makes the lines a little fuzzier than they should be.
Bristol is great for finished pieces, but is a tiny bit on the expensive side. Whenever I am just sketching or doodling with pens, I used laser printer paper. It absorbs the pens really nice without bleeding, and is really affordable. This is what I ordered last time:
https://www.amazon.com/gp/product/B00SN0PI88/ref=oh_aui_detailpage_o01_s00?ie=UTF8&psc=1
i’ve heard that it’s too sticky. This is what I use:
https://www.amazon.com/gp/aw/d/B073XRLZ6Z?psc=1&ref=ppx_pop_mob_b_asin_title
Press n seal is good if you are applying to something really fragile like paper but it's SO HARD to get it to stick to vinyl. I would only use it in very specific situations.
Not to sure on the etiquette but if this is something you want to keep for a long long time don't be cheap. A lot of artist do quick sketches in marker so you want a book with paper that doesn't bleed and is acid free. The best one I can recommend is a Crescent Rendr you can usually find this one at Michael's, but not always.
i used whatever was cheap on amazon, but it seems like it's not available anymore https://www.amazon.com/gp/product/B073XRLZ6Z/ref=oh_aui_detailpage_o01_s00?ie=UTF8&psc=1
http://www.amazon.com/gp/product/B0025TZ30G/ref=pd_lpo_sbs_dp_ss_1?pf_rd_p=1944687722&pf_rd_s=lpo-top-stripe-1&pf_rd_t=201&pf_rd_i=B000FWCQ78&pf_rd_m=ATVPDKIKX0DER&pf_rd_r=0YAA9ZE1DMG7NCNCCYJJ
Here's a Koi set on Amazon that always seems to get a lot of love. And here's the Arches paper I was talking about. I checked- the half off price at Michael's is about the same as it is on Amazon, so if you want to stick with Amazon, there you go. And yes, yes the paper is that expensive for only 20 sheets, but as a learner, it's fine to use both sides of the paper :)
Also, don't worry about easels. Since watercolors are... wet, painting on a flat surface helps the paint not run all over the paper.
Amazon keeps recommending these to me: https://www.amazon.com/dp/B01KBRWKLI/
My favorite dinosaur is made of tiny origami paper. Thanks for the contest!
this is the one that I use. It's just a block of nice watercolor paper, with all of the edges sealed down.
Nice! It is all about starting slow and steady with a little bit of a hodgepodge of things for students to try. At our space we started seeing how much our students were not interested in electronics/robotics/high-tech stuff and were leaning towards design, art, and fabrication. So then we started investing resources and people in that direction. My absolute favorite thing we did was buy a MASSIVE sketchbook that became the community sketchbook for anyone to just draw, paint, or whatever they wanted in it. Filled it up in a little over a year and it is totally amazing.
Buy another copy? The second one could be trashed as long as the cover is in good shape. Then notate that the "real" one is in the other place. If you can get one from the $1 bin, you're good!
My impression is that this particular overlap is going to be pretty limited in scope for most folks, so an extra record for the cover might not cause a financial burden. If this idea were to be expanded for the dreaded "featuring" or duets, etc, it might get expensive.
Maybe some properly sized card stock with the name of the record and where the real record is located would suffice. The ultimate would be something like this - blank white LP covers. Expensive, but pretty much perfect.
Vinyl Record Jackets - White Coated w/No Center Hole | 25-Pack. Thanks adayinalife 2 days ago.
Like these: https://www.amazon.com/TunePhonik-12-Vinyl-Record-Jackets/dp/B06ZXXH2J7
https://www.amazon.com/Candle-Hour-20561B-144-Hour/dp/B001MTRBIC
https://www.amazon.com/Art-Alternatives-Hardcover-Sketchbook-Giant-Sketchbook-600/dp/B0025TZ30G/ref=sr_1_7?ie=UTF8&qid=1536696244&sr=8-7&keywords=sketchbook+hard
https://www.amazon.com/Sunstar-Kadomaru-Corner-Cutter-S4765036/dp/B0076FJ7SS
Great for any thin player boards and player aids. Keeps the corners from gettings dinged up.
I work in architecture and have a pretty deep understanding of reprographics and what any decent print shop is capable of. I'm personally very excited to make what should be, in most cases, much nicer cards than what PP used in the past. I just checked the errata card PDF they released and you can get a 600dpi image for each card, have it printed on a nice linen or even plastic cardstock and use a corner punch so they have nice rounded corners and fit perfectly into some of the better sleeves available specifically for MTG/popular card game sizes.
I know the DIY/crafty aspect to miniature gaming hasn't historically extended much beyond painting/sculpting/terrain modeling, but why not give a nice set of cards the same treatment we give our beloved minis?
I use transfer tape for making printed shirt with vinyl. It might be something you can use. Probably not going to be very pretty.
Thank you so much for your thorough reply! This was immensely helpful; I never knew that there was so much to learn about paper! 110lb Index it is!
I'll be sure to get a rotary trimmer as well.
Is there much of a difference other than sheet capacity between the rotary cutter you recommended and a cheaper one? (e.g.http://www.amazon.com/Fiskars-Titanium-SureCut-Trimmer-01-005454/dp/B003SLC3IU/ref=sr_1_11?ie=UTF8&qid=1457236889&sr=8-11&keywords=rotary+paper+trimmer)
Also, sorry for all the paper questions, but do you think 80lb cover paper would be better? Or is that coated and therefore unsuitable? http://www.amazon.com/Hammermill-Color-Digital-Sheets-120023/dp/B000J0C47S/ref=sr_1_1?ie=UTF8&qid=1457238143&sr=8-1&keywords=80lb+cover
Thank you for your time!
This is really good paper for copics:
http://www.amazon.com/Hammermill-Color-Digital-Sheets-120023/dp/B000J0C47S
Cheap, nice and smooth, and the pages are almost as thick as cardstock too. It's 80lb paper, so it absorbs a hell of a lot of marker and lets you do a lot of layering.
Frisco Craft 4336883150 Transfer Roll 12" x 50 Feet Clear Lay Flat | Application Tape Perfect for Cricut Cameo Self Adhesive Vinyl for Signs Stickers Decals Walls Doors Windows https://smile.amazon.com/dp/B073XRLZ6Z/ref=cm_sw_r_cp_apa_i_.gGvCbMP2KCR3
I have been using this roll for about 6 mos and have yet to be disappointed.
I use this one: https://www.amazon.com/Sunstar-Kadomaru-Corner-Cutter-S4765036/dp/B0076FJ7SS/ref=sr_1_4?ie=UTF8&qid=1537575611&sr=8-4&keywords=corner+rounder
​
It's nice, relatively inexpensive, and has three choices of round.
If you want to pre-make your battle maps, your can go gridless and cheap with butcher paper
Alternatively, you can do a grid on EITHER grid-backed wrapping paper for cheap (especially after Christmas!!) or go with Easel Paper
Oh and I'm getting these
http://www.amazon.com/Sketches-Making-Giant-Hardcover-Sketch/dp/B0025TZ30G/ref=sr_1_2?s=arts-crafts&ie=UTF8&qid=1418088587&sr=1-2
http://www.amazon.com/Sakura-Pigma-Sensei-Manga-Drawing/dp/B001463RWW/ref=sr_1_6?s=arts-crafts&ie=UTF8&qid=1418088761&sr=1-6
Thankfully my birthday is this saturday and christmas is coming up too, so I should get enough money to buy all of these.
I recently got some Canson marker paper (100sheets for $15 in my local Michaels) and it works really well! You can only write on one side (the other side seems to repel ink), but that's fine because it's thin enough to see guidelines on a sheet underneath instead of having to draw them for every practice sheet.
Edit: Fixed the link. There are more sizes available on amazon than locally. Will have to note that for myself, because it could be nice to have something larger when my pad runs out.
You still could but now you just have to copy it or if you have access to something large enough, print it.
I use easel pads and they are great for pre-drawing encounters. For a highly customizable thing that you'll use over and over again I recommend /u/Gandledorf's comment. The vinyl Chessex mat is great.
I use Arches 100% cotton paper. To stretch the paper I soak it in a water bath for about 10 minutes then place it on a board and tape the edges down using butchers tape (some masking tapes seem to work ok as well). I use staples for larger papers. Let it dry then remove it when you are ready to paint. The stretching helps with absorption and reduces buckling when using a lot of water.
You can also get paper in a block that has the sheets glued on all four sides. This prevents the need for stretching as the paper is held down onto the block. Sheets are more versatile and easier to work with IMO.
So, I make my own cards for things every once in a while, and I have this corner rounder. You could trim the sides, then re-cut the corners, and you'd never be able to tell the difference. :)
I ran the first two books of RotRL before we switched to pure virtual games (via Roll20). I used a 3-pronged approach.
Amazon link to grid pad
For instance, in Book 1 I set it up as follows:
It looks like you've got a little warping there; you should try painting on block watercolor paper - the pages are glued to each other around the edge so you don't need to stretch the paper or worry about it ever warping (Something like this, but not necessarily as expensive). Other than that, I'm digging the colors on this. Nicely done.
-ponytails work great in a pinch to keep cabinets shut when you're at someone's house that isn't child proofed. Works particularly nice with knob handles.
-baby carriers can be used on chairs when you're out and about for a makeshift child belt to keep your kiddo in place.
-if you're worried about your child who recently discovered opening doors escaping, switch the door handle so the lock is on the other side of the door and hang a key inside up and out of reach.
-old phones work great as mini tablets! Never trade in those suckers, they are freaking gold! Plus, they're pocket sized. 😉
-create a distraction kit for when you're out and about so dinners or whatever are a breeze. Right now for our three and four year old it consists of a tablet (or old phone) loaded with learning apps and downloaded movies, colored pencils, a pad of paper, and kiddie headphones.
-if you're truly desperate for a lap belt at the store and the carts at the store don't have one, dog leashes work nicely. Strap it around them like a normal lap belt and clip it or tie it behind them on the cart.
-if your kid falls asleep at the store, get a dog bed or soft bath mat for the bottom of the cart. Bam, travel bed.
-snag a snack for the kids when you get into the store and just buy it in your way out. Chips or pretzels do great with mine. They feel like they get a treat and shopping is easier for me. Win win.
-water baby carriers exist in both mesh and bathing suit materials. Definitely worth it to have when you're going to the beach with a baby. Especially if your baby has an older sibling you'll be chasing.
-sock, plastic bag, sock works awesome as waterproof winter gloves that are harder for kids to take off. Also, plastic bags over the socks in boots work nicely to keep their feet dry too.
-if your kids like coloring on the walls, try hanging up large sheets of paper on the wall so they have a safe place to do it. They sell huge rolls on Amazon like this: https://www.amazon.com/dp/B00006IDXW/ref=cm_sw_r_cp_apa_i_zz6aBbABBYF4A
-laminate activity pages so they're reusable with dry erase marker. (You can find tons of free work sheets online to print off)
amazon has it for the same price and free shipping
http://www.amazon.com/Candle-Hour-20561B-144-Hour/dp/B001MTRBIC
edit: refills are about $30
If you want an inexpensive laminator, I bought this one from amazon (http://amzn.to/2kxWSdz). It was around $22. It does one page at a time and seems to do a fine job. I only have experience with this one laminator, but for taking paper things and covering them with plastic it seems to work pretty well. It only comes with 5 pages of lamination material, so you will need to pick up a pack of the lamination pages. A pack of 100 of the "laminating pouches" cost around $12 on amazon. "Pouches" is kind of a misnomer. They open kind of like a clamshell (connected on one edge, the other three sides open). You slide whatever you want to laminate inside, then slide it through the machine. It was a little difficult getting the hang of laminating a bunch of small pieces on one sheet. The trick I used was to put a book in front of the laminator that was even with the level of the input slot, that way you could just gently slide the page forward without moving the little pieces around inside. My first few attempts were done just holding it by hand and feeding it in and I ended up having pieces move and overlap and get laminated overlapping each other.
I would also recommend a corner cutter (like this: http://amzn.to/2k64w1u). When I was cutting out laminated cards/pieces, I ended up with pointy corners. It wasn't a big deal, but being able to round out the corners makes things just feel better to handle.
The whole setup cost about $45 from amazon for laminator, 100 pages (of which I still have plenty left) and the corner cutter.
After buying a laminator, I ended up discovering all kinds of things that I didn't realize needed lamination. :)
Its hefty for sure. Traveling with this thing is going to be challenging although the 75 lbs (110 gsm) is the paper weight not the shipping weight.
Looks like amazon.uk has an option Big Book
Hope that Helps!
Amazon. https://www.amazon.com/gp/product/B003HKQCOS/ref=oh_aui_detailpage_o04_s00?ie=UTF8&psc=1
It works wonderfully for making maps for the game (I keep forgetting to make a forest map, I am TERRIBLE at drawing, haha.). The only problem I have is that when I got it, all the papers fell out of it after a few uses. I just started tearing them out.
If you don't mind using premade items, this is great. http://inkedadventures.com/main/downloads/
Not too pricey, and becase you can print them out, you will never run out of things that you need, or will use. I have a few printed out on poasterboard. They make for great instant rooms, or battle areas when you have a few unexpected things happen.
A few days late here, so for all I know you've already purchased, but I have one called the "Sunstar Kadomaru Pro, Corner Cutter (#S4765036)" and I really love it. It does three different corner sizes, so you can experiment with an index card or something and see which angle works best. I got it from Amazon here:
https://smile.amazon.com/gp/product/B0076FJ7SS/ref=ppx_yo_dt_b_search_asin_title?ie=UTF8&psc=1
I've trimmed the borders off a number of decks, and this guy always makes my corners look great. (I wish the same could be said for my edges -- I'm still working on doing those cuts as evenly as I'd like...but hey, at least my corners always look good...)
Here's all the files you'll need.
For the paper, I just use standard 8.5x14" Legal paper. My printer has a duplexer, but it won't duplex legal, so I had to do a manual duplex (flipping the paper over by hand and printing everything again). The cover is 65lb Bristol Board and was manually duplexed as well.
My books have 10 pages in them, which is made by two sides of 5 sheets of paper. The pages print 2-up per page and they are cut down the middle long-ways, that way when you fold them in half, the score sheet appears on the front page and the notes page ends up on the back of the score sheet. 5 sheets of paper make two books. I have a paper cutter that can cut the full length of the legal sheet, but if you don't, you can simply use a straight edge and a razor blade, or if you have a regular paper cutter, you can just fold the pages in half on the short edge, then cut them in half on the long edge.
Once everything is stapled, I round the corners using a corner cutter. Here's a cheaper corner cutter, but it can't handle the whole book at once. I have both of those corner cutters, and the cheaper one comes in very handy for other projects I do.
In that link is both Trap and Skeet books. I have a doubles sheet, but I need to finish the cover. Once I get done with it, it'll be in that link as well.
I recently got some transfer tape from Frisco Craft that I really like. They offer different variations of transfer tape (they'll send you a bunch of samples with your first order). I just ordered through Amazon: https://www.amazon.com/gp/product/B073XRLZ6Z/ref=oh_aui_detailpage_o00_s00?ie=UTF8&psc=1 That's just a roll of transfer tape without backing. I find it really easy to work with actually. But it's not the paper kind; I see you had gotten the paper transfer tape.
I use a similar method.
I layout my cards in Gimp and print them on Polaroid photo paper that I get at the Dollar Tree. 8 sheets for a buck = 72 cards.
I cut them on with a Fiskar rotary cutter and usually sleeve them with a cut down 3x5 card as backing for a little extra stiffness in UltraPro sleeves. But, if it's something that I want to keep...
I use a Swingline laminator with Apache pouches and corner punch them with the Kadomaru Pro.
https://www.amazon.com/gp/product/B010PK3G96/
https://www.amazon.com/gp/product/B00FORXKOC/
https://www.amazon.com/gp/product/B0076FJ7SS/
The rotary cutter was a little under twenty bucks at Walmart. It was cheaper than Amazon when I bought it.
these ones are the ones I've been using, been working pretty well !
The paper he used is 1-1/16in^2 , so yes, tiny.
Item
Show this gift some love. Thanks for the contest.
http://www.amazon.com/Stanley-Bostitch-Binder-Assorted-RBHP-ASST/dp/B005MWPJWU/ref=sr_1_4?ie=UTF8&qid=1346208066&sr=8-4&keywords=binder+with+hole+punch
No pics, sorry. No excuse, just lazy. >_> It would be a pain to get any of those games out at the moment.
This is the corner cutter I use. I used to use a hand-held one I got at Michael's, but it was a pain to clean out and uncomfortable to use for very long.