Best power transmission products according to redditors
We found 657 Reddit comments discussing the best power transmission products. We ranked the 364 resulting products by number of redditors who mentioned them. Here are the top 20.
We found 657 Reddit comments discussing the best power transmission products. We ranked the 364 resulting products by number of redditors who mentioned them. Here are the top 20.


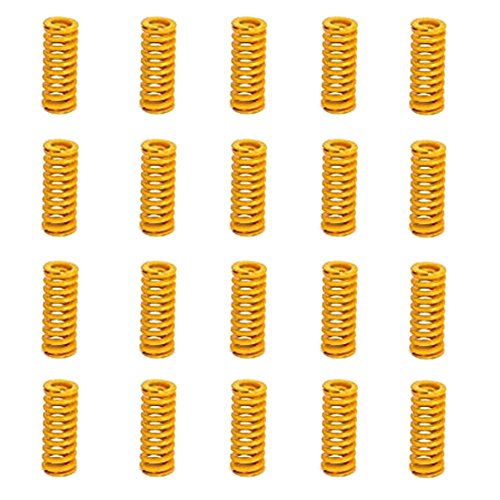


Buy better springs like these: https://www.amazon.com/SIQUK-Springs-Compression-Creality-Leveling/dp/B07K9PBML5
The stock springs are garbage and don't hold anything in place. A slight bump will knock it out of level.
Most hardware stores sell bearings in the specialty hardware section. Or something like this: http://www.amazon.com/dp/B018B7D05K
It'll rotate but not smoothly. I'd recommend you use turntable hardware instead. Read all the comments on the page to get a better understanding.
Also, remember that if your room is 4x4, a 4x4 square won't rotate in it, you'd have to make it circular or a smaller square.
your wife is farting
j/k
probably a plumbing thing (vent pipe moving in the wind? water hammer situation?) . do you share a wall with anyone? is your bed on wood floors or carpet?
if your bed touches the wall, move it out. perhaps buy some rubber isolators for the feet:
https://www.amazon.com/Diversitech-MP4-V-Anti-Vibration-Pack/dp/B00BVEMLR4
It's generally better to use it stock and upgrade as you discover the need to.
The only (purchased) upgrade you really need from the get go is [better bed springs] (https://www.amazon.com/gp/product/B07KF9LZ2L/ref=ppx_yo_dt_b_asin_title_o02_s00?ie=UTF8&psc=1). The stock ones are terrible at maintaining the bed at level. If the bed it comes with is warped, then also a glass bed, but that's the only reason you would need one. Mine wasn't warped and it's just fine. After that, aluminum extruder because the plastic one will start to wear eventually, and capricorn tubing.
A Pi, auto leveling, new electronics, micro swiss are all much more in the "luxury" upgrade category in my opinion. I don't have any of those and I don't feel any particular need to after three months of having the printer.
Make sure you also look into what's called "luke's hotend fix." I struggled with an underextrusion goblin for a while until I did that and upgraded to an aluminum extruder and capricorn tubing. Goblin banished.
I recommend also getting some calipers, though they're not necessary, and a set of feeler gauges has made bed leveling easier and more consistent than using a sheet of paper.
edit: I misread and thought you were trying to save money. Anyway, I still recommend using it mostly stock for a while to get familiar with it before upgrading a bunch of stuff. Out of those, after bed springs, extruder assembly and tubing I'd probably go for the electronics and hotend since bed leveling comes pretty easy to me now.
If you're going to replace the rods, you should really consider upgrading straight to lead screws. I replaced the m5 rods on my Prusa i3v with 8mm leadscrews and saw a pretty noticable increase in print quality. They'll help make your printer more rigid and have less backlash, giving smoother and more consistent print faces.
You can get relatively cheap ones off of amazon that will be a serious upgrade over threaded rods: https://www.amazon.com/Drillpro-400mm-Lead-Screw-Printer/dp/B017AR5QBS
> Mostly, it’s keeping the bed leveled that’s the hard part
I got you fam https://www.amazon.com/FYSETC-Motherboard-Accessories-Compression-Creality/dp/B07GXC1G2B/
I used this.
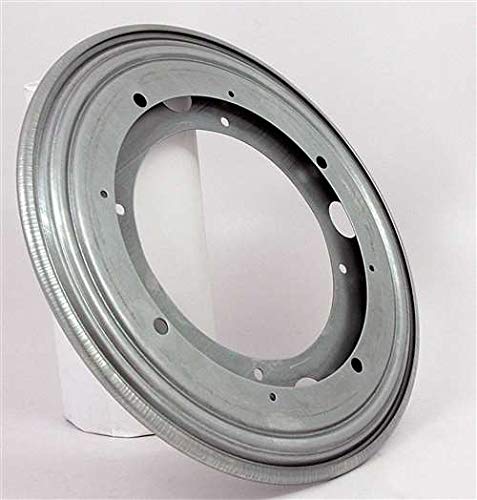
One Square 3" Inch Lazy Susan Turntable Bearing - 5/16" Thick & 200 LB Capacity https://www.amazon.com/dp/B00ZSQSWTM/ref=cm_sw_r_cp_apa_i_dziuDbB1ZASZ4
It's easier than that, even:
Just buy an assortment of bearings. They're cheap. Then when you take it apart, you will definitely have the right size, just match the old ones to the new ones... Which will be 1/4", since this is an 80's Japanese bottom bracket and will be totally standard. ;)
(edit: And then you'll have bearings for your hubs and headset too!)
Great printer, the Ender 3 is very popular right now because it is fully open source. Which means if you have any questions, then there is lots of community support for it right now.
Out of the box everything is great, the only thing I would suggest is to spend a few bucks and upgrade the bed springs right off the bat. I've had mine a few months. Once I got my bed level it has been running great.
Also buy a few roles of PLA filament, because it only comes with enough to get a few test prints. Oh, and replacement nozzles, because they will eventually wear down and need replaced.
Surprisingly cheap. Here is a grab bag of 500 bearings of assorted sizes between 1/8 and 1/4" for $8.
> A 1/4" bearing from a "bike specific" company is the exact same thing as a 1/4" bearing from any other company
As long as they're not a terrible grade... Grade 25 is typical for bike use these days and they're cheap enough not to bother with something like a grade 300. There are still grade 300's being sold by bike companies, but like you said, they're more expensive (even though they're lower quality).
It's possible that while removing a previous print you knocked the bed out of level. One of the best upgrades I usually recommend is heavier duty springs to replace the stock bed level springs.
Something like these:
https://www.amazon.com/gp/aw/d/B07FY47BX7?psc=1&ref=ppx_pop_mob_b_asin_title
I've been using these: https://smile.amazon.com/FYSETC-Motherboard-Accessories-Compression-Creality/dp/B07GXC1G2B
Is it the raw seek noise of the drives that is annoying, or the seek noise amplified by the cabinet the NAS is sitting in?
I used to have a TiVo on top of an armoire in the bedroom that echoed through the wood.. one of those relatively cheap floor mats for fatigue (foam mats that interlock) solved the problem for me entirely.. You could still hear the seek in a silent room, but not with the TV on. I now have a similar problem with 3d printers upstairs from my bedroom.. these work wonderfully to isolate the vibrations away from the cabinet and keep the sound at bay: Diversitech MP4-E E.V.A. Anti-Vibration Pad, 4" x 4" x 7/8" Pack of 4 https://www.amazon.com/dp/B00BVEMLR4/ref=cm_sw_r_cp_tai_DK2JDbBSHP855
When setting your springs make sure you wind them all the way tight and then back off two turns.
Also upgrade to the yellow springs. https://www.amazon.com/FYSETC-Motherboard-Accessories-Compression-Creality/dp/B07GXC1G2B
This bullshit.
US $17
Canada $100?!
Again, I am a super novice...
​
I switched out to a glass bed simply because my stock bed was warped. The tip could touch on the corners and a sheet of paper would slide right through in the center. Once you get the bed level though, I don't think your adhesion problem will be as much of an issue. The magnetic bed it actually pretty nice. I actually ended up turning my bed down a little, to like 55. I was at 60, and it was working, but I was having adhesion problems as well and figured it might be a combination of speed and filament being too hot to stick with a temp that high. I also run my PLA at 210.
​
These springs made leveling the bed much easier. Springs
This was the bed I went with. I like it a lot.
Okay,
this is a fantastic lubricant
this is a fantastic sharpener
I do not recommend going to Walmart or a general sporting goods store. They hire people who don't specialise in knives ( unless they have a personal interest ) and aren't very aware of better products.
depending on the keyboard you can fill it with foam or get sorbothane dampening mats like this. there are examples on youtube how it affects the sound of the kb. the biggest factor is the switch tough.
edit; just saw your flair. if this is about your realforce is the louder sound when you let go of a key?
I use these in my apartment: https://www.amazon.com/Diversitech-MP4-V-Anti-Vibration-Pack/dp/B00BVEMLR4/
seems to work for my angry downstairs neighbor.
What you absolutely MUSTTTTTTT!!!! order? Nothing. The printer works as is. But if you want to do yourself a favour, here's a list of what I consider essentials:
- New springs, both bed and extruder. I don't have a link for an extruder one as I upgraded my entire extruder drive frame and that came with a better spring
- A new removable bed. Creality glass bed or glass with a PEI sheet is my bed of choice
- Thermal pad to avoid the annoying bed clamps. Cut squares out of it, lay them in a checkered pattern alternating between thermal pad and nothing and place your bed on top. They will hold the bed in place and help with heating
- Stepper dampers if your printer is anywhere near where you spend your time, it sounds like a bloody jackhammer right out of the box
- New tube fittings, the stock ones are terrible and will give out in a matter of weeks at best. They also barely hold onto the tube
There are a ton of other great upgrades, but I think a good idea is to get a feel for it yourself.
What you can do, however, is check out some printable upgrades. I have this thread where people contributed with their choice of printable upgrades. It's a great list you can refer to later. Essentials on that are the fan guard and LCD back cover simply because the Ender 3 as is has the fan and back of the LCD exposed and that makes it crazy vulnerable to dust and gook damage
So far working with the Anet A8 has been an extreme lesson in patience. It's honestly a bad printer but if you're willing to spend time and a little money, you can make it decent. First up should be fire safety. Immediately upgrade to the latest version of Marlin and install a mosfet for at least the bed, if not both the bed and hot end.
I would also recommend ordering new bearings before assembling the printer. The ones it comes with are pure garbage and for $10 it's an easy purchase. Another thing that might be worth investing in immediately is better belts.
After it's assembled and you can print well enough print an X belt tensioner and a Y belt tensioner. After that it might not hurt to print some braces for the weak acrylic frame. If you're hardcore about the frame check out the Anet AM8 upgrade which replaces the acrylic one with metal for about $60.
Good luck!
Probably. could be wrong though. Regardless it's pretty cheap.
Here is a relatively cheap supply list:
Loctite Blue 242:
https://www.amazon.com/dp/B000I1RSNS/ref=cm_sw_r_cp_api_9tS9yb9QJHK9R
Nano-Oil 10 weight:
https://www.amazon.com/dp/B002C9RGA4/ref=cm_sw_r_cp_api_EwS9yb10KF8P2
Torques:
https://www.amazon.com/dp/B000LQEUJ0/ref=cm_sw_r_cp_api_yvS9ybNJ3JZ9A
There are probably better torques but l think these will work. I have a $45 set so I didn't think that is really cheap lol
Even if your printer would have arrived with all 4 springs, one of the best, cheapest, and easiest upgrades for the Ender 3 is installing these Yellow springs
As others have stated it looks like Z wobble
Do you use Flexible Coupling's? (eg:https://www.amazon.com/uxcell-5mmx8mm-Helical-Coupler-Coupling/dp/B00KHTVOEU/ref=pd_lpo_328_lp_img_4?_encoding=UTF8&psc=1&refRID=C2PXGYBEHJNE7GHTR8RY)
To connect your Z motors to the rod/lead screw?
If so, I would swap this to a solid connector (And upgrade to lead screws if you haven't already)
Even these work better than the Flexible Connectors
http://www.thingiverse.com/thing:602481
Something like these? Edit; that was my first google hit, pretty sure any place like home depot has a selection on the shelves.
I've settled on these
https://www.amazon.com/gp/product/B007B2A84S/ref=oh_aui_detailpage_o02_s00?ie=UTF8&psc=1
1 inch stainless steel balls, they are surprisingly heavy for how small they are, which is great because I can add as many as I need to counteract floating without being bulky
one on either side of a bag will weigh down even the most air filled bag
Yes, I have one. Here's my post (with pics): https://redd.it/4ne1f9
The PCB & plate rest on a lip in the bottom half of the case. I was not happy when I got it assembled because there was a considerable amount of flex.
/u/axtran suggested that I use I sheet of Sorbothane between the PCB and the case. It worked great and the keyboard feels rock solid.
For the cable, I used a short DIY USB cable from 1UP Keyboards (/u/skiwithpete). I used cable ties to secure it to the PCB in a couple of places. The cable sticks out of the back of the keyboard for a couple of feet and I plug it into an USB extension cable.
I have vintage MX blacks in my Phantom and it's my favorite keyboard in my collection.
You should definitely replace any missing ball bearings, they are pretty cheap and will make the bearings smoother than they would be with some missing. Here are some bearings i got in the past that are good, but you can always just get the individual sizes you need instead.
There are several videos on youtube for first time ender 3 setup. Mostly they cover some detailed orientated techniques like...
here bought some like a week or two ago. Just clicked buying options and picked one.
I got this set from Amazon and it's way more than you need. I've sent a few sets to other friends who have gotten Ender 3s and still had leftovers for when I bought my second one.
For less messy amazon links you can extract the part after "/dp/" in
https://www.amazon.com/Ceramic-Bearing-8x22x7-Bearings-VXB/dp/B002BBQDW0/ref=sr_1_3?ie=UTF8&qid=1484208187&sr=8-3&keywords=vxb+ceramic
and make it:
https://amzn.com/B002BBQDW0
BEEP BOP
Plz send any recommendations via PM
Don't forget some sorbothane blocks to set it on. They reduce vibration transmitted to and through the floor by an amazing amount.
here are some I bought from Amazon, took about a week to ship.
1600pcs Insulating Fiber Washer Spacer 2mmx4mmx0.3mm for Motherboard https://www.amazon.com/dp/B00TX5P3OG/ref=cm_sw_r_cp_apa_i_r-PuDbQQ5GXZJ
Try using some of these. Diversitech MP4-E E.V.A. Anti-Vibration Pad, 4" x 4" x 7/8" Pack of 4 https://www.amazon.com/dp/B00BVEMLR4/ref=cm_sw_r_cp_api_S8XfAbH5554VM
Put one under each corner of the furnace where it sits on the trusses. You might need a total of six depending on how the AC coil is mounted.
I see these
https://www.creality3donline.com/creality-2pcs-cr-10-ender-extruder-spring_p0153.html
Or should I buy some yellow ones from amazon?
FYSETC 3D Printer Motherboard Accessories 0.31 in OD 0.78 in Length Compression Springs Light Load for Creality CR-10 10S S4 Ender 3 Heatbed Springs Bottom Connect Leveling - 10 Pack
https://smile.amazon.com/dp/B07GXC1G2B/ref=cm_sw_r_cp_apa_i_9YFnDb0DV66V4
I'm pretty new to this too, I bought my Ender 3 Pro around the same time as you. Quiet printing is pretty high on my list as well as being able to print high-temp exotic filaments in the long term while maintaining reliability.
First upgrades I purchased were stiffer bed springs so I would be less likely to throw the bed out of level while removing prints or working around the printer and Capricorn XS tube since it has a more consistent internal diameter, fits closer to the filament, and can work with slightly higher temps. I also picked up a pack of bowden couplers recently as I noticed the end nearest the extruder is sliding past the coupler jaws on de/retraction; don't worry about that unless it's an issue for you. That's about $30 alone since I don't have a supply shop locally and have to order those parts in bulk. I had a Pi 3B laying around unused and flashed Octoprint onto it. Highly recommended. I have a replacement Noctua hotend fan, buck converters, and 5015 blower on order to quiet the fan noise; about $32. Just replaced the Meanwell psu fan with a 60x25mm Noctua I had lying around (Note: there may be better options in the 92-120mm range to replace part of the PSU housing, but that's what I had laying around). Next upgrade coming is the SKR Mini E3 with TMC 2209 drivers ($28) to eliminate almost all of the stepper noise. Also looking into a replacement for the control board fan and some vibration isolating feet for the frame. As far as higher temp printing I haven't made a lot of progress aside from buying a titanium all-metal heat brake ($11) winch I have yet to install or inspect, and looking into enclosure and electronics relocation avenues.
Either way the mods I purchased came in at around $100 US which should quiet the printer and help with reliability. Also looking into picking up a good M3-M4 bolt kit if any exist in the US.
Here are some links to the things I picked up and will, which may be helpful if you're in the US. Mostly from Amazon.
Type | Name | Link | Price
---|---|----|----
Reliability | 8mm x 20mm yellow springs | Link | $6.98
Reliability | Capricorn XS Tubing | Link | $11.49
Reliability | PC4-M6 / PC4-M10 Pneumatic Bowden Fittings | Link | $11.99
Silence | Noctua 40mm x 10mm 3-pin fan | Link | $13.95
Silence/Various | LM2596 Adjustable Buck Converters | Link | $10.95
Silence | 24v 5015 Radial Ball Bearing Fans | Link | $7.19
Silence/Various | SKR Mini E3 w/ TMC 2209 drivers | Link | $28.81
High Temp | Titanium All-Metal Heat Brake | Link | $11.52
TOTAL: $102.88 US + Tax
Parts already purchased/ bought with printer
Type | Name | Link | Price
---|---|----|----
Reliability/High Temp | OEM Ender 3 Glass Bed | Link | $20
Reliability | Feeler Guage Set | Link | $5
Reliability | 608zz Bearings, using with this(My Remix), this, and this, though I like this design a bit better | Link | $5.98
QoL Improvement | Raspberry Pi 3B w/ Octoprint | Link | $34.46
Silence | Noctua 60mm x 25mm 3-pin fan, goes with this mod | Link | $14.95
TOTAL: $80.39 US + Tax
Future planned upgrades
ACME thread leadscrew
I learned about this stuff from another user. You may wanna buy something thicker but it works great. I love the case btw. Isolate It!: Sorbothane Acoustic & Vibration Damping Film 70 Duro (0.10 x 6 x 12in) https://www.amazon.com/dp/B0084EXWP4/ref=cm_sw_r_cp_apa_XWxEzb1JMVN91
Well it's not quiet to be honest but you'll have a hard time dampening the noise no matter how you go about it, I do recommend getting vibration dampening cube thingies (like this or maybe this) to put under your rig just so the noise won't travel into the floor which will make it exponentially louder. Those anti vibration things also help keep the vibration in the rig rather than dispersing it into your surrounding area.
As for structural integrity, I've had no issues. I got a tube of threadlocker in case the screws would vibrate loose but I haven't put it on yet and they are still as tight as the day I put them in so I wouldn't worry too much.
Probably nothing. There's a good chance you're extruder gear is slipping. IMO the stock spring doesn't put out enough force to grip the filament and there's no mechanism to tension it. I would recommend one of the following:
Pull out some filament and check for solid bite marks. If you don't have any or have very light bite marks you know your issue.
​
It's on my todo list to merge my model with the newest extruder bracket so you can tension the spring easily.
ohhh okay, I was thinking a stationary stand, with a television that could rotate 180 degrees to face either way
what you're talking about would be referred to as a "turntable". You might just have to make it yourself by driving an anchoring piece into the floor, then adding small casters to the corners if need be.
you would want a bearing swivel plate to mount to the floor, base it with wood to the height you need, and then mount your table.
something like this will even hold 1000 pounds and they're used in cabinet making. Which is basically what you are doing.
After doing quite of bit of reading, I went with these:
OTRMAX 4-Piece 8mm Longer Linear Motion Ball Bearing Double Side Rubber Seal Linear Bushing CNC Part LM8LUU https://www.amazon.com/dp/B01MXTYSVL/ref=cm_sw_r_cp_apa_5iPSBb8S68Y2Q
I'm pleased with them so far.
FYSETC 3D Printer Motherboard Accessories 0.31 in OD 0.78 in Length Compression Springs Light Load for Creality CR-10 10S S4 Ender 3 Heatbed Springs Bottom Connect Leveling - 10 Pack https://www.amazon.com/dp/B07GXC1G2B/ref=cm_sw_r_cp_api_i_92l7CbYBEGJYC
Mine printed fine for a couple months until I got lines like those.... I bought a new lead screw on amazon for about $10 and it’s been printing fine ever since.
https://www.amazon.com/dp/B017AR5QBS?ref=ppx_pop_mob_ap_share
This is the one I bought.
Oh thank god Reddit is back up! Okay, I think a good bet might be these: https://www.amazon.com/OTRMAX-4-Piece-Longer-Bearing-Bushing/dp/B01MXTYSVL/ref=sr_1_2?s=industrial&ie=UTF8&qid=1498657770&sr=1-2&keywords=lm8luu as it is the correct size and has good reviews.
Can't say for sure without knowing what size/specs, it will vary by brand as well, but this one I picked at random on Amazon says it's 0.6 ounces most will be around this.
OnDaq,
This one from Amazon seems like a pretty good deal.
https://www.amazon.com/VXB-Ceramic-Miniature-Bearing-8x22x7/dp/B01JKBUR1Q
It's a full ZrO2 bearing. There are two types of ceramic bearings (Si3N4 Silicon Nitride, and the ZrO2 Zirconium Oxide). Then you have full or hybrid. A full means that all components of the bearing are made from those elements. The hybrids will usually have the ceramic balls and the rings/races are made from some other material. Just make sure the size matches to the existing bearing in your spinner if you're buying a replacement online.
Regards,
Nate
Those couplers are trash and so is the PTFE tube they sent. They may work for a while but you'll want to swap them sooner rather than later. Here's a list of upgrades you'll probably want to do. You'll also want to look up a tutorial on how to upgrade your firmware so you can activate safety features (thermal runaway protection specifically). This also doesn't include a BLTouch or EZABL (auto bed levelers) as I have yet to make a choice personally.
Couplers and Tube:
SIQUK 3 Pieces Teflon Tube PTFE... https://www.amazon.com/dp/B07FPJHRTQ?ref=ppx_pop_mob_ap_share
Metal Extruder: ( original plastic one will wear out or break)
Ender 3 Creality 3D Upgrade... https://www.amazon.com/dp/B07KSS8FRQ?ref=ppx_pop_mob_ap_share
Bed Springs: (more than needed but oh well)
SIQUK 16 Pieces Heated Bed... https://www.amazon.com/dp/B07K9PBML5?ref=ppx_pop_mob_ap_share
Glass Bed: (goes on top of print bed which is usually warped, printing on an uneven surface not so bueno)
Creality Upgraded 3D Printer... https://www.amazon.com/dp/B07DS2LZF1?ref=ppx_pop_mob_ap_share
Raspberry Pi 3B+ for OctoPrint: (still need microsd card for it I believe)
CanaKit Raspberry Pi 3 B+ (B... https://www.amazon.com/dp/B07BC6WH7V?ref=ppx_pop_mob_ap_share
Stepper Motor Dampers: (silences the motors, no more sounding like dial up internet lol will need to print mounts from thingiverse)
Upgraded NEMA 17 Stepper Steel... https://www.amazon.com/dp/B07DNT72SF?ref=ppx_pop_mob_ap_share
Heat Sinks For Stepper Motors: (once stepper motors have dampers and aren't attached to the metal frame, they can get a little hot)
40mmx40mmx10mm Black Radiator... https://www.amazon.com/dp/B07KWVGGGK?ref=ppx_pop_mob_ap_share
Hot end silicone sleeve: (may not need, mine came with one instead of the old insulation)
Creality Original 3D Printer... https://www.amazon.com/dp/B07HNXJ39T?ref=ppx_pop_mob_ap_share
Extra Filament: (ender 3 only comes with a small sample "spool", this is just a brand I use and have had decent results with. The metallic silver hue shows off detail well)
3D Printer PLA Filament 1.75MM... https://www.amazon.com/dp/B00ME7YUIU?ref=ppx_pop_mob_ap_share
https://ultimaker.com/en/resources/20441-manage-profiles
Here's the springs:
https://www.amazon.com/FYSETC-Motherboard-Accessories-Compression-Creality/dp/B07GXC1G2B
Buy these and swap em in.
Less bed wobble, less leveling in the long term.
Upgrade your bed springs: https://smile.amazon.com/Adiyer-Compression-Springs-Printer-Leveling/dp/B07KF9LZ2L/
In my opinion, this is the MOST necessary modification to do on any Ender 3. The springs that come with it are trash, and your bed will constantly shift up or down unless you get better springs. I haven't had to re-level my bed using paper in months.
I'd stick with the glass bed if I were you, it really helps if your bed is warped (which it probably is, judging by your first pic). Just from looking, it seems like your nozzle is too close on that second pic. If you're using a piece of paper to level, make sure to check the nozzle height at locations all over the bed, not just on the edge or the center (although the center is probably the most important spot).
Also, just a reminder to clean your bed with alcohol often. The Creality glass bed can be VERY sticky if clean, so it's actually pretty forgiving on that first layer. Your nozzle can be slightly farther away than it should be, but it will still adhere fine. But if the bed is dirty you'll have a lot of trouble.
As others said, vibration is the real issue.I made a platform with these: https://www.amazon.com/Diversitech-MP4-V-Anti-Vibration-Pack/dp/B00BVEMLR4 and some insulating panel from home depot and helped quite a lot with the vibration coming from my kickr.
edit: inflating -> insulating
The stock Ender 3 extruder is mostly plastic, and the spring in it is very weak. Often the extruder will crack or break, and the filament ends up digging a groove into the arm.
As for bed springs, something like this will do:
https://www.amazon.com/FYSETC-Motherboard-Accessories-Compression-Creality/dp/B07GXC1G2B/ref=sr_1_1?keywords=3d+printer+spring&qid=1554171742&s=gateway&sr=8-1
From amazon
You can buy it on amazon:
https://www.amazon.com/Mercurry-Meters-timing-Rostock-GT2-6mm/dp/B071K8HYB4/ref=sr_1_3?ie=UTF8&qid=1525473423&sr=8-3&keywords=3d+printer+belt
Also on the tevo store:
https://tevo3dprinterstore.com/collections/tarantula-spare-parts/products/10meter-gt2-6mm-open-timing-belt
Notice also that the acrylic parts are fragile and breaking those before printing better replacements will be expensive to solve, unless someone can print the parts for you ofc. So take it easy and don't tight the nuts too much. Use washers whenever you can.
Or $9.95 with free shipping on Amazon.
Sure
These are what I have
You can get an assortment of bearings on amazon. I got these when i serviced my bike: https://www.amazon.com/gp/product/B018B7D05K/ref=ppx_yo_dt_b_asin_title_o09_s00?ie=UTF8&psc=1
I bought these lead screws. Be careful because they will not fit by default. You will have to drill/dremel out the existing z-axis mounts where the original threaded rod brass nuts were to make these fit. These take M-4 screws while the old ones took M-3 so the holes will need to be enlarged on the carriage. It took about a couple of hours to mount it correctly. It seemed that everything the Geeetech came with was too small by a couple of mm. The 8mm spring couplers were not exactly 8mm so I had to purchase new 8mm spring couplers to get the new lead screws to mount to the z-axis steppers. You will also have to cut the rods shorter because these were 400mm. I also had to tap the M4 threads into the mounting nuts for these. this might not be required as yours might come tapped but I would recommend buying an M4 tap or a set of metric taps. These were a pain in the ass to install but they produced really top quality prints, anything better than I've seen come from my printer. I would say it's worth the bit of engineering to get them to fit. I mean that's what this hobby is about right?
I installed the cheap Amazon replacement belt today and wow, what a world of a difference. I got my X axis down to 258 and my Y axis down to 259 which is good enough for me. I did a test print, and the prints look nicer than before. I looked at the old belts I took off (the kit stock belts) and they are indeed the gates GT2 belts. After further investigation, I think the issue was that the stock belts were slipping out of the locking groves where they fasten to the carriage. I measured the thickness of the stock belts and got 1.33mm, and measured the thickness of the Amazon belts and they are 1.54mm. Both belts are supposed to be 1.38mm, so the gates belts are under spec and the Amazon belts are way over spec. I think in this case though, the extra thickness of the Amazon belts help the belt stay tight, even if it's thicker than it's supposed to be. I can now strum the new belts and get a guitar sound, where as with the stock ones I couldn't. And now I have like 5 meters of extra belt left in my parts drawer!
I highly recommend upgrading the springs.
I got these, they are 10x more stiffer and make bed leveling a breeze.
Linear rails are really nice, but honestly I think it's total overkill for a budget printer like this, if you got the cash though go for it.
Just a word of caution though, lots of people have had mixed experiences with the linear rails off aliexpress. some people love em, others have ordered them and they've fallen apart in their hands while installing them.
Me personally, I upgraded all the wheels and bearings to these. they are way more stiffer than the stock wheels and the bearings on those suckers roll like butter. You can just do the bed wheels but I upgraded all of them, was one of the best mods I've bought yet.
Also I'm not sure if this is still an issue, but last I heard the TH3D firmware had some really bad issues with Jerk settings being set WAY too high or acting very buggy. Have you noticed movements that are pretty violent? really high jerk values can throw your bed leveling level off during a print if it's strong enough.
I got my Ender 3 Pro about a month ago, performed some upgrades and ran into a few problems, but with some weird caveates.
I'm trying to print multiple miniatures on a single print, but seem to be getting a lot of oozing or stringing issues, but when I test with retraction tests, the test comes out perfect with identical settings. Additionally, when googling around, I couldn't find anything except for potentially a nozzle clog or potentially hydrated filament (possible, I'll test this later)
​
I've tested a few other prints as well, a benchy and a testcube, they print fine. Really curious about what's going on. Do I need to spread the prints out more, use different settings, or is it more of a mechanical issue?
​
I'd appreciate any help you guys have to recommend!
​
So, lets get down to it:
Printer: Creality Ender 3 Pro
Surface: Creality Glass surface
Upgrades: Aluminum extruder upgrade
Capricorn Tubing
New bed springs
In addition to these, I've tightened the X and Y bolts on the runners to reduce wobble -- there's no more wobble, maybe they're too tight? I don't think so, I've had good prints with these settings, but not with a few things.
Settings:
Basically the same as the "normal" settings for the Ender 3 on Cura 4.0.0
But in addition: (And what I think may be important is bolded)
adhesion_type = raft
layer_height = 0.12
support_tree_enable = True
support_type = buildplate
brim_outside_only = False
fill_outline_gaps = True
infill_pattern = cubic
infill_sparse_density = 25
material_final_print_temperature = 180
material_initial_print_temperature = 180
material_print_temperature = 185
optimize_wall_printing_order = True
raft_margin = 10
retraction_amount = 7.5
retraction_speed = 20
speed_print = 30
support_angle = 40
support_conical_enabled = True
support_infill_rate = 50
support_interface_enable = True
support_pattern = lines
** NOTE ** Standard supports are turned off, I'm using the tree supports
support_tree_collision_resolution = 0.15
travel_avoid_supports = True
travel_compensate_overlapping_walls_enabled = False
wall_thickness = 1.2
These are the ones I bought.
https://www.amazon.com/gp/product/B07GXC1G2B/. These are a game changer. They are so stiff and leveling the bed is so much more accurate.
I actually borrowed some from a friend the first time i did it, but I dont remember the brand. I emailed thrustmaster and they told me to use Mineral based oil / lube / grease, so i ordered a cheap tube of this : https://www.amazon.com/gp/product/B002TWJ2L0/ref=od_aui_detailpages00?ie=UTF8&psc=1
However, someone else further down in the comments mentioned another brand that apparently does well. I'm going to try the petrol gel later when it arrives in the mail and ill report back
Pretty generic Not super high quality, but a big improvement over the bearings my printer came with. They were rough.
I'd say the yellow bed springs are worthwhile. They're about $5 on Amazon, I bought these:
https://www.amazon.com/gp/product/B07GXC1G2B/ref=ppx_yo_dt_b_asin_title_o04_s00?ie=UTF8&psc=1
They help keep the bed from going out-of-level as quickly, vs the stock springs. They're easy to install, and cheap, which is nice.
There are loads of other upgrades you can consider. A glass print bed surface, as one example, or a PEI print bed. Either can help provide a flatter print surface, vs the stock magnetic one (which will more-readily follow any distortions in the heated bed surface, making your print surface uneven).
Nice ! I can see you've done your homework lol, all good choices. I'll just give you a few suggestions then since you've pretty much got it covered. The springs I used on my enders were these: https://www.amazon.com/gp/product/B07FY47BX7/ref=ppx_yo_dt_b_asin_title_o02_s00?ie=UTF8&psc=1 You might need longer screws, not sure about that, but you can get those at any hardware store, probably around 35mm m3 screws should do the trick. And the motor vibration dampers i used were these: https://www.amazon.com/gp/product/B07C7FRLNX/ref=oh_aui_search_asin_title?ie=UTF8&psc=1 you don't need them on the z-axis, just the x and y. As far as smoothers go, I think the creality boards currently use a4988 stepper drivers, so you'd probably not see any benefit from tl smoothers. I'd definitely recommend the glass bed, since ender 3 print beds are almost always warped to some extent which can make leveling the bed a real pain in the ass. The hardened steel nozzle is cool, just be aware it's not as good at transferring heat to the filament as a brass nozzle, so it prints slower, and it's only useful if you're planning on using abrasive filament like carbon fiber or glow in the dark filament. Pla, petg, wood pla, and abs don't need it. You can actually print anything you want with a brass nozzle, you'd just replace it more often depending on how much abrasive filament you use. Also, don't know which fan shroud you're planning on, but the bullseye is very good and it uses the stock fan : https://www.thingiverse.com/thing:2759439
Sorry about the wall of text lol.
Here's a pic of it. The Tower
It stands a little over 6ft tall. It's 5 tabletops, and 4 sets of legs, with the 5th top acting as the base. Each table is 21.5 inches square and the tops of 2in tall and the legs 15.5. It sits on top of this, so it can rotate. The joining plates come from Home Depot. Here's a pic.
I originally joined them with flimsy screws and plastic joiners that came from Ikea's free spare parts areas, but I didn't trust them once the tower would be fully loaded. I'm not much of a craftsman, but I'm happy with it. All told it cost me about $45. ($5 per table, + Joining plates/screws + Lazy Susan)
I mostly use it to hold games that get played a lot, so it's not a shot of my whole collection.
Under 15? The best thing you can buy hands down is this:
https://amzn.com/B002BBQDW0
That was an easy question ;)
No, the lowest I see anywhere is a pack of two for bones red but for 1 dollar more (5.50 if you divide 9 by 2) you can get a single all ceramic bearing
I took off my sheilds with a knife. But that is because I bought ones with non-removable shields. Here is a video which apparently shows how to remove the shield
Here's the extruder: https://www.amazon.com/dp/B07B96QMN2/ref=cm_sw_r_cp_apa_i_uSFjDbRH4ZQE4
Here's the springs: https://www.amazon.com/dp/B07GXC1G2B/ref=cm_sw_r_cp_apa_i_DTFjDb1KAPZ15
There's tons more. All you need to do is search Amazon. Glad I could help.
This is what I use.
http://www.amazon.com/Capacity-Bearing-Turntable-Bearings-VXB/dp/B0045DV04I/ref=sr_1_1?ie=UTF8&qid=1408495735&sr=8-1&keywords=12+lazy+susan+bearing
Are you sure? Most BB bearings are about 1/4 in.
In any case, amazon sells them for cheap
Ex: https://www.amazon.ca/BC-Precision-BCBIKE5-500-Piece-Assorted/dp/B018B7D05K/
I have been very happy with Nano-oil.
Looks eerily familiar: http://imgur.com/MWZAKmU
I don't think they are used on the link the OP posted, but the cords at the bottom are held in place by Amico cable glands, size PG7 and PG9. http://www.amazon.com/Amico-Plastic-Waterproof-Glands-Joints/dp/B005FIWYX8
It was a fun project, but I would probably just buy a Johnson controller next time.
That's actually a good idea. Put newspaper down and a sponge or two. I bought a nice plastic container on Amazon that has multiple latches. It was kind of pricey but it is what it is. I also bought some anti vibration pads for under the container. I've read that the vibrations from driving can really stress snakes out. I'll include the links below.
IRIS Weathertight Storage Box, 41 Quart Weathertight - Clear https://www.amazon.com/dp/B003IB0JCW/ref=cm_sw_r_cp_api_VNvaAbT3RJ52R
Diversitech MP4-E E.V.A. Anti-Vibration Pad, 4" x 4" x 7/8" Pack of 4 https://www.amazon.com/dp/B00BVEMLR4/ref=cm_sw_r_cp_api_OOvaAbF5QXAQW
I second the Nano Oil. Equally as important as the quality of the oil is the applicator tip. The nano oil comes in a pen sized bottle that has a really fine needle point so you can apply it very accurately. I love it, sure it's a little more expensive but I'm pretty sure it will last me forever.
http://smile.amazon.com/Nano-Oil-NanoLube-Friction-Concentrate-weight/dp/B002C9RGA4/ref=sr_1_1?ie=UTF8&qid=1396373262&sr=8-1&keywords=nano+oil
I use these
Wiha set for disassembly (torx screws).
10 weight Nano Oil for lube (not cheap but works very well).
Qtips, alcohol and cloth for cleaning.
Improvements/add-ons
• Filament Roller Guide. You will thank yourself later to further prevent the filament from grooving an indentation where it feeds into your extruder. It utilizes bearings but its a fantastic design. I had mine for ~2 months when I started noticing the groove already being made.
• XT60 Connector clips - if you want a little "cable management"
• LCD Cable Clips - Also if you want a little "cable management". There is also an LCD Cover for the PCB to keep dust and whatnot out.
• Any fan covers you find that suit your style as you dont want filament going into the box in the bottom left (not entirely too sure what it holds).
>
>
>
Physical Upgrades
• Upgrade the bed springs as my originals started to sag a little. Not exactly sure on what the technical name for those springs are but those are the ones I purchased and I have been happy with them.
• Borosilicate glass bed. I use to use the stock mat, tape method, and hairspray method. All of those worked for a little bit but were a complete pain and mess to deal with from time to time. All I do now is use some isopropyl alcohol and clean my glass bed every once in a while but past that I require NO adhesion for my bed outside of tiny pieces that require a brim, skirt or whatever support needed to keep it adhered. As long as your print bed is leveled as best as possible (have a nice filament "squish") you will have no issues.
• Some other things you could look into if you plan to print with other kinds of filament outside of PLA would be: Micro Swiss steel nozzle, Capricorn tubing and an upgraded extruder like the e3d. Keep it simple for right now though while you learn your rigs because I strongly feel no ender 3 works the same and my preference for which program (MatterHacker, Slic3r or Cura) depends on how I feel how the model appears and how its coming out. Also, grab yourself a handful of replacement nozzles if you continue to use the brass ones. They CAN wear out if you use the printer like crazy, so its always good to have spares (also can get a variety of sizes too - standard being the 0.1mm I believe?). I snagged a pack of 10 for $5-8.
>
>
>
Last but not least, run a few bed level test prints as well. The best one that I have found which helps me dial in my printing was CHEPs bed level STL file. Video & G-Code file. I use it religiously if I ever find that my bed is out of wack.
There are a handful of other mods/add-ons you can find on Thingiverse and another website (one which we arent allowed to link to unfortunately).
Oh that kind. I get you now.
Those don't come with it - he lists the kinda stuff he uses on his amazon list.
It's not usually a problem, since the screw doesn't short stuff out that often. Only on some PCBs, in certain places. But as a pleb who doesn't want to buy special parts, I just use a little patch of electrical tape.
This is what I use currently:
Petrol Gel
If you have a local restaurant supply store near you, give them a call to see if they have it. It's inexpensive. If you don't have anything near you, you can always get it from Amazon:
Amazon Link
Mcglaughlin Oil Petrol-Gel Lubricant https://www.amazon.com/dp/B002TWJ2L0?ref=ppx_pop_mob_ap_share
If you can get smaller one the better
I haven't run my cable for my house batteries yet, but if there is no adequately placed hole you could drill a hole the size you need and use a gland nut. Make sure to seal the edges of the hole with paint to prevent rust. The gland nut will prevent water from entering the van through that hole.
Hope this helps. I'll be running my cable underneath the van and bringing it in through the large surround on the gas filler neck.
https://www.amazon.com/uxcell-Plastic-Waterproof-Glands-Joints/dp/B005FIWYX8
-these probably aren't the right size but an idea of what they look like and what they do
Mercurry 5 Meters GT2 timing belt width 6mm Fit for RepRap Mendel Rostock Prusa GT2-6mm Belt https://www.amazon.com/dp/B071K8HYB4/ref=cm_sw_r_cp_api_lsKQBbB5MHDW2
just ordered this now realizing not sure if fiber glass, what are your thoughts on this belt??
Yeah my motivation was storage. Sound dampening is a great idea! I stole the idea from someone on thingiverse who thought the same as you. They added vibration dampeners like the ones below, so I added them as well. I like to think it is quieter, which is why I am looking for something else to store underneath instead of replacing them with the original feet.
https://www.amazon.com/Diversitech-MP4-V-Anti-Vibration-Pack/dp/B00BVEMLR4?keywords=square+dampening&qid=1536604713&sr=8-15&ref=mp_s_a_1_15
A friend of mine uses a large stainless ball bearings as whiskey stones.
These should work. or just search 3d printer bed springs on Amazon and pick one you like. They're super common, and basically all the same. Nothing too special.
https://www.amazon.com/dp/B00BVEMLR4/
Some of these anti vibration pads to make the printer quieter, cut up into smaller pieces. I haven't really noticed a big noise difference with these (the concrete blocks I added later made a much bigger difference) but I keep them on there anyways.
I would also suggest a damper on the Y-axis motor, that made a huge difference in noise and vibration.
I am not sure, as I haven't tried either one, but I have ordered these for a similar issue. can't yet comment on how good they are, as they are still on their way to me. These appear more sophisticated, but as I said, I haven't yet tested them.
https://www.amazon.com/Diversitech-MP4-V-Anti-Vibration-Pack/dp/B00BVEMLR4/ref=pd_sim_60_5?_encoding=UTF8&pd_rd_i=B00BVEMLR4&pd_rd_r=099c2662-e9de-11e8-8e2e-49ff07944d9e&pd_rd_w=GtOIO&pd_rd_wg=eekSs&pf_rd_i=desktop-dp-sims&pf_rd_m=ATVPDKIKX0DER&pf_rd_p=18bb0b78-4200-49b9-ac91-f141d61a1780&pf_rd_r=WA3WKQJD37F71YAJTE2G&pf_rd_s=desktop-dp-sims&pf_rd_t=40701&psc=1&refRID=WA3WKQJD37F71YAJTE2G
​
Moving your bed close to a support point (such as a structural wall) might reduce the vibrations you feel as well, as the vibrations will typically have the largest amplitude toward the center of the floor span. Finally, I suppose you could try also putting the anti-vibration pads under the posts of your bed. Unfortunately, it is impossible to guarantee that any of these steps will solve the issue, but they might be worth trying.
Are you using the belts that came with it? They're plastic and are terrible and will cause all sorts of abnormalities in prints due to stretching and slippage. Get a roll of this instead, it's a cheap upgrade, but it probably won't be your last. :) :
https://www.amazon.com/Mercurry-Meters-timing-Rostock-GT2-6mm/dp/B071K8HYB4/ref=sr_1_1?ie=UTF8&qid=1542164349&sr=8-1&keywords=fiberglass+belt+anet+a8
Probably something like this
Anything rubber would at the very least dampen the vibrations. Possibly even like a cork drink coaster or something like that.
Ideally you should use washers like these: https://www.amazon.com/1600pcs-Insulating-Washer-2mmx4mmx0-3mm-Motherboard/dp/B00TX5P3OG/ref=sr_1_fkmrnull_2?keywords=1600pcs+Insulating+Fiber+Washer+Spacer+2mmx4mmx0.3mm+for+Motherboard&qid=1558147837&s=gateway&sr=8-2-fkmrnull
​
However you can also just use a thin strip of electrical tape to cover whatever contacts the screws were touching on the pcb
That's why I suggested clear marbles, to minimize the impurities, but clear leaded glass crystal is a thing. OP could also pick up some large food grade stainless steel or ceramic ball bearings, but I didn't suggest that originally because of the expense.
https://www.amazon.com/Inch-Stainless-Steel-Bearing-Balls/dp/B007B2A84S
https://www.google.com/search?q="food+grade"+large+"stainless"+steel+ceramic+"loose"+"ball"+bearing
But ultimately you could play the "possible unsafe impurities" game with just about any material unless you personally have it tested.
As far as the bearing goes, I've seen them from $10 (vxb via amazon) all the to the $100s. I personally haven't bought any full ceramic ones yet, but I'm waiting on some of the spinners I ordered to arrive so I might be looking to replace them if I'm not content with the ones that come in the unit.
No problem. I believe most people use something like this to connect the screw to the Z stepper.
I would buy something like this assortment, pick the one that's the right size, put some grease on 'em, and get on with life. The extras will be useful for something, eventually.
edit: typically, you fill the race up with bearings, and then remove one. So if it takes 10 to fill the race with balls, use 9.
Maker Beam starter kit - $112.50 - https://www.amazon.com/MakerBeam-Regular-anodized-including-brackets/dp/B00G3J6GDM
Riuxin Pro knife sharpener kit - $29.95 - https://www.amazon.com/Sharpener-Professional-Sharpening-Fix-angle-III/dp/B015XKSNS2
3" Lazy Susan bearing - $5.95 - https://www.amazon.com/Square-Inch-Susan-Turntable-Bearing/dp/B00ZSQSWTM
-optional-
empty blanks for jig (these are meant to be used as a base for stones, but I just used a glass plate and various grits to flatten them to attach my psa lapping film to) - $28.50/pack of 10 - https://www.amazon.com/Gritomatic-Empty-Blank-for-Stone/dp/B01N0ZINXE
lapping film (I bought 1 sheet of every grit this vendor offers, but I've seen better prices elsewhere) - $5/sheet - https://www.amazon.com/Micron-Lapping-Microfinishing-Aluminum-266Xx1/dp/B071R3S6GS
You want something like this
http://www.amazon.com/Black-Plastic-Waterproof-Glands-Joints/dp/B005FIWYX8
Simple fix: lower your z-endstop - the value in the assembly instructions is just a guideline.
Z-binding will most likely not be fixed by dis- and reassembly. It commonly results from the z-stepper being too close to the vertical beam. Some people used spacers that didn't work for me. I printed this adjustable z-motor mount that solved my problems. I have since also replaced the original rigid coupler with a flexible one.
Another thing I've done is to install stronger springs on the bed. (Something like these)
Replace the springs as well. They are questionably adequate for the stock bed, let alone one with a glass sheet attached.
Here's the aluminum extruder assembly. The plastic one that comes on the printer WILL break. It's just a matter of time. They crack from stress after a while and even before that they creep and you'll start getting missed extrusion.
Here's the stiffer bed springs. You won't have to compress these as much to get a good stiffness.
Another really popular upgrade is this glass build plate. It has a special coating that makes it so parts stick without adhesive, and it leaves a really smooth surface on your prints. Parts stick really well then when it cools down they self-release.
The 3 upgrades I linked are extremely popular upgrades. You can get by without the glass bed, it's just an option because the stock bed will wear out eventually.
https://www.amazon.com/dp/B00TX5P3OG/ref=cm_sw_r_other_apap_2Bc7itOsKNMIl
You want this or something like it
It's hard to describe how tight it should be, but I believe I only loosened the arm about a quarter of a turn after screwing it in.
My apologies, I was a little unclear. The bearing should be able to move freely in the air when you push against the lever arm. When you push the lever arm in (like when you change filaments), you should be able to rotate the silver bearing in the air by hand without any trouble.
If you cannot spin the bearing, then it needs to be loosened a bit.
For your extruder spring, are you using a silver spring, similar to the stock bed/extruder springs, or a yellow spring that's commonly recommended as upgrades?
Popular brands are Nano Oil 10wt,Militec-1,Benchmade Blue lube,Hoppe's No. 9,KPL Knife Pivot Lube,3-in-1 oil,and Tuff Glide dry lubricantjust to name a few in no particular order. I personally like Nano-oil the best but have been hearing really good things about KPL.
Had these for a while and they’re great
FYSETC 3D Printer Motherboard Accessories 0.31 in OD 0.78 in Length Compression Springs Light Load for Creality CR-10 10S S4 Ender 3 Heatbed Springs Bottom Connect Leveling - 10 Pack https://www.amazon.com/dp/B07GXC1G2B/ref=cm_sw_r_cp_api_i_O-MLDbD1EA96T
I want to recommend this product at Amazon.com
FYSETC 3D Printer Motherboard Accessories 0.31 in OD 0.78 in Length Compression Springs Light Load for Creality CR-10 10S S4 Ender 3 Heatbed Springs Bottom Connect Leveling - 10 Pack
by Fuyuansheng
Learn more: https://www.amazon.com/dp/B07GXC1G2B/ref=cm_sw_em_r_mt_dp_U_gPhXDbWZMATD3
You can use something like this. I would use a gear motor with a friction drive against the perimeter of the turntable, it's the simplest. One thing though: unless you make very sure the turntable is absolutely level, it may slip or move unexpectedly if the person shifts weight.
I bought these anti vibration pads from Amazon.
Diversitech MP4-E E.V.A. Anti-Vibration Pad, 4" x 4" x 7/8" Pack of 4 https://www.amazon.com/dp/B00BVEMLR4/ref=cm_sw_r_cp_apa_9dFNAbVYKVG1H
I put them under each clever if the base. THEY ARE AMAZING. I can sometimes not even tell it's printing. I often find myself now checking to see if it's still for some reason. Before you could hear the vibrations through the walls in other rooms.
For the $10 they cost I would recommend them to everyone.
If I have a Hero5 Session how can I charge it and it be waterproof. I need to leave it outside for a timelapse that is going to last for 8 hours. I was thinking about buying this and these to make a waterproof case. The external battery wouldn't run it as long as I need it for, but the case is large enough to connect the charger inside it. I would do something similar to this
That's exactly what happens. I too would watch it and think its fine and then come back later and its floating. Go ahead and check the bed leveling as well. It may need to be adjusted anyway.
Side note: If you find yourself constantly adjusting the bed every few prints or so, change them out for some better ones. These are the springs everyone goes for.
Is that 3rd bearing this bearing? How long does it spin? I was thinking of getting one but I didn't know how long it spins.
you need this
dig around, you can buy them in bulk, too.
Stock springs are cheap and not well under tension. They caused me a lot of balance issues
https://www.amazon.com/FYSETC-Motherboard-Accessories-Compression-Creality/dp/B07GXC1G2B/ref=mp_s_a_1_3?crid=3G99LZGFOMNBI&keywords=ender+3+bed+springs&qid=1556590607&s=gateway&sprefix=ender+3+bed+&sr=8-3
This is the lube I use, and it's amazing
Replace the Bowden pneumatic clamps
https://www.amazon.com/dp/B073TTWWN1/ref=cm_sw_em_r_mt_awdo_uweXCbDCRQK7D
Capricorn Bowden tube
https://www.amazon.com/dp/B07B67GG75/ref=cm_sw_em_r_mt_awdo_VyeXCbA0WGRWQ
Springs
https://www.amazon.com/dp/B07KF9LZ2L/ref=cm_sw_em_r_mt_awdo_zBeXCbD24BJN2
All 3 as they are really cheap.
Bowden Tube
Aluminum Extruder
Bed springs
https://www.amazon.com/Diversitech-MP4-V-Anti-Vibration-Pack/dp/B00BVEMLR4/ref=pd_rhf_ee_s_cp_1_3?_encoding=UTF8&pd_rd_i=B00BVEMLR4&pd_rd_r=K7RAMWWPTQMWDQG4J2Y5&pd_rd_w=IO06O&pd_rd_wg=R53mt&psc=1&refRID=K7RAMWWPTQMWDQG4J2Y5
4" x 4" x 7/8" Anti-Vibration pads, Qty 4 in total
Helping a friend this weekend who has a Synology NAS Rackstation, approx size is 2U high, by 22" x 24"
For now, she will be placing it on top of an old, heavy wooden microwave cart (on the top).
It's a solid wood unit; but I wonder if adding the above 4"x4" anti-vibration pads placed in each corner would help the vibration/noise
She might be doing a small server rack; but that is long time away. /thanks for reading
X and Y look awesome, but you are experiencing LOTS of Z banding/wobble. Look into some Z axis stabilizers or some flexible Z axis couplings like these. Also it looks like you have some underextrusion on the top. Try either increasing the number of top layers or run an E-step calibration for your extruder
I've basically had this problem for about 2.5 years and have posted about it about 6 times, this was the first time anyone knew what it was.
Here's the changes/settings I've made:
EEPROM:
Cura 4.2.1:
Upgrades to the printer (apart from those already mentioned):
The rest of my settings tend to vary based on what I'm printing; and my retraction currently isn't dialed in.
pretty sure he means these
I drilled, then used cable glands: http://amzn.to/1rXpLU6. I did put a dab of lap sealant for extra assurance, like wearing a belt AND suspenders!
If you're in North America (or at least USA), you'll have to figure out the diameter of your cable with this chart: https://en.wikipedia.org/wiki/American_wire_gauge#Tables_of_AWG_wire_sizes. Then match the diameter with the PG cable gland size with this chart: https://en.wikipedia.org/wiki/American_wire_gauge#Tables_of_AWG_wire_sizes. (I tried to find a chart with everything in one place but failed.)
This is what I used. https://www.amazon.com/gp/product/B0084EXWP4/ref=ppx_yo_dt_b_asin_title_o00_s00?ie=UTF8&psc=1
Thanks! The bearing is a full ceramic one I got on Amazon. The design is not mine. It is from Thingiverse, called the Cog Triple Spinner Reddit formatting apparently doesn't agree with mobile sharing links. I fixed it though.
I bought some of these off Amazon https://www.amazon.com/gp/product/B00BVEMLR4/ref=ppx_yo_dt_b_asin_title_o00_s00?ie=UTF8&psc=1
I cut them into four smaller 2"x2" squares and printed some feet for the bottom of the printer to hold them in place. My printer already sits on a solid 2" thick wood base but this helped cut the noise and noticeable vibrations transmitted through my enclosure.
Uxcell produces high quality stuff in general, and their washers are made specifically for PCBs. Here's a link to ones I purchased that worked perfectly with GMK screwn-in stabilizers.
Slightly jerky movement is ok, as long as the final positioning is correct and increments slowly. Say I take 1 full step per photo, and a photo every 10 minutes. With .067deg/step motor+gearbox, it would go about 10 degrees per day total, which is probably fine since it's roughly 300 degrees per month, so if it happened to be a 3 month video, it would go about 2.5 full rotations.
For stiction, you are referring to the stiction of the interface between whatever is being rotated and the base? I have used a stepper before, but it moved much faster and probably had more torque as a result, and used this 'lazy susan'-type turntable device. Hopefully that would be sufficient for this project, and there wouldn't be any step 'skipping'.
(edit: oh unless you mean internal stiction of the gearbox, in which case... I don't know what to do about that.)
I could sync the shutter and movement, but the movement would take little time and the photo is quick (say 1/60 second), so it would be unlikely that the two would trigger simultaneously, although it would be a possibility.
tl;dr for your final question:
Photos every 10 or 20 minutes, rotation on the order of 1-2 rotations a month, leaving some room to fine-tune the rotation rate.
This picture is inland PLA printed at 220 C at various speeds - 60 mm/s on the left to 10 mm/s on the right.
Like most Wanhao i3 pluses, my y axis bearings started going, so I replaced them with these LM8LUUs. I got a lot of ringing. Tightening the belt didn't seem to help. Adjusting print speed and acceleration work, but only with extreme values - the printer was printing fine at 60 mm/s print speeds before the swap, and now I can only get rid of the ringing at 10 mm/s. Similar with acceleration values, originally printed at 1000 mm/s^2, and can get rid of ringing sub 200 (the picture is all 800 mm/s^2). Obviously this is not ideal. I'm out of ideas, but am wondering if this could be a problem with the bearings themselves at this point - that is, if I should replace the bearings again.
This, btw: https://www.amazon.com/gp/product/B071K8HYB4/ref=oh_aui_detailpage_o00_s00?ie=UTF8&psc=1
Got a 35$ Amazon gift card from work. There are so many spinners on Amazon I don't know what to get. Suggestions? I was thinking of getting an inexpensive one then replace with a fully ceramic bearing. Thoughts? This is the combination I was thinking (comes to just under 35$)
Spinner
Bearing
This is what I use (for the middle bearing):
https://www.amazon.com/gp/product/B01JKBUR1Q/ref=oh_aui_detailpage_o09_s00?ie=UTF8&psc=1
(for the outside bearings)
https://www.amazon.com/gp/product/B002BBD6X4/ref=oh_aui_detailpage_o00_s00?ie=UTF8&psc=1
I timed my spin to 2mins 20 seconds. Not too bad
These work better than a mat. I just put them under main contact points of my trainer.
https://www.amazon.com/gp/product/B00BVEMLR4/
List of mods on my Ender 3 Pro:
I use Cura for my slicer, and use the default setting there for the Ender 3.
Hey I also new on this, got my printer a month ago, I was super exited as everyone here when receive their printer, I read a LOT while waiting for the printer, so I heard that the stock bed springs are crappy, so I ordered this ones FYSETC Bed springs, also ordered the Aluminium Extruder feeder, and read about the leveling, the paper sheath method, which I think you should already heard about, I did it at the first time the printer gave me a nearly perfect first print (demo dog) , after a few prints and on my third print I came home just to find a mess on my printer, so I did my research again, find out it was bed adhesion, and find out that the best way was glass bed + PEI sheet was the best option, while waiting to arrive I tried to clean the stock bed sheet with mineral spirits (did have rubbing alcohol) but it worsened the adhesion, so I used one adhesion sticker that comes with the overture filament, and again flawless adhesion, at least for the first 4 prints, then again the frustration, I tried some glue stick and worked but it leaves a mess on your print so I decided to try painters tape directly onto the aluminum bed (which lucky for me it is perfectly flat) this is the best adhesion I have tried, problem is also makes a mess with the down face of the print, Finally mi Gass-PEI arrived, (3 days ago), it has a great adhesion but is not perfect, also you have to raise the Z limit switch to compensate the 5~ mm of Glass-PEI, find out that it isn't perfectly flat it has a good adhesion and leaves a very smooth down face, but at some section it does't sticks well and leaves artifacts on the down face, I'm currently working to fix this.
Sorry for the long post, need to talk about my frustration and let you know you are not alone on this, once you manage to make a good print is very satisfying, I have a PETG filament waiting to be used but I don't think is a great idea to try it until a learn more about 3D printing and the Ender.
Ender 3 pro.
Creality magnetic build surface.
Black matchbox PLA at 200 C
Print bed at 60 C
Using the most recent version of Cura.
I'm using the "Normal" 0.15 mm layer height preloaded setting in Cura. I'm guessing that this is a bed leveling problem, as the only thing that changed between the first 2 pics is that I installed [new bed springs] (https://www.amazon.com/gp/product/B07GXC1G2B?pf_rd_p=f3acc539-5d5f-49a3-89ea-768a917d5900&pf_rd_r=N121Q03JSDJ7ST88QJ8M). I did have a hell of a time getting them back to being level after the install, but I thought I had it.
Any thoughts?
I made the mod to my Simple Metal and while it's sort of functional, it's making noises that obviously indicate some issues. I'm hoping someone here has some suggestions on what's wrong.
I used this leadscrew: http://amzn.com/B015PS2Z4K and this coupler: http://amzn.com/B00KHTVOEU that I'd picked up a few months ago. I'm using the Machine Control Panel of Simplify3D for my testing.
There's a small "thunk" every time I start moving the Z axis. Aside from that, moving the extruder assembly up is smooth. But moving the extruder assembly down is very herky-jerky. Something must be binding and catching but it's not obvious to me what.
If I remove the set screws attaching the lead screw to the adapter I can manually lift and lower the extruder assembly fairly smoothly. The lead screw can be pushed up and will drop down smoothly under gravity. The stepper spins smoothly both directions. Is it an issue with the coupler I'm using? I tried pushing the lead screw down as far as I could before tightening and leaving it up a bit before tightening it down to no difference. I'm thinking the "springy" coupler design was a bad choice?
Or is my problem elsewhere?
Mercurry 5 Meters GT2 timing belt width 6mm Fit for RepRap Mendel Rostock Prusa GT2-6mm Belt https://www.amazon.com/dp/B071K8HYB4/ref=cm_sw_r_cp_api_t6UKBbPA9EA1A