Best raw building materials according to redditors
We found 136 Reddit comments discussing the best raw building materials. We ranked the 80 resulting products by number of redditors who mentioned them. Here are the top 20.
We found 136 Reddit comments discussing the best raw building materials. We ranked the 80 resulting products by number of redditors who mentioned them. Here are the top 20.


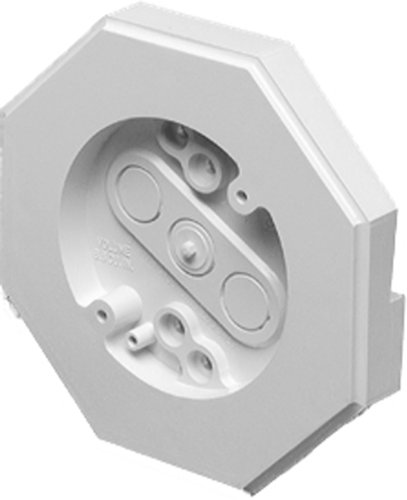


Hi. They make lamp mounting kits for vinyl siding.
Builders Edge 130110006001 Surface Block 001, White https://www.amazon.com/dp/B0041NT7D8/ref=cm_sw_r_cp_api_AV9RAbVRZCPWS
There are different colors. Find one that has the right amount of steps for your type of siding.
Use a outdoor silicon to seal around the edges and there are foam pads you can use between the junction box to the siding cover plate. Hopefully they put a junction box in there, the lamp mount attaches onto the box. If they didn’t, install an outdoor box in there too.
Here is another
Arlington 8141-1 Vertical Siding Lamp Mounting Kit with Built-in Box for 1/2 Inch Vertical Siding LAP https://www.amazon.com/dp/B002W6ZOCO/ref=cm_sw_r_cp_api_4V9RAbFQ3P1Z4
Hope that helps. Turn off the breaker before wiring.
Sure let me find and post back right here.
https://swe.sika.com/sv/solutions_products/bygg/sika-elastic-bonding-solutions/02a012/02a012sa01/02a012102.html
https://www.amazon.com/dp/B07M6LLR8J/ref=psdc_13397791_t1_B079YM51HC
If you have a masonry/stone supply house in your area they should have just about anything you need also.
I've used the Knowles GK driver in all of my builds with a green damper on the TWFK. The sound signature is fairly flat, although I've never measured it. I'm no expert in sound and I haven't listened to a lot of good headphones so I don't really know how it compares to others. I have had a couple of people that told me they were the best sounding headphones they had listened to.
Here are all of the completed sets I've made. Set #1 and #7 were made for myself. #7 was just a reshell. The green and blue faceplates are Kirinite. It is typically used to make knife and gun handles. The wood is from a variety pack of veneer I bought from Amazon. For the wood, I cut rectangles of the veneer that are just bigger than what I need and glue them all together to get the thickness I need, typically 5 or 6 layers.
I also used a sheet of aluminum on my third set. I got it from a local metal supplier for free. Just a small cutoff. It was pretty difficult to work with. It had to be shaped before it was attached to the shell. It would get too hot and fall off when shaping it with it attached.
For metal minis there are typically two generally types of solutions.
For instance, I'm magnetizing my Star Wars Legion models this way.
I'm using this 13x13 container with has 4" tall "levels":
https://www.amazon.com/Snapware-Seasonal-Ornament-Storage-Container/dp/B00FXLTSI6/ref=sr_1_1?ie=UTF8&qid=1522936303&sr=8-1&keywords=ornament+storage+13x13
I'm using this 12x12 sheet:
https://www.amazon.com/gp/product/B000W6ZMQY/ref=ox_sc_act_title_1?smid=ATVPDKIKX0DER&psc=1
The sheet drops right in, I've secured it with some double-sided tape or you can use glue or whatever. Then I put 6x2mm magnets on the bottom of each figure. You'd want to check the Infinity bases to make sure how thick a magnet will fit the recess but basically that's the process. Metal minis are heavier so you might want a slightly bigger magnet or perhaps two smaller ones. There are probably recommendations online somewhere.
It's fairly cheap, very expandable, and should be able to hold nearly any game.
Try this: https://www.amazon.com/Sauers-CECOMINOD058354-Wood-Identification-Kit/dp/B003F0C9EW/ref=mp_s_a_1_3?ie=UTF8&qid=1539613946&sr=8-3&pi=AC_SX236_SY340_QL65&keywords=veneer+sample&dpPl=1&dpID=51neA%2BDyIEL&ref=plSrch
Strap in, this got kind of long! I hope it's useful to someone.
I too have the "need a lot of bins and boxes and whatnot" situation because of my and my partner's hobbies. I sew and crochet and embroider and work with leather, and he works with electronics and 3d printers and so on. We share a small (10' x 10') room for our workspace and all of our most commonly accessed supplies.
Being someone who gets fixated on ideas frequently, I suggest that you open up your search to other options other than interlocking boxes. The reason I say this is that I am surrounded by bins and have been working with various sized bins to access things for a long time and I am tired of them. The problem is similar to what many other posters have mentioned: Getting items out of the boxes (even if they are small) is an Ordeal, especially if you have multiple boxes out, or if the box is very full and hard to put back together.
In general, a rule of thumb is to think about how you'll put your item away rather than how you'll access it. When we want access to something, it doesn't seem like a big deal to undo bins, bags, boxes, slide heavy things around, etc. because we get a reward at the end (yay, it's the thing! shiny!). After that, the idea of undoing all that stuff seems like a pain in the arse, and we just don't want to do it? (and what if we might need another thing from that bin? So, consider how you'll put it away, rather than how you'll get it out when designing a storage solution.
So, I am now moving away from the lidded box approach and encouraging my partner to do the same. Having watched Adam Savage's video describing first order retrievability, I am moving in that direction (although not yet to his ninjery level). Here's the video: https://www.youtube.com/watch?v=TWQAYfGxsPE.
I suggest the following types of storage for smaller objects. Bins still work OK for larger objects but someday I'd like to move away from that too.
Amazon. They do both horizontal and vertical. Link
https://www.amazon.com/gp/product/B013NT3OAC
Staining isn't necessary, but you'll want to put a couple of coats of polyurethane on it to protect it.
Also, since it's plywood you can get some edge banding to make the edges look much better. Just iron it on, trim it close to the board with an xacto knife, then use a sanding block to sand it flush.
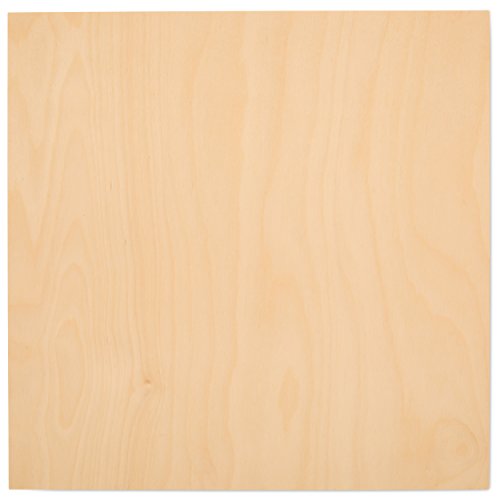
I've been really happy with this: 3 mm 1/8" x 12" x 12" Premium Baltic Birch Plywood, Box of 16 B/BB Grade Birch Veneer Sheets, Perfect For Laser, CNC Cutting and Wood Burning - By Woodpeckers https://www.amazon.com/dp/B01MXVB6O6/ref=cm_sw_r_cp_apa_i_3VxCCb2AGTF8H
Comes in a stack so they are all pretty flat and shouldn't come warped.
Yeah, I did a few test batches that were in the 12"x12" neighborhood. I used melamine for the forms and largely found this Ask This Old House video to be very helpful (although I didn't use the spray method for the initial coat). Key points that I used and learned:
I think that's pretty much everything. Doing a couple test pieces will teach you a ton. Have patience, have fun, and good luck!
https://www.amazon.com/gp/aw/d/B000BPDB6O/ref=cm_cr_arp_mb_bdcrb_top?ie=UTF8
Right here is what I use
So as promised here are the majority of materials/tools I used to make the counters. I used the stain instead of actually coloring the concrete as I was worried about getting inconsistent coloring since I was doing multiple batches.
Now, my mistake I made which turned ok after the fact was that the concrete became too dense for the stain to penetrate. Despite using the sawzall to try and vibrate the air bubbles out from the bottom of the concrete but I was not able to get all of them out so there was pin holes on some of the counters. So I made a slurry as recommended and filled in all the holes and then sanded the high spots down. So when I stained the counters the areas that had been filled with slurry took to the stain very well but the actual concrete only became a darker grey. I communicated with a staff from ConcreteSolutions and they were very helpful in trying to get the stain to penetrate the concrete. I stained it probably 3 times and then just left it as it was and now I really love how it turned out despite not being as planned. Its almost like a black and grey leopard spot on most of the counters, the island area was the last poured and had hardly any air bubbles so its more solid color…
I let them sit and harden at least a week before I flipped them over and started sanding away. I did not want a exposed aggregate look so I had to be careful about sanding too much…
The stain and sealer work great and like the other user said, liquid just sits on an it and doesn’t not penetrate.
If you have any questions ask away- I had lots of friendly people help me on other forums and was very thankful for their help….
Chengs Book
http://www.amazon.com/dp/1561584843/ref=pe_385040_30332190_TE_3p_dp_1
Sealer
http://concretecountertopsolutions.com/products/sealers-and-polish/z-siacryl-14-sealer/
Polish
http://concretecountertopsolutions.com/products/sealers-and-polish/z-counter-shine-polish/
Dye/Stain
http://concretecountertopsolutions.com/products/stains-and-integral-colors/z-aqua-tint-dye/
Nylon Fibers
http://www.amazon.com/gp/product/B000COCDCM
SUPERPLASTICIZER
http://www.ebay.com/itm/-/161011304020
Diamond polishing pads
http://www.amazon.com/gp/product/B00AB1UMOW
Variable speed polisher
http://www.harborfreight.com/power-tools/polishers/7-in-10-amp-variable-speed-polisher-60626.html
went to that link, found this: http://www.amazon.com/Sauers-Wood-Identification-Kit/dp/B003F0C9EW/ref=pd_sim_201_2?ie=UTF8&dpID=61vDejjpw3L&dpSrc=sims&preST=_AC_UL160_SR160%2C160_&refRID=0VACTVP05EKQMBDBD5BW if you wanted to make your own i suppose this would be great!
Definitely veneer. Don't bother trying to save it.
You can definitely sand or strip it off and apply new veneer. The edge is actually pretty easy to trim to the rounded corners.
Paint and epoxy would last longer than the veneer.
That is cute. I like it. If you ever want something a little stronger, you can pick up craft plywood for a few bucks. If you are careful, it can even be cut with a simple utility knife.
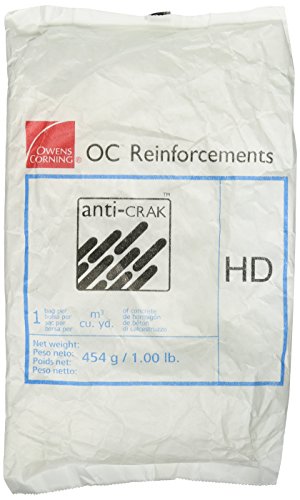
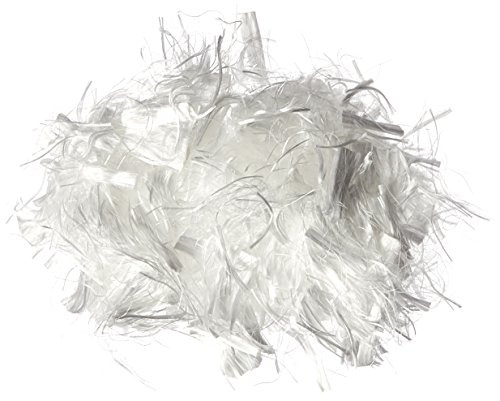
Out where I live, we have moved away from the rebar for light duty applications, such as patios and driveways. Crack control is now done with "kitty fur" and control joints:
https://www.amazon.com/32-500-4-Inch-Anti-Crak-Concrete-Fibers/dp/B000CODWAE
We mix this thoroughly into the concrete, and the fibers help to prevent cracking during the curing process, and afterwards. They are available in many different thicknesses and lengths, depending on the job:
http://usa.sika.com/en/solutions_products/Construction-Products-Services/Concrete/concrete-reinforcing-fibers.html
Call around, and see if this is available in your neck of the woods.
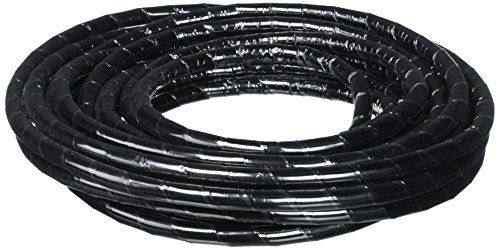
I bought and used some asphalt rope crack filler off amazon for cracks. Pretty easy. Only thing to look out for is alligator cracking. That's not really repairable.
https://www.amazon.com/Dalton-Enterprises-35099-PLI-STIX-Concrete/dp/B000DZGHPO/ref=mp_s_a_1_3?keywords=asphalt+rope&qid=1570842007&sr=8-3
I've had decent success with these 12inx12inx3mm birch sheets I got off amazon. 45 sheets for $65 (these were down to $60 a while back).
​
https://www.amazon.com/gp/product/B013NT3OAC/
I have mounted things on siding using one of these
https://www.amazon.com/Arlington-Vertical-Siding-Mounting-Built/dp/B002W6ZOCO/
but its plastic and like you said you need to hit a stud especially for a antenna that is heavy and might get wind load.
You could buy a veneer sample pack, which includes several species of wood samples that are labled, and use them like flash cards to study the different characteristics. Or you could compare them to the furniture in your house.
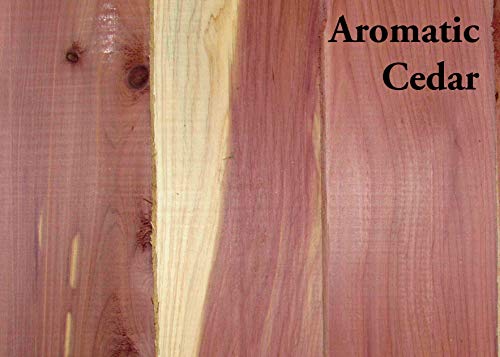
A cheaper way to learn different commonly used wood species would be to walk into Home Depot or Lowe's or even better, a lumber specific store and just study the wood they have there. Typical stuff used around the eastern United States is oak, cherry, maple, walnut, pine, hickory, poplar, cedar, etc. They each have very distinct features like grain pattern, grain spacing, color, density, hardness, and even odor. Cedar for example is very soft, very lightweight, and has a strong odor, which you've smelled if you ever walked into a pet shop that uses cedar chips for rodent cages. While oak is very hard, and heavy and smells more like bad body odor.
Keep in mind that there are lots of different species like I mentioned above, but then there are subspecies like southern yellow pine, white pine, western red cedar, white cedar, black walnut, birdseye maple, silver maple, etc. And even within them examples of each can vary widely, because it its organic nature. But there will always be tell tale signs to narrow it down pretty close.
I'd definitely check out your local big box store and ask them what aisle the finish lumber is in, or just ask where the oak is. They usually sort everything by species and will have plenty of oak, poplar, maple and pine on hand. Lumber specialty stores will have a wider selection of stuff like walnut, and cherry. You can handle in, smell it, poke it with your thumbnail to see how hard it is, and even buy some to use as a reference. Prices vary widely from species to species. Pine is cheap and might be sold by the board while oak is pricier and might be sold by the food. You can cut small pieces of stuff in the scrap bins and they will only charge you for the length you take.
As for using different woods for different things, it's mostly style when it comes to furniture. Some people like the look of cherry, so they buy cherry furniture. There are certain woods with specific uses. For example, southern yellow pine is used for decks because it can be pressure treated with chemicals that make it not rot, or get eaten by wood eating insects. It's also very stringy and not likely to crack. It can bend very far before breaking so it's perfect for the strength needed in decks that can hold large crowds of people during parties. Cedar is also used outside a lot because it has natural tannins which keep it insect and rot free without any paint or chemical treatments. If you ever see wood siding on a house that looks like shingles, it's most likely cedar. Some roofs are even made with cedar shingles because it holds up to the elements very well.
Sorry for the wall of text. I just found this subreddit and I like sharing knowledge on topics I know more about.
I used pre-drilled melamine panels. Easy to install the horizontal shelves in the best spot, super easy to get an excellent paint job on it (if you do not like the bright white color that it comes in), and the edges can be finished with iron-on edgebanding:
http://www.homedepot.com/p/Melamine-White-Drilled-Panel-Common-3-4-in-x-15-3-4-in-x-8-ft-Actual-0-75-in-x-15-75-in-x-97-in-371693/202089062
https://www.amazon.com/38565-Melamine-Iron-Edgebanding-White/dp/B0071BR60I
I get my glue to 160. One thing that I find really helps is getting everything hot. After I press my glue soaked veneers for a day I re-prep them by doing the following:
1 - Spread glue on the toothed substrate
2 - put veneer face-down on glue soaked substrate
3 - Wet with water (spray bottle)
4 - Iron it until the veneer is uncomfortable to touch for longer than a few seconds
5 - Apply glue to veneer
6 - Peel it up, flip it, get it where I want it, and hammer it. Don't go crazy getting all the air pockets out. It's MUCH easier to touch them up after (like he does in video 2) than worry about breaking your glue bond by hammering partially set glue
Also if you want so low level of effort practice, order this. Good quality veneers, really cool species, and you don't need to cut them. They make interesting combinations for box bottoms and floating panel box tops if they come out nice too.
Not 100% sure what the difference is (might just be depth of unit/quality of construction), but this is the actual product on Amazon. Similar, but not quite the same. The actual product is about $20 more expensive on Amazon (although that price difference drops if you have prime).
This is the product link:
http://www.amazon.com/gp/product/B013NT3OAC?psc=1&redirect=true&ref_=oh_aui_detailpage_o04_s00
And here's some pictures from my last batch
http://imgur.com/a/8kHaj
http://www.amazon.com/gp/aw/d/B013NT3OAC/ref=pd_aw_sim_sbs_60_of_7?ie=UTF8&dpID=41Kzr2zFjSL&dpSrc=sims&preST=_SL500_SR100%2C100_&refRID=0MX1HXF0SQPPK6SWQCCQ
45square feet for $50. This is the best deal around I could find so far. All the other places I've looked put the square foot price higher when shipping is added. I've bought stuff from woodpeckers in the past too.
I used 1x1 foot galvanized steel sheets I cut to size to fit in the box with a pair of sheet cutters https://www.amazon.com/gp/product/B000W6ZMQY/ref=ppx_yo_dt_b_asin_title_o07_s00?ie=UTF8&psc=1
I would look into quikrete 5000 which can be bought a Lowes for $5-6 a bag and just add fiberglass shards for added strength. That's what i plan on doing for my bathroom vanity.
https://www.amazon.com/32-500-4-Inch-Anti-Crak-Concrete-Fibers/dp/B000CODWAE/ref=sr_1_1?ie=UTF8&qid=1491533180&sr=8-1&keywords=fiberglass+fibers
http://www.amazon.com/Rockler-Hardwood-Assortment-Mixed-species/dp/B001DT4Q2U
What about this:
https://smile.amazon.com/38565-White-Band-Melamine-Edgebanding/dp/B0071BR60I/ref=sr_1_1?ie=UTF8&qid=1487103978&sr=8-1&keywords=white+veneer
I've got to second Guygan on this, just filling in the spot will almost certainly not produce the result you expect. That being said, you could replace that entire panel and finish it with some edge banding
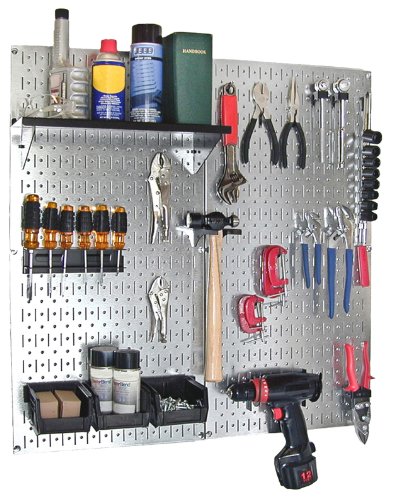
I was going to get this kind: https://amazon.com/Wall-Control-30-HP-1632-GV-Horizontal/dp/B00AM2CG76/
I think what I'll do is put the center holes into a stud, then do the four corners with drywall anchors. I'm sure that should be more than sturdy enough, just not ideal.
Well, there's this for metals: https://www.amazon.com/dp/B07DM7VBCT
Or wood: https://www.amazon.com/dp/B003F0C9EW
Polymers: https://mindsetsonline.co.uk/shop/polymer-identification-set/
Or for 300€, you can get a professional plastic sample set meant for product design: https://www.plasticprop.com/buy-samples
Thanks for the ideas. I'll have to measure the box on the house and compare it to the one you linked. Maybe your box is large enough to completely cover it and then the current position wouldn't be as much of an issue.
I think the only issue with the cover you linked is that it is for Dutch lap siding. I have hardiplank, so I'm not sure if it will work, since there are difference in how the siding is cut. I might just buy a few different types and see what works best.
One other option I'd rather not do but could be a possibility is to remove that box and install one of these in its place. I'd really rather come up with a solution that uses the existing box instead, but this is always an option.
Expected, had mine sealed in summer, some of the cracks that were sealed are open again, planning on trying this stuff out and see how it goes. It's likely the cracks were too large for the stuff they use to completely fill the void, which is why you need something that can get really down there, which the stuff I linked to supposedly does. You stuff it in the cracks, then heat it with a torch to melt it into every crevice to completely seal up the crack.
Can i just get some normal concrete from a big box store and mix in glass fibers?
Im considering this for the concrete:
https://www.lowes.com/pd/QUIKRETE-ProFinish-Crack-Resistant-80-lb-High-Strength-Concrete-Mix/3026899
and
https://www.amazon.com/gp/product/B000CODWAE/ref=ppx_yo_dt_b_asin_title_o04_s00?ie=UTF8&psc=1 for my fibers
I was just going to throw in that you can buy this edging stuff in various widths. Even if it looks slightly off up close, nobody would ever notice.
https://www.amazon.com/dp/B0071BR60I/ref=cm_sw_r_cp_awdb_t1_UIyrDb67GWB0H
Make sure you tape where your cut is because that thermofoil (if that is ehat it is) can really kind of rip when you cut it.
I could only find black melamine edging online. http://www.amazon.com/Sauers-Black-Melamine-25-Edging/dp/B00315PNAI
I was trying to find the "T" type that and rout a groove into my wood, but in the end I just settled for iron on edging. I went slow and its holding up really well.
The one thing I should mention that isn't visible in the photos...I put a small drill hole in the plexiglas over the power button of the monitor. That way if the monitor ever shuts off I can just slide a paperclip inside and fire it back up.
http://www.amazon.com/gp/aw/d/B003F0G60A/ref=mp_s_a_1_1?qid=1417905748&sr=8-1&pi=AC_SY200_QL40
I just looked at this for a 29mm Cesaroni motor. I'm going to switch over to a 29mm motor mount. I think I'll just use a 29mm one grain F load instead of adapting to 24mm. I'll definitely try that in OpenRocket! I would never use balsa for fins :^ ) You caught me. The 1/8" 1sq ft G10 stock is a bit pricey at $27.00 per unit, so I think I'll go for this if that sounds good.
Pretty sure the bottom boards are red cedar.
I imagine that using three hinges between each board would protect against any reasonable abuse.
What kind of wood did OP use I wonder?
Edit: Perhaps just craft plywood. Like so:
https://www.amazon.com/Midwest-Products-Co-5306-Plywood/dp/B000MNKTSS
One of these was posted a while back. I had the link still in my browser history so here you are: Hardwood Assortment - Mixed species, from Rockler.
Having made them before I would say wood veneers work quite well. They likely need to be one sided and you will have to play with your settings because it's fairly easy to burn through. That said I've had the best results with these two:
Cedar Wood Veneer and Veneer Variety Pack
The cedar veneers are super consistent in quality. Thin enough to feel like a biz card but thick enough that they are sturdy like card stock paper. Prints well and gives a reasonable differentiation between shades of light and brown so that you can get some complex imagery going if you feel like it. The variety pack comes with a whole selection of woods of varying color and quality. Some are full of burls which don't lend themselves well to lasering over, and others have such a grain pattern that distracts to much from small imagery as used in a biz card. On the other hand some of them have beautiful sheen as well as very striking color.
Here's an example of some done with two veneers from the variety pack.
Ahh. I see what ya did there. Lol
God bless amazon. Wall Control 30-WGL-200GVB Galvanized Steel Pegboard Tool Organizer https://www.amazon.com/dp/B002LZSWFW/ref=cm_sw_r_cp_api_i_kFVzCbPRPTAQH
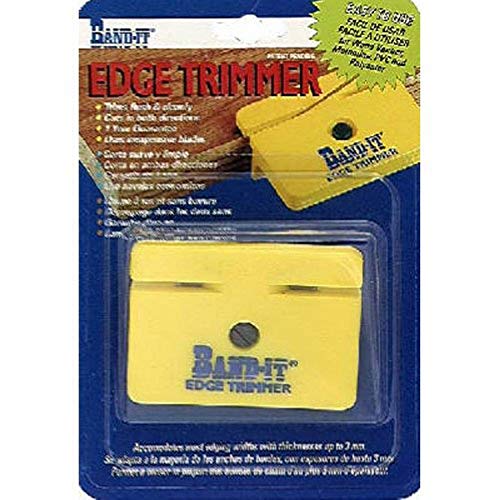
Agreed. I love the way my 626 looks with real wood. The tool that helped the most with the rewrap process was this thing, so be sure to suggest the buyer get one. Cloverdale 33437 Band-It Edge Trimmer https://www.amazon.com/dp/B001B1CHDA/ref=cm_sw_r_cp_api_i_H.00CbAKXFW5M
I don't remember what exactly got me interested in inlays/marquetry but I rented a book on marquetry from the library and picked up the few tools I needed to get started and went on from there.
If you're interested in marquetry I recommend "The Fine Art of Marquetry: Creating Images in Wood Using Sawn Veneers" by Craig Vandall. He doesn't focus on the history/theory behind marquetry too much but gives a straight forward approach on where to begin and what tools you need to start.
For materials, I buy my veneer sheets from Amazon .The product linked gives you the most variety in wood species, great quality control, and value per sheet of veneer. For dyed veneer I go to B&B Rare Woods (their website is a little dated). Their dyed veneer's and regular veneer sheets are top notch. They also let you order book matched veneer sheets.
Let me know if you have any other questions or if you have trouble finding information on a certain subject. Cheers!
​
https://www.amazon.com/Premium-Baltic-Birch-Plywood-Woodpeckers/dp/B01MXVB6O6/ref=pd_sim_201_1?_encoding=UTF8&pd_rd_i=B01MXVB6O6&pd_rd_r=CTDGZZMSXTBKH9B8KXVB&pd_rd_w=DbLsu&pd_rd_wg=i2nBN&refRID=CTDGZZMSXTBKH9B8KXVB&th=1
Is this an example of the wood you used?
Thanks
I only have experience with concrete but this is a type of additive that might be suitable, also glass fibers will add strength or really anything that will help give it some structure and rigidity https://www.amazon.com/32-504-4-Inch-Nylon-Concrete-Fibers/dp/B000COCDCM/ref=pd_sim_469_2?_encoding=UTF8&psc=1&refRID=2H3PGMH6CYWM50GJFTM3
I do not know where you live, but exterior rated caulk is often used for something like this:
https://www.amazon.com/Electric-GE5020-Concrete-Silicone-10-1-Ounce/dp/B000BPDB6O
I do not know if that is available to you, but a local home improvement store may have something similar.
1/8" X 12" X 12" Baltic Birch Plywood Great for Laser, Cnc, and Scroll Saw. 45pc Woodpeckers https://www.amazon.com/dp/B013NT3OAC?ref=yo_pop_ma_swf
http://www.amazon.com/Birch-Wood-Edge-Banding-Tape/dp/B0007SVE96
This is the kit not just the panels and it's currently $66.97 on Amazon.
El Linko:
Baltic birch plywood.
Here is what I buy:
3 mm 1/8" X 12" X 12" Premium Baltic Birch Plywood – B/BB Grade - 45 Flat Sheets By Woodpeckers https://www.amazon.com/dp/B013NT3OAC/ref=cm_sw_r_cp_api_haTVBbZ6D2P64