Best soldering guns & irons according to redditors
We found 868 Reddit comments discussing the best soldering guns & irons. We ranked the 178 resulting products by number of redditors who mentioned them. Here are the top 20.
We found 868 Reddit comments discussing the best soldering guns & irons. We ranked the 178 resulting products by number of redditors who mentioned them. Here are the top 20.

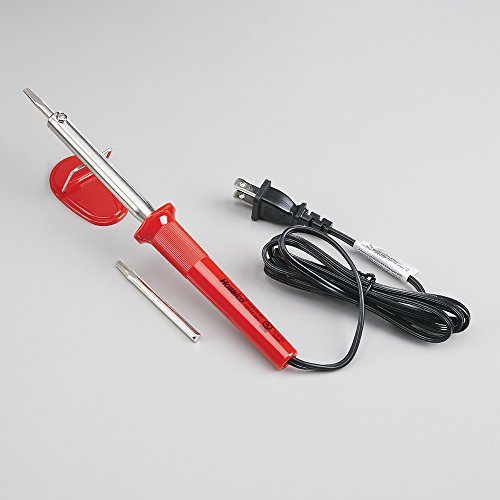


http://www.amazon.com/60-Watts-Soldering-Iron-listed/dp/B0006NGZK0
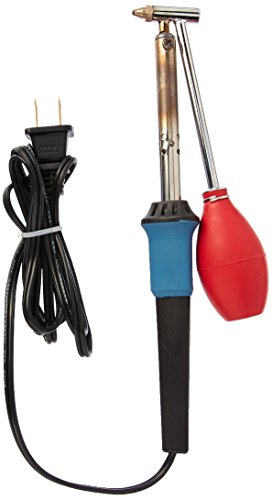
I can't recommend one of these enough. I've had mine for a while and makes desolder work a DREAM. And at $10 with prime shipping you literally cannot beat it.
This thing made desoldering switches so much easier than my solder sucker.
$20 on amazon
Amazon
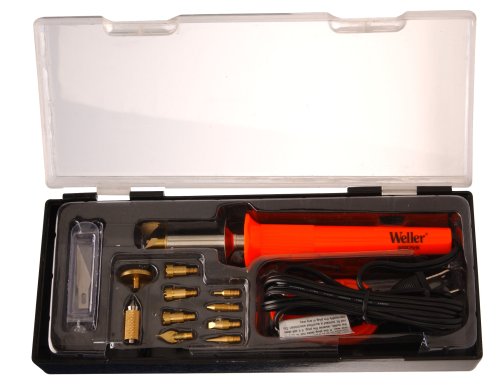
It’s a part from this soldering kit.
https://www.amazon.co.uk/WELLER-SP23LK-25-Watt-Soldering-Iron/dp/B0009ZD2AG
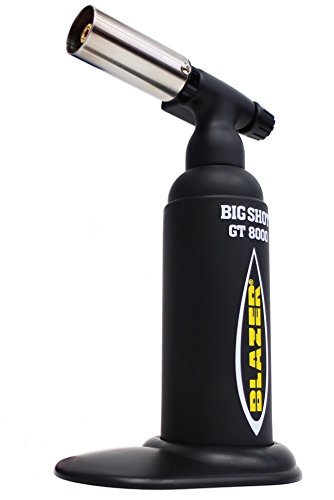
Blazer Big Shot GT 8000
I got one of those and never looked back. Went through several of those shitty creme brûlée torches people mention. This one has been lasting me for months and months of constant use with no signs of breaking down anytime soon. Make sure not to skimp on butane either. If you're gonna spend 9.99 on a torch, you're going to get what you pay for: crap.
Video for the torch, if anyone is interested
Edit: Formatting
TLDR: No instructions came with the DIY kit, which is probably fine for the most part, but I had no idea wtf i was doing, so I wanted to post some info in case others were running into the same lack of how-to information when it came to simple stuff like "which wires do I solder to the usb-a/usb-c/aviator (gx16-4) connector?" or even "How to fish the cable through the paracord/techflex sleeving?" Also to see if any assumptions i made were wrong before I plug this into the Massdrop ALT keyboard that's en route.
​
Prior to attemping this, I haven't done anything electrical related anything, didn't own any of the tools other than a set of wire cutters and I basically didn't know what search terms to even search for.. so keep that in mind when reading. Also, ZapCables weren't taking orders when I wanted to make an order, so I figured "how hard could it be for a newb?" Wrong.
​
Things I still don't know:
- [solved: it works!] I'm not sure if my cable actually works because I don't own any USB-C devices other than a power bank that has a USB-C connection. I plugged it in to an ac adapter connected to the wall then connected it to the power bank and it turned on AND the cable didn't melt (hooray), so I assume power is working.
- I have no idea how to test if the rest of it works. I realized after I pieced this all together I probably could have tested the connections somehow, but I really don't want to dismantle this thing now. I'm planning to just plug it in to the ALT when it arrives and do a rain dance in the hopes that everything works.
​
Assembly Steps
​
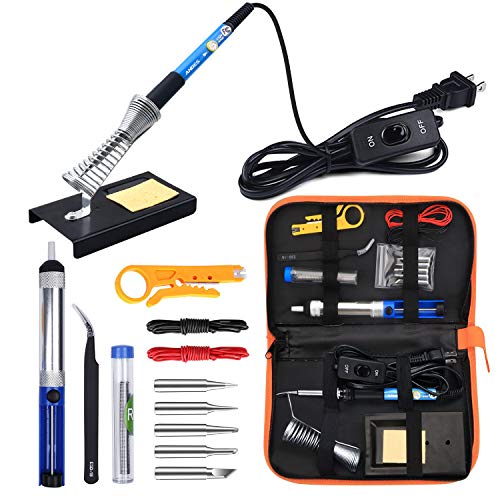
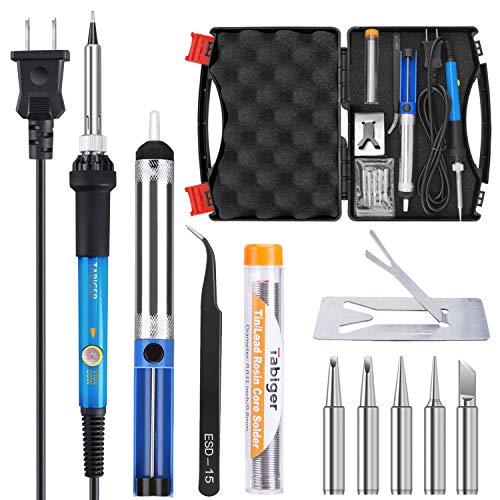
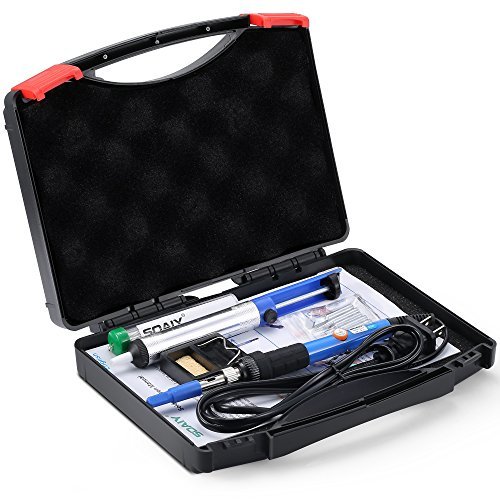
Step 1: I bought a cheap soldering kit off of amazon (https://www.amazon.com/gp/product/B06XZ31W3M/ref=ppx_yo_dt_b_asin_title_o02__o00_s00?ie=UTF8&psc=1) and hoped for the best.
​
Step 2: Stripping the usb cable and incredibly tiny wires inside
- Wire Cutters/wire stripping tool: this worked fine for the USB cable casing, but not for the wires inside. For the inner wires, it only worked 50% of the time because I couldn't get the feel right and kept cutting the strands of the wires when peeling them off. I bought a wire stripping tool and the one i got didn't work as the wires were too small. SIGH.
​
- Soldering iron: i saw some people just melt the casing off, and this kind of worked, but because the already tiny ass wires were stranded (had even more impossibly thin wires inside), the plastic melted between the strands and it took just as long to clean it off before tinning the wire.
​
- What worked for me: I ended up figuring out I could use the soldering iron to melt the plastic away to create a notch where I wanted to start stripping the wire away. Once I melted around the wire, I used my fingers and pulled the plastic off, and the underlying strands of wire were clean and in tact.
​
Step 3: Tinning the stripped wires
- What worked for me: I set the soldering heat on the soldering iron to be around 350deg or a little less as I found any higher and the solder would burn and disappear before I could get it on the wires. I took the tweezers and twisted the strands so they would not come apart when applying heat. Then I heated up the twisted wire with the soldering iron and put the solder on it and moved it all around. Seemed to work.
​
Step 4: Soldering tinned wires to the connector USB-A connector
- I have no idea if I did this correctly. Even though the packaging for USB-A had the wires in order GND, D+, D- and VCC marked, it wasn't clear to me which orientation to have the connector so that the label made sense. I assumed if your wires are on the left, and the connector is on the right, then the top connection point on the USB-A connector was GND. The connection points weren't labeled sooooo I hoped for the best. Once that was done, i assembled the rest of the connector's metal casing. To solder, I added heat to the tinned wire and it connected. I was paranoid about having the solder spread to the other connection points (the USB-C connector has no barriers unlike the A) so i didn't add extra on top.
​
Step 5: Fishing the cable through the paracord/TechFlex
- There's some videos of how to do this for the paracord on youtube, but I couldn't find a way to hack it and make it faster, so i pushed it through one aggravating inch at at time. The Techflex was easy because.. well it can flex.
​
Step 6: Soldering the male side of the Aviator/GX16-4 to your USB cable
- I don't think it matters if you choose male or female part of the connector. I chose the male side because it was easiest to detach the cover (just unscrew it) and expose the solder points. First I threaded the cable through the heat shrink to the USB-A connector. You don't have to do this but I found not all of the heat shrink pieces I got could fit over the connector. Next, I threaded the USB-Cable with the paracord/techflex through cover that was just unscrewed and left it on the cable. Looking at the male GX16-4 solder points, they are labeled 1-4, and I chose the soldering points 1:GND, 2:D+, 3:D-, 4:VCC. You'll do the same for the female connector.
​
Special note: I emailed ZapCables because I was initially confused AF when I saw the GX16 connector and had no idea what to do. John promptly replied with the tip about the labels. Thanks John! He also mentioned they might be making their own tutorial which I think they should do because I found this hard given I don't have any experience doing this.
​
When the soldering was done, I connected the GX16-4 cover back to the male connector. Be sure not to twist the cable while you're re-attaching. I ended up tearing the wires off from over-twisting and proceeded to die inside when I realized I had to do it all over.
​
At this point, you have half the cable and it's pretty much the same for the other half EXCEPT that for the female GX16-4 cable, detaching the cover to expose the solder points requires you have an small screw driver to unscrew yet another miniscule screw. The set of tiny screw drivers I use for my glasses/computers was not small enough, I was able to find one that worked in a random set i had in the garage. The size was not marked, so I have no idea what to tell you guys :( If you manage to get it off, twise the cover 1/4 rotation to the left and then pull.
​
Step 7: Do steps 2-6 for the other side of the cable + female GX16-4 connector
​
If you decide to go this route and you also have no idea what you're doing, I suggest you definitely order a little more length for the usb cable/paracord/techflex. I got a 4ft cable, and in the end, with connectors on and all, i'm 3-4 inches short of 4ft because of all the mistakes I made.
​
I hope this helps someone who wants a nice cable but can't be bothered to wait.. but can be bothered to be frustrated by the assembly process.
​
*Edit: grammar/spelling*
​
EDIT: Update on the cable, some of the parts that i soldered between the cable did not have a good connection, bending the wire ever so slightly would cause the keyboard to connect/disconnect, so i probably have to redo the connections to the male/female gx16-4 connectors.
​
EDIT2: After a quick email to ZapCables, John mentioned that i had too much exposed wire that was touching (near solder points) and suggested I resolder with less exposed wire to prevent this from happening. Rather than do that and figure out how to desolder, I took some electrical tape and wrapped any exposed wire connecting at the solder points to the USB-A/USB-C/GX16-4 connector. Happy to say, it's all working and I am now successfully using this cable. 5/5 for ZapCables and John for help.
For someone who buys a lot of cheap shit, I wouldn't cheap out on a torch. Get the GT8000 Bigshot for only 41$ and you won't have to worry about a shitty flame and it breaking. This thing is the most recommending torch for a reason.
Depends on your budget. I use the Big Shot Blazer currently and its the best torch I’ve ever owned. You could get something cheaper though and still get the job done
If you really want to learn, pick up a small kit like this, like 7 to 10 switches, and like 10 of any kind of keycap, and finally grab a soldering iron.
All that is around $50 total, and places like keeb.io have really detailed guides on how to assemble their PCBs. It's really not hard once you understand what to get, and once you've built even a small macro pad like that, you'll be able to build even hand wired keyboards no problem. They're really simple once you learn the basics! It's pretty much just legos, but really tiny and using a hot stick.
Tell Best Buy to go suck a lemon.
I like this one.
+1 on the big shot. This has been my favorite torch, and not having to hold a button the whole time I'm heating my rig has been awesome. Well worth it.
https://www.amazon.com/Blazer-GT8000-Shot-Butane-Torch/dp/B000NCZU0A
been using mine many times a day for almost 2 years.
I believe it's a Blazer GT8000 Big Shot Butane torch. The pic doesn't have any markings on it but it looks very similar to the Big Shot. You can buy it on Amazon here for $100. Torch works very well and is refillable with butane gas.
You're going to need the following two items if you watch these.
Yeah, yer gonna want to heat that poker up real good with that there torch so you can effectively poke your eyes out.
I wish there was a very clear answer that isn't a
thousand823 words. But there isn't, so bear with me. Or is that bare with me? Regardless, beer with me.Okay, as far as I know there are three ways to do a battery swap (as long as you aren't trying to keep your saves on the game. Then there are wires, lots of prayers, and it is a pain in the bottom). The first two methods are the guide you linked to and soldering the battery. The last is finding a tabbed battery.
As your guide shows, and as both of the first methods will follow, you need to break the connectors off the battery. Don't bust out a soldering iron just yet, these aren't soldered. They are spot welded. Unless you have a spot welder (and you don't - don't lie to me and say you do, I doubt any of us have one) you won't be able to get it back together the same way it was. You need to break the connections in order to get a fresh battery in there.
Grab your finest razor blade in order to sever the connections, and a handful of bandaids in order to stop the bleeding from your accidental cuts. It is bound to happen, maybe not the first time, hopefully not every time, but you will be poking and cutting your hands. It will suck. A sharp razor won't hurt you as much, but try to be careful anyway.
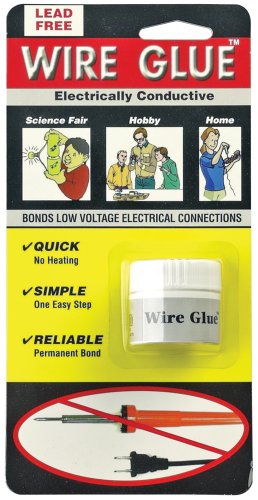
After you clean your blood off the circuit board, you can choose which of the first two methods to go down. You can use the soldering iron or tape / wire glue. Wire glue is, as far as I've been told, basically iron mixed into elmer's glue. It is suppose to hold well, but it wouldn't hurt to tape after using it. Mix it up well before using it, or else you might not get a very conductive result.
The issue with using glue or tape to hold your battery is when you get to Gannon in the dark world, or maybe battling Giygas, or vanquishing dracula, your method of holding the battery will fail. Maybe you'll bump the cart just the right way, or maybe the dog will run in and knock the SNES down, then you'll lose all that time. And be upset at the dog that just was super excited to see you, because he only knows a few people and he loves you so very much. He won't understand why you are angry, and it will break his tiny little heart.
Don't break your dogs tiny little heart. If you don't own a soldering iron, use good electrical tape and use the glue, and make sure it is as secure as possible. Some people will add hot glue in there to hold that sucker in place, and it isn't a bad idea.
So, you love your dog and you are thinking you should use a soldering iron. Well, it is going to be hard to play fetch with fido when you are blind, and you might get angry at me if I don't mention it. Hot things and batteries aren't a good combination. They can pop, spray acid, and ruin your day. Wear safety glasses at the very least, and try to keep the iron on the battery as little as possible. A soldered battery will hold in place much better, but it still isn't great.
So, you've arrived at option 3. I like to call this the expensive option, but it is the right way to do it. You need to find the batteries (and without spending a bunch of time researching, there is a pretty good chance it is one of the ones in this list )then you need to have a soldering iron, and some solder. A desoldering iron would be really handy, but soldering wick could be used in its place, or you could just not use anything and probably be okay. Buy a/some tabbed batteries, remove the old battery by heating up the tabs through the board and pull it out. A desoldering iron can be used to suck the solder away, which will make this easier for you, and a wick can be used in a similar fashion. Pop the old one out, put the new one in, solder it in place, and you'd be good to go. The batteries aren't going to be cheap, and you can't ship them (easily) via USPS because they are lithium.
As for soldering, you might need to practice the basics. There are cheap little kits at Radio Shack. Make a FM radio or something using one of them. Take your time, be careful, and keep some burn ointment on hand. Seriously, there isn't a method here that won't lead you to some sort of minor injury.
Good luck, and tell your Dog I said "Woof!"
Yes works great with leds!
Tenma 21-8240 Vacuum Desoldering Iron https://www.amazon.com/dp/B008DJRYIG/ref=cm_sw_r_sms_apap_4HuPH8htp6ZEX
Nice - you'll be glad to have that variety of tips, depending on what you are working on! If you have any spare Christmas money, I'd recommend picking up one of these self-adjusting wire strippers - it sort of matches your color scheme too! And if you do a lot of de-soldering (anything with lots of headers or through-hole IC sockets), a desoldering iron can save a ton of time compared to your solder wick and desoldering pump.
A few other things that I've found useful (mostly repairing electronic keyboards / synthesizers, although I'm hoping to get more into Arduino / Pi soon):
Hakko wire cutter
Helping hand
Hemostat / Forceps
Digital multimeter with audible continuity tester
It's better to have one that has a controllable temperature setting. But then you have to know when to use what temperature. And they are expensive, but usually comes with a stand and sponge. https://www.amazon.com/gp/aw/d/B000AS28UC/ref=mp_s_a_1_4?ie=UTF8&qid=1495567186&sr=8-4&pi=AC_SX236_SY340_FMwebp_QL65&keywords=Solder+iron&dpPl=1&dpID=41B9YPknwfL&ref=plSrch
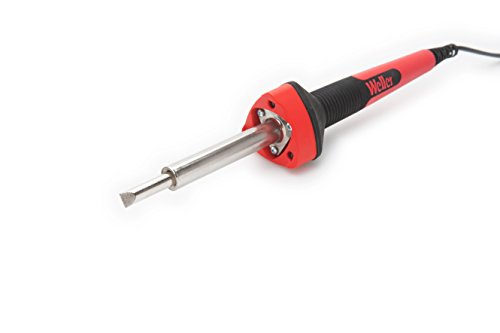
If you get a cheap one you will be fine while learning how to solder. The tips are really bad quality and doesn't heat evenly all the way around and you should have some sandpaper close to give it a good scrubbing between uses. https://www.amazon.com/gp/aw/d/B0006NGZK0/ref=mp_s_a_1_6?ie=UTF8&qid=1495567186&sr=8-6&pi=AC_SX236_SY340_FMwebp_QL65&keywords=Solder+iron&dpPl=1&dpID=41Tf73KQXQL&ref=plSrch
Sorry, on mobile and I don't know how to edit the links without the editor help...
If you feel like you absolutely have to have it stippled, get this $7 soldering iron, watch a YouTube video, and do it yourself.
Butane torch, various uses. I.e. shrinking heat shrink tubing.
Blazer GB2001 Self-Igniting Butane Micro-Torch https://www.amazon.com/dp/B000VML7KO/ref=cm_sw_r_cp_apa_4NH2BbCTQR2TV
As cute as that is. My god the hits are going to be harsh! Try using a soldering iron for clean vape hits!
A friend turned me on to these: https://www.amazon.com/dp/B007A9YSPW
I use it as a backup/don't-care-if-I-lose-it lighter.
http://www.amazon.com/BBQbuy-Pencil-Welding-Soldering-Lighter/dp/B007A9YSPW/ref=sr_1_1?ie=UTF8&qid=1427415847&sr=8-1&keywords=503+torch There you go the last torch youll ever need to buy...unless its a dud then re-order.....
Single torch? check
soft flame? Check
Adjustable? Check
Huge ass tank? Check
Looks cool....eh
Can fuck with it for hours? check.
Sold by mother fucking jackie chan? double check
This. You can find decent starting irons on Amazon with solder. You might consider buying a few ”learn to solder" soldering kits from Amazon. They come with all the parts needed, and the instructions teach you how to assemble the components (you then have to solder them in the board it came with)
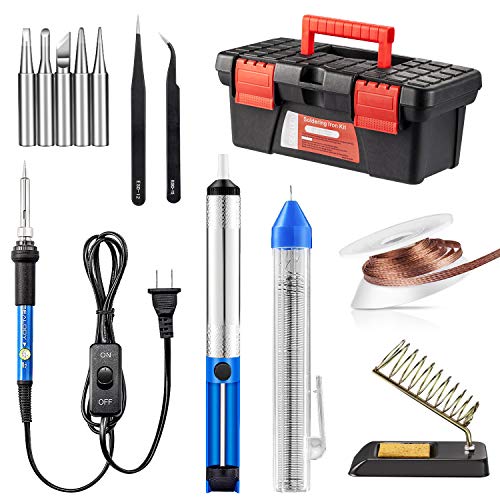
Iron set example: (good for basic /beginner projects) https://www.amazon.com/gp/aw/d/B01H1IFT54/ref=mp_s_a_1_4?ie=UTF8&qid=1523313329&sr=8-4&pi=AC_SX236_SY340_FMwebp_QL65&keywords=soldering+kit&dpPl=1&dpID=51rAt23O28L&ref=plSrch
Electronics kit beginner example (these are fun to do imo)
https://www.amazon.com/gp/aw/d/B0002LUAL6/ref=mp_s_a_1_2?ie=UTF8&qid=1523313465&sr=8-2&pi=AC_SX236_SY340_QL65&keywords=elenco+soldering+kit&dpPl=1&dpID=519bj4ev-jL&ref=plSrch
Propane soldering irons are fairly cheap and really useful, I've been looking at them recently and I'll get one next week. You can use them to remove supports, make your prints smoother, cut off small zits and all that.
I'm looking at something like this.
I use the Aoyue 701A+, but a lot of people really like Hakko irons, here, like the FX-888. Honestly, it really depends on how much soldering you're going to be doing. I really don't recommend spending $80+ on an iron if you're only ever going to solder one or two boards, because that's not very good value. A lot of people recommending irons forget that. If you only plan to do a board or two, I'd recommend something with a lot of value, like this. This is what I started on. Nothing special, but a lot of features for this price and it worked fine for my first two boards.
This $20 Kit on Amazon might be goo entry level... I have NO idea if the iron is any god but have seen people use them and they work fine. This one comes with a multimeter for a few bucks more. The tool you will find a lot of use for is that curved tweezer. It can open switches, hold components, pick up clipped resistor/diode leads etc.
​
If you have never soldered do NOT let an expensive keyboard be the first time... get some PCB's and resistors and then watch youtube videos of soldering... Pete from 1upkeyboards has tons... you might need to scrub through to get to the soldering or just search youtube for soldering videos. Soldering is not that hard but if you do not know what you are doing it is easy to scew the board up and ruining a board sucks.
​
Think twice, solder once... the biggest mistakes are not thinking it through and then you find you soldered the switches and plate BEFORE the stabilizers or the Pro Micro before switches and desoldering is a pita and is easy to burn the pads.
​
Try the Sweet16 or the 9Key first. You have to setup the QMK software no matter what so those are nice affordable ways to get a board built fast and then build and flash your firmware.
​
Have fun.
To start you need an iron and some lead solder
Link: ANBES Soldering Iron Kit Electronics, 60W Adjustable Temperature Welding Tool, 5pcs Soldering Tips, Desoldering Pump, Soldering Iron Stand, Tweezers https://www.amazon.com/dp/B06XZ31W3M/ref=cm_sw_r_cp_apa_GXDQAbRAZ26TT
You can get started now for pretty cheap. If you wanted to try and make an aux cable, you could follow my guide here, but I could recommend some cheaper materials so the up-front cost isn't so much.
I just bought some wire on Aliexpress that may be a cheap replacement for the mogami, and you can get a standard cheap soldering iron like this one if you plan on doing electrical work in the future anyway.
Is Preonic worth the investment?
I have a Planck rather than a Preonic but OLKB designs sturdy and reliable boards that are also very interesting.
I honestly think the Planck is like twitter. Having a very low word (key) count makes people more creative in how they express themselves. The Preonic is more like tumbler where more things can be done more easily.
Moving keys to other layers is fine due to the extra thumbable keys on the bottom row. The Preonic doesn't require as many layers because it has so many more keys, so the extra thumb keys aren't really necessary.
That said, it's a nice compromise.
Is it a good build for a beginner?
It's the same difficulty as any other keyboard build that has PCB components soldered on. All you have to do is add switches and through-hole solder them. It's definitely a fine way to learn to solder as long as you follow a few rules.
Most keyboard kits come this way with the exception of those like the Lets Split which you have to solder diodes and a promicro onto also.
The only thing More difficult is getting a PCB printed and buying diodes, resisters, and chips from DigiKey and then using a heat gun or oven to cook all the little things on.
What is a good soldering station?
Cheap ones will work fine. People around here seem to like the Hakko 888d which is what I use. The cheaper ones like this will also work fine. The extra $80 doesn't change much about how you work. Turn on the iron, heat stuff, sponge occasionally, don't touch it to your skin, then put it away safely.
Soldering rules for beginners
There are a lot of little things to do to maximize soldering experience. You'll figure these out over time. I thing this short list is enough to keep your board intact and blood in your body.
you're welcome
More than enough. I've been using this crappy iron (actually one just similar but safer) for all my boards, and with a totally hooped tip. Basically as long as it will melt the solder and not you or the board, it will work.
Best oil rig I ever bought from dhgate
Banger
Carb Cap
Torch I'm using
$15 oil rig if you don't want the klein
Silicone container
Dab Tool
Edit: Formatting and switched the carb cap from random seller to hyman.
Best torch is the Blazer GT8000 Big Shot
http://www.amazon.com/Blazer-GT8000-Shot-Butane-Torch/dp/B000NCZU0A
Bit expensive at 100, but worth it. Not sure what affordable is to you, though. Everyone has a different idea of what that is depending on their budget. As for fast working this is a flawless torch. Lights every single time and is heats it up quick.
https://www.amazon.com/dp/B008DJRYIG/ref=cm_sw_r_sms_apap_4HuPH8htp6ZEX
This is the Hakko.
If you don't mind manual, then the Tenma will also work
From my expirence a soldering pump and braid will work but a cheap desoldering iron like this will work best and will be much easier.
ECG J-045-DS Electric Corded De-Soldering Iron, +420 Degree C Tip Temperature, 45W https://www.amazon.com/dp/B00068IJSG/ref=cm_sw_r_cp_apa_3idKAb0PPDPBT
I am using this currently but this is coming in the mail tomorrow ;) along with some more lube and solder.
Edit: I have built all of my boards with the Weller without any issues. I also have a desoldering iron which is 10x better than the pump. If you ever plan on desoldering pick yourself up the desoldering iron for the extra 10 bucks. The solder pumps will break and you will end up spending that much on them anyways so its definitely worth it.
If this is just a one time job and you don't have any other soldering tools you could use this pretty easily: https://www.amazon.com/ECG-J-045-DS-Electric-Soldering-Temperature/dp/B00068IJSG/ref=sr_1_2?ie=UTF8&qid=1497024421&sr=8-2&keywords=desolder+tool+tip
It will get the job done. I've harvested switches from 30+boards using a tool like this. It is tedious, but will safely remove the switches from the PCB.
This is the one my pops bought and it works so well. Japanese manufacturing. https://www.amazon.com/Blazer-GT8000-Shot-Butane-Torch/dp/B000NCZU0A
I don't use propane due to it causing oxidation faster than butane. My new favorite is the Blazer Bigshot Blazer GT8000 Big Shot Butane Torch https://www.amazon.com/dp/B000NCZU0A/ref=cm_sw_r_cp_awd_WeyIwbVGXZVYA
This is my torch.
http://www.amazon.com/gp/aw/d/B000NCZU0A/ref=mp_s_a_1_1?qid=1375625750&sr=8-1&pi=SL75
It's $57 and you'll never need another torch. The flame is perfect, it's all around a quality torch.
I'm not fond of the vector torches, but this bed bath and beyond torch is in your price range and is very similar. Not as quality as the big shot but it does its job.
https://m.bedbathandbeyond.com/bedbathbeyond/product/detail.do?itemId=13057451&categoryId=&path=&notinregularhierarchy=false&comeFromSearch=true
I like this type because they are small and take disposable lighters as a fuel cartridge so you can pick up a refill just about anywhere.
IMAGE 1:
1 - OtterBox Drybox 3250 (Keeps my stuff dry when hoofing it through the rain)
2 - Oakley Juliet Carbon, Black Iridium, with Pouch
3 - Victorinox SwissChamp XLT with Pouch (I've disassembled and repaired laptops using only this tool, it's got everything)
4 - Sony Earbuds (Galaxy S4 Active does not have an FM radio, earbuds acts as antenna for HTC phone's FM radio)
5 - Toshiba Canvio Connect 2TB Portable Hard Drive (There's a complete backup of my PC as well as about 1,200 movies on it)
6 - Dayan GuHong 3x3x3 Speed Cube 6-Color Stickerless V2
7 - Moleskine Classic Notebook, Pocket, Plain Paper, Hard Cover, Black, with Zebra F-301 Ballpoint, Sanford Protouch II Mechanical Pencil, and Staedtler Mars Plastic Eraser
8 - Rechargeable Backup Battery (Got it for $10 at Micro Center, great for a quick top-up when I'm in the field, or in a field)
9 - Armani Exchange Leather Logo Embossed Card Case
10 - SanDisk Cruzer Fit 16GB USB Flash Drive x 2 (One Bit-Locker encrypted with PortableApps, and one YUMI bootable with PCLinuxOS, BackTrack, HIREN, and LiberKey)
11 - Importer520 Micro USB OTG Male To USB Female Adapter For Samsung Galaxy S4 Active (Allows me to plug almost any USB device into my Galaxy S4)
12 - Samsung Charger, with retractable USB to Mini-USB cable, and Mini-USB to Micro-USB adapter (Charges both phones, bluetooth headphones, bluetooth keyboard, backup battery, and connects hard drive to phone or PC)
13 - Honest 503 Butane Jet Pencil Torch (Also doubles as a quick and dirty soldering torch)
14 - Rii Touch 330 Bluetooth Keyboard
15 - HTC Inspire 4G (Backup Phone)
16 - Hybrid Case for Samsung Galaxy S4 Active (Taking Photo) (This thing is a beast, water and dust proof, it has pretty much negated my need to carry around a laptop, especially with TeamViewer installed. I was also able to wade across a river with it fully submerged in my pocket while on vacation last year.)
17 - Quikcell S160 Stereo Bluetooth Wireless Headset
18 - Casio PRW2500-1 (Solar powered, with every environmental sensor that my phone doesn't have)
IMAGE 2:
Packed Armani Exchange Ripstop Messenger Bag
Packed Otterbox (Goes in bag)
IMAGE 3:
Thermos E20600 (Goes in bag, quite literally keep ice for 24 hours, utterly amazing)
The Tenma 21-8240 is better and easier to use than that one.
https://www.amazon.com/Tenma-21-8240-Vacuum-Desoldering-Iron/dp/B008DJRYIG/
sauce
Here are some rules to keep in mind:
Start with a pair of wires... Just twisted together wires, like a "Western Union" or "Lineman's" splice.
http://en.wikipedia.org/wiki/Western_Union_splice
It's how I usually install car stereo equipment when putting the car and radio harness together.
Next, you can move up to kits. I wish HeathKit was still selling shit... Velleman seems to sell small trinkets for less than US$10 and you can find them on Amazon. They're fairly easy to assemble, single layer board kits.
http://www.vellemanstore.com/en/minikits
Mainly, it's practice, practice, practice.
You don't even have to spend a whole bunch on an iron... Either of these is quite acceptable and I work on electronics on a daily basis:
http://www.amazon.com/Weller-SP25NUS-Standard-Soldering-Black/dp/B00B3SG70K/
http://www.amazon.com/Weller-SP40NUS-Medium-Soldering-Black/dp/B00B3SG6UQ/
The first one is a 25 watt unit and better suited for smaller circuit board jobs. The second one is a larger 40 watt unit and more suited for wiring type jobs. But both should be acceptable for both types of jobs.
EDIT: Also, as someone who works on electronics almost daily... The was James May should have repaird this was to bend a hook in the end of the wire he was soldering. That way, it'd hang on the terminal strip without the need for a third hand. Iron in one hand, solder in the other.
I started out with this one.
ANBES Soldering Iron Kit Electronics, 60W Adjustable Temperature Welding Tool, 5pcs Soldering Tips, Desoldering Pump, Soldering Iron Stand, Tweezers https://www.amazon.com/dp/B06XZ31W3M/ref=cm_sw_r_cp_apa_i_BFgFDbZKQ2TAX
The ferrule to tighten down the tips I accidentally screwed sideways and stripped the threads. So I can't use it anymore.
I upgraded to this and like it a lot. The only thing that stinks is you would have to buy a separate solder sucker.
Weller WLC100 40-Watt Soldering Station https://www.amazon.com/dp/B000AS28UC/ref=cm_sw_r_cp_apa_i_FHgFDbX2G3J1V
I have this one now and I really like it a lot. I also use 60/40 solder. I hear people rant and rave about 63/37. Either way.
Some thoughts on the IPS:
Overall, I think this really is the game changer everyone has been waiting for. I love my two AGS-101's but, with the prices rising and the availability of this kit, it's a no brainer. Again, I bought this cheap soldering iron and practiced a few times; that's really how easy the install is if you have steady hands. I cannot speak for this kit without the brightness options activated.
Hope this helps!
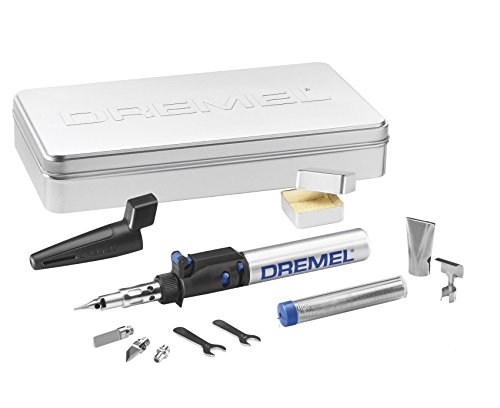
Dremel and Bernzomatic both sell small butane torches for around $30.
I own the Dremel. (It was a gift). I expected it to be hot garbage. Surprisingly, it is not hot garbage.
Honestly, you are probably better off with a simple solder kit and a kitchen sponge.
Then either solder outside, or under the vent of your kitchen stove.
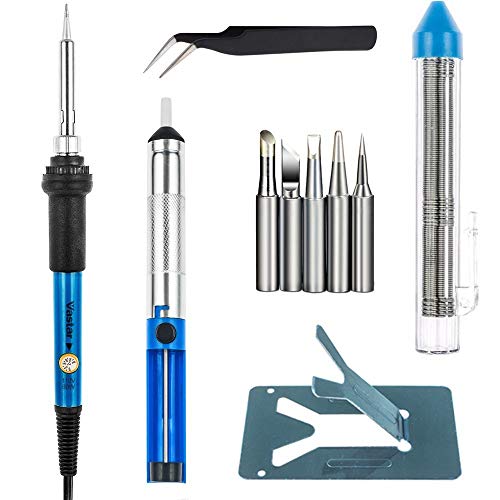
What the hell that's way too expensive for a soldering iron. You can get a good one for like 10-20 dollars. Here's the top amazon result to get you started: Full Set Vastar 60w 110v Soldering Iron Kit - Adjustable Temperature, 5pcs Different Tips, Desoldering Pump, Stand, anti-static Tweezers and Additional Solder Tube for Variously Repaired Usage https://www.amazon.com/dp/B01712N5C4/ref=cm_sw_r_cp_api_-13Yxb3PCAPT6
The battery is much more than required, but you'll need a 5v line and not 9v. What kind of stick is this supposed to go into? USB provides +5v.
I know you said "if I don't have to", but you should really learn how to solder. It's not hard to do it to an acceptable level, and it opens up an entire new world of projects you can do. This kit is very inexpensive and has a decent reputation. Youtube is the only other thing you'd need. https://www.amazon.com/dp/B01712N5C4/ref=cm_sw_em_r_mt_dp_U_pHn4CbPF64AF7
There is a pretty basic soldering kit on amazon that I have been using for the last few months and it has been amazing! Ill link it to you below.
https://www.amazon.com/Vastar-Full-110V-Soldering-Iron/dp/B01712N5C4
It is, but you'd be way better off if you soldered.
Permanent connections, no way a wire will come loose.
You really only need a basic iron, solder and heat shrink.
Hell, this is all you need. https://www.amazon.com/Vastar-Full-110V-Soldering-Iron/dp/B01712N5C4/
https://www.amazon.com/Uxcell-Sleeve-Shrink-Tubing-240Pcs/dp/B01461R89O
If you wanted, you can get a set of helping hands too and make your life really easy.
https://www.amazon.com/SE-MZ101B-Helping-Magnifying-Glass/dp/B000RB38X8
Soldering is very easy when you're just splicing wires. Not a ton of skill required. Get a roll of stranded wire and practice a bit.
When it's time to do the harness, cut away the excess, so you don't have a ton of wiring shoved behind the dash, slip a piece of heat shrink over one of the wires first and then do a lineman's splice, solder that connection and then shrink the tube over the bare connection.
I bought this cheap kit off Amazon and used it to desolder and then solder at least 200 switches.
It works quite well and you can adjust the temperature which is important.
The solder sucker included also works well enough, but is prone to clog up so I would empty it once in awhile and make sure that the tube isn't clogged full of dry solder.
You should be able to clean off the pads, re-tin them, and re-solder new wires to them.
 
You'll need a few tools:
 
Clean and tin the soldering iron tip:
 
Remove the solder from the pads on the heat bed:
 
 
Add some solder to the pads - you'll want a little bit of solder to cover the whole pad, with enough to make a small bump.
 
Tin the wires:
 
Attach the tinned wires to the tinned solder pads on the heat bed:
 
Also: You can use some isopropyl alcohol (rubbing alcohol) to clean up the excess rosin paste - it can get sticky.
 
Hope this helps!
YouTube videos, practicing on something that doesn't really matter too much, looking at a photo of a part. There are a couple arduino kits that require soldering but it's really easy, the Sunfounder starter kit is one I learned from. (It's 99% arduino stuff but there's a easy to solder part)
You really only need a soldering iron, solder, something to hold the iron (if you're crafty with a coat hangar you could make one yourself) and a sponge. A brass sponge is better because it's dry. You may want to get a desoldering pump if you want to remove solder. I got the bestseller kit on Amazon and I've been really happy with it.
Do NOT touch anything metal on the soldering iron when it's on. Burnt the shit out of my hand.
The power leads, assuming you mean from the battery, do take a bit more but that seems like way too long.
if you don't, you need something with adjustable temp...
I've reached the end of the life of the tip for this one
https://www.amazon.com/gp/product/B01712N5C4/ref=ppx_yo_dt_b_search_asin_title?ie=UTF8&psc=1
But i'm just going to try and find a compatible tip and keep using it, the iron works "well enough"... Obviously the $100 stations are going to be better.
The real secrets are
Those two things, + use 350 - 400 C, and soldering is almost fun now!
this. the man makes the iron, not the other way around, although a good tip does help lol. hell the iron i use now is a cheap one as i don't have the room at my desk for a real solder station. i would recommend the iron to anyone starting out looking for one to learn with or use for stuff. and like you said use leaded(rosin core) solder, lead free solder is trash. little tip if using tape to hold the wire, try not to get it too close to the end of the wire or it can melt.
Yeah, an 'ok' soldering iron could cost you around 15 bucks. I used this one for my whitefox.
I'm using Amazon links as requested, but if you have a local big box tool stop you can get the store brand of most all these items for the same price or less. I know from personal experience, that from the tools I've listed all but two of the items are cheaper in store than on Amazon.
Everyone needs a knife! (~$7 home depot)
Razor blade
Where are you going to keep everything? (~$10 home depot)
Utility Sack
You'll need a good all around screw driver. (~$8 home depot)
6-in-1 Reversible Screwdriver
Need some basic general maintenance pliers? (~$20 home depot)
Pliers Set
Ratcheting screwdriver for those repetitive screw jobs. (~$20 sears)
Ratcheting Screwdriver
Where the hell did I put that T6?
Magnetic Precision Screwdriver Set
Where did that damn screw go?
Flashlight
Extra stuff!
I recommend the ball end ones specifically if you don't have a good angle on what your trying to get at (cough towel bar cough cough).
Long Arm Ball End Hex Key Wrench Set
For those damn pesky wires and that damn lack of a third hand.
Helping hands
When duck tape and gum wont cut it.
Beginners soldering iron kit
I have used all of these specific items extensively besides the ball end hex keys, and that specific helping hands.
This is the one I use (and really really like).
https://www.amazon.com/Weller-WES51-Analog-Soldering-Station/dp/B000BRC2XU
To be honest, it would be overkill for just hobby use (I am heavy into drones and other electronics that require a lot of soldering on a very wide range of wires and parts).
This is a great little kit that will get you started;
https://www.amazon.com/dp/B01C9P7HDQ?psc=1
tl;dr I would not spend much more than about 20-30 bucks for your first one, if you use it a ton and get into electronics, you can always upgrade and keep the first one as a travel iron.
This maybe, or this. I spent no more than that on mine and it's seen me through 6 builds/rebuilds so far, and it's still working.
A proper soldering station is nice, but you can definitely get by with cheap stuff, especially if you don't plan on using it a ton.
Tabiger Soldering Iron Kit 60W 110V-Adjustable Temperature Welding Soldering Iron with Tool Carry Case https://www.amazon.com/dp/B01H1IFT54?ref=yo_pop_ma_swf
Works great. Most everything you need is included.
If you've got a nice hefty budget, if recommend a Hakko soldering iron. If you wanna go cheap, make sure you get one with a temperature control. [Here] (https://www.amazon.com/dp/B01H1IFT54/ref=cm_sw_r_cp_apa_YA2CzbK19K8S7) is a cheap one that would do the job. I've used that model to build two let's splits. Go to YouTube and watch some "how to solder" videos
This guy is a real good jammy for beginners. It won't last you forever, but I got 5 full builds out of it without any problems before upgrading to a Hakko.
Raspberry Pi zero w
Relay
Boards
Power Connector
USB Power
Solder kit
Tower Light
Wire diagram
Code in python not the best but that I got on phone.
!/usr/bin/env python2
import RPi.GPIO as GPIO
import json
import base64
import requests
import datetime
import logging
import random
from time import sleep
logging.basicConfig(filename='ci-light.log', filemode='w', format='%(name)s - %(levelname)s - %(message)s')
RED = 17
GREEN = 22
YELLOW = 27
global_state = -2
times = {
"1" : datetime.time(2, 0),
"2" : datetime.time(2, 15),
"5" : datetime.time(2, 30),
"3" : datetime.time(2, 45),
"4" : datetime.time(3, 0),
"5" : datetime.time(3, 15)
}
Pat= “{token}”
bauth = "Basic " + base64.b64encode(':'+pat)
GPIO.setmode(GPIO.BCM)
GPIO.setup(RED, GPIO.OUT)
GPIO.setup(GREEN, GPIO.OUT)
GPIO.setup(YELLOW, GPIO.OUT)
def clearRed():
GPIO.output(RED, 0)
def setRed():
GPIO.output(RED, 1)
def clearGreen():
GPIO.output(GREEN, 0)
def setGreen():
GPIO.output(GREEN, 1)
def clearYellow():
GPIO.output(YELLOW, 0)
def setYellow():
GPIO.output(YELLOW, 1)
def clearLights():
GPIO.output(RED, 0)
GPIO.output(GREEN, 0)
GPIO.output(YELLOW, 0)
tests to make sure lights and relay are functioning as appropriate
def start_up():
clearLights()
setRed()
sleep(1)
clearRed()
setYellow()
sleep(1)
clearYellow()
setGreen()
sleep(1)
clearGreen()
Does little click and light dance to be passive aggressive. don't break builds
def put_on_show(times):
factor = 0.2
while (times > 0):
setRed()
sleep(factor)
clearRed()
setYellow()
sleep(factor)
clearYellow()
setGreen()
sleep(factor)
clearGreen()
setYellow()
sleep(factor)
clearYellow()
times -= 1
factor -= 0.015
blinks light
def blink_light(light_pin):
GPIO.output(light_pin, 1)
sleep(0.1)
GPIO.output(light_pin, 0)
sleep(0.1)
GPIO.output(light_pin, 1)
sleep(0.1)
GPIO.output(light_pin, 0)
sleep(0.1)
GPIO.output(light_pin, 1)
sleep(0.1)
GPIO.output(light_pin, 0)
sleep(0.1)
GPIO.output(light_pin, 1)
sleep(0.1)
GPIO.output(light_pin, 0)
sleep(0.1)
GPIO.output(light_pin, 1)
sleep(0.1)
GPIO.output(light_pin, 0)
sleep(0.1)
GPIO.output(light_pin, 1)
sleep(0.1)
GPIO.output(light_pin, 0)
sleep(0.1)
Checks the builds for D or T then determines if broken
will need to be updated to account for unit tests being broken to change to yellow
def check_builds():
buildDefs = "http://{tfsserver}:8080/tfs/defaultcollection/Development/_apis/build/definitions"
buildsUri = "http://{tfsserver}:8080/tfs/defaultcollection/Development/_apis/build/builds?MaxBuildsPerDefinition=1&deletedFilter=excludeDeleted&queryOrder=finishTimeDescending&resultFilter=failed,succeeded,partiallySucceeded&definitions="
s = requests.Session()
s.headers.update({'Authorization': bauth})
r = s.get(buildDefs)
json1 = json.loads(r.text)
str1 = ''
for x in json1['value']:
if 'D' in x['name']:
str1 += str(x['id']) + ','
elif 'T' in x['name']:
str1 += str(x['id']) + ','
buildsUri += str1
r2 = s.get(buildsUri)
json2 = json.loads(r2.text)
state = 0
print(r2.status_code)
for x in json2['value']:
if x['result'] != 'succeeded':
return 1
return 0
print('starting up')
start_up()
print('started')
main logic loop
while (1):
sleep(3)
logging.info('Checking builds')
print('Checking builds')
new_state = check_builds()
check builds
Also a random human! Good luck!
I bought a cheap soldering kit from Amazon for $17 https://www.amazon.com/dp/B06XZ31W3M/ref=cm_sw_r_cp_apa_oedEzb5K4TWS4
Also a Dremel tool for sanding surfaces and cutting plastic https://www.amazon.com/dp/B003BYRFH8/ref=cm_sw_r_cp_apa_NfdEzbEYCCFER
Pickups almost never fail - they're just a big coil of wire, there's not really anything to go wrong with them.
The first thing to check is obvious - is your volume or tone control rolled off? It sounds silly, but it's easy to overlook if you rarely use the neck pickup.
The next most likely problem is the pickup selector switch. Les Pauls use an open type of selector switch that's prone to corrosion, especially if it's infrequently used. Plug your guitar in, strum the open strings, then click the pickup selector switch up and down and listen to your amp. If you can hear crackling or intermittent sound, it's probably the selector switch.
Most switch problems can be fixed with a squirt of DeoxIT, but the switch may need to be replaced. If you can solder, it's a ten minute job and a six dollar part. If you can't solder, this is a good opportunity to learn - you can buy a basic soldering iron kit for less than $20.
Failing that, take it to a competent luthier. Guitar electronics aren't particularly complicated, so it should be a cheap and quick fix.
How much are you going to be making electronics a hobby? If you're just going to be soldering some boards occasionally you could save a bit on the iron and get this Weller. Also a cleaner. If you go with the 888 that will have a wire cleaner built in. I'm getting old so I personally would recommend at least a magnifying glass. I have this helping hand The clips didn't do much for me but the glass did. There are times where the switch pin just gets lost and the glass helped a lot. I also picked up this kit when I started, primarily for the sucker, but I thought the other tools may come in handy. So far they haven't, other than the solder. The first time I tried to use the sucker I could not get it to work correctly, I just wasn't getting enough of a seal around the hot solder, thinking I'd melt the tip, so I ended up buying a different pump that I still have never used, because I eventually DID learn to use the cheaper sucker. I also can't make solder wick work properly, apparently. If this is your first time soldering/desoldering I recommend getting a cheap practice kit that you don't care if you ruin. I can recommend this one as it has you intentionally foul up joins so you can learn to fix them. You won't need strippers. Flush cutters would be helpful if you need to trim the pcb mount legs off your switches (like Zealios, which you will if you have a GH60 Satan pcb) or trimming LEDs. Work mat would be helpful to keep your work area clean but not necessary. You will need a small screwdriver but I can't remember what size. Tweezers or one of these grabber thingies are always helpful when the screw flips sideways when you are trying to seat it. I used this solder on 3 builds so far and have had no issues with joins failing.
This bad boy right here. It is admittedly the nuclear option, but I work on a lot of old fragile boards that will lift a trace if you look at it the wrong way. I also tend to replace a lot of 40 pin DIPs, which is freaking annoying. It can be had much cheaper, but grainger was the first link that popped up.
​
Before I invested in that, this or this were my favorite styles of desoldering tools. Much more reasonable, and pretty damned effective.
​
edit:
Also, if you can, cut the legs from the top side and clear the holes without anything in the way.
The sage switches & Toxic cap set onto the Ducky, then the Cherry Browns from the Ducky into the E-element sounds like a solid plan. Probably what I would do also TBH. Just be careful de-soldering the Ducky since it was originally wave soldered with lead free solder. This means the solder will have a pretty high melting temp & just be an all around pain in the ass to remove.
I strongly suggest getting at least a cheap de-soldering iron like this or this, plus some solder wick for doing it. Also remember that hitting a stubborn joint with a fresh coat of leaded solder will usually let it all come out on the next shot at de-soldering it. You don't want to have to try to de-solder the same joint more than twice, each time increases the chances of damaging the PCB or lifting the pad.
As /u/Harakou commented, make sure to have desoldering materials. But for desoldering several switches at a time, I had trouble making progress with a regular solder sucker (the braid is very useful for small scale rework). So I bought a desoldering iron for several Planck and Ergodox rebuilds.
And to add to /u/deaconblue42 , a flux pen helped me a lot whenever I struggled to get good wetting action (watch the videos, it's a thing).
I've done two desolder jobs with this one and it is flawless and clean. Nice strong suction, but more importantly the exhaust is also equally forceful for when you need to eject the solder keeping the iron clean, and minimizing down time from cleaning. Really awesome and worth the premium.
https://www.amazon.com/gp/product/B00068IJSG/ref=oh_aui_search_detailpage?ie=UTF8&psc=1
If you are a total noob, I suggest you just get any 60 W soldering iron. Really. This one suits you and cost less than $10. Because getting a FX-888D now is like killing mosquitoes with cannons.
You also may need a stand where to rest the iron when not using it. It comes with a sponge so you can clean the iron tip from time to time (just don't forget to wet it before use).
Finally, you will need some solder. Stay away from lead-free solder, this stuff isn't for amateurs. Get a good-old 63/37 solder with rosin flux core, this one have a 0.3 mm diameter, small enough to even solder SMD components (but don't start with them, they need more practice to be hand-soldered).
Soldering isn't a difficult skill but it requires practice. So you better start small and take easy steps. In no time you will be soldering SMD components. :)
PS: you also want to get some desoldering wick and a hand vacuum pump/solder sucker, those are more useful than you might think.
DISCLAIMER: all these items are just suggestions, buy whatever you think is more useful for you. Just wanted to give you a start point.
My acetylene/oxygen tanks sit in a very compact plastic holder they sell with the bottles and take up no more than about one square foot of floor space. By the time you add the regulators and come up with some way to secure the disposable bottles, I don't think you will gain much extra space.
Do you already have hand held butane torches? For simple tasks with pieces that weigh less than a half an ounce, I don't bother to use my Smith little torch.
I use this one the most.
Blazer GT8000 Big Shot Butane Torch https://www.amazon.com/dp/B000NCZU0A/ref=cm_sw_r_cp_apa_9-NDyb0PAVJR2
http://www.amazon.com/Blazer-GT8000-Shot-Butane-Torch/dp/B000NCZU0A
I have this guy here, I'd imagine if you turn on low it'll work since "fuel efficiency" is your thing, has a big ass tank!
but in the end you get what you pay for non annealed china glass, her tube is small is enough to convert with an adapter imho. adapter plus banger from dhgate maybe 20-30$ torch 40 at bb&b. i would honestly buy a big shot on amazoninstead. im not a fan of the bb&b torches the pizo ignitor ALWAYS fails after about 9 months causing you to have to return and get a new one id rather have something last 4-6years. i have had my blazer gb2001 for 8 years now still lights everytime.
You need a quartz banger, a directional flow carb cap, and a nice butane torch if you've got the extra money for it. A propane torch will work in its place will just mess up your nail quicker. Also qtip the nail in between every hit with q tips dipped in isopropyl alcohol to keep the nail as clean as possible. Will provide better dab experience. Look up "low temp dabs" on youtube, don't ruin your concentrates by taking hot dabs. Hope this helps, happy dabbin!
Edit: fixed link
Regardless of the advice you're given here, please be aware that choosing to smoke meth VS other ROA (oral/intranasal/plugging) may give you a massive compulsion to redose (and specifically, to smoke) that is stronger than any compulsion I've personally experienced from any other drug. If you are very disciplined and have conviction about managing the role of substances in your life it can be controlled, but be mindful that this particular choice may challenge that conviction more than any other use of drugs.
That said I fukken love smoking meth. Also fuck the bic users, torches for life. I have found through much experimentation (nearly $1000 on drug paraphernalia over a year) that the most effective way to vaporize meth is completely contrary to the advice commonly found on the internet. I place direct superhot torch flame on the bottom of the bowl (while rolling and inhaling) for a fraction of a second. This causes the flame to diffuse evenly across the bottom of the glass and the bowl to flash instantly with thick vapor. If I continue in this fashion until I cannot inhale any longer, the meth cracks back with zero discoloration or any other sign of burnt meth.
This requires a hot, high pressure, large diameter nozzle torch (relative to typical tweaker torches) to really work effectively. If you don't want to drop the dinero on a Blazer Big Shot but don't mind the bulk you can head to any hardware store and grab a basic propane pencil torch for $20. Even better if you buy a hose and sparker (sometimes included).
If you aren't looking for a personal challenge or potentially much more just eat or snort your meth.
EDIT: If you are sourcing your meth on DNMs, check out Pregabalin (brand name Lyrica). It's a GABA analogue with a duration similar to Xanax that is used to treat epilepsy and neuropathic pain, but it has a lot to offer a meth user. It brings a often needed element of "chill" to the experience without disrupting the high, and perhaps more importantly it almost completely restores the appetite loss from meth.
http://www.amazon.ca/Colibri-Butane-300ml-Vacuum-Refined/dp/B00PY8I7N0/ref=pd_sim_328_2?ie=UTF8&dpID=51EN23vF-vL&dpSrc=sims&preST=_AC_UL160_SR160%2C160_&refRID=1YWQ78JECWX2355B75DE
this is the stuff you want
also i would suggest a better torch like this one
http://www.amazon.ca/Blazer-GT8000-Shot-Butane-Torch/dp/B000NCZU0A
Do yourself a huge favor and ditch those tiny-ass torches for a blazer
http://www.amazon.com/Blazer-GT8000-Shot-Butane-Torch/dp/B000NCZU0A/ref=sr_1_1?ie=UTF8&qid=1421534953&sr=8-1&keywords=blazer+big+shot+gt8000
I got this and never came back after.
Strong flame and bigger tank than the average vectors.
BIG SHOT GT 8000 gets that nail where it needs to be in no time!!!
Edit here's a link: http://www.amazon.com/Blazer-GT8000-Shot-Butane-Torch/dp/B000NCZU0A/ref=cm_cr_pr_pb_t/176-5012220-3460966
This one's pretty good
http://www.amazon.com/gp/aw/d/B000NCZU0A/ref=mp_s_a_1_1?qid=1453005156&sr=8-1&pi=AC_SX118_SY170_QL70&keywords=blazer+big+shot+gt8000
My cord craft kit
Detail of select tools
DIY Fid, Finished paracord end, Kleen-Kut Paracord scissors & buoy wrap scissor cover
I've accumulated quite a few tools in my years as a knotter/rigger but you really don't need very much to get started in the hobby. When I first started tying, my most commonly used tool was the Dr. Slick Spring Creek Clamp, 5", Black, Straight. You'll find many less expensive "hemostats" on Amazon, this just happens to be the one I picked up at an outdoor outlet many years back. It served as a fid, a "pusher" and a puller. I don't use them for tying much any more, I "thread" with a fid more than I pull through these days, but I do use them for finishing the ends of paracord — see below.
As I said, I now use "fids" or lacing needles regularly. My first fids were homemade — machined by spinning an aluminum Chicago screw in a drill press and shaping it with a file. I progressed to using a pair of the Tandy Leather Long Jumbo Perma-Lok Needle 1193-05 that I'd modified by shortening and shaping the tips to be more needle like. I wouldn't bother these days because purpose made fids are readily available: 3 1/2" Stainless Steel 550 Paracord Fid, Lacing, Stitching Needle. I have fids and Perma-Lok needles in a variety of sizes to accommodate different cords — I don't use 550 exclusively.
Though not completely necessary I do find the Knotters Tool II (Stainless Steel) w/ 3 Different Size Stainless Steel Lacing Needles by Jig Pro Shop to be handy and it includes three fids. An aluminum version is available too, but I'm never one to shy away from investing in a tool that will last. I also use a 4 3/4" Paracord Tucking Tool (Stainless Steel) for tucking and smoothing. You can probably find a similar tool at the local pharmacy, and maybe even at a dollar store.
The best cutting tool I've found for paracord are the Kleen-Kut scissors sold by Paracordist.com. Unfortunately, the store is currently down so I can't supply a link. You can use good quality flush-cutters, bandage scissors or a good, sharp pair of "Fiskars" (or similar scissors) and they will all work. However, I tried everything I could to avoid buying the "special" scissors and, in the end, wish I'd just done it sooner.
My technique for finishing the ends of paracord: Clamp the end of the cord at a 45 degree angle with the hemostats. Cut the cord flush with edge of the clamp. Run a lighter along the edge of the cord to seal. While the cord is still warm, remove the clamp and, if necessary, re-clamp to the very end to squeeze and seal the end. Tuck the end back into the workpiece. If the end is going to be exposed I will sometimes remove a small length of the core first, then trim and seal just the jacket for a flatter, neater finish.
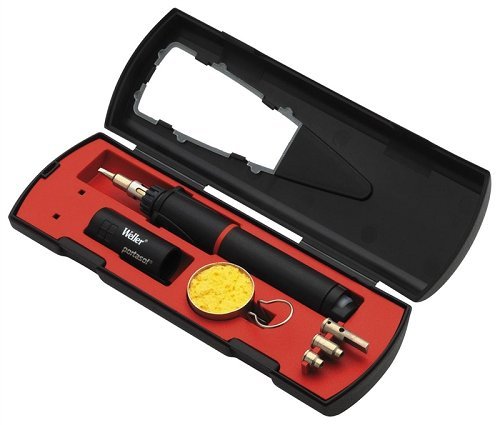
I do sometimes use a hot knife for finish work. Most often the Weller P2KC Professional Self-igniting Cordless Butane Soldering Iron. If I'm at my bench I do have an Engel Heat Cutter HSGM Hot Knife w/ Type R Blade available (used for "big rope" and purchased when I was rigging boats professionally) but it's total overkill for paracord work. I am intrigued by the Hand Held Electric Hot Knife Rope Cutter Set - 100 Watt, Cutting Blade (HHHK-HS18. The tool is probably not as durable as the Engel, but if one isn't using it all day, every day it's likely suitable. One Advantage of these "rope guns" is that they heat up almost instantly but, truthfully, the Weller doesn't take very long to come up to temperature and it's much more portable. Whichever you choose, it’s easy to mar your piece with the hot knife so I generally use the hemostats as a shield. (And again, I'm more often just using the lighter/hemostats for paracord work.)
I also keep a needle case with sail-makers needles and whipping twine (wrapped around the needle case) handy for stitching and whipping. (In a pinch, a single strand of 550 core makes a decent twine, particularly if you pass it along a block of wax.)
I want to emphasize that you don't need all of these tools, you might not really need any of them, but I do find that assembling a good kit and having the right tool available can help overcome tricky problems. I'd say that the Knotter's tool (admittedly, my attachment to this tool may be due to my love for marlin spikes in general) with it's fids—or barring that, just a set of fids—the hemostats, a good pair of scissors and a lighter would make a decent field kit. Add the rest of the stuff to your knotting bench over time. Or not.
I'll also say that there was a certain satisfaction to making and improvising my tools in the early days but now that there are so many quality purpose made tools available via Amazon I don't find it's worth my time any more. (I have a wooden bracelet/collar jig that I made but I recently acquired the aluminum jig from Acid Tactical and I think it's just brilliant and even assigning a lower value to my time than I normally would, much cheaper to buy than build.) I do have a plan to machine a set of Delrin fids and pushers for low-profile air travel "one of these days"
Hope this helps.
I would be careful using that in a computer. For electrical hobby kits and simple circuits it might work, but I would be wary of using it for anything else.
Here's a similar product with widely varying reviews. Some of which seem to confirm my fears. Others say differently, but I wouldn't risk it.
If you're able to solder, you're better off doing that, but it's your computer.
Soto Pocket Torch
Like this? Seems like one of those things that's not very economical or functional...
For anyone that might be interested, from Amazon: Soto Pocket Torch
I'd check the tip of your iron; if it's silver and shiny, it's fine; black and pitted, it probably doesn't conduct heat as well, and it's time to get a new one.
There are also other irons, like this Hakko that are higher wattage for about half the cost of the mentioned station.
I'd suggest switching to silicone hobby wire; a lot of the nerf stores like OutOfDarts, FoamBlast, and Containment crew carry it. It will handle high heat will, but is still pretty reasonable to strip by hand. You can also check out PVC coated wire; it's cheaper and a little thinner (though a bit less flexible), but it will burn much sooner than silicone.
Lead Free soldering is a bit more challenging, but it's certainly doable.
the most popular opinions you're about to get will cost around $100
This one is $37
https://www.amazon.com/gp/product/B006MQD7M4/ref=oh_aui_search_detailpage?ie=UTF8&psc=1
I doubt you can find anything actually decent under $30. While I was in high school, I made do with a dollar store soldering iron, replacing it every few weeks wasn't too bad.
The process is easy, just tweeze (long handles help, it gets hot fast), torch until it glows, and cool off (15 seconds or so).
Cheap option on amazon here (<$9) : http://www.amazon.com/BBQbuy-Pencil-Welding-Soldering-Lighter/dp/B007A9YSPW/ref=sr_1_1?ie=UTF8&amp;qid=1395645522&amp;sr=8-1&amp;keywords=butane+torch
RipTrippers uses this one: (has a standard cheapo lighter under the hood, $20) http://www.homedepot.com/p/Unbranded-Turbo-Torch-Combo-Pack-LTT-110CP/203456954
I use the torch from my creme brulee kit, but a simple torch lighter would work, as well.
Greetings all!
My main suggestion to anyone wanting to get into vaping it is to skip the ego-starter kits, MVP2 (cheapish Vv or Vw boxes), non-rebuildable tanks (Protanks, Nautilus) and just drive right into the mechanical mod / box mod world. I say this because the vaping experience is so much better with rebuildables. I went with the all of the above, and I personally wished that someone would’ve told me to just dive right in, because all that stuff is sitting around not being used. The people that I’ve talked to are typically hesitant to do so because of the coil building, but there are so many YouTube tutorials, suggestions and information on /r/RBA and /r/electronic_cigarette that it’s much easier than it seems. Anyway, if I were to start all over again, these are the things which I’d buy.
Must Haves
These are the things which I consider essential to starting off the on the right foot. I’ve purchased a lot of things, and these are the things which I suggest to my friends. Most of the links are from Amazon, because it’s what I’ve primarily used.
Battery - Sony VTC5
http://www.eciggity.com/2-pc-sony-18650vtc5-2600mah-30a-battery/
These are pretty much the standard when it comes to “safe” batteries. They’re affordable, good amp limit and have been recommended many times. If you purchase from the link above, they also give you a plastic carrying case!
Charger - Nitecore i2 or Nitecore i4
http://www.amazon.com/Nitecore-IntelliCharger-i4-Battery-Charger/dp/B005UAI372/ref=sr_1_1?ie=UTF8&amp;qid=1404287334&amp;sr=8-1&amp;keywords=nitecore
Affordable, reliable and these won’t “overcharge” your batteries. The difference between the i2 and i4 is the amount of batteries they can charge at a single time. They also have a new fancier one out, called the Digicharger D2 and Digicharger D4. Those are nice because it has a LCD panel that displays a lot more information than the i2 and i4. I personally use an just an i2.
Mechanical Mod - Stingray
http://www.vaperoyalty.com/hcigar-stingray-mod-stainless-steel/
Now, 90% of what is suggested for an actual mechanical mod is going to be of personal taste. The Stingray is the “older brother” of the Nemesis. This is what I purchased when I first started out vaping. The unit is very easy to break apart, clean, has a locking ring, has a floating 510 connection and venting holes in case of a battery leak. Almost everyone I know has a Stingray.
Rebuildable Dripping Atomizer - Magma by Infinite
http://101vape.com/rebuildable-atomizers-tanks/309-magma-atomizer-clone-by-infinite.html
One of the best purchases I’ve made. The juice wells are very deep compared to everything else on the market (that doesn’t have a tank system). Threads are nice, easy to build on, post holes are large and the air-flow is easy to manipulate. You can run this on a single coil or a dual coil. Blows almost all the other RDAs I have out of the water. This is my main RDA.
Organic Cotton - Maxim Hygiene Products Organic Cotton Balls
http://www.amazon.com/Organic-Cotton-Balls-Triple-count/dp/B00E8T2X36/ref=sr_1_3?ie=UTF8&amp;qid=1404288337&amp;sr=8-3&amp;keywords=organic+cotton
I suggest using un-bleached, organic cotton. Some people take it one step further by washing them, I think thats taking it a bit far and I don’t do it. You can pick them up from any convenience store or supermarket (CVS, Walgreens, Target, Whole Foods), a 100 count will last you AGES.
Kanthal - AWG A1 26 Gauge
http://www.amazon.com/Kanthal-Gauge-100ft-0-40386-Resistance/dp/B00HALND7Y/ref=sr_1_1?ie=UTF8&amp;qid=1404288659&amp;sr=8-1&amp;keywords=kanthal+26
I like to use 26g kanthal wire for my dual coil builds. 26g is a bit thicker than what a lot of people suggest (28g), but for me, because it’s thicker, it’s easier to work with.
Screwdrivers - Stanley 6 Piece Screwdriver set
http://www.amazon.com/gp/product/B00009OYGV/ref=oh_details_o05_s01_i02?ie=UTF8&amp;psc=1
The screwdrivers which come with your RDAs are short, small and crappy. I like these screw drivers because they come in a variety of sizes and you do not need to mess with a drill-bit. What I really like about these, is at the end of the drill bit is a small little ledge (can’t think of a better word), where you can push your coil and scrunch it up a bit.
Ohm meter / Multimeter - Any generic ohm reader or Innova 3300
http://101vape.com/meters/170-ohms-meter.html
http://www.amazon.com/gp/product/B001O1X65A/ref=oh_details_o02_s01_i01?ie=UTF8&amp;psc=1
You can use a multimeter to do basically the same thing as an ohm reader. The multimeter has an added benefit of being able to read the volts are your battery as well. I have both, but I prefer to use a “regular” ohm reader. This video below can teach you how to use a multimeter for that purpose.
https://www.youtube.com/watch?v=wgXAmPBAO5g&amp;index=2&amp;list=LLU7AM2JUxXCrj4TSCDQDffw
Optional items
Things that I’ve purchased that you can probably substitute with something in your house. They’re nice to have, most people have these, but I decided to link these anyway, because I didn’t have some stuff (my scissors were too large).
Scissors - Generic surgical scissors
http://www.amazon.com/Amercian-Diagnostic-Corporation-3425-Stainless/dp/B000GHIUR2/ref=sr_1_5?ie=UTF8&amp;qid=1404289491&amp;sr=8-5&amp;keywords=surgical+scissors
To cut your cotton. Small, sharp and gets the job done.
Tweezers - Ceramic tweezers
http://www.fasttech.com/products/0/10007588/1655800-heat-resistant-stainless-steel-tweezers-for-e
Allows you to hold your coil together and torch them without heating up the tweezers.
Wire cutters - Hakko CHP-170
http://www.amazon.com/gp/product/B00FZPDG1K/ref=oh_details_o03_s00_i02?ie=UTF8&amp;psc=1
For cutting your kanthal off that spool!
Atomizer holder - Plano 23630-01
http://www.amazon.com/Plano-23630-01-Stowaway-Adjustable-Dividers/dp/B000E3FKVC/ref=sr_1_4?ie=UTF8&amp;qid=1404289861&amp;sr=8-4&amp;keywords=plano
You’re gonna buy a bunch of atomizers. Everyone buys a bunch. You’re not going to be able to help yourself. I use this plastic case to keep everything neat and separated.
Building deck - Tenderfoot Stands
https://www.facebook.com/tenderfoot.stands?fref=ts
You don’t need this. But it makes building RDAs easier. You can also place your juice filled RDAs on here.
Torch - Mini Jet Flame 503
http://www.amazon.com/gp/product/B007A9YSPW/ref=oh_details_o00_s00_i00?ie=UTF8&amp;psc=1
This will help you get those coils nice and tight, without having to fire off your mechanical mod.
Battery Case - Bluecell
http://www.amazon.com/gp/product/B007Q6PJO8/ref=oh_details_o03_s00_i00?ie=UTF8&amp;psc=1
If you don’t buy the batteries from the link above, you’re gonna want a battery case. Do not keep your batteries loose in your pocket or floating around your bag. They can come in contact with something metal and potentially damage the battery.
new torch? butane torches are cheap. http://www.amazon.com/BBQbuy-Pencil-Welding-Soldering-Lighter/dp/B007A9YSPW/ref=sr_1_5?s=hi&ie=UTF8&qid=1382804081&sr=1-5&keywords=butane+soldering+torch
i love this
Personally, I'd just assume all is well. Also, I'd highly recommend a good desolder tool (here's a cheap one I bought, haven't tested it yet: https://www.amazon.com/dp/B008DJRYIG). Also, get flux. Lots of flux.
Taking my advice on this is probably not the best advice ever, but man, I don't know how you'd test one component without soldering it to something else, which means you'd need to unsolder it twice, etc.
I've heard tons of good things about this, especially for the price!
If you don't have a proper vacuum desoldering gun something like this or this is probably worth it just for this mod. It'll save you a decent amount of time and make things easier.
This one?
I gotta put a plug in for this guy.
I used this to desolder a B.mini with relative ease. All it takes is a bit of patience and you're good to go!
The tips on the solder suckers are pretty heat resistant, so don't be afraid to just get in there. I have a digital soldering station and I usually have the temps set to 650°F. Once the solder turns liquid on the PCB, I press down on the iron tip itself and suck the solder away.
I also have one of those fancy desoldering irons, but it can be a pain to wait for it to heat up when I'm trying to remove a few stubborn joints. Not to mention when you have stubborn solder joints that refuse to liquify and you end up having to add more solder on top. Having two irons running is usually more trouble than it's worth.
I had a much easier time using this than I did trying to use a spring loaded sucker. If you get one use your soldering iron to liquify the solder first then use this in your other hand to suck up the solder.
buy one of these and put on your favorite podcast or music playlist
http://www.amazon.com/ECG-J-045-DS-Watt-Desoldering-Iron/dp/B00068IJSG/ref=sr_1_5?ie=UTF8&amp;qid=1462203511&amp;sr=8-5&amp;keywords=desolder+pump
With this there's 0 technique required.
EDIT: if you want to remove all of the old solder, get a soldering wick.
Not really sure on getting a different iron. De-soldering really depends on what you are de-soldering. Here are some things you might want to look into:
Oh, and I'm sure this isnt it, but a lot of games will set the "zero" point of a controller to whatever position it's at when it starts up, so sometimes if you start it up and have the stick moved ever so slightly it will do this on a normal controller.
And really, this is whats happening on broken controllers too which is why you get the drift.
And this is what a desoldering iron looks like if you're curious:http://www.amazon.com/ECG-J-045-DS-Watt-Desoldering-Iron/dp/B00068IJSG/ref=sr_1_1?ie=UTF8&amp;qid=1409456528&amp;sr=8-1&amp;keywords=desoldering+iron
I don't have one, but you can also use a regular iron and a solder sucker (i do this) and some solder wick (I also do this). It's just easier with that tool.
Thanks! Soldering isn't too hard (I also was afraid of soldering). It's intimidating at first, but after a couple hours of doing it, you'll get more comfortable with it. Getting a cheap mech to practice soldering/desoldering on would probably help you get acquainted with the whole process. This is the soldering iron I used, and this is what I used to desolder. I also used this to clean the tip of the soldering iron in order to make it perform more consistently.
Well, the FC660M isn't backlit. All switch and LED solder points are through hole.
Use this: https://smile.amazon.com/ECG-J-045-DS-Electric-Soldering-Temperature/dp/B00068IJSG/
https://smile.amazon.com/ECG-JT-103-Replacement-J-045-DS-Soldering/dp/B0195UZP1Y/
And you'll need one or two tips per keyboard.
Far, far easier to control than those stupid spring loaded suckers. Squeeze bulb, push onto solder point straight down with the pin going straight in, release bulb, squeeze bulb again over a tin can you dump your solder into... push onto next spot.
Tips wear fast but it's a much easier and more controllable process to develop a muscle memory routine for.
Here's every desoldering tool I've used so far, from worst to best:
a) yes, it seems pretty much the same. For the most uses, most DMMs (Digital Multi Meter) will work just fine. Your basic needs are to have a couple of different ranges for both voltage and ampacity readings (i'm refering to the accuracy of the readings here... a DVM generally has 3 or 4 characters on the screen to describe the charactieristic. one range will cover, let's say up to 2 millivolts, and the next will cover up to 2 volts, the next up to 20... you'll figure it out). another major tool on the DVM is an audible continuity tester. these just make a tone when you have a clean circuit path between points a and b. Big help. That one you linked up seems pretty decent.... when you start wiring houses or something, then you can think about upgradign into a fluke handheld or a benchtop if you're doing big fancy circuits, but that'd be fine for quite a while.
I'll tell you, my Iron Experience is pretty dang limited. but this is what i know. As far as a soldering iron goes, one of the major considerations is the power rating, i.e. the wattage ratings... i think mine is about 30W, and it works just fine. If i had my druthers I'd go to one of those variable ones that can get up to ~800 degrees. I'd also definitely consider one that comes with a proper resting stand. An operating soldering iron is a pretty big safety issue, in that it is a burning hot iron tip hanging around on a surface that may or may not be covered in flammable material or human flesh.
As far as de-soldering irons go, at school i have access to those fancy powered vacuum ones... I just take any desoldering tasks i have over there because they are the cats meow. I've used those l'il non-powered vacuum tubes and i think they are going to take a lot of skill and training to get to use efficiently. i didn't like them. I've never used or seen this type
ah I see, maybe try amazon uk? https://www.amazon.com/ECG-J-045-DS-Electric-Soldering-Temperature/dp/B00068IJSG/ref=sr_1_3?ie=UTF8&amp;qid=1482362986&amp;sr=8-3&amp;keywords=desoldering+iron
Here is the one I used on us site
I typically use a Hakko FR300. Takes about 10 minutes to desolder an entire board. It's the cheapest quality option for basic desoldering before you get into decent rework stations that cost thousands.
You could try this http://www.amazon.com/ECG-J-045-DS-Watt-Desoldering-Iron/dp/B00068IJSG/ref=sr_1_7?ie=UTF8&amp;qid=1453981477&amp;sr=8-7&amp;keywords=desoldering+pump
I'm guessing the biggest problem you'll run into with this is clogging and maybe not sucking out all the solder. Probably a step up from the hand sucker though.
Get a DEsoldering iron:
https://www.amazon.com/ECG-J-045-DS-Electric-Soldering-Temperature/dp/B00068IJSG
I had some small amount of experience with soldering beforehand when I redid about 80-100 NES/SNES/N64 carts with battery holders. After that I successfully transplanted the chips from a broken Goldeneye board to a donor board. I did all of the carts with just a desoldering iron (https://www.amazon.com/ECG-J-045-DS-Electric-Soldering-Temperature/dp/B00068IJSG/ref=sr_1_3?ie=UTF8&amp;qid=1504568020&amp;sr=8-3&amp;keywords=desoldering+iron), no soldering iron because of necessity. I did the Goldeneye switch with just a cheapo soldering iron though. One tip - the solder on the carts is a little hard to melt. It helps to add a bit of fresh solder to the existing joint to help melt the old solder.
Are you using a pump? those are awful. Either use a wick, or one of these bad boys If you ever desolder switches you will thank me.
https://www.amazon.com/gp/product/B00068IJSG/ref=oh_aui_detailpage_o01_s00?ie=UTF8&amp;psc=1
The best way to remove a switch when you don't have a desoldering iron like this (you can get cheap ones too, like this one or this one) is to basically use a mix of a solder sucker and wick to suck up as much as you can. Then stick a screwdriver under the switch, and alternate heating and pulling out the two contacts until the switch pops free
Seconding the soldering iron approach. For OP's benefit, this is the one I used.
If I had nothing and wanted to purchase decent quality stuff but still being affordable, I'd do the following.
Multimeter $45
Soldering Station $38
Solder $25
Desoldering Pump $6
If this is the only time you ever plan on soldering, then you can get away with the cheap stuff. You could probably source some of it locally for cheaper. None of this is great quality, but it will do the job for a 1 time project. While I wouldn't enjoy it, I could build an Ergodox with the following setup.
Desoldering Pump $6
Multimeter $13
Solder $9
Soldering Iron $8
Iron Holder $6
A soldering iron. http://www.amazon.com/60-Watts-Soldering-Iron-listed/dp/B0006NGZK0
Not a bad idea - you're much less likely to electrocute yourself!
I can't stress enough the importance of good solder joints! Don't glob solder onto the iron and then apply to the piece of work. It's important to thoroughly heat the work until IT melts the solder and the solder is allowed to naturally flow into the nooks and crannies of the work.
Also, you are embarking on a way of life. This is a serious commitment of time and money. Do yourself a favor and buy a GOOD soldering station - not a cheap soldering pen!!!
Man up.
That's a little tool to help hold wires and components when soldering.
Example: https://www.amazon.com/dp/B0009ZD2AG/ref=cm_sw_r_cp_api_i_xxa5AbJP0EBTK
As far as soldering irons go, I've had relatively good luck with the 25W Wellers. I would ask your local hardware store if you can buy a box or half a box of them for a discount.
I would also look at structuring your projects so that they build on each other and have a low / cheap parts count. There are deals to be had.
That soldering iron heats to 925 degrees F according to the packaging, and about 650 to 750 degrees is more appropriate for PCB work. However, if you're quick you could probably get away with using it. You shouldn't be holding the iron to anything on the PCB for "a few seconds". Also, your solder wire (which I can see in the picture of your iron) is too thick. What is it, 0.062"? 0.020 to 0.025" is ideal for most PCB work, and I wouldn't go any bigger than 0.032".
You don't need an adjustable temperature iron. If you want to play it safe, you can just get a lower wattage non-adjustable iron, i.e., 15 to 25 watts. Those will reach equilibrium at a lower temperature than your 60 watt iron will. Something like this for example - https://www.amazon.com/Weller-SP23LK-25-Watt-Soldering-Iron/dp/B0009ZD2AG - which reaches equilibrium at 750 degrees. It also comes with a couple of chisel tips, which is what you should use to most efficiently transfer the heat (due to having a lot of contact area) so you can solder quickly. With high end irons like the 13.56 mHz Metcals, small conical tips work perfectly (especially the bent ones), even for relatively large joints, but those work on a completely different principle than inexpensive, conventional irons.
I would not generally use a soldering gun for circuit boards.
Here's a 12w iron on amazon.com. Only $13. Weller is a good brand.
This 25w kit seems to include a small roll of solder. For electronics, you want something like 60/40 rosin core. I've used Kester brand solder since 1970. I'm happy with it.
If you also need to remove solder, get a sucker and some desoldering wick. Wick comes in different widths; order various widths, or guess at the optimal width for your circuit boards.
That is for car stereos. It will drop blobs of solder on the board and ruin it. You need one specifically for circuit boards. Weller is a little higher quality and still inexpensive. But you might consider a soldering station.
http://www.amazon.com/Weller-SP23LK-25-Watt-Soldering-Iron/dp/B0009ZD2AG/ref=sr_1_8/178-0341211-8873629?ie=UTF8&amp;qid=1426782390&amp;sr=8-8&amp;keywords=circuit+board+soldering+kit
Soldering Station
http://soldering-store.com/
I used the cheap weller for Christmas decorations and it was ok. If I wanted to go deeper I'd invest in a burner that I won't burn my fingers on the tip so easily. I'd really like this one, but out of my price range
https://www.amazon.com/gp/aw/d/B01GAFZDBE?psc=1
Here's the cheap weller I used. https://www.amazon.com/Weller-WSB25WB-25-Watt-Barrel-Woodburning/dp/B000EMBEY0
My grandfather was a woodworker and I grew up spending my time after school in his downstairs shop. About 10 years ago, I made a rocking chair for my friends daughter, and I wanted to sign my name. My grandfather tossed me a little tool that I had never seen before. It was somewhat like a solderer, but not. I always liked to draw, but when I got the pyrography pen in my hand, I fell in love...mostly because there were real "stakes", if you messed up, you mostly ruined the piece. So, I ended up doing a whole pirate flag instead of my name on the bottom of the chair. That year for my birthday, he bought me a burner and it sat in my closet until we moved. So, a few years back, my wife was making me throw out/give away a bunch of junk and it made its way into a box. I thought, "why not give it a go before I give it away, and I was hooked all over again.
I have since moved to a more advanced tool, but here it is: https://www.amazon.com/Weller-WSB25WB-25-Watt-Barrel-Woodburning/dp/B000EMBEY0/ref=sr_1_7?ie=UTF8&amp;qid=1474580064&amp;sr=8-7&amp;keywords=woodburning+tips
I just kind of started and googled specific questions (for example the flat end of an exacto blade can act as an eraser if you are patient) If you have any questions, don't hesitate to ask!
~2 letters.
I use the Weller Wood Burning Kit which has a whole bunch of neat tips including a collet for an x-acto blade. Some of the others are nice flat tips for setting captured nuts, etc.
http://www.amazon.com/Blazer-GT8000-Shot-Butane-Torch/dp/B000NCZU0A
The main advantage of acetylene torch is the ability to get a very localized area hot very quickly. You can still get it hot with the yellow bottle torches (called Mapp still) or propane or butane (this is the one I was referring to Blazer GT8000 Big Shot Butane Torch https://www.amazon.com/dp/B000NCZU0A/ref=cm_sw_r_cp_apa_gQAXAbRB3QEDA) it just takes longer and so conduction has more chance to take effect and you end up heating a very large area.
I don't know about the bronze alloy. The silver solder I was using flowed at around 1200 F. I used the white paste flux which you also have to be careful with to not burn before you get a good flow. The color of the glow was one of my best indicators of temperature in the moment.
https://www.amazon.com/Blazer-GT8000-Shot-Butane-Torch/dp/B000NCZU0A
I hear endless good things about these.
When it comes to torches, your best bet is to invest a little more and get the GT 8000. It's built to last for years, so chances are you're never going to need to buy another torch.
But as far as your dabs go, I don't think that the torch would cause that issue. Like the others said, maybe let it get seasoned a little bit.
BBaB Bonjour Creme Brulee torch is the best IMO. I have a 14mm domeless and it takes about 25 seconds to heat up, I can usually get about 50 dabs before I have to refill. A can of butane lasts me 5-6 grams of shatter with this torch. The Big Shot torch is also a good one: http://www.amazon.com/Blazer-GT8000-Shot-Butane-Torch/dp/B000NCZU0A
What is active carbon used for?
For Butane, I just use whatever is on sale, for your torch it doesn't really matter. Lately I have been using Power 5x since it's 2 for $5 at my local smoke shop. You can buy a case on Amazon for like $38.
I just love my torch and it's easily my most favorite of all the ones I've had. It's the Blazer Gt8000 Big Shot. Little bit pricey but in my opinion its worth it for how fast it heats up the nail and for how much you'll be using it haha
That could be just a faulty seal as I assume it's leaking from where you fill it?
I would recommend https://www.amazon.ca/Blazer-GT8000-Shot-Butane-Torch/dp/B000NCZU0A
You can find it on sale for 60$ and I've had it dabbing daily for 2 years. A solid device.
I have the Vector Nitro, the bigger $70 one. Great torch, but my igniter went out (common issue with this torch). So it could take a few clicks to get it to go or I need to use a flame to get it going. It does come with a lifetime warranty, so I can get it replaced but I'm lazy.
But I recommend you buy the Blazer GT8000. It's only $20 more and it will be so much better than the small torches. I would have bought it but the Vector torch was a gift
I also have a Blazer Micro Torch, great little back up torch. I've had it since 2012 and it still works great.
The Big Shot is the highest quality hand torch that I've ever used or seen anywhere, they're incredible. It's on Amazon for $53 right now. Unless the size is a huge problem, you wont find a better torch. If you do get a Big Shot the red piece of plastic that goes over the fuel knob is meant for traveling, I've known wayyy to many people who threw them out.
If the Big Shot is too big then go with the Big Buddy. Vetor are straight up relabeled Chinese designed torches, companies like Newport and Blazer at least design their own.
https://www.amazon.ca/Blazer-GT8000-Shot-Butane-Torch/dp/B000NCZU0A Hands down the best torch I have had, Going strong on 2 years now.
I doubt the pencil torch puts out enough heat to solder a heavy ring. I regularly use this for smaller items without too much trouble, sometimes using a pair of them if I need the extra heat. This one is even better in terms of output but again I've used two simultaneously on occasion.
Copper is filthy and really sucks up the heat--you might want to switch to a paste flux like Handy Flux to eat up the oxides that are keeping your solder from flowing.
Your soldering surface is important--you'll have less trouble with something heat-reflective like a Solderite pad or a charcoal block.
If you want one that will last for years and years of use? Get a Weller Portasol. I have them and they are awsome little tools.
https://www.amazon.com/Weller-P2KC-Professional-Self-igniting-Soldering/dp/B000WOHSHM/ref=sr_1_1?ie=UTF8&amp;qid=1505077296&amp;sr=8-1&amp;keywords=Weller+portasol
I like weller:
https://www.amazon.com/Weller-P2KC-Professional-Self-igniting-Soldering/dp/B000WOHSHM/ref=sr_1_6?s=hi&amp;ie=UTF8&amp;qid=1520028231&amp;sr=1-6&amp;keywords=butane+soldering+iron
How long does this thing need to run? Using AA or even a 9 V is very heavy, a LiPo is expensive.... Do you really need it to last a week?
The 5 V pro micro consumes 19.9 milliamps in active mode, so using 6 SR416SW watch batteries (8 mAh) in series will provide an operating life of (8 mAh / 19.9 mA) = .4 hr = 24 minutes. Using 6 watch batteries of a higher capacity (SR44SW) could get you up to 8.8 hours of operating time. Using AA batteries would get you over 100 hours at a significant cost in weight.
There's no sense in carrying any more battery than required. You can always use solder-glue to connect wires to the batteries, which is probably easier than figuring out how to hold the batteries in some sort of clip.
When finding batteries you just need to take the battery capacity in mAh (current*time) and divide it by the current draw you plan on giving it - the quotient will be the operating life of your device in whatever unit of time you chose to do the math in (probably hours).
Your strategy should be to start with a desired operational lifetime, and then from this number work backwards to find a battery capacity that suits your needs. Don't forget to add some margin - so maybe buy the size up from the battery your math specified.
Tape. Just about any Tape will work. Don't any of you know about Led Throwies?
You can also buy (Wire Glue ) or make conductive glue (Elmer's Glue and powdered graphite).
proper way is to re-crimp like the rest of the folks said.
janky way is to use conductive glue
https://www.amazon.com/Sciplus-Electrically-Conductive-Soldering-Wire/dp/B000Z9H7ZW
if this is part of the heater, it wont work, but if it is a limit switch or something else, it should be fine.
Actually, I'm really excited to try something ...
I want to lay out the board in plastic, maybe 1mm, with grooves for wires to run. Then, I want to leave holes, probably 2mm diameter, that will fit two wires, or 1 wire and one pin. If I can design it on one layer, or at least with minimal overlap, I can make a second piece that glues down to it, and make all the solder connections with solder glue (http://www.amazon.com/Sciplus-Electrically-Conductive-Soldering-Wire/dp/B000Z9H7ZW/ref=sr_1_1?ie=UTF8&amp;qid=1426020527&amp;sr=8-1&amp;keywords=wire+glue)
So, ideally, I could spend all my time in design, and end up with something that can be printed/assembled in about an hour.
I'm thinking I could use the 3D printer to emboss the logo over the battery-cover, and leave the micro-controller and Flash chip bare.
Like I said, I think I've probably gone too far down the rabbit hole on this one. I've got the whole thing laid out in my head. I'll probably just order parts this week, and start working as soon as they get here.
Yup.
https://www.amazon.com/SOTO-ST-PT-14SB-Soto-Pocket-Torch/dp/B0046UZRNU/
https://www.amazon.com/gp/product/B0046UZRNU/ref=oh_aui_detailpage_o03_s00?ie=UTF8&amp;psc=1
I never fly without it!
I recently bought one of these for myself and I couldn't be happier as a DIY hobbyist:
Hakko Dial type temperature limiting soldering iron FX600
I only use it for hobby stuff such as Quadcopters, 3D printers and electronics kits but it's way better than the 8watt USB powered I was using before.
Pair it with this and this and you should be good for a while and roughly within budget.
https://www.amazon.com/dp/B006MQD7M4/ref=psdc_3207126011_t1_B00FZPSX3G
Get a Hakko. If you plan on doing soldering at all more than just once or twice, it's a worthwhile investment.
Hakko makes good ones. My dad's experience with Wellers are they die fast. (He solders all day for his business/I do it as a hobby). There is one that has a temp adjustment on the unit itself, which is pretty good. https://www.amazon.com/gp/product/B006MQD7M4/ref=ppx_yo_dt_b_search_asin_title?ie=UTF8&psc=1 this is the one I got him. he has been using it for four months, daily and all day. Still on the same tip.
I'm legally blind and I have no problems soldering, so long as I don't get my nose too close. :P
Seriously, though, the smaller the component the harder it will be, but soldering key switches is pretty easy. Just don't rush and be patient/careful. The trick is getting the right amount of solder, which just takes practice to get a feel for (and having your iron the right temperature really helps here).
You can pick up soldering practice kits for around $10 if you want to give it a try. If you've never soldered before, I'd definitely recommend that before you dive right in to working on a $100+ keyboard.
I recommend not using the cheap $10-15 irons though. They can be a great source of frustration and put you off of the whole experience. If you don't want to sink the money into a full soldering station, something like this would probably be a great place to start.
Why not both? Literally. The 503Torch does both a torch and soft flame. Although, I rarely use it for a torch since I have a Vertigo Cyclone torch.
What I have started doing lately is toast the foot with my torch and then switch over to a soft flame to finish lighting it. I have found that I get a great burn that way and don't overdo it lighting it with the torch.
http://www.amazon.com/BBQbuy-Pencil-Welding-Soldering-Lighter/dp/B007A9YSPW
that one?
It looks like people have mostly got you started here in terms of supplies. In terms of tools though, this is what I keep in my rebuilding stuff (linking to Amazon just because its easier):
Other generic stuff:
I put this here because I didn't want to make a new post and I'm too lazy to filter through Reddit's shitty search feature. Anyone have experience with the 503 Torch Lighter? My ScorchTorch recently took a shit and I need a new lighter.
Not sure if this will show up for you but Dream Garden has it for 12.99 at the moment, with 2 day shipping.
I went on a little shopping spree for my DIY/rebuildable stuff. Picked up the following:
5 glass beakers, 50-1000ml
4 oz amber glass boston round bottles, pack of 12
2x pack of 6 2oz amber bottles w/droppers
2x 2pack 8oz amber bottles
[labels for bottles] (http://www.amazon.com/gp/product/B00004Z5SM/ref=oh_details_o00_s00_i03?ie=UTF8&amp;psc=1)
100count transfer pipettes
2 10 packs of 5ml blunt tip syringes
Heated ultrasonic cleaner (for quick steeping)
100ft A1 32 AWG kanthal
100ft A1 30 AWG kanthal
100ft A1 28 AWG kanthal
12ft 2mm braided hollow Ekowool
Pair of locking hemostats
butane pencil torch (for torching ekowool)
This genius little invention - everyone should buy this, it was like six bucks
other than that, a couple anyvape mini davide glass clearos because the protank 2 group buy I organized will likely not have a replacable drip tip, and I need at least 2 mini glass tanks that can take my bds60 from captivape.
i need me a fucking workshop, not sure where I'm going to put all this stuff...
This!
https://www.amazon.com/Tenma-21-8240-Vacuum-Desoldering-Iron/dp/B008DJRYIG/ref=sr_1_9/140-2662085-0132061?ie=UTF8&amp;qid=1519399470&amp;sr=8-9&amp;keywords=desoldering
Also, when you are re-soldering... The key is to heat the part you are soldering, then add solder to the hot joint. You let the hot joint melt the solder, not the iron. If the parts being soldered don't get hot enough, they will not form a good bond. You've now learned the hard way.
It takes practice to learn how to solder, as it does to desolder. I would suggest practicing on an old printer or some other scrap device first.
You could probably find a used or new, cheap PCB on /r/mechmarket to practice. I just built my own, new 60%. It was harder than I thought but also not terribly difficult. Learning how to desolder (because I'm an idiot and messed up a lot of things) was a more difficult process. Again, not terribly difficult. You could always buy a soldering practice kit on Amazon.
I would suggest you buy a good solder sucker to make your life easier. I recommend this one. I also tried this thing per suggestions on /r/mk but found it disappointing. It doesn't suck out all the solder cleanly when I tried it.
I don't know about the quality or differences between the new and old QFRs or LED process. Some LEDs are separate and are independent of the switches, so you don't have to worry about that. Some are in the PCB themselves, so you don't have to worry about that again. Then there are cherry MX RGB switches which I know absolutely nothing about.
It's just called a desoldering iron, I was sleepy when I wrote the previous comment haha. I use this one and it's great. It just combines the iron and solder sucker into one much more effective tool.
Some will recommend the Engineer SS-02. I prefer the Soldapullt.
There's also this, but I haven't tried it myself. It's apparently good too.
I would buy some decent soldering wick just in case, for those stubborn pads. 99% of the time you won't need it in my experience though, given how big switch holes are.
Those are fine but honestly you don't need all those extra bit and bobs.
Just get the same basic soldering iron off Amazon, a desoldering iron like this one or a desoldering pump.
If you don't have a desoldering iron already, this one has worked wonders for me. I got it when it was around $10 and it's desoldered like 3 boards w/o any problems.
Its never too late to learn how to solder, if its only a few switches that are like this you can buy some Gateron switches individually or in a 10 pack and replace the bad ones.
A decent soldering kit that comes with everything you need can be bought at amazon for less than 20 bucks, with a solder sucker included and if you want even easier solder removal you can get one of these desoldering iron pumps - https://www.amazon.com/dp/B008DJRYIG/ref=cm_sw_r_sms_apap_4HuPH8htp6ZEX
There's plenty of switch desoldering tutorials over at /r/mechanicalkeyboards, and if you need help just make a post and I'm sure plenty of people will be glad to help you out.
That looks like a lot of solder from the picture. Maybe try ordering one of these, I found it to work better than a solder sucker...
Tenma 21-8240 Vacuum Desoldering Iron
https://www.amazon.com/dp/B008DJRYIG/ref=cm_sw_r_cp_api_aegZzb1ZWPPJQ
Sweet. DOETT!
For desoldering the old switches (and diodes), I'd recommend this: http://amzn.to/2EWtuLJ it has worked well for me.
I'd recommend that when you install diodes on the new PCBs (if you do new PCBs) that you install them on the opposite side of the PCB as the switches.
Highly recommend upgrading. I was like you, then I got this (link below), and my whole quality of life improved. Girls even like me now!
https://www.amazon.com/gp/product/B008DJRYIG/ref=oh_aui_detailpage_o00_s00?ie=UTF8&amp;psc=1
Hey! https://www.amazon.com/gp/aw/d/B008DJRYIG/ref=mp_s_a_1_1?ie=UTF8&amp;qid=1521608293&amp;sr=1-1&amp;pi=AC_SX236_SY340_QL65&amp;keywords=desolder&amp;dpPl=1&amp;dpID=41SYOSe4FRL&amp;ref=plSrch such things exist!
I would add that the soldering iron must have a pointy tip! I've been trying to replace my modules, but the stock tips are huge (for the intended work) I could not reach the spots to melt.
The one i'm using https://www.amazon.com/gp/product/B00B3SG6UQ/ref=oh_aui_detailpage_o00_s01?ie=UTF8&amp;psc=1
Also, be sure that the Torx are Security Torx! They have the hollow star shape and also an inside round tip. https://www.amazon.com/Screwdriver-Security-Wireless-Controller-Disassembly/dp/B004YUB6ZU/ref=pd_sbs_469_5?_encoding=UTF8&amp;pd_rd_i=B004YUB6ZU&amp;pd_rd_r=Z51XSKAB8PX325052JVR&amp;pd_rd_w=jAo1O&amp;pd_rd_wg=DYMkI&amp;psc=1&amp;refRID=Z51XSKAB8PX325052JVR
I use something very similar to this, except it's 30 watts:
https://www.amazon.com/dp/B01HSXVR3A?ref_=ams_ad_dp_asin_2
That's probably the cheapest thing you'll find. I wouldn't recommend it unless you're going to solder once or twice a year. Believe me-it's a pain to do anything with an iron this cheap, and I'm getting a new one to replace it. I'm tired of buying extra-cheap stuff.
I've used this before, and it's actually not too bad in my opinion: https://www.amazon.com/Weller-SP40NUS-Medium-Soldering-Black/dp/B00B3SG6UQ/ref=sr_1_7?ie=UTF8&amp;qid=1481862872&amp;sr=8-7&amp;keywords=soldering+iron&amp;refinements=p_89%3AWeller
For $40, these two stations look pretty enticing:
https://www.amazon.com/Weller-WLC100-40-Watt-Soldering-Station/dp/B000AS28UC/ref=sr_1_5?ie=UTF8&amp;qid=1481862523&amp;sr=8-5&amp;keywords=soldering+iron
https://www.amazon.com/Stahl-Tools-SSVT-Temperature-Soldering/dp/B0029N70WM/ref=sr_1_11?ie=UTF8&amp;qid=1481862673&amp;sr=8-11&amp;keywords=soldering+iron
Disclaimer- I have never repaired a synth before.
This is what I use to repair old consoles
Weller SP40NKUS 40-Watts Soldering Iron Kit https://www.amazon.com/dp/B00B3SG7F0/ref=cm_sw_r_cp_apa_i_5koSCbHNHK4S6
It's inexpensive and works great.
All you need is some solder and wick and this will literally only take a couple mins and you have a fixed Atari
Ah okay gotcha. Also I realized I can get tons of discarded circuit boards from work so those should be enough practice material for me. I was looking at an iron like this https://www.amazon.com/Vastar-Full-110V-Soldering-Iron/dp/B01712N5C4/ref=sr_1_4?ie=UTF8&amp;qid=1483622458&amp;sr=8-4&amp;keywords=soldering+iron . Looks like it would be okay and is 60W
I really like this one:
https://www.amazon.com/Vastar-Soldering-Iron-Full-Welding/dp/B01712N5C4/ref=sr_1_4_acs_twc_5bddfe5a-5f_3?s=hi&amp;ie=UTF8&amp;qid=1519276481&amp;sr=1-4-acs&amp;keywords=soldering+iron&amp;content_id=5bddfe5a-5f09-4448-804c-13db1e65e880&amp;ingress=search&amp;content_type=story&amp;ascsubtag=5bddfe5a-5f09-4448-804c-13db1e65e880&amp;tag=ospsearch-20&amp;widget_name=expert_recommendation&amp;content_provider=osp
I use a little better stand then the one they give you but this Iron does have a temp adjustment which makes it pretty nice.
i would get this set
http://www.amazon.com/Full-Vastar-110V-Soldering-Iron/dp/B01712N5C4/ref=lp_11498399011_1_3?srs=11498399011&amp;ie=UTF8&amp;qid=1463149918&amp;sr=8-3
comes with a solder sucker, stand, and tweezers for only a couple bucks more than the other recommendation. What I am currently using to make my SuperGameGirl
Saw a suggestion for this a few days ago from /u/jaiakt:
Amazon.com: Vastar Full Set 60W 110V Soldering Iron Kit
Weller does seem to be a good brand from reviews I've read before, though. The WLC100 that Krelbit suggested would be a step up in class from this.
I bought [this kit](Vastar Full Set 60W 110V Soldering Iron Kit - Adjustable Temperature, 5pcs Different Tips, Desoldering Pump, Stand, anti-static Tweezers and Additional Solder Tube for Variously Repaired Usage https://www.amazon.com/dp/B01712N5C4/ref=cm_sw_r_cp_api_AGFfzbEE1V8HC) off Amazon for $16. Not super high quality, but I've used it for several builds with no problem.
Check Craigslist for guitars that have electronic issues or are completely dead. For example I got an rg321mh that has a perfect neck and frets for $60. All I had to do was rewire a new input jack. Get a cheap solder pen and some 63/37 rosin core solder.
Wiring guitars is WAY easier then most people think. You can find diagrams for almost any production guitar/pickups.
Just make sure your frets, neck, and nut are good, that stuff is a pain to fix. The rest you're replacing anyways.
I just do a full rewire. Buy the following for a dead guitar: 1. CTS pots. 2. Switchcraft input jack and switch. 3. 22awg cloth sleeved wire. Use a multimeter to check pickups resistance. Or just get some guitar fetish pickups of your choice for a cheap option of new pickups. Then just do the full rewire following a diagram. Make sure to pre-tin your solder pen, the solder point, and your wire. Also sand the back of your cts pots for easier adhesion. Pickup a $5 helping hands from harbor freight to hold stuff to solder.
All this stuff will cost you around $50-60 with a cheap solder pen kit ($12 Amazon) and you will have enough wire and solder to do a bunch of guitars.
You will have a completely rewired guitar in less than 2 hours of work.
Here is links to solder pen, solder, and wire. The rest just lookup for your guitar you're gonna rewire.
https://www.amazon.com/Vastar-Soldering-Iron-Full-Welding/dp/B01712N5C4?ref_=fsclp_pl_dp_6
https://www.amazon.com/Gavitt-Cloth-covered-Pre-tinned-Pushback-Vintage-style/dp/B00JYJFE72/ref=mp_s_a_1_4?keywords=22+awg+wire+cloth&amp;qid=1556147584&amp;s=gateway&amp;sr=8-4
https://www.amazon.com/Kester-Rosin-Core-Solder-Dispense-Pak/dp/B00AVLM4SO/ref=mp_s_a_1_4?crid=IRV7SJBS91YR&amp;keywords=63+37+solder+kester&amp;qid=1556147625&amp;s=gateway&amp;sprefix=63+37&amp;sr=8-4
This one for $17 has served me well so far.
I got this kit. [Vastar Full Set 60W 110V Soldering Iron Kit] (https://www.amazon.com/dp/B01712N5C4/ref=CM_SW_R_CP_APA_ZV6IZBDB771M1)
I ended up getting a few other things and a better solder sucker after a few jobs.
[Hakko 599B-02 Solder Tip Cleaning Wire and Holder] (https://www.amazon.com/dp/B00FZPGDLA/ref=cm_sw_r_cp_apa_9Y6IzbHX1H6MD)
[Engineer SS-02 Solder Sucker] (https://www.amazon.com/dp/B002MJMXD4/ref=CM_SW_R_CP_APA_W06IZBVBPKVMP)
The sucker was totally worth the extra cost.
I'm going to pick up either this for $11 or this for $21 when I do the soldering on my pair.
I have one of these. For light duty work, it's served me well.
https://www.amazon.com/dp/B01C9P7HDQ/ref=cm_sw_r_cp_apa_i_gTZdBb0TKEC2V
I've used what's essentially this kit for something like 9 boards so far, and it's still going strong.
You don't really need to spend a lot, if it's just for a few little projects.
A little over a year ago I desoldered and resoldered my entire CM Quickfire TK because I wanted to plasti-dip the backplate (I know did it the hard way but it was interesting to do it that way". I later desoldered and resoldered every single LED because I wanted a slightly cooler shade of white.
To this day My keyboard works perfectly. I did research on soldering and practiced on an old portable DVD player.
I bought a cheap soldering kit and [higher quality solder] (https://www.amazon.com/Alpha-AM31605-Leaded-Rosin-Solder/dp/B0044UH8PC/ref=sr_1_46?ie=UTF8&amp;qid=1500437544&amp;sr=8-46&amp;keywords=alpha+fry+solder) with a rosin core made specifically for PCB's.
This is what I did for a 95% clean job. Note this was my VERY FIRST time ever soldering and I think I did a pretty nifty job.
Look up tutorials. They're very useful
Starting out with a basic 20W handheld iron is fine. You dont need a complex temperature controlled one for you first few projects. Get a little stand so you can put it somewhere safe after each step.
Use leaded solder while you are learning as its easier to work with. Just avoid inhaling the smoke (or even get a small fan filter) wash your hands after working.
Get a basic handheld solder sucker to correct basic mistakes.
A kit like this actually looks pretty solid to start with!
https://www.amazon.com/gp/aw/d/B01H1IFT54/ref=mp_s_a_1_3?ie=UTF8&amp;qid=1493103880&amp;sr=8-3&amp;pi=AC_SX236_SY340_FMwebp_QL65&amp;keywords=soldering+iron&amp;dpPl=1&amp;dpID=51YRK651M%2BL&amp;ref=plSrch
Use the soldering tip to heat the PCB pad and leg of the part at the same time for about a second and then touch the solder to the opposite side of the leg to the iron. Solder should flow even and form a gentle cone shape.
typcially id agree that you'd wanna spend a bit more and get a really nice iron, but if you're just doing casual stuff I have a mudder soldering iron kit with variable temperature and multiple tips and it's done a great job. It feels a bit cheap but I've used it to build mic preamps and a microphone with ease. Also the case is nice to have.
https://www.amazon.com/gp/aw/d/B01H1IFT54/ref=mp_s_a_1_5?ie=UTF8&amp;qid=1491221370&amp;sr=8-5-spons&amp;pi=AC_SX236_SY340_QL65&amp;keywords=mudder+soldering&amp;psc=1
This looks like the same kit but the brand name has changed for whatever reason.
This the Iron I order a while back. Temp control and comes with a fine tip point.
I've done a few NES console builds and a few more NES cartridge builds. This album isn't mine, but for the port access I HIGHLY recommend using the decora keystone wall plate. You can get a gray one on Amazon that comes decently close to matching, and with some good glue work you'll barely notice it's there. Since you'll be using a dremel anyway to get rid of screw standoffs that are no longer necessary, cutting that opening should just take some patience.
I was a complete idiot with a soldering iron, and after getting some reps with it doing projects like these it's kind of amazing what you pick up. I found this site hugely helpful, since a lot of what I was doing was desoldering USB cables from PCB's (for the cartridge builds) and resoldering microUSB heads. You won't be doing a lot of desoldering, however everyone makes mistakes and sometimes fixing those mistakes involves removing solder. There are plenty of youtube vids out there for soldering, but all you need to get started is something like this. It's not the best iron in the world, but it's temperature controllable and something cheep to get you started. The only thing I'd add to that is a little flux, it will help tinning wire ends immeasurably.
Something else that's going to help you out a LOT for the console build: RELOCATE THE MICROSD CARD. Buy one of these, I routed mine to the left side of the cartridge opening, set vertically against the opening and at an angle so i can get the SD card in and out. You really don't want to rip apart 6 screws to open and close the unit, and if the SD card gets corrupted or you just want to change something on there that's exactly what you'll have to do. Move that sumbitch to the front and you'll never have to worry about it.
i came up with this so far (still doing this as an exercise to determine value, i havent decided against the GK64 yet):
&nbsp;
&nbsp;
Total: $222
this one? if so then you should be at about 350 on the dial on the iron. the solder in that kit is leaded, for reference.
yeah surface mount stuff is a little tetchy at first. did you add a blob of solder to one of the pads and then tack the mosfet in place or something else?
Making cables is easier than it sounds, and soldering isn’t difficult - but you’re right that you want to buy a decent iron at the bare minimum.
That said, a variable wattage soldering iron can be had for like $20 if you know where to look, consumables like solder and flux are super cheap and you don’t need a big soldering station if all you’re doing is making cables. If you’re curious hit YouTube and get an idea of whether or not you think you can handle it.
Soldering Kit
Cable Kit
That’s $50 worth of stuff and you can build six cables at whatever length you want. I think that’s still cheaper than lava cable at that rate and if you need more later you still have the equipment.
ANBES Soldering Iron Kit Electronics, 60W Adjustable Temperature Welding Tool, 5pcs Soldering Tips, Desoldering Pump, Soldering Iron Stand, Tweezers https://www.amazon.com/dp/B06XZ31W3M/ref=cm_sw_r_cp_apa_i_1yxIDb03XRX8S
Seconded, also consider this kind of thing: https://www.amazon.com/Aven-17010-Adjustable-Circuit-Holder/dp/B00Q2TTQEE/ - it's invaluable for PCBs. Just populate from one side, add something to hold stuff in place (like gaffa tape, or bend one lead, or clip on a sheet of paper, etc), turn over the PCB and start soldering away. I wouldn't want to miss mine.
Any soldering iron 40+W where you can regulate the temperature should do, I own a nice station but when I don't feel like breaking it out because it'd take longer to set it up than to do the job I use something like this: https://www.amazon.com/ANBES-Soldering-Iron-Kit-Electronics/dp/B06XZ31W3M/ set to 350°C. Just make sure to clean and tin your tip regularly and it will do the trick just fine Oh, but ditch the solder and get a few spools of good rosin core solder of different gauges, it's not expensive but worth it. In my experience, the solder that comes with kits like that mostly works as a deterrent.
If you're not planning on buying all-included kits also get a few spools of stranded core wire of different colors. You could use solid core wires but those tend to break if they're getting bended from movement without showing it. With stranded core some strands may break but as others don't they'll continue to work. Invisibly broken wires (i.e.) inside the isolation) are a *beeeeep* to debug.
Also, a set of tweezers are great to have, especially the kind that holds stuff together per default, like this one: https://www.amazon.com/Curved-Tweezers-Cross-Jewelers-Soldering/dp/B000OVPG9A/ (only an example, I'd get a tweezers set that contains one like that).
In my experience a tool set like this one is great to have: https://www.amazon.com/Haobase-6Pieces-Double-sided-Soldering-Assist/dp/B01DLX6V3C/ - especially the bending tool is great to have, as it allows eg to bend the leads of a LED without running the risk of breaking the LED itself. It's also great in order to clean up mistakes, helps with desoldering and such
Speaking of desoldering: desoldering braid is a must. A desoldering pump can be useful, too. And yes, practice soldering and desoldering until you can do both without destroying anything.
If you're not going to buy pre-drilled enclosures then you very likely want a) a center punch and b) stepping drill bits. Those let you drill holes in all kinds of sizes without having to buy lots of drills.
Last but not least a wire cutter is a must
https://www.amazon.com/ANBES-Soldering-Iron-Kit-Electronics/dp/B06XZ31W3M?crid=1NQ8NYDFHTHAE&keywords=soldering+iron+kit&qid=1539188799&sprefix=soldering%2Caps%2C1057&sr=8-5&ref=sr_1_5 This would be a great little kit for you.
While it isn't possible to replace the switches without soldering, the solder job is a lot simpler than it seems. Just watch a good tutorial and get a decent 20 dollar solder kit off amazon and you'll be set. It's a good skill to learn. This solder set is amazing and actually comes with a solder sucker which you need to replace a switch anyways. I've used it hundreds of times and it's held up very well.
https://www.amazon.com/dp/B06XZ31W3M/ref=cm_sw_r_cp_api_i_5pV3Bb60EXNJ0
Sorry nobody responded to such a simple question on this subreddit about mice. Apparently most people here don't care or know much about the hardware in their mouse. So I guess I'll be the one to answer your question.
Those are just standard 3 pin micro switches you can find on any ordinary mouse. In my opinion they're all similar, Omron, Kailh, Huano seem to be the more common ones. The ones on the Divina series are all Huano and you can buy them on HERE, yes they're all from China because that's where they are all made.
You'll need basic solder / desolder skills to replace them, it should only take you about 30 min -1 hour or so of watching YouTube videos. But I'd get something to practice with first. Most important is to learn how to desolder using Solder Sucker you can look up a ton of tutorials on Youtube. You can find a full solder kit on amazon for under $20 if you're in the US, it should have everything you need for a quick job. Link here
Once you know how to replace a simple mouse switch you'll save a lot of money by not having to buy another full mouse if a switch ever malfunctions, a lot of people just throw away their old mouse and buy a new one if the "clicks" somehow stop working but really it's most likely just the simple mouse switch they needed to replace.
It's super simple. If you have no interest in learning how to do it I would find someone with a soldering iron and have them do it. I bought this kit and all you would do it use a bit a solder to connect the two holes. A 20 second job.
Headlights (you only need one pair. the cutoff is outstanding)
Map lights, license plate lights, running tail lights, and side marker lights
Reverse lights
Front turn signals (accessible from under the vehicle - pin remover and 10mm socket needed)
Rear turn signals (requires tail light disassembly)
Turn signal resistors (required to prevent hyperflashing; soldering is recommended)
Brake lights (requires tail light disassembly)
Daytime-running lights (pliers needed)
Trunk light and dome light
I've had my eye on this one
Would something like this be good or should I avoid it?
Soldering is an extremely valuable skill for this sport, is cheap to get into (this twenty dollar kit is more than sufficient), and will allow you to take advantage of cheap RC packs from HobbyKing and re-solder them yourself. It's definitely worth the mild investment in time, money, and effort.
I've got through about 8 keyboard builds/rebuilds with a generic $20 kit off Amazon and it's still holding up. Like, this'd be fine if you're not willing to drop $100 on something you may rarely use. Or most of the cheap adjustable ones on there.
Check out this guide, watch a couple soldering tutorials, switch soldering is some of the most basic stuff.
I haven't tested this one myself but it seems like this is some good bang for your buck:
https://www.amazon.com/ANBES-Soldering-Iron-Kit-Electronics/dp/B06XZ31W3M
I bought the soldering iron and the replacable tips on ebay, but they're coming from China so it'll be a while before I can vouch for them hope this helps a but.
This is the one I bought and so far it’s been great.
Check it
I don't really wanna post the code for ethical reasons (I started with some basic Adafruit code for bluetooth and turned it into a full OS). But here's a feature list:
I used u8g2's u8x8 mode for the screen drawing, as it requires no ram.
&#x200B;
Here are my parts:
Voltage regulator (takes 8.4v down to 5v)
22pF capacitors
16MHz Oscillator (required for standalone board)
DIYMall blue OLED
Knockoff Arduino Uno
Adafruit UART-Capable bluetooth module (makes sending data easier)
Spare ATMega 328 processors
Li-Ion" 9V" (8.4v) batteries (rechargeable)
Switches
9V battery clip
Soldering Kit
Elegoo prototyping PCBs
Jumper wires (makes life easier & tidier)
Elegoo Starter Kit (Comes with LEDs, resistors, and buttons)
Get yourself one of these soldering kits. It has everything you need to get started with soldering (though I recommend using solder wick instead of the pump for desoldering.) Just be sure to tin the tips with solder to prolong their life and help with heat transfer, and never blow on a fresh blob of solder to cool it; it give the joint air pockets which can corrode and degrade the joint over time.
Get some Bourns 500k push-pull pots (I recently bought a pair for $16 from an Amazon marketplace seller) for both controls. You could wire them up to coil split each pickup independently (assuming they have 4 conductors) as well as to bypass the controls entirely, have one pickup active all the time, etc. They're incredibly versatile.
Also, some new pickups and a Switchcraft jack will help immensely.
How do I compensate when I'm using a lower end soldering iron? I heard the temperature doesn't stay hot as consistently as better irons- so do I have to just wait longer in between soldering each joint?
I got this one for reference:
https://www.amazon.com/gp/aw/d/B06XZ31W3M/ref=ya_aw_od_pi?ie=UTF8&amp;psc=1
I hear you, I OBSESSED over this for a few days. And I still got the first result on Amazon and wasted two days I could have been tinkering or doing anything else haha.
Here's the one I got.
https://www.amazon.com/gp/product/B06XZ31W3M/ref=oh_aui_search_detailpage?ie=UTF8&amp;psc=1
Looks like the price ticked up or I got a deal or something. Definitely get a helping hands or similar device to hold your projects, so incredibly helpful. Can find those at any hobby store or Amazon for cheap too.
I bought this ages ago, great kit. link here: amazon product page 19$
I had never soldered anything before either, but I got one just to mess with my printers. Being able to snip off and reattach connectors, or extend wires on fans or solder some LED strip lights or whatever is a nice thing to be able to do yourself. This kit is pretty much complete for basic soldering and has been great.
I just ordered components to make my first box mod, but have done small electrical work before.
Helping Hands will make your life much easier, may not be necessary if you only intend to make one mod.
a decent digital multimeter is required, as is a Soldering iron.
A Breadboard is very useful to ensure everything works as it should, before you have it all finished and put in the case.
those are all I can think of right now, sure there are others people use regularly though
Dunno about the DA but for keyboards you can. As /u/01111000x said it'll void any warranty you may have with it.
I changed out all my LED's and Cherry switches using the following items:
Weller SP40NKUS - May be too powerful but it got the job done fine.
Solder sucker
Leaded solder with rosin core
Desoldering wick
I guess for Green LED's anything on eBay would work. 2x3x4mm square led's or flangless 3mm will both work. I got mine frome here because im impatient.
Ive been using this for few months. Didnt run in to any issues whether it was for SMDs, Switches, and etc. If you want to try it out for yourself, just remember to take your time with it and you should be fine.
Well, it's not ideal for electronics, but 20USD will get you a 40W Weller iron. For larger joints it's fine, but definitely not great for small stuff/temperature sensitive work.
Keep in mind that for a mere 45USD, Sparkfun sells this temperature controlled iron. Granted it's not in stock right now.. but it's a darn good price for a regulated station.
Soldering is really easy but it takes some practice beforehand. Grab something old that isn't being used anymore (or find something that someone left at the corner near their garbage can) and take it apart. Desolder some stuff and practice soldering it back on. Also, don't buy cheap junk, you don't need a $200 iron, but don't get one of the $5 irons off ebay either. I use these:
Weller Iron: http://www.amazon.com/dp/B00B3SG7F0/
Solder: http://www.amazon.com/gp/product/B000G31N8Y/
Desoldering Pump: http://www.amazon.com/dp/B00QTGEL18/
If you are willing to drop a little bit of coin, but don't want to go too crazy this guy is pretty popular: http://www.amazon.com/dp/B000AS28UC/ref=wl_it_dp_o_pC_nS_ttl?_encoding=UTF8&amp;colid=33Z9SEU0RU74U&amp;coliid=I177ELVX243CET
For starting out, and into the foreseeable future, one like this would probably server you just fine: http://www.amazon.com/Weller-SP40NKUS-Watt-Soldering-Black/dp/B00B3SG7F0/ref=sr_1_2?s=hi&amp;ie=UTF8&amp;qid=1421030141&amp;sr=1-2&amp;keywords=weller+soldering+iron
What was it? I need one for replacing blown capacitors and was looking at the Weller SP40.
http://www.amazon.com/Weller-SP40NKUS-Watt-Soldering-Black/dp/B00B3SG7F0
I don't think this comes with a stand. I have the $40 Weller one.
I just ordered 3x digital temp control switch for $10.80 shipped. Also 3x 3 pin fan controllers for $7.17 shipped. Along with a few different 4 pin and 3 pin fan plugs and adapters. New Weller 40w soldering pencil for <$20 after 20% discount.
I'm ready to automate my fans! :D I'm hoping to run 2 thermostats and 2 fans from one DC 12v psu. I'm thinking something like exhaust starts at a lower temp, like 71.6F/22C, and stops at 68F/20C; intake starts at 80F/27C, and stops at 75F/24C. Give or take a few degrees..
Glad you figured something out, there are these as well:
https://www.amazon.com/dp/B005P1TRAS/ref=cm_sw_r_sms_awd_rnXfxb9BQNTF9
https://www.amazon.com/dp/B00MJW08JK/ref=cm_sw_r_sms_awd_4nXfxbPS230AX
i never really liked woodburning as i was never an artist. that being said the one your looking at seems to be of iffy quality. if you wanna be the bast damn aunt or uncle id get him this one https://www.amazon.com/Dremel-2000-01-Precision-Butane-Soldering/dp/B00MJW08JK/ref=sr_1_1?s=hi&amp;ie=UTF8&amp;qid=1493201538&amp;sr=1-1&amp;keywords=versa+tip
I have one of these, it works well. nfs though, just another option.
https://www.amazon.com/Dremel-2000-01-Precision-Butane-Soldering/dp/B00MJW08JK
I love my Wera screw drivers, but to me that is a personal preference.I believe this is the y wing
I have a Small Butane Heat torch that I use on almost every single 7 and up repair.
Butane Torch
I use guitar picks instead of playing cards.
thin ones are the best
Camping scissors
these fold and are sharp
That’s the small things I can think of if you want a larger list of things that are more expensive I can add to it.
i use one of these http://www.amazon.com/Dremel-2000-01-Precision-Butane-Soldering/dp/B00MJW08JK/ref=sr_1_1?s=hi&amp;ie=UTF8&amp;qid=1451929586&amp;sr=1-1&amp;keywords=dremel+soldering+iron
bit more versatile than a heat gun and useful for field soldering if you're desperate :D (no replacement for a hakko or weller iron)
This is a really light suggestion. Definitely do some research and ask around, but for just a single build or a few builds a year I would suggest this https://www.amazon.com/Vastar-Full-110V-Soldering-Iron/dp/B01712N5C4/ref=sr_1_1?ie=UTF8&amp;qid=1485820735&amp;sr=8-1&amp;keywords=vastar+soldering
At a minimum, its better then the one you have listed.
Don't even think about getting a non-temperature controller iron. They get way too hot and destroy your tip, making it impossible to get proper heat transfer. Weller makes some good irons, but that $40 one you linked is not at all one of them. That $100 Hakko is very nice, as are the knockoffs of their older models, like this $60 937+ and this $33 936.
At the low end, I got this $18 soldering kit for my travel bag recently, the tweezers, stand and solder sucker are extremely cheap, but the iron is almost as good as my station. Swap the cone tip out for the small chisel tip they send, get a brass sponge to clean your tip, and you're good to go.
I have been using this one for almost a year now.
Vastar Full Set 60W 110V Soldering Iron Kit - Adjustable Temperature, 5pcs Different Tips, Desoldering Pump, Stand, anti-static Tweezers and Additional Solder Tube for Variously Repaired Usage https://www.amazon.com/dp/B01712N5C4/ref=cm_sw_r_cp_api_VIZDybZSJ9ZRB
It works, I use it for SMD work and it works fine. I think I am going to get a Hakko this year, but if you just need to do basic soldering; I've used this from automotive to 3D printers to chips. I don't love it, but it works.
I would recommend getting good solder though (the solder it comes with is okay), I bought some Chinese solder and it refused to flow. You also need something to clean the tip, that kit has nothing for that.
TL;DR: For the motor tabs. Ranom link.
For some things you can use these clips
Here's a graphic of the parts hooked up with a 2wd chassis and ultrasonic car http://blog.pixelgiraffe.com/wp-content/uploads/2015/11/roboSketch3b.png
With the kids I use mostly the dupont cables and the wire clips.
The motor cables have to be soldered on though. Wire-wrapping might be possible too.
I don't know if soldering isn't allowed in the dorm, but we even do it in classrooms (we solder on a wooden board so the tables don't get damaged if they drop the iron).
Shield (Random link, can be found cheaper; That particular one seems to touch the USB port risking to make a short).
$20 soldering stations 1 2 - Though of course something like the Hakko FX888D would be a better investment ;-) Just to add it, a soldering iron set
You can also get a soldering iron for $2-$8 but you'll still need to (make) a stand. Some of the stations come with solder, the above don't have it listed.
Unless you are doing wire soldering (headphones, cables, speakers) then that iron is fine but if you are doing anything electronic/circut you should look into one with adjustable temperature, something like https://www.amazon.com/dp/B0029N70WM/ref=cm_sw_r_other_apa_s-z4xb7VZ46BF would be a good starter or https://www.amazon.com/dp/B01712N5C4/ref=cm_sw_r_other_apa_e.z4xbZC5H7VV as a bare minimum
I think this makes sense to me . I realize it’s probably not best but will this iron be good enough. https://www.amazon.com/Vastar-Soldering-Iron-Full-Welding/dp/B01712N5C4/ref=sr_1_10?crid=2XVCDL8OL5RBA&amp;keywords=guitar+solder&amp;qid=1563930976&amp;s=gateway&amp;sprefix=guitar+solder%2Caps%2C140&amp;sr=8-10
So I will first try to resolder all the connections and hopefully that works. If not I will get a little practice using the iron and buy new components. Other than the iron, are there any other materials I will need to buy. Can I reuse the attached wiring?
This is what I recently bought off Amazon. It’s worked well and has temp adjustment and tips.
Vastar Soldering Iron Kit, Full Set 60W 110V Soldering Welding Iron Kit - Adjustable Temperature, 5pcs Different Tips, Desoldering Pump, Stand, Anti-static Tweezers and Additional Solder Tube https://www.amazon.com/dp/B01712N5C4?ref=yo_pop_ma_swf
So far I’ve soldered splices and put on old school all solder pl-259 and crimp ons with the soldered center connector. No issues.
My advice — get this, some flux and some rosin core electronics solder. But also buy a third hand tool.
The most difficult thing I ran into was trying to get the pieces held just right and in the right position.
This was my first iron, though under a different branding. It's only $16, and it has a knob you can spin that at least loosely correlates w/ the iron's temperature.
I wouldn't recommend it, though. I splurged for a Hakko FX-888D a couple of months later and haven't regretted it once. It truly is a night-and-day difference. Working with my old iron was like pulling teeth. Working with the Hakko is effortless.
I'd definitely recommend an upgrade. If you're un(willing|able) to spend $100+ on a soldering iron, I'd recommend still getting the first one I linked, along with some Hakko tips. Hakko tips are about 10-20x as expensive as their no-name counterparts, and you absolutely get what you pay for.
Easily the most frustrating part of using my first iron was how quickly the tips would oxidize, even though I kept them tinned religiously. Hakko tips, when cared for, will last indefinitely. I wouldn't be surprised if nice tips + cheap (but temperature controlled) iron got you 70% of the performance of the all-Hakko kit.
This is the exact kit I purchased. Got it on a flash sale: https://www.amazon.com/Vastar-Full-110V-Soldering-Iron/dp/B01712N5C4
It does have temp control. Works really well, considering how cheap it was. I am really impressed.
I previously asked about this iron, and people said it was fine.
>Copy pasta'ed from my post a few months ago:
After doing some research, here are my top 3 budget soldering iron options. Thoughts?
My $4 Harbour Freight iron's tip is dissolving, and it's time I got a new iron. I don't solder super often, maybe a handful of times a month, so I can't really justify getting a nice $40 Weller soldering station. My budget is around $30. After doing some Google-Fu, and browsing through Amazon and Ebay, here are my top 3 budget choices:
I'm open to suggestions, comments, and questions regarding these choices. The Sywon Soldering Iron kit has nothing I really care about over the Vastar one, aside from a slightly nicer stand and sponge, and of course the carrying case. The Aoyue 469, being the only soldering station on the list, doesn't come with any flashy accessories unfortunately. A solder sucker would be nice, and I'll probably be glad of the extra tips that are included wit the two kit irons. However, if you guys think that the Aoyue 469 soldering station would be better quality, I might be willing to shell out a few bucks more for it, and pick up another tip or two.
https://www.reddit.com/r/Nerf/comments/8bugth/after_doing_some_research_here_are_my_top_3/
Buy a proto board PCB (a printed board with just a bunch of copper-lined holes in it), and some cheap components (resistors, caps) and have at it. Even better if you have a friend who might have some old stuff like that laying around. Digikey.com will have anything you need. Radioshack should too, but a bit more expensive.
And for a soldering iron if you don't have one, I recommend this one from amazon. Really good for its price and a perfect first soldering iron: https://www.amazon.com/Vastar-Full-110V-Soldering-Iron/dp/B01712N5C4/ref=sr_1_5?ie=UTF8&amp;qid=1487451518&amp;sr=8-5&amp;keywords=soldering+iron
There are plenty of Youtube tutorial videos. It's not very hard to get the hang of, and opens up a lot more DIY projects to you.
Ive been using this kit for the last year....
The cheap models actually work pretty well if you take care of the tip and use decent solder.
https://www.amazon.com/Vastar-Full-110V-Soldering-Iron/dp/B01712N5C4/ref=pd_sbs_469_1?_encoding=UTF8&amp;psc=1&amp;refRID=CKT7F9WADDVDFTPZVZ9E
I ordered a $10 soldering iron off amazon, and some sauter, and it worked perfectly fine.
Iron
Sauter
The temp rating is right. The wattage is on the low side. but should still work.
As /u/AshuraSavarra suggested above, try some regular leaded flux core solder, maybe some extra flux while you are at it, use the chisel tip, be sure it is tight, try again on some very light wire and if that works move up to the 18 or 16 awg wire I assume you are using. If you can do the lighter wire but have difficulty with the heavier wire I would suggest an iron with higher wattage. Any of the variants of This I very highly recommend for the price.
But I think trying other solder and more flux will make a big difference.
Something inexpensive with adjustable temperature will do just fine.
I've had good luck with this one.
They don't necessarily have to be genuine deans.
I've used GATE deans (likely rebranded, don't know OEM), Hobbyking connectors (they have XT written on the side for "grip"), as well as these Allytech branded ones, all without issue.
As /u/artist508 said, learning to solder isn't all that complicated, and it's a useful skill. Vastar makes an inexpensive kit that's a solid contender for a starter set. It's not going to win awards for the best thing ever made, but it does what it needs to. Quality solder is also a must, or you'll just end up frustrating yourself
I'm looking to get a soldering iron in order to do some small electronic projects, but I don't know much about soldering. I found this kit on Amazon that looks like it has everything I need and is fairly cheap, but I'm wondering if it would be better to get a more expensive kit. Any recommendations? Also any resources on how to solder would be helpful.
damn man, shitty. There is, but you'll need a soldering iron, was hoping it wouldn't get to this point. Id grab a new 510 connector too. There's no guarantee about this, but I think it'll work.
grab a 510 from Here avoid the squonk ones. Also grab some wire from Here. Next you'll want a soldering iron and some heat srink. A soldering iron and heat shrink are good things to have around the house too.
Use pliers, a flat head screw driver might help too, and remove the 510 connection from the mod. This shouldn't be hard since yours is already loose. Pull that ring on the base off and the whole thing should just pop on out. Then take your new one and place it in the hole. Now take some of the black wire you ordered and strip the wire slightly, like 1/4 of an inch should be fine, twist the loose strands between your fingers and solder it to the ring included with the 510. Look up a video on soldering, it will do a much better job than I can.
Then take some of the white wire, do the same stripping procedure, and solder it to the center post. Be sure not to use too much solder as too much could short the positive and negative terminals. Next take about an inch of heat shrink and run it up the wires. You want to shrink it around the solder joints, it'll help hold everything together and prevent any shorts. You can use a lighter or hair dryer to shrink the wrap, if using a lighter keep it far away and don't let it burn, maybe practice on a small strip of wire. Now secure the 510 to the top piece using the included nut. Tighten it pretty tight.
Now you can trim the wires and solder them to the pcb of the mod, if you feel comfortable about this procedure you should be able to take it from here. Otherwise continue reading and I'll suggest doing it another way.
Now you have a top cap with the 510 installed and wires hanging off of it. Now trim the wires hanging off of it to about 1.5 inches and strip off the end about 1/4 inch. with the wires on the mod, cut off about 1 inch from each one(be sure there is extra as you don't want it to all come off) and strip off about 1/4 inches. Now take solder and melt it over the end of each wire, but don't solder them together yet. Put some heat shrink, about 1 inch, over 1 black and one white wire, and just leave it there. Now take the wires you want to join and melt the solder together so the wires stick. Once they're together take your iron and melt some solder on the tip and while holding the wires together get the extra solder onto the connection(this will decrease resistance of the connection, so less heat is generated there, and thicken the joint, so it's much stronger). then do the same for the other wire. Now shrink the heat shrink over each joint.
Then you just screw it all back together and you're done.
If you don't want to do this, I wouldn't blame you. It is pretty easy and faster than my wall of text indicates. I could do this in maybe 20 min, possibly less. Might take an hour if its your first soldering project. If you don't want to, might I recommend the vaporesso revenger x, it's a great mod and you can get one for pretty cheap($55-$70).
Whatever you choose to do, sorry this happened to you.
Edit: had to repost. Didn't think amazon included affiliate links when copying from the address bar, but it does. They're gone now.
Did you know Amazon will donate a portion of every purchase if you shop by going to smile.amazon.com instead? Over $50,000,000 has been raised for charity - all you need to do is change the URL!
Here are your smile-ified links:
https://smile.amazon.com/dp/B01712N5C4/ref=CM_SW_R_CP_APA_ZV6IZBDB771M1
https://smile.amazon.com/dp/B00FZPGDLA/ref=cm_sw_r_cp_apa_9Y6IzbHX1H6MD
https://smile.amazon.com/dp/B002MJMXD4/ref=CM_SW_R_CP_APA_W06IZBVBPKVMP
---
^^i'm ^^a ^^friendly&nbsp;bot
Do it! As of right now all parts are available.
I used this iron. Cheap and gets the job done.
I recommend this guy here and also a slight enhancement for it here.
Well, the small stuff gets set so quickly...
I believe this is the version of
cheap crapsoldering iron I have, hopefully 60w can keep up with the heatsink? The fact that you know the number of chisel tip tells me this may yet be too difficult for me!I purchased this $15 Vastar after reading a recommendation somewhere on reddit. I've only used it a few times, but it's so far worked much better than the other inexpensive irons I've had.
I doubt it works as well as a $100 iron, but I haven't come across a bad review, it seems to do just fine for what I'm using it for, and I've been happy with the price.
Yeah, can confirm I have no clue what I'm doing! Just got my kit, and I honestly just picked one from Amazon because I don't know one from the others. https://www.amazon.com/gp/product/B01712N5C4/ref=ppx_yo_dt_b_asin_title_o00_s00?ie=UTF8&psc=1
Should this be sufficient?
I've never soldered before, but I was embarrassed by how ridiculously easy it is. I still practiced on a $10 kit first.
Soldering kit
Tip cleaner
Thin solder wire
Solder wick optional, but way easier than a vacuum for a beginner.
Practice kit optional but nice for initial confidence boosting
just looked that iron up, says it a 60w, could be BS but more likely didn't wait for the iron to reach temp.
https://www.amazon.com/Soldering-Adjustable-Temperature-Including-Desoldering/dp/B01C9P7HDQ/ref=sr_1_2?s=hi&amp;ie=UTF8&amp;qid=1518835087&amp;sr=1-2&amp;keywords=SOAIY+IRON
The only video I could find of the MOSFET board installation was very long and somewhat unclear to a newbie. It looks like he mounts it under the printer rather than the control box and overall just seemed really difficult.
I just went ahead and pushed the button on my order from Amazon that includes the XT60 Connectors w/ Heat Shrink and the 6-1 Soldering Kit I would have preferred the MOSFET but in hopes of not getting over my head, it was a total of about 30$ and seems doable.
I got this guy a while back. Helped me make a few custom cables, a GH60, and a planck so far. Looking to build a bunch more with it too. It's a great little workhorse
I used this kit with the heat turned all the way down and it melts PLA nicely.
This super cheap one from amazon. To make things worse I used the included solder.
I managed, but it definitely got a little hairy near the end as the tip got wider and pieces started coming off. I have a Hakko on my wishlist, but won't be able to get it until next week. Impatience is bad.
This is the best cheap iron I've ever used. Won't replace a quality iron but much better than $20 should get you.
Tabiger Soldering Iron Kit 60W 110V-Adjustable Temperature Welding Soldering Iron with Tool Carry Case
https://www.amazon.com/dp/B01H1IFT54/ref=cm_sw_r_cp_apa_Di7HAbT8K8W6F
25W is too low. You want at least 40W.
Something like this would work better.
I got this one. it works great
Notes and links for self:
Soldering Iron Stand: https://www.amazon.com/s/ref=nb_sb_noss_2?url=search-alias%3Daps&amp;field-keywords=soldering+iron+stand
Kit with cleaning wire: https://www.amazon.com/dp/B01KTICO2E/ref=cm_sw_r_cp_api_RzV.ybM81XSFD?th=1
Kit w/o cleaning wire: https://www.amazon.com/Tabiger-Soldering-110V-Adjustable-Temperature-Welding/dp/B01H1IFT54/ref=redir_mobile_desktop?_encoding=UTF8&amp;dpID=51YRK651M%2BL&amp;dpPl=1&amp;keywords=soldering%20iron&amp;pi=AC_SX236_SY340_FMwebp_QL65&amp;qid=1493103880&amp;ref=plSrch&amp;ref_=mp_s_a_1_3&amp;sr=8-3
What is cleaning wire?
Helping hands: https://www.amazon.com/SE-MZ101B-Helping-Magnifying-Glass/dp/B000RB38X8/ref=sr_1_7?ie=UTF8&amp;qid=1493138401&amp;sr=8-7&amp;keywords=soldering+iron+stand
You need to get a soldering iron (not a gun, a soldering gun is way to imprecise for this kind of work). I think you are going to have a difficult time getting the crimp terminals on the spades to properly fasten onto the piezo leads.
Just buy some el cheapo iron for under $20 from Amazon like this one https://www.amazon.com/Tabiger-Soldering-110V-Adjustable-Temperature-Welding/dp/B01H1IFT54/ref=sr_1_6?s=hi&amp;ie=UTF8&amp;qid=1538839395&amp;sr=1-6&amp;keywords=Soldering+iron&amp;dpID=51rAt23O28L&amp;preST=_SY300_QL70_&amp;dpSrc=srch
I picked up this Tabiger kit last year based on reviews, and have been quite happy with it so far; it included everything I needed, is easy to use and appropriately inexpensive given I wasn't sure I'd stick with the hobby.
(I originally had a terrible Radio Shack soldering iron, ditched that, then got a basic Weller iron that had been recommended for beginners a decade ago, but never had much luck with it and became too frustrated to practice. I strongly suspect the Weller was aimed more at "beginners" taking a supervised class, not people trying to teach themselves based on online tutorials like me.)
Recently I finished a 3S Rapidstrike build:
Motors
Microswitches
Some wire
a lipo battery
Also tools, like a soldering iron or a dremel (i don't have a recommendation here, i just use a hobby knife).
My stock flywheels recently gave up the ghost, so I replaced them with some Worker flywheels.
The only other thing that comes to mind right now are flywheel cages: consider one of these 3D printed ones from the Open Flywheel Project, or an Artifact Red cage + flywheels.
Buy a soldering iron and take the dive!! I bought this: Tabiger Soldering Iron Kit 60W 110V-Adjustable Temperature Welding Soldering Iron with Tool Carry Case https://www.amazon.com/dp/B01H1IFT54/ref=cm_sw_r_cp_api_i_JcZyCb5EPZ0J1 and have used it on multiple projects happily. I’m sure better soldering irons are worthwhile, but this is all you’d need to fix that switch. Oh.. also a replacement switch... details
I use this [soldering iron](Tabiger Soldering Iron 60W 110V-Adjustable Temperature Welding Soldering Iron with Tool Carry Case https://www.amazon.com/dp/B01H1IFT54/ref=cm_sw_r_cp_api_v0W4ybAC71YJM) with either the knife tip or the smallest tip. I turn the temp to the highest setting. Works great. Sometimes I have to make a couple passes but as long as the straight edge doesn't move it's not an issue. If it does move I just take my time to reset it. Webbing takes a little longer but again I just make a couple passes and it all works out.
With this can't work? Tabiger Soldering Iron 60W 110V-Adjustable Temperature Welding Soldering Iron with Tool Carry Case https://www.amazon.com/dp/B01H1IFT54/ref=cm_sw_r_cp_api_d4cAybB4D0MQT
Alright, so you basically have 3 options depending on how much soldering you plan to do. If you're just gonna build one or two keyboards and and will never try to do SMD, I recommend this:
If you think you're gonna do this a lot, OR you've already had the cheap iron and want something better, you have two choices:
The Hakko is recommended by basically everyone here, and is widely used in the hobbyist world. I've used the Hakko a few times at TechShop, and it's a good station. However, I've never seen anything but a weller used commercially. I picked up a weller for my own station, I couldn't be happier with it.
No matter which of these 3 you end up you'll be happy.
Heres a good middle of tbe road kit I'm thinking of buying myself off of amazon, it even has a desolder pump sucker. It is the Soldering Iron Kit, Including 60W Temperature Control Soldering Iron with ON/OFF Switch, Tips, Solder Sucker, Desoldering Wick, Solder Wire, Anti-static Tweezers and Stand with Cleaning Sponge https://www.amazon.com/dp/B01MR65RJD/ref=cm_sw_r_cp_apa_7ZzHAbYM5ZP5A
https://smile.amazon.com/Soldering-Including-Temperature-Desoldering-Anti-static/dp/B01MR65RJD/ref=sr_1_11?s=hi&amp;ie=UTF8&amp;qid=1495560179&amp;sr=1-11&amp;keywords=soldering+iron this one comes with everything you'll need and then some and gets good reviews.
I have this one https://smile.amazon.com/X-Tronic-3020-XTS-Digital-Display-Soldering/dp/B01DGZFSNE/ref=sr_1_14?s=hi&amp;ie=UTF8&amp;qid=1495560179&amp;sr=1-14&amp;keywords=soldering+iron and absolutely love it, but it doesn't cost a bit more.
https://www.amazon.com/dp/B01MR65RJD?psc=1
if its only for one time...
I decided to setup a spare pc on this desk... many workbenches I've been researching included one and it does make sense.
Just ordered Soldering Iron Kit, https://www.amazon.com/dp/B01MR65RJD/ref=cm_sw_r_cp_api_fzBxzbDWE45QX due to its very high rating and reviews.
The multi tool is still under investigation.
Came with the iron. I believe it is this kit on amazon:
https://www.amazon.com/Soldering-Including-Temperature-Desoldering-Anti-static/dp/B01MR65RJD/ref=sr_1_11?s=hi&amp;ie=UTF8&amp;qid=1520309067&amp;sr=1-11&amp;keywords=soldering+iron
I used these fans:
https://www.amazon.com/gp/product/B071WMHNG5/ref=oh_aui_detailpage_o07_s01?ie=UTF8&amp;psc=1
https://www.amazon.com/gp/product/B009NQLT0M/ref=oh_aui_detailpage_o07_s01?ie=UTF8&amp;psc=1
This soldering iron:
https://www.amazon.com/gp/product/B01MR65RJD/ref=oh_aui_detailpage_o05_s00?ie=UTF8&amp;psc=1
The screws mentioned in the video (bought them, and used the ones that came with the printer)
And I printed off these files:
V2_5015_CR10_tevoEZPrintDuct4
v2_CR10_TevoGeneric_Base
v2_CR10-TevoWireStrain
Any opinions on this ANBES soldering kit?
Looking to jump into the world of self-built mechanical keyboards but don't want to purchase a higher end kit that I may or may not use.
Follow on, they're cheap: https://www.amazon.com/ANBES-Soldering-Iron-Kit-Electronics/dp/B06XZ31W3M/ref=sr_1_3?ie=UTF8&amp;qid=1549820394&amp;sr=8-3&amp;keywords=soldering+iron
Both of those options seem overly complex considering my skill level and the size of this PCB which is about 1/2” wide. I bought duplicates of everything though because I anticipated messing up somewhere.
The tip is the smallest of this set:
https://www.amazon.com/dp/B07CTLZBHQ/ref=cm_sw_r_cp_api_i_Juq1Cb4ZV5CJP
The iron is this one:
https://www.amazon.com/dp/B06XZ31W3M/ref=cm_sw_r_cp_api_i_SMq1CbW3YJ15W
The solder is this:
https://www.mouser.com/ProductDetail/590-4885-227G
Is this soldering kit any good?
https://www.amazon.com/ANBES-Soldering-Iron-Kit-Electronics/dp/B06XZ31W3M/ref=sr_1_1?ie=UTF8&amp;qid=1538618726&amp;sr=8-1&amp;keywords=solder+kit&amp;dpID=51cIDrNtObL&amp;preST=_SY300_QL70_&amp;dpSrc=srch
I want to get a cheap kit and practice de/resolding my old CM board and eventually buy a higher end kit. Will this kit be enough or do I have to go with something more expensive?
What about these? Which one do I pick?
ANBES Soldering Iron Kit Electronics, 60W Adjustable Temperature Welding Tool, 5pcs Soldering Tips, Desoldering Pump, Soldering Iron Stand, Tweezers https://www.amazon.com/dp/B06XZ31W3M/ref=cm_sw_r_other_apa_i_6D-BCbR2BG953
Anbes Soldering Iron Kit, [Upgraded] 60W Adjustable Temperature Welding Tool with ON-OFF Switch, 8-in-1 Screwdrivers, 2pcs Soldering Iron Tips, Solder Sucker, Wire Cutter,Tweezers,Soldering Iron Stand https://www.amazon.com/dp/B07GJNKQ8W/ref=cm_sw_r_other_apa_i_hF-BCb4RY4RZZ
Or do you pick something else entirely?
I own this one, it's alright, especially if you're not planning on doing a ton of soldering
you'll pretty much have to get a soldering kit but they are pretty cheap on amazon.
There have been a few posts in /r/DIY recently about making them (this or this for example) reading the comments there will probably help. /r/RetroPie/ will also be a good resource, people are always posting their latest builds. I haven't done one like this personally but reading those makes me think I could if I wanted to.
As for 3D printing, check your local library. I know a few locally are starting programs for making stuff with a 3D printer and there are lots of plans for a case online (here for example)
I know I really didn't answer your question but hopefully I was helpful. Look forward to seeing what you end up making!
It's too much fancy junk stuck into a non-ergonomic handle with a way too long working distance. It also isn't grounded, unless you connect that ground terminal to something, and if it's powered from a laptop supply could have RF transients of 100-300V at the tip, which could destroy ESD-sensitive components. If you do ground it, you could still have problems if your ground lead has high RF impedance.
You can do everything you need to do with a cheap plug-in iron like this one, recommended a couple days ago by another redditor:
https://www.amazon.com/ANBES-Soldering-Iron-Kit-Electronics/dp/B06XZ31W3M/ref=pd_ybh_a_2?_encoding=UTF8&psc=1&refRID=RKKZHK5HD74K1HXDXG04
I wouldn't even buy one of those for field work, because I have a butane-powered iron that works just as well and isn't ever going to have a CPU crash.
That said.. people do use them and find their performance acceptable so they can't be completely garbage.
Wow, thanks for taking the time to explain this to me in detail, I really appreciate it. I fixed the link for the power supply, but it's basically just a 12V 5A (60W) power supply, so I think it should be sufficient.
I'm planning on picking up a soldering iron since I don't have one, I was looking at this set.
Just so I'm clear, when I want the panel on, I send 5V to the MOSFET to open it, and to control the "brightness" of the panel, I use PWM?
If you're just going to be soldering switches, most any basic soldering kit will do fine. You should also get some Super Lube and Band-Aids to lube your stabilizers. Zealios are going to be the closest switch to Holy Pandas that you can find on kbdfans, though the different spring weights do change the feel a lot. You should order a switch tester pack with the different weights to get a feel for what you like.
I bought this one: https://www.amazon.com/ANBES-Soldering-Iron-Kit-Electronics/dp/B06XZ31W3M
It's cheap. It's chintzy. But it works just fine, and for occasional DIY stuff, it's perfect.
oh lol the ebay link wasn't there for some reason when I originally replied, now I see it clearly says °C on the dial
Anyway, I've heard the one you linked is fine for quick soldering work. It would probably work for you, but that stand is kinda iffy in my opinion. I would prefer a wire stand that encloses the entire iron so that it's a lot harder for it to fall off and burn something. For a cheap-o set, this one seems pretty okay and is cheaper and probably better than the eBay one: https://www.amazon.com/ANBES-Electronics-Adjustable-Temperature-Desoldering/dp/B06XZ31W3M/ref=pd_lpo_vtph_469_bs_t_1?_encoding=UTF8&amp;psc=1&amp;refRID=MP976EM3NYM02Y0YG0FM
I got a Tenma 21-10120 soldering station from my local MicroCenter for around $60. It has a digital readout and shows not only the temperature you set but also the actual current temperature of the iron. It didn't come with anything else, though, so I had to also get solder core, desolder pump, solder wick, wire cutters, and for the heck of it a brass tip cleaner. Altogether, my set probably came to just under $100.
Semi-related, always wear eye protection when soldering. I also use nitrile gloves to reduce the risk of lead poisoning. I still wash my hands after solder work, but that's mostly to clean the sweaty feeling off my hands from being in gloves.
Not sure if you still need help, but from what you describe, I think that this is a great kit for you. It's cheap and provides enough power to do what you need to do.
This is the iron i ordered. Comes with 5 tips. Looks like a couple are pretty small. https://www.amazon.com/gp/product/B06XZ31W3M/ref=ask_ql_qh_dp_hza
25w: http://www.amazon.com/ECG-J-025-Watt-Soldering-Iron/dp/B0002GLZM4/ref=sr_1_5?ie=UTF8&amp;qid=1323322365&amp;sr=8-5
Desolder iron...fantastic unit: http://www.amazon.com/ECG-J-045-DS-Watt-Desoldering-Iron/dp/B00068IJSG/ref=sr_1_2?ie=UTF8&amp;qid=1323322365&amp;sr=8-2
There are other versions as well, just search ECG soldering
You have to have good temperature regulation and a bit of patience to make wick work. I use a desoldering iron which works well but struggles a bit with cheap lead free solder and makes your hand sore pumping the bulb thing over and over.
http://www.amazon.com/ECG-J-045-DS-Watt-Desoldering-Iron/dp/B00068IJSG/ref=sr_1_2?ie=UTF8&amp;qid=1458832039&amp;sr=8-2&amp;keywords=desoldering+iron
there is this, but still more expensive than the radioshack ones that work just fine.
https://www.amazon.com/ECG-J-045-DS-Electric-Soldering-Temperature/dp/B00068IJSG
It works pretty well, but it tears through tips. I would say that one or two keyboards is about the life of a tip. It also starts to cool off if you do too many switches at once. However if you desolder and remove like 3 switches at a time it works great.
You would need a desoldering iron.
The process is tough and time-consuming, but it's pretty much your only option.
I've had really good success with a desoldering iron. It has generally worked a lot better for me than solder wick, although I've never used flux, as I see other people here recommend. I do often add some rosin core solder with lead to the joints, though, in order to lower the melting point.
I'm a huge advocate for desoldering irons honestly. It's super easy to use once you get used to it. Squeeze, apply desoldering iron to the solder point, melt, release, pull away and clear it.
It doesn't get leads 100% clean but those few it doesn't, it's just a small amount stuck in an awkward position.
EDIT: It's morning, I'm not awake and spelling is the enemy.
I recently bought a cheapo desoldering iron that I haven't had a chance to burst out, this one here and while I haven't used it yet logically it seems to be the easiest way to desolder as long as it works. You almost even could get a free hand if you were clever with it.
As an avid hater of desoldering braid, $25 for that tool was worth it to save my frustration.
https://www.amazon.com/gp/product/B00068IJSG/ref=ox_sc_sfl_title_1?ie=UTF8&amp;psc=1&amp;smid=ATVPDKIKX0DER
Works very well.
Here is how NASA would splice that wire :). All you need is a decent soldering iron and a little bit of solder. Do it outside, especially if you are using lead based solder. A little heat shrink tubing and you can have that cord back in working order, even if it's a tiny bit shorter :).
There should be two wires inside that cord though: one for positive, and one for negative- make sure not to let these wires touch each other!
Milkshake
thank you :D
Hard to say... I personally enjoy doing little electronics projects from time to time, so in my case, I already had a soldering station on hand, and I use it probably once a month or so for various things. Chances are if you haven't needed a soldering iron in your life up to this point, that you will rarely have a use for one later on.
While it's certainly easy to spend a decent amount of money on a nice soldering station, a cheap iron like this one on Amazon would be fine for jobs like this. A small spool of solder will run you about $4 dollars. You could find similar prices to these at Radio Shack as well.
I was hoping it didn't have to come to this.
Do you think this tool would be enough for one time usage?
https://www.amazon.com/Hobbico-Soldering-Iron-60-Watt/dp/B0006NGZK0/ref=sr_1_7?s=hi&amp;ie=UTF8&amp;qid=1475078341&amp;sr=1-7&amp;keywords=soldering
I'm not sure what else I can use a solder for.
Thanks.
You really don't need anything special. Just make sure it has a good pointed tip. This or something similar should be good if your just changing LEDs every now and then.
Also don't for get flux!
J&L 60 Watts Soldering Iron, UL listed by J&L http://www.amazon.com/dp/B0006NGZK0/ref=cm_sw_r_udp_awd_tjKXtb0TK5AQQ
MG Chemicals 835 Liquid Rosin Flux, Non Corrosive and Non Conductive residue MG Chemicals http://www.amazon.com/dp/B0080X79HG/ref=cm_sw_r_udp_awd_WlKXtb1MS6ZZ8
http://www.amazon.com/J-L-SI60-Watt-Soldering/dp/B0006NGZK0/ref=sr_1_7?ie=UTF8&amp;qid=1450988633&amp;sr=8-7&amp;keywords=soldering+iron
http://www.amazon.com/DMiotech-0-6mm-100G-Rosin-Soldering/dp/B008LTIJV4/ref=sr_1_15?ie=UTF8&amp;qid=1450988752&amp;sr=8-15&amp;keywords=60+40+solder
You burned up your transformers because you were drawing way more power than they were rated for.
Every load has a particular impedance at a particular frequency. No offense but it doesn't sound like you're at the level of optimizing a load for active/reactive/apparent power.
If you want to do it semi-safely, buy a variable transformer like the one I linked. Dial it down to zero, then increase the voltage slowly and measure the AC current flowing to your load while you do so. Ensure it stays below the limit of the variac and below the point your iron melts.
If you are remotely confused by any of this then DON'T DO IT. A soldering iron is something you hold in your hand - great way to get more than your recommended daily value of electricity.
Best, cheapest, and safest option.
Is even one like this too expensive? Pretty much any iron is usable.
This is why I love amazon.
http://www.amazon.com/60-Watts-Soldering-Iron-listed/dp/B0006NGZK0/ref=sr_1_1?ie=UTF8&amp;qid=1382719530&amp;sr=8-1&amp;keywords=soldering+iron
This solution requires a soldering iron, which i currently do not own. Cheapest on amazon i can find is this. I have no skills in soldering but a reviewer of the product you linked said it was fairly simple to do. I'll keep this option open.
In the last few weeks, I've been researching the crap out of the craft of stained glass. It just looks so much fun and the final product is actually nice looking even if you mess it up! So I've made a list of all the supplies I'll need to get started on it. And the two most important tools for the job are a solder iron and a glass cutter! So these are definitely needed to start making stained glass art!
Chuck Finley
I watched the innerfedility's video about the crack, you have any idea what are the essential tools that I need to build one? I found this on amazon just for $9 [http://www.amazon.com/60-Watts-Soldering-Iron-listed/dp/B0006NGZK0/ref=lp_13837371_1_1?s=hi&amp;ie=UTF8&amp;qid=1426815579&amp;sr=1-1], is this good enough to solder the kit?
Any old iron will work. I used this $9 iron to fix my Hubsan many times.
I have a Hako now and it is MUCH nicer and easier to use but a pencil iron will get the job done for small projects like the Hubsan. If you plan on doing scratch builds or other projects that require soldering I highly suggest getting a variable temperature iron with integrated thermostat.
Battery
Charger
Loader
[Solder gun]
(http://www.amazon.com/gp/product/B0006NGZK0/ref=ox_sc_act_title_4?ie=UTF8&amp;psc=1&amp;smid=AMH4W1K8OCGMX)
BBs
Deans
Does everything look compatible before I pull the trigger on the order.
If I think of any others, I'll add them, but that's a good start from me.
I've been a hobbits soldering for about 25 years now, but have done a bit in the professional field. For about the last 15 years I've used a Weller WM120 as my primary hobby iron with a super low end SP23LK 25 watt iron for heavier duty things. On my bench in the office I used a Hakko 936 which is a great unit, but it's pretty spendy for a home gamer.
About two months ago I saw an EEVBlog video on a chinese replicate of the Hakko936 and Dave had a lot of really good things to say about it during his teardown. Clive has also done a video on this same iron, and uses a Yuhua soldering station as his regular bench unit. This prompted me to buy one from Hobbyking about two weeks ago and I've been very happy with it so far.
Some notes: The station slides around on my plastic covered table, as does the iron stand. This was easily resolved by adding a couple little rubber feet to the bottom of both. Also, the iron stand is VERY light and easily picked up when you're attempting to retrieve the iron, but simply adding a little bit of weight in the bottom resolved that. For $30 shipped to my house, It's pretty legit. Can use Hakko tips on it as well.
I have been looking for the same thing as you, and here have been some of the ones I've been considering:
https://www.sparkfun.com/products/10707
http://www.amazon.com/Aoyue-937-Digital-Soldering-Station/dp/B000I30QBW/ref=sr_1_1?ie=UTF8&amp;qid=1369866027&amp;sr=8-1&amp;keywords=aoyue+937
http://www.amazon.com/Weller-SP23LK-25-Watt-Soldering-Iron/dp/B0009ZD2AG/ref=sr_1_4?ie=UTF8&amp;qid=1369866094&amp;sr=8-4&amp;keywords=weller+soldering+iron
The first two are temperature adjustable which is a huge plus, however the Weller would suffice. Hope this helped!
Looks like you've started down the road to learning how to make your own cables, and you need some guidance while you're practicing.
This page has a nice picture of good, bad and ugly results. Yours are not bad for a beginner but ... ugly.
This set of search results will provide lots of information. Read as much as you can.
Here's what I use for guitar cable soldering tools. The links are for explanation. You don't have to get them at Amazon. An electronics store will have them. You may decide it's less expensive to buy the patch cables. But, if you are a do it yourself type, the tools will pay for themselves.
Weller 25W iron Get some extra chisel tips. They get destroyed quickly by noobs.
Helping hands
Wire stripper
Solder sucker
Brass wool solder iron cleaner
63/37/resin core .6mm solder
I have one those wood-burning irons. Kind of like this one - link. I believe that is pretty much the same thing. And it's from a dollar-store. I don't mind if it will get solder on it.
https://www.amazon.com/Weller-WSB25WB-25-Watt-Barrel-Woodburning/dp/B000EMBEY0
This is the exact kit I use with all the tips
That may work but I cannot say. This is a cheap kit that has the tip I'm talking about.
Hi there, here is a link to a pen on amazon with a few tips you can use.
I really like this torch:
http://www.amazon.com/Blazer-GT8000-Shot-Butane-Torch/dp/B000NCZU0A
Can't go wrong, $48, best flame I've seen and more capacity for tane.
You want a good torch - the ones for plumbing are decent, but won't be optimal for what you're looking to do. The "cone" you were talking about just adjusts how complete the combustion is - a yellower flame means more air is added and less pure fuel is burning. A good torch will burn the fuel very efficiently and give you a pure blue flame, which in turn will eat up all the fuel, and leave behind no undesirables.
This is a good torch - but very powerful http://www.amazon.com/Blazer-GT8000-Shot-Butane-Torch/dp/B000NCZU0A/ref=sr_1_cc_1?s=aps&amp;ie=UTF8&amp;qid=1370986935&amp;sr=1-1-catcorr&amp;keywords=blazer+bigshot+torch
This for sure. The GT8000 bigshot is the best I've seen and definitely worth the extra few bucks
Here is the desktop version of your link
This is the gold standard for dabs. https://www.amazon.com/Blazer-GT8000-Shot-Butane-Torch/dp/B000NCZU0A/ref=sr_1_4?crid=1XT2R1MPY0DDG&amp;keywords=big+shot+gt8000+blazer&amp;qid=1564424473&amp;s=gateway&amp;sprefix=GT+Blas%2Caps%2C187&amp;sr=8-4
There's no way this torch could get a TI nail red hot in 5 seconds. Creme brulee torches heat at 2500 *C and it still doesn't heat up a TI nail red hot in 5 seconds. The best torch I've seen is a blazer big shot. http://www.amazon.com/Blazer-GT8000-Shot-Butane-Torch/dp/B000NCZU0A Little more than a vector torch, and heats up TI faster.
For an extra 20$ you can get a blazer GT8000 and save your banger. Also butane is stupid cheap.
Just got my “Blazer” torch from Amazon, and it works fantastically. The flame is steady and long for cooking it any other needs. It’s also very durable and doesn’t seem like it will break anytime soon
Blazer GT8000 Big Shot Butane Torch https://www.amazon.com/dp/B000NCZU0A?ref=ppx_pop_mob_ap_share
Much cheaper from Amazon
Butane torches, I've loved my Newport (it comes in other colors if gold isn't your thing). My guy has one of those and a Blazer Big Shot which is nice as well. Both have stood the test of time. The Newport you can operate with one hand, the Big Shot is possible to operate with one hand but slightly more difficult. I ordered a 6-pack of Newport butane with my torch and it's performed wonderfully. A cheap Bernzomatic torch from Home Depot will conk out on you, so just factor that in to whether you want to make another trip to pick up a new torch in 6 months, or buy a slightly more expensive one that'll last twice as long if not longer.
If you're going the propane route and have a TI nail, just make sure you don't overheat your nail. Titanium reacts with oxygen when it reaches a certain temperature, creating titanium oxide (the white coating you see on some TI nails) and titanium dioxide dust, which you can inhale and is definitely not good for you. You can reach this temp with butane or propane, but because propane burns about 1000 degrees (F) hotter than butane, you can reach that temp much easier. Those big blue propane tanks at Home Depot run about $5 though, if you're looking for a cheap and efficient route.
Blazer GT8000 Big Shot Butane Torch https://www.amazon.com/dp/B000NCZU0A/ref=cm_sw_r_cp_api_v1HpybS611S73
It's way worth it
How are you cooking? I'm mostly familiar with sous vide, but it has some similarities with reverse searing. I use a powerful butane torch to finish my steaks and burgers. My dad, when he has some extra hands around, does a combo with a super hot butter filled cast iron. One person torches the top and the other bastes with the butter, but I think this is more complicated than needed. I'm very happy with just a torch. I use https://www.amazon.com/Blazer-GT8000-Shot-Butane-Torch/dp/B000NCZU0A
I use the torch for dabbing too, it's very well made.
Blazer GT8000 Big Shot Butane Torch
I got one of these for my birthday. It's not as powerful as one of the nozzles that fits on the large butane tanks, but it's a great compromise between compact size and power.
$50 with free shipping on Amazon or $40 from this hardware store. So it's just $50 max for a brand new torch... Not $85 for that shitty, used combo. I need what you're smoking if you think you have a good deal haha!
Good try though.
Blazer GT8000 Big Shot Butane Torch https://www.amazon.com/dp/B000NCZU0A/ref=cm_sw_r_cp_api_i_3t30DbD2MDYYV
really had to dig deep
https://en.wikipedia.org/wiki/Butane_torch
https://en.wikipedia.org/wiki/Propane_torch
https://www.amazon.com/dp/B000NCZU0A
https://www.homedepot.com/p/Bernzomatic-14-1-oz-Propane-Gas-Cylinder-304182/202044700
It's all personal taste, there are some torches that require you to hold the "trigger" down to keep it lit and there are some that only require you press the ignition once.
I prefer the torches that require you press it once, when it comes to torches you absolutely get what you pay for.
You might also want to take into consideration a torch that has "child safety" features, they can be a real pain if you are consistently dabbing and don't have children or somehow have a system that guarantees child safety.
https://www.amazon.ca/Blazer-GT8000-Shot-Butane-Torch/dp/B000NCZU0A
This is the torch I use, simple design, large flame, heats up my rig way quicker than any other torches I've used.
I'm not sure if you could caramelize sugar with this torch as the flame is massive. But if you plan on dabbing a lot and can keep it away from children I highly recommend it.
Highly recommend this one. Friend and I both have one and we've been using them for ~3 years. Best torches we've used.
Here is the mobile version of your link
I've had this torch for 4 years now and it still works like the day I bought it. It's also very good on butane.
MAPP would be a bit unwieldy, imo.
I use this guy: http://www.amazon.com/ALL-PURPOSE-LARGE-BUTANE-TORCH-SOL-310-00/dp/B0058EDUYG
It works great. Gets plenty hot, nothing on it has melted even though I'm right up in the action with it, easy to refill but doesn't go through the butane too quickly, and has an adjustable flame (which is really key for a lot of things). Eventually I'll upgrade to acetylene, but for now it works great.
If you want a step up from that the Blazer gets consistently good reviews - http://www.amazon.com/Blazer-GB2001-Self-Igniting-Butane-Micro-Torch/dp/B000VML7KO/
http://www.amazon.com/Blazer-GB2001-Self-Igniting-Butane-Micro-Torch/dp/B000VML7KO
i have one of these and have used it like a stove burner to boil water by putting it between two rocks and putting a pot of water on top. it's also good for starting fires, etc... and it's just a really good torch to have around. it's easily refillable with normal butane canisters.
I would advise against trying to fix that one and just get a new one
https://www.amazon.com/Blazer-GB2001-Self-Igniting-Butane-Micro-Torch/dp/B000VML7KO
I'll second Blazer, I've been using this one daily for 11 months and it's still going strong.
I've always been a big fan of the performance of the Blazer GB2001 Plus it looks cool!
Psh. That stuff is child's play. Try this.
http://www.amazon.com/Blazer-GB2001-Self-Igniting-Butane-Micro-Torch/dp/B000VML7KO/ref=sr_1_2?ie=UTF8&amp;qid=1344476173&amp;sr=8-2&amp;keywords=welding+torch
I like the portasol https://www.amazon.com/Weller-P2KC-Professional-Self-igniting-Soldering/dp/B000WOHSHM
because you can adjust the heat to do small or large jobs. and because you dont need an extension cord, its perfect for car work.
but just keep an eye on the tip so you dont burn it. if it turns blue, back it down. you just want it hot enough to get the work done.
Yeah, so far this is the frontrunner. Thanks for the comment!
I have only used it on my bike a couple times, but I love my Weller Portasol
It heats up fast, solders well, and the little butane exhaust port on the tip works perfectly for shrink tube.
This is the one I use for both through-hole, smd, and smd rework. It has never failed me.
https://www.amazon.com/gp/product/B000WOHSHM/
Soldering is easier then you think and that's coming from someone who is pretty crappy at it. Lots of good Youtube videos on it.
I suppose you could probably use conductive wire glue too, but that looks messy.
Okay, I've never tried this but I would recommend trying to use 1206 SMD LEDs, they're about 1/8x1/16 of an inch. The one I linked makes a red-orange when lit and runs about $10 for 100 LEDs. Since you need it to look like trailer lights I'd connect them with hard steel, like a paperclip bent/cut how you need it. 1206 is pretty big for SMD LEDs, but in case you can't solder it you can use electrically conductive adhesive. Just dip the end of the wire in there and get it to stick to the LED or apply with a toothpick.
You can try something like a conductive glue and apply it with a toothpick.
http://www.amazon.com/Sciplus-Electrically-Conductive-Soldering-Wire/dp/B000Z9H7ZW
In the reviews on there some guy talks about how he fixed an internal connector on his phone with it so worth a shot I suppose. I think taking it to a professional might cost you enough to warrant actually buying a second hand replacement phone if you so desire.
You can buy power buttons premade online
If your looking for a cool button you'll need to find one that is a momentary switch so you can hold it in to force power off your pc
A button like this is pretty bitchin http://r.ebay.com/sdBS4d but you would need to find one that is momentary
I don't recommend soldering to the board in case you were thinking that. get a cable that connects to the mb and splice it/connect it to your switch
If your concerned about soldering you can use wire glue: https://www.amazon.com/dp/B000Z9H7ZW/ref=cm_sw_r_cp_awdb_F5OXzbPRZPQG1
They also sell glue which is electrically conductive. I'll try to find a link for you. You might try that.
Here it is: Sciplus 400.
Amazon search terms: electrically conductive adhesive
I was thinking something like this:
http://www.frys.com/product/2931025
but I have not actually done it.
I once broke off the end of touchpad ribbon cable for a laptop -- I scraped the new end with an exacto knife and inserted into connector and another soldered to a board.
they also have conductive greese:
http://www.frys.com/product/4707359
If you do that you would need to put little bit on the traces and then drops of super glue on both sides and between each trace.
Or this on Amazon
http://www.amazon.com/Sciplus-Electrically-Conductive-Soldering-Wire/dp/B000Z9H7ZW
and maybe you can find something like this in the auto parts store
http://www.amazon.com/Permatex-21351-Electrically-Conductive-Defogger/dp/B000HBGKWE
And, oh yeah, that stuff you linked at RadioShack looks good, too.
The scraping part will be hard to do without breaking so be carefull.
Without seeing pictures I don't know if this would help, but they make a conductive glue that might be appropriate.
No problem at all. Just my sense that most that care enough to buy a DuPont would not use a Bic to light a cigar. I also use a Bic (actually have to use Scripto) along with this when traveling.
Thanks for the feedback!
For the water, I agree that I brought too much water. When I went to Olympic last year I only carried a liter of water with me at a time, but for Big Bend there is only a few streams that generally dry up in the summer (can't be relied on) and the Rio Grande. The route we went only came within about 5 miles of the Rio Grande, and the creeks were reduced to stagnant puddles by the time we went. The Big Bend website suggests a gallon per person per day of water, and we brought 4 gallons between us for 3 days, and that was still too much. I am a hyper water conservationist when I backpack, and I think I can get by with about 2 liters per person per day going forward. I had never done a desert trip before, so I went conservative to be safe.
The trash compactor bag is an intriguing idea. I have historically just done the ducks back to keep my stuff mostly dry and the dry sack to keep my sleeping bag dry so I would never freeze to death, but I like the idea of the compactor bag without the dry bag. I think I messed up my sub kilo by using a compression sack for the first 6 years that I owned it.
I have been eyeing those thermarest xlite pads. My current thermarest is about 10 years old and not very thick.
The rain jacket umbrella combo is something I have been testing recently. The Patagonia jacket I have is essentially a wind shirt, so anything more than a drizzle goes straight through it. So without an umbrella, I would be almost without rain gear. The umbrella has some other benefits like being a wind break, allowing easy night time bathroom breaks, and makes it easier to check maps while its raining and such. I think I will get an OR Helium at some point and bring that whenever it is a low chance of rain, or for particularly long trips.
I searched a bit for a torch style lighter, and these are the only ones that I have found:
Soto Which just loads generic bic style lighters into it for fuel.
Gizga Which requires you to buy separate fuel and recharge it.
I tried the Gizga one time, and I could only get a tiny bit of fuel to charge it, so it only lasted a day or two. I might have a defective unit, so I may try getting another one.
Thanks again for the advice! I will definitely test your ideas out!
$20 from Amazon. Seems like a lot of money, but I think I'm in anyway.
I was having the same issues, likely related to my filling technique. I stumbled across the Soto pocket torch. It uses any non-bic cheapo lighter. When the lighter is empty you open the torch, throw it away and put a new one. I got 20 lighters for $10.
Soto Pocket Torch https://www.amazon.com/dp/B0046UZRNU?ref=yo_pop_ma_swf
The flask miss_mchammerpants is pretty solid. Another neat tool I've not seen around often is this converter kit for lighters. It turns a normal cigarette lighter into a mini torch. Happy holidays!
Opinions on these three soldering irons? It's only use will be for keyboards, and I don't anticipate building them as often as we all dream, haha. But I do want one that'll do the job well without going over the $100 mark, and preferably under $80 if any of these are decent.
Hakko Dial type temperature limiting soldering iron FX600 https://www.amazon.com/dp/B006MQD7M4/ref=cm_sw_r_cp_api_pBXMAb3DXH857
Hakko FX601-02 Adjustable Temperature Controlled Soldering Iron, 67 Watts https://www.amazon.com/dp/B00FZPSX3G/ref=cm_sw_r_cp_api_UDXMAbYNHEAWS
UY CHAN Upgraded Original TS100 Digital OLED Programmable Pocket-size Smart Mini Outdoor Portable Soldering Iron Station Kit Embedded Interface DC5525 Acceleration Sensors STM32 Chip Fast Heat (B2) https://www.amazon.com/dp/B01MDTO6X7/ref=cm_sw_r_cp_api_CEXMAb7A2CDNW
I use this one at work all the time - Hakko FX-600
For $44, it's a good deal. You want an iron where you can set temperature and change the tips. A cheap chinese soldering station with temperature control will be in the $50-70 range.
Ones similar to this are recommended a lot on this sub.
Some people like Xikar lighters because the lifetime warranty.
I've used both of these for a couple of years without any problems.
psssst...
Me as well.
Also consider one of these. They get recommended pretty regularly.
But, honestly, my zippo+jet drop-in like what /u/katmaipinnacles recommended has worked just fine so far.
Nice. Get yourself a ceramic tip tweezers and a torch if you don't already.
It makes building coils a lot easier by not having to put your atty on a mod to heat up the coil. You can just hold the coil with ceramic tweezer and heat it up with torch.
Happy vaping!
Well I say broke, there's a possibility it's a lighter issue. i've been using the honest torch which was vaporize perfectly (until it broke) and this one which worked but it kept combusting....but now I can't even combust or vaporize it no matter what flame size I use.
If it isn't the ligher, I don't know. It's almost as if the airflow is not going through the vape properly cause the weed browns a bit but no vapor comes out.
Far and away my favorite is this from Amazon. The 503 torch is sold by a ton of sellers, holds a copious amount of butane, easily adjusts flame height, and includes a soft flame.
Its pretty much perfect and even fits snugly in my herfadors.
This is the one I have and it works for heating my titanium nail
It's a bit on the bulky side, but for the price and features it's worth it. The 503 Pen Torch
https://www.amazon.com/UNISHOW-Welding-Soldering-Lighter-Unishow/dp/B007A9YSPW/ref=sr_1_3?ie=UTF8&amp;qid=1479406310&amp;sr=8-3&amp;keywords=503+torch+pen
edit:
When your lighter runs out of fuel, it is important to purge and refuel properly. This may be the problem. Who knows? I got a lighter with a 5 pack that also sucked.
This lighter is a pretty good deal, a few of us have one. I have a $60 lighter, but to be honest it's not that much better for doing the same job. I have had this lighter for over a year, it does the same thing. My old standby is a $5 torch from walmart.
I would encourage you to give wood matches a try.
Not too spendy and works great.
http://www.amazon.com/gp/aw/d/B007A9YSPW/ref=mp_s_a_1_2?qid=1394249757&amp;sr=8-2
I bought my BBQbuy Mini Jet Pencil Flame 503 Torch Butane Gas Fuel Welding Soldering Lighter from the seller UNISHOW. Shipped from Texas and was delivered quickly. This was in November.
As for gear how about these? Also what do you recommend
Tightvac
Lighter
Smoke Buddy
Grinder
Pipe
I have to desolder a bunch of switches, and it sucks. I was looking for a specific desoldering tool; would something like this fit the bill?
That's an investment I'm not sure I'm ready to make.
Have you had any experience with the cheaper versions? ie: https://www.amazon.com/Tenma-21-8240-Vacuum-Desoldering-Iron/dp/B008DJRYIG
Hakko.
Cheapie iron that I bought.
It wasn't one of the easiest things to desolder. I lifted a pad for the first time and had to hand wire one switch. I used one of these and soldering wick to do the whole thing.
I love the build quality and layout of the board, but I need MX clears, so it was worth desoldering the thing IMO even though there were a few headaches.
Okay, just making sure people know that cheap, manual pump desoldering irons already exist.
It's not exactly hard, but it's a pain in the ass. You need a solder sucker of some kind, then you heat the solder with your soldering iron and suck it away with the sucker.
But I'd really get at least a cheap soldering iron with integrated sucker.
Something like this:
https://www.amazon.com/Tenma-21-8240-Vacuum-Desoldering-Iron/dp/B008DJRYIG/
Makes it at least easier.
And always be careful and make sure to remove as much solder as possible, and make sure not to let things get too hot.
I got one of these a while back and it makes desoldering really easy. I'd recommend you get one and do it yourself - it would likely be both quicker and cheaper :)
I use this. Works great.
I used a crappy hand pump I got from Amazon for $8. I'd give this one a try though.
You could try one of these, it worked good for me. I removed a promicro using it.
https://www.amazon.com/gp/product/B008DJRYIG/ref=oh_aui_detailpage_o09_s00?ie=UTF8&amp;psc=1
I use this for desoldering switches and it works really well and is cheap
Looks the same as the Tenma 21-8240 and a couple others who use the same design:
https://www.google.com/url?sa=t&amp;source=web&amp;rct=j&amp;url=https://www.amazon.com/d/Soldering-Irons/Tenma-21-8240-Vacuum-Desoldering-Iron/B008DJRYIG&amp;ved=2ahUKEwjXtYrZ78DgAhWniVQKHbesCiwQFjAAegQIBRAB&amp;usg=AOvVaw3rpTjysYOUgLzYnlY1eulr
I think 30w and 40w versions exist so something to keep in mind.
I agree with you. One thing to also mention is that OP would most likely have to de-soldering LED's which is a pain.
One great easy de-soldering pump/iron here is a decent option. But it is atill quite time consuming.
Maybe look into a new PCB, plate and stabs?
>he hako is like $200 or something isnt it? I really dont desolder enough to justify that price tag.
Last week someone posted this as a good cheap option: https://www.amazon.com/gp/product/B008DJRYIG
If you really want different switches on a BW X TE, and still have some money left to spend then MAYBE you can buy a desoldering iron, switch holtites, and switches of your own choice. I said maybe because there's no guarantee that the switch holtites could fit just right into the BW X TE's PCB. Just to give a brief run down, holtites makes it so that you don't have to solder if you want to replace a switch. If you're willing to go through this route, I can help you, but I can't be held responsible if the holtites doesn't fit and you've already bought the holtites and desoldering iron, maybe even the switches.
Are you doing it with an iron or an actual desoldering tool? I bought one of these off Amazon and it's not perfect but it works quite well. It just takes some time to heat up and eventually you have to eject a mass of molten solder since it's all stored in the suction tube.
Just a heads up, supposedly this is a really good desoldering iron for the price.
https://www.amazon.com/gp/aw/d/B008DJRYIG/ref=mp_s_a_1_4?ie=UTF8&amp;qid=1502984637&amp;sr=8-4&amp;pi=AC_SX236_SY340_FMwebp_QL65&amp;keywords=Desoldering+gun&amp;dpPl=1&amp;dpID=41SYOSe4FRL&amp;ref=plSrch
For desoldering, I just ordered one of these. Typically I'll use solder wick and some flux but this seemed well reviewed, maybe it's worth it for you to order one and give it a shot?
$14 link for a solid basic soldering iron.
Here's one that costs a little more, but has more adjustability $39 link.
Anything from Weller is going to be pretty good.
Here's a pretty good basic soldering video.
It's not hard, but takes a little practice to get the feel for it. I would recommend finding a broken electronic that you can pull a circuit board out of and just practice soldering by removing parts from the board and putting them back.
Have fun!
Can't go wrong with this, $19.07 shipped with Prime.
http://www.amazon.com/Weller-SP40NUS-Medium-Soldering-Black/dp/B00B3SG6UQ/ref=sr_1_3?ie=UTF8&amp;qid=1398198851&amp;sr=8-3&amp;keywords=weller+40
If you need something safe for smaller projects as well, this would be fine. $41.19 with Prime
http://www.amazon.com/Weller-WLC100-40-Watt-Soldering-Station/dp/B000AS28UC/ref=sr_1_2?ie=UTF8&amp;qid=1398198808&amp;sr=8-2&amp;keywords=weller+40
I guess I'm a fan of weller products. I've had them at home and a shop. I got one of their higher end soldering stations when I was about 11 to build my own battery packs for my R/C cars and it saw a lot of use. Back then we hardwired the leads from the ESC to the motors and batteries between heats for the lowest resistance. (not to mention deans plugs weren't a thing yet, tamiya connectors would melt together with a hot motor/battery combo) I still have it over 20 years later.
I would say 40 watts is about the standard with typical R/C projects. Also, the lower end brands 40 watt irons don't ever seem to create the heat as something of decent quality.
Also, if you don't have something like this yet, pick one up. $7 shipped all over Amazon. Also available at Harbor Freight for about the same price if you have those in your area.
http://www.amazon.com/SE-MZ101B-Helping-Hands-Magnifying/dp/B000RB38X8/ref=pd_sim_hi_3?ie=UTF8&amp;refRID=0TB7X5RYFKZ3SR4EXY1P
a low-end one is good enough. just to solder the mill-max sockets.
that's what I did and this is what I used - https://www.amazon.com/Weller-SP40NUS-40-Watt-Soldering-Iron/dp/B00B3SG6UQ
just add the set of additional tips, so you have something other than a flat one.
Ended up ordering this:
http://www.amazon.com/Weller-SP40NUS-Medium-Soldering-Black/dp/B00B3SG6UQ
Weller 40W Medium Duty Soldering Iron
this is what i bought
http://www.amazon.com/Weller-SP40NKUS-Watt-Soldering-Black/dp/B00B3SG7F0/ref=sr_1_40?s=hi&amp;ie=UTF8&amp;qid=1465181784&amp;sr=1-40&amp;keywords=soldering
http://www.amazon.com/ATH-M50-ATH-M50s-MDR-7506-Headphones-Replacement/dp/B00PL8BLP4/ref=sr_1_1?ie=UTF8&amp;qid=1465181830&amp;sr=8-1&amp;keywords=mdr+7506+replacement+cord
its the golden aux input thing. when i spin that in whatever hole i put it into then at the right angle the sound comes back into the right ear pad. it stays there even if i move it a little.
I use a cheap soldering iron made by Weller. This one is a little cheaper than the Weller I have, though pretty much the same design.
https://www.amazon.com/60-Watts-Soldering-Iron-listed/dp/B0006NGZK0
First result for googling "Soldering Iron" and it's $8.
Interesting. I was thinking one of these used on the glass directly on the other (inside) side of the glass under each of the suction cups. The idea being that it would heat and expand any residual air under each cup and possibly causing the cup to 'pop' off the glass...
Blazer off of amazon. I went through 3 torches from bed bath and beyond before I said fuck it. Best $50 ever and somebody here recommended it to me. Said Torch
https://www.amazon.ca/Blazer-GT8000-Shot-Butane-Torch/dp/B000NCZU0A
It's definitely the best under $100.
Is this a good place to start
Soldering Iron Kit, Including 60W Temperature Control Soldering Iron with ON/OFF Switch, Tips, Solder Sucker, Desoldering Wick, Solder Wire, Anti-static Tweezers and Stand with Cleaning Sponge https://www.amazon.com/dp/B01MR65RJD/ref=cm_sw_r_cp_apa_iJGHAb8XDC58B
Oh FFS
Here you go http://www.amazon.com/60-Watts-Soldering-Iron-listed/dp/B0006NGZK0