Best tapes, adhesives & sealants according to redditors
We found 2,730 Reddit comments discussing the best tapes, adhesives & sealants. We ranked the 963 resulting products by number of redditors who mentioned them. Here are the top 20.
We found 2,730 Reddit comments discussing the best tapes, adhesives & sealants. We ranked the 963 resulting products by number of redditors who mentioned them. Here are the top 20.


Go pro and use JB Weld. Superglue is amateur.
Spray the dash with Plastidip, no glare. If it's unsafe and Nissan isn't budging, fix it yourself or don't drive it. The hope of this going viral and getting fixed isn't worth the risk of killing some kid on a bike.
https://sugru.com/
Sugru Moldable Glue - Original Formula - Black & White 8-Pack https://www.amazon.com/dp/B00EU7DBNM/ref=cm_sw_r_cp_api_i_N2zaBbSDF3BMP
> PB blaster
Allow me to introduce you to Aero Kroil. I used PB Blaster for years, then a machinist friend introduced me to this stuff. You'll never look back.
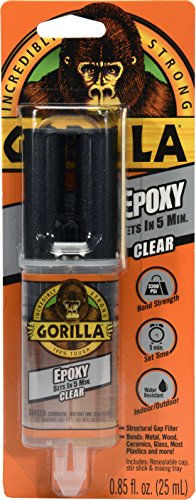
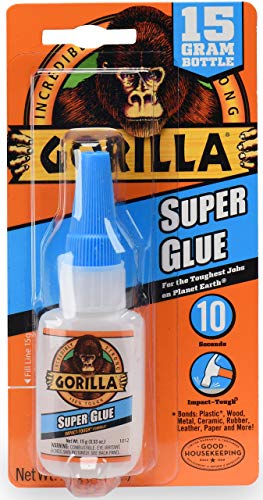
This should do it https://www.amazon.com/gp/aw/d/B001IY82FM/ref=mp_s_a_1_2?ie=UTF8&qid=1497723614&sr=8-2&pi=AC_SX236_SY340_QL65&keywords=gorilla+glue&dpPl=1&dpID=51mHX2GDBrL&ref=plSrch
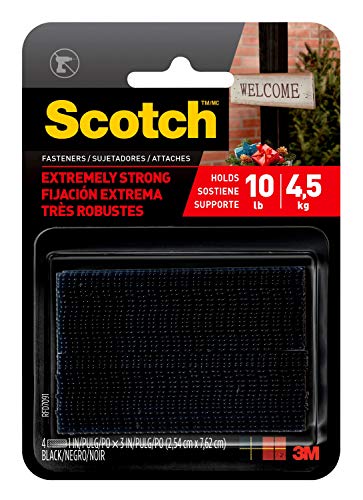
get some double sided fasteners :/
http://www.amazon.com/Scotch-Heavy-Duty-Fasteners-Inches-RFD7091/dp/B00347A8GM/ref=sr_1_3?s=office-products&ie=UTF8&qid=1427065456&sr=1-3&keywords=3M+fastener
Honestly why do people have such boners for fixing shit with half measures when buying a new thing is so incredibly cheap and easy?
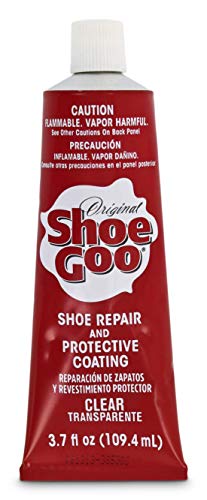
Shoo Goo costs $6
A 5 foot cable costs $0.79
Shoo goo will hold but for how long? How long until the actual wire starts breaking, not just the rubber sheath? You can get 8 brand new cables for the price of one of those shoo goo things.
Just... gah! Why don't people realize that sometimes the simple solution is the best?
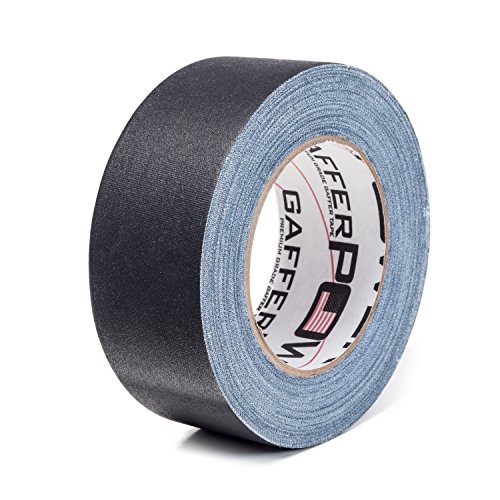
Tip: When that tape wears off, try using real Gaffer Tape. The tape you're using is closer to proper Duct tape, which may annoy you when it comes off (stick and stuff)
This is the tape that road crews use to tape cables to the ground (tile, carpet etc). It's slightly pliable and wont leave any residue when you remove it. It's actually amazing stuff, i use it for all sorts of things
Not sure what exactly Amanda’s tape looked like but.....This is the kind of tape that Kim Kardashian uses for her boobs.
It's a resin cast.
push the drill bit through, and one at the edge to pour the resin in.
The adapter pack you'd need to mount to any rail is $5 on Amazon - https://www.amazon.com/dp/B0006O1ICE/
I've posted this tutorial before, and I'm gonna do it again, for anyone wanting to know how to mount this bad boy. Other people have messaged me saying they've used different adapter mounts and a dremel instead of the JB Weld method. About two weeks now, and still doing great!
 
 
I used this guy's Amazon tutorial on how to put the adapter on, although I got the non-quick set version that comes in seperate tubes.
These are the items I purchased:
Here are the pics of my setup. Please note, I waited a full 24 hours before mounting them. I know people get antsy, but just wait!!! Also, when adjusting the monitors for the first time, don't use too much torque, or you might detach the adapter from the monitor. The scratch marks you see on the back of the monitor, next to the adapter are where I sanded it down. I don't care about the way it looks, since my desk is against a wall. You can probably be a bit more careful if you actually care about the looks. I also sanded off the paint from the adapters so I can get good contact between the rough plastic surface and the bare steel plate. The screws that came with the adapters, as long as I washered them out a little, were perfectly fine to use.
There are still some small adjustments I need to make to the way they are lined up, but this is pretty much 99% done. I highly recommend anyone looking for more desk space to give this a shot.
If it spontaneously separated, it may be due to a bulging battery, and could be risky to put back together. :(
If not, you could try Sugru adhesive. I think /u/PTR_BatterySwaps has shut down his Pebble repair business, but may have some words of wisdom here (/u/foofad might also).
Ballpark $200.. I bought the wood about two years ago and believe it was ~ $80-$100 2x6x8 walnut. The epoxy, tyvek tape, mica powder and a few other things I didn’t have were about $110. Here’s the epoxy and mica powder in case anyone is interested.
https://www.amazon.com/Clear-Food-Grade-Silicone-Sealant/dp/B0063U2RWU
It's an easy way to triple the cost of whatever you're printing.
Congrats, just got mine 2 months ago.
SeeMeCNC forums are awesome. Start reading every new post.
Best upgrade I've done: PEI Bed
http://www.amazon.com/gp/product/B0013HKZTA
http://www.amazon.com/gp/product/B007Y7D5NQ
~$30 in upgrades; all my prints stick and pop off with ease. Also, the underside of every part is glassy and smooth. So good.
Buy "feeler gages" to assist with leveling the bed.
http://www.amazon.com/Stanley-Proto-J000AA-Master-Feeler/dp/B001HWDOK8/
My bed leveling process is kinda like this:
Let's see, what else. If you can spare the cash, I moved to Simplify3d for all my slicing needs ($100~$150 for the license). Love it. If you can't afford it, maybe you'll find a way.
Also, get ready to do a bajillion calibration runs. I mean it, don't be in a rush.
Find a nice 20mm box off thingiverse or whatever, and you're gonna want to print that repeatedly while you dial in your settings. Once that's set, move on to the hollow pyramid, or the 5mm stairs.
I seriously printed at least 20 of each of these while I dialed in my settings:
ASAP, move over to PLA. Prints so much nicer for me than ABS.
Oh, before you go to PLA, make sure you print 3x of the layer fans housings (not just 1x) and order up 2 more of the "squirrel cage" fans (centrifugal fans) from SeeMeCNC. edit: I spliced the single pair of layer-fan wires into three right at the connectors, I didn't bother running extra wire for them.
Oh, and one other big improvement I made was putting connectors in-line with the hot-end and for all the fans. This way, if I have to replace a fan or upgrade the hot-end I don't have to cut and splice wires, I can just pop it off and connectorize another new one. Here are the connectors I used:
That was probably too much info -- just take your time and try not to get frustrated while you get things all set up. It is not a plug-'n-play object, it requires care and feeding.
... oh, and have fun! Whatcha gonna print?
This is a good conformal coating I've used after cleaning of the board to protect the traces:
https://www.amazon.com/gp/product/B008O9YIV6/ref=ppx_yo_dt_b_asin_title_o01_s00?ie=UTF8&psc=1
Gaffer's Tape
Table top facade
Looks like shoe goo. A lot of pitchers use it to protect the shoe on their back foot so it doesn't rip open. I use it on mine and it works really well, it's also cheap. https://www.amazon.com/dp/B002L9AL84/ref=cm_sw_r_cp_apa_i_Y876AbYX1DB0V
Easiest way to fix it. Go to wal-mart or target and buy this or order it from amazon. clean the edges and follow the directions. works perfectly. I did this for 3 of my pieces that broke. It's very clean and will be as good as new. Make sure you don't overapply it so that it oozes out inside. Might be bad for the downstem. It's the cheapest and easiest way to do it. Best of luck! toke on
Edit: Epoxy does not melt or dissolve by acetone so you can clean it with acetone after fixing it too! Source
>There are two broad classes of plastics, thermosets and thermoplastics. A thermoplastic can readily be dissolved or melted, while a thermoset cures and changes. Once cured, it forms a tough, crosslinked network which resists solvents and will degrade instead of melting. Epoxy is a thermoset. The advice to trim or slice it off is good. Solvents like acetone or whatever, unless extremely powerful and dangerous, will have little effect on a cured epoxy. Things that easily swell and dissolve epoxies will do the same with rubber or plastic gloves or portions of your anatomy.
This stuff is magic, I've repaired several hiking boots with similar problems. It will last quite a while.
Get a silicone spray lube it will stay forever and work much better.
This sounds like it might be a case of 'bit off more than I can chew' syndrome, but advice is free. Take it or leave it.
It's not 2 types of resins. It's resin and a hardener. Most modern resins try to make this fairly easy and do a 1 to 1 ratio. This is the chemical 'magic' that makes the liquid harden. As soon as you mix them you have a ticking clock for it to begin to harden, then once hardened, curing fully. Before you mix the two, you can mostly take as long as you want to prep.
Certain resins like Bondo Fiberglass resin use a liquid hardener that you have to measure out and drop into the resin itself. Most modern epoxy style hardeners have simplified the process as described above.
Anyway, depending on the type of wood it might be smarter to stabilize the wood itself under vacuum if possible.
Cactus juice seems to be the standard for this stuff and it does seem to be so for good reasons.
https://www.turntex.com/product/cactus-juice-resin-and-dyes
It's a hardened-upon-temperature resin so you can completely fill the pores of the wood or item, draw out all air bubbles under vacuum and bake at the right temp to stabilize the wood itself.
This has the advantage of making the wood permanently how you want it. You can also pour resin after it's cured if you so choose to make a finished smoothed surface.
I've been looking at a project that requires a good clear resin for a chair and for the price point this seems to be quite reasonable. I do not have any experience with this material yet, but there's a lot of reviews of it. I will say you need to follow instructions about a seal coat.
https://www.amazon.com/Crystal-Clear-Table-Coating-Tabletop/dp/B01LYK2NAG
Hope that helps. There's a lot of Youtube videos out there showing off how to do some of these things.
After you pluck the foam to the shape you want, cover it with some plasti-dip spray rubber.
https://www.amazon.com/Performix-11203-Multi-Purpose-Coating-Aerosol/dp/B0006SU3QW/
It basically glues the rest of the rest of the foam pieces together and makes the foam less absorbant.
Do not try to use the non-spray variety. I tried both and the non-spray variety was a fucking disaster, when it dried it shrunk unevenly which completely warped the foam and it was a pain in the ass to apply evenly. I ended up throwing that foam away.
I sprayed a door/window sensor and magnet with Plasti Dip and then mounted the sensor to the gate and the magnet to the wall. I would have preferred to mount the sensor to the wall and the magnet to the gate, but there wasn't enough clearance between the gate and the wall for the sensor.
I figured I would try it and see if it would fail after a few weeks or not and so far, so good. It has been on for about 10+ months and has survived the weather in Arizona (heat, thunderstorms and sandstorms).
The tape used for mounting (I don't think I used the standard tape it came with) has also held up well. I did make sure to scrub the area with an alcohol swab or two before mounting.
When it is time to replace the battery, I'll remove the coating, which can be peeled off, replace the battery, spray it again, and then remount.
The black coating makes it blend in to the black frame of the gate, so it does not stand out, which is nice, and I am getting ready to do the same for another gate real soon.
(This is my first post, so I'm not sure how to add a picture of it.)
Ok so This might get a bit long. and I apologize if you already know some of this, just being complete
tools:
I get most of this from 3-Rivers because they have everything you'll need but look elsewhere as needed. They also have some videos on there site on how to use the tools.
Taper Tool This will cut the taper for the nock and point. The 5° for the point and 11°C for the nock. Get the right size for the shaft diameter you use.
Fletching jig (answered elsewhere)
fletching glue: I use either Fletch-it or Gorilla super glue
Nock glue: same as fletching glue
Point glue: I use the Boehning Ferr-L-tight I have never had a problem with it them falling off even in the desert heat. Need a heat source; candle, alcohol lamp, etc.; to melt the glue to use. Some people use epoxy the main draw back is if you want to change or salvage points.
Something to cut the shafts to length.
Finish and or paint of your choice
pliers for putting on nocks if you use hot glue they will get hot
cup of water to cool the points when they are installed
Spine weight calculator My favorite tool for getting a starting point on the proper spine weight
components
Shafts: Lofts of good options with different properties but for simplicity right now go with Port Orford Cedar its is the cheapest option that I have found and the lightest. Pick either 5/16 or 11/32 depending on the spine weight you need.
Field Points Pick the same diameter as the shafts you selected and for simplicity go with 125 grain points. Because that is the weight that is assumed to be used in the spine weight of the shaft.
Fletching I assuming you want feather fletching if you're making wood arrows. Pick either shield or parabolic cut and the colors your want. Go with 4-5 inch long feathers.
Nocks Pick the size based on the shafts diameter and pick your color. These are the only nocks I'll use, there are others but they have never let me down.
Simplified Process
This can be done in groups just giving as doing one arrow for simplicity and once you know what your are doing some of these steps can be done in a different order
9 Fletch: The True Flight fletching guide does a better job of explain it than I ever could
and you are done.
It really is that simple. I have made (and broke) bunches of arrows so if you have questions ask away. I can elaborate on different parts if you have specific questions or wondering what to do when you get the parts in.
A dresser: $350
A circular saw: $100
Gorilla glue: $5
A face-cord of firewood: maybe $100 delivered, unless you have a chainsaw, in which case probably free.
Brutally ripping off your customers: priceless
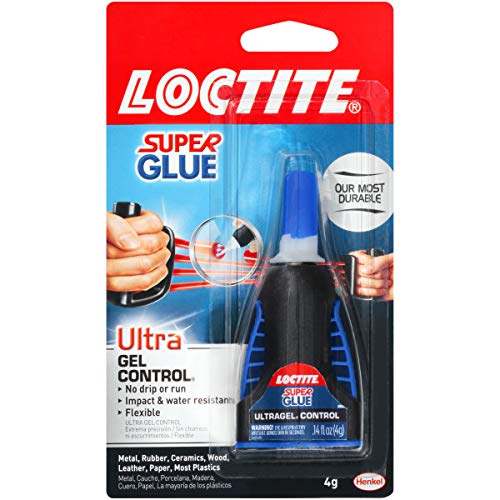
I LOVE [Loctite Ultra Gel Control Super Glue] (http://www.amazon.com/Loctite-Ultra-Control-4-Gram-1363589/dp/B003Y49R7G?ie=UTF8&psc=1&redirect=true&ref_=oh_aui_search_detailpage)
It is very strong and very easy to use with the squeeze control being built in to the container itself. It also dries in a couple minutes
Use this connector into the port.
https://www.amazon.com/YCS-Basics-Micro-female-extension/dp/B00HAOK7XE/ref=pd_sim_147_9?_encoding=UTF8&pd_rd_i=B00HAOK7XE&pd_rd_r=1K7Y8KM8CCG3NA9TRDK3&pd_rd_w=3MLQx&pd_rd_wg=S0wfJ&psc=1&refRID=1K7Y8KM8CCG3NA9TRDK3
Use some epoxy or gorilla glue to bead around the connector between the controller and now you have a short little dongle that weighs next to nothing hanging off but keeps the controller wireless when needed. Do the epoxy in a few coats, don't just glob it on there super thick, it takes forever to get strong then. I recomend against super glue, it will just make a mess.
You can use this to make it look prettier if you want as well.
https://www.amazon.com/Sugru-Moldable-Glue-Classic-Multi-Color/dp/B008URBC9I/ref=pd_lpo_vtph_60_bs_t_2?_encoding=UTF8&psc=1&refRID=GEHJJR1SV07J2VYRE363
Do not use electrical tape. Use gaffer tape
I dunno, I look online at my local stores inventory and I see "black duct tape" and some that say "no residue" but I dont know if they are actual gaffers tape (which is more like a cloth and not shiny plastic) like I would use at a show.
Ill have to see in person next time I go, if so it would make things easier for me to get it in a pinch for work.
Like if you check lowes or homedepot I dont see anything called gaffers tape or gaffe tape available here. If you go to guitarcenter.com you do.
I dont know if its just a labeling thing or not though.
You may already know this (sorry if so) but this is what Im talking about
https://www.amazon.com/Premium-Gaffer-GafferPower-Available-Multiple/dp/B00GZE3UJ8/ref=sr_1_1?ie=UTF8&qid=1527720749&sr=8-1&keywords=gaffer+tape
its a cloth tape that leaves no residue and is very easy to tear
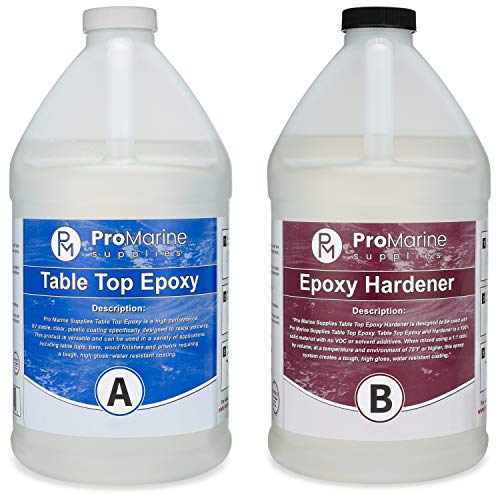
After much nail biting trying to choose the right epoxy, I went with this ProMarine from Amazon:
3M dual lock velcro walmart carries it, way better then regular velcro
paired with some good rubberized straps itd be safe to say if the battery moved after a crash thatd be the least of your worries
>It all depends on how bad it is. I use my ROS (random orbital sander) with 220 and then follow that with 400 then 00 steel wool.
220 grit seems a bit excessive. If you had a think caked-on layer of iron oxide on the surface... maybe. If it's just a light layer of rust, get some 600 grit and maybe some 1000 grit sanding discs for your orbital. Remember to throughly clean the metal dust with some type of solvent, ie alcohol, acetone, ever-clear (not even joking lol)...
Then... once its squeaky clean, hit it with some protective film. I use and aerosol dispersed Dry Lubricant with Teflon for a SUPER slick finish. You could also use BoeShield T9 witch is another aerosol that will leave a nice dry waxy film. if your not into aerosols, try good 'ol Paste Finishing Wax
Welcome to the WoodWorking Community 😊
Top rated one on Amazon is $16.71. I guess it might depend on what you mean by "a decent sized roll", but I have one and it's the size of a regular roll of tape, so I would call it "decent sized".
We actually ended up using a couple brands because we really underestimated how much we would need. So we started with this stuff from home depot and then ended with this stuff from Amazon. They both worked great. I think the part that made it look really good was using a heat gun to get rid of all the air bubbles.
Performix 11203 Plasti Dip Black Multi-Purpose Rubber Coating Aerosol - 11 oz. https://www.amazon.com/dp/B0006SU3QW/ref=cm_sw_r_cp_apa_BHrYBb1KCDE9Q
I had a similar exposed camera and used plastidip (link below) to coat the exposed PCB. It also comes in a little paint can if you don't want the aerosol can. The stuff works well for all sorts of electronics you might want to protect.
http://www.amazon.com/Performix-11203-Multi-Purpose-Coating-Aerosol/dp/B0006SU3QW
https://www.amazon.com/dp/B0006SU3QW/ref=cm_sw_r_cp_api_i_D8MSCbWDGW1WN
You can get it at Walmart, or anywhere that has paint.
https://smile.amazon.com/Kano-Aerokroil-Penetrating-aerosol-AEROKROIL/dp/B000F09CEA?sa-no-redirect=1
This is a really precarious spot on the X230 and X220 lids. I've managed to repair a few that had this same issue.
I used a small spot of J-B Weld imbedded with a small finishing nail laid across the break for extra reinforcement in the area shown in the photograph here.
You just need to remove the screen bezel and temporarily push aside the antenna wires. Make sure everything is aligned and let it set up for about 24 hours and the bond will be virtually impossible to break.
This man speaks truth; give it a try.
Once the rust has gone, you will want to put a treatment on top of it to stop it coming back. Whilst tin foil and water will remove the rust, it will not protect the (now damaged) metalwork from getting rusty again. Several routes to go down here; for chromed metal (think suspension forks or chromed mirrors) you can get Autosol. This works a bit like a toothpaste that is buffed in and does protect for a little while. You can then use a lot of ACF50 and work it into the area good and proper, leaving it to dry naturally if on non-engine parts (or go for a ride around the block and bake that stuff on if on the engine).
In my experience, a combination of Autosol and ACF50 works wonders. Basically you want to remove the rust (tin foil), neutralise it as much as you can (Autosol) and then seal it (ACF50) from moisture to stop it coming out again.
http://www.amazon.com/University-Arizona-Wildcat-Figurine-Antenna/dp/B005IB3N00
Plus
http://www.amazon.com/Barbie-Christmas-Morning-Slippers-Hairbrush/dp/B001JEH7ZW
Plus
http://www.amazon.com/gp/aw/d/B001IY82FM/ref=mp_s_a_1_1?qid=1419287838&sr=8-1&dpPl=1&dpID=41nNuDE7mbL&ref=plSrch&pi=AC_SY200_QL40
= DIY masterpiece
Have you ever heard of Shoe Goo? it's one of those indispensable products for me. If a shoe starts to leak or come apart it's so easy to glue and make waterproof again.
I think we buy ours at the local hardware store but it's one of those items that I think everyone should own. Apparently I walk weird, and I wear holes in my right shoes/boots, right on the pad of my foot. I've gotten months of extended wear out of my boots that look good otherwise!
This is the el wire- excuse mobile
Lychee Neon Light El Wire with Battery Pack, 15 Feet, Blue https://www.amazon.com/dp/B00EENNHMM/ref=cm_sw_r_cp_apa_wb-.zbMXQ6FDS
And I'd recommend using some scotch or painting tape with a fifteen foot string to trace out the path you want to glue down. It will make it much easier, but it does take a while.
Also, use gel glue. It's shock/water proof. I'd recommend 2 of those if you're using a full face helmet
Loctite Ultra Gel Control Super Glue 4-Gram (1363589) https://www.amazon.com/dp/B003Y49R7G/ref=cm_sw_r_cp_apa_qe-.zbFH9CXFF
Build some! Get some hard plastic irrigation tubing from Lowes or Home Depot, a few connectors, and some duct tape/grip tape or sand paper. If you know someone with a saw, great, if not you'll want to get a pipe cutter. Building your own is fun and while it seems spendy, I've gotten at least 5 hoops from a roll and have been able to downsize at will. You'll probably want to tape the hoop for added weight, and while gaff tape is nice and great for grip, duct tape is a bit cheaper and does a good enough job.
Congratulations on 3 months sober, it's inspiring to hear hooping has helped!
Don't buy greenstuff from GW. It's literally this.
Easy.
https://www.amazon.com/MG-Chemicals-Silicone-Modified-Conformal/dp/B008O9YIV6/
I use this on my new winter build. I basically do about 3 packs a day and then toss it in the rack to dry with the dishes and haven't had a problem. Chicago has a lot of snow right now and it's reversed props so it's always packed tight when I get home since they fling the snow at the flight controller.
https://www.amazon.com/MG-Chemicals-Silicone-Modified-Conformal/dp/B008O9YIV6/ref=pd_m_ba_rp_of_2?_encoding=UTF8&psc=1&refRID=C8DPHQ5N2VJN5QBZG0NX
It's normally like this after every flight. https://imgur.com/a/XMGUulZ
Please explain "you cleaned the bottom of the CPU?"
I sure hope you aren't talking about the center of the bottom! That part has many SMD's and should not be touched.
On what surface did you work on the CPU? Did you work on kitchen or wood/tile floor or on carpet?
I've never seen anyone kill a CPU by delidding, except on HEDT CPU's. That's because HEDT's have caps next to the die, by the IHS, and a delid that isn't using the correct kit can cause the IHS to slide over the caps and shear them off. Der8auer explicitly mentioned this in one of his videos. But that is clearly not a problem if all caps are intact.
Delidding a HEDT CPU is far far more risky than a regular consumer chip (e.g. 9900K, 8700K) even ones that are not soldered, all because of those caps.
What nail polish did you use ?? It is made clear that *ONLY* nitrocellulose based nail polish should be used. You can also use conformal coating. https://www.amazon.com/gp/product/B008O9YIV6/
How many coats of nail polish did you use? Usually its recommended to use about 3 coats, letting each coat dry before applying another one.
The laptop issue is surprising. I've probably applied LM on my MSI laptop about god, 30 times now? And it hasn't died yet. I even damaged one of the screwhole HS mounts (Don't ask). Laptop still works fine. How is it possible to break a laptop like this? Did any LM spill out anywhere? Did you check? Did you use a cutout foam dam as a complete spill barrier like I recommend for any direct die LM applications? (this includes delid direct die LGA (desktop), not just BGA)). https://www.amazon.com/gp/product/B002GKC2US/
Are you sure you didn't kill the CPUs by static shock or something? Killing a LGA *AND* BGA chip has me very suspicious about what you actually did.
Silicone conformal coating. You can cover everything with this stuff, fc, escs, vtx, reciever. Keep it out of buttons and connectors, this is where people use a brush and paint on corrosionx.
Use sugru
Sugru Moldable Glue - Original Formula - Classic Colors 8-Pack https://www.amazon.com/dp/B008URBC9I/ref=cm_sw_r_cp_apa_FBxNBbD4XG9MZ
https://www.amazon.fr/Sugru-Pâte-Modelable-Fixante-Primaires/dp/B008URBC9I
I have it my self it works really well !
The TL:DR answer is "gaffer's tape, gaffer's tape, gaffer's tape" specifically for the Replicator+
Don't bother with blue painters tape or glue sticks. Neither works with the awful flex build plate grip surface that comes with the newest MakerBots.
I run a campus makerspace with three MakerBots. It's been a year since we got them, and we've only just NOW (read: within the last few months) figured out how to cut down on about 95% of the warping. Lots of the solutions on /r/fixmyprint might come from folks who aren't too familiar with MakerBot printers and the true shittiness of the flex build plate grip surface. For reference, our machines are used by a campus of about 10,000 students, so the machines are running 9 hours a day, every day. We ran into the warping problem a lot.
First and foremost, if you're within the 30-day return window, return yours. MakerBot machines have become absolute garbage, and if it wasn't for the $250 restocking fee that MakerBot charges after that 30 days, I'd return my three MakerBots in a heartbeat. Both the extruders and the build plates for the Replicator+ are truly awful. The proprietary MakerBot Print software leaves very little in the way of customization, so you can't really expect to even modify some of the slicer settings to test out what some of the folks on /r/fixmyprint might suggest. At any rate, you should always print with a raft, because of the lack of a heated build plate.
MakerBot Customer Support, in their infinite wisdom, will typically recommend the following things over and over. I've spent more hours on the phone with them than hours at my job, and I'll preface this by saying none of their solutions worked in the long-term for any of our machines:
The solution that worked for us was buying gaffer's tape. Another redditor recommended it, and we purchased this gaffer's tape. Since then, not a single print has failed due to warping issues. We can spread objects across the build plate with little regard for orientation or arrangement without much issue. Granted, on extremely large prints that take up the entire print volume, we might see a slight (maybe 5% at the corner, warping up about 1 or 2mm from the plate) warping issue, but it's nearly perfect compared to before.
We've only had to redo the gaffer's tape laid down two months ago once so far. I can't understate the amazing value of gaffer's tape.
The tool you're looking for is called a razor saw. Good luck with the mod!
Edit: Keep in mind that it is not solid plastic, and you will have holes where you make your cut. You could use plasticard and green stuff to cover that up though.
One-day shipping available. ;)
Equipment:
4 oz clear-top tins
3 small 6mmx1.5mm neodymium magnets per tin
Epoxy
A little JB Weld to patch the leak up a bit. I wouldn't recommend using it as a serving keg due to the higher pressure, but could use it as a fermenter. It should be able to hold a few PSI's from the fermentation process or pressurize it 1 or 2 PSI to do a transfer.
The glass doesn't get extremely hot, but it does get pretty warm when you're lighting the bowl, so I don't trust glues. I would use JB Weld, it's extremely strong, water resistant and heat resistant up to 500 degrees F. It won't last if you put the flame right to it, but it will easily handle the low heat from the bowl. Make sure to lather it on thick on the the broken edges, and around the outside to create a support. it won't be super clean, but if you lather on enough it can be sanded down to be smoother.
Here's also a list of the mods, how much, and where I got them.
Visual
Black rims $192.25x4 = $769
Window tint $180
Spoiler $100
Side Stripes $30
Tail light blackout $20
Sidemarker $15
Rear Decal: $50
345/Hemi Emblems black $34
Plasti-dip for Decals $6.00
Rock Guard $60
Engine
Air Filter+Recharge $63
Oil Catch Can $150
Other
Tazer+Bypass $300
Atturo Az850 275/40R20 $127.55x4 = $510
Mid-Muffler Delete $163
if you're new and you just want an easy kit:
field manual with pictures if you're really new to AR's something like this is super valuable to have.
Otis Cleaning Kit includes everything you need to clean it.
solvent You probably don't need a solvent on a new rifle but its damn handy to have around. this stuff is for ultra deep cleaning.
Lube Everyone has their favorite Lube, mine is ballistol, you can dump it on pretty much everything, and it makes it work together smoothly
scrapper for when your bolt carrier group gets all fuckered.
EDIT: almost forgot, you're def going to want one of these puppies too, a chamber brush
Cleaning tools usually come down to personal preference, cost, and how effective you can use them to keep your gun rust free and preforming well. I have had a great experience with all the tools i linked, and have used them to keep my AR 15 clean and functioning for a few thousand rounds. I think the largest benefit to this set up is that all these tools will easily fit inside of any range bag.
Have a good one and keep shooting!
Actually this is wrong. Aluminum is highly corrosive, which is actually a good thing, well mostly. It quickly oxidizes forming a thin "skin" that protects the underlying material from most weather and chemicals.
In the aviation world corrosion is a big concern and we generally deal with it through use of zinc-chromate primers or sometimes plating which has various approaches. You can even use wax if you really want to, think BoeSheild T-9 or ACF-50.
As for why it is good for bicycles. Probably the biggest two factors are low cost and the ease with which it can be extruded, milled and machined into usable shapes for bicycles. All things being equal if I was building a bicycle out of a metal it would be Titanium hands down. If I was building to a price point however, Aluminum wins.
After seeking the guidance of all you gurus (https://www.reddit.com/r/XWingTMG/comments/4tkx3v/taking_the_plunge_with_magnets/), I finally went ahead and did it.
Components:
Ring Magnets https://www.kjmagnetics.com/proddetail.asp?prod=R421
Ball Bearings https://www.kjmagnetics.com/proddetail.asp?prod=R421
Gorialla Glue https://www.amazon.com/Gorilla-7805001-15g-Super-Glue/dp/B001IY82FM
Dremel 4000 https://www.amazon.com/Dremel-4000-3-34-120-Volt-Variable/dp/B002L3RUVQ
X-Acto Knife http://www.michaels.com/10223579.html#q=x-acto&start=10
Pliers http://lmgtfy.com/?q=pliers
My process for the ships was as follows:
My Process for the stands was as follows:
Use some Gorilla Glue for it.
Amazon - Gorilla Glue
one more thing you can do , especially on tricky parts, or parts that you have unsuccessfully mated is :
take a hobby knife or exacto, and make several dozen marks on the surface area (only where it will be covered up by the other part of course) make like a "cross-hatch" pattern of score marks with your blade on the matting surfaces of both parts.
that gives the glue hundreds of little valleys to seep down into and make an extra strong bond.
If that doesnt work, lol, then you have to pin it.
If THAT doesnt work, you just need to quit this hobby and go back to your PS4.
I really fail to understand your issue with the gorilla glue, i think it is the BOMB.
Are you using THIS???
http://www.amazon.com/4-oz-Original-Gorilla-Glue/dp/B0001GAYRC/ref=sr_1_4?ie=UTF8&qid=1422669512&sr=8-4&keywords=gorilla+super+glue
Thats not what you want!!
You want THIS
http://www.amazon.com/Gorilla-7805001-15g-Super-Glue/dp/B001IY82FM/ref=sr_1_1?ie=UTF8&qid=1422669512&sr=8-1&keywords=gorilla+super+glue
Another reason i love the gorilla superglue is it doesnt make nearly as much cyoacrylate stain (white stain from the fume or offgassing of the glue while curing)
I dont know why im talking so much about glue tonight.
Two part epoxy does the trick!
This is what I use:
https://www.amazon.com/Gorilla-Epoxy-Minute-ounce-Syringe/dp/B001Z3C3AG/ref=sr_1_4?crid=1BBHFWDACZ0G9&keywords=two%2Bpart%2Bepoxy&qid=1564781122&s=gateway&sprefix=two%2Bpart%2Bepo%2Caps%2C202&sr=8-4&th=1
Get some shoe goo! Use an old credit/gift/rewards card to spread it around evenly to smooth out the divots, maybe add a layer to protect the smoothed out part under the balls of your feet, and give it 2 days to cure. It's tough stuff and added a good three-five months to the soles of my running/walking/work sneakers.
Shoe Goo?
I just bought the official wireless charger from google, and then attached it to my car using very heavy duty velcro. Then, since my car doesnt have bluetooth, I bought one of these and attached it using a spare bit of the heavy duty velcro. All that was left to be done at that point was attach an NFC tag in my car, and program it so that it would turn off wifi, turn on data, and toggle on bluetooth on / off and connect to the receiver, and then connecting to the receiver would trigger it to open GPM and start playing the music
I tend to buy superglue from my local grocery store. Any kind of “Gel” superglue is what I prefer to use. Loctite has always worked really well for me!
https://www.amazon.com/Loctite-Ultra-Control-4-Gram-1363589/dp/B003Y49R7G
Here’s an amazon link as well
Ok, lots of different opinions here, and everyone's ignorning the fact that's there's silicone that's specifically food safe. If it doesn't say 'food safe', it's not!
Here's one that came up with a quick google search for 'food safe silicone sealant'. https://www.amazon.com/Clear-Food-Grade-Silicone-Sealant/dp/B0063U2RWU
Use the right stuff, please.
I've done a few guerrilla-style repairs to brass and woodwind instruments in my day.
A cheap and easy fix is some "JB Weld", a steel reinforced epoxy. Just put a pea-sized drop under that joint and clamp it down overnight. Done and done. No need for solder, and it's under $10.
http://www.amazon.com/J-B-Weld-8265S-Original-Reinforced/dp/B0006O1ICE
socks + [spray on rubber] (https://www.amazon.com/Performix-11203-Multi-Purpose-Coating-Aerosol/dp/B0006SU3QW/ref=sr_1_cc_1?s=aps&ie=UTF8&qid=1474933644&sr=1-1-catcorr&keywords=spray+on+rubber)
works amazing, is crazy cheap, and if the rubber wears down you re apply, machine washable, get black spray on black socks and you're good to go. i have a few pairs
Use a plasti dip coating to paint the surface of the lock. It's the same stuff that's used to coat handles on tools.
http://www.amazon.com/Performix-11203-Multi-Purpose-Coating-Aerosol/dp/B0006SU3QW
Some people use plasti-dip. Waterproof, lasts, peels off easily if you change your mind.
I'm a mechanic, this is your best bet. It's oil that foams for a short while after being sprayed so it expands up into the mechanism and cleans it out. I wouldn't use wd-40 as it tends to collect dirt and cause the same problem more than simple oil will.
edit: When the spray out fails the next step is an overnight bath in a gentle solvent. Barring that you'll need a new shifter.
You may have luck with an impact screw driver like this, but you may want to start by adding a small amount of penetrating lubricant like this. Safety is a big deal with a panel, so either have the meter removed while you work on it, or be extremely careful while you work. If the money isn't a huge issue it would be worth swaping that federal pacific panel out for something newer and more safe if possible. Best of luck to you.
I use ACF-50 Anti-Corrosion Lubricant Compound. It works well on my old bike, but I live 10 miles from the salt water.
Woodworker here. It's no problem at all to repair that break and end up with a neck that's more solid than before.
You can take it to a luthier and it'll be an easy job for them, or it's a pretty easy DIY job too.
Here's what I'd do: get a bottle of CA glue (super/krazy glue), a needle-tip glue injector, a clamp (a quick clamp would be fine, or any solid clamp with padded clamping surfaces to avoid marring the neck), a wiping cloth, and acetone (paint thinner or nail polish remover).
Gently force the break open slightly, and inject CA into several locations throughout the break. (The ideal would be to get a coat of glue across the entire surface, but that's not practical in this case.) You want to work quickly, as CA has a short working time, but don't rush. Once the glue is in place, immediately apply the clamp. I'd locate it directly on the first fret so it's central on the break. If using a quick clamp, get it as tight as it goes. A screw-based clamp should only be tightened to finger tightness, as those can apply much more force than a quick clamp and you don't need a lot of clamping force in this situation. If there's any glue squeeze-out, clean it up immediately with the cloth dampened with acetone. CA glue cures very quickly, so you can remove the clamp after only 5 minutes or so. Just to be safe, I'd let it sit for a day before restringing it.
The last thing to do to make it as good as new is to repair the finish. It looks like this neck has an oiled finish, so that makes things super easy. Feel across the entire joint. If you can feel the break at all, take a piece of 220 grit sandpaper and gently sand the joint, going with the grain. It shouldn't take much effort to get it smooth. Finally, get some tung oil (make sure it's 100% tung oil, not "tung oil finish"), apply a small amount to a clean rag, and wipe a thin coat across the repaired area. Let it sit for a few hours, gently sand with fine grit sandpaper (absolutely no more coarse than 220), and repeat. I'd repeat this process for three or four coats. If you notice a different coloration on the repaired area and want to keep it even, then oil the entire neck. (Precautions for working with tung oil: work in a ventilated area, and dispose of your oily rags properly. Either burn them, or lay them out in a ventilated area (preferably outdoors) until they become hard and brittle, at which point the oil is cured and the rags can be thrown out. If thrown in the trash or balled up before the oil is cured, they can actually spontaneously ignite.)
You can't, I've destroyed mine and installed PEI.
https://www.amazon.com/gp/product/B01KBGJU5S/ref=oh_aui_detailpage_o01_s00?ie=UTF8&psc=1
Stick it down with this stuff here:
https://www.amazon.com/gp/product/B007Y7D5NQ/ref=oh_aui_detailpage_o00_s00?ie=UTF8&psc=1
When you use this stuff you just wipe it with rubbing alcohol to clean the surface. Then it gives you near perfectly smooth prints where it touches the surface. The prints pop off easy after it cools but holds tight when it's warm. Personally I find it a waste of money to buy glue sticks/hair spray if you don't have to. Although I did buy glass I never installed it after this worked so well. It's amazing stuff and you'll never have to replace it.
Specifically for waterproofing electronics https://www.amazon.com/MG-Chemicals-Silicone-Modified-Conformal/dp/B008O9YIV6/ref=sr_1_1?crid=3EC3ZDK61896K&keywords=silicone+conformal+coating+for+electronics&qid=1557150527&s=gateway&sprefix=silicone+conform%2Caps%2C178&sr=8-1
​
While you're at it, pick up a UV pen light also, to check for missed spots.
http://www.amazon.com/gp/product/B008O9YIV6
I've got this on my Shrieker and I've been flying it daily in rain and mud and snow. My only complaint, and I think this will be true with any conformal coating, is that it wicks into micro-buttons and can cause them to stop working if you aren't careful.
Sugru. I've used it on every helmet and it holds like cement.
https://www.amazon.com/Roland-JD-XI-JD-Xi/dp/B00VHFOV3E/
+
https://www.amazon.com/dp/B014M8ZO8S?ref=emc_b_5_t
+
https://www.amazon.com/Premium-Gaffer-GafferPower-Available-Multiple/dp/B00GZE3UJ8/
I'm only half joking.
I prefer to cover the bottom of the pedals with gaffer tape — there are YouTube videos (which is how I found out about this) but I do it a little differently:
Edit: the gaffer tape should come off clean in most cases so this is also a great way to attach velcro to new/mint pedals and be able to easily get it off later when you want to sell but leave the pedal in mint condition.
Use electrical tape but don't use the cheap stuff, it will leave a residue and get melty and move around in the heat. If you wanna be fancy, buy a roll of self amalgamating tape. It's cheap and I use it for all sorts of random stuff around the house now that I have it.
You could always try to add your own flames with green stuff.
Green Stuff - I'm still going through this 36" roll of Kneadite. $5 more than Games Workshop's product, but 5x more putty.
Primer - Rust-Oleum Sandable Primer is my gold standard. I've used it in all seasons in Mid-West USA with no issues, and it always dries with a perfect finish.
Black wash - Nuln Oil is still my liquid talent, but for large projects I use Vallejo Black Wash. Almost twice the price of a pot of Nuln Oil, but over 8x the amount of wash. Economical for terrain pieces and large models, but not quite the same quality.
Paint - I've been hooked on Citadel paints since 3rd Edition, but I'm slowly transitioning to Vallejo and Army Painter. The latter has color-matched primer and acrylic paints, which has really saved my sanity on the large projects I typically work on.
My temps are fantastic.
Ambient temp of 22
CPU idle = 28
CPU load = 36
GPU idle = 29
GPU load = 38
I'm in the midwest in the states and right now there is a nice cool breeze with the windows open. The other day the ambient temp was around 28-29 so all idle/load temps were about 5 degrees more than what they are now. Nothing ever above or at 45 however (even when maxing out battlefield 4 while streaming youtube and chatting online).
The pumps and reservoirs were first held on with some screws and washers as there are plenty of holes on the side of the drive cages to attach these to. However, I noticed that this caused the drive cages to bend under he weight. So much that the drive doors would not stay shut and it was very noticeable. This was caused by a combination of my incredibly heavy glass reservoirs and the very thin drive cage material/metal.
To combat this, I used this 3m dual lock stuff which works remarkably well. It holds stronger than any simple velcro I have ever seen or used. Absolutely amazing stuff and I highly recommend it for modding. Once you join two pieces together you would swear that they are permanently glued together. I then used some zip ties and strung them from one side of the drive cage to the other (out of view and cannot be seen without opening up the drive cage doors) to prevent any more bending or bulging from the cages.
If you use washers and nuts, you will have to make sure that the head of the screw is facing the inside of the drive cage. the nut will be attached to the screw on the outside of the drive cage. This will allow the drives to still move in and out of the cage. Otherwise if your screw is protruding too far into the cage, your drives will nt be able to move in or out.
Amazon has them for $22. Match with one of these to attach it.
The actual product doesn't have that weird edge, it's just a flat sheet.
DiiCooler, Z braces, thumbscrews for bed leveling, and the melzi temp fix are all common mods that I can recommend. You could also get the all Metal Hot end from Micro Swiss but I have not done this myself.
As for supplies, I would recommend getting a sheet of PEI and some 3M adhesive to stick it to the print bed. PEI is a great, low maintenance print surface that prints stick to very well even without any form of fixative to improve bed adhesion. If you don't go that route I would say get some buildtak to put on the print bed with washable gluestick depending on the filament you use. Basically you don't want to be printing directly on to the bed as there is a hole where the thermistor comes through.
Other than that, just get extra filament and have fun with it.
Open the sensor and coat the board with this.
Edit: inserted hyperlink correctly
Silicone conformal coating is a good choice for where moisture is present, I don't see why not other than it being slightly more expensive. You could also try potting. I recommend this.
Conformal Coat will be durable and microwave safe
MG Chemicals Silicone Modified Conformal Coating, 55 ml Bottle with Brush Cap https://www.amazon.com/dp/B008O9YIV6/ref=cm_sw_r_cp_apa_i_szhYCbWY2KTKM
ESCs (and FC and RX) are coated in conformal compound, its like super thin layer of epoxy. See here: http://amzn.com/B008O9YIV6 Makes it mostly waterproof, in theory at least, not something I want to intentionally test.
And then between ESC and arm is thin piece of double sided foam: http://amzn.com/B007Y7EF4E
Even if it comes loose, there isn't much slack in the wires, so it can't actually move up more than a 1/8 inch or so so its not going to like get hit by a prop or something. I've done similar setup on 2 other quads and not had any issue.
Its some stuff called Sugru.
Haha no. Not lube made for silicone, but lube made from silicone.
You could try Gorilla glue, then (after it dries) use Sugru to seal that up.
https://www.amazon.com/Sugru-Moldable-Glue-Original-Formula/dp/B00EU7DBNM/ref=sr_1_1_sspa?keywords=sugru&qid=1564676960&s=gateway&sr=8-1-spons&psc=1
Surgu + spray paint + varnish
https://www.amazon.com/Sugru-Moldable-Glue-Original-Formula/dp/B00EU7DBNM
Looks like Sugru. I used one of the 3M mounts and then filled in the gaps with Sugru on my old lid. That reminds me I need a new GoPro.
http://www.amazon.com/Sugru-Moldable-Glue-Black-White/dp/B00EU7DBNM
https://www.amazon.ca/Sugru-Mouldable-Glue-Original-Formula/dp/B00EU7DBNM
Sugru or moldable plastic. Save what you don't use for another fix.
Real Premium Grade Gaffer Tape By GafferPower Made in the USA Black (Also Available in Multiple Colors) 2 Inch X 30 Yards Heavy Duty Gaffer's Tape https://www.amazon.com/dp/B00GZE3UJ8/ref=cm_sw_r_cp_apa_i_Pun4CbSXM3219
Search for silicone tape on Amazon. Numbers of makers and sellers. Here's one example also come in clear and other colors.
I've tried some variations myself, and usually I simply revert to printing upright. The biggest issue I have with this is snapping off a piece while removing supports.
Splitting a figure in half does produce nice-looking results, but they never seem to fit back together nicely once printed. It took a while to find a good glue (I'm mostly using gorilla glue now), and I would have had to use green stuff to seal the gaps. All-in-all a lot of work, and it just seemed easier to bring the STL into MeshMixer and inflate it a little to make it a stronger print so that removing supports wouldn't break it as easily.
I'm very curious about printing miniatures on their back, though... that might work great. Will have to try.
anazon link
Citadel green stuff is overpriced. Next time get something like this: https://www.amazon.com/gp/product/B00MQ7EHHC/ref=od_aui_detailpages00?ie=UTF8&psc=1. Same stuff, just different packaging and several times better value.
It's probably not very difficult or time consuming.
You need some kind of resin
You can use a bunch of stuff to color it. Like Glow powder, and some kind of pigment. Then make a mold out of UHMW, (cutting board) and cut to shape with a table saw or something. Then just drilling small indents and painting them to finish it up
I would glue the heck out of that junk.
https://www.amazon.com/J-B-Weld-8265S-Original-Reinforced/dp/B0006O1ICE
Great list!
just placed an order for the Instamorph, I can think of a lot of things I can use it for.
another good thing to keep handy is JB Weld, it has saved me countless times.
http://www.amazon.com/J-B-Weld-8265S-Original-Reinforced/dp/B0006O1ICE/ref=sr_1_1?s=automotive&ie=UTF8&qid=1416784847&sr=1-1
I bet that J B Weld would hold that. That's a "cold welding" substance, you mix the stuff in the two tubes together and stick the broken sections back together with it.
That stuff does have its limitations under loads, but I've used it for things before that carried more weight and it held just fine.
I was able to repair the magnesium base of my X220 using J-B Weld.
It was a bit tricky to get the pieces to sit in the proper position while it cured, but the resulting bond has been really sturdy.
That's too funny. This stuff
http://www.amazon.com/gp/aw/d/B0006O1ICE/ref=redir_mdp_mobile
this was the epoxy we tried, this is another kind we have on-hand that is just too unwieldy/thick to do a job like this.
Is this the kind you're referring to that does work? I never really tried it, thinking it would be similar in effect to the epoxy glue. There's just so much torsion on that location, I worry about how well it would hold.
I should also mention that this is a college help desk and we provide our services 100% free of charge--the only thing the students pay is for the actual cost of parts. It's all about getting them back up and running as economically as possible, since most of the students are broke and just want it back to a functional level so they can write papers, skype, and facebook again. So while negative goodwill (badwill?) is something I'd like to avoid, it's not like we're worried about losing profit or anything as a result.
this one?
You can plasti dip them.
https://www.amazon.com/Performix-11203-Multi-Purpose-Coating-Aerosol/dp/B0006SU3QW
There's someone on here that did this a while back and it was working fine.
The platidip around here comes in a can you just spray on. Similar to a can of spray paint. You shouldn't need anything besides the can!
http://www.amazon.com/Performix-11203-Multi-Purpose-Coating-Aerosol/dp/B0006SU3QW/ref=sr_1_1?s=automotive&ie=UTF8&qid=1419791845&sr=1-1&keywords=plastidip
I took my 2015 rails off 2 weeks ago, laid them out and just put a few coats of "Plastidip" on them. They look much better.
https://www.amazon.com/Performix-11203-Multi-Purpose-Coating-Aerosol/dp/B0006SU3QW/ref=sr_1_1?ie=UTF8&qid=1502383536&sr=8-1&keywords=plastidip
There's an alternative kind of paint PC modders sometimes use. Its called Plasti Dip. Its basically rubber paint in a can. Its non-conductive and people have applied it directly to motherboards even. Though I wouldn't recommend insulating chipset heatsinks and caps but its safe none the less.
You should try it yourself! It is super easy and if you mess up it come off really well. You can get some spray stuff on amazon. It works just like spray paint http://www.amazon.com/gp/aw/d/B0006SU3QW/ref=mp_s_a_1_1?qid=1406342789&sr=8-1&pi=SY200_QL40
It's not the prettiest thing in the world but it works. My kids keep leaving the fence door open so I wanted a sensor in it. Plus I wanted it to trigger the alarm when we are in away mode to decrease reaction time of police.
Plastidip is a removable, sprayable, type of waterproofing.
Now if I can do an outdoor siren...
Any ideas on an outdoor siren?
Here is Plastidip.
PB Blaster or Aerokroil
https://www.amazon.com/Kano-Aerokroil-Penetrating-aerosol-AEROKROIL/dp/B000F09CEA/ref=sr_1_1?ie=UTF8&qid=1519242522&sr=8-1&keywords=areo+kroil
Used Aerokroil on a stuck body mount bolt and ten mins later it was on the floor.
Step 1: aerokroil
Step 2: handle puller
Another product is Kroil, tapping lightly on the end of the handle with a hammer can help shake it loose, heating and cooling in the oven can also help.
Let's start by saying car covers are a pain in the ass for daily use, the car has to be perfectly clean to prevent it from scratching and it just doesn't work that way unless the car is washed every couple of days.
Instead I'd just wash 1 or 2 times a week, and get a gallon-size of Meguiar's spray wax and Last Touch, because you know you'll be in a constant battle against certain elements, might as well stock up (and you save like 50% just buying in bulk this way). In fact I recommend checking out their entire detailer line because you're going to go through a lot of soaps, waxes, etc. Their gallon of shampoo plus for $20 is a great start. And you can find deals like 3-packs of their supreme shine towels for $6 as an amazon add-on item if you're a prime customer.
https://www.amazon.com/Meguiars-D11101-Shampoo-Plus-Gallon/dp/B000EZICII
https://www.amazon.com/Meguiars-X3002-Microfiber-Wash-Mitt/dp/B000RXKR6M/ref=sr_1_1?s=automotive&ie=UTF8&qid=1485457672&sr=1-1&keywords=meguiar%27s+microfiber+mitt
https://www.amazon.com/Meguiars-D15601-Synthetic-X-Press-Spray/dp/B005JPJMI2
https://www.amazon.com/Meguiars-D15501-Touch-Spray-Detailer/dp/B0006SH4NC/ref=sr_1_1?s=automotive&ie=UTF8&qid=1485453717&sr=1-1&keywords=last+touch
https://www.amazon.com/Meguiars-D12001-Glass-Cleaner-Concentrate/dp/B0006SH4KU/ref=sr_1_4?s=automotive&ie=UTF8&qid=1485457691&sr=1-4&keywords=meguiar%27s+glass+cleaner
https://www.amazon.com/Meguiars-Supreme-Shine-Microfiber-Cloths/dp/B0009IQZH0/ref=sr_1_2?s=automotive&ie=UTF8&qid=1485455013&sr=1-2&keywords=supreme+shine
I just buy all their gallon sized stuff and then reuse my old bottles of spray wax, detailers spray, glass cleaner, wheel bottles, etc. Saves me lots of money, like the difference between $100 now or a couple hundred by next year. For instance their gallon size of glass cleaner is probably enough to set you straight on that for a few years, dilutes 10-1 with distilled water. That's 10 gallons of glass cleaner, put that in an old windex bottle and never run out!
Also the Chemical Guy's bucket kit https://www.amazon.com/Chemical-Guys-ACC_101-Detailing-Bucket/dp/B001U522GO was a pretty amazing deal and necessary if you're going to use coin-wash bays. However the mitt included is a bit rough, so instead I use a meguiar's microfiber mitt as its the softest I've found so far. The paint on this car is very soft so it's important to use the softest products possible on the paint.
An Invisible Glass Reach and Clean tool has worked out great for cleaning the interior glass and keeping it from fogging up. Great item to have. https://www.amazon.com/Invisible-Glass-Reach-Clean-95161/dp/B0017K69MA
And a bird poop tip, keep a plastic container with microfibers, a bottle of water, and a bottle of last touch / spray wax mix in the trunk or behind passenger seat. If a bird hits the car, just soak microfiber with water, apply for 30 seconds, and then clean with the detailer spray / spray wax.
To prevent corrosion, you're going to want to clean deep into the wheel wells and stuff with dedicated brushes and mitts, and then use an anti corrosion product (I ordered some ACF-50 spray recently, getting it in the mail today probably) https://www.amazon.com/Lear-Chemical-ACF50-Anti-Corrosion-Lubricant/dp/B000P1C8UO . You're going to want to check crevices for salt buildup, it can happen on some of the window trim parts, so it might be necessary to remove them and clean them out if it starts to rust underneath. You might want to use dabs of silicone stuff to prevent water and salt from corroding these spots. There are a few posts about corrosion of FT86club forums so read up on them. Also your cabin air filter, leaves and bugs like to get in your cabin air filter and make things nasty. You can easily check / service this yourself, its behind the glove box.
For maintenance, I would NOT go past 5000 miles on an oil change, and be choosy where you take your oil changes. The car likes running on fresh oil period. Buy a 5 pack of oem oil filters and oem crush washers to keep yourself straight for awhile, saves money and time. Or also a fumoto oil valve can save even more effort, as a DIY'er it made my oil changes the easiest thing to do. Check your tire pressure constantly, because a decrease in pressure will make the car drive like crap and will wear your tires out quickly.
Your 60k mile maintenance or therabouts is an important interval. Needs stuff done like spark plug changes, and probably checking the clutch throwout bearing to see if it has become worn. These are expensive and labor intensive, expect a $1000 bill.
Premium eMTB bikes using motors like the Bosch and Yamaha are probably the most water resistant. I expect that manufacturer information will provide very accurate information about water resistance.
If they have issues about water damage they are not going to admit it, but if you look through their warranty information and see they have exceptions about water damage then it's a safe bet they know they have some issues. That's just how these sorts of things work.
More affordable ebikes like the Sondors or Crosscurrent or things of that nature are just going to be using the same sort of Chinese parts that you can get with DIY... it's just that they pick some of the better quality stuff. Check out their warranty information and see if you can find exceptions regarding water damage.
------------------------------
For DIY bikes and hub motors... Most of the time people buy the cheaper stuff that isn't really water proof. It has to do with tolerances and such things.
For example:
When motors get used they heat up and the air inside of them expands. It gets pushed out through the wires and cracks in the gaskets and such things. When they cool down then the pull air back into them. If the air is very moist then it will draw that moisture back into the motors. The air cools further in the evening, the water condenses and turns into droplets.
After a few months in very wet climates they can develop a small puddle inside of them. The steel used for magnetic steel on the rotors is particularly vulnerable to rust.
When steel rusts it expands it' original size by 7x or 10x and the rust jamming up the motor is likely the most common killer of direct drive motors outside of accidents.
People try all sorts of things to make things water proof, but often make it kinda worse. Like trying to use excess amounts of silicon to seal controllers or replace motor gaskets.
Often it's better make it easy for water to drain out of electronics then it is to try to seal it up. If you go and look at outdoor electrical enclosures quite often they put weeping holes on them to allow water to easily escape rather then trying to make them permanently water proof.
But because it's all DIY you can still put extra effort into it and make things extremely water proof. Not enough to throw the bike into the ocean for a week... but it certainly can easily withstand a few years of being outdoors 24/7 if you want.
------
Some tips:
and a few other things like that. Check out endless-sphere for tips.
And of course there are people that take things to the extreme. Especially people that want to ride their bikes through streams and such. You can take apart a direct drive motor and spray anti-corrosion spray on it, for example. If you take apart the controller and spray conformal coating and make sure there is ways for water to escape at the lowest point in the mounted controller will make it so it can operate under water. Most of that stuff shouldn't be necessary unless you live in some seriously wet place, like parts of India or something like that.
I use Gorilla Glue on everything including plastics, resins, and pewter. It hasn't failed me yet.
1/4 inch birch from home depot. Durablack labels, axle pegs, Gorilla glue and steel brackets. Because the laser leaves a char, glued joints are not that strong so I like the bracket / peg arrangement. To make, glue edge of each piece, knock together. When done, stick in the pegs, use a japanese flush cutting saw to whack off excess peg. DXF file is here.
I did this in my 2014 forester with a new Nexus 7 LTE a 3.00 Black TPU case from Amazon and some strong little magnets.
Super simple install, looks really great in person, holds on strong, and is removable if you want to still use your tablet or to remove it for security. You can keep your stock deck also!!
I've been using this setup to "Click" my nexus 7 over my radio for 6 months now with out an issue. The three magnets hold perfectly and stay on even when taking off ramps and not so sane speeds and off roading. I've only had it fall off once when the california heat caused the little rubber feet to melt off. I fixed this with super glue and it hasn't happened again.
The parts that I used
Magnets: http://www.amazon.com/gp/product/B001KUURP2/ref=wms_ohs_product?ie=UTF8&psc=1
Rubber feet:
http://www.amazon.com/gp/product/B00CBU8XLA/ref=oh_details_o00_s00_i00?ie=UTF8&psc=1
Glue:
http://www.amazon.com/gp/product/B001IY82FM/ref=wms_ohs_product?ie=UTF8&psc=1
Case:
http://www.amazon.com/gp/product/B00EENEE24/ref=wms_ohs_product?ie=UTF8&psc=1
EDIT:
The Nexus 7 also has a magnetic field sensor that you can use in Tasker to trigger when the tablet it on the dash. For mine I have it auto sense the magnets and open Car Home, and turn the screen timeout off, turn off Wifi, enable Bluetooth, and turn on GPS. Then when it's removed it closes Car Home, enables Wifi, disables bluetooth and GPS.
Super Glue will either frost look or not glue to painted points.
I use http://www.amazon.com/Gorilla-Glue-4200101-Epoxy/dp/B001Z3C3AG put a dot of glue -- enough to not smoosh out then wrap a rubber band the head. Let it set for how ever long the written directions say for. Thats how we glue parts on GKs but minus drilling a hole and putting a pin joint to glue it steady, but I don't think its necessary at the moment.
Gorilla 2-part Epoxy Clear
I guess you can use Super Glue if you are not comfortable with epoxy. Maybe better would be the gel type of super glue. It's just that super glue by nature is not as sturdy when it comes to "shock" strains like should it get dropped or of you slam the detolf door hard enough. Just make sure the superglue is well and dry before putting it in the detolf case as superglue has a tendency to fog up glass.
lead weights
glue
Alternatively, you can just buy the epoxy and glue the toaster to the table.
depending on how rough it feels I would suggest starting with an 80g or 100g and then finishing with 120g and 220g. You can skip the first one if it is not super rough. Get one of those sanding sponges with the different angles on them. That will be easier on you hand than just sand paper. Becasue of the shape you'll want something that you can wipe or spray on. Use 4-5 thin coats. The easiest/cheapest option would be a wipe on poly or even better an Aerosol Spar Urethane. EDIT Also, sand lightly in between coats with 220 or higher. This helps the next coat stick.
You might also consider trying to fix a few of those larger cracks by filling them in with a two part epoxy
Good luck! It will be a nice surprise for her when she returns.
I made one but I decided that I was going to go balls deep and try one of the most difficult designed mau5 heads out, the disco head. Long story short it cost me about ~$300 to make, not counting 2 others that I messed up on.
Materials:
-Head
-Eyes
-Head Mount
-Mouth Mesh
-[2] Led lights for coloring the eyes
-Superglue for mouth
-[2] Plastic glue for Headmount
-About [6-10] Rhine stone glue bottles
-[3] bags of Rhinestones
-Foam Ear material ---> With Ear template
-Washers -[4] Threaded Rods -Wing nuts
-Chrome Spray paint
-Lastly, Insulation Strips [White]
+++++++++++++++++++++++++++
Stuff I had: Dremel, stubbornness, no life, sharpies, too much free time.
+++++++++++++++++++++++++++
Use any of the above tuts to get the general idea.
The template for the ears, (mine are huge).
Once the mouth is cut and you accounted for the eyes (pop the eyes in half and trace them on.)
Spray paint the whole head chrome, in light mist layers. The more layers the smoother the finish.
Once that's done, enjoy the 90+ hours of putting each rhinestone on, one by one.
Profit.
You could probably get a cobbler to stitch it down again no problem, or you could use some Shoe Goo.
A warning with super glue. When the glue dries, it will be solid as a rock. You can find flexible kinds, but even those types of super glue will be quite stiff
If you want it to remain flexible, you can use a product called Shoe Goo. It is strong and remains flexible, and can be found in quite a few local stores, like hobby shops and hardware stores. Another option could possibly be a form of fabric glue, though I have no experience with them so I can't recommend anything.
For a less permanent option, I would try some strong double sided tape, maybe something like this from 3M. It will remain flexible, and you could always remove it, but it may not hold for as long as the other options.
Those are some amazing looking scaled boots.
A shame they are separating like that.
I have no experience with the scaled versions for figures, so no idea if this suggestion will work or not...but I did wear Doc Martens for years, and had the sole separate, on a few different pairs.
When this happened I used Shoe Goo.
Obviously, no guarantee, but it might be worth a shot, if you don't get any better suggestions.
http://www.amazon.com/gp/aw/d/B002L9AL84?pc_redir=1406882480&robot_redir=1
this stuff is amazing, if it's just the sole coming off
I just copied the YouTube dude's parts list and bought them from Amazon. The USB light has several levels of brightness so that's a bonus.
I added an extra Magic Tape at the back before adding the Fastener in case the Fastener leaves a mess when I decide to remove it
Unless you plan on touching that dock once in awhile, you should get some 3M based velcro strips and mount it under the desk since it looks like you value minimalism.
https://www.amazon.com/SCOTCH-Fasteners-Extremely-Strong-Holds/dp/B00347A8GM
Wow, I'm jealous of ethernet in each room. Nicely done.
If you already have a switch buy 3 to 5 Unifi AC-Lite APs. If you dont have a switch get a Unifi POE switch & their 5 pack of AC-Lites. As the 5 pack doesn't include the POE injectors.
Once you have the APs tape to walls / ceiling with gaffer tape (like duct tape but less residue) to sort out ideal placement & eliminate dead spots. Then once placement is sorted use Scotch fasteners or screw the base plate to drywall / bookcase.
SCOTCH Fasteners Extremely Strong Holds 10lb, 4.5Kg https://www.amazon.com/dp/B00347A8GM/ref=cm_sw_r_other_apa_bwIWBbZ63W8K5
No problem. CA is just super glue. I use Loctite Ultra Gel. It's nice and thick so I can apply it with a lot of control. I just use a needle in a pin vise to apply it and then once it's built up and dried on the needle, I burn it off with a lighter to refresh the needle.
What kind of paints are you looking for? It's hard to specify brands since they all kinda have their own place. I personally prefer to use lacquers out of my airbrush, so my go to paints for that are Mr Paint, Gunze Mr Color, and Tamiya. For brush painting, I like to use Vallejo Model Color acrylics. Ammo of Mig and AK Interactive have a good line of acrylic paints, but they don't brush as well, IMO, as Vallejo Model Color. You should be able to google them all and find them. If you need links I can get them, but I'm also on mobile right now so it's a bit of a pain in the ass. If you're in the US, I do my paint shopping at Hobbyworld-USA.
If you have any questions, feel free to PM me, I'm happy to help.
I only really use superglue for magnets and the very few amount of resin models we have, but i really like this one: Loctite Ultra Gel Control Super Glue 4-Gram (1363589) https://www.amazon.com/dp/B003Y49R7G/ref=cm_sw_r_cp_apa_i_Nb9KDbT7PGKD6 because i have an insane amount of control over the amount that comes out, it is a pretty small bottle as far as i can tell though so if you need a lot of glue, i wouldn't recommend it.
A dab of super glue and you'll be back in business. I like the gel stuff. Really good.
The original LEGO design has the same design flaw - the magnets are just too strong. (kinda need to be) I tried to do this without using glue as well but at the end of the day, it really makes no difference. I would suggest Loctite. I used it with my lepin ISD and everything went fine. (almost 2 years now)
Just four dabs on the magnet holder studs will do just fine. The ones that have an extra lego piece, glue those 4 studs too. If I recall correctly, all the magnet location instructions should be fine and everything should line up but the glue really isn't all that permanent. I have sometimes pried off glued pieces using a knife and/or pliers with minimal damage.
If you are having issues with the wings falling apart, make sure to apply a lot of pressure on a flat, level surface to ensure all the long panels are inserted all the way. It takes a bit of force with the real LEGO pieces because of the size but sometimes a bit more with lepin.
I had a much easier time with the UCS Venator because of my UCS ISD lepin experience, but that one has some different issues.
Pick up some food grade silicone and put a dab on the ends to keep it together. If you use just the right amount and don't make the wick tight it shouldn't impact function, especially if your wicks run a little longer.
Example: http://www.amazon.com/Clear-Food-Grade-Silicone-Sealant/dp/B0063U2RWU/
Has to be food grade or you could be adding things you do not want in you to your juice.
I actually use these on a $40 wal-mart chair, and it's perfect.
but the way arm rests tend to be mounted on gaming chairs you may want these as they'll put them more towards where you can reach without contorting.
Hope either of these help you out :)
EDIT: I attach them using this stuff and it is amazing and lasts so much longer than regular velcro, and it's great if you might want to take off your hotas and attach it to your desk or another chair.
Dual lock velcro also does a fantastic job at helping to hold a battery still if you're looking for a slightly more refined solution.
The OG product.
https://www.amazon.com/3M-Dual-Lock-Reclosable-Fastener/dp/B007OXK1AK/ref=sr_1_5?keywords=3m+lock&qid=1557450379&s=gateway&sr=8-5
If the cracked lid casing is the common problem shown in the photograph here there's a pretty easy fix:
Apply a small spot of J-B Weld embedded with a small finishing nail laid across the break for extra reinforcement in the area shown in the photograph here.
You just need to remove the screen bezel and temporarily push aside the antenna wires. Make sure everything is aligned and let it set up for about 24 hours and the bond will be virtually impossible to break. I've done this on a number of X220 and X230 units and it holds up really well.
some stuff you might want to think about bringing:
>lock and chain/bike chain.
you're going to be leave your campsite for ~12 hrs if no one goes back for a break. it takes about a minute to run a chain through your cooler handles, foldable chairs and other stuff. it's also easy to jb weld a metal loop onto an ez-up so they dont walk away either, i've never heard of someone ganking an entire ez up at roo, but i'd be pissed if mine was gone when i came back after the first night.
its easy for someone to walk off with one chair, its almost impossible for someone to carry your entire campsite away without anyone saying anything about it. and if you bring enough chain you can loop it around the wheel of your car, and i doubt thieves are going to go through all that hassle when no one else is locking their shit down.
>rug/carpet
grass might be super long at your campsite
>battery powered fan and string
hang the fan from the middle of your tent and itll be cool enough to get a few more hours sleep in the morning
>battery powered camp lantern
flashlights are good, but a handsfree light that illuminates everything around it is really nice if you dont go to sleep as soon as you get back to your camp.
>extra socks into centeroo
i prefer sanucks and going sockless, but if you're wearing socks bring an extra pair with you in your camelpack/backpack. wet socks suck and can mess up your whole weekend if you're stuck wearing them
The $6 fix; JB Weld epoxy.
The bond will end up being stronger than the plastic. It might look a little ugly, but for $6 it's the best option as far as price/performance.
is it aluminum body or carbon fiber if its an alloy get some jbweld, i used it to weld fittings to 2 stroke rc car mufflers that had high temps and it held grate
https://www.amazon.com/J-B-Weld-8265S-Cold-Weld-Reinforced/dp/B0006O1ICE
apparently there marine weld is good for composites
I’d take it apart a little bit, so you can easily get to the areas you need to, and use some J-B Weld to glue it back together.
This is a really precarious spot on the X220 and X230 lids. I've managed to repair a few that had this same issue.
I used a small spot of J-B Weld imbedded with a small finishing nail laid across the break for extra reinforcement in the area shown in the photograph here.
You just need to remove the screen bezel and temporarily push aside the antenna wires. Make sure everything is aligned and let it set up for about 24 hours and the bond will be virtually impossible to break.
Since your title specifies low cost you can save some money by using a wired lav mic like this Audio Technica or this Olympus lav mic. You simply plug it into the camera's mic input. A 3.5mm extension cable might be needed to reach the camera. Use the lav mic with an inexpensive voice recorder if you need the subject to move around. Smart phones have decent audio recording apps too. Syncing the audio in post can be a hassel so only do this if the shot requires being untethered. If you record audio with a separate recorder it helps to mark it by saying a scene number and making a clap sound so you can find it and sync it with the video editing software.
For lighting you might consider an inexpensive LED light and a second battery. Charge one battery while using the other.
I've used clamps like this and this for quick and simple mount of camera and small lights to a chair, windowsill, cupboard, etc. You can use JB Weld to put a 1/4-20 nut-coupler on the light if it doesn't have it already.
edit: I like Canon equipment and their line of Vixia Camcorders starts at around $300 and has a mic input. The lens and image stabilization gets you a nice picture compared to a camera phone or similar "cheap" camera.
IIRC Premiere has a basic mode that uses a simpler timeline more like Apple's iMovie. You can download 30 day trial versions of the latest Adobe products. Give Premiere Elements a try.
This can be fixed.
Use some epoxy do not use glue. Glue sucks, even gorilla or super glue hasn't got shit on epoxy.
I swear to you, if prepared and applied properly, the bond with the JB Weld linked for you will be stronger than the damn plastic after you let it set for 24 hours.
If the plastic breaks again, it won't be where you used the JB Weld. The shit is insane.
They would be a hell of a lot cheaper if they were;
Official Leica Cufflinks: $970 USD
DIY Leica Cufflinks
DIY Cufflinks Guide: $0 + Replacement Leica M Shutter Speed Dial $99.98 + 2 Silver Cufflink Blanks $16+ 2 Silver Contact Screws $15.80 USD to fill in the screw hole and be trimmed flush, + JB Weld to really nail it down $12.96 USD = $144.74 USD
You can make a genuine pair, with pure silver posts, and at most an hour of time for $825.26 less.
It might be a little overkill but.... JB Weld would work.
hope grad school is going well gabs
I've had the same issue before, fixed it with this stuff: http://www.amazon.com/J-B-Weld-8265S-Compound-Twin/dp/B0006O1ICE/
JB weld is an epoxy. You can buy a tube for like 6 or 7 bucks. It doesn't require welding. I've removed dozens of stripped screws with this stuff.
I think Plasti Dip is pretty cool. It's temporary but it protects the metal surface and it looks good too. One cool thing is you can put it on with an HVLP gun or a can. If you screw something up, you can peel that part off and respray it without doing the whole car. There's just no reason to be driving around in a tri-color hoopty with this stuff around.
http://www.amazon.com/Performix-11203-Multi-Purpose-Coating-Aerosol/dp/B0006SU3QW/ref=sr_1_1?ie=UTF8&qid=1408415322&sr=8-1&keywords=plastidip
Can be bought in your local hardware store most likely
https://www.amazon.com/Performix-11203-Multi-Purpose-Coating-Aerosol/dp/B0006SU3QW/ref=mp_s_a_1_3?keywords=plasti+dip&qid=1565290567&s=gateway&sprefix=plasti+dip&sr=8-3
For the plasti dip
http://www.amazon.com/Performix-11203-Multi-Purpose-Coating-Aerosol/dp/B0006SU3QW/
But you should be able to find Plastidip at any hardware store.
You can buy spray plasti dip.
https://www.amazon.com/Performix-11203-Multi-Purpose-Coating-Aerosol/dp/B0006SU3QW/ref=sr_1_1?ie=UTF8&qid=1467574791&sr=8-1&keywords=plastidip
I bought a set of WearEver stainless, induction-ready pans several years ago and they're still like new. The nonstick is completely unscratched, everything seems top-notch. I expect they will last me a lifetime, but you can certainly spend a lot more and get some which are nicer in some way.
The only thing I don't like about them is the lid handles get hot; I coated mine with PlastiDip but idk if that is safe for the oven; I only use these on the stovetop.
Sure, it is just your typical Plasti Dip classic black 11 oz can. Here's a link to the one I used, though I bought mine at Lowes for like 6 bucks.
https://www.amazon.com/Performix-11203-Multi-Purpose-Coating-Aerosol/dp/B0006SU3QW
Plastidip! I mean it's what I used for my car and also Xiaomi M365 and it works. Have yet to try it on my rev though :)
Performix 11203 Plasti Dip Black Multi-Purpose Rubber Coating Aerosol - 11 oz. https://www.amazon.com/dp/B0006SU3QW/ref=cm_sw_r_cp_apa_i_CvkCDb0NCY5D0
plasti dip, you can find it in most stores that sell paint products
​
It only cost $48 and I have a whole can left over. I just wanted to see what it would look like with black rims because the sliver paint was chipping off.
Plasti Dip: https://smile.amazon.com/dp/B0006SU3QW/
Scouring Pads: https://smile.amazon.com/gp/product/B001KYQBX0
I use plasti-dip on mine. I just dipped the handle in it. I put 2 coats. I don't cut my hand anymore. They sale it in a can at Harbor Frieght if you have one close by.
​
https://www.amazon.com/Performix-11203-Multi-Purpose-Coating-Aerosol/dp/B0006SU3QW/ref=sr_1_2?keywords=plasti+dip&qid=1557410466&s=gateway&sr=8-2
https://youtu.be/otCtkVePX_0
——————————————-
https://www.amazon.com/Performix-11203-Multi-Purpose-Coating-Aerosol/dp/B0006SU3QW/ref=pd_aw_lpo_60_bs_lp_tr_img_1?_encoding=UTF8&psc=1&refRID=DTKQBCFBS1BCFCF89CAH
Plasti Dip possibly. See [HERE] (https://www.amazon.com/Performix-11203-Multi-Purpose-Coating-Aerosol/dp/B0006SU3QW/ref=sr_1_cc_1?s=aps&ie=UTF8&qid=1537149822&sr=1-1-catcorr&keywords=Plasti+Dip+black)
https://www.dipyourcar.com
Watch some of their vids on YouTube, they are pretty cool.
Here it is on Amazon
https://www.amazon.com/Performix-11203-Multi-Purpose-Coating-Aerosol/dp/B0006SU3QW/ref=mp_s_a_1_1?keywords=plastidip&qid=1556123766&s=gateway&sr=8-1
Let me know if you need tips.
Here
Here's what you're looking for
Plasti dip!
That is also my general understanding of how to ventilate.
If your winter temps don't drop below freezing, I believe you can vent year around (someone please correct me if I'm wrong here), but closing off the vents in cold weather doesn't just protect your pipes, it helps cut down on your heating bill a tad (but probably not by much really since the R value of a foundation is fairly low).
As far as getting your current vents to work, I have used liquid wrench penetrating oil and achieved great results and I haven't tried it but have heard great things about Kroil.
In your case, I think that you REALLY need to get down a vapor barrier under your house--that will cut down on the stale smell, and I am pretty sure it also reduces exposure to radon (if you are at any risk).
This video does a good job of showing a well executed install of vapor barrier.
My house was built in 2001, so I'm guessing somewhere around then.
Something like this maybe?
So when I discovered pb blaster, it was amazing. Stuff worked so much better than the other products I used. Then I got into the trades and a couple of the old timers swore by a product called Aero Kroil. I refuse to use anything else now. Literally works 20x better than pb blaster. Stuff is amazing. I have never had it fail to break anything loose.
http://www.amazon.com/Kano-Aerokroil-Penetrating-aerosol-AEROKROIL/dp/B000F09CEA
Also they make Sili Kroil which adds a silicon type lubricant, which works 10,000 times better than WD40 for lubricating.
http://www.amazon.com/SiliKroil-Penetrating-Solvent-aerosol-SILIKROIL/dp/B0003041WK
There is a penetrant you can buy called Aerokroil that Ford recommends specifically for removal of stuck spark plugs. It is recommeded by name in the factory training video for removal of the 3 piece spark plugs that get stuck in the triton engines. This stuff is amazing.
Before you break it off, get a can of this and let it soak in for an hour or so. The plug will probably come right out.
http://www.amazon.com/Kano-Aerokroil-Penetrating-aerosol-AEROKROIL/dp/B000F09CEA/ref=sr_1_1?ie=UTF8&qid=1393988347&sr=8-1&keywords=aerokroil
Kroil.
I've won bets with a can of Kroil and a Knipex Cobra.
WD-40 is a terrible penetrating lubricant. He'll want to use something like PB Blaster or AeroKroil. WD-40 was designed for water displacement, not lubrication, and it doesn't penetrate much at all.
Kroil: http://www.amazon.com/Kano-Aerokroil-Penetrating-aerosol-AEROKROIL/dp/B000F09CEA/ref=sr_1_1?ie=UTF8&qid=1420942400&sr=8-1&keywords=kroil
I recently did an accidental long term storage test on my guns. I didn't have nearly the same amount of rust you do but... /u/moveman61 recommend Kroil to me. It worked wonders.
Steps:
Strip 870 (stock included)
Spray Kroil on affected areas
Let sit for 10-15 min
Use brass brush
Wipe clean
From here you have 1 of 2 choices
A: Apply oil to prevent future rust
B: degrease and paint it
In the past I have used black spray paint that is meant to go on grills. Its a cheap (bubba) solution compared to more expensive paints and it has worked quite nicely for me in the past. I wouldn't use this method on a nicer gun but for the standard black 870 it works great. If you're worried about matching colors just go ahead and clean/paint the barrel as well. As long as you do a decent spray job nobody will even notice. I even had one guy ask me how I kept the finish so nice over the years. It took him a second to realize there was paint on it.
I bought a knife for 2 bucks that was a little less rusted then that, but still very rusty. Don't forcefully open it, but if it opens without too much effort that's ok. Before opening or trying anything soak it in WD40. If you have a type of penetrating oil (like Kroil) that would be good too. Once the WD40 has gotten as much rust off as it can, you will want to take some kind of metal brush too the blade. If you have a wire brush and a drill, you can carefully try that too (just on the really bad parts). Once you've gotten it down to where you can see more metal then rust, take some #000 steel wool and some WD40 and get to work. As for the handle, I would suggest starting off with #000 or even #0000 steel wool as it is really fine and can remove the lighter rust with ease. Once you've got it de-rusted take some metal polish and a towel and get rubbing. If that isn't working fast enough, take some of the #0000 steel wool and use the metal polish with that. At this point you should have a pretty shiny knife, but there will likely still be dips in the knife with rust in them. Not a whole lot you can do about that, but hopefully the worse of it won't be on the blade (or edge of the blade). At this point you will want to clean the knife with isp alcohol to make sure no wd40 or polish is left on the knife, and then go ahead and sharpen it.
If you can get some Aerokroil. This shit is amazing, it will loosen just about anything.
If it still doesn't come out, spray it down with Aerokroil and let it sit overnight to soak in. Next day use a torch to heat up whatever the bolt is threaded into, while cooling the actual bolt with some ice. This will cause the the metal to expand and shrink, loosening the fit on them.
Aeokroil is the best I've ever used
Supposedly This is the best over the counter penetrating oil you can buy. I've never used it. I personally use This.
Thanks! You'd recommend just a single application of this stuff? Is there anywhere else in particular that ACF50 comes in handy, to justify buying a can?
KTC Riders Maintenance Tool Set and 2 cans of ACF-50
Here are some of my personal supplies and tool recommendations.
An anti-corrosive spray, doesn’t hurt paint but I’d be careful about yours anyway.
www.amazon.com/dp/B000P1C8UO/ref=cm_sw_r_cp_tai_5v0NDb496VPF6
A good tire pressure gauge. www.amazon.com/dp/B01J8DLGU2/ref=cm_sw_r_cp_tai_dy0NDb58BP0WX
A basic multimeter. www.amazon.com/dp/B01ISAMUA6/ref=cm_sw_r_em_tai_c_VZPFDbGK9FQ5V
A great battery tender, a lifetime purchase. www.amazon.com/dp/B000CITKCE/ref=cm_sw_r_em_tai_c_ACFQCb40H0E0K
A very good spray on bike cleaner. www.amazon.com/dp/B0036GK83Y/ref=cm_sw_r_cp_tai_XB0NDbJZZC76W
A good explanation about testing your battery and charging system, goes well with the multimeter and tender.
https://www.louis.eu/rund-ums-motorrad/schraubertipps/elektronik
These screwdrivers or ones like it are a must. www.amazon.com/dp/B00A7WAHTU/ref=cm_sw_r_em_api_i_c_kBB7AbGCN238A
A winter storage checklist, very detailed, and can probably pare it down a little but...
http://www.clarity.net/~adam/winter-storage.html
The best (IMO) winter gas treatment. www.amazon.com/dp/B001CAW2DK/ref=cm_sw_r_em_tai_c_ryNKDb9RRE8KF
One of many easy to use lift, works for both front or rear, may have a model for a smaller bike, this is for my Yamaha Raider www.amazon.com/dp/B016Z01QYW/ref=cm_sw_r_cp_tai_UH0NDbVMTEC9K
A great totally enclosed cover, find the size for your bike. I attach the battery tender, the cord comes out where the zipper meets.
www.amazon.com/dp/B001I7XYZW/ref=cm_sw_r_cp_tai_sJ0NDbTJAPEEB
For maintenance questions, a great sub is r/Fixxit.
That’s all I can think of at the moment, welcome to the Club and Happy Trails!
https://www.amazon.com/ACF-50-Anti-Corrosion-Lubricant-Compound-Aerosol/dp/B000P1C8UO
I can't speak highly enough of this stuff.
I use ACF-50 to keep all bare metals from corroding at work and at home.
I use a pin vice to drill the holes; I use wire (any kind will work; I've used sewing pins, paper clips, wire from a spool, piano wire... really, whatever I have within arms reach) for pinning. For the glue, I use Gorilla's Super Glue.
If I'm pinning a metal or resin model, during assembly (I don't worry about pinning plastic as it's usually light enough that plastic glue holds it together just fine), I drill my first holes, then I use a larger drill bit to flare out the entry points, so i have some wiggle room. This generally isn't needed when pinning to a base, but it helps if you want a very specific footing and you're not confident in your drilling.
What I use.
It dries a little gray/cloudy, but I just try not to use too much and you can't really tell. I just add the drop, let it set a few seconds to start to dry (I scuff up the magnets with sandpaper as I wait), then use a Q-tip to remove excess.
This is the tutorial I used to learn. I use slightly different magnets and don't drill in too much. I don't mind seeing the magnet, but I do want it to stick well and lay flat.
https://www.amazon.com/Gorilla-Super-Glue-Gram-Clear/dp/B001IY82FM/ref=mp_s_a_1_2_sspa?crid=1UPES2QIS7N6M&keywords=gorilla+super+glue&qid=1556923885&s=gateway&sprefix=gorilla&sr=8-2-spons&psc=1
For the base:
https://www.amazon.com/gp/aw/d/B00OSJ2RIW/
For the column:
https://www.amazon.com/Non-Stick-Silicone-Containers-Storage-Assorted/dp/B07CVWY3YY/
To put it together:
https://www.amazon.com/Gorilla-Super-Glue-15-Clear/dp/B001IY82FM
I usually use Gorilla brand super glue for plastic models. I'm sure any super glue will work well enough for a shelf model, though. Use a small amount; if you use too much it won't stick as well and will ooze out of the crack when you put it back together. I'd recommend gluing it after moving, so you're less likely to break it again. A fresh bottle always seems to be more potent than a bottle that's been sitting in a drawer for months. Also, don't eat the glue and don't glue yourself to the model. Is that everything? I think that's everything.
I actually made it. Cost me somewhere around $75 if I remember correctly. Buy all the materials listed below for the size/quantity you want, and then I custom printed and cut clear labels for the top and sides of the jar. The magnets are glued to the inside of the jar lids. If you get them strong enough they will never slide or slip. The ones I list can get about a half inch from the stainless base before they won't go back.
Stainless Steel Backplate - You can order in a lot of places - but make sure you have the correct steel makeup. Not all stainless is magnetic!
Superglue - Any standard superglue should work.
Magnets - It would seem that they don't sell these magnets anymore, but it should be easy to find something similar.
4oz Glass Hex Jars w/ Lids - This was the most reliable source at the time.
You can try using Gorilla Glue to paste the head back on. That thing can glue almost anything together.
I've had a few pairs of shoes do this to me, including a pair of platform Demonias. I found that epoxy (this stuff) worked really well to keep the sole on. When mine did it, only the sole came off, and the bottom part of the place where you put your foot stayed whole. Hopefully yours didn't rip or anything. If they did, I don't think epoxy will help without creating uncomfortable bumps under your feet. Good luck!
Shoe Goo Repair Adhesive for Fixing Worn Shoes or Boots, Clear, 3.7-Ounce Tube https://www.amazon.com/dp/B002L9AL84/ref=cm_sw_r_cp_apa_i_kre6Cb2HVGHQS
Shoe Goo!
Just to add another option: Order some Shoe Goo off amazon, pull some old and busted shoes out of your closet and make them into skate shoes! I found an old pair of pumas and two pairs of destroyed Chuck Taylor's that are working great for me
I immediately took the stock tape off because I knew it wouldn't hold up well. I also wanted the ability to remove the entire mount whenever I wanted so I used this 3M heavy duty fasteners instead. It's like velcro except that it uses thick plastic prongs rather than fibers to bind itself together. It also has better adhesive on the backing. I've hit my AP countless times with my knee, accidentally yanked on the cord, as well as taken high G force corners and it has never ever fallen off. I've had it mounted like this for almost a year.
Ah, I didn't make that connection. Just hang it instead? Or if you don't need perfect positioning, these are strong enough even with possible cable tension and don't wear out like velcro.
I was going to say get some 3m velcro. Just don't put it on stickers.
http://www.amazon.com/Scotch-Heavy-Duty-Fasteners-Inches-RFD7091/dp/B00347A8GM/ref=sr_1_2?ie=UTF8&qid=1450881554&sr=8-2&keywords=3m+heavy+duty+velcro There ya go OP.
I went from Gen 5 to 6, get these with some velcro. Stick next to your right knee on the transmission tunnel for a good cell phone holder.
If you need a front plate, ZL1 Addons makes a great one I can vouch for.
I use this - 3M Dual Lock Plastic Velcro along with a typical normal Velcro strap. That battery will not move, I promise. The 3M is incredibly strong for front to back movement and they regular strap also helps prevent it from lifting up.
I've had the battery eject from my quad ONCE, but that's only because it ripped the shrink wrap off of the battery pack! The 3M held it in place lol the shrink wrap was still attached to the quad.
Battery Pic - http://imgur.com/jVvQyWX
Altering is something I'm really enjoying. It's nice knowing your mini is different. To answer your questions:
The most difficult part with altering the sword was making sure I didn't cut the blades incorrectly leaving them too short or long, as well as making sure they were flush. Then it's just a matter of gluing them in place. I recommend picking up Loctite Gel Superglue. I'm finding it works well with Bones figures and gives you a lot more control.
The runes were part of the new blades I cut from the Rauthuros figure. I just dry-brushed them blood red, then highlighted using an extremely small brush.
I'll set to work on pictures of a couple other figures I have here next to me and make a new post for you to check out.
This is the stuff I use at work (computer repair); it works fine for gluing feet back onto laptops so it should be good for your keyboard. Pretty much any hardware store should have it.
This is what I use whenever a pop breaks. It works pretty good. I use it on a lot of things like acrylic, metal, wood etc. dries pretty fast also
Loctite Ultra Gel Control Super Glue 4-Gram (1363589) https://www.amazon.com/dp/B003Y49R7G/ref=cm_sw_r_cp_api_m6TpzbQKTCDFG
Oh no sorry to hear that! I would use this
https://www.amazon.com/Loctite-Ultra-Control-4-Gram-1363589/dp/B003Y49R7G/ref=sr_1_1?ie=UTF8&qid=1519869341&sr=8-1&keywords=loctite+ultra+gel&dpID=51RApY2mL2L&preST=_SY300_QL70_&dpSrc=srch
I have never had any problems in the past with this glue. place VERY fine amounts on her finger tips. This is what I would do, and I firmly believe it will work out fine.
So sorry :(
Edit: I purchase this from home depot all the time, but amazon would work fine. Keep me posted!
super glue that i used
has worked great for reattaching an x-wing laser cannon and 2 pegs
my raider came with the front peg holder broken off, so every time i put it on or off peg i fear it will break again, but that damn super glue connection almost seems the strongest part of the ship now lol
Or use something like this to coat it.
https://www.amazon.com/Clear-Food-Grade-Silicone-Sealant/dp/B0063U2RWU
Truthfully, that is all you need. If you don't have a way to make proper holes in your pot you'll also need a step bit.
On my pot, the rubber that came with the element was enough but you may need separate o-rings (AS568A Dash Number 217).
That's all!
If you can just pop it back on, and you really want to salvage the lid, I'd try high-temp epoxy before giving up. I wouldn't personally worry about it being food-safe, since it's not going to be in direct contact with the contents of the pan.
Just pop the handle back on, mold a decent amount of the putty over the connections, and let it cure thoroughly before use.
Alternately, there's food-safe silicone, which might be easier to work with, though it might not hold up as well under use.
Just don't put either in the oven. They're both supposed to hold up to 400-500F, but I wouldn't trust 'em.
yeah there is stuff like this http://www.amazon.com/Clear-Food-Grade-Silicone-Sealant/dp/B0063U2RWU
But i've just used stuff from the hardware store...considering food or liquids would likely never touch the lip the lid sits in, i didn't really see a problem with it...if you apply it evenly, and wipe off any excess, unless someone twisted or moved the lid with quite a bit of pressure, i doubt there is a risk of any coming off into your vessel, at least, i've never seen it. That being said if it was a teapot or something that would be heated often...i would probably look for something specific, or just skip using this method entirely. Also not sure if cheaper stuff will become hard and crack years down the line.
Here, that’s a small tube of it I found on amazon. Should work for what you need. Remember to read the instructions on it.
This stuff is awesome:
https://www.amazon.com/3M-Dual-Lock-Reclosable-Fastener/dp/B007OXK1AK
Much stronger attachment than normal velcro, and can be removed cleanly (might just need a bit of goo-gone to get all the residue)
I haven't had a need to put any on my synths, but I use it to hold pretty much everything else together.
I built my own pedal board case out of plywood. In order to attach pedals, I've got one better than velcro: 3M Dual-Lock. It's incredibly strong, and survives way longer than normal velcro.
Edit: have some pictures!
Not shown is a MIDI floorboard that goes across the top-left for channel switching, etc. on my tube amp (Hughes & Kettner Swtichblade).
Over the next while, I hope to see the board get smaller and smaller as I sell it off since I just got an Axe FX and don't expect to ever need another pedal again (except I'm not going to sell the Silver Bulb Overdrive Deluxe because it's great and the T-Fuzz because it's pretty rare and have you heard that thing?!).
VELCRO - Industrial Strength - 2" Wide Tape, 15' - Black https://www.amazon.com/dp/B00006RSP1/ref=cm_sw_r_other_awd_Lu42wbXY3P2CH
That's what I use.
Here is the stuff Pedrotheterror recommended. I have never personally used it though. Seems a bit overkill as well.
3M Dual Lock Reclosable Fastener TB3550 250/250 Black, 1 in x 10 ft (1 Mated Strip/Bag) https://www.amazon.com/dp/B007OXK1AK/ref=cm_sw_r_other_awd_Fv42wb66S3VNH
Anytime! 3M Dual Lock Reclosable Fastener TB3550 250/250 Black, 1 in x 10 ft (1 Mated Strip/Bag) https://www.amazon.com/dp/B007OXK1AK/ref=cm_sw_r_cp_api_FSb-Bb8T1AKGD
Sorry embedding links isn’t working for me at the moment. It’s similar to hook and loop but just holds a lot better. You don’t need much and it is very strong.
I use it for my pedals as well.
On the cheap side I would use 3M Dual Lock, it's similar looking to velcro but WAY stronger. Instead of hooks and loops it uses opposing mushroom tops, the one I linked is the medium strength (250) and I think a 4-5 cm square on all four corners would be more then strong enough to hold up an A2 aluminum print (don't use too much, it is strong!). It's also nice that unlike velcro you use the same material on both sides, so you don't have to keep track of what you put on the wall or print.
A step up from that in price would be aluminum standoffs. Nicer looking, but much pricier and requires drilling a hole in the wall.
I was just buying the little ~$5 pack at HomeDepot when I needed it, but that only gets you about 6 inches.
I think this is the same stuff. I need to go to HD tomorrow and verify I was buying 250/250. https://www.amazon.com/gp/product/B007OXK1AK
Use this to fasten the grill cloth frame to the speaker baffle. That way you can take it on and off for access. You only need 4 smallish pieces to hold it on.
I have a sheet on both aluminum and glass. For for both I used 3M 468 adhesive. Works great, just be careful as it loves to stick to itself and once it's down you can't straighten it out.
I used this (Amazon link): [TapeCase 12" squares (pack of 6), Converted from 3M 468MP Adhesive Transfer Tape] (https://www.amazon.com/dp/B007Y7D5NQ/ref=cm_sw_r_other_apa_Ux1sxbDHBG4C0)
Make sure your build surface and PEI sheet are squeaky clean beforehand. Alcohol is your friend (rubbing, not drinking, though that's good too). Take your time laying down the adhesive to the PEI to minimize bubbles (there will be bubbles). Smooth it out as much as you can. You'll end up with a handful of larger bubbles still, but that's OK. Peel of the remaining sheet from the adhesive, and pop those suckers. I used an exacto knife and carefully scored the bubbles, then used a small piece of the discarded backing sheet to smooth them out. Now that that's done, carefully align and lay the stickified PEI sheet onto the aluminum bed. You only get one shot here, so make it work. What I did was lay one edge down and carefully push it down, keeping the farthest edge of the PEI up until the end. Take your time and keep bubbles to a minimum. Once your down, congrats. You now have a a super surface for printing.
Why all the stuff about bubble though? Well, hot air expands. This can cause minor warping of the PEI sheet as it warms up, and can mess up your first layers. You'll have some areas that might not go down smoothly, and others that the nozzle drags on. It's annoying. Trust me, I still need to redo my aluminum the right way.
Side note: if at all possible, I'd recommend getting a PEI sheet larger than your bed. Less work aligning it, then you can cut it to fit after putting it down. Drill holes through it afterwards, hell even counter sink it a bit. You'll have a nice looking print area afterwards!
...shit, time to order a 12in PEI sheet.
To install it you will need some sort of adhesive. I used these to keep it simple https://www.amazon.com/TapeCase-squares-Converted-Adhesive-Transfer/dp/B007Y7D5NQ Slap it on whatever you want, just make sure it's a solid surface (not directly onto a PCB, because the PCB may flex and this PEI does nothing to prevent that). Adhesive on PEI or adhesive on heated surface first is entirely up to you.
The $15 vs $50 price you're probably just paying for the brand -- I haven't found any reason why this generic Polyetherimide stuff would be inferior compared to the pricey stuff.
The putty knife is probably fine as long as you don't dig in with the corner of it. Unscientifically I'd say the PEI is quite hard. So far the only damage mine has suffered was from the hot nozzle scraping across it. Pretty sure I've dropped few screwdrivers on it over the past months and there's no sign of it.
If you get a 12x12 sheet you will probably have some scraps left over once you cut it to fit. Play around with that to get a feel for how much abuse it will put up with. :)
Get this - http://www.amazon.com/Polyetherimide-Natural-Standard-Tolerance-Thickness/dp/B00CPRDDLY/ref=sr_1_1?ie=UTF8&qid=1421210514&sr=8-1&keywords=pei+sheet
Then get this - http://www.amazon.com/gp/product/B007Y7D5NQ/ref=oh_aui_search_detailpage?ie=UTF8&psc=1
Cut the sheet to the size of the bed. Put the glue on the sheet with the old windex+credit card deal. Put the sheet on the bed the same way.
Adjust your Z height to account for the thickness difference.
Never ever worry about bed adhesion again, ever.
https://www.amazon.com/gp/product/B0013HKZTA/ref=oh_aui_detailpage_o02_s00?ie=UTF8&psc=1
AND
https://www.amazon.com/gp/product/B007Y7D5NQ/ref=oh_aui_detailpage_o02_s00?ie=UTF8&psc=1
Sure can!
Get one of these sheets from Mcmaster carr:
12"x12" 3/32nd thick sheet of Ultim PEI plastic
http://www.mcmaster.com/#8685K41
Stick it to the existing glass with this adhesive:
3M 468MP transfer adhesive
http://www.amazon.com/gp/product/B007Y7D5NQ
Trim it to fit, then print on it as you normally would. remember to re-adjust your Z stop to compensate. For ABS at least I have not found anything that works better so far, and I've tried most things. You don't need ABS slurry with it, you can print without brim, things just stick, and then release when cooled off. Polyethalene Tape is garbage compared to this stuff. It's by far the best upgrade you can do for your printer after the heated bed itself, and it costs under $40 to do. If you are having trouble getting things to stick to your bed, this is the way to go. It supposedly works just as well for PLA, though I have not tested that personally.
I use 3M's 468MP Adhesive Transfer Tape.
I had trouble using just binder clips when printing large ABS prints, as they would stick so well, but when contracting would warp the PEI sheet.
I guess it comes down to what you are printing and how thick your PEI sheet is.
I use a 0.03" sheet of PEI and would not recommend binder clips.
I stuck my PEI to a piece of Borosilicate glass which I believe you did as well based off your statement "Bit it's stuck to the glass..."
What quality of Transfer tape did you use. I bought this stuff, again stuck to the glass, and I haven't had issues.
I know you said that you removed the protective film. Mine had film on both sides, did yours?
I have several upgrades in the queue for this weekend once my M3 hardware kit comes in:
(Note the above designs are all three by USWaterRockets, who seems to have exceptional engineering skills, but I haven't installed them yet. Hopefully, this weekend and I'll post results)
Another one I'm considering next:
Here is the E3D-v6 adapter I currently have on the printer:
Note the above design is just a quick-and-dirty solution; the author even states this. It works and will get you what you need to get things going with the new head.
Other upgrades I've done:
https://www.amazon.com/gp/product/B007Y7D5NQ/ref=oh_aui_detailpage_o05_s00?ie=UTF8&psc=1
https://www.amazon.com/gp/product/B0013HKZTA/ref=oh_aui_detailpage_o05_s00?ie=UTF8&psc=1
Here's the E3D-v6 printhead I bought and it's worked well: https://www.amazon.com/gp/product/B01H4V2QEK/ref=oh_aui_detailpage_o04_s00?ie=UTF8&psc=1
Disclaimer: I'm new to 3D printing. This is my first printer and the learning curve is steep. I may look back on this posting in a year and think "what an idiot I was doing <this>". Take my advice with a grain of salt, as I'm muddling through this whole thing. YMMV
That's fair man. THat's how I feel too. Not many people skate in teh rain, but I live in the bay and that's just not an option. Oh... if you're going off-brand I'd recommend that you coat all of your componenets with conformal coating. It's an electronics waterproofing product. Here is a linkl:
https://www.amazon.com/MG-Chemicals-Silicone-Modified-Conformal/dp/B008O9YIV6/ref=sr_1_1?crid=2KILXXHLES5D1&amp;keywords=waterproofing+for+electronics&amp;qid=1564775250&amp;s=gateway&amp;sprefix=waterproofing+for+ele%2Caps%2C176&amp;sr=8-1
You can mostly make it waterproof. You can crack open the case and conformal coat the PCB. I wouldn't consider it 100% because you will still have a battery and button exposed, the voltage/current is low enough it's not likely to be an issue though.
&#x200B;
https://www.amazon.com/MG-Chemicals-Silicone-Modified-Conformal/dp/B008O9YIV6/ref=sr_1_2
A lot of people use this to make PCBs waterproof after the manufacturing process as a DIY thing. I use to to coat receivers on my RC cars and crawlers.
&#x200B;
That or find a small bag and put it in there. my friend does this with his phone lol
A lame humor response I suppose....never mind. I was only suggesting this nice servo as the ultimate pipe hitter. "Fucking around" means to me buying only a slightly better servo than you currently have now while hoping that it will be enough. Then you get it and you wish that you had not wasted time and effort on it. Then you get a slightly better one again in the hopes of the same thing...so on and so forth. My attempt at a humorous reply was to quit fucking around with all that shit and get this "mean as hell" servo and be "done fucking around"
^
Does your BEC output 8.4 volts? If not, you won't be getting the most out of the KD1. It stands up to reason that you should not run a 7.4 volt servo on 8.4 volts if you want it last.
^
Now "spec shopping" can be problematic. People have been doing this forever with most all kinds of merchandise. Its Marketing. The problem here is determining a common metric among brands and lines within brands. Does a reliable metric among all servos exist? ?? Who says .08s/60 degrees and 347oz-in is even accurate? Are those readings for the whole arch? Will the servo be able to hit 347oz-in while 2/3s of the way into a rotation? Does it get hot and does the torque go down with rising heat? Perhaps the equipment used to make those measurements is off a bit to inflate the "specs"? I have so many questions here?? Marketing shenanigans have been going on as long as markets have existed. I like my KD1s because they work well for me. They have no equal in my opinion. I'm too old to jack around with marketing nonsense.
^
I have been playing with RC since 1986 and my "fucking around" days are long gone. Say I wanna build an RC model, I now only purchase enthusiast level products. The servo I mentioned is such a device. It is not cheap, but is anything high end cheap? Do you need a top end servo for your vehicle, probably not. Would you want one? Who wouldn't? Can you afford it? ??
^
My KD1s have amazing holding power. They absolutely stay where they're told through the arch. Its CPU is extremely capable and the coding for this servo is second to none. Now, its algorithms are optimized for heli cyclic duty, but this actually seems to me to translate to surface steering use very well.
^
I've never owned a Savox servo so I can not attest to their quality. As far as the Xpert being waterproof, I cannot say. It is a heli servo and flying a heli in the rain isn't likely a good idea. It also isn't advertised as waterproof. I've gotten my xpert servos wet ripping up dew covered grass and no issues so far ?? You can purchase a bottle of silicone conformal coating I waterproof circuit boards with this stuff all the time. Would it work on a servo? ??
^
Being concerned about this waterproof issue, an advertised as a "car" servo with claims of waterproof might be in order here. Brushless is indeed the new hotness in servos these days. Most higher end servos nowadays are "digital" too.
^
Perhaps instead of "spec shopping" utilize the gifts of modern technology and see what others have done. Don't reinvent the wheel here. As I'm sure you already know, online videos can be pretty nice for seeing what's out there. Better yet find a local RC club or track. Speak to the people there and ask what they have.
^
I used to ride the brand loyalty wagon all around. I was huge into Asian RC radios and servos. I never had a bad Hitec, Futaba, Airtronics, KO Propo or JR servo. I still have vehicles with those servos in them right now.
Clear nail polish may work, though this is specifically made to protect electronics and is only $12.
Don't worry about heat. Conformal coating isn't going to insulate anything so much it over-heats. Unless you put on like 20 coats of the stuff maybe.
By the way, you should probably use silicone conformal coating instead of acrylic. It's a little more durable, and not quite as nasty to work on. Personally I prefer the liquid over aerosol. It's much easier to make sure you get everything coated well, and the fumes aren't quite as bad.
Thats great to hear! It must've still had moisture under the chips causing a short but now had time to fully dry out.
Get this stuff https://www.amazon.com/MG-Chemicals-Silicone-Modified-Conformal/dp/B008O9YIV6/ its modified with a UV dye so you can see where its been applied. You can get a UV led Flashlight for cheap to ensure havent missed a spot.
You can coat everything, even soldering pads. if you ever need to solder anything to the board, the coating just steams away just be sure to reapply the coating in that area afterwards.
The bottle arrived the other day and I took my tinyhawk freestyle apart and desoldered the VTX (same board as the tinyhawk) to fully coat it then also added a larger capacitor. https://i.imgur.com/wYo9Laz.jpg . I did two coats then one more once everything was soldered and plugged in. I'm confident that this thing could survive a dunk in a pond now.
Here is a link to it on amazon. Would be happy to send an affiliate link if you like :)
https://www.amazon.com/MG-Chemicals-Silicone-Modified-Conformal/dp/B008O9YIV6/
Seriously though, this stuff works well for me. I can fly and crash into snow with confidence. :)
I've used this stuff on drones, for flying in the rain (and crashing in wet grass). It's pretty good.
Superglue on the nosepads?
&#x200B;
Edit: im obviosuly kidding. For real tho, you could try to modify the temple tips (of the glasses) with Sugru, or some simular moldable rubber. Then form fit these to catch on the earpads of the headphones. My mate did this for his computer glasses.
&#x200B;
Sugru: https://www.amazon.com/Sugru-Moldable-Glue-Original-Formula/dp/B008URBC9I
Start by superglueing a ring (washer? Metal loop?) To the adapter. Then use some Sugru to form a prtective layer/case. http://www.amazon.com/Sugru-Moldable-Glue-Classic-Multi-Color/dp/B008URBC9I
this stuff is fun!
This is sugru! http://www.amazon.com/Sugru-SMLT8-Hardware-Sealer-8-Pack/dp/B008URBC9I
pretty cool stuff that you mold by hand and it cures at room temperature.
It should work with the slant. From what i can see in the picture it seems a grommet would fit perfectly in that hole. Once you get the grommet in, if you want an added layer of hold(on the downstem/the grommet) wrap over the grommet with some Sugru. Some people will probably tell you not to use sugru because of the lower temperature threshold, however I wouldn't worry too much because the downstem/grommet won't be getting too hot from smoking a bowl.
Perhaps Sugru can help?
http://www.amazon.com/Sugru-SMLT8-Hardware-Sealer-8-Pack/dp/B008URBC9I
I have seen in the past people user https://www.amazon.com/gp/product/B008URBC9I/ref=ox_sc_sfl_title_18?ie=UTF8&amp;psc=1&amp;smid=ATVPDKIKX0DER to build up the areas around the failing plastic.
I wouldn't recommend WD-40, it attracts dirt and can lead to more problems sooner, it was originally a polish. I'd recommend a lubricant, like 3 in 1 Household Oil, or a silicone lubricant.
DuPont Teflon Silicone Lubricant Aerosol Spray, 14-Ounce. https://www.amazon.com/dp/B00D3ZKVAS/ref=cm_sw_r_cp_taa_CNa.BbVK45XGQ
You can get silicone lube as an aresol or as a gel like petroleum jelly
TIL about self setting silicone. Very cool.
you need Sugru, moldable glue
Sugru Moldable Glue - Original Formula - Black & White 8-Pack - I000467
Have you thought about sugru, or polymer clay and glue? Polymer clay is probably the cheaper option, but you'd have to cut large to account for baking, and then sand down.
The electric tape is the cheap option, but if you want to splurge a little on the cable's maintenance, this might be worth a look.
Not gonna lie, really enjoyed the video on the Amazon page.
I'm not familiar with the product you're talking about and google returned a product called "sugru" instead of surgu. This is what you're talking about right?
I personally use Sugru for of my oddly conforming curved surface type mounts. http://www.amazon.com/Sugru-SBW8-Setting-Rubber-8-Pack/dp/B00EU7DBNM Holds up like a champ.
Amazon
https://www.amazon.com/dp/B00EU7DBNM/ref=cm_sw_r_cp_awdb_VlDRzbK6G66YM
Sugru Maybe
Sugru sul casco (per appiattire la superfice e far aderire tutta la base) e non cade nulla.
Comunque o di lato, o chin mount se il casco lo permette.
You could try Sugru or some silicon sealant before you buy a replacement.
https://www.amazon.com/gp/aw/d/B00EU7DBNM/ref=mp_s_a_1_1?ie=UTF8&amp;qid=1501875543&amp;sr=8-1-spons&amp;pi=AC_SX236_SY340_QL65&amp;keywords=sugru&amp;psc=1
"A gaffer in the motion picture industry and on a television crew is the head electrician, responsible for the execution (and sometimes the design) of the lighting plan for a production. The term gaffer originally related to the moving of overhead equipment to control lighting levels using a gaff. The gaffer's assistant is the best boy.[1]
Sometimes the gaffer is credited as Chief Lighting Technician (CLT)."
-Wikipedia
Side note: that's why the black tape used to secure/hide cords is called gaffer's tape
"In US and Canadian filmmaking, the key grip supervises all grip (lighting and rigging) crews and reports to the director of photography.[1]"
-Wikipedia
So the Key Grip is similar to the Gaffer, but has a focus on things like dollies, cranes, vehicles, etc.
Heads up, the only issue I've had with my pressure pad in the past 8 or so months (range/ fun time weapon, not a work gun) is that your run of the mill gaffer tape shits a huge amount of slime onto the pressure pad, but even then, goo-gone gets rid of it
Yes, there is a way:
Edit: This disables sending clips to Tesla, but it might still be recording. If it really comes to it, gaffers tape?. I'd just ask the gate guards if they know of anyone there has a tesla. If they say yes, there is obviously something that can be done....
You might be interested in QLC+ (it's free and open source) and an Enttec DMX USB Pro mk I (same company as the DMXIS, but a hundred bucks less). I've programmed a show for a buddy's band to their click track and had a generally positive time with it. I'm a professional lighting nut, so I thought it was a bit restrictive, but that's more of a problem I have with preprogrammed shows than with the software.
Take the $200 you'd save with this control scheme instead and spent it on safety cables, velcro cable ties, a storage bin for your cables, computer, and DMX adapter, gaff tape, and pizza for when you get together to program and jam the first time!
Those links probably aren't the best options for each thing, I just wanted to link examples.
Hello, I somewhat specialize here.
What you can do is use gaff tape to secure the phone to the headset. use it around all the edges, at your discretion. you MUST use gaff tape because it leaves very little sticky residue... some may stay because of the heat, but its very easily cleanable. The strength of duct tape without the mess.
https://www.amazon.com/Professional-Premium-Grade-Gaffer-Power%C2%AE/dp/B00GZE3UJ8
*This comes in many colors, even white, which may suit better to be less noticeable.
After that, you can secure the black cover plate to it to cover up the phone... if you care more about security than aesthetics, go ahead and secure the black cover plate to the headset as well with the gaff tape...
alternatively, you can configure an anti theft pull box to the phone and/or headset. anti theft kits will most likely leave some sort of mark on either device so use with caution.
http://www.cissecuritysolutions.com/Anti-Theft_Pull-Boxes.html
Gaffer's Tape, not what you're talking about though. It's aluminum wire backed duct tape. The God tier of all tapes.
Gaffer tape
The magic tape you seek is gaffer's tape.
https://www.amazon.com/Professional-Premium-Grade-Gaffer-Power/dp/B00GZE3UJ8
Do yourself a favor and pick up some Gaffer Tape and place on the printing surface(Tray). It helps the first layer of a print adhere to the surface much better. I used to struggle with starting a print almost every time but after I started using the tape I haven't had a problem since.
Gaffer's tape and a sledgehammer oughta fix it.
Silicon tape wrapped around the exposed wire fixed it for me. So it's no longer shorting out.
X-Treme Tape TPE-XR1510ZLB Silicone Rubber Self Fusing Tape, 1.5" x 10', Rectangular, Black https://www.amazon.com/dp/B00HWROO7E/ref=cm_sw_r_cp_apa_i_eADyDbNEZJTB2
It has to have a good thermo, so it turns out the board wasn't the problem. In my case I tightened it down and it cracked the protective coating and shorted it out. The tape fixed it
X-Treme Tape TPE-XR1510ZLB Silicone Rubber Self Fusing Tape, 1.5" x 10', Rectangular, Black https://www.amazon.com/dp/B00HWROO7E/ref=cm_sw_r_cp_apa_i_hLTzDbDAW6STJ
This stuff shrink wraps itself, but is non adhesive do no mess like electrical tape. The secret to a nice looking build is to color coordinate AKA not have a bundle of multi colored wires hanging out on the front side of the Mobo.
To avoid kinks that bad in the future you may want to try this , and this is what I used to cover the ends of sleeving. I found a few reddit posts and it seemed to work well for people. However, others used heat shrink tubing not silicone tape like I did. The tape has held up well for a few weeks now, and when I see any sort of twisting it’s really easy to undo as with the sleeving the cable just sort of pushes itself around instead of gathering kinks.
Thanks!
Yeah, I've thought about that and I might do it. Comfort-wise it really doesn't need to be done as the TPU grips feel fine even without gloves, but the look would surely be nicer with the grips wrapped in something.
There's a silicone rubber tape that fuses with itself when wrapped around something, and it's used to wrap handles on various tools as well as sealing water tubes. It doesn't have any glue on it and it attaches only to itself, so it would be ideal for this kind of thing. I'll probably order it at some point and see how it would do around these grips. Something like this, but maybe a bit narrower would be what I have in mind: https://www.amazon.com/X-Treme-Tape-TPE-XR1510ZLB-Silicone-Rectangular/dp/B00HWROO7E/ref=pd_cp_328_1?pd_rd_w=TjtWn&amp;pf_rd_p=ef4dc990-a9ca-4945-ae0b-f8d549198ed6&amp;pf_rd_r=NHWY47ZSHGV250NA3EWS&amp;pd_rd_r=232d9373-4cbd-11e9-a258-1dc4cbbc6958&amp;pd_rd_wg=AQ5YE&amp;pd_rd_i=B00HWROO7E&amp;psc=1&amp;refRID=NHWY47ZSHGV250NA3EWS
You could probably also use Sugru to wrap the grips, but it's a more permanent solution as I think it's much harder to remove once it settles.
Use “self adhearing silicone tape” durable and sticks only to itself. Revelate Designs used to sell it for this. https://www.amazon.com/dp/B00HWROO7E/ref=cm_sw_r_cp_api_i_bs2bBbCHPHKVN
If you just want to have tentacles, well, those are pretty easy to mold from green stuff. Stick 'em on any barbarian-lookin' mini you like the best.
The one I bought has the blue and yellow separated, but it's not unlikely that it's from the same origin point. I don't buy in bulk because I really don't use a whole lot of it and I have limited hobby storage space in my apartment.
FYI, my related links on that Amazon page had this one listed which is from a good quality brand, and it's a significantly better price by weight. Generally, if an epoxy putty isn't branded by a games company, the price is more reasonable.
Green stuff is a great option that has been around for a while and used by wargamers on 28mm miniatures. It's a two-part modeling epoxy putty that can be molded and put into place, then sanded down. This is for small areas and gaps in segments.
I coat all my props in XTC-3d resin, then sand the crap out of it in order to get a smooth finish.
https://www.amazon.com/Kneadatite-Yellow-Epoxy-Putty-Green/dp/B00MQ7EHHC/ref=sr_1_3?keywords=green+stuff&amp;qid=1554301765&amp;s=gateway&amp;sr=8-3
I did a penny top desk a few years ago and used some from Home Depot. It was in the paint section. It was like $30 a box, and I needed 3 for my desk.
If I did it again I would get the stuff from Amazon sold by the gallon. Something like this: https://www.amazon.com/dp/B01LYK2NAG/
There was nothing wrong with the stuff from the big box stores, but from a pure cost perspective I could have bought that for less, and had a ton left over for something else.
Thank you! I use this one from Amazon :)
Crystal Clear Bar Table Top Epoxy Resin Coating for Wood Tabletop - 1 Gallon Kit https://www.amazon.com/dp/B01LYK2NAG/ref=cm_sw_r_cp_apa_i_Z-OLDb6H9FNVZ
https://www.amazon.com/Crystal-Clear-Table-Coating-Tabletop/dp/B01LYK2NAG/ref=sxbs_sxwds-stvp?keywords=epoxy+resin&amp;pd_rd_i=B01LYK2NAG&amp;pd_rd_r=caf18787-693b-4fc1-8029-58245384cd77&amp;pd_rd_w=cbcYw&amp;pd_rd_wg=5G2we&amp;pf_rd_p=d006b618-5fac-44e6-850d-a0fdd19f7847&amp;pf_rd_r=EC8RAKSF8QSB5HAX671H&amp;qid=1572630183
That’s the resin I use, the acrylic paint I get from Walmart and you can use any isopropyl or denatured alcohol I believe. If you go on YouTube and lookup resin pouring there are tons of channels that show you how
I have had good results with this. I am by no means an expert and used a pressure pot to minimize bubbles, but I liked this stuff. It has worked well on several home projects.
welcome!
yeah most build videos i've seen usually omit them too, but it's usually cuz those people are accustomed to building so many. HELL, the other day i was calibrating my ESC's and for some reason blheli decided to make my motors go bat shit crazy (props off of course). Lucky, the smoke stopper didn't allow it to draw too much power. so yeah you just never know.
remembered a few more.
I've learned to prevent my battery straps from breaking (and they do) put a slab of hot glue near the plastic loop where it attaches to itself.. this part of the velcro is week on EVERY strap and this is where all of mine have broken from. After slapping a glob of hot glue in this location (both sides) i have yet to break one (well now i probably will, LOL).
http://www.amazon.com/3M-Dual-Lock-Reclosable-Fastener/dp/B007OXK1AK
Something like this may work best.
Sure. 90% of it was putting an Ikea Signum underneath the desk towards the back to carry all the cables. http://www.ikea.com/au/en/catalog/products/10200254/
I also used some 3M dual lock Velcro to stick the powerboard to the underside of the desk, up off the floor. https://www.amazon.com/3M-Dual-Lock-Reclosable-Fastener/dp/B007OXK1AK
Finally, I used a number of small Velcro cable ties, kind of like these, to keep cables together. https://www.amazon.com/VELCRO-Brand-ONE-WRAP-Management-Multi-color/dp/B00144CABS
At first I was like lol, but then I was like, that's not actually a bad idea, if you use this: http://www.amazon.com/3M-Dual-Lock-Reclosable-Fastener/dp/B007OXK1AK
It's really tough.
Also known as Ultem, it can be purchased here from CSHyde. There are several options there for size and thickness. The bonus is that these sheets come with adhesive already laminated to the sheet. I believe you can also get custom sizes, although larger sheets are no problem to cut to size.
Alternatively (and probably more common), you can purchase PEI sheets here on Amazon. The recommended adhesive (transfer tape) is here, and there may be other sizes for both available on Amazon as well as wBay.
The whole idea on using PEI as a print surface is that you get good print adhesion with most common print materials. Using a heated bed with PEI works great for getting prints to stick while warm, and also pop off of the print bed fairly easily as the bed cools.
I went with the stuff from CSHyde for convenience, but I think most users here are going with the Amazon stuff (they have thicker sheets which many users prefer as it can last longer before needing replacement).
http://www.amazon.com/dp/B0013HKZTA/ref=biss_dp_t_asn
http://www.amazon.com/TapeCase-squares-Converted-Adhesive-Transfer/dp/B007Y7D5NQ/
Do note I am using a rostock, but psi will work on all regardless, it's also acetone resistant, so you could clean really easily
Do yourself a favor and use some 3M 468MP transfer tape and a piece of PEI. You'll never have to worry about adhesion again. PLA and ABS stick to it perfectly and pop off when cool without issue. I've had hundreds of prints without adhesion issues, even when my offset is way off and I'm printing at 0.4mm height instead of 0.1mm. If you want to see what it looks like, check out the post I submitted yesterday
I recently stopped using blue tape and switched to PEI sheets on glass. I'll never go back. I think this would be a good thing for you to try, the PEI sheet releases pretty easily once cool.
PEI (Polyetherimide) Sheet, Opaque Natural, Standard Tolerance, ASTM D5205 PEI0113, 0.03" Thickness, 12" Width, 12" Length https://www.amazon.com/dp/B0013HKZTA/ref=cm_sw_r_cp_apa_j.9Dxb7FAEG3J
TapeCase 12" squares (pack of 6), Converted from 3M 468MP Adhesive Transfer Tape https://www.amazon.com/dp/B007Y7D5NQ/ref=cm_sw_r_cp_apa_S.9DxbBW56J7Z
Where was this stuff when put my PEI on my borosilicate glass plate? I had to use a separate adhesive sheet (Like https://www.amazon.com/dp/B007Y7D5NQ). That was a serious pain. I think I ruined 3 or 4 sheets before I got it right. Will certainly use this on my next printer.
pei sheet
adhesive
I bought the same thing for my v1:
12"x12" 0.03" PEI
https://www.amazon.com/gp/product/B0013HKZTA/
(6) 12x12" 3M Adhesive Transfer Tape:
https://www.amazon.com/gp/product/B007Y7D5NQ/
At the time there were no practical cheaper/smaller options (although the extra 3M adhesive does come in handy).
... I scored/snapped the sheet into 4 pieces, and I'm still on the first PEI sheet after like 300 hours. It still looks flawless. I only use sharp scraper blades or no tools to remove parts. If you're printing something crazy in a cold room, you can add hairspray, but for the most part, PEI has perfect adhesion on it's own.
I definitely recommend the thicker PEI (0.03"+), as it makes the MPSM bed much more rigid. I don't have to bend the aluminum bed "flat again" anymore. I dont worry about bending the bed when ripping parts off the bed, even with super high adhesion.
Clean it with alcohol, not sandpaper.
I wanted to try this but dat manufacturing lead time doe
MG Chemicals Silicon Modified Conformal Coating.
I was able to see where I had coated and where I missed with this UV Flashlight.
conformal coat EVERYTHING you can (https://www.amazon.com/MG-Chemicals-Silicone-Modified-Conformal/dp/B008O9YIV6). use 'sensor-safe' silicone gasket maker everywhere. It's actually more than just damage, I got water in my HK Swamp Dawg airboat RX and it went full throttle, rather than failsafe. I was holding it, having just gotten it out of the water, draining it. I almost bit me.
also, consider a cheap gyro, really helps with wind, turning and super fun drifting.
As others have mentioned, get rid of that tape. You should be using a conformal coating like this stuff... https://www.amazon.com/dp/B008O9YIV6/ref=cm_sw_r_cp_api_J5dKBbSFHY21N
I'd second the conformal coating, seems to work well for me. this is the stuff I used http://www.amazon.com/MG-Chemicals-Silicone-Conformal-Coating/dp/B008O9YIV6/ref=pd_sim_328_1?ie=UTF8&amp;dpID=41dzbpa8jyL&amp;dpSrc=sims&amp;preST=_AC_UL160_SR118%2C160_&amp;refRID=01C6ET92JK608J6A6AWW
What country is that? If you are in the US Amazon has what you are looking for.
> So for the most part you only have issues if the pcb gets wet.
That's what conformal coating is for.
I'm not sure why it's so hard to find the little bottles on Amazon now.
Acrylic
Urethane
Silicone
I have the acrylic because the silicone kind costs about twice as much. The urethane might make a harder protective shell though I'm not sure. And you can solder through it so don't worry about trying to remove it.
I remember watching a YouTube video where someone covered their electronics in this stuff and flew it in a bathtub. Plus it doesn't add any bulk to the drone like liquid tape. But that being said I haven't tried it myself yet.
I dont get it?
https://www.amazon.com/gp/product/B008O9YIV6
is $13 is that out of your price range?
The nice thing about actual conformal coating is that you can solder through the coating or remove it if needed. Had grate luck with it so-fare.
They sell https://www.amazon.com/MG-Chemicals-Silicone-Conformal-Coating/dp/B008O9YGQI its about $5 more though, it is an Aerosol. Never used it before though.
This is what you want
https://www.amazon.com/MG-Chemicals-Silicone-Modified-Conformal/dp/B008O9YIV6/
This is more specialized than nail polish.
https://www.amazon.com/dp/B008O9YIV6/ref=nav_timeline_asin?_encoding=UTF8&amp;psc=1
Dry drone is a popular product out there but, it's price to size ratio is crazy. I also have come across Silicone Conformal coating like this:
https://www.amazon.com/gp/product/B008O9YIV6/ref=oh_aui_detailpage_o07_s00?ie=UTF8&amp;psc=1
Base model Blade 15 2018 with 1060
For best thermals:
Thermal pads and liquid metal
as well as this conformal coating to prevent the liquid metal from allowing conduction to happen.
in ThrottleStop
for performance
and for Battery
Then if you want to get even better thermals
this cooling pad giving me these idle temps and these temps in Assassins Creed Odyssey after 3 hours of play Connected to my Core X Chroma.
With 32gb of RAM and 4tb of storage between the 2tb sata and the 2tb nvme drives it's my work computer with A couple VMs running and lots of chrome tabs and my main PC when i'm home plugged into the core.
if you don't like the Razer logo on the back you can get a dbrand skin on it with no logo cutout
Don't use liquid electrical tape. It can't handle the temps and will just be goo under the HS. Use MG Chemicals 422B Silicone Modified Conformal Coating instead found here: https://www.amazon.com/gp/product/B008O9YIV6/ref=ppx_yo_dt_b_search_asin_title?ie=UTF8&psc=1
http://www.amazon.com/gp/product/B008O9YIV6?psc=1&amp;redirect=true&amp;ref_=oh_aui_detailpage_o01_s00
that's it
https://www.amazon.com/gp/product/B008O9YIV6/ref=ppx_yo_dt_b_search_asin_title?ie=UTF8&amp;psc=1
It's for waterproofing electronics.
You should try silicon conformal coating. It really works I killed an esc going through puddles and than heard about the stuff from the fpv community and I am able to almost submerge my esc and bms.
https://www.amazon.com/gp/product/B008O9YIV6/ref=ppx_yo_dt_b_asin_title_o07_s00?ie=UTF8&psc=1
I used Sugru. I used yellow so it matches my paint. Also I bought a frame for the license plate and secured that down with the see Sugru so I can take off the plate if needed.
Edit: this is what I used, Sugru Moldable Glue - Classic Multi-Color (Pack of 8) https://www.amazon.com/dp/B008URBC9I/ref=cm_sw_r_cp_apa_w6fizbDVADAAA
I bought the bigger pack because I can use it for other projects but you can buy smaller/ cheaper packs.
I think I understand your issue. What you're saying is that there is something about the construction of the C3 helmet which makes it difficult to wedge the clamp mechanism in.
There is discussion about this issue here. Post #23 explains it clearly.:
> I have the C3 Pro, and don't know the C3 at all. With the C3 Pro there is an internal collar that goes around the inner perimeter of the helmet. The collar is mounted to the perimeter very tightly. If you have C3 Pro you surely know what I mean. Anything that's mounted on the edge of the helmet will interfere with this collar. So the collar must be cut to mount the 20S unless you use the adhesive method. Hence, I chose the adhesive to minimize the damage.
If I understand the issue well, then you have two options. You can either use an attached adhesive mount (I am not sure what is included with the camera), or you can use a product like Sugru which is a type of rubber that sets (which can be removed by cutting afterwards). I use Sugru to attach my GoPro to my chin vent. It works very well and is very easy to do.
Edit: According to the thread I linked above, people are saying that it can also be done by installing the clamp near the rear, and then pushing it into the front. There is also a reply by Sena customer service on this issue, which suggests that it may be made easier if there were thinner foam pads included with your package.
Regardless of the nature of whether it is possible for you to squeeze it through from the rear, I still highly recommend the Sugru option. It is waterproof, heat resistant, can be molded and removed easily, and costs £2 a pop.
Happy to help! Target sells it, if you want it locally. You can buy online from Sugru or Amazon
You can search for nearby retailers a full list on Sugur's site.
What I ended up doing was buying this stuff:
http://www.amazon.com/Sugru-SMLT8-Hardware-Sealer-8-Pack/dp/B008URBC9I
I got the black rubber compound and wrapped the end to support the head. I made sure to press the head into the charger port to ensure the head would be flush when the compound cured. It worked perfectly.
You could get some Sugru. Its pretty much putty but super strong. I have the same problem as you with my glasses, but I haven't gotten around to doing so. When I get a chance I'll post my results to your comment.
I recently bought sugru, it is ₹1799 on Amazon
http://www.amazon.in/gp/aw/d/B008URBC9I/ref=mp_s_a_1_1?qid=1462104235&amp;sr=8-1&amp;pi=SY200_QL40&amp;keywords=sugru&amp;dpPl=1&amp;dpID=51tXzF8FP4L&amp;ref=plSrch
On the US Amazon website it is $22 which is about ₹1500. Not too bad if you ask me. In most countries, uncommon/exotic things will be more expensive. Pay up and move on
As someone who picked up a Daytona around November 2013 I've quickly learned the following:
How to Rhop - Daytonas have a proprietary hopup and bucking so any hopup mods are DIY. Buy spare hopup buckings from Tony.
Lubricant - Accept no substitute. Easy to apply before and after a full day of plastic slinging.
Take it apart and identify all the O rings, check them periodically. They will be the first thing to go out if you don't maintain it.
I also use rust protection gun oil and linseed oil on my externals to keep them protected from the elements.
I don't have any specific links saved. I have read about every post there is on lubing switches. I have used Techkeys thick lube and it makes the MX Clears so smooth that they lose some of their bump. I really like how my most recent batch came out.
I used the dry bike chain lube on the sides of the sliders and the sides of the housings where the sliders go. I used this DuPont lube at the base of the housing where the spring contacts the housing. You could also use it on the slider where the spring contacts it, but I have found that doing this is tedious and doesn't make a real difference. This combo removes the scratchiness without affecting the bump. The spring lube also silences the spring noise. Overall, you end up with quieter, smoother switch with a nice big bump.
Teflon or Teflon/Silicone sprays kick WD40s ass all over the place. Here's some DuPont brand on Amazon, but HD/Lowe's sell other brands in store. Like $4-5 a can and that shit lasts forever.
You can try getting a can of silicone spray and spraying the entire window track. Move the window in the down position and coat the track the window slides starting at the top to as far down as you can go. Move the window up and down 5-10 times. If there's not an immediate improvement after that, replace the window motor assembly.
https://www.amazon.com/DuPont-Silicone-Lubricant-Aerosol-14-Ounce/dp/B00D3ZKVAS
You may be fine using what you have, and you may be fine using the one you just linked to... It's hard to say. The main things you want to watch out for is it eating plastic/rubber portions of your gun (i.e., what the internals are made out of).
This is what that company recommends for airsoft guns
I don't know for sure that the one that you have currently won't hurt your gun, but if you keep it strictly to the rails (assuming the rails and slide are both metal) you should be fine to use it. I'm not familiar with what products are located in the UK but I'd check your airsoft retailers over there and see what they use or recommend.
In the US I use this spray for 90% of my lubrication and it is sufficient, however, not all silicone sprays are created equal and some will eat plastic due to the amount of acetone present in them (this is what the styrofoam test is good for). For the remaining 10% (that is, gearbox gears), I use white lithium grease as it is a heavier weight lubricant, but not something I'd recommend for the slide of any GBB. Stick to silicon oil or spray if you can for that.
I hope that helps!
I've using this to lube as I've had it long before modding switches: DuPont Lube
Most people use something else, but this has worked well for me and others.
I love it. I run it right after the flash, and iron the underbase.
It knocks all the fibers down extremely well and then makes the over print look flat, or like satin. Very cool.
You’ll have to basically double the recommended settings.
I run mine on a higher “squeegee” pressure, a lower squeegee off set, and a higher temp. Other wise it was just not very effective.
The tech support basically told me those settings were a CYA and you need to exceed them to get a good press.
Oh, do yourself a favor and order some Teflon spray off amazon right now. It has to have so ink doesn’t stick to the underside off the sheet.
DuPont Teflon Silicone Lubricant Aerosol Spray, 14 oz
https://www.amazon.com/gp/product/B00D3ZKVAS/ref=oh_aui_search_detailpage?ie=UTF8&amp;psc=1
Sugru is a pretty good adhesive that's flexible. Not quite sure if it would have proper adhesion on that foam though.
https://www.amazon.com/dp/B00EU7DBNM/ref=cm_sw_r_sms_apa_i_T9zGDbVC50THW
Get some Sugru moldable glue and mold it around the charger port with the cord in it. Let it dry and you're set. Don't use a cheap cord in case it stops working correctly. Amazon
Is this the thing you're talking about? https://www.amazon.co.uk/Sugru-Mouldable-Glue-Black-White-x/dp/B00EU7DBNM/ref=sr_1_1?ie=UTF8&amp;qid=1493041567&amp;sr=8-1&amp;keywords=sugru
Not really, about $10 for a 3 pack or $20 for an 8 pack
https://www.amazon.com/Sugru-Mouldable-Glue-Original-Formula/dp/B01BFE0KNQ/
https://www.amazon.com/Sugru-Moldable-Glue-Original-Formula/dp/B00EU7DBNM/
The frayed wire is one of the standard use cases for this stuff.
I suppose you could mold your own replacement out of Sugru moldable glue
I wonder if you could use Sugru to mold a new one?
https://www.amazon.com/Sugru-Moldable-Glue-Black-White/dp/B00EU7DBNM/ref=pd_lpo_60_bs_t_2?_encoding=UTF8&amp;psc=1&amp;refRID=FQGSJGRJ8AW4RGETHD4G
I know it's a bit late but if you have gaps in the adhesive on the curve of the helmet use SUGRU to fill them in, it dries like rubber and its solid af.
https://smile.amazon.com/Sugru-Moldable-Glue-Black-White/dp/B00EU7DBNM
In a pinch, I've been known to use a quarter and some Sugru. Works pretty well until you need a quarter for something.
The bung did not want to stay in initially. I think because I had pulled it from the sanitized water so to make sure it wasn't going anywhere and ruining the works I secured it with some gaffers tape.
Unrelated pro tip from photo and video experience. Decent gaffers tape is much better for securing non paper items than duck tape. It wont leave a sticky mess and its just as strong if not stronger than duck tape.
This is what I use and love
No, that is gorilla tape, that's double thick duct tape.
Gaffer's tape is matte black and comes up with little to no residue.
https://www.amazon.com/dp/B00GZE3UJ8/
I run a 50' ethernet cable from my living room into my bedroom. I just pulled it tight, and secured it with a roll of Gaffer's Tape. Once it's gaffed down you can stick it under a rug or what have you. For two cables put them side by side, pull tight, and gaff a foot at a time
Gaff tape sticks to everything
REAL USA Professional Grade Gaffer Tape By Gaffer Power, Made in the USA, Heavy Duty Gaffers Tape, Non-Reflective, Multipurpose. (2 Inches x 30 Yards, Black) https://www.amazon.com/dp/B00GZE3UJ8/ref=cm_sw_r_cp_api_i_cvR0Db5P2XRNQ
http://www.amazon.com/gp/product/B00GZE3UJ8
It's great stuff!
https://www.amazon.com/X-Treme-Tape-TPE-XZLBRD-Silicone-Triangular/dp/B01EG7MBJU/ref=sr_1_13?ie=UTF8&amp;qid=1466384298&amp;sr=8-13&amp;keywords=silicone+tape
or
https://www.amazon.com/X-Treme-Tape-TPE-XR1510ZLB-Silicone-Rectangular/dp/B00HWROO7E/ref=sr_1_3?ie=UTF8&amp;qid=1466384298&amp;sr=8-3&amp;keywords=silicone+tape
Imgur
Here's the tape I was referring to. It's pretty good stuff.
https://www.amazon.com/dp/B00HWROO7E/ref=cm_sw_r_cp_awdb_p2pKybHH6A56G
As I mentioned, heat shrink looks better but this stuff is excellent for when you can't get heat shrink over a component.
Yeah I’ll have to wait till I get home tonight, but it’s this kind of tape
https://www.amazon.com/X-Treme-Tape-TPE-XR1510ZLB-Silicone-Rectangular/dp/B00HWROO7E/ref=pd_aw_sim_328_1/137-3978350-5422325?_encoding=UTF8&amp;pd_rd_i=B00HWROO7E&amp;pd_rd_r=ce7504d5-3528-11e9-b839-4be84d534962&amp;pd_rd_w=kXX6q&amp;pd_rd_wg=XxJmE&amp;pf_rd_p=469620d9-3e90-496d-9dc8-b19f900ba5fe&amp;pf_rd_r=8YKZ9VJPE5NHYECWX4WY&amp;psc=1&amp;refRID=8YKZ9VJPE5NHYECWX4WY
Self-fusing tape is really good for this as well. Just a quick snip or two with the scissors and you've got access to the ESC.. No residue at all, not to mention it insulates electrical connections, is waterproof and works from -60F to like +500F or something ridiculous.
http://www.amazon.com/X-Treme-Tape-TPE-XR1510ZLB-Silicone-Rectangular/dp/B00HWROO7E
Another potential easier option is silicone fuse tape - it permanently adheres to itself, but doesn't stick to anything else.
I wanted to know what tape you use. Originally I bought this tape
because it's rubber, but it was too thick to fit around the motors and put the motor cover back on.
Could you link me what brand you use to add noise reduction to your wheels. That's my biggest issue.
Awesome, thank you for the recommendations (there goes the money I partitioned for dominators, ha)!
I ordered:
FrSky Taranis X9D plus
D4R-II
Spare motors + ESC
X-treme tape
I use This
Those are kinda overkill for plamo; lots of tabletop gamers use this stuff, both for filling gaps and sculpting. Just cut a length, mash together until it turns green, and do your stuff. Has a decent work time, and smooths out nicely, so you have to file/sand less to finish.
Green stuff is a two part epoxy that hardens when you mix the blue and yellow sides. Kneadatite Blue/Yellow Epoxy Putty Tape 36" "Green Stuff" https://www.amazon.com/dp/B00MQ7EHHC/ref=cm_sw_r_cp_tai_u20gDb2JMASBY
Sure thing. This is the pin vise I used, including the 3mm bit. The 5mm bit I used is just a regular titanium drill bit, turned by hand, and you can get that on Amazon or at any hardware store. You'll need superglue to affix the magnets (any will work), and Kneadatite/green stuff to fill gaps. Other than that you just need the magnets themselves- these are the 5mm ones I used, and these are the 3mm.
https://www.amazon.com/Kneadatite-Yellow-Epoxy-Putty-Green/dp/B00MQ7EHHC/ref=sr_1_1?ie=UTF8&qid=1537629900&sr=8-1&keywords=kneadatite
Go out and get some Kneadatite aka “green stuff”. It comes as a blue and yellow strip that you mix together and it becomes green. You then model it into the hole and let it harden before painting it.
It’s wonderful for conversions and is a staple in Warhammer modeling.
https://www.amazon.com/gp/aw/d/B00MQ7EHHC/ref=sxts_1?ie=UTF8&amp;qid=1520099987&amp;sr=1&amp;pi=AC_SX236_SY340_QL65
Thanks.
Green Stuff on Amazon
The thing that irritated me about Amazon (in general - I know it's not really anyone's fault) is that depending on the 3rd party seller, packaging, and intended customer base, the price varied dramatically. The stuff that was clearly listed for hobbyist to use for minis, etc, was $1-$2/inch. After looking around for a bit, I found a 36" roll for about $16.
https://www.amazon.com/Crystal-Clear-Table-Coating-Tabletop/dp/B01LYK2NAG/ref=pd_lpo_vtph_79_bs_t_1?_encoding=UTF8&amp;psc=1&amp;refRID=QSARMH4356D435A0V01B I used something very much like this at work.
It was one of the cheapest I could find on YouTube.. here’s a link: https://www.amazon.com/Crystal-Clear-Table-Coating-Tabletop/dp/B01LYK2NAG/ref=pd_aw_lpo_201_bs_img_1?_encoding=UTF8&amp;psc=1&amp;refRID=HM7ACTD9CXGKXZM42WXK
Try something like this
And a blow torch to run over the top to release the bubbles. The bubbles are introduced from stiring the epoxy and just natural permeation. If you know someone with a vacuum chamber you can ensure ZERO bubbles.
This is what I use on my projects and it works very well for table tops, bar tops, etc. This would not be appropriate for your garage floor, as it's a very different type of resin than the garage floor kits.
are you talking about doing a full epoxy bar-top like finish, as in something like this. where you want a glass/plastic type look? Generally speaking as long as you follow the mixing instructions to the detail they aren't that hard, biggest thing that can happen is you'll get bubbles as the product cures. I wouldn't recomend using just the bartop stuff for the entire coat, maybe look into putting a coat or two of varnish, or more of a penetrating epoxy resin to seal it first. I think this can also help reduce the air bubbles. Regardless though on something this big you're going to get bubbles, so you get some kind of torch like this and go over the top with it as the epoxy drys.
For these type of glass/bartop look I prefer 2k poly as it can be sprayed and adding multiple coats is easy, stuff can be pretty pricey, but is cheaper if you are producing a lot of stuff for a big job rather than mixing up a bunch of epoxy. The fact that you can do multiple coats easily adds for more options in regards to glossy/sheen (they offer it from matte to gloss like any normal poly).
Now if the epoxy is for filling voids you want more of a structural epoxy (although I guess you could just fill a big void with the tabletop stuff, i've never tried), like a West systems or T-88. fill it a bit over the top, if you have bubbles getting trapped use heat or just do the large voids in multiple pours, bubbles usually congregate to the edge and often times just mixing it a bit more will get rid of it. One's like west system are nice because of their pumps that measure out the right ratio from the hardener and resin, easy to add color if you want, and after sanding it takes a finish fine and becomes clear again.
Those are generally the main applications of epoxies. reason I mentioned using 2k was because if you just want really durable finish because it will take a lot of abuse, there are other options. Also if you do want that plastic bartop, super high gloss look there are other methods out there such as just buffing a higher gloss varnish up through the grits, you don't have to deal with mixing or anything, can usually be applied easier with a brush. General finishes makes a bunch of topcoats that can be sanding, they have a high performance one that supposedly is pretty close to a 2k poly/conversion varnish, but you don't have to do any mixing and it can be applied by hand, although I've never tried it. I use their enduro-var water based urethane for a lot of residential jobs and get get a pretty gloss like look by buffing it up.
Has anyone had any luck using different resin? Art Resin like /u/peterb77 used is pretty expensive for a smaller amount. I was looking on amazon and you can get a lot more for something like this https://www.amazon.com/Crystal-Clear-Table-Coating-Tabletop/dp/B01LYK2NAG/ref=sr_1_18?ie=UTF8&amp;qid=1502468813&amp;sr=8-18&amp;keywords=resin
This will be my first but hopefully not my last resin project.
Epoxy Resin would be your best bet. I don't trust water based polyurethane on anything that may get wet.
https://smile.amazon.com/Crystal-Clear-Table-Coating-Tabletop/dp/B01LYK2NAG/ref=sr_1_3?crid=2PGLVZYV5O35O&keywords=bar+top+epoxy+resin&qid=1556287104&s=gateway&sprefix=bar+top+%2Caps%2C149&sr=8-3
&#x200B;
https://smile.amazon.com/Colorant-0-36oz-Cosmetic-Natural-Pigment/dp/B07DH8QDJN/ref=sr_1_4?crid=2VA4LC6AZZO6M&keywords=epoxy+resin+color+pigment&qid=1556287213&s=gateway&sprefix=epoxy+%2Caps%2C156&sr=8-4
> Third: My casts have a yellow hue to them instead of being crystal clear as the product should be. While setting I did block them from sunlight. Could this be the result of measurement error or mixing error?
Did you use this resin? I had the same problem, and the company said that if you pour in increments thicker than 1/4", the excess heat discolors the resin.
Here is the exact resin I use
I've found with careful control of resin temperature and slow mixing of small batches you can get a nearly bubble-free pour. These pieces are also 1x1x1.5" so they are quite small.
My initial test build had millions of bubbles but by changing a few parameters (dont store resin in the cold basement, mix with proper cups and a mixing spoon) I got something I was happy with!
Also this is regular clear epoxy resin just marked down for tables so that could be why they charge less for it.
I used this stuff and it turned out well:
https://www.amazon.com/gp/product/B01LYK2NAG/ref=ppx_yo_dt_b_search_asin_title?ie=UTF8&amp;psc=1
Okay thanks. I'm leaning towards this one since it says its temp resistant up to 500F, waterproof, and is nontoxic after setting.
Just spend a couple bucks and buy yourself some JB Weld. Fix that shit right up.
http://www.amazon.co.uk/J-B-Weld-Original-Epoxy-Adhesive/dp/B0006O1ICE
Any decent two part epoxy will do. You can order some insanely strong ones from lab stores if you really need it, but start with this.
edit to say: You may want to get a pair of thin plates to sandwich the joint so the epoxy can attach to the surface rather than edge. You can get all sorts in tiny quantities from ebay with no problem.
Do you still have the pieces? If it didn't shatter into tiny pieces, you could definitely try to reconstruct it and glue it back together with JB Weld.
Check out JB Weld. Best damn epoxy ever. Used it to fix a similar problem on an old Dell. Just make sure you clean and sand each piece you apply it to. The sanding is to rough up the surface so you get a better bond.
So. That holder doesn't seem to be the right one for that shower head.
How nice are you wanting this to look vs. the level of function vs. cost and effort you want to put in?
If you want FUNCTIONAL only... I would recommend a big-ass carabiner and some good 2-part epoxy for metal. put the carabiner on that hangar with the epoxy and let that operate as your holder from now one.
Alternative 2: Find a new showerhead mount. Look at the measurements of the products vs. those of the handle on your showerhead. Make sure it fits. Follow the instructions to mount it. TAKE SPECIAL CARE that you either use drywall anchors (which should probably come with the device), or drill it directly into a stud.
Shower Curtain: This is a bit more difficult, because of the positioning of the window and the sink. I would recommend mounting your shower curtain from the ceiling using these. Again, use the mounting instructions that come with them. And for god's sake, when mounting into the ceiling, use drywall anchors. Past that, just get a rod and curtain.
Tools needed for this endeavor include: Small batter operated drill/screwdriver. They are all over amazon for <$50. In fact, if you are TRULY a beginner, here is a cool little set for you. You aren't going to be building any houses with it, but it has some basics you will need around the house. If any of these break, that shows you that you use it enough to warrant something more expensive.
https://www.amazon.com/dp/B0006O1ICE/ref=cm_sw_r_cp_api_7VgCxbJXY6KS5
Use this, buy a new block later when the thermistor dies.
https://www.amazon.com/J-B-Weld-8265S-Reinforced-Hardener/dp/B0006O1ICE/ref=sr_1_2?ie=UTF8&amp;qid=1492996945&amp;sr=8-2&amp;keywords=metal+epoxy
Get some JB Weld and epoxy it back together. I did this with a microwave oven handle and it lasted over ten years. Available at your local *Mart store.
You're looking at $125 to fix it. #8 in the diagram
I would get an adapter like this and epoxy it into the hole using JB-Weld or something similarly temperature resistant.
you can solder the snapped cable if you can get enough exposed to make a good joint, but the frame is broken at a point that is constantly under pressure (which is probably why it broke) and if you use solder to join the ends it will just shear again.
I wonder how the broken frame will hold up with something like this. I have never used it to fix headphones but have been pleased with how well steel-reinforced epoxy works in other high-stress applications.
https://www.amazon.ca/Weld-8265S-Compound-Epoxy-Twin-Pack/dp/B0006O1ICE
First of all, are the cracks down near the bottom corners? If so, there is something you can try. I've seen a "repair," but it was on a polycarbonate container, not on the Tritan material, which your container is, assuming it is a home model from 7-10 years ago. So I'm not if it will work, but you could try it. The repair I saw used JB Weld to reinforce the outside of the corners. I don't know if the JB Weld sticks better to polycarbonate than Tritan, but it's worth a shot if you are looking for a repair.
The other thing you can do is look for a container without blade and lid, and transfer over your blade assembly. There's a wrench you can buy specifically for the task, or you can jury rig something. You have to be careful not to under or over tighten.
KennKatastrophe is right that Vitamix would just replace the container shell.
If you must use super glue, then Loctite is my favorite. However it is brittle and sometimes has problems binding to certain types of plastic.
Epoxy works much better for metal or pewter figurines. For most plastics Tenax 7r is the best.
Maybe some jb weld stuff: https://www.amazon.com/J-B-Weld-8265S-Cold-Weld-Reinforced/dp/B0006O1ICE
I would advise against welding, mainly because of the low melting point of brass. I don't know how your piece is laid out, but I imagine that it would be difficult to keep the heat away from the brass while trying to weld the steel together.
Soldering could work, I don't see why it wouldn't albeit a little frustrating. Brazing is something that came to mind. Another is J.B. Weld. I haven't used J.B. Weld for sealing jump rings, but I've used it as weld filler in a pinch.
Good luck!
I had a thin 4 inch long crack in my XC70 oil pan which leaked oil within 20 minutes. I drained the oil out of the car, let the crack drain out fully, cleaned the outside of the pan and coated almost the entire outside of the oil pan with JB weld. This was 20,000 KM ago and the JB weld is holding strong with no sign of giving up. I also fixed a snow blower engine which had a crack in the head with JB weld many years ago, that snow blower still works.
http://www.amazon.com/J-B-Weld-8265S-Original-Reinforced/dp/B0006O1ICE
Superglue is not a good choice for repairs like this.
Use an industrial epoxy like JB Weld
https://www.amazon.com/J-B-Weld-8265S-Cold-Weld-Reinforced/dp/B0006O1ICE
If you go the plug route, the hot glue on the plug is bound to come loose eventually so I picked up some of this.
Only downside being that the plug will be in there forever
jb weld that shit
It won't have the same texture and will look a bit ghetto. But it will get the job done.
This is a popular method. Also, if it doesn't work, you can use something like JB Weld Epoxy (thanks /u/Boomerkuwanga) to attach another small screw to the top of it, let it set, then screw it out with whatever normal driver works for the screw you attached. I'd heard of this method using superglue, but apparently the JB weld is much better!
I bought this a few min ago. http://thistothat.com doesn't even have epoxies so I figured that epoxies are probably just as strong if not stronger than those.
Buy the Jeff Bezos model
Garden Torch
JB Weld
Airsoft Rifle
If you want an actual flame thrower then give your money to these people X15
Or fill a super soaker with gasoline and save $500.
Try using jb weld or some other type of concrete paste and paste the rod to a drum key. You'll have to throw away the drum key, but it is just an idea.
Oooh. Shiny. Black plasti-dip on the butt would probably look nice and provide some extra grip (don't forget to rough up the surface before applying several coats).
Also available at your local auto parts store.
A better idea might be to turn it inside out and spray it with some aerosol Plastidip. It is readily available at any home improvement store, or Wal-Mart or whatever.
Stock rubicon wheels. Sprayed with Plasti Dip, cheap and easy.
[Plasti Dip] (http://www.amazon.com/Performix-11203-Multi-Purpose-Coating-Aerosol/dp/B0006SU3QW) is what I've seen used most.
Plasti Dip
Its that easy
Like slapping a coat of paint on an old motorcycle!
Is it just regular black plasti dip like this?
Or is it some special stuff, like a kit, matte, glossy, etc.?
Thanks again! Def going with your plan.
FYI it is not hard to plasti-dip anything these days nor would it take tons or even need to be dipped any more as plasti-dip come sin spray can form.
http://www.homedepot.com/p/Plasti-Dip-11-oz-Copper-Metalizer-Spray-6-Pack-11236-6/204416730
https://www.amazon.com/Performix-11203-Multi-Purpose-Coating-Aerosol/dp/B0006SU3QW?ie=UTF8&amp;*Version*=1&amp;*entries*=0
Plasti-dip
http://www.amazon.com/Performix-11203-Multi-Purpose-Coating-Aerosol/dp/B0006SU3QW
No problem. You more or less do the same thing for the paddle. If you are doing just that though, why not use some plasti-dip? Comes in many colors, gives you some extra grip, and no need to prime. Just clean it, coat it, and let it sit for however long it says on the can.
Most people spray it on the bottom of their bags so they don't get soggy and wet. Amazon has it and most hardware stores do as well. Just google disc golf plasti-dip bags and I'm sure you're see some threads about it.
http://www.amazon.com/Performix-11203-Multi-Purpose-Coating-Aerosol/dp/B0006SU3QW/ref=sr_1_1?s=hi&amp;ie=UTF8&amp;qid=1406612535&amp;sr=1-1&amp;keywords=plasti+dip
You should buy some rubber spray off amazon and spray your foam so it doesn’t fall apart. That’s the move.
Performix 11203 Plasti Dip Black Multi-Purpose Rubber Coating Aerosol - 11 oz. https://www.amazon.com/dp/B0006SU3QW/ref=cm_sw_r_cp_api_i_rAb4Ab2NNV0W2
https://www.amazon.com/Performix-11203-Multi-Purpose-Coating-Aerosol/dp/B0006SU3QW/ref=sr_1_1?ie=UTF8&amp;qid=1495541546&amp;sr=8-1&amp;keywords=Plastic+dip
I did a quick search and found these.
https://www.amazon.com/Aluminium-Cigar-Tube-Travel-Screw/dp/B01JJL41FA/ref=sr_1_fkmr1_1_a_it?ie=UTF8&amp;qid=1494609104&amp;sr=8-1-fkmr1&amp;keywords=garcia+vega+cigar+tube
https://www.amazon.com/Stainless-Steel-Cigar-Tube-Travel/dp/B01JJL4AX8/ref=sr_1_fkmr1_2_a_it?ie=UTF8&amp;qid=1494609381&amp;sr=8-2-fkmr1&amp;keywords=garcia+vega+cigar+tube
They would need coated on the inside where the clicker would touch. I'm thinking spraying some plasti dip would work.
https://www.amazon.com/Performix-11203-Multi-Purpose-Coating-Aerosol/dp/B0006SU3QW/ref=sr_1_1?ie=UTF8&amp;qid=1494609272&amp;sr=8-1&amp;keywords=plasti+dip
Here'a a nice oak one for $10.
https://www.amazon.com/dp/B01HMTW00O?psc=1
Electrical tape to tape off any ports first. Then use plasti-dip : https://www.amazon.com/Performix-11203-Multi-Purpose-Coating-Aerosol/dp/B0006SU3QW
Plasti-dip. Spray it on like spray paint, but peels off like tape. http://www.amazon.com/Performix-11203-Multi-Purpose-Coating-Aerosol/dp/B0006SU3QW
I originally looked to fit the seachem bottles with pumps but couldn't find anything that'd fit. It's just a big bottle with a little opening. Here's the bottles I ended up buying. And here's the plasti-dip I used. Although I bought the plasti-dip at the local Lowes for less than Amazon sells it for.
Edit: while getting the link for those bottles, I found a pack of black bottles in the list of related items. More expensive, but it'd have probably been easier. Link
Performix 11203 Plasti Dip Black Multi-Purpose Rubber Coating Aerosol - 11 oz. by Performix http://www.amazon.com/dp/B0006SU3QW/ref=cm_sw_r_udp_awd_XLipub12RWJGR
Worth just figuring out how to do it yourself honestly.
Or just spend $5 and plasti dip.
https://www.amazon.com/Performix-11203-Multi-Purpose-Coating-Aerosol/dp/B0006SU3QW/ref=sr_1_3?s=automotive&amp;ie=UTF8&amp;qid=1541530167&amp;sr=1-3&amp;keywords=plasti+dip+black
https://www.youtube.com/watch?v=EWS9-lTfd30
https://youtu.be/Dxz2dJ6tfeI?t=640
Actually, his second guide tells you all about paint! His guides are VERY useful, and if you're interested, he also does a weekly Q&A livestream via Google Hangouts where you can ask questions about foam fabrication (among other things, usually) and he answers them right then and there! If you follow his Facebook page, he will post who his guest for the week (if any) is, and what time he's streaming.
I hope this helps you out! (To be honest, I'm not a big fan of making armor out of foam, but I've been giving it more of a shot lately. For the foam things that I HAVE made, I've used Plasti-Dip to seal, and then whatever color of spray paints I need, followed by acrylics for details/weathering.)
Edit - Formatting & a word
Plasti Dip you can buy black and white at walmart and you can peel the paint off whenever you want. youtube it
You could just buy some of this
Thanks! I'm a home user, and yes I meant 200kg force (Ebay sells them for about £40).
> Ok so to answer your question: you could wrap it in a rubber mold (which you can paint on in layers)
Any high rated product from Amazon.co.uk you can recommend? How about something like this: http://www.amazon.co.uk/Plastidip-Plastic-Rubber-Paint-400ml/dp/B0006SU3QW
Also maybe this? http://www.amazon.co.uk/250mls-Liquid-Latex-Mold-Special/dp/B004FPMN4C
I think the idea with this second one is to dip objects in multiple times (waiting minutes or hours between each layer), and each time a layer is added. You can dip multiple times, and get it as thick as you want.
> or even glue on sheets of rubber (probably your best bet)
Again, any product page you can point me to? Hopefully, UHU all purpose glue will stick it together. This approach will look less 'clean' than the previous though...
I don't mind not using rubber by the way.
> Remember, the thicker your protective layer, the bigger your air gap, and the weaker the strength will be.
If the distance is more than a few centimetres, the force will be the same AFAIK. It's only weaker in the sense that the metal can't physically touch the actual magnet if it's got a coating.
> And as always, be careful with magnets that strong!
That's why I want to get it coated :)
How do you rate the safety of a cube versus a cylinder versus a sphere? A sphere has no sharp edges or corners, but perhaps more importantly, flat metallic objects won't have so much surface area to 'touch' the spherical surface completely (unless the object was also curved like the magnet, which is unlikely).
Not sure how easy it is to detach metal objects from a 2" diameter sphere though compared to an equivalently strong cube (about 1.6" cube).
> They are cool and fun, but things go wrong very quickly in ways you will not expect.
Any stories to share? Have you ever come close to an accident?
I think this would be a good choice.
You could fashion a wall shelf for the MB with two wall shelf brackets (mounted upside-down) and a can of rubber spray for like $12. For the display, I'd go with the standard VESA wall-mounting option of your choice.
Edit: Shit, I might do this for myself now.
https://www.amazon.com/Performix-11203-Multi-Purpose-Coating-Aerosol/dp/B0006SU3QW/
It's more like spray paint. It works super well.
Did you know Amazon will donate a portion of every purchase if you shop by going to smile.amazon.com instead? Over $50,000,000 has been raised for charity - all you need to do is change the URL!
Here are your smile-ified links:
https://smile.amazon.com/Performix-11203-Multi-Purpose-Coating-Aerosol/dp/B0006SU3QW/ref=sr_1_1
---
^^i'm ^^a ^^friendly&nbsp;bot
for cables, check out either cablemod or mainframecustoms
for painting, I dont think there's a service that you can just ship your parts off to have them painted, but for painting pc parts, use plastidip. it's non-conductive, covers in 2 coats, comes in like 1000 colors, and is REMOVABLE just by peeling it off. for your case you may want to use something else, but for backplates and ssd's use plastidip
here's a linus video on plastidipping parts
one of my friends used clear coat to make it more shiny but I just used plastidip and then the color that I wanted and it worked pretty well
here is an amazon link to stuff we used it comes in different colors as well.
The one I'm using is Performix, not sure if that's the original. I picked it up from HomeDepot but you may even be able to find it at the local auto shop. I've used it to blacken the headlight rings on my car. Amazon link: http://www.amazon.com/Performix-11203-Multi-Purpose-Coating-Aerosol/dp/B0006SU3QW
I did 6 coats, about 15 minutes of drying between coats. Brand wise, i just brought the first one that came up on amazon: https://www.amazon.com/Performix-11203-Multi-Purpose-Coating-Aerosol/dp/B0006SU3QW/ref=sr_1_1?ie=UTF8&amp;qid=1480126309&amp;sr=8-1&amp;keywords=plasti+dip
Spray
I got mine at home depot
Yeah i read to maybe use a foam sealer of some kind before painting it, with maybe acrylic paint? This stuff??
You can always use Plasti Dip. It is basically spray paint but it is non permanent and can be removed.
I have the same chair. I traded it in for a DX Racer but I did not need to... It's a great chair. If I may offer a suggestion. Coat the parts you made with [plasti dip.] (http://www.amazon.com/Performix-11203-Multi-Purpose-Coating-Aerosol/dp/B0006SU3QW/ref=sr_1_1?ie=UTF8&amp;qid=1426521190&amp;sr=8-1&amp;keywords=plasti+dip+black) That would be the finishing touch.
7 coats of black and 5 coats of gold. :)
4 cans should be enough for four wheels and I think 3 is enough for the gold. :)
It looks mean.
http://www.amazon.com/gp/aw/d/B0006SU3QW?cache=d678df272a3c91b9686c08d4631393eb&amp;pi=SY200_QL40&amp;qid=1405885609&amp;sr=8-3#ref=mp_s_a_1_3
Was this the plast dip you used?
https://www.amazon.com/gp/product/B0006SU3QW/ref=ox_sc_act_title_1?smid=ATVPDKIKX0DER&amp;psc=1
I used Plasti-Dip, this stuff here: https://amazon.com/gp/product/B0006SU3QW/ref=oh_aui_search_detailpage?ie=UTF8&amp;psc=1
If you try, look up tutorials on youtube and be careful about application. The stuff is holding on really well through rain and snow with no sign of deterioration
You could try this stuff. Plasti Dip.
Not sure how the clear would look. I've used the black, and blaze orange on my hand tools and it holds up quite well.
Kroil is much better than PB Blaster. Get a can and use it sparingly. https://www.amazon.com/Kano-Aerokroil-Penetrating-aerosol-AEROKROIL/dp/B000F09CEA/ref=sr_1_1?ie=UTF8&amp;qid=1518798021&amp;sr=8-1&amp;keywords=aerokroil
A good quality ratchet can be better than a cheap breaker bar at times. However, a good breaker bar is a very valuable tool. Also in this case, the proper tool would have been a crows foot and a breaker bar. You don't need crows feet very often, but when you need them you need them, and they really aren't too expensive.
Get yourself some Kano Kroil from Amazon and spray it down liberally. Wait 24 hours and then try to take the bolt off. I use said spray consistently at work to free up bolts that have rusted solid on 2000° boilers. It is worth every penny.
Kano Aerokroil Penetrating Oil, 10 oz. aerosol (AEROKROIL) https://www.amazon.com/dp/B000F09CEA/ref=cm_sw_r_cp_api_i_rQ.IDb8RWT79K
UV-5R, small axe, 3/8 socket set, random pipe, water bottles, tow strap, mosquito repellant, hi-lift jack with liftmate, moving blanket, tarp, paracord, aerokroil
if I had to pick three things it would be the UV5R, blanket, socket set, paracord. see what I did there?
Kroil is where it's at. It's fucking dark magic how well it works.
http://www.amazon.com/Kano-Aerokroil-Penetrating-aerosol-AEROKROIL/dp/B000F09CEA
Get some kroil
Shut off the water supply to the house. Turn on the sink faucets. Turn on any faucets below the sink if possible, such as a spigot outside, downstairs sink, bathtub, etc. The water will flow out. It should not take more than 5 minutes.
Put a bucket/pan\towel under the sink as usual. Then you can swap out the sink fixture and leave the hot water valve open.
Alternately, get some Kano and spray it just below the handle on the valve, where the post goes into the housing, and let it sit overnight.
Then put one wrench on the valve handle, and a second wrench on the valve housing (below the stem) and twist. The second wrench will keep you from twisting the valve right off the pipe as the pipe is generally soft and easy to damage if you twist it too hard!
I run into locks that have been unused for years. I have two key blanks: a Kwikset and a Schlage. If the key blank has a hard time entering the key way, I use Aero Kroil to loosen it up for picking. It works great.
http://www.amazon.com/Kano-Aerokroil-Penetrating-aerosol-AEROKROIL/dp/B000F09CEA
Penetrating oil. I like this stuff.
You don't want that getting into the system though, so once it's free, soak the area in dish soap and water.
That sets your ball up for corrosion again, so spritz it with Pam or some other food grade oil.
My experience with chinese motorcycles is if taken care of properly the engine usually runs OK, but everything else will rust to shit very fast due to the poor quality metal.
OP, I highly recommend you pick up some ACF-50 and give the bike a good rubdown with it. It is used in the aircraft industry to prevent rust, and has been used on motorcycles. I live in a rainy humid environment and I use it on my honda.
https://www.amazon.com/ACF-50-Anti-Corrosion-Lubricant-Compound-Aerosol/dp/B000P1C8UO
Use ACF 50, and only do it once a blue moon.
http://www.amazon.co.uk/ACF-50-Motorcycle-Automotive-Metal-Anti-Corrosion/dp/B000P1C8UO/ref=sr_1_1?ie=UTF8&amp;qid=1376034530&amp;sr=8-1&amp;keywords=acf+50
My friends in the UK who ride all year round, swear by something called ACF-50. You may wish to look into it.
Spray it on before exposing the bike to salt, wash it off in the spring. I haven't used it but it's supposed to be great. Paging /u/MisterShine to the red courtesy PM phone.
Yeah, that 3M adhesive on the back of 5050 LED strips is pretty much garbage.
I just used a dot of super glue every 8 inches or so:
https://www.amazon.com/Gorilla-Super-Glue-15-g/dp/B001IY82FM/
Don't use too much superglue. It would be a bitch to remove if you ever need to.
Thanks yeah, it's mostly the removal of the old glue from the shafts that I'm most concerned with. I actually have one of those stripper doodads and it stripped the old glue off my shafts pretty well, but I'm concerned that some of the cyanos that dry rock solid could be a huge pain to remove.
Is the glue you're using this stuff?
https://www.amazon.com/Gorilla-Super-Glue-15-g/dp/B001IY82FM
http://www.amazon.com/Gorilla-7805001-15g-Super-Glue/dp/B001IY82FM
I'd just glue the magnet back on, but maybe that's just me.
Gorilla Super Glue 15 Gram, Clear
https://www.amazon.com/dp/B001IY82FM/ref=cm_sw_r_cp_api_i_81BvCb9WYWRQ3
Cufflink Backs + Superglue.
That is -hilarious-. I put Gorilla Glue on my wishlist 2 days ago, because I'm looking to make my own magnetic spice-jars.. SWEET! I totally don't mind either the glue, or the magnets would be awesome, or even just a gift card to start me off saving!
guerilla gorillas
Hmm... yeah it sounds like a dowel won't work. The only other thing I know of that would fill a cavity, bond two surfaces, and hold a screw would be epoxy. Depending on the situation, you may need to do this in steps, and I would definitely pre-drill for the screw, but not sure how to do that if you don't have a drill. I've personally never used epoxy, but something similar to this should work for you:
https://www.amazon.com/Gorilla-Epoxy-85-oz-Clear/dp/B001Z3C3AG
You might be able to find a video or other tutorial showing the use of epoxy on furniture repairs.
I'll definitely make a post and show it off once I'm done, I think it's going to look pretty badass if it turns out like I'm hoping.
Also just went ahead and ordered a tube of this...
https://www.amazon.com/dp/B001Z3C3AG
Not sure I trust the name as much as JB Weld or Loctite, but it supposedly dries crystal clear and I like the idea of that.
This one stupid trick will actually protect you against all exploits spread by USB devices.
this
Epoxy gorilla glue, https://www.amazon.com/Gorilla-Epoxy-Minute-ounce-Syringe/dp/B001Z3C3AG
I waited 24 hours after application to move her.
https://www.amazon.com/Gorilla-Epoxy-Minute-ounce-Syringe/dp/B001Z3C3AG/ref=mp_s_a_1_1?ie=UTF8&amp;qid=1541767455&amp;sr=8-1&amp;pi=AC_SX236_SY340_FMwebp_QL65&amp;keywords=gorilla+glue+5+minute+epoxy
Its kinda expensive so i dont recommend for large terrain. But it dries crystal clear. Adding a drop of paint will give it more than enougj color and make it much easier to pour
they basically used the equivalent of this on a priceless ancient Egyptian artifact.
I'm not sure what he used. There's a ton of them out there. You could try the Gorilla Epoxy for example.
If the arm is about to break after only one day, your best bet would be to contact the seller and see if they'll arrange for a replacement. If the toy is breaking after a day, you could argue that it was defective.
If you really want to fix the toy yourself, your best bet is to use something like Gorilla Epoxy.
https://www.amazon.com/Gorilla-Epoxy-Minute-ounce-Syringe/dp/B001Z3C3AG
This will make a much stronger bond than any superglue.
You'll want to lightly sand the peg and the surrounding area, and then mix up a small amount of epoxy and coat the peg (not the ball). Use a toothpick or something to apply the epoxy to the peg. Let it dry and it should be stronger, but you'll need to be careful with it going forward.
like this? https://www.amazon.com/Gorilla-Epoxy-85-oz-Clear/dp/B001Z3C3AG/ref=sr_1_1?ie=UTF8&amp;qid=1482113709&amp;sr=8-1&amp;keywords=two+part+epoxy
Would something like this do the trick? http://www.amazon.com/dp/B001Z3C3AG
Some kind of epoxy maybe, but when it comes to gluing things, the materials involved are really important.
Some sort of epoxy might work.
https://www.amazon.com/Gorilla-4200101-Epoxy-85-oz-Clear/dp/B001Z3C3AG/ref=sr_1_3?ie=UTF8&amp;qid=1525929780&amp;sr=8-3&amp;keywords=plastic+epoxy
Would this work?
https://www.amazon.com/gp/product/B001Z3C3AG/ref=s9_acsd_top_hd_bw_bHLAlv_c_x_1_w?pf_rd_m=ATVPDKIKX0DER&amp;pf_rd_s=merchandised-search-3&amp;pf_rd_r=RRZQ030G27SHF15P8SYW&amp;pf_rd_t=101&amp;pf_rd_p=0a3c6581-feb2-509a-bd74-91d7d12a5759&amp;pf_rd_i=256244011
This sounds like you only had one problem - you don't have epoxy - you should always have, if anything else, a little dual squeeze tube of locktite (or any) two part oil resin based epoxy. This is basically a pantry item, like (quality) duct tape or super glue
https://www.amazon.com/gp/aw/d/B001Z3C3AG/ref=mp_s_a_1_1?ie=UTF8&amp;qid=1487817131&amp;sr=8-1&amp;pi=AC_SX236_SY340_FMwebp_QL65&amp;keywords=epoxy
Use an epoxy that can withstand high temperatures. i. e. Gorrila Glue Epoxy
I used shoe goo to fix the exact same problem on my quoddy camp sole penny loafers, and so far it has help up nicely
http://www.amazon.com/Shoegoo-82049-Shoe-Goo-Clear/dp/B002L9AL84
Use a little bit of shoe goo.
If you can't get them resoled, this product will fix that right up
&#x200B;
https://smile.amazon.com/Repair-Adhesive-Fixing-Shoes-3-7-Ounce/dp/B002L9AL84/ref=sr_1_2?ie=UTF8&qid=1542028069&sr=8-2&keywords=shoo+goo&dpID=41CKuZec1YL&preST=_SY395_QL70_&dpSrc=srch
I cut fine strips of gorilla tape ( Black Gorilla Tape 1.88 In. x 35 Yd., One Roll https://www.amazon.com/dp/B000CSS8UE/ref=cm_sw_r_awd_xFOTub1XKN5GT ) and placed around the inside. Then covered the tape with shoe goo ( Sof Sole Shoe Goo, Clear https://www.amazon.com/dp/B002L9AL84/ref=cm_sw_r_awd_eGOTub07851J8 )
The thing is a tank now. I do it to all my plastic bodies. My 4x4 slash, nano cpx, nano and FPV nano etc.
Hi everyone - I have a pair of 5-year-old Doc Martens where the sole (welt?) split in the foot arch area. I don't have a photo of my boots, but another reddit user has experienced the same thing:
https://i.redd.it/i0bm69q2bqx11.jpg
One of the commenters suggested "Shoe Glue." Is this recommended to repair them this way? There is no local cobbler that I'm aware of. Even if there was, isn't it more economical to just... buy another pair at this point?
Shoe Goo: https://www.amazon.com/Repair-Adhesive-Fixing-Shoes-3-7-Ounce/dp/B002L9AL84/ref=asc_df_B002L9AL84/?tag=hyprod-20&amp;linkCode=df0&amp;hvadid=198098255989&amp;hvpos=1o2&amp;hvnetw=g&amp;hvrand=16664767372845432839&amp;hvpone=&amp;hvptwo=&amp;hvqmt=&amp;hvdev=c&amp;hvdvcmdl=&amp;hvlocint=&amp;hvlocphy=9022836&amp;hvtargid=pla-383019498180&amp;psc=1
You can use that if you wanted to glue down other grip.
Its also something that you can peal off with a lot of force.
I use Shoe Goo for many things one of which is to glue back
my surfco tail guards when I re-grip. Since I cant really cut around them.
This shit holds solid, and when needing to remove the tail guard
it just peals off with mild force.
I would like to think adding a thin layer of shoe goo to any grip
would allow you to stick it to the stock grip and then peal it off
if you ever wanted to swap it.
Hey, [try this!] (https://www.amazon.ca/gp/aw/d/B002L9AL84/ref=mp_s_a_1_1?ie=UTF8&amp;qid=1485617835&amp;sr=8-1&amp;pi=AC_SX236_SY340_QL65&amp;keywords=shoe+goo&amp;dpPl=1&amp;dpID=41CKuZec1YL&amp;ref=plSrch)
It's called shoe goo, I use it all the time for my skate shoes, makes them last hella long, cause if it ever wears off from scraping grip tape or even the ground, you can always re-apply it! Also, another good alternative to this you could try is using a hot glue gun. Just apply the hot glue to the place that's scraping, let it dry for 5 mins and you're ready to rock n roll! Hope this helps m8 :)
https://www.amazon.com/gp/product/B002L9AL84/ref=oh_aui_detailpage_o01_s00?ie=UTF8&amp;psc=1
Is it possible the problem is that some of the glue entered into the hole, so now it's not smooth?
You have a few options. Just know that if you're going hard and practicing everyday, your shoes probably won't last longer than a month. If you get high end($80-90) skate shoes, they still won't last longer than a couple of months. So my suggestion is that you get some Shoe-goo. This can make your shoes last potentially forever. Just apply it to the areas of your shoes that get damaged. And you can always put on more goo as soon as you wear out the goo protection. I currently wear Etnies Marana XT's, but I'd also recommend Van's Ultrarange. It's a high premium for shoes you're going to shred but it is totally worth it, especially if you shoe goo them.
You can use this: Shoe Goo, Clear
http://amzn.com/B002L9AL84
I have heard many good things about using that for HOTAS. I would recommend using this to secure it. I am pretty sure that the extreme pro will work with that
I guess? (Not really sure) It hasn't popped off on me at all, very secure.
Scotch(R) Heavy-Duty Fasteners, 2 Sets of 1 x 3 Inches, Strips ,Black (RFD7091) https://www.amazon.com/dp/B00347A8GM/ref=cm_sw_r_cp_apa_qD66xbBKF40R4
I was thinking to use these
Scotch(R) Heavy-Duty Fasteners, 2 Sets of 1 x 3 Inches, Strips ,Black (RFD7091) https://www.amazon.com/dp/B00347A8GM/ref=cm_sw_r_cp_api_iG22xbGPR59SP
I use them them to mount everything in my house. You can stick one on the back of the base station mount and one on the wall. These things are quite strong as well so they could definitely handle the weight of the base stations.
Scotch(R) Heavy-Duty Fasteners, 2 Sets of 1 x 3 Inches, Strips ,Black (RFD7091) https://www.amazon.com/dp/B00347A8GM/ref=cm_sw_r_cp_api_Gd90AbHHJ859H
Is this it?
One of the best things I bought along with the CH was a set of velcro fasteners: https://www.amazon.com/Scotch-Heavy-Duty-Fasteners-Inches-RFD7091/dp/B00347A8GM/ref=sr_1_2?ie=UTF8&amp;qid=1497634206&amp;sr=8-2&amp;keywords=3m+velcro+strips
They'll make the CH feel twice as solid.
Don't nail
Clean/sand the area and then use a heavy duty velcro to cover the entire area you are trying to hold (not just a single strip)
https://www.amazon.com/Scotch-Heavy-Duty-Fasteners-Inches-RFD7091/dp/B00347A8GM
Velcro and tether, baby
https://imgur.com/a/qKpPy
https://www.amazon.com/Scotch-Heavy-Duty-Fasteners-Inches-RFD7091/dp/B00347A8GM/ref=sr_1_4?ie=UTF8&amp;qid=1520960332&amp;sr=8-4&amp;keywords=3m+scotch+heavy+duty+fasteners
https://www.amazon.com/gp/product/B00JFS1TC6/ref=oh_aui_search_detailpage?ie=UTF8&amp;psc=1
Non-mobile: 3M Dual Lock Plastic Velcro
^That's ^why ^I'm ^here, ^I ^don't ^judge ^you. ^PM ^/u/xl0 ^if ^I'm ^causing ^any ^trouble. ^WUT?
This would be great to fill small dents in the floor. Just drip it in. Dries clear. If you use a wood putty of any kind, from 10 feet away, it will look like you dropped something on the floor https://www.amazon.com/Loctite-Ultra-Control-4-Gram-1363589/dp/B003Y49R7G/ref=sr_1_2?ie=UTF8&amp;qid=1474861033&amp;sr=8-2&amp;keywords=loctite+glue
+1 this tip. I recommend the super glue gel to keep it from dripping into the headphone jack, possibly causing further issues.
Something like this would work too.
Welcome to the hobby!
One more thing: terrain makes games of 40K great, but buying manufactured terrain can be very expensive. I recommend buying a double sided battle mat made of mousepad material. These are good mats in the US/Canada and these are good in the EU. As for your large, line of sight blocking terrain, I recommend...building it yourself. Wyloch's Armory is an excellent place to start with crafting your own terrain.
I hope this helps, and if you have more questions, please feel free to ask.
Ah ok, I ordered the stuff that Rockit cool recommended. I'll write up a similar post when all the stuff arrives.
Try getting Gel Superglue (like this). Apply a decent dob in the joints, then plop the arms in there and hold for 15 seconds. You can still move them a tad after, but they won't fall out. Let them set for a few minutes before putting any large amount of tension on them and you should be golden.
Second option is to use an accelerator, like this. Apply glue to the joint, then spray/dip the arm ball in kicker, and put it into the joint. This will set very quickly. It's also exothermic, so if you get glue on your hands and don't notice, then get kicker on there, it can be fairly painful.
Last, a helping-hands can be quite useful if you have it laying around. I use this one for electronics, and it works pretty well holding awkward model parts for letting glue set.
I read a study someone had done in the past few months, and oddly enough, testing PLA specific glues and other various specialty glues, the study concluded that Loctite Gel Ultra Control Superglue drastically outperformed all of the other glues as far as ease of use and overall strength bond. That being the case, I've been using it to assemble the 20" Voltron model I've been printing since Christmas and it's worked wonderfully.
link
I use this stuff -- its perfect. Has a really narrow tip so you can get glue in the sockets, and it doesn't drip/run.
&#x200B;
https://www.amazon.com/Loctite-Ultra-Control-4-Gram-1363589/dp/B003Y49R7G/ref=sr_1_1_sspa?hvadid=176369327477&hvdev=c&hvlocphy=9019699&hvnetw=g&hvpos=1t1&hvqmt=e&hvrand=2263978452012469257&hvtargid=aud-646675773986%3Akwd-3949895385&keywords=loctite+control+gel&qid=1556204318&s=gateway&sr=8-1-spons&psc=1
If you use Zap a Gap or similar they have a removable tip. It seems to stay very clog free with minimal buildup on the tip. Maybe the plastic they use has something to do with it, but my bottle seems fairly clean. That and I like the Loctite control type glues which have the squeeze sides. They tend to let me keep the tip clean as no glue seems to leak out unless I squeeze them. They also have great formulas imo. Gel or liquid depending on your needs.
Loctite Ultra Gel Control Super Glue
I use loctite super glue on pla and it works great too. Loctite Ultra Gel Control Super Glue 4-Gram (1363589) https://www.amazon.com/dp/B003Y49R7G/ref=cm_sw_r_cp_apa_i_GY-UCbGDJ010B
I used this glue -
https://www.amazon.com/gp/product/B003Y49R7G/
I really tried to use as tiny amount as possible and kept it closed while it dried. It was a little stuck when I opened it, carefully scraped the parts that needed it. Definitly still waterproof per light testing.
I used food grade silicon like this stuff from amazon..
https://www.amazon.com/Clear-Food-Grade-Silicone-Sealant/dp/B0063U2RWU
Not exactly that brand but the same basic stuff, it's been a few years and still holding fine..
Well, I'd probably just use food grade silicone if you're looking for something quick and easy.
Otherwise you could use a compression fitting cap but you'll need to insert the dip tube in first and then attach the fitting through the lid hole.
Great idea, can't believe I never thought of that!
I found a tube of some that looks like it would work great from Amazon.
I suppose I could modify an electric kettle using that, I'd just need to find a foodsafe valve for it.
That might actually be fixable.
Clear Food Grade Silicone Sealant - 2.8 oz Squeeze Tube https://www.amazon.com/dp/B0063U2RWU/ref=cm_sw_r_cp_api_byIYBb4E3Z9XS
Silicone Sealant 100% RTV - 2.8 oz Squeeze Tube -Clear- https://www.amazon.com/dp/B0063U2RWU/ref=cm_sw_r_cp_apa_-1c-Bb1T78NRF
Okay, I thought maybe it was metal. I'm guessing it's a cooler? Not sure if it's HDPE or PP. I think finding a good washer, like you are trying to do, is the best way to fix this. But I found this, I've never used it. Maybe it could work.
Meh, that's a pain :( After some research, I'm thinking about something like https://www.amazon.co.uk/Clear-Food-Grade-Silicone-Sealant/dp/B0063U2RWU to seal the cracks as a final layer - I have heard of Kintsugi being done with silicone sealants before.
Huh, that's....well...that's odd. I got to say that I am a little surprised that is a problem. But I guess I can understand.
Well, coating the cage with a food safe silicone based substance could be a start. Look at kitchen silicone sealant, http://www.amazon.com/Clear-Food-Grade-Silicone-Sealant/dp/B0063U2RWU/ref=sr_1_1?ie=UTF8&amp;qid=1420570048&amp;sr=8-1&amp;keywords=food+safe+silicone+sealant
Be sure to let it really dry and cure before you use it. The silicone itself is safe, but the curing agents aren't. say 48 hours minimum. If you do it carefully, you could actually make it look good, and the silicone will act to "grip" your penis, making it much harder to pull out.
This is what I ordered I'll let you know how it works!
https://www.amazon.com/gp/aw/d/B0063U2RWU/ref=mp_s_a_1_1?ie=UTF8&amp;qid=1480949279&amp;sr=8-1&amp;pi=SY200_QL40&amp;keywords=food+grade+silicone&amp;dpPl=1&amp;dpID=41PP7VKwI3L&amp;ref=plSrch
We include 3M Dual-lock so you can stick it anywhere you desire. Including in an SSD sled.
Where we placed it in H440 for photo op.
Where we placed it in I believe our Source 530.
Of course someone can make it on their own. You don't even have an argument there. All that is is a bump. I'm pretty sure I could make a bump I'm for banning bump stocks too, but I'm not naive enough to think it'll do that much
and lets not forget that to even get to this point we have banned all semiautomatic firearms, and are now placing additional restrictions as well. Pretty close to repealing the second amendment.
It's not made for metal. You could use jbewld but far warning the stuff can get messy
https://www.amazon.com/J-B-Weld-8265S-Cold-Weld-Reinforced/dp/B0006O1ICE
Super glue maybe? Maybe check out an adhesive called JB Weld . It’s an all-purpose adhesive that works surprisingly well, especially on items that don’t take a lot of strain or pressure.
thanks, is this what you meant?
http://www.amazon.co.uk/Plastidip-Plastic-Rubber-Paint-400ml/dp/B0006SU3QW
You can find the black Mazda badges here and here.
It's likely Plasti-dip or similar: https://www.amazon.com/gp/aw/d/B0006SU3QW/ref=mp_s_a_1_2?ie=UTF8&amp;qid=1491024471&amp;sr=8-2&amp;pi=AC_SX236_SY340_FMwebp_QL65&amp;keywords=plasti+dip
You may have better luck with Silicone conformal coating:
https://www.amazon.com/gp/aw/d/B004SPJOKK/ref=mp_s_a_1_3?ie=UTF8&amp;qid=1491024482&amp;sr=8-3&amp;pi=AC_SX236_SY340_QL65&amp;keywords=conformal+coating
Silicone is more expensive, but has better temperature resistance.
Yeah, that's a big problem. They call it knuckle busting for a reason. For stuck nuts and bolts, my go to is a product called "Air-Kroil" I've never used a better creeping oil that this stuff. It's worth it. We use it in industrial settings all the time. If you can stand on a cheater bar, then you can probably get an impact driver on it. Black and Decker makes on for 60 bucks. You need a bit of clearance for it, probably 8 inches or so. There's also a MAPP gas torch, of course be careful not to catch shit on fire, have a fire extinguisher on hand, clean up the area before hand as well, heating it helps to bust stuck parts sometimes. So does cooling it, in inverted Airduster can sprays that liquid that'll freeze shit.
It looks a lot like Gaf Tape.
https://www.amazon.com/dp/B00GZE3UJ8/
Use some anti blur gel on your lenses and rub some in your eyes. My friend recommended some and it didn't work for me , I fact it blinded me, Buuuut it might just work for you.
Link to product: https://www.amazon.com/Loctite-Ultra-Control-4-Gram-1363589/dp/B003Y49R7G
*typed using microsoft talk to text
/s