Best test, measure & inspect products according to redditors
We found 4,660 Reddit comments discussing the best test, measure & inspect products. We ranked the 1,275 resulting products by number of redditors who mentioned them. Here are the top 20.
We found 4,660 Reddit comments discussing the best test, measure & inspect products. We ranked the 1,275 resulting products by number of redditors who mentioned them. Here are the top 20.


You could also get a meter that you can plug between the wall socket and the power plug of your computer for pretty cheap, like this one. It tells you exactly how much energy you consumed.
Amazon sells Uranium Ore. How many friends can say they have Uranium? This is the second time I've said this on Reddit, so I'm pretty sure I'll have a "pizza delivery van" across the street soon.
Damn ... it is actually offered from Amazon ... now the NSA will be tracking me for more than porn ...
http://www.amazon.com/Images-SI-Inc-Uranium-Ore/dp/B000796XXM/ref=sr_1_6?s=industrial&ie=UTF8&qid=1395501301&sr=1-6&keywords=uranium+ore
When I bought a Geiger counter Amazon suggested Uranium to me...
Uranium Ore available on Amazon: https://www.amazon.com/dp/B000796XXM/
You can also just buy some Uranium on Amazon.
They sell the stuff on Amazon. The reviews are pretty hilarious.
If we pool our lentils, we can get some on Amazon.
Unrefined uraninum ore is pretty safe and can be purchased on amazon. I'd suggest putting it in a vial of water to eliminate particulates though.
I'd just like to leave this here...
http://www.amazon.com/Images-SI-Inc-Uranium-Ore/dp/B000796XXM/ref=tag_stp_s2_edpp_url
If you're willing to spend about $30, you can get some Uranium Ore in a can.
http://www.amazon.com/gp/product/B000796XXM?ie=UTF8&tag=craziestgcom-20&link_code=as3&camp=211189&creative=373489&creativeASIN=B000796XXM
i've been paged for my link dump, so here it is. the first three links are detailed care sheets, then a tub tutorial, and the rest are product recommendations. read everything thoroughly, come back with any questions. let me know if any of the links don't work.
glass tanks can be very challenging for ball python husbandry due to the high amount of air flow with the screen top and the total lack of insulation with the glass walls. it's generally recommended to use tubs or pvc reptile cages instead. wood enclosures can also be suitable if they're designed well and sealed properly to protect the wood against moisture. glass tanks can work, but they require a lot of modification and maintenance, which you'll find tips for in the second link. i'll give you product recommendations to cover options for tanks, tubs, and pvc/wood enclosures.
He needs, yes. The Lee Challenger kit is around $99 on Amazon, and that has everything he'll need to get started except for: Bullets, Primers, Powder and Brass and DIES for 7.62x54r (another $30-$40)
Now, he'll want a digital scale, a case trimmer, and a tumbler to get his brass clean and pretty. That all can be added on, and most likely, be purchased in addition to the press kit for about $200.
Here's a list of things he'll want:
Lee Challenger Reloading Kit
https://www.amazon.com/gp/aw/d/B003ISVWC6/ref=yo_ii_img?ie=UTF8&psc=1
Hornady Reloading Manual (So he doesn’t blow himself up)
https://www.amazon.com/gp/aw/d/B01MAUZ71V/ref=yo_ii_img?ie=UTF8&psc=1
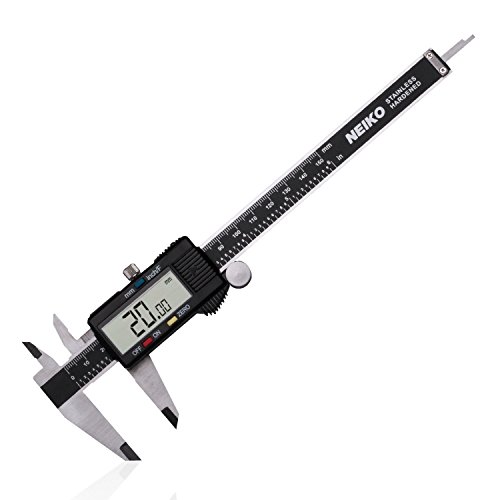
Calipers (So he doesn’t blow his gun up)
https://www.amazon.com/gp/aw/d/B000GSLKIW/ref=yo_ii_img?ie=UTF8&psc=1
7.62x54r Reloading Dies
https://www.amazon.com/Lee-Precision-7-62X54R-Pacesetter-Dies/dp/B00162UGUK/ref=sr_1_1?ie=UTF8&qid=1511562718&sr=8-1&keywords=7.62x54r+dies
Frankford Arsenal Quick-n-EZ Case Tumbler (To make clean-shiny brass)
https://www.amazon.com/gp/aw/d/B001MYGLJC/ref=yo_ii_img?ie=UTF8&psc=1
Case Tumbling Media
https://www.amazon.com/gp/aw/d/B000OQRGF2/ref=yo_ii_img?ie=UTF8&psc=1
RCBS Universal Case Loading Block
https://www.amazon.com/gp/aw/d/B0013RA5DQ/ref=yo_ii_img?ie=UTF8&psc=1
Hornady One-Shot Case Lube https://www.amazon.com/gp/aw/d/B0001NA29U/ref=yo_ii_img?ie=UTF8&psc=1
Guardians of the Galaxy Soundtrack (Because listening to good music scientifically makes better bullets)
https://www.amazon.com/gp/aw/d/B00LICGSFU/ref=yo_ii_img?ie=UTF8
Buying uranium ore on Amazon: $39.95
Seeing top result from Amazon is a testicle self exam form: priceless
(I kid, but, guys, you really should be checking for testicular cancer especially if you keep your uranium ore in your pocket.)
I found this
I don't know, but my gut tells me you can't do it unless it's shown to be safe with a Certificate of Measured Radiation.
Use this
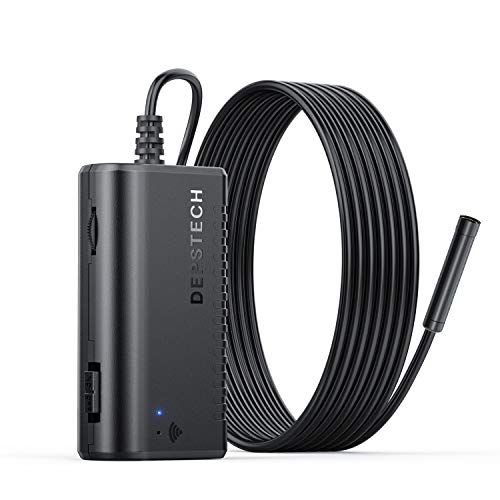
Get a long drill bit and drill through that wood. Get a wireless endoscope and put it down into the hole to see what's in there.
Edit: I would recommend against a paddle bit in case you hit a nail, it'll be ruined.
I'd like to point out that you can, in fact, buy uranium ore as an individual- there's even uranium ore on Amazon.
What I think you're talking about is refined uranium-235, the kind which is used in the creation of atomic weaponry. Even supposing that you're not using it to attempt to create a bomb- and you are indeed hoping to use the product for research or development on medical or other purposes, why should individuals be allowed to obtain such a volatile material? There's the dangers of radiation poisoning, of the creation of weapons, etc... if you're truly hoping to use the uranium for research purposes, why wouldn't you go through an established university, institute, or lab? This way we make sure that qualified professionals with the equipment and know-how to make sure that it is handled safely, and for genuinely useful purposes, are the ones with access to it. And there's accountability to make sure it doesn't just end up in the hands of a bomber.
It's like if someone wanted to obtain samples of smallpox for research purposes- why would we trust just anyone and run the risk of it being mishandled, when there are established procedures and institutes to make sure it is properly contained?
Your life isn't complete without a tub of uranium ore. I would also like to mention that these rubber testicles somehow showed up in the search for "uranium", so you should buy those too.
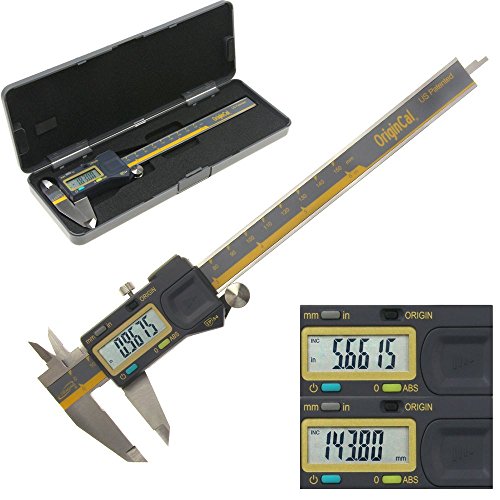
Mitutoyo is absolutely the best, but just in case you want to pickup a few calipers that are very near the same quality at budget pricing, I can highly recommend: iGaging ABSOLUTE ORIGIN 0-6" Digital Electronic Caliper - IP54 Protection / Extreme Accuracy https://www.amazon.com/dp/B00INL0BTS/ref=cm_sw_r_cp_apa_02MAyb2RWWRKM
I have purchased several of these for our engineering department and they are leaps and bounds better than other cheap units. The sliding action is smooth with no slop. The display updates very quickly. Accuracy and repeatability have been tested to be comparable to the Mitutoyos.
Ahem.
Uranium Ore https://www.amazon.com/dp/B000796XXM/ref=cm_sw_r_cp_apa_--0Jzb7JWDQFM
Well...
https://www.amazon.com/Images-SI-Uranium-Ore/dp/B000796XXM
> 40 gal screen top tank
> No thermostat as there is a thick layer of substrate in the tank
/r/ballpython 's worse nightmare. Haha
I see you live in Southern (?) Florida, that's a huge reason why you haven't had an issue keeping the way you have. Decent on/off thermostats like this Inkbird are so cheap there's pretty much no reason not to have one. Check out /r/ballpythons sticky thread. I'm sure you can agree that even if you haven't had an issue in all this time that there's always room for improvement. Here's to 20 more!
Turn the volume down.
Since it sounds like you are already abusing your ears, get a db meter and keep it between 60 and 80db. You need to re-calibrate your brain.
Protip (literally): when doing a final mix, turn the volume down until it's just barely audible and then do a pass. If you pay attention, you'll be amazing how how the mix completely changes.
Volume is like MSG for your ears.
Don't forget uranium!
Long story short:Wanted to learn about the destruction of Carthage on Wikipedia, closed the browser after learning how to make an atomic bomb
bonus: amazon.com sells uranium. The reviews are glorious.
Edit:added link
But you can buy uranium on Amazon!
And Amazon
>Uranium that was given was most likely used to add to Russia's nuclear weapons arsenal.
You do realize that what was sold where Uranium mining rights, right? It's not weaponsgrade, it's not even torn out of the ground yet. In addition, uranium ore is not scarce, you can buy it on the open market.
Hell, you can buy it on Amazon
Russia gained nothing out of this for their weapon programs.
Just to prove how easy it is to obtain uranium, you can literally buy it on amazon. It’s commonly sold for testing instruments.
https://www.amazon.com/Images-SI-Uranium-Ore/dp/B000796XXM
That book better have some of these reviews in it:
http://www.amazon.com/Images-SI-Uranium-Ore/product-reviews/B000796XXM
I have one of these in my bag to prevent just such an occurrence. You don't realize how handy they are until you've used one and lost it.
Get yourself a pair of these (if you don't already):
https://www.amazon.com/Neiko-01407A-Electronic-Digital-Stainless/dp/B000GSLKIW/ref=sr_1_3?keywords=calipers&qid=1565281175&s=gateway&sr=8-3
Then you just measure and model. Look at the basic shape first and model the basic shape. Then add (and subtract) as necessary.
I find using OpenSCAD a little easier for duplicating a real world part because you can use variables and fine tune with variable values rather than having to redraw something. (in OpenSCAD you write code instead of click-to-draw).
3D scanning would also be an option if you have that setup (been meaning to print a 3d scanning rig...couple of good options on thingiverse)
Get yourself a pH reader - this is the one I use. Otherwise, you need to stick to approved recipes.
Here you go.
https://www.amazon.com/Images-SI-Uranium-Ore/dp/B000796XXM
From the looks of the spaghetti on the floor there, it looks to be 14 gauge.
There appears to be a mix of one 14x4 and two 14x2 wires.
This only looks like where the previous owner spliced and extended the wiring. 14 guage should be enough unless its a really long run.
You need to find where both ends terminate. One end should terminate where the speakers are located and the other terminate where the reciever or amp terminates.
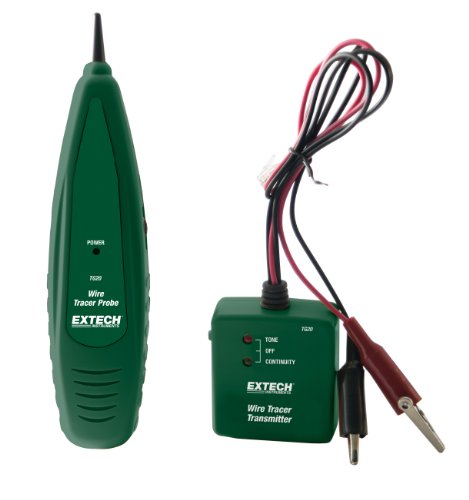
You can use an app or a battery to test, but the easiest way to see where each goes is to use a tone generator.
I used a tone generator to find the wires I put in after my idiot contractor drywalled over all of them and it worked like a charm finding where they ran under the drywall.
Somthing like this would do the trick
https://www.amazon.com/Extech-TG20-Wire-Tracer-Generator/dp/B00APD16D2/ref=mp_s_a_1_4?keywords=tone+generator&qid=1564597096&s=gateway&sprefix=Tone+gene&sr=8-4
Just buy some uranium from Amazon to make it more convincing
You can buy uranium ore from Amazon.
Sorry, out of stock. Customers also bought:
I hope you enjoy shopping with us! Read our customers' reviews to be sure you won't be disappointed in your purchase.
He found it without a Fluke: http://www.amazon.com/Fluke-1AC-A1-II-Volt-Alert-Non-Contact-Voltage/dp/B000EJ332O/ref=pd_cp_hi_2
Sounds like you were getting outdated or flat-out incorrect information and those 'experienced snake owners' are likewise misinformed. There are very few snakes that legitimately have evolved to thrive on sand-based substrate (irony being the Sand Boa is not one of them; they live in sandy soil which is very different composition than straight sand). The Ball Python is native to the svannah/jungles of Sub-Saharan Africa. Its dirt, soil, and burrows. Not a majority or even significant amount of sand.
Additionally, if I extrapolate correctly from this singular picture, your BP is also in a glass enclosure and has a log-style hide. The former makes keeping humidity in the 55~80% range a difficult exercise, and the latter, is a stressor as BPs do best with a hide that has a single-entrance or is cave-like; the more points of contact, the better, and a single entrance means they can feel safer.
I'm going to steal _ataraxia's ball python dump and toss it below:
i'm going to dump a bunch of links to get you on the right track. the first three links are detailed care sheets, the rest are product recommendations. read everything thoroughly.
glass tanks can be very challenging for ball python husbandry due to the high amount of air flow with the screen top and the total lack of insulation with the glass walls. it's generally recommended to use tubs or pvc reptile cages instead. wood enclosures can also be suitable if they're designed well and sealed properly to protect the wood against moisture. glass tanks can work, but they require a lot of modification and maintenance, which you'll find tips for in the second link. i'll give you product recommendations to cover options for tanks, tubs, and pvc/wood enclosures.
Look up "scoping the change key hole" for more
https://books.google.com/books?id=rVFkBgAAQBAJ&lpg=PA57&dq=scoping%20the%20change%20key%20hole&pg=PA61#v=onepage&q=scoping%20the%20change%20key%20hole&f=false
The important information is on page 61 and 62.
I have done this. Took me 4 hours. Drill a small hole for a scope below where you think the bottom of the locking door ends with a couple inches to spare, maybe 5" below the top of the door. Preferably in an inconspicuous spot. Bend and insert the scope, angle up and hope the change key hole isn't covered by a plate. The follow the process in the above link to determine the combo, then use that combo to open the safe.
scope: https://www.amazon.com/dp/B01MYTHWK4/
Mine had a 2nd door below that needed a key. You could always pick that too if you have one. Or just cut the whole thing off.
I bought this one this past year.
https://www.amazon.com/gp/product/B01MYTHWK4/
Works good. You can take photos, videos with their app.
And in case you run out of battery mid-use, you can also use it while it is plugged in via USB charging.
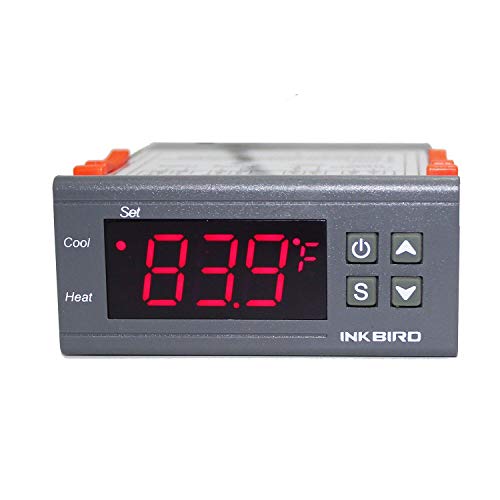
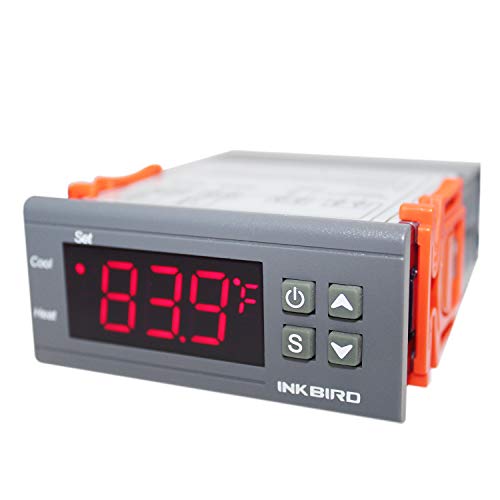
You're going to want to pick up something like this. You set a temperature and an acceptable threshold (i have mine varying by only one degree), and it will automatically turn the heat lamp off and on to keep it at a consistant temperature.
I also have a under-tank heat mat for my hot side, which is the main thing used to warm my snake. I absolutely recommend getting one to put under your tank. Corns like to burrow and will get more benefit to having one on the hot side. I just use the heat lamp to keep the ambient air in the tank at an acceptable level. You will want to get a separate controller for the heat mat.
Edit: I also have an Indoor/Outdoor Thermometer just chilling in the tank to get a more accurate reading inside. Your tank atmosphere is going to usually be a bit different than the atmosphere in your room. I have the "inside" number reading the ambient temp of the tank, the "outside" number reading the inside of the under-tank mat (controller probe goes between mat and glass on the outside, and this prob sticks to the glass on the inside under the substrate), and it also tells me the humidity in the tank.
You want to keep your numbers as consistant as possible. I like to shoot for 85 degrees on the hot side, 75 degrees on the cool side, and between 40%-60% humidty. I hope this information helps. Let me know if you have any questions.
Edit 2: GoHerping does a great care guide video on YouTube, which is where I got most of my setup and care info from. There is also a link to their discord on the YouTube page that is full of friendly people that can answer a lot of your questions.
Edit 3: You're going to be better off using a Ceramic Heat Emitter instead of a bulb. It just produces heat and no light, which will be better with the controller ( you don't want the light isn't constantly turning off and on). Corns don't need UVB either, and do fine with just natural lighting (assuming the light in the room still follows the normal day/night cycle).
Looks like that bastard won't be buying that little tin of uranium or the JL421 Badonkadonk Land Cruiser Tank any time soon.
To answer your first question
In the same vein : https://www.amazon.com/Images-SI-Uranium-Ore/dp/B000796XXM
You're being downvoted because you, and everyone else who brings this up, all try to frame a positive as a negative in complete opposition to the facts.
Additionally, you lay blame for the "evil" deed on the wrong person because you are ideologically opposed to that person and will use any ammunition available, even if it is comprised solely of lies, to harm that person.
The uranium deal was great for the United States.
To top it all off, none of the Russian firms that purchased a 20% stake in US mine output can export any uranium from the US. They have to go through US-controlled entities and get the relevant NRC and AECA/ITAR permits and permissions.
Russia: We need uranium for our reactors and radioisotope medical devices.
US: Want to buy a stake in our mines? We have excess capacity.
Russia: Sure
US: Ok. You can buy the rights to 20% of our mining output. This means you don't have to buy uranium from China, but because of our laws you must go through and intermediary and get permission to export the output, if you want to export it.
Russia: Sounds great! All of our nukes use plutonium and we have 100s of tons stockpiled from the Cold War so dealing with some paperwork to get uranium rods for our reactors and isotope samples for our nuclear medicine industry is no big deal.
Some rando on the internet: $hillery sold us out!!!
Well. I mean. That's why I downvoted you.
And when now-President Trump brings this up in an attempt to whip some anger and rage into his ignorant base he is being a, and this is putting it mildly, shit-headed fucktard who has no clue (Donny, you're out of your element) about what he is regurgitating.
But I guess his garbage-spewing works because you, and many others, fell for it.
Get yourself your very own tin of uranium ore. 1001 uses!
Turn off power at the circuit box. Test that the power is out on the outlet you're going to look at by plugging in a nightlight or something - it shouldn't turn on. Open up the outlet and look at the end of the wires connected to it. If they're silver they're probably aluminum, if they're copper they're probably copper.
Quick and easy, but not foolproof, as you're only looking at the one outlet. If your house has been remodeled it could have a mix.
​
edit: btw...if you own a house or condo you should probably just buy one of these. You put it in an outlet, or touch a wire (even a lamp cord or similar) and it'll glow/beep if there's electricity to it. Something like replacing an outlet or switch with the same kind is dead simple - although if often seems there's no way all those wires will fit back in the wall, they will. This makes it easier to avoid shocking yourself.
Cheap digital caliper
https://www.amazon.com/Neiko-01407A-Electronic-Digital-Caliper/dp/B000GSLKIW/ref=sr_1_3?ie=UTF8&qid=1498403628&sr=8-3&keywords=digital+caliper
well i just got out in the kitchen and experimented. I took ingredients that i thought sounded good together but i took into consideration the pH of things. Thats where vinegar comes in. in order to be shelf stable it has to have a pH of 3.9 or below (as per FDA regulations).
A very simple hot sauce would be Peaches, yellow ghosts, fataliis, and pineapple with some cider vinegar and agave nectar. or you can go the savory route with fresh smoked ghost peppers, pears, white vinegar, garlic, and a touch of salt.
to find the pH you can either use litmus paper or a good pH pen like this
and check this out: http://thehotpepper.com/topic/29501-making-hot-sauce-101/
Red light isn't good, you'll want a heat mat (MAKE SURE you have a thermostat for it or it will get too hot) and possibly a ceramic heat emitter (also needs a thermostat) for air heat. What are the temps and humidity and how do you measure them? Glass tanks usually don't hold humidity well and often aren't good for bps. You need at least 2 good hides, one for each side. They should be snug and enclosed with only one opening, preferably identical, half logs don't work.
Someone should come by with a really good care sheet, read it, it has some great info. I know this might be a lot of information, but having a good setup is important and will save you headaches in the future.
Edit: I found the care sheet. Credit to u/_ataraxia.
Glass tanks can be very challenging for ball python husbandry due to the high amount of air flow with the screen top and the total lack of insulation with the glass walls. It's generally recommended to use tubs or pvc reptile cages instead. wood enclosures can also be suitable if they're designed well and sealed properly to protect the wood against moisture. glass tanks can work, but they require a lot of modification and maintenance, which you'll find tips for in the second link. i'll give you product recommendations to cover options for tanks, tubs, and pvc/wood enclosures.
Forty dollars on Amazon
https://www.amazon.com/Images-SI-Uranium-Ore/dp/B000796XXM
You are allowed to own as much uranium as you want, as long as it isn't enriched.
Antique store? Hell, you can buy it on Amazon.
Like this?
Yeah. You can buy uranium on amazon.
https://www.amazon.com/Images-SI-Uranium-Ore/dp/B000796XXM/ref=sr_1_1?ie=UTF8&qid=1502607828&sr=8-1
Oh, is that how it works? You just grab bag a thing that people suggested to you? :O
Sorry.
http://www.amazon.com/gp/aw/d/B000796XXM?pc_redir=1409199391&robot_redir=1
Put uranium under your archenemisises chair and give them asscancer.
You actually just graduated a level in motorcycle maintenance. You can replace your own chains with a chain breaker/pin set kit and a digital micrometer.
High quality chains like D.I.D. are a good idea, and the instructions will be clear regarding the spread/flare measurement on the pin.
If you do this, lube the threads on the extractor with a little lithium.
You will also typically want to replace both sprockets with the chain.
Don't do the open refrigerator thing, you will waste a ton of electricity and won't actually be able to temperature control even close to enough to lager with any reasonable degree of certainty. If I had to guess, leaving a fridge with an open door for a month will probably waste far more than $16.
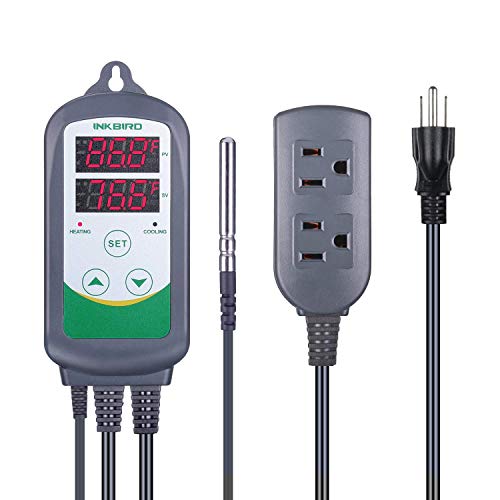
Instead of wasting that $16 in electricity, you can get one of these, which is perfect for a fermentation chamber made from a fridge. A small amount of wiring work is required, but it's relatively easy.
If you aren't willing to invest $16 and an hour figuring out how to wire it together, I would suggest just letting it ride without temperature control (or maybe a swamp cooler or similar). Most lager yeasts will be fine in the low-mid 60s.
Edit to note: it's not too late by any means to get that temp control part now. You could start it warm and chill down in the refrigerator when you have the part, possibly even complete fermentation warmish and then stick in the refrigerator on its highest setting for a few weeks. Or you could start it in the refrigerator on its highest setting and let it warm up a bit more when you have the part. Leaving the fridge open is probably the worst choice you could make out of all the options above.
Double edit: If you don't want to mess with wires, you could get one of these, but it's more expensive. It's basically the same thing as the cheaper one, but with plugs.
Bonus fun fact edit: Refrigerators make the room warmer in general, but peaving the refrigerator door open will make it even warmer. You would be effectively making a really really ridiculously inefficient space heater.
your boyfriend, is incorrect im afraid to say, all heating elements need a thermostat to regulate the temperature. https://www.amazon.com/Inkbird-Max-1200W-Temperature-Controller-Greenhouse/dp/B01HXM5UAC this is a good brand and its only 30 bucks.
My condolences for your loss, it always hurts bad when a pet passes away.
Not having a hot spot would explain the lack of eating, but he shouldn't have starved in such a short time. Was your room super cold? Cold BPs can succumb to respiratory infections, which generally have obvious symptoms - wheezing, drooling, open-mouth-breathing, that sort of thing.
Did his body have any discoloration on the belly? An unregulated heat mat can reach dangerously hot temperatures, capable of burning/cooking a snake. It is possible that your heat mat shorted out after being on "full blast" for too long.
Unfortunately, cases like these are par for the course when it comes to reptiles and reptile equipment sold at chain pet shops. Their snakes are usually not very healthy to begin with - they generally sell the "less desirable" snakes produced by local breeders, and pet shops usually keep them in poor conditions (inadequate feeding, humidity, temps, overcrowding, etc), which weakens them. The quality of most big box heating products (Zoomed, etc) is garbage too.
If you want another snake someday, I would recommend buying from a good private breeder (avoid large-scale operations, like LLL Reptile, BHB, Underground, Big Apple, etc.). Most large cities have a reptile expo once every month or so, if you're up for the drive, or you can buy online and have a snake shipped (it's much safer and less weird than it might sound!). Get a radiant heat panel or a square foot of heat tape, and get a nice thermostat to control the temperature.
I have one of those mini fridges, but I haven't messed with the built in temp controller and I wouldn't want to. Instead, I plug the fridge into an Inkbird temp controller. Then I drilled a hole in one of the screw holes for the door and passed the temp probe through that and into the fermenter's thermowell. I have the inkbird set to 68 and the fridge is set to 50. When the fridge turns on again it is still at 50 for me.
sources: http://otbfirearms.com/nfa/transferable-machine-guns/
https://www.amazon.com/Images-SI-Uranium-Ore/dp/B000796XXM
here ya go
https://www.amazon.com/Images-SI-Uranium-Ore/dp/B000796XXM
$6431 for an e-book but only $39.95 for Uranium
First of all. It's very good you recognize that you need help in learning how to care for the snake.
Second, here is a big link dump created by another regular user u/_ataraxia all credit for this goes to her.
the first three links are detailed care sheets, then a tub tutorial, and the rest are product recommendations. read everything thoroughly, come back with any questions.
glass tanks can be very challenging for ball python husbandry due to the high amount of air flow with the screen top and the total lack of insulation with the glass walls. it's generally recommended to use tubs or pvc reptile cages instead. wood enclosures can also be suitable if they're designed well and sealed properly to protect the wood against moisture. glass tanks can work, but they require a lot of modification and maintenance, which you'll find tips for in the second link. i'll give you product recommendations to cover options for tanks, tubs, and pvc/wood enclosures.
Here's an info dump, courtesy of u/_ataraxia. It has pretty much everything you're asking about and more.
The first three links are detailed care sheets, then a tub tutorial, and the rest are product recommendations. Read everything thoroughly, come back with any questions.
Llet me know if any of the links don't work.
Glass tanks can be very challenging for ball python husbandry due to the high amount of air flow with the screen top and the total lack of insulation with the glass walls. It's generally recommended to use tubs or pvc reptile cages instead. wood enclosures can also be suitable if they're designed well and sealed properly to protect the wood against moisture. glass tanks can work, but they require a lot of modification and maintenance, which you'll find tips for in the second link. i'll give you product recommendations to cover options for tanks, tubs, and pvc/wood enclosures.
u/ataraxia has amazing information for ball pythons. You should definitely read it through. Glass tanks are not ideal for Bps, so this should help. Here is her normal dump of information I took from another post.
i'm going to dump a bunch of helpful links on you. the first three links are detailed care sheets, then a tub tutorial, and the rest are product recommendations. read everything thoroughly, come back with any questions.
glass tanks can be very challenging for ball python husbandry due to the high amount of air flow with the screen top and the total lack of insulation with the glass walls. it's generally recommended to use tubs or pvc reptile cages instead. wood enclosures can also be suitable if they're designed well and sealed properly to protect the wood against moisture. glass tanks can work, but they require a lot of modification and maintenance, which you'll find tips for in the second link. i'll give you product recommendations to cover options for tanks, tubs, and pvc/wood enclosures.
ITC-308 has heating and cooling function, and can be maintained a certain temp range by setting difference values.
US 15% coupon code: CAVDY4S6
ITC-308 With heating and cooling plug
CA 15% coupon code: ZCSTHQJM for ITC-308
An ITC-308 is probably going to be the easiest bet.
That freezer is rated at 1.4 amps at 115 volts. That is 161 Watts if it was a purely resistive load (it isn't; but it gives us a maximum to work with). The ITC-308 is rated for 1000 watts, so we are only at 16% rated capacity... That's a huge safety margin.
This controller also has compressor delay protection, so it's a wise choice in this application. Best of all, it's plug and play!
Bought one. Worked great till I spilled my Tuscan Milk all over it while reading How To Avoid Huge Ships. Luckily I had bought some Uranium Ore at the same time. Sprinkled a little over the cable, and it works perfect now.
Uranium no one expects uranium.
You can however get Uranium.
Resources they have available isn't a problem at this point in the story, because of Coil. Untraceable firearms are a non-issue when one is willing to wait a few days, and (at least in post-9/11 Earth Aleph), uranium is available on Amazon.
As for mentality, I'd understand if this was Regent or Bitch's power, but Grue is pretty diligent, and Tattletale is all about information. Getting a more detailed understanding of a teammate's power seems like something they would... well, get around to eventually.
Amazon?
Here is the actual Amazon product link.
https://www.amazon.com/Images-SI-Uranium-Ore/dp/B000796XXM
I have the thermoworks 8689. It seemed to never lock on to a pH, any temperature fluctuation would change the readout even though it has ATC. It also rarely showed that I hit my expected mash pH. I switched to this: Apera Instruments AI311 PH60 Premium Waterproof pH Pocket Tester, Replaceable Probe, ±0.01 pH Accuracy, -2.00-16.00 pH Range https://www.amazon.com/dp/B01ENFOIQE/ref=cm_sw_r_cp_apa_i_u1i2DbFX4E7XX. Have only used it twice but both times it showed I hit my expected mash ph, it stayed steady, and this all without calibration. Last brew day, I used both, the apera matched my target, so I calibrated the thermoworks and it still did not match. Happy with the apera, but with two different pH readings I have no idea which is correct. Apera is matching my target so I'm inclined to believe it. The apera also comes in a nice case and is easier to keep stored in solution.
https://www.amazon.com/Inkbird-Max-1200W-Temperature-Controller-Greenhouse/dp/B01HXM5UAC
I don't use them for this purpose, but I use them for beer brewing and other hobbies. You plug this inline with a heating/cooling source and place the probe in the desired location. Ten years ago I would make them from scratch and build in redundancy in case of failure, but I have two of these that have been working fine for over 3 years of nonstop use.
Tramontina 126-Can Beverage Center $250
7 gal | Brew Bucket Brewmaster Edition $229
Inkbird $35
We had exactly this problem, and went through dozens of different "solutions" until we finally hit it.
The vent stack was clogged.
If you're not familiar with it, a vent stack is a pipe running up to your roof that lets the air out of your drain pipe ahead of the water trying to drain.
Get up on your roof, look for a pipe about 4" across that's just open to the sky. Drop a fiberoptic camera down the pipe to look for a clog. This is the one we used. Once you've found the clog, you can figure out the best way to clear it. We broke it up with fiberglass snap together poles, then put the garden hose down it on full blast.
Good PSA
Here are some Links
Oakton PH2
Calibration Solution
Storage Solution
Get a good quality tester and keep it cleaned/calibrated and you will have it for a VERY long time :D
PS. I started out with a $20 PH pen and found out after some PH issues started up that it needed to be calibrated pretty much between each use. If I left it alone for a week it would be off by .3-.5 every time...
If you have basic wiring skills you can do it for less than $20 (if you already have a analog/basic crockpot)
STC-1000 on Amazon.com Elitech 110V All-Purpose Temperature Controller+ Sensor 2 Relay Output Thermostat Stc-1000 https://www.amazon.com/dp/B008KVCPH2/ref=cm_sw_r_awd_jq0Wub1M7MB25
https://www.amazon.com/dp/B008KVCPH2/ref=cm_sw_r_awd_jq0Wub1M7MB25
Try finding someone that you don't like, see which bike makes their ears bleed.
Short of that, buy this.
To me it sounds like electrical portions are being leached into a neighboring unit or something like that.
Since your unit is so small, I'd take a look at the breaker box. Turn off power to everything you have, then flip the breakers to turn everything off. Turn on each thing individually to power only the areas you reside in. If there are any remaining after you have your whole unit powered, they may go to other rooms/units in a past renovation.
It may not turn anything up, but it'd be an interesting experiment to see what turns up.
Edit; If you want to try monitoring some of your things, like your pc, try getting one of these.
I use and recommend this one for USB-A. https://www.amazon.com/dp/B00J3JSEG6
Temp Controller
https://www.amazon.com/dp/B011296704/ref=cm_sw_r_cp_api_dYnVAb99AN5JX
Humidity Controller
https://www.amazon.com/dp/B01FQKXRXA/ref=cm_sw_r_cp_api_3YnVAbW8V1DHG
DeHumidifier
https://www.amazon.com/dp/B000H0ZDD2/ref=cm_sw_r_cp_api_SZnVAbTSHMSQT
Humidifier
https://www.amazon.com/dp/B01D0POS7W/ref=cm_sw_r_cp_api_m0nVAbD00AGKP
Small Fan (on a timer, runs for 30 minutes every 2 hours or so)
https://www.amazon.com/dp/B00WM7TRTY/ref=cm_sw_r_cp_api_V0nVAb8XD3K7Q
Heater
https://www.amazon.com/dp/B00P7U259C/ref=cm_sw_r_cp_api_E1nVAbC6R49Z3
I got an old fridge on Craigslist for $25 that I thought was a small personal fridge but turned out to be about 6 cubic feet (perfect for hanging). I’m not sure of the brand actually (maybe Kenmore). So far I’ve done a Bresaola and a Copa, both have turned out great!
Apera Instruments AI311 PH60 Premium Waterproof pH Pocket Tester, Replaceable Probe, ±0.01 pH Accuracy, -2.00-16.00 pH Range https://www.amazon.com/dp/B01ENFOIQE/ref=cm_sw_r_cp_apa_i_17svCb4YECPMC
Sure, happy to
Ingredients:
Directions:
1.) Rinse and prepare the peppers as described above.
2.) Add the cherries and Thai chilies to the jar, and garlic if using fresh, followed by the larger jalapeno pieces.
4.) About an inch before the jar is filled to the shoulder, add the weight, and continue pouring brine until all produce is submerged. It is important to have some distance from the top, as the water level will continue to rise as the produce releases moisture.
5.) Apply the airlock lid and ferment for desired length. Suggested: Minimum one month. The pictures shown feature a nearly 3-month ferment.
After the ferment:
1.) Strain the brine from the peppers.
2.) Transfer the peppers to the blender, add 1/2 cup of the reserved brine, 12oz. thawed frozen cherries, sugar, and garlic powder (unless fresh cloves were used in ferment). Blend on high for a few minutes. If you prefer a thinner sauce, add additional brine, blend, continuing to add brine and blend until desired consistency is achieved.
3.) You may now store the sauce raw in the refrigerator, or go on to cook and/or pasteurize it.
Raw sauce: This method preserves the probiotic bacteria in your ferment. If you can test the pH and confirm it is 3.2 or below, there will be no issues. If the pH is above this level, it is possible the added sugar and cherries can restart the ferment, which can create excessive pressure in the storage container. It is not suitable for mailing or room temperature storage. If you are close to 3.2, you may add vinegar until the correct pH is achieved. If not, refrigerator storage is an acceptable method, but the container should be monitored and the cap periodically loosened to release potential pressure build-up.
Cooked sauce: Transfer the sauce to a medium saucepan, bring to a boil, then reduce heat to low, simmering covered for around 20 minutes. You may then opt to blend the sauce further in the blender for several minutes while hot, which will create a very smooth, easily flowing sauce. You can add a splash of vinegar for flavor and to further reduce pH as well. To transfer to 5 oz. woozy bottles, use a bottling funnel.
You may be right. If it got cold enough, you could have frost in a line or faucet. That'll make a nucleation point and draw a lot CO2 out of solution.
You could add a little heater to the fridge and set it with a temperature controller.
https://www.amazon.com/Depstech-Endoscope-Inspection-Megapixels-Smartphone/dp/B01MYTHWK4/ref=sr_1_3?s=industrial&ie=UTF8&qid=1542329677&sr=1-3&keywords=endoscope
​
i bought one similar - stupid handy to have around. A non wifi flexible version is like $16 on amazon.
This is exactly what I would do to identify what fell in there. With a boroscope type camera, there isn't really a reason to tear down an otherwise good engine, you simply put this through the spark plug hole. The better systems have small magnetic tools you can use to pick things up. If they don't have one they should buy one as it will come in handy in the future.
What I've used at work: High End
What I use at home: Cheap Home Use
Use a pencil or something to confirm that it actually goes in.
If it does, something like this could save you a lot of effort to find out it is empty (or find out that it is full of cash and priceless art that you don't want to damage)
DEPSTECH Wireless Endoscope, IP67 Waterproof WiFi Borescope Inspection 2.0 Megapixels HD Snake Camera for Android and iOS Smartphone, iPhone, Samsung, Tablet -Black(11.5FT) https://smile.amazon.com/dp/B01MYTHWK4/ref=cm_sw_r_cp_apa_i_jl0RDb8YEV8VY
I've got two drones but depending on the space it might be impossible to get in there and see anything safely - maybe something like this would work better/easier?
https://www.amazon.com/gp/aw/d/B01MYTHWK4/ref=mp_s_a_1_2?ie=UTF8&qid=1505512430&sr=8-2&pi=AC_SX236_SY340_QL65&keywords=flexible+camera+scope&dpPl=1&dpID=41MF0hUWJXL&ref=plSrch
> uranium
https://www.amazon.com/Images-SI-Uranium-Ore/dp/B000796XXM
Amazon.
This came up in my Amazon recommendations, might go well with your new purchase.
Wait a second, Amazon.com, a website that sells boxes of ladybugs, the three-wolf t-shirt, Groceries, actual Uranium Ore, and the "Badonkadonk Land Cruiser/Tank" is EXPECTED to sell more general merchandise?
As long as it's not highly enriched there's nothing illegal about it you can buy it on Amazon.
https://www.amazon.com/Images-SI-Uranium-Ore/dp/B000796XXM
Everything is now radioactive. Carry a small sample of Uranium (you can literally order it off of Amazon). Convert copper, aluminum, or concrete, and you'll be glowing in the dark.
This is almost exactly $50!
Thank me later.
> For the same reason that we prohibit people from purchasing any other number of dangerous goods, such as radioactive materials or hazardous chemicals.
You can literally buy radioactive materials on Amazon.
>Again, I agree that it's highly unlikely anyone will use anti-tank rounds to shoot a guy in a robbery.
Side note: .50 cal - even armor-piercing - is completely useless against a modern tank. They're anti-materiel rounds; they'd be great against something like an engine block, and they're not very well-suited to killing people (compared to cheaper, lighter alternatives).
>But people have done something similar
North Hollywood was a problem for two main reasons:
The first would obviously not be affected by this law. The only point on which this law would affect the second is where it concerns magazine capacity, and the provision would be incredibly hard to enforce. In any case, at Columbine, VT, and plenty of other mass murders, the murderers usually only fire an average of around 10 rounds per magazine anyway, and in Aurora, the large-capacity drum magazine actually caused a jam; North Hollywood is exceedingly unusual in that the robbers used larger-than-standard capacity magazines effectively.
You can literally get it on Amazon.
https://www.amazon.com/Images-SI-Uranium-Ore/dp/B000796XXM
Amazon reviews say otherwise
https://www.amazon.com/Images-SI-Uranium-Ore/product-reviews/B000796XXM
And of those, they also looked at Uranium Ore.
Didn't know people like this really existed.
https://www.amazon.com/Images-SI-Uranium-Ore/dp/B000796XXM/ref=sr_1_2?ie=UTF8&qid=1485167706&sr=8-2&keywords=uranium
The comments are great... needs better packaging - half gone on arrival...
You don't have to go to Oz either...
http://www.stuff.co.nz/the-press/news/7197865/Uranium-among-West-Coast-treasures
Uranium isn't really that substantial as an ore.
Haha you can find Uranium just walking around outside, he wouldn't be able to make anything at all with it. It's little more than a bit of rock really. You can buy Uranium on Amazon. https://www.amazon.com/Images-SI-Uranium-Ore/dp/B000796XXM
You can get it on amazon
About as well as you could.
The reason uranium still exists on this planet is it decays extremely slowly in it's natural state. As such, you can handle it without any protective gear. The stuff that is dangerous is uranium that has been brought to critical mass before, and that stuff is considerably more difficult to acquire.
My guess is they have uranium with a pretty natural rate of decay. As such, the bigger risk from a dirty bomb would be heavy metal poisoning (like you would get with lead) than the actual radioactivity of the uranium.
> You can buy "Uranium Compounds" on Amazon.
You're now on a watchlist.
How easy is it to get Uranium in the United States? Pretty damn easy considering you can buy the stuff on Amazon.
https://www.amazon.com/Images-SI-Uranium-Ore/dp/B000796XXM
Your professor seems to have fallen into the classic liberal trap of talking about how EASY it is to get Uranium, instead of how HARD it is to make it weapons grade.
Uranium starts out as yellowcake Uranium, which is .07% U-235 and 99.3% U-238. Reactors typically enrich the U-235 to about 1-5%. Nuclear bombs REQUIRE a U-235 enrichment of above 90%. Below 20% enrichment, Uranium it is PHYSICALLY IMPOSSIBLE FOR URANIUM TO EXPLODE.
Enrichment is typically done using the Gasseous Diffusion and Gas Centrifuge methods, both of which require large, obvious, expensive facilities that can be easily tracked.
Is it easy to get Uranium? You bet your fucking ass it is. But it's nigh on IMPOSSIBLE to enrich it to atomic bomb levels secretly.
Amazon of course...
I beg to differ.
Uranium isn't hard to get. You can buy it on Amazon:
https://www.amazon.com/Images-SI-Uranium-Ore/dp/B000796XXM
https://www.amazon.com/Images-SI-Uranium-Ore/dp/B000796XXM
You can buy a bunch of that and refine it as much as you want, if you really wanted to. There are other ways of getting it legally, too. eBay comes to mind. Old style smoke detectors also.
yellowcake uranium? Uranium is available online at Amazon
I had to search Uranium Ore, to check it was true. It is indeed, however, under the "What do customers ultimately buy after viewing this?" heading was this. Has Reddit got WMDs? :O
I know it's a joke, but they sell that shit on Amazon.
LPT read the reviews
It's probably fine but considering it's electricity I'd stick with the tried and true. Any electrician in the US will tell you Fluke is the gold standard.
Edit- apparently "less than 20 dollars" is no longer true.
https://www.amazon.com/Fluke-1LAC-Voltage-Detector-1000V/dp/B000EJ332O/ref=sr_1_9?keywords=klein%2Bnon%2Bcontact&qid=1566832341&s=gateway&sr=8-9&th=1
you need a digital temp controller ( here ), a 1000watt horse trough heater ( here ) and a submersible pump ( here ).
I will give you my background before my opinions. As everyone has different goals, opinions, and experiences.
I got my printer near the end March of this year. I have something like 2500m of filament run though it, and no idea how much print time.
When I received my printer, my test prints failed and I was pissed. But this community helped improve my Cura settings and started producing usable parts. I then went nuts and printed out a BUNCH of mods. This is by far my most favorite thing. There's always something I can print to improve the quality of the prints.
THe down side is I went too far and got to a point where I couldn't produce anything of quality. So, 2 weeks of tweeking and researching later I'm printing in PETG with beautiful quality and very minimal visible layers.
My most recent project in PETG:
http://i.imgur.com/sVf7S2D.jpg?1
So, now to answer your question...
> How do you like your Maker Select?
I love it. It allowed me to buy a cheaper printer (One of the cheapest at the time @ $350) that produced amazing results. It also has upgrades you can purchase or print to improve the quality, so investing smaller amounts over time to make it better and better. I highly recommend it to anyone who is starting because it does require tweaking which forces you to learn and understand how exactly 3d printers work. A major plus was that this community has a lot of Maker Select users for support, which was a MAJOR plus for me.
As of today, I've purchased the following upgrades:
So, in the last ~3 months I've spent an additional $264... Oh god, don't tell my wife! All are totally not necessary, mind you. The only thing I'd 100% recommend you do are print out the following to mods:
DiiiCooler along with buying the 50mm blower fan. There are cheaper options out there, I just wanted it faster so I bought it through Amazon to get free 2 day shipping.
z-Brace - This is key, and will run you maybe $15 worst case scenario to get enough M4 screws and the threaded rods.
Edit: Forgot a couple more things I bought.
That's another $59, so $323... I have a problem. again, 95% of this is NOT NECESSARY. I'm just addicted to modding.
I experienced a similar situation. I was using the drops-based pH testing system and didn't have to use a whole lot of pH up to get a good color out of the tester. When I switched to a digital pH meter I noticed that much more pH up was needed to attain the proper pH range.
Eventually that pH meter drifted so far down the scale that even calibration wouldn't bring it back. I ended up buying a different digital pH meter that has a digital calibration system and it's perfect. It reads much, much more accurately than the other two systems, especially if I calibrate with three pH points: 4.0, 7.0, and 10.0.
Carbon scrubber
measuring glass/syringe
If you're doing hydro there are other nutrients I might recommend getting.
I know a lot of pH pens have bad reviews, this is probably the best one I've seen for the money, no idea if yours is good:
https://www.amazon.com/gp/product/B004G8PWAU/ref=ox_sc_act_title_11?ie=UTF8&psc=1&smid=ATVPDKIKX0DER
Also if you're not necessarily set on LEDs you can get an equivalent/better, MH/HPS light.
If you do go for a better light for the same/less price you could also go with a larger tent. This one isn't very much more but it can support a larger light, and it has some real decent reviews. https://www.amazon.com/dp/B00H9NGP8C/ref=ord_cart_shr?_encoding=UTF8&psc=1&smid=ATVPDKIKX0DER
I would go with a 4'x4' tent at the very least; the one you've linked is too small for a 1000W lamp. I'm doing 4x3x7 right now with 1000W and it's really not easy to keep it cool, I'll often hit 88-90F even with AC in the room. A little bit larger space and it would be much more comfortable.
What are your plans for a growing medium? This might be more important than anything else you're buying! There are also a million options between soil, coco, and the various hydro setups like DWC, ebb and flow, etc. I've had good results with coco coir. You might be best off starting with a decent soil like the Fox Farms lines - pH is much easier to manage in soil.
Speaking of, you also want a good pH meter, and pH up and down. Just get the General Hydroponics pH test kit - it's cheap and you'll have enough to fix pH for your entire grow. For a meter, I recommend this Oakton unit. You'll also want some pH calibration/storage fluid to maintain it properly.
I just bought a chest freezer off of craigslist for $80. Then I bought a STC-1000 from amazon for $25.
I wired up the STC-1000 with a 4x4x2 junction box, an extension cord, and an outlet (all from Lowe's).
I completed everything 2 nights ago and it has been working great. The controller will both heat and cool if you live in a colder climate. And the whole setup will allow me to ferment Ales and Lagers at proper temperatures, longer term lagering, and store beer or freeze food if I need to. No mods are done to the freezer, so I can unplug the controller and sell it off later if I choose to.
One warning: The STC-1000 is Celcius only, but just print out a conversion chart and you're good to go.
Probably here. That's where I got mine.
That's probably the cause of your weird flavors. Yeast need to be kept around an ideal temperature or they start pumping out lots of not so pleasant flavors. It sounds like you already know that though, so good luck with your fermentation chamber!
Lots of us use an older chest freezer with a cheap temperature controller such as the STC-1000. Other people that don't have room or the money for that use a tote filled with water and then add bottles of ice to keep the temps down. Both will work, but the freezer is a lot more hands off.
You can also get a meter and show them. His estimate is good, but the wats would most likely be much lower. Without a GPU you probably hover around 80wats total system draw with peaks just over a 100.
https://www.amazon.com/P3-P4400-Electricity-Usage-Monitor/dp/B00009MDBU
https://www.amazon.com/d/Industrial-Power-Meters/TS-836A-Energy-Voltage-Electricity-Monitor/B00E945SJG
You can pick up a spool of Cat5e or Cat6 at Lowe's along with the RJ-45 crimping tool and a jar of RJ-45 connectors. I highly suggest also getting a cable stripper while you're at it. Your total outlay will be around $20-$25 for the tools, and about $55 for a spool of cable plus the jar of RJ-45 connectors.
After that, the important things to know:
Don't cut the insulation on the individual wires inside the cable. Don't try to strip the individual wires, don't nick them when you cut the jacket, DON'T don't don't! :) The crimping tool will squeeze them down hard onto sharp blades on the inside of the RJ-45 terminators to make the connection right through the insulation.
If you get a stripping tool - only rotate it ONCE, lightly, around the jacket of the cable. It should require some resistance to pull the cut bit loose. Strip a good six inches or so off the end of the cable - you'll want some extra length in the exposed pairs to arrange them properly.
Untwist the exposed pairs down to the jacket. Straighten them out completely. Now arrange them in the proper pinout: orange-white, orange, white-green, blue, white-blue, green, white-brown, brown. This is "T-568B" layout, and it's IMPORTANT. You might think you can wire it up any old way you want, as long as it's the same on both ends, and have it work - if you think that, you're WRONG WRONG WRONG. The order is important because the structure of the cable prevents crosstalk on pairs, and if you split the pairs up, you will have RF crosstalk and it will completely suck so don't do that.
That T-568B layout up there? It goes in with the locking tab on the RJ-45 connector facing DOWN, repeat, DOWN. Left-to-right, locking tab facing DOWN, orange-white orange white-green blue white-blue green white-brown brown. Learn it, live it, love it.
Consider a cheap cable tester to add to your arsenal. You may have trouble sourcing this at a Lowe's or Home Depot - frequently they either have no testers at all, or only have "pro" testers that cost hundreds of bucks. For your purposes, something like this: https://www.amazon.com/Tonor-RJ45-Network-Cable-Tester/dp/B00OUFX38W/ref=zg_bs_tab_pd_mw_1?_encoding=UTF8&psc=1&refRID=TJ654JVCX7SM9J4YE3GJ at $9 is fine, and can save you a lot of hassle.
Before you feed your nicely untwisted and properly laid out pairs into your RJ-45 terminator, snip them off cleanly about 1/2" from the jacket. Slide them all the way, carefully so they don't cross over on you but FIRMLY onto the exposed pairs, and so that the bottom of the RJ-45 slides OVER the jacket on the cable itself. When you crimp it down - hard, like you're shaking your girlfriend's dick-bag ex's hand - the little bar on the inside of the RJ-45 should clamp, firmly, ONTO THE JACKET, not just onto the pairs.
If you possibly, possibly, CAN remove the crimped RJ-45 from the cable by pulling on it... you did it wrong. Cut it off, re-strip, re-arrange, do it again. A properly crimped RJ-45 connector can hold your weight off the ground. Yes, seriously. THIS IS IMPORTANT, don't fuck this up.
I think that pretty much covers it. Oh, and you can pick up surface-mount raceway to run cable through while you're at Lowe's, if you want. It's square rubbery stuff that comes in 6' lengths (typically) and has sticky stuff on the back if you peel the paper off, so it'll stick directly to a wall, ceiling, etc. Stuff like this: https://www.amazon.com/Medium-Latching-Cable-Raceway-500/dp/B002DO164K/ref=sr_1_3?s=electronics&ie=UTF8&qid=1486775258&sr=1-3&keywords=raceway+cable
>Is the volt chart from Wagan Tech really correct?
Looks more or less close, I think a netbook would use more. The best way to find out is to check yourself with a killawatt.
>I think a trucker fridge or something designed for RVs would have a lower consumption.
You should look into a chest freezer conversion. It is very simple all you need is a thermostat controller, it is easily customizable. During the hot summer my outdoor chest freezer used 200 watts A DAY. Right now it uses about 10 watts a day because it's outside.
>What does 150AH a day require to support it? How fast would that drain a deep cycle battery?
Deep cycle batteries have different ratings for 20 hour periods. Example a battery with 150AH rating for 20 hours, would be able to support 150 Amp hours over 20 hours-meaning it could support 7.5 amps an hour. Which would translate to 90watts of DC an hour (7.512), OR 720watts AC an hour assuming inverter is 80% efficient(7.5120*0.8).
>24V deep cycle marine batteries are what I thought was gold-standard for van applications.
The gold standard is usually 12V battery systems, whether it's two 6v's run in a series or one 12v battery.
For more information I urge you to visit handy bob's site, which is a little harder to read but a wealth of knowledge.
As far as cheap temp control, if you are somewhat handy you can get one of these. There are instructions to add an outlet to it like this otherwise this is plug and play.
Get him a CO2 Keg system. Find a cheap garage fridge or deep freezer on craigslist for $30-$50, and buy this . Instant, easy, keg setup.
I just got this one off amazon and so far so good. Really easy to install and setup
Inkbird Itc-308 Digital Temperature Controller Outlet Thermostat, 2-stage, 1100w, w/ Sensor https://www.amazon.com/dp/B011296704/ref=cm_sw_r_cp_api_-L1MAbC4EPRYM
you can also get one on amazon for about the same price. It works very well
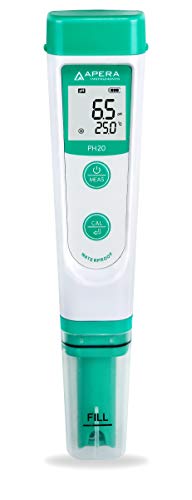
Apera Instruments AI209 PH20 Value Waterproof pH Pocket Tester, ±0.1 pH Accuracy, 0-14.0 pH Range, Complete Kit https://www.amazon.com/dp/B01ENFOHN8/ref=cm_sw_r_cp_apa_B.ftzbRZX6JX1
Edit: Time to transplant, they look big enough and the solo cups have shallow soil to begin with.
Edit2: looks like you have more perlite than soil, I would do a light n feeding after transplant.
Custom made out of plywood. Exhaust on that Sony is in that front corner, so I put two fans, buy I'm actually only using one. I left a small gap along too back for intake.
Using this to automatically turn on.
https://www.amazon.com/dp/B01HXM5UAC/ref=cm_sw_r_cp_apa_i_RAztDbWC9XWZ6
And then the noctua plugs into this.
https://www.amazon.com/dp/B000MGG6SC/ref=cm_sw_r_cp_apa_i_IHztDbJCPQ5XY
And then I found a good temp for it to turn on, and it balances out nicely and keeps temps from skyrocketing, and even runs til it cools down and shuts off.
Lined it with carpet, and overall noise is good. Never hear it. That being said, I'm weird, and I could hear it in quiet scenes, and then I'd START listening for it, ruining the movie, so I made the box. Most normal people don't have this problem. 😆
Guess I can give a short one.
Buy a craigslist chest freezer. Make sure you can fit your fermenter in it (mine fits 2.) Think I spent $50 on an old GE. One 7.9 gallon bucket fits on the hump, the base fits either a carboy or another bucket.
Buy this - http://www.amazon.com/Elitech-All-Purpose-Temperature-Controller-Thermostat/dp/B008KVCPH2
Buy this - http://www.amazon.com/Lasko-100-Personal-Overheat-Protection/dp/B00ATY1OXY
Buy a project box and either a duplex outlet or 2 outlets, and some wire. Wire it up per the diagram on top of the STC1000 (it's very easy.) Plug stuff in, tape the probe to the side of the fermenter. I keep the heater off unless I want it to run so that it isn't fighting the compressor to keep it in range. I've checked it against my thermometer in the beer, it's within 1 degree just by taping it on the side with a dry washcloth taped over the probe. Run one neutral wire to all the places it needs to go.
You can remove the freezers thermostat and wire the STC1000 directly to it, but don't bother. You won't be getting cold enough for the stock thermostat to ever mess with anything. Just plug the freezer into the correct outlet and the heater into the other one.
P.S. Here's a diagram I found. If you do it this way break the tab so the two sides are separate. http://www.homebrewtalk.com/gallery/data/500/medium/STC-1000_outlet_wiring.jpg
It looks like you have male RJ-45 ends on them. One option would just be to buy a switch and plug them all in that way. Plug your router/modem into the switch as well and they should all become active.
If you want a cleaner look, you could get a patch panel and terminate those cables to that and run patch cables to a switch.
If you want to find out what cables go where, I would suggest something like this toner to trace out the cables.
Get a tone tracer http://www.amazon.com/Extech-TG20-Wire-Tracer-Generator/dp/B00APD16D2
Normally used for telephone work. Cross connect wiring in a phone central office is usually all the same blue and white wire... Thousands of them from rack to rack. Tone generator sends out a signal. Receiver picks it up, gets louder as you get closer.
Multimeter and tone generator are going to be a must here.
Something cheap like this https://www.amazon.com/Extech-TG20-Wire-Tracer-Generator/dp/B00APD16D2/ref=sr_1_4?ie=UTF8&qid=1525382409&sr=8-4&keywords=tone+generator+and+probe&dpID=41weL%252BldgUL&preST=_SY300_QL70_&dpSrc=srch would do the trick nicely.
What you do is put the aligator clips on the panel end of a wire and then take the probe out to the different devices and listen for the tone. If you put the tone generator on a wire and you can't get a tone, switch it to the continuity setting. If the wire is showing continuity, then you'll want to open doors and windows one at a time until you see the continuity go away. You've just identified that wire.
Once you've identified where each wire goes, you'll need to identify where they're supposed to be tied into the DSC system. You'll need to look in the programming for that.
http://cms.dsc.com/download2.php?t=1&id=13598 is a direct link to the manual for your panel in PDF.
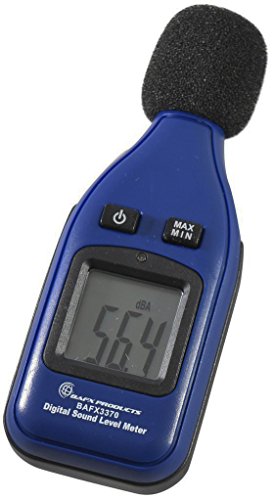
Is there a usable portable SPL meter on amazon that I can buy that's decently priced? I'm looking at this one.
Add one of these and you can see how much USB power is coming out!
https://www.amazon.com/DROK-Multimeter-Voltmeter-Capacitance-Charging/dp/B00J3JSEG6/ref=sr_1_1?ie=UTF8&qid=1469735078&sr=8-1&keywords=usb+amp+meter
Amazon
https://www.amazon.com/Images-SI-Uranium-Ore/dp/B000796XXM/ref=sr_1_1?s=industrial&ie=UTF8&qid=1523662894&sr=1-1&keywords=uranium
The suggested items are hilarious.
Nah, Amazon!
> Where do you think that Uranium comes from?
Amazon.com?
This is SO worth reading through the reviews and questions if you have time. https://www.amazon.com/Images-SI-Uranium-Ore/dp/B000796XXM#feature-bullets-btf
I got you fam.
Uranium Ore https://www.amazon.com/dp/B000796XXM/ref=cm_sw_r_cp_apa_i_uMlPDbNKH63CH
http://www.amazon.com/Images-SI-Inc-Uranium-Ore/dp/B000796XXM
Here you go, one serving of Uranium.
Uranium-238 has a half-life of about 4.5 billion years. So it's slow to emit radiation, and most of it is alpha particles which your skin will stop. The only danger is if you eat it. Heck you can buy uranium ore on Amazon.
Once it's been through a cycle (burned is the phrase used), and a fuel assembly will be used 2 or 3 times depending on the reactor type, there is a ton of byproducts like thorium, iodine, etc. They have increasingly shorter half lives as they decay down (I think, is been a few years since my rad con training) which means they'll emit a lot more radiation and of the stronger beta and gamma types that will cut through you and fuck up your cells.
Another fun fact, younger people are more susceptible to radiation because they have more frequent cell division. So there's a higher chance a cell that was wrecked by radiation splits.
> would be possible to put a set of bullhorns on my bike
Almost certainly yes. You might need a new stem.
> and still be able to use my current shifters/brakes.
Maybe. Measure the diameter of your existing bars where the shifters are mounted. The best tool to do this is a pair of measuring calipers, something like this:
http://www.amazon.com/Neiko-01407A-Extra-Large-SAE-Metric-Conversion/dp/B000GSLKIW/ref=sr_1_1?ie=UTF8&qid=1414190268&sr=8-1&keywords=measuring+calipers
Handlebars come in only a few standard diameters, but really the best way to answer your question is to measure it empirically.
Yep. But if you build the kit yourself:
This press
https://www.amazon.com/Lee-Reloading-Press-Md-90045/dp/B002SF4X5I/ref=sr_1_1?s=sporting-goods&ie=UTF8&qid=1497553125&sr=1-1&keywords=lee+press
Dies
https://www.amazon.com/Lee-Precision-30-RGB-Die/dp/B000N8LHQK/ref=sr_1_fkmr0_4?s=sporting-goods&ie=UTF8&qid=1497553143&sr=1-4-fkmr0&keywords=lee+press+RGB
Scale
https://www.amazon.com/American-Weigh-Digital-Scale-sensitivity/dp/B0012LOQUQ/ref=sr_1_3?ie=UTF8&qid=1497553166&sr=8-3&keywords=digital+scale
Calipers
https://www.amazon.com/Neiko-01407A-Electronic-Digital-Caliper/dp/B000GSLKIW/ref=sr_1_3?ie=UTF8&qid=1497553204&sr=8-3&keywords=calipers
Priming Tool
https://www.amazon.com/LEE-LP90106-Lee-Precision-Prime/dp/B00162UGQE/ref=sr_1_7?s=sporting-goods&ie=UTF8&qid=1497553314&sr=1-7&keywords=priming+tool
... and a few other small things, you should be under $100 dies included.
I still sort and reuse Medeco pins because they're so damned expensive. Get a digital or dial micrometer. Much faster than dropping them into a plug with depth keys. You should have a micrometer anyway. It's pretty much the number one best way to diagnose fiddly little problems with depth and spacing. It's invaluable for adjusting your key machines. I can get my Borkey duplicator down to sub .001 accuracy with one.
In the old days, a decent dial micrometer was expensive. Now, those digital ones are dirt cheap and perfectly serviceable. I bought the one I linked to above as a backup to my fancy Mitutoyo dial unit, and at $17 and change, I actually use it as my main one now because it was so cheap I'm not afraid of damaging it.
Apera Instruments AI209 PH20 Value Waterproof pH Pocket Tester, ±0.1 pH Accuracy, 0-14.0 pH Range, Complete Kit https://www.amazon.com/dp/B01ENFOHN8?ref=yo_pop_ma_swf
There are models that you simply plug into the wall and then plug the fridge into them. Should work universally. Just set the fridge's internal thermostat a little colder than you want it, then set the external therm where you want it.
Here is a moderately priced one.
Inkbird ITC-308 Heater Cooler Device Temperature Controller Carboy Homebrew Fermenter Greenhouse Terrarium 110V 10A 1200W https://www.amazon.com/dp/B01HXM5UAC/ref=cm_sw_r_cp_apa_i_xs1jDb09EQ53M
If you’re truly setting up your kitchen for prep, eliminate the standup refrigerator, convert another chest freezer into a chest fridge with a $35 part off amazon
This should be a significant power savings.
I was going to suggest this if nobody else had. Also idk how bug the hole is, but there are also affordable endoscope cameras that you could stick in there to see if there are broken bits, cylinder damage etc.
Example: https://www.amazon.com/DEPSTECH-Waterproof-Inspection-Megapixels-Smartphone/dp/B01MYTHWK4/
idk anything about that particular one, was just the first one that came up in a search.
I'm sure I don't remember them all, but the last two cool/useful things were:
A bluetooth OBD-II reader. Diagnose check engine lights, look at various performance metrics, real time monitoring... pretty cool for 50 bucks.
A wireless borescope like this one. I bought it to help run some wires for a new thermostat, but I can see it being really useful in a lot of applications.
I have a plaster and Lath walls. I got a Thermal Camera and used that to see the studs when I hung a heavy TV on the wall.
Ink bird 12v digital and 100amp relay found on amazon/ebay
https://www.amazon.com/Inkbird-All-Purpose-Temperature-Controller-Fahrenheit/dp/B00OXPE8U6/ref=sr_1_1?ie=UTF8&qid=1484277440&sr=8-1&keywords=inkbird+thermo
https://www.amazon.com/Support-Heavy-Split-Charge-Relay/dp/B012N09BFE/ref=sr_1_1?ie=UTF8&qid=1484277516&sr=8-1&keywords=12v+100+amp+relay
This. Is. Awesome.
I currently have a Monster cooler like this that is set up as a curing chamber with a simple temperature and humidity controller.
I would love to be able to integrate something like what you made into my setup. The data logging and interface are super nifty! Definitely let us know when/if you pull something together.
I unfortunately don't have all the photos I took of the build. Thankfully google saved a few.
The fridge was delivered and I ripped all the shelves out.
I cut a little hole in the bottom of the fridge (the bottom 6" are empty space for the compressor, so this was just thin plastic) and wired up an ITC-1000. The original freezer controls only go 10F max. I also removed the defrost timer so this fridge is on manual defrost now, though I've had no freezing problems in well over a year. The fan is now on 24/7 instead of coming on with...the defrost? I cant remember how it originally turned on. You're playing with electricity here, be smart and safe and dont start a fire or die, or have a professional do it.
The back panel in the above picture stayed on, RIGHT behind it is about 3" of space for the evap and fan. Right under the evap I drilled 3 holes. 1 for the main CO2 line, 1 for the Nitro line, 1 small one for the fridge temp sensor. Eventually another one for the 5v for the arduino. They all came up through the little slit and had grommets for the sheet metal. They shouldn't be moving around, but the last thing I want is a cut line.
I bought a 36"x5" drip tray without a drain and 3d printed 3 brackets for mounting. Since it doesnt have a drip tray I want it to be mobile. The brackets have magnets in them so it can easily be taken off the fridge door and cleaned. I really didnt want to put any holes in the door except the taps.
I cut the shelves off the door but left most of the skin. The plastic helps seal the door seal AND it's holding in the plywood I used to replace the door. I have no idea the thickness of the plywood anymore but I did have to sand down a good 1/8" where the taps are so they'd fit. Any longer shanks and I'd be poking kegs, any shorter shanks and I'd be too short and need smaller plywood.
You can see above how the CO2 is routed and the temp sensor right in the middle of the fridge.
The top distributor goes to the top shelf, middle splits to both sides, the bottom goes to the bottom shelf. I honestly could have gotten away with 2 different pressures. I really don't change off serving pressure except for quick carbing a beer. Most of the beers I brew end up around the same carbonation level. Maybe when I need something crazy high/low carbed I'll be excited.
That's also the best photo I have of the finished product before it got a bit more messy like now. I have some 3D printed brackets that hold the lines in place on the side of the fridge.
I did have an issue with the fridge leaking all of its damn r134a out. There was a small leak by the evap. A bit late in the build for a replacement. Found the leak and JB Welded it shut. It was too close to the wall to braze and JB Weld has held for over a year now. Luckily I had done a car AC before and had the manifold gauge, vacuum pump, and fittings. I learned to braze on the quick connect, pulled vacuum, hit it with nitrogen to ensure there were no leaks (though it held vacuum as well), pulled another vacuum and filled her to spec with r134a. Been working like a charm ever since.
There is a raspberry pi running RaspberryPints with some cheap ass flow meters. The only changes I made were how many pulses on the meters meant a pint. I've been fiddling with it ever since. I'm sometimes off by a handful of pints on my kegs. Enough to get me close, but I'd like to dial it in without spending $60 on each freaking meter. How much beer is left in my keg is not a $60 problem to me.
If you're going to use it fairly infrequently, they make temp controllers that attach to a crock pot and if you get a cheap fish aquarium bubbler, you have your own DIY version. We used this one for almost a year before upgrading to an Anova: https://www.amazon.com/dp/B011296704?psc=1
I keep posting this in the keezer builds for people who are about to build, here is the list of what I did with costs and where I bought things:
Here, while not basic, but a list that might help. This is a 4 keg setup. Some items are not exactly needed, for example hose clamps, MFL push to connect (you could just get barb ones), but helpful for disconnecting/cleaning. You can save a lot on faucets - my 4 costed me $280 total all in. You could also get a cheaper freezer.
I got a regulator with 2 possible pressures so I can have carbonation pressure plus serving pressure at the same time - also not a requirement.
Name|Price|Quantity|Total|URL
:--|--:|:-:|--:|:--
Inkbird Itc-308 Digital Temperature Controller Outlet Thermostat 2-stage 1100w w/ Sensor|$35 |1|35|https://www.amazon.com/gp/product/B011296704
Intertap Self Closing Faucet Spring|$1.99 |4|7.96|https://www.morebeer.com/products/intertap-closing-faucet-spring.html
Intertap Stainless Steel Faucet Shank|$32.99 |4|131.96|https://www.morebeer.com/products/intertap-stainless-steel-faucet-shank-4.html
Duda Energy HPpvc025-100ft 100' x 1/4"" ID High Pressure Braided Clear Flexible PVC Tubing|$28.50 |1|28.5|https://www.amazon.com/gp/product/B00LX6LS7E
Brewer's Edge UX-CAOO-IQIT Keg Lube 1 oz.|$5.98 |1|5.98|https://www.amazon.com/gp/product/B0064OK99S
Hilitchi 60 Piece Adjustable 8-38mm Range Stainless Steel Worm Gear Hose Clamps Assortment Kit|$12.99 |1|12.99|https://www.amazon.com/gp/product/B01IOE4RQQ
Taprite T752HP Two Product Dual Pressure Kegerator CO2 Regulator|$89 |1|89|https://www.amazon.com/gp/product/B0060NOX40
KegWorks Beer Tap Faucet Handle Black|$4.30 |4|17.2|https://www.amazon.com/gp/product/B000VI753Q
Intertap Forward Sealing Beer Faucet (Stainless Steel)|$31.54 |4|126.16|https://www.amazon.com/gp/product/B01NAGS3ST
4 Way Co2 Manifold|$42.99 |1|42.99|http://www.farmhousebrewingsupply.com/4-way-co2-manifold/
Accuflex Bev-Seal Ultra (3/16) 50'|$15.99 |1|15.99|http://www.farmhousebrewingsupply.com/accuflex-bev-seal-ultra-3-16-50/
Pin Lock Disconnect- 1/4 MFL Gas Side|$5.99 |4|23.96|http://www.farmhousebrewingsupply.com/pin-lock-disconnect-1-4-mfl-gas-side/
Pin Lock Disconnect- 1/4 MFL Liquid Side|$5.99 |4|23.96|http://www.farmhousebrewingsupply.com/pin-lock-disconnect-1-4-mfl-liquid-side/
1/4" MFL Push To Connect|$3.79 |4|15.16|http://www.farmhousebrewingsupply.com/1-4-mfl-push-to-connect/
5/16 x 5/8 BSPP (Shank Connector) Push To Connect|$5.99 |4|23.96|http://www.farmhousebrewingsupply.com/5-16-x-5-8-bspp-shank-connector-push-to-connect/
Igloo 7.1 cu ft Chest Freezer Black|$219.99 |1|219.99|https://www.walmart.com/ip/Igloo-7-1-cu-ft-Chest-Freezer-Black/31136433
Set of Four 5 Gallon Pin Lock Kegs Used|$28.90 |4|115.6|http://www.homebrewing.org/Set-of-Four-5-Gallon-Pin-Lock-Kegs-Used_p_3179.html
20 CO2 tank|$60|1|60|craigslist
2 in. x 8 in. x 10 ft. #2 and Better Prime Douglas Fir Board|$9.86|1|9.86|http://www.homedepot.com/p/2-in-x-8-in-x-10-ft-2-and-Better-Prime-Douglas-Fir-Board-604364/206182008
ZMAX 7 in. 16-Gauge Galvanized Reinforcing L-Angle|$3.27|4|13.08|http://www.homedepot.com/p/Simpson-Strong-Tie-ZMAX-7-in-16-Gauge-Galvanized-Reinforcing-L-Angle-L70Z/100375233
||||1019.36|
You would also need a wrench if you don't have one yet to unscrew the posts on the keg.
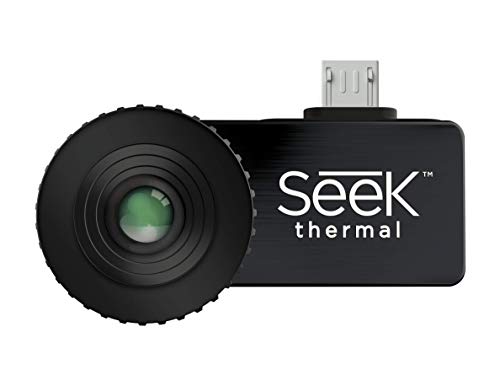
Yea well Amazon pricing fluctuates, so retail vs sale is a tough metric. The $150-160 price was the big sale, but they frequently drop below the $200 mark. Regardless my point was price of these thermal things is getting quite low compared to where they were 2-3 years ago. Went from a 500-600 dollar investment to try to justify down into the "cool toy" range.
Andriod one:
http://camelcamelcamel.com/Seek-Thermal-Compact-Imager-Android/product/B00NYWAHHM
iOS one:
http://camelcamelcamel.com/Seek-Thermal-Compact-Imager-iOS-Apple/product/B00NYWABAA
You probably should punch down those ends on a "better" patch panel like this:
https://www.amazon.com/TRENDnet-Unshielded-Wallmount-Rackmount-TC-P24C5E/dp/B00008AWL3/ref=sr_1_3?s=electronics&ie=UTF8&qid=1466713111&sr=1-3&keywords=patch+panel
It doesn't have to be the exact one, it's just for reference. Keep in mind to keep interference down that can mess with your transfer rates that you will want to keep the amount of wiring that is untwisted to a minimum. Once you are punched down you can get a ton and probe kit, relatively cheap to check that you punched down the wire correctly and that it is terminated correctly on the other end as well, presumably in a keystone jack for a wall. This will also allow you to find which wires go where in your house. Also, you will have to determine which standard for wiring was used, T568A or T568B. You can check this before punching anything down by taking a wall plate out and investigating how the cat5e was terminate at the wall plates.
You can get a cheap line tester like this that will do the job fine.
https://www.amazon.com/Tonor-RJ45-Network-Cable-Tester/dp/B00OUFX38W/ref=sr_1_18?s=electronics&ie=UTF8&qid=1466713437&sr=1-18&keywords=tone+and+probe
I've actually used this exact one at home when I've left my commercial fluke equipment at work. It feels cheap, but it does the job. Good luck, once it's done and done correctly it's very nice to have a wired home with the ability to add wireless access points throughout your home.
You can go cheap on the opening tools without being penalized.
Laptops and the like aren't cars - they don't require tons of force but you DO need the right bits and/or shims to get them open without stripping heads or damaging plastics.
Something similar to this which has a bunch of bits, magnetized pickup, and "guitar" style plastic pry tools should do fine.
https://www.amazon.com/dp/B073ZWY386/ref=twister_B07FMWPBKN
A portable multimeter is always useful, I like the ones that fold in on themselves so you can throw them in a bag.
https://www.amazon.com/Digital-Multimeter-Ranging-Pocket-Tester/dp/B06Y4RZY45
Get some Cat5e clips, put them in a ziploc, and throw them in your bag along with a crimping tool, needle nose pliers, and wire stripper. You will be surprised how often you need to re-crimp a cable or make a new one on-site.
Note - if you don't know how to make a cable, definitely practice that first!
Get an ethernet/phone continuity tester. You don't need a Fluke CableIQ (they're nice though!) but a basic continuity tester will let you (laboriously) trace any ethernet jacks that need tracing. And you can test those cables you just made or just fixed.
I have one basically identical to this and I've used it for over 10 years now I think. Money well spent.
https://www.amazon.com/Tonor-RJ45-Network-Cable-Tester/dp/B00OUFX38W
As mentioned before, something to read a drive(s).
Any multi sd-card reader will do but instead of a dock you may want something like this since it is more portable. Yet another thing I've had for over 5 years and used countless times.
https://www.amazon.com/AGPtek-Drive-Adapter-Converter-External/dp/B00BIE996S
None of the below links are affilliate.
If you're getting into more network layer stuff, you'll want a cable toner, RJ-45 Ends, Cat 5 or 6 Cable, RJ-45 Crimper as well.
The one you're linking to is a heating controller, to be used with a heating element to keep temperature up.
Here's one that does both heating and cooling. I don't have personal experience with it, but this would be more like what you'd want to convert a fridge into a curing chamber.
https://www.amazon.com/Inkbird-Itc-308-Temperature-Controller-Thermostat/dp/B011296704/ref=pd_sbs_328_1?_encoding=UTF8&pd_rd_i=B011296704&pd_rd_r=VG3NE5E8RAZBZZVKYZ2T&pd_rd_w=HwiY4&pd_rd_wg=NUioI&psc=1&refRID=VG3NE5E8RAZBZZVKYZ2T
Are you dead set on a fridge or do you have any interest in going with a chest freezer?
EDIT: With either setup you'll need a temp controller. I'd recommend an Inkbird
Not sure about shipping with Canada Post lately (maybe don't buy date sensitive products if shipping with Canada Post) but here's a short breakdown for Canada deals:
https://www.ontariobeerkegs.com/Articles.asp?ID=323 Lots of stuff on sale (free shipping over $100)
https://brewhq.ca/ 20% off equipment (free shipping over $75)
https://www.noblegrape.ca/collections/equipment/ 20% off equipment with coupon code: HAPPYMONDAY
https://www.hopdawgs.ca/ 10% off $100 or 15% off $250
https://www.everwoodavebrewshop.com/ 20% off Coupon Code: Everwood
https://torontobrewing.ca/collections/black-friday-sale Lots of stuff on sale
https://www.amazon.ca/Inkbird-Itc-308-Temperature-Controller-Thermostat/dp/B011296704 Apply $10 Coupon
https://goldsteam.com/ No specific BF sale but everyday low prices and didn't want to leave them out of the party
https://www.topps-hops.ca/collections/t90-pellets Same with Topps, always good pricing
https://www.plaato.io/plaato-airlock-bf Worth noting $99 (USD?) fun tool with free shipping worldwide
Don't forget to support your local Homebrew shop as well!
I don't see why that wouldn't work, but if you don't want to rewire things, consider the Inkbird ITC-308. Plug and play, much cheaper than other options (Homebrewfinds sometimes has shared coupon codes to get the cost below $35). I just picked one up for my keezer build.
I have this one and it's a lot less than $100 and works great. Plus no additional wiring is required, just plug it in and you're good.
I've been very happy with the ITC-308. One perk over the ITC-1000 is there's no need to wire it into the keezer, or mount it. If I ever want to convert my keezer back over to freezer use all I have to do is remove the collar.
Order it on amazon https://www.amazon.com/Images-SI-Uranium-Ore/dp/B000796XXM
Anyone can own uranium. It isn’t illegal. In fact, it’s one of the most common elements on earth. You can buy it on Amazon.
Uranium Ore https://www.amazon.com/dp/B000796XXM/ref=cm_sw_r_cp_api_i_LsFkDbZGJ01ZG
Yes they do.
You can get it on Amazon...
Uranium Ore https://www.amazon.com/dp/B000796XXM/ref=cm_sw_r_cp_apa_i_2wkwCb943FQQ7
For people who think I'm joking
Fuckin' inflation. I was gonna say this uranium which used to be $29.95 and free shipping, but now it's $39.99 and free shipping.
Pfth
http://www.amazon.com/Images-SI-Uranium-Ore/dp/B000796XXM/
You could consider manufacturing your own armor piercing ammunition. You need to find a good stockpile of depleted uranium for the best man portable anti armor ballistics penetration capabilities. Here is a good site to get you started on accumulating a sizable weapons grade amount.
http://depletedcranium.com/depleted-uranium-its-all-around-you/
Or if you want to bypass all of that hassle just order it direct in bulk
http://www.amazon.com/Images-SI-Inc-Uranium-Ore/dp/B000796XXM
Mind you I believe that it is illegal to manufacture depleted uranium ammunition. Then again it is illegal to jaywalk and jaywalking now a days might possibly net you a beating and or tasing/pepper spraying or all three.
I was going to say a chunk of uranium ore which is reasonably safe and entertaining, but that's slightly over your price range. Still, check it out. It's awesome.
Rub this on it
You can buy Uranium ore on Amazon those days. So, you can re-create your radioactive lab even today.
you can literally buy some on Amazon
https://amzn.com/B000796XXM
We're redoing electric in our house, and the only advice I can give is do not trust any labels unless you've tested it yourself twice. We made an updated wiring map of our house using walkie-talkies and a no-touch tester. There was no logic to the map whatsoever. Half the house turned out to be wired from one 12A breaker. One room had outlets attached to 5 different breakers. Double-taps and duct-taped wires everywhere... It's going to be a long project.
Some of the less intuitive acccessories I've found helpful:
Here's the tools I use most frequently in 3d printing and assembly - I suspect you'll have most of these from modelling work:
Get a decent digital caliper and get good at measuring, model it yourself.
Here is the fun part though - printers shrink some dimensions and expand others based on temperature, extrusion, brand of filament and a hundred other variables.
I make parts that hold spring loaded Pogo pins than are about 1.6mm to 2mm in diameter.
For every design I print a test piece with the holes in various orientations to the build plate. I make each hole the correct size then some a little larger and some a little smaller. I create a profile for each part I print and save that.
When I get the test piece done, I check each hole for fit. Now I know that for part number XYZ123 on Brand-X PLA I need to make the vertical holes .05mm larger and horizontal holes .1 smaller.
It's a pain but it helps take some of the mystery out of sizing.
This one is perfectly fine. I've been using it for 4 years. https://www.amazon.com/Neiko-01407A-Stainless-Electronic-Digital/dp/B000GSLKIW/ref=sr_1_1_sspa?ie=UTF8&qid=1521558561&sr=8-1-spons&keywords=caliper&psc=1
It may be difficult to sanitize all the edges if there are any on the fish tank heater. There a lot of crud floating in a fermenting beer.
If you can spare about 50$ get an inkbird temp controller and a cheap heating pad (I use this one) set it on low or medium. I secure it to the outside and forget about it.
Depending on how much a new controller costs, another option would be to use an ETC to control when the fridge turns on and off. Once configured, the fridge would turn on and off as needed. However if the controller on the fridge completely fails at some point in the future, this setup might no longer work.
Edit: Wrong acronym. ETC not ETR
That's quite the range. I'd recommend getting one of these to get a more accurate reading.
STC-1000 is always a safe bet. link
No idea what style of beer your brewing but 58-60 ° fits most yeast, Build yourself a son of a fermentation chiller about $25 for foam and glue and a STC 1000 and no worries then.
I use these. They work great and they're only 14 bucks.
Not to ruin the maker fun, but something like this is only $13.
What about something like this?
http://www.amazon.com/Extech-TG20-Wire-Tracer-Generator/dp/B00APD16D2/ref=sr_1_2?ie=UTF8&qid=1413756891&sr=8-2
Cool experiment, OP!
I have a couple of suggestions.
First, why not pick one or two very popular (and therefore most people will know them) songs from the 80s, 90s, 2000s, and recent Top 40 hits. That way almost everyone who participates in your experiment will have some idea of the song structure, rather than have to wade through an esoteric song they are unfamiliar with.
Second, get one of these. It's cheap, but useful, and will allow you to adjust the volume of each listening station (and song) so that the lossy and lossless songs are of equal volume (folks tend to think that the louder of 2 versions of a song is "better", so by using a decibel meter you prevent that particular bias)
Third, you may want to pick a very lossy version of a song (something like 96k mp3 (lossy) and have folks compare it with flac. Many people may be able to tell the difference. Now have them compare flac with something like 320k mp3. You may be surprised by the results.
And finally, if you are using M50Xs, it is only fair to pick a good dubstep song that wakes up the listener and slaps them around a bit. You know, something like this :-)
Most cheap calipers are fine for measuring prints for accuracy. If you want to get something a little better than the cheapest but not spend too much, I'd recommend these. They're probably not more accurate than other digital calipers in the $20-$25 range, but the absolute origin feature makes them easier to use since you don't have to zero-out each time you use them.
https://www.amazon.com/dp/B00INL0BTS/ref=cm_sw_r_other_apa_i_pLbZDbZK580M6
Had mine for about 2 years. It has been reliable and repeatable. I haven't put it on a calibration block set but everything I've used it for has fit together as expected.
Apera Instruments AI209 PH20 Value Waterproof pH Pocket Tester, ±0.1 pH Accuracy, 0-14.0 pH Range, Complete Kit
https://www.amazon.com/dp/B01ENFOHN8/ref=cm_sw_r_cp_api_i_u3h7CbEN27BGJ
Sticking with Apera I recommend the PH60.
https://www.amazon.com/Apera-Instruments-AI311-Replaceable-2-00-16-00/dp/B01ENFOIQE/ref=cm_cr_arp_d_product_top?ie=UTF8
Replaceable tips are awesome!
it's worth 20$... sorry had a pretty similar one died after 6 months...
you could try and calibrate if you have calibrating powder
​
bought this... so far so good and it feels way more accurate ... for 6x the price
https://www.amazon.ca/gp/product/B01ENFOIQE/ref=ppx_yo_dt_b_asin_title_o08_s00?ie=UTF8&psc=1
I've actually had a ton of luck with this: Depstech Wireless Endoscope, WiFi Borescope Inspection 2.0 Megapixels HD Snake Camera for Android and iOS Smartphone, iPhone, Samsung, Tablet -Black(11.5FT) https://www.amazon.com/dp/B01MYTHWK4/ref=cm_sw_r_cp_apa_93X8BbMDFSYGB
It creates a wifi hotspot that you connect your phone or tablet to, and then through an app you can see the camera video. It's much cheaper than some of the Dewalt, Milwaukee, and similar items.
Depending on how "presentable" you want it to be build the fermentation chamber it out of a chest freezer. You can throw a tablecloth over it w/o affecting the freezer functioning as long as you leave the motor uncovered.
This is similar to the setup I have. It’s big enough for 10 gallons of beer in two 5 gallon carboys. You could always right size the freezer for what you want.
I built my own controller, but these are cheap enough now that it probably makes sense to buy.
Reposting the famous u/ _ataraxia info:
Glass tanks can be very challenging for ball python husbandry due to the high amount of air flow with the screen top and the total lack of insulation with the glass walls. It's generally recommended to use tubs or pvc reptile cages instead. wood enclosures can also be suitable if they're designed well and sealed properly to protect the wood against moisture. glass tanks can work, but they require a lot of modification and maintenance, which you'll find tips for in the second link. i'll give you product recommendations to cover options for tanks, tubs, and pvc/wood enclosures.
https://smile.amazon.com/Seek-Thermal-Compact-Imager-Android/dp/B00NYWAHHM/ref=mp_s_a_1_17?ie=UTF8&qid=1543241356&sr=8-17&pi=AC_SX236_SY340_FMwebp_QL65&keywords=flir+thermal+imaging+camera
And it's on sale.
Buy a seek thermal camera for your phone (make sure to buy the correct one for your phone, also you can knock $100 off the price by going used/reboxed), and go around looking for holes in your house, sealing them with a caulk gun. Make sure you buy the COMPACT, because it actually works better for this task, whereas the XR is more for spotting deer half a mile away but sucks at 10'. Alternatively, you can rent a thermal imager at big orange for $60 for 4 hours...
This might seem expensive to solve a little spider problem, but what you are really doing is improving the energy efficiency of your home by a ton. It's easier to see cracks when the temperature difference is large, like when it's very hot and you have the A/C on, or it's very cold and you have the heat on.
If you seal all these holes, the only place I'd put any Permethrin is around the cold air intake inside your home (or where it leads outside, or both). It looks like a 4" to 6" flexible hose with a u-bend coming into your furnace room. This should have a lot of free air flow, so don't put a screen over it or plug it, doing so could cause carbon monoxide poisoning as the furnace burns up all the oxygen in your home. If you really hate the air-intake, you can get an air-to-air heat exchanger for a few grand.
It is! Example (leaky front door): http://imgur.com/B65sYfy.jpg
Anyway this is what I have: https://smile.amazon.com/gp/product/B00NYWAHHM/
It was $195 when I got it, looks like the price has gone up a hair.
For value you can't beat something like this. I have used a similar one from L-com for years and have not had any issues for the ~100 home runs I have done.
Anything that will qualify the cable as cat6 is probably $1,000+.
> Any ideas on what I could be missing?
There is something inside the wall or somewhere it's connected to that you are missing. The best thing to do would be buy a cheap cable tester like THIS and after you wired to B standards then test it, it will tell you what is broken or even if there is connectivity at all.
I have two cooler setups using this one: https://www.amazon.com/Inkbird-All-Purpose-Temperature-Controller-Fahrenheit/dp/B00OXPE8U6
I have a large one for large cooks, or meat, while using the small one for veggies, or a smaller cooks. They both work great. I use a tiny aquarium pump which will need to be replaced once in a while since they are not rated for heat and will wear out eventually. Mine have lasted about a year of weekly cooks. Have fun, build your own, and you'll probably learn something too! I use water heater elements for my heating element Get a hobby box for the temp. controller/wires, mount it on the cooler. I actually have a wire diagram I made and will supply you with a full parts list if you are interested. I integrated an external relay in my setup too, and it has it's own GFCI plug end on it for those times when you are not near a regular GFCI plug in a wall. Safety first around power and water! PM me if you want to goods!
I would replace that with an off-the shelf digital controller (like this super cheap model: http://www.amazon.com/Inkbird-All-Purpose-Temperature-Controller-Fahrenheit/dp/B00OXPE8U6/ref=sr_1_9?ie=UTF8&qid=1452810523&sr=8-9&keywords=pid+controller)
I have no previous knowledge of capillary tube thermostats, but personally I find PID controllers can be tuned more easily to get the response you would like out of a system.
Non-mobile:
^That's ^why ^I'm ^here, ^I ^don't ^judge ^you. ^PM ^/u/xl0 ^if ^I'm ^causing ^any ^trouble.
I'm BIAB, so that helps cut down on the space and equipment, but I'm looking at adding [240V Heating Element] (https://smile.amazon.com/gp/product/B000BPG4LI/ref=ox_sc_act_title_2?smid=ATVPDKIKX0DER&psc=1), Inkbird Controller, and [a basket to make raising the grains a bit easier to manage] (https://smile.amazon.com/gp/product/B000VXKJJI/ref=ox_sc_sfl_title_5?ie=UTF8&psc=1&smid=ATVPDKIKX0DER). Which doesn't seem like too much of an investment to make my brewday a LOT shorter, and a bit easier.
edit: [alternative inkbird controller] (https://smile.amazon.com/gp/product/B01KJZMWSI/ref=ox_sc_act_title_1?smid=A1RUFFFCQ74BCW&psc=1). This is the one i am currently considering, but i don't know the real differences.
No.
Get a cheap freezer off of ebay/craigslist, then get one of these and set your temperature:
http://www.amazon.com/Inkbird-Itc-308-Temperature-Controller-Thermostat/dp/B011296704
When it gets too cold, power to the unit gets killed...when it warms back up, you get the idea.
https://www.amazon.ca/Inkbird-ITC-308-Temperature-Controller-Thermostat/dp/B011296704 use one of these guys to save yourself the trouble of wiring an STC.
the side by sides do take a lot of room. If I would find a used (but in great condition) freezer chest. You can pick one up for between $50 to $150 depending on size etc. Build a simple wooden collar. There are lots of tutorials on here and homebrewtalk.com. Its not too hard to build the square just take your time and make sure all your measurements are right. Use this as your temp controller (https://www.amazon.com/Inkbird-Itc-308-Temperature-Controller-Thermostat/dp/B011296704) plug and play. no wiring needed. if you went this route you could probably do it for less than half the cost of what you posted.
If you really don't think you are capable of putting one together, then you need to look at that cost difference to see if its really worth it.
Also, shop around a bit. although its convenient to place one big order through one shop, it can often be more expensive.
I am no expert and still very much a newbie, so any veterans can chime in and correct me.
Maybe Inkbird is what you need: https://www.amazon.ca/Inkbird-ITC-308-Temperature-Controller-Thermostat/dp/B011296704
I just bought an Inkbird Controller
for my build, and it's been working wonderfully so far.
I just put mine together this weekend.
Around $220 for everything, but you can fit two 6 gallon carboys and two 3 gallon carboys or a few 1 gallon jugs on the hump.
What's the temp inside the unit? You could probably just keep it at a low setting or hook up a [temp controller] (http://www.amazon.com/Inkbird-Itc-308-Temperature-Controller-Thermostat/dp/B011296704/) to get to 50ish. Might cut down on the cycles.
I know many appliances are starting to integrate tools that allow them to run based on time of day pricing, but that will take forever.
In homebreweing, we use temperature controllers like this: Inkbird Itc-308 Digital Temperature Controller Outlet Thermostat, 2-stage, 1100w, w/ Sensor https://www.amazon.com/dp/B011296704/ref=cm_sw_r_cp_api_EPwtzb2P3KEM1
It allows us to bypass the fridges regular on/off mechanisms to maintain specific temperatures. By setting your fridge and freezer to the coldest settings and plugging it into one of these you would just need a mechanism that looks at your LMP to decide if you are in appropriate price parameters.
I imagine people will start developing internet/app enabled "smart" plugs that go between appliances and the wall to allow them to take advantage of price signals. Naturally, this is all dependent on a shift in retail markets toward real-time pricing. The consumer is heavily insulated from pice volatility currently.
I have one of these and taped it to the lid with some electical tape. I have it hooked up to one of these dual temp regulators and it works great.
EDIT: Sorry, actually I have the 50w version - here's the link to that length
'Best' is a relative term, but one similar to the defunct BlackBox controllers you mentioned is the OhmBrew Fermostat.
Otherwise if you're a budget brewer like me, then perhaps the Inkbird ITC-308 is an option, but keep in mind that I've heard rumors that the wiring isn't technically up to US code, if that's a concern for you.
I'm guessing the substrate is eco earth (thats what it appears to be), which is good... water bowl size is good although takes up quite a bit of the enclosure. The hide appears to be mostly enclosed so thats good... however theres only one hide so you'll need another one for a cool hide if you use that as a warm hide. Basically you want at least two hides, warm hide and a cool hide... and if you can fit a third one in then that would be your humid hide. I'd also recommend getting more foliage so the snake feels safer. I'd get the heat lamps out of there and get a large heat mat to go underneath the warm hide and then a thermostat to control the temperature. This is the thermostat I use, it seems to work very well.https://www.amazon.com/gp/product/B011296704/ref=oh_aui_detailpage_o00_s00?ie=UTF8&psc=1
And then this is the heat mat I use for two of my animals, and both seem to work so far.https://www.amazon.com/gp/product/B018VQ72RI/ref=oh_aui_detailpage_o00_s00?ie=UTF8&psc=1
You'll also want to get new temperature and humidity gauges, stick on ones don't work. This is the one I use, works great so far.https://www.amazon.com/gp/product/B06XY3X7P9/ref=oh_aui_detailpage_o04_s00?ie=UTF8&psc=1
And then if you want you can also get a temp gun, which tells you the surface temperature. I like using it a lot, and sometimes rely more on it than my temperature gauges.
As far as humidity and temperatures go, the hot spot should be about 90-95, cool side around 70-80 or so, I would make sure temps dont drop below 70. And humidity about 50%, you can boost it up to 70% during sheds but I wouldn't go over that.
If temps aren't getting where they need to be you can use a low wattage CHE, also known as a ceramic heat emitter to heat the tank as additional heat (You'll still need a heat mat).
In all honesty if you could get more substrate (bedding) you could put even more hides in. In my BP's 20 gallon she has a total of 5 hides as her substrate is filled half way so I can put hides underneath the substrate and then put cork bark to keep the substrate raised. She has probably about two humid hides, one underneath the water bowl, one on the opposite side which is a standard hide, and then underneath that in the substrate she has a warm hide which is connected to a "tunnel" system of cork bark. https://imgur.com/a/h6ERs6Y
Argument to absurdity. But I will play along.
So you think absolute free press includes lies and fabricating evidence, and that free speech means yelling fire in a crowed theater?
The means to fabricate a nuke is beyond an individual for the most part in this nation (note you can buy and own uranium legally), but if we take the "only a militia" can on arms, then the collective could in theory amass the means to make one and be within the realm of the "it is a collective right" argument more so than the individual argument.
So to some degree I agree, but no more than I agree that absolute free speech means screaming fire in a crowded theater is ok, or for news to use fabricated stories as fact.
That would be pretty awesome, but unfortunately David Hahn died in 2016, so it's not likely he's up to his old tricks again.
You can get Uranium on Amazon now, so I would think it's more of an interesting headline than anything illegal. Depending on what the guy was going to do with it...
Amazon
I'm sorry to say your understanding has been wrong. Unenriched (i.e. natural) uranium is present in the soil and in seawater. As the originator of this thread said, you can buy a can of it it on Amazon for $39.95 (+$10.49 for shipping). CANDU reactors run on natural uranium, but the fuel itself is safe to handle before it goes into the reactor. Here's a guy holding a CANDU bundle (here's another) with no shielding (the gloves are there to prevent damage to the zirconium sheath and to give more grip so the guy doesn't drop it). As I mentioned earlier, the only danger it poses to a human is if you swallow it in large quantities and get heavy metal poisoning.
Natural uranium is also not used for medical applications, because it's a) an alpha emitter and b) because it decays extremely slowly. Medical and research applications tend to use things like Cobalt 60, Molybdenum 99 and Strontium 90 because they are gamma and beta emitters and because they decay pretty quickly. (n.b. radium 223 is an alpha emitter and is sometimes used in tiny amounts to kill cancer cells.) And because they decay so quickly, it's not really useful for a bomb either because you'd either have to use it right away or a lot of it will have decayed away by the time you do.
We don't know the nature of the research that was being conducted in this case, but chances are it was chemical, not radiological.
https://www.amazon.com/Images-SI-Uranium-Ore/dp/B000796XXM/ref=sr_1_1?s=industrial&ie=UTF8&qid=1469264534&sr=1-1&keywords=uranium
Gonna need citation on all that. First of all only a small percentage of radioactive material is weapons grade.
Second, you can literally by uranium in amazon.
www.amazon.com/dp/B000796XXM/ref=cm_sw_r_sms_apa_93q.zbJG0EC5T
Bonus: comments for a chuckle
Ever handle Uranium?
Buying Uranium online really isn't that hard though :p. http://www.amazon.com/Images-SI-Uranium-Ore/dp/B000796XXM
> https://www.amazon.com/Images-SI-Uranium-Ore/dp/B000796XXM
No, NOW homeland security is gonna be on your ass. I hear GITMO is nice this time of year. :)
Amazon sells everything
> neither extreme or violent in a method to accelerate the projectile rapidly.
......Thats why guns never explode because smokeless gently pushes the rounds down the barrel with with light and gentle pressure. Oh I get it now./s
You are arguing semantics with someone who doesn't give a fuck. Try to change your walls mind and you might have better luck. And hey dumb ass what do hemorrhoids feel like? oh that's right they feel like butthurt. Since I was never a dick to you till after you called me one, you must have hemorrhoids, because you were pretty butt hurt over a mild joke, that was more in agreement with you while making fun of I.O., RAs,C39 owners, yet you took it personally. Most likely because you were already in butthurt due to the hemorrhoids, Hence why I recommended it for you. Why you think my pussy has a yeast infection Idk, it's not like you can see me sitting here scratching at this itchy thing, But I promise it's not from you, you are no where near sweet enough.
And now the downvotes are hurting your feefees? Don't worry I'll have a talk with them.
Guy stop downvoting him. He obviously can't handle the downvotes and needs a safepace where he can hide from all the libtard cucks who aren't even here yet he felt the need to bring that up.
Also might want to double check those numbers, Unless these are 300g containers. But surely you know what you're talking about and didn't throw up a random thing you read once.
If only we could buy it on amazon. Be sure to check Q&A.
Or buy a GM counter and go hiking in central Andhra or other uranium rich regions.
Just buy it on Amazon.
Though the author most likely meant this as an expression, you could be non-depleted ore on amazon.
http://www.amazon.com/Images-SI-Inc-Uranium-Ore/dp/B000796XXM
http://www.amazon.com/Images-SI-Uranium-Ore/dp/B000796XXM
Uranium in any easy to process form is heavily regulated. Ore, residue encased in glass and so forth isn't regulated at all.
Not bullshit.
You can even order it from Amazon.com
http://www.amazon.com/Images-SI-Uranium-Ore/dp/B000796XXM
jeez why dont the iranians just get it from amazon just like everyone else?
https://www.amazon.com/Images-SI-Uranium-Ore/dp/B000796XXM
The rest of the reviews are also pretty cool, occasionally i like people!
http://www.amazon.com/Images-SI-Inc-Uranium-Ore/dp/B000796XXM
Amazon.
You can actually buy Uranium Ore on Amazon
I vote for Uranium ore http://www.amazon.com/Uranium-Ore/dp/B000796XXM
Perhaps Uranium Ore
this yodeling pickle ?
Or, from the same company... This squirell sized coffee mug
whoops. Flintstones
I admit I'm a little disappointed that I did not see this in the "Customers also bought" section.
http://www.amazon.com/gp/aw/d/B000796XXM/
Amusing reviews.
Or just go to Amazon
Actually you can order it from Amazon.
http://www.amazon.com/gp/aw/d/B000796XXM
I thought for sure this was bull shit. I was wrong.
\> voltage detector is showing current on the parts that are not lit.
​
non-led christmas lights have a shunt that forms when the light's filament burns out, this is so if one bulb burnt out, the series continuity isn't broken and it doesn't take out the whole strand.
​
some of the shunts don't form, and that's how those lightkeeper pros are supposed to 'heal' a bad string....by making a big pulse, enough to melt and form those shunts that didn't quite make it.
​
http://www.ciphersbyritter.com/RADELECT/LITES/XMSLITES.HTM
​
actually, usually that lightkeeper pro voltage detector is pretty crappy, I use this:
​
https://www.amazon.com/gp/product/B000EJ332O
Measure it with calipers.
If you don't have any, buy a pair.
Your flow rate does look high. I do 95%. I think that Simplify3D might even default to 90% for PLA. The stuff expands a lot.
Not an expert, but
I'd focus on the drive train issues first, get all those tires working, might be a lost cause before going any deeper, but others will have to help with that, I take that kind of stuff to my mechanic.
Brake pedal could be that it's low on brake fluid, or one of the brake calipers is stuck.
My quad has a foot brake like that and a hand brake, but the foot brake only brakes 1 tire. That tire has two brake calipers on it's roter, one to the foot break and one to the hand brake. So the hand brake is all 4 wheels, and the foot brake is 1 wheel. There is a master cylinder on my hand brake and another on my right rear tire (foot brake). If my foot brakes master cylinder runs low or springs a leak, my pedal goes through the floor like in your pic but I'll still have brakes on the hand brake. It's like a double/emergency braking system. If my hand brake goes out I can down shift (engine brake) and lay on that foot brake to brake and not hit a tree...
___
Fuel wise, it's likely carburetor being old. The carburetor should have a primer on it that injects gas into the carb when you press/pull it. Those generally have a diaphragm in them (rubber) that tends to go bad over time and cause a fuel leak.
If you can find a diagram of the carburetor that would help emensely.
Really though, you should take the whole carburetor off, take it apart and give it a bath in carb cleaner (no plastic/rubber in there) and clean all the jets out.
Also, they make rebuild kits for most carb's that come with all new jets, and pilot screw etc. See if you can find one. I typically just replace them all, easier and then I have spares.
Also, inspect the carb's vent hose and make sure it's intact and not clogged. Check the fuel line too, for damage/rot.
You should also remove the gas tank and clean it out. Take the petcock off and inspect the filters and valve, then clean the whole gas tank out so there's no dirt/bad gas in there.
Then check/change the spark plug(s). Before running it though, I'd check the valve clearance on the valves, guides on that online.
Once all that's done, it should run good and not leak gas.
Then you can address your other issues.
Pending how old it is, there are some parts I might replace just because:
If the current ones are working, call them spares.
Starters and solenoids are cheap, voltage regulators OEM are expensive, but you can buy a few after markets pretty cheap to have spares.
Tool wise, I can recommend at least the following:
Then your typical ratchet sets, air tools, impact guns, etc.
And socket extensions (long ones) because getting to some things is a royal pita.
You don't need a micrometer, just calipers with a wheel lock and 3 points after the decimal is fine
https://www.amazon.com/Neiko-01407A-Electronic-Digital-Stainless/dp/B000GSLKIW/
Search "digital calipers" just about anywhere, here is one on Amazon, for example.
I know what sub i'm in but seriously dude:
https://www.amazon.com/Neiko-01407A-Electronic-Digital-Caliper/dp/B000GSLKIW
You have to factor in the value of your own time.
Cool fix anyway.
calipers
I suggest getting two things that helped a ton with my prusa:
http://www.amazon.com/gp/product/B000BQR7TU/ref=oh_aui_detailpage_o00_s00?ie=UTF8&psc=1
and
http://www.amazon.com/Neiko-01407A-Extra-Large-SAE-Metric-Conversion/dp/B000GSLKIW/ref=sr_1_1?s=hi&ie=UTF8&qid=1417042163&sr=1-1&keywords=caliper
Building from scratch is really great because you then have a mental framework for diagnosing when something goes wrong. Have fun.
Get a cheap digital caliper and get modeling!
For the record, those digital calipers aren't made by Frankford, but are re-branded. You can get the same set "made" by several different companies but cheaper, like this set.
Not that there's anything wrong with the Frankford ones. Just pointing it out in case you were interested in saving a few dollars.
I use these nearly everyday at a desk doing reverse engineering / 3d printing prototypes. They work fine for me
https://www.amazon.com/Neiko-01407A-Electronic-Digital-Caliper/dp/B000GSLKIW/ref=sxts_k2p_hero1?pf_rd_m=ATVPDKIKX0DER&pf_rd_p=2668834182&pd_rd_wg=cSyFv&pf_rd_r=2SJYEW38AY5AGNBK2KCF&pf_rd_s=desktop-sx-top-slot&pf_rd_t=301&pd_rd_i=B000GSLKIW&pd_rd_w=0nGkJ&pf_rd_i=digital+calipers&pd_rd_r=2VEACHX9JZMZ570M28R0&ie=UTF8&qid=1479323368&sr=1
Many homebrewers just buy a conventional chest freezer, then use an external temperature controller like this Inkbird:
https://smile.amazon.com/Inkbird-Temperature-Controller-Thermostat-Fermentation/dp/B015E2UFGM
The freezer plugs into the controller, you put the temp probe inside the freezer space (make sure it's in air, not touching the sides/bottom of the freezer), and set to the desired temp. I personally use them and they work well. I have 2 freezers, one is a constant 35 f year round, and the other one I adjust to specific temperatures all the way up to the 60s and 70s for fermenting beer. Keep in mind using a 3rd party controller might void the freezer's warranty, even though most all have compressor cycle protection built in now.
Meh... Def not worth the trouble imo.
This one is awesome. https://www.amazon.com/dp/B01ENFOHN8/ref=cm_sw_r_cp_apap_wRPEXgJRekaAc
If that's too expensive for your price range just do the strips or the drops. Waaaay more reliable.
Us or Canada? Cuz he linked Canadian amazon. Apera also has a really good cheaper model that i use.
Apera Instruments AI209 PH20 Value Waterproof pH Pocket Tester, ±0.1 pH Accuracy, 0-14.0 pH Range, Complete Kit https://www.amazon.com/dp/B01ENFOHN8/ref=cm_sw_r_cp_apa_i_OZpvCbD6G9EE5
I have an Apera pen and it works really well. I like it for sure.
I used to use the drops suck, and they suck. It's hard to get an accurate reading. The pen is great for accurate readings, but it takes up to 20 seconds to fix on the correct pH, which at times feels like forever.
This is the one I have: https://www.amazon.com/Apera-Instruments-AI209-Waterproof-Accuracy/dp/B01ENFOHN8/ref=sr_1_2?ie=UTF8&qid=1499548253&sr=8-2&keywords=ph+pen
I have tried a few of the $15-$25 pens on amazon, they all seem very similar and very inaccurate. Eventually I got tired of it and opted to spend a bit more ($50ish) and picked up this meter:
Apera Instruments AI209 PH20 Value Waterproof pH Pocket Tester, ±0.1 pH Accuracy, 0-14.0 pH Range, Complete Kit https://www.amazon.com/dp/B01ENFOHN8/ref=cm_sw_r_cp_apip_NeCAe1dMSV4Nc
And have been extremely pleased with its performance. Quick and accurate readings for both pH and water temperature.
Get the Apera. DON'T GET THE BLUELAB.
> if you dont mind having to calibrate your ph pen every time you use it just get a cheap 10 dollar ph pen. I dont mean to imply that all of them need to be calibrated every single time but i am saying don't expect them to work perfectly.. i advise you just assume that you will need to be calibrating it very very often if you use it very very often so you dont set yourself up for disappointment.
>
> but If you want a solid ph pen get an apera ph pen (i have this one)
>
> I had a yellow ph pen that lasted me a couple months before it went to crap. then i went through two broken Bluelab ph Pens (they werent mine though they were used and handed down from a close friend). I always read about bluelab being the ph pen every one should have. that is bullshit imo. If you do your research you will see lots of stories with bluelabs going to crap, probably because they dried out... but stilll.... its very commmon...
>
> i HIGHLY recommend apera ph Pens. I got the 50 dollar version and it works perfectly just like a bluelab (in working condition) does. It has a one button auto calibration... and it can calibrate using three points if you want.. and its dead on accurate and reminds you when to calibrate and it tells you when the ph reading is stable.. and tells you the temperature of the solution.. Its nice for 50 dollars. Or you can dish out more and get the version that has a repplaceable probe. Keep in mind the replaceable probe is about 40 bucks so i ended up getting the 50-dollar pen thinking that if it ever goes to crap i might as well buy a nother one instead of just replacing the probe...
>
> apera ph pen is probably the only ph pen that averages 4.5 star reviews on amazon (140 reviews is a lot imo). When it comes to ph pens the reviews on amazon speak for themselves if you ask me
https://www.reddit.com/r/microgrowery/comments/6vdl6n/getting_into_dwc_hydroponics_bluelab_guardianpens/dlzpu78/
I wouldn't use the strips they are shit. Get a liquid ph tester kit at the very least, I use this ph meter it works like a charm don't waste money on a cheap ph meter either. You will regret it.
Here's what I've found so far. The search continues...
Refractometer with Brix + SG scales - $19 Brülosophy link | non-affiliate link
5 gallon No Chill cube - $11.50 Brülosophy link | non-affiliate link
pH Meter (starts 3:15pm) Brülosophy link | non-affiliate link
40x-1000x Microscope (starts 3:50pm) Brülosophy link | non-affiliate link
You can if you're willing to create a safe enviroment for it. I used a temprature sensing power outlet and connected it to two small fans inside an entertainment stand total setup is about 85$. Has been working for 4 years. 3 digit temps are very common for me.
This is the plug I used
https://www.amazon.com/Inkbird-Max-1200W-Temperature-Controller-Greenhouse/dp/B01HXM5UAC/
For me the path of least resistance was to buy an external controller like this one. You simply plug the fridge into the controller and place the probe inside the fridge. Takes a few minutes to setup and you're done.
7ft+ chest freezer (or smaller of space is a concern. 7 should give you took for two vessels most likely)
Inkbird or DIY BrewPi if you don't mind the DIY projects
Small heater with a fan
And a thermowell for whatever fermentation vessel you have. If you're looking for that too, I can't recommend Fermonster enough in terms of price/quality. Though your budget may allow a SS Brewbucket
He's controlling it with an Inkbird temperature controller, we use one connected to a chest freezer for the same purpose.
Very configurable, if you wanted to you could even add a heating element and keep it from getting too cold (if you're fermenting in winter).
I borrowed one of these from a buddy.
DEPSTECH Wireless Endoscope, WiFi Borescope Inspection 2.0 Megapixels HD Snake Camera for Android and iOS Smartphone, iPhone, Samsung, Tablet -Black(11.5FT) https://www.amazon.com/dp/B01MYTHWK4/ref=cm_sw_r_cp_api_i_j3LjDbGN7D7BB
Made a huge difference. I was able to start with small easy to patch holes while I was figuring out the route and made sure I wasn't going to put my hole saw through an electrical cable. Almost felt like cheating.
Just drill a small hole (easy to patch) in the wall and use an inspection camera to peek in and see. If worried about patching walls, pull off a piece of the trim and drill behind that. Then put the trim back and hide the hole.
Here are things from my wishlist (past and present)
Wera Screwdrivers
https://smile.amazon.com/dp/B0085NTQJK/
Oscillating blade set:
https://smile.amazon.com/dp/B0109SELWA/
Clamp multimeter:
https://smile.amazon.com/dp/B00NWGZ4XC/
Kreg Jig Jr.:
https://smile.amazon.com/dp/B000J43A7W/
Angled Long Nose Pliers:
https://smile.amazon.com/dp/B00N3VSS4S/
Groove Lock Pliers:
https://smile.amazon.com/dp/B000FK1R0W/
11 ft wifi endoscope:
https://smile.amazon.com/dp/B01MYTHWK4/
non contact voltage tester:
https://smile.amazon.com/dp/B001UAHZAM/
claw nail puller:
https://smile.amazon.com/dp/B0015YPJMY/
Workmate portable work bench:
https://smile.amazon.com/dp/B000077CQ0/
Cable snake fish tape:
https://smile.amazon.com/dp/B000BP7WBO/
9 Outlet metal power bar:
https://smile.amazon.com/dp/B00F8ZQY5M/
Spade drill bit set:
https://smile.amazon.com/dp/B00099E7WE/
36" bubble level:
https://smile.amazon.com/dp/B000UKMWMO/
You can order an ozone generator to sanitize your ductwork. I used them back when I worked as an auto detailer and ordered one for myself. Damn things are like magic. Family and neighbors are always wanting to borrow it. Hell, I run the thing in the kitchen after I fry stuff (empty house, of course). It's right up there with cheap borescope on my list of stuff that's handy to have, but many homeowners don't think of.
And to add on:
Some of us bought digital calipers so we could get really technical with our widths... =/
I finally found and purchased these that have a 0-14 pH testing range, on Amazon. I think for increments smaller than 1 your best bet is to get a digital pH meter (something like this), but those can be pricey.
I've had one of these for almost two years with no problems: http://www.amazon.com/Oakton-EcoTestr-Waterproof-Tester-Range/dp/B004G8PWAU ... Try finding that, or similar on Amazon UK. I think, if my £>$ math is correct, it should be about £30-40
Although I need mine for my own hydroponic botanical needs, I can recommend the meter I use as a low-cost solution if nobody has one for you.
This is the one I use, and it's quite cheap at $15, but will still read just fine. Just get some calibration solution and check it a couple times between uses, until you are satisfied it is keeping calibration, then you can go longer without testing. I kept checking mine and it never lost calibration, so I've been pretty happy with it. It is not waterproof though, and after dropping mine in the reservoir I had to relearn how to read it due to to LCD cells lighting up when they shouldn't (so 5.8 read as 9.8 because the extra line on the 5 lit up.) After recalibrating, it was fine, just wonky to read, testing against drops and ph buffered nutrient solution (always sets itself to 5.8ph) showed it was calibrated fine. So just don't get it wet, and be careful not to break the probe putting the cap back on, as it's made of glass and the cap edge can crush it.
Another better quality one that I hope to get soon is this one, although it is more expensive at $50, it is also waterproof and just all around better quality.
I put one of these in my fridge and it works perfectly. Also a humidifier and humidity controller.
This is a useful guide
I've got three STC-1000s that I've ordered from multiple places and they have all been flashable - so I guess I've been lucky. The first two I bought from Amazon and the last one I bought from Alibaba although it took about 6 weeks to arrive. Mats has this link set directly on his Github page for the software so I figured this would be a really safe bet and it worked fine.
The flashing is pretty easy and there's a great instructional video on the blackboxbrew.com website. You'll need an Arduino Uno and some jumper wires which cost me about $20 at a specialty electronics shop. Best thing to do would be to ask around your homebrew club or brew shop if anyone has one that you could borrow. One guy brought his to a brew club meeting and flashed a whole bunch of peoples all at once.
Good luck with the build and feel free to hit me up for any questions. Go Leafs!
I based it on the Son of Fermentation Chiller plans but made modifications to the dimensions to allow it to fit two carboys. Originally I just had a cheap thermostat from Home Depot and only cooling, but had some issues in the winter months with the beer getting too cold at night and the yeast dropping out before it reached the targeted FG. So eventually I upgraded the temp controller to the STC 1000 which does both heating and cooling and picked up a 4" duct fan, some 4" duct, foil tape, and cut up an old brew belt I had laying around. I would highly recommend building one if you have the resources. It's probably the single biggest improvement to my brewing process I've ever made.
I'll see if I can grab one when I get home.
Danby dcr412 Fridge.
6G Better Bottle:
Therm-well stopper: https://morebeer.com/products/hood-thermowell-3-5-6-65-gallon-smooth-neck-carboys-15.html
Fermwrap heater: https://morebeer.com/products/fermwraptm-heater.html
STC-1000 temp control unit: http://www.amazon.com/All-purpose-Temperature-Controller-STC-1000-sensor/dp/B00862G3TQ
The only picture I have of the inside is with a plumb wine I was doing last year. http://i.imgur.com/WXFK5XX.jpg?1
Absolutely the STC-1000. They are very cheap on Amazon. (queue pricezombie)
I just did one myself. I posted it in the Monday Forum here with some pics and details.
I'm using mine already now. I didn't do any sort of airlock or anything in it. I think it will work fine. The only real place anything can escape is the small hole I drilled in the compressor hump to feed the probe into the chamber. Even if that is silicone'd though, don't worry about the seal.
The unit itself is currently $17.04 on amazon. I spent $11 on the box, $16 on a 15ft 15amp extension cord, and maybe $3 on the outlet and plate. Total cost = $47 or so.
Here's what you should do with it: Get a temperature controller unit like this, wire it up to an electrical outlet, and plug plug the smoker into it.
This will allow you to customize temps up to 212F. Then, get a cold smoke generator, put it in there, and you've got a temperature accurate cold smoker.
Use one of these to find and label each end.
http://www.amazon.com/Extech-TG20-Wire-Tracer-Generator/dp/B00APD16D2/ref=pd_sxp_grid_pt_0_1
I've had to diagnose a few mystery circuits in my house, too. Turn off the power, check with your non-contact tester to make sure it's not hot, then you can use a wire tracer like this:
https://www.amazon.com/Extech-TG20-Wire-Tracer-Generator/dp/B00APD16D2/ref=sr_1_10?ie=UTF8&qid=1495645071&sr=8-10&keywords=continuity+tester
Take pictures of the wiring of every switch you take apart, so you can return things to the way it was before, if need be.
In order to answer this correctly, you need a little more information. You'll need to buy/borrow a power meter and see what your average power consumption is. The 1000w max number really doesn't mean much.
https://www.amazon.com/d/Industrial-Power-Meters/TS-836A-Energy-Voltage-Electricity-Monitor/B00E945SJG
​
Once you know how many amps or watts you draw, we can start sizing the system. How critical is it that this system be up and available 24/7? Are you trying to run a server that needs to have a 99.999% up time? Even with solar and batteries, there will be strings of cloudy days that may require you to stay plugged in, or if you can tie the alternator into the batteries, you'll have to run the engine or buy a generator to get you through bad weather days.
​
Standard components:
Batteries - Either 12 Volt deep cycle, or pairs of 6 Volts golf cart batteries. Golf cart batteries tend to allow deeper discharge than the 12 Volt deep cycle, but come with lower overall capacity. Two 12 Volts will get you ~400 amp-hour rated capacity, four 6 volts will get you the same capacity, but generally last longer before needing to be replaced.
​
120 volt Battery charger - can be a cheap pep-boys battery charger or a dedicated RV converter setup.
​
Solar system - Number of panels will be determined once your average usage is known.
​
Solar Charge Controller - size will be based on # of panels. Can be super cheap but not efficient, or expensive but efficient.
​
Inverter - Takes your 12 Volt battery power and turns it into 120 volt AC to run your computer. You'll need a pure sine wave inverter if you're running electronics. Size will be based on average power consumption of the computer.
​
Here's the numbers if you want to size to the full 2000 watt power draw:
​
If you want to run the system off of the battery for 14 hours, you'll need the following:
2000 watts for 14 hours equals 28,000 watt-hours, or 28kwh.
The Tesla Power Wall has a capacity of 13.5 kwh, so two of those will get you close.
Battery: https://www.tesla.com/powerwall
I believe the new powerwalls come with built in inverters, so they should be able to output 120 volts directly. Weight = approx 600 lbs with wire and connections, they cost $7,800 each, so you're looking at just over 15k for your batteries. Other industrial sized batteries may be available slightly cheaper.
​
Add as many solar panels as you can. You only get 4-7 equivalent hours a day of solar charging based on location:
https://www.nrel.gov/gis/assets/pdfs/solar_dni_2018_01.pdf
The Chevy Astro may be able to fit 4x100 watt panels on the roof. 400 watts for approx. 5 hours a day means you'll be able to charge the batteries about 2kwh per day minus any efficiently losses, so it would take 2 weeks to charge the batteries from dead to full on solar alone. You're basically buying yourself the full 28 kwh required capacity with the 4 solar panels and 2 power walls.
​
If the batteries were just about dead when you plugged in at night and you wanted to recharge them while keeping the system running for 10 hours, you would need 2000 / 120 = 16.67 amps to run the computer, and 23.33 amps for 10 hours to charge the batteries. That's 2.8 kw for 10 hours to fully charge the battery, unfortunately, during grid charging, the powerwall charges at a max rate of 1.7 kw. That's 14.16 amps to charge the powerwalls. You would need to max out a 30 amp RV hookup site for a minimum of 16 hours to charge the batteries to last you one day.
​
My suggestion, buy one of these, and carry enough gas to run it 24 hours a day.
https://www.amazon.com/Honda-EU3000iS-Starting-Portable-Inverter/dp/B0002XC0V2/
​
EDIT: Final suggestion, rent a server and travel with a laptop that will allow you to remote in to the more powerful computer.
​
​
Yep, I use something like this: https://www.amazon.com/d/Industrial-Power-Meters/TS-836A-Energy-Voltage-Electricity-Monitor/B00E945SJG
There's all price ranges, but the principle is the same, you put it in-between your device and the wall socket, so all current goes through it, then it can show it on a screen. Some of them do real time calculations based on your local electricity prices.
The Beats Solo 2 are excellent starter headphones. So much better than what I started this journey with. I was surprised that the packaging of the Beats was that high quality. Must be Apple's influence.
Do yourself a favor and don't listen too loud! I made that mistake, and now I have some annoying tinnitus, which is constant high pitched ringing in my ears. You can use a dB meter to measure the volume, just put the mic end into the headphone's cup and try to seal the cup with your hand or a rag. Keep it around 80dB or lower and you're good to go.
Get an SPL Meter Put the subwoofer on your couch where you sit and start playing bass sweeps then walk around your room with the SPL Meter and you'll start to see where the bass gets boomy and where is cancels out. What you want is pretty even response across all frequencies, meaning there is a very little dB level difference between the the various frequencies.
That is where you want to place your sub. Older article but still relevant
If you are using speakers to play the tome you could get a cheap sound level meter.
http://www.amazon.com/BAFX-Products-TM-Decibel-Battery/dp/B00ECCZWWI/ref=sr_1_1?ie=UTF8&qid=1414958244&sr=8-1&keywords=sound+level+meter
If I were in your position, I would definitely shoot for a big ticket item such as the sawstop PCS (36" T-glide) with 1.75hp motor. That will eat up your entire budget (plus $219 more). I cannot imagine a hobbyist woodworker who would not be happy with it.
OR you can do lots of little stuff: (take out the things he may already have)
Sharpening: this this this this and this
Chisels: here
Japanese saw: this and this
Caliper: here
Exceptional quality hand plane set every woodworker would love to have if they don't have it already: here. Conversely, you can get the Lie Nielsen 60-1/2 block plane and get the #4 and #5 from Lee Valley (I prefer their version).
If he doesn't have a planer, this is a great one: here
As for festool products, I would highly recommend the Rotex 150 with Dust collector combination
I'm sure i'm missing a couple of stuff here and there but I hope the list helps you get started.
I have had VERY good results with the iGaging Absolute Origin found on Amazon Here: https://www.amazon.com/iGaging-ABSOLUTE-Digital-Electronic-Caliper/dp/B00INL0BTS/ref=sr_1_5?ie=UTF8&qid=1498694071&sr=8-5&keywords=digital+calipers
There are a number of reloaders (much deeper into reloading than I) using this piece of hardware with very good results.
Here is the video that sold me on buying it: https://www.youtube.com/watch?v=1yqZx_FNbSs
I use these: https://www.amazon.com/dp/B00INL0BTS/ref=cm_sw_r_cp_tai_tu9KBbW7NBX32
>Harbor Frieght calipers
Whenever I hear/see someone using these, I show this alternative.
They're no B&S or Mitutoyo, but they are soooo much better than those HF jobs while being cheap enough that you can travel with them without (monetary) fear of them getting damaged/lost/confiscated.
Twice your price range but I have these.
There is a great comparison video of several different calipers in the reviews. Some of which I think are in your price range.
30mm dia. base Source 510 from Stealthvape turned down to 25mm. Threads weren't damaged from being chucked in a 3-jaw. Used a carbide cutter and took light cuts, about 0.05mm per pass. Also wet sanded the top base 600-2500 grit (I should have started with a lower grit, still some tooling marks)
http://www.stealthvape.co.uk/SOURCE-30MM-FLAT
/u/IsABot /u/vapescaped you guys want one let me know
A prior thread asking about 25mm 510s: https://www.reddit.com/r/OpenPV/comments/5gnnbf/25mm_510_connector/
If anyone needs some digital calipers, these are great: https://www.amazon.com/gp/product/B00INL0BTS/ I was using some from Harbor Freight prior and was becoming frustrated with them. Started looking around and these were quite highly recommended and well reviewed. Well machined, few smooth action, maintains zero. Was considering dropping $200 on Mitutoyo calipers until luckily finding these
http://www.harborfreight.com/6-inch-digital-caliper-47257.html (when on sale or with coupon for ~$10-$12)
http://amzn.com/B00INL0BTS
http://amzn.com/B00KDUD67G
I just let my timelapse script run last night until the 1500mAh battery powering it died. It probably wasn't fully charged, but a Pi model B with just a USB camera attached taking pics every 10 seconds went for 2.5 hours.
There's ways to turn off nonessential accessories on the pi to save power including the HDMI & USB ports. Also, shutting the pi down correctly instead of letting it die will help keep the sd card from being corrupted, some good info here. I've got one of these on the way to really tell how much power I'm using before I figure out a battery solution. Mopi is another option to manage power and automatically turn the pi off before it dies, and I think the mopi can turn the pi off and turn it back on at certain times to extend battery power even further with the addition of a real time clock.
I bought one of these to see when it was actually charging: USB Meter, DROK Digital... https://www.amazon.com/dp/B00J3JSEG6?ref=ppx_pop_mob_ap_share
I just keep plugging the gotcha into the cord until I get a reading on the screen.
you can measure resistance with a regular multimeter using the 4-wire method. If you have a regulated digital power supply (like a lithium battery charger with lcd) it's as simple as putting a constant current relatively high amp load on the wire, measuring the voltage drop and dividing by current. you could also use a good quality USB power meter ($10, amazon), or a dedicated ~15 watt meter. i've used an incandescent light bulb for this and got fairly accurate results.
you can also use the same process to test USB cables' resistances. I'll use 2x usb power meters (one on each end of the cable) and a powered off cell phone//other electronic as the load. most modern power banks will also display voltage out and current.
edit: here's some more info, and is quite accurate if done correctly.
I'll give a dollar to the first person who hooks up with one of these and reports on the open-circuit voltage, voltage under load, and whether it does at least 2A.
Quite a few reasonably inexpensive thermal image attachments for cell phones on the market that cut the cost significantly over all in one solutions. Maybe not quite to the point of buying it just for giggles, but easily justifiable from a business standpoint.
Seek Thermal
or
FLIR One
We're dealing with a similar problem (water coming out a light fixture in our dining room that's below the sliding glass door to the balcony). We haven't solved it yet (it hasn't rained enough again for us to see the path of the water), but one thing we got that seems promising is an infrared camera that attaches to a phone. This is the one we have: https://www.amazon.com/Seek-Thermal-Compact-All-Purpose-MicroUSB/dp/B00NYWAHHM
Get a caliper:
https://www.amazon.com/gp/product/B000GSLKIW/ref=s9_acsd_top_hd_bw_b2hbgbL_c_x_w?pf_rd_m=ATVPDKIKX0DER&pf_rd_s=merchandised-search-3&pf_rd_r=X8J846GSRS6NS60FW29R&pf_rd_t=101&pf_rd_p=1a8eac19-c971-50dd-a67f-89fb6ce5ef10&pf_rd_i=2476630011
If you're doing any kind of modeling of real life objects, it might be worth your while to buy a digital caliper so you can make your own measurements, especially if you need more specific ones after you get the initial ones in.
https://www.amazon.com/gp/product/B000GSLKIW/ref=s9_acsd_top_hd_bw_b2hbgbL_c_x_w?pf_rd_m=ATVPDKIKX0DER&pf_rd_s
There are two pH pens: One for soil, and one for water.
In my experiences and others, soil pH pens aren't the most accurate, so a liquid pH meter has done well measuring the pH of the water that is about to go in, and the pH of the water coming out the drain holes.
So if you were to water in soil with say 6.7 pH water/nutes, and it came out at 6.5, you'd know your soil was around 6.3 pH. This way, you can have one meter that's practical for two functions!
This would be one of the most recommened
This is the one I always see suggested
https://smile.amazon.com/Oakton-EcoTestr-Waterproof-Tester-Range/dp/B004G8PWAU
With a lab-style ph meter, like this one or this one. I use the oakton because it is temperature corrected, whereas other meters require you test a solution at a specific temperature for an accurate reading. You use them to test the runoff water when you water the plants. You measure the PH of the water you put into the pot, and see how much it changes when it comes out, which will give you an idea about the PH level of your soil. For instance, if I measured my water to be 7.0 going in, and found it to be 5.8 coming out, I would know my soil is at least 5.8 on the ph scale or lower. However, I find that just measuring the PH of what I put in, the runoff doesn't matter so much, if the soil is properly prepared. I would go on, but I'll stop myself here for the sake a brevity; there's plenty to learn if you seek the information.
Having said that, I will say there are some soil probe type meters that work well, but you have to calibrate it, and care for and store the electrode properly, which can get difficult because the electrodes are often very long and don't have a cap/case to hold storage solution. Though, it does require you mix water with your soil for the electrode to get a proper reading, so really testing the runoff is the same as (properly) using a soil probe, but the lab meters will be more accurate, easier to use, calibrate, store, and care for properly.
edit: oh yeah, PH indicator drops can also be used, but they are not nearly as accurate or reliable, and can sometimes be difficult to read since your runoff solution will not be perfectly clear.
If you continue to plan on doing dwc grows your need a PH meter get this one.
http://www.amazon.com/Oakton-EcoTestr-Waterproof-Tester-Range/dp/B004G8PWAU/ref=sr_1_2?ie=UTF8&qid=1372348082&sr=8-2&keywords=ph+meter
If the leaves that are turning brown are touching the soil, I would consider that the reason. If not, possibly a ph issue? I would definitely invest in an accurate meter regardless. I use this and haven't had any issues, but most people will recommend the Oakton
I've used this one that was $50 for over a year and it has been reliable. I got it because it is comparable in quality to the BlueLab ones (which some people like here) without being $80. Their are ones for cheaper like this one, but they should be avoided like the plague because they lose calibration almost immediately. With the one I showed above, I've only had to calibrate it once every 2 grows while the other one would lose its calibration after a few weeks.
The most important tool i have is:
Oakton ph2 pen with calibration solution(s). Proper ph adjusting base and acid too.
Bonus:
HPS lighting as its usually cheap and very effective. LED is still expensive.
lots of jars to store the massive harvests you will get.
Oakton 2
I started off with one of the yellow cheap models, dropped it from 2 feet above ground and it immediately died. The Oakton is leaps and bounds more accurate, faster, and waterproof if you accidentally drop it in your res.
EDIT: The cap on the Oakton is perfect for keeping a little storage solution on the tip, which keeps it accurate for longer and will extend the lifetime of the device.
http://www.amazon.com/General-Hydroponics-GH1514-Control-Kit/dp/B000BNKWZY
Kit comes with test indicator. Although with a 50gal tank, you might want a bigger quantity than the 8fl.oz bottles there. Getting a digital pH tester will save some time as well.
I love this one http://www.amazon.com/gp/product/B004G8PWAU/ref=oh_aui_detailpage_o04_s00?ie=UTF8&psc=1
What about this one?
http://www.amazon.com/gp/aw/d/B004G8PWAU/ref=mp_s_a_1_1?qid=1373158088&sr=1-1&pi=SL75
I think you should get one of these http://amzn.com/B004G8PWAU
You'll need 7.0 and 4.01 solution too which would put you over your 50 a bit unfortunately.
Just dont get the cheap milwaukee pens, they are awful
ph drops are pretty cheap for a general idea otherwise
I'm currently using this in combination with this to get exacting temps. The sensor that comes with it is not really that good, but I use a infra-red temp gun on the inside of my chamber and increment the temp on my controller and I can get it within 3 - 5 degrees F of what I want.
I'll admit ordering from china can be costly but if you buy an enail and maybe some other equipment in the same order it becomes worth it in the end.
If you're up for a little diy you could always build an STC 1000 and hook a heating pad up to it. It should only cost you about $30 to build the STC 1000 and you can get a heating pad pretty cheap at CVS or on Amazon if you don't already have one.
Edit: These are the instructions I used to build my STC 1000.
It depends on how much you want to spend, but the easiest way to control temps is with a dedicated fermentation fridge with a temperature controller to regulate the temperature. I generally only need to regulate down (i.e., cool the fermenter to keep it from getting too warm), but some climates require a dual regulator to be able to either increase or decrease temp, especially depending on the seasons.
The cheapest regulator that's gained a lot of popularity in the community in the last few years is the STC-1000. There's a bit of DIY involved in connecting this controller to an actual electrical outlet. But it does dual control for around $30 total (once you buys the outlet, etc.).
If you're less handy but have the money, you can get a controller like this Ranco. There are tons of other options, so just Google "refrigerator temperature controller" or something.
There are also much less robust, but also much less expensive options. Google "fermentation swamp cooler" or "son of a fermentation chamber" for some good, low-cost, DIY options.
http://www.amazon.com/AGPtek®-WH8040-Digital-Humidity-Controller/dp/B009VXXBCQ
Here is good temp controller:
http://www.amazon.com/Digital-All-purpose-Temperature-Controller-STC-1000/dp/B00862G3TQ
Seconded. I bought one of these on Ebay and wired it to a standard two-outlet receptacle in a project box from Radioshack. Cold phase supplies power to mini-fridge compressor and the hot phase runs to a FermWrap. Can go down to 40s in the summer and 70-80 in the winter...just in case I feel like a saison in December.
If you want to go cheaper than the Johnson Controller, you can get yourself one of these and DIY. Since you're comfortable with some handy skills, this should fairly easy. Tons of tutorials online and will save you about $50 or more!
Homebrewers use these to control temps in fermentation chambers.
http://www.amazon.com/Elitech-All-Purpose-Temperature-Controller-Thermostat/dp/B008KVCPH2/ref=sr_1_1?ie=UTF8&qid=1407875219&sr=8-1&keywords=stc-1000
fixed the link
It was 19 x 32 x 39 and use a stc 1000 temperature controller after 3-4 months I got a 18 cf fridge off CL and trashed the son of a fermentation chiller but keep the stc 1000.
How's this - do it for free... at least... without having to buy a temp controller.
Your next cheapest method is to wire up an STC1000.
Then the Johnson Temp controllers, Love controllers, and Ranco controllers require basically no wiring, but generally cost $70+
Here it is: http://i.imgur.com/RY7BqXD.jpg
It's basically an STC-1000 in an enclosure I got from Home Depot, hooked up to a crock pot I got for our wedding. It cost about $40 in total and has yet to shut off randomly. :-)
Yup, that'll work perfectly for you. As long as everything else runs when the thermostat is bypassed, the STC-1000 would work. All it's doing is cutting power to the fridge when cooling isn't needed, so it's basically plugging/unplugging it as needed.
Just permanently bypass the thermostat and either wire the STC-1000 in directly or put an outlet on it that the fridge can plug into. Should work just fine. The most difficult part of the job depending on your setup would be getting the STC's temperature probe into the fridge. Mine comes in the top with the beer lines and is taped to the side of the keg so it's monitoring the beer temp more than just the air in the fridge.
Here's the one I bought: https://www.amazon.com/Lerway-All-Purpose-Temperature-Controller-Thermostat/dp/B008KVCPH2. Should be the one you need assuming you live in the US.
I just did this, literally last week!
It is pretty easy just takes a little patience.
You can look at my recent post to see how mine is coming. I am doing it with a new 7.1 igloo that I got from best buy for about $200 tax included. I bought a 3 tap system from kegconnection with a dual regulator and all stainless hardware and perlicks. That came to about $370, which is a lot BUT everyone recommends it, and if you're going to fucking do it, you might as well fucking do it right.
I probably spent close to $100 on materials for the collar, BUT this is my first real project and I didnt have a lot of tools/screws/misc stuff around to put that together so about $30 of that would go there.
I got a temp controller on amazon for $16 and an extention cord at home depot for ~$10, and have some leftover electrical accessories from my previous TC build so YMMV there.
I bought these dehumidifiers on amazon for $32
I bought two converted ball lock kegs from cornykeg.com for $100 with shipping and it was a breeze to clean them even thought they said they would be cleaned already.
I then got a 10lb steel air tank from adventures in homebrewing for $60 which I thought was a steal (steel hehe).
So this puts me close to $900. Which is $300 less than a very DIY-spirited blog post like this says it will cost. Sure I havent bought the last two kegs, but I then would still be $200 short of it.
There are some suggestions by the other guys in here that will save you money, and I'd say that my attempt is a little bit of combining both.
Hope I was some help!
http://www.amazon.com/Elitech-All-Purpose-Temperature-Controller-Thermostat/dp/B008KVCPH2/
Mind the 110v vs 220v before buying.
http://www.youtube.com/watch?v=7I-iwFLykxs
http://www.homebrewtalk.com/f51/ebay-aquarium-temp-controller-build-163849/
I bought the Lerway 110V All-Purpose Temperature Controller for $15 and have had great success with it.
https://www.amazon.com/gp/product/B008KVCPH2
I have this one. I can fit two 5 gallon carboys in there or one 8 gallon. There's a small ledge on the right side which prevents me from fitting two 8 gallons carboys. There is tons of room for bottles, though, and even 2 baskets which hang you could put bottles in.
I got this: http://www.amazon.com/gp/product/B008KVCPH2/ref=oh_details_o03_s00_i00?ie=UTF8&psc=1
To control the temp, which works well as well.
Looks to me like that edge cover should come off allowing you to remove screws or clips to bring down the speaker. You could then see what wires are connected to them and use one of these to trace them back to the termination point.
maybe try getting a tone generator and then sniff out where all the lines lead and label them.
basically get one with the aligator clip and attach it to the cable in question, then go around to all of the outlets in your house with the sniffer and it will make a noise telling you where the signal is coming out.
you'll want to take the splitters off so it doesn't split the tone on to multiple lines.
http://www.amazon.com/Extech-TG20-Wire-Tracer-Generator/dp/B00APD16D2/ref=pd_sbs_indust_7?ie=UTF8&refRID=0XQB5G5BZ1A4G36TP4W3
at least once you have everything labelled you'll know where its all going.
Can you get your hands on a wire tracer? https://www.amazon.com/Extech-TG20-Wire-Tracer-Generator/dp/B00APD16D2?ref_=fsclp_pl_dp_5
You'll need to verify the circuit dead then just attach it and follow the wand. If you want to go totally fool proof just open your main disconnect.
No that's not a tone generator, that's just a voltage detector. It's good for confirming a circuit is dead before touching bare wires and for making sure there's not a wire in a wall when you are about to drill a hole.
This is a tone generator:
http://www.amazon.com/Extech-TG20-Wire-Tracer-Generator/dp/B00APD16D2/ref=sr_1_2?ie=UTF8&qid=1464230762&sr=8-2&keywords=tone+generator
The problem is almost certainly not behind a wall, unless someone put a junction under drywall which is not supposed to be done, or someone put a nail through one of your cables and severed a wire. But that stuff is rare compared to other kinds of problems that don't require ripping out walls.
For the breaker that does nothing, check to see if there's even a wire in it. I would leave it turned off if it was off when you found it, otherwise. You never know if someone left a live wire hanging somewhere stupid.
Also keep in mid that in most cases, when an apartment complex is set up with the ONTs in a common location, like yours, there is typically a Cat5e cable run from each apartment to the ONT room for landline phone purposes. This is very easy to repurpose for Ethernet. Just identify it (you may need a tone and probe kit for this), attach a punch-down Cat5e keystone jack to the end in your apartment, crimp an RJ45 plug onto the ONT end, plug it into the ONT, and call Verizon to have the ONT switched to Ethernet. I did just this for my brother's previous apartment.
No problem!
If you ever need help, feel free to PM if you'd like. I like fixing electrical problems :) Sometimes you need a toner tracer to find where a wire goes. These work by clipping the toner box to the bare wire, which injects a signal into the wire, and the tracer will beep like a metal detector over the wire it's clipped to. Not saying it's a necessary tool, but can be very handy.
I would think that a thorough search of all lights and outlets in the vicinity would solve the mystery. check that the switch is off, find outlets that are off, flip the switch to see if they come on. Seems like you're done that but not exhaustively?
I've got a box similar to this - I could pull the switch out, clip on the generator and literally follow the wire through the wall to its destination. Make sure the switch is off so you aren't tracing supply. And, still sometimes the wire goes right up the wall into the attic and you end up wandering from device to device hunting for a signal.
>I have a home built in 1959 and I believe it must have had a doorbell at some point
Based on what info? Not all houses had doorbells, some had knockers in lieu of doorbells.
>I see some small gauge wiring that looks like doorbell wire going roughly toward the door in the since-finished basement ceiling, but I've not been able to find out where it terminates at either end.
Low voltage wiring could be doorbell, alarm, speaker, irrigation, thermostat......just because you see small gauge wire doesn't mean it was a doorbell wire.
If you're sure that wire isn't used for anything else, I would get a wire tracer, cut the wire in the middle and see if you can find one or both ends. Be prepared to splice it in a junction box if you determine it's being used for something else.
https://www.amazon.com/Extech-TG20-Wire-Tracer-Generator/dp/B00APD16D2/
This is wonderful. I was able to trace a wire through a wall to find a buried junction box in an unexpected location. It's also only $20.
They may even just be hanging behind drywall somewhere. Installers do that sometimes.
You should pick up a wire tracer if you can't find the ends. http://www.amazon.com/Extech-TG20-Wire-Tracer-Generator/dp/B00APD16D2/ref=sr_1_1?ie=UTF8&qid=1414521740&sr=8-1&keywords=wire+tracer
I would look harder for a sort of junction box for the cables for the rest of your house. Get a tool like this one: https://www.amazon.com/Extech-TG20-Wire-Tracer-Generator/dp/B00APD16D2/ref=sr_1_2?s=hi&ie=UTF8&qid=1488242973&sr=1-2&keywords=tone+generator+probe So you can trace where (2 of) the wires are actually going.
If you're having trouble finding them, connect the black lead to a ground wire and you'll start broadcasting the signal, and make it easier to find your tone.
Pickup one of these to trace out the wires. They likely drywalled over them.
Get a wire toner: Extech TG20 Wire Tracer and Tone Generator https://www.amazon.com/dp/B00APD16D2/ref=cm_sw_r_cp_apa_i_Qf4MDbP9GV1ME
(This was the cheapest one, never used it, but I used the cheapest one at harbor freight)
Clip it to the wires at the doorbell button location and turn the sending unit to tone and take the receiver and turn it on and volume up and follow the wire through the walls by following the sound received from the wire
Something such as this, you clip it to a pair of the wires in the room, in the central location use the probe to touch the wires and it will make noise the strongest when you are on the correct wire. Label both ends and then move on the the next drop.
Extech TG20 Wire Tracer and Tone Generator https://www.amazon.com/dp/B00APD16D2/ref=cm_sw_r_sms_c_api_i_-73YDb7XV6KCC
This is a cheap set, but if all you are doing it this one thing, it should work fine.
Compra uma merda destas e vai percorrendo as tomadas da tua casa todas até encontrares o que é responsável pelo consumo elevado. Se não é a pelas tomadas é pelas lâmpadas. Algo aí está a gastar um exagero de energia desnecessariamente.
https://www.amazon.com/dp/B00E945SJG/ref=cm_sw_r_cp_apa_i_d79GDbEETPCEW
Pretty cheap, very useful. It's going to be hard for you to just anecdotally measure. And your property manager is more likely to listen if you send in a problem stating "the fridge is averaging X kwh a day, which is Y kwh over what the manufacturer says is it's normal operating time"
Most hardware stores should have them. Or even Amazon. The kill a watt is a popular brand.
You should use something like this https://www.amazon.com/TS-836A-Energy-Voltage-Electricity-Monitor/dp/B00E945SJG
Then you plugit in to the wall, and plug your rig to the power meter, then you can see how much watt your rig is using
An Arduino Uno is an ATMega328p with header pins attached and a USB programmer.
If you don't know what you're doing, you really shouldn't be messing with mains power.
Here's a commercial power meter.
Here's a project where someone uses that for the purpose you've described.
Okay let's use logic here, every part of the computer has been swapped or changed so we can eliminate the components from the equation.
3 things are left.
Try with a different set of peripherals, clean instal using different keyboard, mouse and monitor.
​
Check the voltage that your outlet outputs into your PSU, I know these units are meant to regulate voltage and this should not be an issue but if it's too important of a variations, even for split seconds, it can damage/render unusable certain components.
​
Make sure you plug everything properly, motherboard 24pins are hard to plug in, make sure it's all the way in there.
Standoffs behind motherboard? Proper power cables to graphics card? PSU strong enough to drive all components?
Any overheating component ^(try) HWMonitor?
​
Maybe formatting isn't getting rid of a ferocious virus created by the lord of pain in the ass himself.
​
So many things can be at cause here, hope this helps, never stop trying you magnificent warrior, those 3 years weren't for nothing!
​
EDIT : My girlfriend mentioned : internet connection. try clean install offline and see if it only happens when online maybe ?
I would almost guarantee it's power related. Especially if you are mining Ethash etc. You will be amazed how different algos draw power. Ethash burns almost 30% more power on the same GPU as Crytponight. Get two of these outlet watt meters $14 each https://www.amazon.com/dp/B00E945SJG/ref=sspa_dk_detail_4?psc=1&pd_rd_i=B00E945SJG&pd_rd_wg=QooCB&pd_rd_r=MM75D80Z5KP5PVS680GJ&pd_rd_w=pV3wH the best money you will spend. Put on each powersupply, remember that you really don't want to run more than 75% of the stated power. If you have 1000W don't pull more than 750-800 max and that is if you are using a top quality power supply. Make sure the power is spread equally, you may need to mix the power to the cards to balance out the power.
my biggest advice - try picking up an appliance power meter and running it on different applicances (especially TVs and washer/dryer) for a day at a time, this will tell you a lot about which appliances are using the most power and will almost certainly pay for itself when you can be more mindful of the biggest users. My suspicion is the electric dryer, especially if it's on the older side.
Both of these devices will let you monitor how much energy your whole house is using, but the big thing about the Neurio device is it can supposedly detect which device is causing the spike in usage. As I understand from reviews it's a work in progress - it doesn't magically work out of the box, but you need to train it against your devices.
Non of these are going to magically help you save energy, I think you'd be better off just trying to figure out yourself what is using so much power (and put the money towards buying more energy efficient devices if you need to). If you want to measure how much power a device is using over a day, something like this will do (and even calculate the cost): https://www.amazon.com/gp/aw/d/B00E945SJG
Your usage works out to be an average of 5kW which seems quite high (US average is about 1/10 of that) but without more details who knows. How big is your house? How many people live there? Do you have electric heating? AC on most of the year? A pool?
Here you go. $18.
Dude, I did the same thing! and then I got one of these guys. Its much better, lol
http://www.amazon.com/BAFX-Products-TM-Decibel-Battery/dp/B00ECCZWWI/ref=sr_1_10?ie=UTF8&qid=1407346303&sr=8-10&keywords=db+measure
This would be a good start. :)
https://www.amazon.com/BAFX-Products-Pressure-30-130dBA-Warranty/dp/B00ECCZWWI/
Hello, reddit,
I think I can break a world record for the... wait for it... loudest pop of the lips. I can create an extremely loud pop with my lips, but I'm sure I need a calibrated, official way to measure that. I don't really know much about the technology of audio, so here's where I ended up. Would a cheap decibel meter record a short instance of sound like that, or would I need something else?
Would a product like THIS help to get the WR for loudest pop of the lips: https://www.amazon.com/BAFX-Products%C3%82-Decibel-Reader-Battery/dp/B00ECCZWWI
Thanks, sound people.
Whenever there's probable noise issues, I recommend being objective. When you're in love with the house, it may not seem "that bad" or "we'll get used to it" but then a year later you're half-insane with the noise.
Buy an SPL Meter and take actual measurements outside and inside the house, write the highest results down. At 60db, it's definitely intrusive. At 70db, you might have to ask your partner to repeat themselves from time to time over the noise. At 80db, it's absolutely annoying, like a running chainsaw. I'd recommend taking measurements at different times of the day, but I don't know if you'll get to do that with a house that you don't already own.
http://www.amazon.com/gp/product/B00ECCZWWI?keywords=decibel%20meter&qid=1450290723&ref_=sr_1_1&sr=8-1
This is what I used
I was thinking of getting one of these http://amzn.com/B00ECCZWWI and doing my best to seal the headphone cups around it and figure out what a safe listening volume sounds like while using something like this as a guide http://www.dangerousdecibels.org/education/information-center/decibel-exposure-time-guidelines/
I am cautious about my hearing at times because I have 15-30% hearing loss in my left year (varies with frequency) and it was quite debilitating when it first happened. I can tilt the audio balance in my headphones to compensate somewhat but it's not even close to the same fidelity as my good ear. 15-30% doesn't sound like much but it's roughly the equivalent of putting a finger in your ear, go ahead try it, see what it's like to be me, lol. The most disturbing thing for me is that I can no longer determine the source of a sound around me. Since the hearing is uneven I can no longer unconsciously distinguish which ear is receiving a direct signal and which is receiving a delayed/decayed reflection and therefore have no idea what direction to look most of the time.
Best ear health tip I ever received was from my ear doctor, he recommended peroxide in the ear canal until it stops bubbling followed by white vinegar whenever my ears are feeling stuffy or a little sore to keep the ears clean and free from infection. I wish he had told me that 20 years ago before my eardrum got all scarred up from infections and caused the hearing loss.
Digital Calipers
Bought this one and works wonderfully.
Funny coincidence... my <$20 caliper suffered a tragic "accident" in the shop today and is now NFG.
Here's a video that compares a bunch of digital calipers. If you don't want to spend $120+ on a Mitutoyo caliper, it sounds like the iGaging calipers are almost as good for less than half the price.
I just ordered the iGaging Absolute, expecting it to be decent.
I have one of these (https://www.amazon.com/iGaging-ABSOLUTE-Digital-Electronic-Caliper/dp/B00INL0BTS) as well as a Mitutoyo (along with the piece of crap in the gif).
The iGaging is absolutely amazing for the price and feels pretty much the same quality as the Mitutoyo.
But without a doubt if you have some cash to splash, get the Mitutoyo Digimatic.
Mitutoyo is the right answer. You can't go wrong there.
If you want a cheaper solution, I've heard good things about these:
https://www.amazon.com/dp/B00INL0BTS/ref=cm_sw_r_cp_apa_02MAyb2RWWRKM
I've used many pairs of $10 calipers and sometimes they work fine. When they don't it's pretty disappointing. What might you waste/ruin by cutting something the wrong size? How long would it take to make back the extra $30? $100?
I like the igaging stuff. iGaging ABSOLUTE ORIGIN 0-6" Digital Electronic Caliper - IP54 Protection / Extreme Accuracy https://www.amazon.com/dp/B00INL0BTS/ref=cm_sw_r_cp_tai_ZQERAbVQDZTS9
It’s won a lot of caliper shootouts on YouTube.
Chamfer/deburr - the two you have listed fit on a case prep machine that I don't see listed. One like this, made by every manufacturer, is all that is needed https://www.midwayusa.com/product/465641/rcbs-chamfer-and-deburring-tool-17-to-60-caliber or https://www.midwayusa.com/product/171844/hornady-deluxe-4-blade-chamfer-and-deburring-tool
For a bench priming tool, this one https://www.midwayusa.com/product/457599/rcbs-automatic-bench-priming-tool is more highly reviewed, and the one I use now. First 15 yrs I primed on the RockChucker press. Or get a hand-primer as suggested. Got extra space on your bench, get it. Wanna watch TV and prime, get a hand tool. Up to you really.
And get the shorter handle for the press https://www.midwayusa.com/product/528383/forster-co-ax-single-stage-press-short-handle , much easier to work with. I do 7mag, .270, 30-06, and haven't felt the need for the unwieldly standard longer handle yet.
This guy makes a much better set of jaws for the press. https://www.youtube.com/watch?v=9BpFD7NbvL8 . Worth it? Take Forsters jaws on/off a few times. Then you'll say YUP. I'm honestly surprised Forster hasn't bought this guy out or designed their own like this.
One thing I have found with the Forster press vs O-ring presses, is that the Forster forces you to sit more in front of it, to facilitate 2 handed operation, and thus slightly farther away from the workbench. The O-ring style presses are more open to your left hand placing and picking up cases. Lefties gotta work at it with O-ring presses. I managed to angle my press slightly on my bench to minimize this realization.
As u/unrulywind mentioned, a decapping die is nice to have so you can remove the primer, clean the case, then get to work without getting any grit into your dies, my choice https://www.midwayusa.com/product/211699/hornady-universal-depriming-and-decapping-die
As for neck sizing dies, they are something you could get later if you find a need for it. I'd wait until you are more familiar with the process, and then go with a bushing bump neck die like Forster makes https://www.forsterproducts.com/product/bushing-bump-neck-sizing-dies/ , or a Redding https://www.midwayusa.com/product/1018049293/redding-type-s-bushing-full-length-sizer-die . If you're going down this rabbit hole you would probably want to get a good neck turner/reamer https://www.midwayusa.com/case-neck-turners-and-reamers/br?cid=10455 . But going down this rabbit hole this early on is not necessary. Most never do. Aren't most of the bench-rest guys going with full length sizing now?
And as u/-RicFlair mentions, the comparator tools would be more useful to you earlier on than the neck sizing/reaming tools. This is the comparator body with bullet ogive inserts. https://www.brownells.com/reloading/measuring-tools/bullet-comparators/lnl-comparator-body-w-14-inserts-prod36535.aspx . You should be able to find just a body and a .30 cal insert. And then these fit the same comparator body but measure shoulder bump https://www.brownells.com/reloading/measuring-tools/bullet-comparators/sinclair-bump-gage-insert-prod35265.aspx . Just for clarity, all this paragraph attaches to your caliper tool, so as u/-RicFlair also mentions, this is a reason to have 2 or more calipers. I have one dial caliper (never needs batterys) and one electronic which makes it easier to zero-out the comparator body + insert, so you're getting true lengths without having to perform subtraction, or re-zeroing a dial caliper.
This electronic caliper has been found to be accurate and inexpensive and the one I use https://www.amazon.com/iGaging-ABSOLUTE-Digital-Electronic-Caliper/dp/B00INL0BTS/ref=sr_1_1?ie=UTF8&qid=1525514664&sr=8-1&keywords=origincal . Keep extra 2032 batteries around! They give an extra battery in the case, but you don't want to be caught without. It matches up with my more expensive Brown & Sharpe dial caliper exactly, so far.
All my new cases also get prodded once with this tool https://www.midwayusa.com/product/729748/lyman-flash-hole-uniformer-tool . And after every firing (or 2) with one of these https://www.midwayusa.com/s?userSearchQuery=primer+pocket+cleaner&userItemsPerPage=48 . Note that the steel pin wet tumblers will clean this debris out, but the tool is so cheap why not have a manual version for those once off/extra dirty times.
Case cleaning: 4 choices in approx $ low-\>high - wipe by hand cloth - dry media tumbler - sonic solution wet vibe - steel pin wet tumbler. The last one is the latest invention and the one to go to if you want/need shiny clean. https://www.cabelas.com/product/shooting/reloading/case-cleaning/pc/104792580/c/104761080/sc/104661180/platinum-series-rotary-tumbler-l/1811194.uts?slotId=0 Does an amazing job. Do you want to wet tumble every time? Perhaps not, so one of these is the original standby https://www.cabelas.com/product/shooting/reloading/case-cleaning/pc/104792580/c/104761080/sc/104661180/thumlers-tumbler-ultra-vibe-tumbler/705516.uts?slotId=8 . Still using the one i got since um lets see 1972ish, so wow, yeah 46 yrs ago. LOL. I won't recommend any other dry media tumbler.
Powder measure - can't go wrong with something like this https://www.midwayusa.com/product/759813/redding-match-grade-3br-powder-measure-with-universal-metering-chamber . You might need a stand to go with https://www.midwayusa.com/product/552580/redding-rs-6-powder-measure-bench-stand . I see that Redding has come out with a few more powder measures since I last gandered at them, so pick what u want.
Powder Trickler - https://www.midwayusa.com/powder-tricklers/br?cid=9212 your pick, they all should be decent, but I'd pick the Frankford first, RCBS 2nd. $20 ish. The Redding is too short, don't know why they haven't realized it yet. Still good, but theres better for your money.
Powder funnel - https://www.midwayusa.com/s?userSearchQuery=powder+funnel&userItemsPerPage=48 . You can buy the pricey aluminum ones if you must have the best of the best, but the $5 jobbers have been doing the same job for a long time too, for the other 99.5&#37; of us.
Scale - find an old used Lyman M5 or RCBS 505/510/1010 on ebay. Seriously. The ones that were made in good ole USofA. If it doesn't work to your satisfaction, there is a guy here that will re-tune to better than original. http://bulletin.accurateshooter.com/tag/scott-parker/ . Or get an elec/batt scale. People seem to like the RCBS ChargeMaster https://www.cabelas.com/product/RCBS-reg-ChargeMaster-Combo/741110.uts?slotId=0
Pick up another couple reloading manuals, Hornadys and Noslers. You can find bullet/charge weights online too, but say power or internet goes out, you've nothing to do, so may as well reload some. You want to pick another load to work up. What do? One manual is not enough.
Also useful to find an older volume of the same manuals at gunshows/shops in your area. I think Hornady is up to 10th ed. Find a 2nd or 3rd ed. to see how much the lawyers have caught on to our game.
I know Forster is still made in USA. I think Redding and Hornady too. But RCBS has left this shore and it shows. Thats why my money goes to the first 3. You can't go wrong swapping their versions for what I've suggested here.
When you have another wad of cash burning a hole in your pocket, and you've digested what you're doing thus far, there are other gauges/accessories/rabbit holes to fall into and spend your hard earned dough on. Hit me up, I've got more suggestions.
Gotta like spending other peoples money !!!!
This is the caliper that I bought:
https://www.amazon.com/gp/product/B00INL0BTS/ref=oh_aui_detailpage_o07_s00?ie=UTF8&amp;th=1
I wish I bought a 3mm hexdriver so that I did not have to use the hex key.
My biggest tip would be to pre-install or thread the screws in first when installing any screw to the frame. The threads need to be cleaned of the powder coat. This will make installing anything to the frame go much smoother.
Other than that use the online manual read the directions clearly and read the comments, they are very helpful.
I've got these at work, they lay flat.
https://www.amazon.com/gp/aw/d/B00INL0BTS/ref=mp_s_a_1_7?ie=UTF8&amp;qid=1517528088&amp;sr=8-7&amp;pi=AC_SX236_SY340_FMwebp_QL65&amp;keywords=Digital+caliper&amp;dpPl=1&amp;dpID=51r2J68iW3L&amp;ref=plSrch
EDIT: I really suggest staying away from plastic calipers. There are metal calipers that are similarly priced and will last much much longer and are higher quality.
I usually recommend these from Harbor Freight because they do fractions:
https://www.harborfreight.com/6-in-digital-caliper-with-sae-and-metric-fractional-readings-63731.html
And these from Amazon because the quality is much higher for a very good price, but they don't do fractions.
https://www.amazon.com/gp/product/B00INL0BTS
I use both depending on what room I'm in.
I started with a pair from harbor freight, but then decided I wanted something a little more substantial, so got these off of Amazon - https://www.amazon.com/gp/product/B00INL0BTS/ref=oh_aui_search_detailpage?ie=UTF8&amp;psc=1 and moved the HF pair out to the garage. These iGaging ones do feel more substantial.
OP, it’s possible your current sensor isn’t getting data through properly. How fast does it actually charge? It may be useful to pick up a cheap USB current & voltage meter. I got a nice one and I have used it countless times.
[Cheap](USB Meter, DROK Digital Multimeter USB 2.0, Multifunctional Electrical Tester, Capacity Voltage, Current Power Meter Detector Reader with Dual USB Ports, LED Displahttps://www.amazon.com/dp/B00J3JSEG6/ref=cm_sw_r_cp_api_i_ss8IDbE6C7JCJ)
[The one I have with unlimited useful tools. ](AVHzY USB Meter Tester Multimeter USB Load Current Tester Voltage Detector DC 26.0000V 6.0000A Test Speed of Charger Cables Capacity of https://www.amazon.com/dp/B073R7YRM9/ref=cm_sw_r_cp_apip_Gc6nVKprYh32G)
It sounds like you need a USB meter.
Can you move to a different port? Maybe the RTL is drawing too much power? These's a USB test tool that will show you the voltage/current of a device. I use https://www.amazon.com/DROK-Digital-Multimeter-Voltmeter-Capacitance/dp/B00J3JSEG6/ref=sr_1_6?ie=UTF8&amp;qid=1492270966&amp;sr=8-6&amp;keywords=usb%2Bvoltage%2Bcurrent&amp;th=1
Usually different USB ports on the same external battery have completely different amperage outputs. I guess just make sure that you are always using the highest amperage output. One thing that you could do is buy a voltage and current meter from Amazon they're like $7 to watch the power flow through your USB and you could test.
DROK&reg; Dual USB 2.0 Digital Multimeter Ampere Voltage Capacity Power Meter 7 Modes Monitor for Fast Charging Data Sync DC 3.2-15V 0-3A Volt Amp Charger Detector Mobile Solar Panel Alignment Tester https://www.amazon.com/dp/B00J3JSEG6/ref=cm_sw_r_other_awd_XzJDwb5JV4VB4
You mentioned the basics... how about electricity? I'm specifically thinking of a portable solar arrays, and some multipurpose chargers, batteries devices. Here are a few links of interest:
Super portable 21Watt version that has USB outs:
http://www.amazon.com/dp/B012YUJJM8/
Bigger model but capable of charging 12Volt batteries (I'm thinking trickle charging a car battery):
http://www.amazon.com/Charger-Backpacking-Battery-Foldable-Cellphone/dp/B00VBSFT74/
Multimeter for displaying power output:
http://www.amazon.com/dp/B00J3JSEG6/
(useful for positioning the solar cells for best power)
ThruNite U1 charger and battery; acts as not only a charger for NiCad, NiMH, and Li-Ion cells of varying sizes, but also (drum roll) can be used as a USB powerpack:
http://www.amazon.com/ThruNite-Charger-1x3400mAh-Multifunction-Portable/dp/B00WFXWUOE/
Then, standardize on lights that use 18650 cells as they're way, way better than NiMH (higher power, better capacity, longer life):
http://www.amazon.com/Bundle-Nitecore-Rechargeable-Flashlight-EASTSHINE/dp/B00VG1J8S2/
Oh, random idea... small stove that'll burn wood and comes with a backup alcohol burner:
http://www.amazon.com/dp/B0088FVZZI/
These are pretty handy and not too expensive.
https://www.amazon.com/gp/aw/d/B00J3JSEG6/
The hub working simply just as a hub, adding more ports and a conduit for the signals, is different from powering external devices. And so any hub will work with the pi. That being said, I run non powered $4 4 port hubs on a pi zeros and it can run keyboard, mouse, wifi dongle and web cam. I have never needed a hub for my B+, 2's and 3's doing all that as well. Short of running a dvd burner or charging other devices how much power do you really need? You can figure it out with one of these DROK meters. So all hubs work with the pi, the question is really how much power you actually need.
Get yourself one of these if you want to know what your charger is doing. Use a current monitoring widget to see if it is getting to the phone. I have had good luck with Anker chargers in general, but for a Quick Charge capable device it has to be the real thing. Qi chargers are cool, just watch the temperature. They can get hot. Letting you phone sit around at 100% too much is not great for the long time life of your battery.
Thermal optics are now $200
http://amazon.com/dp/B00NYWAHHM
The FLIR One is upcoming as well, probably for a similar sort of price.
Here you go.
Thermal cameras are decently inexpensive when paired with a phone.
Seek Thermal Camera
It won't have the clarity of the picture you posted, but it'll give you an idea.
I would not be surprised if this still happened but this practice was outlawed in the US in 2001 by US Supreme Court decision under the 4th Amendment as an illegal search.
https://en.wikipedia.org/wiki/Kyllo_v._United_States
The problem now was that since infrared cameras were not commonly used in the late 1990's by the public when the bust was made in the case that the search would be "presumptively unreasonable". Today thermal cameras for a phone starts around $200 and are becoming popular.
https://www.amazon.com/Seek-Compact-Thermal-Imager-Android/dp/B00NYWAHHM
A few thousand watts can still be reasonably hidden if the exhaust from the lights is vented underneath the house if one were that paranoid. It's really not an issue for small to medium sized grows.
I've purchased those in the past and was disappointed with the results. I don't think it is worth slapping onto a nexus 7. You mention IR filters in a reply. You need a special sensor to get an IR image beyond what is found in most mobile devices. There's this:
https://www.amazon.com/Seek-Thermal-Compact-Imager-Android/dp/B00NYWAHHM
But, it's a pricey bit of tech.
you can rent a thermal imager from home depot in brooklyn or buy this http://www.amazon.com/Seek-Compact-Thermal-Imager-Android/dp/B00NYWAHHM
Based on the watermark, I would assume he has a consumer device like this: https://www.amazon.com/Seek-Thermal-Compact-Imager-Android/dp/B00NYWAHHM
Maybe it's this thingy? https://www.amazon.com/Seek-Thermal-Compact-Imager-Android/dp/B00NYWAHHM
FLIR is a brand, a thermal camera is what you want. FLIR makes a mobile phone attachable units, but I personally went with the Seek brand and have been happy with it.
(I bought this model for $168 but it has gone up drastically since then. I'm guessing there's a newer model that is in the same price range?)
https://www.amazon.com/gp/product/B00NYWAHHM
As another user suggested I’d get a FLIR cam and see exactly where heat loss is occurring. You can get ones fairly cheap that connect to a smart phone.
https://www.amazon.com/gp/product/B00NYWAHHM/
I'd buy or rent one of these, turn on circuits, pull off cover panels on junction boxes and look for hot spots.
You might want to get one of these then: https://www.amazon.com/Tonor-RJ45-Network-Cable-Tester/dp/B00OUFX38W/ref=sr_1_1?ie=UTF8&amp;qid=1474654003&amp;sr=8-1&amp;keywords=ethernet+tester
It's cheap and it will tell you if the pins are still connected. Hopefully if it's broken, it's at one of the terminations and not somewhere in the wall.
Get a cable tester, and find out where the issue is. I have this one
It is either the switch, the line to the patch panel (if you have one), the line in the wall between the switch or patch panel to the office outlet, the line from the outlet to the PC, or the PC itself. Rule them out one by one. Once you find where the issue is, you can try to figure out what the the issue is (bad cable, loose connections, improper termination etc.)
Yeah, I can see what you are trying to do now a bit better. That would work and the connector you found will do the trick. I think it is a great idea. As long as you know that the cables are put together with that junction box and when it comes time to do anything that might disturb them be careful, there's nothing wrong with using them. I might even try to find a place in the attic to screw them down, keep it up out of the insulation and out of the way of storage. When running the cable to the office, give yourself about 5 to 10 ft of slack so you can move the junctions if you need to in the future.
The only concern I would have is the cable the contractor is running, is it spliced anywhere? If it is intended for phones, is it terminated and daisy chained (no problem for phones but bad for data but would probably still work just cause problems every now and again) anywhere?
There are some very cheap cable testers on the internet ($5) , I would get one and see what I was working with. Those testers will let you know if there is a break in any of the 8 wires inside a ethernet cable. Plus you can rule out the cable if something isn't working.
Edit: cheap cable tester
If you aren't even getting Blinkenlights on multiple devices, the cable is either unplugged at the router end, or dead. If you want to be 100% sure, you can grab a cheap RJ45 Cable tester off amazon for $10. Ethernet cables, especially long runs that are getting moved around and aren't properly sent through the walls, do go bad from time to time.
It's possible not all 8 of the wires are making proper contact.
Networks try and be resilient: if there's a blockade, try and route around it, if there's a network cable problem, try and use what you do have left.
Cat 5e has 8 wires. To get full 1000mbit/s speeds, you need all 8 of those intact and working to spec. If you're missing one or several, the speed will fall down to 100mbit/s or slower.
A simple cable tester like this only costs a few bucks and is absolutely vital when running your own network cable.
More than once, I've dealt with contractors (I'm a sysadmin) who check to make sure that a network drop is working simply by plugging a laptop into one end and a switch (which is usually already present) on the other, and see if it connects. More than once, I've given them a simple cable tester like that, after showing them that the local network only supported 100mbit/s (instead of 1000mbit/s) because e.g. only 7 of the 8 wires were making proper contact.
Alternatively, it's possible that the "bridged router" (whatever the fuck that is) has issues. Why not just get a simple gigabit switch (like this) if you want to connect the cables?
By the way, if you're worried about the cable being too long (100m is the absolute hard limit, according to the spec), just put a simple switch halfway, that'll reset that limit, in this case giving you e.g. a 40m cable and a 60m cable, either of which are fine.
If there are no problems with your cables, you should have zero packet loss. If you're staying within spec (no cables longer than 100m) and your cable isn't broken anyway and the plugs are connected properly, you should have zero packet loss. Especially when staying on your own network (e.g. pinging the router or another (wired) computer in the same house.
I've been using this one for months with no issues. It's cheap and easy to use.
Correct me if I'm wrong, but you have your modem in another room, where you get 110 Mbps, and then you have a wired connection to your room where you only get 42Mbps?
Well, to answer your question in the edit, no degradation is supposed to happen over 100 ft of cable. Maybe it's wired wrong, I would get a cheap cable tester to make sure there aren't any crossed wires.
If you are running CAT cable around the house, you will probably want to run all the cable to a common point where they can connect to your patch panel, switch(es), servers/NAS and routers. Most people locate this place out of the way in a basement, to hide the clutter.
If you are running CAT cable you should really use CAT6A which is certified for 10G speed. CAT6 is not a standard. CAT6A is. I used shielded CAT6A. You should buy a spool of solid CAT6A wire that you can cut to specific lengths.One end gets wired to a keystone jack that is usually mounted in the wall of where you need to connect something. The other end is wired to the patch panel. The patch panel has normal jacks that you would use with regular premade patch cables to connect to switches which then connect to the server/NAS/router, etc.
Examples and tools needed:
CAT6A structure cable: https://www.firefold.com/064-series-cat6a-shielded-cable
Patch Panel: https://www.amazon.com/gp/product/B00AQL46TY/ref=oh_aui_detailpage_o06_s01?ie=UTF8&amp;psc=1
Small Rack to hold patch panel and switches (servers would need bigger rack):https://www.amazon.com/gp/product/B000VDPBXM/ref=oh_aui_detailpage_o06_s00?ie=UTF8&amp;psc=1
keystone jacks: https://www.amazon.com/gp/product/B00CLVAJCK/ref=oh_aui_detailpage_o06_s03?ie=UTF8&amp;psc=1
Wall plate mounting bracket: https://www.amazon.com/gp/product/B003JQL0S8/ref=oh_aui_detailpage_o05_s00?ie=UTF8&amp;psc=1
Keytone wall plate cover: https://www.amazon.com/gp/product/B0072JVUPG/ref=oh_aui_detailpage_o06_s02?ie=UTF8&amp;psc=1
Tools:
Punch down tool:https://www.amazon.com/gp/product/B0000AZK4D/ref=oh_aui_detailpage_o06_s02?ie=UTF8&amp;psc=1
LAN Cable tester: https://www.amazon.com/gp/product/B00OUFX38W/ref=oh_aui_detailpage_o06_s02?ie=UTF8&amp;psc=1
If you can splice a few wires yourself, here is a cheaper option for temp control. You would still need to buy a couple of extension cords, and a heating element (I use a light bulb in a paint can). Set up a search alert on Craigslist for a cheap fridge or chest freezer and you are in business. If you are looking to go super cheap, your best bet is to submerge your carboy about 3/4 of the way in water, add ice, and wrap a towel around the top of the carboy to encourage evaporation. You really have to stay on top of the ice though.
I'm looking to build my ferm chamber in the next several months. So far the only components I have are a mini fridge and this Inkbird Temp Controller. I was planning on using OSB sheathing for the walls, lined with foam board insulation, and throw in a 60 watt bulb for a heat source and perhaps a small fan to circulate the air.
I'm pretty handy. I do a lot of home/auto repairs myself so I imagine this will be a pretty simple endeavor, but what are some common pitfalls/mistakes that people make when building these things?
Buy this. plug your induction stove top into it. You'll have to do a little wiring. It comes with a little temperature probe. Put that in your water bath. It will turn the power to you device off when you reach the target temp and back on when the temp dips below the target.
To make sure this will work turn on your induction stovetop, unplug it from the wall, plug it back in. If it heats up again after you plug it back in then it will work. If it doesn't heat up again then it won't work.
Can I recommend a different thermostat? I think you would be much better off with an STC-1000, with a probe that can be immersed in the beer with a thermowell, or stuck on the side of a carboy/bucket. They are really cheap, and easy to wire. It needs 120v to power the unit, and then you can switch the input voltage for the fan with the built in relays.
If you ever wanted to add a heater it would be easy too.
The [Inkbird](https://www.amazon.com/dp/B00OXPE8U6/ref=cm_sw_r_awd_spS8ub02194G2
https://www.amazon.com/dp/B00OXPE8U6/ref=cm_sw_r_awd_spS8ub02194G2) seems to be a pretty great option that has F instead of C
Probably, but the temp probe is not waterproof.
This is what I use. It's a bit diy
http://www.amazon.com/gp/aw/d/B00OXPE8U6/ref=mp_s_a_1_1?qid=1458699099&amp;sr=8-1&amp;pi=SY200_QL40&amp;keywords=stc+1000&amp;dpPl=1&amp;dpID=41qoIapm7VL&amp;ref=plSrch
This guy is for sale on Amazon right now for less than $15 and is in Fahrenheit:
https://www.amazon.com/gp/product/B00OXPE8U6
I actually converted my mini fridge into a wineador. You'd want to invest in a ETC (temperature controller) to keep the temperature at an ideal level for your cigars. Make sure to get an airtight tupperdor so you get no condensation and a few bovedas to control the humidity. Try it out with what works best for you for a few days and then put your cigars in. Hope this helps!
I bought mine in Germany, but they have the same one on amazon.com.
http://amzn.com/B00OXPE8U6
There are quite a few with different brand names, but they are all made by the same company, mine was branded 'Tinxi'.
For the plug and connection [to crockpot] I just cut an extension cable in half and attached either end to the relevant terminals.
And I use a pump a little similar to this: http://amzn.com/B00NPJECXO.
The crock pot is only 200W so it takes a while to get to temperature, but you can use something more powerful like a rice cooker or start with hotter water.
It's great for making yoghurt in jars too.
Just need a better vacuum sealer, any suggestions?
For temp control, you want something like This to control your heating/cooling, and a Carboy Wrap to heat your FV up.
If you get a thermowell you can put the temp probe down in your fermentation vessel, rather than just taping it to the side - you'll get more accurate readings. Downside is you can't set up a proper 1" blowoff hose, and counter-intuitively the first few days of fermentation (When you really need a blowoff hose) are the most critical to temp control (Based on what I've read in other threads here)... Might work well if you get a 6.5 gallon carboy, and do 5 gallon batches in it, so you've got extra head space for all the krausen. You can also use some standard size siphon hose as a blowoff, it's just more prone to clogging than 1" hose.
What's your ventilation in the box like? If you are constantly pulling air in/out, a programmable thermostat may be your answer. Connect it to your fans, tell it to only kick on at 76 degrees (it'll turn on at 79, and cool down to 75, then shut off--and you can set it to whatever temp and number of degrees you want). For me, that means fans on about 1/4 of the time. The off-time will let your plants create moisture for you. I'm in the same ambient RH situation, but have no issues by just keeping the exhaust off except when needed.
If you get a minifridge make sure your fermenter fits in it otherwise you might have to build a collar.
Then just plug the fridge into a temperature controller, like the one linked below and tape the temperature probe to your fermenter. Set the temperature and you're good.
https://www.amazon.com/Inkbird-Itc-308-Temperature-Controller-Thermostat/dp/B011296704/ref=mp_s_a_1_3?ie=UTF8&amp;qid=1524708569&amp;sr=8-3&amp;pi=AC_SX236_SY340_FMwebp_QL65&amp;keywords=temperature+controller&amp;dpPl=1&amp;dpID=417y0W4HFmL&amp;ref=plSrch
This one: https://www.amazon.ca/Inkbird-ITC-308-Temperature-Controller-Thermostat/dp/B011296704
Where did you see the 15A? That'd be an incredibly high load for a mini fridge. I really doubt so. Probably closer to 5.
Screw the Johnson btw, check out these for half the cost and nicer: https://www.amazon.com/Inkbird-Itc-308-Temperature-Controller-Thermostat/dp/B011296704?ie=UTF8&amp;*Version*=1&amp;*entries*=0
Eh, what happened?
can you return it and get this one?
https://www.amazon.com/Inkbird-Itc-308-Temperature-Controller-Thermostat/dp/B011296704
$39. www.amazon.com/dp/B011296704/ref=cm_sw_r_wa_apa_8wczxbFDAWQ8W
$39 https://www.amazon.com/Inkbird-Itc-308-Temperature-Controller-Thermostat/dp/B011296704/ref=sr_1_2?ie=UTF8&amp;qid=1465921855&amp;sr=8-2&amp;keywords=temperature+controller
Great plug & play controller with heating and cooling
Wow, really interesting work you're doing. I know a little bit about the challenge of your garage grow. I live in a temperate climate that requires both heating and cooling, and my grow space started in an uninsulated 8'x12' shed. I framed off the rear third of the shed, insulated the hell out of it, and equipped it with automated temperature control. My final space is a 3x5 flower area and a 2x3 veg/seedling area. I don't have a great relationship with computers, so I took a more low-tech approach to my controls. I used an Inkbird temperature controller to control heating/cooling switching. I then ran the cooling output of the Inkbird through an old Honeywell temperature controller which monitors outside air temperature and selects between blower or AC cooling. If the ambient temperature is below 65 degrees, the blower is used for cooling. Above 65 degrees, a little AC unit does the cooling.
When I was researching and brain-storming my grow-space build, I considered using a tent. Tents are not well insulated, obviously, so it crossed my mind to put a 3x3x6 tent inside of a 4x4x6.5 tent, with a 4x4 sheet of plywood atop rigid foam to insulate the floor. I believe that the 6" air-gap created by this arrangement would be a pretty good insulator.
Edit to add: Here is my build, if you are interested.
Question One: Fridge Temperature Control
There are several different units available to adjust the temperature of your fridge. The Johnson Controls A419 will control only cold (or heat if rewired), but the Inkbird ITC-308 will control both cold and heat.
I’ve used both and the Inkbird better fit my needs and is less expensive by more than half. There are other options available as well. Google something like “temperature control unit homebrewing” and you have plenty to read. As for wiring your own, I’m sure it’s possible, but I have no expertise in doing so.
Question Two: Carbonation Pressure
There are many different ways to carbonate your beer and several different gas blends available. Oxygen is not a good choice, as it will cause your beer to oxidize quickly - this common tastes like wet cardboard smells.
I only use carbon dioxide (CO2), but I do draft line consulting for a bar that uses a “beer blend” of 80% CO2 and 20% nitrogen. I can’t taste a difference and it pours the same, but that gas blend costs a little more. There may be other reasons to choose a specific blend that I am unaware of.
As for carbonating your kegs, what you described sounds like burst carbonation. Brulosophy has a great write up on different carbonation methods. I normally use the Set It And Forget It method, but will use the Burst method if I’m in a rush.
Question Three: Infusions
Not sure if you mean infusing the beer with flavors in the keg or glass or if you mean adding fruits or other flavors during fermentation.
To infuse in the keg, I use a mess bag to keep the liquid diptube from clogging. To infuse in the glass you can use a coffee press or even a Randall The Enamel Animal.
As for adding things to fermentation, fruits, hops, oak, spices, and liquor all make good additions to the right beer. Google phrases like “beer infusion recipes, “adding fruit to fermentation,” and “keg dry hopping” for more information.
Happy home brewing and good luck. Kanpai.
You can find a chest freezer on Craigslist for almost nothing.
I use this tiny space heater for heat. It turns off automatically if it gets too hot, so I’m not worried about it burning down the garage, and it works really well. And everyone loves the Inkbird ITC-308. It’s cheap as all hell and has separate plugs for heating and cooling. That’s pretty much everything you need.
You can need one temperature controller. Try this one
https://www.amazon.com/dp/B011296704
Welcome to homebrewing!
For that stout you probably want to be around 67, but your beer is fine, don't worry! Higher temperatures can impart off flavors, but at the temperatures you are at, your beer should taste just fine. I use this attached to a wine fridge or chest freezer, and it works wonders for keeping your fermentation temperature consistent (plus you can make lagers).
Cold crashing improves clarity, which is not a big concern for a stout so i wouldn't worry about it for now, it is totally not necessary.
Both of those beers would be good, and there is nothing wrong with extract brewing/kits, don't let anyone tell you different! That being said, i switched to biab (all grain) and have enjoyed it more and gotten better beers.
Lastly, as you get deeper into brewing water will become more of a concern, but for now don't worry too much about it. Grocery store water has two problems. First, you don't know whats in it, though some water companies like crystal geiser post the info online. 2. If it is distilled/reverse osmosis/filtered it will not have much of any minerals which you might want in your beer. Calcium, for example, is important for great beer, though you can add gypsum salt to your water to give it the calcium content you might want.
cheers and good luck with your new hobby, its very rewarding and a lot of fun. let me know if you have any questions and ill try to share my (limited) knowledge
I've not seen that one! I use an inkbird unit:
https://www.amazon.com/dp/B011296704/ref=cm_sw_r_cp_awdb_qF45yb97BVBV0
It works just fine with the Crock-Pot. I've done a few steaks, a couple 36hr+ bacon cooks, chicken and veggies.
I use this for my aquariums, but it also works for measuring air temp. It even has an alarm in case your heating system ever starts to lose the battle against the cold air. You could also use it to control a ventilation system in the summer to keep it from getting too warm.
EDIT: The actual temp you target will probably depend on how well you get that thing sealed up and how much firepower you put into the heating system. You could create an overpowered system that can maintain room temp and then set it to exactly what you want, but you could also go for efficiency and design it to maintain just above 50F on the coldest nights. That said, you'll have lots of warning if your system won't be able to tolerate the coldest days of the year as long as you pay careful attention.
Plug your heat Mat into this
This device will only turn the heat mat on when the temperature of your mead drops below a set temperature
Something like this.. Temperature Controller will allow you to turn your freezer into a refrigerator. I brew beer and that is a common way to store kegs in a chest freezer. might work well in your case
Going to be turning a freezer into a fermentation chamber soon (I hope). This is the temp controller I'm looking at:
https://www.amazon.ca/Inkbird-ITC-308-Temperature-Controller-Thermostat/dp/B011296704/ref=sr_1_1?ie=UTF8&amp;qid=1493653514&amp;sr=8-1&amp;keywords=inkbird
Do I need to rig up an old extension cord or anything or will this thing be ready to go right out of the box?
I feel like I'm becoming a shill for this product, but I see these questions and always feel like its worth a mention.
ITC-308
Heating and cooling, pre built, no fuss. I think there's a six stage version in the works, but I'm not sure.
Hope that helps!
I have one of these, and it works fantastic for controlling the temp in my crock pot.
http://www.amazon.com/Inkbird-Itc-308-Temperature-Controller-Thermostat/dp/B011296704/
Just use an older style crockpot with a manual knob and not electronics.
And I've noticed that too, my old crockpot I bought at goodwill would let you slow cook chili. My new one will boil it, even on the warm setting. I hate it.
> "the danger zone"
LANNAAAAA
https://www.youtube.com/watch?v=kyAn3fSs8_A
If he's an extract brewer, upgrading to an all-grain setup would be fun. Mash tuns, ported brewing kettles with temperature gauges and sight glasses, a nice gas burner or an all in one BIAB setup like the Unibrau or Wort Hog (especially if you have 240V power available, though 120v options are available). The latter two hit just around $1000 themselves but are ready to go out of the box.
If he's already an all-grain brewer in either multi-vessel or BIAB (or even if he's not), does he have a kegging setup? A good size chest freezer (consult the chart here for model numbers that fit the right number of kegs), a 4 pack of kegs with connectors, a gas manifold, a CO2 cylinder, and an Inkbird temperature controller will fall neatly within the budget range and is a significant "luxury" upgrade to buy all at once.
Already got that? He's probably already got fermentation temperature control if so, but if not, it's a nice one. This option tends to be the most awkward to just buy off the shelf and the temperature controlled conical fermenter I'm seeing runs around $1800, so its a bit out of budget. Again, a fridge or freezer with temperature controller are nice. I'd advise against a conical unless you know it will fit into his fermentation chamber. They are super sweet but they require a setup built with them in mind.
Already got all that? Ok, we're into the hilarious luxury items now. A reverse osmosis water setup? A high end pH meter? A giant stainless steel sink in his brewing area with one of those nifty shower head things for easy water filling and cleaning? A barrel of some kind for ageing? Can't help you past here, I'm too poor!
Badabing!
Inkbird Itc-308 Digital Temperature Controller Outlet Thermostat, 2-stage, 1100w, w/ Sensor https://www.amazon.com/dp/B011296704/ref=cm_sw_r_other_apa_xPpgyb5DPMEDA
[This guy] (https://www.amazon.com/gp/product/B011296704/ref=oh_aui_detailpage_o02_s01?ie=UTF8&amp;psc=1)
It's awesome for keeping everything the right temp, humidity I use a shitty little monitor inside which can give a better reading of what the plants feel.
More of an electrical engineering question, but I feel like you guys would provide me with a better answer.
After doing a lot of research the past week, I found many guides on how to assemble a Freezer-Chest-Fermenter. I am using this temperature controller, and I just want to make sure I set it up correctly.
From what I can understand (PLEASE CORRECT ME IF IM WRONG), this tool lets me set a temperature and a range, and will heat or cool if necessary to reach that destination temperature.
If that's the case, what my plan is, is to plug the Chest Freezer into the "Cooling" out, and a small space heater into the "Heating" outlet.
So my two questions... Is my idea on how this works correct? And would my plan work? Or should I get something other than a space heater?
What's the unit of measurement for your dimensions?
If you want to go super cheap, I imagine you could could get a temperature regulator (two outlets and 1 temp probe); you could run a dedicated fan next to a space heater to keep the temperature moving around the space, while the probe sits somewhere in the middle of the room. You can set a temp range where on the low it would pop on the heater, and when it hits the top temperature it shuts off (and you could attach another fan in another part of the room/wall of the incubator to the other outlet which would switch on once it hits the top of the temp spectrum you hit to promote ventiliation and more quickly cool it down).
The space heater I suppose would be overkill for a 2 foot container, but if it's 6 feet (meters) it would be a lot. You could even scrap the extra fan by getting a heater that oscillates with a fan and then use the second outlet, again, to promote ventilation.
Not sure how ideal this would be for super consistent temperatures, but temp regulators are pretty darn cheap. https://www.amazon.com/gp/product/B011296704/ref=oh_aui_search_detailpage?ie=UTF8&amp;psc=1 is what I used with a medium sized styrofoam cooler and a 60W bulb. It worked quite well.
Here's the hardware I ended up with for a simple continuous brew setup. For me, two gallons is a lot for a batch brew mostly just handling the vessel. Good luck! You're mostly limited by your imagination here.
Beverage dispenser Target is supposed to carry it also, but I never found one in the store.
Stainless spigot
Rubber bands
Heater
Temp controller outlet
Adhesive thermometer
Ahh! Thanks. Based on all of that I should be safe with something like... http://www.amazon.com/gp/product/B011296704 ?
Craigslist freezer - we chose upright for vertical space. Chest freezer might work - but you would have to figure out how to hang in it.
Temperature controller - there are lots of options. This one is the Johnson 419. You plug it into the wall then plug the freezer into the female lead. It cycles the freezer on and off at the set temperature. There are cheaper options - but I had this one laying around. I'll link some suggestions below.
The fan is a computer fan with speed switch. I wired it to an old 12v wall wort I had laying around in the parts bin.
Meat hooks are just stainless hooks - again from amazon.
Temp controllers:
Johnson - https://www.amazon.com/Johnson-Controls-Digital-Thermostat-Control/dp/B00368D6JA/ref=pd_sim_328_1?_encoding=UTF8&amp;psc=1&amp;refRID=SG7X9CB5Z0VYY8RM7EVB
If you're comfortable with electricity:
https://www.amazon.com/Lerway-All-Purpose-Temperature-Controller-Thermostat/dp/B00BMLCGF8/ref=sr_1_2?ie=UTF8&amp;qid=1481133568&amp;sr=8-2&amp;keywords=temperature+control
Best deal:
https://www.amazon.com/Inkbird-Temperature-Controller-Thermostat-Fermentation/dp/B015E2UFGM/ref=sr_1_1?ie=UTF8&amp;qid=1481133568&amp;sr=8-1&amp;keywords=temperature+control
Meat hooks:
https://www.amazon.com/Meat-Hooks-Inch-Pack-Pieces/dp/B0195CE08Q/ref=sr_1_3?ie=UTF8&amp;qid=1481133886&amp;sr=8-3&amp;keywords=meat+hooks
Fan:
https://www.amazon.com/Antec-TriCool-DBB-Cooling-3-Speed/dp/B00066ISES/ref=sr_1_5?ie=UTF8&amp;qid=1481133824&amp;sr=8-5&amp;keywords=speed+fan+computer
I use an existing fan and this temperature controller to turn the fan on when the water is above 78F. https://www.amazon.com/dp/B015E2UFGM/ref=cm_sw_r_cp_api_8ZHNAbEYSH8NX
Inkbird Pre-Wired Dual Stage Digital Temperature Controller Outlet Thermostat 110V, 1000W Heating and Cooling for Fermentation Kegerator ect https://www.amazon.com/dp/B015E2UFGM/ref=cm_sw_r_cp_api_pVplxbKZFRS0H
I used this for a similar application. It works well and is intuitive.
Inkbird temp controller - Inkbird Pre-Wired Dual Stage Digital Temperature Controller Outlet Thermostat 110V, 1100W Heating and Cooling for Fermentation Kegerator Heating Mat ect https://www.amazon.com/dp/B015E2UFGM/ref=cm_sw_r_cp_api_60kEAbEGD0X7D
Chest freezer
Heat lamp
To Make yourself a ferm chamber
Stirplate and bar for making starters
A journal to document of/fg recipe and tasting notes
One won't be near enough, though that depends on its size. As far as heat transfer, yeah, wort doesn't pump well at all, and if anything, keeping it circulation as opposed to still would probably give the little yeasties some indigestion. I can imagine a complex system of tubing, heat sinks, pumps, and heat exchange fluid, but that's probably beyond most people's motivations and abilities. I think that you can make essentially an insulated box that's cooled by the Peltiers, essentially a refrigerator, and use a glass carboy for better thermal transfer to the fluid.
For example:
https://www.mpja.com/Peltier-Cooling-Assembly-12VDC/productinfo/15312+PM
This module uses 6A at 12VDC to move just 170 Btu of heat. Fermentation is exothermic, so let's do some math. According to this:
https://byo.com/article/fermentation-temperature-control-tips-from-the-pros/
It's possible for the fermentation process to raise the temperature 20°F in 6 hours. A common batch size is 5 gallons. A BTU is the amount of heat necessarily to raise one pound of water one degree F. A gallon is 8 lbs, so to raise 5 gallons, which is 40 lbs, of wort 20°F takes 40x20=800 BTU, and to do it in 6 hours takes 800/6= 133.3 BTUh.
The main physical problem with Peltiers is that the hot and cold side heat sinks have to be close together, and that makes it difficult to use them in an insulated box because insulation requires thickness to be effective. You'll need fans, both internal and external, to move air past the heat sinks, and in the inside, to keep it circulating. Putting the modules in the lid would probably be the most effective solution as hot air rises and that brings that air to the modules via convection.
The more I think about this, the more difficult and expensive it looks, honestly. If you're lagering, I think you'd actually be better off money and power wise using a small refrigerator. Actually, maybe a small chest-style freezer with an external thermostat controller to turn it into a refrigerator might be a more practical approach. In fact, here's a decent one on Amazon:
https://www.amazon.com/Inkbird-Thermostat-Temperature-Controller-Fermentation/dp/B015E2UFGM/ref=sr_1_4?keywords=Inkbird+ITC308&amp;qid=1568383520&amp;s=industrial&amp;sr=1-4
That being said, it sounds like an interesting series of experiments to try!
I had to replace my fridge's dial thermostat with a digital one; it looks a bit hacked together but was able to control the temperatures much better
this is similar to the one i used:
https://www.amazon.com/Inkbird-Temperature-Controller-Fahrenheit-Thermostat/dp/B0152LYY0I
but if your fridge gets can stay below your target temp you could set the fridge to max and use something like this:
https://www.amazon.com/Inkbird-Temperature-Controller-Thermostat-Fermentation/dp/B015E2UFGM
So here we go,
First off a Danby 4.4 Cu Ft fridge, something like this. I got this off of some one on craigslist for a $100. I tried to talk them down but some one had informed them that the fridge was valuable to home brewers.
The tap tower was purchased on amazon.
The line connections were also purchased there, since the ones that came on the tower were incorrect for the five gallon kegs.
The temperature controller was also purchased on amazon. Really amazon was my go to.
Here is the CO2 tank I anticipate buying. I haven't really picked out a regulator yet.
Here's u/ataraxia's classic link dump I found on a other post. Although the informstion is written for bps (most common snake people have trouble with it seems- mostly due to the humedity) but the suggestions could definitely help you for the humedity aspect needed for your boa.
You should definitely read it through.
i'm going to dump a bunch of helpful links on you. the first three links are detailed care sheets, then a tub tutorial, and the rest are product recommendations. read everything thoroughly, come back with any questions.
glass tanks can be very challenging for ball python husbandry due to the high amount of air flow with the screen top and the total lack of insulation with the glass walls. it's generally recommended to use tubs or pvc reptile cages instead. wood enclosures can also be suitable if they're designed well and sealed properly to protect the wood against moisture. glass tanks can work, but they require a lot of modification and maintenance, which you'll find tips for in the second link. i'll give you product recommendations to cover options for tanks, tubs, and pvc/wood enclosures.
Do you have temperature control figured out? I did it DIY with an STC-1000, but I'd suggest going with the Inkbird for $35.
https://www.amazon.com/Inkbird-Temperature-Controller-Thermostat-Fermentation/dp/B015E2UFGM/
Design and design considerations:
Heating/Cooling:
Active Aqua Chiller, 1/4 HP - Note in the temp graph below the blunting of the green curve as the red (ambient temp) went high. I have the dual stage temp controller set to kick on the cooling plug at 68, and this starts the second water pump that pumps through the cooler. The cooler is set for 69 currently so when the temp reaches 70, cooling kicks in. I am continuing to fiddle with this setting.
Nutrients:
Plant photos:
Plants received dry bare root with no green growth from starkbros.
Temp graph:
This is with the La Crosse wifi temp probe (https://www.amazon.com/Crosse-Technology-926-25106-Wgb-Wireless-Monitor/dp/B06ZYJ5L5B/ref=cm_cr_arp_d_product_top?ie=UTF8) so I can check remotely. Red line is ambient temp, green line is water temp.
Water changes:
I use a Digital Temperature Controller with a small chest freezer. Shop around for the freezer, I just used this one 'cause I was on Amazon. Think I got mine at Sam's Club. This is inexpensive to set up and really frugal on electricity. All the cold stays in the compartment when you open it. Also - super insulated compared to a beverage cooler. It's not stainless, but you can get compact chest freezers in black. If you like DIY, you could buy a cheap chest freezer and cover it with [stainless steel laminate] (https://www.amazon.com/Stainless-Appliance-BRUSHED-Nickel-Adhesive/dp/B00BAUPS9M/).
Hey folks, back again with another question.
I just took advantage of labor day sales and got my first equipment kit, linked below.
https://www.homebrewsupply.com/advanced-homebrew-beer-kit.html
I bought some extract recipe kits from northern Brewer. Stepson root beer, beerie and off the topper to be exact.
I have a small basement freezer already and plan to buy this item to control fermentation.
https://www.amazon.com/gp/aw/d/B015E2UFGM/ref=s9_simh_gw_d0_g60_i2?pf_rd_p=1c5f02ae-183e-4906-990b-5a293310a66c&amp;pf_rd_s=blackjack-personal-1&amp;pf_rd_t=Gateway&amp;pf_rd_i=mobile&amp;pf_rd_m=ATVPDKIKX0DER&amp;pf_rd_r=Y4SZRWAJQ2ND3A86RR3W
Is there anything hardware wise that I'm missing to get my first batch ready ? Any recommendations?
Thanks in advance.
The meter is a matter of preference. I would shop based on how it's calibrated...some use 6.86 and 4.01 solutions but meters that calibrate at 7 & 4 may be more expensive but those solutions are cheaper. I have had probes break too so don't go crazy on price. I like this one because of the case it comes with along with the calibrating fluid. I would also get some sort of dropper it will help to adjust your ph. If it is just clean water a single drop of ph down will lower the oh by several points. Aim for 5.5-6.5
Draining and replacing the water won't solve your issue right away. As long as the plant stays alive and growing it should be fine. If you can remove the plant out of the bucket and run some water over it for a few minutes and replace the water it would probably help.
Edit: found a photo of my tomato last year. This thing got like 8ft tall.
http://imgur.com/a/cpSRuql
First off, in order to use a pH meter, you must calibrate it every. single. time. Or at least once a week. They're notorious for drifting even when stored correctly. You will need 4.0 and 7.0 calibration solutions, they're sold as powder or in liquid form. You should also have probe cleaning and probe storage solution. Contact lens solution (not hydrogen peroxide stuff) can work as probe cleaning solution in this context, as it works well on organics in a gentle way.
Unfortunately the $10 specials aren't really that great, and you won't get really repeatable results until you hit about the $35-$50 price point. At this price point they should start to have replaceable probes. e.g.: this or this . I'm pretty sure /u/chino_brews knows the specific generic design name of the 2nd one I linked, lots of different vendors have a house brand white box version of it. Fisher Scientific design that went off patent, can't remember the number.
Spring for a pH meter. This one comes with a full calibrations and testing kit for about $80. Here's the same one, without the extras for about $45.
I got this Apera Instruments pH pen style meter. It was about 0.2 out of calibration after ~2 months of use, it takes about 30 - 45 seconds for the pH to stop slowly changing... really annoying. It's fairly reliable but slow. Overall I'm fairly happy with it as a new grower, definitely meets my needs.
Just received this ph meter today:
https://www.amazon.com/dp/B01ENFOHN8/ref=cm_sw_r_cp_api_-iXpzb0Y5RXN0
Was really easy to calibrate and not too expensive imo. Will update with any issues, but so far it's perfect for my needs.
Apera Instruments makes very very good ph pens. I’ve had mine for many months and I’ve calibrated it 2 times. I didn’t even need to calibrate it the 2nd time. I just wanted to see if it was off after a couple months, but it was still good! It’s still correctly calibrated right now, which has been another couple months since I did it last
I know some people use the cheap 15-20$ Orange and yellow ones amazon has with some pretty good results. I would personally spend a tad bit more and get one from Apera if you can.
Here’s the one I have: Apera ph20
I apologize for not linking. That was poor Reddit etiquette.
Apera Instruments AI209 PH20... https://www.amazon.com/dp/B01ENFOHN8?ref=ppx_pop_mob_ap_share
Professional TDS ppm Conductivity... https://www.amazon.com/dp/B01FPG89CE?ref=ppx_pop_mob_ap_share
> Use Environment: RH 95%, 0-50℃(32~122℉ )
Listed right in the item description.
For what it's worth, I picked up this one and it's been great.
Bok choi has been the easiest thing for me to grow by far so there's definitely something off in your system.
Having a pH pen and an EC pen is pretty much critical to diagnosing nutrient solution problems. This is the pH meter I have, which is kind of mid-tier but comes with calibration solution. Also pick up some storage solution as it will reduce how often you have to recalibrate the pen vs keeping it dry. EC meter you can go cheap on, I use this one and get good results.
i had the yellow one threw it away and got this https://www.amazon.com/gp/product/B01ENFOHN8/ref=s9_acsd_topr_hd_bw_bQc7kp_c_x_w?pf_rd_m=ATVPDKIKX0DER&pf_rd_s=merchandised-search-3&pf_rd_r=YEXJEDDCYN7YESJAB4XY&pf_rd_t=101&pf_rd_p=c8d54159-ecd9-53c4-bc0e-a00d14b99e74&pf_rd_i=393271011 it comes with 4ph and 7ph solution so you can calibrate it when ever too
Supposedly the probe I use has ATC. I've tested the same sample at mash temp vs 60 degrees and got the exact same reading. YMMV
This is what I have:
https://www.amazon.com/gp/aw/d/B01ENFOHN8/ref=mp_s_a_1_4?ie=UTF8&amp;qid=1525700380&amp;sr=8-4&amp;pi=AC_SX236_SY340_FMwebp_QL65&amp;keywords=ph+meters
About $80. It's a lower-mid tier Apera. You could get one of their $40-$50 and I'm sure you'd be fine. They come in an awesome little case with a foam insert to hold the meter, testing cups, and calibration liquid. Here's a link if you're interested: https://www.amazon.com/Apera-Instruments-AI311-Replaceable-2-00-16-00/dp/B01ENFOIQE/ref=sr_1_2_sspa?s=industrial&amp;ie=UTF8&amp;qid=1520625309&amp;sr=1-2-spons&amp;keywords=apera&amp;psc=1
+1 for Apera, I just decided on this one by them. It was ~15 dollars more expensive than the model you have, but the increased pH sensitivity as well as the fact that it includes storage solution was more than enough for me to be willing to shell out the few extra bucks. Also, another super cool feature of this model is that you can buy replacement probes if you ever damage your current one, which will save you money in the long run. These also seemed to have a consistently higher rating than any other pH pens I looked at on amazon, and their customer service is pretty stellar from what I've gathered. Look into these too OP!
I’d guess this one:
https://www.amazon.com/gp/aw/d/B01ENFOIQE/ref=sspa_mw_detail_2?ie=UTF8&amp;psc=1
I have it as well, and highly recommend it.
I use this one. It has a replaceable probe, 1–3 point calibration, and automatic temperature compensation. You can also get other types of probes if you get into cheese-making or something. I'd also recommend buying bigger bottles of calibration solutions and storage solution.
Also be aware that the probes on pH meters need to be replaced periodically. As much as you hate strips, meters are an ongoing expense.
At a price point not far from an Arduino, you can get an Inkbird that is built for this.
Inkbird ITC-308 https://www.amazon.com/dp/B01HXM5UAC/ref=cm_sw_r_cp_apa_i_c65pDb5V1K87G
Commonly used for homebrewing, plug the fridge into it, along with a small heating pad, lightbulb or other heat source placed inside the fridge. Set your heat and cool setpoints and walk away.
For the future, if you want to be super safe, you can get a temperature controller. That way if the heater thermometer breaks again and causes the heater to stay on, then the temperature controller will catch it and turn off the heater:
https://www.amazon.com/Inkbird-Max-1200W-Temperature-Controller-Greenhouse/dp/B01HXM5UAC
One like this should be fine. You can look at similar products and find what suits your needs financially and such.
They're quite easy to make. I use mine all winter long. Just need a heater and a controller. I use the two below.
Brew Fermentation Heating Belt, 1-Count https://www.amazon.com/dp/B001D6IUB6/ref=cm_sw_r_cp_apa_Q3L1BbH29S370
Inkbird ITC-308 Max.1200W Heater, Cool Device Temperature Controller, Carboy, Fermenter, Greenhouse Terrarium Temp. Control https://www.amazon.com/dp/B01HXM5UAC/ref=cm_sw_r_cp_apa_04L1Bb1CAC4VY
If the fridge is your only option and you can't get above 45F then you can look into getting a heat wrap and a temp controller. There are several options to choose from. I personally use these (you can find both for quite a bit cheaper than those listed prices):
https://www.amazon.com/Inkbird-Max-1200W-Temperature-Controller-Greenhouse/dp/B01HXM5UAC/ref=sr_1_1?ie=UTF8&amp;qid=1501262251&amp;sr=8-1-spons&amp;keywords=inkbird&amp;psc=1
https://www.amazon.com/Weekend-Brewer-COMINHKPR125665-Fermentation-Heater/dp/B01J1WZNM2/ref=pd_bxgy_86_3?_encoding=UTF8&amp;pd_rd_i=B01J1WZNM2&amp;pd_rd_r=RFQ7WFS8YVB9XMBQQY2D&amp;pd_rd_w=gm24D&amp;pd_rd_wg=Nn18Z&amp;psc=1&amp;refRID=RFQ7WFS8YVB9XMBQQY2D
Sorry for the late response. Their are two versions, the 306 model and the 308 model. The 308 model has the ability to control a fan or chiller if it gets too hot and the 306 doesn’t - so it just turns the heater off if it gets too warm.
Inkbird ITC-306T Pre-Wired Electronic Heating Thermostat Temperature Controller and Digital Timer Controller for Aquarium, Seed Germination, Reptiles, Hatching ect, Without Cooling Controlling https://www.amazon.com/dp/B01486LZ50/ref=cm_sw_r_cp_api_i_cGVVCbSZA8C0W
Inkbird ITC-308 Max.1200W Heater, Cool Device Temperature Controller, Carboy, Homebrew, Fermenter, Greenhouse Terrarium Temp. Control https://www.amazon.com/dp/B01HXM5UAC/ref=cm_sw_r_cp_api_i_lEVVCb1KF4RSS
Temp controller : https://smile.amazon.com/Inkbird-Max-1200W-Temperature-Controller-Greenhouse/dp/B01HXM5UAC/ref=mp_s_a_1_1_sspa?crid=1CZISB4U1CU9M&amp;keywords=inkbird+temperature+controller&amp;qid=1556415981&amp;s=gateway&amp;sprefix=Inkbi&amp;sr=8-1-spons&amp;psc=1
I do a similar sous vide bath type setup, but have an Inkbird controller driving an immersion coffee heater and fountain pump in my cooler so it's 100% hands off
&#x200B;
Nicely done!
This reminds me of the borescopes on Amazon for iPhones or tablets that could probably do the same thing with a modified Laryngoscope to hold the wire.
Depstech Wireless Endoscope, WiFi Borescope Inspection Camera 2.0 Megapixels HD Snake Camera for Android and IOS Smartphone, iPhone, Samsung, Tablet - Black(11.5FT) https://www.amazon.com/dp/B01MYTHWK4/ref=cm_sw_r_cp_api_na01AbWNKMD9E
Rather than take the seat out, have you considered purchasing a borescope? Especially if you know where the sticker should be. They aren't much money and then you'll have a borescope for later.
Something like this...
https://www.amazon.com/Depstech-Endoscope-Inspection-Megapixels-Smartphone/dp/B01MYTHWK4/
It's kinda like this one, but the newer updated one from Depstech.
https://www.amazon.com/dp/B01MYTHWK4/ref=cm_sw_r_cp_apa_i_NOX4Cb8BDMV4S
It shows for $35.99 and the updated one is $60 but my dad had a code from the company that we got it for $35 for the newer one. I thought it was a dead bird at first too
So something like this, with a pair of needle-nose pliers could help. Use the camera to push it to where the pliers can get to it.
&#x200B;
Good luck!
or this (sfw)
Depending on the angles a long flex bit can be good. Along with a hook on the end of one of these
DEPSTECH Wireless Endoscope, IP67 Waterproof WiFi Borescope Inspection 2.0 Megapixels HD Snake Camera for Android and iOS Smartphone, iPhone, Samsung, Tablet -Black(11.5FT) https://www.amazon.com/dp/B01MYTHWK4/ref=cm_sw_r_fm_apa_i_AuG0DbZS54RS3
Otherwise you are looking at cutting and patching sheetrock
Yes its on Amazon for $36.99
https://www.amazon.com/Endoscope-Depstech-Inspection-Megapixels-Smartphone/dp/B01MYTHWK4
Also, there's no way to know for sure but try to watch a video on youtube on how to properly source an engine from a junk yard. You might look for one with accident damage versus one that looks normal because it implies that it was running at the time of the accident, versus scrapped for mechanical issues.
&#x200B;
You might be able to do a compression test if you find a way to somehow bring your battery and the junkyard allows you to do connect to the starter somehow. At least pull the plugs and take a look.
&#x200B;
You won't be able to check the fluids at the junkyard to know if there was oil mixing with coolant so.. if you can manage to get a compression test done somehow that'll be the way to go.
&#x200B;
I bought this wireless snake camera thing for $30 on amazon which connects to your phone and it's got a light at the end. You might be able to use this to check inside of the cylinder head and look for any damage.
https://smile.amazon.com/gp/product/B01MYTHWK4/ref=oh_aui_search_detailpage?ie=UTF8&psc=1
&#x200B;
I use it to find TDC when doing a leakdown test when a screwdriver won't fit
You can literally buy it off of Amazon.
https://www.amazon.com/Images-SI-Uranium-Ore/dp/B000796XXM
https://smile.amazon.com/Images-SI-Uranium-Ore/dp/B000796XXM?sa-no-redirect=1
ALL the reviews!
Dandelion and burdock
https://www.amazon.com/Images-SI-Uranium-Ore/dp/B000796XXM/ref=sr_1_1?keywords=uranium&amp;qid=1566568145&amp;s=gateway&amp;sr=8-1
What about Uranium? https://www.amazon.com/Images-SI-Uranium-Ore/dp/B000796XXM
Uranium Ore?
Need some uranium ore?
Amazon.com
> Uranium is used in nuclear weapons. That's why you don't sell it to everyone, and you don't sell it to political rivals like Russia, or Russian companies.
I can literally buy uranium on Amazon. Here's one example. Uranium is extremely common. What a nuclear bomb requires is enriched uranium, which is extremely difficult technologically to do. That's why for example Iran needed all those centrifuges; to turn easily obtainable uranium into the actually useful stuff.
> If you can't figure out why giving Russians easier access to uranium is a bad thing, you're probably dumb -- oh, I see you are a global warming cultist.
I suppose I shouldn't be that surprised that someone who doesn't understand how nuclear bombs work at all is also a global warming denier and is so far down that hole that they've decided that people accepting the evidence must be cultists. Sigh.
When I'm on my deathbed I'm going to order a shittonne of stuff on Amazon for my relatives. The good ones will get cool stuff like you got.
The bad relatives will get this.
http://www.amazon.com/Images-SI-Inc-Uranium-Ore/dp/B000796XXM
I'll give you a hint... Make sure you look at all of the customer images.
http://www.amazon.com/Images-SI-Uranium-Ore/dp/B000796XXM
The only remotely dangerous thing you could do with it is make bullets. (Because its heavier than lead.)
Still my favorite: http://www.amazon.com/Images-SI-Inc-Uranium-Ore/dp/B000796XXM
https://www.amazon.com/Images-SI-Uranium-Ore/dp/B000796XXM/
Calm down.
You can buy uranium on Amazon right now.
why was THIS!? a related item?
Amazon did:
http://www.amazon.com/Images-SI-Inc-Uranium-Ore/dp/B000796XXM
Uranium is $40 on Amazon
Your wish list item, should you choose to accept it, is this super useful for every day life uranium ore! With this item, you'll get to experience life with enhanced anatomy features, likely get to see your very own CIA spy drone, and have a legacy that will last you beyond 4.7 million years. What more can you honestly ask for?
Uranium
3 foot dong (NSFW)
Best I can do
> Problem, is you can't get uranium
You can get the ore easily enough! http://www.amazon.com/Images-SI-Uranium-Ore/dp/B000796XXM
If nothing else, some of the reviews are kinda cute.
Sob story: I missed the deadline :-(
Would have requested this.
Not at all, I have one of these sitting on a bookshelf somewhere in here.
JL421 Badonkadonk! The name is just a bonus!
Or maybe some uranium ore?
Old man wiener cleaner! Hahahaha!
I think it is important to note that the system they are trying to develop doesn't use highly enriched uranium. It would use low enriched and a smaller amount. There is a video in this thread somewhere that explains it better. I mean you can buy uranium on Amazon ,if you didn't know, but how enriched it is makes the difference between no big deal and dirty bomb. https://www.amazon.com/Images-SI-Uranium-Ore/dp/B000796XXM
Smile Link: https://smile.amazon.com/dp/B000796XXM
Partially-spent nuclear fuel is not usable as a nuclear bomb. Fuel has to be very pure in order to sustain the rapid chain reaction that happens in a nuke, and spent reactor-grade fuel isn't even close. At best, it has to be heavily refined first.
Plus you have to actually design and build the bomb itself, which is extremely difficult. The bomb's casing has to withstand the explosive force of a fucking nuke until the fuel is consumed, and only then give way, or else it'll fizzle out. Good luck.
Edit: Also, you have to somehow make the bomb not explode prematurely. Uranium is unstable, remember. If you have a chunk of 100%-pure uranium, a fission chain reaction will be started immediately by its own radioactive decay, and then you no longer have a chunk of 100%-pure uranium. (That's why highly-enriched uranium does not occur in nature.) So, you have to figure out how to make the fission chain reaction happen, but only when you want it to. Again, good luck.
Spent reactor fuel might be used to make a dirty bomb, but the effectiveness of dirty bombs as actual weapons is highly questionable.
Anyway, we already have more than enough nukes lying around—some of them unaccounted for, and probably in terrorist hands—to go full Fallout.
Fun fact, by the way: you can buy uranium on Amazon. Seriously. You can even buy it as a gift, amusingly enough.
Just like... buy some very low level radioactive shit online or something and tape it to the bottom... Just so on the little card it can read "ceramic, glaze, uranium ore"
Uranium Ore. Yep.
Uranium!
http://www.amazon.com/Images-SI-Inc-Uranium-Ore/dp/B000796XXM
http://www.amazon.com/Images-SI-Uranium-Ore/dp/B000796XXM/ref=sr_1_11?ie=UTF8&amp;qid=1453242399&amp;sr=8-11&amp;keywords=plutonium
At least it looks innocuous. There was a post about this guy finding Uranium on Amazon and it turned into a thread about all the weird shit you could find there. I clicked on a link for a 55 gallon drum of lube thinking it was a joke. Nope, 6 months of very interesting "More Items to Consider" sitting right on my front page.
If you're into this type of thing
If not, then you could always try knitting a scarf or sweater for her.
http://www.amazon.com/Uranium-Ore/dp/B000796XXM/ref=pd_sim_sbs_t_6
Where do they store the uranium ore in the warehouse?
Actually, it is legal to own up to fifteen pounds of U-238. You can buy it online. Amazon currently has uranium ore in stock, but not the pure element as far as I can tell. This is the "classic" place to buy uranium ore. They appear to currently be sold out of pure uranium-238 metal. It's totally illegal to own fissile U-235... and all this assumes you live in the US.
http://www.amazon.com/Images-SI-Inc-Uranium-Ore/dp/B000796XXM/ref=sr_1_9?ie=UTF8&amp;qid=1375382678&amp;sr=8-9&amp;keywords=uranium+238
Not the weapons grade stuff but uranium still.
I expected a gag gift. It was not.
I wouldn't want to know what it was like if the zombies ate my brains, so I would use my Uranium Ore and build a nuke. Nothing bad could happen from this plan at all.
Nope! These are cured with a few grams of uranium ore ingested orally with a Tide pod every day. You can order it on Amazon
Uranium ore. Now at the low, low price of $29.95!
Oh it's ok... I buy my uranium from Amazon
I love the fact that in the section "Customers Who Viewed This Item Also Viewed" Uranium Ore shows up.
Oh god. Okay. I feel like I've been preparing for this post my whole life (or at least since I found these awesome things on amazon):
Make sure you read the comments on these amazing, once in a lifetime products!!!
edit: Aww shoot, I just saw you meant for realz. I got nothing, sorry. But still, you'll have a good laugh!
Yellowcake from Amazon.
Essential for both terrorists and mad scientists
Flintstones!! :)
you can buy urianium! http://www.amazon.com/Images-SI-Uranium-Ore/dp/B000796XXM
You can buy uranium on amazon.
Amazon, actually.
And yes, I know that's not enriched.
Well, you can't get plutonium. But you can buy uranium here and here
You can also buy one of the plutonium cell props from the movie here
God damn I love Amazon...
I already posted This the other day, but it's still the best I've ever found :D Jetsons
You can buy Uranium Ore which seems pretty crazy.
Plus the reviews for it are absolutely hilarious.
Jetsons
This- It's Uranium Ore O_O Jetsons
The reviews on that item are hilarious...just ignore those pesky ‘verified purchase’ customers.
https://www.amazon.com/Images-SI-Uranium-Ore/product-reviews/B000796XXM
It's best if /u/thewebsiteisdown doesn't click this link
You forgot your /s http://www.amazon.com/gp/aw/cr/B000796XXM/ref=mw_dp_cr
Uranium
Great community effort :) Much like the plutonium reviews on Amazon.
Getting the Uranium is not hard. You can buy it on fucking Amazon.
Processing it is the difficult part.
If you’re looking for a non contact voltage tester ( tick tracer) my personal favorite is the fluke.
Fluke 1AC-A1-II VoltAlert Non-Contact Voltage Tester https://www.amazon.com/dp/B000EJ332O/ref=cm_sw_r_cp_api_i_PMRkDb24ADV56
If you’re looking for a wiggy to check actual voltage I would recommend buying a volt meter. I currently use this one and love it.
Fluke T5600 Electrical Voltage, Continuity and Current Tester https://www.amazon.com/dp/B0006Z3GZU/ref=cm_sw_r_cp_api_i_rPRkDbNV768AZ
> I'd at least take it apart and use a multi-meter to see if the wires are hot.
I would NOT recommend using a multi-meter to see if the wires are hot. Get yourself one of these things. I consider them an absolute essential for any homeowner or DIY'er. It's a very easy, and relatively safe, way to test for a live cable.
> I would NOT recommend using a multi-meter to see if the wires are hot.
Why not? Also, you can use https://www.amazon.com/dp/B000EJ332O as the url, you don't have to add all that extra crap to it
For 80% of hardware work you just need a good, solid multi-tipped magnetic screwdriver and a pez dispenser full of excedrin.
Toss in a power supply tester like a Dr. Power II and you have nearly all hardware tools you need.
Just be aware that many software tools on Hirens are only licensed for personal use, using them for professional use would be a violation of license agreement.
If you're going to be checking networks, you're going to want a good fluke toner, and a fluke voltage tester so you don't kill yourself
You're also going to want a cat5 crimper that won't break
If you're troubleshooting big networks then pick up a fluke microscanner II, but only if it will save you several thousand bucks in effort.
I should also mention I like this one best because the Klein ones can be sensitive to bumping and give off false positives: Fluke 1AC-A1-II VoltAlert Non-Contact Voltage Tester https://www.amazon.com/dp/B000EJ332O/ref=cm_sw_r_cp_apa_i_5HP2Db6VTSXP3
It looks like you're trying to format a word into a link. Try this instead:
> [this](https://www.amazon.com/dp/B000EJ332O)
Result: this
Got it fixed? Downvote to delete.
***
^^Note: ^^Edits ^^appear ^^invisible ^^if ^^made ^^soon ^^after ^^posting. ^^| ^^I'm ^^a ^^bot, ^^beep ^^boop ^^| ^^Contact ^^me ^^| ^^Opt-out ^^| ^^Feedback
You can use one of these to test if the line in the wall is still live. Push it in the hole you made and it should light up. Then turn off breakers one by one until the light on the sensor turns off.
Non-contact voltage tester is what I'd use. I linked a Fluke, but you should be able to pick up something comparable for around the house usage for around $20.
I'd bet it's 120v, and if a doorbell doesn't sound inside the house when you press the button, it's probably disconnected.
If not, there's a wire shoved in the walls or ceiling somewhere that's going hot every time you press the button.
Good luck.
Hmm, that link should take you directly to a voltage tester. Here's another one off Amazon that appears to be getting good reviews: http://www.amazon.com/Fluke-1AC-A1-II-Volt-Alert-Non-Contact-Voltage/dp/B000EJ332O/ref=sr_1_1?ie=UTF8&amp;qid=1343538975&amp;sr=8-1&amp;keywords=voltage+tester
> classic Fluke
You mean this one?
Amazon link
This isn’t bad for the price we use $150 calipers and I’ve tried some of these in a pinch and they’re pretty comparable.
I'd buy something like this. It's just an example, probably better ones available, it's just the first one that came up.
http://www.amazon.com/Neiko-01407A-Extra-Large-SAE-Metric-Conversion/dp/B000GSLKIW/ref=sr_1_1?s=industrial&amp;ie=UTF8&amp;qid=1405012283&amp;sr=1-1&amp;keywords=vernier+digital
http://www.amazon.com/Neiko-01407A-Extra-Large-SAE-Metric-Conversion/dp/B000GSLKIW/ref=sr_1_1?ie=UTF8&amp;qid=1397511458&amp;sr=8-1&amp;keywords=digital+micrometer
Get a set of decent calipers. You'll need them for all sorts of stuff and they aren't going to wear out. Plus they're so cheap it's almost a non-issue.
Eyy~ You'll likely want one of these~ A digital caliper / micrometer.
Digital calipers! There are other methods, and certainly better calipers than this, but these are way more than enough to get yourself started for cheap. I have two nice sets of calipers, but at one point I just bought four of these and keep one in my office at home, one at work, one in the garage, and one more just stashed in a drawer because I use them all the time: https://www.amazon.com/Neiko-01407A-Electronic-Digital-Stainless/dp/B000GSLKIW/ref=sr_1_3?keywords=Calipers&amp;qid=1564629857&amp;s=gateway&amp;sr=8-3
For this print all I did was measure the diameter of the cable and the diameter of the knockout. That was enough to give me all the info I needed.
One machine screw with a spring washer and three sheet metal screws. Buy these:
http://www.amazon.com/Neiko-01407A-Extra-Large-SAE-Metric-Conversion/dp/B000GSLKIW/
http://www.amazon.com/Neiko-01407A-Extra-Large-SAE-Metric-Conversion/dp/B000GSLKIW/
You can take a pretty close guess at exactly what the screw specifications are without them, but they're cheap, very useful and will tell you exactly what the screws are.
If you're designing your own parts, definitely get a pair of calipers. Can't recommend these enough.
Zip Ties are always a good thing to have around. Spare parts for your printer (heater cartridges, thermistors, fuses if you printer has them. ) and tools to change them (usually a socket or wrench set will do). Flush cutters.
Safety glasses for removing support material. My eyelids have saved me from so many flying pieces of plastic I've lost count. You always think "I dont need those" until you do lmao.
Small flashlight (+1 for magnetic mount), fine tweezers for pulling gunk off of your hotend, PTFE grease, Allen wrench set (ball-end sets are AMAZING for getting into tight angles)
ABS and Nylon are the toughest, but can be difficult to print.
ABS will withstand higher temps.
Get a cheap digital caliper so you can take precise measurements. I model stuff in Fusion 360 and make weird parts all the time.
Using a digital caliper on the clamp area is the best way to measure it if you can't find the spec somewhere online. I recall my 2009 Pista having a 26.0 handlebar clamp diameter.
Cinelli Peppers are cool, but you can't go wrong with Nitto either.
Electric could be .011 too as I told my guy I play heavy last time I got my les paul set up. No idea what's on the Jaguar but I think they might be .008s? I like a light touch on fenders.
Either way I'd rather spend $17 on the tool and get the job done than buy a $20-$30 in electric strings and $10-15 in acoustic strings, and then throw most of them away.
https://www.amazon.com/Neiko-01407A-Electronic-Digital-Caliper/dp/B000GSLKIW/ref=sr_1_1?ie=UTF8&amp;qid=1493316915&amp;sr=8-1&amp;keywords=6%22+digital+caliper
I've been using these Neiko ones (0.01mm resolution, 0.02mm accuracy) for about 8 years now with no issues
If there is a second set screw and you have a set of calipers and a thread pitch guage handy, you can remove the second set screw and measure the major diameter which is your nominal thread size, overall length of the screw and the thread pitch. It will also likely be a "cup point" set screw, not a "dog point" or anything else crazy.
Otherwise, find a local machine shop to help you determine what you need, or a gunsmith to take care of everything.
I use basically this (probably a different brand, but likely made in the same factory):
https://www.amazon.com/Neiko-01407A-Electronic-Digital-Caliper/dp/B000GSLKIW/ref=sr_1_3?ie=UTF8&amp;qid=1482953396&amp;sr=8-3&amp;keywords=digital+micrometer
Disagree on the digital calipers. I bought one of these last year:
http://www.amazon.com/Neiko-01407A-Extra-Large-SAE-Metric-Conversion/dp/B000GSLKIW/
It's been perfect. Checked it against precision hole gauges. Held up great with abuse. And if it breaks someday, hey, $15.
I dont have experience with printrbot, but i used tom's guide from youtube to do my calibrating. Just watch his video.
https://www.youtube.com/watch?v=YUPfBJz3I6Y
Depends on the software for real time changes. I use octoprint. I know repetier host is really good also. If you do that, just set it as 100 in the slicer, then adjust in real time so you know what your setting should be always.
If you dont have a pair of calipers get these to measure the outside diameter of your filament, that may be why you have to adjust your extrusion. if the diameter is bigger, then it is shoving for plastic in thatn it really should.
http://www.amazon.com/Neiko-01407A-Electronic-Digital-Extra-Large/dp/B000GSLKIW/ref=sr_1_1?ie=UTF8&amp;qid=1451996465&amp;sr=8-1&amp;keywords=caliper
I am a toolermaker by trade, and i actually use these everyday in the shop. I stopped using my expensive ones and just use these now.
My reloading setup was based on budget. I spent about $147 total for my Lee Single Stage Press + extras. The only complaint I have is I wish the press was a little more accurate for speedier results.
Id like if anyone commented on high speed pressing components with high accuracy results. It would be nice to have but really just curious whats out there and what works.
Edit: incase you were curious ive listed my parts below
http://www.amazon.com/gp/product/B002BDOHNA/ref=oh_details_o09_s00_i00?ie=UTF8&amp;psc=1
http://www.amazon.com/gp/product/B000GSLKIW/ref=oh_details_o08_s00_i00?ie=UTF8&amp;psc=1
http://www.amazon.com/gp/product/B002SF4X5I/ref=oh_details_o07_s00_i00?ie=UTF8&amp;psc=1
http://www.amazon.com/Lee-Precision-Deluxe-3-Die-Rifle/dp/B00162TEOE
http://www.amazon.com/gp/product/B000NOQIOU/ref=oh_details_o05_s00_i00?ie=UTF8&amp;psc=1
http://www.amazon.com/gp/product/B000NOSGOU/ref=oh_details_o05_s00_i01?ie=UTF8&amp;psc=1
http://www.amazon.com/gp/product/B0014136PA/ref=oh_details_o05_s00_i02?ie=UTF8&amp;psc=1
http://www.amazon.com/gp/product/B00162UGQE/ref=oh_details_o01_s00_i00?ie=UTF8&amp;psc=1
so im looking to get into 3d Printing, and unless someone has some better option, im going with the MP Select Mini.
My question is on the other things i need. Here is the list of the things im looking to buy along with the printer:
I have a set of exacto knives and a screw bit set. Is there anything else im missing?
Some time ago, I posted a set of Caliper Extenders for the Neiko 150mm digital calipers. I just added to the Thingiverse file a storage slot to glue onto the Caliper Case. It sort of snaps in, but obviously requires some glue. I'm using E6000.
Looking at my toolbox, here was something I bought so I could measure the trunks and keep a log over the years...https://www.amazon.com/gp/product/B000GSLKIW/ref=oh_aui_detailpage_o03_s00?ie=UTF8&amp;psc=1
I have yet to start that log but I did use it to measure a drill bit size.
>It's difficult to create nuclear fusion but a teenager did it a few years ago.
Fission, not fusion. And no, creating nuclear fission is not difficult at all. It happens naturally.
>It is no more insane to think that a disease could be created, in this day and age, than creating nuclear fusion I would think.
It absolutely is, as creating a disease would require access to a bio lab and a fair amount of education, whereas creating nuclear fission requires a lump of radioactive material, which you can actually purchase online for $40.
[here's some] (https://www.amazon.com/Images-SI-Uranium-Ore/dp/B000796XXM)
That did cross my mind. I think I'm good since they probably have more pressing issues to deal with.
&#x200B;
What is scary though is you can actually buy freaking Uranium ore on amazon.
https://www.amazon.com/Images-SI-Uranium-Ore/dp/B000796XXM
Keep Talking and Nobody Explodes.
Well, how serious are you? Cause if you're serious... here ya go
Otherwise, without knowing what you're into, it's a bit tough. Sushi Go! is an absolutely awesome card game - super easy to teach, pretty quick to play, but really fun for anyone. It's... "THE BOMB" at parties.
I would also extremely recommend Dominion, it's probably my favorite table-top game. However, I can't say it's for everyone.
I would absolutely love KTANE... wish I could buy it, but I've already spent way too much on games, and college is eating into my pockets. Thanks much! Sir Soaring Spud
Heh, I'm home now, not on mobile and got a closed look at the actual data and numbers, to compare it to the EPA data. Some quotes from the article:
> The Nuclear Emergency Tracking Center has issued a Radiation Alert for Mattituck, NY on Long Island after local background radiation levels spiked 156 times higher than normal on March 14, but quickly returned to normal.
The NETC doesn't appear to have any tracking sites on long island (at least not public, because I see what appears to be EPA sites). However it seems they sell sites you can setup, so maybe those are what they mean they are tracking. And they don't seem to have issued any active alerts which BTW are based solely on a single stations readings. The site looks like a crazy person made it too, bible verses quoted as a warning on the home page? UFO chat in the forums. That doesn't looks like a legit site backed by science.
> According to local Geiger Counter equipment, the one-year average background level of radiation in Mattituck is only about 10 counts-per minute. Yet on March 15, the radiation level suddenly skyrocketed to 1565 Counts-Per-Minute (CPM)
The Yaphank data from the EPA above shows an average of 2500CPM with with a spike that's over 5000CPM, that data looks average, and inline with NYC. 10CPM sounds like a bogus number, and the EPA plots their data on a log scale, with a full order of magnitude of variation appearing in normal data. Couple that with the fact that the NETC seems to get their data from crazies buying detectors, I wonder if a crazy put a smoke detector on their detector (or bought some yellowcake to play with), I doubt this is a controlled environment and individual stations are unreliable.
> Pursuant to an ORDER dated December 10, 2010 by federal judge Donald E. Walter, sitting at the United States District Court for the Eastern District of New York in Brooklyn, the former owner of this web site, radio host Hal Turner, divested himself of ownership and control of this - and all other - internet web sites. Mr. Turner is barred by court order from owning or contributing to the content of web sites until October, 2015. As such, Hal Turner has nothing to do with the ownership, operation or content of this web site.
The creator of the website seems to be a crazy
> We have been made aware that a small local newspaper, "The Suffolk Times" has run a new story about this on its web site today, and possibly in print issues. They prominently quote US Environmental protection Agency (EPA) spokesperson Elias Rodriguez, who said “We don’t have any validated data that would indicate a cause for concern.” The EPA did not test for radiation in Mattituck, NY and the EPA has no radiation monitoring stations in -- or near -- Mattituck, NY. THAT is why they have "no validated data."
> One final note, the Suffolk Times places great emphasis on the fact that the source of our story "is not a government agency" as if that has any bearing on the facts. It does not. To put it bluntly, most of us already know that the federal government - in general -- is one of the largest collections of liars on the planet. What gives our story credibility is that it is NOT based on government information!
We already know the government is liars? That's why you don't agree with the EPA when they say they have no "validated" sources?
I think that proves my point, the current operators are also crazies and the data has not been professionally analyzed and it hasn't been validated. I don't trust any of this data. I think a blogger needs to get back on their meds.
For a person with such a collection you are missing some important stuff.
Spoons is a handsome cat!
This is an item
Green is my favorite color! Here's some green... and here's some green... and this is probably green too
My week via Amazon. Sometimes, I kinda wanna blow up the work building.
Uranium ore anyone?
I have Uranium on my wishlist.....
Pretty California
This is probably one of my favourites.
Just have a read through of the comments xD
Also:
1
2
3
And here's my favourite (vaguely) NSFW one.
Not entering btw, don't have a Playstation.
Uranium
Plutonium finde ich gerade nicht, aber wie wär's mit etwas Uran von Amazon?
nah amazon has some though. It's a small amount used to test Geiger counters.
you can get some at amazon.com.
Well, more accurately, if you buy enough of this stuff, and then do some fission reactions and refine it you might get enough plutonium eventually.
It's from here. Go there. Look at the other reviews. Now you won't have to spend the rest of the day on Reddit. You'll spend it on Amazon, but you won't buy anything.
Look at the suggested products. A lot of them have hilarious reviews as well.
http://www.amazon.com/Images-SI-Inc-Uranium-Ore/dp/B000796XXM
that
Ahhh, knew it. Thanks. It's on order.
http://www.amazon.com/Images-SI-Inc-Uranium-Ore/dp/B000796XXM
You can already purchase Uranium Ore,
http://www.amazon.com/Images-SI-Uranium-Ore/dp/B000796XXM/ref=sr_1_8?ie=UTF8&amp;qid=1411500002&amp;sr=8-8&amp;keywords=plutonium+ore
I see no reason why you wouldn't plutonium either... but you'd have to explain how this is FOR PERSONAL USE?
What about this ?
The best play is to hoard while stocks last. Since U has a long half life period, you should hoard enough of it while shipping is free in Amazon.
https://www.amazon.com/Images-SI-Uranium-Ore/dp/B000796XXM
http://www.amazon.com/Images-SI-Uranium-Ore/dp/B000796XXM
For the very low price of just under $40 you must get
This!!
Read the reviews it's legit and AMAZING!!
Actually the only thing I enjoyed about this product was reading the reviews. I now have 4 eyes .. my depth perception is fucked and its really hard to read.
I think these are some pretty good reviews for one of the better products on amazon
DIRTY THIRTY
Happy almost DIRTY THIRTY !
That is my brother's birthday as well :)
Uranium ore
With that logic we should chip in and buy some Uranium Or a Super lens
If it were me, I might go for the uranium ore.
http://www.amazon.com/Images-SI-Inc-Uranium-Ore/dp/B000796XXM/ref=pd_sbs_gro_2
I might not even use americium. I might just buy uranium ore from amazon.
Can't trust a third party, so buy a uranium ore sample, a 3.5mm to USB cable, and a Geiger counter with a 3.5mm out, then use that to get you some random ass numbers. I'm sure someone's written a program for that that takes the Geiger counter as input. Oh you may also want to fracture the ore sample in a semi-random way, and then use that instead of just the standard sample, just cause.
Total price, 450$, ish.
(disclaimer, I don't know shit about Geiger Counters or getting them to feed data into a computer)
Start collecting these: http://www.amazon.com/Images-SI-Inc-Uranium-Ore/dp/B000796XXM/
http://www.amazon.com/Images-SI-Inc-Uranium-Ore/dp/B000796XXM
We've got a (considerably more expensive) sample in our lab for testing our geiger counters. It's just radioactive enough to register, and perfectly legal to own (since it would take tons of the stuff -- and a bunch of huge centrifuges) to get any fissile material.
Uranium ore
https://www.amazon.com/Images-SI-Uranium-Ore/dp/B000796XXM
But give the code to someone else since I already got one and used it to buy some games yesterday lol.
Wait till this reporter finds about this.
http://www.amazon.com/Images-SI-Uranium-Ore/dp/B000796XXM/
He's going to have a panic attack.
Also top review
"I purchased this product 4.47 Billion Years ago and when I opened it today, it was half empty. "
25,381 people found this helpful.
http://www.amazon.com/Uranium-Ore/dp/B000796XXM/ref=cm_lmf_tit_11 for the mad scientist? lol
You could get some Uranium :https://www.amazon.com/Images-SI-Uranium-Ore/dp/B000796XXM
Or a some tech shirts: https://www.amazon.com/Tech-Support-Definition-Shirt-Computer/dp/B076CZ7BMW/ref=sr_1_4?ie=UTF8&qid=1540179134&sr=8-4&keywords=tech+shirts
Or a cool Tesla: https://www.amazon.com/ThinkGeek-Steampunk-Styled-Weathered-Brass-Findings-Leather/dp/B01I5Q2TCC/ref=sr_1_1?ie=UTF8&qid=1540179159&sr=8-1&keywords=tesla+watch
&#x200B;
I have an entire folder of cool stuff on amazon, if you can tell me what you like, I can prob help.
U-238 is the (mostly) harmless unenriched kind used in small science experiments like a cloud chamber.
Uranium https://www.amazon.com/dp/B000796XXM/ref=cm_sw_r_cp_api_51aZBbR80VVHY
Cloud Chamber Kit https://www.amazon.com/dp/B0168SCCJO/ref=cm_sw_r_cp_api_Q4aZBb12MBMRZ
> edit: yeah, it's available on Amazon Canada/US (and other places too, I assume)
There are much cooler elements you can buy on amazon.
They have everything. (Sure, it's unrefined and only useful for geiger counter calibration, but still.)
Que existe exclusivamente na internet? Provavelmente não tem muita coisa.
Que é difícil de achar apenas andando num shopping e olhando vitrines? Muita coisa.
Eu, por exemplo, acho que seria bem difícil achar essas facas de CSGO, urânio, ou brinquedos sexuais estranhos pra vender em lojas físicas.
É maís prático em alguns casos também. Quando fui comprar as peças para o meu computador nos EUA, eu podia ir na Amazon e escolher cada peça individualmente e especificamente, de uma seleção gigantesca de possíveis peças. Em lojas físicas eu ficava limitado à uma seleção muito pequena.
Yeah, here ya go OP:
https://www.amazon.com/dp/B000796XXM/ref=cm_sw_r_cp_apa_yI58Bb04X3NBH
http://www.amazon.com/Images-SI-Uranium-Ore/dp/B000796XXM/ref=sr_1_2?ie=UTF8&amp;qid=1457451511&amp;sr=8-2&amp;keywords=uranium
Good enough for a poor man's reactor, bad enough it's nearly useless.
Amazon?
Oooh, free shipping!
https://www.amazon.com/Images-SI-Uranium-Ore/dp/B000796XXM?crid=1JLKHLA59FC1T&amp;keywords=uranium+ore&amp;qid=1535983620&amp;sprefix=uranium+o&amp;sr=8-1&amp;ref=mp_s_a_1_1
Uranium ore.
Link: https://www.amazon.com/dp/B000796XXM/ref=cm_sw_r_cp_api_wIDNBbYSAYQ1Q
Buy some of this: http://www.amazon.com/Images-SI-Uranium-Ore/dp/B000796XXM
put a little in every package you ship with fragile things
Found it!
MELT CITIES TO YOUR FRIENDS' AMAZEMENT!
Here is some
http://www.amazon.com/Images-SI-Uranium-Ore/dp/B000796XXM#
Don't forget the uranium!
http://www.amazon.com/Images-SI-Inc-Uranium-Ore/dp/B000796XXM/ref=pd_sim_sbs_indust_4
Depends on what you consider highly radioactive.
You can buy Uranium on Amazon and let us know.
Urainum Ore
Here you are. Merry Christmas
https://www.amazon.com/Images-SI-Uranium-Ore/dp/B000796XXM
Banned you say?
None are as good as the first review of this.
I'm more amused, confused and impressed by Uranium.
how about some uranium?
Uranium Ore.
http://www.amazon.com/Images-SI-Inc-Uranium-Ore/dp/B000796XXM/ref=sr_1_5?ie=UTF8&amp;qid=1342972062&amp;sr=8-5&amp;keywords=uranium+ore
http://www.amazon.com/Images-SI-Inc-Uranium-Ore/dp/B000796XXM/ref=sr_1_13?ie=UTF8&amp;qid=1342972622&amp;sr=8-13&amp;keywords=uranium+ore
http://www.amazon.com/Images-SI-Inc-Uranium-Ore/dp/B000796XXM/ref=pd_sbs_indust_4
also, look at some of the product pics ;)
http://www.amazon.com/Images-SI-Inc-Uranium-Ore/dp/B000796XXM Amazon...
I'm more preplexed that people who bought that also bought uranium ore... I mean read the reviews for this stuff. http://www.amazon.com/Images-SI-Uranium-Ore/dp/B000796XXM/ref=pd_sim_sbs_14_6?ie=UTF8&amp;dpID=51LrKbS8ajL&amp;dpSrc=sims&amp;preST=_AC_UL160_SR160%2C160_&amp;refRID=0TQQGGYE1R818BKSPFCB
Amazon is an amazing thing...
The "Customers who viewed this item" section is also full of win:
Uranium Ore
Parent Child Testing Product (Only one left in stock, hurry!)
Amazon?
http://www.amazon.com/Images-SI-Inc-Uranium-Ore/dp/B000796XXM/ref=pd_sim_sbs_indust_3
Theseusperse: ^^original ^^reddit ^^link
Depleted Uranium emits non-iodising radiation, like radio waves and microwaves and radar, you can easily buy some uranium from Amazon and test this yourself at home. It isn't dangerous at all unless you eat / drink it. You can hold it in your hands with no side effects what so ever. Radiation isn't some magical substance that can get into everything, I suggest you educate yourself on the different types of radiation and how they all act differently and effect us differently.
From the available public sources and from common sense. Didn't you study this stuff in high school? I was spending hours in the library virtually every day.
The least remote possibility of weaponizing naval reactor waste would be separating U235, but due to the level of burnout, that's highly unlikely (remember, the proportion of U238, while small, is still non-zero, and it increases as the U235 disappears, thus forcing the need to re-enrich the extracted uranium which is no less difficult than starting with natural uranium in the first place, and that is more accessible to anyone than any military waste), and even if successful, nobody in the 1st world uses U235 in weapons anymore, least of all the US Navy (which was the core of your claim).
Uranium ore. Who buys that? It has hilarious reviews, though.
Tipsy gifting!
It`s not as hard as you might think...
http://www.amazon.com/Images-SI-Inc-Uranium-Ore/dp/B000796XXM
Although, the required equipment to actually turn this into usable uranium U-235 might be slightly more expensive....
Try Amazon
People who viewed that also viewed thus...
https://www.amazon.com/Images-SI-Uranium-Ore/dp/B000796XXM/ref=pd_sbs_236_1?_encoding=UTF8&amp;pd_rd_i=B000796XXM&amp;pd_rd_r=49B7VH9Q4D5HDX6YWEK4&amp;pd_rd_w=L6UQK&amp;pd_rd_wg=WhObH&amp;psc=1&amp;refRID=49B7VH9Q4D5HDX6YWEK4
https://www.amazon.com/Images-SI-Uranium-Ore/dp/B000796XXM/ref=mp_s_a_1_3?keywords=uranium&amp;qid=1554100121&amp;s=gateway&amp;sr=8-3
Uranium Ore
Just get more:
http://www.amazon.com/Uranium-Ore/dp/B000796XXM
From the same page: "Uranium Ore".
http://www.amazon.com/Uranium-Ore/dp/B000796XXM/ref=cm_cr_pr_sims_t
It looks like your Uranium collection needs more Uranium. Here, let me help.
Uranium Ore https://www.amazon.com/dp/B000796XXM/ref=cm_sw_r_awd_uYiQub1BSFDG1
Here you go
not sure how i stumbled upon this little gem....but i though i would share., apparently this is very useful if you want to kill ants or clean your teeth....who knew.
on a more serious note....this is a life saver! have you ever tried to tie 100 water balloons by hand before, ouch! this saves delicate little fingers :)
http://www.amazon.com/Images-SI-Uranium-Ore/dp/B000796XXM
They're are arguments that legalizing heroin could be be beneficial as it would make it safer do to not being cut with anything deadlier and addicts could get better access to help. Birth control should be as easy to assess a aspirin and you can buy uranium on amazon.
http://www.amazon.com/gp/aw/d/B000796XXM?pc_redir=1404995055&amp;robot_redir=1
So dangerous that you can order the same stuff they have on Amazon. Fertilizer plants put more uranium dust into the air than a "dirty bomb" filled with what they have.
Uranium on Amazon
How to build a cloud chamber
For the rest of the reviews for the lazy: http://www.amazon.com/Images-SI-Inc-Uranium-Ore/product-reviews/B000796XXM/ref=cm_cr_dp_see_all_btm?ie=UTF8&amp;showViewpoints=1&amp;sortBy=bySubmissionDateDescending
The "most helpful review" is also humorous!
http://www.amazon.com/gp/aw/d/B000796XXM?pc_redir=1413841085&amp;robot_redir=1
I'm loving the reviews
This.
Uranium Ore
Uranium.
http://www.amazon.com/gp/aw/d/B000796XXM
All the reviews on it are pretty funny and stupid
http://www.amazon.com/Images-SI-Inc-Uranium-Ore/product-reviews/B000796XXM
Would this work?
Totally agree! I like the way you think! ;) Is your floor controller down yet? I bet a nice dark mahogany phanalic loop would look amazing with an ice top. You would probably have a lot of birds trying to get close to it if you use a bit of this.
This
Pics
The Mountain Three Wolf Moon Short Sleeve Tee
Fresh Whole Rabbit
Zenith Men's 96.0529.4035/51.M Defy Xtreme Tourbillon Titanium Chronograph Watch
Wenger 16999 Giant Swiss Army Knife
Tuscan Whole Milk, 1 Gallon, 128 fl oz
Uranium Ore
What it thinks of that one uranium product. Essentially a joke product
oh my goodness!!! what a great little gadget. I had no idea something like this even exists. I checked Amazon Canada but there are so many of these, and the instruction videos shows them sticking it into the hole of the wall plug. Yeah of course it has electricity inside. Will it work on any surface like a lets say a metal countertop that is "live" for whatever reasons???
I am going to buy the one a little expensive because it seems to be a reliable brand as per the reviews. Please let me know what you think and tell me if it will work on any conducting surfaces??
https://www.amazon.ca/Fluke-1AC-A1-II-Volt-Alert-Non-Contact-Voltage/dp/B000EJ332O/ref=sr_1_5?s=hi&amp;ie=UTF8&amp;qid=1518252273&amp;sr=1-5&amp;keywords=non+contact+voltage+tester
How about that one please??
These are great too.
For non contact testers fluke makes one of the best ones.
http://www.amazon.com/Fluke-1AC-A1-II-VoltAlert-Non-Contact-Voltage/dp/B000EJ332O
This one will let you isolate the exact wire in the panel/box that is on, versus other testers that are so sensitive it will tic on wires that are merely around other wires that are hot.
In any case all electricians need to have a non contact tester in their bag, it helps keep everyone alive.
yup, knipex is good. He probably already has a multimeter and hot stick, but I like having multiple hot sticks around as they go bad.
https://www.amazon.com/Fluke-1AC-A1-II-VoltAlert-Non-Contact-Voltage/dp/B000EJ332O/ref=sr_1_1?ie=UTF8&amp;qid=1475250851&amp;sr=8-1&amp;keywords=fluke+hot+stick
https://www.amazon.com/gp/product/B0006Z3GZU/ref=od_aui_detailpages00?ie=UTF8&amp;psc=1
Replacing them is extremely simple. It's just a matter of turning off the power at the electrical panel, unscrewing the plate and switch/outlet, disconnecting the wires from the old switch/outlet, and reconnecting them to the new one. Three way switches just have one extra wire. This video gives a good overview of the process.
The only tool you might want to grab is a non-contact voltage tester to make sure the power is definitely turned off before you start handling the wires. A regular DMM would work as well if you already own one.
I’d want to determine which of those wires is hot and which is neutral. Like with a Non-contact voltage sensor.
I would recommend getting one of these non-contact voltage testers (or similar). They work great and you don't need to have physical contact like a multi-meter. That's very handy if the wires are not exposed.
Mine saved my bacon when I was replacing the outlet in the bathroom. I shut off the breaker for the bathroom, but still tested the outlet to be sure. To my surprise, it was still live (must be a different circuit to handle hair dryers).
Here are two tools that help:
Tells you if an outlit or wire is hot before you touch it:
http://www.amazon.com/Fluke-1AC-A1-II-Volt-Alert-Non-Contact-Voltage/dp/B000EJ332O
Allows you to find the circuit for an unlabeled outlet:
http://www.amazon.com/Sperry-CS550A-Circuit-Breaker-Finder/dp/B000ET403A
I have a a backpack for LD (various MIDI interfaces, USB-DMX dongle, laptops, AA Maglite) or a Bum bag for more hands-on electrics (where I say Knippex, Lindstrom, Fluke. And Maglite.). And a toolbox with the all important hammer (nicknamed "sweetness"), big-ass wrenches and so on.
I try not to forget this, ever.
Also a Wera of sort, but damn this one is elegant, I wasn't aware of it.
That thingy when used responsibly is a huge help, but do NOT use it as a safety controller.
Speaking of which, I tend to get people mad by insisting on using this before starting actual work. 400mA diff NOT working anyone? It happens.
Looking at how things are organised here, I couldn't get it in one bag; long jobs end up filling my car actually: Gels, and spares, and backups, and adapters, and an actual toolbox... And the cordless drill... when I do festivals or street theatre or such, my car end up the Tool-chest, you can't possibly carry it all while on the move, but you can organise your trunk so that everything comes easily at hand.
I used this, an idiot stick apparently lol.
Without knowing what he's already got it's hard to say. He's probably already got all the basics. I'm just assuming he's already got boardsaws, tape measures, screwdriver sets, plier sets and so forth.
I'll list off a couple of things I would rather not live without:
[Irwin wire strippers] (http://www.amazon.com/Irwin-Industrial-Tools-2078300-Self-Adjusting/dp/B000OQ21CA) These are totally awesome.
[Non contact voltage detector] (http://www.amazon.com/Fluke-1AC-A1-II-VoltAlert-Non-Contact-Voltage/dp/B000EJ332O/ref=sr_1_3?s=hi&amp;ie=UTF8&amp;qid=1449993757&amp;sr=1-3&amp;keywords=Non+contact+voltage+detector)
Stubby ratchet screwdriver
I'll parrot my usual recommendation.
Stick it against all sides of a wire, no beep no problem.
http://www.amazon.com/Fluke-1AC-A1-II-VoltAlert-Non-Contact-Voltage/dp/B000EJ332O/
This is a higher quality one and it's still pretty affordable, these would indeed be pretty helpful. Sure, hidden cameras are inherently hidden but they require some basic stuff (Power, a point of view) and based on that you can surmise where they would be should they exist.
Someone who wants to creep you would want to get you naked so bathrooms and bedrooms, aimed at toilet/shower and bed/closet areas, from there you go for POV, where could a camera be that faces these areas. There are ultra small wifi cameras but most people would go with the easiest possible installation (i.e. wired to existing power sources and so on) so it's not as hard as it sounds.
I'll second the call from /u/Cheech47 that you should get a multi-meter. I'll go even further and say you should also get a non-contact voltage tester. The one linked is my preference, but just don't pick up whatever cheapy they have at Home Depot or Lowes. You want one that will work in a marginally crowded box without just going off because *something* in there is hot. =)
Funny you should ask, just wired these up today. I killed the circuit, pulled out the boxes (leave them wired up), turned on the circuit again, turned on the light, and used a non-contact voltage tester (like this: https://www.amazon.com/gp/product/B000EJ332O/ref=od_aui_detailpages00?ie=UTF8&amp;psc=1) to determine which box had no power out when the light is turned on. That's where the companion goes. Now kill the circuit again and follow the wiring diagrams that come with the switches. Note: after wiring it up you may have 2 extra black leads in the companion box - they should be wired together (not to the switch). Also, traveler is generally red. In this set-up the companion is just wired to the master via the red traveler wire (not to the load/light, as with standard 3-way set-ups).
Or, check the labels on the old switches (mine said "two pole" where the master goes but where the companion went it was just a standard switch).
That Klein non contact tester is garbage, go with the tried and tested fluke
http://www.amazon.com/gp/product/B000EJ332O?ie=UTF8&amp;camp=1789&amp;creativeASIN=B000EJ332O&amp;linkCode=xm2&amp;tag=vrefid-20
There totally are.
I have uploaded my work papers here that should help, you can also check my post history for other work in progress shots.
Basic rundown:
Always more than willing to answer any questions, so let me know if something does not make sense.
People really overestimate how hard measuring things are.
Not what I would use due to how cheap it is, but look here dummy
Bowl gouge, not gauge :)
Read this PDF and watch the video that's linked for more information as to why spindle gouges are not to be used for bowls or other cross-grain turning.
The accessory tool set you linked is mostly designed for metalworking by the look of it. You would make modest use of the two spring calipers and the scribe compass in the bottom left of the photo, but none of the other stuff would be useful to a woodturner doing bowls. To be honest, you can buy the same three tools for under $20, so I'd buy the calipers and then maybe a [cheap digital caliper}(https://www.amazon.com/Neiko®-01407A-Electronic-Digital-Caliper/dp/B000GSLKIW/) for when accuracy matters.
Get a pair of calipers, this will confirm all you measurements. Good luck!!
https://www.amazon.com/Neiko-01407A-Electronic-Digital-Stainless/dp/B000GSLKIW?psc=1&amp;SubscriptionId=AKIAILSHYYTFIVPWUY6Q&amp;tag=duckduckgo-d-20&amp;linkCode=xm2&amp;camp=2025&amp;creative=165953&amp;creativeASIN=B000GSLKIW
Get a few of the cheap digital calipers. They're almost disposable, accurate enough for 95% of measurements, and if you need that extra accuracy on a final cut you should be using a good micrometer anyway.
As the others said, stick to Maya or 3ds max. Learning C4D once you know other packages is pretty easy, but for employment you really want one of the Autodesk packages.
Also, I've found the best way to learn to do 3D modeling is to do it as often as possible. No substitute for hours spent trying and failing. Almost everything you model has unique needs and requirements, so watching tutorials can only help so much. You need to just get in there and start creating, hit a wall on how some part of it should be made, then go research the best technique. A good example is how best to drill holes in surfaces, many people trip up on this.
I would recommend you start by choosing simple real-world objects and model them, whether they are things in your room or products, etc. Go on Amazon and buy a pair of calipers (such as these) and use them to take measurements of real world objects as you model them. This will help you get everything proportionally correct, AND make the job easier. Guessing proportions is a good way to make everything look off.
I'd recommend you just pick up a set of cheapo digital calipers off Amazon like these. Worth noting, though, that if you plan to use it only to measure lug width you could save yourself some money and pick up one of these, since the precision of a digital set isn't necessary.
http://www.amazon.com/Neiko-Stainless-Digital-Caliper-Extra-Large/dp/B000GSLKIW/ref=sr_1_2?s=industrial&amp;ie=UTF8&amp;qid=1311244096&amp;sr=1-2
These will cover most small objects. They have different lengths for different things, so pick whatever suits you. Have fun!
Calipers: http://www.amazon.com/Neiko-01407A-Extra-Large-SAE-Metric-Conversion/dp/B000GSLKIW/ref=lp_256411011_1_1/178-3815067-2714000?s=industrial&amp;ie=UTF8&amp;qid=1394071937&amp;sr=1-1
I use them around the house all the time (and only once to measure my peen)
http://www.cabelas.com/product/RCBS-reg-Rock-Chucker-Supreme-Master-Reloading-Kit/1324071.uts ($50 mail-in rebate on this)
https://www.amazon.com/dp/B000N8JZL4?psc=1
https://www.amazon.com/RCBS-Small-Base-Die-223/dp/B000N8LIOQ/ref=sr_1_1?s=sporting-goods&amp;ie=UTF8&amp;qid=1495571705&amp;sr=1-1&amp;keywords=rcbs+223+dies
https://www.amazon.com/Neiko-01407A-Electronic-Digital-Caliper/dp/B000GSLKIW/ref=sr_1_3?ie=UTF8&amp;qid=1495571775&amp;sr=8-3&amp;keywords=digital+calipers
https://www.amazon.com/Lyman-Reloading-Length-Headspace-Gauge/dp/B001RI7A66/ref=sr_1_1?s=sporting-goods&amp;ie=UTF8&amp;qid=1495572110&amp;sr=1-1&amp;keywords=lyman+headspace+gauge
= $435, leaving $65 for your first round of components.
When your $50 rebate comes, I'd get this stuff:
https://www.amazon.com/Hornady-Lock-Load-Comparator-Inserts/dp/B000PD5VLA/ref=sr_1_1?s=sporting-goods&amp;ie=UTF8&amp;qid=1495572018&amp;sr=1-1&amp;keywords=hornady+bullet+comparator
https://www.amazon.com/Frankford-836017-Quick-n-EZ-Impact-Bullet/dp/B001B7ZB4Q/ref=sr_1_2?s=sporting-goods&amp;ie=UTF8&amp;qid=1495572088&amp;sr=1-2&amp;keywords=bullet+puller
This is basically my exact setup and I get great results from it.
Sorry for the delayed response!
I appreciate the compliment, sometimes I still get the feeling like I'm over my head with this stuff, but I still want to help however I can. Qui docet discit, as they say...
OK, if your results are coming back that far off, I would take a big step back and start with the basics. From what you've told me, my first guess is that the steps/mm for your towers is off. In your case, I would throw the assumption that your towers are all moving the same right out the window for now, and check each tower independently:
(Current steps/mm) x (Expected mm traveled) / (Actual mm traveled)
If that doesn't work, or if your steps/mm is still off, it's probably still a firmware setting, so try the following one at a time:
Don't give up! Running a 3D printer is an exercise in patience, and I find it extremely gratifying when it works! Trust me, you'll start keeping backups of your config settings, it's a hard lesson that most operators don't need to experience twice.
What you're in the middle of is exactly the kind of situation where "you have to know how to walk before you can run" applies, except in an extreme case like this, you have to learn to crawl first.
I'll help in whatever way I can! If you'd like, put your config and config-override files on pastebin, and I'll take a look to see if anything stands out!
This is my current plan, tell me what you think I should do different.
Press
Bullet puller
Scale
Dies
Caliper
Book
Tumbler
Media
Media Seperator
Case Prep Tool
Trimmer And also the needed shell holder
Here’s an example of what you’ll need to measure your rotor thickness if you want. digital caliper
How about some measuring calipers.
For calipers I'm not sure about going with gun brand name since the price tends to go up just because gunz. This thing is probably just as good as your Frankford, but much less money. It's $17 and pretty much the same thing as the Hornady that goes for $27. Just look for general calipers that have the best reviews and you're bound to get a better deal than that one. Definitely look to see if they maintain zero for a long time, since you don't want it to be off several thousandths by the time you've measured your COL on your 50th bullet of 100.
Buy yourself a set of calipers (those are cheap, use better ones for real precision work) and take em with you when you go shopping. You'll be able to tell how thick things are from memory pretty quick that way.
And you're right; most dimensioned lumber is in 3/4" thicknesses. If you need to double that then buy 2 boards and glue em together. Easily done, just takes all teh clamps.
I use an [Electronic Digital Caliper like this one] (https://smile.amazon.com/Neiko-01407A-Electronic-Digital-Caliper/dp/B000GSLKIW/ref=sr_1_3?ie=UTF8&amp;qid=1491858601&amp;sr=8-3&amp;keywords=micrometer) and recommend you get one in your kit. Used several times in building the MK2S as well as calibrations later on.
Cheap electronic calipers are cheap. And they're incredibly handy.
So this is a month old but I have some insight if you haven't already started a certain path.
I just bought a 300blk upper for my pistol. I have a lot of 223 brass I've saved to and decided to reload for 223 to save some money. Well I'm pretty well into reloading for 223 and decided i would start for 300blk as well. The equipment isn't too expensive (relatively) if you get some Cabela's sales and buy some discounted gift cards. Full equipment with necessary parts will run about $250 after everything (can be cheaper if you buy a bundle pack).
This kit
Digital caliper
Initial 300blk dies
Trimming die
Trimmer
Case lube
That's pretty much it for the equipment side. Then you'll need bullets, powders, and primers.
If you're starting out with 223 brass you may want to cut the case before trimming, but you'll need something to cut it with. If you buy some ammo to shoot and collect the casings you can't use them too.
I have everything I need for 300blk except powder pretty much. I just need to find something to use.
So $250 for equipment and 1k round of 223 reloading will cost me about $175. That's $425 for the first 1k round of just 223. Once I buy stuff for 308, 300blk, and 9mm I'll start saving in much higher quantities per round. I think I'll probably actually start saving money through reloading in a couple months if I shoot as regularly as I'd like. I still buy ammo on sales and all, so I typically don't count brass into my cost for a reloaded round. On average it's about $.18/round (for .223) if I don't find good deals.
Edit: so I just went through and did some calculating. .178cpr for 223, .285cpr for 300blk, and .362cpr for 308 of I get good sales and free shipping.
After reading a lot of reviews, I went with this pair. They aren't built like engineering equipment--there's a bit of wiggle in the depth rod, but many reviewers said that they were very accurate. In my limited experience, I'm also finding this to be the case.
I preferred the idea of a metal head to a plastic one, but this $15 one seems to get decent reviews.
Unfortunately I don't think that there's another solution that would produce an acceptable result. Personally I'd measure the thickness of the door and shop for a new lock to suit.
Here we go, from Amazon:
Cam Lock
Available sizes For Material Thickness:
5/8" cylinders fit up to 3/8" material
7/8" cylinders fit up to 5/8" material
1-1/8" cylinders fit up to 7/8" material
1-3/8" cylinders fit up to 1-1/8" material
Also I'd suggest a set of These which make measuring things like this really easy and they are cheap!
There are less expensive ones. I use mine all the time though, not just for vaping hardware.
Agree with check the clutch cable first (simple things first always). If at the point where you're sure that it's not the cable, it's not hard to pull a clutch, drain the oil, pull the cover off, take the clutch springs off and then plates (pay attention to orientation). At this point do two things. Take a pair of mics and measure the thickness in three places on each clutch disc. Then make sure your steels are flat by putting them on a flat surface and try to slide a feeler gauge between the plate and surface.
If it's a relatively simple shape, you can measure it up with some calipers and be on your way. For most 3d printing applications you don't need to go drop a bunch of money on some Mitutoyo or other "high end" calipers; These would do just fine.
Another trick for something with a lot more shapes to it, is to take a picture of it as squarly straight down as you can with a ruler next to it, so you can import the image as a 'canvas' into your modeling software, scale it until an inch on the ruler equals an inch in the software, and then you can trace the shapes up pretty well that way without having to do a ton of reiteration. Just keep material shrinkage etc in mind when you go to print if you're using a material susceptible to that.
Overextrusion would only change if you modify your E steps per mm. You should not do this, though, without proper measurement. To calibrate E steps per mm, you mark off 100mm of the filament and tell the printer to extrude 100mm of the filament. Then, see what difference it actually extruded, and adjust your steps fractionally to compensate.
As for your XY steps per mm, you cannot do it without calipers. Pick up a nice pair, like these
And not more precise or accurate, see https://www.amazon.com/Neiko-01407A-Electronic-Digital-Stainless/dp/B000GSLKIW/ with the same accuracy.
To add to the others, get a nice set of calipers if you don't already have some. I prefer digital, and they are relatively inexpensive. I have this pair, and they work great for taking precise measurements. Spending a bunch of time modeling and then printing only for the parts not to fit is such a buzzkill.
Neiko 01407A Stainless Steel Electronic Digital Caliper with Extra Large LCD Screen | 0-6 Inches | Inch/Fractions/Millimeter Conversion https://www.amazon.com/dp/B000GSLKIW/ref=cm_sw_r_cp_apa_i_nRh8Ab09Q96YR
32 and 28 are pretty interchangeable as far as rims go. 25 will most likely still be okay, but 23 probably not. You can check this easily with a caliper, if they have more than 28mm width you might want to reconsider your choice :) By the way, I switched from 28 to 25 on mine and it made a hell of a difference.
You could definitely go cheaper if your boss-man is worried about price: intertap faucets
kegco couplers
The intertaps are pretty new to the scene so IDK how well they perform. I think their design is pretty close to Perlick. Perlicks have been around forever and they are really solid.
I don't know if the freezer you end up buying will have a setting above freezing, or if it will have precise enough control for an optimal kegerator. You might plan on buying one of these temp controllers if the freezer isn't capable of holding ~38F +/- 1F.
Wine fridge is one way
I have a fridge with a temperature control plug( Inkbird Pre-Wired Dual Stage Digital Temperature Controller Outlet Thermostat 110V, 1100W Heating and Cooling for Fermentation Kegerator Heating Mat ect https://www.amazon.com/dp/B015E2UFGM?ref=yo_pop_ma_swf)
With a thing of water.
I am one day going to buy a humidity sensor
Beer fridge https://imgur.com/a/QenV5
The link is a post of my old setup and current setup.
My first setup was a result of me checking Craigslist constantly to find wine fridges. Found 2 and used those for a while.
The new setup was achieved when I went to a local furniture auction and won it for $300.
I would either look for good deals on commercial wine fridges or buy a garage fridge and something like this to control the temp:
Inkbird Pre-Wired Dual Stage Digital Temperature Controller Outlet Thermostat 110V, 1100W Heating and Cooling for Fermentation Kegerator Heating Mat ect https://www.amazon.com/dp/B015E2UFGM/ref=cm_sw_r_cp_apa_OKCNzbB8YSKW1
This related model might be better for beer-making: Amazon link to ITC-308.
The ITC-310T is a more fully-featured model that allows you to pre-program a fermentation schedule.
Kegerators use a thermometer tied in with a freezer to automatically kick it on and off depending on temperature. If you tie it in to the space heater, that may help regulate the space.
&#x200B;
https://www.amazon.com/Inkbird-Temperature-Controller-Thermostat-Fermentation/dp/B015E2UFGM/ref=as_li_ss_tl?ie=UTF8&qid=1489001949&sr=8-1&keywords=inkbird+kegerator+thermostat&linkCode=ll1&tag=kegerators-20&linkId=1861f6ca14056781d504e4797547f086&data1=999999
&#x200B;
Just an example.
I used before this green one ,it works great. You can try one out.
Inkbird Pre-wired Plug Digital Humidity Controller,
[Inkbird Pre-Wired Dual Stage Digital Temperature Controller]
(http://www.amazon.com/dp/B015E2UFGM)
try one out, I think they're good.
Outside of basic equipment like pots, fermenters and chillers, the 2 most impactful things that will make his beer better are the following:
I got http://www.amazon.com/Inkbird-Temperature-Controller-Thermostat-Fermentation/dp/B015E2UFGM?ie=UTF8&amp;psc=1&amp;redirect=true&amp;ref_=oh_aui_detailpage_o02_s00
It is an option within the device.
Thankyou so much for the help. Yes I care about animals and she just doesn't look that happy. The new owner is a great person, but doesn't possess either the financial means nor "technical desire" to take care of the somewhat precise environmental needs.
Yes tank is glass, with a "wire frame" top. I am handy with carpentry, so am thinking of making a decent wooden lid for the cabinet, with air vents routed in to it.
So for a glass tank, should I go for a UTH and a ceramic lamp for ambient temperature? Would I need two thermostats? e.g would two of these suffice: https://www.amazon.com/dp/B015E2UFGM/
Ive used this before.
What /bodobeers said. I just bought an igloo 5.1 cuft chest freezer just for fermentation. (My bigger chest freezer is being turned into a keezer.) Got a slightly dinged one from Home Depot for ~$130, new ones are~$160-200 depending on brand. You can go with a 3cuft chest freezer (about same price, less space width wise than 5.1), but you will have to make a collar for it to fit carboy+airlock due to the hump. you can get the plugin Inkbird controller for around ~$30-40 for a cheaper temp controller with doesn't require wiring. If you want to be more precise with the Inkbird though, you will also need a heating element. If you don't mind it being off by 5 or degrees then you are ok with cold side only. I have one of the more expensive Johnson Controllers that are pretty precise with just cold side for my fermenter, and an Inkbird for my bigger keezer build for I'm not as concerned about exact temperature with the keezer.
Pre-wired Inkbird
Johnson Controller for reference
I just use an stc 1000 temp controller with my heaters. I have used the cheap chinese heaters, eheim ,and most in between. I use the internal temp setting on the heater as a failsafe should my temp controller fail. Though the relays in the stc are n/o so they should fail off, not on. In any case I feel confident using any crap heater lying around since the temp controller is running the show, not some crappy bending metal thermostat trapped in the same tube as the heating element. The stc 1000 is like 15 bucks on amazon. They also make a similar version that is already wired up, though it costs a little more.
Pre wired https://www.amazon.com/dp/B015E2UFGM/ref=cm_sw_r_other_apa_RpJxxbCN93ZZE
Stc-1000 https://www.amazon.com/dp/B00BMLCGF8/ref=cm_sw_r_other_apa_vrJxxb8CMPCKW
I use 2 250 watt eheim currently in my dual 40b setup. That way if one fails my corals stay nice and warm while I replace it. I fear no overheating! Also I keep my house like 65 during winter. So I need some serious wattage. To keep my uncovered tank at 80f
I hooked mine up to a cheap thermostat, and used a VERY cheap digital thermometer along with my TDS meter (not this exact one) to hone in.
Now I don't worry about my heater failing in the ON position, because if the tank gets too hot, it shuts off. I set my desired at 77 with a 1 degree in either direction swing before either my heater kicks on or a clip-fan pointed at my water surface does. I went from 81-84 (yikes!) swings to 76.5-77.5 degree stability.
At this point, there are roughly three categories:
The bottom category is how most of us with thermal systems to mess around with have them.
I was going to go with the $999 standalone version but it has issues. I got the 5s version for now but they are coming up with new products and might show stuff at CES 2015. They were offering $100 discount on that iPhone case. I have an old iPhone that I test apps on, so I thought why not put it to good use.
I first ordered Seek for Android (http://www.amazon.com/Seek-UW-AAA-Thermal-Connector-Black/dp/B00NYWAHHM/) but returned it for a FLIR
Aww jeez, Rick. That doesn't look good. I think the technical term for that is "cratered".
My guess would honestly be that the chip itself overheated due to the high current. This is a problem for a heatsink and maybe a fan. I hesitate to say this though, because both the trace AND the chip are utterly destroyed. Maybe a bad solder joint on the chip caused it to overheat?
Are you willing to sacrifice another channel of that board? Might be worth hooking up a stepper in such a way that it's permanently stalled and just running it until it pops, while carefully monitoring the board's temperature. You should at the very least be able to tape down a thermocouple with kapton, and they sell cheap dual K-type thermocouples with a digital readout on Amazon. I've personally had this one to over 700C, and while it DEFINITELY didn't like it and the insulation burned up, it still works. The best solution here is definitely a thermal camera, and if you can afford it you'll be able to pinpoint where the heat is coming from - the traces or the chip.
A good experiment would be to get a thermometer or thermal camera, and hook up one channel with a heatsink and one without. Monitor both chip's temperatures and see how hot they get, again with the motor stalled. The A4983 is supposed to be good to 150C before it detonates according to the datasheet, although it definitely won't be performing well at that temperature. If you see it getting close (within 20C or so) of that temperature, it's likely just not dissipating enough heat.
Would be very interested to see the redesign, if you decide to do one. If you haven't yet read Dave Jones' PCB layout tutorial, I suggest you do. Lots of really great information there, particularly about making your circuit boards neat and professional, not just so they work.
Minor edit: just thinking about the traces, remember that the ACTUAL current can be much higher than intended when you're working with motors or other large inductive loads. A "2A" limit can turn into 20A if something causes a large acceleration on the motor (like a robotic arm hitting a stop and stalling). That'll fry your trace if you specced it for 2A. Make the power traces big and fat. Bigger. Unless you're squeezing the other traces thinner (not just closer), you can go very large with your power traces. You're paying a flat rate for the amount of copper on the board, use it all. Don't squeeze out the ground plane (it's just as important) and don't squeeze the other traces too thin, but if there's any feel free to use it.
See if you can rent, borrow, or even buy a thermal camera:
https://www.amazon.com/Seek-Thermal-Compact-All-Purpose-MicroUSB/dp/B00NYWAHHM
It will tell you exactly where your problem areas are.
Or spend a mere $180 on amazon https://www.amazon.com/gp/aw/d/B00NYWAHHM
The advantage of using Ubiquiti stuff is the amount of info available: https://www.youtube.com/results?search_query=ubiquiti+nanostation+ptp
PtP means Point-to-point, which is the kind of link you want to do. You will need some outdoor ethernet cable and a crimp tool + connectors. A simple cable tester would be useful too to make sure the cable is OK.
Also, Ubiquiti uses passive PoE. Plug your injector correctly or it will fry your computer's network card!
Don't hesitate to contact me if you have any more questions!
get yourself a cheap cable tester, something like this.
http://www.amazon.com/Tonor-RJ45-Network-Cable-Tester/dp/B00OUFX38W/ref=sr_1_2?ie=UTF8&amp;qid=1462121743&amp;sr=8-2&amp;keywords=cat5+cable+tester
Check that all 8 wires are connected correctly.
Could always pick up a cheap line tester from amazon.
The tester also shows if a signal is weak. Every LED light up brightly.
The tester is this one:
https://www.amazon.com/Tonor-RJ45-Network-Cable-Tester/dp/B00OUFX38W
If the lines are terminated you can use one of these.
Use a toner/cable-tester to see how the wires are connected from the room to the patch panel. Something really cheap like this will work.
For Tone gen, Fluke makes the gold standard. They also have a cheaper version.
You didn't mention a probe, so maybe you are looking for a cable certifier?. That's super expensive though. if you just have to test that there is continuity and not certify the cables, you can use this, or this if you want to look like a pro.
As for Screwdrivers, Wiha makes the best screw drivers, hands down. I have this set for working on electronics & laptop repair. Magnetic tool-kits are fine. This isn't the 80's anymore. There aren't too many magnetically sensitive items inside a computer anymore. especially with the advent of SSD drives.
As for a toolbox, depending the work, I prefer a tool bag or pouch.
Good luck, hope that helps. What helped for me when I started was to go to harbor freight and just get an assortment of tools. As I worked I slowly replaced the stuff I used all the time with quality gear, and didn't have to burn myself buying expensive tools and gear that I would never use.
I'm pretty sure that's how VOIP works.
Okay but seriously, you can technically daisy chain phone lines, so one of those lines is providing service to another phone jack. It sounds like your guess is probably correct. If you don't need service in the basement then disconnect it. Im not sure if it's worth it to you, but one of these would be useful: https://www.amazon.com/gp/aw/d/B00OUFX38W/ref=mp_s_a_1_1?ie=UTF8&amp;qid=1469014796&amp;sr=8-1&amp;pi=SY200_QL40&amp;keywords=cable+tester&amp;dpPl=1&amp;dpID=51Bu0GxKXML&amp;ref=plSrch
Check your wiring with something like... http://www.amazon.com/gp/aw/d/B00OUFX38W/ref=mp_s_a_1_1?qid=1462143785&amp;sr=8-1&amp;pi=SY200_QL40&amp;keywords=cat+5+cable+tester
Using one of these.
https://www.amazon.com/gp/product/B00OUFX38W/ref=oh_aui_detailpage_o01_s00?ie=UTF8&amp;psc=1
RJ45 tester
wall plate mounting bracket
keystone wall plate
keystone f/f jack
CAT6 ends
The setup from your diagram should work.
Edit: the wall plate has various options for the number of jacks.
I'm sorry, total noob here. Do you mean something like this and does this get wired directly into the mini fridge? I feel silly but I have no idea about any of this.
I made a box out of 3" solid insulation foam(dense styrene). The fermenter sits on a base and there are two 1" pvc pipes that go up through the corners. The 5 sided top slides over these. Generally this will keep it warm, but if not I use an aquarium heater with a [$16 thermocontroller from Amazon](Inkbird All-Purpose Digital Temperature Controller Fahrenheit &Centigrade Thermostat w Sensor 2 Relays https://www.amazon.com/dp/B00OXPE8U6/ref=cm_sw_r_cp_api_7TfjzbFJHYNNT)
Works great for letting those starches convert too
I use this temperature controller to control my 3d printer temperature [INKBIRD ITC-1000] (https://www.amazon.com/dp/B00OXPE8U6), maybe this is also suitable for you.
No need.
All you need is one of these things and a crock pot.
Getting everything working requires a bit of handiwork and some wiring, but it's a half hour project that has many uses beyond sous vide. I initially made mine for homebrewing, but now I use it more often for sous vide.
Here's a handy instructional.
I've found that water circulation isn't necessary unless you're doing large cuts in a massive crock, but if it's something you require you can use a high-temp water pump from Amazon for a few bucks.
All said my sous vide rig cost me about 40 bucks, plus putting the controller together was a fun project. I also use it to save money by controlling my fridge's temperature more precisely, control traditional crock meals more accurately, and to keep my space heater from over-heating my room.
Edit: I should have linked this: Inkbird ITC-1000
The other one only allows either cooling or heating at any given time as opposed to both at once. This other model is more versatile (though admittedly it won't make a difference for sous vide).
I'm planning on using an Inkbird temperature controller to regulate a heating element in a cooler used as a HLT. Will there be an issue if there is nothing hooked up the the cooling connections of the Inkbird?