Best thermometer & timers according to redditors
We found 2,238 Reddit comments discussing the best thermometer & timers. We ranked the 447 resulting products by number of redditors who mentioned them. Here are the top 20.
We found 2,238 Reddit comments discussing the best thermometer & timers. We ranked the 447 resulting products by number of redditors who mentioned them. Here are the top 20.


![Maverick M Remote Smoker Thermometer [ET-73] - White](https://m.media-amazon.com/images/I/41XV8Q7N89L.jpg)

They're cheap as hell here is the one I have
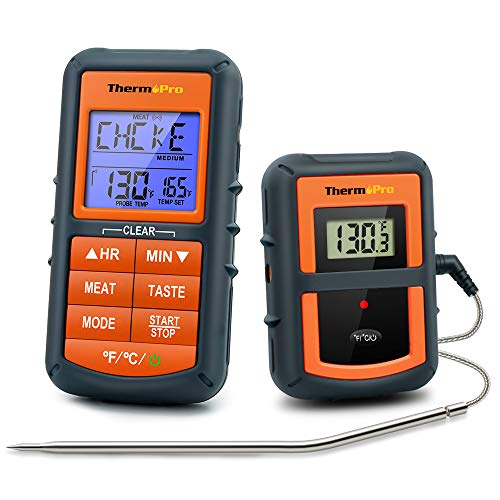
Lasers are for surface temperature, for thick meat you want to be able to measure the inside. An electronic monitor with a probe that you can leave in is the best, then you don't have to keep opening your oven to check the temperature. Something like: https://smile.amazon.com/ThermoPro-TP-16-Thermometer-Stainless-Standard/dp/B017613C3C
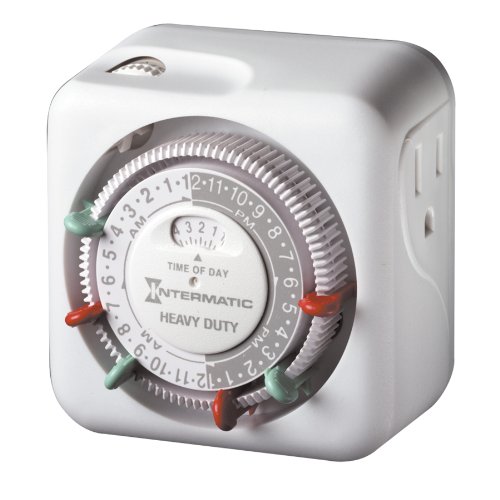
I'm pretty sure you can get one of those timers for christmas tree lights. It's shut off the power at a certain time. Then you could have it switch back on at a certain time.
I think this would work because you tv doesn't turn on as soon as it get electricity (ie plugged in).
TV: on Power: on
-timer off
TV: off Power: off
-timer on
TV: off Power: on
then repeat.
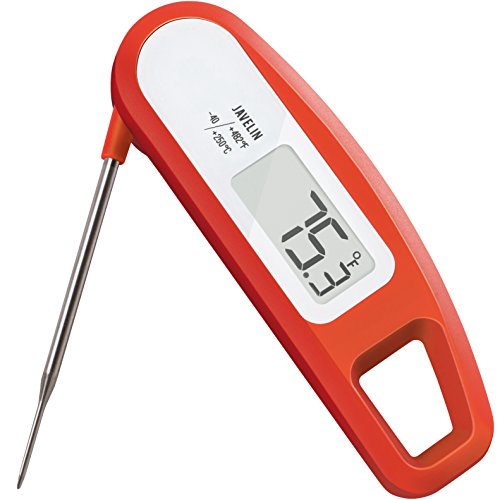
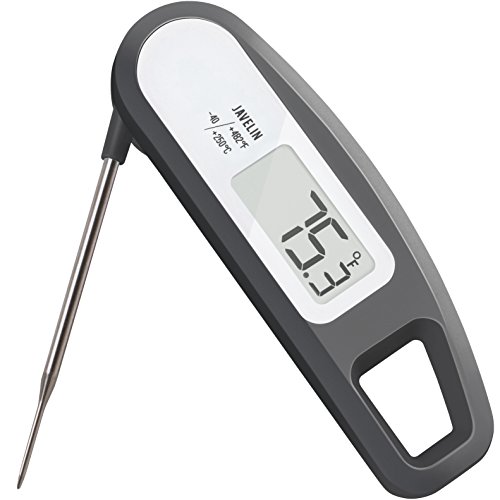
I bought a Thermapen and I love it. But back when I was living with my folks, my mom also really liked using it from time to time. For Christmas I bought her a Lavatools Javelin because it was cheaper but still looked good. I also found that I liked that thermometer as well. Plus, it has a magnetic back so it hangs out on the fridge, so I found that more often than not I was reaching for it instead.
Again, I love my thermapen, and it's absolutely worth its price, but for those balking at the cost, that $25 Javelin is a really good buy.
i've been paged for my link dump, so here it is. the first three links are detailed care sheets, then a tub tutorial, and the rest are product recommendations. read everything thoroughly, come back with any questions. let me know if any of the links don't work.
glass tanks can be very challenging for ball python husbandry due to the high amount of air flow with the screen top and the total lack of insulation with the glass walls. it's generally recommended to use tubs or pvc reptile cages instead. wood enclosures can also be suitable if they're designed well and sealed properly to protect the wood against moisture. glass tanks can work, but they require a lot of modification and maintenance, which you'll find tips for in the second link. i'll give you product recommendations to cover options for tanks, tubs, and pvc/wood enclosures.
Stay at home Dad here. I cook for six every night. Prior to about four years ago the most cooking I did was on the grill. I started with the Betty Crocker Cook book. Literally. Red book in binder format. It has simple comfort food and the recipes are simple. I now have 30+ cookbooks, some better than others. (Giada's are only good for the pictures.) Once I started cooking, I then started watching Alton Brown for other ideas and other techniques, but without a firm base of at least six months of trial and error, it won't help much. Without that, it'd be like watching a Michael Jordan video having never even picked up a basketball and thinking you could play like him. Get used to the environment first.
Start simple. Do a chicken breast and a vegetable from a can. Maybe rice. But note what works and what doesn't. Get a feel for what a "done" chicken breast looks like and feels like. Same with a pork chop. Same with some pasta. Get yourself used to the chemistry and physics of cooking first, then work on more complicated techniques and dishes.
Starter Supplies:
(http://www.amazon.com/gp/product/B008M5U1C2/182-6325493-8824318)
Clean while you cook.
Salt and butter are always your friend. And cheese. If something sucks, add cheese. Good luck!!! Report back please.
TL;DR Just start cooking. Keep it simple, but start cooking.
Almost all home ovens cycle on and off, so the temperature will cycle up and down. Better ovens have smaller variations, worse ovens have bigger ones.
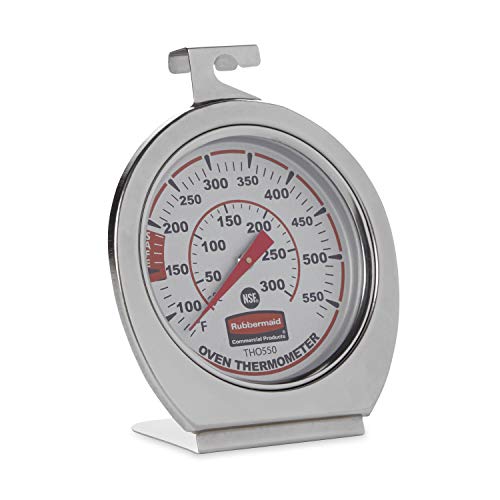
Get an oven thermometer and you can make sure your oven is doing a good job/adjust the oven as needed to keep baking even.
Some gift ideas that have gone over well in the past:
Also, here's my link to a review on here of Etsy/ArtfullyWalls/Society6 artists in case you want to shop for yourself/others with the upcoming sales.
As a motorcycle racer, we pay a lot of attention to track temps b/c we get different tires depending on the heat. I have my IR surface temp thermometer for reading tire and track temperatures
Hot days can mean ridiculously hot surface temps... as in hot enough to blister your feed in a single step or two
For those warning about PH issues and electrolyte imbalances, they are very valid concerns! But I do this daily, sometimes twice, and have for years.. and have never had any problems. Just make sure you're eating well, and maybe drink a gatorade beforehand, and you'll be fine.
Also, noone has ever died from enema'ing with water alone. It doesn't happen unless you take it to an extreme. But colon perforation is a serious concern. You just have to be careful of water pressure, and don't overfill yourself.
Also, I've found that flushing with a water temperature of 120-130F is almost like having a constant orgasm. (Use a food thermometer to check the output water temperature before you put the enema nozzle in you). But you should start at about 100F and work your way up to a safe and comfortable temperature.
Edit: a word.
Edit2: Ouch. Could the downvoters please give me a reason for their disagreement? If you have better information, I'd like to learn; for my sake and the sake of anyone reading this later.
People will say things like 'screaming hot cast iron'. I disagree.
Let me recommend one of these. Then buy a bunch of high quality unsalted butter and make ghee (just cook the butter very low, crockpot even, until all the layers are seperated. Scrape the fat off the top, then pour the middle layer into a container, do not let the stuff at the bottom get in. You will lose a tiny amount of ghee but it's just butter so don't worry about it.). Ghee won't smoke till like 485. anything between 400 and 450 is plenty hot enough for a good sear.
Cast iron doesn't heat evenly. It retains heat exceptionally well. So what I do is preheat the pan for about 5 minutes on a 4/10 on my stove (flat glass stovetop). By then, at least half the pan's about 400. I throw in the fat, wait for the fat to get up between 400-450 (takes seconds), then drop the seasoned steak on a part maintaining that heat large enough to cover the steak. I do 3 minutes a side at that temp.
Sear's great. I can leave up the smoke alarm. I don't even need to open windows. I don't even put the overhead fan for the stove on...cause there's next to no smoke.
Here's a steak I made last night (half eaten).
I've yet to try, but I will next week; putting a cast iron weight on the steak while it vacuum seals. This, in my head, should keep the steak perfectly flat instead of getting 'scrunched' a little by the vacuum sealing. The only part on my steaks that haven't seared well were where the steak got 'scrunched' and wasn't flat and even. I think that will solve that.
EDIT: Quick note since people like this comment...Someone made a comment that changed my life a bit with sous vide. They said to just cook the meat sous vide, ice bath, then fridge. You can then keep it in the fridge for like 2 weeks (I've never let it go that long, usually within a week) but it ends up being like 75% meal prep'd. Searing takes all of 10 minutes with the pan preheat. Pop steaks out in no time flat.
Applicable point about searing is that from cold is key (3 minutes per side from hot will 100% overcook it).
First of all, quit closing the doors. That right there is a big part of this problem. If you want nice cool air to flow into a room, you must also let it out. Blocking the air movement leads to stagnation and high humidity.
Second of all, you might want to try to balance the air flow.
Balancing the system only requires two inexpensive things, an anemometer and a non-contact thermometer.
First, open all the registers. Set the A/C about 5 degrees lower for this test, so that it stays running. Then walk around the house and record the air speed and temperature at each room's vent(s).
Now comes the balancing. Start closing the registers closest to the air handler (A/C fan). Is it in the basement or on the first floor? Restrict it way down. Maybe 25% of fully open. Don't worry, you can adjust it later.
Take a reading of the air flow. Now go to the next register in line. Greatly reduce it. Move on to the next....
As you do this, all the air is now being forced upstairs. The general rule of thumb is that you do not want to reduce the total air volume delivered by the A/C by more than 25% to 30%. More than that can make the fan work harder which means it could run hotter, which could shorten it's lifespan.
Your goal is to get maybe 60% of the airflow upstairs, and perhaps 40% downstairs. Some homes require 70% - 30% (depending on how it is built). Split levels can be a bit tricky, but I think you know what I am getting at.
Re-directing the air so more blows upstairs is not restricting it. A better term would call this a re-distribution of the available air.
Your goal with the anemometer and the thermometer is to get uniform air speed and temp across the entire upper levels. Just a reminder; all doors must be open, please.
Your friend is incredibly irresponsible and should seriously be talked to. You don't dump an animal on someone who 1) isn't expecting it and 2) doesn't even know how to take care of it.
Get rid of the sand, it's not an okay bedding. You want shredded aspen or coconut mulch for a milk snake. You can find either of these options at most pet stores. Make sure you don't get pine bedding meant for rodents. Give him at least several inches of bedding because milks do love to burrow.
You want to give the snake very small, tight places to hide. They like to be squished, it makes them feel secure. So the coconut hide is too big and open to function as a safe space for a baby milk snake. Look at the pet store for small caves and hide boxes that will just barely fit your snake. You'll need at least two, one for the warm side and one for the cool side.
For the heat, a heat lamp is great but only if used correctly. You'll need an infrared temperature gun to check what the surface temperature of the bedding below the lamp is. You can get one from Amazon, this one is great and cheap. You want the temperature of the bedding to be around 85°f directly below the lamp. You'll want to put one of the hiding spots close to the warmest spot so he can choose to warm up while being hidden. As for bulbs, the one you have is likely going to be too hot but it depends how big your tank is. It might be some trial and error with dimmer bulbs. Have the bulb on for ~14 hours a day, really whenever it's naturally daylight where you live.
Milk snakes are easy and room temperature is fine for the rest of the tank during the day. The light will be off for night and as long as your house stays warmer than around 70° it's okay for the snake to have a night time temperature drop.
You might need to add a humid hide if you notice trouble with shed getting stuck. This is as simple as a Tupperware container with a hole cut into it and filled with damp sphagnum moss. It's just to offer a more humid place for the snake to use.
Grab some silk plants and fill the tank. Snakes like to feel invisible so don't worry if the plants take up a lot of space, he'll love crawling through them.
Milksnakes should be fed once a week as babies and once every 10-14 days as adults. You'll want frozen mice the same thickness as the snake or a little smaller. Thaw it in cold water or in the fridge before meal time and then warm it up with warm water right before feeding. You'll need feeding tongs, snakes like to "accidentally" grab fingers when in feeding mode. Don't pick the snake up for at least 48 hours after feeding to allow him to digest in peace. Also, there is a myth that you should feed in a separate container to avoid cage aggression. This is false and outdated information, just feed him in his enclosure.
Snakes don't require handling and would be perfectly fine without any. But they will tolerate it to some extent. Generally, only handle once or twice a week for 5-10 minutes maximum.
Clean up poop/urates as you see them, clean and refill the water dish at least every few days. Eventually you'll want to replace all the bedding. Depending on the snake and size of the tank, this could be every 3 months or every 9 months, just judge when the bedding is getting smelly.
Yay! I can actually help with this!
Adagio Teas has my FAVORITE loose leaf teas in the world. It depends what kind of tea she likes to drink, but you can get her a bunch of samples and go from there. You'll also get frequent cup points you can use later if you get some samples.
My favorites are:
(Black teas) Yunnan Gold, Golden Monkey, and Black Dragon Pearl: all chocolatey and rich, I drink them with soy milk and listed from not-very-earthy to smoky-earthy.
(Green teas) Gyokuro, Sencha Overture, and Jasmine Yin Hao: I prefer Japanese steamed greens which are more grassy and vegetal than Chinese pan roasted ones, but if she likes nutty green teas Dragonwell is also great.
(White teas) Silver Needle and White Peony:
Awesome because they're low in caffeine(I was just informed they aren't necessarily lower in caffeine, so let's just say awesome for the sublime nectar-y taste), my white teas have been kind of lonely since it's winter here, but in the summer they're perfect. Apricot liqueur and honeysuckle come to mind.But I'm not a big fan of blends (she may be), or Oolongs, or Pu Erhs, and definitely I don't drink anything not camellia sinensis (like honeybush), and a lot of my favorites are pretty expensive (but so worth it), so if you know she loves peppermint or chamomile by all means do that! If you only got one from Adagio, I would go with yunnan gold undoubtedly. You can get a sample for only $5 and it's heaven. Nobody dislikes this tea, not even people who say they don't like tea!
(And you can use code 6905673943 for $5 off!)
---
Next she's going to need a way to brew it. I abhor doing dishes, my mother has made me some wonderful tea cups (she does ceramic pottery) but you can definitely just use the coffee/tea cups you already have to start. If you wanted to make it a cute holiday basket, of course, a tea cup would make the whole thing look adorable. At the risk of sounding like I work for Adagio, a glass cup like this is so perfect because you can watch the color of the tea as it brews which is a great indicator of tea strength!
Since I hate dishes so much, I have ended up using just empty, fill-able tea bags (I get the 2-cup capacity ones here) which is really great for re-steeping because you can just save the tea bag and put it in the fresh water.
Temperature is super important if you're brewing anything other than super robust black teas or herbal teas. For example, I steep my favorite green tea at 170 degrees F, which is a lot cooler than the 212 of boiling water. I bought this thermometer more than a year ago, and I've never had any problems... plus, getting a temp-specific tea kettle is so expensive :/ To walk you through how I personally make my tea:
I'll often put agave sweetener in my tea, and soy milk if it's a black tea.
I have also bought this for steeping and I adore it but it's another dish to do for a student without a dishwasher... It's a spring-loaded receptacle where you place your loose-leaf, and when it's done steeping in the hot water, you put it on top of the teacup. The gravity pushing on the spring releases the tea from the receptacle leaving the leaves and it's really really cool and efficient and you can make more tea at a time... but for a beginner, I would really recommend empty bags.
---
Best of luck!
tl;dr Adagio is not a cult
edit: linked to Adagio
dried mealworms have no nutritional value. leopard geckos need live bugs.
here's an affordable thermometer. you really need one so you can make sure they're able to digest their food. https://www.amazon.com/gp/aw/d/B00837ZGRY/
Sir please sit down and let go of my hand, I'm here to help. That's a Thermapen by Thermoworks, it's one of the world's fastest and most reliable digital thermometers, but it comes at a price. - a cheaper option is the Thermopop, and an even cheaper option is the Lavatools Javelin - I haven't tried it myself, but the reviews on Amazon are stellar.
There are lots of other things I use daily:
etc.
But the point I guess I'm making is that you can get lots of good, cheap stuff to start with.
Edit: Dear downvoters: just a simple warning to check your meat before putting it in your mouth.
I love the idea, but I'm not so sure about the inside of that second (top layer) burger.
http://i.imgur.com/xhXKH.jpg
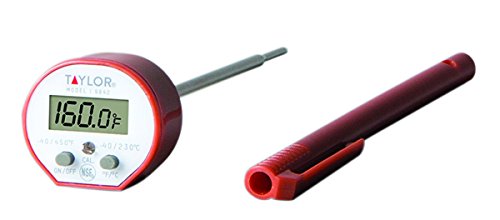
An instant thermometer like this can really come in handy for food experiments.... you know, so they don't kill you.
http://www.amazon.com/Taylor-Classic-Instant-Read-Pocket-Thermometer/dp/B00004XSC4
Hamburgers should reach an internal temperature of 160.
http://www.fsis.usda.gov/is_it_done_yet/
That's very cool! I should warn you though, caring for a baby beardie isn't easy or cheap. They need to eat at least twice a day, have salad made every morning, have poops cleaned every day, and have baths regularly, which is a lot to do and can be overwhelming. Their food is also pretty expensive because they can eat over 100 insects per day, it often comes to $20-40 a month. Plus the initial setup will cost a few hundred dollars. I say this not to scare you off (I always love when people get their first reptile) but to warn you. Reading it again it sounds more complicated than it actually is, but you should definitely be prepared to deal with those things.
For now make sure he/she is in a place where they can get to 75-80f. You can worry about high temps later, right now I don't want to risk overheating. Don't worry about feeding for now, they need specific temps to be able to digest, just give some water for now, maybe a place to hide. This should be fine for a few days while you gather the materials you need.
Read through the sidebar and ask questions if something is confusing.
The basic list of stuff you'll need is here:
Enclosure: minimum adult size is 36" x 18" x 18", but 4' x 2' x 2' is better. Can be an aquarium or a wood/pvc enclosure. You can get a 20g tank and upgrade, but there's no point in spending extra money, they don't get scared by big spaces.
Heat: a heat lamp is the best heat source for beardies, it doesn't have to be reptile branded. As long as it gives off bright white/yellow light and gets the temp to 100-110f it works, I have a 90w halogen flood light.
UVB: proper UVB light is essential. The best/only guaranteed good UVB lights are either Mercury vapor bulbs (heat and UVB combined) or fluorescent tubes. Compact bulbs can cause eye problems. Tubes are used much more often and are cheaper and better for beardies. You'll want either a reptisun 10.0 or Arcadia 12% tube, roughly 2/3 the length of the enclosure. They come in two sizes, t5 and t8, t5 is newer, stronger, and better. It gives you more options for where to place it and is lasts 12 months instead of 6 so it's cheaper. Basically, you want either a reptisun 10.0 t5 or Arcadia 12% t5.
UVB fixture: heat lamp fixtures are easy to find, but for uvb it's a bit tougher. This is what I use for my 22" t5: https://www.amazon.com/dp/B00AKKUBDQ/ref=cm_sw_r_cp_apap_as8FHHQMbU3iD
Timer for the lights
Substrate: tile is the best, imo. Paper towels and reptile carpet also work, just stay away from sand.
Basking spot: a large, flat object that absorbs heat well, a tile on a platform works well.
Hides: personally I've never seen my Beardie use a hide, but they're good to have.
Other decor: totally up to you, just make sure it's safe. Reptile hammocks are popular.
Dusting powder: you'll want calcium w/D3 and vitamins, calcium should be used more often.
Thermometer: analog thermometers are inaccurate, you want either a probe thermometer or a temp gun. This is what I have: https://www.amazon.com/dp/B00837ZGRY/ref=cm_sw_r_cp_apap_L679M528XRDNl
Some housing for feeder insects to stay alive for a few weeks and to gut-load them.
Let me know if I forget anything or if you have any questions. Good luck!
Generally speaking around here the Thermoworks Thermapen (and the other Thermoworks products) is considered the gold standard. And there is no reason why it shouldn't be. It is accurate and fast. But it is also somewhat pricey. Especially for people just getting into grilling.
Personally, especially for people just getting serious about grilling, I tend to recommend the LavaTools Javelin ( https://smile.amazon.com/Lavatools-PT12-Javelin-Thermometer-Chipotle/dp/B00GRFHXVQ/ ). The price is nice and low and the performance is fairly comparable to the Thermapen. (source: http://www.brewunited.com/index.php?blogid=150 ) Note that the tester ( u/sufferingcubsfan ) thought he was testing the PRO model when in fact he was just testing the standard.
While the testing wasn't exactly vigorous or scientific journal worthy, it was enough in my book to save myself the $75 and go with the Javelin. That was @ 1.5 years ago and I haven't looked back yet. I've also given it as a gift to friends that either grill or brew beer (or both) and haven't heard a complaint yet.
Sounds like you were getting outdated or flat-out incorrect information and those 'experienced snake owners' are likewise misinformed. There are very few snakes that legitimately have evolved to thrive on sand-based substrate (irony being the Sand Boa is not one of them; they live in sandy soil which is very different composition than straight sand). The Ball Python is native to the svannah/jungles of Sub-Saharan Africa. Its dirt, soil, and burrows. Not a majority or even significant amount of sand.
Additionally, if I extrapolate correctly from this singular picture, your BP is also in a glass enclosure and has a log-style hide. The former makes keeping humidity in the 55~80% range a difficult exercise, and the latter, is a stressor as BPs do best with a hide that has a single-entrance or is cave-like; the more points of contact, the better, and a single entrance means they can feel safer.
I'm going to steal _ataraxia's ball python dump and toss it below:
i'm going to dump a bunch of links to get you on the right track. the first three links are detailed care sheets, the rest are product recommendations. read everything thoroughly.
glass tanks can be very challenging for ball python husbandry due to the high amount of air flow with the screen top and the total lack of insulation with the glass walls. it's generally recommended to use tubs or pvc reptile cages instead. wood enclosures can also be suitable if they're designed well and sealed properly to protect the wood against moisture. glass tanks can work, but they require a lot of modification and maintenance, which you'll find tips for in the second link. i'll give you product recommendations to cover options for tanks, tubs, and pvc/wood enclosures.
It's not fancy.
I've only made canna caps a few times so I'm still tweaking things but here's what I've got so far.
Ingredients:
• 1oz bud - your choice of strain.
• 8oz (1 cup) coconut oil or butter. I prefer coconut oil.
• 1.5tb soy lecithin
Directions:
Pre-heat your oven to 215° F.
Chop up your herb finely.
You can grind it but I've found it's easier to strain if chopped.
Sprinkle evenly into a small oven safe dish.
Cover well with aluminum foil, crimping up around the edges.
Place in oven for 30-45 minutes.
After 30-45 minutes, remove the dish and let it cool, WITH the foil still on. Letting it cool down slowly, allows any vapors to settle back into the material (theoretically).
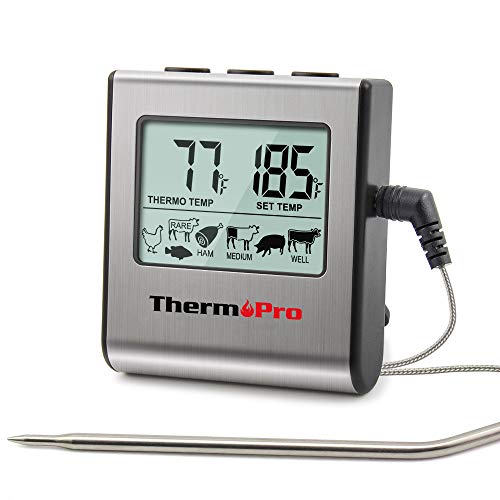
Note: for the extraction process I prefer a Nesco 6-Quart Roaster Oven. I prefer this over a crock pot because it has temp control.
I used this in combination with a Digital Cooking Thermometer which comes in handy not only for more accuracy but also because you can set an alarm on it if the temp gets too high - in which case you'd just add some water to the mixture.
While you wait for the container to cool, Melt your coconut oil or butter in a pan on low heat.
Once cool, remove the foil lid from the pan and place the decarbed herb into the roaster/crock pot.
Pour enough distilled water over the herb to float it, then add the oil or butter over your herb and stir it up.
Set the temperature between 200 and 220 Fahrenheit and let cook for 12-18 hours, stirring occasionally.
Note: this step is where that digital thermometer with temperature alarm comes in particularly useful. Set it and forget it.
After 12-18 hours turn off heat and and strain the oil from the herb using a stainless steel mesh strainer, pouring the extract into a class or ceramic dish.
Note: I prefer a steel strainer but it's possible to use cheesecloth. Coffee filters do not work. Also, I don't throw away the herb. I let it dry as much as possible, grind it finely and put it in capsules also.
Place dish in refrigerator over night or until the oil or butter has hardened.
Once solid, separate oil/butter from the water, discarding the water.
Place solid extract in an oven safe dish and heat at low temp until liquid.
Once liquid, add 1.5tb of soy lecithin to the extract and stir gently until homogenized.
You now have cannabis extract ready to be used for cooking or for filling capsules.
Here are some things that I used that may help you.
1,000 Herbal Oil Capsules - Size "00"
Size 00 Capsule Holding Tray
Soy Lecithin Powder - 1 Lb
Glass Eye Droppers
Hope this helps. Happy cooking :)
You want a fast reading digital thermometer, by the way. Something like this will do the job.
There's an amazing instant read that's even better, but they're like $100. But temperature is your main concern, really.
Also, an excellent technique for cooking meat that's quite forgiving is braising in a slow cooker. It's stupid simple, cheap, and you end up with something tender and delicious.
You can stick on in the oven on a baking sheet under the broiler to crisp up a bit. With some salt and other seasonings of your choice that can go great on tacos.
Or you can combine with BBQ sauce for a pulled pork sandwich.
>Not yet
NO NO NO NO FUCKING NO.
NEVER. REPEAT NEVER PUT A HEAT SOURCE IN WITH A SNAKE THAT IS UNREGULATED. It can burn or kill your snake. Go and order one, or go to a reptile store immediately and get one. Its literally one of the most important things in snake husbandry. And get a digital thermometer to keep track as well.
I dont mean to sound mean but this is something that needs to be done NOW for the health of your snake.
What is the wattage of the bulb and how long do you leave it on ?
EDIT: get the following (or equivalent) immediately
thermostat
temp gun
thermometers. one for hot and cold sides
yes, it does. You can use all your dowsing rods and meat-ruining techniques if you want, but an accurate thermometer will tell me that the middle of my steak is exactly 143 degrees, ready to be eaten after a small rest, with nary a puncture in the middle. That's the secret to always delivering exactly what somebody asked for, without cutting into it 3 times making sure it's an even pink throughout. Or getting a good breaded chicken breast to exactly 160, so it's not dried out but moist and flavorful, while still being thoroughly cooked.
same thing with making desserts -- you want 160 degrees to "cook" eggs when you're making custards. Much higher and they start clumping/solidifying, and you will start scalding dairy products.
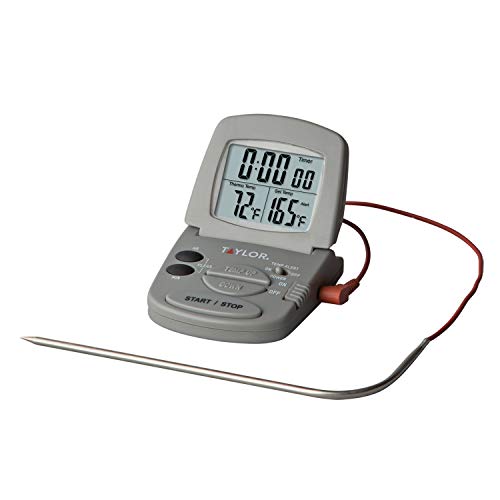
Also, a good thermometer can be left in an oven with a base unit reading temperature. So, making a perfect prime rib roast is as easy as setting an alarm temperature (all the good thermometers do this), and taking it out at that point. Same thing with boiling water, if you're busy. Stick the probe in the water, set a temperature alarm of 212 degrees, and walk away. It'll beep when it's ready.
Personally, I have 4 different leave-in thermometers. don't spend a lot of money, a simple 20 dollar one from amazon will do you just fine.
Personally I'd toss it, drinking glass makes me nervous. Buy a $20 digital thermometer as a replacement.
I use this one and love it http://www.amazon.com/gp/aw/d/B0021AEAG2?pc_redir=1408766971&robot_redir=1
These awesome popsicle makers. They come and go but should pop up for about $17.
A butter bell... never deal with hard butter again
A probe thermometer... it's changed my cooking accuracy like no one's business
A safety razor and 100 blades... shave like your grandfather and stop paying $8 for shit blades
15 bucks over budget. Maybe skip the popsicles.
That AC is broken. You should temp the air coming out of the vents, it should be in the '50's mid-range.
https://www.amazon.com/Etekcity-Lasergrip-774-Non-contact-Thermometer/dp/B00837ZGRY/ref=pd_lpo_vtph_263_bs_t_1?_encoding=UTF8&psc=1&refRID=M18KZBV4SKQ18QAJTZH3
If you want to try and find where they are coming in, or locate the nest by yourself, you can rent one of these from the Tumwater Home Depot for about $50 and look for hotspots:
https://www.homedepot.com/tool-truck-rental/Thermal-Camera/FLIR-i7/
This is a pdf example of how to use an IR camera to find wasps.
Or Amazon has cheap IR thermometers without cameras that you could do the same with.
https://www.amazon.com/Etekcity-Lasergrip-774-Non-contact-Thermometer/dp/B00837ZGRY/
-----------
But, insects are specifically a landlord duty by Washington State law, so you should read up on that to know your rights, then find legal help at that last link:
https://www.atg.wa.gov/tenant-rights
https://app.leg.wa.gov/RCW/default.aspx?cite=59.18.060
https://app.leg.wa.gov/RCW/default.aspx?cite=59.18.070
https://app.leg.wa.gov/RCW/default.aspx?cite=59.18.090
https://www.atg.wa.gov/residential-landlord-tenant-resources
Long time smoker, recent convert to concentrates here. My thoughts over the last few months:
You don't want to season a quartz nail, just heat it with a torch to clean it before you use it.
I like to always keep my banger clean. If you heat it up enough with a good-size torch, everything will burn off and it will look new again. No need to dunk in ice water or anything crazy, just torch it until it's crystal clear. Any residue will burn off and leave nothing but a fine layer of white ash. There is no reason to leave any icky buildup like a regular pipe, it will just taste bad later.
I initially bought a little butane creme-brulee torch. It sucks. Takes way too long to heat a banger. I grabbed my propane plumbing torch from the garage, and haven't looked back.
Unless you're dabbing one of those crazy-strong concentrates like distillate, you will have liquid residue left in the banger after you hit it. That's NOT the "good stuff", it's the other stuff that doesn't vaporize at THC- and terp-temps. Wipe it out with a q-tip after you take the hit, it saves you cleaning time later.
As far as getting it to the right temp, I had some trial and error. Too low, and it melts slowly and doesn't all vaporize. Too high, and it immediately turns black when you put it in the banger and tastes like crap. With metal nails, I can see getting it "red hot" and then timing the cool down, but with quartz is NEVER gets "red hot", at least with a brand-new banger. Quartz is insane... it just takes the heat with no complaints.
You could definitely learn your rig and torch as far as heating/timing, but I got tired of imprecision and bought one of these infrared thermometers. AWESOME PURCHASE, money well-spent. It only reads a high temp of 850 degrees or so, but you can monitor the cool-down, and as soon as it drops to 600F or so, you'll get a great dab. Plus, it has a built-in laser pointer! You can take a dab, and then lay on the couch and torment your cat! For only $17! But seriously, it makes for perfect dabs.
About the cleaning, I usually clean the banger right after the hit now (with the torch), after wiping with the q-tip. It's already half-hot, torching it makes it look brand-new, and who knows, maybe you'll be inspired to do another dab while it's still hot! (wash rinse repeat)
Have fun!
Not to sound like some know it all asshole, but I've found infrared thermometers to be amazing when getting my pans up to the right temp, especially on a unfamiliar stove.
These thermometers read accuratley in about 1 second and also leave a very small, non leaking hole.
I'm a huge Kenji fan myself. I've cooked nearly half of the Food Lab book, and dozens of his recipes from the website, great stuff!
My thoughts on gifts
Lavatools PT12 Javelin
A Nice carbon steel wok
A good Dutch Oven
A torch for searing, or Creme Brulee
An awesome knife
Another awesome, but cheaper and well rounded knife
The list could go on, and on, and on....just some thoughts though.
I just picked up one of these bad boys. Tape one probe to the motherboard and the other to any hard drive. If you don't have tape I'm sure a magnet will do the trick. Clip the receiver onto your belt and head home.
https://www.amazon.com/gp/product/B01GE77QT0/ref=oh_aui_detailpage_o00_s00?ie=UTF8&psc=1
/s
should just get one.
also good
Sure!
This is the popcorn popper I'm using to roast (not pictured)
This is the Sweet Maria's sampler pack (4 lbs of green coffee for roasting). Mine specifically came with these four coffees:
Now on to the equipment:
Bonavita BV3825ST 1-Liter Stovetop Kettle
American Weigh Black Blade Digital Pocket Scale, 1000 by 0.1 G
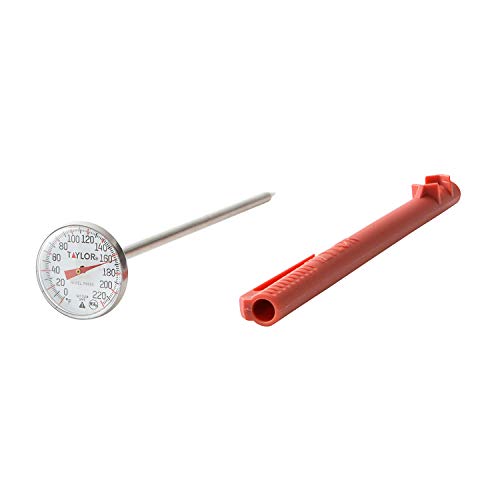
Taylor Classic Instant-Read Pocket Thermometer
Chemex Coffee Maker 8 Cup Classic
Chemex Coffee Filters - 100 Chemex Bonded Unbleached Filter Squares FSU-100
Hario MSS-1B Mini Mill Slim Coffee Grinder
I also have a bodum french press and an aeropress. The scale is big enough to measure coffee, but not big enough to brew on, so keep that in mind if you are thinking about getting one, but it was pretty cheap and I don't mind pre-measuring the coffee and water rather than doing it while i brew. I also have already had some issues with the thermometer head rotating, throwing off the measurement, but it's not really a huge deal because it's easy to rotate it back and I usually just bring water to a boil and then let it drop 10 degrees regardless of what the temp actually says. Overall, loving all my new goodies!
This one, I think. I have it too.
http://www.amazon.com/Polder-Original-Cooking-All-In-One-Thermometer/dp/B0000CF5MT/ref=sr_1_4?ie=UTF8&qid=1367934782&sr=8-4&keywords=probe+thermometer
http://www.amazon.com/Raytek-MT6-Non-contact-MiniTemp-Thermometer/dp/B000O80B5M
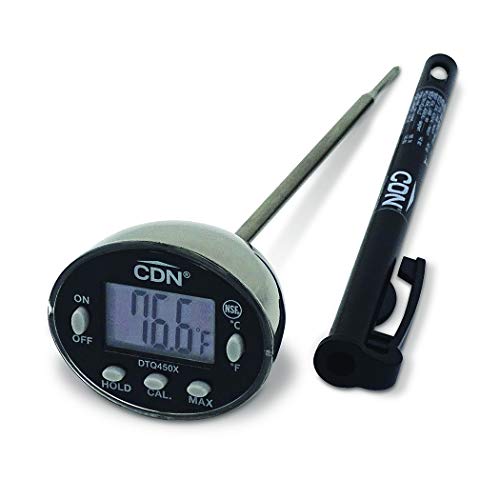
No joke. I use it all the time when cooking. It stays in my kitchen. It really opens up your eyes on how uneven the temperature of your cooking surfaces are. SURFACE TEMP ONLY! to temp meat like chicken, use something like this: http://www.amazon.com/CDN-DTQ450X-ProAccurate-Quick-Read-Thermometer/dp/B0021AEAG2
Also: http://www.amazon.com/s/ref=nb_sb_ss_sc_0_11?url=search-alias%3Dgarden&field-keywords=chainmail%20scrubber I don't know which one I have, I think the knappmade one, but these are also awesome. Work great for cleaning stainless steel pots and pans also.
Here are some of my favorite tools:
Can you set what time the pot starts? I used to use a plug timer to start the pot when I wasn't around. Throw all the ingredients in the pot in the morning before leaving, set the timer to turn on at noon, and leave the crockpot dialed to LOW -- by the time I got home at 6, the food would be done.
also - ovens cycle to maintain the temp - get an oven thermometer that hangs on a rack to get better accurate temp readings. Just cause your knob says 325 doesn't mean the oven IS 325 all over or at all - it could be way off or tell you you need a new oven. a thermometer can also help you map out the hot/cold spots.
You should always use smile.amazon.com! Same price, same everything, except 0.5% of your purchase goes to the charity of your choice!
Here's your link using Amazon Smile
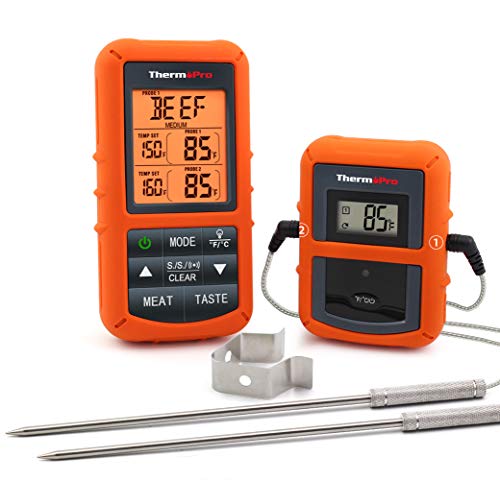
I have this one and I like it a lot. The two probes are handy and it's got a bunch of pre-set meat and doneness temps so it's easy to use for anyone who doesn't already know what temp they want their meats to be cooked to.
Do you have a photo of the second boa? BCI and BCC aren't THAT different in size, though BCC average a foot or so larger.
I use thermometers like this, and place the probe on the substrate in the center of the hot spot. I have a temp gun like this to make sure the temps in other areas are within acceptable ranges.
You ALWAYS want to know the temperature of your hot spot, since the heating element can get hot enough to cook your snake. I just noticed this, but you need to get that lamp out of there - she can reach it, and she will burn herself on it. Boas LOVE climbing and they are dumb at registering pain.
Take out the lamp and replace it with an under tank heater or heat tape regulated by a thermostat (unregulated UTHs are dangerous). You can get a decent and affordable thermostat here.
I'd highly recommend getting an instant read thermometer. You will never overcook a steak again. Here is the one I use. Pull your steaks off at about 130-135 degrees for medium rare.
Also, let them rest for 5-10 minutes before you cut into them. Also, salt them generously about an hour before you cook and pat off any excess moisture on the surface before you throw them on the grill. They will be a lot juicier, and you'll get a better sear on the outside this way.
The Thermapen is awesome, for sure, but I'm not entirely convinced most cooks need it when something like this can give similar results at maybe a second or two slower and fractions of degrees less accuracy for 1/3 or 1/4 of the price.
I agree with most of this.
The part I would question would be the Cooling due to extra surface area and conductivity. I think this part plays a much greater role than you visualize. You specify that in lab conditions you would "control temp and humidity of ambient air as well as any currents passing over the cup". The air currents are the key element. The heat rising from the tea would create an air current passing directly by the exposed end of the spoon creating the same effect as a heat sink. Cool air rising past the edge of the cup would draw the heat from the spoon.
I think this would easily be a measurable difference outside the lab.
Edit: Marginally scientific results from home experiment. Placing here so it doesn't get buried below.
First the how:
Due to some measuring inaccuracies I did not feel that I could address the difference between a hot spoon and a cold one as the difference was early and changes early on were much harder to control.
The results should be considered accurate to +/- 5 seconds
Results: No Spoon
1 - 1:19, 3:02, 4:58
2 - 1:17, 2:53, 4:53
3 - 1:21, 2:53, 4:54
4 - 1:20, 2:56, 4:56
Results: With Spoon
1 - 1:26, 3:06, 5:00 *** (I made the mistake of preheating the entire spoon, instead of just the part in the water)
2 - 1:22, 2:49, 4:43
3 - 1:15, 2:52, 4:40
4 - 1:20, 2:52, 4:52
5 - 1:18, 2:50, 4:50
Conclusion???
To my untrained eye, the data appears to be fairly consistant over the first 2 intervals with or without the spoon. The final interval however seems to show a tendancy to be quicker with the spoon. Even including the mistake, the average without the spoon is 4:54.750 vs the average with the spoon being 4:49:00. Not including the mistake, the average with the spoon lowers to 4:46.250
I call that a measurable difference.
First of all. It's very good you recognize that you need help in learning how to care for the snake.
Second, here is a big link dump created by another regular user u/_ataraxia all credit for this goes to her.
the first three links are detailed care sheets, then a tub tutorial, and the rest are product recommendations. read everything thoroughly, come back with any questions.
glass tanks can be very challenging for ball python husbandry due to the high amount of air flow with the screen top and the total lack of insulation with the glass walls. it's generally recommended to use tubs or pvc reptile cages instead. wood enclosures can also be suitable if they're designed well and sealed properly to protect the wood against moisture. glass tanks can work, but they require a lot of modification and maintenance, which you'll find tips for in the second link. i'll give you product recommendations to cover options for tanks, tubs, and pvc/wood enclosures.
Here's an info dump, courtesy of u/_ataraxia. It has pretty much everything you're asking about and more.
The first three links are detailed care sheets, then a tub tutorial, and the rest are product recommendations. Read everything thoroughly, come back with any questions.
Llet me know if any of the links don't work.
Glass tanks can be very challenging for ball python husbandry due to the high amount of air flow with the screen top and the total lack of insulation with the glass walls. It's generally recommended to use tubs or pvc reptile cages instead. wood enclosures can also be suitable if they're designed well and sealed properly to protect the wood against moisture. glass tanks can work, but they require a lot of modification and maintenance, which you'll find tips for in the second link. i'll give you product recommendations to cover options for tanks, tubs, and pvc/wood enclosures.
Anyone who wants to try this at home it is very simple. It helps to have a temperature gauge like this one for $16 on Amazon.
Put any water based liquid in the freezer and get it to just below freezing. Depending on the liquid, the optimal temperature might vary to get the reaction to work.
If you don't mind wasting $3.00 on a 40oz of Highlife, those are my favorite. Get it down to about 30 Freedom Units, put it on the counter and open it. Watch the bottom and you can see the ice lattice forming all the way to the top. Super cool looking, but then you have frozen beer :-(
I use this one, it's pretty good.
u/ataraxia has amazing information for ball pythons. You should definitely read it through. Glass tanks are not ideal for Bps, so this should help. Here is her normal dump of information I took from another post.
i'm going to dump a bunch of helpful links on you. the first three links are detailed care sheets, then a tub tutorial, and the rest are product recommendations. read everything thoroughly, come back with any questions.
glass tanks can be very challenging for ball python husbandry due to the high amount of air flow with the screen top and the total lack of insulation with the glass walls. it's generally recommended to use tubs or pvc reptile cages instead. wood enclosures can also be suitable if they're designed well and sealed properly to protect the wood against moisture. glass tanks can work, but they require a lot of modification and maintenance, which you'll find tips for in the second link. i'll give you product recommendations to cover options for tanks, tubs, and pvc/wood enclosures.
You don't need to touch them, just buy a temp gun. I don't recommend touching them anyway, it gets dirty ape scent all over the prey items, and that probably won't be an issue with a Ball Python but once you start getting into species with very strong feed response it can become an issue with certain animals who start to associate human scent with rat scent.
TL;DR warning
Are you willing to invest in some tools? Do you like Five Guys? (skinny burgers) The fastest burger procedure that I know of is Kenji's Ultra-Smash technique, which makes a pair of thin patties in no time. Takes about a minute per burger (two patties with cheese). Details here:
http://www.seriouseats.com/2014/03/the-food-lab-maximize-flavor-by-ultra-smashin.html
You can also do a regular smash burger, which is thicker (McDonalds-thin), but takes longer (~1.5 minutes per side, about 3 minutes total per burger):
http://aht.seriouseats.com/archives/2012/09/the-burger-lab-smashed-burgers-vs-smashing-burgers.html
The advantage of the ultra-smash is that it's super quick & you can toss a piece of cheese to melt between two patties, so you can pump out a ton of burgers in no time. You will need a few tools, namely:
It's not rocket science, but getting a proper setup will let you have a workflow that makes cooking for a crowd a breeze. I have a big extended family, so I cook in bulk a lot, but I also use this for just my immediate family because it's so fast to get setup. There is an up-front investment required, but everything you'll buy will pretty much last forever, so it's worth it if you like to eat burgers!
So the first two things you need are a metal cooking surface & a heat source that can pump out a lot of heat. I don't recommend a regular grill because they simply don't get hot enough; you need 600 to 700F to do this. You can either do a compact setup (a 2-burger surface with a single burner) or invest in a quality flat-top setup (more expensive, but lets you do more burgers at once). The ideal surface to do this on is a Baking Steel, which is very expensive. There are knockoffs for cheaper, but I like BS because they have a Griddle version with grooves to catch the grease:
http://www.bakingsteel.com/
You can also do it with cast iron. Lodge has a griddle for $25:
http://www.amazon.com/Lodge-LDP3-Double-Reversible-Griddle/dp/B002CMLTXG
If I'm just doing a single regular smash burger at a time, I use a 12" cast-iron pan. $28:
http://www.amazon.com/Lodge-Cast-Iron-Skillet-L10SK3ASHH41B-12-Inch/dp/B00G2XGC88/
If you do get into cast-iron, read up on this seasoning procedure (i.e. the way to keep it smooth & slippery without Teflon). It's a bit of a pain, but it's worth learning because anything you buy in cast-iron can be handed down to your kids because it lasts forever:
http://sherylcanter.com/wordpress/2010/01/a-science-based-technique-for-seasoning-cast-iron/
You will want a heavy smashing tool as well. I have this massive 2.5-pound cast-iron press. It fits inside the 12" pan above (but not the 10"). $13:
http://www.amazon.com/Update-International-Heavy-Weight-Hamburger-Commercial/dp/B002LDDKZ6
If you plan on doing ultra-smash burgers, you'll need a scraper. This is the one Kenji recommends, but you can probably find something locally: (Home Depot or Lowes)
http://www.amazon.com/Plextool-Wall-Paper-Stripper/dp/B00AU6GQLQ/
Anyway, getting back to the cooking part: you'll need a hi-temp burner. I like Bayou Burners, they sell them on Amazon. I have an SP10: ($50)
http://www.amazon.com/Bayou-Classic-SP10-High-Pressure-Outdoor/dp/B000291GBQ
I use that with my 12" cast-iron pan for when I'm just doing a few burgers for the family. 15 minutes = 5 burgers. You can also slap a flat surface like a cast-iron griddle or Baking Steel on that puppy. Also comes in a square version (not sure how the BTU's compare). I also have some KAB4 burners that I use with my Baking Steel, among other things. More expensive, but larger shell & burner: (more even heat over the cooking surface)
http://www.amazon.com/Bayou-Classic-KAB4-Pressure-Cooker/dp/B0009JXYQY/
For cooking more at a time, you can get a cooktop. Blackstone has a 36" cooktop available, but it doesn't get very hot (don't get me wrong, it's an awesome tool, but I've had trouble breaking 500F on mine, which means you're not cooking 1-minute burgers on it, plus the heating is kind of uneven, so you have to work in the hot spots for faster cook times). Also comes in a slightly smaller 28" version (but it's only like $50 less, so it makes more sense to get the full-sized version because you get so much more cooking area). The nice thing with this setup is that for $299 (or a bit less if you shop around at places like Cabela's), you can cook like 20 burgers at a time, it's absolutely insane! I make epic breakfasts on it. Plus it folds up for transport, which is really handy. We use it for all of our family events & holidays:
http://www.amazon.com/gp/product/B00DYN0438
A better version is from Tejas Smokers. They make camping stove carts that have burners built-in & have griddles available separately. They get super hot, downside is the cost: you can easily spend $700 on a nice setup.
https://tejassmokers.com/Camp-Stove-Carts/23
Oh yeah, Blackstone did just come out with a compact outdoor griddle which can run off those little one-pound green tanks if you want. They go for around $99 ($79 if you have an Ace Hardware near you). I have not tried this, but it gets good reviews. I'd be curious to see what kind of temperatures it can achieve:
http://www.amazon.com/Blackstone-Portable-Griddle-Outdoors-Camping/dp/B0195MZHBK
So that's a basic introduction to the cooktops: you need some kind of decently-sized metal surface, a hi-temp burner, a smashing tool, and optionally (but recommended) a scraper. You will also want to get a strong, high-quality spatula. A good one is $32:
http://www.seriouseats.com/2010/07/equipment-the-due-buoi-wide-spatula-my-new-fa.html
Available here:
http://www.duebuoi.it/x/uk_usd/catalog/p/spatulas~805-16x10.html
If you opt for cast-iron, get an infrared temperature gun (doesn't work too well on shiny metal surfaces like steel tho). $17:
http://www.amazon.com/Etekcity-Lasergrip-1080-Non-contact-Thermometer/dp/B00DMI632G/
A cheap digital kitchen scale is useful too, for measuring out the proper amount of meat. $14:
http://www.amazon.com/Ozeri-Digital-Kitchen-Capacity-Stylish/dp/B003E7AZQA/
This collection of tools ensures that you have the proper workflow: a metal surface to cook on, the ability to bring the surface to a high temperature (and know what that temperature is for precise control), the ability to weigh your meat so you can pre-measure out what you need, the ability to smash the burger down, and also to properly scrape it off. Again, it's not rocket science, but if you have a wussy grill or a crappy surface or weak smashing/scraping tools, you're gonna have a bad time. You just need the right setup to pump burgers out fast!
So on to prep. For ultra-smash, you do a pair of 2-ounce ground beef balls. In the tutorial above, they use a mix of meat for 25% fat. I just grab some regular 80/20 ground plus some salt & pepper. For regular smash burgers, do a single 4-ounce ball (optionally 5 ounces...useful if you have a big cooktop for a bunch of burgers at one time & are only doing a single patty per burger). The nice thing is, there's no special prep required for the meat, so you can make all of your burger balls ahead of time. If you have 10 people & are doing ultra-smash, let's say half of them get 2 burgers, so 15 burgers total, or thirty 2oz balls. If you have 20 people & are doing regular smash, again with half getting an extra burger, that's 30 burgers total or thirty 4 or 5oz balls. So that takes care of prep...adjust as needed. If you're feeding mostly dudes, you'll want to add more seconds (and thirds) to the equation.
There are a variety of buns you can get. Crap buns will make for a crap burger. See if you can find potato buns or brioche buns. Those are pretty soft. Buns aren't overly hard to make, but I have yet to find a decent recipe that takes under 40 minutes, so I usually only doing fancy home-baked buns for my family rather than a crowd. Buying 5 or 10 pounds of ground beef & making smash balls out of them will take you all of ten minutes, but making buns can take forever. Here's a good recipe if you want to try it out tho:
http://smittenkitchen.com/blog/2009/07/light-brioche-burger-buns/
Or this, if you wanna get crazy:
http://www.seriouseats.com/2015/05/fresh-cemita-rolls-mexican-sandwich-burger-bun-bread-food-lab-recipe.html
Or this one, nom nom nom:
http://amazingribs.com/recipes/breads/brioche_hamburger_buns.html
But eh, just hit up Sam's/Coscto/BJ's and buy some hamburger buns in bulk, problem solved. Or find a local bakery that has good rolls. There's a good shootout of buns here:
http://aht.seriouseats.com/archives/2011/04/the-burger-lab-whats-the-best-bun-for-my-burger-taste-test.html
(continued)
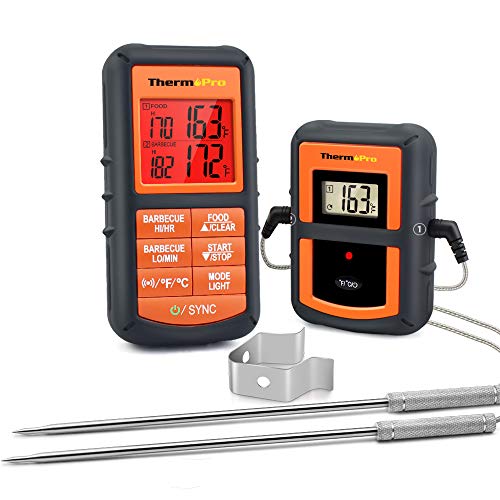
At my last pastry job they used this Now I can't live without one. I use it for everything
https://www.amazon.com/ThermoPro-TP20-Wireless-Meat-Thermometer/dp/B01GE77QT0/ref=sr_1_3?ie=UTF8&qid=1524846443&sr=8-3&keywords=thermopro
TL;DR pretty tricky to boil consistently by guessing; thermometers are cheap
The long answer is that there isn't a good way to get uniform temperature unless you always boil the same volume of water, set the range to the same setting, and pull the kettle off at the same time, each and every time.
As an FYI, most bodegas, supermarkets, and certainly kitchen stores will have simple meat thermometers for less than $5. Here's one on Amazon for less than $10.
I boil, put in a cup, and wait for the thermometer to indicate the water is at the proper temp. Doesn't take very long, isn't very expensive, and is much more consistent.
Just looked at your thermometer. That would be safe in a slow cooker and probably stay visible through the glass.
For an oven, I can't recommend getting a digital probe thermometer like this enough.
I use one literally every time I cook meat or bread in the oven or on the grill.
When buying new gear like this, I often find it worthwhile to buy the good stuff from the beginning. It'll cost more upfront, but in the long run you save money by not sinking it into gear that you're just going to upgrade away from. I know you're looking for a starter kit, so I'll outline some entry level stuff and then some recommended upgrades.
For a burr grinder, a decent entry level manual grinder is the Hario Skerton. One complaint with this is inconsistent coarse grind size, which is what you'll be using with a French Press. Orphan Espresso makes an upgrade kit that fixes this problem, but personally I feel that if you're going to spend $40 on the Skerton and $15 on the upgrade kit, you should just spend a few more bucks and get something like the Capresso Infinity. This grinder is going to be way more convenient, versatile, and consistent than the hand grinder. For one last option, there's the Baratza Encore. This is probably the best grinder you'd want for French Press, because anything better / more expensive would just be overkill as they're primarily aimed at espresso.
The Press itself isn't too important. Bodum is usually the recommended brand.
You'll also need a way to heat water. You could go with a stovetop kettle, but I think electric kettles are more convenient, and are roughly the same price anyway. You can get a pretty standard one for less than $25. But getting a gooseneck kettle is going to help control your pour better and ensure the coffee grounds are completely saturated. If you don't want to worry about getting the perfect temperature for brewing, a variable temperature kettle will take care of it for you.
Other than that, you might want a kitchen scale to get the right coffee-to-water ratio, and a thermometer to check your water temperature.
Yep. Not OP, but this is what I use: https://www.amazon.com/dp/B0000CF5MT
Get a thermometer for your meats. I use this one at home.
Stop caring about grill marks. You're not cooking on a grate. You don't need to make it look like you are.
Cut back on the oil. Commercial restaurant appliances are very different than what you're working with in a dorm.
One thing I would strongly suggest (if you haven't done so already) is going out yet today or tomorrow and obtaining a remote-probe thermometer with alarm - something like this. Try Target or Wal-Mart or BBB, or somewhere that sells a decent selection of kitchen supplies.
Secondly, consider employing a reverse-sear technique if time permits (it takes hours, but yields great results) . See this article.
Thirdly, if one of your company likes medium-well/well-done and you can't disinvite them (j/k), I agree with the slice-and-sear method mentioned by /u/AlabamaAviator.
Get a cheap toaster oven from any big retail store and an oven thermometer to dial in the exact temperature.
You shut your whore mouth. That $13 laser thermometer is fucking awesome.
Home: For the heating pad, you need a thermostat, which will turn it on and off automatically around a specified heat range. Mine is set to 86 degrees with the probe placed between the heat mat and the bottom of the tank. This keeps the glass on top of the tank around 83-85, and the paper towel I have over the glass is around 81-83. You may need to have a different temperature setting, depending on your setup. You shouldn't turn the heat mat entirely off, unless you notice it is malfunctioning and overheating.
To make sure that your temperatures and humidity are decent, you will want a digital thermometer/hygrometer and a temperature gun. The cool side should be in the low-mid 70s and the warm side in the low-mid 80s. The humidity should be 30%-60%. If it isn't, you can make or buy a humid hide, block off some of the venting on the screen top with aluminum foil or acrylic panels, or switch substrates to something that can be misted. This last measure will likely not be necessary unless you live in a low-humidity area.
You should have two identical caves, one on the warm side over the heat mat and one on the cool side.
Diet: What you were told may be appropriate for an adult snake. If possible, weigh her and post pictures. Do a quick Google search on how much adult corns should be eating and how often. I only have a hatchling, and don't want to lead you astray with my lack of adult corn experience.
Handling: If you got her recently enough that you haven't fed her yet, you shouldn't be handling her yet. You should feed her at least once, preferably twice before handling her the first time, and wait 48 hours after feeding to handle her.
Depending on the snake, many can be held multiple times per week. Some are conservative and say only once a week for 15 minutes. Some people allow for more handling than this. But 3-4 times a week for 'extended periods' is almost definitely too much, and as she's new to you, you should be slowly working your way up to longer periods of handling. You also should never be handling her in the 48 hours after she eats.
Shedding: Their color will usually dull and their eyes will turn milky or blue. They might have some minor changes in behavior, like more resistance to handling or possibly even refusal to eat. Mine just shed, and hid for three days prior to that. Note that the shed should come off all in one piece -- if it doesn't, it may be a sign that your snake is dehydrated and doesn't have sufficient access to clean water or the humidity in the tank is too low.
Another quick note on water: You should be changing it at least twice a week, plus any time the snake soils it. I buy filtered spring water from the store, which doesn't have some of the chemicals in tap water that are fine for humans but not so good for snakes. It's kind of a pain in the butt, but it's only about $2 a month, so whatever.
Homebrew Materials:
Vacuum Pump Oil
Vacuum Tubing
1/4" Barb x 1/4" NPT Male Hose Fitting
1/4" Male x 1/4" Female NPT Extension Hose
Vacuum Pump
Filters
Spatulas
Magnetic Stir Bar
Digital Hotplate with Magnetic Stirrer
Nitrile Gloves (Better than Latex)
Empty Capsules (Buy Separated unless you hate your life)
Capsule Machine (If you value your sanity, buy more than a 100... I hated my life doing this)
Mohr Pipets
Pipette 10ml
Mortar and Pestle (If you're doing orals, get this... Otherwise, you're playing Russian Roulette with your doses and liver)
Funnel (For pouring into small places)
Alconox (For clean your shit)
Temperature Gun (How hot is my shit?)
Graduated Cylinder (If you measure with beakers, you're a fucking idiot... And you should consider Volumetric Flasks)
Beaker Set
1 Liter Beaker (Because brewing en'masse is better)
Scale (I have a 2kg one, too)
Calibration Weight Set
Calibration Weight 100g (Because you need two for the scale linked)
Vacuum Regulator (Unless you want to filter 9001 times due to broken shit)
Oil (Any USP grade, filtered or unfitlered)
BB
BA
Butyl Stoppers
Flip Top Seals
Crimper
Vials (Unsealed)
Autoclave (Cheaper than an oven, why are you using an oven?!)
Weight Boats (Buy a million of these. They're cheap and useful)
Did I miss something? Probably. Yes.
Purchased the Lavatools a couple months ago and have used it on a handful of brews since. Perfect choice for my needs. https://www.amazon.com/Lavatools-PT12-Javelin-Thermometer-Chipotle/dp/B00GRFHXVQ/ref=sr_1_20?ie=UTF8&qid=1488199480&sr=8-20&keywords=kitchen+thermometer
You should get an instant read thermometer to check for doneness so you don't have to cut into them like that.
People like this one, but I haven't used it. I use a Thermapen:
https://www.amazon.com/Lavatools-PT12-Javelin-Thermometer-Chipotle/dp/B00GRFHXVQ/ref=sr_1_1?ie=UTF8&qid=1499449239&sr=8-1-spons&keywords=instant+read+thermometer&psc=1
Hey. This recipe is a great starting point and is very detailed: http://amazingribs.com/recipes/porknography/perfect_pulled_pork.html
Before you get started, the most important thing you need is an accurate thermometer. The best ones are any of the remote ones so that you can leave the smoker alone for long periods of time. Anything like this: https://www.amazon.com/ThermoPro-Wireless-Digital-Kitchen-Thermometer/dp/B014DAVCP4/
Otherwise you need: charcoal, charcoal chimney, wood chunks of your choice (for your smoker chunks or even small logs are better than chips).
I'll let the recipe do most of the talking but here are the basic steps:
Good luck!
If it goes to shit, remember you can always finish it in the oven! Keep that in mind if it ends up taking too long.
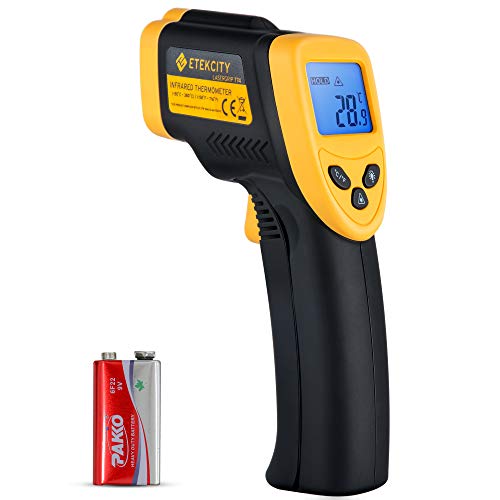
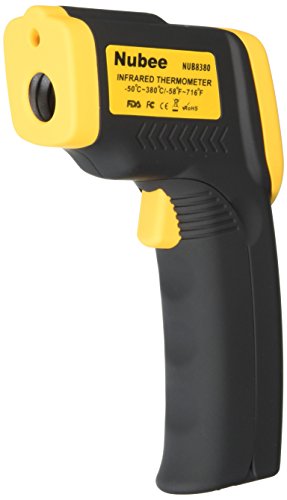
There are a bunch of tips here on sealing gaps to prevent infiltration. I used one of these to find out where the worst spots were that cold air was coming in. Just point and shoot! If you are trying to save some $$$ then targeting the worst areas should give you the best bang for the buck.
Etekcity Lasergrip 774 Non-contact Digital Laser Infrared Thermometer Temperature Gun -58℉~ 716℉ (-50℃ ~ 380℃), Yellow and Black https://www.amazon.com/dp/B00837ZGRY/ref=cm_sw_r_cp_apa_XkjXBb2ZTAQV1
When you're learning how it's done be sure to have a probe thermometer.
First, take the meat out of the fridge for about an hour so it comes up to room temperature. If you don't do this, you will find it difficult to get a nice medium rare steak without overcooking the outside and first cm or so of the inside of the meat.
Salt and pepper it generously.
Have your grill or skillet rip roaring hot. Highest heat you have available. Place meat to skillet or grill and LEAVE IT ALONE for a few minutes. Turn it once. Wait a few minutes, leaving it alone. Remove from grill or skillet and take its temperature. Refer to this guide for desired doneness based on temperature.
You'll want to remove it from heat about 5-10 degrees short of desired doneness. Place your meat on a warmed plate and leave it alone for 10 minutes to rest. If you cut in to it too soon, the juices will all run out and you'll have dry meat.
Once rested, pig out.
I actually used to do this. Now I have a digital probe thermometer that I can leave in the meat while it's cooking.
Heres the deal with the weber smoker:
If you aren't filling up that top grate with 3 racks of ribs, or even filling the bottom grate there is honestly no point in using it unless you just want a fun hobby thing to do.
If you only want to do 1-2 racks of ribs, go grab a weber 22 inch kettle off craigslist. I got mine for 20 bucks.
It's ROI for charcoal use and time is very high compared to other smokers. Here are some tips that have gotten me lots of rave reviews on bbq using ONLY this smoker:
The weber is a great backyard cooker. Many people win LOTS of competitions with them. It will serve you for MANY, MANY years if maintained well.
You could just learn how to make them at home. That's what I did.
Tools needed.
Edit: you can YouTube and Google all the keywords I gave, there is lots of information out there. I think the cold grate technique video gives a great example of how to reverse sear a steak. But all the tools in the world can't turn a bad steak into a good one, focus on buying a proper steak, then focus on how to properly sear.
Forget the stop watch. Get yourself a good thermometer. This one http://www.amazon.com/gp/aw/d/B0021AEAG2?cache=5d1e5c0c4c68e20ef8478543341af466&pi=SY200_QL40&qid=1405258313&sr=8-1#ref=mp_s_a_1_1. Time is not reliable.
The Sweet Home highly recommends this one as it is really cheap compared to the Thermapen but works nearly as well.
Now where are my bonus points?
Get this remove the "on" plugs and set the "off" plug for your desired end time, you can manually turn it on.
Lots of good stuff in here.
I'd add to get a couple of timers and connect them to lamps and/or a radio. Make sure to change the timing every so often. It'll give the appearance someone is around.
Also, when I was young and starting out, I would stock up on non perishable items when I had a few extra bucks. I pretty much always have a back up of soap, shampoo and the like, even now. Sucks to run out of things, and sucks even worse if it's a lean week. If you cook, this is a good plan with meat too. When the store has meat on sale, buy and freeze. Saves money and you'll pretty much always have food in the house.
Good luck! Living alone can be really great.
Edit: link derp
has anyone tried with success to use a Temperature Gun? I'm thinking of picking up one and try it https://www.amazon.com/Etekcity-Lasergrip-774-Non-contact-Thermometer/dp/B00837ZGRY/ref=sr_1_3?ie=UTF8&qid=1523456285&sr=8-3&keywords=temperature+gun
It's doing to depend out the range more than anything. Every range will be a bit different, and the burners on the same range will probably be different as well.
It only takes $16 to find out how hot your pan is getting
What you want is a digital thermometer like this one: https://www.amazon.com/Etekcity-Lasergrip-1080-Non-contact-Thermometer/dp/B00DMI632G/ref=sr_1_1?ie=UTF8&qid=1473889665&sr=8-1&keywords=digital+thermometer+infrared
Is this still happening when you turn the bike on today?
To confirm it's only running on one cylinder, check the temperature of the exhaust headers while it's running. I use this thermometer, but you can just hover your hand over and figure it out.
I have the Javelin by Lavatools, (amazon link) that is currently $25.99. I've had it for over a year, use it for brewing and cooking (with good sanitation practices) and haven't had an issue. Some report the hinge breaking though. Lavatools also makes a stick version for less than half the price and has the same precision.
Speed/accuracy, but cheaper alternatives are catching up quickly.
I have not used the one you linked to, but I use this guy and it is only slightly slower than a thermapen and plenty accurate. A couple years ago, thermapen was by far the fastest "instant" read thermometer. That is no longer really the case, and now they are overpriced compared to the competition.
eh, its probably a throw away. I personally use the Lava Tools Javelin, both for brewing and grilling.
https://www.amazon.com/Lavatools-PT12-Javelin-Thermometer-Chipotle/dp/B00GRFHXVQ/ref=sr_1_1?ie=UTF8&qid=1496853976&sr=8-1&keywords=lavatools+javelin
A heads up for people shopping for meat thermometers on Amazon. There's a lot with fake reviews that make them look better than they are.
Use a site like Fakespot to make sure the reviews are legit. I found this one that has honest reviews and works great.
I actually bought this yesterday haha
If you’ve only had her for 6 days and have tried feeding 3 times, it’s way too much. On top of being in a new environment, having food presented over and over is stressful. When bringing a new snake home, you should leave them completely alone for a week- no handling- and then offer food. From now, wait a week before you offer food again, and don’t handle her between now and then. You should make sure she’s eaten at least 2 times in a row before handling, and wait 48 hours after she’s eaten so she has time to digest.
In the meantime, make sure her enclosure is set up correctly- correct temperature (78-80 cool side, 88-92 hot spot) with heat sources controlled by thermostats, humidity at least 60% or higher, at least 2 secure hides and other clutter like fake plants and branches. As others have mentioned, aspen is bad for holding humidity- cypress mulch or coco fiber/chip is better. Read through the care info in the group stickied post if you haven’t already.
Both of my BPs ate F/T right away despite being fed live at the breeder. To warm it up, thaw in the fridge overnight in a ziplock bag. When it’s thawed, fill a bowl with the hottest water from the tap and put the mouse (still in the bag) in the water. I usually have to change the water out a couple times as it cools. Warm it like this until the temperature measures at least 100 degrees measured with an infrared temp gun like this one . I would also use feeding tongs not your hand.
Hope this helps, congrats on your new baby. 😊
Now that I do BIAB, I would highly recommend everyone starts at BIAB over extract, personally. It's not much harder, and requires barely any extra equipment, if any. And you get much more control when you want it.
Well, where do you plan to brew? Can you do an outdoor propane burner for 5 gallon batches, or are you limited to your stove? If you have to stick to the stove, I think you can really only do 2.5 gallon batches.
I personally do 5 gallon batches on a propane burner, so I can give you a rundown of what I use, at minimum:
Boil Kettle: 10 gallon minimum. I have an 8 gallon, get 10 or bigger
Propane burner (like a turkey fryer)
Propane tank
Thermometer, digital prefered. I have the Javelin
Stainless steel spoon or mash paddle
6.5 Gallon Glass Carboy, but you can start fermenting in buckets
Bottling bucket
Auto siphon
bottling wand (spring tip recommended)
Wing capper to start, bottle capper if you keep brewing
Bottles and bottle caps
StarSan sanitizer
PBW cleaner
Hydrometer w/ test tube
Other: hose for siphon/bottling wand, airlock, funnel,
https://www.amazon.com/Lavatools-PT12-Javelin-Thermometer-Chipotle/dp/B00GRFHXVQ
I like this one. Gets the temp fast and not as expensive as the Thermapen. I checked it in ice water and boiling water when I got it and it was accurate.
I agree. I have this one and love it.
I purchased a ThermoPro TP-07 back in October. One the first use it was great. On the 2nd use, it stopped working but I am convinced that it is because i left the probe on the grill and it got too hot. There is a max temp allowed. I emailed the seller and told them the truth that i may have done it but i didn't realize it couldn't work that way; so they replaced the probe free of charge. I've used it numerous times since and it's been great.
https://www.amazon.com/gp/product/B014DAVCP4/ref=oh_aui_detailpage_o07_s00?ie=UTF8&psc=1
thermpro tp07
It's not the best in terms of interface, but my Maverick dual probe has worked well enough for me for 4 years now.
Here it is for $35.
I've heard good things for the thermpro TP08. Here it is for $46.
I like a dual probe thermometer (example). One probe for the meat internal temp and one for the smoke chamber temp. For the smoke chamber temperature, I just lay the probe on the grate.
An advantage of having a wireless thermometer is that you can set alarms. So if either one of the temperatures varies outside a given range, it will alert you no matter where you are around the house. That way you'll know if the smoker needs fuel, if it's caught on fire, if the meat is almost done, etc.
Most people use a different type of dual probe thermometer for smoking. One gets attached to the grate right next to the meat so that you can fine tune your smoker temp. The other is placed in the center of the meat for the duration of the cook.
Nice ones like this one are wireless, so you don't have to sit by the smoker and you can set alarms if the temp gets to low/high on either probe.
ThermoPro TP20
This is where those cheap infrared thermometers really come in handy. Just point it at the pan. Also great for grilling. https://smile.amazon.com/gp/product/B00837ZGRY
I have https://www.amazon.com/gp/product/B00837ZGRY/ref=ppx_yo_dt_b_search_asin_title?ie=UTF8&psc=1 but any cheap IR gun should work. Also for taking temps ignore the laser light and put the opening/sensor area right over the top of the banger for accurate readings.
you did mention that you went straight from the fridge to the pan. that means the meat is starting out cold in the center and will take longer to heat up. he started with a steak that had been left to warm up to room temperature.
i agree with /u/AManAPlanACanalErie that using a thermometer takes a lot of the guesswork out. if your steak isn't hitting the internal temperature that you want after searing on each side for 1.5min or whatever, you can toss into a low heat oven to finish off. i have a thermometer like this that i stick in the steak as I'm finishing the sear. If it is still below the temp I want, I throw it in the oven for a bit to finish it off, leaving the thermometer in it. You want to make sure the tip of the thermometer is in the thickest part of the meat.
You plug the headphone-jack type thing into a part that will usually have a digital display of some sort that will show you the temp of wherever you have put the spike part. You would typically put the spike in meat that is in the oven and have the digital reader part on the counter.
Here's a picture of one!
I've had this one for a year and it hasn't failed me yet. Not sure if it's quite what you're looking for, but I love it. (also, I got it because it's what Alton used a lot in earlier episodes)
http://www.amazon.com/Polder-Original-Cooking-Timer-Thermometer/dp/B0000CF5MT
thermapens are great if you use them all the time, but expensive if you're only using it once in a while. Seriously a $15 digital probe like this one should be just fine for cooking steaks.
Agreed with the other parts of the comment though. I prefer stovetop to oven, but you can do it all stove top if your pans aren't ovenproof. Just turn down the heat a bit when you flip it and pull your steaks off the heat ~5-10 before your desired doneness temp (10 if you're going to tent it with foil)
The major advantage of the oven method (IMO) is the decrease in smoke and it's much more forgiving time wise.
Also, you might try the frozen steak method which is pretty forgiving.
Okay, so a while ago I said I was going to make a gummy bear tutorial and I never did so I thought it was about time I at least made a write up for them. This recipe will get you right around 200 gummy bears.
Tools:
Ingredients:
Decarbing
Pre-heat your oven to 250F - 260F, use the digital theremometer to keep an eye on the temp to make sure it stays around there and does not get above 260F. I like to place my concentrates into the small pyrex dish and decarb in that. Put the dish with your concentrates in the oven for 30 minutes. You can check it around the 30 minute mark and see if it is fully decarbed. Look for it to be pretty clear of all little "carbination" like bubbles. When those are mostly gone you are done decarbing. It will take around 30 minutes. Go a little longer if you want couch lock / sleepy time gummies.
When it is done decarbing pull it out and set it to the side for a minute.
Infusing the coconut oil
Grab your medium sized pot and put a few inches of water in it. get it to a boil then turn the temp all the way down to a very low heat. When the water is ready place your dish with the freshly decarbed oil into the water bath and add the 1 Tbsp of coconut oil to the dish.
Let the two mix for a few minutes until they are nicely combined. It shouldn't take long maybe 10 minutes max.
Grease your molds
At this point if you dont have silicone molds (I do and I still grease mine for precautions) grease your molds so you don't forget to do it before adding your gummies.
Preping fruit juice (or water)
In the second small pyrex dish pour your real fruit juice / water or whatever base liquid you are using for your gummies. I havent tried much besides fruit juice and water but you can experiment with other liquids, but don't do an experiment on a batch with THC in it just in case something doesn't work out.
To the fruit juice / water add 1 tsp of soy lecthin and stir with the fork. Place the dish in the fridge for 5 minutes or so and stir again. Let it sit in the fridge stirring occasionaly until the soy lecthin is fully desolved.
This liquid mixture NEEDS TO BE COLD for the blooming process to work so make sure to keep it cold.
Mixing the dry ingredients
In your small non-stick pot mix the following together: 85 grams of Jello, 5 Tbsp of Gelatin, 1/4 cup of sugar. Completely mix them all together and dont let any of them get wet yet. Stir and stir until they are completely mixed.
Blooming
Take your mixed dry ingredients and pour in your friut juice (water) soy lecthin mixture. Stir it and get everything evenly mixed and make sure there are no lumps. When everything is evenly mixed place the lid on the small pot and let it sit for 10 minutes.
This is called "blooming" the gelatin and allows the gelatin to absorbe the water. The water needs to be cold because gelatin activates at about 120F and after that will start to set when it cools. We don't want it setting right now.
http://www.amazon.com/Maverick-Remote-Smoker-Thermometer-ET-73/dp/B0000DIU49/ref=sr_1_9?ie=UTF8&qid=1419911294&sr=8-9&keywords=maverick+thermometer
If you absolutely have to stay under $50 then go with this..
http://www.amazon.com/Maverick-Remote-Smoker-Thermometer-ET-73/dp/B0000DIU49
If you want to spend a little more get this one...
http://www.amazon.com/dp/B00FM8DJHQ?psc=1
I own that first one and i've never had any problems with it. It's the older model (that's why it's cheaper) but the thing has been rock solid for me. You cant go wrong with Maverick. They're commonly recommended for a reason.
Whatever you choose make sure it's a wireless one. I can sit my ass on the couch and watch the game and know exactly what's going on outside. It's great!
I have a few of these that I use almost daily:
https://www.amazon.com/Polder-Digital-Oven-Thermometer-Graphite/dp/B000P6FLOY
At $20 (there's even a $11 one), it's not a huge risk to try it to see if it suits your use cases.
Not sure - I don't think anyone would say the thermapen isn't a great thermometer.
Although I WOULD say that you can get 95% of the benefits at a fraction of the cost with something like the CDN DTQ450X: http://www.amazon.com/dp/B0021AEAG2
That's $17 for a water proof thermometer that gives you a reading within about a 1 second difference of the thermapen. I've personally been using mine for 3 years now regularly for food and beer making. I've dropped it in the mash, had it soaking in the sink by mistake, dropped it, left it outside - pretty shitty conditions and it still rocks on.
I have nothing against the thermapen but I personally wouldn't pay the money for one when something like the CDN is so much cheaper and effectively works exactly the same.
Amazingribs is great. So is America's Test Kitchen. And Serious Eats also gives great basic background on how to use a grill.
Examples:
It's really not that hard. If you want some basic advice from me:
Sigh
Thermometer
Universal Knob Replacement
You really only need the first one and a sharpy.
I don't really think 350F is all that important, 250F-400F will probably get you there, just stir it frequently until it is dry.
Oven preheat sensor cannot be trusted. Preheat to 450... 15 minutes pass and beeeeeep. BARELY 400. Lies.
Get one of these.
That's it. You might want to consider getting an oven thermometer.
I assume you're talking about an IR thermometer? I got one because, like you said, it's a novelty and pretty cheap. I use it for things like taking surface temperatures of foods (melted chocolate, meat that I'm curing, etc.)
A lot of TV chefs (cough...Alton Brown) use them for things like taking surface readings of pan's temperatures. Unfortunately, many times an IR thermometer can't accurately measure temperatures in this situation. They rely on a property called emissivity. Emissivity had to do with how a material emits its energy as heat. Long story short, light/shiny objects have low emissivity which means that an IR thermometer will read a temperature lower than the actual temperature. So using the IR thermometer will work much better on dark, matte finished (some types of teflon or cast iron) cookware than stainless steel/aluminum/copper. So buyer beware...
If you're trying to wrap your head around the whole shiny vs. dull situation and why that matters. Think about it like this. A shiny object will reflect the ambient energy/radiation to a greater degree and not so much emit its own.
Even medium is probably hot enough if you let the skillet warm-up long enough. If you get a cheap infrared thermometer, you can start to figure out what temperature your stove dial settings equate to. I shoot for around 550 F fo searing steaks.
https://www.amazon.com/dp/B00837ZGRY/ref=cm_sw_r_cp_apa_3dXhzbX2XTSD8
15 bucks on amazon and will give you instant temperature readings unlike a dial or probe thermometer
That sounds like a faulty sensor to me. But I'm no expert, just know the basics and learn as I go. But shooting up immediately makes it sound like the sensor has a wire crossed and can't read the right base level. Thermocouples are very simple devices, but anything can fail.
Also, just as another line of investigation, do you have an OBD2 reader that works with a phone or computer to read the stats? It could be that the computer is seeing the real temp and the gauge might be shot.
Also, maybe an IR temp gun, like this? You could watch the heat rise in the radiator and if it starts getting dangerously high, then shut down. It could be the right temp, but the sensor or computer is borked.
My hunch is that the pan is too cool. Try using an Infrared Thermometer Gun to measure the temperature of your frying pan. When the pan is too cool the meat tends to get grey and yucky instead nicely browned.
I like to heat the pan up to 450-550 F. Then you get a nice brown sear.
You might also try cast iron. Two reasons. The first is that it holds a lot of heat so it stays hot even when you pop the cool steak on it. Second is that you can safely heat up cast iron to higher temps than many non-stick pans will handle.
Digital Thermometers are basically instant, think of the hand-held ones like this (great to use as a high-powered laser pointer since it's powered by a 9volt, can keep your dog running at a dog park for hours).
The only real issue seems to be that they're using a type of thermometer that is supposed to be plunged into the product to check internal temperatures, and they are simply putting it next to the product. Not enough of an issue that you're likely to end up with food that was out of temperature, as long as it was fully heated and checked before being placed in the holding pan. Also an issue if they're plunging it in far enough to be touching the metal bottom of the holding pan. That's where you can easily have food that's out of temp and not caught, because the pan is always slightly hotter than the food inside.
Instead of a second pad, pick up a thermostat. A temperature gun is useful to have as well. The thermostat will control the temperature of the mat, preventing burns and overheating, and a temperature gun will tell you the precise temperature of any spot in the enclosure.
Judging temperature by hand is as good as taking a wild guess. A mat at the right temp usually feels barely warm to the touch, but can also feel hot or cool depending on whether your skin is hot or cool.
looks pretty good to me, he may not be moving around because he’s cold, so just be sure you’re around 85 warm end with a basking spot of up to 120 (while they’re still young) and then cool end around 75 and drop the temperatures by ten degrees at night. i always recommend getting a thermometer gun as it tends to be more precise than a dial, and you can tell the temperature of several different locations without multiple dials, the stick on one you’re using is usually pretty inaccurate as it’s telling you the temperature of the glass. this is the thermometer gun i use and it works pretty well, it’s within 1-2°F of the actual temperature, there are certainly more expensive ones but i haven’t had any issue with this one. i always recommend having more hides, at least one on the warm end and one on the cool end, and while the extra food bowls look cool, it’s usually easier to have them out of the enclosure and put them in when you’re putting food in. congrats on your new pal, and i wish the two of you much fun
A tad over 8# shoulder. Rubbed down with horseradish mustard, pepper, and garlic. Lightly injected with cajun butter.
Put it on about 8:30 p.m. at 225°, with apple juice in the water bath. Did two rounds of smoke with Pecan chips, then let it go all night. Set the alarm for 200°.
Woke up to the alarm about 8:45 the next morning. Pulled it, and let it rest for about an hour and a half in foil. Pulled apart like a dream, and was moist throughout.
I found the MES30 local on CL for $80, missing nothing, without even a full season on the inside. I am a fire fan, but a man can get used to set it and forget it.
https://www.amazon.com/Etekcity-Lasergrip-1080-Non-contact-Thermometer/dp/B00DMI632G/ref=sr_1_2?s=hi&ie=UTF8&qid=1467908210&sr=1-2&keywords=infrared+thermometer
I use mine all the time, and it has lasted for years.
Refined avocado oil does actually have a high smoke point. I personally use Safflower oil, which also has a very high smoke point.
I would recommend getting an infrared thermometer (this is the one I have) so you can more accurately control the temperature of your pan.
Get a "Brew in a bag" bag, if you want to do BIAB. They're resilient and worth the extra money. You won't find them on Amazon.
If you want to start going to all grain you can buy a large Coleman / Igloo cooler (60 quart is what I use, can do up to 10 gallon batches). Ball valve and fittings, some pipe tape too. Don't forget a pulley to help get the bag out of the cooler!
You can get a flask, stir bar, and everything else you need to start making yeast starters.
Grab a large spoon and/or a flask wisk to help mashing.
Amazon also sells immersion chillers to help with the post boil. I bought mine for $50 and I think it's the 25' one. Works like a charm for 5 gallon batches.
Get a good pair of insulated gloves for your brew day!
Amazon also sells thermometers to help track mash temperatures. I have this one and this one. They're both great. An IR thermometer is great to have for yeast starters too...but definitely not needed. Would put that at the bottom of my purchase list.
Oh! A sterile siphon is also awesome. Bought that from Amazon too.
And so I don't keep rambling, Homebrewfinds as a good list of filler stuff from Amazon. Things like campden tablets, hop bags, pieces to make hop spiders....etc. http://www.homebrewfinds.com/homebrewing-related-amazon-fillers
Congrats on your new baby! Since you're new to the world of beardies, please read up on their care with these wonderful guides:
Comprehensive Care Gudie, Nutrition Guide, A wonderful Cheat Sheet!
You will want to get in an Infrared Temp Gun for the most accurate readings for your basking/warm/cool areas. The sticky thermometers on the side are severely inaccurate. This will help guarantee your beardie's temps are where they need to be for proper digestion and health.
I cannot tell from the picture, but mealworms should be avoided until your dragon is over 6 months old as they're very hard to digest and can cause compaction- as should adult superworms.
Micro super worms, pheonix worms/black soldier fly larva, dubia roaches, silkworms, and crickets are all safe options for your baby.
What does your lighting setup look like?
Wait, Home Depot sells homebrewing specific items? Awesome! And congrats on the first brew, looks great. Welcome to the addiction!
Edit: for the thermometer, I highly recommend a Javelin or Javelin Pro. Great thermometer and significantly cheaper than the competition. You'll find other folks on here singing their praises as well. I love mine.
Charcoal grilling is great! The only additional purchase I would make is for a chimney starter, if you haven't already. Weber makes a great one that will last you a while and is like $15. You can use newspapers, balled up paper towels, or the little chimney lighter cubes to start the chimney, whichever is easiest for you. I like the cubes, they're very consistent and easy.
This article from Serious Eats talks about several different two zone charcoal setups. They're all fairly basic, but they are good to know.
When you purchase charcoal, don't buy any of the stuff with the lighter fluid on it. And don't add lighter fluid. If you get the chimney starter right you'll never need it. It imparts a yucky chemical flavor in the meat. I prefer briquettes. They are more consistent for me and they are much cheaper where I live. Lots of people love lump charcoal but it's a lot harder for a beginner I think.
Learn where your grill vents are. They're much more important to charcoal grilling since they are how you control the heat.
These are all great resources that have been posted. Read through them and keep coming back here! This is a great community.
Edit: If you don't already have an instant read thermometer, you should definitely buy one. It's one of my most used tools in the kitchen and on the grill. There are a ton out there. I've had the Lavatools Javelin for a while now and love it. It reads the temp quickly, it isn't crazy expensive, and it looks nice. It really stepped up what I was pulling off the grill.
I have this one.. which works very well and is 1/6th the cost of a thermapen.
Buy a good instant read thermometer like this and cook everything until it's 170 degrees and you'll kill virtually everything that could ever make you sick. Many things can be cooked below 170 and still be very safe and more delicious, the FDA has your back on cookng tempatures.
I have this one. Pretty inexpensive and no problems yet! https://www.amazon.com/dp/B014DAVCP4/ref=cm_sw_r_cp_apa_Vz7jzbA4YPXEK
Yep
http://www.amazon.com/gp/product/B00837ZGRY/ref=oh_aui_detailpage_o03_s00?ie=UTF8&psc=1
You really need an infrared temperature gun for just this reason. This would detect surface temperature. It's a snake owner staple.
Edit: this is the one I have, and it works great
Get one of these: http://smile.amazon.com/gp/product/B00CVHIJDK/ref=oh_aui_detailpage_o02_s00?ie=UTF8&psc=1
I think I actually paid $12 a couple of weeks ago.
I've been using this one for several years now without a problem.
Before I automated my house, I was using inexpensive timer like these
I have this one, but you can get away with this one for $16
Those are rookie numbers. Personally wouldn’t listen to his advice, he’s fuven you a bit of bad advice. Which i will apologize that those are total junk, if you can return it. What would probably be the best thing for you guys and similar pricing is a temp gun, you can use them for all the reptiles and get the temperatures anywhere in the tank. Those only poorly measure the air temperature, but your using a heat pad which doesn’t heat ambient, but surface temps. Here’s a really good one. You’d both be able to use it. You just point and shoot, it has a little red laser to show where it’s reading the temp from. Also a care guide that can go into more detail on some of this stuff than I can in a comment section.
https://www.amazon.com/Etekcity-Lasergrip-774-Non-contact-Thermometer/dp/B00837ZGRY/ref=mp_s_a_1_1_sspa?keywords=temp+gun&qid=1563412077&s=gateway&sr=8-1-spons&psc=1
Also no reason to get so upset because people are giving you solid advice to care for your animal. Bit of hostility towards us on this.
If you want to make MCT oil, here's the method I use for extraction:
You should have enough to fill 16 - 20 bottles. Depending on the strain, the oil should contain 15 - 20 mg/ml THC.
Some items you may need:
Turkey Bag for decarb
MCT Oil
Lecithin
Digital Thermometer
Honey Strainer to remove the particulate
Large syringe for transferring oil
Dropper Bottles
You can use shortening or veg oil, same difference. You'll need enough that will come halfway up the side of the pan WHEN THE CHICKEN IS ADDED. If you fill the pan halfway with oil and then put in the chicken, you will have a bad time.
For your flour dredge, easiest way is to add your flour to a gallon ziploc bag. Add salt, pepper, a little garlic powder, onion powder, cayenne, cumin, and whatever else you might like to season the breading. Shake it to mix up the spices and flour.
Now you can add your chicken pieces to the bag a couple at a time, and seal and shake the bag to coat.
Remove the coated pieces and set them on a rack or plate to rest for a second while you do the rest.
If you want a thicker breading, make an egg wash (mix 1 part egg, 1 part water), dunk the coated chicken pieces, and put them back into the flour for another coat, then set them aside to rest for a few minutes so the coating can set.
When all the chicken is coated, and your oil is hot (should be about 350F. If you don't have a thermometer for this (get one, an instant read digital thermometer is like ten bucks), stick a wooden spoon or chopstick into the oil. It should bubble nice and steady. If it doesn't bubble or produces weak bubbles, you're not hot enough. If it goes crazy with bubbles, you're too hot.
Note that you will need to boost the heat when you add the chicken to compensate. You've just added a bunch of cold mass to the pan.
Fry it on one side for 4-5 minutes, then flip. Your first side should be nice and deep brown.
While you're waiting, prepare the landing spot. Ideally it's a cookie sheet lined with papertowel with a rack on it.
Fry another 4-5 minutes, pull and temp your smallest piece. If you're at temperature (160F for white meat, 165 for dark), put it on the rack.
This part is important. Unless you're doing a bunch of identically-sized pieces of the same type, all your chicken will not be done properly at the same time. I suggest pulling the chicken 5 degrees early and let them coast the rest of the way. If your outside is getting really dark and the inside isn't done yet, pull it and consider finishing it in the oven or even the microwave.
Eventually you will get good enough after a couple times that you'll be able to tell right away what to do, but you really can't fuck it up too bad if you keep an eye on the temperature of the meat. A thermometer is pretty key. This one is great for 12 bucks: https://www.amazon.com/Taylor-Commercial-Waterproof-Digital-Thermometer/dp/B00009WE45/
Amazon
An infrared thermometer, closely-followed by a Polder probe.
Take the guesswork out of cooking, and use these so that you aren't afraid to apply heat!
Get yourself a digital thermometer. The lid ones that come with the pit are useless.
This one is pretty good. and not expensive.
http://www.amazon.com/Maverick-Remote-Smoker-Thermometer-ET-73/dp/B0000DIU49/ref=sr_1_12?ie=UTF8&qid=1408223212&sr=8-12&keywords=maverick+thermometer
Very accurate and very fast. I have one for brewing and cooking, but honestly, I don't think it is worth it just for brewing when you can get a Thermopop or CDN for ~$20. However, for cooking, the thin probe and quick read speed is really, really nice.
Hello! We have a C&C (similar to a hamster cage) cage and these are the products we use to keep it warm:
stand
thermometer/switch that will click on and off to keep the temperature from getting to high or low
Ceramic heat emitter
Porcelain clamp lamp
You should also pick up a temperature gun because the thermometer switch isn't that accurate. Also, because the switch isn't great you may find yourself needing to adjust it every so often, but that isn't too big of a deal.
Depending on the size of your cage you may need to double this set up (we do for our 8 sq ft cage).
I would imagine that an aquarium may get to hot/not provide enough ventilation, but can't say for sure because I've never used one. It may also not provide enough square footage, but not sure about that either.
Also, be sure to check out /u/VolcanoView 's page on hedgehog care to get more info about temperature.
You should try to get this issue resolved immediately as you do not want your hedgehog to try to hibernate. See the section on hibernation in the link above.
> the coldest month last year cost me close to $400.
> I've also gone around sealing up cracks in the year I've lived here
If you don't have one of these yet, I highly recommend it. Super cheap and you can pinpoint exactly where the hot/cold spots are. You'll probably find quite a bit around the windows and floorboards, but if you've got single-pane windows that aren't covered there's likely a massive amount passing right through.
It is certainly worth waiting for the right tools. It is actually quite rare that the section on this pen was shellaced as Sheaffer did not do that at the factory. 95% of all Sheaffers I have had come loose with a good water bath. If you are going to keep doing restorations, it is certainly worth acquiring a temp gun to keep your pens safe during heating. I have one similar (same brand as) this one and it works great.
The last time I looked, the infrared thermometer was about $15. And it's one of the handiest things you can have, even if you don't use cast iron.
I would aim for something like 350F myself, 400F strikes me a quite hot for fish. FWIW I just use a dutch oven and check the temp with one of these infrared thermometers.
Also, are you dredging the fish in flour before the eggwash? If not you'll have a hard time getting the batter to stick.
edit: just so we're clear, the order would be flour -> eggwash -> batter
It would probably vary a bit depending on your specific model of stove. The only way to know for sure would be to use something like this:
http://www.amazon.com/Etekcity-Lasergrip-774-Non-contact-Thermometer/dp/B00837ZGRY/ref=sr_1_2?ie=UTF8&qid=1451863683&sr=8-2&keywords=temperature+gun
I have been recommended a temp gun as a just-in-case for areas that become too hot or too cool, but it doesn't sound like you'll need any other heat emitters, if there are no issues like that. Edit: I think she hasn't gone into the log because hides that only have one opening do their job better/are generally better/half-log hides suck as hides. I wouldn't remove it, but maybe put another box in for maximum hide-age.
About the tank: aquariums have been known to be the escape artist's dream, and difficult to keep the humidity right with. (You didn't mention what the humidity was at! Has it been manageable?) If you don't have proper clamps to keep the top down (no rocks or weights), you should definitely invest in some. I don't actually know where you could get those, because I never looked into getting an aquarium for my ball, but I'm sure someone here could tell you if you asked. And If you do, prepare to be blown away with alternative enclosure options. Aquariums aren't generally ideal. (As a side note, do you have decorations for the tank aside from the log? At that size, it may need lots of clutter to help your snake feel comfortable. I've been assured sanitized rocks and branches could work.)
Ataraxia's comment might help you figure out the enclosure situation, if you're interested in changing it. (Assuming you haven't seen it before.)
Hot is one of the more subjective words in the dictionary. What's hot to you may be warm to me. Fortunately, they make a thing called a laser thermometer that will tell you exactly how "hot" your grasshopper is. Here's one for example. Take measurements of the parts in question.
Get an infrared thermometer. Not perfect, but it gives a ball park pan temperature.
Link
I’ll link what I use.
For water.
https://www.chewy.com/zoo-med-digital-thermometer/dp/154874?utm_source=google-product&utm_medium=cpc&utm_campaign=hg&utm_content=Zoo%20Med&utm_term=&gclid=EAIaIQobChMIgoWLsNql4wIVUYezCh0pQQS7EAQYASABEgJScPD_BwE
For basking area.
https://www.amazon.com/Etekcity-Lasergrip-1080-Non-Contact-Thermometer/dp/B00DMI632G/ref=mp_s_a_1_1_sspa?keywords=temp+gun&qid=1562602149&s=gateway&sr=8-1-spons&psc=1
> Would that be powerful enough to heat a 75 gallon tank? I read that the basking spot also needs to be at least 100 degrees farenheight.
You won't know until you check it with an accurate thermometer- you want the ambient air in the basking spot to be around 90ºF and the surface of the basking spot itself to be 105-110ºF for a juvenile.
You want to measure these temperatures accurately with a digital probe thermometer or a laser temperature gun- the guns are cheap.
Once you check the temperature then you adjust the light until you get things perfect but you can't just guess. If it's not warm enough you can simply raise his basking area via a taller platform, rock, or branch.
How are you fixed for his UVB light? That is equally crucial!
Care Guide.
Sturdy step stool ($40) - not the rickety tubular kitchen chair ones, I mean one where you can stand on the top. a Buy it for Life item, not inexpensive, but safe. https://www.amazon.com/Louisville-Ladder-AS3002-6966014-2-Foot/dp/B00182TWL2
Leatherman multi tool (around $50), which i keep in the junk bowl because I can never find a screwdriver fast enough. Pricey new, less expensive when you buy it second hand or in a pawn shop. they don't really break, but you do have to clean and oil them once a year. https://www.amazon.com/LEATHERMAN-Wingman-Multitool-Stainless-Steel/dp/B005DI0XM4/
Cordless drill (under $50), mine basically has the screw driver bit in it 90% of the time. the rest of the time I drill lots of pilot holes. pay attention to the battery... if you can get one with a battery that is shared by other tools in the line, then it is easily replaceable and if you buy another tool in that line you can swap batteries. I like to have 1 battery in the charger and one in the device. https://www.amazon.com/BLACK-DECKER-Cordless-Driver-BDCDD12C/dp/B0111N8L7I/
Spirit, bubble or torpedo level. (under $10) the Hanging kit usually contains just the wires and hooks, but you need a small spirit level for hanging pictures and shelves evenly. doesn't matter the brand they all work the same https://www.amazon.com/WilFiks-Leveling-Resistant-Different-Visibility/dp/B07M62GJYP/
Small tool boxes vary in quality. I don't know if this is for you or someone else. But don't buy anything unless it's a NAME BRAND, cheap metal tools bend and can break with too much torque. Even the Stanley line that Walmart sells isn't fabulous, but it's better than a nameless brand. I don't like SETS of tools, but you need to start someplace, buy GOOD tools one at a time, I love finding $$$ tools at thrift stores. https://www.amazon.com/STANLEY-94-248-Piece-Homeowners-Tool/dp/B000UHMITE/(i bought a cheap socket set 4 years ago to replace my stolen ones and they already have rust)
Bucket organizer. (around $15) If you buy a SET of tools, take the plastic blow molded container and put it in the recycling. You will never bother putting the tools back in and when you get more tools they won't fit. Bucket Organizers are pockets that fit around a 5 gallon bucket. You shove your tools into the pockets and everything else in the middle. And keep it in the bottom of your closet and carry it to where you need the tools. https://www.amazon.com/Bucket-Boss-10030-Bucketeer-BTO/dp/B00GK4TOWK
Tack Hammer. (under $15) You won't need a big 22 oz hammer, but a smaller 16 oz one with a normal handled and then a Tack hammer, these have a narrow head and sometimes are magnetic and hold the nail in place. Tack hammers are easier to use for hanging things exactly where you want them. https://www.amazon.com/Stanley-54-304-5-Ounce-Magnetic-Hammer/dp/B00002X1XD
Stud finder.(under $20) uses a battery, and lets you know where the studs are behind drywall. BEST PURCHASE EVER. https://www.amazon.com/Upgraded-Stud-Finder-Wall-Detector/dp/B07VLDTVFQ/ any brand will work fine.
Digital Infared Thermometer (under $20) Non-contact Digital Laser Infrared Thermometer Temperature Gun - ALSO BEST PURCHASE EVER... works in the kitchen for food and oven temp, fridge temp, and for locating drafts and cold spots around doors and windows. https://www.amazon.com/Etekcity-Lasergrip-1080-Non-Contact-Thermometer/dp/B00DMI632G
Toilet Plunger - the sort with the extra bit on the end. https://www.amazon.com/Get-Bats-Out-Plunger-Bathroom/dp/B00ODD5MD0 you do NOT want to be waiting around for someone to unblock your toilet. It may be disgusting but scoop out some of what's in the toilet before you start plunging, it's less disgusting than having to mop it off the floor. You want the plunger that makes a seal around the bottom.
BUCKET. (under $10) mine is constantly in use, i keep it in the tub and toss wet things into it. I have gone through EVERY TYPE on offer...I was so sick of plastic buckets, that warped and stained, where the handles ripped out. But the BEST and cheapest one I have ever found is a flat back duraflex bucket for watering horses. Not kidding. Made of a hard polyethylene these things are designed to be flung around and stepped on by 2000 lb animals. https://www.amazon.com/LITTLE-GIANT-Flat-Back-Dura-Flex-Plastic/dp/B000HHLHPS/ these are cheap if you buy them in a feed store, but even with the shipping on Amazon it is WELL WORTH the money. You will need a bucket when you empty the back of the toilet tank to change the flushing flapper or gasket, and you will need it when you empty the commode itself, if you have to change out the wax seal underneath.
Blanket hangers. (6 for $27) yeah this is obscure, but when I moved I lost a LOT of storage space. These saved my sanity. I use them to hang up quilts and sleeping bags in the back of the closet OFF SEASON. I also use them to hang blankets, sheets curtains and stuff once they come out of the laundry aren't quite dry. I didn't even know there was such a thing before now I wouldn't give them up. https://www.amazon.com/Stock-Your-Home-Comforter-Organization/dp/B00EUG51JU
Flashlight. ($30-50) I've written about these before. Until I bought a GOOD one, I had no idea how bad the others were. Cheap flashlights are great to have scattered about in the cellar, or in the junk drawer. but if you really want TO SEE, get a great flashlight. I gifted myself one for christmas one year and I love it. It hangs by the door and if I am going to be out very late or the weather is bad, I shove it in my bag. It will also illuminate Well past the end of the porch and into the yard if I hear a noise. https://www.amazon.com/Pelican-Carded-SabreLite-Flashlight-Yellow/dp/B01CKAIYV4 any very good brand will do, but I found Maglites to be dangerously useless.
I highly recommend one of those laser guns that takes temps. Oven/hotpot temps are notoriously +-50 degrees. or even more. https://www.amazon.com/Etekcity-Lasergrip-1080-Non-Contact-Thermometer/dp/B00DMI632G/
We just got a laser thermometer like this, and have found it great so far. There is a slightly cheaper model as well. Good luck!
https://www.amazon.com/Etekcity-Lasergrip-1080-Non-contact-Thermometer/dp/B00DMI632G/ref=sr_1_3?ie=UTF8&qid=1487966083&sr=8-3&keywords=laser+thermometer
Model #332 $ 349 - click order online - http://visionproducts.us/vp12wp/?page_id=18
Herpstat 2 $195 - http://www.spyderrobotics.com/index.php?main_page=product_info&cPath=1&products_id=26
80 watt radiant heat panel $89.99 - http://www.reptilebasics.com/80-watt-radiant-heat-panel
Ultratherm Undertank Heater $19.99 - http://www.reptilebasics.com/ultratherm-undertank-heater-uth-11-x11
Large Hide Box $6.99 x 2 - http://www.reptilebasics.com/large-hide-box
Large water bowl $3.99 - http://www.reptilebasics.com/large-water-bowl
Reptile Prime substrate $15.99 - https://www.reptileprime.com/purchase-here
Tweezer 18 " - $9.99 - http://www.reptilebasics.com/tweezer-18
acurite 06066m temperature and humidity probe $49.99 - https://www.amazon.com/AcuRite-06066M-Temperature-Humidity-Monitor/dp/B01MD1DJPY
Etekcity Lasergrip 1080 $18.88 - https://www.amazon.com/gp/product/B00DMI632G/ref=ox_sc_act_title_2?smid=ATVPDKIKX0DER&psc=1
Just to throw in some decoration...
Koyal Wholesale Grapewood Branch $20. 89 https://www.amazon.com/Koyal-Wholesale-Grapewood-Branch-24-Inch/dp/B00C0PCK2O/ref=pd_lpo_vtph_199_tr_t_2?_encoding=UTF8&psc=1&refRID=HWE88KCVEHPM6K9ZW057
Rounding up to the whole dollar this comes out to around $781 before taxes and shipping so yes, less than the price of a biopod grand (these are not even shipping yet)
$999.95
https://www.thebiodude.com/products/biopod-grand-price-does-not-include-freight-shipping
more sites with prices
https://www.reptiles.swelluk.com/biopod/
https://www.indiegogo.com/projects/biopod-world-s-first-smart-microhabitat-animals-pets
Just posted this in another thread, if it doesn't work you either are using the laser to aim, which doesn't work, or you got one that doesn't go to a high enough temp. Anyways heres the post:
I have this. Turn off the laser and aim with the big hole. You can easily find them at a depot store in your town too instead of waiting on shipping. Just ask for infrared thermometers.
I have the Lavatools Javelin. Absolutely no complaints a year in.
https://www.amazon.com/Lavatools-Javelin-Digital-Thermometer-Chipotle/dp/B00GRFHXVQ
https://www.amazon.com/Lavatools-PT12-Javelin-Thermometer-Chipotle/dp/B00GRFHXVQ
Ive got these but it looks like they're not on amazon anymore. I think most well rated quick read thermometers should be just fine though. I'm not a huge fan of the fork style, they don't seem as quick as the ones like I just linked. this one looks great, but ive never used one
For grilling or cooking in the oven I use my iGrill all the time. I had an original and it broke on me, but then I picked up the 2 after seeing them at CES (before Weber bought them) and hearing how it was all new etc. etc. and its been rock solid for me since. Ive picked up a few minis for friends for Christmas as well and they all unanimously love them. I see the 3 is out now, but I have no experience with that.
Edit Looks like the igrill 3 is just crappier and only works with some grills. How dumb is that. If you're going to get one in that case, get an iGrill 2 or a mini
I use this quick read one. It’s similar to ThermoWorks, which is what people with money to spend buy. It’s just a little slower and less fancy I guess.
https://www.amazon.com/Lavatools-PT12-Javelin-Thermometer-Chipotle/dp/B00GRFHXVQ
For long smokes though, I will admit, I use a Fireboard. And it’s the Cadillac of wireless temperature monitoring.
If your meat's not juicy, it's almost certainly because you are overcooking it. As others have pointed out, cubed chicken takes very little time to cook. It's probably better to cook them as larger pieces and then cut them up.
BTW, cooking to correct temperature doesn't mean that long cooking times are bad. For example, when stewing beef or chicken, it's entirely possible (and sometimes required for tougher cuts of beef) to cook for hours at a time - but the key is that this is done at a low simmer.
For burgers, you want to cook them at a relatively high heat so the outsides get a nice brown crust while the center is a nice medium rare. Some people will say "only flip it once", but I think that is a myth. I've flipped steaks and burgers multiple times without any ill effects. In fact, my preferred method of cooking steak is to use a lot of oil, flip it every 30 seconds while basting it continuously in the oil with a big spoon.
Another important point if you are forming your own burgers. DON'T OVERPACK THEM. If you are squishing them together very firmly, you will end up with hard bricks of meat. Just enough pressure to hold them together (at least a half inch thick. I like them thicker) and you will get nice juicy crumbly burgers.
Lastly, let the burgers rest for 5 minutes (longer for big cuts of meat). Otherwise, a lot of the juice will leak out when you cut into it.
Get something like this thermometer to help you cook steaks and burgers.)
Edit: I've never read this book, but America's Test Kitchen is an awesome resource. LINK. I think I'll buy this myself!
When I was looking for a new digital thermometer, I was a little put off by the price of the Thermoworks. I think they are great devices but I just didn't want to spend $100. I also was weighing the difference between the models, like you.
But then I found the Lavatools Javelin.
https://www.amazon.com/gp/product/B00GRFHXVQ
It had everything I wanted and was only $25. I gave it a shot and it's been in my pocket while cooking ever since.
I've got one, but it's from back when they called it Thermowand. Got it in 2014 and it's still doing fine.
Oh, and the price seems to be down to $25 on Amazon now.
the thermapen is fantastic if you have 100 bucks to spare. nist certified and delightful to use.
after my thermapen broke i bought this and it's about 80-90% as good for 1/4 the price https://www.amazon.com/Lavatools-PT12-Javelin-Digital-Thermometer/dp/B00OXHQL3Q/
Of course! Happy to help! Definitely recommend an instant read thermometer as well (I have this one: https://www.amazon.com/gp/product/B00OXHQL3Q/ref=oh_aui_search_detailpage?ie=UTF8&psc=1)
I typically remove the chicken at about 160f because meat will actually continue cooking after you remove it from the oven, so you'll get up to 165f by just letting it rest for 5-10 minutes after taking it out.
Here is a decent one with a 10% coupon that puts it just above your limit.
ThermoPro TP-07 Wireless Remote Digital Cooking Turkey Food Meat Thermometer for Grilling Oven Kitchen Smoker BBQ Grill Thermometer with Probe, 300 Feet Range https://www.amazon.com/dp/B014DAVCP4/ref=cm_sw_r_cp_api_i_AwhyCbB0D19T7
https://www.amazon.com/gp/product/B014DAVCP4/ref=oh_aui_detailpage_o02_s00?ie=UTF8&psc=1
Pretty cheap right now, excellent thermometer. You can hook it on a handle and go in the house and see live updates in temp.
Not sure what you consider affordable, but the ThermoPro TP07 has great reviews on Amazon, is only $35, and Amazing Ribs gave it a silver medal, saying the only negative was that it didn't announce when it lost signal.
If I didn't already have one I received as a gift, that's definitely what I would buy.
I’m about to buy a thermopro tp08. Friend has one, works great. It’s just Bluetooth though.
https://www.amazon.com/ThermoPro-TP-08-Wireless-Thermometer-Grilling/dp/B014DAVHSQ
I have this and it has served me well. Does what I need it to do without spending crazy money. The more important thing to have though is an instant read probe like this.
I gave up my other grills for a weber kettle and have been happy with the choice ever since.
For slow cooks, look up the snake method. It's fantastic for things like a pork butt for holding a lower temp for hours. I picked up two things that made it much easier for me do the cook without as much stress.
The first is a Thermapro 2 probe wireless thermometer so I can monitor the grill temp and the meat temp. So i can basically ignore the grill while it smokes the meat and enjoy my company instead of focusing on the grill.
The second is Tip Top airflow regulator. This sits on top of the exhaust and uses a temperature sensitive coil to open and close the vent to help control airflow. Takes a little practice to get used to, but when you do, it really helps with my temp stability.
(Those should not be affiliate links but I wouldn't know one if I saw one)
250 is way too high. I guess you got it from ribs/brisket smoking recipes, but sausages are not supposed to be smoked under higher than 170F-175F temperatures. You are right that you cook the fat off. It will give you dry sausage without nice glossy surface. Get a meat thermometer to make sure that you won't overcook your sausage. 155 internal should be OK. I invested $50 recently in these guys. Very convenient. You can monitor both temp of your smoker and internal. Highly recommend.
Got a link? I've gone through a ton of cheap instant read thermometers so I was considering pulling the trigger on a Thermapen.
Right now I'm pretty happy with this ThermoPro dual probe though.
I can't speak to this particular product, but I use their wireless thermometer all the time for smoking meats. It's a great product that works really well, and I would hazard a guess to say that this thermometer would be great, too.
This is what I have from them: https://www.amazon.com/gp/product/B014DAVHSQ/ref=oh_aui_search_detailpage?ie=UTF8&psc=1
Yes it is! Im using the one that came with the smoker. I am also using this one. It works pretty well and has an alarm that lets you know when the meat is at the temp you set it to alarm you at. I found that only having one meat thermometer was only good for me if I was only smoking one thing at a time, but I quickly realized that if I have the smoker out I might as well do more than one thing.
Yes, the amount of coal you add is the determining factor. You might want to buy a [digital thermometer] (https://www.amazon.com/ThermoPro-Digital-Cooking-Thermometer-Stainless/dp/B017613C3C/ref=sr_1_14?ie=UTF8&qid=1491328348&sr=8-14&keywords=BBQ+thermometer) to monitor the temperature.
Masterbuilt 20071117 30" Digital Electric Smoker https://www.amazon.com/dp/B01JGF97D0/ref=cm_sw_r_cp_api_fNe8ybZJZSQ2M
That's the one I have, got on sales for $170.
ThermoPro TP16 Large LCD Digital Cooking Kitchen Food Meat Thermometer for BBQ Oven Smoker Built-in Clock Timer with Stainless Steel Probe https://www.amazon.com/dp/B017613C3C/ref=cm_sw_r_cp_api_ZQe8yb6JGYF04
Also get a digital remote thermometer with a temperature alarm. Just set it to the ideal temp and wait for the beep.
Pork butts/shoulders are super forgiving to start out. Anything pork is pretty easy. Also poultry is pretty easy as it doesn't benefit from a slow cook (pro-tip: brine). I've smoked a turkey for the last three years and they are amazing!!!
Happy to answer any questions if you decide to invest.
It doesn't sound like a likely scenario, but if you have access to a oven thermometer like this I'd be curious if it's always 100 degrees under. An over will rarely sit at the right temperature and instead fluctuates to hit an average temperature. Again, 100 degrees is a pretty huge dip so I don't think that's the case, but might be worth checking.
I've made Alton Brown's roast turkey recipe every year for five years running, no regrets! It comes out amazingly flavorful and moist!
Don't forget a quality probe thermometer either if you don't already have one! It WILL make or break a good turkey - don't rely on those silly plastic pop-up things that come with them!
Get a digital meat thermometer, makes a huge difference in how easy it is to monitor internal temperature.
https://www.amazon.com/gp/product/B017613C3C/ref=oh_aui_detailpage_o00_s00?ie=UTF8&psc=1
Do you have a good thermometer system? If not, you need to get one.
I did and it changed the way I smoke and dramatically changed the way I grill. No more guesswork and I have a remote sensor which is great.
The results with this new method on the grill are astounding!
I can't recommend this enough.
this is what i have
I cannot agree and recommend an IR thermometer enough. I believe I purchased this one from Etekcity on Amazon and it works like a charm.
Have you measure the temperature of your hotend with some external measurement source? I picked up a cheap IR thermometer from Amazon while I was building my Mendel90, and it had been super useful in the "should I touch that yet" department.
It could be that your thermistor is improperly installed, causing your hotend to not be as hot as you think it is.
Here's my el-cheapo IR thermometer:
Etekcity Lasergrip 774 Non-contact Digital Laser Infrared Thermometer -58℉~ 716℉ (-50℃~380℃), Yellow and Black https://www.amazon.com/dp/B00837ZGRY/ref=cm_sw_r_cp_api_GjrTyb6KAX0F6
This has served me so well.
Works on strike water if you stir the water while heating, and it works to check in on fermentation temps. I've been using mine for about 2 years and its still on the first battery. Only downside is not getting a super accurate mash temp, but if you grab the temps on your grain and strike water, your mash should be fine.
Plus the laser is super fun.
Get yourself a laser temp gun (https://www.amazon.com/Etekcity-Lasergrip-774-Non-contact-Thermometer/dp/B00837ZGRY)
I find it handy to know what temperature the pan is before I add food. so I can tell it's warm enough, or possibly too hot.
I haven't used this specific combination before, but here's some things I know about the components:
Those measure air temp, are are needed for general monitoring, but if you want to measure surface temps, you need something like this. It's a non-contact IR thermometer that measures the actual temperature of surfaces. The temperature of surfaces below your heater are going to be hotter than the air around them, sometimes significantly so, and these let you measure that.
I use my IR thermometer so much. I use it to monitor surface temps in enclosures, but I also use it to measure the temps of rats and mice that I'm warming for feeding. I think I've gotten more mileage out of it than anything else I've bought for my snakes and inverts.
Who told you that this was appropriate? Listen to u/arcticrobot. His advice is spot on! Insect only diet and hot basking surface! 140 degrees F! Use this to measure it: https://www.amazon.com/Etekcity-Lasergrip-774-Non-contact-Thermometer/dp/B00837ZGRY/ref=sr_1_3?crid=1C2DMUP0STUE&keywords=ir+temperature+gun&qid=1569642081&sprefix=ir+temp%2Caps%2C264&sr=8-3 It's cheap and it works. Get it now.
Do not feed it any more rodents!
The analog dial/stick-on ones are notoriously unreliable. Tbh I'm not even sure why they still make them, but go with something digital for sure.
Hygrometer wise I have used and seen several people recommend [these] (https://www.amazon.com/AcuRite-Humidity-Thermometer-Hygrometer-Indicator/dp/B0013BKDO8/ref=mp_s_a_1_5?ie=UTF8&qid=1540538560&sr=8-5&pi=AC_SX236_SY340_QL65&keywords=Hygrometer&dpPl=1&dpID=516gPXAOs5L&ref=plSrch). You can also find them at most hardware stores in the garden section.
A [temperature gun] (https://www.amazon.com/Etekcity-Lasergrip-774-Non-contact-Thermometer/dp/B00837ZGRY/ref=mp_s_a_1_3?ie=UTF8&qid=1540538681&sr=8-3&pi=AC_SX236_SY340_QL65&keywords=temperature+gun&dpPl=1&dpID=41UpFdeJusL&ref=plSrch) is super cool and useful to have- it will measure the surface temperature of whatever you point it at, which is really nice especially for monitoring things like basking spots. They do make reptile-specific temp guns as well, but the hardware kind are significantly less expensive and function the same.
+1 for IR thermometer, avocado oil, and ~500°F surface.
I'd also add that you need to get as much surface area contact with the meat and skillet as possible, so any way to get even pressure pushing down on the meat. I put the meat in, then a sheet of aluminum foil, then my clean smaller cast iron pan (for weight/distribution) on top, then my hand pushing it all down (in an oven mitt). You can use a plate as well, and I've heard of people putting dumbbells on top instead of pushing down. Just something to consider.
I bought the ThermoPro. I really like it. Sadly the probe clip that comes with it is pure nonsense, so I had to order a different one from Amazon but that's a small price.
https://www.amazon.com/ThermoPro-Wireless-Digital-Cooking-Thermometer/dp/B01GE77QT0
I used an electric smoker until the heating element burnt out. You can smoke good meat on it but I definitely prefer my charcoal smoker with wood chunks. Find a decent quality lump charcoal to use. I order fogo from Amazon but it is a bit pricey, avoid the cowboy brand... It is the only lump charcoal I've thrown away for bad flavor. This is a good resource for lump charcoal reviews, even if the web site looks like it is from 1992.
Get some decent temperature probes, one you can put on a small clip and attach to your grill and another to get internal temp of meat. Something like this.
A cheap boning knife like this is great for trimming meat. If you plan on doing brisket I'd consider it a necessity for fat trimming.
Get kosher salt and use it liberally on your meats. I usually try to rub everything a day before I cook it with salt, like a dry brine. If not a day at least a few hours.
Use hickory or oak to start out. They are really good for all around smoking and have great flavor.
An electric charcoal starter is also handy if you are going to cook frequently.
Franklin's YouTube channel is a great resource for smoking.
I think amazingribs.com is a good resource for when you are looking to cook a meat you've never cooked before.
If you want fool proof eggs, get yourself one an egg timer
I have never failed to produce exactly the kind of egg I want. Just fill a pot with water. Put in the eggs and egg timer. Heat on the stove. When it gets to the doneness you want, remove from heat and run under cold water.
Just get him this: http://www.amazon.com/Norpro-Egg-Rite-Timer/dp/B00004UE75/ref=sr_1_1?ie=UTF8&qid=1331230830&sr=8-1
It works great.
These work very well. There are multipacks that are a bit cheaper per timer. (Maybe give one as a gift)
https://www.amazon.com/Norpro-Egg-Perfect-Timer/dp/B00004UE75
Any cooking thermometer should be just fine.
Like this one:
Taylor Classic Instant-Read Pocket Thermometer
http://amzn.com/B00004XSC4
Btw, I have the bonavita variable temp kettle and it's awesome. Just sayin.
If you have two, why don't you do one as a perfect standing rib roast and play with the second one?
I'll get to the playful ideas for the second hunk of meat later.
Part One - an instructional on making prime rib:
Keep in mind, for some of my less essential estimations, I'm totally guessing. Just use your brain.
My procedure was born from the standing rib roast episode of Good Eats. I couldn't find the whole episode for you online, but [here's a clip from it] (http://www.foodnetwork.com/recipes/alton-brown/dry-aged-standing-rib-roast-with-sage-jus-recipe/standing-rib-roast.html) in case you're interested.
Basically, the trick is to take your time with it. This method is foolproof if you're patient and if you give your meat a day to hang out in a salt and pepper rub-down, a couple hours to get to room temperature, and a chunk of time to roast in a very low oven.
Why a low oven if you can reach medium rare in less time with a hot oven? Because a low oven will help keep the whole mass of the meat at roughly the same temperature while it cooks. The thermal assault of a hot oven would decimate the roast's outer inches before beginning to cook the raw center. Look at [one] (http://www.heroacres.com/heroacres/PrimeRib.jpg) and [two] (http://literalminded.files.wordpress.com/2012/09/prime_rib.jpg).
As for special equipment, you'll need [something like this] (http://www.amazon.com/Taylor-1470-Digital-Cooking-Thermometer/dp/B00004XSC5/ref=sr_1_1?s=home-garden&ie=UTF8&qid=1411674292&sr=1-1&keywords=digital+thermometer+probe). Don't rely on interrupting the cooking and sticking it every 20 minutes once it gets close. This isn't a horror movie. The less you stab it, the less blood, the better.
So here's how it'll go:
A day or two before your dinner (I prefer two), season the meat.
Rub the meat (giggity) with salt, pepper, and whatever else you want. I like garlic and mustard powder. Classic flavor combos exist for a reason. Wrap it in saran and toss it in the fridge to let that salty/savory crust develop. The seasoning needs to support the otherwise monotonous roast, so don't miss this opportunity as step 1 to getting an A+ crust on there.
When you wake up the day of your prime rib dinner, take it out of the fridge. Let the roast come to room temperature (about 2 hrs), rub it with a mix of non-extra-virgin olive oil and some good mustard. This'll help that crust we've been talking about.
Insert the meat thermometer at center-mass. Set the device to alert you at your desired temperature. Count on about degrees of carryover cooking once it's out of the oven. I set mine last time to 127 I think. Put it in your favorite ovenware, cover it with foil to aid even-heating, and put it in a cold oven. Set that oven to 200 degrees, or 250 if you're feeling pressed for time.
Once it beeps, let it sit on the counter. You'll notice there isn't much juice for gravy. That's cause being gentle kept the proteins intact and the juices inside. Fear not, gravy and Yorkshire Pudding lovers-- juices will flow soon. When you're an hour away from dinner, crank your oven to 500. Turn it on convection mode if you have it.
Once it's up to temp, stick the roast in and keep your eye on it. It helps if your window is clean, cause opening and closing will partially reset the searing process (you want to leave the inside at perfectly medium rare). Start checking after 5 minutes, then every 2. Once you get that golden-brown/brown, you're there. Pull it. Let it rest for another 15-20. Enjoy.
Part Two - playing with your meat:
Lots of cool ideas on this thread already. This will speak to some of that.
If you wanted to go the Korean bbq or Philly Cheesesteak route, a nice trick is to partially freeze the roast so that your knife can slice it thinly. It's a restaurant trick for carpaccio, but it's super-useful here. Then have fun on YouTube and Google, weigh the pro's and con's of all your options, and learn how to make the most kickass cheesesteak possible. Then tell me about it. Or don't. Not like I've told youanything about food.
The other obvious route is to make steaks. If you wanna make that a project, try dry-aging the roast in your fridge and cutting steaks out of that. I love dry-aging my own beef. If you have a beer fridge in the garage or basement like I do, it's a pretty damn easy task. Just put it on a non-reactive rack and let it sit in the open air.
I have no idea if it helps, but I generously sprinkle salt under the rack to make sure any excess moisture is being sucked out of the air instead of feeding mold.
It'll smell a little beefy and maybe a little funky, but that's fine. Trim the crusty edges and treat them like normal steaks. Be careful, cause their reduced water content (flavor dilution, as dry-aging aficionados know it) make them cook faster.
Have fun!
Learn how to cut up a chicken. This saves you tons of money, I bought a whole chicken for $4 last weekend, enough for 3 meals for my wife and I.
here is a really good short how-to.
Get a good digital thermometer, preferably one of the ones with a probe that can go in the oven. A lot of recipes tell you to cook until "done" or the internal temperature reads something. A good thermometer will help keep you from over or undercooking things, especially meats. This is a decent one.
I completely agree with this. I only had my machine about a month before I went to the Auber PID. Early on I attached a multimeter thermocouple to the base of the boiler to get an idea of what the temps were doing near the grouphead.
The PID is great because you get a live temp reading in the well on top of the boiler and it changes instantly. Since the PID, I added a grill thermometer to take a temp reading on the top of the grouphead. The thermometer has an alarm I can set so I know when the machine is up to temp. It also has a stopwatch so I can time my shots and everything is on the screen at once. I did a ton of searching to find a thermometer with all of these functions displaying at once and in a small size. Definitely recommend it.
You're welcome. It's definitely one of the easiest ways to cook a perfect steak if your new to it. It's hard to go wrong, unlike if you were cooking solely on a grill/in a pan.
The two most important things to remember here are cook on a rack like this, not flat on a cooking sheet.
And use a meat thermometer like this one. Don't just guess at the temperature.
Strange. That's exactly how mine behaved when it got wet. If it were me, I'd throw it in the oven just to satisfy my curiosity. Also, are you sure the part that plugs into the base isn't getting wet? Mine has a huge warning about that, but I haven't personally experienced what happens when it gets wet.
Anyway, if you continue to have problems, you might try this thermometer. It's cheap, but mine has held up through 18 batches and survived a drop into my sparge water despite not being labeled as waterproof.
I highly recommend how-to-brew as well. It will tell you nearly everything you need to know, and if you read this subreddit religiously, you'll learn boatloads.
As far as the general process goes, the next logical step up from extract+specialty grains (what you have been doing) is a partial mash, also known as a mini-mash. Here is a clone of Rogue's Dead Guy in partial mash form. It's a delicious beer, and you won't have to change much to your process, and it can be done in a 21 qt. pot which is what a lot of beginners start with. If you have a smaller pot let me know and I'll scale the recipe for you.
The additional equipment you will need is a large nylon mesh bag and an accurate thermometer. The difference for your process would be that you add all the grain to 4 gallons of 160F water and then to hold the mini-mash at 152F for a full hour. You will need to be fairly precise, but it's not that hard. After the hour pull the mesh bag of grains out, let it drain, then start your boil as normal. Add the extract when there are ten minutes left in the boil.
You can read How to Brew for details of this, but mashing is basically the process of using naturally occurring enzymes in the grain to convert the grains starches into sugars that the yeast can eat. Malt extract is a concentrated version of this "sweet wort" that has already been mashed for you.
I know this is somewhat incomplete because I haven't partial mashed in a while, but I have a document on it I could round up if you want.
As far as adding or changing ingredients, I would start by either adding 2-4 ounces of a different grain that is in the same category as grains already in the recipe. For example, if an Irish Red calls for 4 ounces of crystal 40, maybe add 4 ounces of crystal 120. You can also google for recipes to see what other people are using and maybe swap out crystal 40 for crystal 60 in a recipe, or chocolate malt for black malt. If you have doubts, post the recipe here. There are several recipe guru's that hang around here that are more than willing to help out with a recipe.
You can get most of them from Amazon. I've been using Ken Forkish's recommended Cambro clear plastic bins with covers and they work great, 12qt for mix / rise and the 6qt for sourdough storage. You can get bannetons and bench knives from Amazon too.
Get a 2nd dutch oven so you can do two loaves at once! 10" Lodge cast iron ovens are fantastic and durable and have tons of uses outside of baking too.
Maybe the most important thing you can get for her if she doesn't have one already is a kitchen scale. One that goes to 1g would probably suffice though if you're doing smaller yeast measures you might want .5g or .1g.
Also recommend getting a thermometer.
Of course if you're in Canada and are Amazon impaired hollar and I can let you know where to get this stuff in the 3rd world above the 49th parallel.
Getting a probe thermometer might help reassure her. The ambient air temp inside the fridge is irrelevant if the actual yogurt is still at 38 degrees.
https://www.amazon.com/dp/B00009WE45?ref_=ams_ad_dp_asin_3 We this exact model at my work to test hot and cold foods for safety.
No, do not precook.
It'll be way too dry.
There's no worry of under cooking meat if you have a thermometer.
You must own a meat thermometer!
I have this Taylor 9842
Slow cookers, I believe, cook at temperatures between 190º and 300º (depending on the device).
Chicken needs to be cooked to 165ºF/74ºC.
It's fast and easy to check when chicken is done and tasty.
Your mash time seems a bit long. 2-row should be done with the conversion in less than an hour.
Use a good calculator to hit your mash temperatures. I use BrewPal on the iPhone and am always within 1 degree of my target. Also, make sure you stir the mash well and just leave a thermometer in there to get an accurate reading.
I use this thermometer and am quite pleased with it. It gets a steady reading in less than 30 seconds, but you can kind of estimate where it will end up within 10 seconds (the last few degrees take a while to dial in).
Hop bags aren't required. Unless you're letting the beer age for a long time, the hops in the fermenter won't hurt anything. Just filter on the way into the keg using a hop bag on the end of the siphon tube.
Taylor for less than $10.00. It's fast and accurate enough between freezing and boiling temps. I've been using it for over 5 years (back when they were selling for $14). It's going to take you about 8-10 seconds to get a good reading.
https://www.amazon.com/gp/product/B00009WE45
I just picked up a Thermopop too (last week). It's much faster than the Taylor and will become my go to digital thermometer going forward.
> Fresh meat is better than the discounted stuff near its pull date.
Dry aging.
But a probe meat thermometer meant to stick into the oven is a worthy investment for roasts, especially.
https://www.amazon.com/dp/B0000CF5MT/
I think this is the same probe as the other poster suggested. Works great for me. Sometimes I will wrap the wire around the kettle handle once or twice to keep in somewhere in the middle of the wort. You can set alarms when you hit temps so it keeps me from constantly staring at the wort like watching paint dry.
This is the one I have.
http://www.amazon.com/dp/B0000CF5MT/
Heh.. Indeed, you can buy any level of quality / price / technology in a probe thermometer, the above referenced example, I'd place on the high-end of the scale. I own, and use 2 remote probe thermometers (with alarms) and have gone through a few others in the previous years. This Polder model ( http://www.amazon.com/Polder-Original-Cooking-Timer-Thermometer/dp/B0000CF5MT/ref=sr_1_4?ie=UTF8&qid=1450201255&sr=8-4&keywords=remote+probe+thermometer) can be found at local mega-marts usually, or another brand of roughly the same quality for ~$20. The Amazon sellers have them as cheap as $14 or $15. They're fairly cheap, very convenient, and typically accurate within a degree or two. (I have a Nanmac factory calibrated type C thermocouple, on a eurotherm 2704 3 loop PID controller to reference with..) /u/Blog_Pope has a very practical solution to "police" your Anova, that will alert you if there's indeed a problem... Its just that theres considerably cheaper probe thermometers than he linked to.
Plus, they're great to have around for any other cooking you may be doing.. Say butt-can chicken on the grill, or Thanksgiving Turkey, or Christmas Ham, or Tuesday night Meatloaf... Having a constant temp reading on what your protein is doing in the cooking environment, can help you avoid dry, over-done meat. Set the temp alarm for a little under your target temp, and you dont have to worry about it until the beeps! :-)
For a beginner who wants his steak cooked right, a thermometer is a must. A thermometer will not ruin the steak. Especially if you use a probe thermometer and put it in the steak before cooking. Those hand and face tricks are bullshit.
https://www.amazon.com/gp/aw/d/B0000CF5MT/ref=psdcmw_289812_t1_B000P6FLOY
Others here have given you advice on using a proper temp gauge, getting one for the smoker and one for the meat, but they forgot one. Get a beer or some liquor,relax, and have one or five drinks.
Also this is the temp probe I have Maverick Redichek . Not the best but it gets the job done.
I've got the Smokenator and a maverick wireless thermometer on my weber kettle. I love it. I can put on a whole brisket at dawn, go back to bed and set the alarm to alert me if it goes outside of my preset temp. I can easily get 4 or 5 hours at a pretty stable 250 degrees on the first load of coals. After that I usually have to reload every hour or so. It's well worth the price.
you can get a cheap oven thermometer that will hang on the grates from most anywhere - grocery store, big box store, kitchen supply store, Amazon.
Very soft cookies in part is due to the recipe. So you need a different recipe if you want a more chewy texture.
Another thing is to check accuracy of your oven temp. Buy an oven themometer like this for about $6. Check the oven corners not just in the middle for temp accuracy. https://www.amazon.com/Taylor-Precision-Products-Classic-Thermometer/dp/B0000DJUYR/ref=sr_1_2?ie=UTF8&qid=1496167252&sr=8-2-spons&keywords=oven+thermometer&psc=1
After you know your oven temp is accurate, try a different recipe from someone who consistently gets good results.
Also with a new cookie recipe, I mix the dough and then bake just one as a test to see how long to bake and how much they spread.
I like my recipe because it is tender/chewy plus it uses melted butter. I can bake cookies on a whim because I don't have to wait for the butter to be room temp before mixing the dough.
Let me know if you want my recipe from America's Test Kitchen. It's the recipe 3 bakers in my family have always used for about 15 years.
Sorry, you'll just need to go out and get a 10 dollar oven rack thermometer...
HERE is one that is 6 dollars...
Well, for a large piece of meat, there are general cooking time guidelines that you would be better off using than a recipe anyway. But like what moikederp said, get one of these: http://www.amazon.com/Polder-Digital-In-Oven-Thermometer-Graphite/dp/B000P6FLOY Your food will end up being much better, and your life much easier. I know it seems a bit like overkill now, but you will be thankful later.
Since this AskCulinary, I am also going to recommend that when cooking you avoid just merely following recipes. Look at the food. Learn by site/smell/feel when things are done. Read more about techniques, so instead of blindly following a recipe that says "Turn a skillet up to medium-high heat, add some oil, then brown chicken breasts for 4 mintues on each side. Take the chicken cutlets out of the pan and add chicken stock" You can understand that you are using a very common technique where you brown the chicken, then deglaze the pan making a gravy.
Have the butcher cut two pieces and do hers separately for a little time more. I guess that is what you are saying, but I am not sure. Get a Probe thermometer with an alarm for best results. I use the Alton Brown method which works well for me. Start hers about 1/2 hour earlier. The thermometer ensures perfect meat every time. DO NOT forget to set the alarm though.
https://www.amazon.com/Polder-THM-362-86-Thermometer-Resistant-Graphite/dp/B000P6FLOY
~~~~~< BEEF - ALTON BROWN’S PRIME RIB ROAST, 4 LB >~~~~~
1 rib roast, about 4 lbs......olive oil, to coat roast......1/2 cup water......1/2 cup red wine......1 tsp sage......Garlic powder......Lawry's seasoned salt
NOTE: If frozen, place roast in fridge for 3 days to thaw loosely covered by paper towels for 3 days, change towels daily.
Preheat oven to 250F.
Add Lawry's and garlic powder to olive oil brush roast with oil including bones.
Let stand 2 hours at room temp.
Place roast in pan.
Place probe thermometer into center of roast halfway in and set for 123F - no foil.
Put roast into oven till target temp achieved.
When temp achieved ( about 2-3 hours) remove roast and turn oven up to 500 F.
Cover roast with heavy-duty foil till 500 F achieved.
Remove foil and place roast back into preheated 500 F oven for about 12 - 15 minutes.
Remove and transfer roast to cutting board.
Keep covered with foil for about 15 minutes.
Add wine to pan and scrape goody bits into saucepan. Add sage and water to sauce and cook for 1 minute.
The biggest help to me in getting moist chicken results was when I started using a probe thermometer.
Something like this, but you can find them at Walmart and Kohl's as well. I like having the long probe cord for roasting recipes that will reach inside the oven during cooking so that I can set an alarm and walk away.
The official temperature to cook to is 165F or more, but I don't like going past 160F in a piece of breast meat. I usually will pull mine off of the heat at 155F and let the residual heat coast to 160.
There's a difference between instant read thermometers and leave in probe thermometers. If there is a plastic/lcd readout directly attached to the metal probe, then no, you cannot leave it in the oven. If the metal probe connects to the readout part via a flexible wire, then yes, it's a leave in probe.
This is an example of a leave-in probe therm:
http://www.amazon.com/Polder-Digital--Oven-Thermometer-Graphite/dp/B000P6FLOY/
This is an example of a non-leave in therm:
http://www.amazon.com/CDN-DTQ450X-ProAccurate-Quick-Read-Thermometer/dp/B0021AEAG2
Use a thermometer. You'll see a lot of people talking about poking the meat and comparing it to a hand or whatever, but that can be incredibly imprecise and vary wildly based on things like cuts of meat, starting temperature, cooking temperature, and how muscle-y your hands are. Cooking is science, and measuring is your friend.
To measure accurately, put the thermometer centrally in the thickest portion of the meat. If there's a bone, put it near that but not directly against it. Pull your food off 5 degrees below where you want to serve it, and keep it covered as you move it to the table. There's no need to let it rest extra time (warning: controversial topic). Very thin cuts under 1/2'' should be pulled off closer to 3 degrees from final temp, since they'll cool faster.
http://amzn.com/B009IH0BZ0 is a nice simple example, though I use one of these ( http://amzn.com/B000P6FLOY ) since I tend to do a lot of things in my broiler and don't want to open it during cooking. (City living, no grill)
Reposting the famous u/ _ataraxia info:
Glass tanks can be very challenging for ball python husbandry due to the high amount of air flow with the screen top and the total lack of insulation with the glass walls. It's generally recommended to use tubs or pvc reptile cages instead. wood enclosures can also be suitable if they're designed well and sealed properly to protect the wood against moisture. glass tanks can work, but they require a lot of modification and maintenance, which you'll find tips for in the second link. i'll give you product recommendations to cover options for tanks, tubs, and pvc/wood enclosures.
> chill the entire fitting then heat the outside with a torch
Reverse that process. Heat the entire fitting first, then use a freeze spray to drop the temp of the cartridge.
Use a small torch flame on the fitting, mostly on the threaded area around the cartridge; conduction of heat will heat the rest of the fitting to a lesser degree. Have a fire extinguisher handy, of course. Buy or borrow a non-contact IR thermometer to monitor the temp. Walmart has a similar thermometer if you don't want to wait for delivery by Amazon.
Once it's around 250F, use a freeze spray to rapidly cool the cartridge, while applying a bit of torque with a wrench on the cartridge (you might need an assistant to do this safely).
Walmart has a freeze spray that's almost identical, but without the penetrating lubricants. I'd use the non-lubricant spray, as the lubricants hitting a 250F fitting might cause issues or a possible fire.
I've been happy with this one. It also has a lit screen option.
https://www.amazon.ca/gp/product/B00837ZGRY/ref=oh_aui_detailpage_o05_s00?ie=UTF8&amp;psc=1
Are you just setting the rat in front of him? Because it can often help if you make it do the rat dance (take a pair of tongs and wiggle it in front of your snake) and then once he strikes, keep pulling on the rat after the snake as struck, so he thinks the rat is trying to get away and will constrict it. Also are you sure you're getting the rat all the way up to temp? It should be about 90 degrees. You can use something like this to be sure: https://smile.amazon.com/gp/product/B00837ZGRY/ref=oh_aui_detailpage_o01_s00?ie=UTF8&psc=1
I have this one :)
https://www.amazon.com/gp/aw/d/B00837ZGRY/ref=yo_ii_img?ie=UTF8&amp;psc=1
Yep. I should mention that it only displays one temperature at a time, but a quick button press will switch back and forth between temperature at the unit and temperature at the probe.
You should also grab a temp gun for spot checking temps directly above the UTH.
the only thing I can think of is give her a week or two to settle in before trying to feed her (goes for handling as well), and you might want to pick up some more hides. Shes still a small snake so the more clutter you have in the tank the more secure she'll feel (paper towel tubes buried in the bedding is one of mines favorite). Oh and you might want to pick one of these up: https://www.amazon.com/gp/product/B00837ZGRY/ref=oh_aui_detailpage_o01_s00?ie=UTF8&amp;psc=1 (just to do surface spot checks, and if you get other snakes that are a bit more picky this would be pretty handy to have)
Heat mat is the way to go for sure, but you MUST also get a thermostat for it. Otherwise it will be too hot. Set the thermostat to keep it at 90°. The heat mat goes under the tank, definitely not in it. The heat mat has a sticky surface and you stick it to the bottom of the tank. There’s very little risk of fire. Ours is on a wood table and has been for years.
Here’s a pretty good thermostat that we use:
https://smile.amazon.com/gp/aw/d/B000NZZG3S
Make sure the temperature sensor is against the floor of your substrate (I recommend paper towels for the substrate. Cheap and easy) so it reads more accurately. To be extra safe get a laser thermometer to read the temp on the surface of the tank. This one is good and inexpensive:
https://smile.amazon.com/gp/aw/d/B00837ZGRY
Use it to verify that the surface temperature is about 90°
https://www.amazon.com/gp/aw/d/B00837ZGRY/ref=mp_s_a_1_1?ie=UTF8&amp;qid=1520056166&amp;sr=8-1-spons&amp;pi=AC_SX236_SY340_QL65&amp;keywords=infrared+thermometer&amp;psc=1
Open lid, give the pot o’ wax a quick stir, zap it with this. Instant and accurate af.
*Bonus red dot laser fun if you have a cat.
I picked one up in preparation for my first snake. Be prepared to try and temperature sense all the things.
u/_ataraxia recommended this one to me and it seems to be a nice unit. If nothing else, it will come in handy for some of my other hobbies too. I've yet to try a ice bath test with it like I did the two digital thermometers I also purchased, but that is planned for tonight when I get home.
&nbsp;
Also, just as an aside, the laser is just there to help guide you. it doesn't actually do any sensing.
I use a laser thermometer instead (~$15). More accurate, and many more uses. Strike water temp, see how close wort is to boil, toy for your cat to chase, wort chilling monitor, finding a fermenting area, stop it cat I'm trying to make beer, checking fermenting temp.
https://www.amazon.com/gp/product/B00837ZGRY/
A temp gun is your friend. For under 20$ at that.
https://www.amazon.com/gp/product/B00837ZGRY/ref=ppx_yo_dt_b_search_asin_title?ie=UTF8&psc=1
http://amzn.com/B00837ZGRY As is a IR thermometer.. Got one just for the kitchen.. since were bringing up things that are damn handy in a kitchen.
Get an IR Thermometer so you can measure the surface temperature. The surface temperature can sometimes be surprisingly higher than the ambient air temperature.
I have an Oneida digital thermometer that I find indispensable, both for keeping tabs on the water temp for my yeast starter, as well as taking a final must temp reading, etc.
As much as I like it, i'm kinda dying to try out one of these bad boys.
I'd do it like this for 100ml
10g test 20g tren 20g mast
Displaced fluid: 9.43 + 18.18 + 15 (used .75 for mast displacement via google)
2ml BA
16 ml bb
60.61 ml from above
I'd make the rest like this
(39.39ml)80% EO + (39.39)20% oil if it doesn't mix completely
80% EO + 3-6% guaiacol (start with 3 add more if needed) + rest oil
Feel free to tell me if I'm wrong about anything cause I'm learning still :)
Also if you plan on using heat I'd get one of these to keep it Gucci for tren
Nubee Temperature Gun Non-contact Digital Laser Infrared IR Thermometer https://www.amazon.com/dp/B00CVHIJDK/ref=cm_sw_r_cp_api_SWlfzb838KAS7
something like this
This is why I got one of these
Chamber and pump - $235
Glass extract tube that holds 60 grams - $40 A larger tube may be necessary, I don't know how big your pants are but Amazon has tons of different sizes to choose from.
25 micron Mean Screenz - $20
Thermometer gun - $17
PTFE sheet to blast onto - $20
I use these rubber gaskets to attach my screens on and tighten a hose clamp over the gasket - $15 So the order will be glass tube, screen, gasket, hose clamp.
Presto griddle - $23
This gives you a total of $370 with plenty room for shipping, butane, and anything else you may need.
I don't like cooking boneless, skinless breasts in the oven as they are as you describe, dry or undercooked. I did start using an instant read thermometer to solve the undercooked problem..
But I've used this recipe with great success. I've used it by cutting up the whole chicken and I've used it with just breasts, but ones with skin and bones. And it's come out great - that is moist and done.
I still use the thermometer (this one) to make sure they're done.
Hope this helps...
Buy yourself a meat thermometer and stop worrying! You'll probably end up cooking meat better than most if you learn to use it.
There is zero evidence that you have to actively maintain temperature for your standard single infusion mash. It's yet another way that homebrewers make things more complicated than they have to be.
If you're the type who needs to stress about things, then insulate your kettle --or-- pre-heat the oven to 170-180°F, turn it off, and stick your kettle in the oven.
> I only have a crappy stick thermometer
Yeah, you're probably going to want to spend the $8-$13 needed to get a decent handheld digital thermo
We use these guys:
https://www.amazon.com/CDN-DTQ450X-Thin-Tip-Thermometer/dp/B0021AEAG2
Same accuracy as the thermapens, though not quite as durable, but you can buy five CDNs for the cost of a thermapen. What are you guys doing to these things though? Our head brewer has been using her personal thermapen for five years and it looks brand new.
It does depend on how thick it is, whether there is a bone present or not, the cut of steak, how cold the steak was before it hit the pan, etc. There are some basic guide lines you could probably goolgle. I would say to get a digital instant read thermometer and follow a chart on doneness. Eventually you will be able to get good at this by just feeling it and looking at it.
ATK has often referenced the fact that the Thermapen is their favorite thermometer - $100
**
They also tested cheaper models:
**
From Season 11: Fall Favorites
Inexpensive Instant-Read Thermometers
Testing notes
TIE FOR FIRST
ThermoWorks Super-Fast Waterproof Pocket Thermometer - $24
> An extra-thin probe that allowed for easy temperature checks, even inserted horizontally into chicken breasts, and relatively fast readout times put this model at the top of the rankings. We also liked the location of the readout screen at the side of the wand (as opposed to the end) and the simplicity of its controls. Its few drawbacks are a low maximum temperature, the fact that it can’t be calibrated (reset when accuracy seems off), and its lack of an automatic shutoff.
> Although this bulb-shaped thermometer felt awkward and cheaply made, and testers found it was too easy to hit the small buttons accidentally while gripping the head, it received top marks for speed, accuracy, and temperature range. An automatic shutoff preserved battery life.
I'd recommend a digital thermometer. I have this and it's been great so far. If you're doing extract a thermometer isn't quite as critical, but you'll still want to steep grains and pitch yeast at proper temps.
I guess I could call myself an experienced home cook now and I also would recommend Rachael Ray recipes. A lot of people on reddit seem to hate her because she's not Gordon Ramsey or Alton Brown, but I think that a lot of her recipes are a simple, realistic way to start cooking. Alton Brown, Julia Child, and the like are all great for learning to cook from, but most people don't have the time it takes to cook like them every night. Aim to prepare their recipes once or twice a week, but in the meantime, just gain some experience with the simple stuff.
Definitely get a meat thermometer! I've been using this one for a few years. I've had a few others, and this is the only one that has lasted a while. I used to say that I didn't like meat very much, but when I started using a meat thermometer, I really started to enjoy it. It's a lot better than cutting into it and losing juices, especially since you should let your meat rest for at least 5 minutes after cooking it.
Also, check out this slideshow about the most common cooking mistakes.
As for thermometers, I got this one from Amazon and have loved it. Cheap and accurate. Used to have an analog thermometer and it was impossible to get a good reading through the steam of the water/wort
The last time we had this discussion the CDN DTQ450X ProAccurate Quick-Read Thermometer came up as a more affordable alternative. I bought one and have found it not too bad. It only has ice water calibration and it's not quite as quick as you'd ideally like, but otherwise I'm happy with it.
I have an IR temp gun and it doesn't do shit for an enail.
Max temp I could get off it was like 250F and I tried EVERY ANGLE at distances from 1" to at least a foot out.
They say some of them are not accurate over a small area and require a larger area to test due to how they're focused which I'm not sure. They are also supposedly made inaccurate by reflective services which most nails are.
I bought a cheap kitchen probe which is rated to read up to 450F and is calibratable and it seems far more accurate and useful than my IR thermometer.
Useful for low temp dabs only (probably) because I could see one wanting to turn the actual nail's temp up beyond 450F but I feel that is a waste of terpenes.
https://smile.amazon.com/gp/product/B0021AEAG2/ref=oh_aui_detailpage_o02_s00?ie=UTF8&amp;psc=1
My enail is currently set to 573F but I get readings of around 405-435F with that probe actually touching my nail depending on where I touch the nail. (it takes close to a minute to get the first full accurate reading as the probe warms but it's worth it)
If I went much below a measured 400F the dabs would pool up some and not vape and that's because it's much closer to the ingredients boiling points and from my research a chemical at its boiling point is just as content staying in a liquid form as it is in a gaseous form (vapor) which is why one needs to have the temp a bit higher than the actual boiling point (THC boiling point is 315F for reference but a common terpene limonene is 350F)
That last bit makes a bit more sense if you think of a pot of water at its boiling point, sure it's putting off vapor (steam) but only slowly, most of the water is still liquid.
Basically I realized I had my nail set almost 100F too high after doing these tests. I thought a setting of 670F was low judging from what others say but on my nail it was not .. lol.
Cheap: https://amzn.com/B0021AEAG2
Not so cheap: Thermapen
Right, because they tried hiding m and realized that the entire internet does not work in their narrow view. Proving yet again the whole change is a half baked and was even more half assed in implementation.
I'm on the latest Windows 10 chrome release. Literally just updated to check. They do not hide the protocol so your example is wrong, and it's still very little difference made by only removing the www. If your going to do it go full bore like Safari on my Mac and just show the domain. Don't bother with anything else because the user "probably doesn't care". Simply stripping three characters is so insignificant and doesn't provide any real benefit to the user or the UI but has already proven to introduce unnecessary bugs.
Ehh, what the URL represents is not the deciding factor of atrociously long. It's the fact that it is made up of a large amount of characters.
It's not a step towards shorter URL's. They can't stop what comes after the domain, there will always be a lot of junk in URL's because it's critical to routing to the correct resources and passing whatever other input needs to be passed. Below is a random product page I clicked on my Amazon home page. I'm soo glad they are going to hide and try to make www a reserved sub-domain. It'll do wonders to shorten this URL and make things easier to look at. Heck once they hide the www that means I'll finally be able to see the letter "KX0" that was being cutoff. Hot damn, browsing the web has become a better place now.
https://www.amazon.com/Rubbermaid-Commercial-FGTHO550-Monitoring-Thermometer/dp/B005KDEIZ0/ref=br_msw_pdt-3?_encoding=UTF8&amp;smid=ATVPDKIKX0DER&amp;pf_rd_m=ATVPDKIKX0DER&amp;pf_rd_s=&amp;pf_rd_r=RD6DV55XYT67Z7GTSARZ&amp;pf_rd_t=36701&amp;pf_rd_p=1507acd0-824d-41b3-b05c-3b288136f12d&amp;pf_rd_i=desktop
If it's as universal as you say, why does it need to be removed. People already understand it, they work with it. Removing it can't provide any real benefit other than to obfuscate things which is never a good idea.
It's a controversy because of the assumptions that were made by the developers and the fact that those assumptions are wrong. If they just stated that they want to make things pretty so we are hiding letters, people would have said your a bunch of idiots and we hate your UI people. But they have double downed similarly to you that hiding the letters provides a ton of benefits to the end user when in fact all it literally does is allow 3 more characters at the end of the URL to be displayed. Three characters that the user probably cares less about than they do the www sub-domain.
Fold 'em up the night before and toss them in HERE. Put it on ONE OF THESE. Done.
It sounds like we might have similar coffee machines (here's mine). I like to have mine come on an hour before I wake up to give the group head and portafilter time to come up to full temp. The cheap and simple approach would be to plug in one of these and call it a day.
In my case, I'm using a SmartThings hub along with a Z-Wave switch which allows me to schedule the on/off in a little more intelligent manner, while also monitoring power utilization and allowing me to integrate control into additional environments. For example, the Rocket will only turn on if somebody is home at 5am as there's no sense starting coffee for an empty house. I also can control it with the Amazon Echo with "Alexa, turn on the Rocket". Unfortunately I can't say "light the Rocket" yet but I've filed a feature request :D
In this use case SmartThings will work fully local so it should avoid some of the cloud reliability problems people have experienced recently. You could do the same with several other hub or software options available as well as this is a very standard use case.
Good luck, and good coffee!
You should automate this more. https://www.amazon.com/dp/B005MMSTNG/ref=cm_sw_r_awd_EGLevb1DQ0E7Y
http://www.amazon.com/gp/product/B005MMSTNG/ref=oh_details_o04_s00_i00?ie=UTF8&amp;psc=1
http://www.amazon.com/gp/product/B00080G0BK/ref=oh_details_o04_s00_i03?ie=UTF8&amp;psc=1
http://www.amazon.com/gp/product/B001TH7GV4/ref=oh_details_o04_s00_i01?ie=UTF8&amp;psc=1
You are welcome. This is my setup
Definitely keep a heat source on one side of the tank all night. Make sure the hot side is maybe around 80 at night and the cold side at 70. As for the matt burning him, you should purchase a light dimmer.
Lutron Credenza C.L Plug-In Lamp Dimmer for dimmable LED, Halogen and Incandescent Bulbs, TTCL-100H-WH-C, White https://www.amazon.ca/dp/B00FRD2GHA/ref=cm_sw_r_cp_api_i_6Qm4AbD5SB2F5
This is what I bought, it works for a heating pad so you can keep it warm. I noticed it was way too hot for my skink. You should also buy a thermal digital thermometer (alongside digital thermometer on each side of the tank and a hydro meter) to check surface temperatures.
Etekcity Infrared Thermometer Digital Temperature Gun Non-contact Food Laser Thermometer for Kitchen Cooking BBQ and Bath Water, -58℉~716℉ (-50℃~380℃), Yellow and Black https://www.amazon.ca/dp/B00837ZGRY/ref=cm_sw_r_cp_api_i_8Sm4AbFESMM21
This is what I use. I usually make sure the glass where the matt is is never over 90 degrees and his basking spot is never over 105 degrees.
As for the substrate it’s really up to you, I use aspen too, I’ve tried other substrates and he just doesn’t seem to enjoy them cause he can’t burrow. I change my substrate once a month and spot clean daily. If you keep it clean it shouldn’t be a problem.
Source: Northern bluey owner for only a year. My information is only from my own research.
I bought one of them Laser Thermometers. Can't wait to use it for the perfect temps. Also great to have on hand if you cook.
Oven thermometer is a must, but IR guns are also a fun and cheap investment.
I'd get rid of the lamp, bright light can hurt their eyes. The under tank heater should be enough for heat, and whatever the lighting in the room is should be enough for light.
You'll need a thermometer that measures ground heat, digital thermometers with probes are best. You can also use a temp gun.
You're also gonna need more hides for him to make him feel more secure, at least one on the cool side and one on the hot.
Check out /r/leopardgeckos too, they have tons of helpful information and a lot of cute gecko pictures.
You can cook very small portions of most anything in an Instant Pot (especially if using the PiP method for anything liquidy, etc).
Or you can cook larger portions, then just refrigerate or freeze the part you don't eat for nights you don't want to cook or not whole meals.
Cooking PiP (pot in pot, pan in pot) usually means you'd put water in the bottom of the inner pot (usually 1 c or so), then put in a wire rack (or make your own risers) in the pot, and finally put the food in a bowl or on a plate, etc, on top of the rack so it will pressure cook only up in the steam area.
I cook single chicken thighs that way all the time, sometimes adding a bit of salsa or other seasoning, wet or dry, on the chicken.
As long as the walls of the PiP container aren't too tall or too thick, the same pressure time will be used as for one or more thighs put in the bottom of the inner pot (15 min or so, depending on thickness + NR), as long as they're not significantly overlapped.
Cooking PiP also means things like tomato sauce, etc, that would otherwise get hard and prevent pressure cooking on the bottom of the inner pot, are totally fine since they're not down there.
https://www.reddit.com/r/PressureCooking/comments/6tghkd/chili_and_cornbread_at_the_same_time/dlmhjue
https://www.reddit.com/r/instantpot/comments/72tmk2/brown_rice_and_pinto_beans_at_the_same_time/dnlqu80
https://www.paintthekitchenred.com/pot-in-pot-pip-instant-pot-cooking
I might put a bit of loose foil or parchment, etc, on the top of the food or container to keep out any moisture that condenses on the underside of the lid and drips down, but often not necessary. If covered too tightly or completely, time would need to be increased.
For a single potato or yam, etc, I'd just put it on top of the rack with the water underneath, and pressure cook it that way.
Many things can be put directly on the bottom of the inner pot too and don't need to be elevated out of the water below, and sometimes that just depends on the diameter of the inner pot being used so the food wouldn't burn, etc.
Many things can be cooked at the same time too. If they don't use the same cooking time, one can be wrapped or enclosed while the other isn't or one can be sliced/cut into thinner pieces, to get the times closer to the same.
If eating meats, you'll definitely either want to buy an instant read thermometer to check interior temps after pressure cooking, or just cut into something like chicken to make sure all the juices run clear, especially before you get used to the regular times/etc for each type of meat (and for the thickness it is...and longer if pieces of meat have been "stacked" on each other effectively making them thicker). This is the one I have, but others will also work:
https://www.amazon.com/CDN-DTQ450X-Thin-Tip-Thermometer/dp/B0021AEAG2
I started with the BSG kit, love it. Get an 8 gal (preferably 10 gal) kettle, a mesh brew bag, and this thermometer, then you can jump right in to all-grain Brew In a Bag method (cheaper per batch, better beer than extract, barely more difficult). Your next major gear upgrade should be a temp-controlled fermentation chamber (craigslist fridge + probe temp controller).
I use this one for brewing and cooking. It is a great all purpose thermometer at a great price. It has a very fast response time too.
CDN DTQ450X Digital ProAccurate Quick-Read Thermometer-NSF Certified https://www.amazon.com/dp/B0021AEAG2/ref=cm_sw_r_cp_apa_hLCzxb93WGH0V
I have one of those classic pot clip thermometers which I leave in the brew pot, and then I also have a quick-read thermometer which is excellent to get very quick, accurate readings. I use them both - the turkey fryer thermometer is not always precise enough for steeping, etc.
[edit] - obviously the other thermometers listed here with separate probes are nicer and way more accurate, but I wasn't willing to jump up to taht price range. If you are, go for those!
Did someone say STEAK???
My favorite steak is made about medium, on the grill behind my house, with shrimp grilling below it. Preferably on a Texian fall day, about 80F, perfect weather to chip golf balls into a bucket in the yard while the steak cooks.
Who would I invite? Geez...there are about three hundred people on here that I'd want to enjoy a steak with. I'll pick three.
/u/NeverPostsJustLurks is invited, because every time we talk we find some other common interest. I imagine he'd hang out by the grill and by the time the steak was done we'd have drawn up plans for a pergola or build a compost tumbler or something.
/u/Stefanienee, because she's one of those rare appreciators of fine music who wouldn't find it odd that the soundtrack to Saturday Night Fever is blasting from my house while steak cooks. Yes, I'm secure in my masculinity, and grilling steak.
/u/rubenick. Rubenick MUST visit my back yard, preferably with his bow. I consider a Texas tradition to shoot something while grilling. (Or while frying a turkey.) We can't shoot the guns in my backyard, but there's enough space for us to target shoot some archery.
Edit: forgot the raffle phrase and the link. You got me thinking about steak.
No soup for you!
And check out my [meat thermometer!] (http://www.amazon.com/CDN-DTQ450X-ProAccurate-Quick-Read-Thermometer/dp/B0021AEAG2/ref=sr_1_1?s=kitchen&amp;ie=UTF8&amp;qid=1394498229&amp;sr=1-1) (Oh, that one never gets old...)
https://www.amazon.com/CDN-DTQ450X-ProAccurate-Quick-Read-Thermometer-NSF/dp/B0021AEAG2/ref=sr_1_3?ie=UTF8&amp;qid=1466018608&amp;sr=8-3&amp;keywords=cdn+thermometer
This guy gets very good feedback for the price
It does have a small bolt on the back, I may try it out next brew. If you are looking for a good digital thermometer on a budget I have one of these and it works awesome at 1/4 the price of a thermopen!
http://www.amazon.com/CDN-DTQ450X-ProAccurate-Quick-Read-Thermometer/dp/B0021AEAG2/ref=sr_1_4?ie=UTF8&amp;qid=1416939922&amp;sr=8-4&amp;keywords=instant+thermometer
Instant Read Thermometer's cost under $20 on amazon. I have the second one, the CDN DTQ450X ProAccurate Quick-Read Thermometer. $17.99 currently.
It's a thin little stick and reads really quick. Just jab it into the center of the meat when you want a reading, then go back to cooking (take the thermometer out!) and check again if it's not done.Small enough that a few jabs wont affect the meat.
I use this for bloody everything. Even frozen corndogs... I don't want to bite in and find a frozen or chilly center.
http://www.amazon.com/CDN-DTQ450X-ProAccurate-Quick-Read-Thermometer/dp/B0021AEAG2/ref=sr_1_1?ie=UTF8&amp;qid=1413904659&amp;sr=8-1&amp;keywords=cdn+thermometer
Been using that for a year, it's accurate and works great. If it breaks, I can buy several more before getting to the price of a thermapen.
sure, you can go pretty expensive or relatively cheap. my brewing partner uses a CDN which I think of as a pretty good buy. it works almost as well as my pricey thermapen, but was 1/4 of the cost.
edit- yo u/homebrewfinds didn't you have a good one on the site recently?
EatWild.com is a great way to find actual pasture-raised animals, including chickens.
I bought a deep freezer at Costco (only $100-$200), and buy a dozen or so whole chickens at a time. I learned how to roast them (and bought a good quick-read meat thermometer, and haven't looked back!
Is there a hole down the center? In that case I agree with /u/PuddnheadAZ that it holds a thermometer. Seen here
This is another one that is just as good http://www.amazon.com/CDN-DTQ450X-ProAccurate-Quick-Read-Thermometer/dp/B0021AEAG2/ref=sr_1_10?ie=UTF8&amp;qid=1374166017&amp;sr=8-10&amp;keywords=thermometer
Lots of exotic flours I have only been able to find in grain form, so this would be useful for that. I've also heard that freshly ground flour is supposed to taste amazing, but I can't personally vouch for that.
What does your mom have now? If she doesn't have an electronic scale definitely get one of those.[This one is good.] (https://www.amazon.com/Kitchen-Scale-Bakers-KD8000-Weight/dp/B00VEKX35Y) I don't know what kind of bread she is baking, but a banneton would be nice if she doesn't have one, they are good for the 'rustic' breads you see here. A good electric thermometer is another one, I like this one. If she isn't baking in a loaf pan or dutch oven, a baking steel or baking stone are useful.
Sheet Pan Suppers are pretty fool proof. This is one of my favorites. http://www.cookingclassy.com/one-pan-autumn-chicken-dinner/
If you're concerned about over or under cooking food get yourself a digital thermometer. This one is great and fairly inexpensive. CDN DTQ450X Digital ProAccurate Instant-Read Thermometer-NSF Certified https://www.amazon.com/dp/B0021AEAG2/ref=cm_sw_r_cp_api_98hIzbBSP3255
Also, google "beginner cooking skills". I'm sure there's tons of info. Cooking is a skill and you're not going to start out great. Even Julia Child was a terrible cook when she began.
This is the thermometer that usually comes up in discussions of bang-for-buck value: https://www.amazon.com/CDN-DTQ450X-ProAccurate-Quick-Read-Thermometer-NSF/dp/B0021AEAG2
There are reasons why chilling quickly is important (protein break for clearer finished beer, reduced risk of infection, DMS concerns if you're doing all-grain), but for the most part, it won't change the way your beer tastes.
The exact same wort fermented with the same yeast at different temperatures will taste different. Depending on the wort and the yeast and the temperatures, it might not be that different, but the typical ale fermentation temperature range is lower than you want to keep your house. Fermentation creates heat, as well, so if your house is at 68, there's a good chance your beer is cranking away at 76 or 78, which is a great way to get something that tastes like rubbing alcohol and banana Laffy Taffy.
I still recommend getting a wort chiller, but the biggest improvement in the quality of your beer will come from controlling fermentation, and the biggest part of that is controlling the temperature.
It looks ugly, and the thermometer is analog.
I love data and I love the idea of measuring the exact temperature of my drinks when I serve them, but for that I will use an actually good thermometer, such as a thermapen or at least one of these.
Pick a spoon based on its aesthetics and how it feels in your hand. By all means, use science to make your drinks better, but don't clumsily graft science onto art.
You don't need to spend that much for the same level of quality, contact thermometers come in two varieties the typical kitchen thermometers and ones with thermocouples, thermocouples read fast and are very accurate.
I got this one, http://www.amazon.com/gp/product/B0021AEAG2/ref=oh_aui_detailpage_o01_s00?ie=UTF8&amp;psc=1
reads just as fast as the 100 buck thermopen, is water resistant, and most importantly can be calabrated, (you just put it in a glass of water and ice and hit calibrate) The one I got read within one degree of our slow fragile but very accurate glass alcohol thermometer.
16.22 on amazon free shipping with 35 bucks worth of stuff with 900 plus reviews. also got this one.
http://www.amazon.com/gp/product/B0084JQL1Q/ref=oh_aui_detailpage_o02_s00?ie=UTF8&amp;psc=1
gives you two reading from two standard k type thermocouples (you can order many different varieties all just plug in) large lcd display and can be calibrated.
18.67 I have not used the double thermometer yet but im pretty sure it is going to work well, may have to order longer k type sensors the ones that came with it are only one meter.
Hope this helps. Brew on!
I use this thermometer with my Hario kettle. Works great! I lift the lid up a bit, stick it in and it gives an accurate reading in roughly 2 seconds.
I've used this $15 CDN DTQ450H Thermometer for years. https://www.amazon.com/gp/product/B0021AEAG2/
I've used this for just about everything. From cooking a steak to brewing beer. It takes a few seconds for it to read, but I think i can afford a few seconds of time. Plus it's waterproof and no moving parts. https://www.amazon.com/gp/product/B0021AEAG2/ref=oh_aui_search_detailpage?ie=UTF8&amp;psc=1
As little as possible. The more crap you have, the more it weighs you down.
That said, every home needs some necessities to get by. For me those generally involve cooking, sleeping, and repairs. I just finished watching Parks & Rec and am in a bit of a Ron Swanson mood.
For the kitchen (all recommended by America's Test Kitchen):
Victorinox 8" Chef's Knife
Victorinox Paring knife
CDN Instant Read Thermometer
Lodge 12" skillet - cheap and will last you forever
Crockpot, 6qt - the one kitchen appliance I'd cheat with. Easy delicious meals. Toss in a cheap cut of meat (chuck roast, etc), salt, pepper, garlic, onions, carrots, whatever. Let it sit for 6-8 hours. Dinner for 3 meals.
Tools:
I'd probably just pick up a cheap set of craftsman stuff (screwdrivers, hammer, sockets, pliers). Splurge on the ratchet and any power tools you need:
Bahco 3/8" ratchet - same as snapon F80 at 1/2 the price
Other misc. tools that are quite handy:
Magnetic stud finder - in a new place you're going to be hanging pictures, installing shelving, and mounting curtain rods. These are dirt cheap and super convenient.
Multimeter - Flukes will last you for life. If you need to do any electrical work, these are great. If you don't want to splurge up front just borrow them or buy a cheap $15 one at home depot.
Bedroom:
Get comfortable pillows and nice sheets. Don't get all caught up in the 1000 thread count crap, it's a hoax. Just get at least 400tc or so, and preferably egyptian or pima cotton. My favorite sheets are actually a super cheapo brand that are 60% cotton 40% polyester. I prefer them because they feel more "smooth and cool" rather than "soft and warm".
Obviously get real furniture: dresser, bed with headboard, etc.
Electronics
I won't go into too much detail here, but consider cutting the cord (/r/cordcutters).
A cheap Roku3 + netflix + an OTA antenna can go a long way.
If you have a lot of pictures/media/etc, don't forget about backups. I'd look into an inexpensive NAS, or at least a USB harddrive. They are dirt cheap and worth the insurance.
Insurance
Lastly, don't forget renters or homeowners insurance. If you are renting, you can get rather good coverage for quite cheap. I just paid around $50 for 12 months of coverage on my apartment ($15k coverage, $1k deductible). I shopped around at 5 different places and Amica came out the cheapest by FAR.
Other than that, you don't need much. Buy less crap. Don't buy some $50 automatic electronic wine opener when a $1 wine key will do the job. Same for a can opener.
Just switched to this one and it's been a great cheaper option so far.
I think they found that 145 was just as safe as 165. The meat is so much more tender/juicy at 145.
IMO I would invest in a thermometer (something like this is fine) then you can figure out where the sweet spot is just by pushing.
Plenty of people have commented on the need for a meat/probe thermometer but I think it's also worth mentioning that an oven thermometer is a crucial tool as well. Kinda like this
It hangs on the rack and gives you a more accurate look at what temp you're cooking things at.
Not all ovens are equal, and it doesn't always give you the temp that you specify. My oven is old as hell and tends to run quite hot, to the point where if I want to cook at 400 then I'm better off setting it closer to 350.
I use a couple of cheap oven thermometers - About $7 each off Amazon. You could also move your probe around but I like to be able to check it, but I like being able to read left and right side at the same time.
First think I would check is how far your heat shield is off of the left wall of your smoker. With the GMG DB, this is the single most important measurement. Figure this out and you will be golden. I have found the sweet spot to be around 4.75 inches from the left side wall to get equal temps. I would try that as a starting point.
Intermatic still makes old-fashioned mechanical electric outlet timers. They're no longer made in USA, but they are made in Mexico, and I've never had any problem with them.
Re: the crock pot, if you get a lightswitch timer it controls the flow of power and turns off your crock pot. I actually like it better than crockpots with timers because the 'keep warm' mode overcooks them.
When I had a home mining operation (with TOU pricing), I ran my antminer S1 off of a christmas light timer so that it only harvested that sweet sweet off-peak electricity.
Something like this would probably work if you're running the S9 off of 120v. You might be able to find a 240v alternative.
I have this light alarm clock and love it. It slowly ramps up the brightness until it's time for you to wake up. There are 20 levels of brightness and at level 20 it's RIDICULOUSLY bright. I purchased it for around $50 or so, I think there is a new model out and this one is no longer available.
I also have this outlet timer that I plug a coffee maker and small heater into. Wake up to a warm room and the smell of coffee every day! INTERNET OF THINGS!
They have been around forever. Well, not the digital ones. And, I really wouldn't call them smart. The smart ones are wifi enabled so you can turn them on/off while away from the house and what not.
A digital one.
A Mechanicall one.
This should work. Rated for up to 1750 Watts.
That's not much. They're plants that naturally grow in full sun. Put a plant light above them on a timer. 16 hours per day this time of year will have them growing like weeds.
Here's my setup in my office. The window is south-facing but as you can see is somewhat blocked by a big old wall, so I augment to the light supply for the plants with the light. It's hooked up to the timer I linked above and the plants seem pretty darn happy with it. The black thing attached to the side of the desk is my old phone, which works as an FTP camera that I use to make stop motion video of the plants as they grow.
A simpler method could be just put a real radio on a outdoor light timer similar to this http://www.amazon.com/gp/aw/d/B005MMSTNG/ref=mp_s_a_1_9/192-4860476-3947024?qid=1457225204&amp;sr=8-9&amp;pi=AC_SX236_SY340_QL65&amp;keywords=outdoor+timer
This would be better also since some online stations time out if inactive
Two things come to mind.
These have been around for ages. Otherwise simplest would be GE's new Link LED lights.
Just a note on buying plug-in timers... if you decide to go that route, be sure to buy an "appliance timer", which will be capable of handling the extra power draw of a crock-pot. An easy way to tell is an appliance timer will have a ground prong, while a lamp timer usually won't (assuming you're in a country like the US, where lots of plugs aren't grounded.)
I've never had a problem with this temp gun. If you can afford a Liger, you can afford this.
Oh good, I'm glad she is more comfortable. :)
As far as thermometers, I have this one and have been happy with it.
No worrries man! I'm just skeptic as fuck. You got nothing to apologize for, that link does have data in it, dude says he gets more potency with UV lights, even put them on one side and not the other and got more potent buds from the side with UV.
I would very much like to know if/by how much the total yield changed with UV and without. To put it as a question: what effect does UV light have on THC production vs it's effect on plant growth?
Once I established that I would like to run the same test but substitue UV with blue, then 6000k white, then green, then 3500k white, 3000k white, then red, then IR. Then I could compare the effects of adding different wavelengths and see if one seems to make more THC but not effect yield, or maybe one tends to make the plant yield more but THC remains the same.
And don't beat yourself up too much for just not knowing. I get schooled all the time on stuff that I think I know about and I'm completely wrong. Case and point: a couple weeks ago I got in an argument with Growmau5 (is he on Reddit? /u/Growmau5) about LED efficiency. I thought there couldn't be that much of a difference between manufactures because an LED is an LED, right? Wrong. I set up an expirement with a Cree CXB3590 run at 30w and an array of Epistar LEDs at 30w and got 52k lux at 6" from the Cree vs 30k lux from the Epistar LEDs. However, 30w of Epistar LED's is $8, while a CXB3590 is ~$50, plus I like the spread of the Epistar LEDs and you can always just put them closer if you want more light on your plants.
....anyways, for to measure VPD you need an IR thermometer and a temp and humidity monitor
Honestly I know what my VPD is, but I haven't really found what the optimal VPD is for weed. Poeple talk about it a lot but I've never seen someone say "8.0 is the best VPD for cannabis"
https://www.amazon.com/dp/B00837ZGRY/ref=cm_sw_r_cp_awdb_t1_MnJlDbS5YK605
I have this one. It works great.
My advice is to invest in a good IR thermometer. ETEKCITY branded ones are affordable and they do the job really well. You can get one that reads up to 380℃ for $16 from Amazon.
I personally don't know the correct temperature for dabbing DMT as I only use full convection vaporisation, but having the IR thermometer will allow you to learn the best temperature and apply it consistently to get the same result every time.
This infrared thermometer is one of my favorite kitchen tools.
Knowing the temperature of the cooking surface helped me "calibrate" my sense of how my pans behave on the stovetop.
For starters, yes, please go to an exotic vet who's familiar with beardies.
Can you take a photo of your enclosure? What's his basking temperature like? Do you have a temperature gun? How close is the bulb to his head? What sort of bulbs are you using? And What do you have for substrate?
Here's my method for preparing scrambled eggs in case anyone cares:
This technique yields incredibly moist, soft, fluffy scrambled eggs every time.
Use the CandleScience wick guide while you're building your cart and that'll give you a good idea of which ones to start testing!
I use this cheap infrared thermometer I swiped from the garage tools. Hold it at the recommended distance and it works great!
Etekcity Lasergrip 774 Non-contact Digital Laser Infrared Thermometer Temperature Gun -58℉~ 716℉ (-50℃ ~ 380℃), Yellow and Black https://smile.amazon.com/dp/B00837ZGRY/ref=cm_sw_r_cp_apa_i_jTVADbGSJVHB9
Thats a nice budget build. You will want to make sure those bricks are secure. You don't want them falling while you beardie is climbing on it. Maybe silicone them together.
Also those thermometers are known to be inaccurate and fail over time.
Go with an IR thermometer like THIS for better readings
I also use one with a wired probe as well. You can put the probe right on the basking spot. And the keep the unit of the other end so you get readings from the hot spot and cool side. Like this one
You dont really need a water dish either.
Get digital temp amd humidity gauges. The analog ones are known to be highly inaccurate which could lead to you not knowing of a problem inside your bps enclosure. Ill list some more accurate temp/humidity gauges i use for all my animals/know work far better than analog gauges.
(These two links are for direct spots) https://www.amazon.com/Zoo-Med-Digital-Thermometer-Humidity/dp/B06XY3X7P9/ref=sxin_2_ac_m_rm?ac_md=0-0-ZGlnaXRhbCByZXB0aWxlIHRoZXJtb21ldGVy-ac_d_rm&amp;keywords=digital+reptile+thermometer&amp;pd_rd_i=B06XY3X7P9&amp;pd_rd_r=f1b30844-5547-49df-95ff-ba0aac3561f2&amp;pd_rd_w=Uchs0&amp;pd_rd_wg=guzkL&amp;pf_rd_p=d1a6ea92-24ed-409e-8e33-97dc5a8de815&amp;pf_rd_r=TGRYA2JMNKC4SK449XXH&amp;qid=1569166473&amp;s=gateway&amp;sprefix=digitalreptile++thermometer
https://www.amazon.com/gp/aw/d/B07RBPV8Q4/ref=sspa_mw_detail_0?ie=UTF8&amp;psc=1
(I use this one to make sure my heatmat regulartor thing is accurate) https://www.amazon.com/Etekcity-Lasergrip-774-Non-contact-Thermometer/dp/B00837ZGRY/ref=sxin_2_osp129-ac57b3ab_cov?ascsubtag=ac57b3ab-bed4-443b-8488-8e105122ba5b&amp;creativeASIN=B00837ZGRY&amp;cv_ct_id=amzn1.osp.ac57b3ab-bed4-443b-8488-8e105122ba5b&amp;cv_ct_pg=search&amp;cv_ct_wn=osp-search&amp;keywords=digital+thermometer&amp;linkCode=oas&amp;pd_rd_i=B00837ZGRY&amp;pd_rd_r=89005af9-9dd9-4e80-a240-605a60d3d510&amp;pd_rd_w=t3SHd&amp;pd_rd_wg=c1tkV&amp;pf_rd_p=33b90d57-4392-4d9b-9557-da4c9de25645&amp;pf_rd_r=AZDN5TXKRQHMD5KGXTCN&amp;qid=1569166451&amp;s=gateway&amp;sprefix=digital+&amp;tag=thedrive09-20
(This one is for the middle or get two for each side as this one has worked the best to see the overall temp/humidity in the enclosures for my bp and crested) geckohttps://www.amazon.com/dp/B01H1R0K68/?coliid=I2O5Q9VJY092E6&colid=2MBRCC0QH2E8J&psc=1&ref_=lv_ov_lig_dp_it
Edit: also whats your overal humidity in the room you're keeping the tank cause the cypress might be soaking up in moosture in the air which is causing your enclosure to be so high. I do still suggest you change to digital but it still might be helpful to know if your bedroom is the problem.
Get yourself one of these bad boys. You'll never figure out weird and random scales like burner settings, you need to know the actual temp of the pan.
You should always have temps available on the warm and cool side.
If you don't have fixed thermometers I highly suggest spending the extra $$ on a battery powered infrared thermometer.
Something like: https://www.amazon.com/Etekcity-Lasergrip-1080-Non-Contact-Thermometer/dp/B00DMI632G/.
Depending on age, their basking spot should be 95-100(fahrenheit) for adults, a little warmer for juveniles, 100-105. The ambient temp of the basking side will naturally be higher than the cool side.
The cool side should be noticeably different in the 80-85 degree range.
&nbsp;
Hope this helps, please provide an update!!
Pleaaaase get a thermostat. Snakes move substrate and burrow and do weird snakey things, and uncontrolled temperatures can burn your snake, have it go off its feed, cause it to regurgitate, or even crack the glass of your tank. Most tank heating pads fluctuate in temperature, so even if it's reading 108 right now, most reptile pads can spike to 120-130F.
I use this thermostat for all of my tanks, for all of my species. https://www.amazon.com/MTPRTC-Controller-Thermostat-Germination-Reptiles/dp/B000NZZG3S Cheap and prime-eligible!
Also, I recommend getting a laser thermometer if you have any reptiles at all-- specific temperatures are vital to your snake's husbandry if you want it to thrive, and being able to check surface temperatures is super important (in addition to a temp prob that can measure ambient temp in the rest of the cage). I use this one: https://www.amazon.com/Etekcity-Lasergrip-1080-Non-contact-Thermometer/dp/B00DMI632G/ref=sr_1_1_sspa?s=lawn-garden&amp;ie=UTF8&amp;qid=1510799376&amp;sr=1-1-spons&amp;keywords=temperature+gun&amp;psc=1 It works like a charm!
Alright! So that fixture itself isn't bad, but the UVB bulb that is in there probably isn't great. There is a bunch of research that suggests those coil style UVB bulbs aren't great for our beardies and don't cover the tank in enough UV. This hood is what we use along with this bulb. This light should be on during the day and turned off at night. General consensus is at least 12 hours on. That hood may come with a bulb already, but if it does, it's probably the 5.0 which isn't strong enough for bearded dragons. That why I gave the link to the 10.0 version. This bulb should be replaced once a year even if still illuminates, as the capacity to produce UV diminishes after about a year.
The other thing in the fixture may be a CHE (ceramic heat emitter). If it just generates heat but no light, then that is what that is. You really only need that if the tank temperature drops below 75-70 degrees F. Make sure not to use any red or any lights at night as bearded dragons can see color and it will disrupt their sleeping.
Finally, it sounds like you don't have a basking light. Even though your house stays pretty warm, beardies still need a basking spot of around 105 degrees F. In the now empty spot where your old UVB bulb was, you can use one of these. Some people just use flood lights from Home Depot or elsewhere, just make sure it's not an LED one. You can use this light dimmer to control the light output to get the basking spot to the correct temperature. I would recommend this infrared temperature gun to check for the correct temperatures during the day and at night.
Lighting is one of the biggest things for bearded dragons and can take some time to get set up correctly. It's good to ask questions and research! I still learn new things about beardies all the time. I'll get pictures of our setup tomorrow and show you. I would tonight, but our babies are already sleeping!
One last thought, as some others have said, if you have an exotic vet nearby, it certainly wouldn't hurt to have Ember checked over. They can check for parasites or other issues before they become a problem.
I like using laser thermometers
Here's a cheap IR thermometer that would probably do the job.
https://www.amazon.com/Etekcity-Lasergrip-1080-Non-contact-Thermometer/dp/B00DMI632G/ref=sr_1_1?ie=UTF8&amp;qid=1474470595&amp;sr=8-1&amp;keywords=infrared+thermometer+amazon
I'd check the air temp coming out of the vent in the hot room vs. the temp coming out in other parts of the house. It might be that the ducting in that part of the house doesn't have enough insulation and is losing a bunch of coldness on it's way to that room. Or it just might be the farthest from the air handler. In any case, cool air coming out shouldn't be any more than around 60-62 at the worst.
It's also worth checking the temperature differential in the air handler between the temp going in and the temp going out. It should be in the 20-30 degrees range at least, i.e. 85 degree air comes in, 55 degree air goes out. You can usually do this with a cheap probe thermometer and is a standard test done by any AC guy that checks out the system.
Home Depot, Lowes, and even Amazon have these handy infrared thermal temperature readers. They are relatively cheap and you can scan the mobo to see if you have any components getting too warm. I would check with that that to see what's going on and then go from there.
Edit: Etekcity Lasergrip 1080 Non-contact Digital Laser Infrared Thermometer Temperature Gun -58℉~1022℉ (-50℃~550℃), Yellow and Black https://www.amazon.com/dp/B00DMI632G/ref=cm_sw_r_cp_api_OCRrzb8HTB27T
2 more things. If that heat lamp is resting on metal mesh cut a hole around where the light bulb is. The mesh on the cage could create a mini oven and have your bulbs burn out in half the time. Second, get a heat temperature gun to test that spot. Its the only accurate way of testing a basking spot. https://www.amazon.com/Etekcity-Lasergrip-1080-Non-contact-Thermometer/dp/B00DMI632G/ref=sr_1_1?ie=UTF8&amp;qid=1497757240&amp;sr=8-1-spons&amp;keywords=temperature+gun&amp;psc=1
Get a deep fry thermometer. They should have one in the kitchen gadget aisle at your grocery store. Or grab one cheap off Amazon. For a few more bucks, you can get a handheld infrared thermometer which is infinitely more fun to use (and doesn't require cleaning).
You and I are probably similar. I had never cooked before spontaneously deciding I was going to cook all of my own food from scratch on my 37th birthday. I also spent HOURS slaving away on often so-so dishes and felt discouraged. I pushed through that initial 2-3 month window of crappiness and now I'm 2.5 years into cooking 6 days a week and it's been life changing. That said, I still don't LIKE cooking, but I don't mind it, and I love the feeling that I finally know what I should be eating.
I think it was J. Kenzi Lopez Alt who said that good food is the result of:
Good recipes: I can't believe there's 41 comments and no one's mentioned Budget Bytes. She is the queen of pragmatic, low cost, fast-enough, from-scratch, healthy weeknight dinners. For your first couple of months of cooking try focusing on just her recipes. They're beginner friendly and very well written.
At least until you develop the sense of what makes recipes good, avoid YouTube, gif recipes, Pintrest, and the obnoxious blogs full of too-well-staged-photos. They're interested in views and shares, not cooking.
Here's some other sites that produce consistently good food:
Here's some confidence building fantastic recipes:
Good Ingredients: In the beginning I found that cooking was often way more expensive than I'd ever imagined. That was in part because I hadn't built up much of a pantry (oils, vinegars, spices, other condiments), but the main reason was because I was shopping a supermarket. For both cost and quality reasons, each week try finding a new market in your area. In particular, look for ethnic markets frequented by people of the biggest ethnic culture in your area. The asian, mexican, and middle eastern markets in my area have better quality food for quite seriously 50-75% less than a supermarket. The closest supermarket charged $7/lb for prepackaged ground beef. The mexican place nearby charges $3/lb for ground beef they grind themselves.
Speaking of ethnic markets, try to find an ethnic market with a dry goods section where you can scoop out as much of an ingredient as you want into bags for cheap.
If you live in a metropolitan area find a Penzeys. They sell spices that are much higher quality than a supermarket for about 25-50% less than supermarket prices.
You're going to need tons of chicken broth. Until you inevitably start making your own large batches in a pressure cooker a year from now, stick with Better Than Bouillon(https://www.betterthanbouillon.com/wp-content/uploads/2018/06/BTB_Package_8oz_Roasted_Chicken_Base-2017.png). It's cheaper and better than the crap you get from a can or carton.
Good Equipment: The most important thing is a sharp knife. Here's the $27 knife everyone usually recommends. Even if you already have a knife, it's probably dull if it's not new and you haven't sharpened it; get it sharpened or buy a new one for now. Learn to hone it before or after each use.
Go to a kitchen supply store, Smart & Final, or Amazon and get a couple of 1/4 sheet trays ($4?), ten or so bar towels ($1 each), and a prep bin ($4) so that your prep area looks like this. Also get a bench scraper ($5). The 1/4 sheet trays keep your ingredients organized and ready to go. The prep bin saves you from having to keep a trash can nearby and keeps things tidy. The bench scraper is a time-saving godsend for moving stuff around. A proper prep station alone will probably cut your cooking times by 10-20%.
Good Technique: Once you have an organized prep station and you get your workflow down, the biggest time saver is going to be knife skills. Onions & garlic will be your most commonly chopped items, so watch several videos and make sure that each time you chop one of those it's meaningful practice. To avoid cutting yourself: get a sharp knife, while cutting always consider what would happen if your knife slips, and every time something awkward/unusual happens, take a small pause before you continue cutting.
The art of home cooking by recipe really comes down to heat management. Get an infrared thermometer for $20, they're incredibly valuable when starting out. For the vast majority of sauteing, turn your pan to medium high (just guess) and measure your pan with that thermometer until it's around 300 then pour in whatever oil you're using. Keep checking them temp with the thermometer until that oil is around 330-360 then toss in your meat or vegetables. If you wait a few seconds, slide the food out of the middle of the pan, and check the temp again you'll see it's in low 200's because the food saps the heat out of the pan. Your goal is to keep that heat in the 300's. Note that as the food heats up the pan will get hotter quicker, so as you're learning keep monitoring that pan and get used to the sounds it's making so eventually you'll manage heat through sound & instinct.
The last thing is: use more salt. If you're cooking a recipe that looked great, and got great reviews, and it doesn't seem like you made any big mistakes yet it's still bland, it's because you didn't add enough salt 100% of the time. It took me a while to realize that when I add salt to a dish someone else has made, they had already put a good amount of salt in it. So when salting a dish that makes four portions, you're not going to just shake in some salt from a shaker, you're going to pour in a teaspoon or more.
I have a little temperature gun. I'm constantly measuring the ambient temp, water temp, and dough temp. I don't have any formulas but I think it helps develop a feel for how temperature affects the process. For example this time of year my kitchen is typically 65-68 degrees which is pretty cold for room temp, so I decided to put my dough in the oven with the light on (about 75 degrees) between folds for the bulk fermentation. I think that helped.
I think the best advice, though, is not to fret over it too much! It's a lot like yoga, you just have to let go and enjoy your own journey. Embrace the ebb and flow of gradually improving with practice. There are so many variables to play with and no perfect loaf.
Hmmmm...If you know the name of the shop that did the work, they should keep records on the mileage. You could then call them and confirm that it indeed "has not been driven that much." I know dealerships will do this, but I'm not sure about small shops.
I truly doubt it's the belts, but I wouldn't discount it. The only thing I can think of that would make them slip is if there is oil or some other slippery fluid lining the entire inside portion of the belt, which you can easily look for.
http://www.amazon.com/Etekcity-Lasergrip-1080-Non-contact-Thermometer/dp/B00DMI632G/ref=sr_1_5?ie=UTF8&amp;qid=1453141132&amp;sr=8-5&amp;keywords=temperature+gun
$15, hold it as close as you can to the spot you're measuring. This will allow you to see if your sensors match the actual temperature.
What are you looking to do?
If just walking out to the field and taking temp measurements: Any digital thermometer will work. In my truck, I've got both a temperature gun and a digital instant read (not these exact units, but pretty similar).
If you want crazy cool/hi-tech, you can go with something like John Deere's FieldConnect. It's will give you moisture and temp readings, as well as send the readings to you.
Here you go: http://www.amazon.com/Etekcity-Lasergrip-1080-Non-contact-Thermometer/dp/B00DMI632G/ref=sr_1_4?ie=UTF8&amp;qid=1451344205&amp;sr=8-4&amp;keywords=infrared+thermometer
Some of my favorite things.
Have this one and it's great. Used it originally in my silkscreening class actually to watch temps on the shirts. https://www.amazon.com/gp/product/B00DMI632G/ref=oh_aui_detailpage_o04_s00?ie=UTF8&amp;psc=1
I would say the light is completely unnecessary. It'll hurt the eyes, especially if the gecko is albino, plus I think 75w is probably going to be too hot in addition to the heating pad. The heat gradient should be fine if you have a heating pad that covers 1/3rd. I would recommend ditching the light.
I use this one
The Maverick is a great choice for a "leave in" thermometer than monitor your smoker and meat temps independently. I also like Pthe Javelin instant reads. Almost as fast as the ThermoPen and a third the price.
https://www.amazon.com/Maverick-732-Remote-Smoker-Thermometer/dp/B004IMA718/ref=sr_1_4?ie=UTF8&amp;qid=1483915378&amp;sr=8-4&amp;keywords=maverick+thermometer
https://www.amazon.com/Lavatools-PT12-Javelin-Thermometer-Chipotle/dp/B00GRFHXVQ/ref=sr_1_1?ie=UTF8&amp;qid=1483915319&amp;sr=8-1&amp;keywords=javelin+thermometer
If you can't spring for that though, the Lavatools Javelin gets pretty good marks, and it's only $25.
The only downside is the probe is only 2.75" long.
In tests, it's about .5 seconds slower than the thermapen in a baked chicken test, although a full 5 seconds slower for a boiling water test, so it may not be the best choice if your primary use is frying.
Nice set up! I've been oggling pour over supplies for forever but haven't bit the bullet yet. We use this thermometer. It's a knock off thermapen. It's probably a few miliseconds slower, but it's been more than fast enough for us and is also significantly cheaper.
http://www.amazon.com/dp/B00GRFHXVQ
> What kind of spices go with what? Right now, I'm just putting some salt, MSG, soy sauce, garlic powder, and red pepper flakes into most all meats I make because I really enjoy it. I'd like to know what else is good and for what purposes. Also I'm really sad that I haven't been able to use my cinnamon.
http://www.spicesinc.com/p-510-what-spices-go-with-what-meat.aspx
>Why does my chicken get sticky when I cover the skillet while it's frying? It's great and all, but I just want to know why and whether or not I can apply the same principle to other meats.
Not sure what you mean, generally what happens when you put a lid on is that your chicken starts steaming and frying at the same time. The excess moisture in the air would make the chicken skin go soft. Perhaps that is the 'sticky' you are talking about? I will often put the lid on something that isn't cooking well in the pan and needs heat from all sides. It is fairly rare I will ever put the lid on frying meat. I will usually put the lid on sauces to stop them evaporating more water and thickening.
>Right now I'm limited to ground beef and chicken breasts for meats. I was wondering if anyone could recommend some cheap/quick recipes using those that I could steal to diversify my cooking.
Steak is easy, sausages are easy, fish fillets are easy, cubed chuck for stews/curry/casserole is easy, slow cooker recipes are generally really easy (foolproof) and come with excellent results. Just google recipes, if the picture looks delicious then read the recipe steps and if you think you can do it then give it a go. Cooking is fairly forgiving of mistakes so don't be afraid to try.
>Also, does anyone have any good guides to dealing with dough? I've been meaning to experiment and have fun with dough (noodles, breads, pastries?).
I don't like making dough so I'll let someone else field this one.
>And a guide for pork. My better-cook-than-I-am friend keeps telling me I'll literally die if I don't cook pork right, but he's a pansy, and I like pork.
Pork is fine. Get yourself an instant read thermometer and use that to avoid over and under cooking meats. After a while you'll just be able to tell it is cooked by poking the meat with your finger. Use the thermometer until then.
http://www.amazon.com/Fastest-Accurate-Water-Resistant-High-Performance-Thermometer/dp/B00GRFHXVQ/ref=zg_bs_289809_4
http://www.fsis.usda.gov/wps/portal/fsis/topics/food-safety-education/get-answers/food-safety-fact-sheets/safe-food-handling/safe-minimum-internal-temperature-chart/ct_index
>Is there a way I can use potatoes in my frying pan adventures? From all that I've read, people seem to want to boil them before using them for anything.
Generally a good idea to bake/boil/parboil before frying. There are some dishes you don't need to do this like a potato latke. They are easy and yummy. Look up recipes on google.
Oh dude. Get a thermometer. I like this one.
Without a decent instaread thermometer in your kitchen your hands are tied. You will find a million uses for this. You can get your oil hot enough (I don't think you're frying hot enough. 325-350f for chicken, depending on cut and what kind of crust you're going for. I go more towards 325 on the oil temp and cook my chicken towards 160-165 at the bone), you can test all your meats for correct doneness. It's an essential tool. I can make do without a decent chef's knife or a good spatula, but the thermometer? I carry that one with me when I go visiting.
Also get a kitchen scale. They cost about the same 20-25 bucks.
This is the one I use.
https://www.amazon.com/Lavatools-PT12-Javelin-Thermometer-Chipotle/dp/B00GRFHXVQ
Time to upgrade! Go digital, you'll be glad you did. After going through a few cheapo $10 digital thermometers from the grocery store, I got one of these and couldn't be happier. https://www.amazon.com/dp/B00GRFHXVQ/ref=cm_sw_r_awd_ByCXub1Z946FX
If anyone is interested, I have owned both and this thermometer is better (more water resistant) and cheaper too
https://www.amazon.com/Lavatools-PT12-Javelin-Thermometer-Chipotle/dp/B00GRFHXVQ/ref=sr_1_3?ie=UTF8&amp;qid=1501868342&amp;sr=8-3&amp;keywords=javelin+thermometer
Go with the Lavatools Javelin. You really can't beat its price/performance.
http://www.amazon.com/dp/B00GRFHXVQ/
They also have a pro version which is a bit larger and even faster.
http://www.amazon.com/Lavatools-PX1-Javelin-Thermometer-Chipotle/dp/B00NMQGAT4/
Javelin thermometer, best thing in my kit and I use it though out the kitchen
https://www.amazon.com/dp/B00GRFHXVQ/ref=cm_sw_r_cp_apa_rE8VAbF1HFB4G
Any NSF dial thermometer should be suitable but you will need to calibrate an analogue thermometer in ice water. It's not difficult, you just need a pair of pliers. That said, this is the best thermometer I've ever used and you can use it in your kitchen for other things: https://www.amazon.com/Lavatools-PT12-Javelin-Thermometer-Chipotle/dp/B00GRFHXVQ/ref=sr_1_1_sspa?ie=UTF8&amp;qid=1505350802&amp;sr=8-1-spons&amp;keywords=lavatools+javelin&amp;psc=1
Last minute effort? Defrost in cold water (running water will make them defrost even faster). Marinade for 30 minutes; I usually do a combo of olive oil, S&P, lemon juice, chopped garlic/garlic powder, chopped onion/onion powder, and oregano or thyme. Grill or pan fry on medium-high heat, reduce heat to low when you've achieved your desired outside sear and cook until 155-160. Invest in a thermometer, it's definitely worth it... I love this one: http://www.amazon.com/Ultra-Accurate-High-Performing-Digital-Thermometer/dp/B00GRFHXVQ/ref=sr_1_8?s=kitchen&amp;ie=UTF8&amp;qid=1426294198&amp;sr=1-8&amp;keywords=meat+thermometer
I'd recommend an inexpensive thermometer like this, rather than the probe--I'm not sure quite how warm a probe can get, but I'd be surprised if it's over 100 F. https://www.amazon.com/gp/product/B00GRFHXVQ/ref=oh_aui_search_detailpage?ie=UTF8&amp;psc=1
https://www.amazon.com/gp/aw/d/B00GRFHXVQ/ref=mp_s_a_1_15?ie=UTF8&amp;qid=1473558392&amp;sr=8-15-spons&amp;pi=AC_SX236_SY340_QL65&amp;keywords=Lavatools&amp;psc=1
We have this one and it has worked perfectly for us. Relatively low cost, accurate, and will give you your temp in seconds. We have tested it with outside temperature against what the weather is and it is always correct. We also tried inside versus our thermostat and there to it is correct. For 25 dollars you can not beat it. Have had it since fathers day so I can not attest to years of use, but you could buy multiple and it would take a while to equate to the same cost as a thermapen.
Picked up this probe therm for $15, orig $24.99: Lavatools PT12 Javelin Digital Instant Read Meat Thermometer (Chipotle)
I almost bought it previously but didn't love the price. Put it on the Honey drop list and received an email notification today.
or this
pizza stone
I'd also suggest:
https://www.amazon.com/dp/B00OXHQL3Q/ref=twister_B00GGMFK9M?_encoding=UTF8&amp;psc=1
save your thermapen money and buy this. It works great for a LOT less money.
https://www.amazon.com/Weber-7203-iGrill-2-Thermometer/dp/B01MG2CNDL/ref=sr_1_3?ie=UTF8&amp;qid=1498510072&amp;sr=8-3&amp;keywords=igrill+2
http://www.kickashbasket.com/store/product-detail.php?product_id=1
https://smokeware.com/products/stainless-steel-vented-chimney-cap
I've got opinions on a couple of these:
-1. pork butt is super forgiving...next closest I would say is a prime rib roast. It's a nice big chunk of tasty meat that smokes up nicely. Turkey breast is another tough to screw up option.
-3. You'll want a wireless like a Maverick and a decent instant read unit, the Lavatools Javelin is a very good and inexpensive option
Lavatools PT12 Javelin Digital Instant Read Meat Thermometer (Sesame) https://www.amazon.com/dp/B00OXHQL3Q/ref=cm_sw_r_cp_apa_RyKjzb86EEJHW
It's about $25 bucks but it's instant read and it's made for this stuff. If you have a lot of money($100)a thermapen MK4 is great.
The thing is you can smoke on near anything once you know how to actually smoke. You didn't say how much food you were looking to do at one time but you can smoke on a basic cheap charcoal grill. This one would work fine - http://www.homedepot.com/p/Aussie-Walk-A-Bout-Portable-Charcoal-Grill-4200-0A236/100164850
Or just go to craigslist and see if you can find a used cheap charcoal grill. After that, go to a website like amazingribs.com and read everything in there until your brain melts. Smoking isn't any kind of secret, it all comes down to time, temperature, humidity control. Once you get that down pat you could smoke in a 55 gallon drum if you wanted to. What is more important than the actual smoker itself is your thermometer. You have to have a good thermometer if you want good results. Click this link, for the money, you can not get any better. It's not a thermapen, but it's 99% of what a thermapen does for a fraction of the cost - https://www.amazon.com/Lavatools-PT12-Javelin-Digital-Thermometer/dp/B00OXHQL3Q/ref=sr_1_1?ie=UTF8&amp;qid=1496441176&amp;sr=8-1&amp;keywords=lava+tools
So, I have a thermometer already, but it's awful, slow, and not very efficient. It does the job, but it could use replacing. On my kitchen WL is a new meat thermometer that would be really helpful in my kitchen endeavors. I prefer the black one, but any color would be okay!!
Thanks for the contest. This is a great idea!!!
Fast & Accurate, Water-Resistant, High-Performance Digital Food/BBQ Thermometer - Lavatools Thermowand® (Sesame) https://www.amazon.com/dp/B00OXHQL3Q/ref=cm_sw_r_awd_u2JGub0X5JC9Z
I have this one. It works great.
Here is a great review of the popular ones comparing them.
This is the one I use: https://www.amazon.com/gp/product/B00OXHQL3Q/ref=ppx_yo_dt_b_asin_title_o06_s01?ie=UTF8&amp;psc=1
I've had it for two years, use it weekly. Still works great and is as accurate as I need it to be.
A less expensive option is the ThermoPro, which I’ve been using for a few months. I’m not in love with it, but it does what I expect it to (accurate readings, wireless, reliable), and for only $37.00. What I don’t love is that the screen flashes different colors toward the end of the cook to indicate you’re close to target temp. Great for steaks, but not great if it’s on your nightstand for an overnight brisket cook, and you can’t turn it off. Still, for the price, I’m happy.
ThermoPro TP07 Wireless Remote Digital Cooking Food Meat Thermometer for Grilling Oven Kitchen Smoker BBQ Grill Thermometer with Probe, 300 Feet Range https://www.amazon.com/dp/B014DAVCP4/ref=cm_sw_r_cp_tai_DYI.zbKH1R9K6
The bluetooth part is just so the main gadget can talk to the handheld gadget I take with me through the rest of the house. It's like this...
https://www.amazon.com/ThermoPro-Wireless-Digital-Kitchen-Thermometer/dp/B014DAVCP4/ref=sr_1_5?s=kitchen&amp;ie=UTF8&amp;qid=1496335234&amp;sr=1-5&amp;keywords=meat+thermometer&amp;refinements=p_72%3A2661618011
It probably isn't bluetooth....but they talk to eachother.
I have the Oklahoma Joe Highland and I like it. Fairly heavy construction for a low price. It weighs about 200lbs. It eats a lot of fuel but it is easy to maintain temperature and everything I have smoked on it has come out delicious. I generally have to feed it charcoal every 2-3 hours to keep it at temp so it requires some maintenance but not too much.
The only modifications I made to mine was some self stick seals for the doors and some food grade high temp sealant for the joints between the firebox and the barrel. Without those it leaked a lot of air/smoke.
I would also recommend a thermometer because the one built into the lid always reads 25-50 degrees hotter than the temperature at the grate where your food is. I use this one and it works great. Just glance at it every now and then to check if I need to add more fuel.
What thermometer is this and how much did it cost?
Found this on amazon, looks close if not the same:
https://www.amazon.com/ThermoPro-Wireless-Digital-Kitchen-Thermometer/dp/B014DAVHSQ
I bought this one. Not much frills, but it does everything I need for a great price.
ThermoPro TP-08 Wireless Remote Digital Cooking Meat Thermometer.
https://www.amazon.com/dp/B014DAVHSQ/ref=cm_sw_r_cp_apa_dVm3AbXZDXJ56
The thermometer makes a huge difference. A programmable meat thermometer is sooo great to have and they’re fairly inexpensive. Just set to alert you to the temp and you can be sure you won’t overcook it. Something like this is all you need: ThermoPro TP-08S Wireless Remote Digital Cooking Meat Thermometer Dual Probe for Grilling Smoker BBQ Food Thermometer - Monitors Food from 300 Feet Away https://www.amazon.com/dp/B014DAVHSQ/ref=cm_sw_r_cp_api_i_YVWZCbTKW68T5
I don't mean to sound like a salesman, but the ThermoPro was an easy choice for 45$ from Amazon. It's been great!
Smoker: Camp Chef Smoke Vault
Thermometer: ThermoPro TP-08
I kept water in the pan throughout the cooking. I have a dual probe thermometer so I had one in the thick, meaty part of the butt (not touching bone) and the other on the same rack as the butt but 5-6 inches away.
I had the butt positioned on the second highest rack. The recipe I followed didn't specify where it should be placed, but maybe that was an factor for the long smoke time?
I’ve been using this .
https://www.thermoworks.com/Thermapen-Mk4
It's worth the money, and I'd also suggest getting a cheaper prob-style for roasts like this, as having two is really helpful (especially where the probe ones typically have a temperature alarm)
I just bought this $18 one for all my holiday cooking and it's been working great
ThermoPro TP16 Large LCD Digital Cooking Kitchen Food Meat Thermometer for BBQ Grill Oven Smoker Built-in Clock Timer with Stainless Steel Probe https://www.amazon.com/dp/B017613C3C/ref=cm_sw_r_cp_api_-dEqybE7MZRB9
I preheat my cast iron to 475 in the oven for a good half hour - then bring it up to my stovetop. I keep it on a medium high heat on my stovetop - I have an electric stove and set it to setting 6 on a 1-10 scale.
But most importantly - pickup a meat thermometer: it takes the guessing work out. I got one on amazon for $17. Pull my steaks at 115 and let them rest for 10 mins and they always end up a perfect medium rare.
https://www.amazon.com/gp/product/B017613C3C/ref=oh_aui_search_detailpage?ie=UTF8&amp;psc=1
This! freaking awesome product. Also, I stop cooking the chicken right before it hits 165^(o)F. I put them in a bowl so they keep cooking for a bit.
You can pick up an oven probe thermometer for less than $20.
https://smile.amazon.com/gp/product/B017613C3C/ref=oh_aui_detailpage_o06_s00?ie=UTF8&amp;psc=1
You can set a temp alarm so you know when you've reached strike temp (or just below, if you want to nail accuracy), which I find very convenient.
My crappy stove/oven came with a thermometer, which disagrees with the dial by 40-75° (not even consistently). I don't know which or both is wrong though my money is on the oven.
Does anyone know if this kind of thermometer would accurately measure an oven if it's not stuffed into meat?
Got a Thermopro TP20: https://www.amazon.com/dp/B01GE77QT0/ref=sspa_dk_detail_0?psc=1&amp;pd_rd_i=B01GE77QT0&amp;pd_rd_wg=aREHz&amp;pd_rd_r=NVP6BR8RQH15JD89K8G0&amp;pd_rd_w=p3Fqm
Works fine, and I've been really happy with the reception--from anywhere I am on my property (small city lot) it works great.
However, I was disappointed that there is no way to calibrate the probes. I've taken to just buying spares to replace the old ones when they stray. Is there any device out there that allows calibration? Is this a good feature? Or is replacing probes the best way to deal with this?
gotcha, try and grab you one of these https://www.amazon.com/Etekcity-Lasergrip-774-Non-contact-Thermometer/dp/B00837ZGRY. it's an extra expense but it definitely makes all the difference in the world knowing what temp you are dabbing at so it's at optimal temp. are you just heating the nail and then ripping with no time in-between? I don't have much experience with nectar collectors but chances are you are dabbing it too hot. if you really want the best experience get an electric nail for cheap that you can get for like $80 that has a digital read-out of the temp you are dabbing at. sweet spot is anywhere between 500-650.
This is a very good recipe. Dip a few onions to get the feel for how thick the batter needs to be, better to start a tad thick and add milk a little at a time until you think it looks right. I fried these in canola oil at 350 or so. These things are great for monitoring oil temps.
Just grabbed a 150w CHE and and this IR thermometer.
http://www.amazon.com/Etekcity-Lasergrip-774-Non-contact-Thermometer/dp/B00837ZGRY/ref=redir_mobile_desktop?ie=UTF8&amp;keywords=lasee%20thermometer&amp;pi=AC_SX118_SY170_QL70&amp;qid=1453128482&amp;ref_=mp_s_a_1_sc_1&amp;sr=8-1-spell
You need an infrared thermometer gun thingey like this
These are terrible. For snakes, you want to ditch the coloured bulbs & go for ceramic emitters (http://www.amazon.com/BYB-Ceramic-Infrared-Emitter-Brooder/dp/B00HFNZ59Q) in a porcelain clamp lamp such as http://www.amazon.com/Zoo-Med-Deluxe-Porcelain-8-5-Inch/dp/B0002AQCXM/ attached to a stand such as http://www.amazon.com/Zoo-Med-Reptile-Stand-Economy/dp/B000HG76B8 (highly recommended as ceramic emitters are a large fire hazard, reaching over 700f) . Exo terra terraniums such as http://www.amazon.com/Exo-Terra-Short-Terrarium-12-Inch/dp/B008N9LYJ6 are great for beginner snakes which don't have unusually high humidity requirements (mesh tops found on glass tanks let out lots of humidity compared to e.g. plastic tubs with air holes melted via soldering iron). While the ceramic emitter will raise the ambient temperature, your snake will also want a very warm spot to go to for belly heat to aid digestion, so a heat mat such as http://www.amazon.com/Zoo-Med-ReptiTherm®-Heater-Medium/dp/B0002AQCL4/ attached to a thermostat such as http://www.amazon.com/MTPRTC-ETL-Certified-Thermostat-Germination-Reptiles/dp/B000NZZG3S/ is highly recommended. The thermostat is not optional as heat mat's reach over 105f which can be fatal. As for supplementary light in e.g. winter, snakes have no special requirements as compared to other reptiles for uva/uvb, so any desk lamp or room lighting would suffice. As for decoration, snakes don't care. Hides can be made out of cereal boxes, butter containers etc, substrate can be newspapers, shredded tissue paper (not shredded paper as it causes cuts), or you can research more professional substrate for your specific snake (beware the earthy substrate which can cause impactation/death if ingested, also wood chips can harbour mites - simple paper is often better!). As for monitoring humidity/temperature within the tank, the analogue ones suck. I would recommend a digital one such as http://www.amazon.com/Avianweb-Digital-Thermo-Hygrometer-Black/dp/B00U2S6JSC/ - even if 10% out as per reviews, they are better than analogues which are 20-30%+ out and get more inaccurate over time. Finally, not required, but useful is an ir gun such as http://www.amazon.com/Etekcity-Lasergrip-774-Non-contact-Thermometer/dp/B00837ZGRY/ so that you can get a sense of the surface temperatures around the tank that your snake is crawling across, and to ensure your hot hide is within parameters and not lethally exceeding 105f.
u/_ataraxia has a lot of good information. I've stolen their list of links and information for you to go through, but all the credit for this belongs to them. (Also I don't know how to embed links into the comments since I'm a reddit noob so please excuse the messiness)
the first three links are detailed care sheets, the rest are product recommendations in case you need to get any supplies yourself.
http://reptimes.com/ball-pythons-the-basics-and-then-some
http://reptimes.com/ball-pythons-common-problems
http://reptimes.com/ball-pythons-feeding
spyder robotics (http://www.spyderrobotics.com/index.php?main_page=index&amp;cPath=1) makes high quality thermostats to regulate your heat sources with pulse/proportional temperature control and various safety features. https://www.amazon.com/MTPRTC-ETL-Certified-Thermostat-Germination-Reptiles/dp/B000NZZG3S/ is a popular cheap thermostat with simple on/off style with zero safety features. any heat source should be regulated by a thermostat.
heat tape (http://www.reptilebasics.com/heat-tape) or ultratherm heat pads (http://www.reptilebasics.com/ultratherm-heat-pads) are high quality and affordable under tank heater [UTH] options.
a digital dual sensor thermometer/hygrometer (https://www.amazon.com/AcuRite-00891A3-Outdoor-Thermometer-Humidity/dp/B001BO8CUE/) allows you to easily monitor the warm side floor temperature [with the probe] as well as the ambient temperature and humidity [with the main unit].
an infrared thermometer (https://www.amazon.com/Etekcity-Lasergrip-774-Non-contact-Thermometer/dp/B00837ZGRY/) allows you to spot-check surface temperatures anywhere in the enclosure.
these hide boxes (http://www.reptilebasics.com/hide-boxes) are a cheap simple hide with a design that offers the best sense of security for your snake. cave style hides, cardboard boxes, plastic food containers, etc, can also be used. half logs are not appropriate hides.
edit: Just fixed some formatting to make it easier to read.
Yeah, that guy is wrong. You are not getting proper surface measurement with cooking thermometer. You need this:
https://www.amazon.com/Etekcity-Lasergrip-774-Non-contact-Thermometer/dp/B00837ZGRY/
Two things of note:
Apparently Robocop got the Amazon deal of the day
> I'd like to know how long the dog was in there.
The cop has a thermometer in his other hand, so the dog was in there long enough for the car to get hot, even with the windows cracked.
Okay, Do you know the temps of the hot and cool side of your enclosure? 20 gallons is small. Could be too hot in there. do not trust the velcro stick on analog thermometers. You need to get a temp gun or digital thermometer to be accurate. Let me know when you know what kind of bulbs you're using and how far away they are from each other and the basking spot. :)
https://www.amazon.com/Etekcity-Lasergrip-774-Non-contact-Thermometer/dp/B00837ZGRY/ref=sr_1_1_sspa?s=hi&ie=UTF8&qid=1542315725&sr=1-1-spons&keywords=temp+gun&psc=1
&#x200B;
this is the one I use and it's super affordable and reliable.
> How would I get a good reading on the water temperature?
As some what stated by others, a G1/4 or inline temp sensor hooked up to a temp sensor header on your motherboard so that you can read out the parameter in Windows (with HWInfo64 or the motherboard manufacturer's own monitoring software). Another way is to use stand alone setups like Aqua Computer's Aquaero. Yet another is to do the very cheap way and use an infrared thermometer gun (held close to various spots) to get base line and overclocked readings while paying close attention to the rooms current ambient temps. This last method is not very accurate, but could get you by until you can move to or afford something more accurate.
> I always thought the cpu temp was the measurement
You still do this, yes, but the water temp is key for cooling both a CPU and a GPU at the same time to prevent high water temps that could damage a pump (like your listed 50c rated D5 pump). We, collectively, say that a water temp reading is best to base ones fan and pump speed (if doable) curve on because if you set your fan speeds based on your CPU temp, only, then the fans are going to be both prone to fluctuation considerably more (case by case) than if that lower, more consistent water temp is used and limited to only working with your CPU as opposed to both the CPU and GPU in the same loop, automatically (sorry for the long sentence):
So if a loop, with fans at 750 RPM is providing 225 watts of cooling for both a CPU and GPU in the same loop then only the CPU is getting the higher 375+ watts of cooling made available from your loop because the fans, tied only to the CPU temp, are now at 1500 RPM under a heavy, hot CPU load, for example. But if you were gaming with a 8600k that was sitting at 25% load and only about 40-55c then the fans probably won't be moving a whole lot away from that 750 RPM and ~225 watts of cooling. Meanwhile in that same game your overclocked 1080Ti is dumping out tons of heat, say 250+ watts alone, into the loop water with fans stuck at a low RPM not moving air, and thus heat, away from the radiators. This can lead to that 50c of water temp scenario that whatever D5 pump you were looking at can come into play.
&#x200B;
this one is on sale on Amazon right now!
First, I would not use Prime95. There is a specific version that can be used with newer Intel processors, but either way, Prime95 puts an unrealistic load on the CPU. Try AIDA64 for a better baseline.
As for the hoses, I have an infrared thermometer gun but after running under full load for about 10-15min I could physically tell a significant difference just by touching the hoses. I suppose it boils down to (heh) if there is a problem with the rad, how much of a problem it is.
One final note that the H80i GT is a single rad and you should probably expect higher temps on it to begin with. I unfortunately have no idea what temps you should expect.
They mean an infrared, non-contact thermometer. The laser dot is just for sighting where it's taking the reading.
Here's u/ataraxia's classic link dump I found on a other post. Although the informstion is written for bps (most common snake people have trouble with it seems- mostly due to the humedity) but the suggestions could definitely help you for the humedity aspect needed for your boa.
You should definitely read it through.
i'm going to dump a bunch of helpful links on you. the first three links are detailed care sheets, then a tub tutorial, and the rest are product recommendations. read everything thoroughly, come back with any questions.
glass tanks can be very challenging for ball python husbandry due to the high amount of air flow with the screen top and the total lack of insulation with the glass walls. it's generally recommended to use tubs or pvc reptile cages instead. wood enclosures can also be suitable if they're designed well and sealed properly to protect the wood against moisture. glass tanks can work, but they require a lot of modification and maintenance, which you'll find tips for in the second link. i'll give you product recommendations to cover options for tanks, tubs, and pvc/wood enclosures.
It takes a while for them to warm up, but remember 90 isnt very different from our own body heat, so it wont really feel hot or anything. Make sure its making good contact with the floor of your tank.
Get an infared temp gun, they are really cheap and make checking temps super easy and its very important to know your temperatures. About $15 on amazon. https://www.amazon.com/Etekcity-Lasergrip-774-Non-contact-Thermometer/dp/B00837ZGRY/ref=lp_393284011_1_1?s=industrial&amp;ie=UTF8&amp;qid=1503297617&amp;sr=1-1
write this down instead.
So I don’t know exactly how much I’ve spent on my beardie since he was given to me with almost everything I needed to care for him, but I can give you the basics.
First off, for the flooring you can use paper towels to start, or contact cabinet paper that can be found at a dollar tree. I don’t think tile is that expensive, but if you’re unable to get some at the moment those work just fine. I also suggest covering the back and sides of the tank so the beardie doesn’t see its reflection and get stressed
You’ll need at least one hide on the cooler side, which can be made from something as simple as a small cardboard box with a hole cut in it or some bricks that are arranged into a cave-like hide
A basking area can be made from bricks purchased at Lowe’s or Home Depot, or if you choose to use any driftwood/rocks you find just make sure you clean them properly
Calcium powder is also extremely important to help your beardie not develop MBD. I’m part of a Facebook bearded dragon group that suggests this brand sprinkled over greens/bugs three times a week: https://www.chewy.com/repashy-superfoods-calcium-plus/dp/166276 I poke some holes in the paper lid with a toothpick to create a shaker-type deal so I’m not wasting any calcium
I think one of the most expensive parts is the UVB light since they can get pretty pricey, and since they need to be changed every six months. Here’s an 18”, along with a fixture that could be used, but obviously with a longer tank you’ll need a longer size: https://www.chewy.com/zoo-med-t8-reptisun-100-uvb/dp/126590 https://www.amazon.com/GE-Fluorescent-Included-Workbench-16466/dp/B000HJ75PW again, I usually stay away from reptile brands for things such as fixtures because the cheaper version works better and lasts longer. The T8 bulb needs to be hooked into the tank, which I use zip ties to the lid but Velcro to the side also works, as long as it’s 12” away from the basking area
Heat lamp with dimmer: https://www.chewy.com/flukers-clamp-lamp-dimmer-85-in/dp/129140
Pack of 90w flood lights (make sure they’re halogen, not LED): https://www.homedepot.com/p/Philips-90-Watt-PAR38-Halogen-Indoor-Outdoor-Flood-Light-Bulb-2-Pack-466268/205541724
Digital temp gun: https://www.amazon.com/Etekcity-Lasergrip-774-Non-contact-Thermometer/dp/B00837ZGRY
Light timer for both lights: https://www.amazon.com/Century-Heavy-Digital-Programmable-Timer/dp/B00MVF16JG
Vet bills and fecal tests can be pricey as well, depending on where you live. My last vet appointment with mine, which did include a test for parasites, cost around $300
While I don’t know how much I’ve spent on my beardie, I can safely estimate it’s $700+, give or take a bit. One of the most expensive is buying the greens and bugs for him. I’m growing a garden to feed him but since it’s not ready yet, I have to constantly buy him collards, turnip and mustard greens, along with various fruits and veggies which can go bad very quickly. I’m in the process of looking into buying his superworms online where you can get a better deal, but at the moment I’m paying 100 for $10 at my local exotic pet shop, which he goes through quickly.
I don’t know how old you are, but if you say you’re not old enough to properly take care of a reptile I would wait a few years or so until you get another. Bearded dragons, while more of a beginner reptile than others, still require a lot of time and effort to make sure they stay healthy. I would recommend doing a lot research throughout the next few months (look at multiple sources, don’t just listen to people at a pet store because often they don’t know what they’re talking about), and if possible, perhaps slowly start gathering the needed supplies in order to properly care for one
I hope I covered everything since reddit refreshed and deleted my first response before I finished, but if you have any more questions you can always message me (:
Pick up a temp gun similar to this then walk to your vents and see what temp is coming out of your vents. If its not matching your thermostat or colder then you may have a issue with the condenser. Had a similar issue last year but if you have cold air out and its just really hot outside your unit may just be struggling with the heat and the size of your house.
Hi! A little late to the party, but something else to keep in mind that I did not see mentioned is that you will definitely want a thermostat (not just a thermometer) to regulate the heat from your heat pad and/or Ceramic Heating Element. You will probably want one for each heat element, although CHEs can be controlled with dimmer switches as well I believe.
A thermostat lets you regulate the output of a heat pad or CHE. This is important because without regulation, it is possible for either of them to overheat beyond typical heating abilities. This could lead to extreme temperatures in your tank that could burn the snake or even cause neurological damage if it's hot enough.
I'm taking my list of suggestions from other users who post around snek subreddits as I am not yet a snek owner myself :(.
Cheap options are Jump Start thermostats, although they do not have safety features that will shut down the heating element if the thermostat fails. Another option that's in the same price range but a bit safer is an Inkbird thermostat. If you wanna splurge and get a very high quality thermostat for your little buddy, you can go for a Spyder Robotics thermostat.
Also, not necessarily required but useful and fun: an Infrared Thermometer
how old is your uvb bulb? They should be replaced every 6 months or so... also consider a thermometer gun - you can get them from amazon or at a local hardware store usually.
EDIT: I have this
I use this one http://www.amazon.com/gp/aw/d/B00837ZGRY/ref=mp_s_a_1_1?qid=1462332524&amp;sr=8-1&amp;pi=SY200_QL40&amp;keywords=temp+gun&amp;dpPl=1&amp;dpID=41nDmmWRKKL&amp;ref=plSrch so they aren't expensive and they could save you money in the long run depending on how many animals you are keeping. You don't need a thermometer for each individual enclosure which is nice.
My new Jungle carpet python is like that. She won't eat anywhere but in her cage right now, thankfully she isn't aggressive by any means just really curious. It's usually stress or security related when they won't eat outside their habitat from what I have read. All my others never cared where they were fed. I'd try to get a meal into your snake however you can until he adjusts completely, then keep trying it in a tub until he takes. Sometimes it can take weeks. Knowing it's age will give you an idea how long they can go without food. Switching to frozen can sometimes be a pain though, and some snakes will just never take to it. Just make sure the temps, and humidity are good so you can rule that factor out. Sometimes they won't eat if it's not ideal. Also make sure there are at least two hides that the snake fits in comfortably, but not too big. One on the hot side, one on the cold side.
This is the temp gun I use for all my reptiles by the way. It works great, and is quick and easy to read/use.
http://www.amazon.com/gp/aw/d/B00837ZGRY/ref=mp_s_a_1_1?qid=1406867683&amp;sr=8-1
I have a Mexican Black Kingsnake in a 40 gal (36x16x18). I bought a zoomed 8x12 UTH for it. (I bought this one since it was labelled for 40 gal.)
I have a UTH and a CHE. I use the UTH for a hotspot and use the CHE for ambient temp (my room is usually at like 68-70F). If your room is usually like 72F to 75F normally, I don't think you need a CHE. I use the jump start thermostats and they work fine for my needs. I plan on getting the herpstat one when I upgrade my tank when my boi is an adult.
The UTH probe should be sandwiched inbetween the adhesive pad and the bottom of the glass tank, all of it outside of the tank. You can try to use silicone caulk or hot glue to adhere it to the glass inside the tank but burrowing species like kingsnakes can dislodge them and through off the thermostat. Do NOT use tape inside the enclosure at all for any reason. Also, if your tank doesn't have little legs on it, make sure you use the silicon stickies on your tank at the corners so it's lifted up a bit. The air flow will help stop your UTH from burning your table/floor.
I put the CHE prob in the middle-ish of the tank suction cupped on the glass right above the substrate. I want the ambient temp to be about 75F. I set it up on top of the screen on the hotspot side, this way both the CHE and the UTH doesnt need to be set super high to heat up the substrate. The hotspot is 84-86F depending on how deep the substrate is. I let my cool side go down to 72F. At night cool side hits 68F.
I use aspen substrate. As long as the bag says its 100% aspen then is fine for snakes as well.
I use something similar to the number 2 thermometer/hydrometer to measure the ambient temp in the middle and cool sides. I just leave those two inside the tank. For my hotspot I use a laser thermometer like this to measure the surface temp. I also will periodically sweep the laser gun over the middle and cool side to kinda spot check that my thermometers are working.
For deep cleaning I use bleach and for spot cleaning I use cholohexidine and vinegar. (I make my own solutions with the ratios recommended in this video )
I don't have or use the emergency heat pads yet, so no recommendations there.
If you're getting a baby please also budget for clutter. They like having fake leaves when going from one hide to the other. And my MBK really loves climbing! Corns especially are semi-arboreal so they need it more.
Good luck!
It's blown three times so far. The first fuse lasted about 1 year of near 24/7 use and the second and third lasted one or two days each.
There is a chance that the first fuse was a 10A. There was a spare fuse compartment on the power inlet and I just took the spare one that was included in there. It's possible that the original was a 10A and the backup was a 5A, once the second fuse blew I replaced it with another 5A fuse which also blew.
I did replace the foam on the sensor, should be ok there.
We have a thermometer (this one) what are you thinking?
Thanks!
These can actually be off significantly (+/- 5 F) depending on the surface they measure, as well as how much you pay for them. A lot of people like them because they're convenient, but the really cheap ones can be misleading, especially if you try to measure a surface that has different emissivity than what the temp gun is set to. This is a cheap one but accurate about +/-2 F. It will only be accurate on surfaces like glass and plastic, but won't work on metal surfaces at all.
Well I'm not the person you replied to, but I bought a cheap infrared thermometer and it has trouble getting a steady reading (especially on metal). Sometimes the temp fluctuates rapidly by hundreds of degrees when I'm holding it still on the same surface. This is the one I bought on Amazon It has great ratings, so maybe mine is just a fluke. Never bothered to comment or write to the seller or anything (it was so cheap, I just didn't bother).
https://www.amazon.com/gp/aw/d/B00837ZGRY?psc=1&amp;ref=ppx_pop_mob_b_asin_title This is the one I got that works well.
I use the Python and am super happy with it. I don't have any experience with the Aqueon unfortunately so can't comment on it.
I know you're not looking for reasons to spend more money, but I will say there are a couple things for the Python that make a huge difference. First, I feel like the hook attachment is almost required. It makes it so much easier to use the system without getting water everywhere. My only other initial problem was that water would often come rushing out of the hook so fast that it would dislodge plants, however I saw a great tip in a YouTube video that this filter tube (70/110 size) fits perfectly onto the end of the hook and is great for diffusing the water. The conbination of these two products makes the Python a pretty perfect system in my opinion.
In regards to matching water temp, I use an infrared thermometer to match the water coming out of the facet before adding it to the tank. Has worked flawlessly as far as I can tell.
Also just to comment on the other posters, I haven't personally experienced any trouble just adding Prime directly to the tank and then immediately filling it up. Haven't had any issue with flow strength either and I'm on the third floor of my building with the tube stretching the full 25' length to reach my tank room.
First you gotta determine if it's really overheating or if your gauge is faulty.
When the temp gauge is reading red, is the coolant boiling? You would be able to see it boiling into the overflow bottle, and when its real bad it would be puking out the radiator cap.
Get one of those IR thermometer guns and check the upper and lower radiator hoses. If the upper hose is over 245 F then its overheating or very close to it. If the lower hose isn't reading significantly lower than the upper hose then you probably need a new/better radiator.
If it looks like its not actually overheating when your gauge says it is, then its either a faulty gauge or sensor. Get an OBDII scan tool, I use this one, to check the temp that the ECU is seeing. If its reading too high while your IR thermometer is showing a normal reading then it's probably a bad temp sensor. Else it's a bad gauge.
Too much air in the system can cause the sensor to give a false reading, as others have mentioned, so bleed any air bubbles out first.
Unless you live in AZ, it usually takes more than a few minutes of normal driving to even get up to normal operating temp. But if you have a head gasket leak and the engine is pushing hot gases in the coolant then it will get crazy hot real fast. Check for air bubbles in the coolant with the engine running, coolant in the oil, oil in the coolant, white smoke in the exhaust, etc. You can still have a HG leak though without those symptoms so if you really want to be sure, check for combusion gases in the coolant by taking it to a shop. They'll stick their emissions wand in the radiator opening and know right away and charge you $20. Yes Autozone and others loan out kits that test the same thing, but I don't like those personally.
Lets say you've tested everything you can, you're actually overheating, and you still can't figure out why. Does your heater work? If not your water pump might be bad or the heater core clogged (indicates your radiator could also be clogged). If it does then what happens when you run the heat at full blast? Does the temp drop? If so then your cooling system just can't keep up with the demand. Maybe the fan clutch is bad, the lower radiator hose is collapsing, etc.
Use a non-contact thermometer to check the temp of the ceiling radiator:
https://www.amazon.com/Nubee-Temperature-Non-contact-Infrared-Thermometer/dp/B00CVHIJDK
If it IS getting hot, then a reflective radiant barrier behind the pipes could send more heat towards you, and less into the ceiling. A simple fan blowing on the pipes could help, as well.
If it is not getting hot, then that should be addressed.
I have a similar one. It works very well.
Buy a small one, at walmart, for like 30-40 bucks. Use it outside. More expensive fryers are mostly for aesthetics and in my experience dont fry any better. You might however like name brand stuff that has your favorite "Kitchen aid" logo that you would like to match to the rest of your kitchen. If this is you, then spend the extra money if you want. I personally just want bang for the buck, and i don't leave my fryer out on my counter as a showpiece or anything. Others might tell you im full of shit and their $80 or $150 dollar fryer is much better, which is fine but unless you plan on frying a ton of stuff, and you need a ton of room to fry large batches of stuff, a small reasonably priced fryer will do just fine if you maintain it well and keep it clean. Here are some examples:
Reason? Well, a small fryer lets you fry in small batches. Unless you have a large family and need to fry a ton of stuff, this is the way to go. Sure, you might have larger temperature changes due to the size ( when you drop food in it drops the temp sometimes complicating or even ruining your cooking ) but the small size lets you change the oil easier, clean it easier, and store it easier.
Because lets face it, hopefully your not planning on eating a TON of fried food. Sometimes making some cheese sticks, jalapenos, mushrooms, french fries, wings, etc is great, but it shouldn't be a majority of your eating experience. Unless you don't care about personal health.
ProTip: use it outside. Reasoning: Your house will smell like a french fry. Plus, grease flies out of the fryer and gets on everything, and it will get on everything in your house. The stench will permeate your couch, carpets, clothes, and more. You will leave home to go to work, run errands, etc... and you'll come home to that nice, greasy egg roll smell as you open the front door.
Its not pleasant. I learned this, and started frying outside. I also got a small fryer that had great reviews and wasn't super expensive. The parts, except the heating element, are all dishwasher safe. Also you will save money by not buying, or buying INTO, the whole sealed fryer with carbon filter blah blah blah. If you plan on keeping a fryer that features that indoors, it'll still smell. You still have to open the fryer at some point while cooking, which again, makes your house smell. And I HATE that smell in my home. Ive had a $120 dollar fryer and it performed just like my $30 dollar model, just looked super snazzy which i don't give a flying f** about since its not a counter-top item that gets daily use in my household.
My .02 anyways. I hate the house smelling like a french fry, and a small fryer is easy to store in your garage, easy to clean and operate. Plus i have a small 2 year old daughter and since i only use it outside on the porch, shes never around it which minimizes any injuries ( that could be catastrophic... grease burns / fires are serious biz )
At the end of the day, a fryer is a simple device. Heating Element, temp knobs, bucket for grease, and a basket with a lid. There are more expensive options, but your paying for brand name, looks, and you might want to drop 75-100 bucks for one that has a digital readout that can* be more accurate.
I myself have a digital thermometer in my kitchen i use for steaks and such ( any good cook should have one imho ) but it also helps me verify temp. With that said, i have i think the $30 dollar model i posted and its temp control is spot on. If you do want a digital one, i personally would just get a non digital one, then invest in a thermometer since you can use it for SO many things, including your new deep fryer. I also have a "laser thermometer" that works as well and can be used again for many many things in your home.
http://www.amazon.com/Comark-Instrument-Digital-Thermometer-Accuracy/dp/B001U59MDA/ref=sr_1_1?s=home-garden&amp;ie=UTF8&amp;qid=1418957150&amp;sr=1-1&amp;keywords=comark+PDT300
I have both styles of thermometers, and i use my pen style a lot ( its like the bottom one, but mine is white and i got it at a local grocery store for about 10 bucks... has a hold button but is pretty much the same deal )
Hope I helped you. Good luck and be safe!
I've read that Kale is supposed to be used sparingly, it's not the bulk of her diet. I pick out the spinach and romaine from the spring mix. I am looking for endive, dandelion greens, and edible flowers now. I have a temperature gun for testing temperature.
I hope the infrared works fine, I wanted a bulb that would work at night in case the apartment gets cold. If needed I can switch that out though. I have a UV light also that is on for a 12hr cycle.
The middle of mine are a bit soft, but not unpleasantly so.
I use a pizza stone in the oven, and I pre-heat it till the stone gets to ~400F (takes like 40 minutes). I have an infrared thermometer I use to read the temp of the stone.
I'm assuming you're using a torch and a titanium domeless nail. The best and most precise way to take low temp dabs is to buy yourself an infrared thermometer and measure your temps that way.
(http://www.amazon.com/gp/aw/d/B00CVHIJDK/ref=mp_s_a_1_1?qid=1421443336&amp;sr=8-1&amp;dpPl=1&amp;dpID=51yFyraWgJL&amp;ref=plSrch&amp;pi=AC_SY200_QL40)
Another method (sighting) is just to heat up your nail to a slight red, then allow it to cool. This takes trial and error. Time how long it takes to cool (5, 10, 15 seconds) and then take your dab, cap it. Check if there's any oil left on your nail, if so then your nail is too cold and you should take your dab sooner. If you took your dab too soon, the you'll get a slight burn and diminished flavor in your dabs.
I find waiting 8-10 seconds after torching is the best for me, but everyone's nail is different.
Etekcity Lasergrip 1080 Non-contact Digital Laser Infrared Thermometer Temperature Gun -58℉~1022℉ (-50℃~550℃), Yellow and Black https://www.amazon.com/dp/B00DMI632G/ref=cm_sw_r_cp_apa_i_3P14AbZ9RCK9B
This is the one I've used for over a year for my dab setup and it works flawlessly. $17 on Amazon, elegible for prime
Get one of these and find out just how hot dryer is getting. If either the Thermal Limiter or the High Limit Thermostat is bad you usually can't tell by looking.
Yep with the Smokey the minion method is the way to go - it can run a long time without needing any help - much longer than it takes to do a pork butt.
As far as temp, I would recommend getting something like this -- you just put the probes in and kick back inside and relax until it reads 200. I usually put the probes in when I foil it up a few hours in.
You absolutely MUST use this technique! It is called a reverse sear. Search "Guga foods" on YouTube
(Or click here, he talks about pan frying in the beginning too, and the reverse sear is around the 15 min mark, a fun video regardless and cast iron plays a role)
https://youtu.be/4oLnJiYN_GE
Also, get a nice thermometer, you won't regret it. I just got this one from Amazon:
https://www.amazon.com/gp/aw/d/B01GE77QT0/ref=sspa_mw_detail_0?ie=UTF8&amp;psc=1
I have one and like it a lot. One thing I will say is that you'll need to get a thermometer because the built in one is garbage. Mine runs between 60-80 hotter than what built in one says. It ruined my first few cooks, but once I got the extra thermometer I was set. This is the one I got and I like it, but use whatever you feel like: https://www.amazon.com/gp/product/B01GE77QT0/ref=oh_aui_detailpage_o08_s01?ie=UTF8&amp;psc=1
If he's into grilling and smoking, does he already have a wireless temperature probe? It's a lifesaver for me. https://www.amazon.com/ThermoPro-Wireless-Digital-Cooking-Thermometer/dp/B01GE77QT0/ref=sr_1_4?ie=UTF8&amp;qid=1481037076&amp;sr=8-4&amp;keywords=wireless+temperature+probe
I have a Flame Boss 300, its amazing.....keeps my KJ within ~3F of the set temp. A little pricey, but well worth it.
You can get a Thermopro TP20 with the clip to mount a probe to the grill, and a meat probe for $50
As far as your question, you can....just be mindful of where you are taking your reading. Don't use internal walls or the heat deflector, to get a good reading youd need to get it from something on the grill surface, or if you are doing indirect, maybe a drip pan or something right under the grill (I use a 16" cast iron skillet as a drip pan, sitting on my accessory rack in my KJ)...its far enough above the heat deflector and close enough to the grill that I feel comfortable with the reading
Pick up a thermpro tp20. One probe for ambient, one for meat. No need to open up anymore.
https://www.amazon.com/ThermoPro-Wireless-Digital-Cooking-Thermometer/dp/B01GE77QT0/ref=asc_df_B01GE77QT0/?tag=hyprod-20&linkCode=df0&hvadid=198091107028&hvpos=1o1&hvnetw=g&hvrand=17816983443184717330&hvpone=&hvptwo=&hvqmt=&hvdev=c&hvdvcmdl=&hvlocint=&hvlocphy=9004338&hvtargid=pla-379519116602&psc=1
I've got one of the ThermoPro and works fantastic. Also, works great for checking fermenter temps without having to look for your thermometer strip, probe it, etc. Just leave it sitting and you can check it from anywhere in the house. Not a salesperson for these guys, but I like it. https://www.amazon.com/ThermoPro-Wireless-Digital-Cooking-Thermometer/dp/B01GE77QT0/ref=sr_1_2?ie=UTF8&qid=1498228391&sr=8-2&keywords=thermoworks
I went with the Thermo Pro TP-20 when i was looking for a thermometer. I did an ice bath when i got it to make sure that it was on point, and it was. It has preset meat temperatures, but i always end up using the program or BBQ settings. The sending unit at the smoker has a nice hook on the back so you can hang it from a handle. In rain i just put sandwich bag over it to keep it dry. The receiving end, i can walk anywhere in my house and receive the temperatures. I am very happy with this unit.
You can also get something like this egg timer which I've found helps a lot.
I got one of these, it's great. It darkens as the egg cooks from the outside in, and helps you pull your eggs exactly when you should
https://www.amazon.com/Norpro-Egg-Perfect-Timer/dp/B00004UE75/ref=pd_lpo_vtph_201_bs_img_1?_encoding=UTF8&amp;psc=1&amp;refRID=GGBYPVDNXWW9JVV4KDW1
Check this thing out, I use it almost everyday and it hasn't let me down yet. Your example egg would be right at the "soft" bar if not just before it.
https://www.amazon.com/Norpro-Perfect-Changing-Kitchen-Temperature/dp/B00004UE75
Like I want anything from YOU. You shouldn't gift me because I put off 2 papers I have to write until the last minute.
Taylor 5989N Classic Instant Read Pocket Thermometer by Taylor Thermometers http://www.amazon.com/dp/B00004XSC4/ref=cm_sw_r_udp_awd_51nktb0T04NCN
Sundry list: Kindle.
It's for my dad. His birthday and father's day are the same day. It's a combo gift. He's been through a lot, health-wise, and he's finally at a place he can relax. We both love reading and bond over books better than anything else. I'm one of 4 kids and reading was the thing we had together while I was growing up, that nobody else shared. It was really special.
Books list: Mr. Mercedes
Stephen King and I have a long relationship. I've got Dark Tower tattoos, even. I have read everything he's written that I could get my hands on. This comes out in June. I own all of his books in hardcover. My den is basically a shrine to Uncle Steve.
Home Improvement list: Recessed Light Can Converters
I bought a house last year. It's got sunken eyeball lighting in the kitchen. They really, really creep me out. I know it's irrational. But I plan to put mini pendent lights in instead. o_O
Kitchen and Noms list: Instant Read Pocket Thermometer
I recently bought a bread machine. It's great and I use it every day, almost. Some of the breads require water at an exact temperature. I need a thermometer that starts at zero for this.
Pets and Wildlife list: Feliway
I have a ten-year-old neurotic cat who takes his pants off when he's anxious. This helps keep him decent. ;)
My son's birthday list: Wooden Pantry Products
The boy turns 2 in May. He has a play kitchen, but no play food yet. (He did have some cardboard boxes that came with the set, but he ate them in true baby form.) This set of wood pantry items will hold up and also be fun for stacking.
Add-ons list: iRobot Scooba Hard Floor Cleaner
Because a bot's got to eat, too.
Thanks for the contest!^ifitisacontest^probably
If you have access to a stovetop, try searing the chicken on medium/med-high heat for 2 mins~ a side then transfer it to the oven for 10-15 mins til cooked through. The sear is delicious and really beats the pants off plain baked breasts. I suggest a meat thermometer to help with not drying the hell out of your dinner! You can go stupid simple or a little more complex. I have both of these thermometers and use them both often.
I also highly recommend this recipe for bone in chicken.. I've done legs, breasts and wings (on grill and the oven) and it comes out fantastic.
Wings are really cheap and are damned good. Chicken breasts get boring and expensive! Wings, I do at 425 degrees for 20 mins, flip them, then do 15 mins more. If you want a good buffalo wing recipe, these are great.
You can try different things for marinades/rubs. Lemon pepper, Tony Chachere's, Adobo (or just buy Goya brand...it's salty as hell. though), etc. Marinades are fun too. Salad dressings, bbq sauce, apricot preserves, Trader Joe's Soykiaki, and so on. Just remember that if there's a lot of sugar in them, you're probably going to have sticking/burning issues. Best bet is to cook the chicken to 5 mins before done and then brushing on bbq sauce/sticky marinade. Also, if there's any acid in your marinade (vinegar, citrus), don't marinate for more than a couple hours or the acid will "cook" the chicken. Poultry ceviche isn't good eats!
My diet is very protein heavy and I just can't make a decent steak to save my life. I get sick of eggs & tuna so I've made chicken LOTS of different ways and have changed it up a lot so I don't get bored. I hope this helps! Sorry it's long. heh
TL;DR -- Vary your seasonings, buy a thermometer and get a good sear. Links and suggestions provided.
More like this
To get more confidence in your cooking of meat: Get an instant-read thermometer-- analog or digital, your choice. Ignore those who say 'don't pierce the meet you'll let all the juice out' (because that's been debunked by
Alton BrownFood Lab) and take internal temps of meat you cook. Internal temps is a better gauge of food safety than time or visual indicators.Soon you'll get more confidence that you're doing the right thing and have the tool to prove it.
The temperature range on stoves can vary greatly, especially on electric stoves. The only way to know for sure your meat is at medium rare, is by using a thermometer. This one is pretty cheap. A steak at around 130-135F (55-57C) is cooked medium rare (be sure to measure the internal temperature, stick that thermometer in there!). Also, make sure to let your steak rest for at least 5 minutes before eating.
That being said, on most electric stoves around 5-6 would be considered medium-high heat. In Europe, anyway.
Not really keto specific, but... My knife, my stainless saute pan/skillet/whatever, and chef's tongs. A lot of other things are great, like a cast iron grill pan or a food thermometer, but the first three are requirements for me.
Oh yeah, I do keep a single, small non-stick pan whose only purpose in life is cooking eggs (omelets, scrambled, fried.) And I guess that is pretty damned necessary, too, along with a heat-resistant rubber scraper and spatula, but now I might as well list all my cookwear. I stand by the original three; keto or no, I would not want to have a kitchen without them.
Buy a scale - use it for most measuring, especially flour.
Buy 2 thermometers - one to leave in the oven and one instant read for testing done-ness.
Use Instant yeast.
Besides that - read alot about baking then practice and experiment. Try adjusting the water/flour amounts and see what works best for you.
Baking is an art... but it helps if you also know the science.
Hario Mini Mill
Kettle
Scale
Brita Filter
Aeropress
Thermometer. The one I have is from a Culinary Arts class I took, but this looks to be the same. It's very useful, and to calibrate it, which you'll need to do every once in a while, fill a cup full of ice and then water and put the blue thing on so you can move it (I'm not sure how to explain it, but I'm sure you'll get it), and make sure the dimple is in the water and move it to 32 degrees.
Edit: Also, the mug was from the reddit Secret Santa exchange! It's a really fantastic mug.
Honestly, my best advice is to get a probe thermometer like this and stick the probe in the meat when you put it in the oven. I've done this a few times so I know about how long it takes in my oven for my steaks, but your mileage may (and probably will) vary.
This is what I did for four years. You can also use the scale to weigh your pot..
I might also recommend a timer & thermometer combo. Convenient when you use it every day, and the thermo for if you feel like dialing in your temperature.
http://www.amazon.com/Taylor-1470-Digital-Cooking-Thermometer/dp/B00004XSC5
Oh I also had a cheap electric grinder for those days when you wake up just before class starts but you're not willing to go without a fresh cup. Not gonna stand there for 2 minutes grinding when 15 seconds will produce okay results.
That recipe sounds absolutely terrible, man, no wonder they tasted like shit. Get yourself a meat thermometer and do this thing:
Rub some olive oil and sprinkle some Old Bay on it, bake at 425F until it's 159F in the thickest part, let it rest at least two minutes. Perfect every time. Chicken breasts are all different thicknesses, never do a whole breast recipe based on time if you want it to be cooked right. Cook it until it's done in the middle, and no longer.
If it has skin on it, even better, but make sure you cover it (cut some vent holes in the foil for steam) because the fat renders out and goes eeeeeverywhere and will splatter down onto the heating element and smoke up your place. But crispy chicken skin rocks, and it makes the chicken a little bit juicier.
What's it called? Do you have a link?
Edit: Nevermind, I found it... http://www.amazon.com/Taylor-1470-Digital-Cooking-Thermometer/dp/B00004XSC5
This one is $11 used on amazon. Taylor Digital Cooking Probe Thermometer and Timer https://www.amazon.com/dp/B00004XSC5/ref=cm_sw_r_cp_apa_sYMZAbDDV8MME
I have an older version. Love love love it. When I'm roasting, I can stick the meat and set the temp alarm and let it go until it reaches temp.
> Will any kind of cooking thermometer do?
Have used a variety of thermometers. In the drawer is an OXO and an inexpensive Thermoworks pocket.
I'd recommend a ThermoWorks DOT probe-style oven thermometer. This way you can insert the probe into the chicken and bake/roast it to the temperature you want without opening the oven door to check. You don't have to go with the DOT. I started out with something similar to Taylor Digital. (I no longer have it because I burnt the probe over a grill hot spot.)
You can put the boneless chicken in a baggie or fold over plastic wrap. For a recipe/instructions, have a look at 101 Cooking for Two's Pan Seared then Oven Roasted, Skinless Boneless Chicken Breast.
= = = = Edit to add
You might like to read through this post on Baked Chicken Breasts at ThermoWorks
Get a digital meat thermometer with an alert that you can leave in while the roast is cooking (like this one), and it becomes basically impossible to fuck up a roast. The method in this video looks delicious, but you can also just slap some salt and pepper on a roast and as long as you take it out of the oven at the right time and rest it, it will be some good eatin'.
I've had this one for years.
Everything I hear is that those things aren't the best for brewing...
I got this Taylor Digital Cooking thermometer with probe for $20 at Target a year ago and it works amazingly. Here it is on Amazon for $2 less with free shipping.
The probe is linked to the unit via a 4' long cable capable of withstanding oven broil temperatures, very durable. You can set timer alerts and temp alerts to let you know when your mash/wort has reached a certain temp.
The unit is magnetic so you can stick it to your brew pot or oven (you can use it for baking and stuff too) and it's brought my grilling to an entirely new level. I've gotten really good at grilling steaks and pork chops thanks to this thing.
Your budget is pretty low but for 45$ here's what you can get that will set you up correctly
Fry/candy thermometer (Alton's favorite): 10.00
Instant read (the same one use by chefs everywhere): 19.00
Alarm Thermometer ( the good old Taylor): 16.00
And if you want to invest more change the alarm thermometer to something more serious like the chef alarm. But it's 60$ just for that.
Chili - the first time I made this, I just used ground turkey, which is why that's in the recipe... I've also made it with pork and bison/beef and it's good. Whichever you prefer. Sometimes I use pureed tomatoes instead of diced. You can use both, if you like. If the chili is too liquidy, put a few tablespoons of cornstarch into a glass with a little water, mix until it's blended, and then add to the chili, and cook - this will help thicken in up a bit.
8 strips (half a package) of bacon
1 red onion
1 small bulb of garlic
3 to 4 tablespoons tomato paste
2 lbs extra lean ground turkey
1 large can diced tomatoes
1 can baked beans
1 can mixed beans
2 tablespoons maple syrup
1 tablespoon chili powder
1 tablespoon Sriracha hot sauce
1 teaspoon paprika
1 teaspoon cayenne pepper
1 teaspoon cinnamon
salt and pepper, to taste
.
Chop bacon into small bits and cook in a large pot. Add chopped onion, saute until clear, and add minced garlic. Add ground meat, and cook until it's done (sometimes I add some of the spices now). Add tomato paste, tomatoes, and both cans of beans to the pot, as well as the spices and maple syrup. Simmer for at least half an hour, but an hour is ideal. I tend to cook this a day ahead, and then reheat and simmer for another 20 minutes or so - I find it's better the next day.
Jamie Oliver's Guinness Pie is amazingly delicious.
Also, a digital thermometer - like this - is your best friend when cooking meat.
If you're a fan of breakfast food, check this out. It's so good.
Edit: Cornbread goes wonderfully with chili. I leave out the green chile peppers, and replace with chopped green onions. Sometimes I put about a tsp of chili powder in, and sometimes a little cayenne to give it some kick.
Thermometer: https://www.amazon.com/gp/aw/d/B00004XSC5/
Like others have said a probe thermometer is the only option.
I'd recommend one of these, cheap and effective:
http://www.amazon.com/Taylor-9842-Commercial-Waterproof-Thermometer/dp/B00009WE45
It should survive a sink washing, but I dunno about the dishwasher. It shouldn't be too hard to keep it out of there though...
Edit: Like some of the reviews on Amazon say, don't leave this particular thermometer in the oven unless you want to destroy it.
For normal home use (not a probe), I've been really happy with the $8.25 Taylor waterproof digital thermometer.
https://www.amazon.com/Taylor-Precision-Products-Commercial-Thermometer/dp/B00009WE45
I've had mine for years and no problems. I don't know if it's BIFL, but for an item like this, I've certainly gotten my 8 bucks of value from it.
Not the case at all. They were all reading virtually the exact same spot on an interior wall.
I’ve also done the same with pool thermometers and even some of the same thermometers used on the thermostat wall.
Wish I hadn’t trashed the pic, it makes the point far better than with text......
Easily recreated in a kitchen store... found a display of a thermometer like these: https://www.amazon.com/dp/B00009WE45/ref=cm_sw_r_sms_c_api_bcsSBbMASDZ6F and turned them all on... the results varied by around 2 degrees— all for the same spot at the bottom of a cuplike holder.
My bad!
I would recommend you start with chicken. Chicken thighs are cheap and yummy :) Somebody else posted this recipe, and I can confirm that it is ridiculously easy and fabulously tasty: [The BEST way to cook chicken thighs] (http://www.reddit.com/r/keto/comments/1otscu/the_best_way_to_cook_chicken_thighs/) :)
It sounds like a cheap instant read cooking thermometer might a good investment when you decide you want to cook steak. I have [this one] (http://www.amazon.com/Taylor-9842-Commercial-Waterproof-Thermometer/dp/B00009WE45/ref=sr_1_6?s=kitchen&amp;ie=UTF8&amp;qid=1420405020&amp;sr=1-6&amp;keywords=food+thermometer) and I've found combining it with [safe cooking temps for various meats] (https://www.google.com/url?sa=t&amp;rct=j&amp;q=&amp;esrc=s&amp;source=web&amp;cd=1&amp;cad=rja&amp;uact=8&amp;ved=0CDUQFjAA&amp;url=http%3A%2F%2Fwww.foodsafety.gov%2Fkeep%2Fcharts%2Fmintemp.html&amp;ei=LqupVMDUC8PpaMuJgugB&amp;usg=AFQjCNEm--9fyqOj3ZCOBziO2TSw7yMZoQ&amp;sig2=X5WjzRjRbiSI3Lx6NxY2xQ&amp;bvm=bv.82001339,d.d2s) really helps me to not overcook my meats :)
Morthy's Demands:
Tea for an old posh Englishman. I would no doubt ring a bell to have a serving wench bring it to me though. Yummy Goodness WL
Think these would show under a shirt? I would still never be seen in public with them! NSFW WL
Phallic-ish Kitchen wants and needs WL
Akeleie Demands:
Most geeky item. As a grown woman, I still want this! Books: Glorious Books WL
Help me achieve a personal goal of learning all the Egyptian dieties I've always been fascinated by ancient Egypt and want to really delve into their deities. Books: Glorious Books WL
Binoculars would be handy on a deserted island. Keep a watch out for passing ships! Wish I may, Wish I had WL
Thanks for the fun contest!
So people have given all of the advice I would have already, basically recipes plus learning how to cook meats/veggies. Here is a tip to get you closer to freedom in the kitchen and the ability to throw things together. Simply put, learn how to cook each type of meat to it's proper done-ness. Learn how to bake it, learn how to bake it in liquids with random veggies, leRn how to sear it. Buy one of these: http://www.amazon.com/gp/aw/d/B00009WE45/ref=mp_s_a_1_4?qid=1409236879&amp;sr=8-4&amp;pi=AC_SX110_SY165_QL70
They're 12 dollars. You eventually will need it much less, and may even not use it at all. As a beginner though, it will allow you to buy any meat with full confidence that you won't underdo it. It'll open up options that seem scary at first, like roasts and tenderloins and thick steaks. Most red meats are delicious if you simply get them to 130-135 (rare), just add some spices and figure out if you like it a little more done. Crappy pork should be cooked higher, and chicken should always be 150. Remember that things gain 2-5 degrees after you take them out and let them sit. Don't be intimidated by recipes, just isolate how the meat becomes done as the core and simply do whatever you want around that basis ( for example, my veal roast is quite complicated, with multiple steps, at its core though it's just bake veal in stock until 130 then throw in veggies and cook to 140)
Jimmypage got it right my friend...grab a taylor ( http://www.amazon.com/gp/aw/d/B00009WE45/ref=redir_mdp_mobile) cheap and reliable.
I noticed that the Polder timer/thermometer was cheaper out of Amazon.ca for us Canadian shoppers.
http://www.amazon.ca/Polder-Original-Cooking-Timer-Thermometer/dp/B0000CF5MT/ref=sr_1_1?ie=UTF8&amp;qid=1332974970&amp;sr=8-1
I've never added the probiotics, and I've had it turn out fine. Choose the plain version of your favorite yogurt, and you'll make a yogurt that tastes similar - you'll be adopting the same culture mix. Try other yogurts if you don't like how your first batch turns out.
My technique for keeping it warm is to put the yogurt in mason jars in a cooler with a heating pad. I fill any unused space with more mason jars filled with hot water. I have a probe thermometer sticking in there to make sure it's staying at around 100 degrees.
Alton Brown did a good episode of Good Eats on yogurt, and he had some really good tips.
The Brewpal iPhone app.
Refractometer
Digital Thermometer w/ timer
Immersion Chiller
I generally just saute with a little olive oil or butter to get fried results that aren't completely dried out without all the oil.
If you really want to bake it instead, get yourself one of these - http://www.amazon.com/Polder-Original-Cooking-All-In-One-Thermometer/dp/B0000CF5MT/ref=lp_289810_1_1?s=kitchen&amp;ie=UTF8&amp;qid=1420663578&amp;sr=1-1 - you can set an alarm for it once the right temperature is reached. All you need to do is google what temp whatever cut of meat you're baking is safe to eat at and there you go. Just plug the thermometer into your meat and leave the other part hanging out of the oven door. Alton brown does it all the time :D
What I used this morning.
(https://www.seattlecoffeegear.com/pasquini-moka-espresso-grinder)
That's kind of tough because several things on your list could run you upwards of $100/each.
I'd definitely advise starting with the knife and spending money to get a high quality one. You should go test them in store because one of the most important things in a knife is balance and one that feels right in your hand.
After that I'd go: thermometer (I like this one, you don't need an expensive one for most things), whisk, paring knife, dutch oven, food processor (again, spend the money to get a good one), cutting board, bread knife, ramekins, prep bowls
I think you can definitely live without the digital scale (until you are really into baking breads you can wing it), mandoline (a good knife is easier 90% of the time), salad spinner, blowtorch, vegetable peeler (you can peel with a paring knife)
A couple of good places to start would be a restaurant supply (whisk, china, prep bowls), a discount store like TJ Maxx (dutch oven)
Good luck!!
You definitely should get an instant read thermometer. It's an absolute life saver.
You don't have to spend much for one either. My crappy non-instant read was overpriced at $10 from a grocery store but this is the one I should have/will get.
That's unfortunate.
If you end up needing a replacement, decent ones can be had inexpensively.
Or you can Splurge and get the ferrari of all probe thermometers.
I'm Canadian, so it's not really inexpensive. But thanks for the recommendation.
A few things from the top of my head that will hopefully be fresh advice:
Analyzing nocoffeesnob
This is the one I have my eye on: Maverick ET-73 BBQ set
It comes with both a meat probe and a pit probe. For about the price of two replacement probes.
could be caramelization of the sugars. might try lowering the heat a little, getting the rack up in your oven a bit if your heat source is at the bottom, using a nice, thick baking sheet.
if you're not using a thermometer to test your oven temp, you should have one. Something like this https://www.amazon.com/Taylor-Classic-Large-Dial-Thermometer/dp/B0000DJUYR/ Never trust your oven temp.
I bake in mine all the time and its great! I have THIS pizza stone on the bottom of the oven right over the thin metal plate that guards the burner. It fits perfectly in the oven. I also have an oven thermometer in there to make sure it's properly preheated I found my knob is about 25 degrees off. Lastly, I'm sure to rotate half way through cooking.
I got this one after some research. I liked that it has big numbers and 350 is top center.
I would put it in the oven right where you cook food and do a few tests. Most ovens have a way to adjust/correct the temp. On mine I pull off knob and adjust it on the back.
^edit: ^that ^one ^displays ^freedom ^units
Here's the one I have :)
https://www.amazon.com/Taylor-Precision-Products-Classic-Thermometer/dp/B0000DJUYR/ref=sr_1_4?ie=UTF8&amp;qid=1505151981&amp;sr=8-4&amp;keywords=oven+thermometer
To add to the basics
http://www.amazon.com/Polder-Digital--Oven-Thermometer-Graphite/dp/B000P6FLOY/ref=sr_1_1?ie=UTF8&amp;qid=1313495188&amp;sr=8-1
I would recommend getting a probe thermometer. Like this guy: http://www.amazon.com/Polder-Digital--Oven-Thermometer-Graphite/dp/B000P6FLOY/ref=sr_1_1?ie=UTF8&amp;qid=1320817763&amp;sr=8-1
That way you know when it's cooked.
Here is a thermometer similar to the one I use for siphon brewing for $17. It won't work for home roasting. If you think you might get into that, you will need one that has a higher max temp (500 F+). I haven't bought one yet because I am considering a roast profiling setup which would port to my pc. This is a good grinder at $45. This is the kitchen scale I like for $50 but you might be able to get one for less. The scale only measures down to grams which works fine for this siphon at 40 oz. ($36) but for a smaller siphon you might need a scale that measures down to .1 grams. To summarize, you could get a decent set up for ~$120 or for a roast compatible thermometer ~$145. You will also want a wooden spoon for stirring the coffee in the siphon.
Another good way is to get a probe thermometer. Also, keep the fridge cold (38 degrees F or less...for the metrically-minded, 3.3 degrees C or less) and clean it with bleach or another disinfectant about every 2-3 months. Keep raw meat/poultry/fish separated from vegetables or fruit; otherwise, the vegetables or fruit could become contaminated. And never let tongs/a spatula/whatever that have touched raw meat/poultry/fish touch the finished meal. (Instead, get new ones.)
I've been using this Polder for ten years. It's worked flawlessly every time.
Their customer service is excellent, too. A year or so after I bought it, I lost the clip that comes with it so you can use it as a candy thermometer by attaching it to a pot on the stove. I sent them an email asking if I could purchase a replacement clip, and they sent me an entirely new thermometer. I kept the clip and gave the thermometer to a friend.
Thermopop
This bacon cure with the recipe tied to a mason jar filled with the cure.
Head lamp
Clam Shell Tongs
Roll of Heavy Duty Foil
Roll of Pink Paper
Spool of Butchers Twine
Polder wired probe thermometer
Instead of a basket throw everything on a decent sheet tray.
FWIW I've had excellent reliability and accuracy from my Polder food thermometer.
What are you using it for?
I have this probe thermometer and love it. I know it's not a traditional candy thermometer, but I use it for caramel and deep frying all the time and it's great. My favorite feature is that you can set the alarm to go off at a certain temperature, so you don't have to stand there watching it the whole time.
IR (laser) thermometers are fantastic, but not for candy cooking, as the steam throws off the reading. Digital is the way to go; I recommend one of these three: CDN, Maverick, Polder. I use the Polder and a refractometer.
Here's my 2 cents on preventing burnt meat. Get a food thermometer like this: http://www.amazon.com/Polder-Digital-In-Oven-Thermometer-Graphite/dp/B000P6FLOY/ref=sr_1_4?ie=UTF8&amp;qid=1374375316&amp;sr=8-4&amp;keywords=meat+thermometer. I highly suggest this for any beginner cook. It will help ensure you get the proper temperature for meat. My other advice, and it's a obvious statement, don't leave the meat alone.
I have this: https://www.amazon.com/gp/product/B000P6FLOY/ref=s9_acsd_al_bw_c_x_3_w
dome temp or grill temp to 225?
Got it, I have a little smokey joe and a random charbroil gas grill that I can probably use, thanks!
Will one of the egg timers you drop in the pot work with steaming? My mother in law gave me one and it's great for showing different levels of doneness based on temperature/duration in water.
example
First, I use Grade A Large brown eggs...the Organics brand from Tom Thumb/Safeway (cage free, hormone free, etc). They average about 2 1/4" on the long axis.
To make sure you don't overcook/undercook your sausage: do your absolute best to make sure that the sausage is the same thickness all the way around (as close as possible) and not too thick. Do not go thicker than a 1/4" thick.
Also, get a probe-style kitchen thermometer and make sure your oil is a close to 300ºF (150ºC) as possible. At 300ºF and 1/4" thick sausage, it will take you no longer than 6 minutes (more like 5 minutes) to cook the sausage all the way through without turning the outside to carbon. ;)
For eggs: get yourself one of these and follow the instructions. You'll never have wrongly-boiled eggs again.
Just remember, practice makes perfect. :D
http://smile.amazon.com/Norpro-Egg-Rite-Timer/dp/B00004UE75/
http://smile.amazon.com/Fox-Run-Egg-Piercer-Carded/dp/B0000VLPTO/
I use this: http://www.amazon.com/dp/B00004UE75
Perfect eggs each time. You put it in the boiling water with the egg and it indicates exactly which stage the eggs are in.
Get a Norpro Egg Rite Egg Timer [Amazon] (https://www.amazon.com/dp/B00004UE75/ref=cm_sw_r_other_apa_YxqyxbB98PR6G). Just put it in with your eggs and the indicator is amazingly accurate.
I recommend you get one of these (small, cheap, easy to use, reusable). Keep the egg timer in the frig with your eggs, take it out at the same time, put it into the water at the same time. This is actually a lot more reliable than a clock timer, because all sorts of things may affect the cooking speed (frig temp, water temp, air pressure, ...).
frig = refrigerator
https://smile.amazon.com/Norpro-Perfect-Changing-Kitchen-Temperature/dp/B00004UE75/ref=sr_1_2?s=kitchen&amp;ie=UTF8&amp;qid=1486917454&amp;sr=1-2&amp;keywords=egg+timer
This thing works surprisingly well. The key, as OP said, is to take it out right when you want and put it under cold water immediately..
I'm making some hard boiled eggs right now! I use this amazing egg timer, then pop the eggs into an ice bath. When they are fully cooled and COLD, I crack the egg like I would if it were raw. Then I keep tapping it all around the outside until the whole shell is cracked. Then I gently press the pads of my fingers onto the shell to crack it all up really small. When the shell and membrane start to detach from the egg, find a place where the membrane has broken and gently push the shell away from the egg with the outer side of your thumb. Don't peel using your fingertips or nails, that just makes it easier to shred the egg.
I find that eggs that have spent a couple days in the fridge after being cooked peel easier than freshly cooked eggs. Good fucking luck peeling warm eggs. I've pretty much given up on soft-boiled, shelled eggs.
You could try to use an egg timer , those are cheap, and they prevent having overcook eggs..
https://www.amazon.com/Norpro-Egg-Perfect-Timer/dp/B00004UE75/ref=sr_1_6?s=kitchen&amp;ie=UTF8&amp;qid=1549986435&amp;sr=1-6&amp;keywords=egg+timer
This is one of the best gadgets I own:
https://www.amazon.com/Norpro-Perfect-Changing-Kitchen-Temperature/dp/B00004UE75
Cheap and works flawlessly.
I would highly recommend this egg timer
https://www.amazon.com/Norpro-Perfect-Changing-Kitchen-Temperature/dp/B00004UE75/ref=sr_1_1?s=kitchen&amp;ie=UTF8&amp;qid=1482786886&amp;sr=1-1&amp;keywords=egg+timer
I use one those those.. works for me. I like my eggs super soft/rare.
Some restaurants will put eggs in oven to boil them. I think Good Eats have epsd on it.
I've had this egg timer for 2 years and love it.
https://www.amazon.com/Norpro-Egg-Perfect-Timer/dp/B00004UE75/ref=sr_1_4?crid=2Y3Y4OJ8MHDP5&amp;keywords=egg+timer+for+boiling+eggs&amp;qid=1556540488&amp;s=gateway&amp;sprefix=egg+time%2Caps%2C145&amp;sr=8-4
I've been using one of these for a few years. I could never remember how long to boil the egg to get the results i was looking for. This provides a nice visual.
Just a basic $5-10 "instant read" thermometer (they'll take about a minute to get a good reading) is good enough for home use - here's the one I used to have. These are for poking into something, checking the temp & removing. If you want something to leave in there while your turkey or roast is cooking, you want an ovenproof one that's designed to stay in the oven.
If you feel like spending a bit more money ($80-100), there's always a Thermapen - a professional grade thermometer that reads temps in 3s or less. I wouldn't buy one for myself but I was lucky enough to get it as a present & there's no way in hell I'm giving it up. I've also seen a few references to some of their lower-cost models being worth buying if you're OK with the $20-30 range.
You can always check old threads on /r/cooking to see what other people have to say about thermometers.
It's fine. Make sure you cook it properly and this is something you should be doing anyway.
I believe it's 160f for chicken.
A cheap little instant read meat thermometer is your friend.
Not sure if done? Stab it with this, count to 10 and read. Less then 160? Not done. 160 or more? Time to eats.
The Victorinox ones are probably the best value around. Thats speaking as someone who owns several hundred dollars worth of mostly Shun and Mercer knives.
All you REALLY need is a
Chefs Knife
and a
Pairing Knife
to start with, those will handle about 85% of anything your ever need to do, but if you want to expand i would get a
Boning knife
Bread knife
Slicer
And dont forget a honing steel.
And MAYBE a pair of shears.
As far as other gear, i have an honest to god pocket protector, im paranoid about putting pens in pockets ever since a bad experience as a child, doubly so when i wore a white coat, and its nice because i can just throw it in whatever coat im wearing. In it i keep;
my thermometer
a little thing of superglue, for major cuts and minor repairs
a pen which is frequently stolen and then i steal another one thus perpetuating the cycle
a $.99 snap off box cutter, for all non fine/sanitary cutting needs, breaking down boxes, opening bags of baking mix or frozen vegetables, etc,
and my sharpie.
I also used to keep a tide pen in there when i wore a white coat.
Make sure you are checking expiration dates after leaving it in the fridge for days. When chicken is cooked there should be no pink on the inside, so cut it open and check. Also, invest in a meat thermometer. Here is one for pretty cheap.
This guide can tell you what temperature to cook your foods at.
Ziplock bags are fine, but don't skimp on them. Flimsy bags will get holes in them and ruin your food. And get the kind with the zipper, not the pinch-close.
If your apparatus is just a party cooler that you pour hot water into, then your thermometer can just be a cheap instant-read with its probe pushed through a cork. You'll need to check and adjust the water about every 20 minutes.
I do my sous-viding in Hefty brand freezer bags, in a part cooler, with a jury-rigged temperature controller made from an STC-1000, a cheap aquarium pump, and an immersion element. (Not those exact models.) Oh, and an outlet and outlet box I bought at Lowes, and the plug from an old fan, which I was later informed was not previously garbage.
Lessons learned: you'll burn out at least one heating element, and aquarium pumps are not reliable after your flimsy ziplock bag leaks meat juice into the cooler and gums up the impeller. Buy a spare of each.
Edit: Oh! and when you take the meat out, let it cool and dry off for a couple minutes before you finish it on the grill. You'll get a better crust and (very slightly) less overcooking around the edges.
temperature probes are your best friend! also, juices that run clear is usually a good indication of a cooked chicken.
Something similar to this Thermometer
we have about 4 in our kitchen at any given time.. you can get more expensive ones that are digital and awesome, but i usually always fall back on my supply of these.. 165 is the suggested safe zone for poultry. always stick it in the thickest part of the breast, but be sure to not go all the way into the chest cavity.. I've done it a lot lol.. and or into the thickest part of the thigh..
Pink chicken doesn't mean raw.. as long as the temperature is properly at it's mark and the juices run clear you should be fine!
Wooo that was fun!
I am actually really in need of a [meat thermometer] (http://www.amazon.com/Taylor-Classic-Instant-Read-Pocket-Thermometer/dp/B00004XSC4/ref=reg_hu-rd_add_1_dp)
Great contest! Good luck everyone!
Sushi is not for me but I could use this meat thermometer from my five dollar list as for some reason I do not own one! :)
Ok, I trust you know best, but for the sake of being a know it all, I'm going to say that is actually takes very little space (if you have a small kitchen/bathroom/a sink and some ventilation, that's probably enough) and very little special equipment.
This is what I would say the basics would be for you:
Mixing spoons;
It's really pretty basic/cheap stuff. You can use used plastic bags and tape as gloves, you can wear sunglasses as safety glasses. Just be careful with the lye. When you mix the lye and water, its going to stink a bit, so you need some ventilation for that. You'll need the oil/fat to get to 110 degrees Fahrenheit, so you'll use a double boiler for for (a bowl sitting on-top a sauce pan/pot is what I use).
I do the same thing with the Bonavita. I think it's a great kettle. This thermometer fits and seems to be pretty accurate.
You know, that exact same style is available from multiple manufacturers.
http://www.amazon.com/Taylor-1470-Digital-Cooking-Thermometer/dp/B00004XSC5
http://www.amazon.com/ThermoWorks-Original-Cooking-Thermometer-Timer/dp/B0019R4HQQ
I wonder whether they're all the same probe/curcuit board/LCD panel
You can get those. You leave the probe in the meat (for chicken/turkey you put it in the thickest part of the breast, off to one side). and a wire connects it a monitor outside your oven. Something like this. You can set the temp (or cook time, but really, use the temp option). When it reaches your desired temp (I would cook chicken to at least 162-ish so that residual cooking gets it to 165) it will beep, and you take it out.
Well, there are always these options:
this or this
The only problem is the lack of temperature control, it's basically hit boil and it stops. If you care about temperature control, then I recommend buying an instant thermometer(I recommend this one because it will beep when it reaches the desired temperature, make sure to set it to like 180 if you want 185) along with those kettles.
So if you purchase the the cheapest electric kettle and the thermometer, then you don't even break $30.
Alternatively you can always buy a normal kettle and microwave the water but control management would be more difficult.
Yeah my oven keeps the temp pretty consistent, usually within a few degrees of 150. I guess it just depends on your oven. I measured the "warm" setting on my oven to see what the temp would be. Here is the exact probe thermometer I have. It's nice because you can set an alarm if it gets to a certain set temperature.
I use a leave-in cooking thermometer all the time for meat in the oven, in my opinion it's worth the $15 bucks to get the right type of thermometer. I would be worried that a standard probe thermometer would end up reflecting the heat of the slow cooker or get damaged from the moisture. http://www.amazon.com/Taylor-Precision-Products-Digital-Thermometer/dp/B00004XSC5/ref=sr_1_5?s=kitchen&amp;ie=UTF8&amp;qid=1464048847&amp;sr=1-5&amp;keywords=kitchen+thermometer
this kind of thermometer have extremely slim wire for the probe, it should not skew the cooking temp / time that much
also, just cook chicken or any other protein the simple traditional way. hard pan sear for color / crust and throw it in a low temp oven (225 - 250) with the probe thermometer and let the temp rise to 145 and rest.
I used an digital cooking thermometer. The meat was cooked to an internal temperature of 165F. I set the alarm for that threshold and pulled it out right when it hit it. Used this recipe for its simplicity.
First, the hats look great! I have always dropped a digital thermometer in one of the top vents and has seemed to work well. As rocketspank pointed out, just make sure it isn't touching any of the pit or grill and you should get a good reading.
Anything like this works. do not wash the probe in a dishwasher, or soak in water, clean by hand.
https://www.amazon.com/Taylor-Digital-Cooking-Probe-Thermometer/dp/B00004XSC5/ref=sr_1_13?gclid=Cj0KCQjw_absBRD1ARIsAO4_D3tpSRCT7fe9Xc1KjO4E7kx1aBCAiombNRw1V8uRgLiFcWTRFdm0SeIaAhJCEALw_wcB&hvadid=241567707765&hvdev=c&hvlocphy=9030029&hvnetw=g&hvpos=1t1&hvqmt=e&hvrand=1892287846665362991&hvtargid=kwd-573895322&hydadcr=28576_10704709&keywords=digital+thermometers+with+probe&qid=1569379975&s=gateway&sr=8-13
Something like this will give you the best temperature, since it checks temperature at the grate, as well as the meat. If you do not smoke that much, you could buy a cheap oven thermometer and calibrate it in hot water and just set it on the grate.
https://www.amazon.com/ThermoPro-TP-08S-Wireless-Thermometer-Grilling/dp/B014DAVHSQ/ref=sr_1_14?crid=N6C4AIL1BP61&keywords=maverick+thermometer&qid=1569380102&s=gateway&sprefix=mavrick+them%2Caps%2C191&sr=8-14
This is going to be my first year going with this recipe. But I would assume for a turkey that is almost half the weight of the prescribed turkey, I would cut the time in half. I always use a digital thermometer (that is oven safe) that I leave in the turkey so I can see how it is doing as it cooks. I use something like this: http://www.amazon.com/Taylor-1470-Digital-Cooking-Thermometer/dp/B00004XSC5/ref=sr_1_1?ie=UTF8&amp;qid=1416934813&amp;sr=8-1&amp;keywords=digital+oven+safe+thermometer&amp;pebp=1416934815131
I hope that helps!
The thing is, you're looking for a high/low alarm, where you want to know if it's out of a range. You can certainly get a cheap $16 model with only a high notification alarm, but it doesn't sound like that's what you want.
I have a Thermapen and one of their meters, and ThermoWorks has very nice stuff.
http://www.amazon.com/Taylor-1470-Digital-Cooking-Thermometer/dp/B00004XSC5/ref=pd_sim_k_4
For well done it's unnecesary, just cook it until it's (almost) a charcoal.
Almost every episode of Good Eats
Watch them all, even the ones that deal with non paleo foods because the techniques are all solid. There are three basic cooking methods you need to worry about. On the stove, in the oven and in the microwave.
For the stove, all you need is a good cast iron skillet, but I recommend having a teflon pan as well. The iron will cook everything you can imagine. I like having the teflon for eggs mainly, iron will do eggs as well, but it can take some practice getting the temperature and lubrication levels correct. Teflon is much more forgiving. I have not used any of the newer nonstick pans so I cannot comment on those.
For the oven, get a aluminum half sheet pan and a oven safe cooling rack. Also get some sort of glass dish or casserole. Always wrap your sheet pan in aluminum foil, or line it with parchment paper when you cook with it. Makes clean up so much easier. Always grease your casserole dish. Baking, roasting, broiling are all pretty simple. Follow the recipes, and keep your eye on it. Get a probe thermometer and it'll tell you when your meat is cooked to your desired doneness.
For the microwave, all you need is a microwave safe plate, plastic wrap and some parchment paper. You can steam so many vegetables just using the microwave, it's ridiculously easy.
I hope this helps out, feel free to PM any questions. Don't forget a good sharp knife too. I still can't stress enough to just watch all the Good Eats episodes, they really have a lot of good techniques and explain the science behind it all. And if you ever want and/or get to cheat, there are some pretty awesome cheats there too.
EDIT: Forget to add this It is a great article on some really cheap tools you should pick up.
I use a probe thermometer with a cord similar to this
I stick that sucker in the meat and then put the meat in the oven (the cord is oven-proof). As long as you aren't probing it multiple times in multiple locations, you shouldn't have any issue with losing juices.
Tangentially related, I would get his books as well:
http://www.amazon.com/Im-Just-Here-Food-Version/dp/158479559X/ref=sr_1_4?s=books&amp;ie=UTF8&amp;qid=1291527138&amp;sr=1-4 (This one is about cooking)
http://www.amazon.com/Im-Just-Here-More-Food/dp/1584793414/ref=sr_1_6?s=books&amp;ie=UTF8&amp;qid=1291527138&amp;sr=1-6 (this one is about baking)
Read through those and you'll feel much more confident.
If you are cooking meat, I'd suggest getting a probe thermometer: http://www.amazon.com/Taylor-1470-Digital-Cooking-Thermometer/dp/B00004XSC5/ref=sr_1_2?ie=UTF8&amp;qid=1291527262&amp;sr=8-2
You'd be amazed how good any kind of meat tastes just with some salt and fresh pepper cooked to the exact right temperature tastes...
you get one of these ;)
&#x200B;
https://www.amazon.com/Taylor-Digital-Cooking-Probe-Thermometer/dp/B00004XSC5
I noticed that too. It looks like a digital meat thermometer to me.
This instant read thermometer is really nice. It's what I use.
Also, this thermometer has temperature/alarm settings which, though I've only used for brewing beer, would work equally as well for coffee or tea.
After checking the temp a few times you'll get an idea for when to pull the pot off the stove or how long to let it sit to get down to the right temp.
Here is a little explanation on a [dry brine] (https://www.youtube.com/watch?v=QkaslYP1Ruk&amp;list=PLDmXPQGZmiCGEvCF-XztLdo1boZWkXSqK). Also butter under the skin. The most important thing is to make sure you don't over cook the turkey. So I use a thermometer that allows me to keep an eye on the temp without having to open the oven. Good luck with the turkey
What about something like this? I used something similar until I got a temperature controlled kettle. The only thing is the temperature alarm goes off when the temperature exceeds the temp you have set. What I did was hang the probe in the spout of my kettle, and set the alarm for about 5 degrees below the temp I wanted. Then when the alarm went off I'd just turn off the heat and it would end up right about where I wanted it. Might save you a bit of time since you're not waiting for it to boil then waiting again for it to cool. Almost all of these have some sort of countdown timer, no tea presets as they're mostly meant for meat, but should still do the job.
Here is the kit. I did add the $40 for the kettle in my list (it's actually $35). So it would be $105 plus shipping, and you will also get a bottling bucket and spigot, which your list did not include.
They have a deal today -- if you buy an Irish Red ingredients kit ($27) plus that kettle which you need anyway, they will give you a free Dark Star Burner (propane), which is a $50 value. Around Halloween, they have a deal to get a free kettle if you buy the equipment and ingredients kit. There are other deals at each of the hombrew stores over the whole year.
Midwest Supplies does not include the bottles, but it is silly to pay for glass when you can just buy beer and drink it to get the glass. They sell a thermometer, too, or you can go the Amazon route (if you are not Prime, you will need to buy some more stuff to I believe it is the best deal is starter kits.
Anyway, always buy when you can get deals, and do the math.
Good luck!
TL;DR - Go by weight for flour, there's a method to figuring out how much 1 cup of your flour weighs. Yeast temperature description is too subjective, again use exact numbers.
---------
Water temperature for yeast: between 95-115 degrees Fahrenheit (35-46 Celsius) depending on the kind of yeast. Usually dry yeast activated with water + sugar needs about 105-115F. See here for some details. I believe you fall in the 105-115F range. edit: I personally have had luck with the 105F temperature.
>
Your description of "being able to barely handle the temperature" is very subjective. Use a thermometer and always have a consistent temperature when making your breads!
Get a simple digital thermometer that goes up to the boiling point of water I use one of these types, they're cheap and they're good enough.
--------------
Flour: I hate being too strict myself but a consistent weight is the key (not volume). When you scoop flour you compress it into the cup you're scooping with, making each scoop very different from the rest. What I do is I carefully measure sifted flour for a particular brand and type of flour (different types weight differently) and I write it down on the package or on a reference sheet (with brand/type). Once I have the weight, I can look at recipes that use volume or weight (since most volume recipes mean sifted cups, not scooped cups) and all I need is reach the desired weight by looking at a scale:
Needed:
How to measure how much 4 cups of your favorite flour weigh:
Why 4 cups? because 4 is enough for a good estimate (margin of error is spread over 4 cups instead of just weighing a single cup) and you can then divide the result by 4 to get a single cup's weight!
The Lineup from left to right
Bag of flour - Large Bowl with a measuring cup in it - Scale with medium bowl on it
Your scale will tell you how much 4 cups of sifted flour (for that brand) weigh!
Write the 4 cups weight on a reference sheet along with the brand and type of flour (example: King Arthur Unbleached bread flour see here). I also write the weight/cup conversion.
Next time you make bread, go by weight and you can exactly replicate your success or amend your attempts by knowingly changing an exact amount.
EDIT: It's late and I completely forgot to mention that your video was really nice, a bit long and could use some editing but I enjoyed listening to you talking through the recipe! Good luck and happy baking!
Thanks. I'll end up ordering it off of amazon. Just not worth dealing with Walmart.
What are your thoughts on the slightly more expensive industrial model?
This one: http://www.amazon.com/Taylor-9842-Commercial-Waterproof-Thermometer/dp/B00009WE45/ref=pd_sim_k_1
http://www.amazon.com/Taylor-9842-Commercial-Waterproof-Thermometer/dp/B00009WE45/ref=pd_sbs_indust_8
Is that what you guys are using?
I use this waterproof digital thermometer for brewing and like it a lot. Can just throw it in a bucket of sanitizer on cold side of brewing
https://www.amazon.com/Taylor-Precision-Products-Commercial-Thermometer/dp/B00009WE45/ref=sr_1_2?ie=UTF8&amp;qid=1466091094&amp;sr=8-2&amp;keywords=waterproof+digital+thermometer
I have some gunpowder here that will easily stand up to two steepings, and the third is even pretty decent. I extend the steep by 30 seconds each time. Gunpowder tends to be better hotter, so I do 180 for 3:00, then 180 for 3:30 the second steep, then 180 for 4:00 the third steep. Some people also adjust their heat on resteeps. Other green teas should be steeped cooler, the packaging for this lung ching/longjing/dragonwell I got from Upton recommends 160 for 2 minutes, for example. I think it lasts a bit longer than the gunpowder since each steep is less intense.
This digital thermometer has been working pretty well for me, ~$10:
http://www.amazon.com/Taylor-9842-Commercial-Waterproof-Thermometer/dp/B00009WE45/ref=sr_1_3?ie=UTF8&amp;qid=1332092244&amp;sr=8-3
I dunno if it has changed at all, but some recent amazon reviews have claimed the quality has decreased lately, like in the past few years, but I bought mine about a year ago and it seems fine. One of the bad reviews I read suggested getting an $80 thermometer instead... is it really surprising that you get a better product for 8x the cost?
Like others have said, any recipe will have ingredients for two and can be followed pretty easily. If neither of you cook or grocery shop at all, I recommend some of the simplicities already mentioned. Maybe focus on the filet this time and save shrimp risotto or shrimp and grits for next time.
Go shopping together at a higher end market, grab a premade shrimp cocktail, 2 filet mignons, some potatoes to mash and some asparagus or other veggie to have along with it. Grab 2 bottles of wine (one for while you cook, one for the meal), a box of brownie mix and some ice cream.
This way you're not so stressed that you have 3 unfamiliar things to make and can focus on steak while enjoying each others company and not stressing about the other stuff.
Side note: I think knowing how to cook a good filet is invaluable. It is SO MUCH CHEAPER to make yourself, it will always impress people, and it can be pretty easy. I like to sous vide mine to 132 degrees then sear quickly on all sides. I have a $5 thermometer from amazon and a beer cooler as my sous vide set up.
Here are the links:
Aeropress
Grinder
Scale
Thermometer
EDIT: I bring this setup with me when I travel for work, along with a small screw top tupperware full of coffee beans.
Which kit did you use? Moving into my new house with a (hopeful) darkroom soon and eager to get developing. Thinking of the unicolor kit.
Is a thermometer like this good enough?
Just a cheap plastic kitchen thermometer.
No need for anything fancy.
I made this earring holder out of an old vinyl record. My ring size is a seven!
This would make my day because I am tired of being paranoid about meat temperatures.
Cook to temp, not to time. You'll need a thermometer. I use this one.
I currently use my 210mm (about 8") for produce and simple meat trimming, and I use a 180mm specifically for deboning whole chickens.
Like many have said, I suggest that you get him the 210.
Some things that I suggest:
Peeler
http://www.amazon.com/gp/aw/d/B001CRFX2A/ref=mp_s_a_1_2?qid=1465177075&amp;sr=8-2&amp;pi=SY200_QL40&amp;keywords=kuhn+rikon+peeler&amp;dpPl=1&amp;dpID=41wv%2BZkw4LL&amp;ref=plSrch
Paring knife
http://www.amazon.com/gp/aw/d/B005LRYE36/ref=mp_s_a_1_1?qid=1465177122&amp;sr=8-1&amp;pi=SX200_QL40&amp;keywords=paring+knife&amp;dpPl=1&amp;dpID=21KoD9tXR6L&amp;ref=plSrch
Thermometer
http://www.amazon.com/gp/aw/d/B00009WE45/ref=mp_s_a_1_2?qid=1465177218&amp;sr=1-2&amp;refinements=p_85%3A2470955011%2Cp_89%3ATaylor+Precision+Products&amp;pi=SY200_QL40&amp;keywords=taylor+precision+products&amp;dpPl=1&amp;dpID=41hdUUoToJL&amp;ref=plSrch
Microplane
http://www.amazon.com/gp/aw/d/B00004S7V8/ref=mp_s_a_1_1?qid=1465177314&amp;sr=8-1&amp;pi=SY200_QL40&amp;keywords=microplane&amp;dpPl=1&amp;dpID=312Sz19u%2BtL&amp;ref=plSrch
How instant is instant? I have one of these that I use for brewing but it's not what I would call instant. It gets to the temp typically in a few seconds. Is this sufficient you think? Also, I'm very familiar with the meat "doneness" scale, what temp's are bread done at?
Thanks!
How bad is take-away food really? I'm trying to gain mass and not much of a cook. I find the easiest way to get a lot of food in me is to get a large pizza or a large meal from McD's after a workout. Am I slowly killing myself?
Both of those are pretty high in carbohydrates, as is most take-out or freezer food. Start checking the nutrition information on items you buy. For instance, I've found a variety of chicken nuggets (Walmart brand, no less) that is very low in carbs for being breaded and very high in protein for being chicken product.
Also, there are nearly infinite things you can do to chicken breasts (baked, grilled, etc) that are tasty and delightful, and cooking chicken breasts is one of the easiest things to do in the kitchen. If you're worried about giving yourself food poisoning, get a digital thermometer (I found this Taylor one to be great, but don't leave it in the oven) and read up on "safe" meat temps.
You will do yourself a great service by learning a couple 'basic' food preparation techniques. That, and/or get a slow cooker - how does a week of pork tenderloin tacos with pineapple or mango salsa sound by just throwing some spices, canned tomatoes, and some water in a crock pot? You can pull it instead of slicing, it's that tender.
To 'pull' meats, pretend you're a vulture with forks for talons.
Awsome thanks. Any opinion on how this compares to the Taylor Precision.
Yeah, no problem. I also have this one but the thermoworks is significantly faster and has a longer stem which I found out makes things much easier.
I have had
http://www.amazon.com/Polder-Original-Cooking-All-In-One-Thermometer/dp/B0000CF5MT
for over a year now and it works great and also has a timer.
The Polder is a good quality tool, I've had this one for years.
http://www.amazon.com/Polder-Original-Cooking-All-In-One-Thermometer/dp/B0000CF5MT/
Do it oven first, then sear. That way there is no need to rest it afterwords as the oven evenly heats it and the moisture remains evenly distributed. That way your steak is the right doneness, but at the highest temperature so it's nice to eat. Get something like this so you can set an alarm for when it hits the temp you want it to be while it's in the oven. It seems that the consensus is 350f oven temp. If you're unsure about if your oven is getting the temp right, one of these will come in handy.
I have two of these: http://www.amazon.com/Polder-Original-Cooking-Timer-Thermometer/dp/B0000CF5MT/ref=sr_1_2?ie=UTF8&amp;qid=1422105644&amp;sr=8-2&amp;keywords=polder
Work perfectly and easy to operate. Oh, and they are magnetic so it's easy to just stick them to the side of something for storage.
This is kind of neat, but you can just get one of these for under $20, and it will beep at you when your ham is done. Bonus: this thing is designed to go in the oven so won't melt and poison you if the oven gets too hot.
The kind I used was a little white square with an LCD display, with a metal tip on a 3 foot metal cable. Cheap.
Like this, but you can find cheaper ones. The cable makes it easier to keep it in the pot, and handle: https://www.amazon.com/DIGITAL-IN-OVEN-THERM-TIMER/dp/B0000CF5MT
If you're going to make a habit of grilling and BBQ, it's good to have both an insta-read, and a "leave in" thermometer.
If you can't even get close enough to the meat to even take a temp with the insta-read, it's either an awfully short probe or you're grilling over very high heat. And it's not an exact science. Reward is correct when he says grills have hot-spots. Also the meat may not cook evenly given the fat content and distribution, any bone that may still be in it, or inconsistent thickness.
They are insanely cheap. $15 from Amazon. It can pay for itself in not ruining a single piece of meat. Bonus, they have alarms, so you can set it at the temp you want and cook undistracted.
good tip on the door, thank you. i'll keep an eye on it and start dreaming up fixes.
wrt the eel, im an hour from the DC fish market. nofear.
im looking at a slightly cheaper model of thermometer, that appears to do everything i need it to. reviews arent unpleasant, its on sale. the smoker is going to be, directonally, about 30 feet from my computer, so im not too worried about range on the wireless ohshitometer. is there specific places i should place the probes? top of the smoker? bottom? between the meat? IN the meat?
Sure, though that would seem to require leaving your computer outside next to the grill? I have one of these which means I can keep the receiver end inside, but you're right it requires OCR. I really need a custom receiver that connects via USB. I'm not much of a hardware person though, so I don't know how hard that would be to make, or if such a thing exists.
I have a few smokers (the low and slow kind) and I monitor the temps with a Weber Wireless Outdoor Cooking Thermometer. When it dies I am going to get one of these:
http://www.amazon.com/Maverick-Remote-Smoker-Thermometer-ET-73/dp/B0000DIU49
Two probes and a 100 foot range on the Maverick. All you need. You should be able to establish when to add smoking wood by the temps. After the meat reaches approx. 140F little smoke flavor is absorbed from what I have been able to read on the many BBQ forums. YMMV of course...
Remote telemetry of the temps is far more reliable indicator of how the smoker is behaving for me. Windy days, cold days all affect my smokers temp.
Have fun!
I ended up getting this and my buddy got this one which he's says is also good. But don't take my word for, see what else reddit likes.
I was thinking about getting the maverick because it comes highly recommended...but which one? this one or this one?
Actually, here's the one I have - ET-73!
One for the probe and one for the meat! Sorry about the confusion.
I use a dual probe thermometer.
This one actually. The grill probe is great at keeping a constant temp at the meat.
One caution: I would strongly suggest wrapping both wires in foil. I had an accident when a piece of applewood caught fire and the flames melted the meat-probe. Now I wrap both wires in a layer of heavy foil.
The receiver has a display which is great for being near the smoker, and the remote has a great range. The wires are about 3 feet long - which should be long enough to get it away from the heat somehow.
Your millage may vary, but I found the features (and price) of that unit right up my alley. Good luck with the smoke, sounds delicious.
I just bought this ThermoPro TP-04 for my fathers xmas present, it's not wireless and only has 1 probe though.
Maverick seemed to be one of the most recommended brands on /r/smoking and /r/bbq. I didn't need the wireless because my dad will sit out with the smoker and check on it a lot.
This Maverick ET-73 would have been my other choice because it has dual probes and falls within a reasonable price range (~$29-33ish atm).
I'm sorry to say that these are only recommendations and I have no experience with either of these. There were a lot of complaints about the probes failing on many of the thermometers that I looked at as well so make sure that you read some reviews!
What type of results are you getting?
The key to powder coating is the temp, more than anything IMO. Cheap table top ovens(and even older traditional ovens) aren't gonna be super accurate. Go buy a little thermometer to verify what the actual temp is. Once you see where 400° is, mark it on the oven dial.
I use my vibratory tumbler to coat the bullets. I've done the plastic container method, but this is just easier for me. I just throw a bunch in, add some powder and let it go while the oven preheats. Roughly 5 minutes or so.
Once the oven is heated, then place the coated bullets in. Make sure to knock off the extra powder before putting the bullets in the bin or whatever your are using to put in the oven. I generally let it go for 15 or 20 minutes.
Once cooled, they always have passed the smash test for me.
it depend on what type of meat ( is it something like a patty or breast or steak cut it be cooked differently than a whole or larger piece of meat). what type of dish you are going to make. then use a correct cooking method.
example, bbq is low heat and longer time, smoking is longest time most favor. on a pan high heat to mark and seal the juices finish in oven. if you want to cook on pan only you need to fine a good medium heat , so you can cook each side the same amount of time with over doing one of the sides 2 to 3 minutes a side.
know your finishing temps for each kind of protein, so then you can cook it to the way you like it
season correctly
cook with love
two good thermometers wouldn’t hurt. One that goes into an oven/your barbecue. And one to check the protein you’re cooking especially if you’re doing big pieces. here are two basic thermometer that will get the job done every time. you can pay more and get something fancy. just know how to calibrate your thermometer with a cup of ice water
for cooking
https://www.amazon.com/dp/B01IHHLB3W/ref=cm_sw_r_cp_awdb_t1_ylf3CbTTQ4ADM
keep inside of oven/bbq
https://www.amazon.com/dp/B0000DJUYR/ref=cm_sw_r_cp_awdb_t1_vnf3CbG3MPG2W
For the oven temp problem grab one of these oven thermometers. I recently grabbed that exact one and realized my oven "beeps" to indicate it is pre-heated about 50F-100F under selected temp. It eventually gets to temperature but now I never trust it's beep, only the thermometer, and give it ample time to get to the correct temp. It's revolutionized my baking as everything used to come out just wrong!
&#x200B;
As far as the seasoning goes, I'll just echo what others are saying and say cooking on it regularly (with a bit more oil at first) will make it perfect.
Brother, I bid you venture deep into the Amazon where exist perfect armaments to cook the Holy Bird.
A knife and deadly hook will be of aid.
Remember to reach 165 degrees of Fahrenheit at bare minimum to purge the agents of Broki from the flesh. His servant salmonella with it's punishing diarrhea and vomiting threatens to steal thy gains. Also, I think it is tastiest at 170°-180°.
375°F with a coating of regular olive oil followed by hearty spicing of oregano and rosemary is how I eat the Bird. Best cooked in a deep glass casserole dish where the chicken covers the whole bottom; it will soak in its own rich juices. 2.5-3lb (three large breasts) cooks in about 75 minutes.
> I've found that when I've used that procedure in the past, I've ended up with overcooked steak...
A digital probe thermometer is a godsend for this. I sear my steak for ~90-seconds per side in grapeseed oil, put a pat of Ghee onto the steak, and then toss the steak into my 250º oven for ~20-minutes with the probe thermometer set in it set to 145º.
Perfectly cooked, perfectly delicious steak.
Last year while I was driving I found myself thinking about things. Before I knew it I was wondering how would blind people know which side of the contact case to put their contacts into, like did it have a braille or what. Took me about 5 minutes to realize I was thinking about blind people wearing contacts. Then a few days later I was drying my hands on some paper towels and I thought...they really should make something that isn't disposable. I then chuckled to myself as I remembered about towels.
Luckily my brain is working again but I still catch moments where I wonder Why on earth did I do that?
This thermometer would be amazing to help me with the /r/52weeksofcooking challenges I've been doing this year!! I've needed one for awhile!
I started cooking mine based on temperature. Preheat oven, season, stick em in, set the temp alarm and walk away. The thermometer goes right in the oven in the chicken and my bird never turns out dry anymore. This is the one i have: http://www.amazon.com/Polder-Digital-In-Oven-Thermometer-Graphite/dp/B000P6FLOY/ref=sr_1_18?s=home-garden&amp;ie=UTF8&amp;qid=1372213088&amp;sr=1-18&amp;keywords=thermometer
Cook to 165--yum.
Buy a decent meat thermometer and dense cut of meat like a brisket, london broil, or pork loin. Salt the meat and put it in a pan. Stick in the meat thermometer and tightly cover the pan with foil. Cook on low heat until you just reach the medium rare temp for type of meat. Perfection.
I've read in one of Ed Rosenthal's books that baking is supposedly an effective way to kill the mold that's present on much cannabis. I actually recommend a higher temperature, though like 200^oF for 20 minutes or 220^o for 10-15 minutes, as this will kill the mold and promote decarboxylation. Use the thinnest surface possible, like very flat aluminum foil or a very clean and dry cookie sheet. Your product should be finely crumbled, like out of an herb grinder, and will eventually be pretty brown in color. Further, don't rely on your oven's thermostat. Get an inexpensive digital oven thermometer and standardize your oven a few times. Considering that you're getting within 30-50^oF of the vaporization point of everyone's favorite compound, you could accidentally burn off all the good stuff. Stock oven thermometers are notoriously inaccurate.
Lots of info in there!
Probe thermometer. Perfect roasts every time.
Yeah flat for sure then. You could always pull it out and then put it in the end as well just make sure you wear gloves.
You can also always buy something like this too (there are tons of different ones):
https://www.amazon.com/Polder-Digital-Oven-Thermometer-Resistant/dp/B000P6FLOY/ref=sr_1_3?keywords=meat+heat+probe&qid=1555355291&s=gateway&sr=8-3
I just bought this temperature probe and I love it. I can monitor my boil temp without getting up, set an alarm when the wort gets to a certain temperature, use the built-in timer for hop additions, and now I even have the probe inside my carboy, so I can get an accurate reading whenever I want.
Just curious, are those digital thermostats and would you recommend them?
I've been using this but it started getting a bit weird, recently. Looking to replace it.
Thermoworks is the winner every time but I’ve had this one for a few years and it’s been great:
CDN DTQ450X Digital ProAccurate Instant-Read Thermometer-NSF Certified https://www.amazon.com/dp/B0021AEAG2/ref=cm_sw_r_cp_tai_UekIAbQ76JBYQ
Great idea, just bought this:
http://www.amazon.com/Non-Contact-Thermometer-ETC-8380-Instant-read-Temperature/dp/B00837ZGRY/ref=cm_cr_pr_pb_t/177-6670342-6502060
If anything itll just be fun to play with.
If stuff is coming out burnt tasting it could be because the oil is getting too hot. Get yourself one of these -it's a life saver
That's good, You are on the right track, kudos to you for reading up and asking for advice :) Also, I might suggest getting a lazer thermometer, that way you can get readings from all over the tank, they are quite reasonably priced
https://www.amazon.com/Etekcity-Lasergrip-774-Non-contact-Thermometer/dp/B00837ZGRY/ref=sr_1_2?ie=UTF8&amp;qid=1494354713&amp;sr=8-2&amp;keywords=laser+thermometer+gun
With warmers you'll probably be fine (i.e. no cold tire crashes), but considering the temperature and your pace, the SC2's probably won't give you any benefit over Q3s.
You could get one of those little laser temperature readers and test your tire temp right off the track. If you can't break 100 F, put the Q3's back on.
My heat is currently shut off. I'm able to maintain a comfortable 68 by utilizing the heat from my neighbors to the sides and below me.
EDIT: some helpful advice
Pick up one of these and scan around any exterior facing areas of your home (from inside) to check for cold spots. Add insulation or caulking or tape up your windows.
Or pick up a thermal imaging camera - FLiR just released a new one that works on iPhone/ Android
Awesome. Those starter kits are a shame - you've done a good job keeping up with the lights though. Here's my recommendation and this is from learning from experienced bearded dragon keepers.
Finally - you must check out the links in the sidebar, starting with the "Comprehensive Care Guide" -- everything I've said in this message is in that comprehensive guide.
In 24 hours, the keg should be at room temperature. I also use an infrared thermometer gun to show temp instead of an actual thermometer inside the wort to help keep everything sanitary. My gun is similar to this one on Amazon
https://www.amazon.com/Etekcity-Lasergrip-774-Non-contact-Thermometer/dp/B00837ZGRY/ref=sr_1_3?keywords=temp+gun&qid=1570210888&sr=8-3
Ir gun
im assuming the cage is directly on the floor? i would recommend getting a laser thermometer (theyre actually pretty cheap on amazon) so you can see how cold the floor of the cage really is. If you can, buy or build something that will raise the cage off the floor, which will allow the warmer room air to circulate under the cage. If you can bump up the room temperature too, that would be best. Once a hedgie has attempted to hibernate, they are more likely to again in the future. 74 is only one degree higher than the minimum recommended temperature of 73 so a higher temp (75-78) would definitely be safer.
I'm putting together a kit to develop black and white film at home.
Can I use one of these infrared thermometer guns instead of a glass thermometer? I eventually want to develop color film as well.
http://www.amazon.com/dp/B00837ZGRY
For that OC maybe it is worth it. you can get a infrared temp for less than $20
https://www.amazon.com/dp/B00837ZGRY
Yes, I like to use a laser thermometer as they are usually very accurate and let me check all around the tank. I have this one https://www.amazon.com/dp/B00837ZGRY/ref=cm_sw_r_cp_apa_i_-aKiDbR2WT5H2
Some home depots rent them. I have one builtin to my phone and it comes in quite handy at times.
If not something like this will work. you just have to pan slowly across rather than being able to see everything at once.
https://www.amazon.com//dp/B00837ZGRY/
https://www.amazon.com/Etekcity-Lasergrip-774-Non-contact-Thermometer/dp/B00837ZGRY/ref=sr_1_3?ie=UTF8&amp;qid=1517805707&amp;sr=8-3&amp;keywords=laser+thermometer
I think I’m gonna try one of these
https://www.amazon.com/Etekcity-Lasergrip-774-Non-contact-Thermometer/dp/B00837ZGRY/ref=mp_s_a_1_3?ie=UTF8&amp;qid=1549656791&amp;sr=8-3&amp;pi=AC_SX236_SY340_QL65&amp;keywords=ir+thermometer+gun&amp;dpPl=1&amp;dpID=41blRzSrohL&amp;ref=plSrch
i prefer this one, it works amazing https://www.amazon.com/Etekcity-Lasergrip-774-Non-contact-Thermometer/dp/B00837ZGRY
> I might try and borrow and IR camera to see how hot the bottom of the stove is getting.
You can get one of these fairly inexpensive IR thermometer guns to check that out. They work surprisingly well and are handy to have around. https://www.amazon.com/Etekcity-Lasergrip-774-Non-contact-Thermometer/dp/B00837ZGRY
It looks wayyyyy too hot based on that picture. Get a temperature sensor gun thing and measure the actual temperature at the nozzle - I wonder if the temperature control is broken and it's actually heating up as much as possible. I guess you could also try doing like 150° or something else that should barely melt the plastic and see if that changes it.
Mhm! I use this one from Amazon. It's cheap and works great.
This is a bit of a drop in the bucket, but one thing I haven't seen yet is that even if an electronic is turned off, it's still pulling a small amount of electricity. What I've done with a few areas of my house is plug everything into a surge protector (this should be done anyways for expensive electronics) and unplug them completely when you're not going to use them for hours at a time. My PC setup is unplugged for about 18 hours of the day then.
Another option is to see if there are "peak" times your electric company charges more since everyone is using the electricity. Try and avoid doing laundry / dishes around these times.
Move to LED bulbs. They're roughly $2.00 / bulb at this point.
When I added insulation to my attic, my utility company reimbursed 75% of the cost of the material. I found out about this from a free energy audit along with other initiatives that they would reimburse.
You could also try spotting your own leaks with: https://www.amazon.com/Etekcity-Lasergrip-774-Non-contact-Thermometer/dp/B00837ZGRY/ref=sr_1_1?s=hi&amp;ie=UTF8&amp;qid=1487044338&amp;sr=1-1-spons&amp;keywords=laser+thermometer&amp;psc=1
Basically you remove the all of the insides of the smoker (heat shields and grates) and then set the pizza base directly over the fire box - top it with the stone and then the dome. Fire up your smoker and let your stone get up to ~800 degrees. I use a temp gun to get my actual stone temp ( Temp Gun Link ) but normally it's set smoker to 300 degrees for about 20 mins. Fresh pizzas cook in about 2 to 3 minutes at that temp. Good find on CL. Enjoy !!
Sure! If you're in a place where amazon is something you can use, I like this one.
https://www.amazon.com/Etekcity-Lasergrip-774-Non-contact-Thermometer/dp/B00837ZGRY/ref=sr_1_1_sspa?keywords=digital+gun+thermometer&amp;qid=1568486920&amp;sr=8-1-spons&amp;psc=1&amp;spLa=ZW5jcnlwdGVkUXVhbGlmaWVyPUEzTU1PUFFDUDNaM0w1JmVuY3J5cHRlZElkPUEwNDUzMjI3MUFTSlJLWk9YNEhTNyZlbmNyeXB0ZWRBZElkPUEwMDA0NTAwUVNTWkwyWUM1WkJQJndpZGdldE5hbWU9c3BfYXRmJmFjdGlvbj1jbGlja1JlZGlyZWN0JmRvTm90TG9nQ2xpY2s9dHJ1ZQ==
I use a 2L erlenmyer flask for 100g extractions. I use a 1L for the acid bath.
Some other tools you might consider:
To answer your question about frozen meats, my experience has been that pre-cooked frozen meat is of a lesser quality. It is usually chicken with a bunch of preservatives and water added to the meat. It may be more expensive too because of the extra process steps involved. It may be convienent, but I would recommend cooking your own meat in big batches and then refrigerating that for leftovers throughout the week. You can freeze too if you think you will want to save it longer than four or five days. Since you are busy, I would suggest baking roasts or using a crock pot. These you can cook throughout the day and don't need to be baby-sat so you can check on them once in awhile during homework breaks. Get a thermometer; here is the one I use. You can find charts for minimum cooking temps easily online.
If you are patient, there's stuff from China.
This infuser is $2. It looks like my FORLife one. I'm sure you have a mug, and they're cheap & decent (bone china & porcelain) in Ikea or a restaurant supply store. If your kettle is not temperature variable, grab a digital thermometer. I personally splurged on Thermoworks Chefalarm since it'll also ring if it's below a certain temperature and should last a lifetime. If you want to go cheap, this one is NSF certified and will be quick reading.
A scale is optional...this jewelry one is under $4.
Try a ripe puerh, since it can be brewed repeatedly.
Another thermo recommendation - I used one of these for several years before replacing it with a thermapen. It is not as fast, but it is accurate, and 1/15th of the cost.
Good idea. Also, investing in a cheap digital thermometer wouldn't hurt.
Well now you know to never use a glass thermometer again.
A lot of people on the brew forums like the cdn probe thermometer.
I got this one at target for $20 and it's my preferred one. Reads the same as the cdn but I can I leave the probe in the wort.
Anybody use this one? I was thinking about getting it.
http://www.amazon.com/CDN-DTQ450X-ProAccurate-Quick-Read-Thermometer/dp/B0021AEAG2/ref=sr_1_1?ie=UTF8&amp;qid=1311535951&amp;sr=8-1
https://www.amazon.com/CDN-DTQ450X-Thin-Tip-Thermometer/dp/B0021AEAG2
This thermometer has been serving me well for years now. Originally got it for homebrewing but mostly use it in the kitchen now. Most of the time you can tell how done a piece of meat is by touching once you've been cooking for some time, though sometimes you want to be sure.
Going to disagree with u/eman14
The two best regarded thermometers are those from thermoworks (thermapen, rt600c, and 301wa) , and this guy right here. http://www.amazon.com/CDN-DTQ450X-ProAccurate-Quick-Read-Thermometer/dp/B0021AEAG2
As the others said, yeah.
Couple things to keep in mind:
The upside is that cast iron is great at retaining heat, so popping a big cold steak in it won't cool it off too much. This really gives that good sear.
Aside from the meat thermometer that you don't like, there is no more accurate, predictable, and consistent method. Your grill is not always the same temp, especially if you are cooking outdoors. Timing doesn't produce reliable results.
http://www.amazon.com/CDN-DTQ450X-ProAccurate-Quick-Read-Thermometer/dp/B0021AEAG2/ref=sr_1_5?s=home-garden&amp;ie=UTF8&amp;qid=1450275891&amp;sr=1-5&amp;keywords=instant+read+thermometer
CDN DTQ450X. Quick read, cheap, and accurate (as far as I can tell).
It's some crappy one from target. I had one of these, it's what they use in restaurants and I liked it. I'll buy another when the crappy target one dies.
http://www.amazon.com/CDN-DTQ450X-ProAccurate-Quick-Read-Thermometer/dp/B0021AEAG2/ref=zg_bs_289809_4
In preparation for today I purchased this a while back, because Donosborn off YT recommended it.
Pro Accurate
I used a crappy walmart digital for my extract batches which worked well enough to get steeping temps around where they needed to be. I knew I needed to step it up because mash temps can be so critical, and a few degrees is all the difference. I calibrated it in 3/1 ice water and it works really well. Definitely worth the money. Now all I need is a refractometer.
the ones with the leave in probes aren't as accurate. its convenient for alerts but that should just be used as a rough estimate.
the best are the thermometers with the temperature sensor located in the tip and somewhat fast read time. this is what the pro's use:
http://www.thermoworks.com/products/thermapen/
but for casual use somethign like this works fine: http://www.amazon.com/CDN-DTQ450X-ProAccurate-Quick-Read-Thermometer/dp/B0021AEAG2/ref=sr_1_1?ie=UTF8&amp;qid=1375626328&amp;sr=8-1&amp;keywords=cooking+thermometer
For those on a budget this CDN Probe Thermometer is not a bad purchase. I picked one up for under 20 bucks and it reads in about 2 seconds. They are also available on eBay if you're into that.
Do yourself a favor and at least pick up something like this: http://www.amazon.com/CDN-DTQ450X-ProAccurate-Quick-Read-Thermometer/dp/B0021AEAG2/ref=sr_1_3?ie=UTF8&amp;qid=1373038404&amp;sr=8-3&amp;keywords=digital+thermometer
I use the API freshwater master test kit for all my testing needs and this thermometer.
For the hydroton "crib" I just meant that I dug a hole about 4" deep and filled it with just hydroton, and put 2/3rds of the plant in it. Assuming hydroton is the ideal medium for root development, I wanted the plant to have the highest ratio of it as they are starting out.
thermometer!
You know, I've had two probe thermometers, and the probes failed in both of them.
[This little guy] (http://www.amazon.com/CDN-DTQ450X-ProAccurate-Quick-Read-Thermometer/dp/B0021AEAG2/ref=sr_1_3?ie=UTF8&amp;qid=1346844666&amp;sr=8-3&amp;keywords=digital+thermometer) has been rock solid.
I've been using this (almost instant) cheap ($20) thermometer for years at home and have been extremely pleased. They take a beating, too, having been sent through the dishwasher by mistake, dropped on tile, left out on the grill for three days in the rain, you name it.
https://www.amazon.com/gp/product/B0021AEAG2/ref=oh_aui_search_detailpage?ie=UTF8&amp;psc=1
Meat temps still perfect, and I use it to gauge deep frying and candy making as well. Great bang for the buck.
This one from CDN is always recommended. I bought it and have had no issues so far.
Get this: http://www.amazon.com/gp/aw/d/B0021AEAG2/ref=mp_s_a_1_7?qid=1417542605&amp;amp;sr=8-7&amp;amp;pi=AC_SX110_SY165_QL70
I use it allll the time. Even the thermapen is tested against it and it comes in close. Check out the test.
@2:20 http://www.thermoworks.com/blog/2010/10/side-by-side-testing/
This is the digital one I use. I read a number of reviews that claimed that it is almost as fast and just as accurate as the Thermapen, so I gave it a try.
The floating ones are slow, but when you leave it in the mash and check it a few times throughout, the speed to read doesn't matter. The digital and floating match up within a degree.
After seaching on homebrewtalk, it seems that this may be a good alternative. Although it won't be as quick or as accurate.
http://www.amazon.com/gp/product/B0021AEAG2/ref=pd_lpo_k2_dp_sr_1?pf_rd_p=486539851&amp;pf_rd_s=lpo-top-stripe-1&amp;pf_rd_t=201&amp;pf_rd_i=B00064BCPM&amp;pf_rd_m=ATVPDKIKX0DER&amp;pf_rd_r=0HBK55048KG8CD3NJYES
I can't find how accurate it is which seems fishy. Even their site doesn't state it.
This digital one. It's highly-rated, I would trust it with my life.
I have a nice remote wifi enabled multi probe thermopro tp20 thermometer but I never use it. I generally use a handheld thermopen and this cheap oven thermometer. Once I learned I could spray it with oven cleaner and wipe the smoke residue away it became a habit. Here is the oven thermo. I got in the habit of keeping up with grate temps because the rest is easy and the outside therms can be 50-75f off real easy.
Rubbermaid Commercial Products Stainless Steel Instant Read Oven/Grill/Smoker Monitoring Thermometer https://www.amazon.com/dp/B005KDEIZ0/ref=cm_sw_r_other_apa_i_gPyIDbEQNSDG3
So incredibly worth it. My oven was way off.
https://www.amazon.com/Rubbermaid-Commercial-FGTHO550-Monitoring-Thermometer/dp/B005KDEIZ0/ref=sr_1_3?ie=UTF8&amp;qid=1550677722&amp;sr=8-3&amp;keywords=rubbermaid+thermometer
Get one of these suckers for $5 and check the oven.
https://smile.amazon.com/Rubbermaid-Commercial-FGTHO550-Monitoring-Thermometer/dp/B005KDEIZ0
get an oven thermometer so you can somewhat verify your temperatures. cant trust the dials.
The Twin Cities.
The timers are like these. http://www.amazon.com/Intermatic-TN311-Heavy-Grounded-Timer/dp/B005MMSTNG/ref=sr_1_2?ie=UTF8&amp;qid=1406033476&amp;sr=8-2&amp;keywords=timers
I don't know if they are available in AUS, but you could get an Access Point like the Ubiquity found here.
Power is sent through the network cable by an injector. Just use a light timer like this.
http://www.amazon.com/Intermatic-TN311-Heavy-Grounded-Timer/dp/B005MMSTNG/ref=pd_cp_hi_3/191-2033056-5552934
Get one of these. Set your pot to low then set the timer to turn on 6-7 hours before you get home.
You can also get timers to plug into your power source so it only comes on every other hour or however often you need it to (depending on how cold it is).
Or you can time it to pop on an hour before work I think if you have fancy ones. Make sure they can work in extreme cold.
My brother uses these non-digital ones and they work for him:
http://www.amazon.com/Intermatic-TN311-Heavy-Grounded-Timer/dp/B005MMSTNG/ref=sr_1_1?ie=UTF8&amp;qid=1409449629&amp;sr=8-1&amp;keywords=electric+timers
Edit: Also, buy the blue extension cords. They are the ones for cold weather.
Any basic Christmas light timer will do. You ought to be able to get them for $10, let alone ten pounds. This is the one I use:
https://www.amazon.com/Intermatic-TN311-Heavy-Grounded-Timer/dp/B005MMSTNG/ref=sr_1_5?s=hi&amp;ie=UTF8&amp;qid=1473883428&amp;sr=1-5&amp;keywords=light+timer
Worked great for years. Do pay extra to get a grounded three-prong version, not a cheap two-prong version. It's not worth the risk in your own home to not spend the extra couple bucks. I'm not sure that they even sell ungrounded versions in Britain, but just in case.
They're pretty cheap. Alternatively, you can buy one of these and use it with any coffee maker that requires electricity.
I've used this [model] (https://www.amazon.com/Intermatic-TN311-Heavy-Grounded-Timer/dp/B005MMSTNG/ref=sr_1_9?ie=UTF8&amp;qid=1496850877&amp;sr=8-9&amp;keywords=light+timer) for seven years, no problem. If you have multiple reptiles you can plug in a power strip and voilà!
The link you provided was broken for me. But I think you were trying to link to this timer.
I agree this is probably the best answer to OPs question even if it is not as sexy as a "smart device"
If you want different behavior on the weekends, you could always spend just a little more and get one like this with 7 day programmability.
For anyone having issues with charter, one of the easiest fixes is to just reboot your router and modem. (I know, I know, you've heard it before)
Buuuuut, I bought a wall timer, similar to one of these bad boys: https://www.amazon.com/Intermatic-TN311-Indoor-Decorations-Grounded/dp/B005MMSTNG/ref=sr_1_5?ie=UTF8&amp;qid=1536945255&amp;sr=8-5&amp;keywords=timers+for+electrical+outlets&amp;dpID=51mbESwQNrL&amp;preST=_SY300_QL70_&amp;dpSrc=srch
I have it set to kill power for the small increment (usually 10-15 min) at about 4:00 AM, i.e. when I should be asleep on any given day. I barely have connection issues anymore. It's a bit extreme, but for the 8-15 dollars to never worry about it, it's been a great use of my cash.
Here are some things that may or may not help you grow Wysteria:
Other than that, I don't do anything particularly special. I don't aerate or CO^2 inject. I used Excel once for algae, and it totally melted most of my plants, so I don't recommend it to anyone.
I should note that my tank is a 29 gal.
They're not that expensive. I use this one and it's only like $6. Mine looses time after a bit - I think it speeds up around 5 minutes a month but it's still working good and I've had it running 24/7 since last May.
Grant it, I don't use it for the phones - I have it set to a light for my leopard gecko. There's this more expensive one that you can set multiple times a day. I have one that looks like it but is much older but I can't seem to find it.
Then setup a timer like this https://www.amazon.com/Intermatic-TN311-Heavy-Grounded-Timer/dp/B005MMSTNG to do so at off hours just put the off and on right next to each other your router goes down for 1 minute and come back up.
Your other option is buy your own modem and router to stop using comcast's crappy equipment. That method also saves you $10 a month.
I'm a pretty heavy sleeper, snoozing through fire alarms, tornadoes, etc. I have finally found something that wakes me up.
I use one of those indoor appliance timers (something like this) on a bedside lamp. I have it timed so that a few minutes after my alarm clock starts going off, my lamp turns on. This woke me up at 5am yesterday to bike 100 miles!
After I've successfully woken up early every day for a week or two, I start getting tired and going to bed at a normal time each night, which in turn makes waking up easier.
KX? Also, sometimes you just have to try another OS (stick with same vintage/arch) to get other language options. For example: for 08R2, try 7x64 drivers when searching the support site.
Could also go low tech: http://www.amazon.com/gp/aw/d/B005MMSTNG?cache=13a91fec0b33c55a5393331bf14af847&amp;pi=AC_SX110_SY165_QL70&amp;qid=1408483971&amp;sr=8-10#ref=mp_s_a_1_10
I think it's low 60s? I used to run it for 30 min x 3 per day. I haven't used it in a month, I moved to a different model. I'm completely comfortable with that. I had ~15 Bovedas in there though.
A huge bag of KL in the back helped absorb excess condensation.
$10 shipped. http://www.amazon.com/gp/product/B005MMSTNG/ref=oh_details_o04_s00_i00?ie=UTF8&amp;psc=1
I've had two of these: http://www.amazon.com/gp/aw/d/B005MMSTNG/ref=pd_aw_sim_60_2?ie=UTF8&amp;dpID=51mbESwQNrL&amp;dpSrc=sims&amp;preST=_AC_UL130_SR130%2C130_&amp;refRID=1FJNNQ1T800W3VMKPD84
Had them for two grows and no problem at all, really nice because it's all mechanical so not much to go wrong.
Here is the mobile version of your link
For a walstad like I described, I originally just used a small ikea desk lamp. It was this one actually.
You can also buy a timer for the light, so you won't ever need to worry about missing a day. This is my favorite timer so far. They have cheaper ones that work great too.
You should never need to feed the walstad bowl I described. At most, you'd have to add a glass of water every few days. You'll never need to do a vacuuming session on it. Just topping off should be fine. I've got my walstad bowl I made forever ago, and it still looks awesome. I've borrowed its light for weeks at a time, so it sat in the dark, and it's fine. I top it off every few weeks when I realize its getting REALLY low.
Super low maintenance. Looks beautiful. Just buy a large glass bowl (a few gallons), miracle grow organic potting soil, gravel, the plants you choose, and a piece of driftwood to get started. If you want to add a lamp on a timer, it's an extra ~$30 probably. You'll need a small bottle of dechlorinator too, but you'll need like a drop of it per large glass of water for the most part. If you stay on top of just adding a half cup or so every day (assuming its a hot day), then you won't even need to bother with dechlorinator after the initial fill.
old reliable:
https://www.amazon.com/d/Kitchen-Timer/Intermatic-TN311-Indoor-Decorations-Grounded
Two things: Sleep Cycle app on my phone, and a timer that I plug my lamp into - I also point the arms/bulbs at my bed.
I set the app for a 15 min wake period, so I'm up anywhere between 5:45 and 6 am. When I attempt to snooze it in a haze, the lamp serves as a backup and it tends to snap me out of the "must go back to sleep" mode long enough to get with it & stand up before I have a chance to convince myself otherwise.
I work 3-midnight and using the above helped me reset my sleep schedule to going to bed right after work and waking up at 6 am to run (before, 6 am was when I usually went to bed).
Buy an inexpensive flourescent fixture - Something along the lines of this and mount it inside the tank, under the screen, using 3M Command Hooks. That'll be the fixture for your UV bulb. You want it under the screen because A) distance affects UV strength and B) the screen will block a lot of UV.
You also need a basking bulb and fixture. Get a fixture like this with a ceramic socket. You want the ceramic as basking lights get hot and plastic sockets will fail. You'll want a basking light to go in there, as well.
Depending on how warm your house stays at night, you may need a second fixture like the above with a ceramic heat emitter in it. During the winter, we have to use a CHE to keep Vermillion's tank warm enough, but we don't need it during the summer.
I would suggest a timer. That way, your new buddy has a regular daylight schedule. Put the UV and basking light on the same timer.
The basking light should be placed over something that allows your beardie to get moderately close to the bulb for warmth. A temp gun is handy for checking the temperature in the basking spot to make sure it's warm enough.
You mean something like this?
Inkbird thermostat, I figured it would be good enough to use temporarily. I have my other snake on a Herpstat 2 and I intend to use it for the BP too, once she's done with quarantine.
I use this temp gun to check the temps under the hide, at least once a day.
Usually on the back of the bulb/lamp boxes there will be a little graphic of distance vs heat, so for the basking bulb, find a structure that they can climb onto that is at the height, usually in the 100 to 110 region. For the UVB, i would make sure that a good portion of the tank gets good lighting, especially the basking spot as thats where they spend alot of their lazy boi hours. I used a cheap laser thermometer to check my temps for the first week or so and he seems to be doing ok. Good luck!
Thermometer: Etekcity Lasergrip 774 Non-contact Digital Laser Infrared Thermometer Temperature Gun -58℉~ 716℉ (-50℃ ~ 380℃), Yellow and Black https://www.amazon.com/dp/B00837ZGRY/ref=cm_sw_r_cp_apa_i_qcGjDb6TY1ZVQ
Of course, take good care of husbandry, once you do you’ll feel more at peace lol. Take it from me, I was in a panic because my thermostat was coming late and it was getting too hot below the substrate. Feels good now to have a thermostat handling things for me.
Here’s the links to what I have, good luck:
www.amazon.com/dp/B00837ZGRY/ref=cm_sw_r_cp_api_i_WxkzDb9TYPQ3Z
www.amazon.com/dp/B000NZZG3S/ref=cm_sw_r_cp_api_i_lxkzDb47R94N0
I just point a digital thermometer at my res. https://www.amazon.com/Etekcity-Lasergrip-774-Non-contact-Thermometer/dp/B00837ZGRY/ref=sr_1_5?crid=29HPYC6KPBAAW&amp;keywords=digital+thermometer&amp;qid=1566596447&amp;s=gateway&amp;sprefix=digital+therm%2Caps%2C185&amp;sr=8-5
If you don't want to rent the FLIR, yes, just buy one of these. It'll get the job done. Honestly though, so will your bare hand. If it's making that big of difference, it'll be obvious.
Funny meeting you here! I do occasionally wander outside of /r/excel . I have used this infrared thermometer to check for cold spots in my house with great success. Doors and windows are the obvious leak areas, but I have noticed while working on some of the plumbing in my house that areas between walls where there are plumbing fixtures tend to have no insulation , as to allow room to work on the pipes. I also had drafts coming in from the base of my house where I have plumbing and gas lines running. I shoved insulation and or foam anywhere where I noticed meaningfully temp differences and resolved most of my issues. Messy work, though. Congrats on the second, kids are a blast.