Best tile epoxy adhesives according to redditors
We found 119 Reddit comments discussing the best tile epoxy adhesives. We ranked the 35 resulting products by number of redditors who mentioned them. Here are the top 20.
We found 119 Reddit comments discussing the best tile epoxy adhesives. We ranked the 35 resulting products by number of redditors who mentioned them. Here are the top 20.

![CEMEDINE 30 minutes epoxy adhesive high super 30 80g set CA-193 [HTRC9] (japan import)](https://m.media-amazon.com/images/I/51IzkFTDDZL.jpg)


As long as this doesn't go in the oven (or get hotter than 180ºF / 80ºC) of course it can be glued, and with fine, strong (but still slightly visible) results.
u/GondorUr is probably right, it would be easiest to return it and that would have the best results, but...
u/pobroin has the right attitude, considering their appreciation of kintsugi, and so do you, I presume, since you are asking about repairing, rather than replacing.
u/BcookieOmonsterB is right, that cyanoacrylate (Super Glue, Krazy Glue, etc.) works well with ceramics, but cyanoacrylate works best on nonporous surfaces, and when the surfaces fit really well with the least possible gap. On ceramics, especially if not fired to the point of being vitreous, there's often a few grains that will get dislodged in the glue, while fitting the pieces back together, that will stand in the way of ever getting a truly close fit. So...
As this job is a nice clean break, and a simple two pieces. It's the perfect job for a two-part epoxy, which is plenty strong and will fill any small gaps with virtually no loss of strength, unlike cyanoactrylate.
Your best option to repair (rather than replace) is a two-part clear epoxy. Since you're asking about this, I assume you haven't worked with glues much, and are unfamiliar with the process, and may be a bit slower than someone more practiced. Different epoxies have different working or handling times, and since you don't want to rush it, look for longer than 5-minute epoxy (this one gives you a full 30 minutes, but that's a lot longer than you should need for this simple job - look for a 10-minute epoxy).
Edit: Yay! Silver! Thanks for the alms, secret Samaritan.
Edit 2: Clarification added to taping procedure
https://www.amazon.com/gp/aw/d/B079CR71SL?psc=1&ref=ppx_pop_mob_b_pd_title
I used 4 gallons of this stuff. Total $260
Yeah, this is recommended on another 3d printing thread I'm probably going to buy some and try it out myself :)
Amazon links, you are looking for FDA safe epoxies.
[link1] (https://www.amazon.com/CLEAR-GRADE-Epoxy-Resin-System/dp/B01J16MYSE/ref=sr_1_6?ie=UTF8&qid=1474585448&sr=8-6&keywords=FDA+epoxy)
[link2] (https://www.amazon.com/Alumilite-amazing-clear-cast-resin/dp/B013H6OTPK/ref=sr_1_4?ie=UTF8&qid=1474585448&sr=8-4&keywords=FDA+epoxy)
edit: I wonder if copper infused filament would be food safe? It is naturally antibacterial.
If it's a metal break, you might be able to fix it with some JB Weld.
???
It’s pretty common. I’ve made belt buckles out of it.
Simple amazon search:
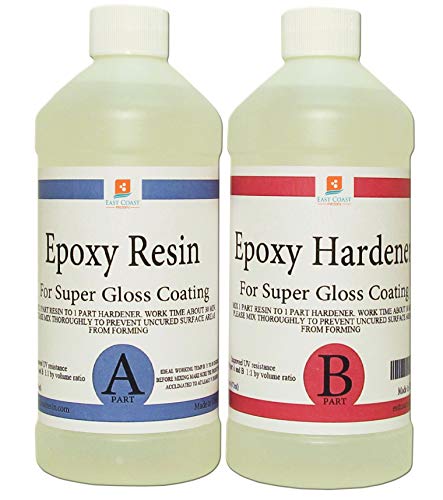
EPOXY RESIN CRYSTAL CLEAR 16 oz Kit. FOR SUPER GLOSS COATING AND TABLETOPS https://www.amazon.com/dp/B01LWT156B/ref=cm_sw_r_cp_api_DguHzbHFXJ16E
Don't actually do that. Terrible idea. Electrical tape is a quick rigging measure. In a few years, it'll get weird and sticky as the adhesive slowly leaks out or something. The proper way to do it would be with potting compound.
http://www.amazon.com/3M-Scotch-Weld-Epoxy-Potting-Compound/dp/B000X5G6O6/ref=sr_1_1?ie=UTF8&qid=1453615446&sr=8-1&keywords=potting+compound
EPOXY RESIN CRYSTAL CLEAR 16 oz Kit. FOR SUPER GLOSS COATING AND TABLETOPS https://www.amazon.com/dp/B01LWT156B/ref=cm_sw_r_cp_api_mF4MBb28WHGH6
Victorinox SwissTool. Like a leatherman only much sturdier.
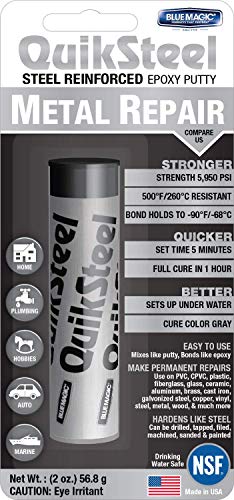
QuickSteel epoxy. You knead it. sets in second. I've repaired broken engine cases with it on the side of the road. https://www.amazon.com/Blue-Magic-16002TRI-QuikSteel-Reinforced/dp/B000FW7UOM/ref=sr_1_4
They do. https://www.amazon.com/CLEAR-GRADE-Epoxy-Resin-System/dp/B01J16MYSE
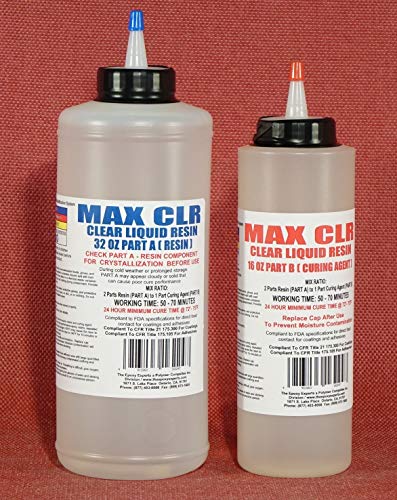
MAX CLEAR GRADE Epoxy Resin System - 48oz. Kit - Food Safe, FDA Compliant Coating, Crystal Clear, Stain Resistant, Countertop and Tabletop Coatings, Wood Coatings, Fiberglassing Resin https://www.amazon.com/dp/B01J16MYSE/ref=cm_sw_r_cp_api_i_lgB6CbQBNK2DX
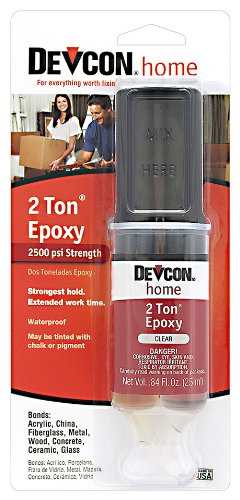
Epoxy. I like Devcon 2 Ton. Bonds anything to anything. Just make sure you don't use too much; a little really goes a long way.
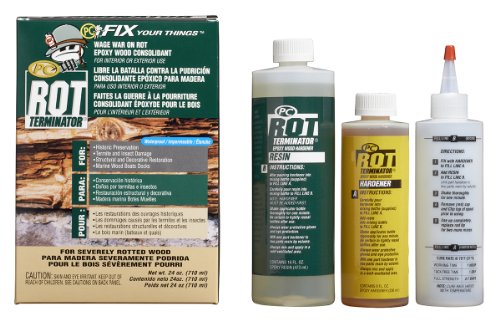
Not *exactly* what you're looking for, but I've had a similar situation with dry rot. There are wood reinforcing products that penetrate the wood (it acts like a wick) and restore integrity. Here's a starting point for your research: https://www.amazon.com/gp/product/B008DYN1B0 Here's something similar: https://www.amazon.com/System-Three-Resins-646697001380-Window/dp/B0015YLMUW
The pegs are plastic on those right? If gluing them doesn't work (since the peg will lack lateral stability at the break) you could drill out the broken pegs and use epoxy to put in replacement loom pegs. They might be a different color and shape, but at least you could still use the loom and since the base of the peg would be set in epoxy and surrounded by the loom body, it would have much greater strength against shearing forces.
Alternatively, you could use drywall or self tapping metal screws to just screw into the spot where the broken pegs are. Pre-drill the hole with a bit that is just a tiny bit smaller than the screw to prevent splitting the loom plastic.
I just googled food saw epoxy and this one here is supposed to be FDA compliant.
Why did the chemical engineer say he wouldn’t want to eat out of anything with epoxy?
Depends on your 'philosophy' in knife making. Personally I feel that the epoxy shouldn't be used to keep everything together, it is more just an added thing to keep things in place. If you are relying on glue alone (or mostly) to hold your knife together you are in a pretty rough place with that knife. You should make sure your fit of the tang into the handle is solid (not lots of wiggle room) this will go a long way. Next a single pin through the handle and the tang gets you to 90-95%. Adding the epoxy just makes up for any slack and keeps things in place. Personally I just use the JB Weld brand rated for bonding metal. I see a lot of people using this epoxy -> https://www.amazon.com/System-Epoxy-Resin-Hardener-Metering/dp/B07JHC28CV?keywords=west+system&qid=1540668531&s=Industrial+%26+Scientific&sr=1-14&ref=sr_1_14 but I don't make enough knives for it to be economically practical.
https://www.amazon.com/CLEAR-GRADE-Epoxy-Resin-System/dp/B01J16MYSE
Not just any epoxy. Should be good grade. And if you’re using the glasses from alcohol or acidic drinks, I’d be careful not to use them too regularly, as (I’m not 100% certain) it may degrade the epoxy a bit, and it’s probably not a great idea to ingest those particles.
Devcon 2-Ton
https://www.amazon.com/Devcon-31345-Ton-Clear-Epoxy/dp/B0006O8QQ0
Seriously..
Spiffy! Have you considered painting on an epoxy to seal it and improve structural integrity/longevity?
I bought this to coat 3d prints for watertightness and improved finish: "EPOXY RESIN CRYSTAL CLEAR 16 oz Kit. FOR SUPER GLOSS COATING AND TABLETOPS" https://www.amazon.com/dp/B01LWT156B and it seems like it would be ideal here.
This, only with epoxy instead of super glue.
here it is. You should be able to get it at any hardware store. It will work fine for what you want to do. I'd recommend you get the kwik set version.
I just tried it myself for the first time and was quite proud of the results...
Imgur
I used 30-minute epoxy to give me plenty of working time and applied just a tiny bit at a time to give it a chance to spread over the entire area I wanted it to cover. Use a toothpick to both apply and remove any excess epoxy.
Here is the tutorial I watched before I tried it myself.
You could get some 2-ton epoxy and carefully apply it around the hinges with a small disposable brush (like the ones that come with kid's watercolor paint sets). This stuff cures to be hard as a rock, clear, it adheres nicely to metal, and should provide the support you need. Don't get 5 minute epoxy because that isn't as strong and turns yellow.
Just be sure to carefully measure out equal parts resin and hardener and THOROUGHLY mix them. I mean mix them for like a full 2 minutes. Otherwise the epoxy may not cure properly and might come out tacky.
The epoxy starts to set up in about 30 minutes after you have mixed it, so you will have enough time to apply it to the hinges. After you apply it however, you will want to keep turning the glasses over in your hands otherwise gravity will cause the epoxy to sag. 2-ton epoxy is frequently used as a protective clear coat on custom fishing lures, and lure builders like myself make "turners" like this to prevent sagging. Obviously you're not going to want to build one but you can accomplish the same thing by slowly rotating the glasses around by hand for a minimum of 30 minutes, an hour would be better. After that is done just let it cure however long it says on the package.
Do not use super glue. This will look like garbage, especially if this a plastic or acrylic surface. You can try applying drops of clear epoxy with a fine point as water droplets OVER a matte spray. If its over the spray then it should come clear again (All of the little cavities in the matte spray will be filled in assuming you do this in warmer temps).
Link for clear resin epoxy:
https://www.amazon.com/EPOXY-RESIN-CRYSTAL-COATING-TABLETOPS/dp/B01LWT156B/ref=sr_1_3?ie=UTF8&qid=1510181305&sr=8-3&keywords=Clear+epoxy
The inexpensive Whippeddog Handle at $6.00 and The Golden Nib Standard Silvertip Badger Knot at 20.95 or any of their other knots would be a good choice. You can glue the knot into the handle with Waterproof Epoxy - Setting a Brush Knot. I have several brushes with TGN Knots, they are great, soft tips and good backbone. A 24mm Silvertip Badger brush for $26.95
You can get Cemedine epoxy on Amazon, but there are lots of 30 minute epoxies out there.
PETG is actually food safe, but the lamination lines will trap food that will spoil.
This epoxy resin is food safe, as are several others
https://www.amazon.com/MAX-CLEAR-GRADE-Epoxy-System/dp/B01J16MYSE/ref=mp_s_a_1_1_sspa?keywords=food+safe+resin&qid=1567106734&s=gateway&sprefix=food+safe+resin&sr=8-1-spons&psc=1&spLa=ZW5jcnlwdGVkUXVhbGlmaWVyPUFPNEk5MjY4MERTTEsmZW5jcnlwdGVkSWQ9QTA5OTA1MjIySTQ3WEpURE5HREREJmVuY3J5cHRlZEFkSWQ9QTAzODQ4NDhLRUM1RDJUSldPSjYmd2lkZ2V0TmFtZT1zcF9waG9uZV9zZWFyY2hfYXRmJmFjdGlvbj1jbGlja1JlZGlyZWN0JmRvTm90TG9nQ2xpY2s9dHJ1ZQ==
EDIT: My first knife BUILD
This was an awesome experience! The most important thing I learned was to make sure to tape far enough down the blade to prevent the epoxy from getting on the blade. :/
Blank: https://www.amazon.com/Condor-Knife-Bushlore-Blade-Silver/dp/B00WTH01K6/ref=sr_1_1?ie=UTF8&qid=1465848087&sr=8-1&keywords=condor+bushlore+blank
Scales: http://www.rockler.com/bolivian-rosewood-by-the-piece-1-4-thickness?utm_source=google&utm_medium=cpc&utm_term=&utm_content=pla&utm_campaign=PL&sid=V9146&gclid=CN7e6_m3yM0CFUFehgodNFUMkA
Epoxy: https://www.amazon.com/gp/product/B0006O8QQ0/ref=oh_aui_detailpage_o00_s00?ie=UTF8&psc=1
Pins: https://www.amazon.com/Unpolished-Finish-Extruded-Standard-Tolerance/dp/B00CNLVD1E
Finish: Natural Danish Oil
It seems like you'd need a pretty low viscosity product that could be poured down into the voids. I think most of the rotten wood repair products I've seen are much thicker, more putty-like in consistency.
Although a lower viscosity product might just seep and run through the cracks and out the sides unless you contained it somehow . . . maybe a couple of tightly wrapped layers of that stretch-wrap used by movers/packers?
This seems like it might do the trick?
https://www.amazon.com/PC-Products-Terminator-Two-Part-Consolidant/dp/B008DYN1B0/ref=pd_sim_328_4?ie=UTF8&dpID=51tU9ZITdlL&dpSrc=sims&preST=_AC_UL160_SR160%2C160_&refRID=REYBDD3CVFB3X4ER9ZRF
That kind of plastic can be screwed and held together with 2" drywall screws. And it will hold. Pre drilling is an option, but only drill with a very skinny bit. You don't have to pre drill that shit, unless you decide upon fatter screws than drywall. In fact you can practice screwing through the plastic on another area of the chair. And because it may be impossible for the plastic to be brought together for the repair without removing the base, which you must do, (because thinking that you can rely on the screws to bring the plastic together is a bad idea) you probably need to separate the chair and base. Separate the base by removing and sliding the top clip off, and the washer pictured, and the black metal tube will then slide off. This will allow you to hold only the plastic base for the repair. You need to close the gap of the torn plastic before and while you put the screws in. A small clamp, or a pair of vise grips. Or pull together 2 ends of the star where the wheels are, and tape or string them together. Then with a drill, in an x pattern, put 4 screws into it, 2 from each side, at 3/4 of an inch from the top, and then 3/4" further down. After your 4 screws are in place, remove your clamp device, and mix this putty and force it into the entire cavity and down over the screws, for additional solidity. Reinstall the chair to the base because it's ready to be used. The putty will begin doing its job soon enough. You can also put a 1 inch drywall screw into the other smaller crack. From the thinner piece into the heavier, or right to left.
https://www.amazon.com/Loctite-431348-Multi-Purpose-Repair/dp/B000BOB8P6/ref=sr_1_sc_1?ie=UTF8&qid=1474483504&sr=8-1-spell&keywords=loc+tite+putty+epoxy+stick
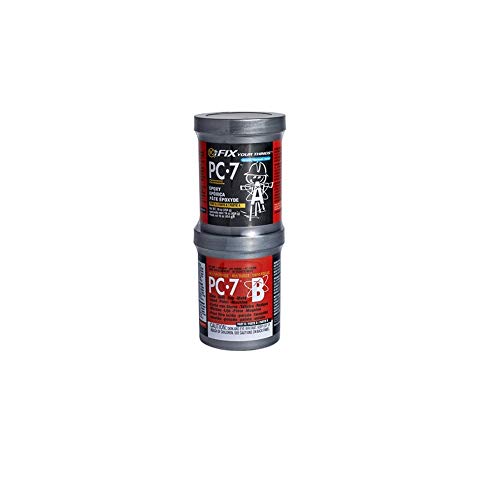
PC-7 and PC-11 are amazing epoxies. I always keep some handy in case I need something to stuck to something else. Forever.
http://www.amazon.com/PC-Products-Two-Part-Multipurpose-Adhesive/dp/B000BOHJJ0
http://www.amazon.com/gp/product/B008DZJJGU/ref=pd_lpo_sbs_dp_ss_1?pf_rd_p=1944579842&pf_rd_s=lpo-top-stripe-1&pf_rd_t=201&pf_rd_i=B000BOHJJ0&pf_rd_m=ATVPDKIKX0DER&pf_rd_r=1KRJW33VM2QC1GVP85R7
JB Weld works great, once it dries it is very strong. It has little to no odor.
https://www.amazon.com/J-B-Weld-8265S-Original-Reinforced/dp/B01FWGF9L6/ref=sr_1_11?hvadid=241629233883&hvdev=t&hvlocphy=9024550&hvnetw=g&hvpos=1t1&hvqmt=e&hvrand=4321946538073873986&hvtargid=kwd-581086181&keywords=jb+weld&qid=1550378163&s=gateway&sr=8-11&tag=googhydr-20
The only drawback is it is grey when mixed and it is hard to make it not ooze when you push the parts together. So it can be messy.
They have a clear version but haven’t tried it myself, been meaning to order some and try it:
https://www.amazon.com/J-B-Weld-50112-Clear-0-85/dp/B009EU5ZM0/ref=sr_1_10?hvadid=241629233883&hvdev=t&hvlocphy=9024550&hvnetw=g&hvpos=1t1&hvqmt=e&hvrand=4321946538073873986&hvtargid=kwd-581086181&keywords=jb+weld&qid=1550378453&s=gateway&sr=8-10&tag=googhydr-20
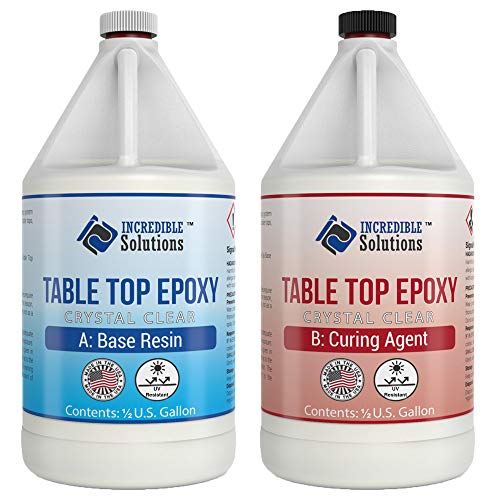
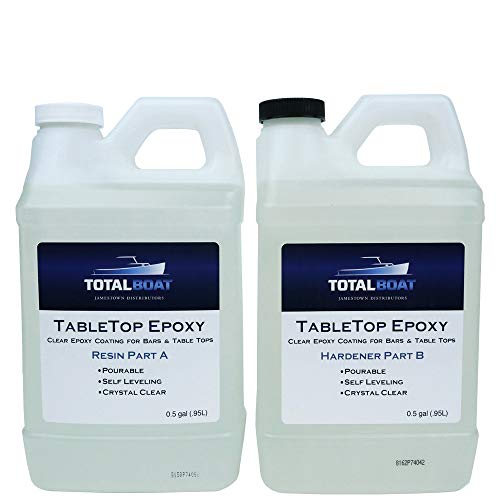
I got this stuff off Amazon. This tabe, with the ~4"x20" trough took juuust under a gallon to fill. This stuff is good, git hotter than others I've used, but it cured super fast
https://www.amazon.com/TotalBoat-Gallon-Crystal-Coating-Countertops/dp/B00S9QJIY6/ref=sr_1_9?ie=UTF8&qid=1540298386&sr=8-9&keywords=table+top+resin
As everyone (including OP) has pointed out, this is not the best choice. According to the official site (http://www.loctiteproducts.com/p/sg_glass/overview/Loctite-Glass-Glue.htm) it is not recommended for use above 176°F.
If you absolutely need to make a repair/weld, I would suggest using QuikSteel. It's rated to be safe up to 500°F. I would avoid using it within a few inches of the bowl.
http://bluemagicusa.com/index.php/blue_magic/products/164/
http://www.amazon.com/16002TRI-QuikSteel-Reinforced-Repair-Blister/dp/B000FW7UOM/ref=sr_1_1?ie=UTF8&qid=1413473327&sr=8-1&keywords=quiksteel
I used this product. Looks like a million dollars, and is heat resistant, as well:
https://www.amazon.com/Countertop-Epoxy-Resistant-Resin-Gallon/dp/B00BISWFL0
I'll take a look. I toyed with the idea of selling cookie cutters on Etsy earlier this year, but got super depressed midway during the design phase and never made it to sealing. I got close to a finished model for a few of my designs, but found the gaps around the edges discouraging.
Something like this should work, but you can probably find a cheaper version at Michaels or somewhere.
I second the PETG idea, though. PETG is usually food-safe (we've got a PETG neti pot we bought at the pharmacy, and that goes in your nose), and it holds up to higher temperatures better than PLA so you could totally throw it in the dishwasher.
The other thing you want to be careful of is the brass nozzles might sometimes leach bad chemicals into your cutter. You can get stainless steel nozzles, but they're a bit pricier? They'd be a lot safer, though if you're extremely worried you might want to do the old "into a pot of boiling water" trick to sanitize them.
Epoxy. I had some extra PC-7 sitting around, this stuff bonds anything and everything.
Edit: looks like this doesn’t bond well to polyethylene so ymmv. Worked for me
Edit 2: scratch that. A bit of extra force and the adhesive popped off. Threw on a couple wood screws and hoping that’ll be the end of it.
I pulled a vacuum on it before pour and was sorry I did. I find that a lot of the bar top resins have much better air release. I’m going to try this one out. This weekend.
https://www.amazon.com/dp/B07Q474BV1/ref=cm_sw_r_cp_api_i_hoGLDbKZY6BNT
Try this: https://www.amazon.com/J-B-Weld-50176-KwikWeld-Reinforced/dp/B009EU5ZMA
500F and food safe.
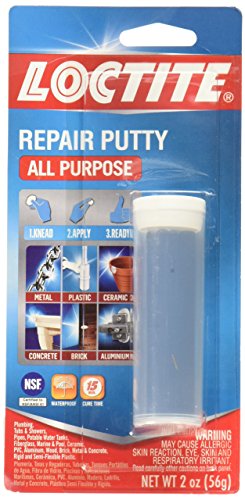
If you are looking for something more cost effective than Sugru (which is great, but not cheap) you can try an epoxy putty.
It looks like there isn't any screws in that hinge. Whoever made this likely just used an adhesive.
This Devcon glass epoxy dries clear, and is pretty strong for glass to metal joints.
Whichever route you take, please post pics here. I'm interested in it myself
Pro tip: use this stuff called Quiksteel it's a epoxy/putty and it's exactly what you need and it won't fuck your lungs up when you smoke. Good luck!
This question doesn't have enough information in it to provide any type of answer beyond a list of handguard manufacturers so I'm going to assume no budget and no mounting preference.
http://www.amazon.com/UTG-MNTP503-Tactical-Picatinny-Weaver/dp/B002GNYCNU/
http://www.amazon.com/J-B-Weld-8276-KwikWeld-Reinforced/dp/B0006O1ICY/
I found the same on my Mini Hilal. I'm going to try using JB Weld.
J-B Weld 50112 ClearWeld Quick-Setting Epoxy Syringe - Dries Clear - 25 ml https://www.amazon.com/dp/B009EU5ZM0/ref=cm_sw_r_cp_awd_PppRwbFNCJ3H8
A hardware store. It's this stuff. Not expensive at all.
Tabletop epoxy would be one way to go.
You could always coat it with clear food grade resin. Here is on I found on amazon.
Edit- Make sure you read the labels to see what kind of food contact it can have. Some things are fine for dry food but not liquids.
Get a can of bud light and put it under the monitor that is sagging. Then put some epoxy around that joint and wait for it to set.
you can use this shit to bond metal. it would be stronger than thin solder, imho. you can sand this when dry, with a fine sandpaper to a smooth finish. it’s nasty to work with, mixing it with the fingers, but it’s amazing stuff. rough up any metal surfaces that will come into contact with the product by scraping it on cement or a metal file or sandpaper first.
https://www.amazon.com/gp/product/B000BOB8P6/ref=oh_aui_detailpage_o05_s00?ie=UTF8&psc=1
Amazon! I got table top resin. It's supposed to be food safe after it cures, I guess.
https://www.amazon.com/gp/product/B079CR71SL/ref=ppx_yo_dt_b_asin_title_o01_s01?ie=UTF8&psc=1
Has anyone used plumber's putty on higher-draw weight bows to modify the grip?
https://www.amazon.com/Loctite-1999131-Purpose-Repair-Ounces/dp/B000BOB8P6/ref=pd_day0_60_1?_encoding=UTF8&pd_rd_i=B000BOB8P6&pd_rd_r=S17AZ1QRQP3XHQ8KA3MM&pd_rd_w=xNmzf&pd_rd_wg=Qfnqa&psc=1&refRID=S17AZ1QRQP3XHQ8KA3MM&dpID=51eSZk39EIL&preST=_SY300_QL70_&dpSrc=detail
Alternatively, would I be better off using something like Sugru and just build up a bunch of it?
I've got a 60 lb. takedown longbow that I'll be putting this on (it's got a high-wrist grip, I want to change it to a low-wrist grip)-- just want to make sure that it's not going to crack in half as I draw the bow!
This stuff. It dries like cement and would be pretty much impossible to remove.
Or maybe this.
Before you replace it, I would attempt to repair it using 2 part epoxy.
I am partial to the "JB Weld" brand, and this variety is perfect for a repair such as this...
Maybe dip them in epoxy like this stuff
hmm might make the paper too floppy maybe spray and then brush on some epoxy.
http://www.amazon.com/CEMEDINE-minutes-epoxy-adhesive-CA-193/dp/B003F9VWXW
https://www.google.com/search?q=CEMEDINE+high+super+30
I managed to translate the brand as Cemendine (characters in the middle white strip) and while the green characters after the brand name (in black) were partly obscured by glare) knowing that "30" was part of it led me to
Cemedine 30 high super (30 minute epoxy).
Big tube (like OP's): http://www.amazon.com/CEMEDINE-minutes-epoxy-adhesive-CA-193/dp/B003F9VWXW
small tube: http://www.amazon.com/Cemedine-High-Super-30-15g/dp/B0036WCG56
/u/encaseme , I used the handwriting option to write out the Japanese characters with my mouse. image translate can be quite iffy. (I know Chinese, not Japanese).
Same here.
Adapter: $8
JBweld: $8
Cheap and horrible case for my phone: $5
You mean the little keyboard feet that raises up the back?
Just repair it
https://www.amazon.com/Loctite-1999131-Purpose-Repair-Ounces/dp/B000BOB8P6/ref=lp_256244011_1_10?s=industrial&ie=UTF8&qid=1524385833&sr=1-10
You may be able to fill it with epoxy. Find a food-safe one. https://www.amazon.com/CLEAR-GRADE-Epoxy-Resin-System/dp/B01J16MYSE
why you no try M-Seal Fast Curing Epoxy
amazon.in/M-Seal-Phataphat-curing-Epoxy-Compound/dp/B01N9GSD63/ref=pd_sbs_201_t_0/259-9807457-0739201?_encoding=UTF8&pd_rd_i=B01N9GSD63&pd_rd_r=17a0217d-29b8-4b15-b72d-c0468da89165&pd_rd_w=zy8Sr&pd_rd_wg=fvwGU&pf_rd_p=21bbdc4d-873b-48c5-a88a-70e643377944&pf_rd_r=3X8VFW1Z1SKNR9CCCS48&psc=1&refRID=3X8VFW1Z1SKNR9CCCS48
Well worth it when I needed to cover a gash on the toe box on the first day with my new boots. I was looking into using something for more volume per dollar. Perhaps marine epoxy https://www.amazon.com/TotalBoat-FlexEpox-Flexible-Epoxy-Adhesive/dp/B01I1PAHXA
or find a dude who will spray my boots with truck bed liner for a six pack of beer.
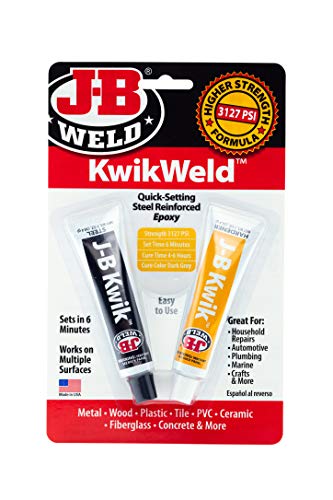
Get some JB Kwik. Sets up in 6 minutes and cures in 6 hours. Nothing beats good ol' JB weld for gluing stuff to metal.
Why not just use some 2 part epoxy. It will harden clear, can be cut and shaped just like wood and will bond to almost anything.
​
https://www.amazon.com/TotalBoat-Gallon-Crystal-Coating-Countertops/dp/B00S9QJIY6/ref=sr_1_1_sspa?ie=UTF8&qid=1536709248&sr=8-1-spons&keywords=2+part+epoxy&psc=1
JB Weld is my go to for epoxy or adhesives: https://www.amazon.com/J-B-Weld-50112-ClearWeld-Quick-Setting/dp/B009EU5ZM0
I've used epoxy from the same syringe probably 5 or 6 times without issue. Note that you will have to mix the stuff from both sides before use - this is likely why it is reusable.
Use some putty stuff like this.
I love that stuff, use it on all kinds of shit. Even fixed a crack in my upper intake manifold.
Yes, get some epoxy putty, like this: http://www.amazon.com/Loctite-431348-Multi-Purpose-Repair/dp/B000BOB8P6 Used it to fix a very similar problem on my 7509HDs, solid as a rock now. Make sure to scrape the plastic a bit before you apply it so it binds well - wrap it around the broken area. I also painted it black afterwards, doesn't look too bad.
Edit: Here's a decent tutorial: http://www.instructables.com/id/Cheap-Fix-Bose-Headphones/
This:
http://www.amazon.co.uk/J-B-Clear-Quick-Setting-Epoxy/dp/B009EU5ZM0/
I would recommend a 2 part epoxy.
JB Weld makes a steel reinforced epoxy that is very tough. It dries in 6 min in warm weather, and is totally hard in 45 min. Any other brand of similar epoxy would also work fine.
https://www.amazon.com/J-B-Weld-50176-KwikWeld-Reinforced/dp/B009EU5ZMA/ref=sr_1_9?s=automotive&ie=UTF8&qid=1487210197&sr=1-9&keywords=jb+weld+epoxy
JB also makes epoxy putty sticks, these are really easy to use, and work great.
https://www.amazon.com/s/ref=nb_sb_noss?url=search-alias%3Dtools&field-keywords=jb+stick
Sand the two parts you want to glue with some 80-100 grit sandpaper, it'll make the bond much stronger than if it was smooth.
Thank you a lot for the tip. How do I remove the previous adhesive?
And is this the stuff you're talking about?
https://www.amazon.com/J-B-Weld-8276-KwikWeld-Reinforced/dp/B0006O1ICY
Drill some holes on each side of the broken part and file the plastic down to be thinner. Get some 4000psi+ epoxy like this ( www.amazon.com/dp/B009EU5ZM0 ) and shape it to how it should look. Make sure to get it through all the holes you drilled so that it has places to hold onto for strength. Wrap it in wax paper and clamp it to hold the broken part together.
Once it dries just file it down to size.
Ding All is overkill for this repair. This is very easy to repair with Epoxy putty that is cheaper and just as durable (if not more) with this size ding. You can get it from a paddle/surf shop for $12 to $15 a tube or get the exact same thing from HomeDepot or Lowes for half the price under Loctite or JBWeld. I keep a tube with me whenever I go out for emergency repairs to keep it water tight.
https://www.amazon.com/Loctite-1999131-Purpose-Repair-Ounces/dp/B000BOB8P6
https://www.amazon.com/J-B-Weld-8277-White-Pack/dp/B000BRQ0TW/
​
BluePlanet has decent video showing how to do it. Their Ding Stick is the same stuff as above.
https://www.youtube.com/watch?v=_5SPbD-te7o
​
After it dries give the area some sanding. Start around 150 - 180 grit then finish ultra fine, like 220 grit or higher. I've used it a few times on a yellow Naish board, then hit the spot with some Krylon and it's hard to see the repair.
​
Maybe look into JB weld, or some kind of epoxy?
EPOXY RESIN CRYSTAL CLEAR 16 oz Kit. FOR SUPER GLOSS COATING AND TABLETOPS https://www.amazon.com/dp/B01LWT156B/ref=cm_sw_r_cp_api_jAc7yb325RB6G
J-B Weld 8276 KwikWeld Quick Setting Steel Reinforced Epoxy - 2 oz. https://www.amazon.com/dp/B0006O1ICY/ref=cm_sw_r_cp_apa_i_4M5UDbA0DT7Q4
I'm not sure what you're using, but a quick google search turns up clear Epoxy for less than $100 a gallon on Amazon.
Besides that, have you tried to negotiate a bulk price with the retail operations. If you're buying 100 gallon at a time, they can probably cut you a great deal.
If that fails, call some flooring companies and see if they have any leads for you. They are the only guys I can think of who would need Epoxy in those quantities.
https://www.amazon.com/J-B-Weld-50112-ClearWeld-Quick-Setting/dp/B009EU5ZM0
It's fairly easy if you are just replacing a standard plate with another standard plate. (Mounting on virgin boots, doing a short-forward mount, or things like that get a bit more technical)
Chances are you will need to drill new holes in your boot (often you can get 1 or 2 holes to line up, which is a good starting point). What you want to do is match the centerline of the old plate (kingpin-to-kingpin in the case of a non-symmetrical plate) with your new plate, and marking the axle and toe stop locations on the side of the sole is a good reference for the front-to-back placement.
I use a two-part epoxy stick to fill the old holes.
There was a good beginner's guide that was published in Five on Five a few years ago.
Slow-setting epoxy is an alternative. This one has been serving me well.
use epoxy, they sell it on amazon for a good $8.
http://www.amazon.com/gp/product/B009EU5ZM0/ref=oh_aui_detailpage_o08_s00?ie=UTF8&psc=1
That is the link to the one I used in my down stem repair on my bong.
http://www.reddit.com/r/StonerEngineering/comments/2f2lpz/repaired_my_broken_downstem_on_bong/
Do you mean that the frame is actually cracked? I just managed to glue back a similar frame with J-B Weld 8276 KwikWeld Quick Setting Steel Reinforced Epoxy if that helps. You can see the machine here while the product is setting.
I haven't tried to pull hard on it after glueing it, but so far it seems to hold.
Been using this JB weld epoxy without an issue, but I dont want or need instant seal but a strong seal: https://www.amazon.com/gp/product/B009EU5ZM0/
Yup, available at your regular auto parts stores like AutoZone and Pep Boys.
Here is the mobile version of your link
I was speaking specifically of epoxy putty like this, this or this. Will that stuff not work because it might get too hard when dry? Would the silicone actually be better in this case?