Top products from r/FixMyPrint
We found 40 product mentions on r/FixMyPrint. We ranked the 79 resulting products by number of redditors who mentioned them. Here are the top 20.
1. HICTOP Upgraded Replacement Aluminum MK8 Extruder Drive Feed for Creality 3D Printer Ender 3/3Pro CR-10, CR-10S, CR-10 S4, and CR-10 S5
Sentiment score: 0
Number of reviews: 3
[UPGRADING]: Original Aluminum Drive Feed for Creality Ender 3/3Pro CR-10, CR-10 S4, CR-10 S5, it is stable and durable.[REPLACEMENT]: MK8 extruder drive feed kit, can replace acrylic parts of Creality Ender 3/3Pro CR-10, CR-10 S4, CR-10 S5.[Easy TO USE]:for 1.75mm filament of 3D printer MK8 bowden ...
 Show Reddit reviews
2. Capricorn Bowden PTFE Tubing XS Series 1 Meter for 1.75mm Filament (Genuine Capricorn Premium Tubing)
Sentiment score: 0
Number of reviews: 3
Brand: CapricornLength: 1 MeterID: 1.95mm ± 0.05mmOD: 4.0mm
 Show Reddit reviews
3. Upgrade 3D Printer Parts MK8 Extruder Aluminum Alloy Block Bowden Extruder 1.75mm Filament for Creality 3D Ender 3,CR-7,CR-8, CR-10, CR-10S, CR-10 S4, and CR-10 S5
Sentiment score: 0
Number of reviews: 3
Original Aluminum Drive Feed for Creality 3D CR-7, CR-8, CR-10, CR-10 S4, CR-10 S5, it is stable and durable.MK8 extruder drive feed kit, can replace acrylic parts of CR-10, CR-10 S4, CR-10 S5.Full Metal Aluminum AlloyUsed for 1.75mm filamentDIY aluminum block, need to assembly by yourself
 Show Reddit reviews
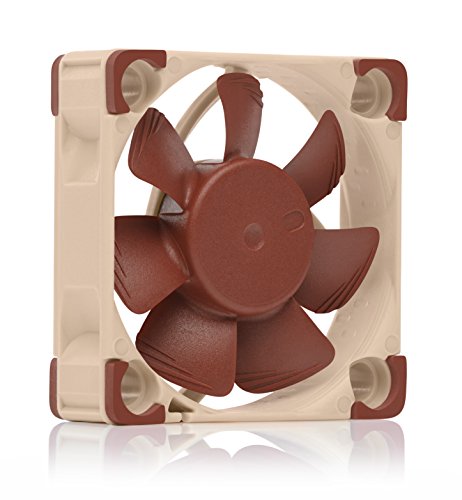
4. Noctua NF-A4x10 FLX, Premium Quiet Fan, 3-Pin (40x10mm, Brown)
Sentiment score: 1
Number of reviews: 2
Premium quiet fan, 40x40x10 mm, 12V, 3-pin Molex, 4500/3700 RPM, max. 17.9 dB(A), >150,000 h MTTFAward-winning 40x10mm A-series fan with Flow Acceleration Channels and Advanced Acoustic Optimisation frame for superior quiet cooling performanceIdeal replacement for noisy or broken 12V 4cm fans in 3D ...
 Show Reddit reviews
5. Signswise 2 Pack 5mm 40T Extruder Driver Feeder Gear Bore for Makerbot Mk7 Mk8 3D Printer
Sentiment score: 0
Number of reviews: 2
2 pieces Makerbot MK7 MK8 Extruder Driver Feeder Gear Bore 5mm 40T 3d PrinterOuter diameter:12mmInner hole:5mmQuantity :2 pcsThe number of teeth: 40 teeth
 Show Reddit reviews
6. 3DRAX 3D FILAMENT PURPLE HAZE PLA(PLUS)-1KG (2.2 LBS) - NEXT GEN FILAMENT PROFESSIONAL 1.75 +/- 0.05 mm Accuracy-Color- Purple Haze PLA
Sentiment score: 1
Number of reviews: 2
3DRAX 3D FILAMENT Purple HAZE PLA-1KG 1.75 mm- NEXT GEN FILAMENT PROFESSIONAL +/- 0.05 mm Accuracy-PurpleLOVE OUR GREAT 3D Purple HAZE PLA FILAMENT - Think about all the fun creating designs with our professional filament Try it now, decide later. it's that good. You'll wish you had ordered Purple 3...
 Show Reddit reviews
7. CCTREE Creality Upgraded 3D Printer Ultrabase Platform Heated Bed Build Surface Tempered Glass Plate for Creality Ender 3/Ender 3 Pro Ender 5 GEEETECH A10 3D Printer 235x235x4mm
Sentiment score: 3
Number of reviews: 2
.Excellent adhesion: Ultrabase covered by microporous coating, shows strong adhesion in printing. Easy to take off models by hand or with a little help from the scrapper for very large models.Integrated with heated bed: Super Flatness, Fast and uniform heatingDurable: The special coating is inorgani...
 Show Reddit reviews
8. uxcell 400mm x 205mm x 0.5mm Silicone Thermal Pad for CPU GPU Heatsink
Sentiment score: 0
Number of reviews: 1
Product Name : CPU Thermal Pad;Material : SiliconeSize : 40 x 20.5cm/15.7'' x 8.1'' (L*W)Thickness : 0.5mm/0.02''Weight : 103gPackage Content : 1 x CPU Thermal Pad
 Show Reddit reviews
9. TUPARKA 70Pcs 3D Printer Nozzle Kit MK8 Extruder Nozzles Brass Print Head 0.2mm, 0.3mm, 0.4mm, 0.5mm, 0.6mm, 0.8mm, 1.0mm with Storage Box Compatible with 3D Printer Makerbot Creality CR-10 Ender 3 5
Sentiment score: 0
Number of reviews: 1
3D printer accessories: 60pcs MK8 nozzles, 10pcs cleaning needles, 3D printer nozzles are made of high-quality brass material, sturdy and durable, connect with M6 out the thread, easy to install, NOTE: Small 3d printer accessories, please keep away from childrenThe outer surface and the inner wall a...
 Show Reddit reviews
10. uxcell LJ18A3-8-Z/BX 8mm Approach Sensor Inductive Proximity NPN NO Switch DC 6-36V
Sentiment score: 0
Number of reviews: 1
Product Name : Inductive Proximity Switch;Model : LJ18A3-8-Z/BX;Wire Type : DC 3 Wire Type (Black, Brown, Blue);Switch Appearance Type : Cylinder TypeTheory : Inductive Sensor;Output Type: NPN NO(Normal Open);Diameter of Head : 18mm;Detecting Distance : 8mmSupply Voltage : DC 6-36V;Current Output : ...
 Show Reddit reviews
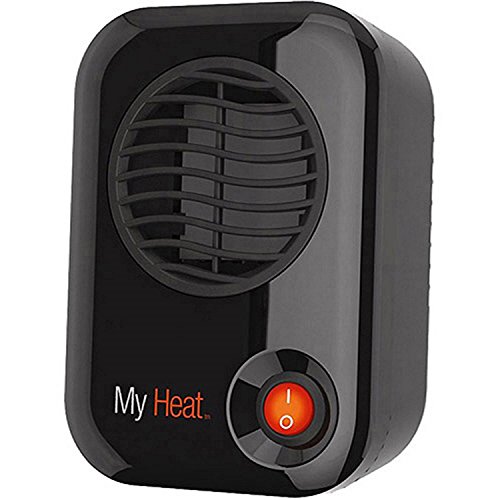
11. Lasko 100 MyHeat Personal Ceramic Heater, Compact, Black
Sentiment score: 1
Number of reviews: 1
KEEPS YOU WARM AT WORK – At 200-Watts and 682 BTUs, this low wattage mini space heater is ideal for use under the desk to keep your feet and legs warm. Best of all, because it’s low wattage, it won’t keep tripping the office circuit breaker every time you turn it on.YOUR PERSONAL SPACE HEATER...
 Show Reddit reviews
12. Neewer 24x24 inch/60x60 cm Photo Studio Shooting Tent Light Cube Diffusion Soft Box Kit with 4 Colors Backdrops (Red Dark Blue Black White) for Photography
Sentiment score: 0
Number of reviews: 1
It has a large removable front opening to allow for easy studio images in your home or office.Made from translucent light diffusing white nylon fabric, detachable front door cover with slit for camera lensThe studio kit has a standard with a custom carrying case with both shoulder and hand carrying ...
 Show Reddit reviews
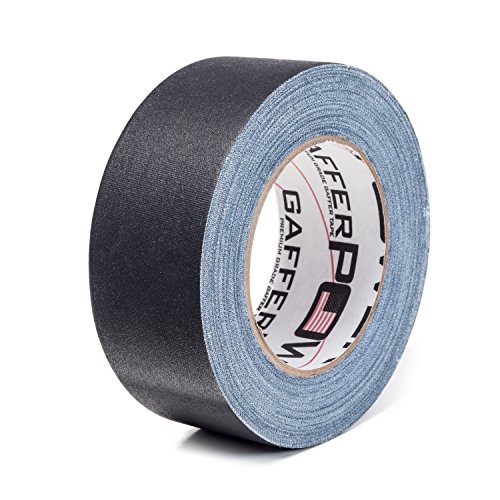
13. Gaffer Power Premium Grade Gaffer Tape, Made in the USA, Heavy Duty gaff Tape, Non-Reflective, Multipurpose. 2 Inches x 30 Yards, Black
Sentiment score: 2
Number of reviews: 1
PROFESSIONAL GRADE GAFFERS TAPE – This tape is what the pros use. It's industry standard, premium grade gaffer tape, not the fake ‘gaffer tape’ being sold on Amazon. Our tape is MADE IN THE USA and has the specifications of ‘premium grade’ gaffer tape.YOUR GEAR, CABLES AND SURFACE ARE SAFE...
 Show Reddit reviews
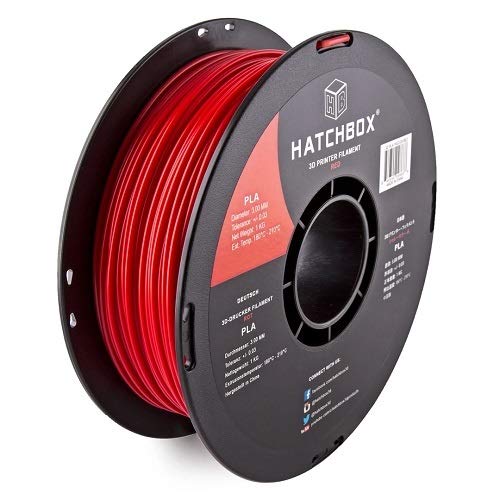
14. HATCHBOX PLA 3D Printer Filament, Dimensional Accuracy +/- 0.03 mm, 1 kg Spool, 1.75 mm, Red
Sentiment score: 1
Number of reviews: 1
1 KG (approximately 2.20 lbs.) Spool1.75mm Filament Diameter (Dimensional Accuracy +/- 0.03mm)PLA (Polylactic Acid) 3D Printer Filament Vacuumed Sealed With DesiccantRecommended Extrusion/Nozzle Temperature 180°C - 210°C (356°F - 410°F)Spool Diameter: 7.88" - Spool Width: 2.69" - Spool Hub Hole ...
 Show Reddit reviews
15. BuildTak 3D Printing Build Surface, 6.5" x 6.5" Square, Black (Pack of 3)
Sentiment score: 1
Number of reviews: 1
Build sheet adheres to a print bed to help the filament stick during printing, while also enabling clean removal of the printed part afterwardCompatible with ABS, PLA, HIPS, PET+, brick, wood, and flexible (TPE) filaments (sold separately)Durable construction allows for multiple uses with either the...
 Show Reddit reviews
16. eSUN 3D Printer Cleaning Filament 1.75mm Natural 0.1kg for All 1.75mm FDM 3D Printers, 1.75mm Cleaning
Sentiment score: 0
Number of reviews: 1
Industry's first 3D cleaning filamentExcellent heat stability, Wide cleaning temperature range of 150 to 260 celsius.Cleans the extruder's interior by removing accumulated residual filaments.Possesses a certain level of adhesive quality. Will not clog extruder.Clean the 3D printer's extruder before ...
 Show Reddit reviews
17. Aqua Net Extra Super Hold Professional Hair Spray Unscented 11 oz
Sentiment score: 5
Number of reviews: 1
Quality you can trust from Lorna MeadGreat Value!Extra Super Hold
 Show Reddit reviews
18. IRIS USA, Inc. UCB-LDD WEATHERTIGHT Storage Box, 74 Quart, Clear
Sentiment score: 0
Number of reviews: 1
WEATHERTIGHT storage seal on storage tote is the ideal way to keep stored contents clean and dry.Reinforced lid provides stability for stackable plastic storage bins.6 durable buckle latches on WEATHERTIGHT tote lid secure contents inside.74 quart capacity per large plastic container box.Dimensions:...
 Show Reddit reviews
19. Eva Dry Wireless Mini Dehumidifier. Top Moisture Absorber for Small Spaces. Rechargeable & Portable. Perfect for Bedrooms, Closets, Cars, RV & Gun Safes. Removes Humidity & Helps Prevent Mold Growth
Sentiment score: 1
Number of reviews: 1
EASY TO USE: This mini dehumidifier is spill and mess free. Just hang and go! Non-toxic, child and pet safe! Your small rooms will be dry and odor free. Works for areas up to 333 cubic feetMINI DEHUMIDIFIER GOES A LONG WAY: Super dry dehumidifier unit lasts 20-30 days before recharging the silica ...
 Show Reddit reviews
20. Neiko 01407A Electronic Digital Caliper Stainless Steel Body with Large LCD Screen | 0 - 6 Inches | Inch/Fractions/Millimeter Conversion,Silver/Black
Sentiment score: 0
Number of reviews: 1
THREE MEASURING MODES: one button quick change between three measuring modes: inch, fractions, millimeterPRECISION | ACCURACY: Measurement Range: 0 - 6” and 0 - 150mm; Resolution: 0.0005” / 1/128” / 0.01mm; Accuracy: 0.001” / 0.02mmSTAINLESS STEEL: finely polished stainless steel frame with ...
 Show Reddit reviews
Definitely sounds like adhesion problems. A good first layer is the most important thing for a successful print, so hopefully once you get this figured out you will start having a lot more success.
In my opinion, there are three parts to a good first layer:
Some more little things, you are printing with ABS which has a high coefficient of thermal expansion. That means it has a strong tendency to warp and shrink as you print, which can cause the corners of your print to peel up off the bed. You can mitigate that slightly by controlling the ambient temperature around your printer more carefully. Get some sort of enclosure to stick your printer in to keep it hot- something simple like an insulated plastic bag, cardboard box, or tupperware container can work. Just be careful not to use anything flammable that the hot end could ignite.
Alternatively, you could try a different plastic. PLA is a much more beginner friendly material that shouldn't give you the same warping problems that ABS does and doesn't need a heated enclosure at all. It has it's own problems that you may run into, but it should be much easier to get your first few good prints out of your printer with it.
I got my Ender 3 Pro about a month ago, performed some upgrades and ran into a few problems, but with some weird caveates.
I'm trying to print multiple miniatures on a single print, but seem to be getting a lot of oozing or stringing issues, but when I test with retraction tests, the test comes out perfect with identical settings. Additionally, when googling around, I couldn't find anything except for potentially a nozzle clog or potentially hydrated filament (possible, I'll test this later)
​
I've tested a few other prints as well, a benchy and a testcube, they print fine. Really curious about what's going on. Do I need to spread the prints out more, use different settings, or is it more of a mechanical issue?
​
I'd appreciate any help you guys have to recommend!
​
So, lets get down to it:
Printer: Creality Ender 3 Pro
Surface: Creality Glass surface
Upgrades: Aluminum extruder upgrade
Capricorn Tubing
New bed springs
In addition to these, I've tightened the X and Y bolts on the runners to reduce wobble -- there's no more wobble, maybe they're too tight? I don't think so, I've had good prints with these settings, but not with a few things.
Settings:
Basically the same as the "normal" settings for the Ender 3 on Cura 4.0.0
But in addition: (And what I think may be important is bolded)
adhesion_type = raft
layer_height = 0.12
support_tree_enable = True
support_type = buildplate
brim_outside_only = False
fill_outline_gaps = True
infill_pattern = cubic
infill_sparse_density = 25
material_final_print_temperature = 180
material_initial_print_temperature = 180
material_print_temperature = 185
optimize_wall_printing_order = True
raft_margin = 10
retraction_amount = 7.5
retraction_speed = 20
speed_print = 30
support_angle = 40
support_conical_enabled = True
support_infill_rate = 50
support_interface_enable = True
support_pattern = lines
** NOTE ** Standard supports are turned off, I'm using the tree supports
support_tree_collision_resolution = 0.15
travel_avoid_supports = True
travel_compensate_overlapping_walls_enabled = False
wall_thickness = 1.2
I run a campus makerspace with three MakerBots, and I feel your pain. It's been a year since we got them, and we've only just NOW (read: within the last month) figured out how to cut down on about 95% of the warping. Lots of the solutions here seem like they come from folks who aren't too familiar with MakerBot printers and the true shittiness of the flex build plate grip surface. For reference, our machines are used by a campus of about 10,000 students, so the machines are running 9 hours a day, every day.
First, I'd agree with some of the folks on here about throwing the machine out the window. If you're within the 30-day return window, return yours. They are absolute garbage, and if it wasn't for the $250 restocking fee that MakerBot charges after that 30 days, I'd return my three MakerBots in a heartbeat. Both the extruders and the build plates for the Replicator+ are truly awful. The proprietary MakerBot Print software leaves very little in the way of customization, so you can't really expect to even modify some of the slicer settings to test out what some of the folks in here are suggesting. At any rate, you should still print with a raft, because of the lack of a heated build plate.
MakerBot Customer Support, in their infinite wisdom, will typically recommend the following things over and over. I've spent more hours on the phone with them than hours at my job, and I'll preface this by saying none of their solutions worked in the long-term for any of our machines:
Now, the solution that worked miracles: try buying gaffer's tape. Another redditor recommended it, and we purchased this gaffer's tape. Since then, not a single print has failed due to warping issues. We can spread objects across the build plate with little regard for orientation or arrangement without much issue. Granted, on extremely large prints that take up the entire print volume, we might see a slight (maybe 5% at the corner, warping up about 1 or 2mm from the plate) warping issue, but it's nearly perfect compared to before. The same gaffer's tape strips I placed down for the very first test at the beginning of April are still sitting without a scratch on the build plates, so you can bet it doesn't peel or get scratched up easily either.
I can't understate the amazing value of gaffer's tape.
I had a problem somewhat similar at times. My ender 3's bed was a bit warped. The buildtak surface worked well (never used tape) but yes, prints were a bit difficult to get off without scraping and damaging myself or the bed surface sometimes. So i bought this: https://www.amazon.com/gp/product/B07F6CLTD7/
And it has changed everything. As long as you get the bed heated up to 60 degrees (and let it sit for a short bit to make sure the actual glass is that temp) you will get fantastic, flat, first layers. And prints that pop off on their own once the glass cools down. Warning, make sure the nozzle doesn't scratch the glass and don't use sharp spatulas on it. I bought these: https://www.amazon.com/gp/product/B075SLTY8B and they work perfectly. Thin, not sharp, flexible, pops things off no problem, even if the bed isn't cooled down.
Hold the glass to the bed with some tiny binder clips. Just make sure the print head doesn't run into the clips and you're good. I ended up changing out the cooling set up so that i had a thinner profile around the extruder to make sure i lost less print area due to the clips. I printed this: https://www.thingiverse.com/thing:2911981 and like it, but there are many other fang style ones out there.
For leveling i use a piece of printer paper, folded over. Took calipers to it and it's about .2mm in that set up and i level just so the nozzle scratches the paper (not holds it) and that seems to work for me.
Check your extruder drive gear. If the gear is turning but the idler wheel isn't, that means there isn't enough pressure on the filament.
Steps to fix:
Though I recommend upgrading to an all aluminum set up like this one.
Yeah, I had been really good at getting part that are easy to work with and I missed where a 12V would be easier to work with. I ended up getting this fan:
https://www.amazon.com/Noctua-Cooling-Blades-Bearing-NF-A4x10/dp/B009NQLT0M/ref=sr_1_1?ie=UTF8&qid=1498843580&sr=8-1&keywords=noctua+40mm
It had a few people mention using it for their 3D printer then I forgot to check the rest lol. I'll probably pick up a new fan here soon if I can't get this one hooked up.
Warping is caused by uneven cooling. As the top layers cool, they shrink and pull on the lower layers. The trick is to minimize the difference between the extruding temperature and the ambient temperature in the chamber. For ABS at 240c you want the chamber around 80c, but any heat helps. This will cause everything to cool more gradually and evenly, reducing the chances of warping. Increasing the heated bed temperature can also help for the same reasons.
I put two 4ohm 50W power resistors on a cpu heatsink to make a small heater, but if I were doing it again I'd just make one of these things blow into the chamber. My heater is 72W, that one is 200W.
Start with drying your filament or dumping and buying new.
Filament that’s been left out absorbs moisture just from the humidity in the air.
I bought a 5 gallon bucket along with an air tight screw top lid and one of these Rechargable Dessicant modules. Lock your filament in here, put that bucket in a warm place for a week and it should dry out. There’s a modification to this setup where you place a work light with a metal shade inside the bucket at the bottom with a low wattage bulb (40W) along with dessicant. You need a little shelf inside the bucket to sit the filament on. The turn the bulb on, close the lid, and wait overnight. You have to put holes in the bucket for this technique but it’s faster. IMO, save the $$ from building this heated chamber, buy new filament and have just the bucket with dessicant for storing when not in use.
If you have access to a large enough dehydrator or you have an oven than can go very low (100°F), that will work too.
Once you’ve dried out the filament your prints should improve. Heck I found that prints improved drastically from putting brand new filament in the bucket for a day.
I have the same machine/hot end it was working great for around a year then I started having intermittent under extrusion issues and they it kept getting worse.
I finally fixed the problem by changing out the extruder gear for one of these https://smile.amazon.com/gp/product/B00ZZRI0DC/ref=oh_aui_search_detailpage?ie=UTF8&psc=1 and replacing the extruder motor as well.
I don't think the extruder gear was the root cause, but all other things being equal the finer tooth gear definitely performs better for me.
I suspect the root cause was either the extruder motor wearing out, or maybe some material building up inside the hot end, creating more friction and making things harder for the extruder.
This one, which I used many times with the old head and nozzle to great results. I may have used 300-400 grams of it at this point.
3DRAX 3D FILAMENT PURPLE HAZE PLA(PLUS)-1KG (2.2 LBS) - NEXT GEN FILAMENT PROFESSIONAL 1.75 +/- 0.05 mm Accuracy-Color- Purple Haze PLA
https://www.amazon.com/dp/B0755ZXK3B/ref=cm_sw_r_cp_apa_q3iJBb37Z3X4B
I recently turned up the temps a bit because I was having first layer going down badly, but I think I over did it a bit and it's giving me a bit of stringing. Other slicer settings tried changing:
The thing that's been driving me a bit crazy is getting the front of the boat there to have a nice smooth surface. The surface didn't really seem to change that much with the reduced jerk / acceleration. What are some things I can try changing to help improve the print?
Can we a get a closeup of the first layer only? It will help if we can get a really good look at the size/shape/texture of the first layer extrusions.
Tape and glue and everything can work, but it's always been a huge hassle for me. https://smile.amazon.com/BuildTak-Printing-Build-Surface-Square/dp/B00MN5X304 might be worth a little money. In my experience that printer does just fine with buildtak and a hot bed, as long as you have your nozzle height dialed in and the bed leveled. It might be worth $20 just to remove the surface material from the equation.
As for the nozzle wiping bit, that's a huge pain in the ass. If you're up for learning a little g-code (it's not hard), I recommend changing your pre-print g-code to move the nozzle directly onto the bed during the heatup phase, this keeps the goo in and makes your life a lot easier.
Also, you should change your skirt distance to about 15mm. The point of the skirt is to prime the nozzle. Moving the skirt away from the part will increase the skirt path length, which means more priming, which means you won't have to restart prints after a bad start as often.
Not that I recall, but I bought a pretty early version of the Monoprice Maker Select when they dropped the price a few years ago, and the glass bed was one of my first additions.
The mod isn't difficult. I had a 16"x24" piece of window glass cut into four 8" squares. They did it at the hardware store (Lowe's iirc) for no extra charge.
The squares lay on the bed using four 1" (or so) thermal pads. I bought a sheet of the stuff from Amazon and just cut what I needed. It occasionally tears, so I replace it a couple of times per year. Using the thermal pad eliminates the need for binder clips or something more elaborate to hold the glass on the printer's bed.
The Z-Stop adjuster I used is so old that I probably wouldn't use it today. Just search Thingiverse and pick one you like. There are some nice designs out there.
Here's the process I would follow:
​
This might work, but it's a different style. Amazon has these: https://www.amazon.com/dp/B0761PGLZ4/ref=cm_sw_r_cp_apa_i_Zg4LDbB1BRRG0 which are the same style, but aluminum.
Ive always used 210 so I thought I'd be good. It looks like you're right though, at 210 it constantly leaks out. At 181 or so it stops.
I did buy the cheapest nozzles ever. After 2 more hours and a dozen more failed prints I'm starting to think they're just crap. Shoulda known at 70 nozzles for 11$ lol.
TUPARKA 70Pcs 3D Printer Nozzle... https://www.amazon.com/dp/B07WTB47N7?ref=ppx_pop_mob_ap_share
So this was PLA printed at 198c (amazon.com/dp/B00J0GO8I0). The print was a "success" in that the catapult works. It loses its springiness after a bit though.
I also used the increased tolerance version
You don't need a micrometer, just calipers with a wheel lock and 3 points after the decimal is fine
https://www.amazon.com/Neiko-01407A-Electronic-Digital-Stainless/dp/B000GSLKIW/
Thanks for the ideas. Here's more info:
Printing in a closed garage, no windows.
Printer is shrouded with a photo light cube to keep temp and eliminate drafts.
Material:PLA
Print Temp: 195C
Bed Temp: 60C
Before you do anything else, order a new extruder kit like this one: https://www.amazon.com/3D-Extruder-Aluminum-Filament-Creality/dp/B07B96QMN2/ref=sr_1_3?ie=UTF8&qid=1537687003&sr=8-3&keywords=ender+3+extruder&dpID=517S8mUQW-L&preST=_SX342_QL70_&dpSrc=srch
the spring that comes with the printer is weak and even if it's not causing a problem now, it will before too long. Plus the stock arm tends to bind up, also causing under extrusion. after that's installed, then calibrate the printer.
3drax purple haze pla
https://www.amazon.com/gp/product/B0755ZXK3B/ref=oh_aui_detailpage_o02_s00?ie=UTF8&psc=1
I am also using a Anet. the A8[ with this Sensor.] (https://www.amazon.com/gp/product/B008FZC8F2/ref=oh_aui_detailpage_o02_s00?ie=UTF8&psc=1)
I was also [following this video] (https://www.youtube.com/watch?v=G-TwWfUzXpc) But several things didn't work right.
I shall try what you did right now and see what happens.
https://www.amazon.com/gp/product/B009NQLT0M/ref=ppx_yo_dt_b_search_asin_title?ie=UTF8&psc=1
Two things I would I highly recommend is to get a new extruder assembly and a new Bowden tube. I've had similar issues and they went away as soon as I changed these parts out.
Upgrade 3D Printer Parts MK8 Extruder Aluminum Alloy Block Bowden Extruder 1.75mm Filament for Creality 3D Ender 3,CR-7,CR-8, CR-10, CR-10S, CR-10 S4, and CR-10 S5 https://www.amazon.com/dp/B07B96QMN2/ref=cm_sw_r_sms_apa_i_6tWTDb1JYN38X
Capricorn Bowden PTFE Tubing XS Series 1 Meter for 1.75mm Filament (Genuine Capricorn Premium Tubing) https://www.amazon.com/dp/B079P92HN9/ref=cm_sw_r_sms_apa_i_vvWTDbKY7ZVTY
These or any other should work
Actually I think I did. A new extruder stepper coupled with a new extruder gear (/u/speeddemon974 recommended) seems to have fixed the problems. I used these gears: https://smile.amazon.com/gp/product/B00ZZRI0DC/ref=oh_aui_search_detailpage?ie=UTF8&psc=1
Possibly. It has more to do with moisture clinging to the outside of the filament. Nylon actually absorbs water, so you need to keep it super dry all the time. PLA is the least affected of common materials, but it will still suffer performance issues because of this.
My advice is get an airtight container/box and get a big pail of desiccant off of Amazon. Dump a bunch into the container so you have about an inch of desiccant on the bottom. Then just put your spools in their and keep it shut unless you need to get a different spool out. This can recondition material over the course of a week as well. Nylon would probably need a professional dryer of some sort, similar to what injection molding companies use to dry their plastic pellets before using them. I haven't had to dry nylon yet, but I would think that's what you'd have to do.
UPDATE
After cleaning out my bowden tube between the tube itself and the nozzle, and removing the gunked up crud as well as trimming the end of the bowden tube where some filament was partially blocking, I put everything back together as it should be and set another test print for last night. I used the same model I had printed somewhat successfully but changed the following:
.2 less on wall thickness
10% less on density
10 added to Print speed
40 added to Travel speed
10% less on support density
And unfortunately, alittle more than halfway through the print this happened:
https://imgur.com/VbJXFJI
https://imgur.com/LrwHxlB
https://imgur.com/fcVClfZ
​
This morning I pulled apart the bowden tube and nozzle again to check for that problem from before but this time everything was fairly clear, no gunk in between tube and nozzle. At this point, I think it may be the extruder or possibly even something to do with the feeding of the filament spool itself since it seems to be a problem occuring around the same height everytime. I ordered an upgraded extruder [aluminum body] and better bowden tube this morning. Has anyone else noticed this kind of problem occurring consistently around the same height?
​
​
​