Top products from r/HondaCB
We found 23 product mentions on r/HondaCB. We ranked the 103 resulting products by number of redditors who mentioned them. Here are the top 20.
1. Motion Pro 08-0015 Oil Filter and Clutch Hub Spanner 24mm ID
Sentiment score: 2
Number of reviews: 2
Made of heat treated steelUse with a 3.8 inch driverDesigned to fit oil filter and clutch hub nut on many Honda modelsInside diameter is 24 millimeter
 Show Reddit reviews
2. AUDEW 2-Pin Electronic Turn Signal Flasher Relay Fix Motorcycle Turn Signal Hyper Flash
Sentiment score: 0
Number of reviews: 2
Completely waterproof design. Work for most Motorcycles such as Honda, Kawasaki, KTM, Suzuki, Yamaha and many other brands as wellDirectly replace the OEM two-pin flasher.Eliminate the need for tapping wires to install the load resistors.Allow LED bulbs to blink at the normal rate.The Max Power of t...
 Show Reddit reviews
3. Emgo 40-15820 Replacement Ignition Switch
Sentiment score: 1
Number of reviews: 2
Direct OEM replacementAvailable with standard flat keyTwo keys included
 Show Reddit reviews
4. K&N Engine Air Filter: High Performance, Premium, Powersport Air Filter: 1979-1983 HONDA (CB1000C, CB1100F, CB750SC Nighthawk, CB750C Custom, CB750F, CB750K, CB900C, CB900F, Limited Edition) HA-1079
Sentiment score: 0
Number of reviews: 1
ULTIMATE LONGEVITY: 10-Year/Million Mile Limited Warranty protects for the life of your vehicleENGINEERED POWER: State-of-the-art filtration media provides up to 50% more airflow than disposable paper filters to increase power and acceleration Clogged or dirty air filters can reduce your vehicle’s...
 Show Reddit reviews
5. Motion Pro 08-0073 Tappet Tool Set
Sentiment score: 1
Number of reviews: 1
Heat treated and chrome plated for durabilityInterchange adjusters and wrenches for nine different combinationsFits most motorcycles and ATVs with screw type tappet adjustersFits any screw-type tappet adjuster with 8 millimeter , 9 millimeter or 10 millimeter adjusting nut combined with either a 3 m...
 Show Reddit reviews
6. LP USA Short Stalk II Turn Signal Black/amber Single Filament
Sentiment score: 1
Number of reviews: 1
FeaturesWe offer five sizs of the popular Short Stalk Marker Lights. The small ones look best on the 250 machines and the larger Short Stalk II's on the bigger bikes. The Short Stalk II's feature a dual filament or single filament so they can be used as running lights as well as flashers. The Short ...
 Show Reddit reviews
7. WonVon 12V Universal Digital Motorbike Speedometer Tachometer Oil Level Meter LCD Gauge Tachometer Motorcycle Accessories Instruments Display Motorcycle Modification Refit Kit (Black Shell)
Sentiment score: 0
Number of reviews: 1
【Stable Performance】: Made of electrical components that adopted chip technology, high precision.【High Quality Metal Shell】: Totally waterproof , allows to withstand slight collision.【Enhance Your Road Safety】: LED digital Speedometer Tachometer Oil Level Meter, which can indicates your ...
 Show Reddit reviews
8. Denso 4099 Spark Plug
Sentiment score: 1
Number of reviews: 1
Denso # 4099Denso Traditional Nickel Spark PlugNOTE: Plug has threaded terminal stud and does not contain terminal nut. If terminal nut is needed, order part#067606-0051U-Groove Ground Electrode
 Show Reddit reviews
9. Renthal (758-01-GO) Gold 7/8" Aluminum Handlebar
Sentiment score: 1
Number of reviews: 1
Model/Bend: 758-01, Name: Road Ultra-Low; Dimensions: Overall Width: 725mm, Total Height: 75mm, Rise: 50mm, Clamp Area Width: 110mm, Sweep: 95mm, Control Length: 232mmRenthal Road handlebars are a 7/8" (22.2mm) diameter handlebar that utilizes the same materials and manufacturing process as our cham...
 Show Reddit reviews
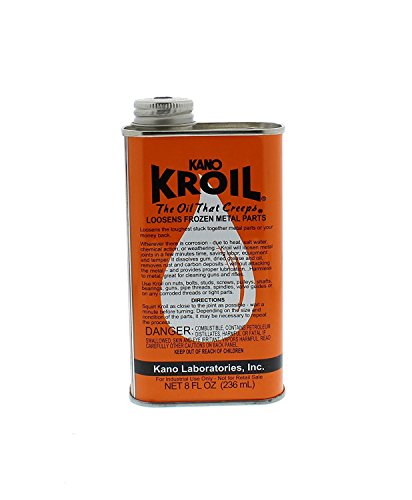
10. Kano Kroil Penetrating Oil, 8 ounce liquid
Sentiment score: 1
Number of reviews: 1
Safe for use on metal, rubber, plastic and painted surfacesFeatures a spout for convenient and precise applicationPractically no expiration dateCan be used on a wide range of hardware, tools and equipmentDoes not harden, gum or expire
 Show Reddit reviews
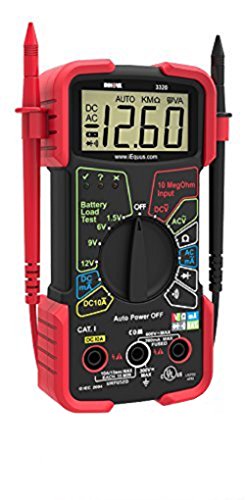
11. INNOVA 3320 Auto-Ranging Digital Multimeter
Sentiment score: 0
Number of reviews: 1
UL certified product designed to safely and accurately troubleshoot a variety of automotive and household electrical problemsAuto-ranging scales eliminate the need to dial in the correct range when making electronic measurementsFeatures large digital display and color coded LED's for battery quick c...
 Show Reddit reviews
12. How to Restore Your Motorcycle: Second Edition (Motorbooks Workshop)
Sentiment score: 1
Number of reviews: 1
 Show Reddit reviews
13. K&N 81-0221 Fuel Filter
Sentiment score: 1
Number of reviews: 1
High volume, low pressureSimple to clean by backflushingAvailable with 1/4Inch flangeAvailable in single or 12-packs
 Show Reddit reviews
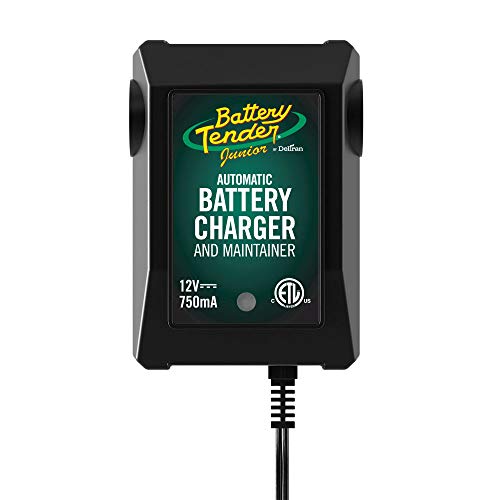
14. Battery Tender Junior Charger and Maintainer: Automatic 12V Powersports Battery Charger and Maintainer for Motorcycle, ATVs, and More - Smart 12 Volt, 750mA Battery Float Chargers - 021-0123
Sentiment score: 0
Number of reviews: 1
STAY CHARGED: Provides a full charge to your machine’s battery before switching to float mode to maintain proper voltage levels for safe, long term storage without overcharging. Spark proof during lead connection, reverse polarity protected and includes a 12-foot output cord and 5-year warrantyEAS...
 Show Reddit reviews
15. NGK (2120) D8EA Standard Spark Plug, Pack of 1
Sentiment score: 0
Number of reviews: 1
Designed to operate over a much wider heat range than ordinary plugsResists carbon buildup and pre-ignitionHigh alumina ceramics for better heat transfer and electrical insulationSolid copper core and nickel tipped electrode provide a longer plus lifePatented triple gasket sealing process eliminates...
 Show Reddit reviews
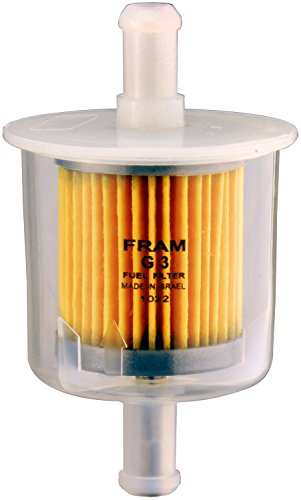
16. FRAM G3 In-Line Fuel Filter
Sentiment score: 1
Number of reviews: 1
Universal FitFram is the CONSUMERS #1 CHOICEChanging Fuel filters will improve the engines emissionChanging the fuel filter will also improve the engines performanceConventional stainless steel and conductive plastic fuel filters to meet the needs of virtually all engine configurationsAccessory filt...
 Show Reddit reviews
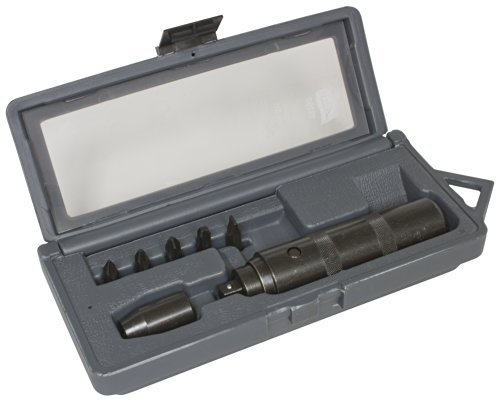
17. Lisle 29200 3/8" Hand Impact Tool Set
Sentiment score: 0
Number of reviews: 1
Unique design delivers over 200 ft. lbs. of shock torqueCan be reversed to tightenCan also be used with impact sockets3/8" drive with 3/8" drive bit holder
 Show Reddit reviews
18. Sea Foam SF-16 Motor Treatment - 16 oz.
Sentiment score: 1
Number of reviews: 1
Cleans injectors, carb jets and passagewaysCleans and lubricates intake valves, pistons and cylindersDissolves and cleans fuel residue in fuel systemsDissolves oil deposits in crankcaseClean timing chain tensioners and VVT actuators, quiet noisy lifters100 percent pure petroleumEPA registered produc...
 Show Reddit reviews
19. CAIG Laboratories D100L-25C Contact Cleaner
Sentiment score: 1
Number of reviews: 1
Fast acting deoxidizing solutionCleans, protects, lubricatesCan be used as a general treatment for ConnectorsCAIG LABORATORIES D100L-25C 25ml Contact Cleaner
 Show Reddit reviews
20. IRWIN Bolt Extractor Set, 5-Piece (394001)
Sentiment score: 0
Number of reviews: 1
Frees rounded-off, rusted-tight or painted-over boltsReverse spiral flutes are designed to bite down to provide maximum gripping powerHigh carbon steel for greater durability and a longer lifeUniversal lobular design fits all types of fastenersSet includes carrying case and extractors to remove bolt...
 Show Reddit reviews
You should ask santa for an ultrasonic cleaner from harbor freight. The large one. Pull out your entire wireharness and soak each cluster of connectors in a mix of LA Awesome and distilled water. They'll come out brand new. Swing it like an old sling shot to the the water out, then immediately hit the metal contacts inside the plastic connectors with deoxit d100L that'll keep the metal shiny. And soak the next chunk of connectors. If you need to rewrap the harness don't use electrical tape. Use self fusing silicon tape from harbor freight. I think its called super tape and its $4 for 10 feet x 1 inch. But it stretches so its more like 20+ feet. Don't over stretch it tho.
I'd probably spray and scrub the battery case with brake cleaner and a brush, then spray it with brake cleaner again.
Broken plastic connectors can be bought for cheap at 4into1, link is on the right side. You remove the metal connectors by using a very small flat head jeweler screw driver. Make sure all your connectors lock in together. Most people hate electronic work on bikes. But if you do it right its fun and easy.
This is a good book to have for overall know-how and tips and tricks and stuff. When you find a bike just look for a Clymer manual for the bike, there are other companys that make the manuals as well. If you want to make your headache as minimal as possible, try not to tear into the engine if you don't have to. Make sure that when you try and use the kick starter that the pistons actually move up and down and aren't frozen. Start off with simple projects with it. Try not to tear the whole thing down at once or you will get overwhelmed like crazy. Good luck and try not to spend too much money :)
you'll want some RTV to reseal the cases. honda brand is honda-bond I believe.
some engine assembly lube is good too for the cam and other parts until it gets running and oiled properly again.
If you're taking apart the head,(Actually the tool is needed for reassembly only, to turn/compress the torsion springs into place) there's a special tool honda made to turn the torsion springs that hold the valves in. I just cut a notch in a socket, another guy just put a wrench on it to turn it.I will also say that the 500t engine is essentially identical to the CB450 engine, and the CB450 service manual is a fantastic service manual. I would recommend you use that to rebuild the 500t engine. All the 500t manuals I found were pretty poor manuals in comparison.
timing gun isn't entirely needed on these bikes if your spark advance works properly, i've found static timing a bit easier for me, but I know my advance works properly.
you'll also need a chain breaker tool for the very long cam chain in the engine, as it has to come off to remove the head. I used a slightly modified bicycle chain tool, as it's much smaller than purpose built ones and I found it easier to use.
When I lapped my valves, the suction cup tool thing they sell was a pain to use. I wound up sticking a rubber vacuum hose around the end of the valve and used that to spin/ move the valve. worked well.
make sure the seal/gasket kit you get has the rubber cylinders for the oil galleys. when I rebuilt mine a few years ago some kits didn't have them.
finally, there is a special socket needed to remove the oil slinger from the end of the crank shaft. You probably won't have to remove it, so you probably won't need it. here is one on amazon. I just bought myself a cheap socket and ground it down to the right shape.
EDIT: changed a couple things.
The octane level of the gas should not affect the idle. You could try changing out the fuel but I'd bet there is some other issue. I had a '72 cb350 myself for several years and never saw any difference in the running condition based on the gas type.
The idle jet inside each carburetor has a very small hole that allows gas to pass through. More than likely there is some small debris blocking one of the idle jet passageways.
Can't tell from your picture, but you should definitely have an in-line fuel filter that keeps debris from the gas tank from getting into the carbs.
I have heard of people having luck with running Seafoam through their tank to clear out the carbs. But in my experience owning a CB350, removing and cleaning the carbs was a process I inevitably had to do a couple of times a year. It really isn't that difficult to do.
Edit:Spelling
Won't recommend using the float valves from the K&L kits. They will change your float height due to a different height and spring tension. Also, I've heard of issues with main and idle jet sizes as well, though I personally haven't had any issues using the emulsion tubes, main and idle jets. Also, the needle jet taper is way off those aftermarket kits as well. Can cause weird fuel delivery at certain throttle openings. Stick with Honda for the needle nets, float needles and seats.
Also speaking of ignition these Densos will do you one better than the d8ea ngks.
Denso-X24ES
For more info try the sohc4 forums. Also, this book is one of the best resources for the 750.
I did the same thing to my 76 360 (very similar engine). The tricky part was the oil filter locknut.
All i had to do was drain the oil, remove the crankcase cover, pull the centrifugal oil filter (this took a spanner to remove the locknut as shown in the manual), pull the clutch and the shift shaft pulls right out. Have a look at a parts fiche on partzilla or whatnot and it'll give you a pretty good idea.
The spanner can be purchased here for 10 bucks (worth it), or do what i did and spend an afternoon making one from a 12 point 15/16" socket - http://www.hondatwins.net/forums/62-engine-discussion/19731-clutch-hub-nut-socket-how-make-2.html
Overall it was an easy fix and didnt take more than 2 hours for a totally incompetent mechanic like myself.
They're Renthal bars. https://www.amazon.com/gp/product/B000GTTBBE/
Here's a better photo of the cockpit:
https://www.flickr.com/photos/therobbstory/24930665813
And the bike with some Dime Shitty bars a while back.
https://www.flickr.com/photos/therobbstory/24259381119
I replaced the shredded seat with the correct K8 seat in good condition recently, and ditched MAC fart-can exhaust and rusty headers with a nice stainless Delkevic exhaust recently. Sounds like a CB750 now, and much more comfortable to ride.
I bought aftermarket because the rubber arms on the OEMs had rotted.
I actually didn't get LEDs as I couldn't find any that looked close enough to stock. In the end I got these and these. The second link is for the dual filament model so you can keep the running lights like stock.
It looks like Amazon is out of stock for those particular ones but the manufacturer is definitely still making them.
Haven’t done any work in my CB petcocks but on my Airhead, I replaced the original petcocks with new ones and was able to re-use the original filters (they’re metal).
In addition, you could add a filter on the line itself after the petcock if you end up wanting some extra protection.
[Inline filter](FRAM G3 in-Line Fuel Filter https://www.amazon.com/dp/B0009H524S/ref=cm_sw_r_cp_api_i_uLU4DbC92PP76)
I recently had to redo my 1980 CB750c after the previous owner made it a strait on/off switch.
https://www.amazon.com/gp/product/B000GU7D0Y/ref=oh_aui_detailpage_o07_s00?ie=UTF8&psc=1
This is the one I purchased. Since yours is already wired up to work on your starter, you should pretty much be able to just plug the wires to the corresponding spots. I have the wiring written down at home, but its for a 750c. I'm sure its the same, but I don't want to give you incorrect information either.
These guys make the job way easier. The outer wrench loosens and tightens the lock-nut while the inner flat-head makes the adjustment. $25 well spent (even though Motion Pro's stuff isn't heirloom grade).
http://www.amazon.com/Motion-Pro-08-0073-Tappet-Tool/dp/B000JP31T8/ref=sr_1_1?ie=UTF8&qid=1368246057&sr=8-1&keywords=tappet
Until you tried Kroil, you haven’t tried everything. I started using this after the gunsmiths at Ruger told me it’s the secret weapon on their bench. Good luck, rider.
Kano KROIL Penetrating Oil, 8 fl. oz. https://www.amazon.com/dp/B000F09CF4/ref=cm_sw_r_cp_api_i_JM-PDbQF5G0SQ
This is the gauge. I was only able to hook up the gas indicator and its backwards because the float switch is normally open instead of closed, so when it indicates a full tank its actually on empty hahaha
As far as the other dummy lights are concerned. I ordered these LEDs. I haven't hooked them up yet because I need to build a housing for them.
i bout this to replace my ignition and it comes with a set of new keys. though the keys edges are very just like how the picture looks and probably the same for everyone key too.
https://www.amazon.com/gp/product/B000GU7D0Y/ref=oh_aui_detailpage_o08_s00?ie=UTF8&psc=1
A multimeter is a must have tool for someone running a vintage bike. They are relatively inexpensive. I can recommend this one as it has auto-ranging, but anyone you get will do.
Tutorial on multimeters and how they work.
How to test your motorcycle components.
Instead of a resistor you can replace the blinker module with an adjustable $4 one from amazon:
https://www.amazon.com/AUDEW-Electronic-Signal-Flasher-Motorcycle/dp/B011BTMDQM/ref=sr_1_1?ie=UTF8&qid=1494862870&sr=8-1&keywords=Blinker+relay
See how it runs then, that tightened mine up after purchase.
Wait. You’re just trying to get the oil filter cap off? If you are just use these: nut extractor I’ve used them on turbos before and they work. Just hammer it on and twist it off
I've def been there.
What you need is a rubber mallet, a regular hammer, and one of these suckers (you can probably find one at Ace hardware or O'reillys.)
Just use the impact driver on the screws, and once you get those out just hit the top of the cover with a mallet, and eventually it will come off.
Those wires are going to be battery, flasher out, and ground. For standard filament bulbs, just buy a 2 prong standard mechanical relay and leave the ground disconnected. If you upgrade to LED bulbs, switching to a load independent relay (usually 3 prongs) will fix the fast blink issue.
In the 3 prong the coil side seeks ground for discharge through the additional ground, otherwise it has to discharge through the circuit. Because the load (resistance) is low with LED bulbs, the capacitor that controls the coil latch timing can discharge really fast and the flasher blinks fast or not at all. There are some electronic relays without a standard coil/cap that have a rheostat in them that allows you to adjust the discharge load. Those will be 2 prong - they discharge through the bulbs/circuit. The standard mechanical relays are available at any auto parts store.
Electronic solid state 2 prong with adjustable load:
https://www.amazon.com/AUDEW-Electronic-Signal-Flasher-Motorcycle/dp/B011BTMDQM/ref=sr_1_4?ie=UTF8&qid=1493815500&sr=8-4&keywords=electronic+flasher
Standard mechanical coil 2 prong:
https://www.amazon.com/Bussmann-NO-552-12-8-Thermal-Flasher/dp/B000GKAZCW/ref=sr_1_1?ie=UTF8&qid=1493815609&sr=8-1&keywords=12v+flasher
3 prong with load independent grounded coil (my preferred type - these still need some load to function):
https://www.amazon.com/uxcell-Vehicle-Blinker-Flasher-0-02-20A/dp/B00BLZ9XQK/ref=pd_sbs_263_2?_encoding=UTF8&pd_rd_i=B00BLZ9XQK&pd_rd_r=B9EGDRDCQ81ZH9VWKT7A&pd_rd_w=SRsBN&pd_rd_wg=UBlTA&psc=1&refRID=B9EGDRDCQ81ZH9VWKT7A