Top products from r/SCREENPRINTING
We found 71 product mentions on r/SCREENPRINTING. We ranked the 109 resulting products by number of redditors who mentioned them. Here are the top 20.
1. Speedball Hinge Clamps, 1-Pair
Sentiment score: 6
Number of reviews: 7
AIDS IN REGISTRATION – Offers artists control for precise registrationMADE TO LAST – Made of rust-resistant, cast aluminumFEATURES WIDE-WING THUMBSCREWS – Allows for firm fastening to fram and positive locking for perfect registrationUSE WITH MOST SCREENS – Suitable for use with Speedball wo...
 Show Reddit reviews
2. Screen Printing Today: The Basics
Sentiment score: 3
Number of reviews: 3
Used Book in Good Condition
 Show Reddit reviews
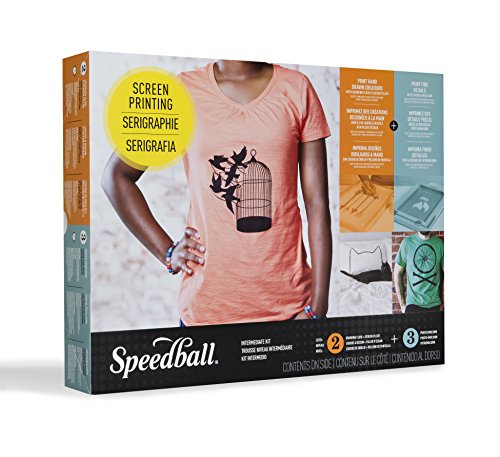
3. Speedball Intermediate Kit
Sentiment score: 0
Number of reviews: 3
TAKE IT TO THE NEXT LEVEL - For those ready to tackle both the Drawing Fluid/Screen Filler and the Photo Emulsion methods of screen printingBRING YOUR ARTWORK TO LIFE - Using the Drawing Fluid & Screen Filler method is ideal for hand-drawn and painterly imagery, which offers great detail without the...
 Show Reddit reviews
4. Sylvania 23113 - F30T8/350BL Fluorescent Tube Black Light
Sentiment score: 1
Number of reviews: 2
Average Lifetime: 7500 hours
 Show Reddit reviews
5. Ecotex DC-Blue - Textile Dual-Cure Screen Printing Emulsion (Quart)
Sentiment score: 0
Number of reviews: 2
Emulsions, Screen Printing Chemistry and More Available here on AmazonCompatible With All Ink Systems - Highly resistant to Solvent, UV, Plastisol, & Short Run Water Based InksReclaiming is easy with Ecotex Emulsion RemoverDiazo IncludedMade In USA | 100% Satisfaction Guaranteed or Your Money Back!
 Show Reddit reviews
6. UV LED Black Light, HouLight High Power 20W LED Blacklight Flood Light IP65-Waterproof (85V-265V AC) for Halloween, Blacklight Party, Neon Glow, Glow in The Dark, Birthdays, Blacklights, Curing
Sentiment score: 0
Number of reviews: 2
Excellent high power blacklight. 20 watt, premium quality and powerful LED blacklight (50,000 hours of long life, high power efficiency), wavelength: 385-400nm, UVA level.Intense and stunning special effects. Neo glow and fluorescent glow for fluorescent materials, face and body paint, glow in the d...
 Show Reddit reviews
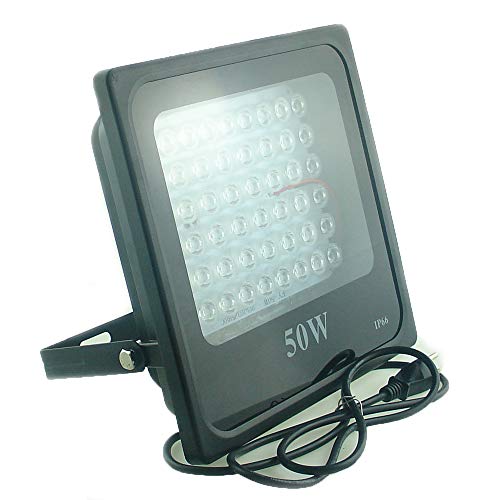
7. QUANS 50W Ultra Violet UV LED Light for Curing Glue Blacklight Fishing Aquarium Glow in The Dark Special Effects, 110V US Plug (50 Watt)
Sentiment score: 1
Number of reviews: 2
QUANS 50W UV Ultra Violet LED Flood LightWavelength 395nm to 400nm Great for Curing Glue, Plant Growth, Aquarium, Screen Printing, Fishing, Glow in the dark special effects, parties, art, painting, Halloween, Detecting Stain Pet Urine Scorpion, Money License Passport ID Card Authenticating, and simi...
 Show Reddit reviews
8. Anderson Metals Brass Garden Hose Fitting, Connector, 3/4" Male Hose ID x 1/2" Female Pipe
Sentiment score: 0
Number of reviews: 2
Adapter for connecting pipes, hoses, or fittings of different typesMale GHT threads on one end and female NPT threads on the other for connecting pipes or hoses with different endsBrass for durability and resistance to corrosionThese fittings contain lead and are not allowed by federal law to be ins...
 Show Reddit reviews
9. Canon Pixma Pro-100 Wireless Color Professional Inkjet Printer with Airprint and Mobile Device Printing
Sentiment score: 1
Number of reviews: 2
8 Dye based inks for amazing gradients and color, 3 of which are dedicated grayscale inks for beautiful black & white printsThe Optimum Image Generating System reproduces colors as you intend them by logically selecting the optimum ink combination and placement. Output Tray Capacity Auto Sheet Feed...
 Show Reddit reviews
10. Speedball Acrylic Screen Printing Ink, 8-Ounce, Black
Sentiment score: 2
Number of reviews: 2
PROFESSIONAL QUALITY SCREEN PRINTING INKS - The brand of choice for professional screen printers available across a broad range of colorsEXCELLENT WORKING PROPERTIES - Offers artists vibrant colors, great coverage, and consistent workability every timePRINT WITH EASE – Unrivaled working time allow...
 Show Reddit reviews
11. CISinks Waterproof Inkjet Transparency Film for Printing Quick Drying Silk Screen Positives 11" x 17" 4 mil (100 Sheets)
Sentiment score: 1
Number of reviews: 2
Microporous waterproof technology coated paper absorbs ink quick and dries instantlyWater Resistant coated side bonds well with ink for rich nonsmearing and contrasted screen prints, transparencies4Mil thickness of High Density material provides a consistent durable film with no curling, comes vacuu...
 Show Reddit reviews
12. Ecotex PWR - Pre-Sensitized Water Resistant Screen Printing Emulsion (1 Quart)
Sentiment score: 2
Number of reviews: 2
 Show Reddit reviews
13. LED Flood Light, Exulight 20W High Power Black Lights 85V-265V AC for Parties,Curing, Glue, Blacklight, Fishing, Aquarium with US Plug (20)
Sentiment score: 10
Number of reviews: 2
【Great Lighting Effects】The Black light Wavelength 385nm to 400nm, no harm to human eye and skin, great for illuminating most blacklight reactive pigments, paints and dyes, plus many glow in the dark products. 120 degree wide beam angle that covers a large area, creates a special lighting effect...
 Show Reddit reviews
14. Print Liberation: The Screen Printing Primer
Sentiment score: 1
Number of reviews: 2
 Show Reddit reviews
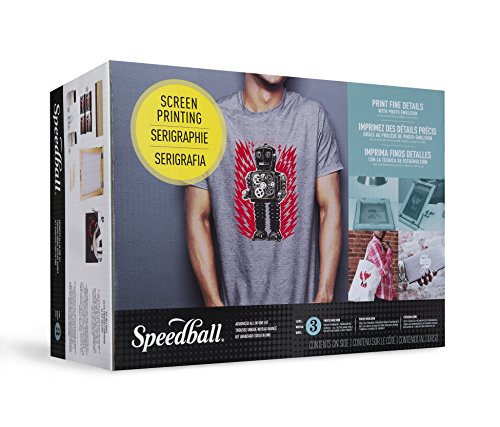
15. Speedball Advanced All-In-One Screen Printing Kit
Sentiment score: 2
Number of reviews: 2
READY TO TAKE ON THE PHOTO EMULSION METHOD? – All-in-one kit designed for those ready to take on the photo emulsion method of screen printingHAS IT ALL - Not only does the Speedball All-in-One Kit include all of the tools and inks, but it also contains the light source needed to make the process o...
 Show Reddit reviews
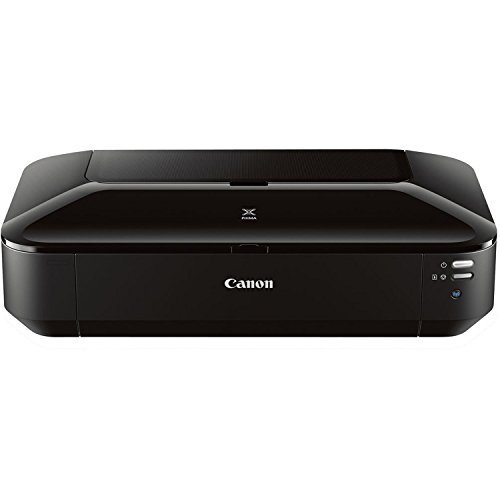
16. Canon Pixma iX6820 Wireless Business Printer with AirPrint and Cloud Compatible, Black
Sentiment score: 1
Number of reviews: 2
OS Compatibility :Windows 8, Windows 8.1, Windows 7 , Windows 7 SP1, Windows Vista SP1, Vista SP2, Windows XP SP3 32 bit13; Mac compatibility : Mac OS X v10.6.8 v10.913Utilizes Air Print, Google Cloud Print and PIXMA Printing Solutions (PPS)Fine print head technology (Full photolithography Inkjet N...
 Show Reddit reviews
17. How to Print T-Shirts for Fun and Profit!
Sentiment score: 2
Number of reviews: 2
Used Book in Good Condition
 Show Reddit reviews
18. Hangar 9 Fiberglass Cloth, 1/2 Oz 1 Sq Yard
Sentiment score: 1
Number of reviews: 1
Fiberglass Cloth, 1/2 Oz 1 Sq Yard
 Show Reddit reviews
19. Speedball Art Products 4559 Diazo Photo Emulsion Kit
Sentiment score: 0
Number of reviews: 1
Photo emulsion is best for creating detailed or photographic type stencils for screen printing.Speedball’s Diazo Photo Emulsion is a 2-step process where the photo emulsion needs to be “activated.” To activate, the photo emulsion, sensitizer needs to be added. The sensitizer is a very thick oi...
 Show Reddit reviews
20. Leruna100 LERUNA Shower Curtain Polyester Fabric High Grade Quality for Bathroom with 12 Hooks | 72 x 72 Inch
Sentiment score: 0
Number of reviews: 1
✓100% premium polyester Fabric✓HIGH QUALITY FOR DURABILITY: The curtain is made by 100% premium polyester fabric with 12 plastic hooks, along with 12 metal grommets, which measures 72*72 Inch.✓HEALTHY SHOWER CURTAIN: Simply the safest shower curtain for you and your family. Water repellent-wat...
 Show Reddit reviews
You're asking for quite a lot, but luckily screen printing isn't all that complicated once you understand the process and underlying concept.
Here is a nice guide with some helpful illustrations that should explain the process fairly well. It shows screen printing onto paper with a printing table rather than clothing, but the screens as well as the ideas are the same.
To print on shirts, you'll need a slightly more advanced/modified press, the most basic ones tend to look like this but they also get larger and more complex if you want to print more colours, like this, or as big and intimidating as this. The fundametals behind it all are the same.
To print on fabric you'll need special inks, most commonly an ink called Plastisol. It prints like normal ink, but it doesn't fully dry and resist washing until it's heated up ("cured"), so you need to pair the t-shirt press with a dryer that heats the garment up. The most basic ones look like this and cure the ink as the garment sits on the press. But there are also larger ones like this, with a conveyor belt that take the garment through an oven to cure the ink. There are also water-based inks available that air-dry and do not require curing.
There are a few places to buy equipment/supplies online, especially if you're in the US. The most popular is probably Ryonet.
That sort of runs you through the VERY basics. There is a lot more to learn however, but there is LOTS of information available online, and video tutorials on YouTube as well if you search for them.
Here are some good books for beginners on the subject as well:
Screen Printing Today: The Basics by Andy MacDougall
Screen Printing on the Cheap
And there's a ton of information and answers to common questions on various discussion boards online, two that I found most helpful when I was learning were T-Shirt Forums and the screen printing subforum on GigPosters.com. Most people on the latter forum print on paper, but a lot of the stuff is relevant to both media.
If you have any specific questions, this subreddit is a good place to ask, and from what I've seen we are all happy to share our knowledge. But hopefully this helps you get your mind around how it works.
Start small, get a solid grasp on the fundamentals, and then build.
Firstly I would strongly suggest you not print flatstock on a garment press, use a vacuum table. While it is possible and I've seen a lot of folks do it, printing this way is a massive pain and you will need to use adhesive on your paper to hold it down. Vacuum is far easier and won't make your sheets stick together. For less than $100 you can build a vacuum table with a small shop vac. If you do it smart you should still be able to use the shop vac for normal stuff as well.
As to inks the standard is water based acrylics like Speedball. While their fabric inks are meh, their acrylics are really good. Smooth, evenly drying, and excellent viscosity for a variety of mesh counts. For an even cheaper option you can try acrylic house paint. (Bonus punk cred for buying only off-tints at a discount.) Make sure it's water based acrylic or you will have a bad time. Personally I've had some issues with house paint on occasion but those are pretty rare and this is a common cheap alternative.
You can print pretty much on any paper but uncoated cover stock is generally the best place to start. Strongly suggest not starting with coated stock, it's trickier to get right. In the gigposter world, Mr. French Paper is the gold standard and with good reason, it's f'ing awesome paper. Smooth tooth, even grain, lovely colors, and a nice selection of weights. It is expensive though. For a cheaper alternative you can start with what I did, Exact Index 110# Cover. It's not as fancy as other options but it'll get the job done. I used this paper for many of my early gigposters and it never let me down. The only real issue it has is a bit of ink spread where the ink, if it's thin enough, will tend to spread into the sheet more than in the nicer papers but this is a minor issue really and easily fixed by not watering down your ink too much (a common practice to deal with very high mesh counts).
If you have any other questions post 'em and welcome to the wonderful world of flatstock!
Alrighty, some of the ultra basic stuff is below but I would advise that anything worth doing is worth doing right and the vacuum table would be a huge upgrade to a tack table. Anyhoo...
Everyone's first hinge clamps. For the ultra basic, just get some 1" thick pine stock that will fit your screens plus at least 3" long for the clamps. Here is a mockup of what you're going for, even has 6-up 6x6 image areas mocked up.
You can just square up and drill in the clamps, clamp in the exposed screen, spray down some tack, and print. That's quite literally how I printed my first few gigposters. Note this only works with flat material, if you need dimentionality you will need to split this into 2 builds, one for the clamps and one for the jigs. But for flat stock, it works...
You will probably also want to use quarters taped to the bottom (substrate side) of the screen to help with off-contact. Also you'll want to put down some tape where your substrate is to be placed. Basically you set down the print piece where it's getting printed and run a few layers of tape along two sides of it, not attached to it, just the table. And finally you'll want to keep a 1x1 or 1x2 piece of wood or whatever to put under the clamps when the screen is up to hold it. Or you can buy/buid a sidekick.
Hope that helps and good luck!
You could of course skip all this hassle and headache and get a preburned screen.
Buying a cheap halogen work light from Lowes or Home Depot and a 8' 2x4 can make you a good starter exposure lamp.
​
Copying and pasting one of my comments from another thread
I'm new to screen printing too and bought some Ecotex PWR emulsion.
Here is how it worked for me:
- 500 watt halogen work light with safety glass removed
- 18in away from screen
- 3mins 10secs burn time (this time worked for me, it will probably work for you too. I haven't done any testing of adding more seconds or less, this one just worked so I'm sticking with it)
- This was on 110 and 160 mesh screens
​
Like others have said a heat gun to cure your ink is a good idea. You can use a hair dryer to dry the ink to the touch and then use an iron to set it if you want as well. I went on craigslist and you can normally (depending on location) find an old, but usable, heat press for around $50, that makes things a lot easier
​
Also I bought some butterfly hinge clamps and used some 2x4s and such to make a diy single color press.
​
Best of luck!
Buy this dudes book:
http://www.amazon.com/Screen-Printing-Today-The-Basics/dp/0944094619
The book not only has multiple process descriptions (with photos) but it also does a brief overview on the industry. It will explain all the details you need, including what an exposure unit is. Its a good start.
Andy is a screenprinting saint...or prophet..or...he is just the bomb, is what im trying to say.
Or random internets is always a good source.
Here's a good thread that takes the shotgun approach. This book is recommended quite a bit, and here's another I've personally enjoyed.
Not sure how super it is to post from one's own website, but we put out a fairly comprehensive tutorial a couple of weeks ago, linked here. It's not down to the last detail, but it does stretch across most of the process. Youtube is probably another great resource, but I'd say just dive in and get dirty. You'll have more specific questions that way. Hope this helps!
Not sure about the lights, but you definitely need a scoop coater for applying the emulsion. For the screens you have a 15-16" scoop coater will work just fine. Use the thin edge, coat the shirt side first, then the ink side.
I use this light in the 20w version, 16" from the screen.
By the way, if you order screens in a 6 pack or more they get much cheaper per screen. Also, if you order a multi pack directly from Goldupusa.com you can have them mix a couple different mesh counts, like 3@160, 3@110.
There's also adapters you can use for connecting a hose to your shower head. I was going to run a hose in from an outside spigot but your post inspired me to look into it more. Thanks!
Anderson Metals Brass Garden Hose Fitting, Connector, 3/4" Male Hose ID x 1/2" Female Pipe https://www.amazon.com/dp/B000FPAPM8/ref=cm_sw_r_cp_api_i_dhQoDbT0A5G3M
Hinge clamps like these work very well to keep your screen in the same place, and are still pretty minimalist.
If you want to go a little more complex, do an internet search for, "DIY t-shirt screen printing press," or something similar, and you will find a bunch of pretty easy-to-make setups that use hinge clamps, but are a little better than the "flat on a table" setup.
Info | Details
----|-------
Amazon Product | Speedball Hinge Clamp Pair for Screen Printing
>Amazon donates 0.5% of the price of your eligible AmazonSmile purchases to the charitable organization of your choice. By using the link above you get to support a chairty and help keep this bot running through affiliate programs all at zero cost to you.
The pro 100. We would get streaks in our Epson if we didn't clean the heads twice a day. The Epson also had problems with taking the 11x17 paper we used for transfers onto white shirts; this Canon does not. I also personally think the prints are more crisp as well, but that could be bias. Canon sends you free photo paper too when you buy their ink, which is nice. The Canon does take up a lot more space on your desk though, things really big.
Canon PIXMA Pro-100 Wireless Color... https://www.amazon.com/dp/B0095F5BCS?ref=yo_pop_ma_swf
Edit: we use this printer (have 2 of em) for mock ups and scanning. I got it for $182, not $300. Also a solid buy, don't know how it would do for small transfers though
HP OfficeJet Pro 8720 All-in-One Wireless Printer with Mobile Printing, HP Instant Ink & Amazon Dash Replenishment ready - White (M9L75A) https://www.amazon.com/dp/B01CJNMMZG/ref=cm_sw_r_cp_apa_v5ZLBbFFZBTSR
When I first started I read Print Liberation: The Screen Printing Primer. I found it to be a great read and also made screen printing seem very approachable. It has good explanations and lots of step-by-step pictures.
I just picked up a pair as well. Amazon has them at a good price, well at least $15 less than my local art supply store. speedball hinge clamps
Someone on one of the Facebook groups sent me plans yesterday. It’s basically a wooden box 24”x 36”. You take the glass out of a poster frame and lay it on top. And then I will be using this: https://www.amazon.com/dp/B06XJZL97N/ref=cm_sw_r_cp_api_i_U3yTDbQRXJVBF
It should expose in 30 seconds or less, I still need to dial it in. You can even get the registration template from Ryonet to lay over the top of the glass and congratulations, you have a $500 exposure unit for about $85.
https://www.amazon.com/dp/0963947419/ref=cm_sw_r_cp_awdb_OldGybBK2KFE9
When we bought our press, my dad bought me this book. I read it front to back. Then just started messing around. Might be a good gift idea? I still refer to it every now and then.
I use a wide format printer officejet 7612 and transparencies from amazon. I believe these are it (Size 11x17) if that's not big enough there's also some 13x19's:
https://www.amazon.com/CisInks-WaterProof-Inkjet-Transparency-Printing/dp/B00HWI9KWM/ref=sr_1_12?ie=UTF8&qid=1484768448&sr=8-12&keywords=screen+printing+transparencies
Works great, possible depending on how you print, you may need to double them for optimum Blackout.
Use unfiltered black light T8 bulbs
Sylvania 23113 - F30T8/350BL Fluorescent Tube Black Light https://www.amazon.com/dp/B000TZUMQ8?ref=yo_pop_ma_swf
The box I have is from ryonet it uses 8 bulbs, spaced about 3.5 in on center. I’m approximating the glass is about 4 in from the base of the bulbs. My box does not use a vacuum just a lid and I use a piece of foam that is thicker than the screen by about an inch and it compresses when the lid is latched to force the screen flat. Hope that helps, I can give more info if needed
I use these from CISInks and they work great!
https://www.amazon.com/gp/product/B00HWI9KWM/ref=s9_acsd_hps_bw_c_x_3
Ryonet has a number printing system that they talk about in a few videos.
Since you probably can't expose the boxes to ~400 degree heat, you probably want a water-based ink, and let it air dry.
I think that surf- and snowboards have the designs printed onto sheets which are embedded into the top surface with resin. You could print onto the boxes and then paint over it with a finishing resin to protect the design. Or possibly some sort of marine clear coat spray.
Or... if you wanted the design inlayed, print onto fiberglass cloth and bond it to the box with resin adhesive and finishing resin.
Bought a Pixma 6820 a few months back, love it so far
https://www.amazon.com/Wireless-Business-Printer-AirPrint-Compatible/dp/B00HM0IVDY
https://www.amazon.com/Sylvania-23113-F30T8-350BL-Fluorescent/dp/B000TZUMQ8/ref=cm_cr_arp_d_product_top?ie=UTF8
Half the price and work like a charm.
Screen Printing Today is the best book I have read on the subject.
[Amazon Link] (https://www.amazon.com/dp/B001E0FI3E/ref=cm_sw_r_cp_awdb_-TEAzbHASRWG9) Assuming you are in the USA and/or Prime Member- otherwise you could probably find something to do the same job at a hardware store or sites that better serve your area. Hell, you could probably get a local welder to tack a couple of them together for you from of the shelf parts, its just a clampable hinge...
On a side note: you should be building screens! Its pretty easy to do on the cheap and lets you start working with multicolor prints!
this one would be a great one to learn the process: https://www.amazon.com/Speedball-Advanced-All-Screen-Printing/dp/B007W6SAD4
The $50 one isn't on Amazon anymore.
I have the more expensive model of pretty much the same thing.(still looking for clients.) Depending on what you are printing.. If you really want to start small, just get a 110 screen, and some hinge clamps.. Do some one colors.. https://www.amazon.com/Speedball-Hinge-Clamp-Screen-Printing/dp/B001E0FI3E/ref=sr_1_1?ie=UTF8&qid=1478171684&sr=8-1&keywords=hinge+clamps
Been down this route, it's rough. I found indoor grow shops usually have a line on some but it is like pulling teeth to try and figure out even the smallest details about the light. Aquarium's also use UV lights but same deal. 1000bulbs.com has some (https://www.1000bulbs.com/product/3039/F-30T8BLB.html?gclid=Cj0KCQjwsMDeBRDMARIsAKrOP7HU4A6eitm5QE4YxXgHRfDUY6_p6mKT7gHsFpiDU1LabGHIkOqN9psaAn-XEALw_wcB#detail-tabs) I'm switching over to the UV flood lamp (https://www.amazon.com/HouLight-IP65-Waterproof-85V-265V-Blacklight-Supplies/dp/B01LWBV2OJ)
As a complete beginner I wouldn't spend money on that set up just yet. You can get the clamps on amazon here that will save you a ton of money and space. Just screw them into an old table or countertop you don't mind getting paint on.
This claims to have a shelf like of 10-12 months
https://www.amazon.com/gp/product/B075SGLRM8/ref=ppx_yo_dt_b_search_asin_title?ie=UTF8&psc=1
I think Ryonet's stuff is overpriced and of medium to low quality. Buy a book called Print Liberation and use their setup. I went to school for two years for screen printing and have been doing it for another four years at pro shops and was blown away with what they suggest. They'll tell you what you'll need. :)
https://www.amazon.com/dp/B07VKNCQQ9?ref=myi_title_dp
https://www.amazon.com/Ecotex-DC-BLUE-Dual-Cure-Printing-Emulsion/dp/B075LJ8T99/ref=mp_s_a_1_3?keywords=ecotex+dc-blue+emulsion&qid=1567909000&s=gateway&sprefix=ecotex+dc&sr=8-3
I’m using this kind. I was going to try and mix it more on my next attempt, although I think I mixed it thoroughly enough.
Try this I use it with a phu emultion 40 sec
https://www.amazon.com/gp/aw/d/B06XJZL97N/ref=ya_aw_oh_bia_dp?ie=UTF8&psc=1
I got this. And I like it. CANON PIXMA iX6820 Wireless... https://www.amazon.com/dp/B00HM0IVDY?ref=yo_pop_ma_swf
here's the speedball kit
I use this ink for shirts
Speedball Art Products 4560 Fabric Screen Printing Ink, 8 Fl. oz, Black https://www.amazon.com/dp/B001038NLY/ref=cm_sw_r_cp_apa_i_jrRBDb0SHXE2T
And for emulsion this
Speedball Art Products 4559 Diazo Photo Emulsion Kit https://www.amazon.com/dp/B0007ZHGWI/ref=cm_sw_r_cp_apa_i_DwRBDb6XH126Z
It was a home job.
We have an older version of the Canon PIXMA pro (Canon PIXMA Pro-100 Wireless Color Professional Inkjet Printer with Airprint and Mobile Device Printing https://www.amazon.com/dp/B0095F5BCS/ref=cm_sw_r_cp_api_.G5vxbF7ERPF4)
The transparency I used was a 13x19. I am not sure of the brand, a stack of the transparencies came with the manual press setup I got from Craigslist.
That’s interesting. I used to use the 500w halogen worklight but it got tricky exposing larger screen(also got really hot). Been looking for a practical alternative.
Do you use a light similar to this one?
https://www.amazon.com/HouLight-IP65-Waterproof-85V-265V-Blacklight-Supplies/dp/B01LWBV2OJ
It is fun! I'm new to this sub too, just started doing this a few weeks ago so I'm learning a lot as I go.
I started off buying this kit and reading the instructions. It was clear I'd have to buy stuff to make an exposure unit separately, but I did it as cheaply as possible. One bulb from here, one light fitting from here, one home-made reflector made of carboard and foil, hung the light 12" above my desk using my existing desk lamp to hold it up. It's not tidy but it works! Looks like this.
The instruction book in the speedball kit gave a lot of helpful advice. But really it's trial and error.
My biggest errors so far:
Sorry for the wall of text.. There's tons of helpful vids online but most of those people have pro set ups with carousels. I'm doing it very cheaply!
Give me a shout if you buy the kit and get into it!