Top products from r/crafts
We found 29 product mentions on r/crafts. We ranked the 320 resulting products by number of redditors who mentioned them. Here are the top 20.
1. The Incredible Clay Book. Klutz Press
Sentiment score: 2
Number of reviews: 2
Spiral-bound82 PagesBy Sherri Haab, Laura TorresPublished by Klutz - June 1994For Ages 9-12
 Show Reddit reviews
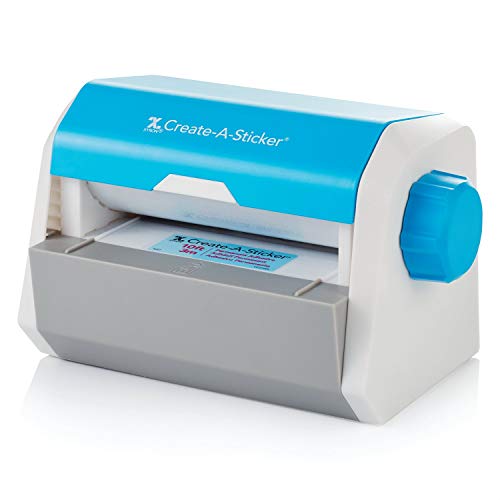
2. Xyron Create-a-Sticker, 5", Sticker Maker, Machine, Permanent Adhesive (0501-05-10A)
Sentiment score: 1
Number of reviews: 2
Ready when you are – The non-electric create-a-sticker has no warm-up time. Effortlessly apply edge-to-edge adhesive with only a few turns of the knob and very little clean upEasy to use – Create stickers in a snap. Place an item up 5" wide in the create-a-sticker, turn the knob, and then tear a...
 Show Reddit reviews
3. Morgofun Diy Paint by Number Kits, Paint by Numbers for Adults with Canvas Brush Romantic Cherry Blossoms Park 40x50cm
Sentiment score: 1
Number of reviews: 2
【PAINT BY NUMBERS】: Paint by numbers for adults 16 x 20inch ( 40 x 50cm), paint by number kits romantic cherry blossoms pattern will be excellent decoration for your home, kitchen, hotel.【DIY PAINT BY NUMBERS】: This number painting is not finished, it need to paint by yourself. And will prov...
 Show Reddit reviews
4. Mod Podge Dishwasher Safe Waterbased Sealer, Glue and Finish (8-Ounce), CS15059 Gloss, 8 Ounce
Sentiment score: 2
Number of reviews: 2
Mod podge water base gloss Sealer, glue and finishDishwasher-safe formulaPerfect for sealing your art projects on dishwasher safe itemEnough glue to Seal several small projects or one larger itemBottle contains 8 ounces
 Show Reddit reviews
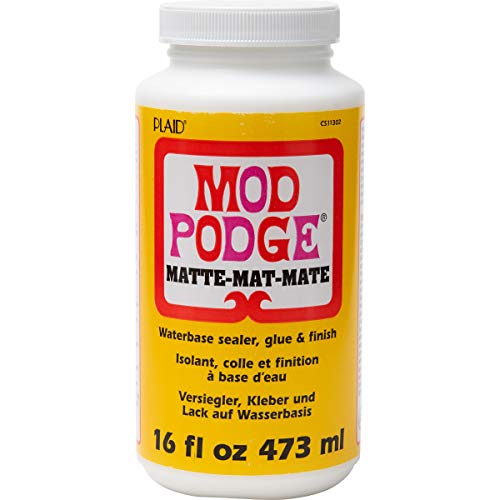
5. Mod Podge CS11302 Waterbase Sealer, Glue and Finish, 16 oz, Matte
Sentiment score: 1
Number of reviews: 2
Multipurpose, all-in-one sealant, glue, and finish. Matte finishQuick-drying for multiple coat build up. Dries clearApply with brush or sponge applicatorDries in approximately 15-20 minutes and can be sanded to a smooth finishWater-based, non-toxic, made in the USAQuick-drying for multiple coat buil...
 Show Reddit reviews
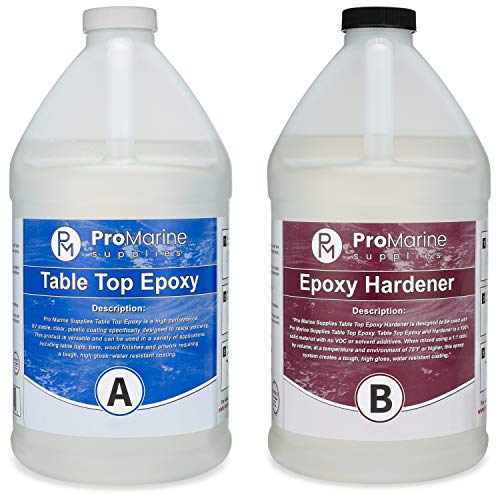
6. Crystal Clear Bar Table Top Epoxy Resin Coating for Wood Tabletop - 1 Gallon Kit
Sentiment score: 0
Number of reviews: 2
Designed for Table Tops, Bars, Wood finishes, See-Through Encapsulations, Art work, and other applicationsSelf Leveling and High Gloss U.V. Resistant FormulaProduces a Tough, High Gloss, Water Resistant CoatingEliminates Craters, Crawling and Fish EyesBlush Resistant. A total of 1 gallon combined
 Show Reddit reviews
7. Wrapables Fish Bubble Wall Mounted Acrylic Fish Bowl
Sentiment score: 0
Number of reviews: 2
Brand newTop qualityUp to half gallon
 Show Reddit reviews
8. HitLights 16.4FT RGB LED Strip Lights 5050 Color Changing LED Light Strips Kit with Remote Control, Power Supply for Home Room Kirchen Decoration
Sentiment score: 1
Number of reviews: 2
Everything you need including a 16. 4 feet/ 5M of 300 LED SMD 3528 strip lights, a small 12V DC PWM dial Dimmer, and an easy plugin 12 volt transformerCut table and connectable - compatible with our hit Lights 8mm Connector extensions and accessories. Simple connect - Cut with a pair of scissors eve...
 Show Reddit reviews
9. Hemp Masters: Ancient Hippie Secrets for Knotting Hip Hemp Jewelry
Sentiment score: 1
Number of reviews: 1
Used Book in Good Condition
 Show Reddit reviews
10. Making Silver Chains: Simple Techniques, Beautiful Designs
Sentiment score: 1
Number of reviews: 1
Used Book in Good Condition
 Show Reddit reviews
11. Making Wire Jewelry: 60 Easy Projects in Silver, Copper & Brass
Sentiment score: 1
Number of reviews: 1
Helen CleggMary LaromMaking Wire Jewelry60 projectssilver, copper, and brass
 Show Reddit reviews
12. KINNO Imitation Gold Foil Sheets - Red Leaf Paper for Arts Decoration, Handcrafts, Picture Frames, Sculpture, Wall, Line, Furniture, Gilding, Nails, 100 Sheets 3.15 by 3.35 Inches
Sentiment score: 1
Number of reviews: 1
【Dimension】: 3.15x3.35 inches / 8x8.5cm, 100 sheets of red foil【Materials】: The component of these imitation red foil main sheets are alloy【Multi-Applications】: You can use these foil papers on many ways such as artistic work, furniture, picture frames, slime, nails, eyes, paintings and ...
 Show Reddit reviews
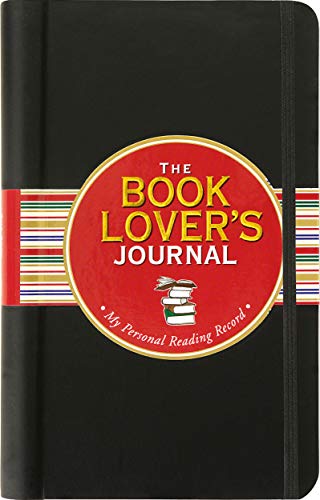
14. The Book Lover's Journal (Reading Journal, Book Journal, Organizer)
Sentiment score: 1
Number of reviews: 1
Used Book in Good Condition
 Show Reddit reviews
16. The Polymer Clay Cookbook: Tiny Food Jewelry to Whip Up and Wear
Sentiment score: 1
Number of reviews: 1
Watson-Guptill Publications
 Show Reddit reviews
17. Twinkie Chan's Crochet Goodies for Fashion Foodies: 20 Yummy Treats to Wear
Sentiment score: 0
Number of reviews: 1
Used Book in Good Condition
 Show Reddit reviews
18. Klutz Sew Mini Treats: More Than 18 Food Plushies to Stitch & Stuff, Craft Kit
Sentiment score: 0
Number of reviews: 1
2016 nappa award winner2016 parents’ choice award winnerMore than 18 food plushies to stitch and stuffNo prior sewing experience is necessaryIncludes a 48 pgs. Instructional bookSmall-scale projects stitch up fast and provide hours of funIncludes 9 colors of felt, 32 yards of floss, 2 embroidery n...
 Show Reddit reviews
19. Klutz Make Clay Charms Craft Kit
Sentiment score: 1
Number of reviews: 1
Parents' Choice Award WinnerFamilyFunToy of the Year AwardMake more than 35 different charms to wearComes with 9 colors of clay, charm bracelet, clay shaping tool, glaze with brush applicator, jump rings, charm loops, drying and display standIncludes a 60 page instructional book with Klutz certified...
 Show Reddit reviews
You can find books and videos on working with wire to make fancy links or simple jump rings to make a variety of different kinds of chains. There are also books on wire wrapping to make settings for stones and bands for rings, etc.
I don't have my jewelry books handy at the moment, but I recall this one being a good book for beginners - and you can get a used copy on Amazon right now for around three bucks plus shipping. This book is a really good one on chain making. It's apparently out of print but still available new through Amazon affiliates for less than half its original price. I don't own this book, but it looks like it has a few different interesting techniques for wire working.
I'd HIGHLY recommend practicing with plated or filled/layered wires to begin, because of the expense. I picked up a roll of bare aluminum wire at Home Depot really cheaply a few years ago, to try new techniques. If I remember correctly it was used for electrical fences, which is why it was uninsulated. I've also used heavy copper wire to make stuff, after stripping off the insulation.
When you buy wire, the smaller the gauge number the fatter the wire. Really thin wire is often too flimsy for jewelry - unless you're doing something special, and really heavy wire is usually too clunky - though if it's fat enough you can file and hammer it to get some interesting textures.
Ultimately it would be really good to learn to solder with a torch, to close up all of the links in your chains and join pieces together, etc., but leaving links unsoldered when you're first starting out is usually OK, as long as they don't snag on stuff.
Good luck.
This is a really cute idea. Have you thought about self-publishing?
In January I self-published a picture book through Amazon's CreateSpace.
Pros:
Cons:
For me, self-publishing was the way to go because my only real goal was to create a book. I had an idea, thought it would be really fun to try, and seeing the project through to completion was a rewarding experience in itself.
If your goal is to sell thousands of copies and outsource production of your monsters to China, you'll probably want to align yourself with an agent and/or publisher.
If your goal is to put something out into the world because creating it makes you happy and it has the potential to bring happiness to others, then don't wait for a publisher to validate your awesome idea. Assess how much of it you can do on your own, and if there are aspects you may need help with (graphic design, copyediting, etc.), enlist the help of friends, or network with friends of friends, and see if you can't collaborate.
Good luck!
I bought all my material at Aaron Brother's, a bit pricey but they had a buy 1 get 1 free on pretty much every piece I needed for the project. The case it's in is called a keepsake box. I used watercolor paper by Canson, but any cardstock type paper would do (think thickness of greeting cards, maybe a bit thicker). Each layer is spaced apart by two piece of doublesided thick sticky tape to give it more depth. And for the lighting I cut a small hole in the back of the box and used http://www.amazon.com/gp/product/B00713R2ZK/ref=oh_aui_detailpage_o01_s00?ie=UTF8&psc=1 (straightforward to use, cost a few more bucks but I think the convenience is worth it. And as for the whole design, I just had a few ideas in mind and did it free hand. But the key thing to think about it how much of one layer will cover the other, and to make sure you have enough space to put everything you want into the picture. Make sure to keep checking your progress in between every layer. Hope that helps! Ask if you have any specific questions I forgot to mention.
Well you could use a clear spray varnish like this clear Varathane or Neverwet. But I don't know about those being dishwasher safe or food safe if that's what you're looking for. But since it's on the outside of the glass as long as it has about an inch around the top for where you drink from the food safe shouldn't be a problem.
Otherwise Mod Podge makes a finish that is dishwasher safe which is what I always recommend.
good luck!
There were two Klutz books back in the day for polymer clay, and each came with 8 half-bars of Sculpey III (a low-quality polymer clay); they wouldn't have the clay still included though if purchased at amazon, eBay, etc.
https://www.amazon.com/Incredible-Clay-Book-Klutz-Press/dp/1878257730
https://www.amazon.com/Create-Anything-Clay-Sherri-Haab/dp/1570543275
Those were very simple books oriented toward kids, and almost entirely small sculpted items in the second book (the first book had more techniques), but I see there's at least one newer Klutz polymer clay book (not by the same author/s though) on making sculpted "charms":
https://www.amazon.com/Klutz-Make-Clay-Charms-Craft/dp/0545498562
There are better books for those things though, even for simple sculpts (including "charms") like these for example:
https://www.amazon.com/Clay-Play-JEWELRY-Terry-Taylor/dp/0486799441
https://www.amazon.com/Polymer-Clay-Cookbook-Tiny-Jewelry/dp/0823024849
But there's also loads of FREE info, tutorials, etc, online at YouTube and at places like my website for making things like that, and many other things with polymer clay.
Here is the exact resin I use
I've found with careful control of resin temperature and slow mixing of small batches you can get a nearly bubble-free pour. These pieces are also 1x1x1.5" so they are quite small.
My initial test build had millions of bubbles but by changing a few parameters (dont store resin in the cold basement, mix with proper cups and a mixing spoon) I got something I was happy with!
Also this is regular clear epoxy resin just marked down for tables so that could be why they charge less for it.
Hiya! I have one of [these guys] (http://www.amazon.com/Xyron-XRN500-Create---Sticker-Machine/dp/B000WWGANC/ref=sr_1_3?ie=UTF8&qid=1405812543&sr=8-3&keywords=sticker+maker) and I love it. As long as your paper is under 5" (or I guess 12.7 cm for you) you can make a nice clean sticker out of it.
I've never used it personally but I know that Mod Podge makes a dishwasher safe sealant that I've heard good things about.
I bought this book back in highschool when I was really into making hemp necklaces. It has a lot of cool knots that I haven't ever seen anywhere else. If I remember right, the directions were pretty easy to follow too.
I took a course on foil imaging in college. It’s one of my favorite art media’s ever!
http://www.theiowafoilprinter.com
We used these kinds presses to get the foil to stick to our base (we’d use any kind of polymer base. My favorite was elmer’s glue and normal printer ink)
I’ll add additional links on it and reading material on it.
(Book in foil imaging)
https://www.amazon.com/Foil-Imaging-New-Art-Form/dp/0965162079
https://now.uiowa.edu/2014/04/learn-foil-imaging-technique-created-ui-summer-workshop
https://www.behance.net/gallery/12736173/Foil-Imaging-(A-New-Art-Form)
For a friend's baby's birthday, I presented a copy of The Owl and the Pussycat and I made this toy to go along with. Thanks for the help on my original post asking for advice! I went with a teensy little satin stitch for the beak and just three stitches next to each other for the cat's eyes.
Lessons learned for if I do it again:
The only big unanswered question is how I should actually have handled tying off the knots when sewing the sides together. It's kinda haphazard as is and probably not terribly durable but my google-fu failed me in trying to find a better solution.
Edit: also if I were doing it again I'd obtain a squeaky or a rattle to put inside, or maybe put a layer of crinkly plastic.
1.) Cut your paper pattern to just a little bit bigger than your surface. I got my paper from paper source
2.) Put down a thin layer of mod podge using a sponge brush. Make sure to cover the entire surface. I use matte, but you can use glossy or whatever you want
3.) put the paper down on the mod podge, being careful not to let air bubble develop
4.) push down the edges, but if they don't stick at this point it's not a big deal
5.) Let it dry for like 30-40 minutes
6.) When it's dry, use an exacto knife to trim the edge to your surface's dimensions. It's very important that the underlying glue already be dry because trying to cut it when it's still wet can tear the paper
7.) If the edges aren't totally glued down at this point, use a small sponge brush to touch them up and let them dry for 30-40 minutes
8.) Finally, with the paper glued down and cut to shape, use sponge brush to spread a thin layer of mod podge across the surface, making sure to spread it evenly. If you use a regular brush, your finish is going to get a much more textured feel to it, so that's why I prefer sponges. Let dry for 1 hour or more depending on how thick you applied the finish
If she's interested in continuing with the clay, I had this book when I was a kid and I loved it. I think my mom still has some of the figurines I made from it, haha.
Do you like the idea of a suitcase? Because you could still make a book/suitcase with pics and everything, put those few books in there and put this in there too:https://www.amazon.co.uk/Lovers-Journal-Diary-Notebook-Organizer/dp/1441304827. you can write the list in there and she can make notes or use it as her book journal :)
Love the colors. I just got one off Amazon for $12, should be here tomorrow. Put it on my list of things I will never complete :p
Red foil leaf (as well as any other color you'd like)
https://www.amazon.com/KINNO-Imitation-Decoration-Handcrafts-Sculpture/dp/B07TWTNRHV/ref=sr_1_8?keywords=red+metal+leaf&qid=1574799197&sr=8-8
Not a dumb question at all! Unfortunately it doesn't, it's just a box with a lot of space in it to make the layers. The lights that have been recommended that I purchased for mine are these though! click here
Amazon sells that exact dome bowl thingy. I couldn't really find any alternatives that looked similar that weren't going to cost you an arm and a leg.
For the water (I imagine you'd have to put in some sort of divider, unless you want to just fill the whole thing up) you could use the technique this guy uses Youtube tutorial
http://www.amazon.com/Wall-Mount-Fish-Aquarium-Goldfish/dp/B0033SHT00
Modge podge
https://www.google.com/url?sa=t&source=web&rct=j&url=https://www.amazon.com/Mod-Podge-Waterbase-16-Ounce-CS11302/dp/B001IKES5O&ved=2ahUKEwjNh7LT0uHhAhUMZKwKHfDJB58QFjAJegQIAxAB&usg=AOvVaw2iY6wF4RHodprO46OLQlB6
You can paint this too!
This is a Twinkie Chan pattern from this book. Chan Book
There is a similiar bacon and eggs pillow pattern on Ravelry. Pillow
I am making a pillow next since I already have the yarn and know the techniques. I actually think the pillow will get more use than the scarf.
This is the kit I bought!
There is clear sticker paper that you can print on and then cut out yourself. There's several brands and you can find them at pretty much any craft store.
There's also some that you can draw on yourself.
If you're looking for intricate cuts, you may wanna look into investing in a die cutting machine (like the silhouette cameo or a cricut machine).
And also there's these small, simple sticker maker machines for like 10-20 bucks, not including the sticker refill (though I'm not quite sure how to use those. It's these though).
> Third: My casts have a yellow hue to them instead of being crystal clear as the product should be. While setting I did block them from sunlight. Could this be the result of measurement error or mixing error?
Did you use this resin? I had the same problem, and the company said that if you pour in increments thicker than 1/4", the excess heat discolors the resin.