Top products from r/ender3
We found 233 product mentions on r/ender3. We ranked the 702 resulting products by number of redditors who mentioned them. Here are the top 20.
1. FYSETC 3D Printer Motherboard Accessories 0.31 in OD 0.78 in Length Compression Springs Light Load for Creality CR-10 10S S4 Ender 3 Heatbed Springs Bottom Connect Leveling - 10 Pack
Sentiment score: 8
Number of reviews: 18
Please Note: The length of it is 20mm which is not suitable for CR10 series products)Die Spring: compatible with most 3D Printer Bed, great Ender 3/2 TronXY X5S heat bed springs, flat top and stiffer;(Note: The length of it is 20mm which is not suitable for CR10 series products)Hole Diameter (OD) : ...
 Show Reddit reviews
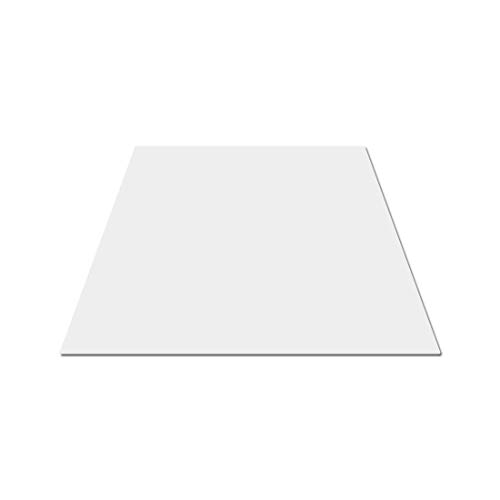
2. Gizmo Dorks PEI Sheet 3D Printer Build Surface 235mm x 235mm (9.3" x 9.3") with Preapplied Laminated 3M 468MP Adhesive for Creality Ender 3 or CR 20 | Made in The USA
Sentiment score: 3
Number of reviews: 12
Made in the USA - Ultem 1000 PEI sheet installs quickly via the laminated adhesive on top of existing flat build platforms (e.g. borosilicate glass)Bubble free application - The 3M 468MP adhesive is already preapplied to the PEI; simply peel back the tape liner for quick adhesion to the bedBuild Sur...
 Show Reddit reviews
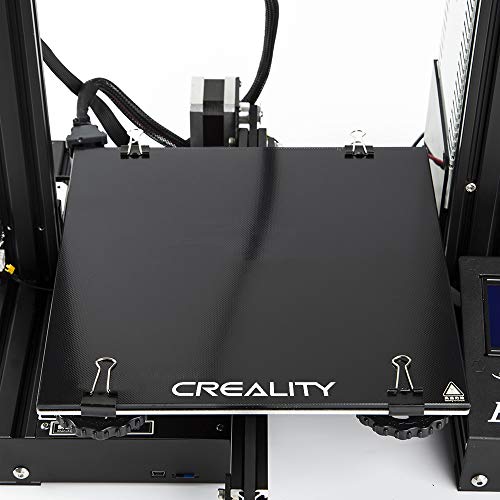
3. Creality 3D Printer Platform Heated Bed Build Surface Tempered Glass Plate for Ender 3/Ender 3 Pro 3D Printer 235x235x3mm
Sentiment score: 7
Number of reviews: 11
Very easy to take off the models, NO tools to remove modelsUse clips to fix the glass plate on the hot bed.Higher temperature higher sticky. The models will stick on bed firmly when temperature is highFit for Ender 3 and Ender 3X 3D printer.If you have any question or problem,please feel free to con...
 Show Reddit reviews
4. Capricorn Bowden PTFE Tubing XS Series 1 Meter for 1.75mm Filament (Genuine Capricorn Premium Tubing)
Sentiment score: 2
Number of reviews: 10
Brand: CapricornLength: 1 MeterID: 1.95mm ± 0.05mmOD: 4.0mm
 Show Reddit reviews
5. Upgrade 3D Printer Parts MK8 Extruder Aluminum Alloy Block Bowden Extruder 1.75mm Filament for Creality 3D Ender 3,CR-7,CR-8, CR-10, CR-10S, CR-10 S4, and CR-10 S5
Sentiment score: 3
Number of reviews: 10
Original Aluminum Drive Feed for Creality 3D CR-7, CR-8, CR-10, CR-10 S4, CR-10 S5, it is stable and durable.MK8 extruder drive feed kit, can replace acrylic parts of CR-10, CR-10 S4, CR-10 S5.Full Metal Aluminum AlloyUsed for 1.75mm filamentDIY aluminum block, need to assembly by yourself
 Show Reddit reviews
6. Official Creality 3D Ender 3 Ender 3 Pro Ender 5 Tempered Glass Upgraded Build Plate Printing Surface for Heated Bed 235x235mm
Sentiment score: 5
Number of reviews: 10
Experience Pro-hesion- Our state of the art carbon and silicone build surface provides the best adhesion in the market. Once the hotbed cools back to room temperature, the carbon-silicone base will release the model which can be easily removed by hand.This new glass plate can be placed on top of any...
 Show Reddit reviews
7. Official Creality 3D Extruder Feeder Drive MK-8 Aluminum Upgraded 1.75mm for CR-10 Ender 3 CR-10S
Sentiment score: 5
Number of reviews: 9
This high quality all aluminum construction is guaranteed to last for years!Upgrade from your stock plastic or 3D printed extruder feeder drive as they can wear over time, scrape filament as it is pulled into the printer, or even break when squeezed to release the filament.This extruder feeder drive...
 Show Reddit reviews
8. SIQUK 2 Pcs PTFE Teflon Tube (2M) 4 Pcs PC4-M6 Quick Fitting 4 Pcs PC4-M10 Straight Pneumatic Fitting Push to Connect for 3D Printer 1.75mm Filament
Sentiment score: 21
Number of reviews: 8
 Show Reddit reviews
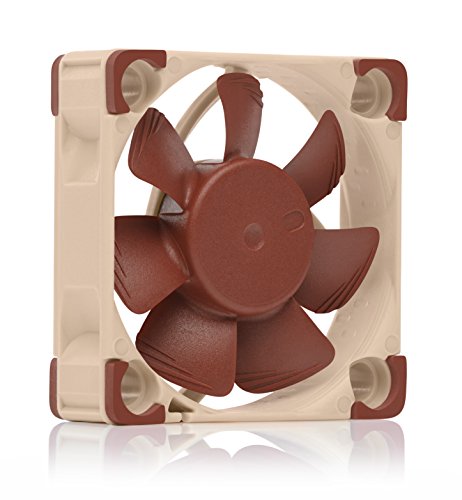
9. Noctua NF-A4x10 FLX, Premium Quiet Fan, 3-Pin (40x10mm, Brown)
Sentiment score: 6
Number of reviews: 8
Premium quiet fan, 40x40x10 mm, 12V, 3-pin Molex, 4500/3700 RPM, max. 17.9 dB(A), >150,000 h MTTFAward-winning 40x10mm A-series fan with Flow Acceleration Channels and Advanced Acoustic Optimisation frame for superior quiet cooling performanceIdeal replacement for noisy or broken 12V 4cm fans in 3D ...
 Show Reddit reviews
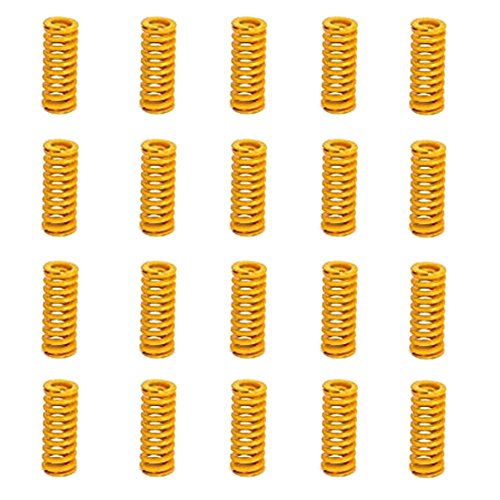
10. 8mm OD 20mm Long Light Load Compression Mould Die Spring Yellow Compression Mould Die Spring for The Ender 3s Bed 20pcs
Sentiment score: 2
Number of reviews: 7
Product Name : Die Spring; Loading Grade : Light LoadHole Diameter (OD) : 8mm/0.31";Rod Diameter (Inner Dia) : 4mm/0.16"Free Length : 20mm/0.8";Material : MetalColor : Yellow; Model : TF 8*20Package Content : 20 x Die Spring, because the quantity is counted by people, if the quantity less 20, please...
 Show Reddit reviews
11. SoundOriginal 24V DC Brushless Blower Cooling Fan 50x50x15mm,for 3D Printer Humidifier Aromatherapy and Other Small Appliances Series Repair Replacement (2pcs 24V)
Sentiment score: 4
Number of reviews: 7
Cooling Blower Fans; DC 24V 0.15A 50mmx15mm Widely used in humidifier, aromatherapy and other small appliances series; small heat radiating communication equipment; military equipment; intelligent industrial control equipment plate cooling heat, high precision medical equipment cooling; pc cpu serve...
 Show Reddit reviews
12. ZUPAYIPA 400mm x 210mm x 0.5mm Silicone Thermal Pad for CPU GPU Heatsink
Sentiment score: 3
Number of reviews: 7
Product Name : CPU Thermal Pad;Material : SiliconeSize : 40 x 21cm/15.7'' x 8.1'' (L*W),Weight : 103gThickness : 0.5mm/0.02''Used for graphics cards, graphic chips and CPU chips.The thermal pad can lower greatly CPU temperature and solve most of the laptop heatsink problem.Package Content : 1 x CPU ...
 Show Reddit reviews
13. Glass Printer Bed 235x235x4.0mm Borosilicate Glass 3D Printer Glass Print Platforms for Ender 5/Ender 3/Ender 3 Pro
Sentiment score: 4
Number of reviews: 6
【Borosilicate Glass】This material has Ultra-low thermal expansion,heat resistant and high temperature shock resistance.Thick 3.8mm glass plate will not warp or bend under heat.【Worked Perfectly】This Printer Glass bed is amazingly flat.Smooth flat surface improves the quality of your 3D print...
 Show Reddit reviews
14. [Gulfcoast Robotics] 3D Printer Borosilicate Glass for The Creality Ender-3-4mm Thick.
Sentiment score: 4
Number of reviews: 6
100% Genuine Borosilicate Glass is thick, durable and resistant to thermal shockRounded corners and beveled edges are safe and easy to handleFits the Creality Ender 3, Ender 3 Pro, Ender 5 and Geeetech A10 Heated BedsPerfectly flat, heat resistant plate does not warp and maintains shape over timeRec...
![[Gulfcoast Robotics] 3D Printer Borosilicate Glass for The Creality Ender-3-4mm Thick.](https://m.media-amazon.com/images/I/51T0-r9uaWL.jpg) Show Reddit reviews
Show Reddit reviews15. HICTOP Upgraded Replacement Aluminum MK8 Extruder Drive Feed for Creality 3D Printer Ender 3/3Pro CR-10, CR-10S, CR-10 S4, and CR-10 S5
Sentiment score: 2
Number of reviews: 6
[UPGRADING]: Original Aluminum Drive Feed for Creality Ender 3/3Pro CR-10, CR-10 S4, CR-10 S5, it is stable and durable.[REPLACEMENT]: MK8 extruder drive feed kit, can replace acrylic parts of Creality Ender 3/3Pro CR-10, CR-10 S4, CR-10 S5.[Easy TO USE]:for 1.75mm filament of 3D printer MK8 bowden ...
 Show Reddit reviews
16. CHPOWER CR-10 Extruder Upgraded Replacement, Aluminum MK8 Drive Feed 3D Printer Extruders for Creality Ender 3, CR-10, CR-10S, CR-10 S4, CR-10 S5
Sentiment score: 3
Number of reviews: 6
UPGRADE: Right hand extruder kit - Perfect replacement for Creality 3D Printers ENDER3, ENDER5, CR-10 Series, CR-10 S4, CR-10 S5, CR-10 Mini, CR-10S, CR-10 Plus. Upgrade your Creality 3D Printer Extruder with our New "Metal Anodised Aluminum" Upgrade Kit.STABLE and DURABLE: Full metal aluminum alloy...
 Show Reddit reviews
17. SoundOriginal 24V DC Brushless Blower Cooling Fan 50x50x15mm,for 3D Printer Humidifier Aromatherapy and Other Small Appliances Series Repair Replacement (24v Dual Ball Bearing 2pack)
Sentiment score: 1
Number of reviews: 5
Cooling Blower Fans; DC 24V 0.15A 50mmx15mm Widely used in humidifier, aromatherapy and other small appliances series; small heat radiating communication equipment; military equipment; intelligent industrial control equipment plate cooling heat, high precision medical equipment cooling; pc cpu serve...
 Show Reddit reviews
18. Comgrow Creality Ender 3 Pro 3D Printer with Removable Build Surface Plate and UL Certified Power Supply 220x220x250mm
Sentiment score: -1
Number of reviews: 5
REMOVABLE BUILD SURFACE PLATE: Provide all-round protection to your 3D printer build plate and ensure consistent temperature throughout the build surface. Easy to remove the printing models after cooling.SAFE POWER SUPPLY: Ender 3 Pro comes with a UL Certified power supply, protecting your printer f...
 Show Reddit reviews
19. HATCHBOX PLA 3D Printer Filament, Dimensional Accuracy +/- 0.03 mm, 1 kg Spool, 1.75 mm, Black, Pack of 1
Sentiment score: 3
Number of reviews: 5
1 KG (approximately 2.20 lbs) Spool1.75mm Filament Diameter (Dimensional Accuracy +/- 0.03mm)PLA (Polylactic Acid) 3D Printer Filament Vacuumed Sealed With DesiccantRecommended Extrusion/Nozzle Temperature 180°C - 220°CSpool Diameter: 7.88" - Spool Width: 2.69" - Spool Hub Hole Diameter: 2.20"
 Show Reddit reviews
Most of these are less about upgrading, and more about fixing possible issues. But all of these are great to have and extremely cheap.
As others have said the glass bed and yellow bed springs are great, just be aware the amazon listing on there I used was shipped from china and took almost a month to show up. So pay attention to the shipping times.
The couplers the E3 comes with are straight up garbage. If they are not causing problems yet... they will. These are way better and give you plenty of extras if you ever need them:
https://smile.amazon.com/Ivelink-PC4-M10-Straight-Pneumatic-Extruder/dp/B073TTWWN1/ref=sr_1_7?keywords=ender+3+coupler&qid=1558892247&s=gateway&sr=8-7
​
The PTFE tube it comes with is also not great, any replacement one is usually better, and like others said with Capricorn you can print higher temps, but they also are manufactured to tighter tolerances and have less slack in your system. As to if this is a noticeable difference, it's arguable, but upgrading has fixed problems for some people.
https://smile.amazon.com/Capricorn-Bowden-Tubing-1-75mm-filament/dp/B079P92HN9/ref=sr_1_3?keywords=capricorn+tubing&qid=1558892351&s=gateway&sr=8-3
​
Even more important than the tubing it self is the cutter you use, if you buy different tubing, make sure you get a good cutter so the ends don't get pinched. This can cause drag that causes underextrusion.
https://smile.amazon.com/Capricorn-Bowden-Tubing-Cutter-M-Bowden-Cutter/dp/B07N11H963/ref=sr_1_8?keywords=capricorn+tubing&qid=1558892424&s=gateway&sr=8-8
​
The plastic extruder on the E3 is know to wear out after a few months for some. A filament guide will help but a better aluminum extruder should fix it for good. They are cheap and easy to install:
https://smile.amazon.com/HICTOP-Upgraded-Replacement-Aluminum-Extruder/dp/B0761PGLZ4/ref=sr_1_1_sspa?keywords=ender+3+extruder&qid=1558892498&s=gateway&sr=8-1-spons&psc=1
​
Once you want to go deeper down the hole, the two big mods that you will be happy with are A auto bed leveler and quieter stepper motors. There are guides for both of these on youtube and they are much more complicated and a bit more expensive but give amazing results.
​
A BLTouch goes for about $80 with the extension cable so you don't have to cut wires. It will make it so you save an offset and basically rarely have to level your bed again and the machine will account for most of it. There is another type of leveler I think it's called EZABL or something like that, but I liked the BLTouch option better so I never did the research on it.
If you want to do more upgrades like a touch screen, filament rounout sensor, and etc. you need a different main board. Most people upgrade to the MKS Gen L. They are about $25 bucks but require you to also buy new stepper motor drivers, which i'll touch on next. The board has more memory and slots for upgrades that the stock board does not. It does require a lot more setup and printing a new housing for the board. Again there are great youtube videos, just search for 'Ender 3 MKS Gen L'
​
If you think the Ender 3 is loud and would like it to be WAY quieter you can install better stepper motor drivers. The TMC 2208 driver will make the movement almost silent. you will still hear the fans, but the movement sound will completely gone. To install them you will need to either use the above mentioned board (as the stock board has the drivers integrated) or if you want an easier way you can order the Ender 3 Silent Ver 1.4 board:
https://www.creality3donline.com/creality3d-new-upgrade-silent-114-mainboard-for-ender-3-pro-ender-5-customized-und-non-standard-matching_p0147.html
This won't give you the upgradabiliity of the MKS board, but is a direct drop in replacement that gives you the silent steppers.
​
Welcome to family, and I hope some of that was helpful
I've owned the Ender 3 for a few months now and have made a number of upgrades, both purchased and printed. Here's a list of what I have purchased and printed, sorted by importance/usefulness.
 
Purchased Parts:
 
Printed Parts:
 
Future Upgrades:
Spool Roller - One issue I've found is that the stock spool holder requires excessive force from the extruder to unwind filament. A replacement spool roller with bearings should reduce the friction significantly and produce more even extrusion.
Metal Extruder - A common problem with the Ender 3 is that it fails to maintain proper tension on the extruder gear, which leads to failure to feed and poor extrusion. An all-metal extruder has been known to fix the issue.
The PSU case needs some love, too. It's like Creality shopped around for the loudest fans it could find, and that's what shipped with the Ender. Anyway, these two things make the PSU much better: https://www.thingiverse.com/thing:3384875 WellFan Noctua 60x25 remix https://www.thingiverse.com/thing:2967389 WellFan PSU case mod and for fun https://www.thingiverse.com/thing:2987473 cause, well, just cause (60mm fan guard) oh, and the fan: https://www.amazon.ca/gp/product/B009NQMESS/ref=ppx_yo_dt_b_asin_title_o07__o00_s00?ie=UTF8&psc=1
Heyyyyy, you've added a buck converter and have 12v now, time to change the main board fan! It's a noisy bugger too! It ends up being the same fan as what comes on the factory hotend cooler. Annoyinggggggggggg. Like a mosquito in my ear!!! https://www.amazon.ca/gp/product/B009NQLT0M/ref=ppx_yo_dt_b_asin_title_o07__o00_s00?ie=UTF8&psc=1 Noctua 40x10mm fans are bolt in replacements for both of those, if you don't want to change the hotend cooler. I could have used a 40x10 on the Hero Me cooler I used - but the 40x20 looks cooler.
This is the LED strip lighting I used, it was expensive though, and I'm sure you could find much less expensive alternatives. https://www.rpelectronics.com/55-7160w-0-led-strip-outdoor-ip65-white-1m.html (white and red! z-rail and top rail!)
I printed a handle, and really like it, but it won't work without some love. Instead of modifying the 3d model I'm probably just gonna heatgun it into the shape I need it to be. Currently, it hits the Y-axis rail. It's here, if you wanna take a stab at it: https://www.thingiverse.com/thing:3313306
The Z-axis stepper is by far the loudest - I'm going to try to see if I can make a damper work, like this: https://www.amazon.ca/gp/product/B07CL356J5/ref=ox_sc_act_title_3?smid=A28ZWXW3ZSVNZU&psc=1 ** disclaimer note: I haven't done this yet. I haven't received the dampers.
I printed a zillion links from this thing: https://www.thingiverse.com/thing:2920060 but didn't like the result after putting it all together. It motivated me to try and do something for cable management, though. I DID end up using a bunch of the start and end mounts, though, and cut off the link nubs. They worked super great for cable management.
I'm still not 100% happy with the cabling - I'm ordering these: https://www.amazon.ca/gp/product/B074GZFYM1/ref=ox_sc_act_title_2?smid=A23BY812APN9IU&psc=1 and will be trimming/cutting/hiding/wrapping them so it looks nicer. Don't get me wrong, it works fine the way it is, but I don't like that flat ribbon cable stuff. It's too... ugly. It's either these cables or I'm going to build my own, which I like doing anyway. This will be soon. I don't think it'll look much different, but I think individually wrapped cables running to the stepper motors would look cooler. More space-ship-ie.
There's probably more. For this list, there's another list like it of failed/ugly/discarded parts - it took some trial and error for sure. It's worth it though. I've actually printed more stuff for my printer than I have for projects I'm working on. 3d printing is so funny that way!
If you have questions, I'm happy to help :) I have pictures of all this if you need them. I haven't figured out imgur, but will add photos to this album as time goes on: https://photos.app.goo.gl/AEXNqvTXE5ZZhnhi8.
-Tunder
PS. Man this is a really big post. I didn't realize I did so many things. Rabbit hole, this thing is.
I have 22 spools of filament lying about and 4 more arriving today. Of those I think 6 of them are Solutech. While I have some problems with the color in a couple of cases, I've never had any issues with getting them to print. Only filament I have that prints better is the Amolen stuff, but it's expensive.
Your under extrusion issue is one that I've been fighting for two months now. I would get a couple of good prints, then would load a different filament and get the under extruded layers that look just like the ones you're getting. Finally got to the bottom of the problem a couple of days ago.
Try this as an experiment. Pick out a model with a large flat surface like this and print it with a raft. If you're having the issue I was then you'll see diagonal bands of under extrusion, with the bands getting wider as you print larger parts.
I discovered that there was a lot of play in the spring that applies tension to the extruder pinion and when I changed filaments it would change position. No amount of adjustment to the screw that holds it would give me consistent results. I installed this improved all metal version of the extruder from Creality and those went away entirely. Print quality now is at least as good, and maybe better, than I'm getting off of my Tornado and that's saying a lot.
Project for the holiday weekend is to install the BLTouch, and I'll probably swap the extruder out again for the same Titan clone that my Tornado has. If that didn't require a firmware change I probably would have installed it instead of the Creality one. I like the Titan design a lot better.
Good luck and have a wonderful holiday!
Dude, you're spending way too much time and effort on a fan, just buy a new one, they are cheap and will be much better in the long run, just make sure you buy a 24 volt one.
All the stock fans will need to be replaced after a short while on the ender 3, they are cheaply made and are not designed to last very long at all. I'm pretty sure the stock fans that come with the ender 3 don't even use a real metal bearing, it's just plastic, that's never going to last.
Here, 8 measly bucks, cheaper than a meal at a fast food restaurant
here's the part cooling fan, however this thing is pretty cheap too so it wont last very long
I would strongly recommend to skip buying the parts cooling fan and print yourself out a pets fang or something simmilar that uses the 5015 parts cooling fan.
Just like PC cooling fans, these types of fans are not ment to be taken apart, soon as you bend back the plastic that holds the fan blades in the housing it will never be right again. Small fans like this are ment to be replaced, not repaired.
You might as well get used to upgrading parts as they break now, because I guarantee this wont be the last time.
You bought a budget printer, it's a budget printer for a reason, every part that came with it was sourced from the cheapest most cost effective options available on the market. Some people are lucky and manage to get a lot of life from the stock parts, others not so lucky and will probably end up upgrading every part on the machine except for the frame itself.
Update for everyone:
Conclusion:
Hopefully in a couple of weeks I'll be back with a successful picture!
/u/hockeyhippie and /u/johnedwa if you have any input.
https://www.thingiverse.com/thing:3563135
​
I found a vent ring that accepts a 5015. I highly, highly suggest getting a 5015 blower.
​
Here's the ones I got. You also get 2 of them so you can go straight to dual blowers as well if you would like that.
It's a super worthy upgrade. Easy to install too, just snip the 4010 wires and splice the new fan on. For 2 blowers you wire them both to the same line in parallel. Or if you want to do it the pro way, use dupont connectors and a crimper.
​
I used these nifty things to connect them. Super convienient.
Thanks for the reply. So far I haven't touched the extruder arm screws so the should be ok but I will check them later tonight.
I have watched the gear and it looks pretty good to my untrained eye. It doesn't appear to be slipping and also doesn't look like its digging in too much. I have had the chance to check out the tube when I was cleaning out the nozzle and hot end and it looks free from any particles.
​
I have purchased https://www.amazon.co.uk/dp/B07DC594D6/ref=cm_sw_em_r_mt_dp_U_1NwwCb51ACY2Q and it should be arriving today. So I will try to use https://www.thingiverse.com/thing:3203831 to stop any future issues.
​
I will go through the the procedure shown in the video you link and hopefully, this will help.
​
All of this as well as Kamilon's should hopefully resolve my issues.
Hey I also new on this, got my printer a month ago, I was super exited as everyone here when receive their printer, I read a LOT while waiting for the printer, so I heard that the stock bed springs are crappy, so I ordered this ones FYSETC Bed springs, also ordered the Aluminium Extruder feeder, and read about the leveling, the paper sheath method, which I think you should already heard about, I did it at the first time the printer gave me a nearly perfect first print (demo dog) , after a few prints and on my third print I came home just to find a mess on my printer, so I did my research again, find out it was bed adhesion, and find out that the best way was glass bed + PEI sheet was the best option, while waiting to arrive I tried to clean the stock bed sheet with mineral spirits (did have rubbing alcohol) but it worsened the adhesion, so I used one adhesion sticker that comes with the overture filament, and again flawless adhesion, at least for the first 4 prints, then again the frustration, I tried some glue stick and worked but it leaves a mess on your print so I decided to try painters tape directly onto the aluminum bed (which lucky for me it is perfectly flat) this is the best adhesion I have tried, problem is also makes a mess with the down face of the print, Finally mi Gass-PEI arrived, (3 days ago), it has a great adhesion but is not perfect, also you have to raise the Z limit switch to compensate the 5~ mm of Glass-PEI, find out that it isn't perfectly flat it has a good adhesion and leaves a very smooth down face, but at some section it does't sticks well and leaves artifacts on the down face, I'm currently working to fix this.
Sorry for the long post, need to talk about my frustration and let you know you are not alone on this, once you manage to make a good print is very satisfying, I have a PETG filament waiting to be used but I don't think is a great idea to try it until a learn more about 3D printing and the Ender.
Honestly, I don't see a benefit in getting new hotend fans to replace the stock one. the only exception to this is if the old one is broken/damaged, or you want to silence your printer, in which case you would want to get a high quality noctua fan. but you need a buck converter. Teaching Tech made a step by step process on using a noctua and a buck converter, here
you can get a better part cooling fan, you can use the stock 4010 fan, new 5015 fans, or regular fans like the stock hotend fan. if you buy a 5015 fan and it blows your prints down for cools them too much, just turn down the fan speed in your slicer
Borosilicate Glass Bed is absolutely worth it. Even when you wait for your bed to cool after printing (you should) you'll struggle removing parts with Ender 3 print surface. With that borosilicate glass, you'll get a perfectly flat surface that will release parts easily after cooling.
The line down the left hand side is now defaulted in the Cura 3.5.x printer profile. You can modify the start and end gcode under Settings > Printer > Manage Printer. The cura folks adapted it from another person who posted it on Youtube and then modified it to improve it a bit. For instance it now starts both bed and the element at the same time.
Finally, Cura 3.5.1, while supposedly fixing the Ender 3 Printer Profile, is still pretty shakey. It doesn't seem to render good gcode. I've switched back to 3.4.1... more of a PSA than resposne to your question.
Yep Capricorn often rocks. I am in the U.S. so these links may or may not help.
BLtouch kit https://www.amazon.com/Creality-Upgraded-BLTouch-Leveling-Accessories/dp/B07WK3T7S7/ref=mp_s_a_1_2_sspa?keywords=bltouch&qid=1574763211&sprefix=bltou&sr=8-2-spons&psc=1&spLa=ZW5jcnlwdGVkUXVhbGlmaWVyPUEzNUtFTUhQUTcwMDc3JmVuY3J5cHRlZElkPUEwODcyMTkyM0RJVExFMUE4SVMyWiZlbmNyeXB0ZWRBZElkPUEwNDI0MTQ0MTEzOVNSVjZPOTNQQyZ3aWRnZXROYW1lPXNwX3Bob25lX3NlYXJjaF9hdGYmYWN0aW9uPWNsaWNrUmVkaXJlY3QmZG9Ob3RMb2dDbGljaz10cnVl
Bigtreetech SKR Mini E3 https://www.amazon.com/BIGTREETECH-Control-TMC2209-Printer-Creality/dp/B07XYW21J3/ref=mp_s_a_1_1?keywords=mini+e3&qid=1574763284&sr=8-1
Aluminum Extruder
https://www.amazon.com/HICTOP-Upgraded-Replacement-Aluminum-Extruder/dp/B0761PGLZ4/ref=mp_s_a_1_2_sspa?keywords=bowden+aluminum+Extruder&qid=1574763338&sr=8-2-spons&psc=1&spLa=ZW5jcnlwdGVkUXVhbGlmaWVyPUEyNTBSWEdBMFREUzZYJmVuY3J5cHRlZElkPUEwMTM0MzM4MkpCSFA3RFpRVzFZTCZlbmNyeXB0ZWRBZElkPUEwMDA2MDY2MlQ4TTRZVE5URzdTSSZ3aWRnZXROYW1lPXNwX3Bob25lX3NlYXJjaF9hdGYmYWN0aW9uPWNsaWNrUmVkaXJlY3QmZG9Ob3RMb2dDbGljaz10cnVl
You already have a magnetic bed since you grabbed the pro version. The board I linked is silent , you will be impressed if you get it. The BLtouch makes bed leveling much easier and in my opinion is worth the extra cash. It just makes things easier. The aluminum extruder negates having to worry about the plastic one wearing out. Also look into getting a raspberry pi and running octoprint. That's another must have upgrade as well. Your going to love the Ender 3, enjoy it!!
I struggled with adhesion for the first couple weeks of printing. Then I swapped my stock bed for a glass + PEI combo. Got the flatness of the glass + the adhesion of the PEI. Once the plate cools down a few degrees, the parts come right off. No need for sticky hairspray to get things to stick, and no need to put the bed in the freezer to get things to unstick. Best upgrade I’ve made on my ender 3 (~$30 total). Always wipe down with isopropyl alcohol in between prints for best adhesion.
Tip: I also recommend gently wet sanding the PEI. Helps with adhesion and creates a very nice matte finish on the first layer.
Glass Bed:
Nearly Natural 4855 35in.... https://www.amazon.com/dp/B07JKGNB6W?ref=ppx_pop_mob_ap_share
PEI:
Gizmo Dorks PEI Sheet 3D Printer... https://www.amazon.com/dp/B07GSJSDWR?ref=ppx_pop_mob_ap_share
I've heard of people having good results with thermal pads like this. Maybe something to try as a less messy but similar functioning alternative. Also easier to get consistent even coverage id imagine. Personally I've never had any issues with heat transfer to my glass so never really bothered. But maybe I could get better results if I did. Wouldn't be able to clean the glass in the sink as easily though as I don't think these are meant to be removed and reapplied repeatedly.
Some other things I'd recommend
TL-Smoothers https://smile.amazon.com/gp/product/B071WG3SZQ/ref=ppx_yo_dt_b_asin_title_o01_s01?ie=UTF8&psc=1
I know you already upgraded the extruder assembly but this duel geared version is nice: https://smile.amazon.com/gp/product/B07SY745CF/ref=ppx_yo_dt_b_asin_title_o01_s01?ie=UTF8&psc=1
PEI Bed surface (has to date been the best upgrade): https://smile.amazon.com/gp/product/B07GSJSDWR/ref=ppx_yo_dt_b_asin_title_o09_s00?ie=UTF8&psc=1
and if you don't have a glass: https://smile.amazon.com/Creality-Ender-Glass-Upgraded-235x235x4mm/dp/B07RD6D2ZQ/ref=sr_1_5?keywords=creality+glass&qid=1571456745&sr=8-5
I'd recommend applying the pei in the smooth side of the glass that way you can flip it over to have the textured side if you want.
Watch this video to help with assembly. The included instructions are full of engrish and hard to follow. This guy makes it easy, and adds some handy tips. If you're not replacing the bowden tube immediately (you don't need to, but it's a cheap and relatively easy upgrade), skip the steps in his video where he removes the tube and its couplers.
Read this comment for my advice on how to level the bed. Leveling is a misnomer - you don't want it level compared to gravity, but compared to the gantry. The usual advice involves sliding a piece of paper under the nozzle as a feeler gauge. That'll get you close - the steps in my comment will get you just about perfect.
Once you've done that, this fan shroud is one of the few things I'd call an essential upgrade. Also a glass bed.
I'd say the yellow bed springs are worthwhile. They're about $5 on Amazon, I bought these:
https://www.amazon.com/gp/product/B07GXC1G2B/ref=ppx_yo_dt_b_asin_title_o04_s00?ie=UTF8&psc=1
They help keep the bed from going out-of-level as quickly, vs the stock springs. They're easy to install, and cheap, which is nice.
There are loads of other upgrades you can consider. A glass print bed surface, as one example, or a PEI print bed. Either can help provide a flatter print surface, vs the stock magnetic one (which will more-readily follow any distortions in the heated bed surface, making your print surface uneven).
What you absolutely MUSTTTTTTT!!!! order? Nothing. The printer works as is. But if you want to do yourself a favour, here's a list of what I consider essentials:
- New springs, both bed and extruder. I don't have a link for an extruder one as I upgraded my entire extruder drive frame and that came with a better spring
- A new removable bed. Creality glass bed or glass with a PEI sheet is my bed of choice
- Thermal pad to avoid the annoying bed clamps. Cut squares out of it, lay them in a checkered pattern alternating between thermal pad and nothing and place your bed on top. They will hold the bed in place and help with heating
- Stepper dampers if your printer is anywhere near where you spend your time, it sounds like a bloody jackhammer right out of the box
- New tube fittings, the stock ones are terrible and will give out in a matter of weeks at best. They also barely hold onto the tube
There are a ton of other great upgrades, but I think a good idea is to get a feel for it yourself.
What you can do, however, is check out some printable upgrades. I have this thread where people contributed with their choice of printable upgrades. It's a great list you can refer to later. Essentials on that are the fan guard and LCD back cover simply because the Ender 3 as is has the fan and back of the LCD exposed and that makes it crazy vulnerable to dust and gook damage
Unfortunately I can't say myself what printing with bad filament will do to your overall print as I have never had any go that far. Got worried with one but it still prints just fine. Maybe someone can chime in with that brand, or you should look up what others say about that brand. Seems like things arent quite right with it though. I'd suggest buying a different brand and try that out to see if it performs better. It's possible that you got a bad spool straight out of the gate. I'd personally suggest the hatchbox brand $20 for 1kg spool on amazon. And they seem to be pretty highly recommended across the board. Always got really good prints on mine with hatchbox so long as my settings were right.
I LOVE MY ENDER 3'S. I have one running stock everything (except the bed) and the other is well, an ender 3 in name only now. (I know you mentioned you are in the EU, but I have provided links to my sources for US based distributors)
Printer setup:
Ender 3
MKS (MKS GEN L V1.0)
TMC (2208's)
Micro Swiss All Metal Hotend ( MS all metal )
Custom Modified heater block (installed 300°c heater cartridge and 450°c capable thermistor from slice engineering) (heater) & (thermistor)
Bantamfeeder Extruder ( bantam design ) ... will be changing this out soon when I decide what next. Works well just not my cup of tea for convenience purposes.
Bullseye Duct ( https://www.thingiverse.com/thing:2759439)
3-point bed conversion for leveling made easy (Leveling guide and 3 point leveling adapter). HERE IS A COMPLETED DESIGN OF THESE CHANGES( My bed setup ... < < < this is my stock ender 3)
Borosilicate glass bed w/ PEI (Glass bed & PEI Sheet)
PSU (Mean Well NES-350-24 24V 350 Watt UL Switching Power Supply 120 Volt)
&#x200B;
OCTOPRINT SERVER
RPI 3b+ (raspberry pi w/ octoprint)
Pi Cam (https://www.amazon.com/gp/product/B07L2SY756/ref=ppx_yo_dt_b_asin_title_o05_s00?ie=UTF8&psc=1)
&#x200B;
So now you see why I say not really an ender 3 anymore, only in name
I assume you are talking about the fan in the PSU since that is what the picture is of... It is thermally controlled and only comes on if the PSU warms up and needs to be cooled... it doesn't run all the time....
&#x200B;
If your isn't coming on ever it may be bad or the connection loose...
&#x200B;
proceed at your own risk -
unplug from the wall... turn the power switch on to drain off any residual power... disconnect the PSU (take pictures and label the wires BEFORE you disconnect everything so you can reconnect it all... There should be 2~4 screws that hold the top case cover on the PSU... remove them and just the top with the fan attached will come loose... You don't need to take it any farther apart and so long as you don't go poking around all the hazardous bits should be discharged or not exposed...
&#x200B;
Check that the wire is plugged into the board before you pull it all the way off... if it isn't plugged in that is your problem... if it was plugged in you can order a new fan on Amazon or wherever for not much $$... in my case the fan is a 50mm square by 10mm tall and 24vdc .... .. yours may be different.... so measure it before you order....
&#x200B;
In an ideal world you want to order a fan that has double ball bearings or needle bearings... they will last longer and move more air for less power... The typical type fans included on the cheaper 3d printer have a sleeve bearing... those are OK in a very specific use case ---- horizontal mount and not subject to movement or shocks... so if your PSU is mounted vertically on the rail it will work, but isn't the ideal bearing type... Just order the double ball bearing type and you won't need to replace it again... pay attention to the picture and get a fan with the correct power connector on it already... otherwise you may have to splice the wires from the old fan onto the new one...
&#x200B;
IF you aren't comfortable taking apart the PSU here is a link that would be a good upgrade/replacement to your stock PSU
&#x200B;
https://smile.amazon.com/gp/product/B013ETVO12
Your hot end is not able to extrude the amount of filament you are trying to push into it.
you need to do one (or more) of the following:
the hot end hotter. ^1
to print slower. ^1
to sort out a clog (either full or partial.) ^2
calibrate the E steps and flow rate. ^3
----------------------------------------------------------------------------------------------------------------------------
^1
Not all filaments are made equal, I've had rolls of PLA that print fine fast at 210, then others that will gum up the hot end at speed. The printer takes time getting up to speed so some filaments look fine when printing slow or small models. Long paths show this failure I've had filament refuse to print cleanly unless the hot end is set somewhere on the upper side of 225-235 - going to extremes with temp should only be considered after ruling out a clog e.g. a/b the misbehaving filament with another brand and have the other brand work fine at the lower temps/same speed.
^2
(make sure to replace the stock bowden couplers they are crap allow the tube to back out and will cause no end of clogs, something like https://www.amazon.co.uk/dp/B07DC594D6/)
Follow this video on how to replace the nozzle paying close attention to the temperature everything is done at and the procedure to make sure the tube is snug with the nozzle. (to loose and you get goo, too tight and you'll squish the bowden tube and get clogs) https://www.youtube.com/watch?v=FRzsGttNMyk
If you need to clean your nozzle (a big bag of 0.4 nozzles is a worthwhile investment and you can find them cheap on amazon) hold the nozzle in pliers and cooking off everything over a gas burner, use cocktail sticks to remove the majority of the gunk, get the rest out with the acupuncture needle the printer came with. - Needless to say this is all very hot and the plastic can catch fire and drip, so do it somewhere or over something non flammable and easy to clean, I do it over a ceramic stove top with gas burners.
^3
https://mattshub.com/2017/04/19/extruder-calibration/
I'd make an addendum to the above instructions, ideally E-steps should be calibrated without filament running to the hot end, and the altered steps would look something like:
hot end at temp
remove filament completely
undo the bowden coupler
insert filament slightly into feeder,
cut filament flush at the hole the bowden coupler was in
extrude, measure, math, set e-steps,
cut filament flush
extrude, measure, math, set e-steps, save settings.
This way completely removes any sort of partial clog, variance in filament diameter size or issues downstream from the feeder assembly.
I bought this extruder feed from Amazon to replace my plastic one.
I checked a YouTube video real quick and then went for it. It seemed like a pretty straightforward install.
That said, now I look at it, the arm seems canted a bit, almost as if the screw with the bearing on it isn't in all the way? It's in as far as it will go.
I had one short countersunk screw (M2 I think) and a lock washer leftover. Couldn't think of where a lock washer would be useful for this assembly, and the stock one didn't have a lock washer anywhere, but if someone knows where it goes, or anything else to ensure this is on correctly, please let me know.
That said, it seems to be extruding just fine, I've done a couple of test prints and nothing seems amiss.
I bought a regular glass bed off amazon and really liked that but the textured surface started to fail after a while and I didn't like having to clean off adhesives or hairspray. I got this PEI build surface from amazon and stuck that on top of it. The ender 3 pro's magnetic bed base is enough to keep the glass in place and the PEI sheet has adhesive on the bottom of it so I don't need to use the binder clips like I thought I would have to at first. It all just stays in place without shifting and I have access to the full print bed. The glass is still on there to correct a warp in the base bed and the PEI is honestly such an upgrade from glass. Things stick with no effort and come off easily at the end, except PETG which sticks like nobody's business and is harder to remove.
I got this one. I started with a glue stick but found out just washing soap and warm water provides great adhesion. I did increase bed temp to 70 from 60 also.
https://www.amazon.com/Official-Creality-3D-Tempered-235x235x3mm/dp/B07F16WPR5?ref_=bl_dp_s_mw_17936569011
Again, I am a super novice...
&#x200B;
I switched out to a glass bed simply because my stock bed was warped. The tip could touch on the corners and a sheet of paper would slide right through in the center. Once you get the bed level though, I don't think your adhesion problem will be as much of an issue. The magnetic bed it actually pretty nice. I actually ended up turning my bed down a little, to like 55. I was at 60, and it was working, but I was having adhesion problems as well and figured it might be a combination of speed and filament being too hot to stick with a temp that high. I also run my PLA at 210.
&#x200B;
These springs made leveling the bed much easier. Springs
This was the bed I went with. I like it a lot.
Do you mean the little blue clips? They've been coming with those for a number of months, but yeah, do yourself a favor and just get some better quality pieces to begin with. This is what I'm using, as an example.
Thanks for the detailed reply.
&#x200B;
I need to read more to understand the z switch and z screws you are referring to. I have no idea what those are. I assembled by watching some channel on youtube do it. It was like a tales from the crypt vibe channel.
&#x200B;
As much as it sucks, I probably need to completely disassemble it and start over. There has to be something done incorrectly for it to be this difficult. I am definitely going to get one of those gauges before I get back into. I returned the springs today and ordered different springs on amazon. When they get here, I might sit down one night and try again.
&#x200B;
As for the bed, the glass one I got was scratched to hell from those stupid springs. I didn't know I had to raise or lower whatever switch you were talking about. Like I said earlier, I already ordered a SD card reader so that will be a definite mod. As for the octopi, is there a list somewhere on this subreddit of everything you need to purchase before starting? I have a raspberry pi at the house. I originally bought it to build a retropie but I haven't gotten around to it yet. I could use it for the printer if needed. I really like the idea of remote printing, having a webcam to see the print live, and putting a part on there that stops the print if there is a filament issue.
&#x200B;
I have to go into the city tomorrow so I was thinking of stopping by ikea and getting some Lack Tables for the eventual enclosure but now I don't know if I am even going to keep the Ender 3. I am debating on returning it and moving up a tier. I really want to get started on this but it seems like I am never going to be able to print any of this awesome stuff. So many awesome files on thingiverse and I can't use any of them.....
&#x200B;
Here are the parts I have purchased so far....
&#x200B;
SD Card Extension
&#x200B;
Glass Bed
&#x200B;
Springs that I bought that would not lower bed enough
&#x200B;
Most Recent Springs I am going to try
&#x200B;
Metal Extruder Upgrade
&#x200B;
Filament Black and Red
Yes of course :)
Black PLA:
• HATCHBOX PLA 3D Printer Filament, Dimensional Accuracy +/- 0.03 mm, 1 kg Spool, 1.75 mm, Black https://www.amazon.com/dp/B00J0ECR5I/ref=cm_sw_r_cp_api_i_-Nn0Db9E2TV4N
•OVERTURE PLA Filament 1.75mm with 3D Build Surface 200mm × 200mm 3D Printer Consumables, 1kg Spool (2.2lbs), Dimensional Accuracy +/- 0.05 mm, Fit Most FDM Printer, Black https://www.amazon.com/dp/B07PGY2JP1/ref=cm_sw_r_cp_api_i_yPn0DbA5MFBZS
White PLA:
•HATCHBOX PLA 3D Printer Filament, Dimensional Accuracy +/- 0.03 mm, 1 kg Spool, 1.75 mm, White https://www.amazon.com/dp/B00J0GMMP6/ref=cm_sw_r_cp_api_i_IOn0Db4BZ8QWH
•OVERTURE PLA Filament 1.75mm with 3D Build Surface 200mm × 200mm 3D Printer Consumables, 1kg Spool (2.2lbs), Dimensional Accuracy +/- 0.05 mm, Fit Most FDM Printer, White https://www.amazon.com/dp/B07PGZNM34/ref=cm_sw_r_cp_api_i_LRn0Db62EBRN2
There is This glass bed with a coating on to that helps stuff to stick. I have it worked for a bit but after about a month stuff would not stick and I started to use hairspray to keep stuff stuck and its working great now. Here it is on amazon as well
I just have the Creality glass bed from amazon https://www.amazon.com/gp/product/B07FSM8DK9/
It's been fantastic. Assuming your bed is properly leveled you don't even need to use adhesive, just make sure to clean it every once in awhile.
Sure thing. I got 2 of these 40mm FLX for the hotend and electronics box. https://www.amazon.com/dp/B009NQLT0M/ref=cm_sw_r_cp_apa_i_HOlODbHSE71M2 and one 60mm FLX for the PSU. https://www.amazon.com/dp/B009NQMESS/ref=cm_sw_r_cp_apa_i_eRlODbEZJZ1TK last but not least I ordered this pack of 5015s for the part cooling fan. https://www.amazon.com/dp/B07WFKPLWY/ref=cm_sw_r_cp_apa_i_cSlODb030FK1T Make sure it's the 24v quiet versions as well as these are dual ball bearing fans as opposed to other cheaper fans. While my printer is running I cant hear any of these fans at all.
I bought these on Amazon: https://www.amazon.com/gp/product/B0755BY9RH/
I originally printed a Petsfang, but I switched to a dual fan Hero Me.
It's possible that while removing a previous print you knocked the bed out of level. One of the best upgrades I usually recommend is heavier duty springs to replace the stock bed level springs.
Something like these:
https://www.amazon.com/gp/aw/d/B07FY47BX7?psc=1&amp;ref=ppx_pop_mob_b_asin_title
I'm pretty sure I just got an official creality one, but here is an Amazon link. I'm glad you got it figured out!
You can just replace the gear, but this is cheaper and better if you haven’t upgraded yet, or get them both 😁
Creality 3D Printer Parts 5PCS Brass Extruder Wheel 40 Teeth Drive Gear for CR-10.CR-10S,S4,S5,Ender 3,Ender 3 Pro https://www.amazon.com/dp/B07BFT6VCV/ref=cm_sw_r_cp_api_i_spo0CbCFA5YSD
CHPOWER CR-10 Extruder Upgraded Replacement, Aluminum MK8 Drive Feed 3D Printer Extruders for Creality Ender 3, CR-10, CR-10S, CR-10 S4, CR-10 S5 https://www.amazon.com/dp/B079JZ374W/ref=cm_sw_r_cp_api_i_Fqo0CbJX7V96H
Thought I would report back in case anyone else is looking for info. The new fans work great and as expected. I'm not sure what was up with the first ones, or amazon may have accidentally sent me the "queit" version which is supposed to run at a lower rpm.
Here is a link to the fans that work well if anyone comes across this.
Thanks again for putting in the effort to help!
It's hard to describe how tight it should be, but I believe I only loosened the arm about a quarter of a turn after screwing it in.
My apologies, I was a little unclear. The bearing should be able to move freely in the air when you push against the lever arm. When you push the lever arm in (like when you change filaments), you should be able to rotate the silver bearing in the air by hand without any trouble.
If you cannot spin the bearing, then it needs to be loosened a bit.
For your extruder spring, are you using a silver spring, similar to the stock bed/extruder springs, or a yellow spring that's commonly recommended as upgrades?
Yeah. Rather than a fan it's a blower. So far more airflow to hot end and nozzle. Make sure if you buy them you get the right ones. You want the 24v ones to match your power supply.
SoundOriginal 24V DC Brushless Blower Cooling Fan 50x50x15mm,for 3D Printer Humidifier Aromatherapy and Other Small Appliances Series Repair Replacement (2pcs 24V)
https://www.amazon.com/dp/B0755BY9RH/ref=cm_sw_r_sms_apa_i_MOdDCb1X4BW4E
I got the Noctua 40x10mm
I have one on my Hot End already and it works great, keep the temp cool just fine.
I found this metal replacement for $11 on amazon when I had this issue a few weeks ago, such great value
CHPOWER CR-10 Extruder Upgraded Replacement, Aluminum MK8 Drive Feed 3D Printer Extruders for Creality Ender 3, CR-10, CR-10S, CR-10 S4, CR-10 S5 https://www.amazon.com/dp/B079JZ374W/ref=cm_sw_r_cp_apa_i_NzsODb9EGYASC
i ended up buying this glass bed. Overall its pretty good. Just use purple glue stick you can buy anywhere and youll be fine. albeit for me i need to call in NASA engineers to get mine off as well. :/
&#x200B;
https://www.amazon.com/Glass-Print-Borosilicate-Printer-235x235x3-7mm/dp/B07JKGNB6W/ref=sr_1_5?crid=3C42WXXA97BWB&keywords=ender+3+glass+bed&qid=1569282569&sprefix=ender+3+glas+bed%2Caps%2C219&sr=8-5
It looks like the extruder arm may be squeaking the filament against the extruder wheel so tight it is causing skipped steps and filament to wear off on the wheel.
I bit the bullet and got an aluminum extruder arm kit from amazon - CHPOWER CR-10 Extruder Upgraded Replacement, https://www.amazon.com/dp/B079JZ374W/ref=cm_sw_r_cp_api_i_kCaPCbF0AF0C3 - and have had good luck and no more skipped steps since changing.
The pro has a different bed surface, a neat magnetic one they sell by itself for around 18$ on amazon, an upgraded power supply that runs around 30$ on amazon, and a beefier Y axis bar. 40x40 instead of 20x40. The electronics area is inverted making a small fan cover print not needed. This is about all there is different from the regular ender 3.
Considering the two interesting parts are under 50$, I don't think it's worth going for the pro vs just getting those two parts yourself and upgrading.
Neither the ender 3 nor the pro have a bootloader, so be sure to add a tinyisp programmer to your aliexpress order.
Yeah, that's kinda what I was worried about. This is what I purchased. https://www.amazon.com/gp/product/B07FSM8DK9/ref=ppx_yo_dt_b_asin_title_o01_s00?ie=UTF8&amp;psc=1
I was kinda hoping to be able to put the sticky build sheet on the back side, and leave the coated side against the heated plate. The reviews seem to suggest that the coating wears away very quickly. But I'm afraid that the coating will mess with the adhesion of the polycarb build sheet.
Ideally, it would be great if I could just put the polycarb sheet on the back, and just flip it back and forth and use both surfaces. Just don't know how safe it would be having either surface directly against the build plate.
Here's the extruder: https://www.amazon.com/dp/B07B96QMN2/ref=cm_sw_r_cp_apa_i_uSFjDbRH4ZQE4
Here's the springs: https://www.amazon.com/dp/B07GXC1G2B/ref=cm_sw_r_cp_apa_i_DTFjDb1KAPZ15
There's tons more. All you need to do is search Amazon. Glad I could help.
+1... This is a WIN
Honestly I would suggest getting the upgraded motors instead of the dampeners. They will be much quieter and give you better performance. For the bed I got this:
[Gulfcoast Robotics] 3D Printer... https://www.amazon.com/dp/B07DFTKCV9?ref=ppx_pop_mob_ap_share
Yellow springs are stiffer replacements for the bed levelling springs that are stock. They should help keep the bed level meaning you don't need to adjust it as regularly.
The stock Bowden couplers have a habit of coming disconnected, though I believe in newer machines a clip has been included to alleviate this. It's good to have spares anyway.
A glass bed gives you a nice flat print surface and I don't know what I did before I got mine. Many stock beds are warped making this a necessity.
Comgrow Heat Bed Glass Plate 235... https://www.amazon.co.uk/dp/B07DSC9TJQ?ref=ppx_pop_mob_ap_share
SIQUK 2 Pieces PTFE Teflon Tube... https://www.amazon.co.uk/dp/B07DC594D6?ref=ppx_pop_mob_ap_share
I can't find the link for the springs at the moment, will update when I find them.
Get a all metal extruder top like this: https://smile.amazon.com/3D-Extruder-Aluminum-Filament-Creality/dp/B07B96QMN2
If you don't mind spending, consider just moving over to a direct drive setup like this: https://www.youtube.com/watch?v=omXgJT5V0D4
That's exactly what happens. I too would watch it and think its fine and then come back later and its floating. Go ahead and check the bed leveling as well. It may need to be adjusted anyway.
Side note: If you find yourself constantly adjusting the bed every few prints or so, change them out for some better ones. These are the springs everyone goes for.
pretty sure he means these
I will give you my top 5.
1.The hard yellow springs $5 and you will have extras. These will help your bed stay level longer. I think I need to check mine once every.. 10 prints or so or every other week, maybe longer. https://www.amazon.com/dp/B013G5I4US/ref=cm_sw_r_cp_apa_i_vkE6Cb8SHNBVG
2.Glass bed. Lowes for $3 cut 2.5mm. Ender 3 bed known to be warped.
3.Pick up a Raspberry pi ~$50 and install octopi/ octoprint.. free, and a mini b to USB cable $5. Now you don't need the to fiddle with micro SD and can manage everything from PC. https://www.amazon.com/dp/B07BC6WH7V/ref=cm_sw_r_cp_apa_i_olE6Cb8J91Q1J
And
https://www.amazon.com/dp/B00P0GI68M/ref=cm_sw_r_cp_apa_i_umE6CbPGSR7T4
4.Raspberry pi cam $25 and longer cable $3 to go with your Raspberry pi octoprint. Now you can monitor prints while "away" .. aka relaxing in your lazy boy watching YouTube vids on how bad season 8 of GOT was. https://www.amazon.com/dp/B01ER2SKFS/ref=cm_sw_r_cp_apa_i_noE6CbXTHCPDS
And
https://www.amazon.com/dp/B00M4DAQH8/ref=cm_sw_r_cp_apa_i_ipE6Cb9RK6QNR
5.Bowden tube $11. Only if you plan on printing hotter then 240c. So petg, abs.. ECT ECT . https://www.amazon.com/dp/B079P92HN9/ref=cm_sw_r_cp_apa_i_KjE6CbDMX6SGE
Hope this helps.
Yes my friend
Gizmo Dorks PEI Sheet 3D Printer Build Surface 235mm x 235mm (9.3" x 9.3") with Preapplied Laminated 3M 468MP Adhesive for Creality Ender 3 or CR 20 | Made in The USA
https://www.amazon.com/dp/B07GSJSDWR/ref=cm_sw_r_cp_apa_i_gbsPDbPNKDNM9
Glass Print Bed Borosilicate Glass 3D Printer Glass Print Bed 235x235x3.7mm for Ender 3 DC-01 Glass Print Bed Borosilicate Glass https://www.amazon.com/dp/B07JKGNB6W/ref=cm_sw_r_cp_apa_i_T-sPDbX4FQ8EG
I've put 3 of these Hictop extruders on two CR-10S and one Ender 3. They work great so far!
I got this one and it is working out great!
So far I have printed PLA and PETG.
https://www.amazon.com/dp/B07DFTKCV9?ref=ppx_pop_mob_ap_share
Glass Bed
Here's the extruder I bought
And here's the bowden tubing and connectors
There's a lot of similar items on Amazon that will work; I just personally went after the popular ones with the highest reviews
Also, if you get the tubing, don't forget to get cutters if you don't have any already
Printed in two parts. You can see the seam right above where I redacted my PII. Printed in Overture PETG. I used CHEP's petg profile in Cura but had to turn the flow rate down on the printer to 65% because the infill was falling apart. took about 18 hours total I think. printed on the this glass bed because my build plate has a huge bulge in the center. 205C/50C. Going to CA glue and clamp it together and prime and paint it to look like aged/patinaed copper.
This is only about my fourth print and my first with PETG. I can't believe the quality and surface finish I can get out of this little workhorse
The stock bed is known to warp sometimes. Ever since I got the glass bed for mine it's been amazing. https://www.amazon.com/gp/product/B07F16WPR5/ref=ppx_yo_dt_b_asin_title_o07_s00?ie=UTF8&psc=1
Had these for a while and they’re great
FYSETC 3D Printer Motherboard Accessories 0.31 in OD 0.78 in Length Compression Springs Light Load for Creality CR-10 10S S4 Ender 3 Heatbed Springs Bottom Connect Leveling - 10 Pack https://www.amazon.com/dp/B07GXC1G2B/ref=cm_sw_r_cp_api_i_O-MLDbD1EA96T
I bought this one: https://smile.amazon.com/gp/product/B013ETVO12/ref=ppx_yo_dt_b_asin_title_o00_s00?ie=UTF8&psc=1
Unfortunately, as soon as I powered it on, the RFI was back. No change. I'll keep the PSU since it's supposed to be better quality than the original, but it is thinner than the original and needs a different box. I tried printing one from TH3D but it was slightly too narrow and it cracked when I tried to put it on. Oh well.
So if the PSU isn't the culprit, my next guess was the fans. So I opened the electronics bay and disconnected them. No change.
So, either it's the board itself (1.1.5 silent), or the steppers?
Has anyone else seen RFI?
Just to be clear, we're talking about this one, no?
Damn, then I definitely got the wrong bed -I bought a borosilicate glass plate and some glue sticks. I saw that bed on Amazon, but the description implied it only worked on ABS. Too bad, I liked the idea of the Build Tak, and now I'm not really in the mood to buy yet another bed and re-level it again.
But my laziness may win out in a week or so, so who knows.
You seem knowledgeable about the couplers... Would these be better than stock? 4 Pieces PC4-M6 Quick Fitting + 4 Pieces PC4-M10 Straight Pneumatic Fitting
I got this set from Amazon and it's way more than you need. I've sent a few sets to other friends who have gotten Ender 3s and still had leftovers for when I bought my second one.
If that doesn't help, have a look at the aluminum extruder upgrade. I put it on three Creality printers and it solved the issues for good!
This stuff? https://www.amazon.com/FBApayipa-400mm-Silicone-Thermal-Heatsink/dp/B01N9HGKR1/ref=sr_1_3?ie=UTF8&amp;qid=1549200321&amp;sr=8-3&amp;keywords=Silicone+cpu+pad
Seems really thin, may not bridge the gap based on how mine is warped, still good?
Replace the springs with some of the yellow ones, they'll help keep the bed level for much longer.
Here's an amazon link, you can find them on ebay and Aliexpress for cheaper.
https://www.amazon.com/FYSETC-Motherboard-Accessories-Compression-Creality/dp/B07GXC1G2B/
Put a silicone sheet between the bed and the glass it will hold the glass in place and will conduct heat to the glass more effectively and evenly.
https://m2.ikea.com/us/en/p/lots-mirror-39151700/
Paired with
ZUPAYIPA 400mm x 210mm x 0.5mm Silicone Thermal Pad for CPU GPU Heatsink https://www.amazon.com/dp/B01N9HGKR1/ref=cm_sw_r_cp_apa_i_RhnPCb2H53BAM
That's my favorite change yet.
I bought a Mean Well from Amazon
https://www.amazon.com/gp/product/B013ETVO12/ref=ppx_yo_dt_b_asin_image_o02_s00?ie=UTF8&amp;psc=1
I just ordered one today. https://www.amazon.com/dp/B07FSM8DK9/ref=cm_sw_r_cp_apa_i_ApDCCb7WCN032
I want to say it has a textured surface where you don't have to use hairspray and the like.
I want to recommend this product at Amazon.com
FYSETC 3D Printer Motherboard Accessories 0.31 in OD 0.78 in Length Compression Springs Light Load for Creality CR-10 10S S4 Ender 3 Heatbed Springs Bottom Connect Leveling - 10 Pack
by Fuyuansheng
Learn more: https://www.amazon.com/dp/B07GXC1G2B/ref=cm_sw_em_r_mt_dp_U_gPhXDbWZMATD3
I changed to a PTFE tube that came with some coupling that e bought, because i didnt like the original couplings. The diference i noticed is that this tube lets the filament flow more freely.
Link to the couplings and tube:
https://www.amazon.co.uk/gp/product/B07DC594D6/ref=ppx_yo_dt_b_asin_title_o00_s00?ie=UTF8&psc=1
I actually put a silicone thermal pad in between the heated bed and the glass plate. This seems to minimize warping of the heated bed influencing the flatness of the glass plate, and it also allows the glass plate to heat a little faster. If you don't want that, I'd just recommend putting the glass directly onto the heated bed.
I went with the Crealitty Glass Bed Upgrade
There are mixed feelings on what to go with. A lot of people just use a mirror or similar, but to me it was worth $20 to know it wasn’t going to shatter on me at any point.
Sure
These are what I have
When setting your springs make sure you wind them all the way tight and then back off two turns.
Also upgrade to the yellow springs. https://www.amazon.com/FYSETC-Motherboard-Accessories-Compression-Creality/dp/B07GXC1G2B
It's going to happen to you. Possibly even with a filament guide eventually. The plastic extruder is just terrible. Picking up the all metal extruder is one of the best buys you'll make.
I had the exact same problem with mine as well. Swapped out to an all metal extruded with a stronger spring.
https://www.amazon.com/dp/B07B96QMN2
I recommend a PEI sheet
Gizmo Dorks PEI Sheet 3D Printer Build Surface 235mm x 235mm (9.3" x 9.3") with Preapplied Laminated 3M 468MP Adhesive for Creality Ender 3 or CR 20 | Made in The USA https://www.amazon.com/dp/B07GSJSDWR/ref=cm_sw_r_cp_apa_i_FVfVCb8Q5VK3N
Hmmm, maybe I should just go ahead and replace the whole tube and the fittings while I'm at it. That seems to be a highly recommended upgrade.
One day I'll actually get to do some printing of cool things instead of merely trying to get my Ender 3 operational. :/
&#x200B;
Add tape or glue to the smooth surface of the glass for adhesion, yes, but if you get https://www.amazon.com/Official-Creality-3D-Tempered-235x235x3mm/dp/B07F16WPR5 you won't have to use tape or glue at all.
You’re fine.
Just order a silicone GPU pad, and put it under a glass bed.
ZUPAYIPA 400mm x 210mm x 0.5mm Silicone Thermal Pad for CPU GPU Heatsink https://www.amazon.com/dp/B01N9HGKR1/ref=cm_sw_r_cp_api_i_ZsiZCbH0H643R
I see these
https://www.creality3donline.com/creality-2pcs-cr-10-ender-extruder-spring_p0153.html
Or should I buy some yellow ones from amazon?
FYSETC 3D Printer Motherboard Accessories 0.31 in OD 0.78 in Length Compression Springs Light Load for Creality CR-10 10S S4 Ender 3 Heatbed Springs Bottom Connect Leveling - 10 Pack
https://smile.amazon.com/dp/B07GXC1G2B/ref=cm_sw_r_cp_apa_i_9YFnDb0DV66V4
[Here’s one](Comgrow Creality Ender 3 Pro 3D Printer with Removable Build Surface Plate and UL Certified Power Supply 220x220x250mm https://www.amazon.com/dp/B07GYRQVYV/ref=cm_sw_r_cp_api_i_EXX1DbYEDMC60) on Amazon that’s legitimate: https://www.amazon.com/dp/B07GYRQVYV/ref=cm_sw_r_cp_api_i_EXX1DbYEDMC60
The genuine one is $14.99 on Amazon. Look for seller Creality3d Online.
Official Creality 3D All Metal MK-8 Extruder Feeder Drive Aluminum 1.75mm for CR-10 Ender 3 CR-10S https://www.amazon.com/dp/B07J44QW8B/ref=cm_sw_r_cp_apa_i_ViaSCbP7EG11R
The couplings I use don't have those clips. These are the ones a lot of people seem to recommend so I don't think that they should give a problem. I tried that trick with using the bowden tube to clear the space but I didn't find any old filament.
I can't suggest using glass with a PEI sheet enough Get a sheet of glass cut at lowes or the likes for under 5$ (I think i paid a little over 3 bucks) and just grab pre cut PEI sheet if you want you to pay a little extra for it. the entire set up should cost you under 20$. You will have 0 adhesion issues with PEI and the prints just pop right off once the bed cools off, not to mention your first layer will be smooth as butter and you'll solve most if not all weird warping issues by laying a plate of glass on the ender bed.
These are the fans I bought to use on my Petsfang. 24 volt for direct wire in. May be something better, but these work.
Sorry about that.
https://www.amazon.com/SoundOriginal-50x50x15mm-Humidifier-Aromatherapy-Replacement/dp/B0755BY9RH
That's a real bummer :( it sounds like it needs a shim, or to be returned and replaced. I bought this one and other than needing an additional m3 screw to hold the spring in place (I think I just lost the other one during the install) it's worked flawlessly. I also picked up a set of stainless extruder gears. Together these parts are performing flawlessly. not a great example, but it was dark when I took the picture.
https://smile.amazon.com/Noctua-Cooling-Blades-Bearing-NF-A4x10/dp/B009NQLT0M?sa-no-redirect=1 This is what I have and it pushes out ~4cfm, half the stock fan, I didn't realize that before I bought it and it gave me a host of issues.
I just grabbed some ball bearing 24v 5015's off ebay and they are at least quieter than stock but I wouldn't call it quiet. I think TH3D is now selling a "quiet" 24v 5015 but I don't have first hand experience with it.
I forgot I also swapped the PSU for a meanwell which has a quieter fan as well.
I get the worry about the enclousre, you could sound deaden the outside instead of the inside, maybe with sound deadening mat instead of acoustic foam (this is something pc case manf. have switched to as well.)
You have some underextrusion. The lines you're seeing are caused by too much tension on the extruder gear. It cannot get enough material to the hotend.
Mine was the idler arm breaking under the pressure. Buy the metal one from Amazon or wherever. Then print the filament roller guide. And lastly, print a better holder/roller for your spool.
Given the colour it seems to be a Noctua - probably a NF-A4x10 - they are 12v though so need a voltage convertor https://www.amazon.com/Noctua-Cooling-Blades-Bearing-NF-A4x10/dp/B009NQLT0M
I got a Cooltek 4020 and noctua 4010 wired them in serie, used the cooltek for the heaterblock and noctua for the SKR board
I started with a spool of this: https://www.amazon.com/gp/product/B00J0ECR5I/ref=ppx_yo_dt_b_asin_title_o00_s00?ie=UTF8&amp;psc=1
https://www.amazon.com/HATCHBOX-3D-Filament-Dimensional-Accuracy/dp/B00J0ECR5I/ref=sr_1_3?crid=2B2P5SB0R7B5R&keywords=hatchbox+pla+1.75&qid=1573968481&sprefix=hatchbox%2Caps%2C160&sr=8-3
https://www.amazon.com/HATCHBOX-3D-Filament-Dimensional-Accuracy/dp/B00J0GMMP6/ref=sr_1_7?crid=2B2P5SB0R7B5R&keywords=hatchbox+pla+1.75&qid=1573968517&sprefix=hatchbox%2Caps%2C160&sr=8-7
&#x200B;
Would either of these work?
I use zero!
&#x200B;
https://smile.amazon.com/dp/B01N9HGKR1/
I don't know about fans. I bought this and this and then designed and printed this to mount them on, but they won't work on the stock Ender 3.
Here: https://www.amazon.com/gp/product/B079JZ374W/ref=ppx_yo_dt_b_asin_title_o01__o00_s00?ie=UTF8&amp;psc=1
Mods:
Ended 3 official 1.1.5 from here. All mainboard settings are stock.
Aluminum extruded from here.
Capricorn tubing from here.
Cura 4.1 on Linux
Filament at 210 on hotend, 60 on bed.
List of mods on my Ender 3 Pro:
I use Cura for my slicer, and use the default setting there for the Ender 3.
https://www.amazon.com/Capricorn-Bowden-Filament-Genuine-Premium/dp/B079P92HN9/ref=sr_1_1_sspa?keywords=ender+3+bowden+tube&qid=1569894105&s=gateway&sr=8-1-spons&psc=1&smid=A1D7NBXHNTHOV9&spLa=ZW5jcnlwdGVkUXVhbGlmaWVyPUFJSUJYQ0tXSkpBRzMmZW5jcnlwdGVkSWQ9QTA0MTM1MjUxNkRURzdBN0VJVUc5JmVuY3J5cHRlZEFkSWQ9QTAxMDQwODYyRFE0U0dKQk82VUc5JndpZGdldE5hbWU9c3BfYXRmJmFjdGlvbj1jbGlja1JlZGlyZWN0JmRvTm90TG9nQ2xpY2s9dHJ1ZQ==
&#x200B;
This seems to be the one everyone uses, and I also have this installed on both of my printers.
All 3 as they are really cheap.
Bowden Tube
Aluminum Extruder
Bed springs
https://www.amazon.com/gp/product/B079P92HN9/ref=ppx_yo_dt_b_asin_title_o07_s00?ie=UTF8&psc=1
here you go
Underextrusion. I had that same issue until I upgraded to an all metal extruder and calibrated my extruder.
https://www.amazon.com/dp/B07DFTKCV9/ref=cm_sw_r_cp_api_3gR-Bb0NTY89V
It's a glass bed, this one specifically:
https://www.amazon.com/dp/B07DFTKCV9/ref=cm_sw_r_cp_apa_i_zriNDbXHEVSEN
Go glass.
PLA sticks with nothing for prep, smooth bottom surface, and very, very flat.
(edit) - with the upgraded yellow springs, I don't even need to level anymore - except when I change tips.
Link: Official Creality 3D Ender 3... https://www.amazon.com/dp/B07F16WPR5
Official Creality 3D Ender 3... https://www.amazon.com/dp/B07F16WPR5?ref=ppx_pop_mob_ap_share
Amazon's where I got mine...
Creality 3D Printer Platform Heated Bed Build Surface Tempered Glass Plate for Ender 3/Ender 3 Pro 3D Printer 235x235x3mm https://www.amazon.com/dp/B07FSM8DK9/ref=cm_sw_r_cp_apa_i_Z0KGDbQPPRZFX
16.99 dollhairs to be exact.
This is the one I bought.
https://www.amazon.com/gp/aw/d/B07FSM8DK9/ref=yo_ii_img?ie=UTF8&amp;psc=1
Bed springs?
https://www.amazon.com/gp/product/B07FY47BX7/ref=ppx_yo_dt_b_asin_title_o02_s00?ie=UTF8&psc=1
Put this on top of your glass and everything will stick.
https://www.amazon.com/gp/product/B07GSJSDWR/ref=ppx_yo_dt_b_search_asin_title?ie=UTF8&amp;psc=1
https://www.amazon.com/Gizmo-Dorks-Preapplied-Laminated-Adhesive/dp/B07GSJSDWR/ref=asc_df_B07GSJSDWR/?tag=hyprod-20&amp;linkCode=df0&amp;hvadid=312163444503&amp;hvpos=1o1&amp;hvnetw=g&amp;hvrand=3399292976891203176&amp;hvpone=&amp;hvptwo=&amp;hvqmt=&amp;hvdev=m&amp;hvdvcmdl=&amp;hvlocint=&amp;hvlocphy=9001880&amp;hvtargid=aud-801657747996:pla-584394961083&amp;psc=1
https://www.amazon.com/gp/product/B07GXC1G2B/. These are a game changer. They are so stiff and leveling the bed is so much more accurate.
These are the ones I bought.
For same price you can get a ender 3 new or the pro for 20 more. Cheaper if you wait for a sale.
https://www.amazon.com/Comgrow-Creality-Printer-Upgrade-Certified/dp/B07GYRQVYV/ref=mp_s_a_1_3?keywords=comgrow+creality+ender+3+pro+3d+printer&amp;qid=1567803109&amp;s=gateway&amp;sprefix=comg&amp;sr=8-3
https://www.amazon.com/gp/slredirect/picassoRedirect.html/ref=pa_sp_phone_search_atf_aps_sr_pg1_2?ie=UTF8&amp;adId=A10468883U8DGA2KT7B3I&amp;url=%2FComgrow-Creality-Ender-Aluminum-220x220x250mm%2Fdp%2FB07BR3F9N6%2Fref%3Dmp_s_a_1_2_sspa%3Fkeywords%3Dcomgrow%2Bcreality%2Bender%2B3%2Bpro%2B3d%2Bprinter%26qid%3D1567803109%26s%3Dgateway%26sprefix%3Dcomg%26sr%3D8-2-spons%26psc%3D1&amp;qualifier=1567803109&amp;id=4584317094790537&amp;widgetName=sp_phone_search_atf
Replace the part. Then print a filament guide off thingiverse for your model printer.
Official Creality 3D All Metal... https://www.amazon.com/dp/B07J44QW8B
I've seen some people that have printed a replacement, but the metal one will last longer.
Bit Holder
___
BL-Touch
Borosilicate Glass
Extruder Filament Guide (for TPU)
TPU Feet
Fan Cover
I was just doing some test prints to get the bed re-leveled and this fitting decided it didn't want to live any more.
Time to order some new parts, I guess.
I've seen these available with ball bearings, which should last longer:
https://smile.amazon.com/SoundOriginal-50x50x15mm-Humidifier-Aromatherapy-Replacement/dp/B07DQ7F1T7
&#x200B;
I've no experience with this brand so I have no idea how well they work.
I’m not sure about that one, but I just bought this one : https://www.amazon.com/Comgrow-Creality-Printer-Upgrade-Certified/dp/B07GYRQVYV 2 weeks ago and it has the 1.1.4 board, removable magnetic bed, it may have had thermal runaway protection out of the box, but I flashed the newest marlin firmware to get some other options, so I know I have it now.