Top products from r/mpminidelta
We found 31 product mentions on r/mpminidelta. We ranked the 29 resulting products by number of redditors who mentioned them. Here are the top 20.
1. Mini Delta 3D Printers 120mm Round x 3mm Thick Borosilicate Glass Build Plate Surface for Monoprice Mini Delta
Sentiment score: 2
Number of reviews: 4
120mm round X 3mm thick glass build plate surface for 3D printersSmooth flat surface, improves the quality of your 3D printing, for consistent resultsUltra-low thermal expansion; heat resistant, high temperature shock resistanceFits perfectly, slightly over sized to allow for quick alignmentDog Rive...
 Show Reddit reviews
2. Super Lube 51004 Synthetic Oil with PTFE, High Viscosity, 4 oz Bottle,Translucent white
Sentiment score: 2
Number of reviews: 2
Auto & Truck MaintenanceCountry of manufacture: United StatesManufacturer: SUPER LUBESuper Lube OilComes in 4-ouncesQuality craftsmanship and materials make this product a must have for any fisherman
 Show Reddit reviews
3. Kingston 2 GB microSD Flash Memory Card SDC/2GB
Sentiment score: 1
Number of reviews: 2
Ultra-Portable - extremely small footprint designGuaranteed lifetime warrantyShips with adapter to convert to full-sized SD card2GB microSD Memory CardComplies with SD card specification standards
 Show Reddit reviews
4. BuildTak 3D Printing Build Surface, 4.5" x 4.5" Square, Black (Pack of 3)
Sentiment score: 0
Number of reviews: 2
Build sheet adheres to a print bed to help the filament stick during printing, while also enabling clean removal of the printed part afterwardCompatible with ABS, PLA, HIPS, PET+, brick, wood, and flexible (TPE) filaments (sold separately)Durable construction allows for multiple uses with either the...
 Show Reddit reviews
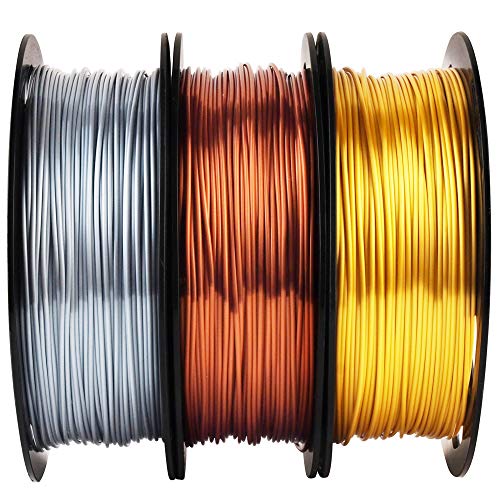
5. Shiny Silk Gold Silver Copper PLA Filament Bundle, 1.75mm 3D Printer Filament, Each Spool 0.5kg, 3 Spools Pack, with One 3D Printer Remove or Stick Tool MIKA3D
Sentiment score: 0
Number of reviews: 1
<b>Popular Silk Metal Colors:</b>Include Silk Filament Shinning Colors: Gold, Silver, Copper PLA Filament,<b>Strong Compatibility:</b>High Quality, No Bubble, Low Odor, Eco-Friendly, Universal Compatible with Diverse FDM 3D Printers in Market<b>Package:</b> Pack Contains 3 Spools, Each Spool Contain...
 Show Reddit reviews
6. Sandisk microSD 2GB memory card
Sentiment score: 1
Number of reviews: 1
This product has been extensively tested, is certified to be 100% functional, and ready for use2GB of expandable storageIdeal companion for multimedia phones because they plug right inside the phone providing immediate expansion of memoryPerfect for storing more music, video, photos, games, and mobi...
 Show Reddit reviews
7. BIQU 3D-M6 0.4mm Brass Extruder Nozzle Print Head for 1.75mm Filament 3D Printer (Pack of 5pcs)
Sentiment score: 1
Number of reviews: 1
Bore diameter: 0.4mmScrew thread inner diameter: 1.75mmHeight: 12.20mmNet weight: 2.5g/pcsWidely use for 1.75mm PLA filament
 Show Reddit reviews
8. inShareplus 10 Pairs 12V Male and Female 2.1x5.5mm DC Power Jack Plug Adapter Connector for CCTV Security Camera, LED Strip Light
Sentiment score: 0
Number of reviews: 1
Product Dimension : 3.8 x 1.4 x 1.3cm/ 1.5 x 0.55 x 0.5inConnector Type: Internal diameter 2.1mm,External diameter 5.5mmAmps(max): 6AmpsPlug and playUsed for CCTV security camera and LED strips
 Show Reddit reviews
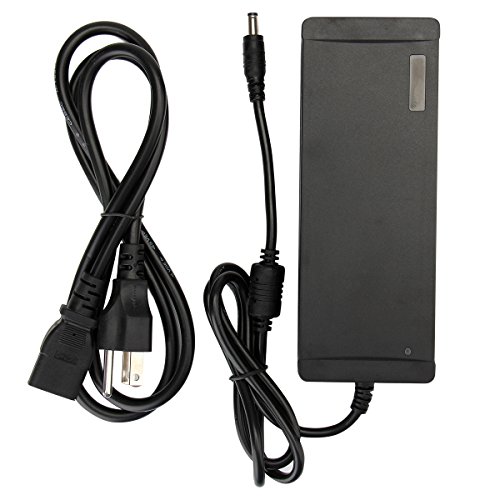
9. APC UPS, 425VA UPS Battery Backup Surge Protector, BE425M Backup Battery Power Supply, Back-UPS Series
Sentiment score: 0
Number of reviews: 1
425VA / 225W Backup Battery power supply6 Outlets (NEMA 5-15R): 4 UPS Battery Backup with Surge Protection Outlets, and 2 Surge Protector Only OutletsBacked by APC's 3 YEAR WARRANTY, and $75,000 connected-equipment policy5' Power Cord, right-angle 3-prong wall plug (NEMA 5-15P). Wall mountableDuring...
 Show Reddit reviews
10. Conwork 10-Pack DC Socket Male Barrel Jack 5.5mm x 2.5mm Solder On DIY Custom Power Plug Adapter
Sentiment score: 0
Number of reviews: 1
Great item for small electronics projects and CCTV applications.Connector Size - 5.5mm x 2.5mm - External Diameter x Internal DiameterMale DC Plug, solder termination with solder bucket and tagPerfect for making a cable to a desired length or replacing a broken connector.Package Contents: 10 x 5.5 x...
 Show Reddit reviews
11. 3M Scotch 5952 VHB Tape: 1 in. x 15 ft. (Black)
Sentiment score: 1
Number of reviews: 1
3M 5952 Heavy Duty Mounting VHB Tape is black, double-coated VHB adhesive tape with an acrylic foam core. A modified acrylic adhesive is on both sides of very conformable foam which provides adhesion to the broadest range of substrates/surfaces, including most powder coated paints. It comes on a red...
 Show Reddit reviews
12. 12V 10A Camera Power Supply with 8 Way Splitter Cable, AC 100-240V to DC 12V 10Amp Power Adapter, 1 Female to 8 Male Connectors for CCTV Security System / LED Strip Lights
Sentiment score: 0
Number of reviews: 1
Regulated switching power supply with 1 to 8 power adapter cableAC Input: 100V to 240V DC Output: 12 Volt at 10 AmpProtections: Short circuit, Overload, Over voltage, Over temperatureFor the Led Strip/Wireless Router, ADSL Cats, HUB, Switches, Security Cameras, Audio/Video Power SupplyNote: This po...
 Show Reddit reviews
13. BINZET AC to DC 12V 10A 120W Power Supply Adapter Converter Regulator, 5.5mm x 2.1mm DC Plug, 12Volt 10Amp Wall Power Plug for DC12V 5050 5630 Flexible LED Strip Lights
Sentiment score: 1
Number of reviews: 1
Input: 100-240V AC 50/60Hz;Output: DC 12V/10APower: 120 WattsEasy connection and simplicity to useFor flexible led strip power supply
 Show Reddit reviews
14. ARCTIC Thermal Pad 145 x 145 x 0.5 mm - Thermal Compound for Coolers, Efficient Thermal Conductivity, Gap Filler, Non-Stick, Safe Handling, Easy to Apply - Blue
Sentiment score: 1
Number of reviews: 1
EFFICIENT THERMAL CONDUCTIVITY: The Thermal Pad based on silicone and a special filler offers a conductivity of 6.0 W/mK, outperforming generic padsFILLING THE GAPS: Due to its low hardness and compressibility it works as the perfect gap filler, bridging uneven surface & gaps without any problemsSAF...
 Show Reddit reviews
15. Mcbazel On Off Power Switch Button Adapter for PlayStation 3 PS3 Slim Color Black
Sentiment score: 1
Number of reviews: 1
To avoid plugging in and out repeatedlyProfessional design, portable for convenient usageMade of fireproof, high pressure resistant material and it is very safe and reliableEasy to use, quickly power on or off. High quality power switch, easily turning on or off and guide consoleCompatible with PS3 ...
 Show Reddit reviews
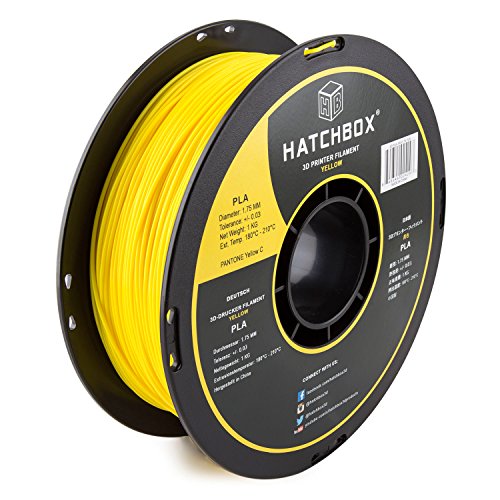
16. HATCHBOX PLA 3D Printer Filament, Dimensional Accuracy +/- 0.03 mm, 1 kg Spool, 1.75 mm, Yellow
Sentiment score: 0
Number of reviews: 1
1 KG (approximately 2.20 lbs) Spool1.75mm Filament Diameter (Dimensional Accuracy +/- 0.03mm)PLA (Polylactic Acid) 3D Printer Filament Vacuumed Sealed With DesiccantRecommended Extrusion/Nozzle Temperature 180°C - 210°C (356°F - 410°F)Spool Diameter: 8" - Spool Width: 2.50" - Spool Hub Hole Diam...
 Show Reddit reviews
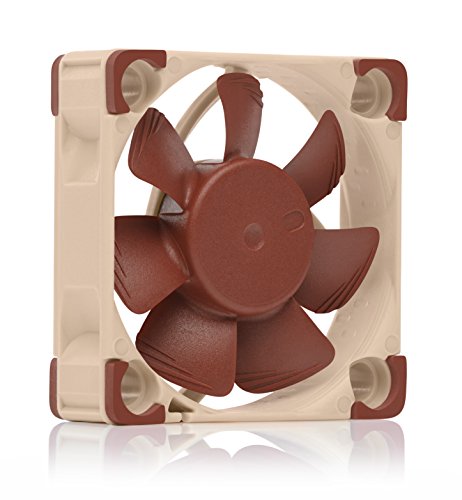
17. Noctua NF-A6x25 FLX, Premium Quiet Fan, 3-Pin (60mm, Brown)
Sentiment score: 1
Number of reviews: 1
Premium quiet fan, 60x60x25 mm, 12V, 3-pin Molex, 3000/2400/1600 RPM, max. 19.3 dB(A), >150,000 h MTTFAward-winning 60x25mm A-series fan with Flow Acceleration Channels and Advanced Acoustic Optimisation frame for superior quiet cooling performanceIdeal replacement for noisy or broken 12V 6cm fans i...
 Show Reddit reviews
18. Noctua NF-A4x10 FLX, Premium Quiet Fan, 3-Pin (40x10mm, Brown)
Sentiment score: 2
Number of reviews: 1
Premium quiet fan, 40x40x10 mm, 12V, 3-pin Molex, 4500/3700 RPM, max. 17.9 dB(A), >150,000 h MTTFAward-winning 40x10mm A-series fan with Flow Acceleration Channels and Advanced Acoustic Optimisation frame for superior quiet cooling performanceIdeal replacement for noisy or broken 12V 4cm fans in 3D ...
 Show Reddit reviews
19. Kingston 4 GB microSDHC Class 10 UHS-1 Memory Card with Adapter (SDC10/4GB)
Sentiment score: 1
Number of reviews: 1
High-Speed Class Rating - Class 10: 10MB/sec. minimum data transfer rateCompliant with the SD Card Association card 3.00 specificationOperating temperatures: -13°F to 185°F (-25°C to 85°C)Storage temperatures: -40°F to 185°F (-40°C to 85°C)File Format - FAT 32Reliable - lifetime warranty
 Show Reddit reviews
20. Officemate Micro Size Binder Clips, Black, 100 per Tub (31030)
Sentiment score: 1
Number of reviews: 1
A great alternative to small or mini binder clips or jumbo paper clipsHandles can fold up for handing or can be removed for bindingStrong heat treated steel grips papers securelyMicro binder clips have a width on 1/2-Inch and a capacity of 5/32-InchComes in 100 in a reusable storage tub
 Show Reddit reviews
Sure, no prob, hopefully I can paste this properly:
Yeah, though the Facebook post someone made that has a lot of other things you can do as well. Let me see if I can paste it here.
------------------------------------------------------------------------------------
My printer tune up and alignment process and needed upgrades.
This is a work in process, but since I have created the first alignment post, it will be a place holder to point to my alignment posts as I create them, or pointers to good posts by others or the Wiki. This post is just an index and will get edited often. Some pointers will just be placeholder to comments I have made until I write up a good top level post. For others, I may place short instructions inline until I can make a better post.
Feel free to add comments about the index or the ordering.
I know there is a lot of stuff here, but I had to do something in all these areas to get my printer up to snuff. I am still doing a few tweaks. It is running pretty awesome right now after doing something in each of these areas.
At this point, each item has some pointer or short instructions associated with it.
.
.
.
✅A) Essential new printer hardware/Settings improvements (any order):
1️⃣Update the step/mm for the 3 axis. The steps/mm for the 3 axis are currently set wrong in the factory defaults. Once fix this, your optimal Z layer heights will be in multiples of 0.0175mm with 0.28, 0.21, 0.14, 0.07mm being the best.
Do this:
M92 X57.14 Y57.14 Z57.14
M500
https://www.mpminidelta.com/howto/extruder_calibration…
https://www.facebook.com/groups/mpminideltaowners/permalink/2049358935079582/
2️⃣Replace 3 bottom feet with taller, noise dampening ones. Can be done out of order, if you need to order them online. The point is to get better airflow to the electronics so they do not overheat.
https://www.facebook.com/groups/mpminideltaowners/permalink/2029969193685223/
️3️⃣Replace the print surface with a more durable PEI surface (some prefer other surface treatments). Best to do this now before the final alignments, since the factory bed gets destroyed pretty quickly. I recommend a 0.5mm PEI sheet because it is tough and hard to destroy, but the surface is soft enough not to beat up the nozzle tip if you crash into it (like every time it self levels). It also sticks well at moderate temps, but releases well when cold with many filament types. If you proceed with alignments first, then recheck them after you replace the bed surface.
https://www.facebook.com/groups/mpminideltaowners/permalink/2003734886308654/
️4️⃣Attach printer power supply to a power switch of some sort. Do not plug and unplug the 12VDC power directly at the printer with the power on except in an emergency. Otherwise the connector will degrade over time and may become intermittent.
https://www.facebook.com/groups/mpminideltaowners/permalink/2056149511067191/
️5️⃣Get a second (or third) microSD card. The one included has not been reliable for many users (though mine has been fine). You will need a good card for printing from card or upgrading the FW. Many higher capacity cards do not work in this printer. The card that has worked perfectly for me is the one recommended on the Wiki.
https://www.mpminidelta.com/parts/microsd_card
️6️⃣Tune up the PID values for the hot end. This would have to be redone if replacing parts on the hot end.
https://www.facebook.com/groups/mpminideltaowners/permalink/2042879919060817/
.
.
.
✅B) Printer settings for your slicer (do before printing anything other than the cat)
1️⃣Set up printer hardware settings in slicer.
2️⃣Make a startup gcode sequence for the slicer.
Use G29 P2 for small parts and G29 P4 for large ones.
https://www.mpminidelta.com/starting_ending_g-code_scripts
.
.
.
✅C) Essential first time tune up process (Done in order):
1️⃣Set the belt tensions.
https://www.facebook.com/groups/mpminideltaowners/permalink/2057956777553131/
2️⃣Print out bed hold down supports. The rest of the bed alignments will not be stable without these support clips. These parts don't actually touch the hot bed, so they can be made from any stable filament material. They could even be fabricated.
https://www.facebook.com/groups/mpminideltaowners/permalink/2030427000306109/
https://www.facebook.com/groups/mpminideltaowners/2054733421208800/
https://www.mpminidelta.com/…/bed_clips_-_remove_and_replace
3️⃣Shim bottom of bed directly where the bed switches are located with HVAC aluminum tape (0, 1, 2, or 3 layers thick as needed) to just touch the supports as needed. You should not be able to slip a piece of paper between the hold down clip and bed, but when you rotate the clip away from the bed and back again, it should not push down on the bed in the slightest. This is a finicky operation, but critical to do before you proceed to the rest of the alignments. This will create a consistent distance from the top of the bed to where the switch activates, and keep the bed from rocking up when probing at the point opposite each tower.
4️⃣Find the correct delta radius using G29 P2 and update it with M665 Rxx.x.
I had to change the Delta radius by quite a bit to this to get a more linear flatness. Start with this number:
M665 R63.20
That number will not be consistent across different machines, follow this process to zero it in:
Use a USB interface to a manual controller (so you can see the printouts of the G29 command). Do the following:
G28
G29 P2 V4
Take the average of the first 6 numbers (double tap on each tower). Compare that average to the center double tap number. If it is a match, then you are done. If not, adjust the delta radius by 0.1 or 0.01 depending on how close the numbers match with:
M665 R63.xx
Then try again from the G28.
When you have found the closest match to save the value:
M500
Check out this comment thread below for more discussion and details about this and the next step and a spreadsheet to download to help speed up the calculations:
https://www.facebook.com/…/mpm…/permalink/2058169440865198/…
5️⃣Equalize the home switches using G29 P1 and update it with M666.
Use a USB interface to a manual controller (so you can see the printouts of the G29 command). Do the following:
G28
G29 V4
Compare that average double tap number to the others. If they are not even close, you may have to adjust the physical stops to get them into the ballpark.
If it is a close match, then you are done. If not, adjust the home stop offsets:
M666 X Y or Z offset. The smallest axis of these will always be set to 0 offset and the other are adjusted to match.
Then try again from the G28.
When you have found the closest match to save the value:
M500
Once you are done here go back and check the Delta radius alignment to make sure it did not shift its value. Recalibrate if needed and do this one again also.
Spreadsheet xlsx to help with the calculations:
https://www.facebook.com/groups/mpminideltaowners/2064274083588067/
6️⃣Print out 3 lower side shields to keep trash out of belts.
https://www.thingiverse.com/thing:2622002
.
.
.
✅D) First time and periodic tune up (any order).
1️⃣Adjust the extruder steps/mm. You may need to adjust this number for each new roll of filament. If you change filaments back and forth, label each roll with the steps/mm number so it can be reset each time you use it.
https://www.mpminidelta.com/howto/extruder_calibration…
2️⃣Oil all rails and universal ball joints. I use Super Lube Multi Purpose Synthetic Oil with PTFE. I have the pen oiler version that I refill with the 4 oz size.
I put a drop on each rail above each linear bearing when the hot end is near the build plate. I also put a drop on each of the 12 ball joints on the ends of the 6 arms.
https://www.amazon.com/gp/product/B000UKUHXK
.
.
.
✅E) Optional things that require opening up the printer:
1️⃣Add cardboard to block fan cooling the heat bed.
https://www.facebook.com/…/mpm…/permalink/2057274527621356/…
Or possibly print this which can be installed from the top:
https://www.thingiverse.com/thing:2783589
2️⃣Slow down lower cooling fan speed to reduce noise.
https://www.facebook.com/groups/mpminideltaowners/permalink/1992618474086962/
3️⃣Move the connectors to make the Y axis face the front. If you do this, you need to redo the calibrations, because the firmware settings and hardware configuration no longer match. Do it first if you want it (highly recommended). However, if a future MP firmware upgrade fixes this, it will have to be undone in the hardware.
https://www.mpminidelta.com/howto/face_forward
.
.
.
✅F) Make sure to refer to the Wiki for additional advice:
https://www.mpminidelta.com/start
For the bottom Fan, i printed a modified base i found on thingiverse (https://www.thingiverse.com/thing:3747339) and used a 120 fan with a 3pin to 2 pin adapter(included with the 40mm fan I bought), for the hot end i printed a modified fan duct also from thingiverse (https://www.thingiverse.com/thing:3471759) to mount a 40mm noctua fan and spliced the original 30mm fan connector onto the "omnijoin connector" included in the box with the 40mm fan(https://www.amazon.com/gp/product/B009NQLT0M/ref=ppx_yo_dt_b_asin_title_o08_s01?ie=UTF8&psc=1)
So I use Cura with my printer, but there's some stuff you have to do first.
The biggest thing for me in getting my printer to work was switching to only using the microsd card instead of the USB connetion, and taking the g-code header and footer from the cat print and applying it to all of my cura slices. At work currently, I'll try to take some screenshots of the screens and stuff that i'm referring to in cura.
Edit: Couple images to illustrate the process: https://imgur.com/a/Wibxzft
From cura: go to settings, then go to printers, then select Manage Printers. Select the MP Delta Mini profile that you've created, and hit Machine Settings. then put the cat header and footer in and voila.
Edit 2: If you've lost access to your auto00.gcode, I've made a paste with just the header and footer information. find it here: https://pastebin.com/DtZyuc1H
Yes and no.
The printer really doesn't like anything bigger that 2gigs.
Try formatting it as either fat16, or (probably less likely to work) as fat32.
I know where you can get another guaranteed to work card: Monoprice has then from around $180.00 (US). But, they come with a free Delta Mini! :-). (ha!)
2gig cards might hard to find. 1 gig cards might be easier.
It looks like Amazon might have them though. Sandisk microSD 2GB memory card https: //www.amazon.com/dp/B000HCGAFK/ref=cm_sw_r_cp_apa_0838Bb29E5Q4V
This is what I use and my glass doesn't move a muscle
ARCTIC - Thermal Pad, Thermal Compound for Coolers, Highly Efficient Thermal Conductivity,Gap Filler, Safe Handling, Easy to Apply (145mm x 145mm x 0.5 mm) https://www.amazon.com/dp/B00UYTTLI4/ref=cm_sw_r_cp_apa_i_0cYsDbYF4R8ZT
Probably best to just go with a 4.5" square and trim it to fit. The smallest round size they offer is 6.5", which will be way too big.
https://www.amazon.com/BuildTak-Printing-Build-Surface-Square/dp/B00MN5X4RQ
u/HenbestJP found a better deal on another thread, by the way. It comes with an microSD to SD adapter, and is $7.99 vs $11.99 (both have free shipping.) Thanks for all the information!
What size binder clips are you using? Is the bed free to move still up and down?
The bed needs to be free to click down in order for the autoleveling to function. I noticed that when I tried using "mini" binder clips, the bed was unable to move freely in order to trigger the button that the autoleveling routine uses to check whether the tool head is in contact with the base. Sure enough the nozzle would just slam into the glass bed using this.
What you need are "micro" binder clips. This will still let the bed move freely and autolevel correctly. I am not sure what country you are in, but these are the ones available in the US I got.
FYI: I ended up ordering theses:
https://www.amazon.com/gp/product/B01J3BB000/ref=oh_aui_detailpage_o00_s00?ie=UTF8&amp;psc=1
They're slightly longer than the original, but work great. No changes are needed to use them, though the extra length will take a few mm off the max Z height.
If you plan on maxing out the Z height, change setting in your slicer from 120mm to 117.
I got a 10a upgrade. The printer cannot fry itself. In fact, if it was designed correctly, it shouldn't be able to draw more power than the stock power supply, but giving it the availability to pull more amperage is only better. I wouldn't waste the money on 20 amps as that's way overkill.
Here's the supply I went with. The MiniDelta uses an odd sized barrel connector so if you go with this one you'll have to handle that.
https://www.amazon.com/gp/product/B00Z9X4GLW/ref=oh_aui_search_detailpage?ie=UTF8&amp;psc=1
>... I just reenter it and it stays.
Have you tried using some 3M double sided tape on the sides to improve adhesion? Just those three small strips hold that thing down like an anchor.
This is the fan for the electronics in the base, don’t worry it isn’t an affiliate link. It’s the Noctua NF-A6x25 FLX and it makes a big difference... However, the steppers are still super loud and so is the hot end fan.
Noctua NF-A6x25
I myself purchased this to solve that issue, and it works wonderfully. https://www.amazon.com/dp/B00RUV75D2/ref=cm_sw_r_cp_apa_i_pf45AbDCK7VVT
https://www.amazon.com/gp/aw/d/B075B1R9YZ/ref=cm_cr_arp_mb_bdcrb_top?ie=UTF8
is this also a good option? or are the mirrors better & can you link to a good mirror or will a random mirror at a craft store work?
also the settings in cura im using (ill upload images later today) are the settings that he manual lists. but i downloaded the configuration & put the manual settings into it. is this ok?
This one is fulfilled by Amazon, would that be able to get to you?
120mm X 3mm Borosilicate Glass Plate, 3D printer Build Surface, Mini Delta https://www.amazon.com/dp/B075B1R9YZ
Hi there,
I'm wondering how many of you have successfully resolved your heating issues on the MPMD. I've upgraded the power supply to this (https://www.amazon.com/gp/product/B018G3ABWY/ref=oh_aui_detailpage_o03_s00?ie=UTF8&amp;psc=1), and it's certainly made the bed heat a little more quickly. However, I'm still seeing a lot of fluctuation from the bed and the hot end. I don't care about the bed too much, but +-10 degrees constantly on the hot end is... not ideal.
I've got the v43 firmware (got this as a graduation gift, and that was the firmware it came with)...
What am I missing?
My machine would only read Non-HC (high capacity). I found some 2G on Amazon.
https://www.amazon.com/Kingston-microSD-Memory-SDC-2GB/dp/B0015R2NUW/ref=sr_1_5?ie=UTF8&qid=1542570561&sr=8-5&keywords=micro+sd+card+non+hc
It is PLA from Amazon.
Copper/Gold/Silver PLA
You can get an inexpensive Battery backup to plug the printer into if your home has power fluctuations that could cause the print to stop. I run an 400VA APC UPS like the one at the link below on my printers.
https://www.amazon.com/APC-Battery-Protector-Back-UPS-BE425M/dp/B01HDC236Q/ref=mp_s_a_1_3?keywords=apc+ups+425&amp;qid=1570291301&amp;sprefix=apc+ups+425&amp;sr=8-3
Other than that, restart the print or measure the print and re-slice the portion that didn’t print and break out the glue.
Hatchbox yellow
HATCHBOX PLA 3D Printer Filament, Dimensional Accuracy +/- 0.03 mm, 1 kg Spool, 1.75 mm, Yellow https://www.amazon.com/dp/B00J0GRREW/ref=cm_sw_r_cp_apa_i_0AiwCbF2GTDNQ
I put a glass ( https://www.amazon.com/gp/product/B075B1R9YZ/ref=ppx_yo_dt_b_asin_title_o00_s00?ie=UTF8&psc=1 ) over my bed with clips. Will I get faster heating with the stock pad removed?
I posted this to the Mini Delta Owners Facebook group on July 8, 2017 but I thought I would share my experience here also.
&nbsp;
"It's been almost 3½ months and I finally had to replace the build surface. Worst part was getting the adhesive from the build plate (not shown). It was easier to remove after spreading a bit of Goo Gone over the entire surface and let sit. After 5 or 10 minutes I used razor blade to peel of the nasty goo."
&nbsp;
I replaced it with BuildTak 3D Printing Build Surface, 4.5" x 4.5" Square, Black (Pack of 3)
I used the original bed surface that I removed as a template to trace the outline onto the 4.5 inch square BuildTak sheet.