Top products from r/polymerclay
We found 24 product mentions on r/polymerclay. We ranked the 44 resulting products by number of redditors who mentioned them. Here are the top 20.
1. Reynolds Oven Cooking Bags-Large Size for Meats & Poultry (up to 8-Pounds), 5 Count Boxes (Pack of 4) 20 Bags Total
Sentiment score: 1
Number of reviews: 2
4 boxes each box 5 count, Total 20 bagsEasy way to make great tasting mealsJust open the bag, place it in a pan and fill it with your favorite meat and vegetablesThe bag traps in moisture and natural juices to keep food from drying out so it comes out juicy and tender every time
 Show Reddit reviews
2. TEMONING Polymer Clay, 50 Colors Oven Bake Clay with 27 Models Creations Book and Rolling Pin, Modelling Clay Soft and Nontoxic DIY Plastic Tools and Accessories … (50)
Sentiment score: 2
Number of reviews: 2
▶BAKE:Oven Temperature 135℃(275℉), at least bake at 3-30 minutes, Please testing the time from 3 minutes if you are new Beginner. Bake at a lower temperature for longer if unsure.Clay takes 24 hours to fully Harden.▶Creations Books(18*13cm,44pages). 32 models. Step-by-step Instructions a...
 Show Reddit reviews
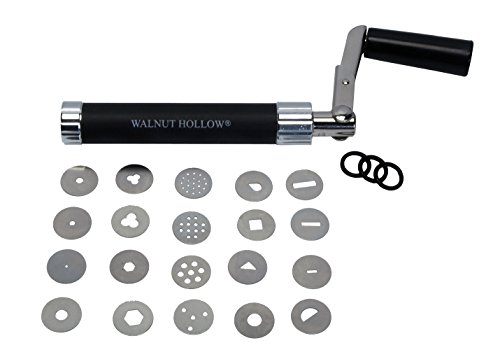
3. Walnut Hollow Clay Extruder with Easy Crank Handle
Sentiment score: 1
Number of reviews: 2
Features a smooth, easy to turn crank-type handle with 20 unique disc designsMakes clay extruding easy for both the young and the oldThe reusable storage case prevents the loss of discs or spare O ringsIncludes a reusable storage caseSuitable for use with most types of clays! Not suitable for Precio...
 Show Reddit reviews
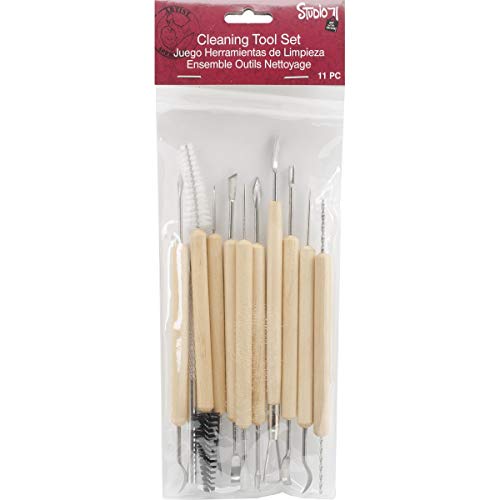
4. Darice 11-Piece Clay Tools Set from Studio 71 – Metal Tipped Clay Sculpting Tools with Wood Handles, Ideal for Cleaning and Creating Decorative Effects on Clay Surfaces
Sentiment score: 2
Number of reviews: 2
CLAY TOOLS SET– When you work with clay, things can get messy! This 11-piece Studio 71 Clay Cleaning Tool Set makes cleaning your greenware simple and easy. Everything you need is right at your fingertips with these modeling clay tools.VERSATILE – Not just for cleaning clay, these clay tools can...
 Show Reddit reviews
5. Polyform Super Sculpey Firm Oven Bake Clay, Gray, 1lb
Sentiment score: 1
Number of reviews: 1
Has a firm texture making it perfect for sculpting fine detailsShatter and chip resistant and the coloring of it makes it easy to photographContains 1lb of extra-firm gray compound
 Show Reddit reviews
6. EFCOLOR Kiln Set
Sentiment score: 1
Number of reviews: 1
Full stove setFix your enamelling145mm stoveExcellent Starting Pointchildren should be supervised
 Show Reddit reviews
7. Polyform Sculpey Acrylic Clay Roller, 8-Inch (456524)
Sentiment score: 1
Number of reviews: 1
This roller is designed to roll even sheets of clay and smooth clay surfacesThe non-stick surface eliminates the need for a release agent and it cleans easily with soap and waterThis package contains one acrylic clay roller (8x1x1 inches)Country of Origin : China
 Show Reddit reviews
8. G.S Wax Carver Spatula Carving Spatula #7a Stainless Steel Dental Instrument Best Quality
Sentiment score: 1
Number of reviews: 1
G.S Instruments Are Just Sold By G.S Online Store.G.S Wax Carver Spatula Carving Spatula #7a Stainless Steel Dental Instrument Best QualityMade In Stainless SteelSame As Picture
 Show Reddit reviews
9. OOK 50154 28 Gauge, 75ft Brass Hobby Wire
Sentiment score: 1
Number of reviews: 1
This Item Is A Ook 50154 28 Gauge, 75Ft Brass Hobby WirePurpose Of Use For Electrical & Heating, Rough ElectricalThis Product Is Manufactured In ChinaBrand Name: Ook
 Show Reddit reviews
10. Polyform Sculpey Clay Conditioning Machine
Sentiment score: 1
Number of reviews: 1
Perfect for conditioning clay, mixing colors and much more
 Show Reddit reviews
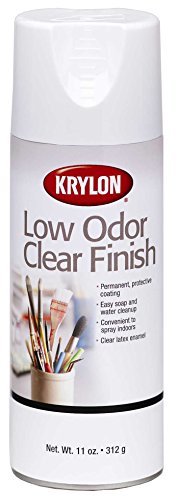
11. Krylon K07120 11-Ounce Low Odor Clear Matte Finish Aerosol Spray
Sentiment score: 0
Number of reviews: 1
These low odor finishes protect like traditional clear coatings without the odorPermanent protective finishEasy soap and water clean-upFor indoor and outdoor use on wood, metal, wicker, plastic, glass, craft foam, plaster, ceramic, paper, paper mache, dried and silk foliage, etcAvailable in clear ma...
 Show Reddit reviews
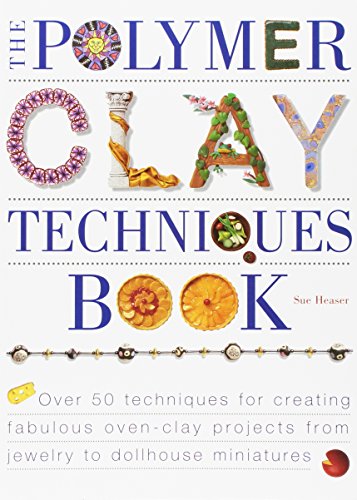
12. The Polymer Clay Techniques Book
Sentiment score: 1
Number of reviews: 1
Northlight
 Show Reddit reviews
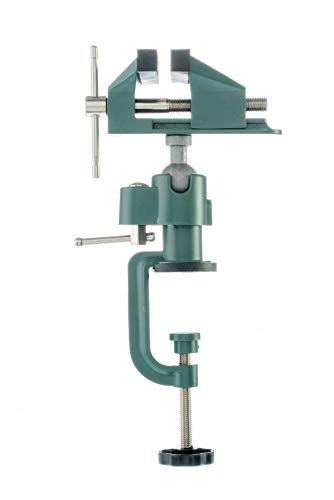
13. SE 3" Universal Aluminum Table Vise 360 Degrees Rotating - 8436MVC
Sentiment score: 0
Number of reviews: 1
Rubber bumpers, aluminum bodyHead rotates 360° and tilts 45°Clamps onto surfaces up to 2" thickSecures an object to allow work to be performed on itGreat for artists, hobbyists, and jewelers
 Show Reddit reviews
14. Fimo Tools Cutter Blade Set 3pc
Sentiment score: 1
Number of reviews: 1
3 blade set used for cutting polymer clay
 Show Reddit reviews
15. Premo Sculpey Polymer Clay 2 Ounces-Silver (PE02 5129)
Sentiment score: 0
Number of reviews: 1
Soft enough to blend easily but firm enough to hold fine detail.The best choice for professional techniques: caning, mokume gane and mica shift due to its unique formulation and ease of achieving consistent results.Retains flexibility after baking so the finished product remains very strong and dura...
 Show Reddit reviews
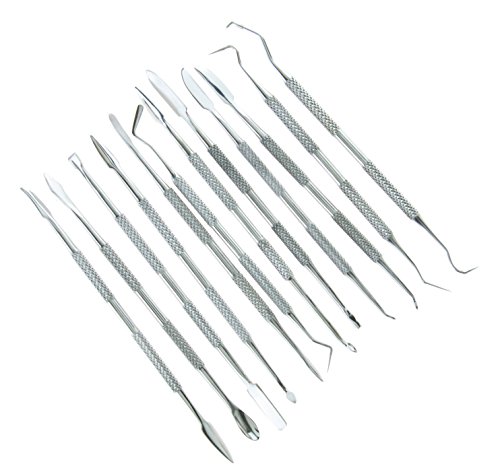
16. SE 12-Piece Stainless Steel Wax Carvers Set - DD312
Sentiment score: 1
Number of reviews: 1
Durable and long-lasting stainless steel constructionDouble-sided for a variety of shapes and uses6" average lengthBalanced weightGreat for carving, cutting, modeling, scraping, shaping, etc.
 Show Reddit reviews
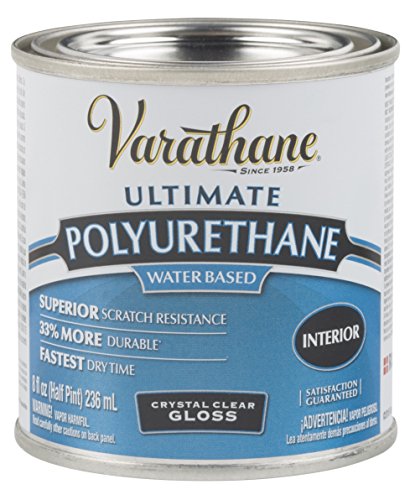
17. Rust-Oleum 200061H 1/2 Pint Water Based Wood, 1/2-Pint, Gloss Finish
Sentiment score: 0
Number of reviews: 1
Protects indoor wood surfaces such as furniture, windows, cabinets, trim and moreWater based formula dries fast and cleans up with soap and waterDries to the touch in 30 minutes with coverage up to 31.25 sq. ft., recoat after 2 hoursDurable formula provides outstanding stain and scratch resistance w...
 Show Reddit reviews
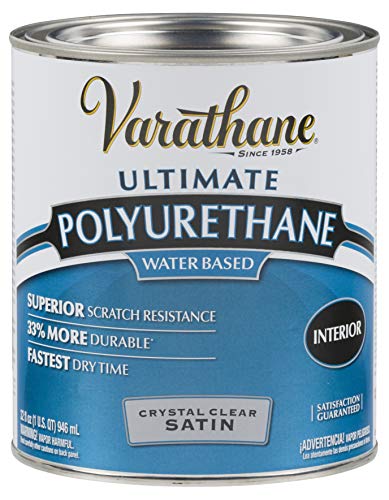
18. Rust-Oleum 200241H Water-Based Poleurethane, 1-Quart, Satin Finish
Sentiment score: -1
Number of reviews: 1
Protects indoor wood surfaces such as furniture, windows, cabinets, trim and moreWater based formula dries fast and cleans up with soap and waterDries to the touch in 30 minutes with coverage up to 125 sq. ft., recoat after 2 hoursDurable formula provides outstanding stain and scratch resistance wit...
 Show Reddit reviews
No clay is perfect--each has their own strengths and weaknesses. Which is best for you will depend on exactly what you're doing and your own preferences (both positive and negative). And which you can easily find. This article might be helpful.
Personally, I like Kato. It's tough when baked, doesn't discolor easily during baking, and comes in pure colors for easy mixing. It's also really, really firm so it holds detail well. On the other hand: it's way harder than most people enjoy working with, the color selection is small (you really need to mix it to prevent the "I only have eight crayons to color with" look), and it has a stronger odor than most other kinds. It's great for me, maybe not for you.
As Diane pointed out, what tools will be useful to you depends on what you're making. "Small charms" could mean chibi animals, faux gemstones, caning, etc. All are going to have slightly different ideal tools. I can tell you what I use the most, though. I mostly sculpt little cutesy little animal figurines, and keeping that in mind, I think these are my most used tools:
-Aluminum foil. You can sculpt on top of it, then put it into the oven to bake without trying to peel it off. Making a little tent out of it can help prevent discoloring of the clay from spikes in temperature. It can be used to bulk out armatures if you try making figurines. Even when making something small, a ball of it inside a sculpt can save clay, make it lighter (which makes it less likely to break when dropped), and keep the clay thinner to make baking quicker and easier. The one potential problem is that air expands when heated, so air pockets left in the foil could make the clay bulge in places when baked. Because of that, I like to cover the foil ball in a thin sheet of clay, bake it, and then add more clay to sculpt on top.
​
-Plastic baggies for clay storage. I use gallon-sized freezer bags, then inside those small bags with individual colors. Keeping all the blocks in one bag together results in them getting smeared on each other and stuck together. Ew.
​
-An X-acto or other sharp blade. I also like to keep a dull knife around--the sharp blade to cut the clay cleanly without denting or deforming it (such as for trimming the bottom of a figurine flat), the dull one to make rounded-off cuts and dents (such as adding a mouth or putting texture on locks of hair).
​
-Needle tools. You can buy them, but if you're trying to keep costs down, here's a tutorial on making your own. Good for making holes, but also creases and long dents (such as around pumpkins or the neck of a teddy bear). The ones she shows are all straight, but I like using curved ones sometimes, too. I have some cheap dental tools that work like that, but you can get curved needles or just use a bent piece of wire.
-Ball stylus. Good for making soft rounded dents (inside ears, eye sockets, pretty much anywhere you want to add a depression that isn't just gouged out). You could probably make your own using the needle tool tutorial, but instead of keeping a needle in the handle, you'd glue the pointy end of a pin into the handle's hole after baking it. If you decide you like the hobby, it would probably be worth purchasing sturdier metal ones eventually. There's a good chance that clay could break down the pin's plastic over time, and besides, it's helpful to have a wider range of sizes than you can easily find in pinheads.
​
-Dental spatula. Like this one or this one here. I know don't know anything about either of those companies, but those spatulas look like they have my preferred shape to the ends. Mine probably spends more time in my hands than any other tool, because it's good at both cutting and smoothing. There are other tools out there that are probably better at each, but I like the versatility. Not having to stop and a find a different tool is nice.
​
-An oven thermometer (noticing a trend with these? lol).
​
-Some sort of roller/rod for making flat sheets and mixing/conditioning clay. The upgrade to this would be a pasta machine, but they're more expensive. And unless you're rolling out a lot of clay, they can take longer to clean than simply making the sheet with a low-tech roller would.
-If you start making larger objects, you'll want to look into making armatures. Wire and foil are the main supplies you would need for that. Which wire will depend on your project, though.
​
Looking around for free potential tools is a good idea. Along with purchased tools, my kit contains all kinds of random junk...bits of wire, toothpicks (some with ends trimmed to certain shapes), a broken paint brush handle, something intended to do something to nail cuticles, etc. I might not use them often, but if they're free, why not?
​
It's hard to say what is useless, because most tools are useful if you're making just the right things. I rarely use my clay extruder or mini cookie cutters, for example, but some people seem to get a lot of use out of theirs. Very little is absolutely necessary, though, even when it is helpful. My first tools were just a toothpick and an old beat up paring knife, and those (plus a ball stylus or my rounded-off broken paintbrush handle) would still be sufficient for just about anything I could want to sculpt. You can spend a ton of money on this hobby, but there's very little you must buy. Everything else is just "Ooooo, that would make this project so much easier!" And you'll know when that happens.
Agree about "The Polymer Clay Techniques Book" by Sue Heaser. An oldie but goodie, and always a favorite of mine because she just covers so many different things in one book, and simply. (I wouldn't use some of the same colors or necessarily make the same things, but that won't matter for techniques. That book isn't primarily about sculpting although that's covered a bit.)
https://www.amazon.com/Polymer-Clay-Techniques-Book/dp/1581800088
(paperback is fine... eBay may have used copies cheaper if you're interested in it)
Re painting on baked polymer clay, there are just a few things to know about preparing the surfaces, paints to use and not use, etc:
http://glassattic.com/polymer/paints.htm
And btw, temperature and time are interdependent for the type of plastic that polymer clay is, although too high for a particular brand/line will create more darkening than you might want unless the clay is protected (and it will actually burn at 385), and too low will take much longer than you might want for thoroughly polymerizing all the way to the center.
Re bulk brands/lines of polymer clay usually sold for "sculpting," original plain Sculpey will be very brittle in thin or projecting areas. Super Sculpey-flesh will be better but still brittle in those areas. Super Sculpey-Firm will be strong, and Super Sculpey-Medium will be halfway between SS and SS-Firm.
Other brands of flesh-colored bulk polymer clays will be strong but each will have its own handling characteristics (e.g., Fimo's Doll/Puppen clays and Cernit's Doll Clays).
Yay! It's a fun hobby and makes me feel super creative.
I would not recommend Michael's for tools. They are overpriced. There are a lot on Amazon. I got this set and it's only 5 bucks right now!
The clay kind of depends on what you want to make. I started out with a few Premo colored clays from Michaels. The vibrant color is nice. Now I use just a grey Super Sculpey and then paint over it after baking.
The glue I'm using is a gap-filling cyanoacrylate, specifically this: https://www.amazon.com/Insta-cure-filling-Bob-Smith-Ind/dp/B0000DD1QQ
What I've been doing is applying it to the cracked areas, and smoothing it down. Once that's dried, I've applied more, and smoothed that. Repeating until the crack is filled, and I will sand that after. I have a pretty solid array of fine grit sandpapers, as well as a pretty extensive array of dremel bits. I think some fine grit buffs will help me with these cracks as well as some other rough spots I was hoping to smooth over. Hoping it goes well. I'm actually having some success re-texturing the hair where it cracked by using the same metal bristle tool on the glue as it dries. Gonna need to soak this tool in some acetone when I'm done, though.
I only called it a kiln because it was inspired by this:
Efcolor Kiln Set by Efcolor https://www.amazon.ca/dp/B004KT2JOW/ref=cm_sw_r_cp_apa_i_djnzCbA0NCY34
An artist I follow uses it to bake her pieces.
The other simpler ovens use Teflon, and I have birds. I love this set up because it keeps everything enclosed for me, I can take it out to air out after bake time is over.
Yes I just put it over a stove burner. I used an oven thermometer. I did a bunch of testing to see if it held the temp over long periods of time and it was very consistent, once I found the right distance and setting on the burner. I have taken to baking my smaller pieces for 45 min, regardless of size. Nothing has burned or even changed colour. There seems to be a lot of residue inside the lid after, so I'm feeling pretty confident that they are thorough baked.
Thank you so much for that link! Further reading of the baking info, the science behind it, and other points makes me feel like my pieces are being baked properly with this as well! I really appreciate it. And yes I do leave the thermometer in. So that at the end of baking when I take the lid off, if the temperature is lower than expected I can readjust, and bake at the right temp. It has yet to happen however.
You're definitely a natural. They look great!
One thing I've found is that the zig-zag-y blades you get in sets of polymer clay blades like this - https://www.amazon.co.uk/dp/B0013E0RQ4 - are really useful for cupcake cases. If you press the texture on the case part instead of cutting the grooves in, you get a really great effect that looks like a real cupcake case.
Thanks!! Yes, i have Fimo and it is easy to work. So, do you think i keep working with fimo/premo? Because I have been looking and amazon does not have single blocks from other brands, they have a lot of stuff like this: https://www.amazon.co.uk/Polymer-Creations-Modelling-Nontoxic-Accessories/dp/B07HB6LTVZ/ref=mp_s_a_1_2_sspa?keywords=polymer+clay&qid=1566162374&s=gateway&sprefix=polymer+clay&sr=8-2-spons&psc=1&spLa=ZW5jcnlwdGVkUXVhbGlmaWVyPUEzQTNXSFlHVUpUNkhKJmVuY3J5cHRlZElkPUEwNTI2Nzk3SE1CSko4U0FaOEJGJmVuY3J5cHRlZEFkSWQ9QTAzNjI4MjY0U0E3S003QzNHMUEmd2lkZ2V0TmFtZT1zcF9waG9uZV9zZWFyY2hfYXRmJmFjdGlvbj1jbGlja1JlZGlyZWN0JmRvTm90TG9nQ2xpY2s9dHJ1ZQ==
And i can't choose the colors. So, maybe, i will just keep buying Fimo.
Cool, I'm new too. I used my hands for most of it. I have some bendy wire a little thinner than a paper clip (that I used inside this mini's rod, cuz I was afraid it might break otherwise) — I cut a piece a few inches long and used that to scratch some lines (on the rod, beard, hat, feather).
Which tool set did you get? I saw this super cheap one on Amazon, but you're right, it seems a bit large. I think I'd be happy with a pointy thing, small chisely shaper thing, and a loop of some sort. If you find a set you like, let me know!
Yeah, just some very thin gauge brass/copper wire should work well. Something like this.
You can twist multiple strands together to make adjustable armatures for limbs, and for smaller, more pointy bits yeah, just jamming a few bits in (being careful not to push it into your finger) works great.
Also, not sure which sculpey is being used, but I find Super Sculpey is better than Original Sculpey for fine detail, and doesn't break as easily for smaller pieces.
I would also recommend Super Sculpey Medium or Firm. I just discovered medium at Pat Catan's. You can also order it from Amazon.
Medium on Amazon
Firm on Amazon
These and these. Oh and This. I also recommend getting a pasta machine or something like it. Heres one by sculpey.
After trying two others, we (my 3-year-old maker queen and I) really like this one:
Walnut Hollow Clay Extruder with Easy Crank Handle https://www.amazon.com/dp/B004478EWG/
I always go to Amazon to look for tools. I often just get the clay tools that are meant for pottery and the like,
Ball tools here and here
I also have tools meant for fondant (but sometimes these arent the best because they are plastic and have the mold line). I also bought a pack of box cutter blades because they were cheaper blades that were long than the Sculpey brand. Also a roller! I bought one meant for baking because it was so much cheaper! This is the one I have.
Thanks! The item I'm planning on using for covering sculptures in the oven would be this: https://www.amazon.com/Reynolds-Cooking-Bags-Large-Poultry-8-Pounds/dp/B00HFNEE48/ref=sr_1_4?s=home-garden&ie=UTF8&qid=1537398926&sr=1-4&keywords=Roasting%2Bbag&th=1
I also use this table vise to clamp onto the clay extruder so I don't have to hold onto it. It is 10x easier to use with the clamp.
I haven't tried it yet, but the artist who I've been following most closely as I learn about sculpting uses Krylon matte finish spray (this one I believe: https://www.amazon.com/dp/B001HWCLK2/ref=twister_B004JLA2OU?_encoding=UTF8&psc=1), and her stuff doesn't seem to be shiny. Her name is EmilySculpts if you want to check her out.
I use varathane. It’s water based and I have never had it yellow or crack on me. I will suggest that once you open it,you put it in a different container or the can will rust and discolor it. RUST-OLEUM 200061H 1/2 Pint Gloss Water Based Wood Finish https://www.amazon.com/dp/B000FPCKBW/ref=cm_sw_r_cp_api_i_6t13CbEP3NGNT
theres a diffrence?
Is this not polymer clay? (https://www.amazon.co.uk/gp/aw/d/B00114PYGO/ref=mp_s_a_1_1?ie=UTF8&qid=1495042507&sr=8-1&pi=AC_SX236_SY340_FMwebp_QL65&keywords=sculpey%20polymer%20clay%20silver&dpPl=1&dpID=51J4VWiZTJL&ref=plSrch
I have not had this happen with the Sculpey glaze, but I have barely used it. It sort of looks like maybe there was trapped air bubbles that popped as it was drying. Did you shake up the bottle or stir it up before painting on your glaze? If so, don't do that.
I have only used Sculpey Satin Glaze once or twice on my pieces. I seal everything with Verathane which is a water-based polyurethane sealant and/or PYM II.