 Reddit reviews BMOUO 12V 30A DC Universal Regulated Switching Power Supply 360W for CCTV, Radio, Computer Project, LED Strip Lights, 3D Printer
We found 14 Reddit comments about BMOUO 12V 30A DC Universal Regulated Switching Power Supply 360W for CCTV, Radio, Computer Project, LED Strip Lights, 3D Printer. Here are the top ones, ranked by their Reddit score.
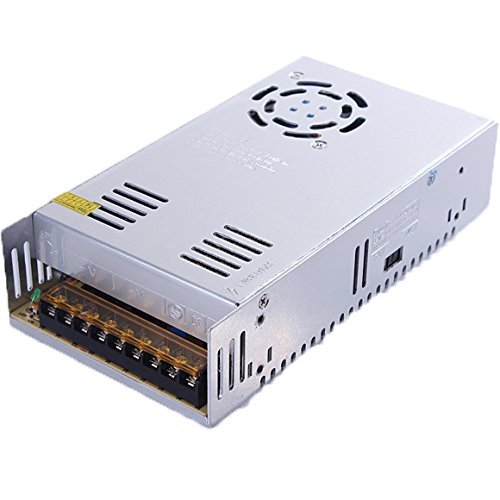
Switch power supply, convert AC 110V/220V to DC 12V 30A 360W.Dual input voltage: AC 110V/220V. There is a switch, choose the proper voltage before use.Protection: Shortage Protection, Overload Protection, Over-voltage Protection:115%-135%,Action output cut-off Reset:Auto Reset or fuse.Smart device surge protection for Shortage Protection, Overload Protection, Over Voltage ProtectionWide input voltage range, steady and precise output voltage.Great power transformer for electronic equipment, Led Lighting, home appliance etc.
Anet A8 owner here. Actually now it's P3Steel but with all of the Anet electronics.
https://www.amazon.com/dp/B01EWG6YT8/ref=cm_sw_r_cp_apa_JxUTzb7C2VWGD
With these mods you should be fine. I've been running mine for over a year in this configuration with absolutely no problems.
EDIT: I forgot a very important mod and it's 100% free. Flash Skynet firmware onto the board. It has some critical functions not on the shitty stock Anet firmware, such as thermal runaway protection. Also has some other cool stuff you can play around with like PID temperature controlling.
12V bench power supplies are a thing. I got one to work on avionics. E.g.: https://www.amazon.com/dp/B01EWG6YT8/
There's no reason it wouldn't work, most amps have a variable input gain and switchable/defeatable crossovers and can drive loads down to 2ohms with adequate cooling. The big issue is that you need a beefy 12V power supply to handle the electrical demands of power amp. In a car, the battery acts as a high capacity reservoir to supply large amounts of electricity on demand, and is continuously charged by the alternator between peak discharge cycles (like starting your engine). The amplifier has plenty of power on reserve to produce heavy bass. When that amplifier is not connected to a battery, you need a power supply that can supply those large currents without a battery to assist it.
Let's say you want 300W amp RMS output. You have to account for some enffenciency. Class D will be 90% (ish) efficient, meaning at Max volume you need a continuous 335 watt. That's 27amps at 12volts. Luckily the price of these power supplies have gone way down. I found this on Amazon, and it should work for a 300 watt amp. Depending on how familiar nyou are with car audio you can have it all hooked up in a matter of minutes, but it won't be all that portable unless you building a custom enclosure. I'm pretty familiar with bastardizing car audio for other things so ask questions if you have any.
Alright, I’ll do my best to explain what I did. First off, material list:
4 x WS2811 5m 30LEDS/m addressable LED strip 12V in IP67 waterproof tube
https://www.amazon.ca/gp/product/B01CNL6EG2/ref=oh_aui_detailpage_o00_s00?ie=UTF8&psc=1
1 x 12V 30A DC power supply
https://www.amazon.ca/gp/product/B01EWG6YT8/ref=oh_aui_detailpage_o00_s00?ie=UTF8&psc=1
1 x Magic LED Bluetooth controller
https://www.amazon.ca/gp/product/B01LW1J10W/ref=oh_aui_detailpage_o00_s00?ie=UTF8&psc=1
1 x Sound activated controller
https://www.amazon.ca/gp/product/B0792T73VB/ref=od_aui_detailpages00?ie=UTF8&psc=1
10m (cut in half to get 20m) of Gorilla Mounting Tape Clear (link is for black, but I bought clear)
https://www.canadiantire.ca/en/pdp/gorilla-glue-mounting-tape-black-0671081p.html#srp
14 gauge wire
https://www.canadiantire.ca/en/pdp/southwire-30-metre-in-wall-speaker-wire-yellow-14-2-0529814p.html#srp
18 gauge wire (brown thermostat wire)
Can’t find a link, but I had it in my garage from another project
There is a strip that holds the soffit in place on the far side from the house that was a perfect channel for the LED strip. You can buy white aluminium channels for LED strips with nice frost glazing that diffuses the light. I would have bought them, but soffit and house trim are all brown and I could not find it in brown. I cleaned the surface of the house, then suck the tape to the strip and ran a knife down the side to cut it in half. I then attached it all to the house. 20m fit perfectly around the lower level trim on my house.
I have built-in shelves all around the inside of my garage. So I put the power supply on an upper shelf near the centre of the strips. I picked 12V strips over 5V strips to minimize voltage drops. There are numerous online voltage drop calculators, I used this one:
https://www.calculator.net/voltage-drop-calculator.html
My electrical engineering friends tell me I need to size the wire for no more than a 3% voltage drop. That might be a bit overkill for low-voltage LED lights, but that’s what is in the CEC for building wiring. I ended up using 14-gauge wire and ran power to each strip. It worked out to be a bit more than a 3% loss. I used the brown thermostat wire to tee off the main line indoors and ran it through the wall to power the strips. Each connection was done using crimp-style splice connectors that I had left-over from wiring a stereo in my boat.
On the far end I mounted the Magic LED Bluetooth controller (inside) and ran an extra run of the thermostat wire for the data signal. The controller worked great once I put in the right settings. I also set the wiring up so I can connect the sound activated controller outside. On Halloween I plan on setting up some singing pumpkins and have the lights dance to the music.
I hope this helps and good luck with your project. A key thing to keep in mind is you need to run power to each strip, otherwise, you will have too much line-loss, generate lots of heat, and the colours will be different on the far end. It can, and should, come from the same power supply, but just run additional power lines out to each strip.
https://www.amazon.com/BMOUO-Universal-Regulated-Switching-Computer/dp/B01EWG6YT8/ref=sr_1_3?ie=UTF8&qid=1502831100&sr=8-3&keywords=12v+15a+power+supply
You may as well go with a 12v 30a power supply for a couple bucks more. Give yourself some headroom.
Here's what I got for the power supply http://imgur.com/a/iYKWH I searched hard to find an enclosure that wasn't overly big, but I didn't expect this slim fit.
The rest of the parts are coming from mouser. http://www.mouser.com/ProjectManager/ProjectDetail.aspx?AccessID=0edeb14cbf
I plan on taking the shield off, but things are going to be tight. Any suggestions would be helpful. Thanks
Edit : Add Links
I got this unit because it was affordable, available next-day, and had good reviews (albeit not a ton of reviews): https://www.amazon.com/gp/product/B01EWG6YT8
Yes, it has mounting holes: they just don't match up with the floorplate on the control box. The corner mounting holes overlap with the lip of the control box, so if you are thinking of drilling holes, you'd have to drill the lips of the box as well. There is a 5th mounting hole right in the middle of the PSU, so maybe you could just drill one hole to screw it down and keep it pressed against the four metal posts on the floorplate.
Here's a pic from RepRap Champion of a similar (if not identical) unit showing what I mean: https://cdn.shopify.com/s/files/1/0663/6961/products/DSC_5703_1024x1024.JPG
I'm sure you would notice on your own, but heads up that the connectors are arranged in the opposite direction from the stock unit. I.E. #2 on the original PSU = #8 on the PSU I installed. No big deal: just pay attention when wiring it back up. Photo again: https://cdn.shopify.com/s/files/1/0663/6961/products/DSC_5701_1024x1024.JPG
Could have saved a lot of money and had twice the power supply.
Have been running this setup on my 100 watt rig thats rated at 25 amps at full power with zero issues
Power supply $17
Heavy duty cord
Are you in the US?. If so, here's a link to the power supply I bought. It's a drop in replacement for the CR-10. Also, there is a supposed short that can occur by the control knob and LCD, that people have reported fixing with some kapton or electrical tape.
Everyone is going to tell you this printer is bad, but for what it is it can work quite well. I have made some very precise parts with mine. I would stick to PLA until you make safety upgrades, it keeps the load minimal as most of the electronics are strained in terms of design.
I would get a small fire extinguisher, they are ~20$ at Home Depot in the electrical section by the smoke detectors, you want one where you live regardless. Be sure to keep it somewhere accessable but not right next to the printer. If there is a fire you need your extinguisher to not be behind it. Also don't print while away from home or sleeping until you make safety upgrades.
As for those upgrades.
For around 50$ you can make the printer safe, and it will otherwise be a hobby project of tweaking and tuning to improve/maintain the quality. Many people don't like the tinkering part, but if you like tinkering this printer can be a very good learning experience.
Also, for convenience, you can have a dedicated power strip to use as a power switch.
Welcome to 3Dprinting. Have fun and stay safe.
I'm using this for my Yaesu FT-450D without issues.
BMOUO 12V 30A DC Universal... https://www.amazon.com/dp/B01EWG6YT8?ref=ppx_pop_mob_ap_share
$18
Would this work? https://www.amazon.com/dp/B01EWG6YT8/
> Given the prices you mentioned, that was pretty much what you did imply.
I factored $20 for a power supply and $20 (this is a PTFE lined hotend and has poor reviews, an all-metal would probably be $25+) for a new heater block (I went for the one with the cartridge and thermistor because newer variants need a cartridge thermistor). A Meanwell 12v@30a (360w) costs $47 and a legit E3D replacement would be $20 without a heater cartridge (assuming the A8's fits), and you would still be using a PTFE lined heat-break (assuming the A8's heat-break is compatible with E3Ds).
I'm not trying to imply that you should be using the best parts possible, I'm trying to say that you shouldn't be using the cheapest stuff, you should be using something somewhere in the middle.
> There are some problems with the PSU, maybe not enough to warrant a replacement upon acquisition, but it's not entirely unheard of.
The Duplicator has QC issues, as noted in the printer recommendation list, but no where near as bad as the A8s (I got a screw that wasn't threaded).
>As to the board, there's quite a few(see comments) posts on that
Since you don't understand why the MOSFET mod is needed, go read my explanation. The MOSFET mod prevents the connectors on the Melzi from burning up (and don't forget, the A8 needs the mod too) on the Duplicator v2.1 (again, the Plus does not need the MOSFET mod or a board swap, the amount of current running through the connectors is well within the limits of the connectors).
I bought this because I can use it off a car battery but for in the house hooked it up to the 3d printer power supply. Basically anything 12vdc 5A will work, the amps depend on the charge amps and pack voltage. A 4s 2500mah would need a higher Amp supply because the Accucell 6 needs to boost voltage at the cost of amps all while delivering 2.5A on a 1C charge. As said a laptop supply should do the job, check thrift shops bring a voltmeter. I cut the alligator clips off, soldered the wires and clamped them into screw terminals.
BMOUO 12V 30A DC Universal Regulated Switching Power Supply 360W for CCTV, Radio, Computer Project , LED Strip Lights https://www.amazon.com/dp/B01EWG6YT8/ref=cm_sw_r_cp_apa_eQgXAb7R7TVDE