 Reddit reviews Lodge 2 Quart Cast Iron Dutch Oven. Pre-seasoned Pot with Lid for Cooking, Basting, or Baking
We found 3 Reddit comments about Lodge 2 Quart Cast Iron Dutch Oven. Pre-seasoned Pot with Lid for Cooking, Basting, or Baking. Here are the top ones, ranked by their Reddit score.
Seasoned with oil for a natural, easy-release finish that improves with useEasy care: hand wash, dry, rub with cooking oilThe right tool to sear, sauté, simmer, bake, broil, braise, roast, fry or grillAt home in the oven, on the stove, on the grill or over the campfire; Great for induction cooktopsUnparalleled in heat retention and even heating
So there are basically two keys here:
Typically when you make bread, you knead the dough manually by hand or with a dough hook. With no-knead bread, you use "time" as the tool to knead the dough; yeast will basically self-knead, IF given sufficient time (in a relatively warm environment). The process basically has 3 steps:
The reason so many people use Dutch ovens (basically an oven-friendly cast-iron bowl with a lid) is because of the heat retention. The heat radiates from the metal & cause the bread to "spring" up, so you can a nice round boule; the idea is basically to emulate a baker's oven, which creates kind of a steamy environment to allow the bread to do the proper rising trick when baking. Whole Foods sells loaves like that for five bucks; you can make it yourself at home for like a quarter, haha, plus a minute or two of time to stir up the ingredients & whatnot. A lot of people have never heard of no-knead bread & have no idea how easy it is to add homemade bread to your daily routine with minimal effort (literally like, minutes a day).
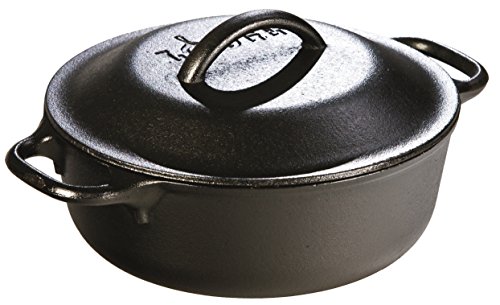
You can also use a flat surface, such as a cast-iron griddle, or a Baking Steel. I use a Baking Steel for most of my no-knead bread projects these days & just leave it in my oven all the time. I also have a smaller 2-quart Dutch oven for making Panera-style bread bowls for soup & stuff. You don't necessarily need a fancy, expensive Dutch oven (Le Creuset Dutch ovens can go for over $300; you can get a Lodge model that functions exactly the same, but isn't as pretty, for $40 on Amazon, and will literally outlive you).
There are also two additional factors for flavor:
You can do "speedy" no-knead bread, which is what I sometimes do with my Instant Pot, but you sacrifice some of the aromatics & flavor that develops from a long self-kneading rise time. It's not like a night & day difference, but depending on how sensitive your palette is, it can be the difference between "meh, bread" & "ooh, bread!". It's also fun to experiment with sourdough instead of yeast; you basically just have to let some flour & water "rot" for a week in a jar, and then use that in place of the yeast:
https://artisanbreadinfive.com/2017/02/06/easy-sourdough-starter/
It's super easy & helps with the flavor. You can also try using different flours, such as whole wheat & a bit of rye, as both of those provide additional flavor layers. I typically tell people to experiment several times a week over the course of a few months & see what they like; a lot of people end up liking this setup:
You can pick up that cheap cast-iron griddle (recommend pre-heating it for 45 minutes to get it to absorb the heat) above for like $20 on Amazon & start experimenting with round boules, small baguettes, Naan, pitas, flour tortillas, and so on. Flour is cheap (Costco sells 25-pound bags for $11 delivered) & the effort is pretty minimal (stir ingredients by hand, let sit overnight, form into a shape & let rise again, toss into oven to bake...really really easy).
The Instant Pot offers two benefits:
One tip for loading the bread: after proofing for the first rise, put the dough on a sheet of parchment paper, and then load the entire parchment paper into the Dutch oven. It will burn (a bit), but when you go to take off the lid to get the crispy crust, you can just slide the parchment sheet right out, since the dough will be solid bread at that point. That makes loading the dough really easy, without having to risk messing up the dough ball when putting it in the Dutch oven or risk burning your fingers!
Seems like a good cooking pot could be added. Zebra pot with the metal clips, for example.
Also, a good folding skillet.
EDIT: My preference above either of these is a Dutch oven if you can manage the weight. I know people generally say to get one with legs for camping, and that's mostly true if you have some kind of transporation (car, four wheeler, horse, etc.). But when I pack mine for multiday hunting trips, I actually prefer to take one without legs. If I need to lift it up off the coals I can just use rocks or hang it, but it packs down much easier without the legs. Something like this for one or two people. If you have a party of four, then obviously you'd want a larger one, but then it's best to organize with everyone and trade off weight. Have one person carry the larger Dutch oven in their pack, and you take some of their heavier gear in yours so even out the load everyone carries.
People say to get the ones with legs primarily because of the lid design, a rimmed lid which lets you pile on coals and not worry about them spilling into your food when you lift the lid. This is a nice feature, but it isn't necessary. Just brush the coals off the lid before you lift it and shovel them back on once you've put the lid back on if you need to keep cooking. It's cast iron. You're not going to lose enough heat in that time frame to matter.
That Dutch oven is $22 new on Amazon. Look carefully for rust pitting and cracks.