 Reddit reviews SharkTap Gigabit Network Sniffer
We found 10 Reddit comments about SharkTap Gigabit Network Sniffer. Here are the top ones, ranked by their Reddit score.
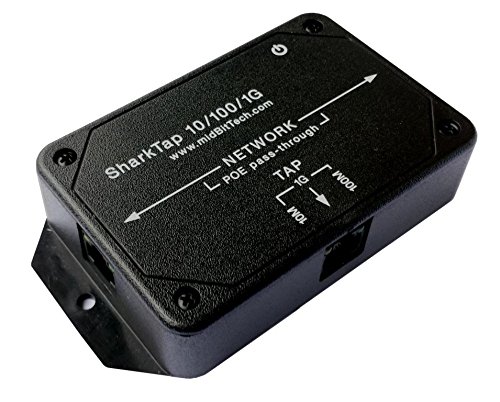
The SharkTap is a special purpose ethernet switch that allows you to 'tap into' an ethernet connection. It is intended to be used with the free Wireshark network analyzer or equivalent.Conventional switches route packets only to the intended destination port, reducing traffic, but preventing a third port from seeing all packets. The SharkTap duplicates all packets to or from the 'NETWORK' ports on the 'TAP' port.Supports 10, 100 and 1000Base-T, all ports. Power-Over-Ethernet (POE) pass-through on the 'NETWORK' ports.Powered from a micro-USB cable (included), draws 350mA or less. For USB TAP, search 'SharkTapUSB'Other features: Auto-MDIX, so no crossover cables ever needed. Non-conductive enclosure. Will not route packets from TAP to NETWORK ports.
Wireshark works on Windows and even has a pretty GUI. It can save packet captures in a tcpdump-compatible format (among others). It even has a portable version if you don't want to install programs.
Aside from Wireshark, you can mirror a port in your switch, or if you can't do that, get a hardware network tap (like this) and then run Wireshark/tcpdump/whatever on a laptop connected to the tap port.
>Should I install Cygwin on my DC?
No.
If you go wired instead of wireless you could use a network tap. You will see other traffic (ARP, etc.) but I don't think there's a way to solve this regardless of the solution, not from the hardware side. It is easy enough to filter out in Wireshark though.
https://www.amazon.com/midBit-Technologies-LLC-100-1000/dp/B0175EODCE/
Or much cheaper, but not bi-directional unless you reassemble the streams:
https://hakshop.com/products/throwing-star-lan-tap
Or some USB NICs and use computer.
I love these: https://www.amazon.com/midBit-Technologies-LLC-100-1000/dp/B0175EODCE/ref=sr_1_1?ie=UTF8&qid=1521726003&sr=8-1&keywords=sharktap
... but I've seen where I need 4 or more captures and only have one or 2 of those available... I've used 10M hubs only a few times but those times were lifesavers.
Not, strictly speaking, true. e.g.: https://smile.amazon.com/midBit-Technologies-LLC-100-1000/dp/B0175EODCE
https://www.amazon.com/midBit-Technologies-LLC-100-1000/dp/B0175EODCE/ref=sr_1_3?keywords=sharktap&qid=1557855694&s=gateway&sr=8-3
​
https://www.amazon.com/NETGEAR-Gigabit-Lifetime-Protection-GS105Ev2/dp/B00HGLVZLY/ref=sr_1_3?keywords=managed+switch&qid=1557857433&s=gateway&sr=8-3
Stuff to think about:
Enterprise quality taps are expensive, but pocket-sized managed switches with mirror functions are cheap.
This thing is pretty much the same as that little switch, but with no UI to configure behavior.
gigabit taps are available - https://www.amazon . com/midBit-Technologies-LLC-100-1000/dp/B0175EODCE/
You need one of these between the router and the wall to run wire-shark on ->https://www.amazon.com/midBit-Technologies-LLC-100-1000/dp/B0175EODCE/ref=sr_1_4?keywords=network+tap&qid=1556664438&s=gateway&sr=8-4
Ah... this might be the reason why I'm not picking up the traffic on wireshark through my PC.
Do I need something like this?
https://www.amazon.com/midBit-Technologies-LLC-100-1000/dp/B0175EODCE/ref=sr_1_4?keywords=network+tap&qid=1556664438&s=gateway&sr=8-4
Why you should care about encrypting and anonymizing your internet traffic, and how to build your very own Raspberry Pi TOR project.
RasPi AP
Steps
-- Open Terminal
-- "sudo raspi-config"
-- Select option 1
-- Select option 2
** RasPi will Reboot
-- Open Terminal
-- "git clone https://github.com/unixabg/RPI-Wireless-Hotspot.git"
-- "cd RPI-Wireless-Hotspot"
-- "sudo ./install"
-- "Y" to agree to terms
-- "Y" to use preconfigured DNS
-- "Y" to use Unblock-Us DNS servers
-- "N" for WiFi defaults
-- Type in a new WiFi password (it will be checked)
-- Type in a new SSID
-- Type in your desired WiFi channel (1, 6, 11)
-- Type "N" when asked - "Are you using a rtl871x chipset?" --
-- Type "N" for chromecast support (unless you plan to use a chromecast w/RasTor)
** Your Pi will reboot
What's in your traffic stream?
Why should we care about encrypting/anonymizing our traffic?
The easiest way to explain this is to show you what can be seen by your ISP.
Parts and Tools
RasPi TOR
Steps
-- "sudo apt-get install tor"
-- "Y" on "continue?"
-- "sudo nano /etc/tor/torrc"
-- Add the following just below the first set of comments
Log notice file /var/log/tor/notices.log
VirtualAddrNetwork 10.192.0.0/10
AutomapHostsSuffixes .onion,.exit
AutomapHostsOnResolve 1
TransPort 9040
TransListenAddress 192.168.42.1
DNSPort 53
DNSListenAddress 192.168.42.1"
-- "sudo iptables -F"
-- "sudo iptables -t nat -F"
-- "sudo iptables -t nat -A PREROUTING -i wlan0 -p udp --dport 53 -j REDIRECT --to-ports 53"
-- "sudo iptables -t nat -A PREROUTING -i wlan0 -p tcp --syn -j REDIRECT --to-ports 9040"
-- "sudo iptables -t nat -L"
"sudo sh -c "iptables-save > /etc/iptables.ipv4.nat""
-- "sudo touch /var/log/tor/notices.log"
-- "sudo chown debian-tor /var/log/tor/notices.log"
-- "sudo chmod 644 /var/log/tor/notices.log"
600 : Only owner can read/write
644 : Only owner can write, others can read
*** 666 : All uses can read/write.
-- "sudo service tor start"
-- "sudo service tor status"
-- "sudo update-rc.d tor enable"
Be Sure to Include this text in the notes!!!
"* Install the WiFi Hotspot
git clone https://github.com/unixabg/RPI-Wireless-Hotspot.git
cd RPI-Wireless-Hotspot
sudo ./install
Install TOR
sudo apt-get install tor
Configure TOR
sudo nano /etc/tor/torrc
Add the following to the config file
Log notice file /var/log/tor/notices.log
VirtualAddrNetwork 10.192.0.0/10
AutomapHostsSuffixes .onion,.exit
AutomapHostsOnResolve 1
TransPort 9040
TransListenAddress 192.168.42.1
DNSPort 53
DNSListenAddress 192.168.42.1
Dump iptable
sudo iptables -F
sudo iptables -t nat -F
Route DNS
sudo iptables -t nat -A PREROUTING -i wlan0 -p udp --dport 53 -j REDIRECT --to-ports 53
Route TCP
sudo iptables -t nat -A PREROUTING -i wlan0 -p tcp --syn -j REDIRECT --to-ports 9040
Check Routes
sudo iptables -t nat -L
Save routes
sudo sh -c ""iptables-save > /etc/iptables.ipv4.nat""
Create Log File
sudo touch /var/log/tor/notices.log
sudo chown debian-tor /var/log/tor/notices.log
sudo chmod 644 /var/log/tor/notices.log
Start TOR
sudo service tor start
Check TOR
sudo service tor status
Set TOR to start on boot
sudo update-rc.d tor enable
Connect with us!
Don't forget to check out our large library of projects at https://twit.tv/shows/know-how.
Join our Google+ Community.
Tweet at us at @PadreSJ, @Cranky_Hippo, and @Anelf3.
Thanks to CacheFly for the bandwidth for this show..