 Reddit reviews Taylor Precision Products Taylor Commercial Waterproof Cooking Digital Quick Read Thermometer, One Size, Red
We found 42 Reddit comments about Taylor Precision Products Taylor Commercial Waterproof Cooking Digital Quick Read Thermometer, One Size, Red. Here are the top ones, ranked by their Reddit score.
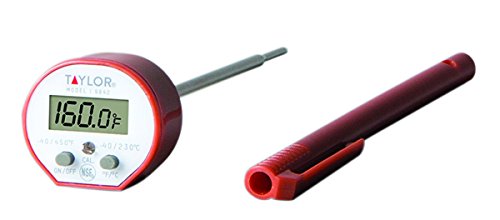
WATERPROOF DESIGN This thermometer is designed to get wet without ruining the product It takes splashes without damage but please note that the unit should not be submersed in waterRECALIBRATABLE Using the sleeve the thermometer can be recalibrated for precise measurementsThe sleeve of this thermometer incorporates an EPA registered product that inhibits the growth of bacterial odor and mold on the sleeve It is important to thoroughly clean and disinfect your thermometer after each useEASY TO USE EASY TO READ the 0 8 inch display is easily seen from all anglesHIGHLY ACCURATE Thermometer can measure temperatures ranging from -40 to 450°F and -40 to 230°CThe 9842 has an average of 5. 3 seconds for response time from room temp to 165°F in water
Yay! I can actually help with this!
Adagio Teas has my FAVORITE loose leaf teas in the world. It depends what kind of tea she likes to drink, but you can get her a bunch of samples and go from there. You'll also get frequent cup points you can use later if you get some samples.
My favorites are:
(Black teas) Yunnan Gold, Golden Monkey, and Black Dragon Pearl: all chocolatey and rich, I drink them with soy milk and listed from not-very-earthy to smoky-earthy.
(Green teas) Gyokuro, Sencha Overture, and Jasmine Yin Hao: I prefer Japanese steamed greens which are more grassy and vegetal than Chinese pan roasted ones, but if she likes nutty green teas Dragonwell is also great.
(White teas) Silver Needle and White Peony:
Awesome because they're low in caffeine(I was just informed they aren't necessarily lower in caffeine, so let's just say awesome for the sublime nectar-y taste), my white teas have been kind of lonely since it's winter here, but in the summer they're perfect. Apricot liqueur and honeysuckle come to mind.But I'm not a big fan of blends (she may be), or Oolongs, or Pu Erhs, and definitely I don't drink anything not camellia sinensis (like honeybush), and a lot of my favorites are pretty expensive (but so worth it), so if you know she loves peppermint or chamomile by all means do that! If you only got one from Adagio, I would go with yunnan gold undoubtedly. You can get a sample for only $5 and it's heaven. Nobody dislikes this tea, not even people who say they don't like tea!
(And you can use code 6905673943 for $5 off!)
---
Next she's going to need a way to brew it. I abhor doing dishes, my mother has made me some wonderful tea cups (she does ceramic pottery) but you can definitely just use the coffee/tea cups you already have to start. If you wanted to make it a cute holiday basket, of course, a tea cup would make the whole thing look adorable. At the risk of sounding like I work for Adagio, a glass cup like this is so perfect because you can watch the color of the tea as it brews which is a great indicator of tea strength!
Since I hate dishes so much, I have ended up using just empty, fill-able tea bags (I get the 2-cup capacity ones here) which is really great for re-steeping because you can just save the tea bag and put it in the fresh water.
Temperature is super important if you're brewing anything other than super robust black teas or herbal teas. For example, I steep my favorite green tea at 170 degrees F, which is a lot cooler than the 212 of boiling water. I bought this thermometer more than a year ago, and I've never had any problems... plus, getting a temp-specific tea kettle is so expensive :/ To walk you through how I personally make my tea:
I'll often put agave sweetener in my tea, and soy milk if it's a black tea.
I have also bought this for steeping and I adore it but it's another dish to do for a student without a dishwasher... It's a spring-loaded receptacle where you place your loose-leaf, and when it's done steeping in the hot water, you put it on top of the teacup. The gravity pushing on the spring releases the tea from the receptacle leaving the leaves and it's really really cool and efficient and you can make more tea at a time... but for a beginner, I would really recommend empty bags.
---
Best of luck!
tl;dr Adagio is not a cult
edit: linked to Adagio
When buying new gear like this, I often find it worthwhile to buy the good stuff from the beginning. It'll cost more upfront, but in the long run you save money by not sinking it into gear that you're just going to upgrade away from. I know you're looking for a starter kit, so I'll outline some entry level stuff and then some recommended upgrades.
For a burr grinder, a decent entry level manual grinder is the Hario Skerton. One complaint with this is inconsistent coarse grind size, which is what you'll be using with a French Press. Orphan Espresso makes an upgrade kit that fixes this problem, but personally I feel that if you're going to spend $40 on the Skerton and $15 on the upgrade kit, you should just spend a few more bucks and get something like the Capresso Infinity. This grinder is going to be way more convenient, versatile, and consistent than the hand grinder. For one last option, there's the Baratza Encore. This is probably the best grinder you'd want for French Press, because anything better / more expensive would just be overkill as they're primarily aimed at espresso.
The Press itself isn't too important. Bodum is usually the recommended brand.
You'll also need a way to heat water. You could go with a stovetop kettle, but I think electric kettles are more convenient, and are roughly the same price anyway. You can get a pretty standard one for less than $25. But getting a gooseneck kettle is going to help control your pour better and ensure the coffee grounds are completely saturated. If you don't want to worry about getting the perfect temperature for brewing, a variable temperature kettle will take care of it for you.
Other than that, you might want a kitchen scale to get the right coffee-to-water ratio, and a thermometer to check your water temperature.
Amazon
I use this one.
A lot of people also like this one.
But I'm thinking of getting this one because it has a temperature alarm.
You can use shortening or veg oil, same difference. You'll need enough that will come halfway up the side of the pan WHEN THE CHICKEN IS ADDED. If you fill the pan halfway with oil and then put in the chicken, you will have a bad time.
For your flour dredge, easiest way is to add your flour to a gallon ziploc bag. Add salt, pepper, a little garlic powder, onion powder, cayenne, cumin, and whatever else you might like to season the breading. Shake it to mix up the spices and flour.
Now you can add your chicken pieces to the bag a couple at a time, and seal and shake the bag to coat.
Remove the coated pieces and set them on a rack or plate to rest for a second while you do the rest.
If you want a thicker breading, make an egg wash (mix 1 part egg, 1 part water), dunk the coated chicken pieces, and put them back into the flour for another coat, then set them aside to rest for a few minutes so the coating can set.
When all the chicken is coated, and your oil is hot (should be about 350F. If you don't have a thermometer for this (get one, an instant read digital thermometer is like ten bucks), stick a wooden spoon or chopstick into the oil. It should bubble nice and steady. If it doesn't bubble or produces weak bubbles, you're not hot enough. If it goes crazy with bubbles, you're too hot.
Note that you will need to boost the heat when you add the chicken to compensate. You've just added a bunch of cold mass to the pan.
Fry it on one side for 4-5 minutes, then flip. Your first side should be nice and deep brown.
While you're waiting, prepare the landing spot. Ideally it's a cookie sheet lined with papertowel with a rack on it.
Fry another 4-5 minutes, pull and temp your smallest piece. If you're at temperature (160F for white meat, 165 for dark), put it on the rack.
This part is important. Unless you're doing a bunch of identically-sized pieces of the same type, all your chicken will not be done properly at the same time. I suggest pulling the chicken 5 degrees early and let them coast the rest of the way. If your outside is getting really dark and the inside isn't done yet, pull it and consider finishing it in the oven or even the microwave.
Eventually you will get good enough after a couple times that you'll be able to tell right away what to do, but you really can't fuck it up too bad if you keep an eye on the temperature of the meat. A thermometer is pretty key. This one is great for 12 bucks: https://www.amazon.com/Taylor-Commercial-Waterproof-Digital-Thermometer/dp/B00009WE45/
Taylor for less than $10.00. It's fast and accurate enough between freezing and boiling temps. I've been using it for over 5 years (back when they were selling for $14). It's going to take you about 8-10 seconds to get a good reading.
https://www.amazon.com/gp/product/B00009WE45
I just picked up a Thermopop too (last week). It's much faster than the Taylor and will become my go to digital thermometer going forward.
Those dial thermometers are notorious for being off. Drop it once and you're screwed. You can turn the nut to re-calibrate, but you'll just drop it again. I learned my lesson the hard way and brewed four AG batches 10 degrees off.
Now I use two cheap digital thermometers. Two beacuse I like to see how close they are to each other - if they are very different I start worrying. I've dropped them numerous times, even cracked one open, and they are still accurate.
here it is
edit - waterproff is not much more though I've never had an issue with it getting wet.
Your mash time seems a bit long. 2-row should be done with the conversion in less than an hour.
Use a good calculator to hit your mash temperatures. I use BrewPal on the iPhone and am always within 1 degree of my target. Also, make sure you stir the mash well and just leave a thermometer in there to get an accurate reading.
I use this thermometer and am quite pleased with it. It gets a steady reading in less than 30 seconds, but you can kind of estimate where it will end up within 10 seconds (the last few degrees take a while to dial in).
Hop bags aren't required. Unless you're letting the beer age for a long time, the hops in the fermenter won't hurt anything. Just filter on the way into the keg using a hop bag on the end of the siphon tube.
No, do not precook.
It'll be way too dry.
There's no worry of under cooking meat if you have a thermometer.
You must own a meat thermometer!
I have this Taylor 9842
Slow cookers, I believe, cook at temperatures between 190º and 300º (depending on the device).
Chicken needs to be cooked to 165ºF/74ºC.
It's fast and easy to check when chicken is done and tasty.
Getting a probe thermometer might help reassure her. The ambient air temp inside the fridge is irrelevant if the actual yogurt is still at 38 degrees.
https://www.amazon.com/dp/B00009WE45?ref_=ams_ad_dp_asin_3 We this exact model at my work to test hot and cold foods for safety.
You can get most of them from Amazon. I've been using Ken Forkish's recommended Cambro clear plastic bins with covers and they work great, 12qt for mix / rise and the 6qt for sourdough storage. You can get bannetons and bench knives from Amazon too.
Get a 2nd dutch oven so you can do two loaves at once! 10" Lodge cast iron ovens are fantastic and durable and have tons of uses outside of baking too.
Maybe the most important thing you can get for her if she doesn't have one already is a kitchen scale. One that goes to 1g would probably suffice though if you're doing smaller yeast measures you might want .5g or .1g.
Also recommend getting a thermometer.
Of course if you're in Canada and are Amazon impaired hollar and I can let you know where to get this stuff in the 3rd world above the 49th parallel.
I highly recommend how-to-brew as well. It will tell you nearly everything you need to know, and if you read this subreddit religiously, you'll learn boatloads.
As far as the general process goes, the next logical step up from extract+specialty grains (what you have been doing) is a partial mash, also known as a mini-mash. Here is a clone of Rogue's Dead Guy in partial mash form. It's a delicious beer, and you won't have to change much to your process, and it can be done in a 21 qt. pot which is what a lot of beginners start with. If you have a smaller pot let me know and I'll scale the recipe for you.
The additional equipment you will need is a large nylon mesh bag and an accurate thermometer. The difference for your process would be that you add all the grain to 4 gallons of 160F water and then to hold the mini-mash at 152F for a full hour. You will need to be fairly precise, but it's not that hard. After the hour pull the mesh bag of grains out, let it drain, then start your boil as normal. Add the extract when there are ten minutes left in the boil.
You can read How to Brew for details of this, but mashing is basically the process of using naturally occurring enzymes in the grain to convert the grains starches into sugars that the yeast can eat. Malt extract is a concentrated version of this "sweet wort" that has already been mashed for you.
I know this is somewhat incomplete because I haven't partial mashed in a while, but I have a document on it I could round up if you want.
As far as adding or changing ingredients, I would start by either adding 2-4 ounces of a different grain that is in the same category as grains already in the recipe. For example, if an Irish Red calls for 4 ounces of crystal 40, maybe add 4 ounces of crystal 120. You can also google for recipes to see what other people are using and maybe swap out crystal 40 for crystal 60 in a recipe, or chocolate malt for black malt. If you have doubts, post the recipe here. There are several recipe guru's that hang around here that are more than willing to help out with a recipe.
Jimmypage got it right my friend...grab a taylor ( http://www.amazon.com/gp/aw/d/B00009WE45/ref=redir_mdp_mobile) cheap and reliable.
So people have given all of the advice I would have already, basically recipes plus learning how to cook meats/veggies. Here is a tip to get you closer to freedom in the kitchen and the ability to throw things together. Simply put, learn how to cook each type of meat to it's proper done-ness. Learn how to bake it, learn how to bake it in liquids with random veggies, leRn how to sear it. Buy one of these: http://www.amazon.com/gp/aw/d/B00009WE45/ref=mp_s_a_1_4?qid=1409236879&sr=8-4&pi=AC_SX110_SY165_QL70
They're 12 dollars. You eventually will need it much less, and may even not use it at all. As a beginner though, it will allow you to buy any meat with full confidence that you won't underdo it. It'll open up options that seem scary at first, like roasts and tenderloins and thick steaks. Most red meats are delicious if you simply get them to 130-135 (rare), just add some spices and figure out if you like it a little more done. Crappy pork should be cooked higher, and chicken should always be 150. Remember that things gain 2-5 degrees after you take them out and let them sit. Don't be intimidated by recipes, just isolate how the meat becomes done as the core and simply do whatever you want around that basis ( for example, my veal roast is quite complicated, with multiple steps, at its core though it's just bake veal in stock until 130 then throw in veggies and cook to 140)
http://www.amazon.com/Taylor-9842-Commercial-Waterproof-Thermometer/dp/B00009WE45/ref=pd_sim_k_3
Always preform a water boil test on any new thermometer should read 212F/100C.
Morthy's Demands:
Tea for an old posh Englishman. I would no doubt ring a bell to have a serving wench bring it to me though. Yummy Goodness WL
Think these would show under a shirt? I would still never be seen in public with them! NSFW WL
Phallic-ish Kitchen wants and needs WL
Akeleie Demands:
Most geeky item. As a grown woman, I still want this! Books: Glorious Books WL
Help me achieve a personal goal of learning all the Egyptian dieties I've always been fascinated by ancient Egypt and want to really delve into their deities. Books: Glorious Books WL
Binoculars would be handy on a deserted island. Keep a watch out for passing ships! Wish I may, Wish I had WL
Thanks for the fun contest!
I would recommend you start with chicken. Chicken thighs are cheap and yummy :) Somebody else posted this recipe, and I can confirm that it is ridiculously easy and fabulously tasty: [The BEST way to cook chicken thighs] (http://www.reddit.com/r/keto/comments/1otscu/the_best_way_to_cook_chicken_thighs/) :)
It sounds like a cheap instant read cooking thermometer might a good investment when you decide you want to cook steak. I have [this one] (http://www.amazon.com/Taylor-9842-Commercial-Waterproof-Thermometer/dp/B00009WE45/ref=sr_1_6?s=kitchen&ie=UTF8&qid=1420405020&sr=1-6&keywords=food+thermometer) and I've found combining it with [safe cooking temps for various meats] (https://www.google.com/url?sa=t&rct=j&q=&esrc=s&source=web&cd=1&cad=rja&uact=8&ved=0CDUQFjAA&url=http%3A%2F%2Fwww.foodsafety.gov%2Fkeep%2Fcharts%2Fmintemp.html&ei=LqupVMDUC8PpaMuJgugB&usg=AFQjCNEm--9fyqOj3ZCOBziO2TSw7yMZoQ&sig2=X5WjzRjRbiSI3Lx6NxY2xQ&bvm=bv.82001339,d.d2s) really helps me to not overcook my meats :)
My bad!
To get more confidence in your cooking of meat: Get an instant-read thermometer-- analog or digital, your choice. Ignore those who say 'don't pierce the meet you'll let all the juice out' (because that's been debunked by
Alton BrownFood Lab) and take internal temps of meat you cook. Internal temps is a better gauge of food safety than time or visual indicators.Soon you'll get more confidence that you're doing the right thing and have the tool to prove it.
Not the case at all. They were all reading virtually the exact same spot on an interior wall.
I’ve also done the same with pool thermometers and even some of the same thermometers used on the thermostat wall.
Wish I hadn’t trashed the pic, it makes the point far better than with text......
Easily recreated in a kitchen store... found a display of a thermometer like these: https://www.amazon.com/dp/B00009WE45/ref=cm_sw_r_sms_c_api_bcsSBbMASDZ6F and turned them all on... the results varied by around 2 degrees— all for the same spot at the bottom of a cuplike holder.
For normal home use (not a probe), I've been really happy with the $8.25 Taylor waterproof digital thermometer.
https://www.amazon.com/Taylor-Precision-Products-Commercial-Thermometer/dp/B00009WE45
I've had mine for years and no problems. I don't know if it's BIFL, but for an item like this, I've certainly gotten my 8 bucks of value from it.
Like others have said a probe thermometer is the only option.
I'd recommend one of these, cheap and effective:
http://www.amazon.com/Taylor-9842-Commercial-Waterproof-Thermometer/dp/B00009WE45
It should survive a sink washing, but I dunno about the dishwasher. It shouldn't be too hard to keep it out of there though...
Edit: Like some of the reviews on Amazon say, don't leave this particular thermometer in the oven unless you want to destroy it.
Yeah, no problem. I also have this one but the thermoworks is significantly faster and has a longer stem which I found out makes things much easier.
Awsome thanks. Any opinion on how this compares to the Taylor Precision.
How bad is take-away food really? I'm trying to gain mass and not much of a cook. I find the easiest way to get a lot of food in me is to get a large pizza or a large meal from McD's after a workout. Am I slowly killing myself?
Both of those are pretty high in carbohydrates, as is most take-out or freezer food. Start checking the nutrition information on items you buy. For instance, I've found a variety of chicken nuggets (Walmart brand, no less) that is very low in carbs for being breaded and very high in protein for being chicken product.
Also, there are nearly infinite things you can do to chicken breasts (baked, grilled, etc) that are tasty and delightful, and cooking chicken breasts is one of the easiest things to do in the kitchen. If you're worried about giving yourself food poisoning, get a digital thermometer (I found this Taylor one to be great, but don't leave it in the oven) and read up on "safe" meat temps.
You will do yourself a great service by learning a couple 'basic' food preparation techniques. That, and/or get a slow cooker - how does a week of pork tenderloin tacos with pineapple or mango salsa sound by just throwing some spices, canned tomatoes, and some water in a crock pot? You can pull it instead of slicing, it's that tender.
To 'pull' meats, pretend you're a vulture with forks for talons.
How instant is instant? I have one of these that I use for brewing but it's not what I would call instant. It gets to the temp typically in a few seconds. Is this sufficient you think? Also, I'm very familiar with the meat "doneness" scale, what temp's are bread done at?
Thanks!
I like this Taylor waterproof thermometer pretty well.
This instant read thermometer is really nice. It's what I use.
Also, this thermometer has temperature/alarm settings which, though I've only used for brewing beer, would work equally as well for coffee or tea.
After checking the temp a few times you'll get an idea for when to pull the pot off the stove or how long to let it sit to get down to the right temp.
I currently use my 210mm (about 8") for produce and simple meat trimming, and I use a 180mm specifically for deboning whole chickens.
Like many have said, I suggest that you get him the 210.
Some things that I suggest:
Peeler
http://www.amazon.com/gp/aw/d/B001CRFX2A/ref=mp_s_a_1_2?qid=1465177075&sr=8-2&pi=SY200_QL40&keywords=kuhn+rikon+peeler&dpPl=1&dpID=41wv%2BZkw4LL&ref=plSrch
Paring knife
http://www.amazon.com/gp/aw/d/B005LRYE36/ref=mp_s_a_1_1?qid=1465177122&sr=8-1&pi=SX200_QL40&keywords=paring+knife&dpPl=1&dpID=21KoD9tXR6L&ref=plSrch
Thermometer
http://www.amazon.com/gp/aw/d/B00009WE45/ref=mp_s_a_1_2?qid=1465177218&sr=1-2&refinements=p_85%3A2470955011%2Cp_89%3ATaylor+Precision+Products&pi=SY200_QL40&keywords=taylor+precision+products&dpPl=1&dpID=41hdUUoToJL&ref=plSrch
Microplane
http://www.amazon.com/gp/aw/d/B00004S7V8/ref=mp_s_a_1_1?qid=1465177314&sr=8-1&pi=SY200_QL40&keywords=microplane&dpPl=1&dpID=312Sz19u%2BtL&ref=plSrch
Cook to temp, not to time. You'll need a thermometer. I use this one.
I made this earring holder out of an old vinyl record. My ring size is a seven!
This would make my day because I am tired of being paranoid about meat temperatures.
Seconded and I've tried at least a half dozen others myself. Most did not make it through one batch. This Taylor was a close second, but the probes aren't as beefy and are expensive to replace.
The only modification I recommend for the Polder is to seal the probe with shrink tubing to prevent steam penetration. I am also careful not to immerse the probe.
I also have This Taylor pen thermometer for measuring hydrometer samples, but I prefer the remote probe and alarm functions for heating mash & sparge water, as well as keeping track of progress when chilling wort.
Just a cheap plastic kitchen thermometer.
No need for anything fancy.
Which kit did you use? Moving into my new house with a (hopeful) darkroom soon and eager to get developing. Thinking of the unicolor kit.
Is a thermometer like this good enough?
This one: https://www.amazon.com/gp/product/B005OMV3FK/ref=oh_aui_detailpage_o07_s00?ie=UTF8&psc=1
Broke within less than a year, temperature readings would fluctuate when trying to calibrate it
https://www.amazon.com/Habor-Thermometer-Digital-Cooking-Anti-Corrosion/dp/B0198473E4/ref=sr_1_5?ie=UTF8&qid=1496884372&sr=8-5
Worked okay but felt pretty flimsy.
https://www.amazon.com/Taylor-Precision-Products-Commercial-Thermometer/dp/B00009WE45/ref=sr_1_6?s=home-garden&ie=UTF8&qid=1496884455&sr=1-6
Slow to read, I still use this one from time to time in the kitchen, but when it comes to grilling and I need fast and accurate I go for my thermapen
Here are the links:
Aeropress
Grinder
Scale
Thermometer
EDIT: I bring this setup with me when I travel for work, along with a small screw top tupperware full of coffee beans.
Like others have said, any recipe will have ingredients for two and can be followed pretty easily. If neither of you cook or grocery shop at all, I recommend some of the simplicities already mentioned. Maybe focus on the filet this time and save shrimp risotto or shrimp and grits for next time.
Go shopping together at a higher end market, grab a premade shrimp cocktail, 2 filet mignons, some potatoes to mash and some asparagus or other veggie to have along with it. Grab 2 bottles of wine (one for while you cook, one for the meal), a box of brownie mix and some ice cream.
This way you're not so stressed that you have 3 unfamiliar things to make and can focus on steak while enjoying each others company and not stressing about the other stuff.
Side note: I think knowing how to cook a good filet is invaluable. It is SO MUCH CHEAPER to make yourself, it will always impress people, and it can be pretty easy. I like to sous vide mine to 132 degrees then sear quickly on all sides. I have a $5 thermometer from amazon and a beer cooler as my sous vide set up.
I use this waterproof digital thermometer for brewing and like it a lot. Can just throw it in a bucket of sanitizer on cold side of brewing
https://www.amazon.com/Taylor-Precision-Products-Commercial-Thermometer/dp/B00009WE45/ref=sr_1_2?ie=UTF8&qid=1466091094&sr=8-2&keywords=waterproof+digital+thermometer
http://www.amazon.com/Taylor-9842-Commercial-Waterproof-Thermometer/dp/B00009WE45/ref=pd_sbs_indust_8
Is that what you guys are using?
Thanks. I'll end up ordering it off of amazon. Just not worth dealing with Walmart.
What are your thoughts on the slightly more expensive industrial model?
This one: http://www.amazon.com/Taylor-9842-Commercial-Waterproof-Thermometer/dp/B00009WE45/ref=pd_sim_k_1
TL;DR - Go by weight for flour, there's a method to figuring out how much 1 cup of your flour weighs. Yeast temperature description is too subjective, again use exact numbers.
---------
Water temperature for yeast: between 95-115 degrees Fahrenheit (35-46 Celsius) depending on the kind of yeast. Usually dry yeast activated with water + sugar needs about 105-115F. See here for some details. I believe you fall in the 105-115F range. edit: I personally have had luck with the 105F temperature.
>
Your description of "being able to barely handle the temperature" is very subjective. Use a thermometer and always have a consistent temperature when making your breads!
Get a simple digital thermometer that goes up to the boiling point of water I use one of these types, they're cheap and they're good enough.
--------------
Flour: I hate being too strict myself but a consistent weight is the key (not volume). When you scoop flour you compress it into the cup you're scooping with, making each scoop very different from the rest. What I do is I carefully measure sifted flour for a particular brand and type of flour (different types weight differently) and I write it down on the package or on a reference sheet (with brand/type). Once I have the weight, I can look at recipes that use volume or weight (since most volume recipes mean sifted cups, not scooped cups) and all I need is reach the desired weight by looking at a scale:
Needed:
How to measure how much 4 cups of your favorite flour weigh:
Why 4 cups? because 4 is enough for a good estimate (margin of error is spread over 4 cups instead of just weighing a single cup) and you can then divide the result by 4 to get a single cup's weight!
The Lineup from left to right
Bag of flour - Large Bowl with a measuring cup in it - Scale with medium bowl on it
Your scale will tell you how much 4 cups of sifted flour (for that brand) weigh!
Write the 4 cups weight on a reference sheet along with the brand and type of flour (example: King Arthur Unbleached bread flour see here). I also write the weight/cup conversion.
Next time you make bread, go by weight and you can exactly replicate your success or amend your attempts by knowingly changing an exact amount.
EDIT: It's late and I completely forgot to mention that your video was really nice, a bit long and could use some editing but I enjoyed listening to you talking through the recipe! Good luck and happy baking!
Here is the kit. I did add the $40 for the kettle in my list (it's actually $35). So it would be $105 plus shipping, and you will also get a bottling bucket and spigot, which your list did not include.
They have a deal today -- if you buy an Irish Red ingredients kit ($27) plus that kettle which you need anyway, they will give you a free Dark Star Burner (propane), which is a $50 value. Around Halloween, they have a deal to get a free kettle if you buy the equipment and ingredients kit. There are other deals at each of the hombrew stores over the whole year.
Midwest Supplies does not include the bottles, but it is silly to pay for glass when you can just buy beer and drink it to get the glass. They sell a thermometer, too, or you can go the Amazon route (if you are not Prime, you will need to buy some more stuff to I believe it is the best deal is starter kits.
Anyway, always buy when you can get deals, and do the math.
Good luck!